Weekend Cinnamon Rolls

cinnamon_rolls5 We’re calling these weekend cinnamon rolls as a formality. But seeing that we’re all in the same crazy boat, we know that every day is a weekend! Ha!

JK. There are no weekends, just days. They don’t have names any more, and we’re just fine with that. To celebrate, bake up a pan of these on… day. Either this day or that day or the other day.  Continue reading

Cooking with Kids : Lemon Bread

Lemon is our ingredient of the season! So far we’ve used it in a bucklein bars, in a savory pasta, and in the shower. Oh, and there are two on my counter waiting for our next project!

You don’t have to have a kid to make this Lemon Bread, but it’s more fun messy if you do! As you’ll see, the simplicity of this recipe is what makes it the perfect choice for cooking with an assistant, but it’s also what makes it an easy go-to treat. You can bake a loaf in no time at all for a last minute brunch, but it also stores well, so it’s the perfect tangy treat to make on a Monday and eat it all week long with your afternoon tea break (speaking from experience). Now on with the cuteness ~

liveseasoned_summer2015_lemonbread1b

We’ve reached a new milestone in our house : weekly cooking sessions with Alex. It’s no surprise that Calder and I love to cook, and we’ve kept the kitchen open to Little A from the start. We recently turned a corner when it comes to sharing the kitchen with a little guy; at first we were just trying to keep him busy and safe, but now he’s actually helping with the cooking and he understands what’s going on!

liveseasoned_summer2015_lemonbread20-1024x637 copy

Continue reading

Almost Vegan Jam Muffins

liveseasoned_winter14_bestjammuffins-2

A couple months ago, I was invited to a JAMboree hosted by a dear friend.  She described it as, “a sweet swap and contest of sorts.” She had us all cook up a favorite jelly, jam chutney or conserve and bring eleven quarter-pint or half-pint jars of our entry to her home.  She served wine as everyone had a taste of all the entries.  After all the wine sipping and socializing all the guests voted on their favorite and a winner was chosen.

liveseasoned_winter14_bestjammuffins-5

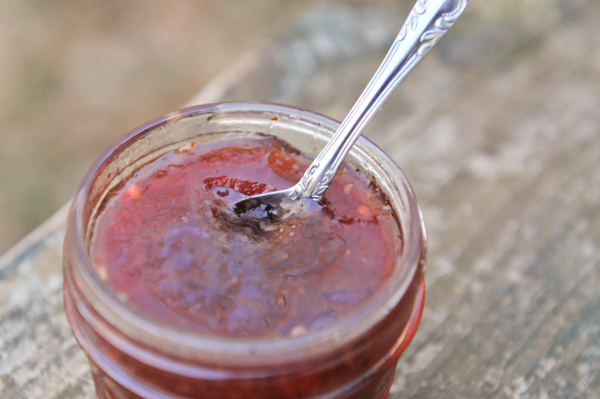
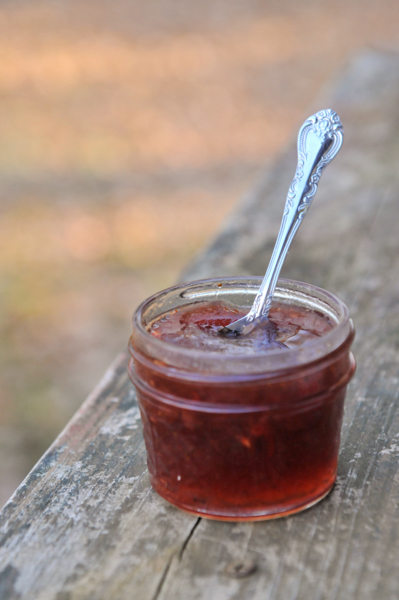
I’m not here to tell you I won. Before this, I had never canned solo.  I’ve done it plenty of times in my mom’s or Katie’s kitchen, but never in my own little apartment.  I was a little bit intimidate and overwhelmed by the possibilities.  I went to the farmer’s market to purchase supplies and I came home with 12 pounds of onions.  I was in a burger with blue cheese and onions phase.  I decided to can caramelized onions, which I now realize was the most unexciting offer, but at the time I was really excited about to make a big batch of them.  I cried. A lot. It was glorious.  Anyway, I mailed in my entry because I couldn’t attend in person (you’ll see me at the 2nd annual JAMboree!) and a month later my mom gave me eleven jars of delicious and interesting jams to try.  I had totally forgotten that I would be receiving jars of jam in exchange for my caramelized onion slop.  I’m over my blue cheese burger phase and well into my what do I do with all this jam phase.

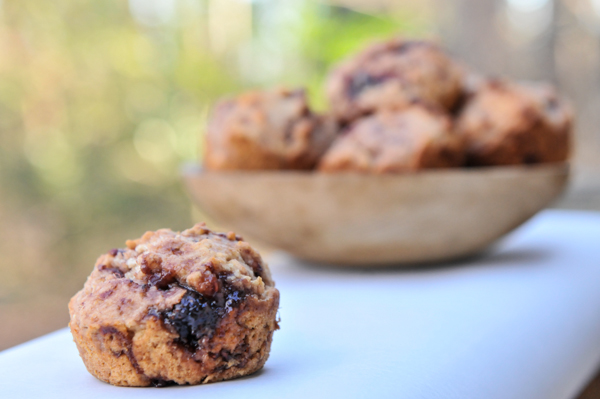
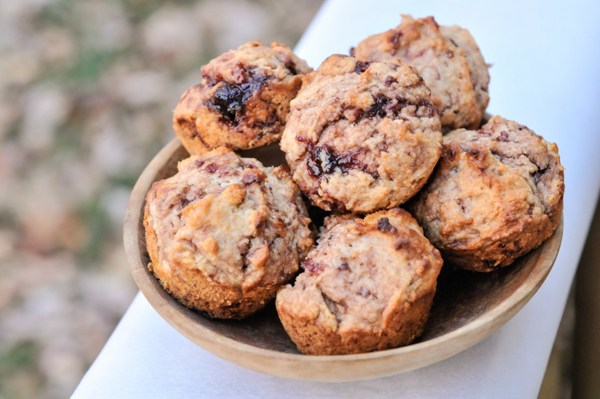
I intended on creating a vegan jam muffin recipe, but in my morning daze I added honey to the muffins.  Technically honey isn’t vegan, which is why I hereby name this batter creation the almost vegan jam muffins!  You could swap out the honey for maple syrup or another preferred sweetener, but I love them just the way they are.  For the milk, I simply used almond milk; you can use whatever you prefer.  Instead of adding an egg, I created a flax meal egg substitute, the easiest and most reliable in my experience.

liveseasoned_winter14_bestjammuffins-3

 Ingredients:

  • 1 + 1/2 cup whole wheat flour
  • 1/2 cup all purpose flour
  • 1 TBSP baking powder
  • 1/2 tsp salt
  • 3/4 cup almond milk (or whatever milk you prefer)
  • 1/4 honey
  • 1/4 vegetable oil
  • 2/3 cup jam (I used a friend’s strawberry balsamic)
  • 1 tsp vanilla extract
  • 1 TBSP ground flax meal
  • 3 TBSP water

 The How:

  • In a small cup stir 1 tablespoon of ground flax into 3 tablespoons of water and set aside.  This will transform into your egg substitute.
  • Preheat the oven to 350° and grease a standard-sized muffin tin.
  • Combine the flours, baking powder, and salt in a large mixing bowl.  In a separate bowl whisk together the milk, honey, vegetable oil and vanilla extract.
  • By now the flax and water mixture should have a gelatinous texture resembling that of an egg. Incorporate the flax egg into the wet ingredients.
  • Pour the wet ingredients into the flours and mix with a wooden spoon until just combined.  Pour the jelly into the batter and stir just a few times.  You want the jelly to appear in large swirls throughout the batter.  Add some more jelly if you want sweeter muffins.
  • Fill each muffin tin about 3/4 of the way.  Batter should make 12-15 muffins.
  • Bake for 16-20 minutes. Test by inserting a toothpick into the center of the largest muffin.  If it comes out clean they are done.  Remove the jam muffins from the tin and set on a wire rack to cool completely.

liveseasoned_winter14_bestjammuffins-4

Enjoy with tea, coffee or juice 🙂  These almost vegan jam muffins are hearty enough for breakfast, but delicious enough for dessert too!  The strawberry balsamic jam was SO tasty.  I was tempted to add nuts or oats to the muffins, but I really wanted the jam to shine in this recipe and it really does.  These whole wheat muffins have the perfect about of moisture and sweetness for a breakfast snack.  Now that they’re all gone, I’m left wishing I had more strawberry balsamic jam!
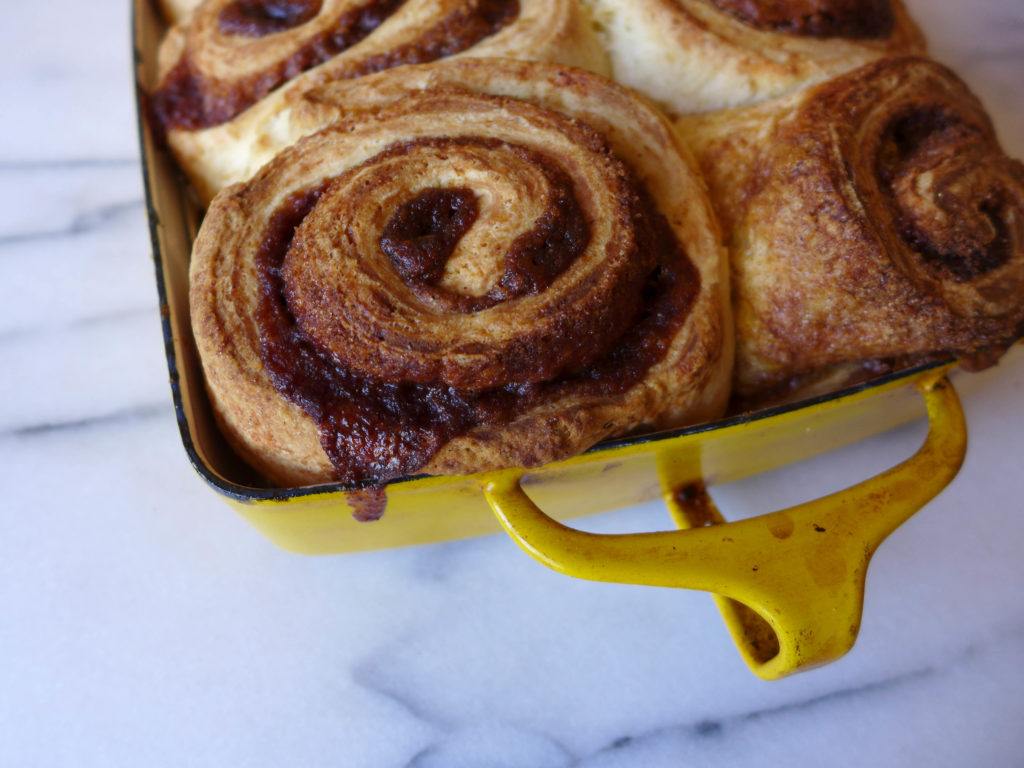
Apple Cream Cheese Quick Bread

Apple is our ingredient of the season. Expect quite a bit of baking, a sampling of hard cider, and a house full of aroma (if you’re lucky!) from this series.

The same mystery apple tree that provided the inspiration for our German Apple Cake keeps on giving, so we keep on taking! Alex makes it a daily stop, and I’ve run over a few times when we needed an apple for this or that; today’s bread being the perfect example. We went on a one-night camping trip last weekend, and whenever we’re camping and I know there’s going to be a chill in the air I like to pack along a baked good – just something to snack on when we need an energy boost or want a little treat with our camp breakfast. Since this recipe comes together relatively quickly, it’s an easy last minute treat whether you’re staying home or packing the car (and forgetting the hotdogs!) as you head out for the weekend.

liveseasoned_fall2014_applebread3_wm

In addition to the apple, this bread gets its flavor from a touch of cinnamon, fresh nutmeg, and vanilla. And I loved the hearty addition of cream cheese, reminding me of another fall favorite ~ the pumpkin roll!

Ingredients

  • 2 apples, peeled and grated
  • 1/2 cup vegetable oil
  • 1 cup sugar, separated
  • 3 eggs (2 for the bread, 1 for the cream cheese filling)
  • 1 tsp vanilla
  • 1/2 cup whole wheat flour
  • 1/2 cup + 1/3 cup white flour
  • 1 tsp baking soda
  • 1/2 tsp salt
  • 1 tsp cinnamon
  • 1/2 tsp nutmeg
  • 1/2 cup chopped walnuts
  • 6 oz. cream cheese
liveseasoned_fall2014_applebread1_wm

The How-to

  • Preheat the oven to 350F and lightly oil a loaf pan.
  • Place the apples, oil, 3/4 cup sugar, 2 eggs and vanilla in a large bowl. Mix well. Gently fold in the flour, baking soda, salt, spices, and walnuts until wet. Pour the batter into your prepared pan.
  • With an electric mixer beat together the cream cheese, 1/4 cup sugar and 1 egg. Pour over the top of the bread batter and swirl with a fork or knife.
  • Bake for 30 minutes with a loosely covered foil tent. Remove the foil and continue to bake for an addition 15-20 minutes, until a toothpick inserted into the bread comes out clean.
  • Allow the bread to cool before slicing.
liveseasoned_fall2014_applebread4_wm

As I mentioned, this is a nice hearty bread. It was the perfect treat on our camping trip, especially with a cup of hot tea at the breakfast table. My cream cheese didn’t marble into the bread so much as it sunk into the middle and the bread seemed to bake up around it, but we didn’t mind – it made it more like a filling.

I adapted today’s recipe from Today’s Creative Blog, adding the walnuts, reducing the sugar, and taking her suggestion for a combination of whole wheat and white flour. I found the core recipe to be easily adaptable, so feel free to experiment and make it your own!

Savory Rosemary Scones

Rosemary is our ingredient of the season. We think you’ll love the rosemary aroma that’s left on your fingers after mixing these scones, only to by topped by the aroma that fills your house as they are baking!

These are your grandmother’s scones.  Rosemary, butter and heavy cream are the main flavor players in this mix.  Crumbly, but not dry, these scones are perfect with a cup of tea or in place of a biscuit at lunch or dinner.

liveseasoned_spring2014_rosemaryscone8

Ingredients:

  • 2 cups all-purpose flour
  • 2 Tbs. sugar
  • 2 Tbs. finely chopped fresh rosemary
  • 1 Tbs. baking powder
  • ½ tsp. salt
  • 6 Tbs. cold unsalted butter
  • 1 cup heavy cream
  • 2 large egg yolks

Glaze (optional)

  • 1 large egg
  • 1 Tbs. milk
  • sea salt for sprinkling

*makes 8 large scones

Instructions:

  • Place an oven rack in the lower third of the oven and preheat to 400ºF.  Lightly grease a baking sheet and set aside.
  • In a large mixing bowl combine flour, sugar, rosemary, baking powder and salt.  I like to give the ingredients a light whisk to ensure everything is mixed evenly.
  • Slice cold butter and add it to the dry ingredients.  Now it’s time to play Edward-butter-knife-hands, if you have a pastry cutter-use that now.  Hold a butter knife in each hand and begin chopping the slices of butter even smaller until all the pieces are no larger than a tic-tac.  That little lump you see on the butter knife is an example of what your largest butter ball should look like.
  • In a separate bowl, lightly whisk the two egg yolks and stir in the cup of cream until it’s blended together.  If you’re new to the egg-separating game, don’t fret it’s easy.  Just give your egg a good whack on the side of a small bowl, right about in the center of the shell.  Then pour the yolk into one side of the shell and back into the other.  Continue to do that little egg dance until all of the egg whites fall out of the shell and into the small bowl.  You should be left with a perfect little yolk.  After the egg yolks and cream are blended, combine it with the dry ingredients.
  • Gently mix the batter with a wooden spoon.
  • Dust your hands and a clean surface with flour.  Lightly knead the batter.  I like to push the ball forwards over and into itself, backwards, left and right.  You don’t want to over mix the dough or it will become gummy.  Lumps and bumps are characteristics of a great scone.
  • Form the dough into a disk about an inch thick.  Cut the disk in half and then cut each half into four triangles.  Place the triangles on your prepared baking sheet.

The glaze is optional, but it adds a nice golden sheen to the scones, so if you’d like to pretty ‘em up a bit then glaze on.

  • Lightly whisk two eggs and a tablespoon of milk and brush it onto your wedges.  If you’re like me and your kitchen isn’t fully stocked with gadgets, gizmos and mainly a pastry brush, no worries!  Wash your hands and grab a spoon.  Spoon a little bit of glaze onto each triangle and gently brush two fingers over it to evenly coat the scone. You’ll have a good amount of glaze left over. Martha is probably shaking her head, but that’s how we do it over in Sarah’s kitchen.
  • Sprinkle each scone with a bit of course salt and before popping them in the oven for 15-18 minutes.

liveseasoned_spring2014_rosemaryscone7

While the scones were baking I mixed the extra glaze with the two egg whites and scrambled up a healthy little snack.  It was just enough to tide me over until the buzzer rang.  The scones should have a golden brown crust when they’re finished.  To ensure they are fully baked, insert a toothpick, chopstick or butter knife into the center of a scone and make sure it comes out squeaky clean. Serve warm or at room temperature and be sure to enjoy!

*I slightly tweaked this recipe from one found in Fine Cooking.

Irish Soda Bread

Are you still recovering from yesterday? I must admit, it isn’t a holiday that we celebrate in any special way, except that every March I get the urge to bake a loaf of soda bread and drink a Shamrock shake*.

liveseasoned_spring2014_sodabread_baked_wmFor the longest time I baked a basic soda bread sometimes with raisins sometimes without, either way not giving it much thought. Then I tasted an out-of-this world loaf from La Farine in Oakland, and ever since I’ve been on a mission to recreate it. La Farine’s version contains caraway seeds (something I never thought to include), raisins, and, at least to my tongue, it tasted sweeter than what I was accustomed to.

I haven’t been able to find a recipe for their bread, so I’ve made do with sampling from recipes I’ve found online. Today’s recipe is a variation of one found on Whipped. And remember, we usually include some tips and tricks at the end of the recipe, so read it in its entirety before starting.

Ingredients

  • 4 cups flour
  • 1/3-1/2 cup sugar
  • 1 Tbsp baking powder
  • 1/2 tsp baking soda
  • 1 tsp salt
  • 1 Tbsp caraway seeds
  • 1 1/2 Tbsp orange (or lemon) zest
  • 3/4 cup raisins
  • 3/4 cup cold butter
  • 1 cup plus 2 Tbsp buttermilk
  • egg wash: 1 egg + 1 Tbsp water + pinch of salt


Instructions

  • Preheat the oven to 350F and line a baking sheet with parchment paper or a silicone mat.
  • In a large bowl, whisk together the flour, sugar, baking powder, baking soda, and salt. Stir in the caraway seeds, raisins, and zest.
  • Cut your butter into 1/2 inch segments and add it to the dry ingredients. Using a pastry cutter or the paddle attachment on a stand mixer, incorporate the butter until the mixture becomes mealy.
  • Add 3/4 cup of the buttermilk, missing it in for about 30 seconds. Scrape down the bowl, making sure to incorporate the dry ingredients that remain. Add enough additional buttermilk until the dough holds together. I used the full quantity of buttermilk, but you may use more or less depending upon humidity and how arid your ingredients are.
  • Turn the dough out onto a lightly floured surface and form into two evenly-sized disks. Score the loafs into quarters and brush  with the egg wash.
  • Bake the bread for 20-25 minutes, it should be a light brown with a shiny finish when done.

Tips and Tricks

  • If you don’t have buttermilk, you can substitute with regular milk and 1 Tbsp white vinegar or lemon juice. Mix it together and let it stand for 5 minutes before using in the recipe.
  • The original recipe called for 1/3 cup sugar, but in trying to recreate the sweetness of La Farine’s bread, I increased it to 1/2 cup. Either will work depending upon your preference.
  • The original recipe called for orange zest. I would have loved to use it, but alas, I didn’t have any fresh citrus in the house. I did, however, have some dried lemon rind that I rehydrated and used. It was delicious, but I’m craving another loaf with the orange zest.
  • Sarah here: If you’re like me and you don’t own a pastry cutter or stand mixer, hold a butter knife in each hand and cut in the butter that way.

Soda bread is such an easy bread to make, no waiting for the dough to rise or kneading required. It’s delicious hot from the oven, and even better with a pat of butter. If you have the urge to bake, I hope you’ll give this recipe a try!

*Back to the Shamrock Shake. I’m not talking about this disgustingly sweet new version that looks to be 90% neon green syrupy goop, but the old one of my childhood that was a perfectly minted shake (and even if it wasn’t made from 100% ice cream, milk, and mint, it was a good imitation). This may be the year I finally break down and make my own. [insert tiny Sarah on your shoulder chanting dooo it, dooo it!]