In Season : Donuts!

doughnutcontest_libraryofcongress

Next Tuesday is Fat Tuesday, or Donut Day if you grew up in our house. Today we have a few donut-related links to delight your inner child, and on Tuesday we’ll be sharing some donut recipes to satisfy that rumble that just started in your tummy. In doing our research, we learned that  there’s a real “Donut Day” the first Friday of June. Who knew?!  I know that’s a lot of donuts to tend to, but donut stress about it. ha?

This donut balloon DIY is perfect for your next donut party (we’re all wishing we had a donut party).

While we’re on the topic, here’s a serving suggestion for your donuts and milk.

Wear your donut love on your iPhone with this case.

And there’s a surprisingly large variety of donuts on t shirts. This one was our favorite, but it looks like it’s not in stock anymore.

Ok, maybe the tshirts were a bit over the top? Well nothing whispers donut like a pair of  cuff links.

Of course, if your sweetie loves all things sweet, she’ll be smitten with this donut ring.

And your mister will love this donut-holding mug.

Want to try your hand at baked donuts? Here’s a cute heart-shaped pan.

Or you can skip the oven and try this countertop donut machine.

Even easier, you can skip the baking altogether and make a batch of these super-cute Cheerios donuts. They say the donuts are for elves, but I’m sure the garden fairies wouldn’t mind a treat.

These donut printables, and the corresponding ideas look like they would make for some easy fun on a rainy afternoon.

Whatever you do, donut give up.

If you liked these donut links, we’ve created a donut Pinterest board (necessary, no?), follow along and we’ll add fun donut ideas whenever we see them!

Fun fact : while searching for a image for today’s post, I came across this article and learned that during the first and second world wars, the Salivation Army flew “donut lassies” to the front lines to make donuts for the soldiers!

Image from the Library of Congress archive.


Vortex : Hat Pattern

I’m sure this winter’s arctic vortex won’t leave our memories anytime soon, but we felt that it was worth commemorating with a new winter hat pattern. Let me introduce Vortex!

liveseasoned_spring2014_newhat_solo_wm

I know not all of our readers are knitters, but if you’re ever given the opportunity or have the motivation to learn, I highly encourage it! There has been a true resurgence in knitting over the past decade, and this has led to awesome local knitting shops, knitting-focused blogs, and amazing pattern independent designers. If you’re new and wondering where to start, a quick google search will return a variety of handy tutorials and knitting guides. Ravelry is the place to start if you to explore knitting patterns and so much more (my username is winterfoliage, let’s be friends!).

I admit that there’s a slight learning curve, but once you grasp the basics, you’ll be pleasantly surprised to see how much you can do with just a few stitches. Plus, you can knit while watching TV! You know what this means, right? You’ll now have something to justify those marathon House of Cards sessions and the past two weeks spent doing nothing but watching the Olympics.


Continue reading

Become a Woods Warrior

Want more yoga and exercise? Become a woods warrior, try this lower body workout, then end the day with bedtime stretches that relieve lower back pain. Check out my 200hour yoga teacher training experience and read about the school I attended here.

liveseasoned woods warrior

Become a woods warrior.  Nope, not the kind that wields a sword, instead the kind that smiles peacefully and stretches deeply.  Warrior pose is also known as Virabhadrasana (vira=hero, bhadra=gentle, asana=pose).  You can be a warrior anywhere, but I believe the woods to be the calmest and most inspiring space for these stretches.  There’s nothing like holding warrior one while you gaze up at your fingertips and see the tops of tall trees swaying in the wind.  You have the overwhelming sense of feeling grounded yet flexible like those limbs.  Then comes warrior two where you can pause and gaze miles past your fingertips.  The forest gives you ample spaces for exalted (reverse) warrior so you can stretch and lengthen until you’re as limber as the trees that surround you.  I love looking down at my environment in warrior three.  It gives me time to take in the dry leaves and tiny bugs as I breathe, balance, lengthen and stretch with all I’ve got.

live seasoned woods warrior yoga poses-9

After recently completing a month-long yoga challenge, I was a little bored with the warrior poses.  I was eager to move on to harder, more intriguing postures, but I realized that isn’t the yogi way.  It’s important to be present with each pose, no matter how many times you’ve practiced.  The more you appreciate the present, the more space you create for improvement and appreciation.  Of course, the same is true with life.  The more we focus on the task at hand, the more we come to contribute, improve, appreciate and love what we’re doing.  So even if you’ve practiced warrior one, two, and three a thousand times, try them all again and appreciate their presence in your life and your ability to stretch and strengthen your body.

A few tips:

  • Wear stretchy pants or shorts so you can practice your fullest expression of each pose.
  • Pick a relatively flat and non-slip surface.
  • Move into each pose slowly and with intention.  Think about each part of your body in order to achieve the proper alignment.
  • Breathe deeply and evenly through your nose.  If the pose seems tough, focus on your breath.
  • Try each pose for a couple breaths and then go back and hold them longer if you’d like.
  • My form isn’t perfect so don’t just peep at the pics – read through each warrior before practicing.


live seasoned woods warrior yoga poses-7live seasoned woods warrior yoga poses-2live seasoned woods warrior yoga poses-1

Warrior One

  • Stand up straight with your feet together, arms down by your sides, and palms facing forward.  Inhale and as you exhale, step your right foot forward about 4 feet.  Reach your arms upwards (perpendicular to the floor) as you rotate your palms to face each other and actively reach through your fingertips towards the sky.  Breathe as you roll your shoulders down and back into their sockets.
  • As you inhale, make sure your heels are aligned and turn your back foot (left) out 45-65 degrees to the left (anywhere from 9 o’clock to 11 o’clock). Exhale and rotate your hips and torso to face forward while grounding into your back leg.  You’ll probably have to pull your left hip forward and your right hip back.  Try to square your pelvis as much as possible, this is difficult (especially if you have tight hips like myself) and won’t happen overnight. I like to bring my arms down for a moment, touch both my hips and direct them towards the front of my invisible mat.
  • Keep your back foot firmly planted and as you exhale, bend your right knee over the right angle so the shin is perpendicular to the floor and your thigh is as close to parallel as possible.  You may have to scoot your front foot forward a little bit if your knee is tracking over the front of your ankle (you never want that to happen). Your back leg should be straight and your heel should be touching the ground.
  • Anchor yourself firmly with both legs, even though your front leg is probably burning a little more, your weight should feel equally grounded.  Inhale as you reach towards the sky, look up at your fingertips and those beautiful trees and reach some more.  There can be a slight bend in your back.  You can also bring your palms together overhead and spread your fingers if you’d like.
  • Relax into warrior one with strength, breathing deeply for thirty seconds to a minute.  To release, straighten the front leg while bringing the back leg forward to meet at the front of your invisible mat.

live seasoned woods warrior yoga poses-6live seasoned woods warrior yoga poses-8live seasoned woods warrior yoga poses-3

Warrior Two

  • Starting from warrior one (with your right foot forward), rotate your left arm back and your front arm forward so they create a straight line (parallel to the ground).  Keep a tall spine and feel strength radiating from your core.  At the same time rotate your hips and your back toes outward.  Your shoulders should be stacked directly over your hips and your left toes should be pointed towards the left side of your invisible mat (perpendicular to your right toes) .  The heel of your front foot should line up with the arch of your back foot.
  • Sink lower into your lunge and exhale while relaxing your shoulders.  Just like in warrior one, the weight should be distributed evenly in your legs, which means the outer edge of your back leg is pressing firmly into the ground.
  • Even though you’re actively reaching forward and backwards with your arms, they should be slightly relaxed not rigid.  I like to imagine a string tied to each middle finger, knowing I could sway my abdomen forward and backward if someone came along and pulled either string.
  • When you’re properly aligned, look out over the edges of your front fingertips.  Keep your gaze soft and your face relaxed.  Hold the pose for thirty seconds to a minute all the while breathing deeply. To release, rotate the arms upwards and the back toe and hips forward to return to warrior one and then straighten the front leg while bringing the back leg forward to meet at the front of your invisible mat.

live seasoned woods warrior yoga poses-10live seasoned woods warrior yoga poses-5live seasoned woods warrior yoga poses-4

Exalted or Reverse Warrior

  • Starting in warrior two, simply rotate the front palm towards the sky and slide the back palm gentle down your back thigh.  Inhale the front arm towards the sky, reaching and lengthening the front side of your body while your back hand extends lower on your thigh and eventually calf.  You don’t want to put any weight on your back hand, instead use your abdominal muscles and right hand to lengthen and raise your heart towards the sky.  Gently gaze up at your fingertips while keeping your neck relaxed.
  • Deepen the lunge in your front leg and breathe deeply for up to thirty seconds.  To exit, return to warrior two, warrior one and then straighten the front leg while bringing the back leg forward to meet at the front of your invisible mat.
  • *If you’d like to go into a half bind in reverse warrior, bring your lower hand around your back and place your fingertips in your front hip crease.  Make sure you keep a deep lunge and your upper body uplifted.

live seasoned woods warrior yoga poses-11live seasoned woods warrior yoga poses-12

Warrior Three

  • Starting from warrior one, simply (ok nothing is simple about this pose) tilt your upper body forward about 45 degrees and simultaneously straighten your front leg while you gently push forward and lift your back leg.  The goal is to look like the letter T.  Your hips should be squared towards the ground.  Stretch your arms forward so they’re parallel to the ground while you flex your back foot and push backward.  I like to imagine a wall directly behind me that I’m pushing against with my heal.  You don’t want your shoulders to sink below your hips so engage your core muscles and lengthen your arms while you gaze at the ground.  Hold this for up to thirty seconds, which is a major challenge, and gently release back into warrior one. To release, straighten the front leg while bringing the back leg forward to meet at the front of your invisible mat.


Now you’re well versed with warrior and equipped to take your calming strength out into the woods.  I hope you enjoyed a magnified look at these important postures.  I’m sure you’ll find yourself in one, if not all four, of these poses during any vinyasa class.  And remember that everyone’s body looks and works differently even though we’re all made up of the same parts, which means everyone’s warriors will differ slightly.  Embrace yours, whatever it may look like today and leave it in the woods when you’re finished.  It may look different tomorrow, embrace that too!

Sweet (Heart) Potato Skillet

liveseasoned_sweetpotatoskillet8 copy

If you’re looking to shake up your breakfast menu, try this sweet potato skillet.  It’s a quick and hardy dish with the perfect amount of spice.  The eggs are a great source of protein and the sweet potatoes add lots of fiber and potassium to the dish.  What’s my favorite aspect of this recipe?  The lack of dirty dishes.  Since you cook and eat out of the  skillet, clean up is easy peasy.

liveseasoned_sweetpotatoskillet3

Ingredients:

  • Splash of olive oil (or coconut oil)
  • 1 medium sweet potato
  • 1 clove of garlic
  • ½ an onion
  • 1 small sweet pepper
  • few sprigs of cilantro
  • 2 eggs
  • ½ teaspoon cumin
  • ½ teaspoon cayenne pepper
  • shake of red pepper flakes
  • salt and pepper to taste

Equipment:

  • Finely chop half an onion, the pepper and a clove of garlic.  Over medium-low heat, add a splash of olive oil to a small skillet.  Add the chopped onion, pepper and garlic. Sprinkle a pinch of salt over the onion mixture.
  • Wash, peel and julienne (or grate)  the sweet potato while the onion mixture is sautéing.
  • Stir in the grated sweet potato and turn up the heat to medium.
  • Finely chop the cilantro and add it to the sweet potato mixture along with the cumin, cayenne and red pepper flakes.
  • Stir every so often until the sweet potato begins to soften.  About seven to ten minutes.
  • Place a rack at the top of the oven and turn on the broiler.
  • Make a heart shape in the middle of your skillet and crack two eggs into it.  Sprinkle a little salt and pepper over the raw eggs.
  • Place your skillet in the oven, under the broiler, to lightly cook the eggs.  Anywhere from 2-5 minutes depending on your preference.  I broiled my skillet for only two minutes because I like my eggs runny. (Katie here ~ what? you like your eggs runny? I’m not sure if we can be sisters anymore!)

liveseasoned_sweetpotatoskillet4

If you’re serving it with toast you can put the slices under the broiler too.  I ate my skillet with an expensive ($8!), but delicious gluten-free loaf from the Saturday Farmers’ Market.  I’m not allergic to gluten, but the loaves at Imagine That Gluten Free looked so delicious that I had to give them a try.  It was a cold and windy (read absolutely freezing) Saturday and I was wandering around near closing time so the vendor even gave me a baguette ($6) for free!  That combination of friendliness and deliciousness will keep me coming back for more.  I wish I had a photo of the baguette.  It seriously looked like a piece of art.  My guy and I scarfed it down that day.  Stay tuned via Instagram and I’ll snap a picture of the beautiful baguettes this Saturday.

I hope you enjoyed this simple yet filling recipe.  The heart makes me smile every time I serve this up.  Do you ever play with your food?  Morph your pancakes into any fun shapes lately? If so, snap a picture, share it on instagram #foodart and tag us!  I’m off to make dinosaur pancakes and heart-shaped donuts!


*I highly recommend buying a julienne peeler.  It basically transforms any veggie into a noodle.  It’s my new favorite toy.

In Season : Spring Links

liveseasoned_springlinks

February always flies right past us and soon it will be spring time.  We’re so excited to pull on our rain boots, kick around in some puddles and watch flowers bloom.  Are you with us?  We see you nodding your head!  Here’s a few inspiring links to get you geared up for the rainy, but lovely season we know as spring.

  • Katie just bought this blouse; the detailed flower print makes it a fun winter to spring transition piece.
  • Which reminds Sarah of this lovely pastoral picture of spring. We wish we knew the source!
  • If you’re thinking about doing a little gardening this year, here’s a great starter set.
  • What a creative and cute idea for starting seedlings.
  • If you have the space and you’re really serious, you could try your hand at building some cold frames.
  • There’s still time to knit this sweater, and it will come in handy for those cool mornings and evenings that spring throws at us.
  • Every time Sarah sips this Tazo tea she feels like spring is one step closer.  FYI you can find it at your grocer too.
  • Have you caught this inspiring travel article?  We found it long ago, but it’s too good not to share.  How the heck do you decide what shoes to take?!  Speaking of shoes…
  • It’s almost time to put away your winter boots and switch into your rain gear.  Last year Sarah had these, but this year she’s thinking about purchasing these.
  • Sarah always buys cool umbrellas in case it rains while she’s shooting a wedding; her favorite is the clear bubble style.  It acts like a big soft box, filtering the light and adding a blurred background to the bride and grooms face.
  • Alex is a charmer in stripes, and that onsie will be so cute when he’s crawling around the (snow-less!) back yard.
  • Looking for quick craft? What about a spring embroidery project?
  • Finally, how excited are you to wake up one morning and finally say Hello Spring!
Image via Elegant Wreath

DIY : Touchscreen Compatible Gloves & Supply Giveaway!

I’m one for quality over quantity, but sometimes I run into the problem that the quality items just won’t wear out so that I can get the shiny new version with extra features. Take gloves. Being the winter walker I am, having a good pair of gloves is essential. I have a pair that work fine in every way: warm, give me plenty of dexterity for wiping runny noises and picking up the {ahem} dog poop, and above all else, they magically stay together as a pair. You’ll notice that they look well worn in the photos, please excuse their pilled rough and tumble appearance.  Unfortunately, they are not touch screen compatible, which leaves a few fingers out in the cold when I want to use my phone for anything from taking pictures to making calls. Lucky for me (and you!), with the right materials this is a surprisingly easy problem to fix.


Our smart phones have capacitive touchscreens, which require the flow of electrons between our fingers and screens to function. Unless you already have touchscreen compatible gloves, you’re like me: making this connection requires taking off your gloves. BUT we can easily complete that circuit with just a bit of conductive thread!

Buying conductive thread is not as hard as it used to be. There are a variety of threads and other materials available on Amazon. When I converted my first pair of mittens a few years ago, I remember there being only a few suppliers, and I had ordered a sample pack from Silverell.  Sparkfun is another supplier that’s been around for a while and sells a variety of materials for similar crafty projects. Now, the sky’s the limit and you probably already have supplies in your house to make your own!

That said, if you want to dip your toes in the water but don’t want to order or make your own conductive thread, we’re giving some away! The details are at the bottom of this post.

liveseasoned_spring2014_touchscreengloves_supplies_wm 

Materials:

  • conductive thread
  • sewing needle
  • gloves

Instructions:

  • Mark your contact hotspot. Put on your glove, pick up your phone, and swipe the screen as if you’re going to use it. Mark the area on your finger or thumb tip that makes contact with the screen – this is where you’ll want to make your stitches, and often it’s not directly in the middle of your glove’s finger tips, where your instinct may tell you to add the thread.
  • Stitch your marked area! Make a number of overlapping stitches where you marked your glove. *Notice the way I weave the needle in and out of the thumb tip from the outside, it makes your sewing much easier than having to reach into the glove for the needle.* After a few stitches, double check to make sure that the thread is clearly exposed to your thumb on the inside of the glove and the screen on the outside. If it is, continue stitching until you cover the full area of the glove that was making contact between your thumb and the screen.
  • Check your work. Put on your glove and use your phone. Does it work? If it works, great, you’re done! If not, read my first tip below and try again. If you’re still having trouble, add a few more stitches in the same area. The more thread that’s there, the more opportunity the electrons have to will flow!

And we couldn’t help ourselves, we had to show a little action clip of the glove at work! If you have a sharp eye, you’ll notice that we took that footage on Tuesday, during the latest storm, and Calder’s texting me to say that he shoveled the driveway (usually my job), but that the snow already covered it up again. There couldn’t have been a more appropriate text for this post!

gloves

This is one of those updates that is so easy that you’ll wish you did it back in November before suffering through the Arctic Vortex.  Back when you could still feel your fingertips and were greeting each day’s snow with a smile because you were going to make the best of this cold!

Has anyone out there attempted a similar conversion? What type of conductive thread did you use? Have any tips to share?

Notes and Tips:

  • I often find that these gloves are not as perfect as our ungloved hand. They work fairly well when I’m doing a big slide motion (like unlocking my phone), but are not as successful with tap motions. Tap performance can be improved if you add a very slight slide at the same time, so often I will slide across the button I want to tap, and that does the trick.
  • The thread I’m using is sold as “sewing thread” and I get the impression that it is meant to be used for machine sewing to stitch two pieces of fabric together. As such, it’s a combination of fabric and conductive material, and the connection is not as strong as it could be using a purely conductive material, but, it does work!
  • If I were knitting a pair of gloves or mittens, I would hold my conductive thread with my yarn when knitting the thumb and finger tips that I want active. Depending upon how well this works, you could then go back over the a specific point on your finger tips, just like the project above, to enhance the conductivity.
  • In the last picture, my stitches look like a big lump, but they are truly not noticeable. This might be more of a problem if your gloves are fitted. If anything, I found that having a slight bump can be helpful in giving you a good sense of where to touch the phone.

Now, about that giveaway ~

We want to share the love and encourage some simple DIY action. The first five commenters on this post will be gifted enough conductive thread to pimp out your own gloves. What do you say, want to give it a try? Let us know!

Lower Body Woods Workout

Want more yoga and exercise? Become a woods warrior, try this lower body workout, then end the day with bedtime stretches that relieve lower back pain. Check out my 200hour yoga teacher training experience and read about the school I attended here.

live seasoned lower body woods workout-1 copy            Growing up, I’ve always been involved in some type of activity, whether it was playing tag with my neighbors, going backpacking with my father or running around on the soccer field.  Because of this, my legs have always been the biggest part of my body and I admit, I used to feel a little insecure about it.  Struggling to squeeze into skirts and skinny jeans that my friends easily slipped on with their cute little bird legs and knobby knees.  Now that I’ve grown up a little bit and realized that Barbies and models are far from average, I love my muscular legs.  Are they proportionate to the rest of my body? Sometimes no, but it’s cool, thunder thighs are where it’s at.  They take me everywhere I need to go, even if it’s twenty miles from point A to B, I know they’ll carry me.  Climbing up a volcano? Yep, they were there. Walking three miles home from class carrying a twenty-pound camera lens? No biggie.  Taking dozens of photos while frozen in the same pose for an hour during this tutorial? No problem they say!  They even requested a yoga class afterwards. They’re that good.  So, after years of self-doubt and twirling in the mirror wishing they’d shrink up a bit, I decided it’s time to give my legs some love and some more exercise.  Time to cherish those limbs and treat them right.  This lower body workout is really basic, but can be easily modified if you’d like it to be a bit tougher.  I designed it to be easily remembered and equipment free that way you can add it to the end of a hike or a walk.  These moves target your thighs (especially the inner thighs), glutes, calves and even your abdominal muscles.  Read through all the exercises so you’re familiar with proper form.  You’ll find a concise workout routine at the bottom of the post.

live seasoned lower body woods workout-9 copylive seasoned lower body woods workout-10 copylive seasoned lower body woods workout-11 copy

A few quick tips:

  •             Wear sneakers or supportive shoes
  •             Stretch out for a couple minutes before you begin
  •             Breathe consistently throughout each exercise
  •             Engage your muscles, especially your abdominals
  •             You are your own trainer.  Do what feels best for you. Don’t push it unless that’s what your body wants.
  •             If you’re not accustomed to strenuous exercise, consult your physician before you begin.

lowerbodywoodsworkoutdesign

live seasoned lower body woods workout-1 copylive seasoned lower body woods workout-2 copy

Basic High Lunge

  • Stand up straight with your feet shoulder length apart.  Engage your abdominal muscles and step forward with your right foot until your knee is bent at a 90° angle.  Your thigh should be parallel to the ground or as close as you can get to parallel.  Your need should be directly over your ankle, never over your toe.  Your left heel will naturally rise off the ground.  There should be a slight bend in your left leg.   Stand up, bringing your back foot to meet the lead foot and switch legs.  Continue lunging forward for a total of 20 lunges.
  • Modification: Bring your hands in a prayer position and use your abdominal muscles to twist slowly to the left and then the right.  This strengthens your core and improves balance.

live seasoned lower body woods workout-7 copy

live seasoned lower body woods workout-16 copylive seasoned lower body woods workout-17 copylive seasoned lower body woods workout-18 copy

Calf Raise Three Ways

  • Super simple, but don’t let that fool you, these work and you’ll feel the effects instantly.  Stand up straight with your feet shoulder length apart.  Rise up onto your toes and count one Mississippi, two Mississippi and lower down.  Repeat twenty times and do a quick set of ten. Rise up, down, up, down as quickly as possible.  Make sure your rising up on your toes as high as is comfortable.  Now point your toes in towards each other and repeat, twenty slow, ten fast.  Finally, point your toes away from each other and repeat again, twenty slow, ten fast.  Your calves should be on fire at this point.  No need to wear heels to have defined calves anymore.

woods chair pose-100

Basic Chair Pose

  • If you’ve ever practiced yoga, you’ve probably done chair pose.  Stand up straight with your feet hip’s distance apart and your arms raised over your head.  Simply exhale and sit back as if you’re sitting down in an invisible chair.  The goal is to have your thighs parallel to the floor.  Your knees will protrude over your feet a little bit, but your weight should be in your heels.  I lifted my toes in the photo above to demonstrate that, but you should keep your feet flat on the ground. Keep your chest and arms lifted, look up and keep breathing.  Count to ten or twenty and stand up straight.  I like to sprinkle in chair pose between all of the other exercises.
  • Modification:  Instead of feet shoulder length apart stand with your feet together and challenge yourself to bring your thighs parallel to the floor all the while keeping your chest and arms lifted.

live seasoned lower body woods workout-5 copylive seasoned lower body woods workout-4

Lunge Rollover

  • This is very similar to a high lunge. Stand up straight with your feet shoulder length apart.  I like to hold my hands at my heart’s center in a prayer position, but you can also hold them overhead or down by your sides.  Engage your abdominal muscles and step forward with your right foot a little further than you would for a regular high lunge.  At this point, your knee should be behind your ankle.  You are balanced on the ball of your back foot.  Roll forward onto your toe, which propels your body forward so that your knee is now directly over your ankle.  Your knee should never be over your toe.  That is why you take a bigger step in the beginning. Rock back onto the ball of your foot, that’s one repetition.  Roll forward slowly onto your toe again and back, that’s two.  Complete 15 on each foot.

live seasoned lower body woods workout-3 copylive seasoned lower body woods workout-6 copy

Prayer Squat

  • Stand up straight with your feet a little wider than shoulder’s length.  Engage your abdominals and bring your hands in a prayer position at your heart’s center.  Lower down slowly until your thighs are parallel (or as close as you can get) with the ground and your elbows touch the insides of your knees.  Keep your weight in your heels and as you lower your knees will track outwards instead of forwards.  Your knees should never track out over your toes.  Slowly rise back up.  Repeat 15-20 times.

live seasoned lower body woods workout-8 copy

Squat Walk

  • First make sure there are no strangers around because this is one sure-fire way to creep them out.  Take a wide stance with your legs with your toes pointing outwards; I like to pretend I’m making the letter A.  Then squat down so your thighs are parallel with the earth.  Keep your head and chest lifted and take 6 small steps forward and 6 small steps backward.  You should feel it in your inner thighs.  Continue six-steppin’ for about a minute.

live seasoned lower body woods workout-14 copylive seasoned lower body woods workout-15 copy

Speed Skater

  • Stand up tall with your arms at your sides.  Bend your left knee with your toe pointed towards the ground.  Keeping your back straight, lean forward bend your right knee and kick your left leg out behind you.  Your fingertips should be pointing towards the earth and your right knee will track over your foot a little bit, but never past your toes.  Pretend you’re speed skating in place.  Do 15 reps without letting your left leg touch the ground and repeat on the other side.

live seasoned lower body woods workout-12 copylive seasoned lower body woods workout-13 copy

Tree Squat

  • Find a tree with a smooth surface.  Make sure there aren’t any poison vines growing on it and lean with you back against it, thighs parallel to the earth.  Sit up tall and count to thirty.
  • Modification: Try lifting one leg for 15 seconds and then the opposite for 15 more.

Lower Body Woods Walk Workout      1-3 sets

  • Basic High Lunge x20
  • Basic Chair Pose 10-20 seconds
  • Calf Raise Three Ways: Slow x20 Quick x10
  • Lunge Rollover x15 each leg
  • Prayer Squat x20
  • Squat Walk 40-60 seconds
  • Speed Skater x15 each leg
  • Tree Squat 30 seconds


There are dozens of modifications for each of these moves, but rather than overwhelm you I thought it’d be great to start simple and go from there. You’ll see these basic exercises being built upon in future posts.  Exercise doesn’t always mean putting on bright workout clothes, paying for a gym membership and fumbling around with machines.  Sometimes the most effective workouts are the simplest because we’re more likely to be consistent.  I hope you’ll try out some of these moves this week while you’re out walking around or hanging out at home.

Butter Lettuce Salad with Roasted Beets, Pumpkin Seeds and Citrus Parmesan Dressing

This salad’s citrus dressing combined with the flavor of roasted beets and the crunch of the pumpkin seeds creates a flavor that’s sure to please, making it a super healthy alternative for lunch or dinner.

Do you ever dine out and wonder why restaurant salads seem so much tastier than those prepared at home?  It’s because the chef had a certain vision and flavor combination in mind instead of chopping up every veggie in the fridge. I know I’m guilty of the latter eighty percent of the time, but not with this one!  The fewer the flavors, the more you actually recognize, taste and appreciate them.  I wanted a salad that had a warm feeling, hence the roasted beets, while simultaneously waking up my taste buds, which is where the citrus dressing comes in.  Butter lettuce is a great vehicle for the beet and pumpkin seed power couple.  Even though there are only four ingredients, this salad is packed with vitamins and minerals that have some pretty powerful effects and there’s even some protein in the mix.  If you prepare the beets ahead of time, you can throw this together in five minutes, making it perfect for lunch or a colorful appetizer before dinner.

Quick tip before you begin:

  • Roasting beets takes some time, so I usually do this step the night before.  I like to roast a bunch of beets at once so I have them in a pinch.  You can store roasted beets for up to a week in the fridge.

Ingredients:

  • Head of butter lettuce
  • 4 small beets
  • ¼ cup pumpkin seeds
  • 4 stems Cilantro
  • 2 oranges, juice and zest
  • 1 tsp white wine vinegar
  • 2 tsp olive oil
  • ½ tsp lemon juice
  • 1 Tbs parmesan cheese
  • 2 shakes of salt and pepper

Equipment:

  • Sheet pan
  • Aluminum Foil
  • Pairing Knife
  • Skillet


  • Preheat the oven to 400°F.  This is a flexible temperature; if you’re cooking something else you can throw them in at that temperature. Cut the leaves off of the beet near the bulb and then scrub them clean. Wrap each individual beet loosely in aluminum foil without drying them off first.  Place them on a baking sheet in case they drip.  Check on the beets after 25 minutes by sticking a fork through the center.  If it goes in easily then they’re finished.  The bigger they are the longer they’ll take, but most beets are cooked completely after an hour.  Once the beets are finished roasting, take them out of the oven and unwrap them to cool.  Once they’re cool enough to be handled, peel them by rubbing them gently with a paper towel or using a pairing knife.  The peel should separate quite easily; if it doesn’t then the beets probably need to be a roasted a little longer.
  • Next you want to roast the pumpkin seeds.  Put them in a small skillet over medium heat.  Shuffle them back and forth every two minutes or so until they’re lightly browned.  The seeds quickly turn from roasted to scorched so keep an eye on them, it should only take about five minutes.

liveseasoned_butterlettucebeetspumpkinseeds6

  • While you’re roasting the pumpkin seeds, wash the lettuce and chop up the beets.  Pull the leaves off of four or five stems of cilantro and add them to the mix.  Top with the warm seeds and your salad is complete.

liveseasoned_butterlettucebeetspumpkinseeds2

  • Now it’s time to mix up the dressing.  Juice two oranges and add a little zest to the juice.  Mix in the olive oil, vinegar, lemon juice, cheese (leave it out if you want to keep it vegan) and a few shakes of salt and pepper.  Whisk it with a fork and give it a taste.  Adding a bit more of anything your taste buds think it lacks.

liveseasoned_butterlettucebeetspumpkinseeds4

  • Pour some dressing over the salad and then cut it with a knife and fork.  I think this is the best way to mix all the flavors together, which is why I don’t rip up the lettuce leaves while prepping the salad.  Take a big bite and enjoy your fresh and healthy meal.

liveseasoned_butterlettucebeetspumpkinseeds7

A note about our star ingredients: If you’re not a beet lover, I’m begging you to give them another chance.  Beets are high in vitamins like A, B and C and minerals such as potassium, magnesium, fiber, phosphorus, and iron just to name a few.  I’m always looking for ways to get more iron since I eat a veggie heavy diet (otherwise meat is a great source of iron) and that’s where beets and pumpkin seeds come in handy-they’re loaded with iron.  Back to the beets, they contain betaine, which is used to help treat depression and tryptophan, which relaxes the mind similar to chocolate.  Beets are also an aphrodisiac because they contain high levels of boron, which is directly related to the production human sex hormones, so eat beets and get busy.  If all that isn’t enough, I don’t know what I’m going to do with you, but if you come over for dinner be prepared to eat it or beat it!

Now about those pumpkin seeds, you can substitute in another roasted seed or nut, but I chose pumpkin seeds because they’re a good source of vitamin B, E and K and they have loads of iron, magnesium, phosphorus and copper.  Like beets, they also contain tryptophan which helps produce serotonin.  Pumpkin seeds are also high in zinc, which means they’re a natural protector against osteoporosis.  They also add some protein to the salad.  The list of benefits goes on, but I don’t want to overwhelm you, just go ahead and pat yourself on the back for treating yourself to this salad.

While you’re chowing down, think of all the great benefits of beets and pumpkin seeds and know that you did something great for yourself today.  Even if making a salad is the only thing you did besides sitting in bed, typing posts and dreaming up new recipes.  If you’re one of those who thinks a salad won’t cut it for the entire meal, that’s cool and that’s me most days, just whip it up as an appetizer!

This Isn’t Your Monk’s Meditation

           liveseasoned_spring2014_meditation-1

I’m sure a lot, if not all of you, already meditate in some form or another.  Maybe you clear your mind while you exercise or while doing the dishes or while taking a shower.  When you are alone with your thoughts you’re beginning to meditate.  Over the past couple of years, I have read a few powerful books about mediation and self-discovery and I believe they have had a big impact on my overall happiness and upbeat attitude.  I’ve learned to direct and guide my thoughts in a constructive way instead of arguing with myself.  Self-love is always in season so from time to time we’ll be sharing a little bit about our paths to self-discovery and tips for your own, in a series called Grey Matters.

First let me start off by saying I don’t identify myself as a Buddhist per say and I’m not here to promote any one religion.  I do however think that the Buddhist religion has some really great insights into how to become a better individual and how to pass on that goodness to those around us. Shunryu Suzuki Roshi, founder of San Francisco Zen Center, said it best, “The purpose of studying Buddhism is not to study Buddhism, but to study ourselves.” Buddhism informs us that we should identify the intention behind our actions and whether those actions will have a positive or negative effect on those around us.  If you identify with a particular religion or not, I think the Grey Matters series will be helpful to you as you walk on your path to self-discovery.
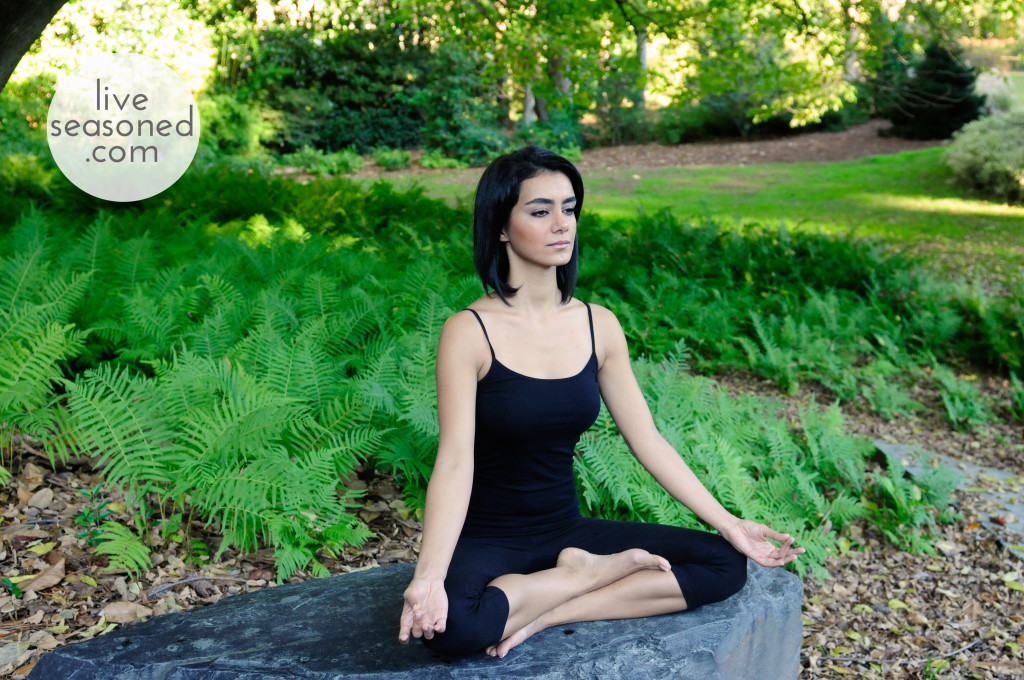
In this first installment of Grey Matters I thought it could be helpful to give a little primer on meditation and setting an intention for your day or week.  When you let your mind rest you are beginning to practice meditation.  You don’t have to venture to a secluded spot and sit in the same position for days on end without talking to a soul.  This isn’t your monk’s meditation.  It’s a tool for self-reflection that we can all utilize.  Mediation has tremendous power in that it helps us identify the motives of our actions and reactions.  It helps us to expand our minds and hearts and allows both to more easily accommodate the obstacles we all face from day to day. If the word meditation makes your eyes roll then think of it as constructive thinking.  Sometimes life feels like you’re climbing Mt. Everest with no coat when it should feel like you’re strolling along a beautiful beach.  Taking the time to reflect while setting an intention and motivation for your day can help you transform that mountain into a plain.  Meditation is a helpful tool in reducing stress, anxiety, depression, insomnia and many other uncomfortable conditions of the human mind.  At first the goal of meditation is to have an open and clear mind.  You can’t solve all of your problems during the first week of meditation.  It’s a process so start small.

Here are a few tips to practicing meditation:

  • Choose a consistent, comfortable, clean and quiet space in your home.  I put a pillow on the floor in my bedroom; it’s as simple as that.  Some people have a space set aside specifically for thought.  Maybe it involves a comfortable cushion and a couple scented candles in front of a sunny window or maybe you’re not sold on the idea of meditation and you choose to sit at your dining room table with a cup of coffee.  However you choose to begin is fine.
  •  Minimize distractions and focus within.  If you’re sitting on the ground, sit up straight in a comfortable position and rest your hands on your knees or thighs.  If you’re sitting on a chair make sure both feet are touching the ground.  When you breathe in you should feel uplifted and when you exhale you should feel balanced and grounded, it’s easier to feel grounded when you’re making contact with the earth.
  • Close your eyes or soften your gaze and focus on your breath.  You don’t have to alter your breath, it shouldn’t be a distraction to you, but rather an anchor to the present.  We are practicing being present and not letting our thoughts carry us to the past or future. Change is possibly the only constant in our lives; let your flowing breath be a gentle reminder of that.
  • If thoughts pop into your mind simply exhale them away. Continue to focus on the sensation of your breath traveling in and out. Try not to get caught up in thoughts of your to do list or the fight you had with your friend.  Don’t beat yourself up about all these random thoughts either, simply acknowledge that you’re thinking and then exhale the thought and return your focus to the breath.
  • After five minutes feel free to leave the cushion.  It’s important to keep your meditation short and regular.  If you find yourself successfully freeing your mind of thought and meditating every day for five or ten minutes then you’re ready to address various issues through meditation.

After all, meditation breeds mindfulness, which is simply paying attention to what’s going on around you and not getting hooked by strong emotion.  If we’re being mindful we can begin to identify our intentions and begin to work with them.  We’ll save problem solving and addressing emotions for the next Grey Matters installment, but let’s start setting short-term intentions for our days and weeks.

Your intention is a thought or motivation for how you’d like to live your life.  It’s kind of like a New Year’s resolution without all the pressure.  You can shape your intention daily, weekly, monthly and even yearly.  We’ll talk about setting long-term intentions in the next Buddha Brain post, but let’s stick to daily intentions right now.

Tips for setting a daily intention:

  • Think of a positive word, feeling or focus that will guide you through the day or week.  It can be a goal like writing and photographing x number of blog posts, completing a project at work or a gentle reminder like taking a nap when one is needed. It can also be an overarching, nonspecific theme like practice patience or be generous or persevere.  Think about what you’re lacking, what you’d like to work on or what your body and mind really needs and create your intention.
  • Repeat your intention. After meditating for five to ten minutes, repeat your intention, aloud or internally, three times with passion and motivation to carry through with your intent.
  • Take your intention with you. Now it’s time to go out into the world always knowing that you have your own special guidelines by which you’ll live your life.  You can repeat your intention whenever you’re feeling like your day is going off track.  Know that above all else something is guiding you even when you feel lost.

If your intention was to get enough rest than you’ll feel better about working harder when you’re awake and sleeping sounder during naps or at night.  You won’t have to feel guilty if you need nine hours of sleep instead of eight because you’re paying attention to what you really need to live a happy and fulfilling life.  If your intention is to be more patient, it will be helpful to repeat the word patience when a coworker is talking out of turn during a meeting, when your kids are misbehaving or when the line at the grocery store is a mile long.  Setting intentions is another small way to take control over emotion and immediate behavior.  It’s a tool for shaping our actions, reactions and even the way we talk to ourselves.  It’s a reminder that you live by your own rules.  It’s time to stop feeling guilty, upset or uneasy about the choices you make.  It’s time to stop judging yourself so harshly and instead knowing there was a reason for why you did whatever you did.  You intended it to be so and that’s all the reason you need.

I really hope you enjoyed this Grey Matters post and learning a bit about meditation and setting intentions.  I always felt like I had it all together, but once I started to peel away my emotions through meditation I realized I had a lot to learn about myself.  I’m able to communicate my thoughts so much clearer than in the past and I feel like I actually know why I’m experiencing strong emotion instead of just getting wrapped up in it.  I feel free from my own self-doubt and it’s really refreshing.  If you’ve ever felt the effects of guilt, anxiety or doubt I encourage you to try some of the tactics in this post.  I think you’ll feel a bit if not a whole ton.

Now go live lives of purpose!  Whether your purpose is to take a walk in the woods, cook a delicious meal, rekindle a friendship or get a promotion at work.  It is all just as important and integral in living a happy and fulfilled life.
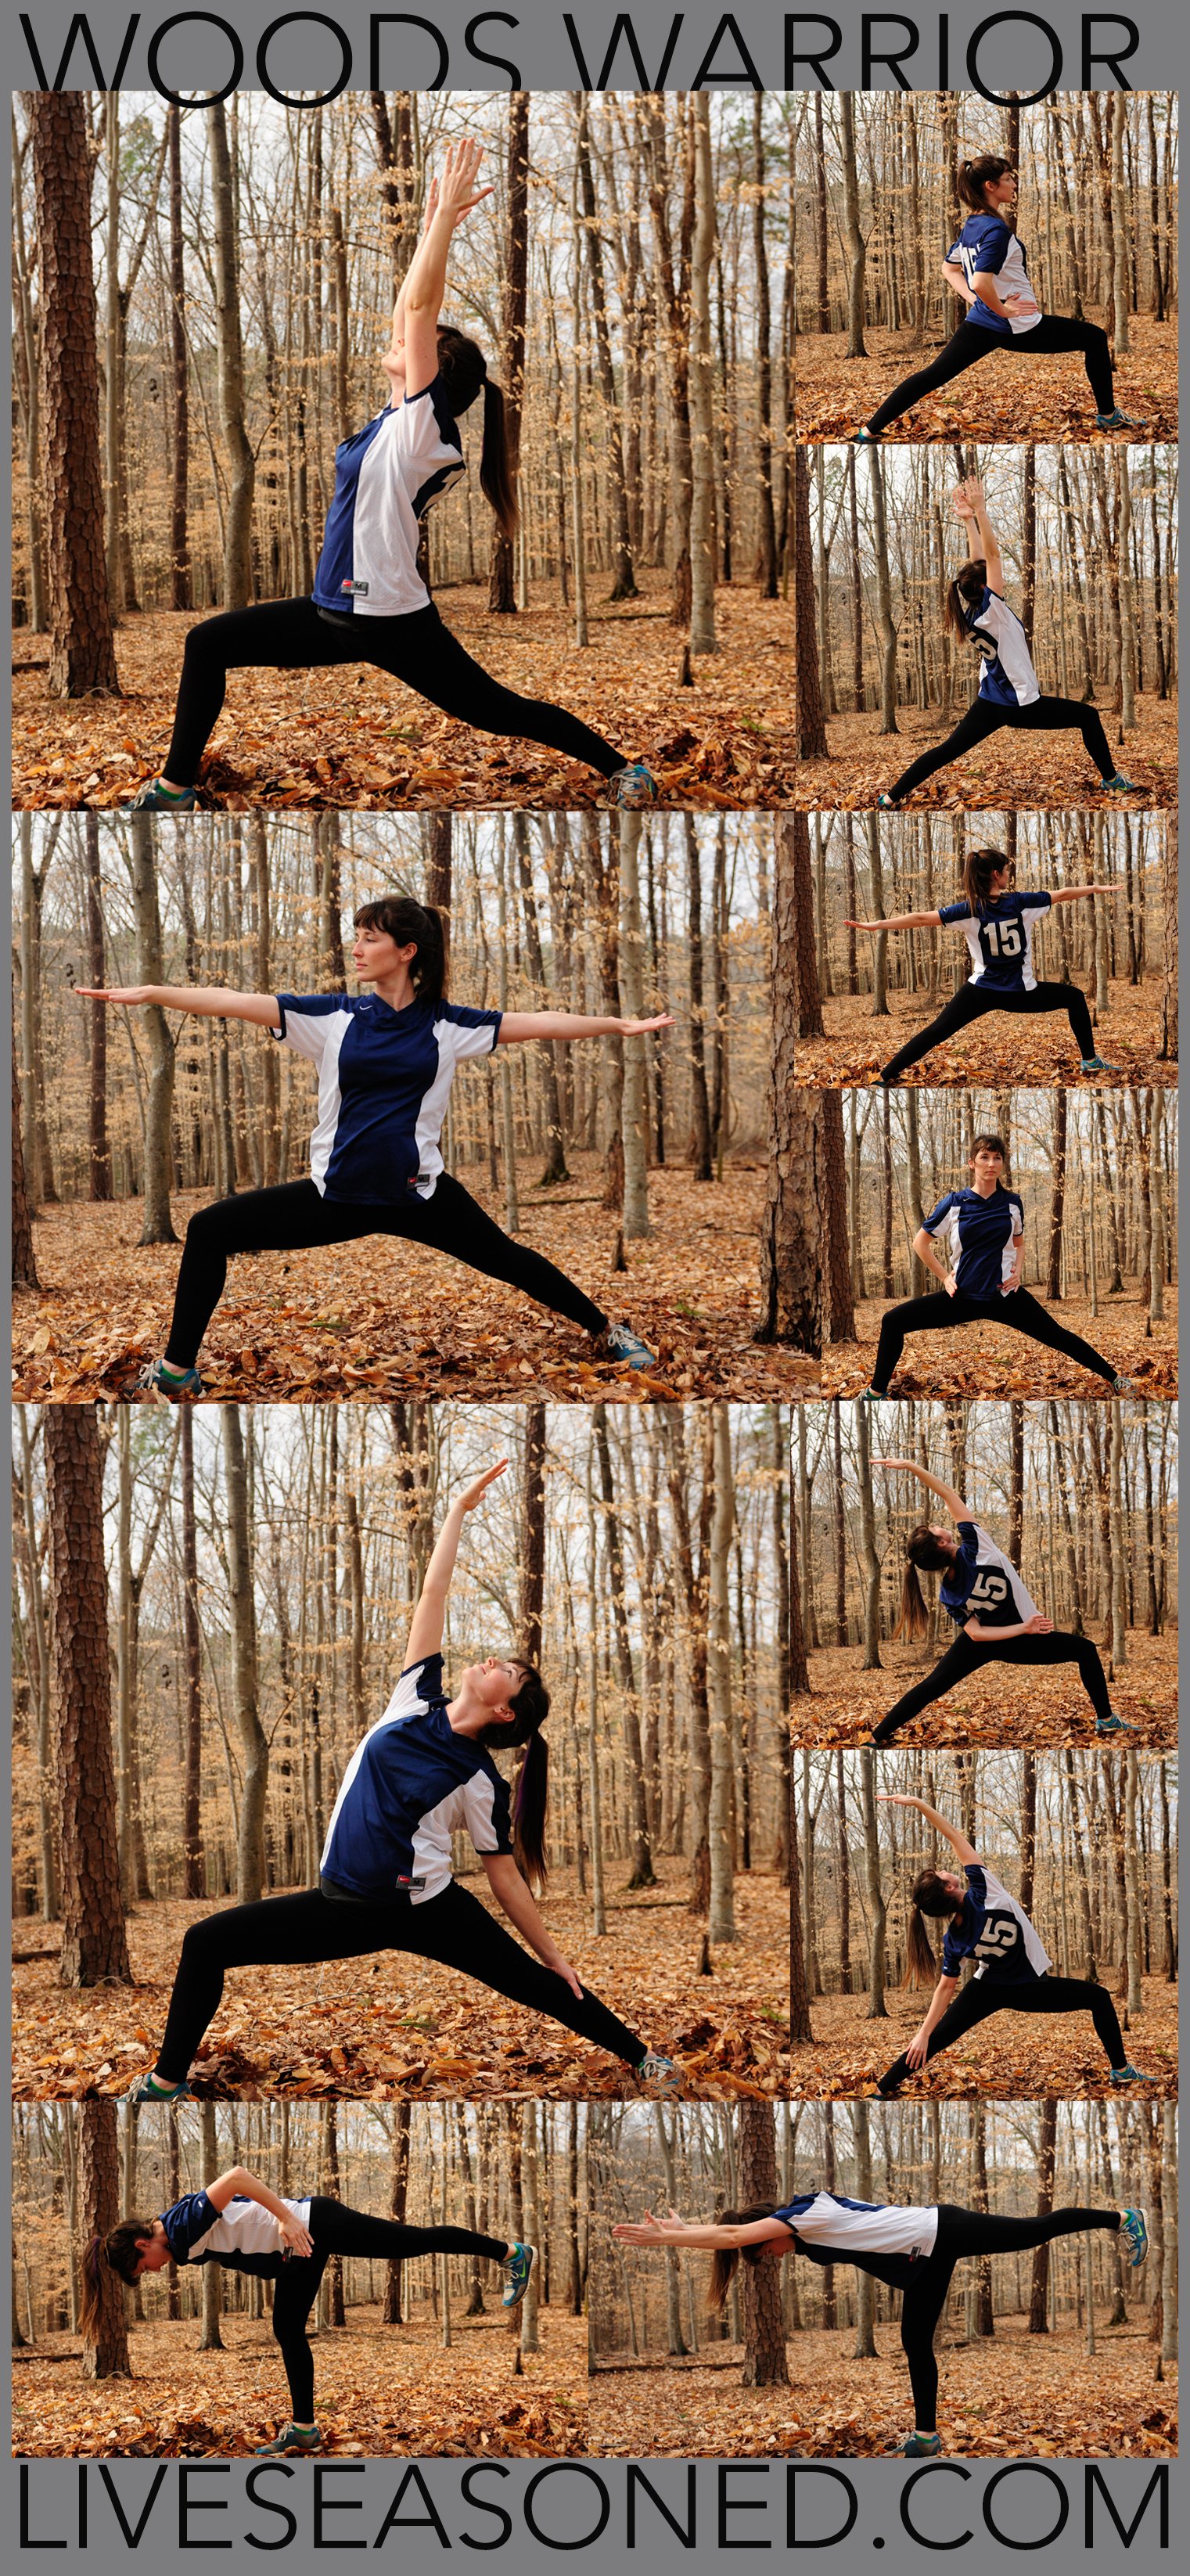
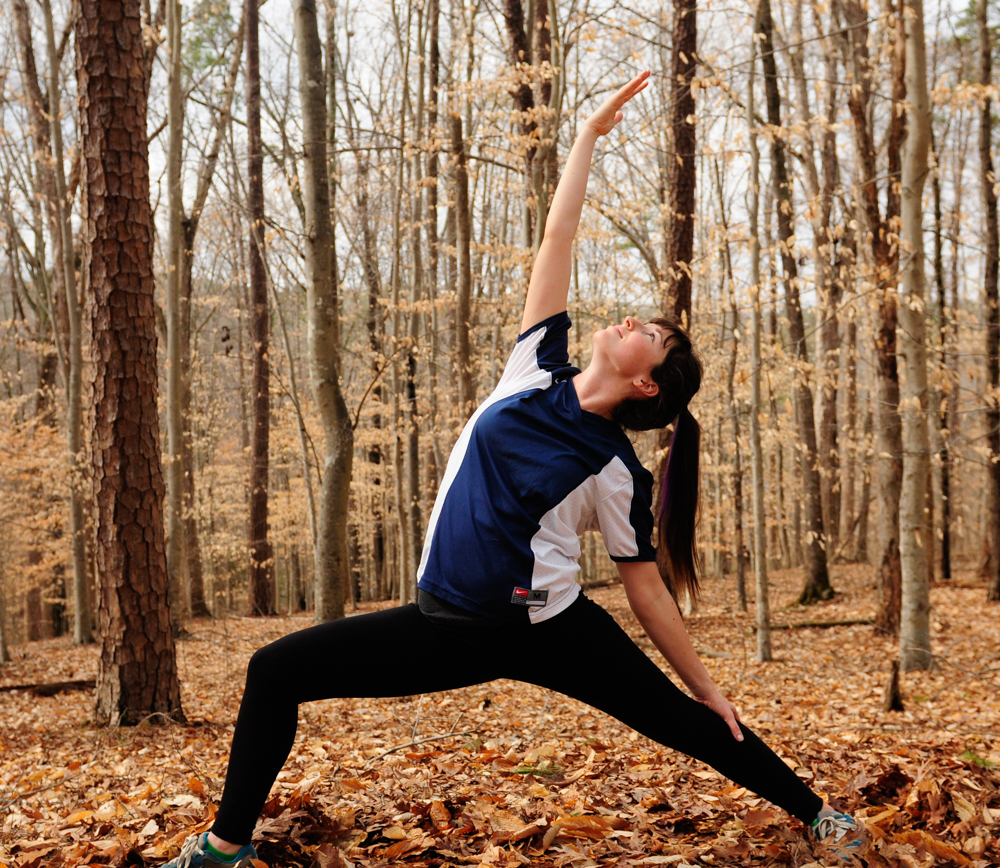
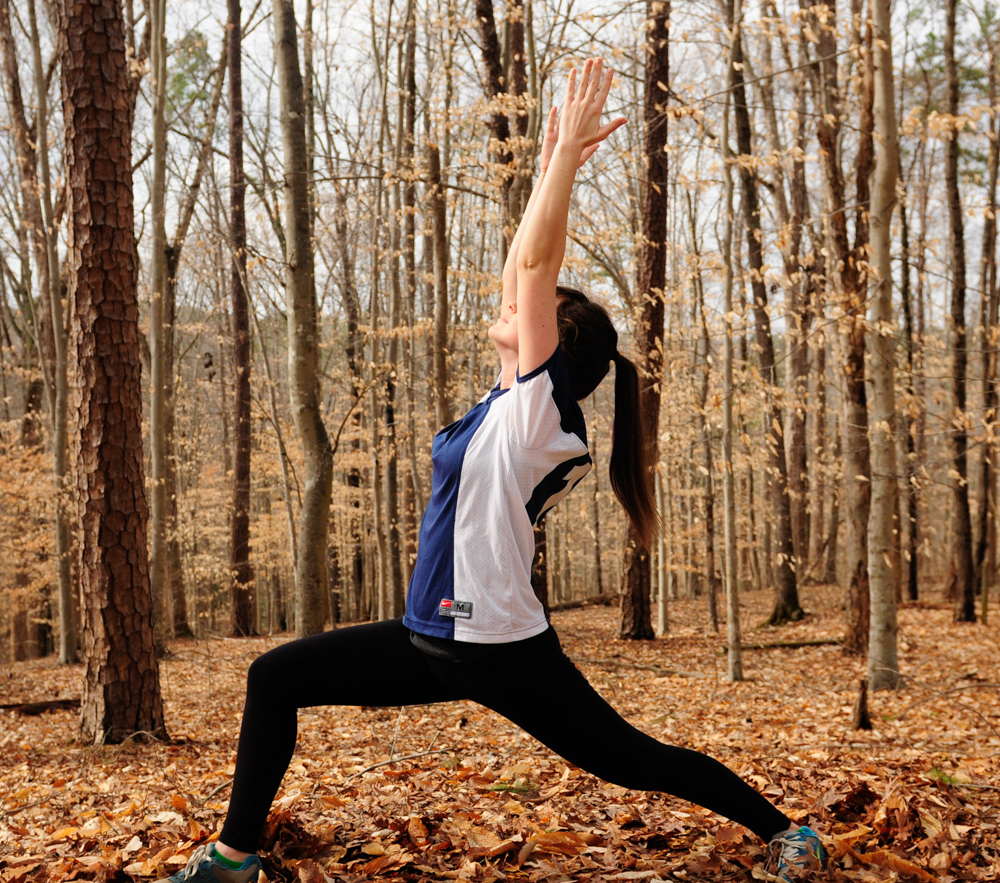
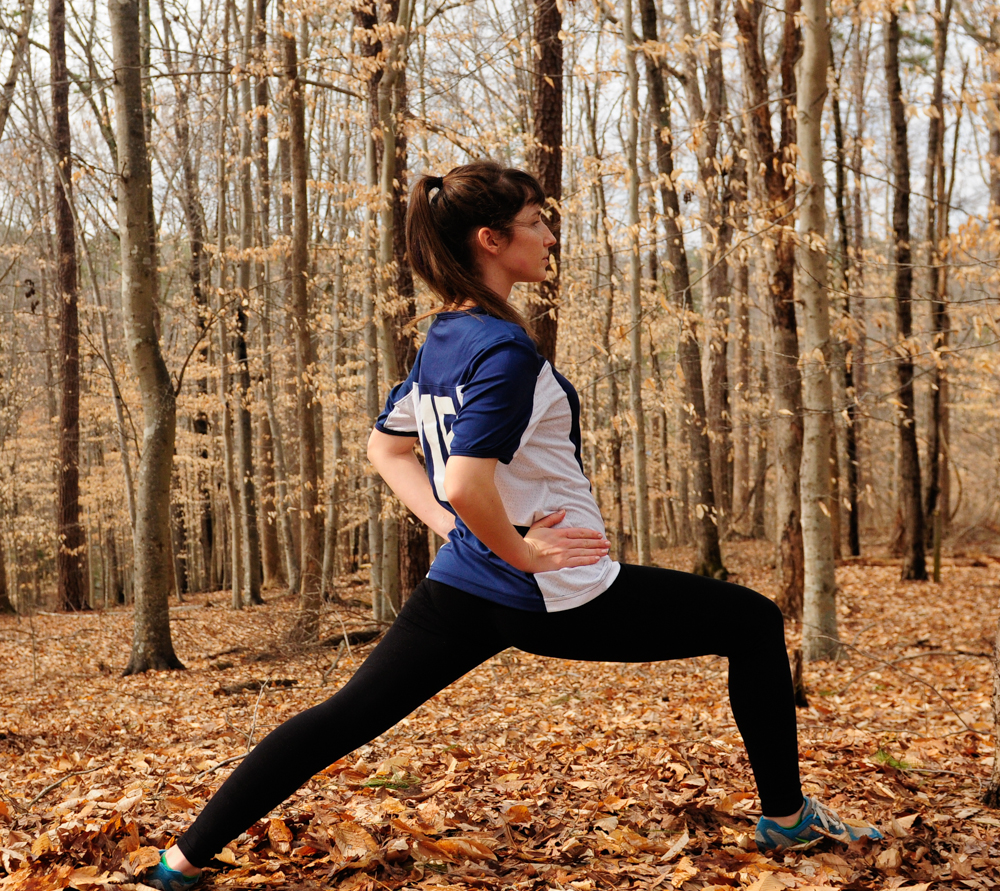
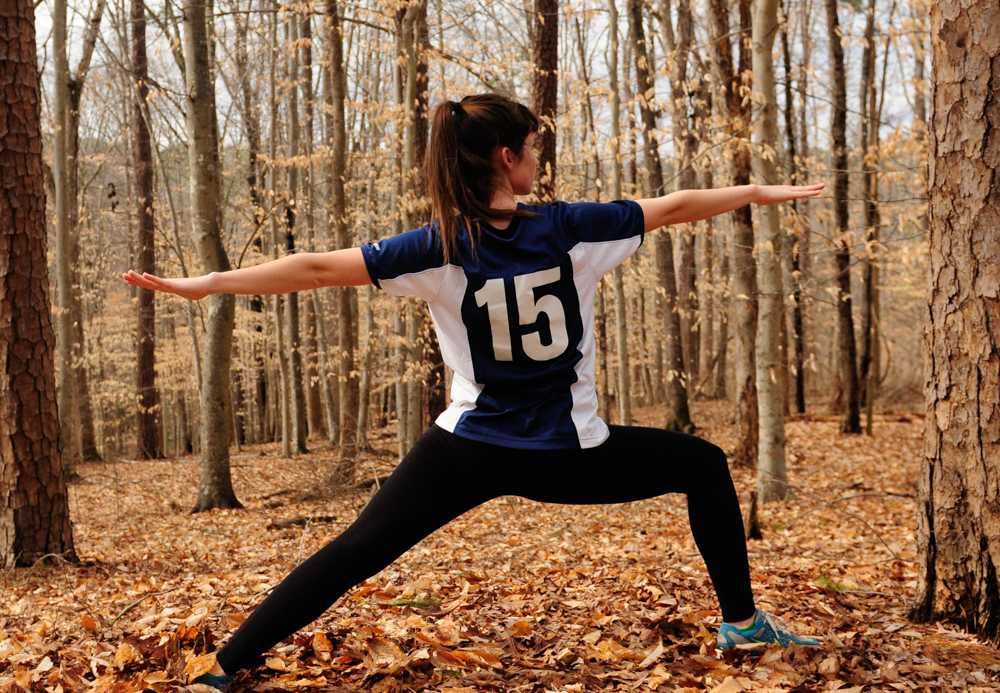
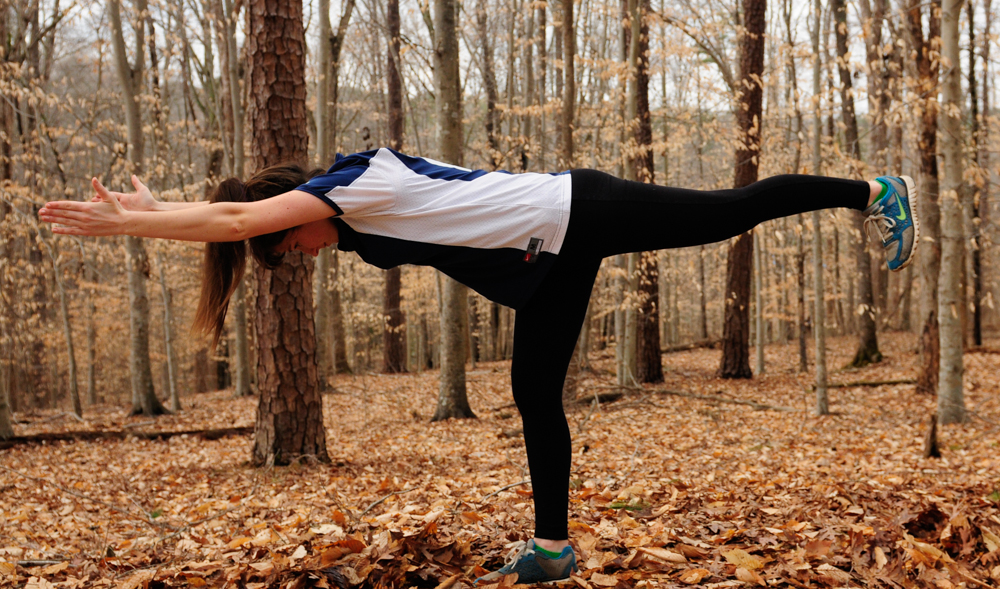
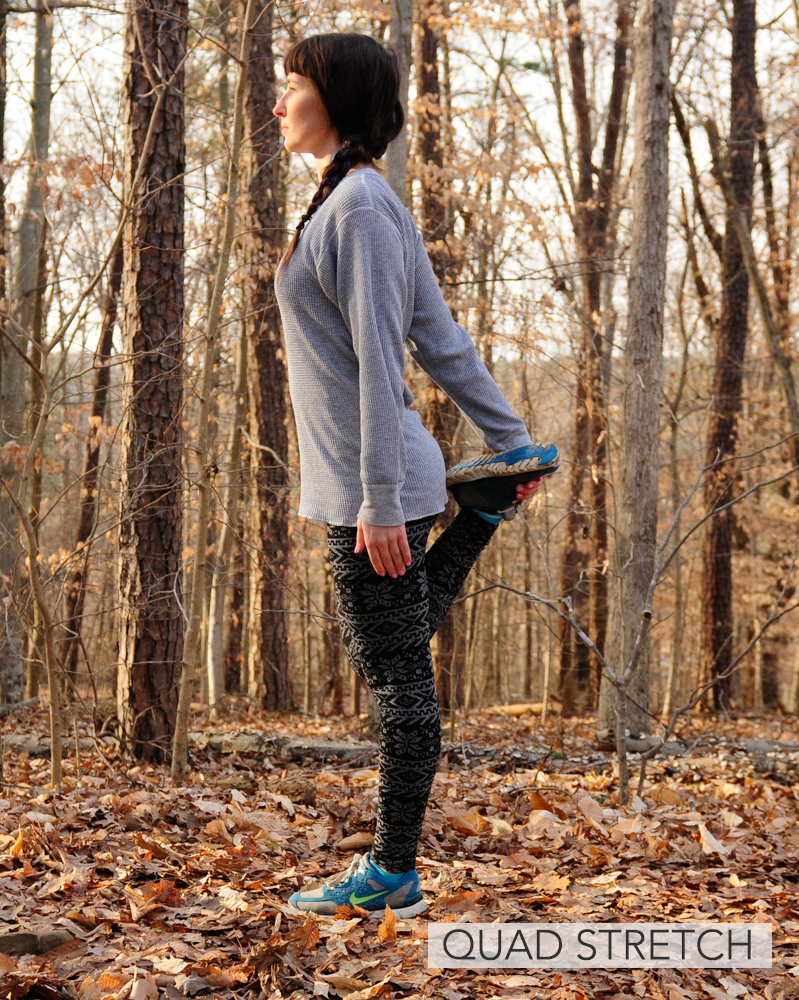
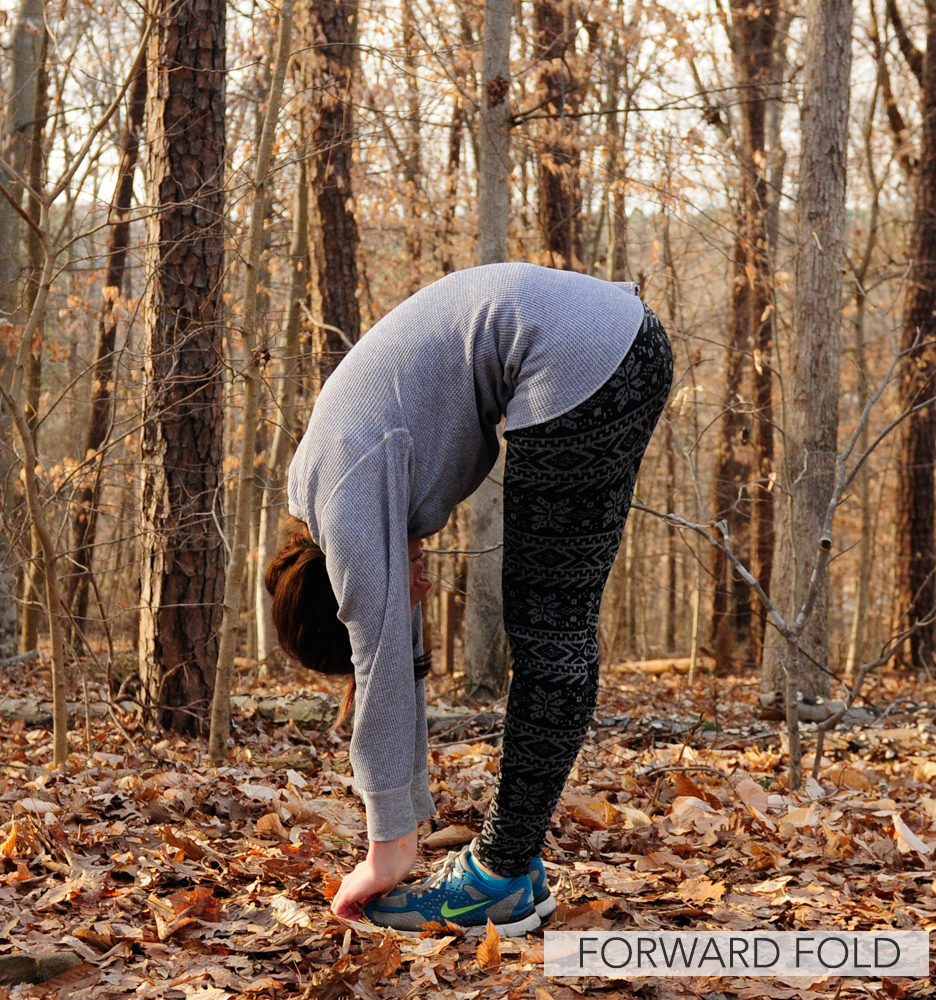
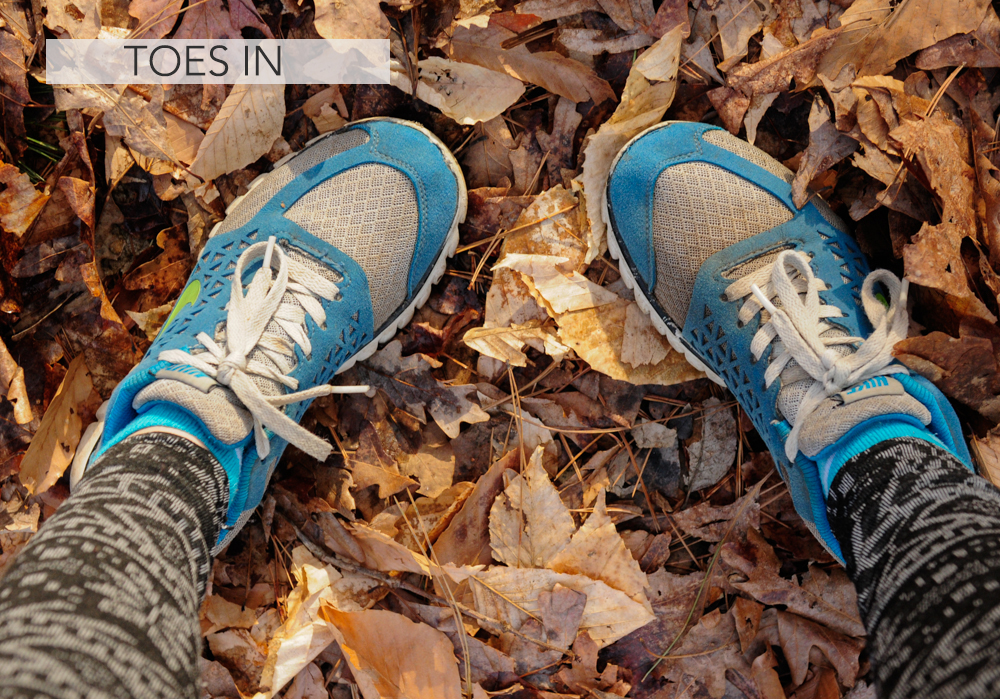
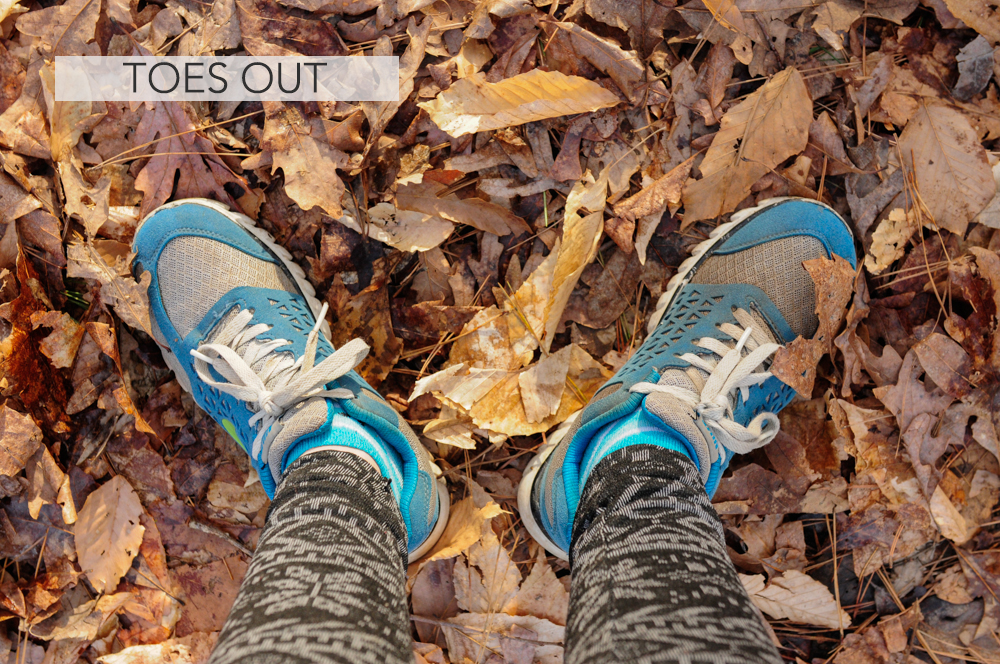
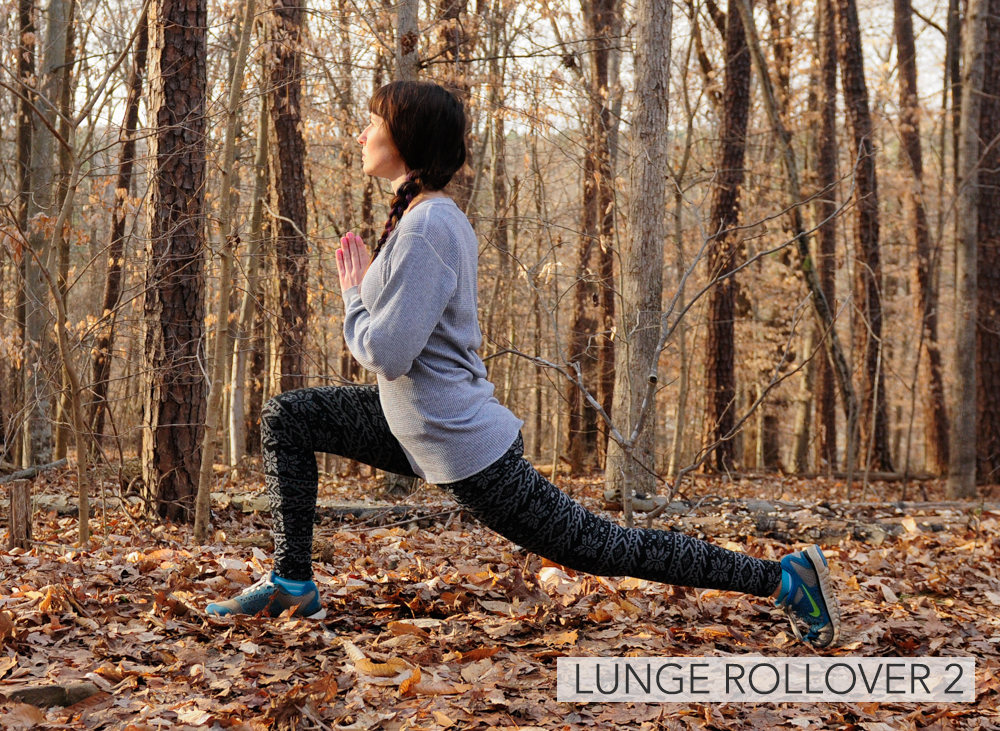
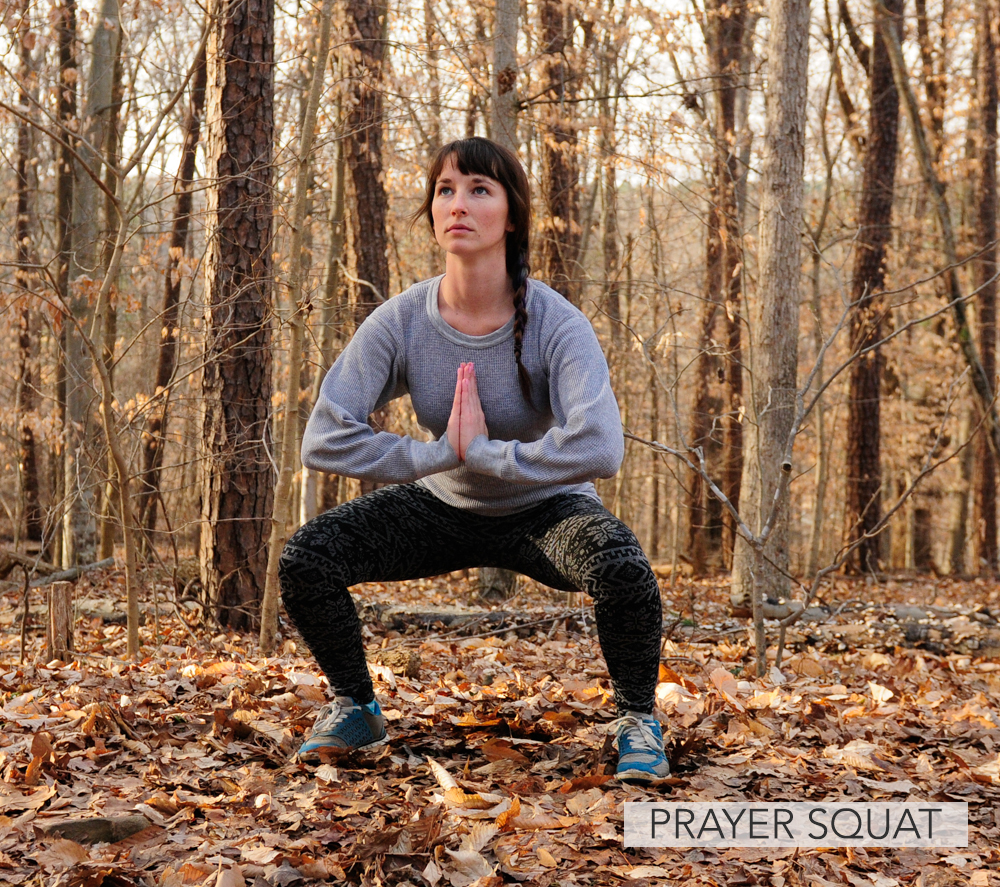
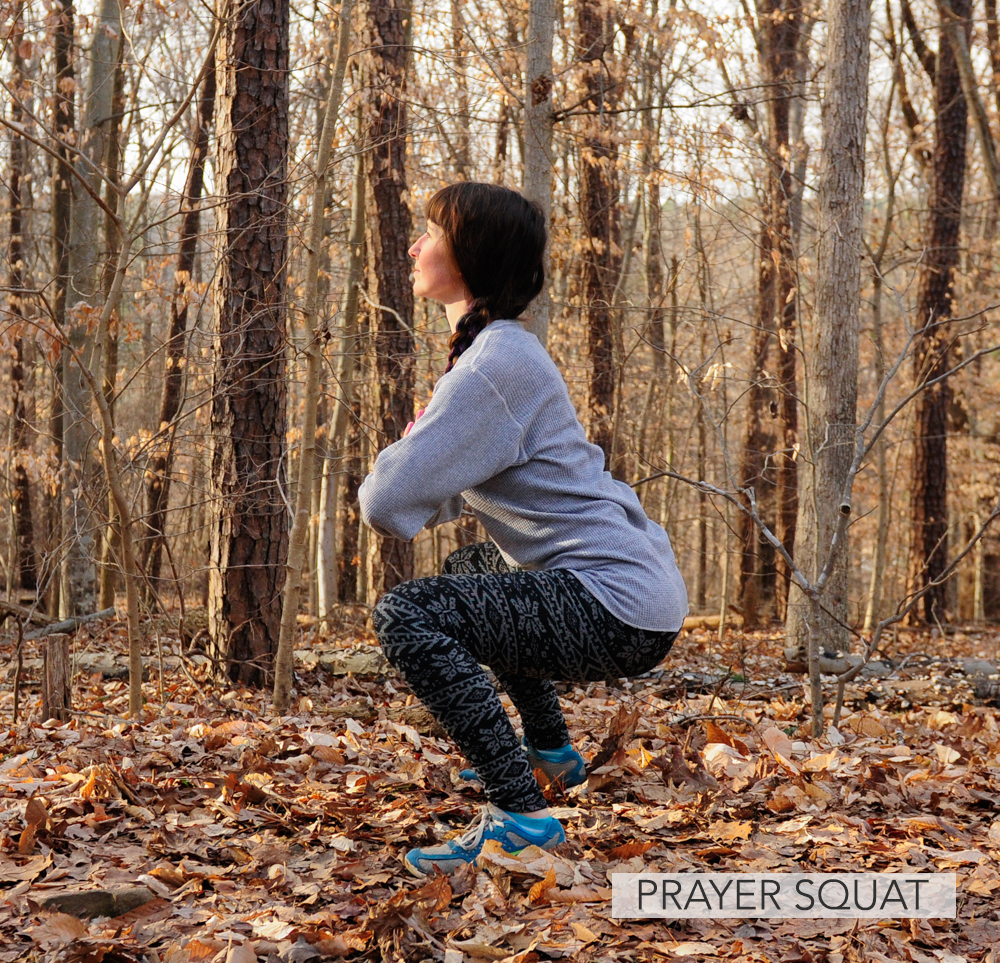
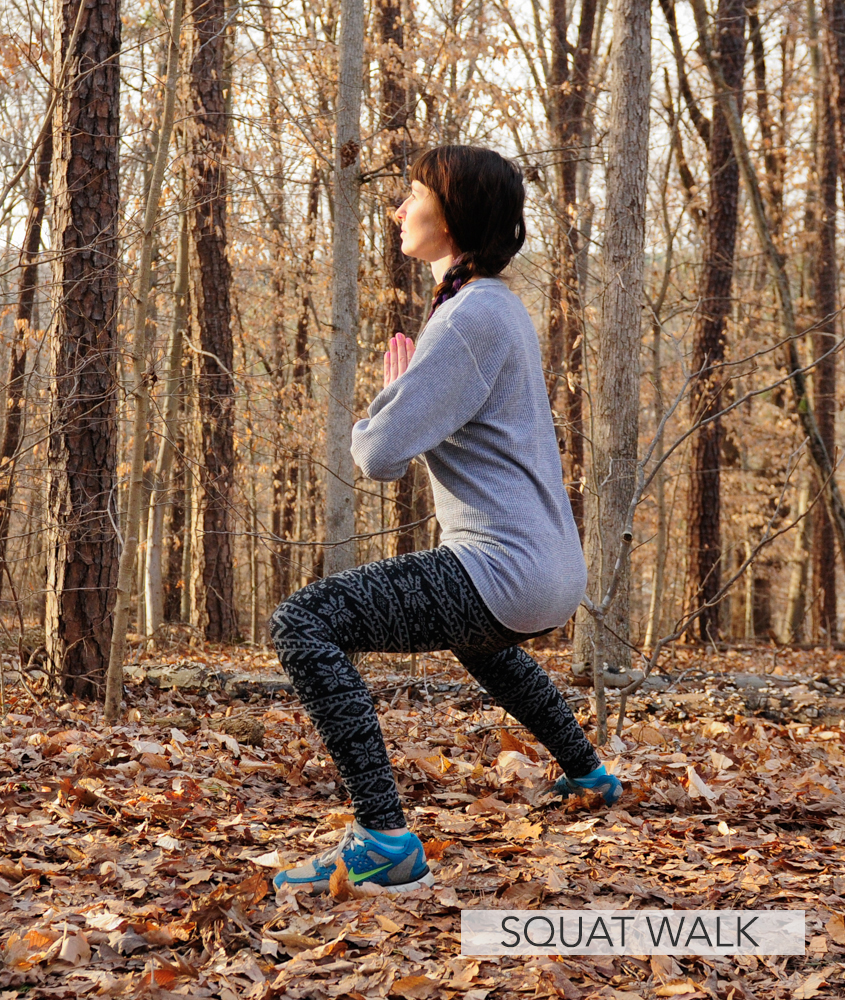
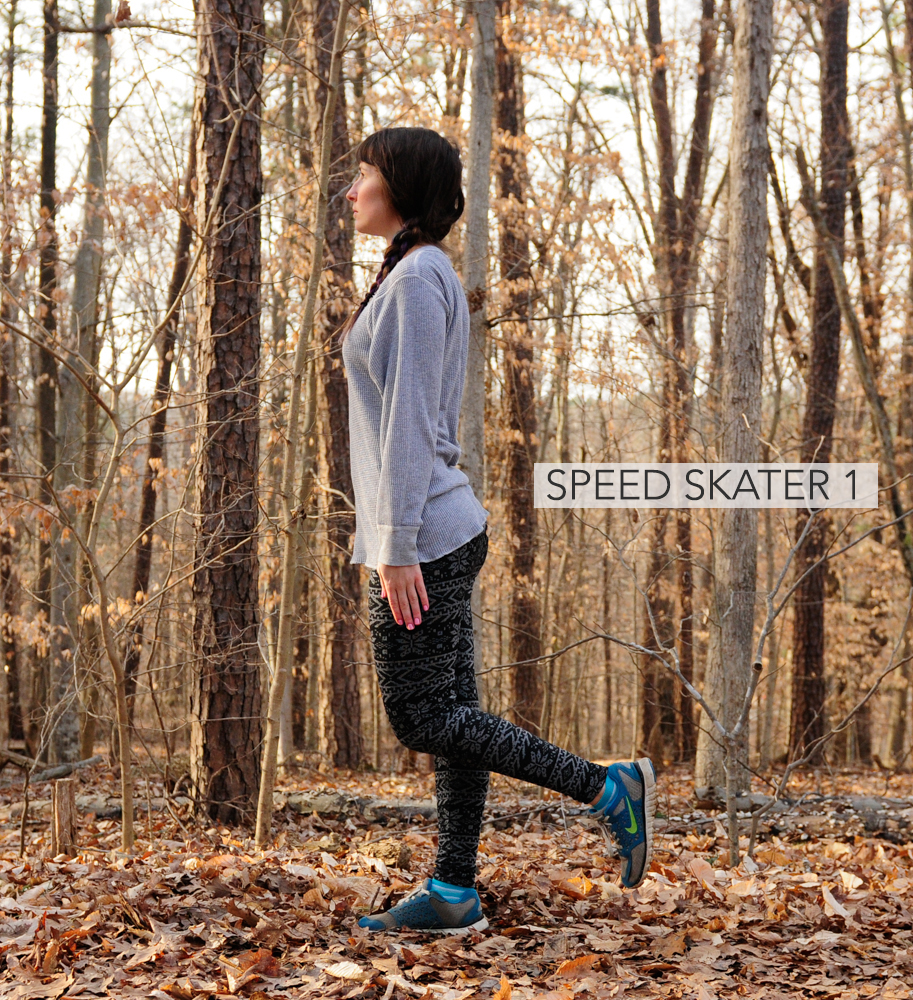
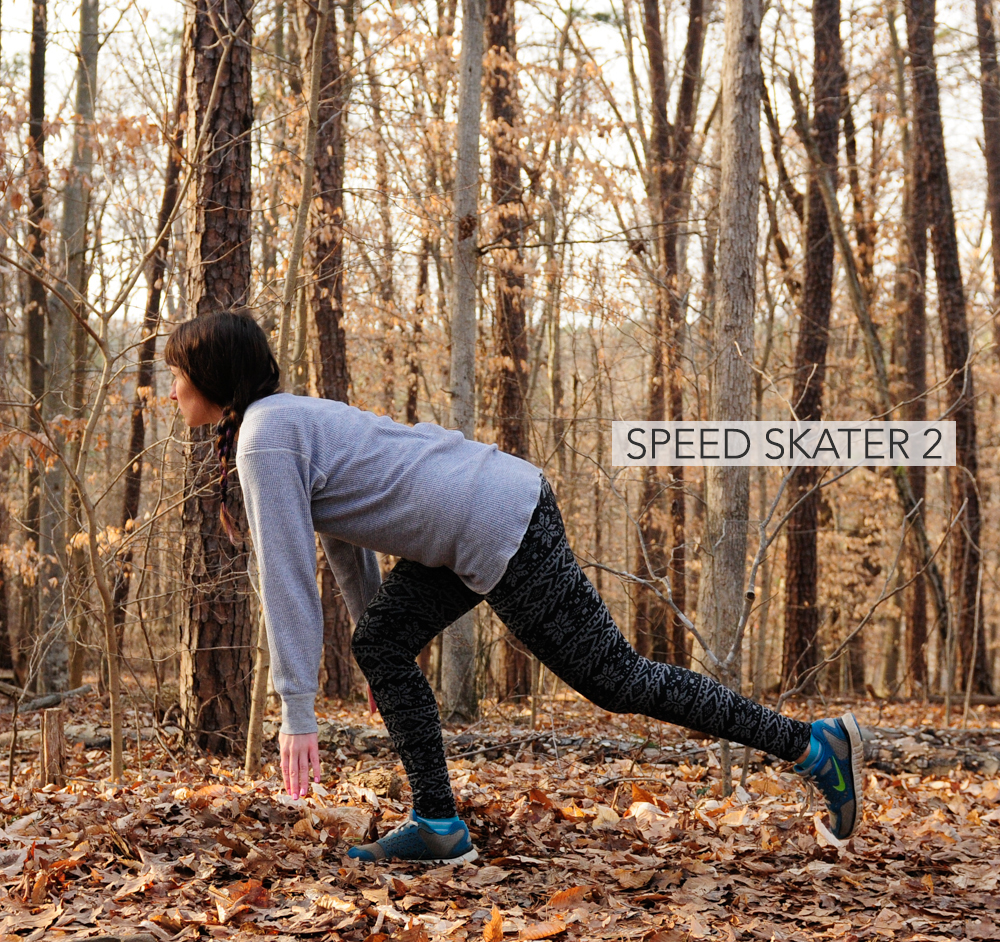
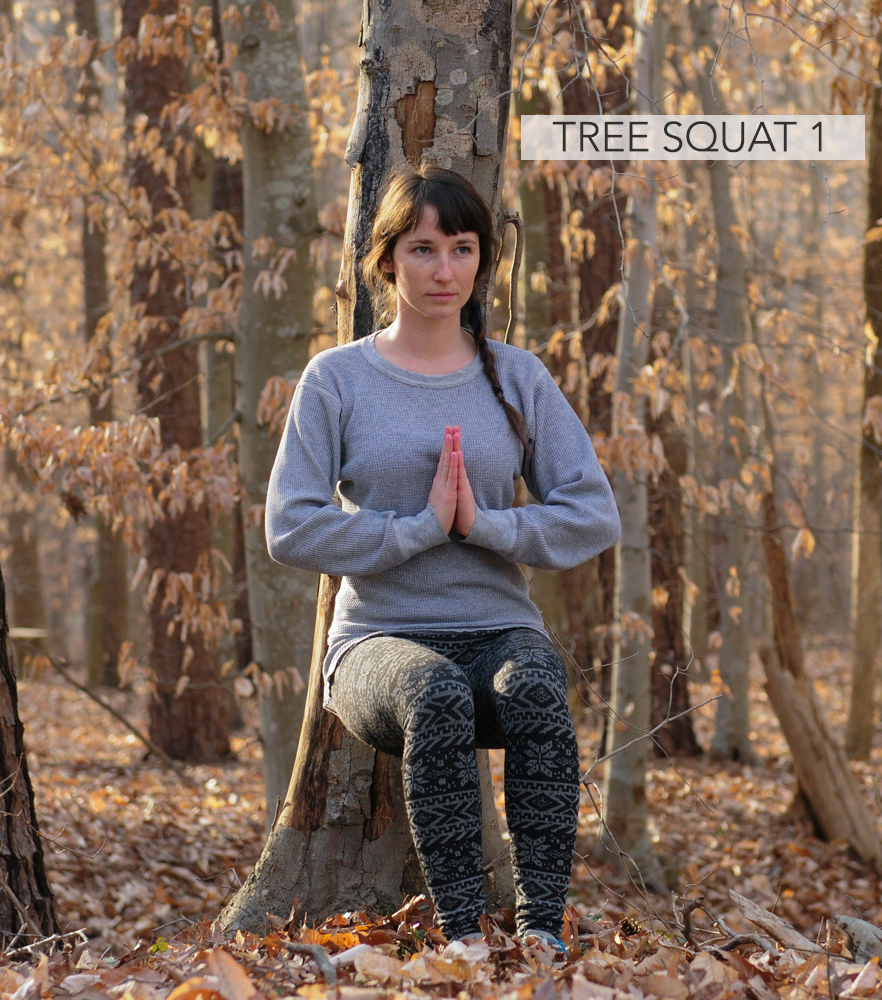
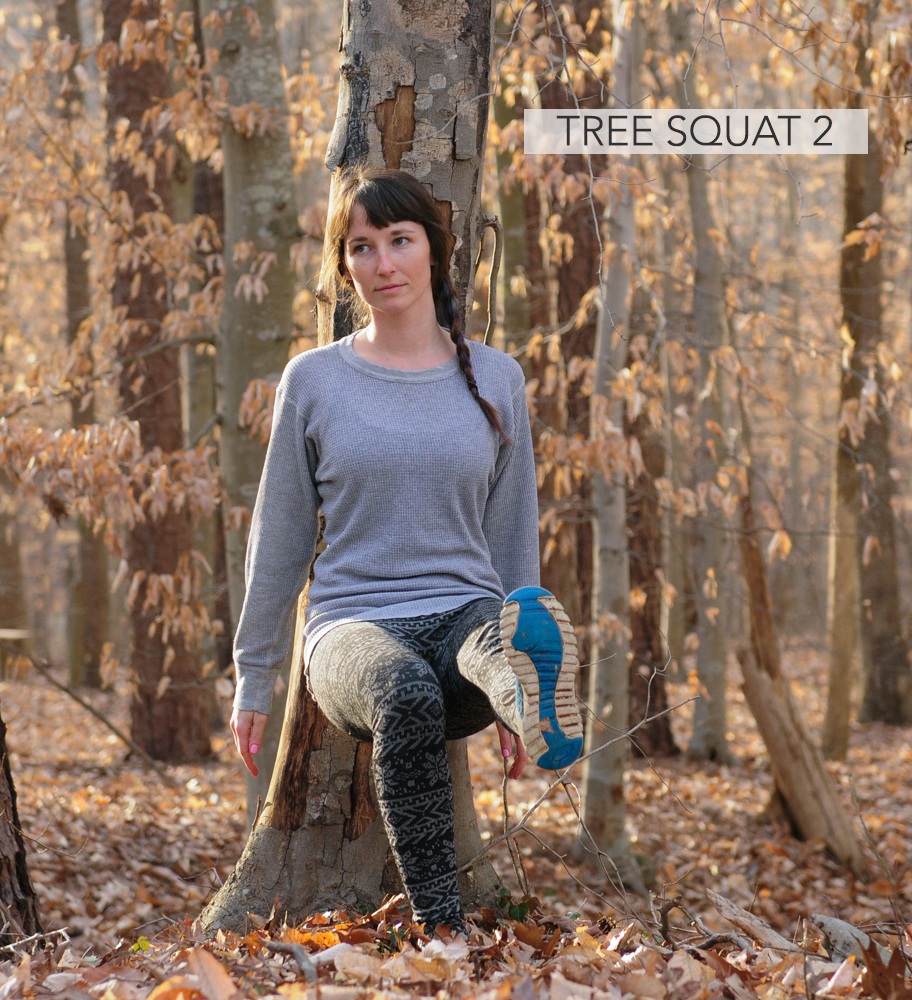
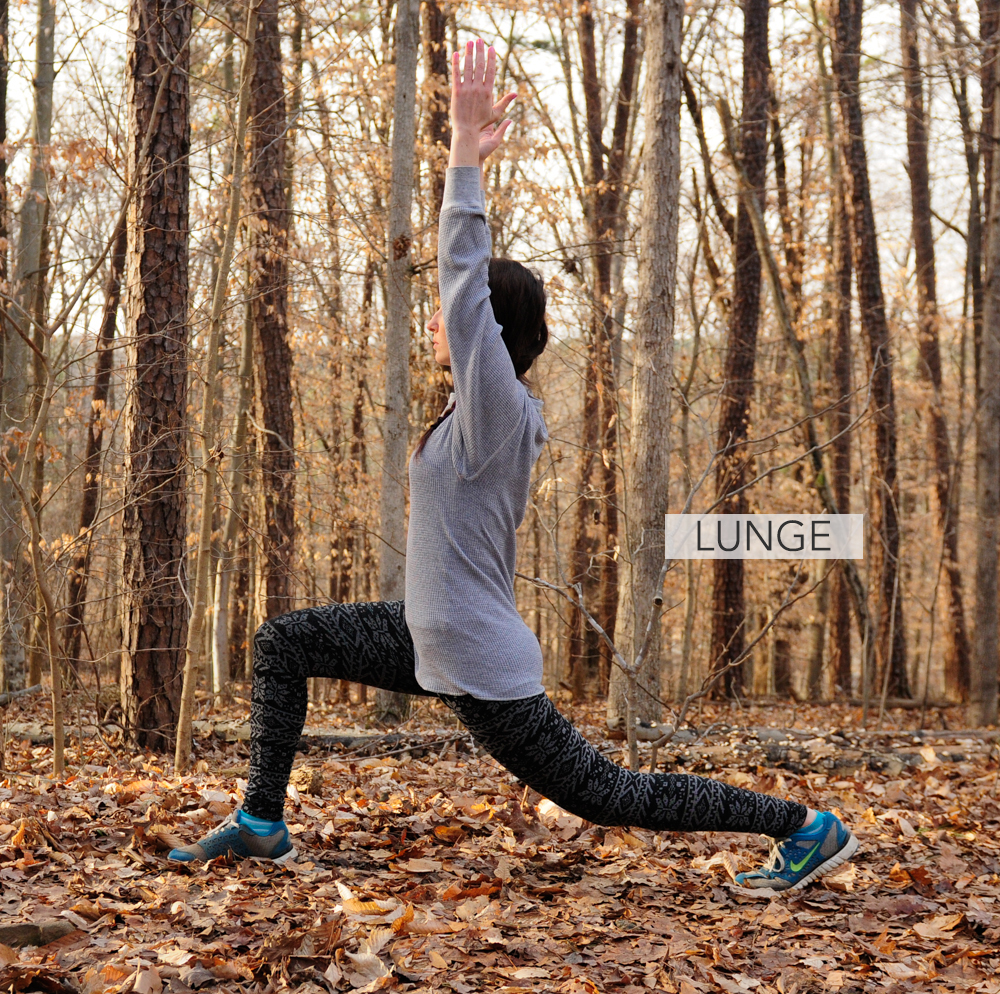
In Season : Valentine Edition

congress_kiss   
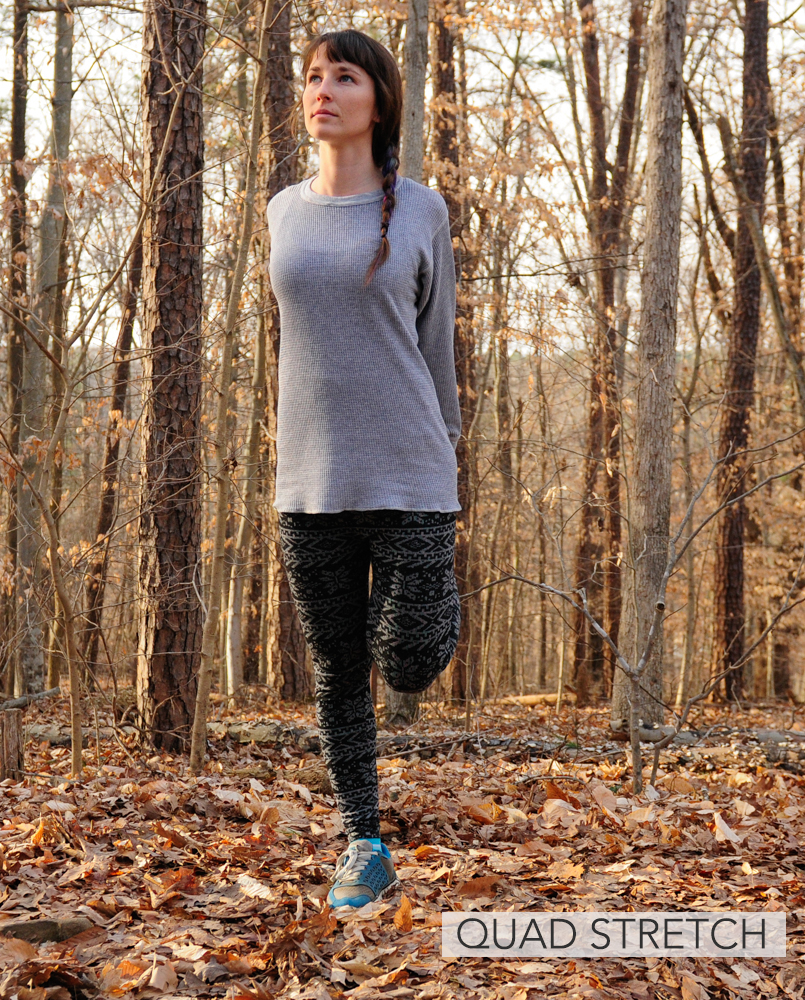
Valentine’s Day is today! Don’t worry, there’s still time to do something special.
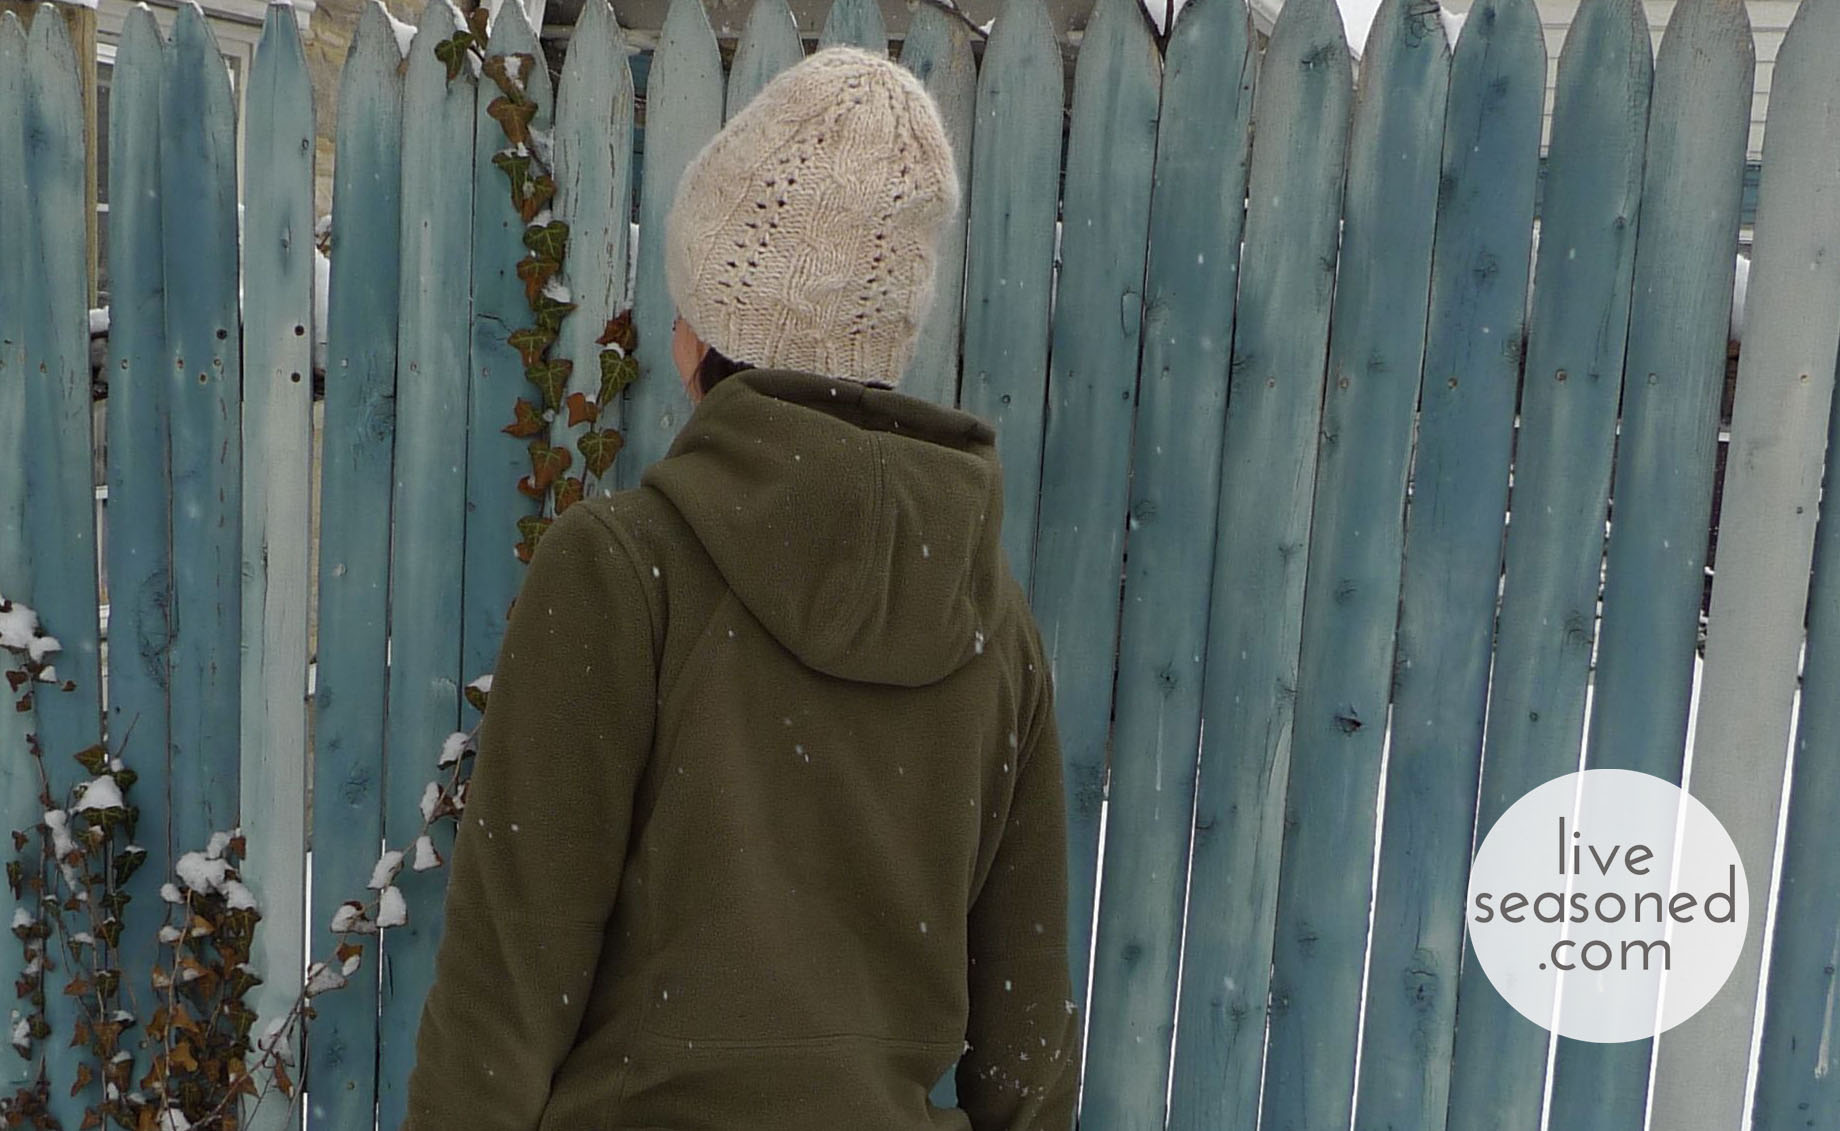
  • Create a banana valentine (this is so easy, and before you know it, you’ll be leaving banana to-do lists, banana jokes, banana instructions. Need we go on?)
  • Do you have a jigsaw puzzle? Create this super simple valentine. It’s ok if you don’t have red paint, just glue the pieces so that their back side is facing; brown’s pretty too.
  • Have stray birthday candles? Make this card.

Give your sweetie a hug. and a smooch.

Image stored in the Library of Congress’ digital archive.