
It’s been at least a decade since I made this cake. I got the original recipe from The Kitchn, and that old printed copy on has been folded up and used as a bookmark in my cookbooks for these past 10 years.
Continue reading
It’s been at least a decade since I made this cake. I got the original recipe from The Kitchn, and that old printed copy on has been folded up and used as a bookmark in my cookbooks for these past 10 years.
Continue reading
Have you ever walked past a tree full of ripe fruit and wanted to ask the owner if you could pick some? That idea’s not so crazy! Read on to learn more about the practice of gleaning : picking that unwanted fruit before it goes to waste.
Continue reading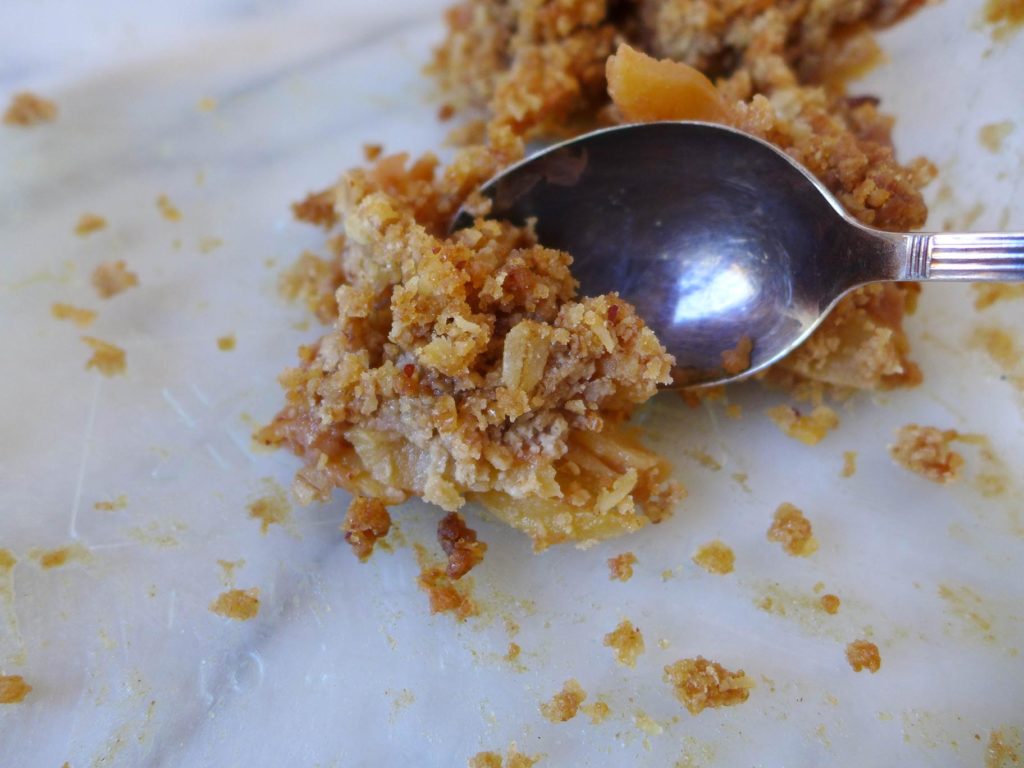
Forget pumpkin spice season, in our house fall is apple crisp season!
Continue reading
With the holidays just around the corner, we wanted to share a super simple toddy recipe with an extra kick of cinnamon that’s sure to warm you up!
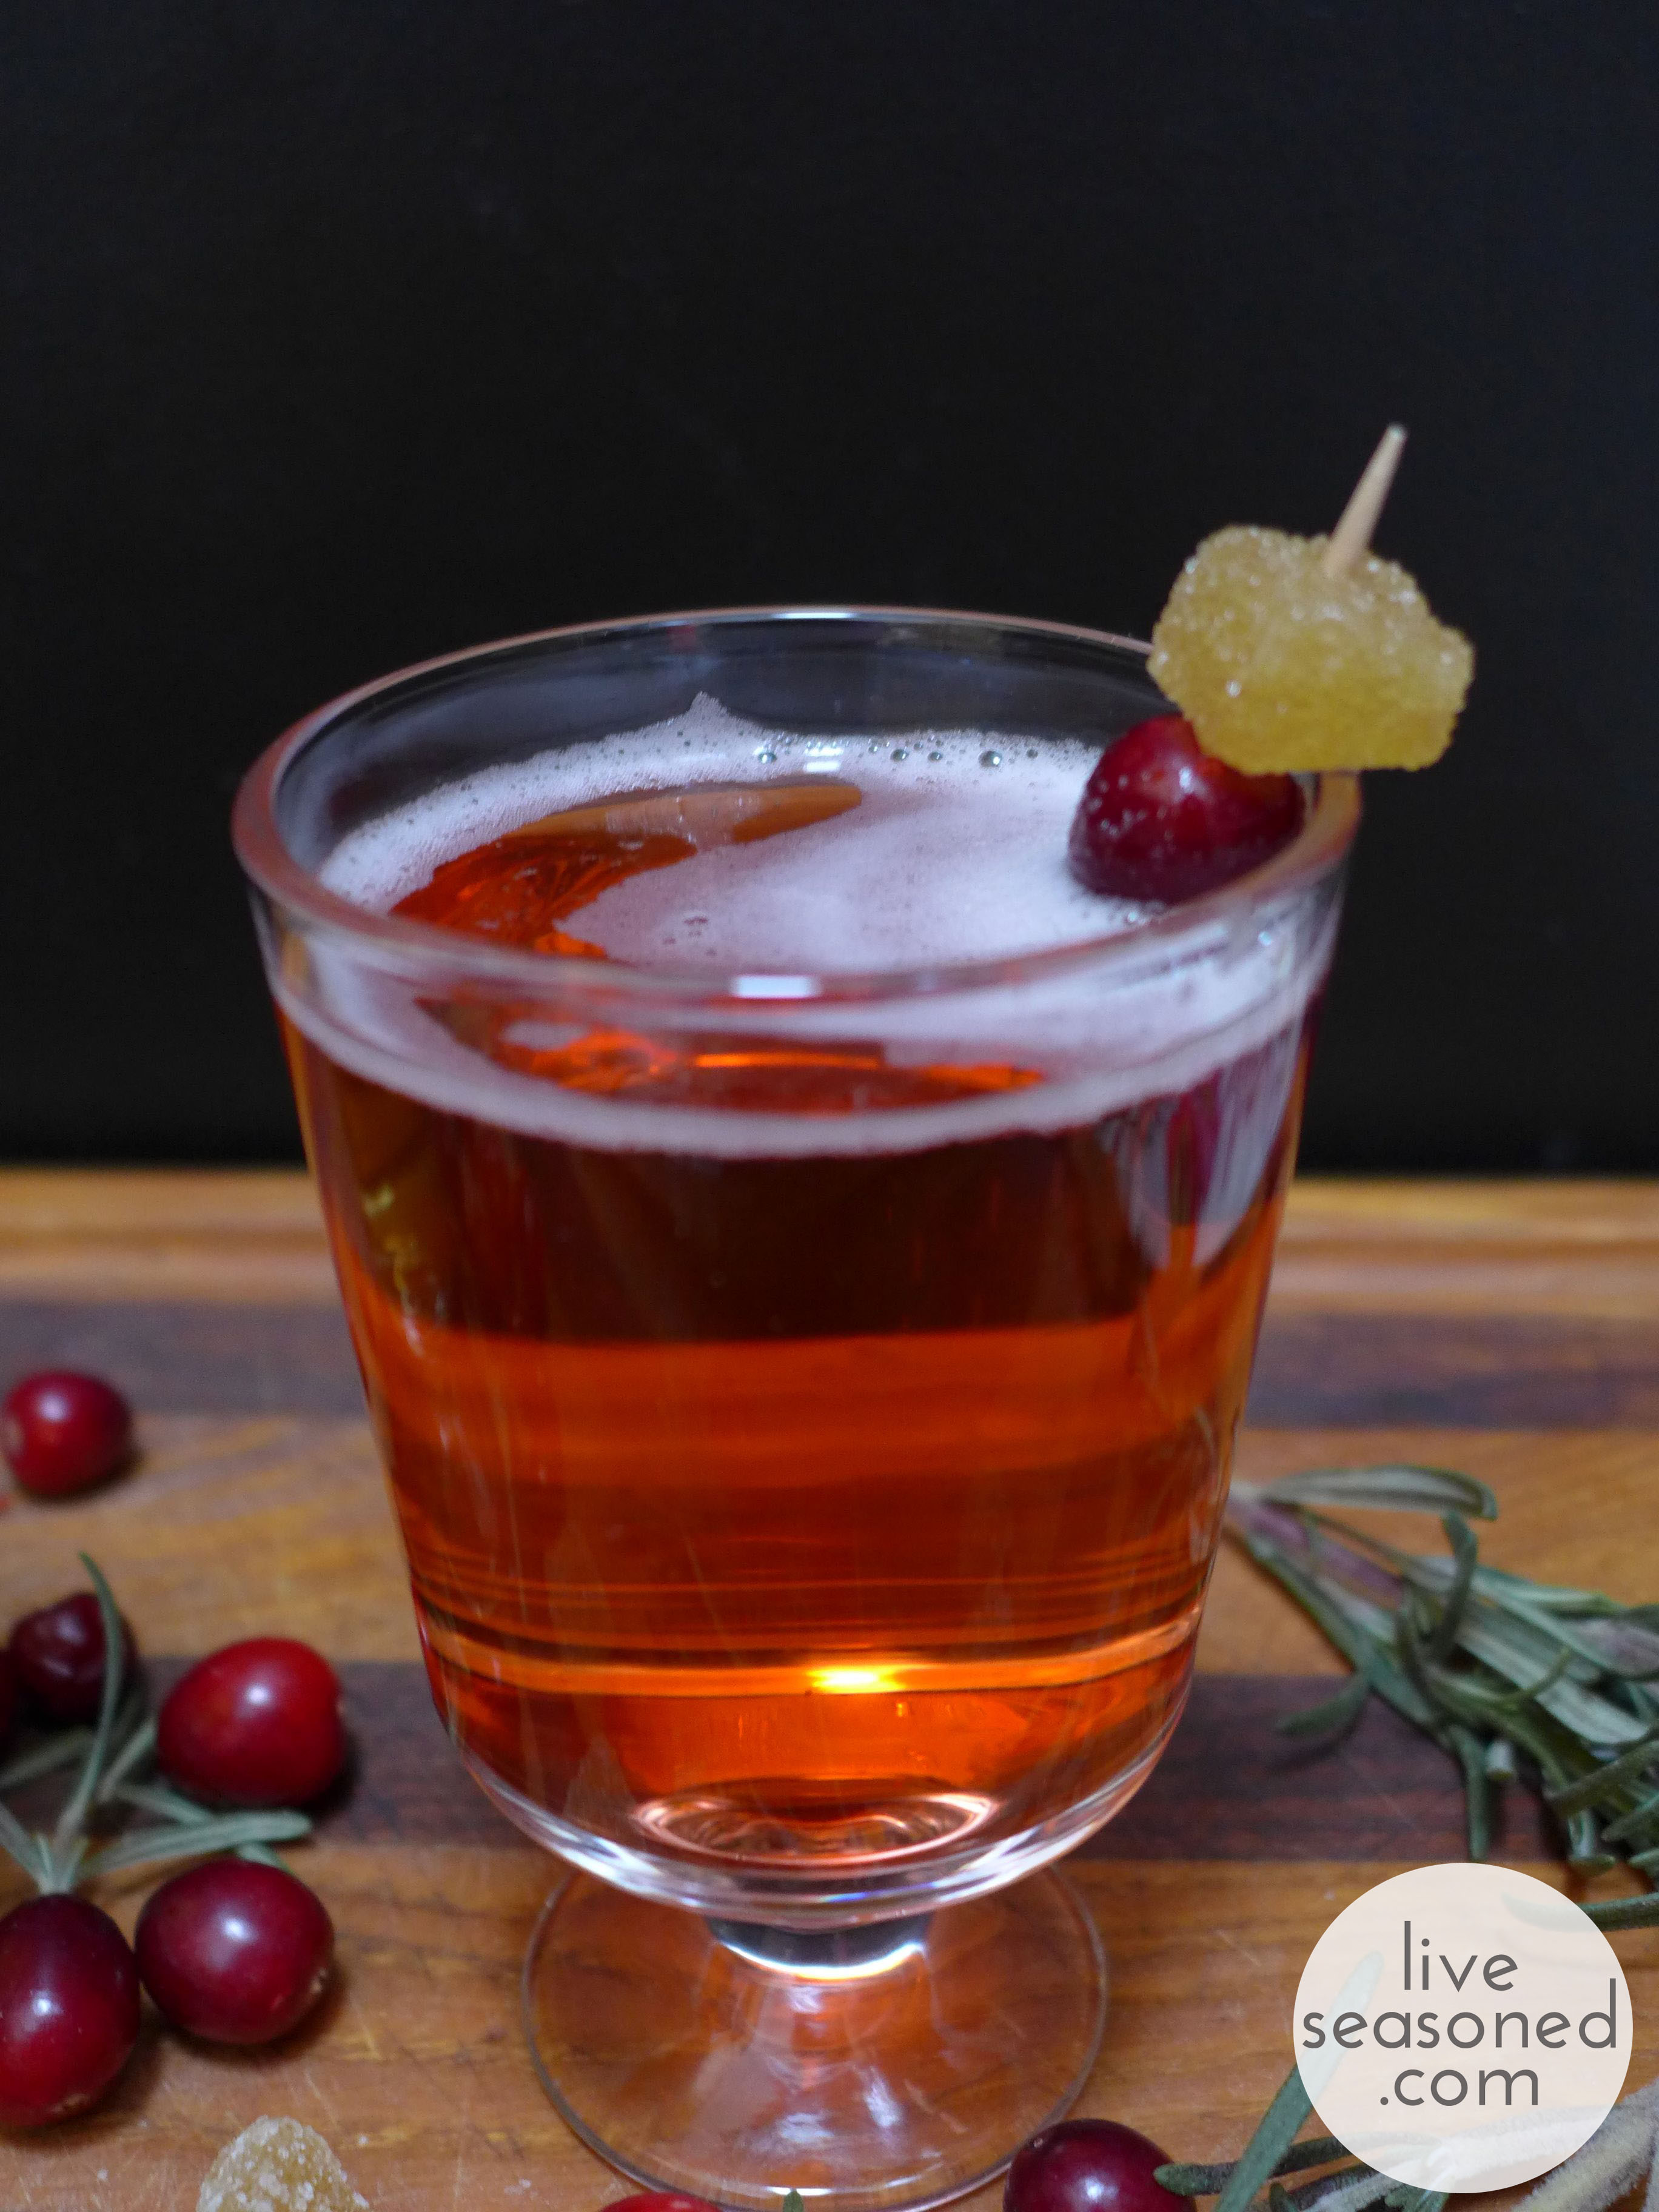
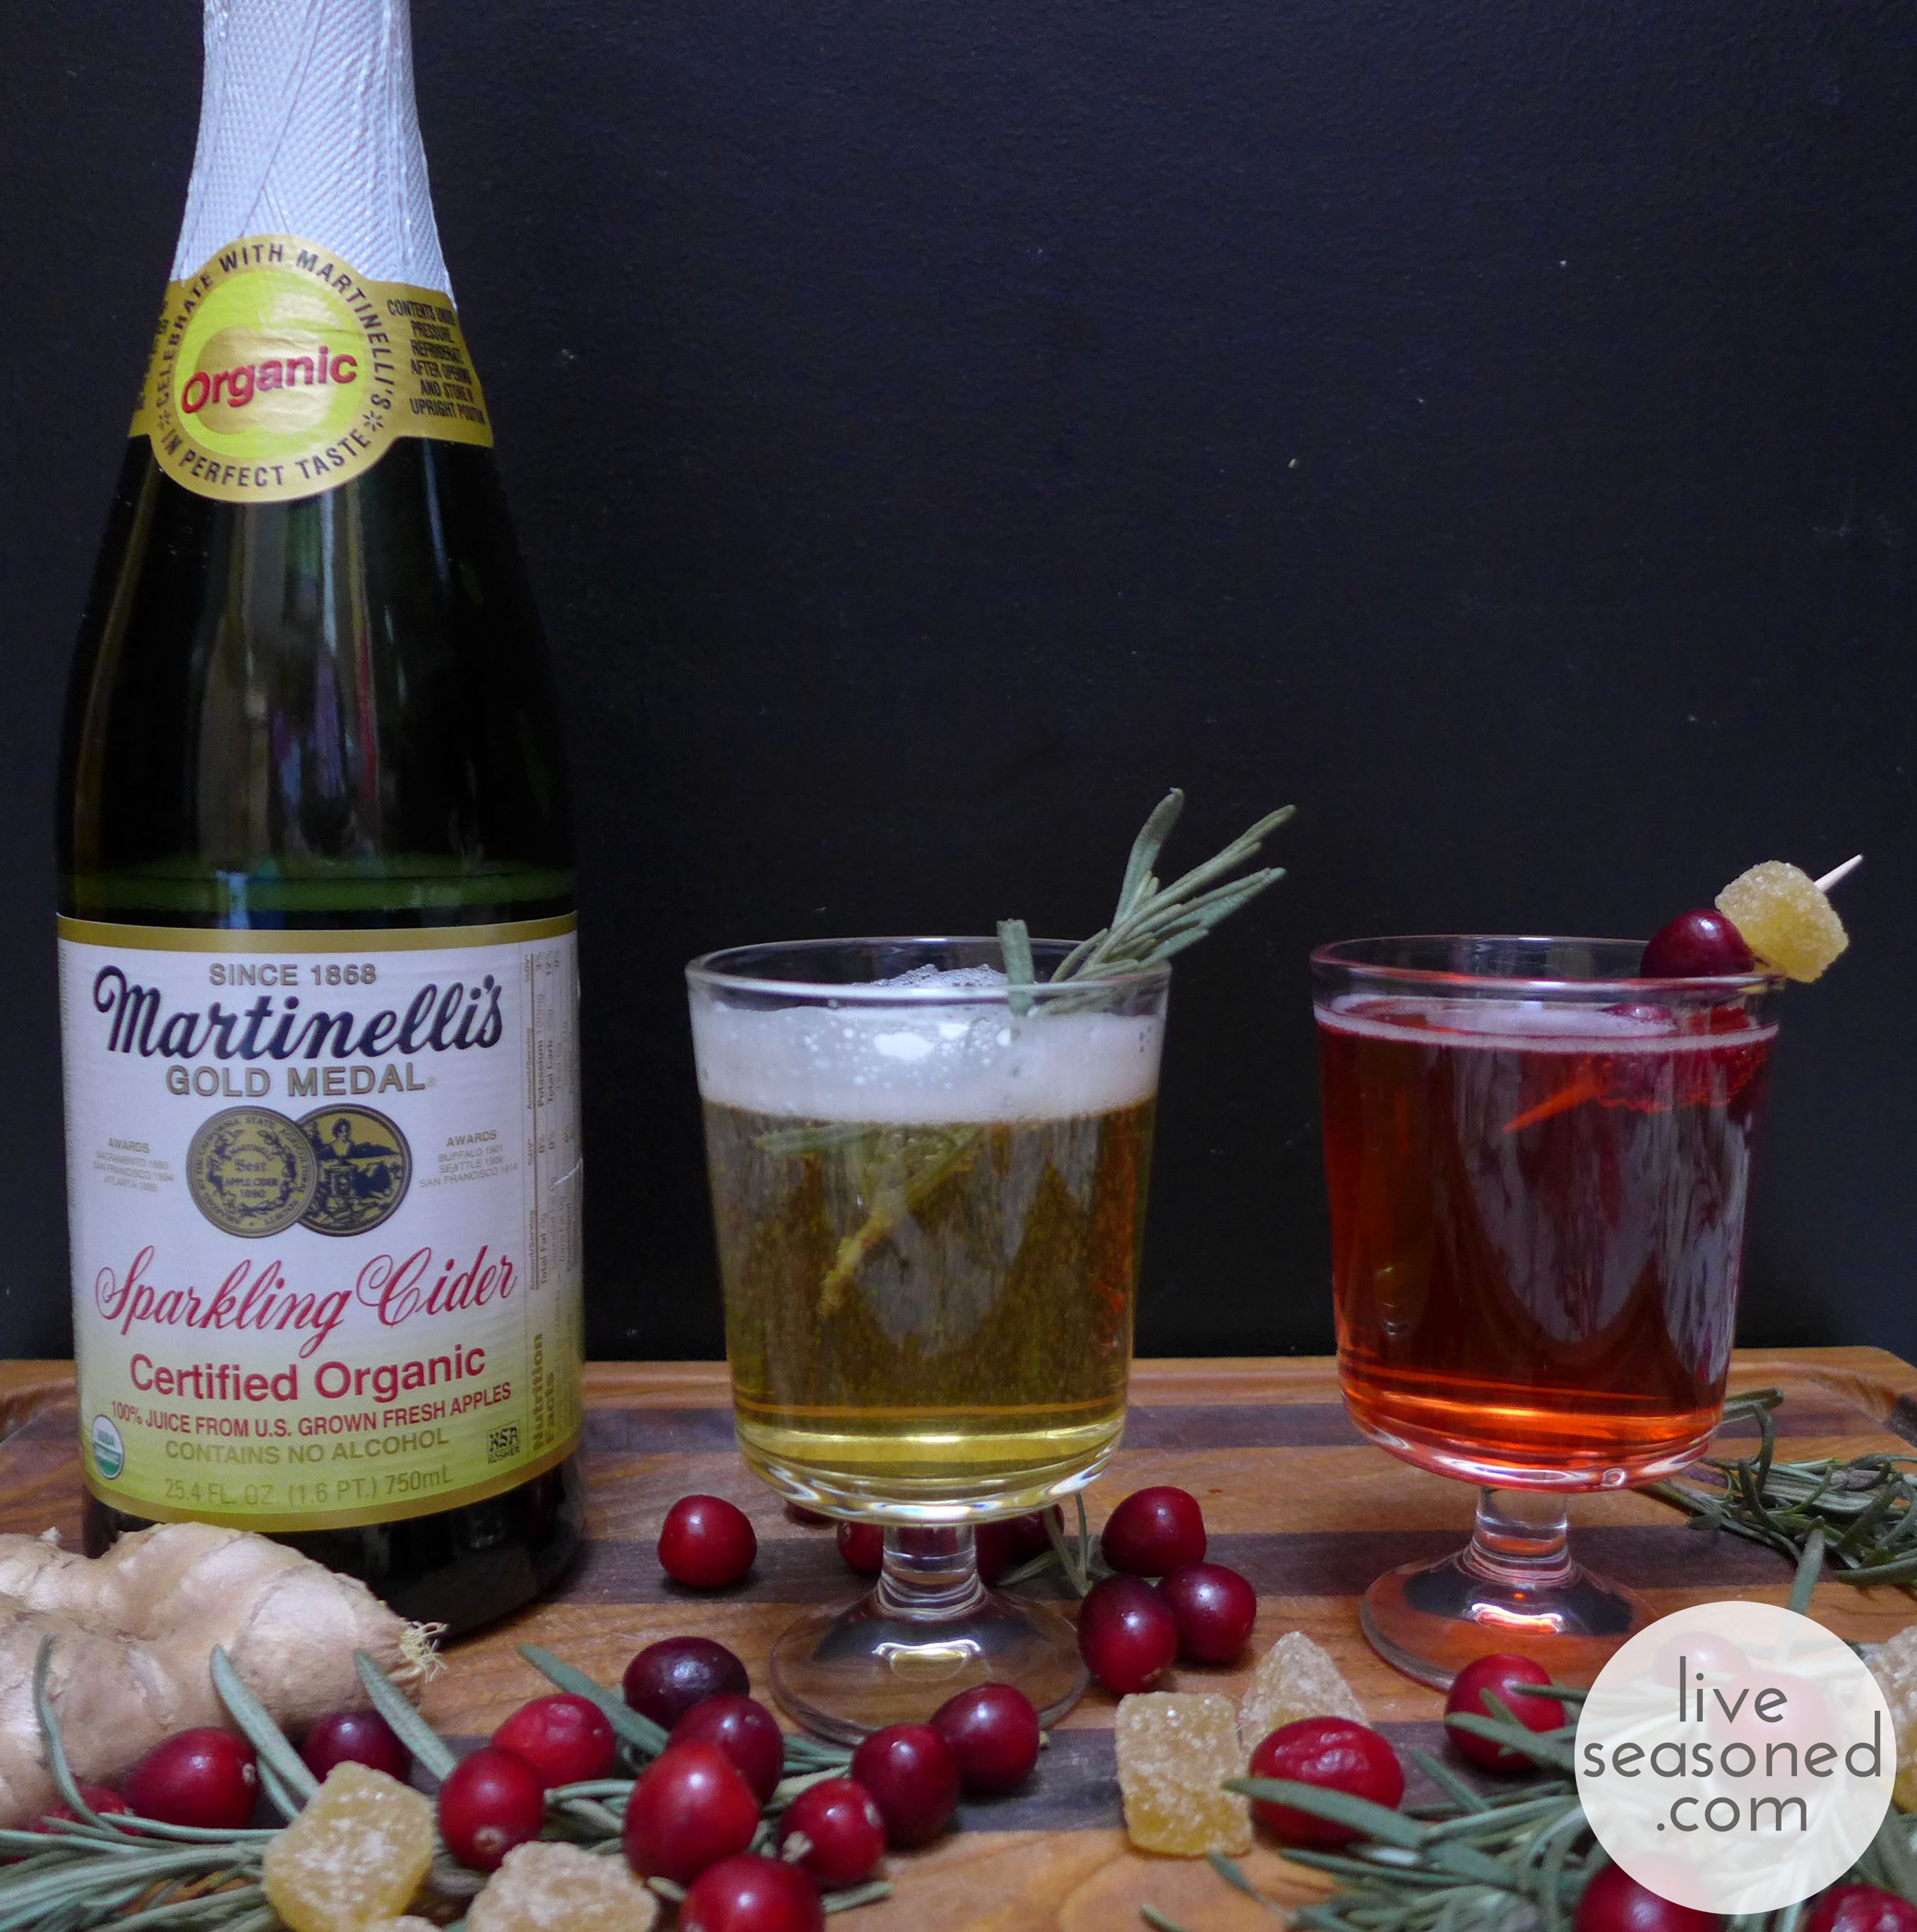
If your holiday dinners are anything like ours, there will be at least one bottle of non-alcoholic sparkling cider or grape juice on the buffet. We may have outgrown the kids’ table, but we haven’t outgrown the kids’ bubbly. This year we suggest adding a bit of grown-up flavor to your juice in the form of cranberry and ginger-rosemary simple syrups, creating mocktails worthy of the adult table… of course, we won’t bat an eyelash if you add a touch of your favorite vodka or gin too!
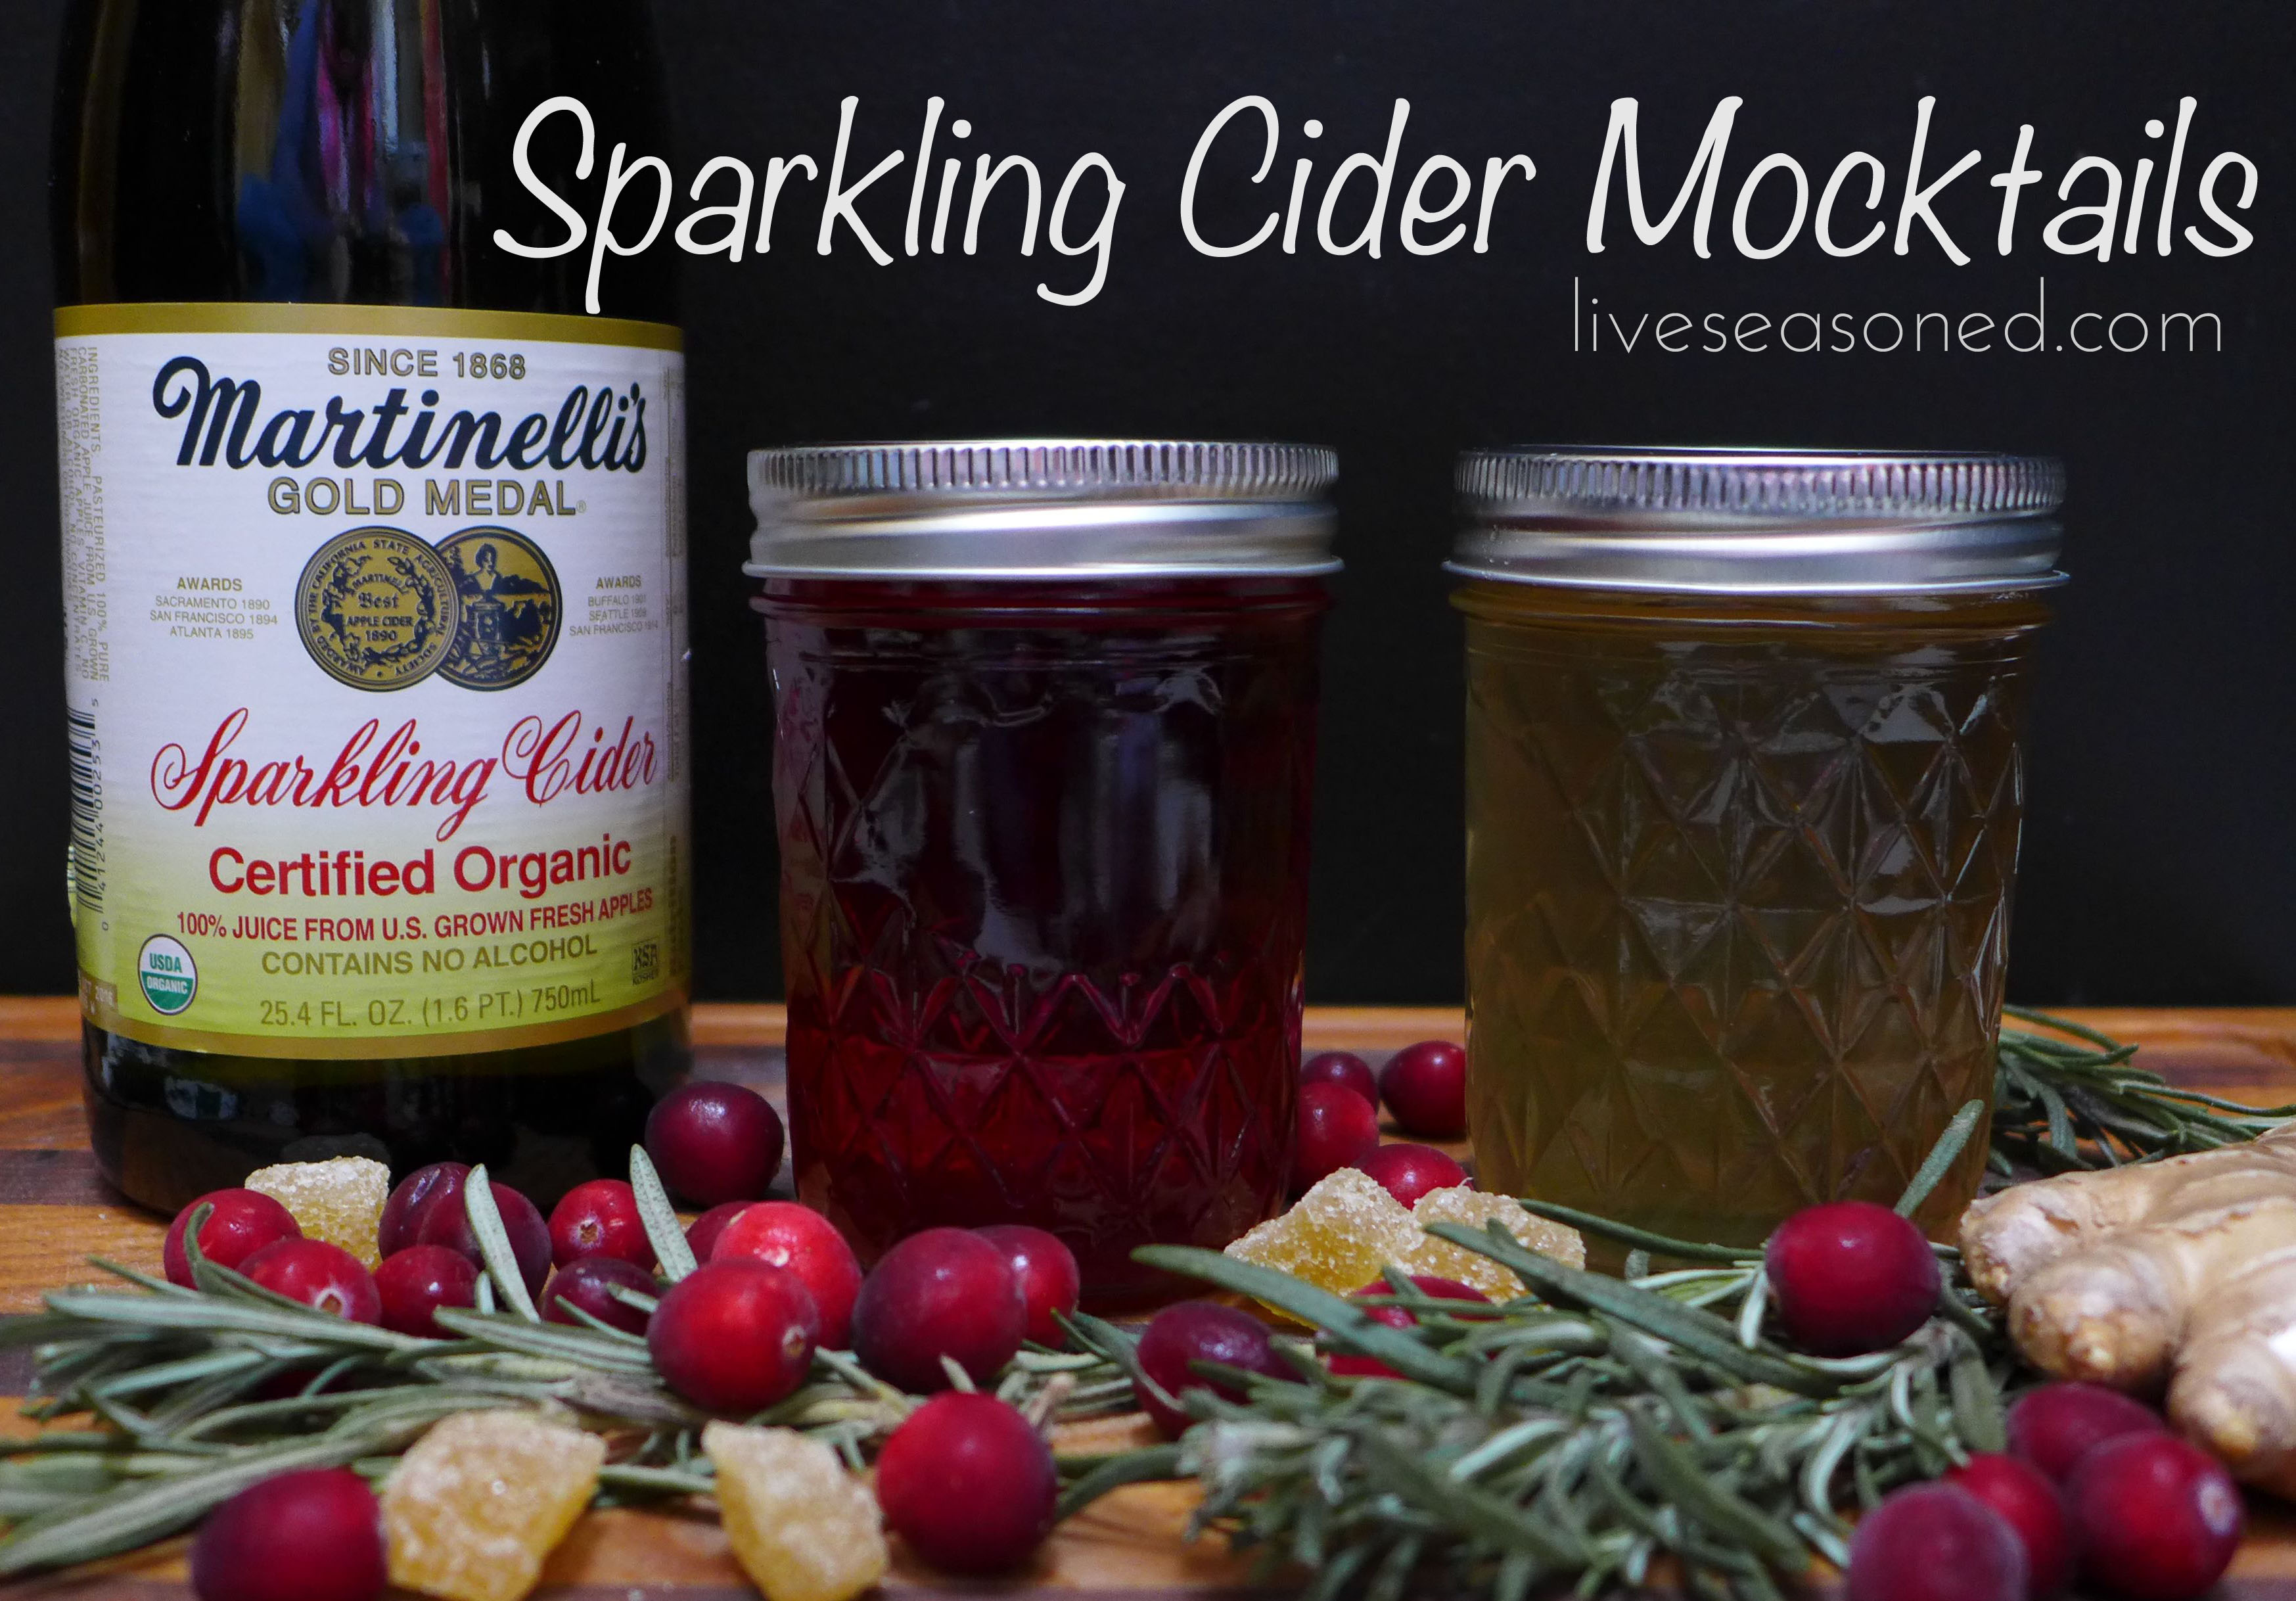
Each of these drinks gets their flavor from Martinelli’s Organic Sparkling Cider and an infused simple syrup. We’re sure your holiday menu is already full, so we purposefully kept these mocktails simple to make using ingredients that we always have on hand for Thanksgiving. As such, there’s no need to add an extra item to the mile-long grocery list, and if you’re short on time, you can assign the syrup-making to the first guest to walk through the door.
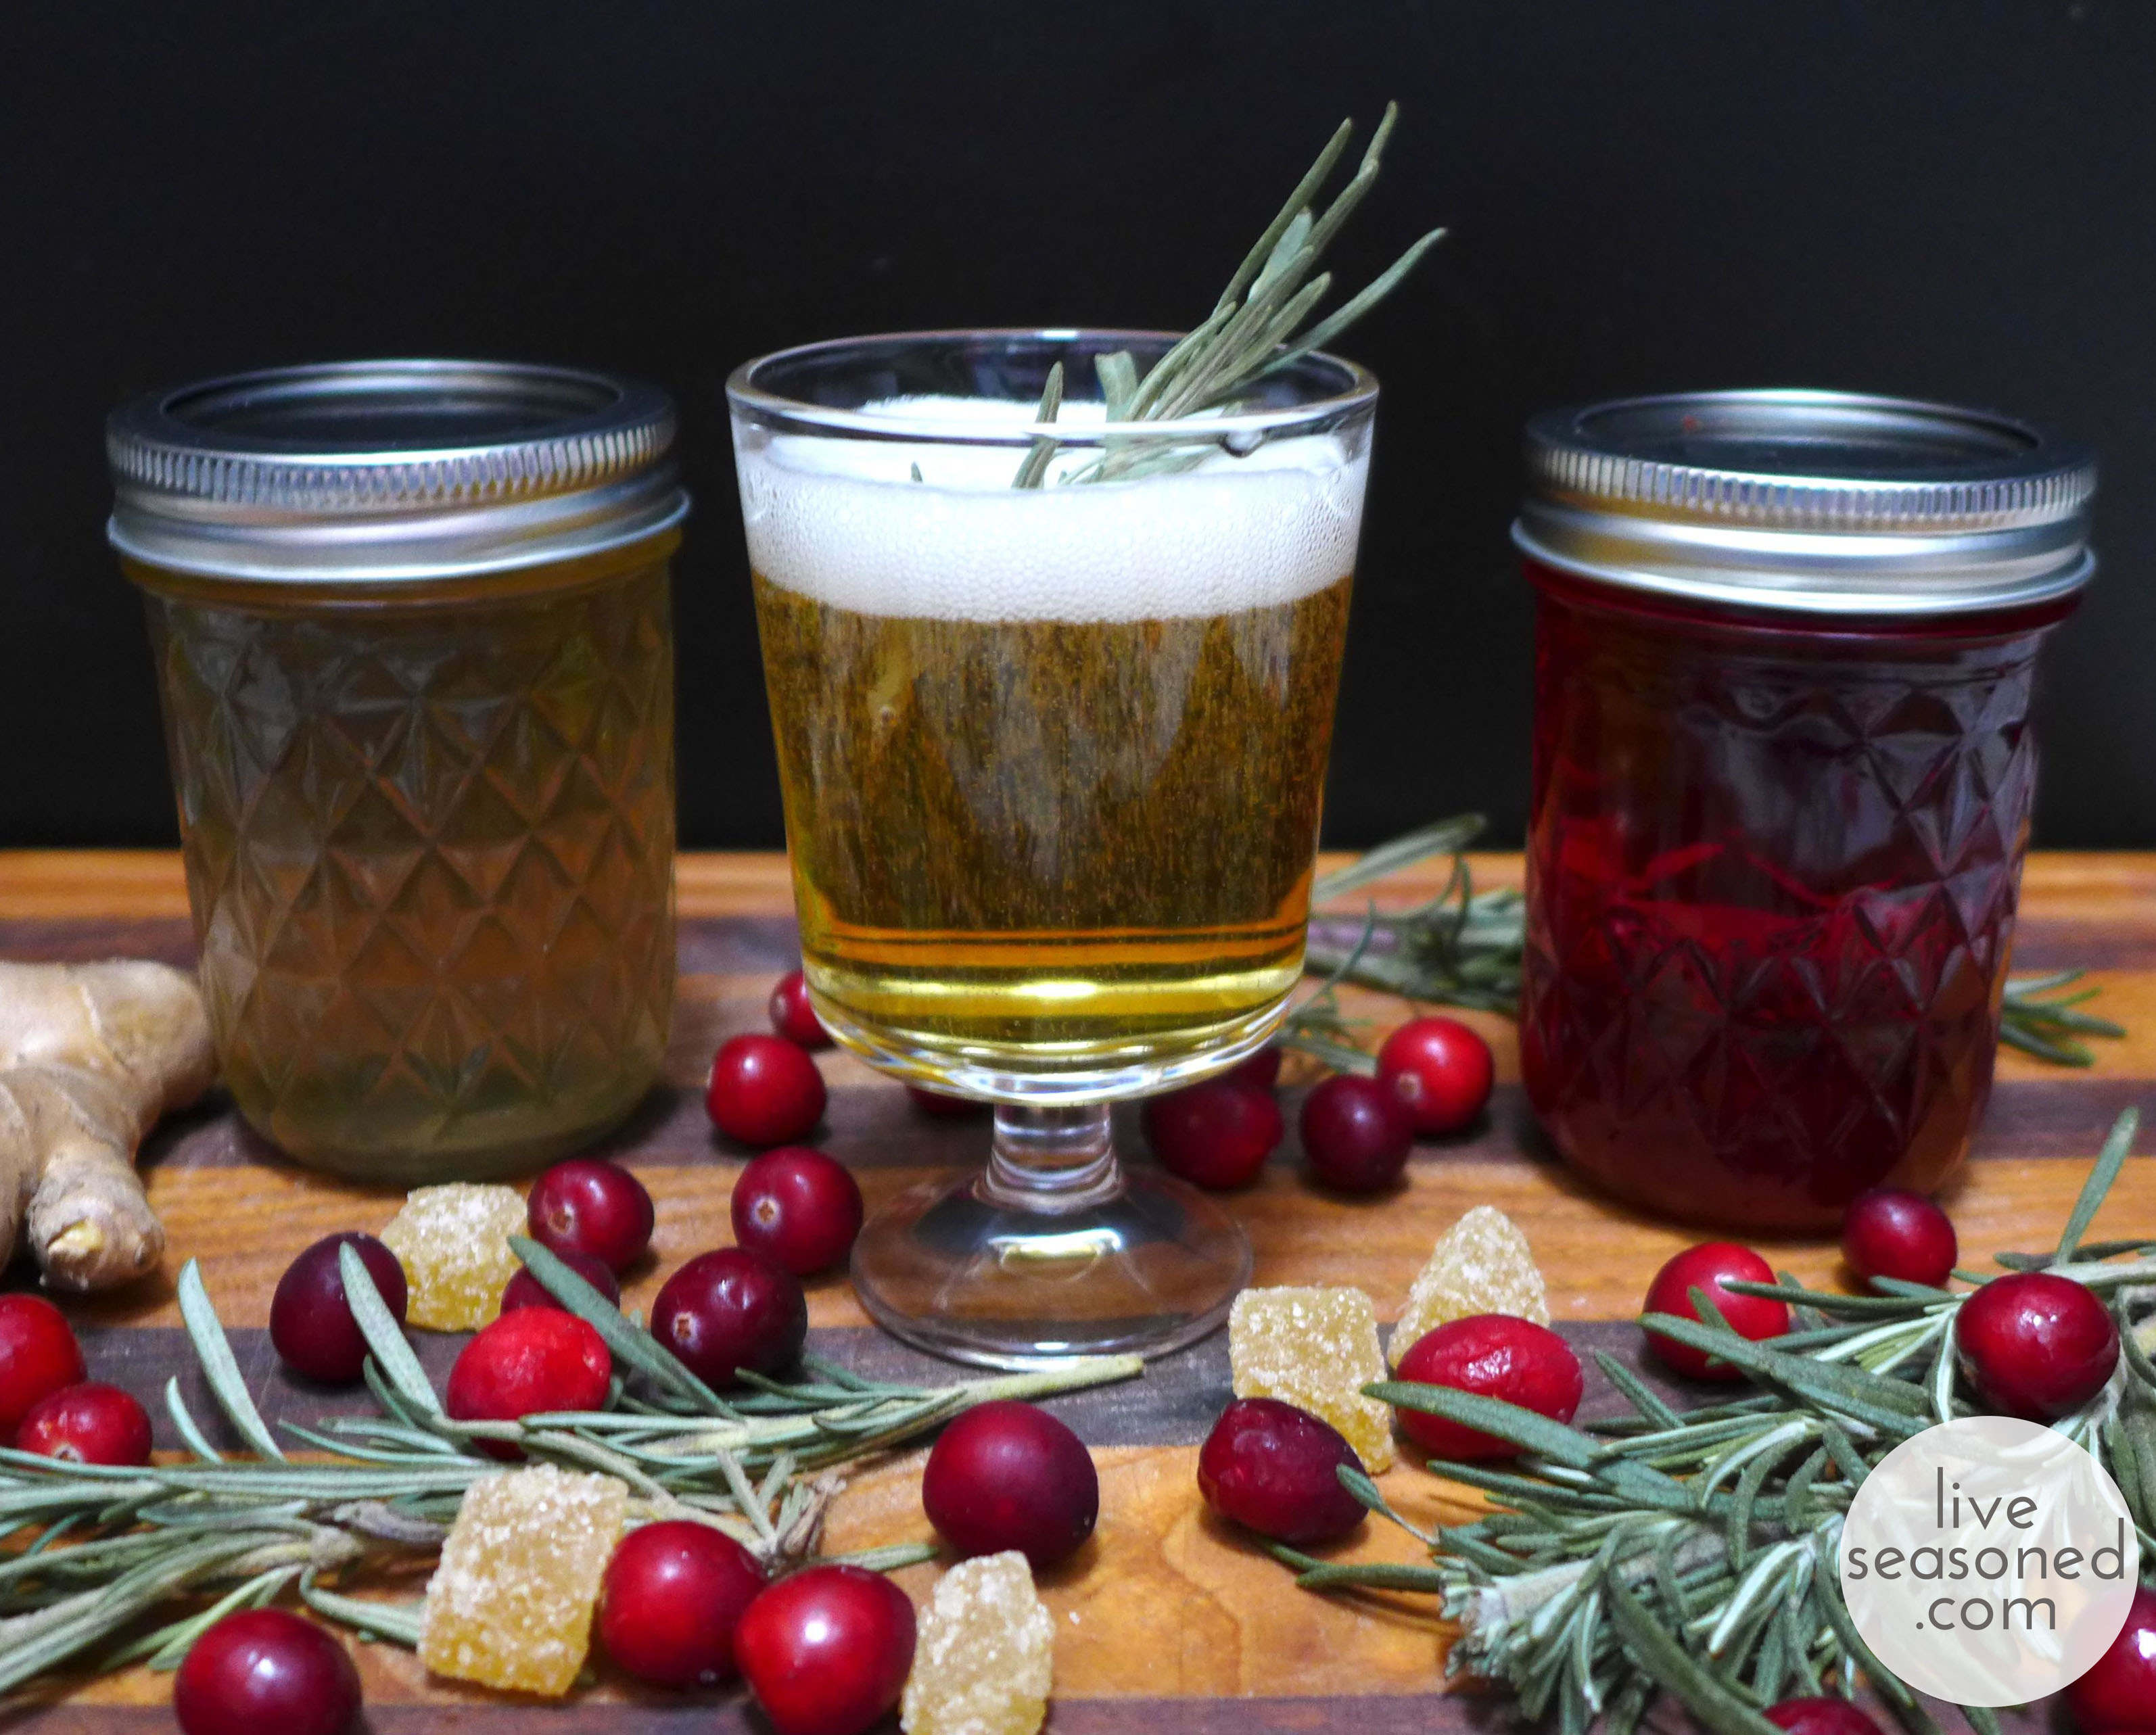
The Martinelli’s on its own is too sweet for my taste and adding these simple syrups would create a drink that would make my teeth hurt, so I always start by cutting the cider 50-50 with seltzer water. I would suggest you do that, or, if you’re the drinking type, take our suggestion and add vodka.
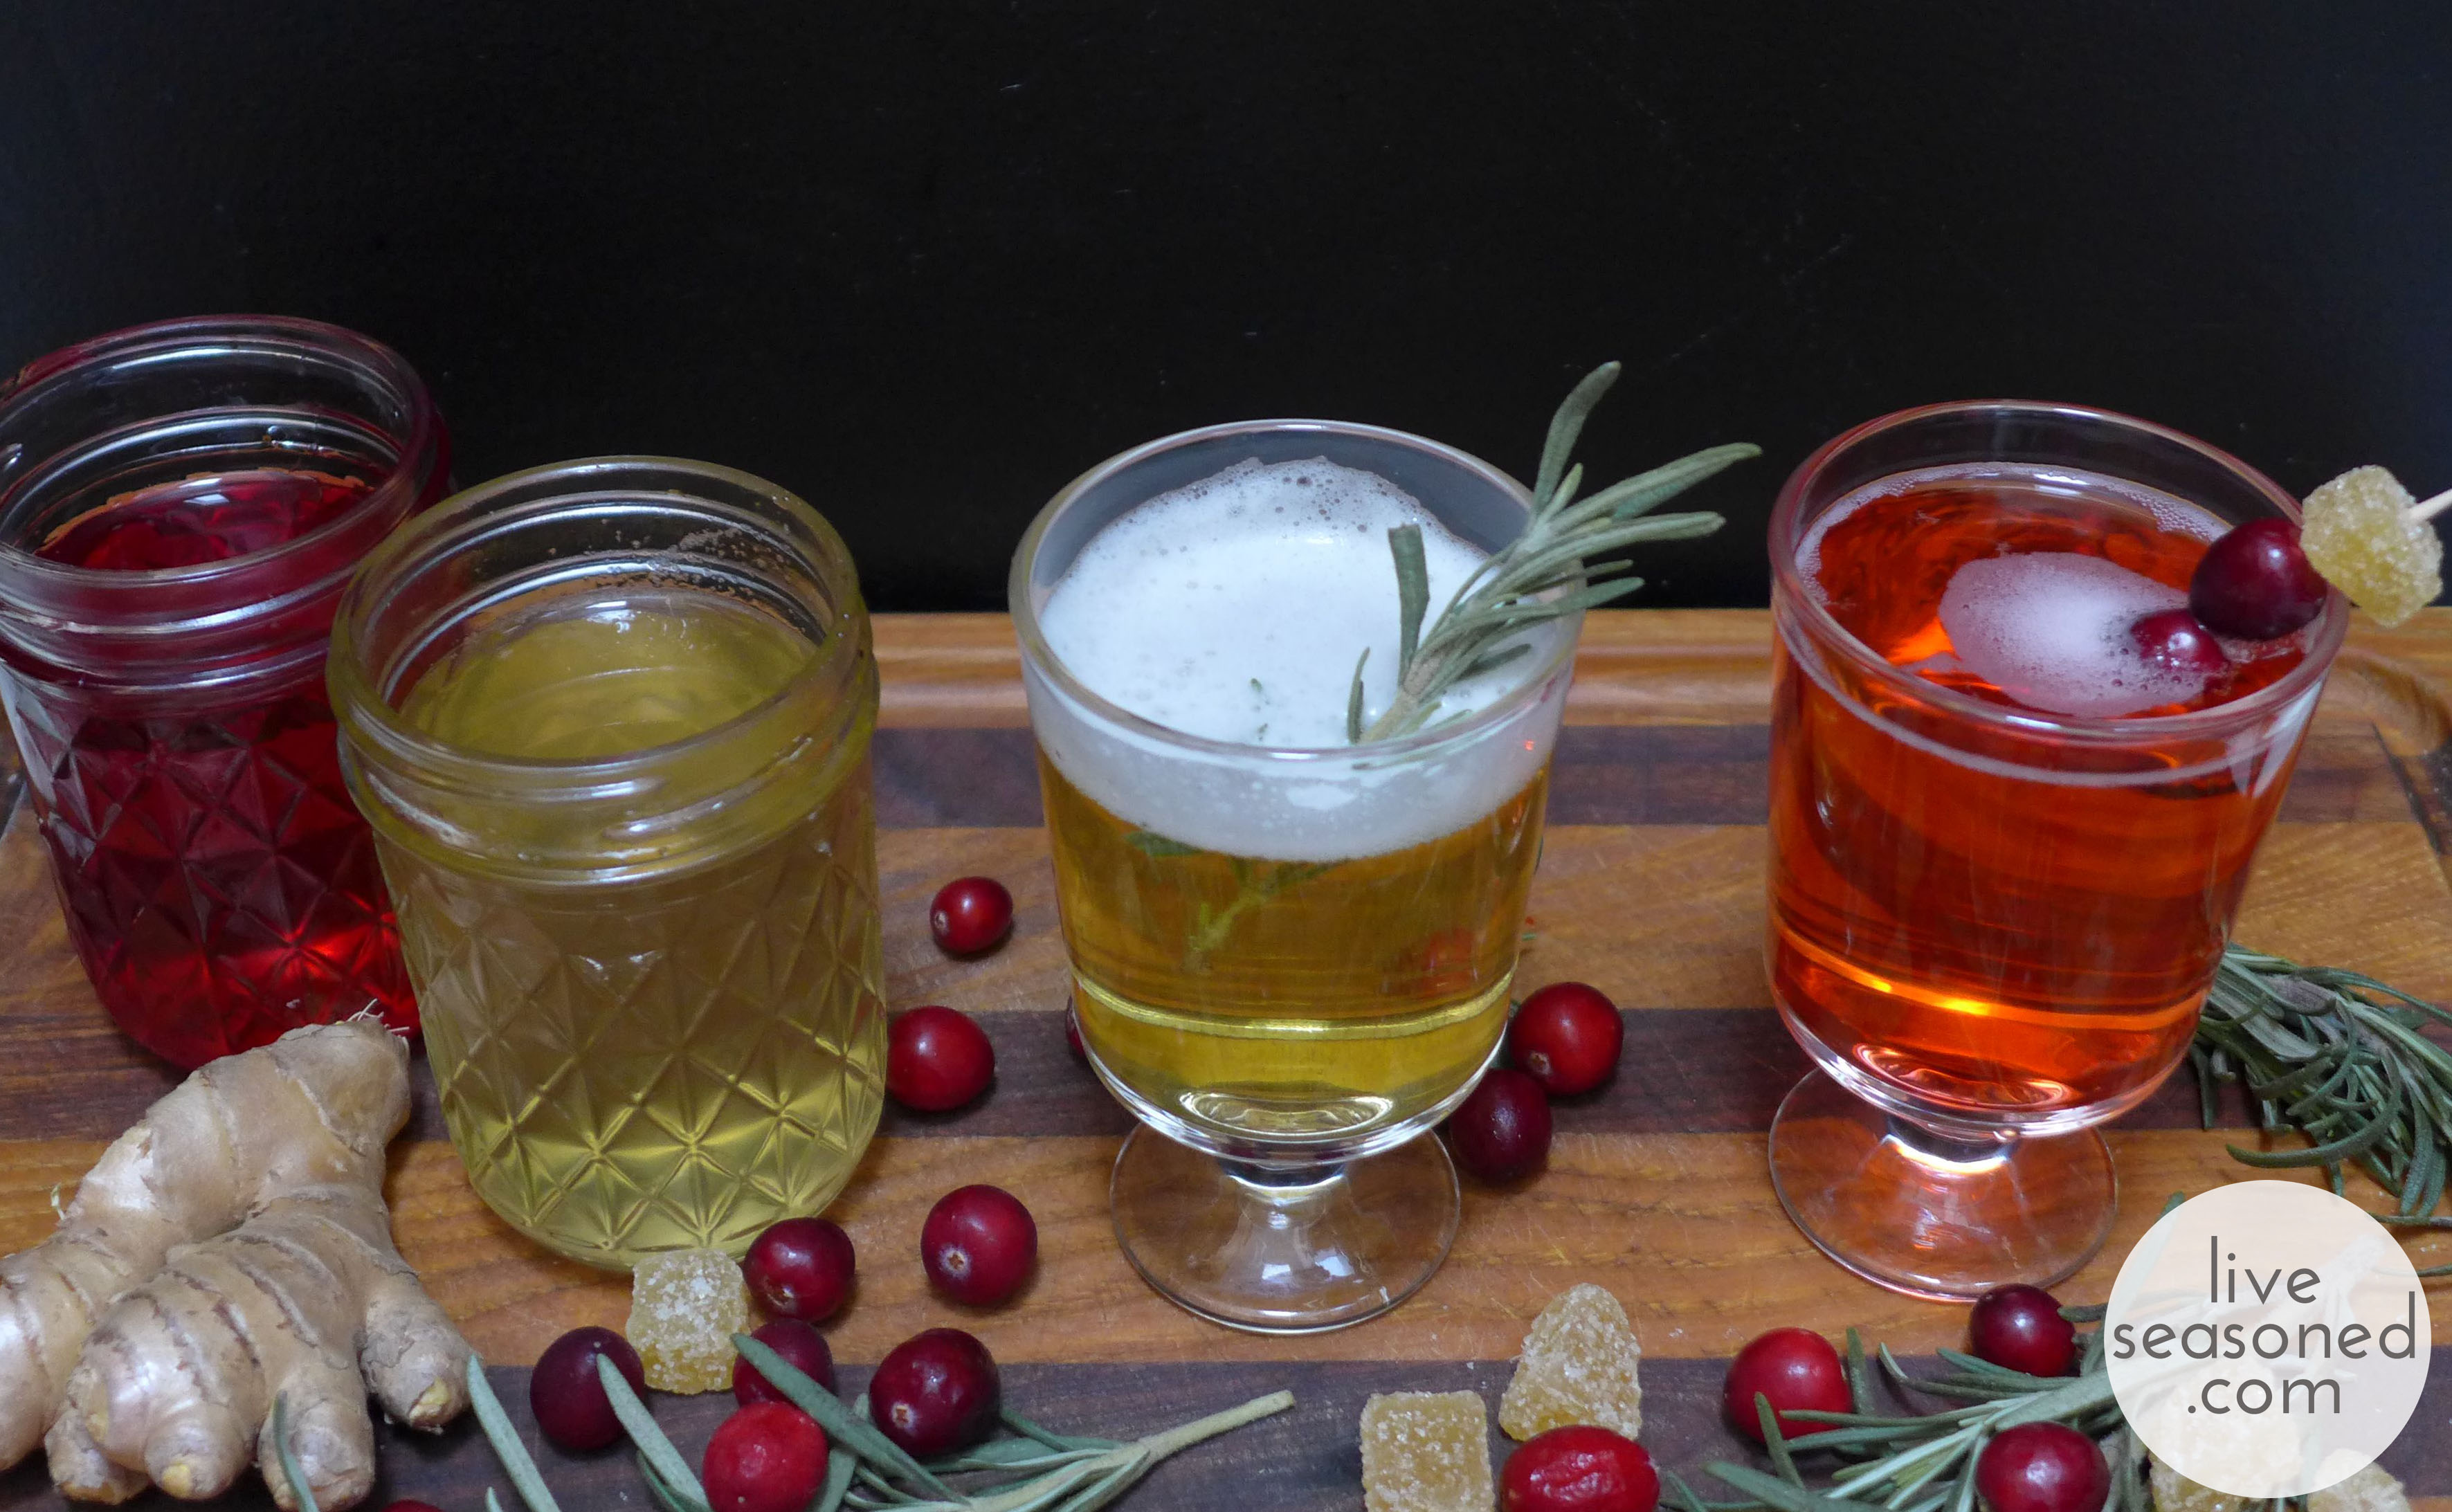
Place all ingredients except the garnish in your glass and give it a gentle stir.
I think my favorite part is coming up with the garnishes! Is professional garnish-er a job? If so, I’m available for your next party. A note about buying the ginger: I never keep crystallized ginger on hand, because it always seems to dry out and get hard before I have a chance to use it. Instead, I buy only what I need for any recipe from the bulk foods section of the grocery store. On this particular day I only bought 8 or 9 pieces; considering my love for buying in bulk, this seems silly, but it’s always so nice having fresh and soft crystallized ginger for a recipe.
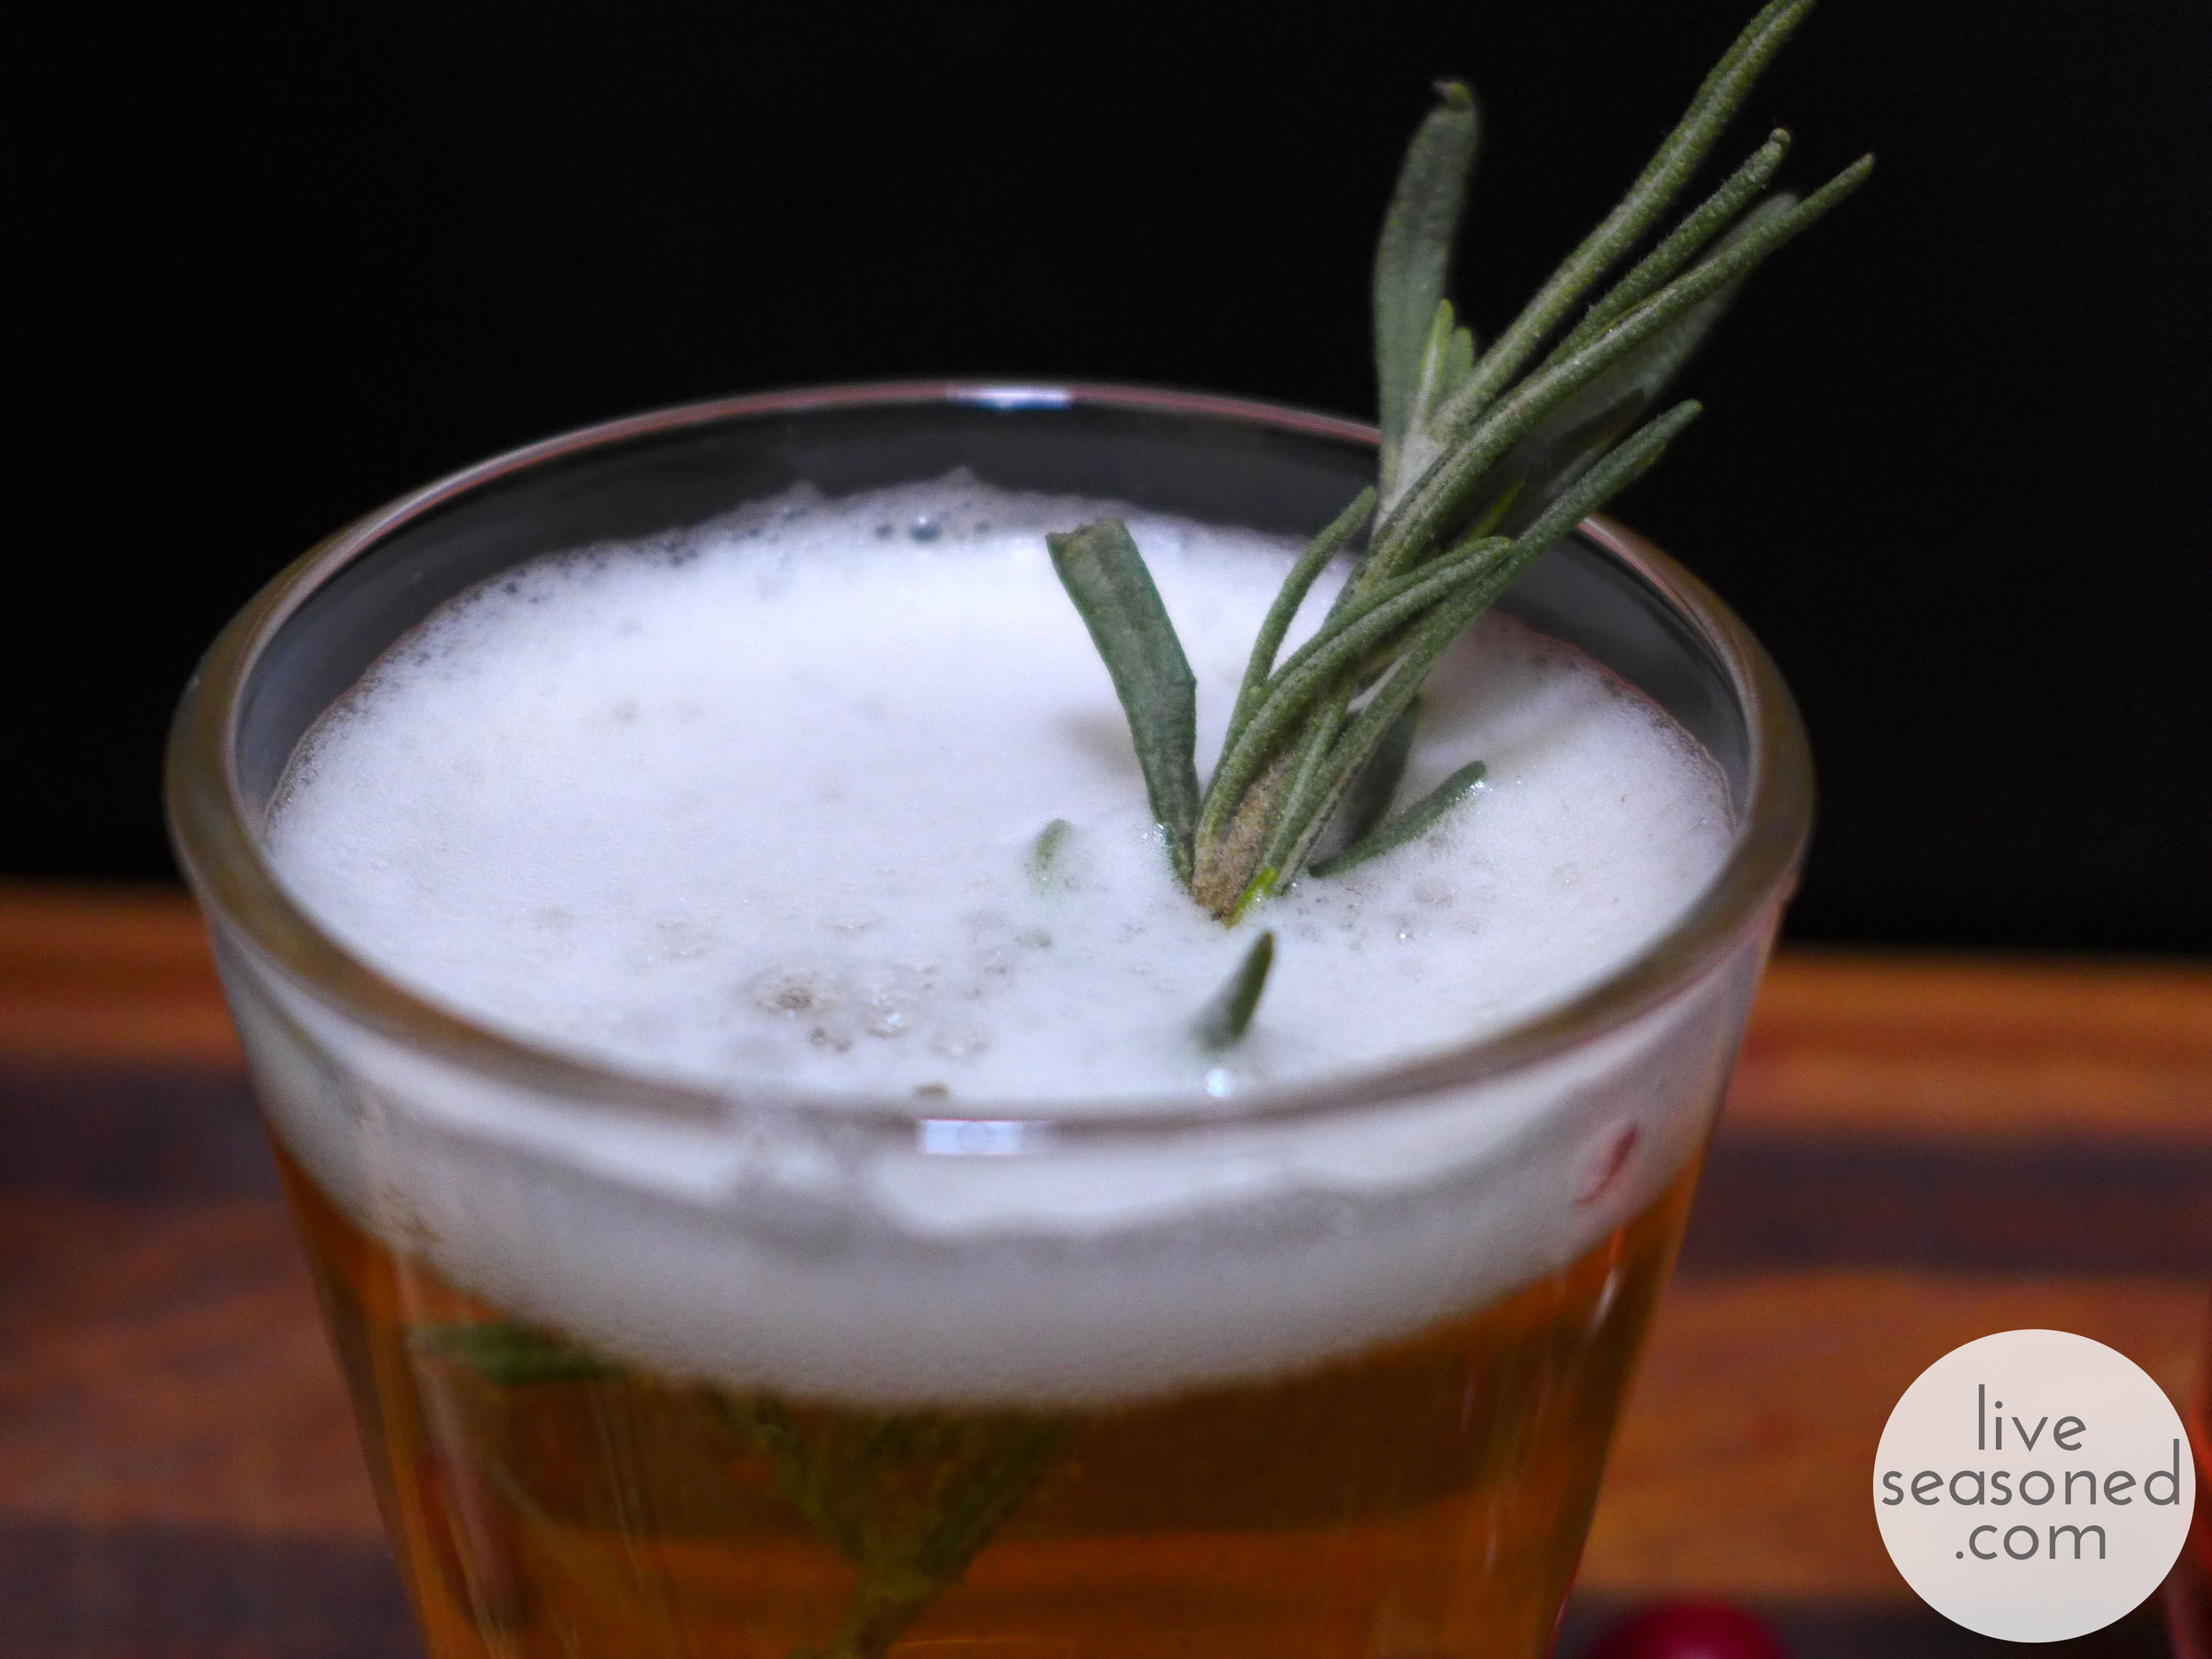
In the ginger-rosemary drink I used a sprig of rosemary. It matched the flavor of the drink, and the green and gold combination looked beautiful. My rosemary stems were a bit flimsy, but if your rosemary stems are firm, use them to skewer some of the cranberries and ginger.
For the cranberry drink I put a couple of cranberries and a piece of crystallized ginger on a toothpick. Even though there’s no ginger in the drink, the sparkling gold candy looked so pretty on top of the red berries. Don’t you think?

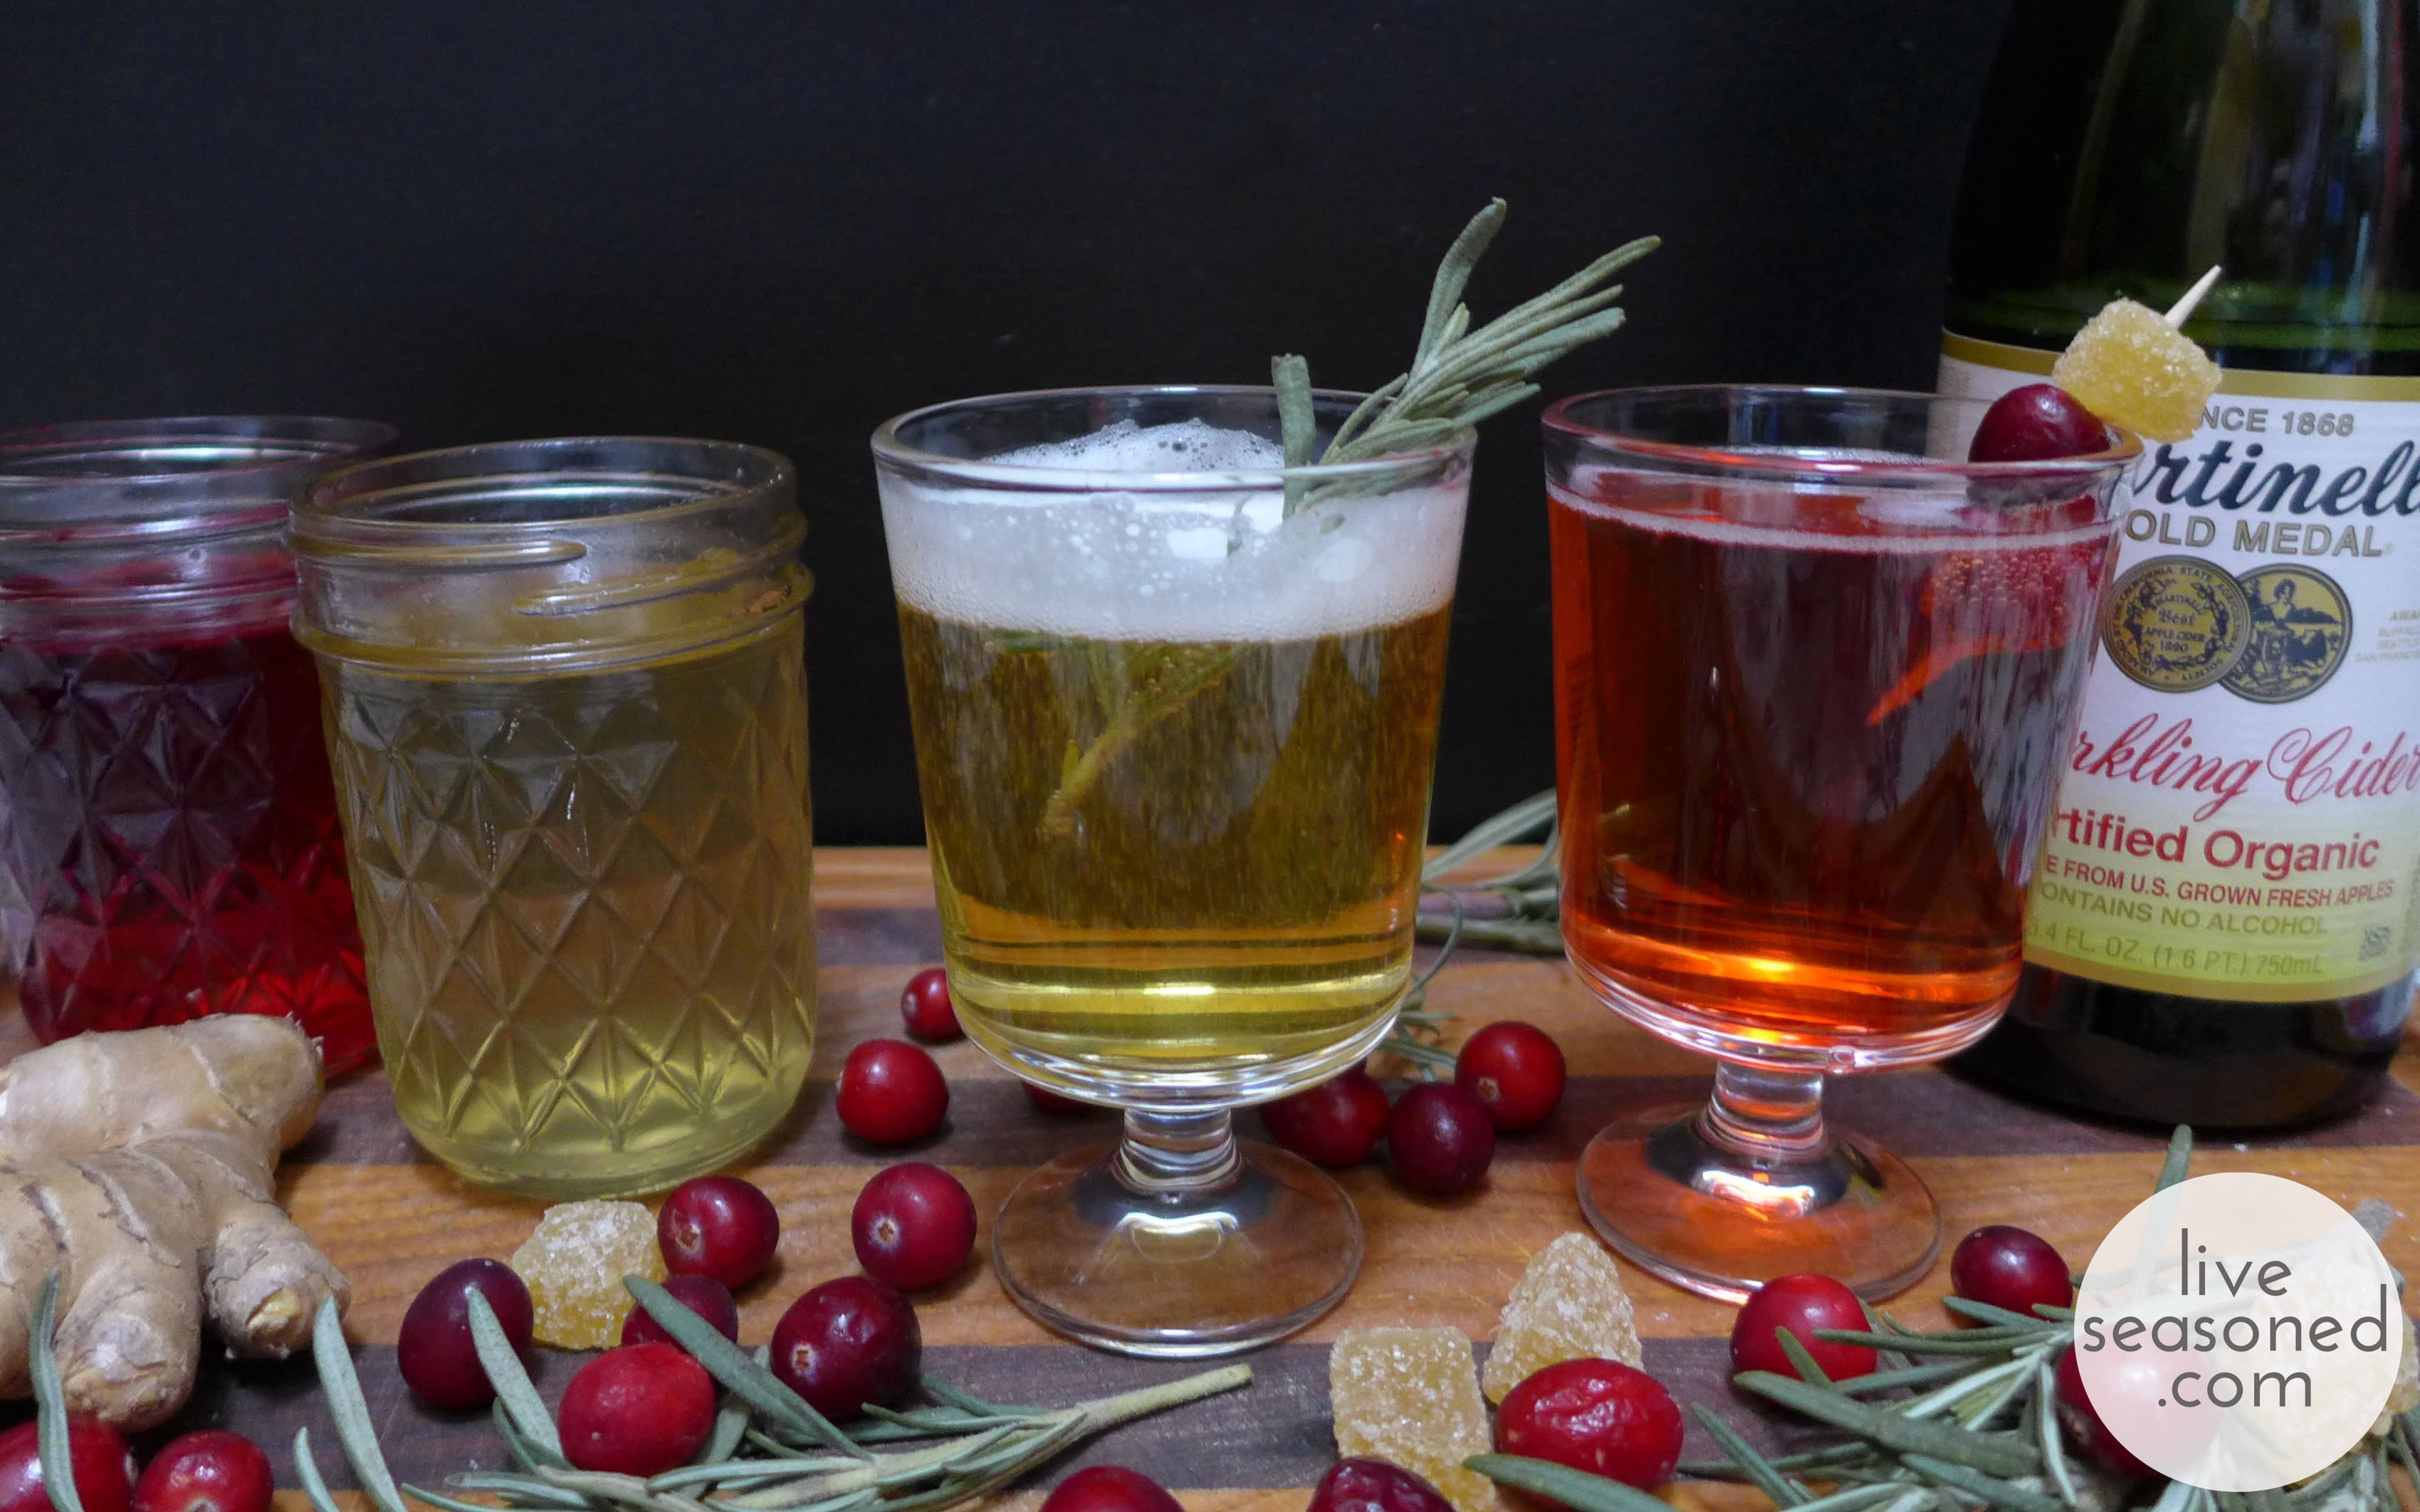
Of course, even if you don’t have time to mix up these syrups, just adding a bit of garnish to your sparkling cider will make every feel special! Especially if you add something like the sprig of rosemary ~ each time your guests take a sip of cider they’ll get an added bonus with the rosemary aroma.
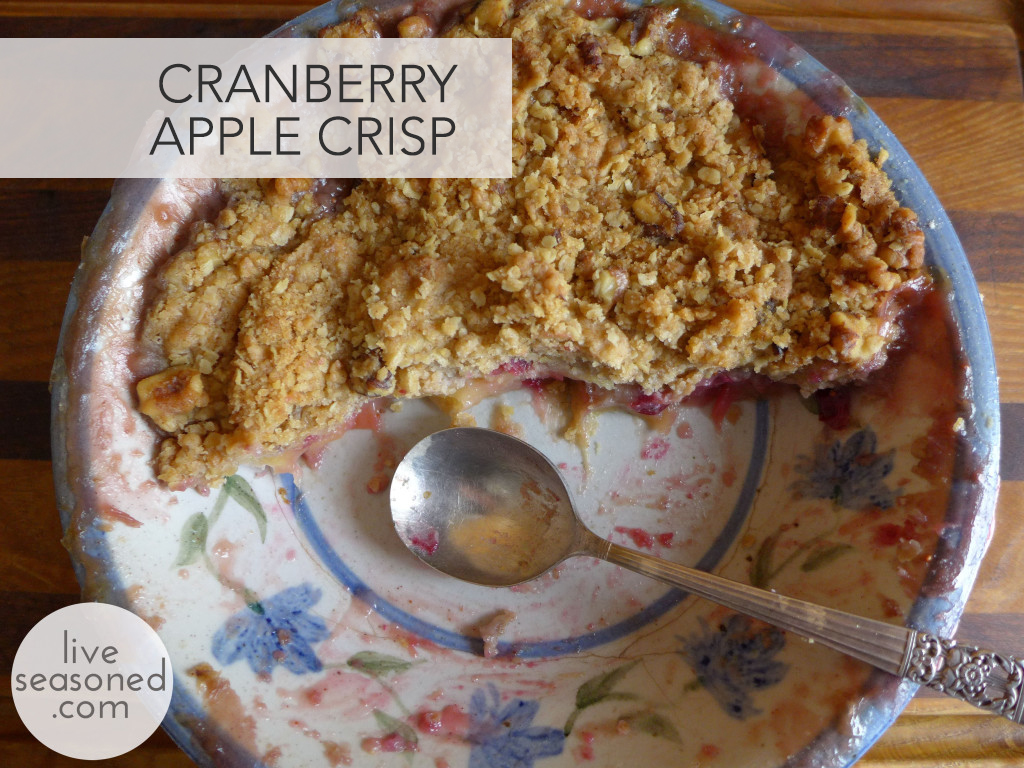
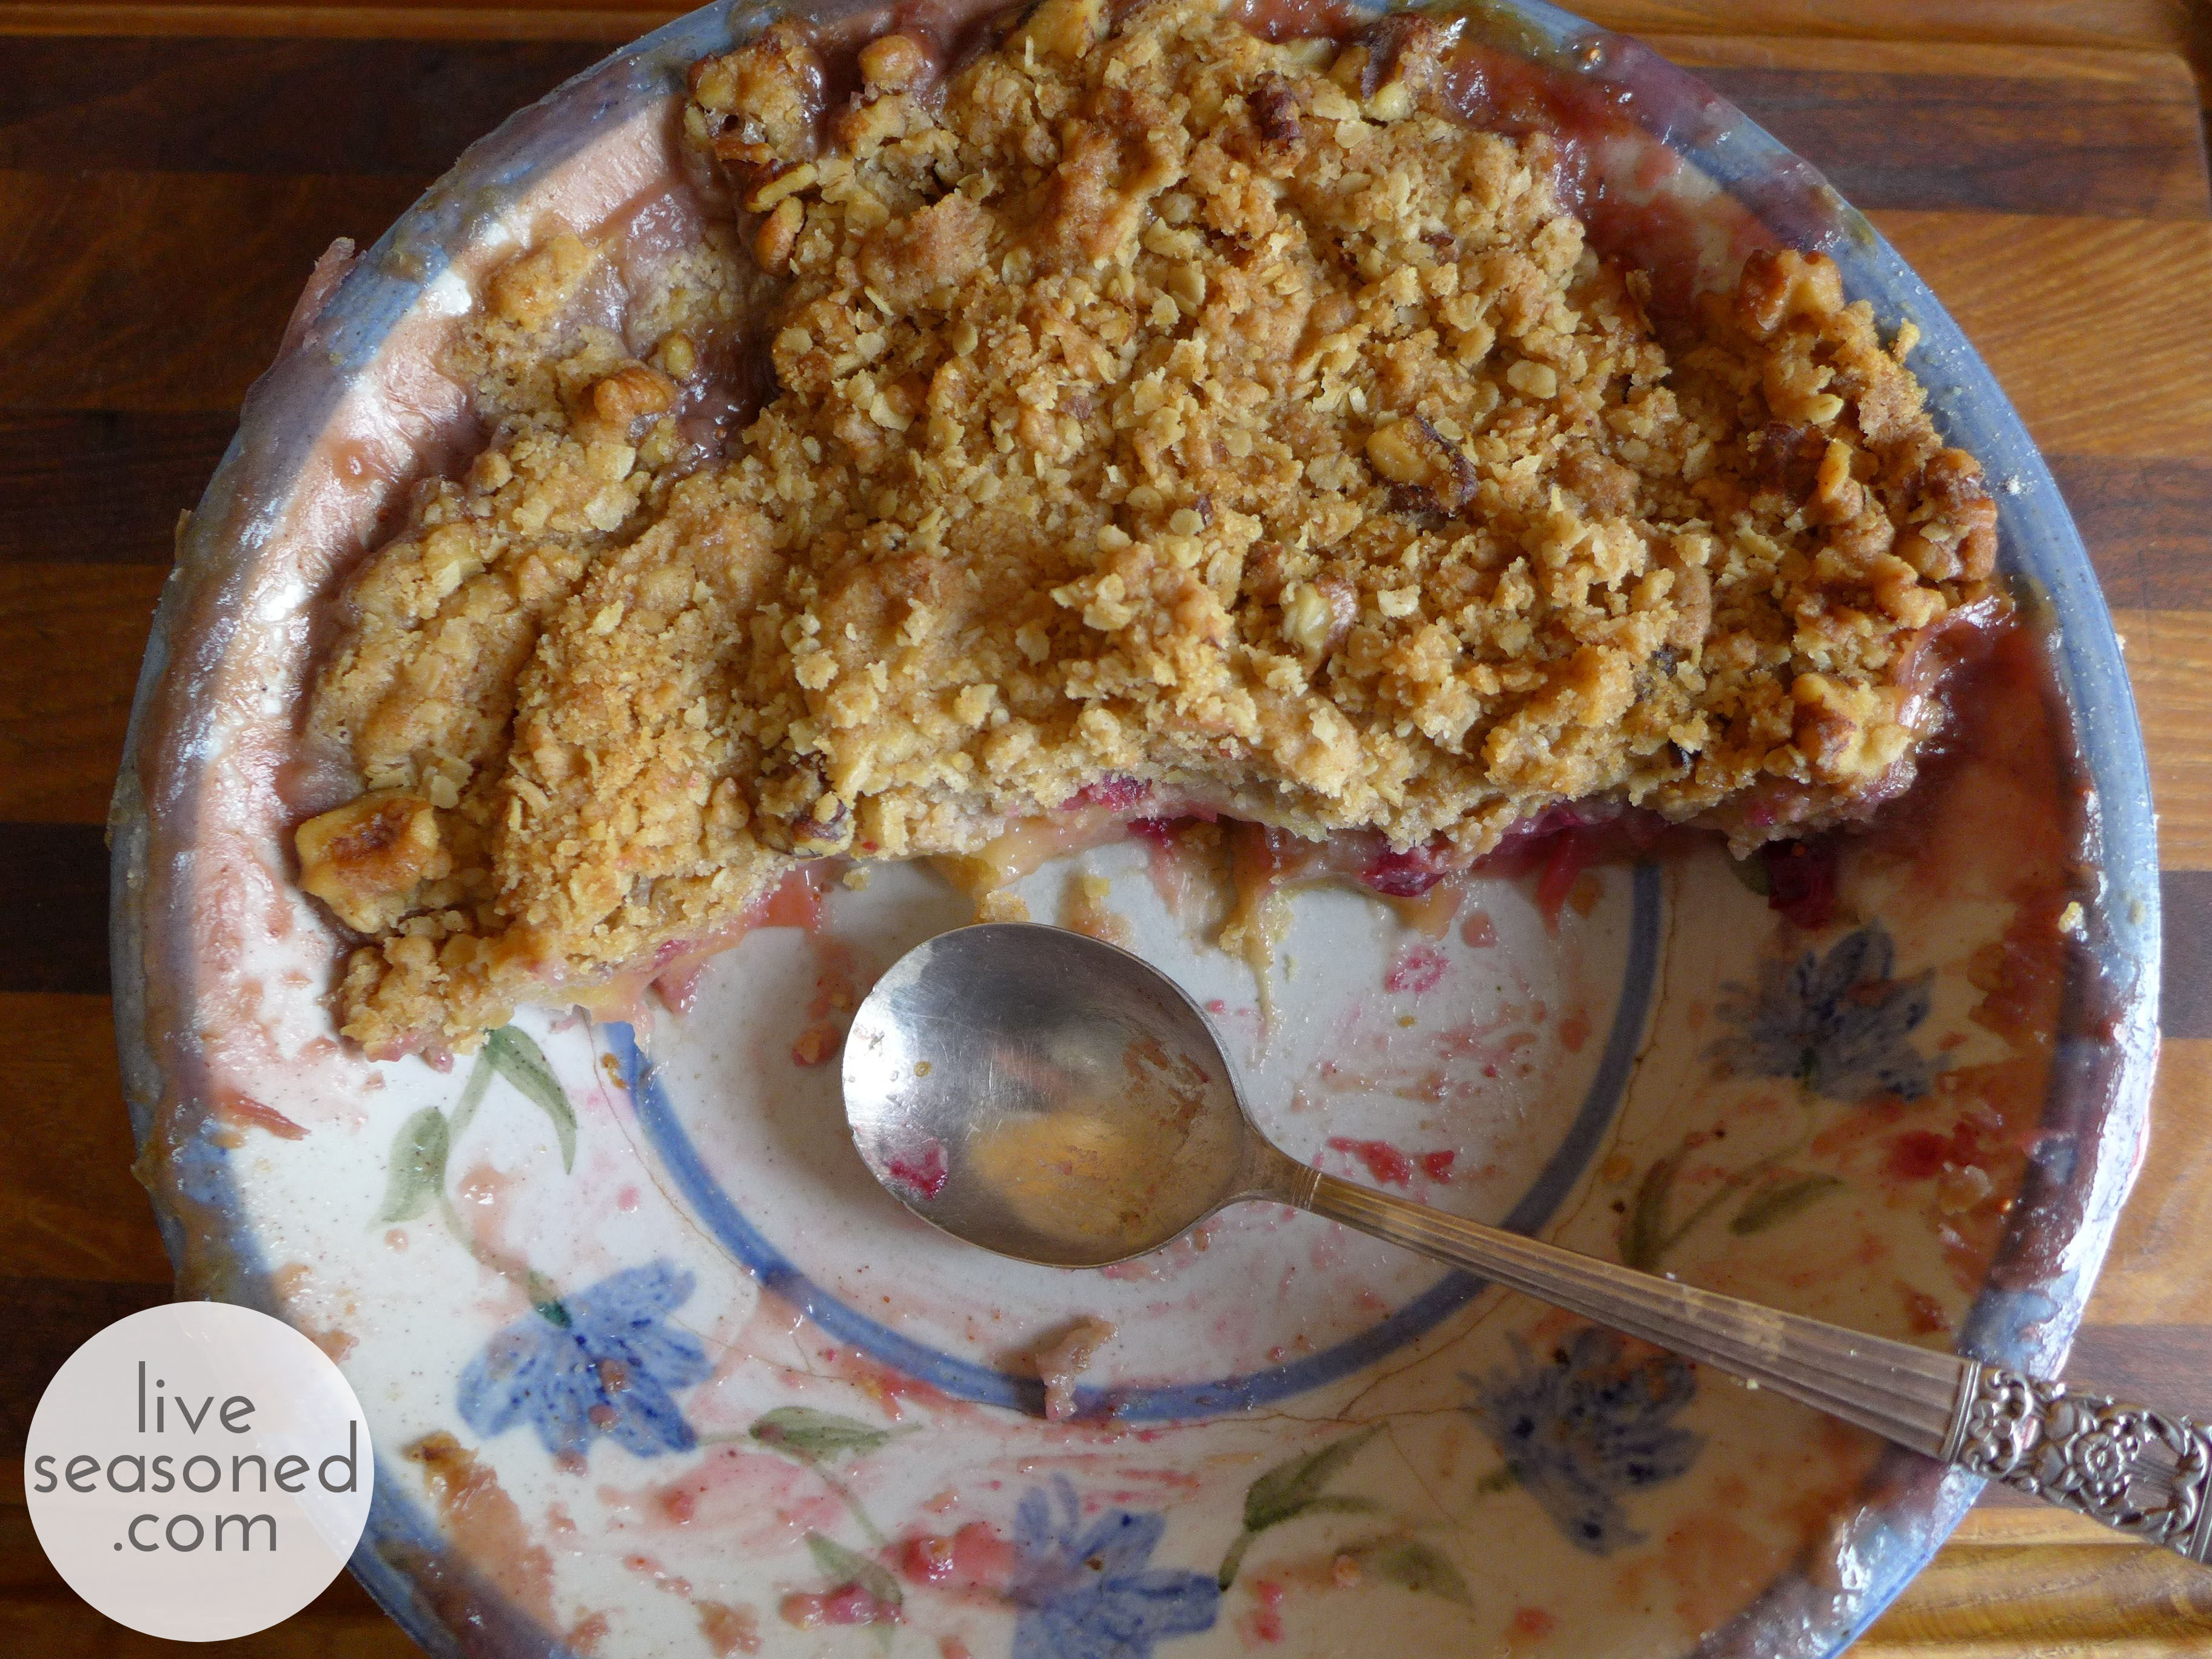
It’s about time we shared the staple of all apple desserts ~ a crisp! What’s not to love? They are packed with fruit, covered in a hearty and nutty oat crumb. With the right combination of sugar and salt you can get that irresistible sweet yet salty flavor. Still warm, they make vanilla ice cream melt to produce a delicious sweet cream running through every bite. You can totally eat them for breakfast with plain yogurt and know you’re getting your day off to a great start. Or is that just me?
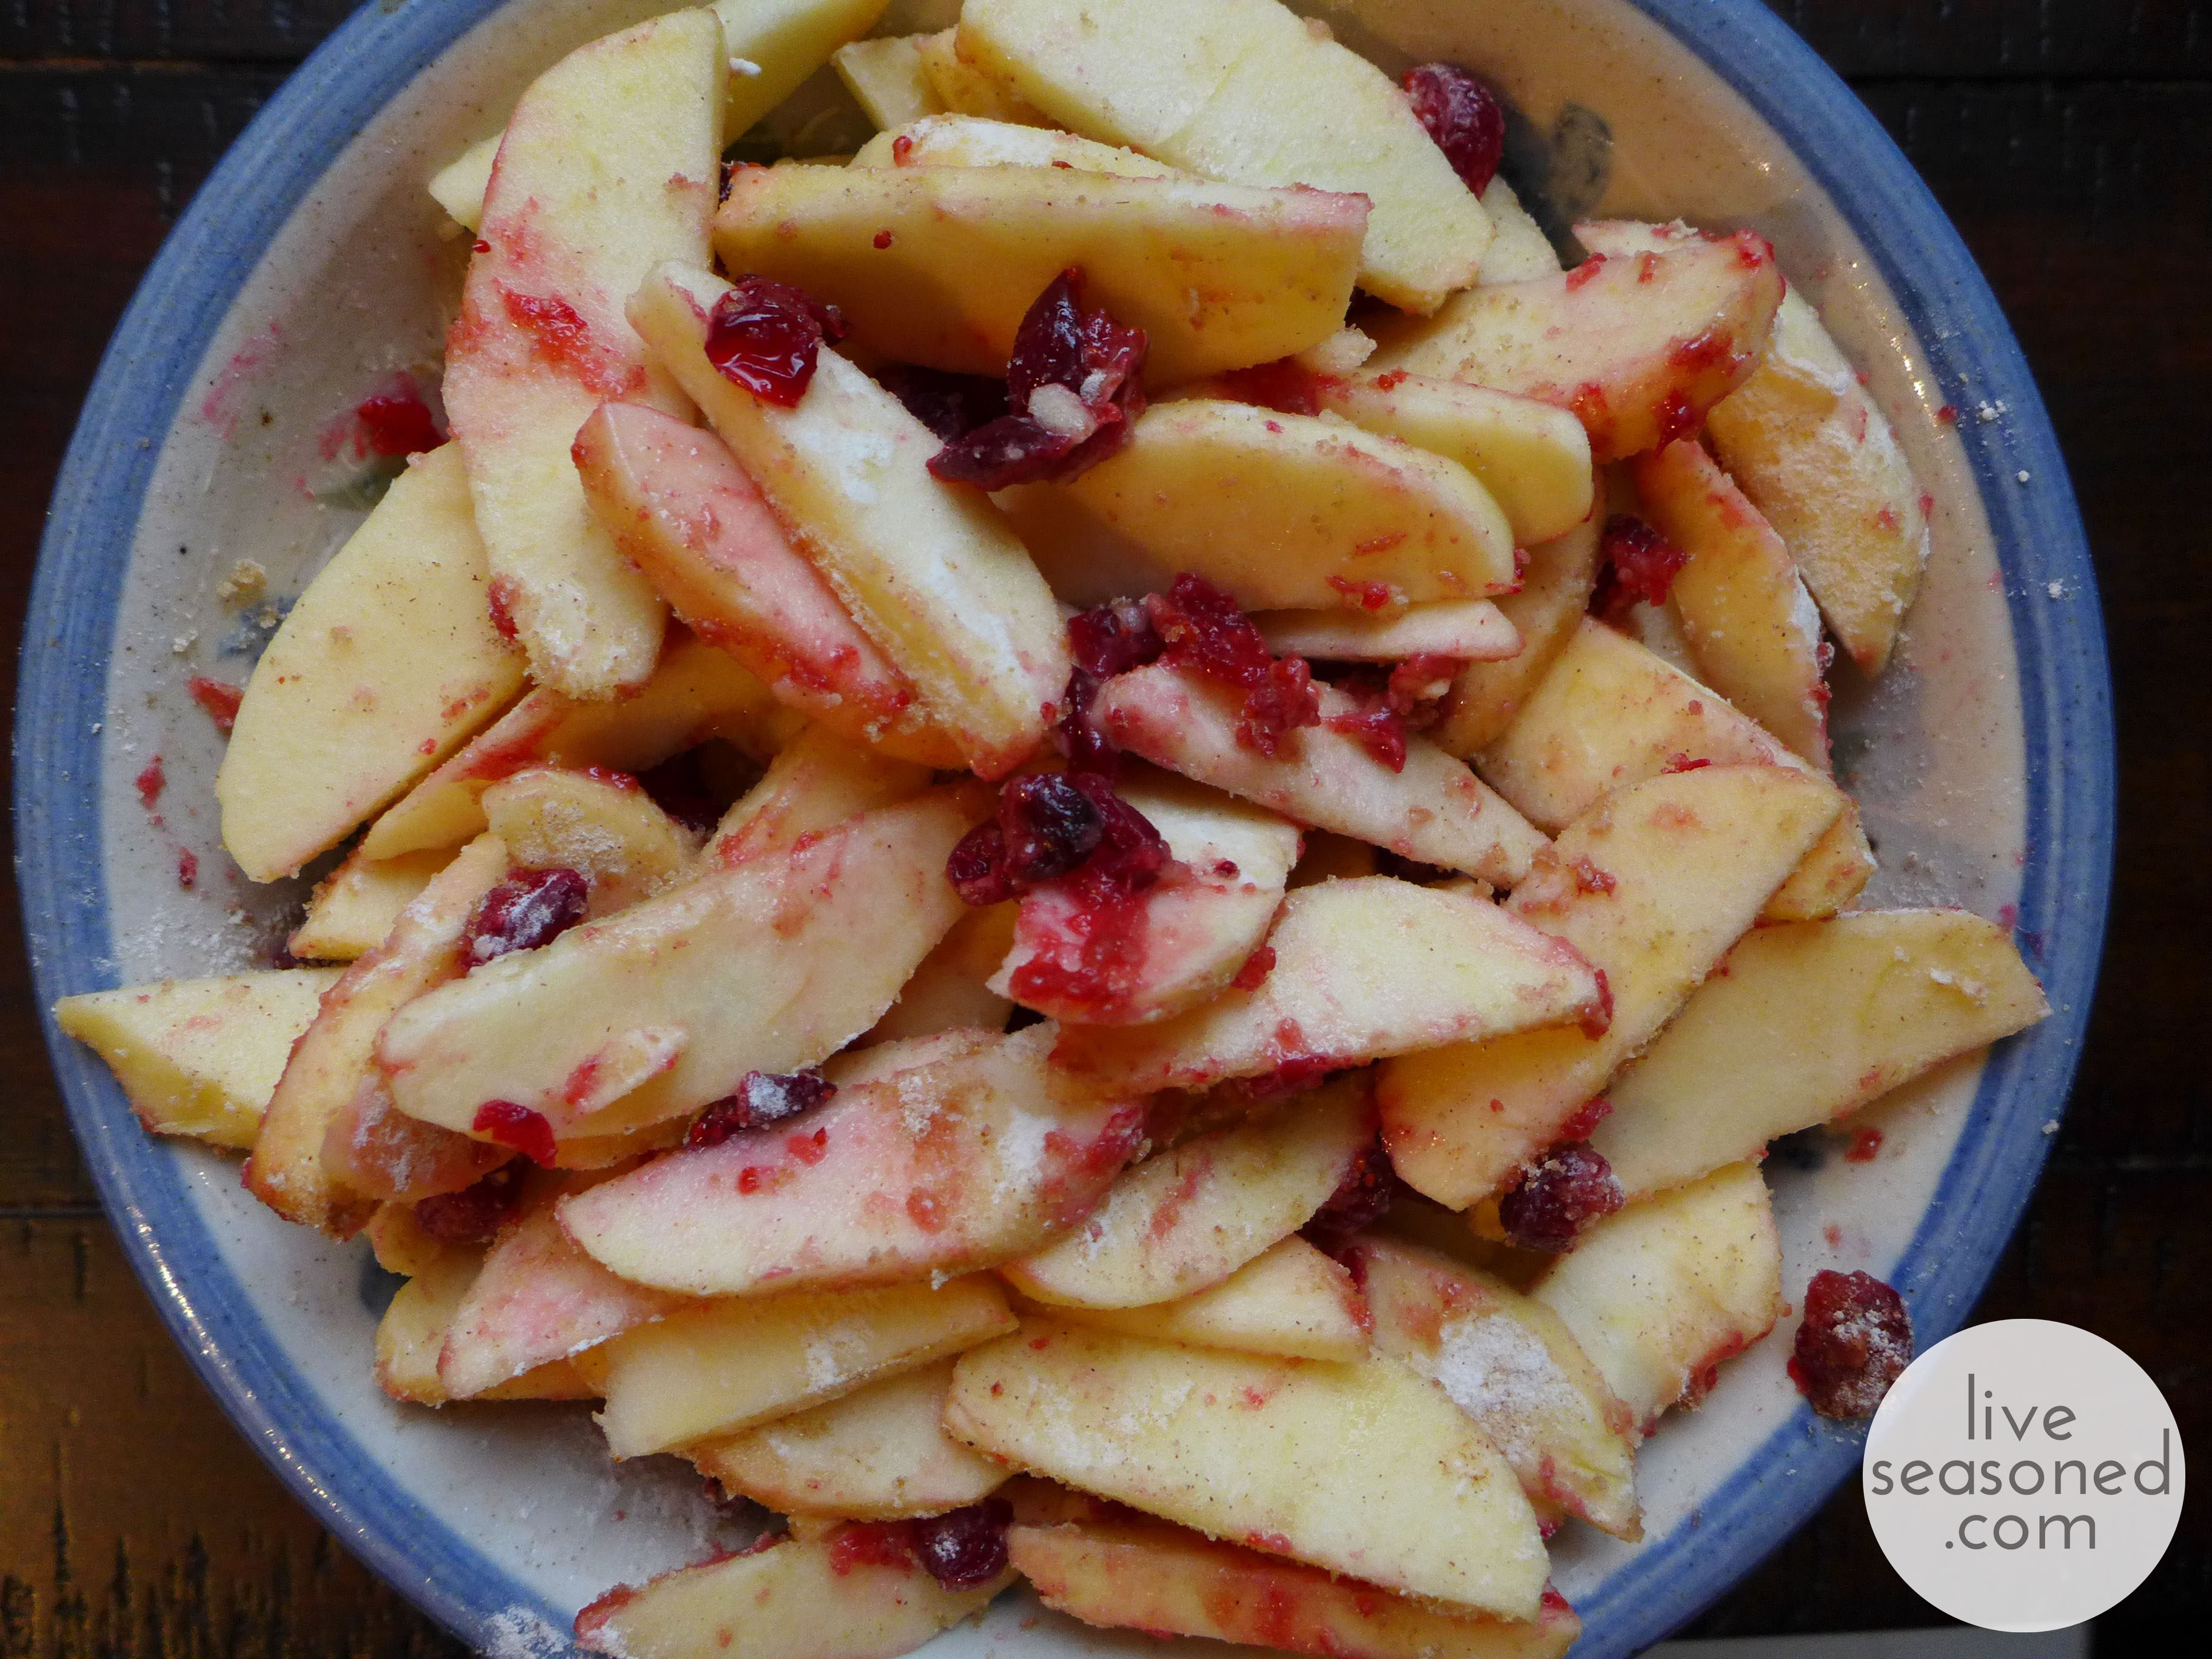
I made this crisp yesterday. It was our first unbelievably cold day of the season that also blanketed us with snow. A perfect day for finding any reason to stick close to the stove. So I did a whole bunch of cooking and baking. One of the recipes I cooked earlier in the day resulted in boiled cranberries that were then filtered out of that recipe (that’s vague, but you’ll get the full details next week!). The berries looked so perfect that I thought it wouldn’t hurt to experiment and see if I could re-use them in a crisp. I used my standard crisp recipe, it’s a simplified version of something I found in the King Arthur Baker’s Companion (my go-to for all sorts of standard baked goods). While I don’t do it every time, I’ll often add fresh cranberries to the crisp, luckily, yesterday’s “used” cranberries still had a lot of flavor and worked just as well as fresh ones.
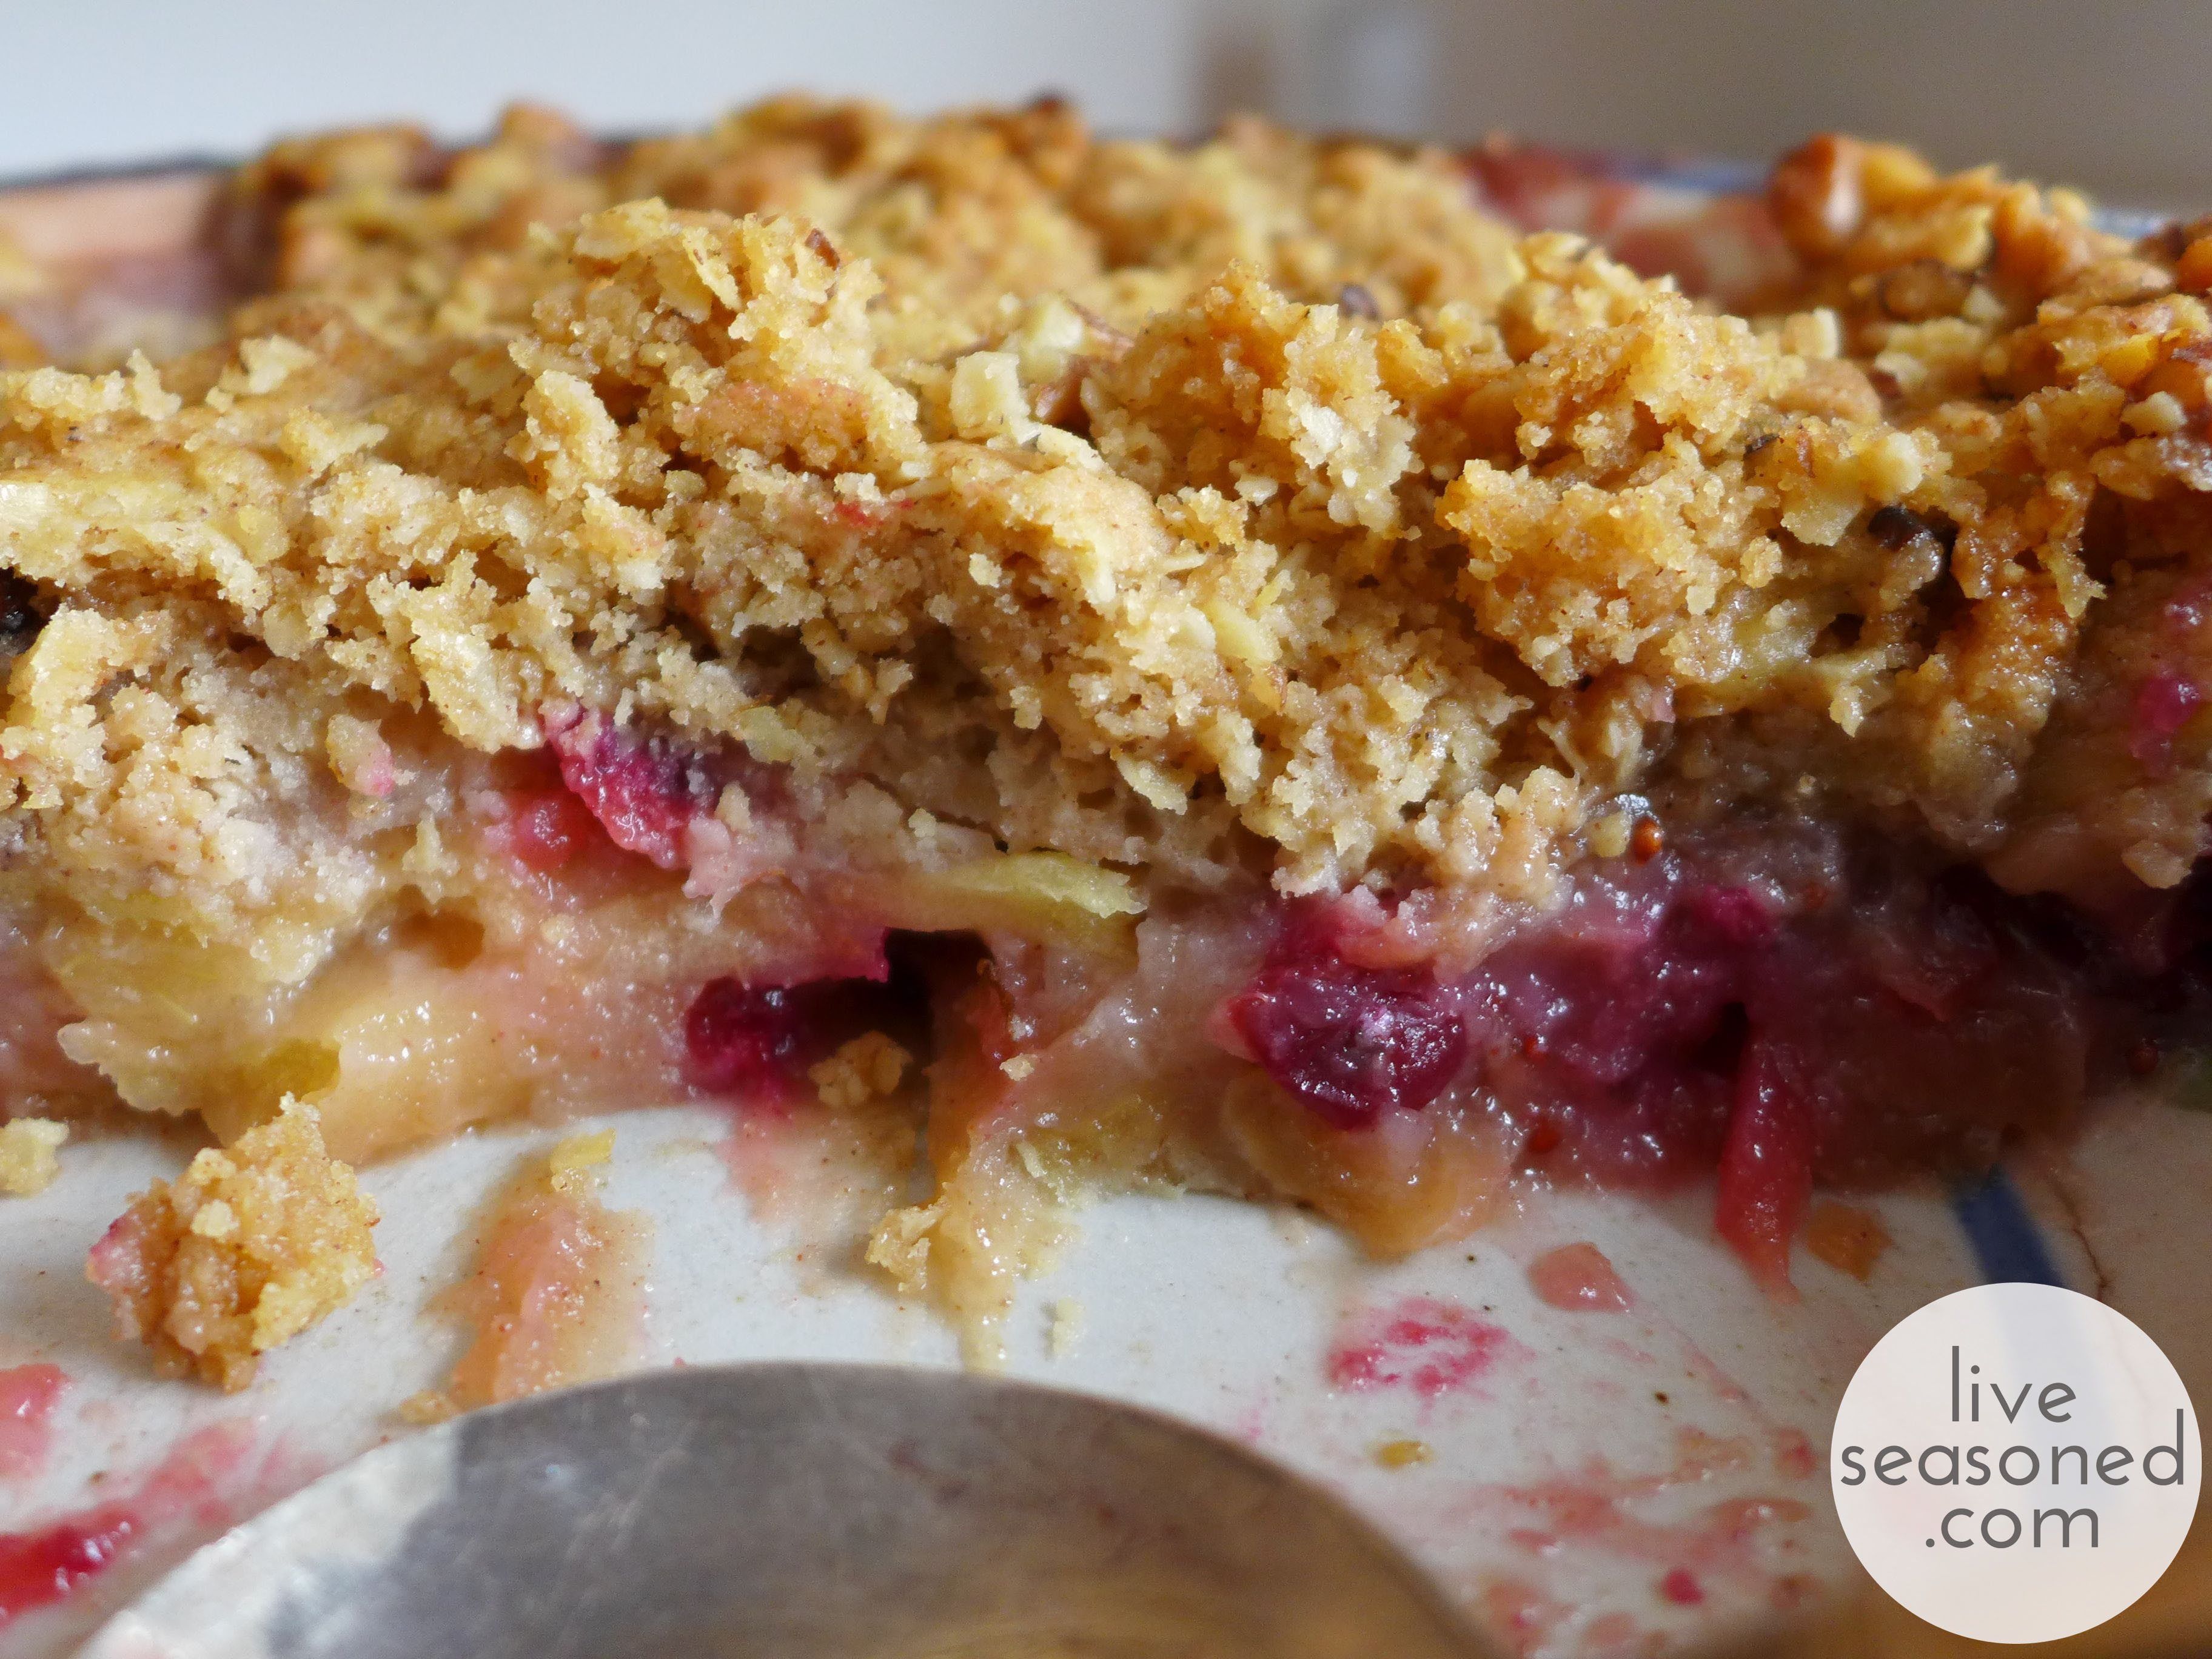
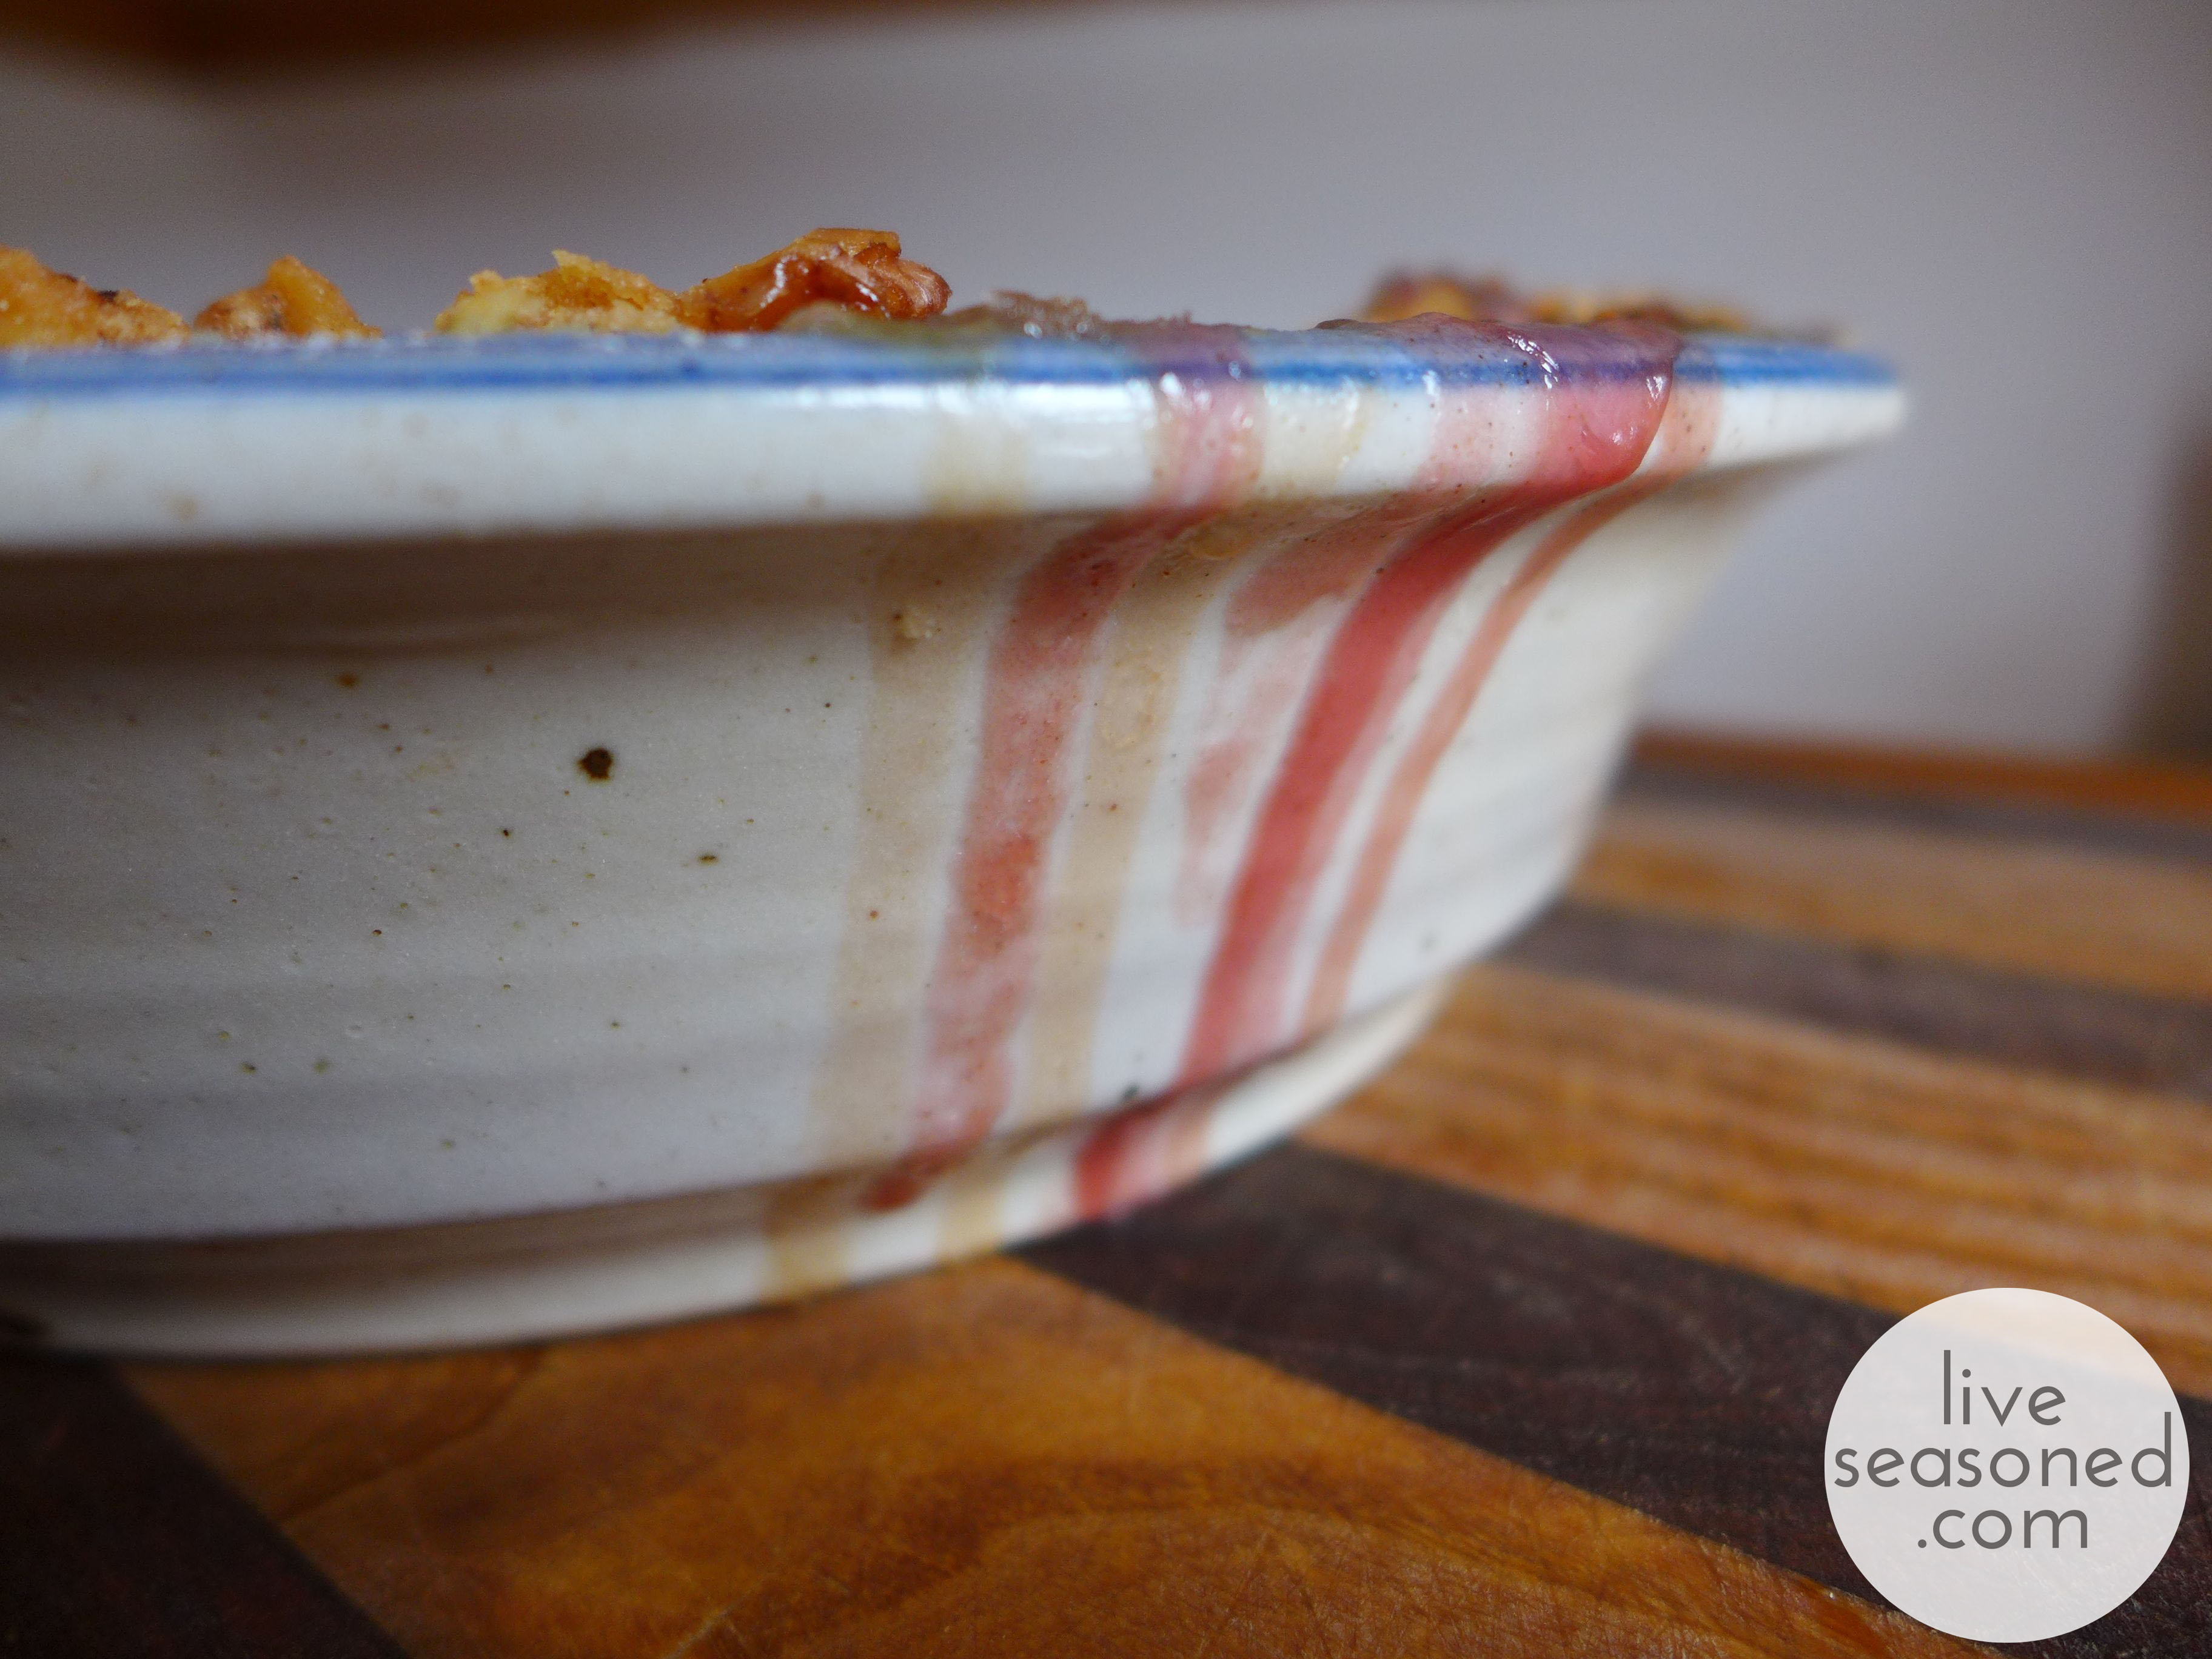
As you can see, the juices from this crisp ran over the side of my dish (producing those beautiful yellow and pink streaks on the outside of the dish – isn’t it cool that the apple and cranberry juices didn’t completely blend?). Depending upon how much I’ve over-stuffed my dish, I will often use a cookie sheet to catch the droppings – it’s much better than have the sugary syrup burn on the bottom of your oven!
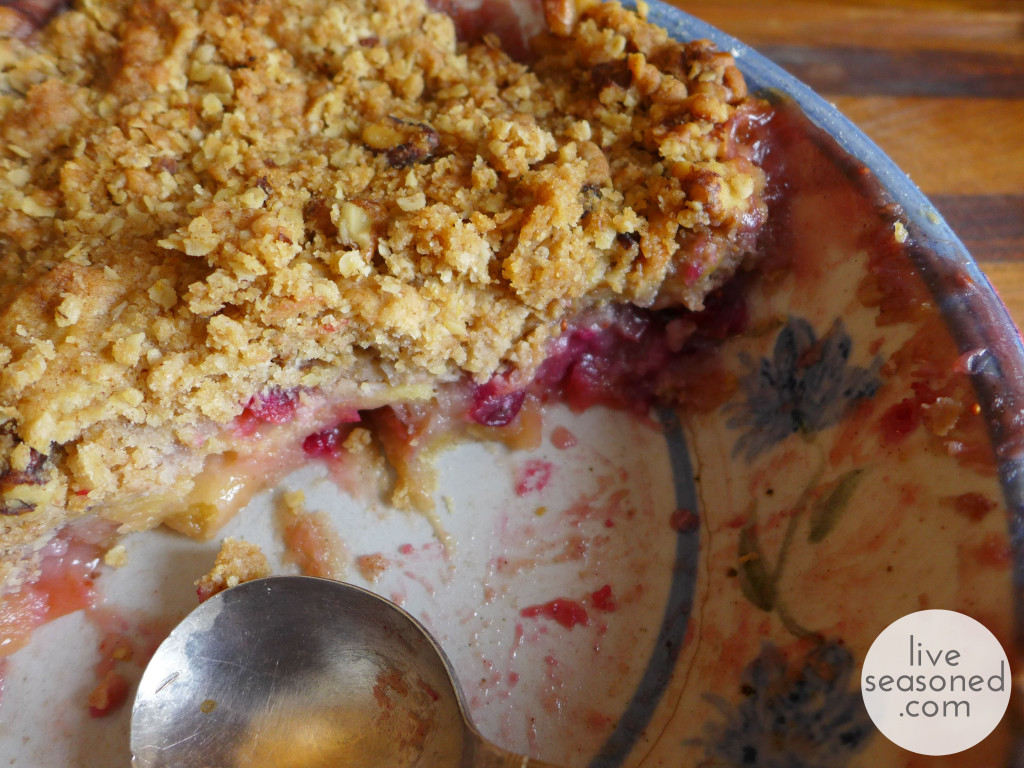
This recipe is easily customizable. You can begin by keeping or skipping the cranberries and/or walnuts. You can replace the water in the filling with apple cider or orange juice. You can play with the spice combinations and amounts. But whatever you do, don’t forget the vanilla ice cream (and yogurt for breakfast!).
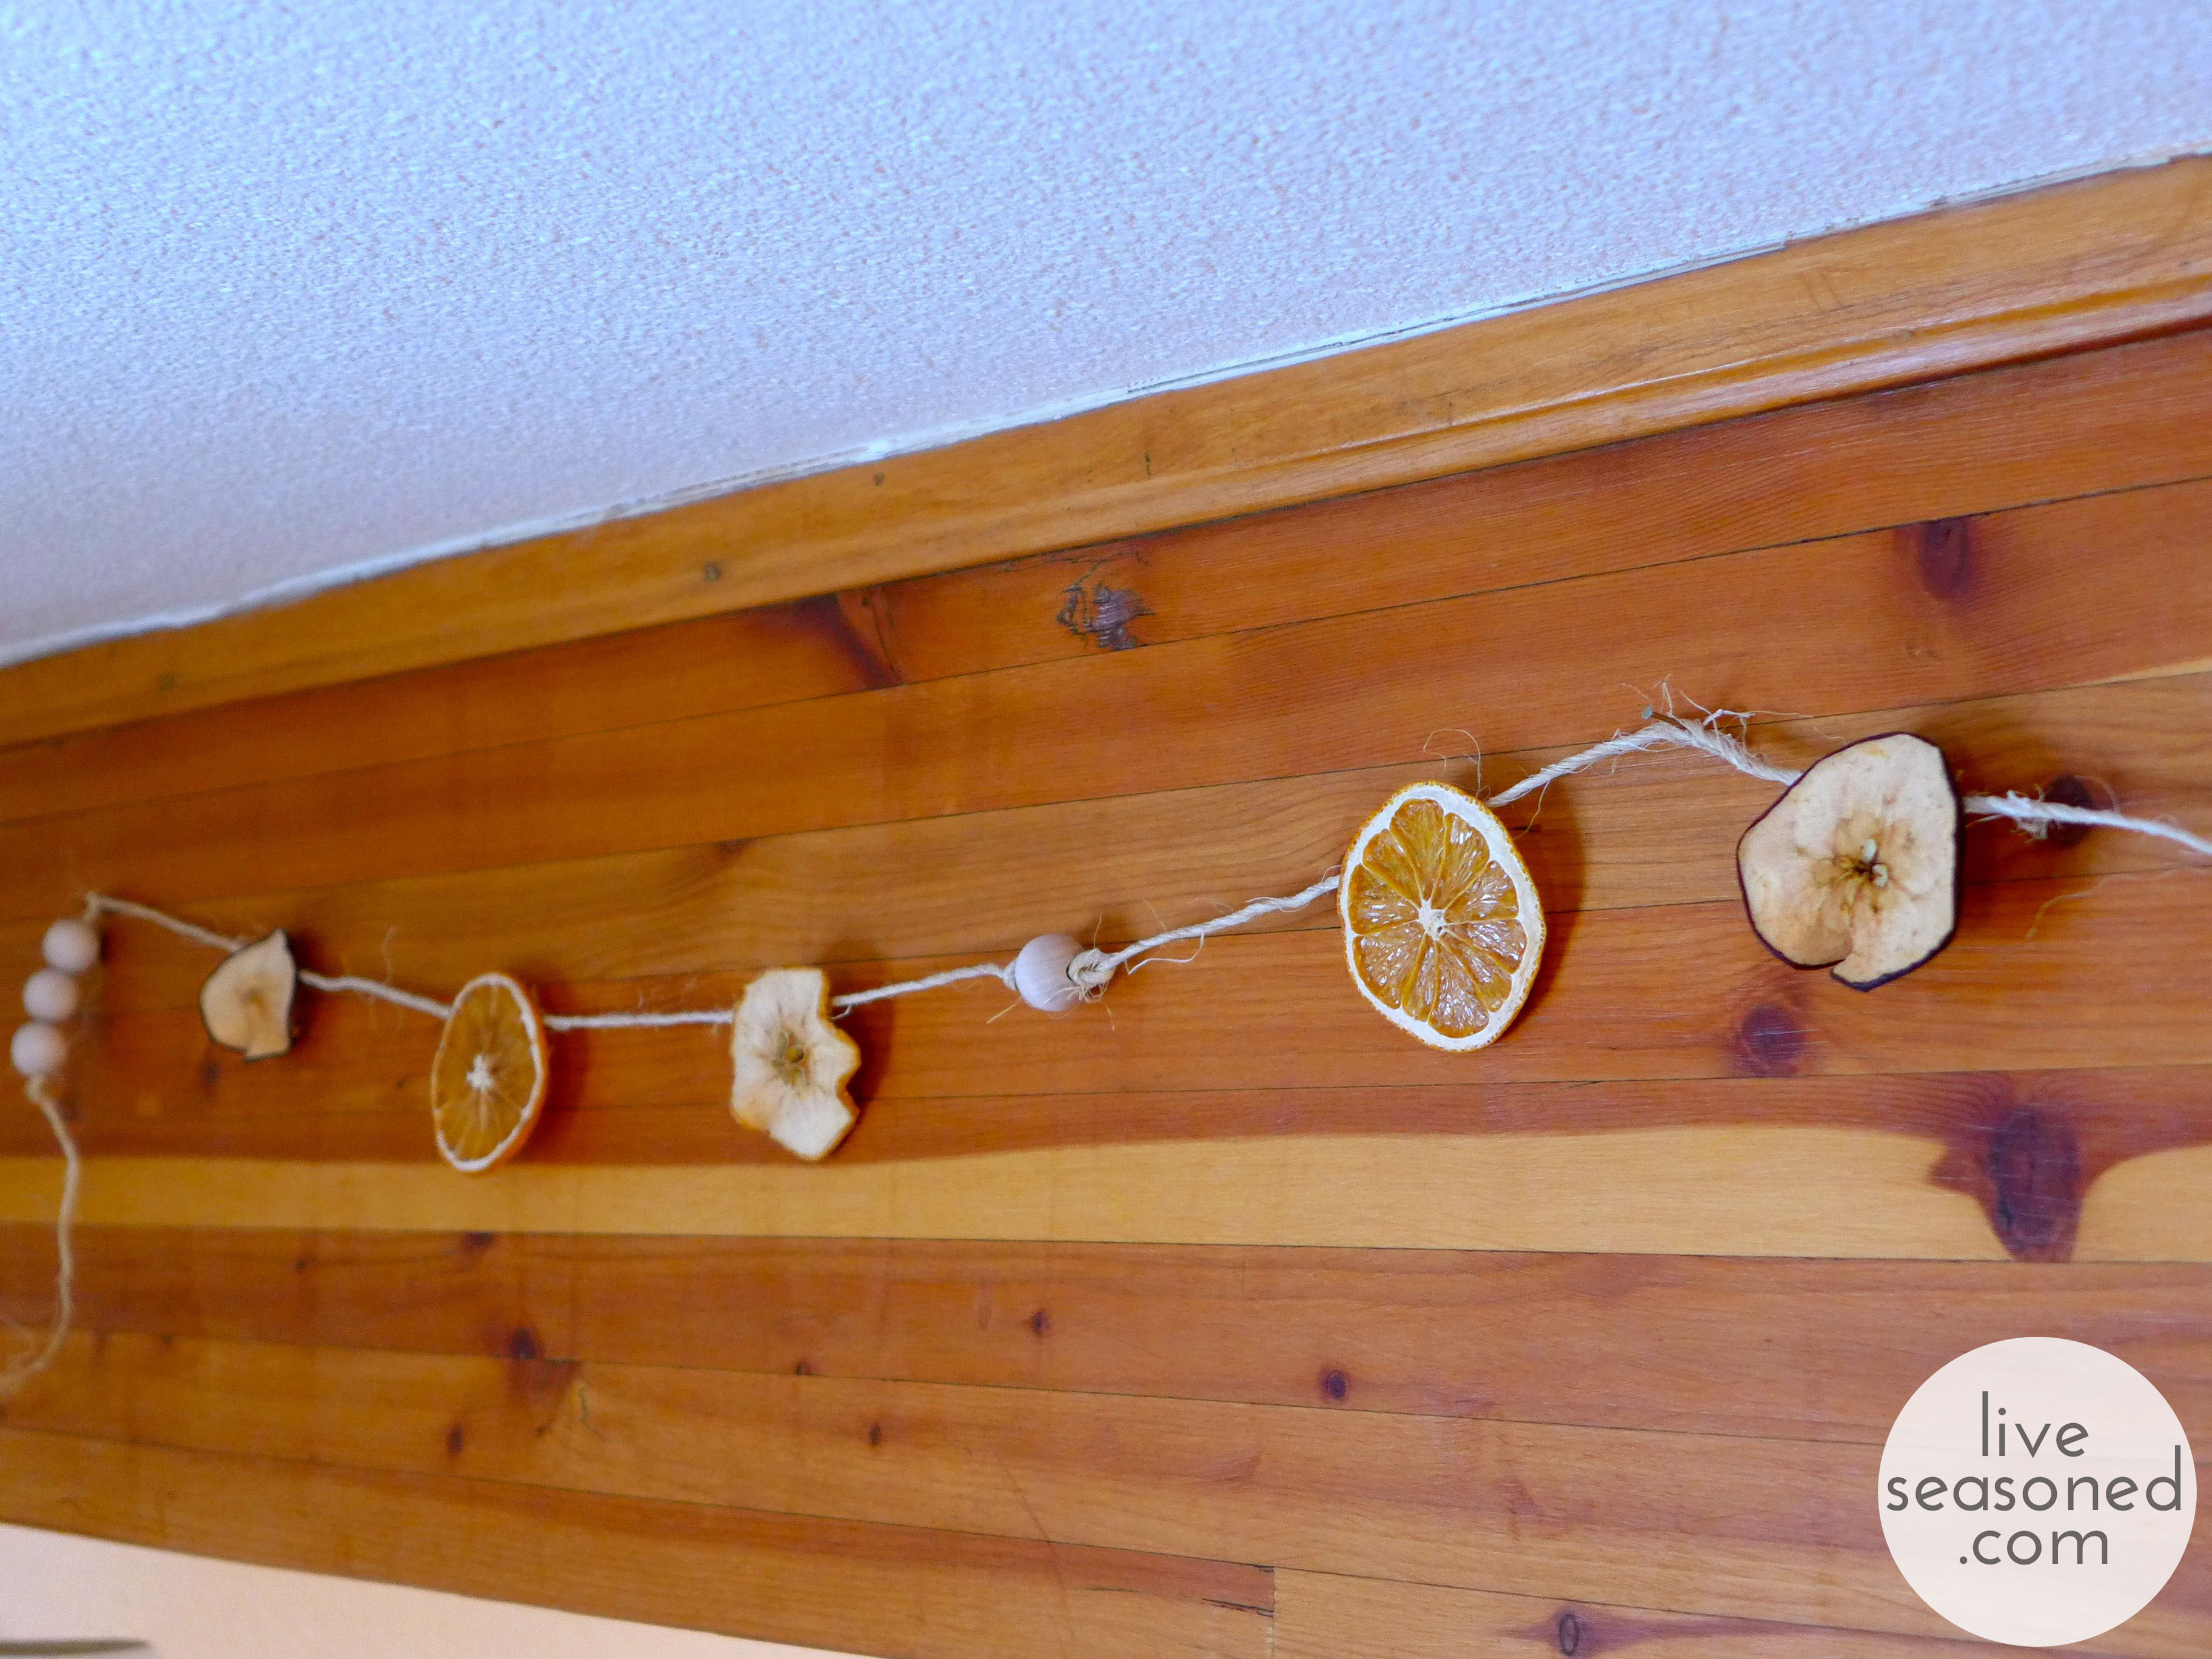
This year, after taking down our Halloween decorations and while waiting to up a Christmas tree, I was really feeling the urge to decorate. So I put together this simple garland that’s a snap to make, celebrates the bounty of the season, and is perfectly suited for my need to add a little touch of something to our November walls.
This project requires relatively few supplies, but as with everything we do around here, the garland is easily customizable, so look around your craft room and get creative!
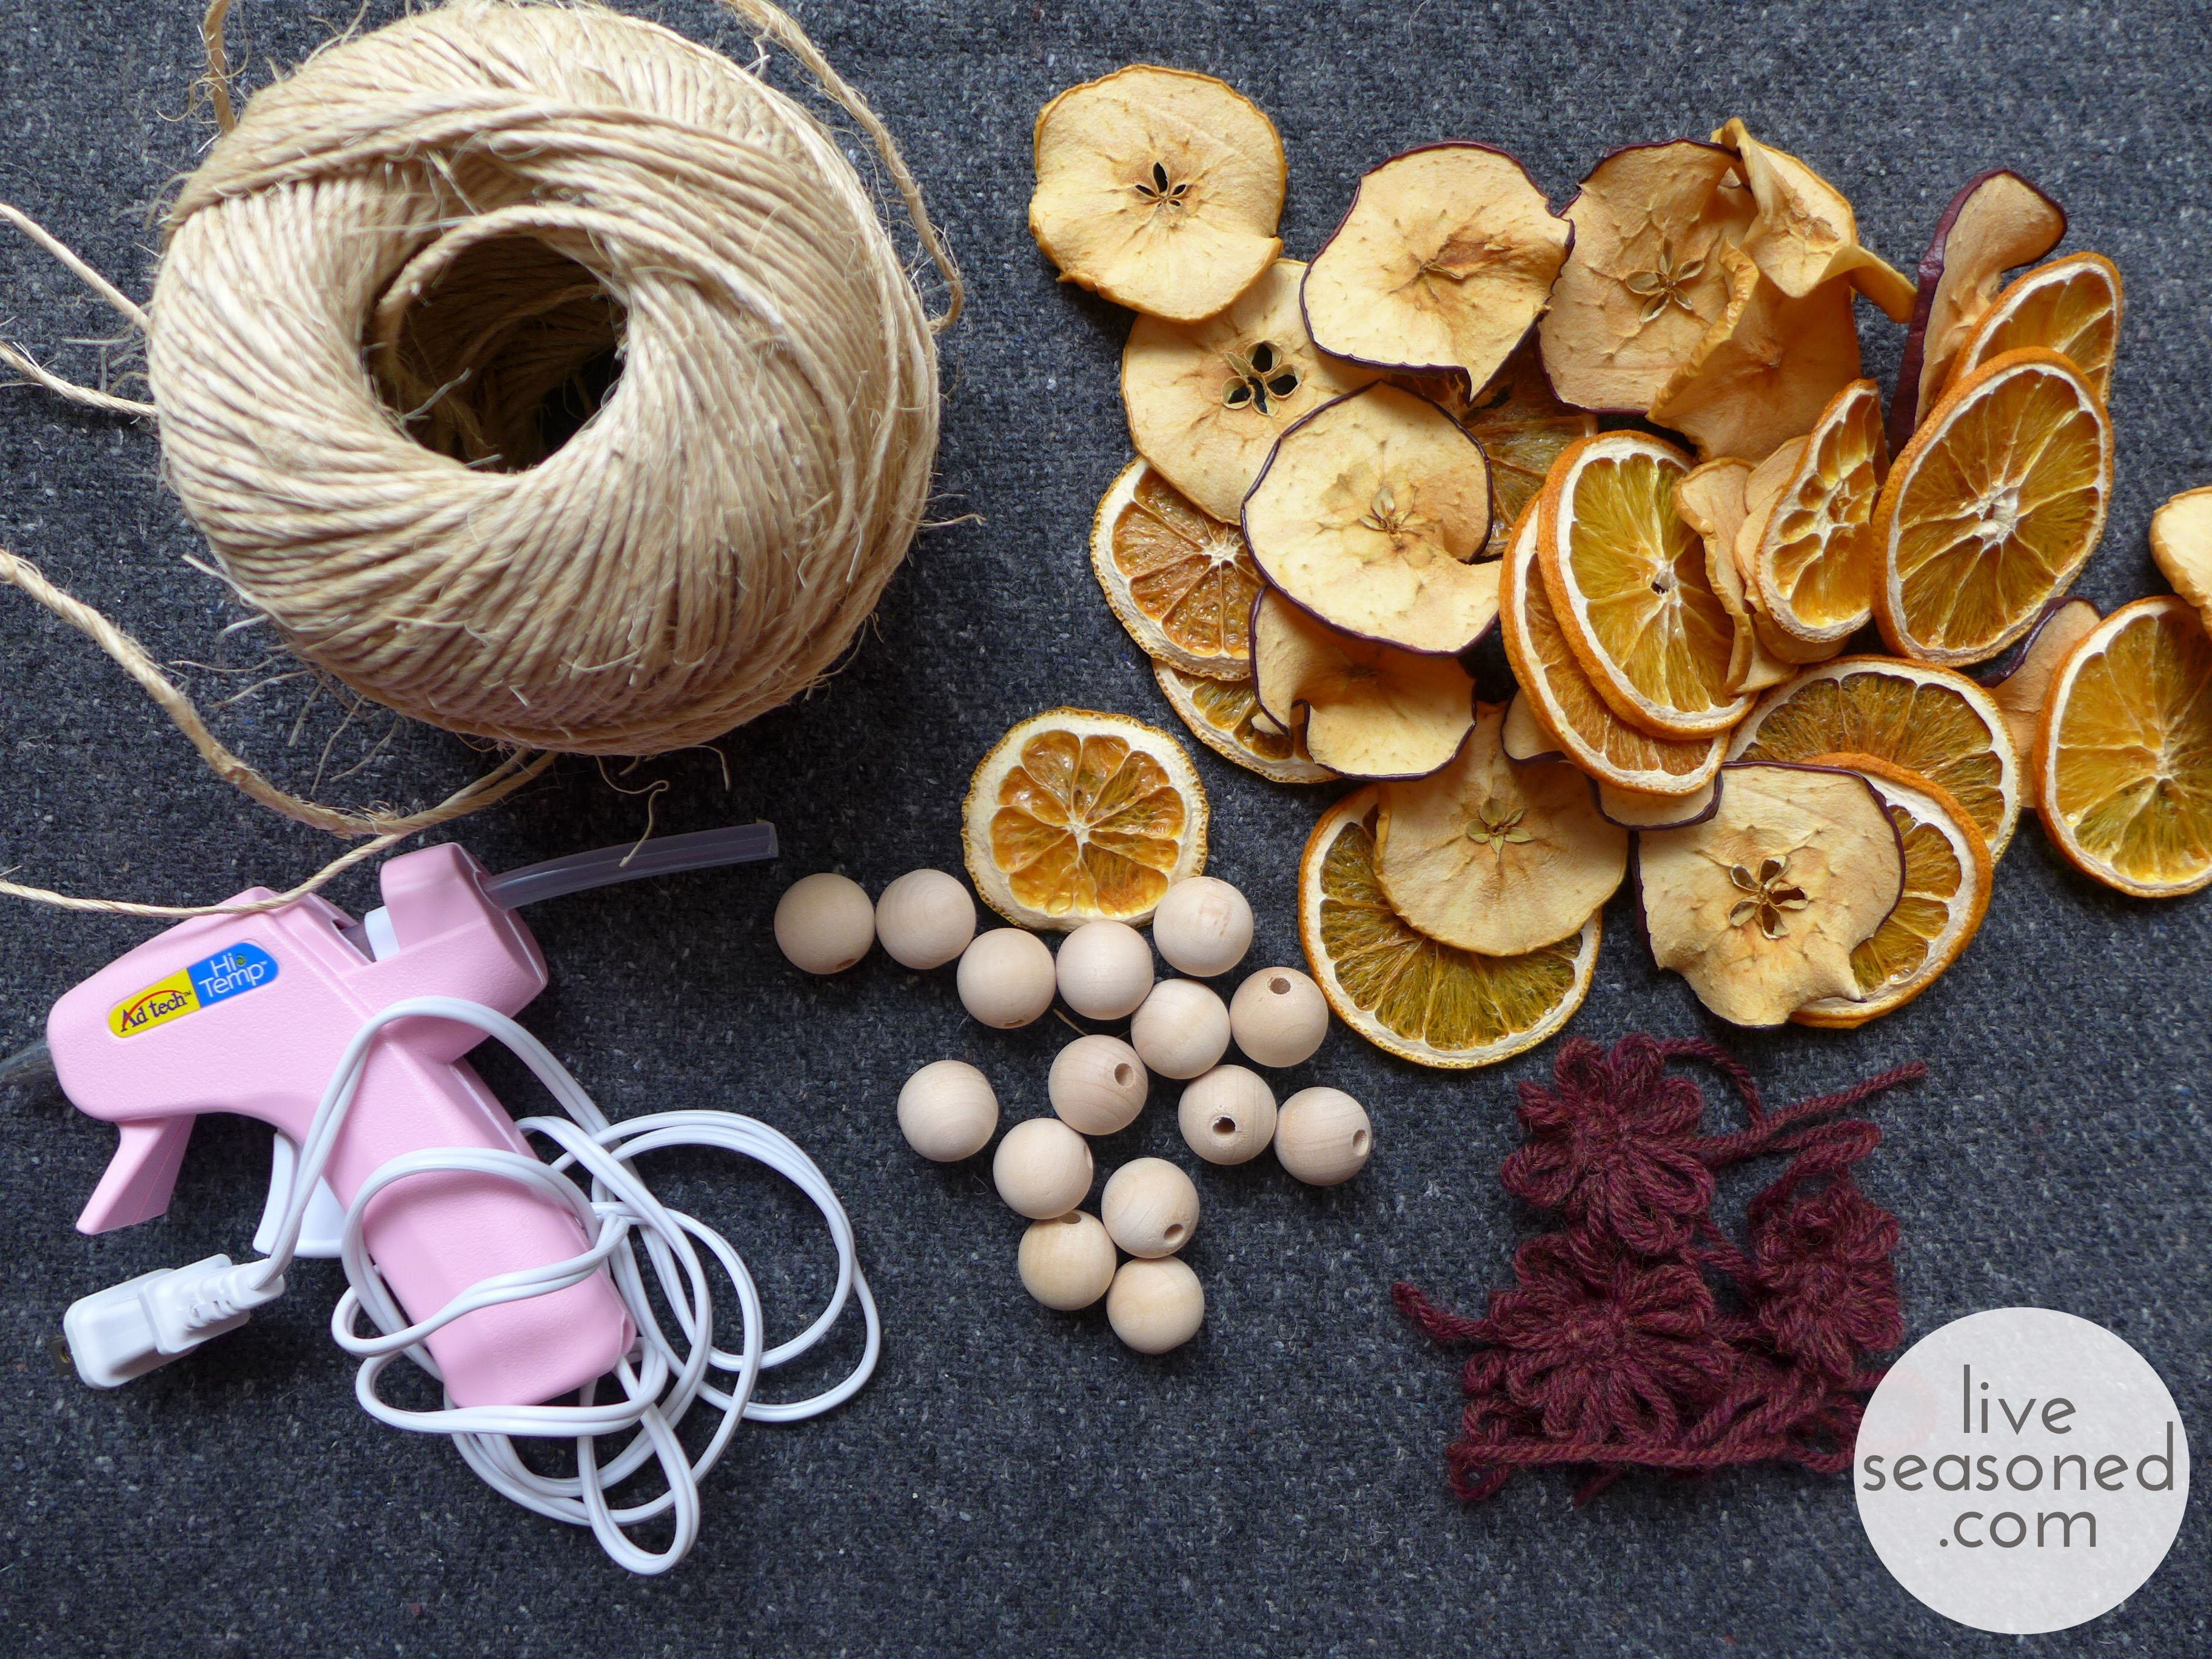
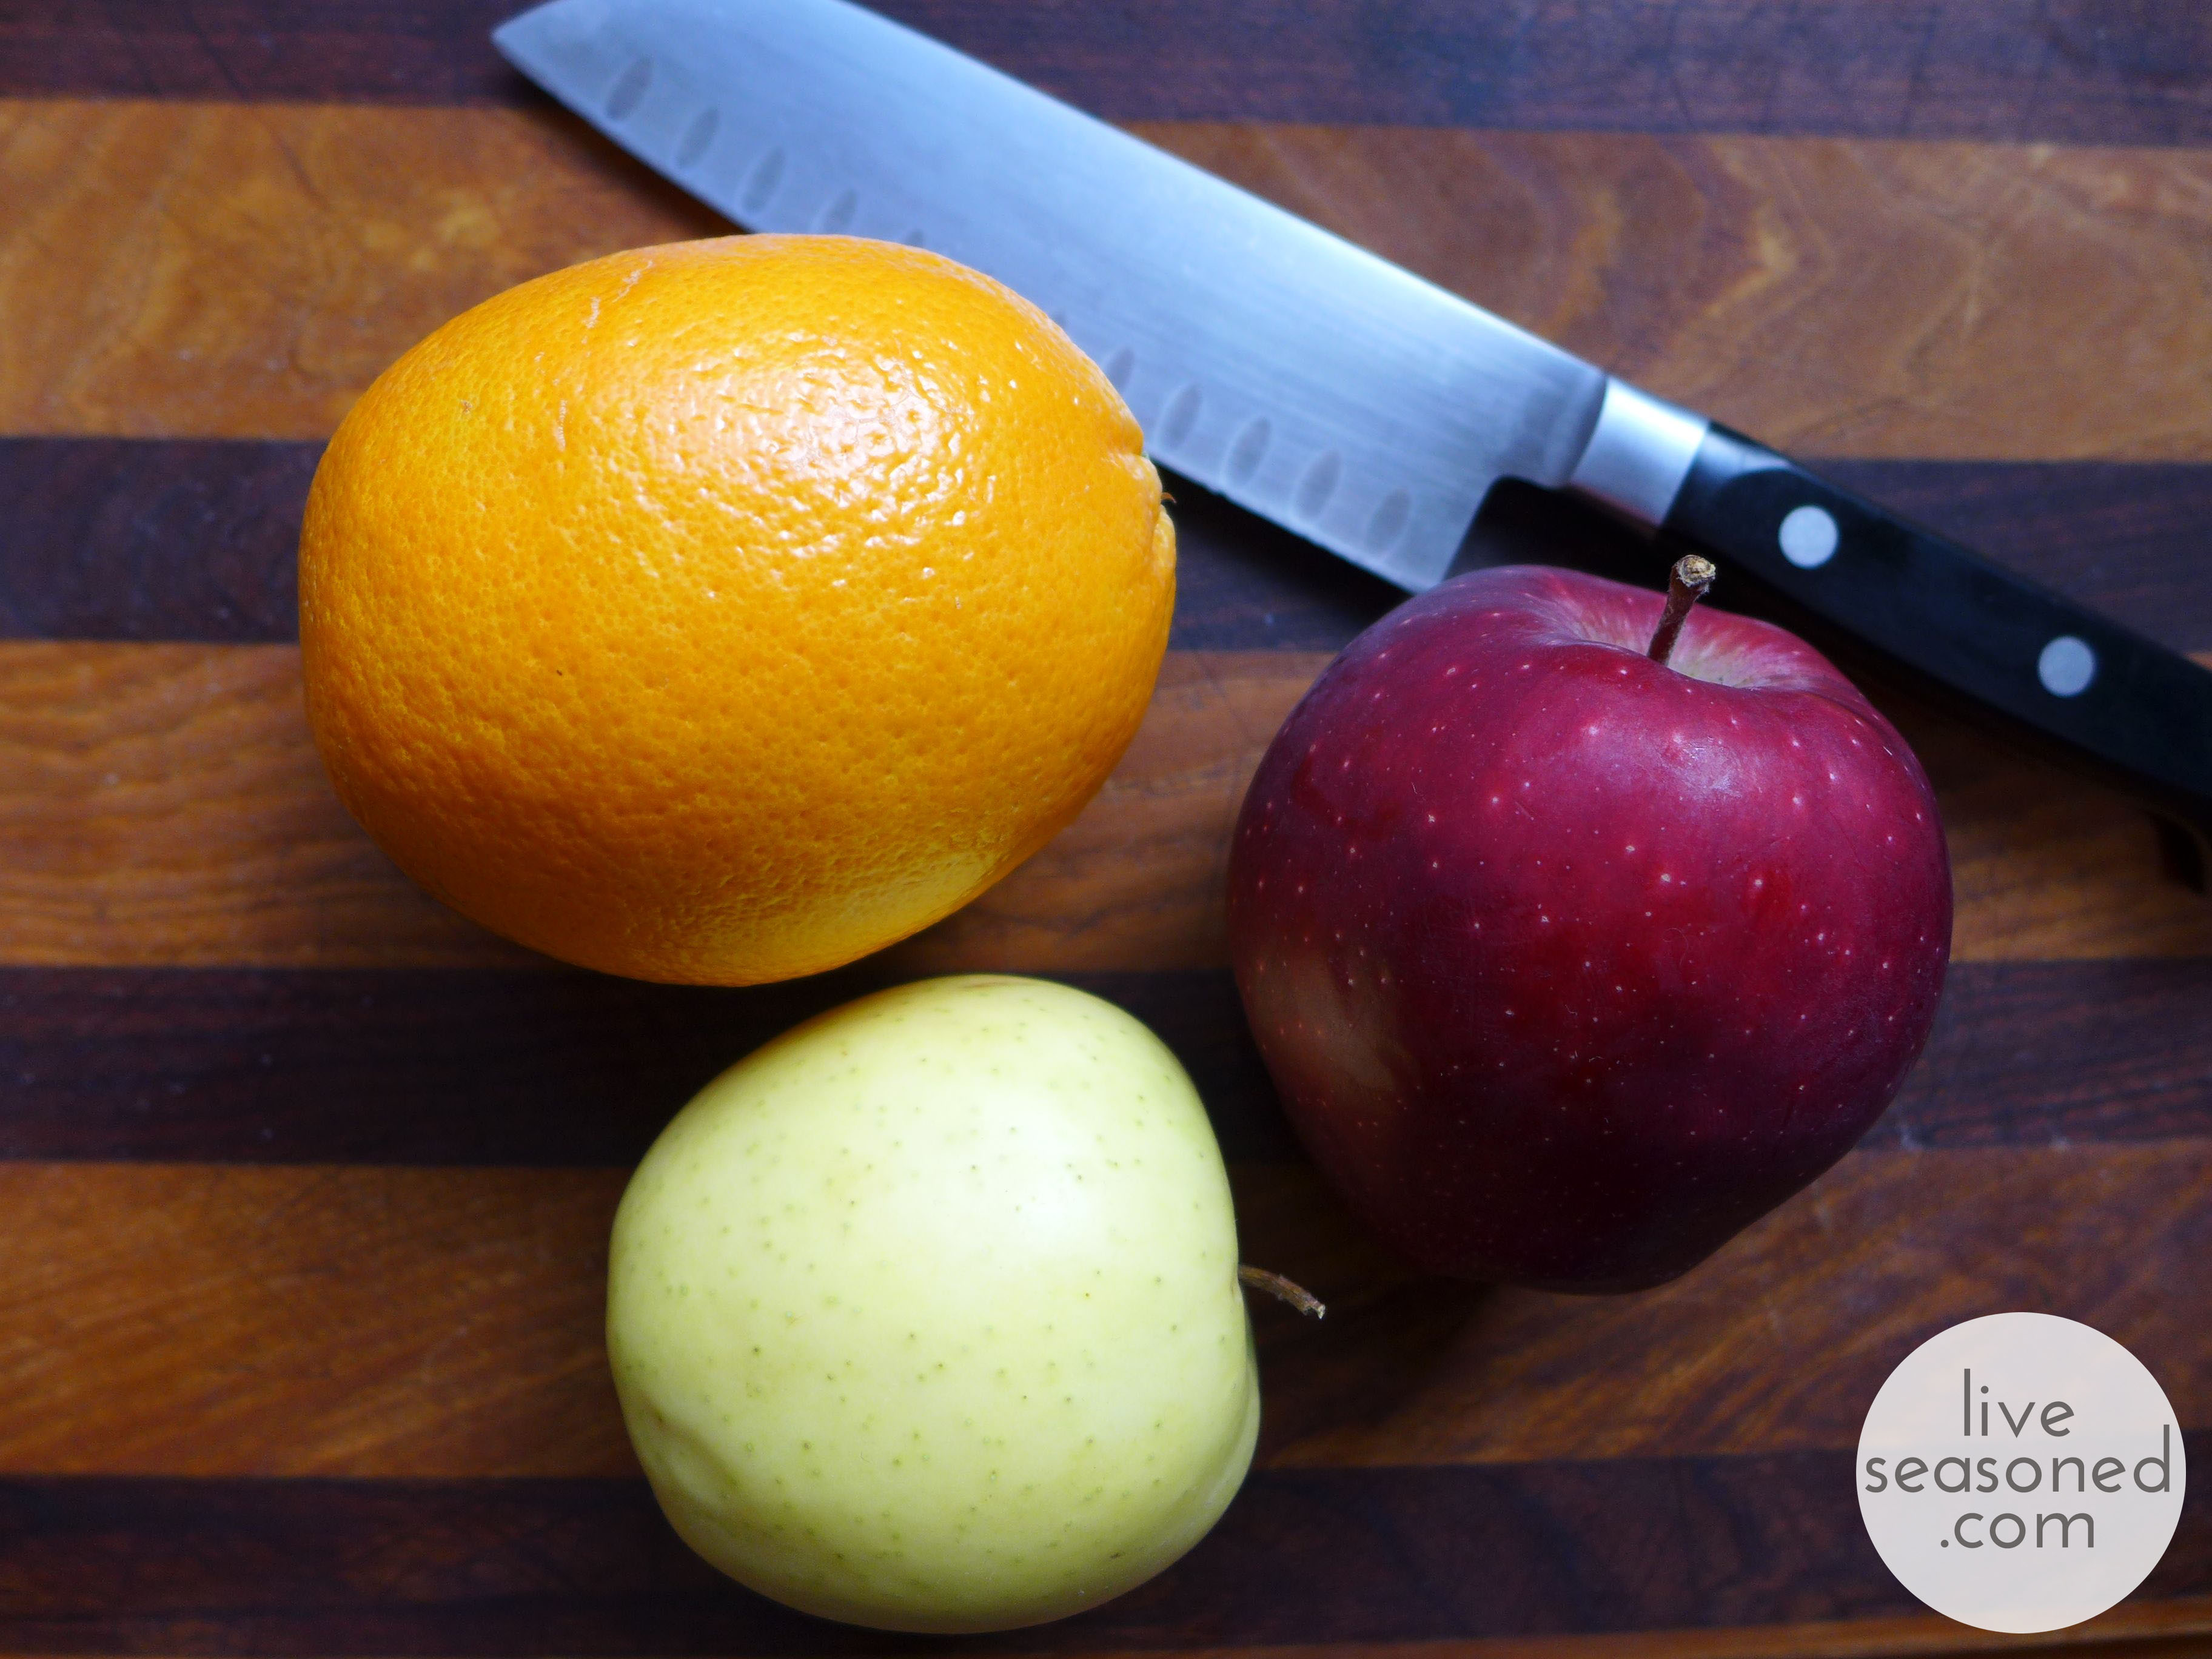
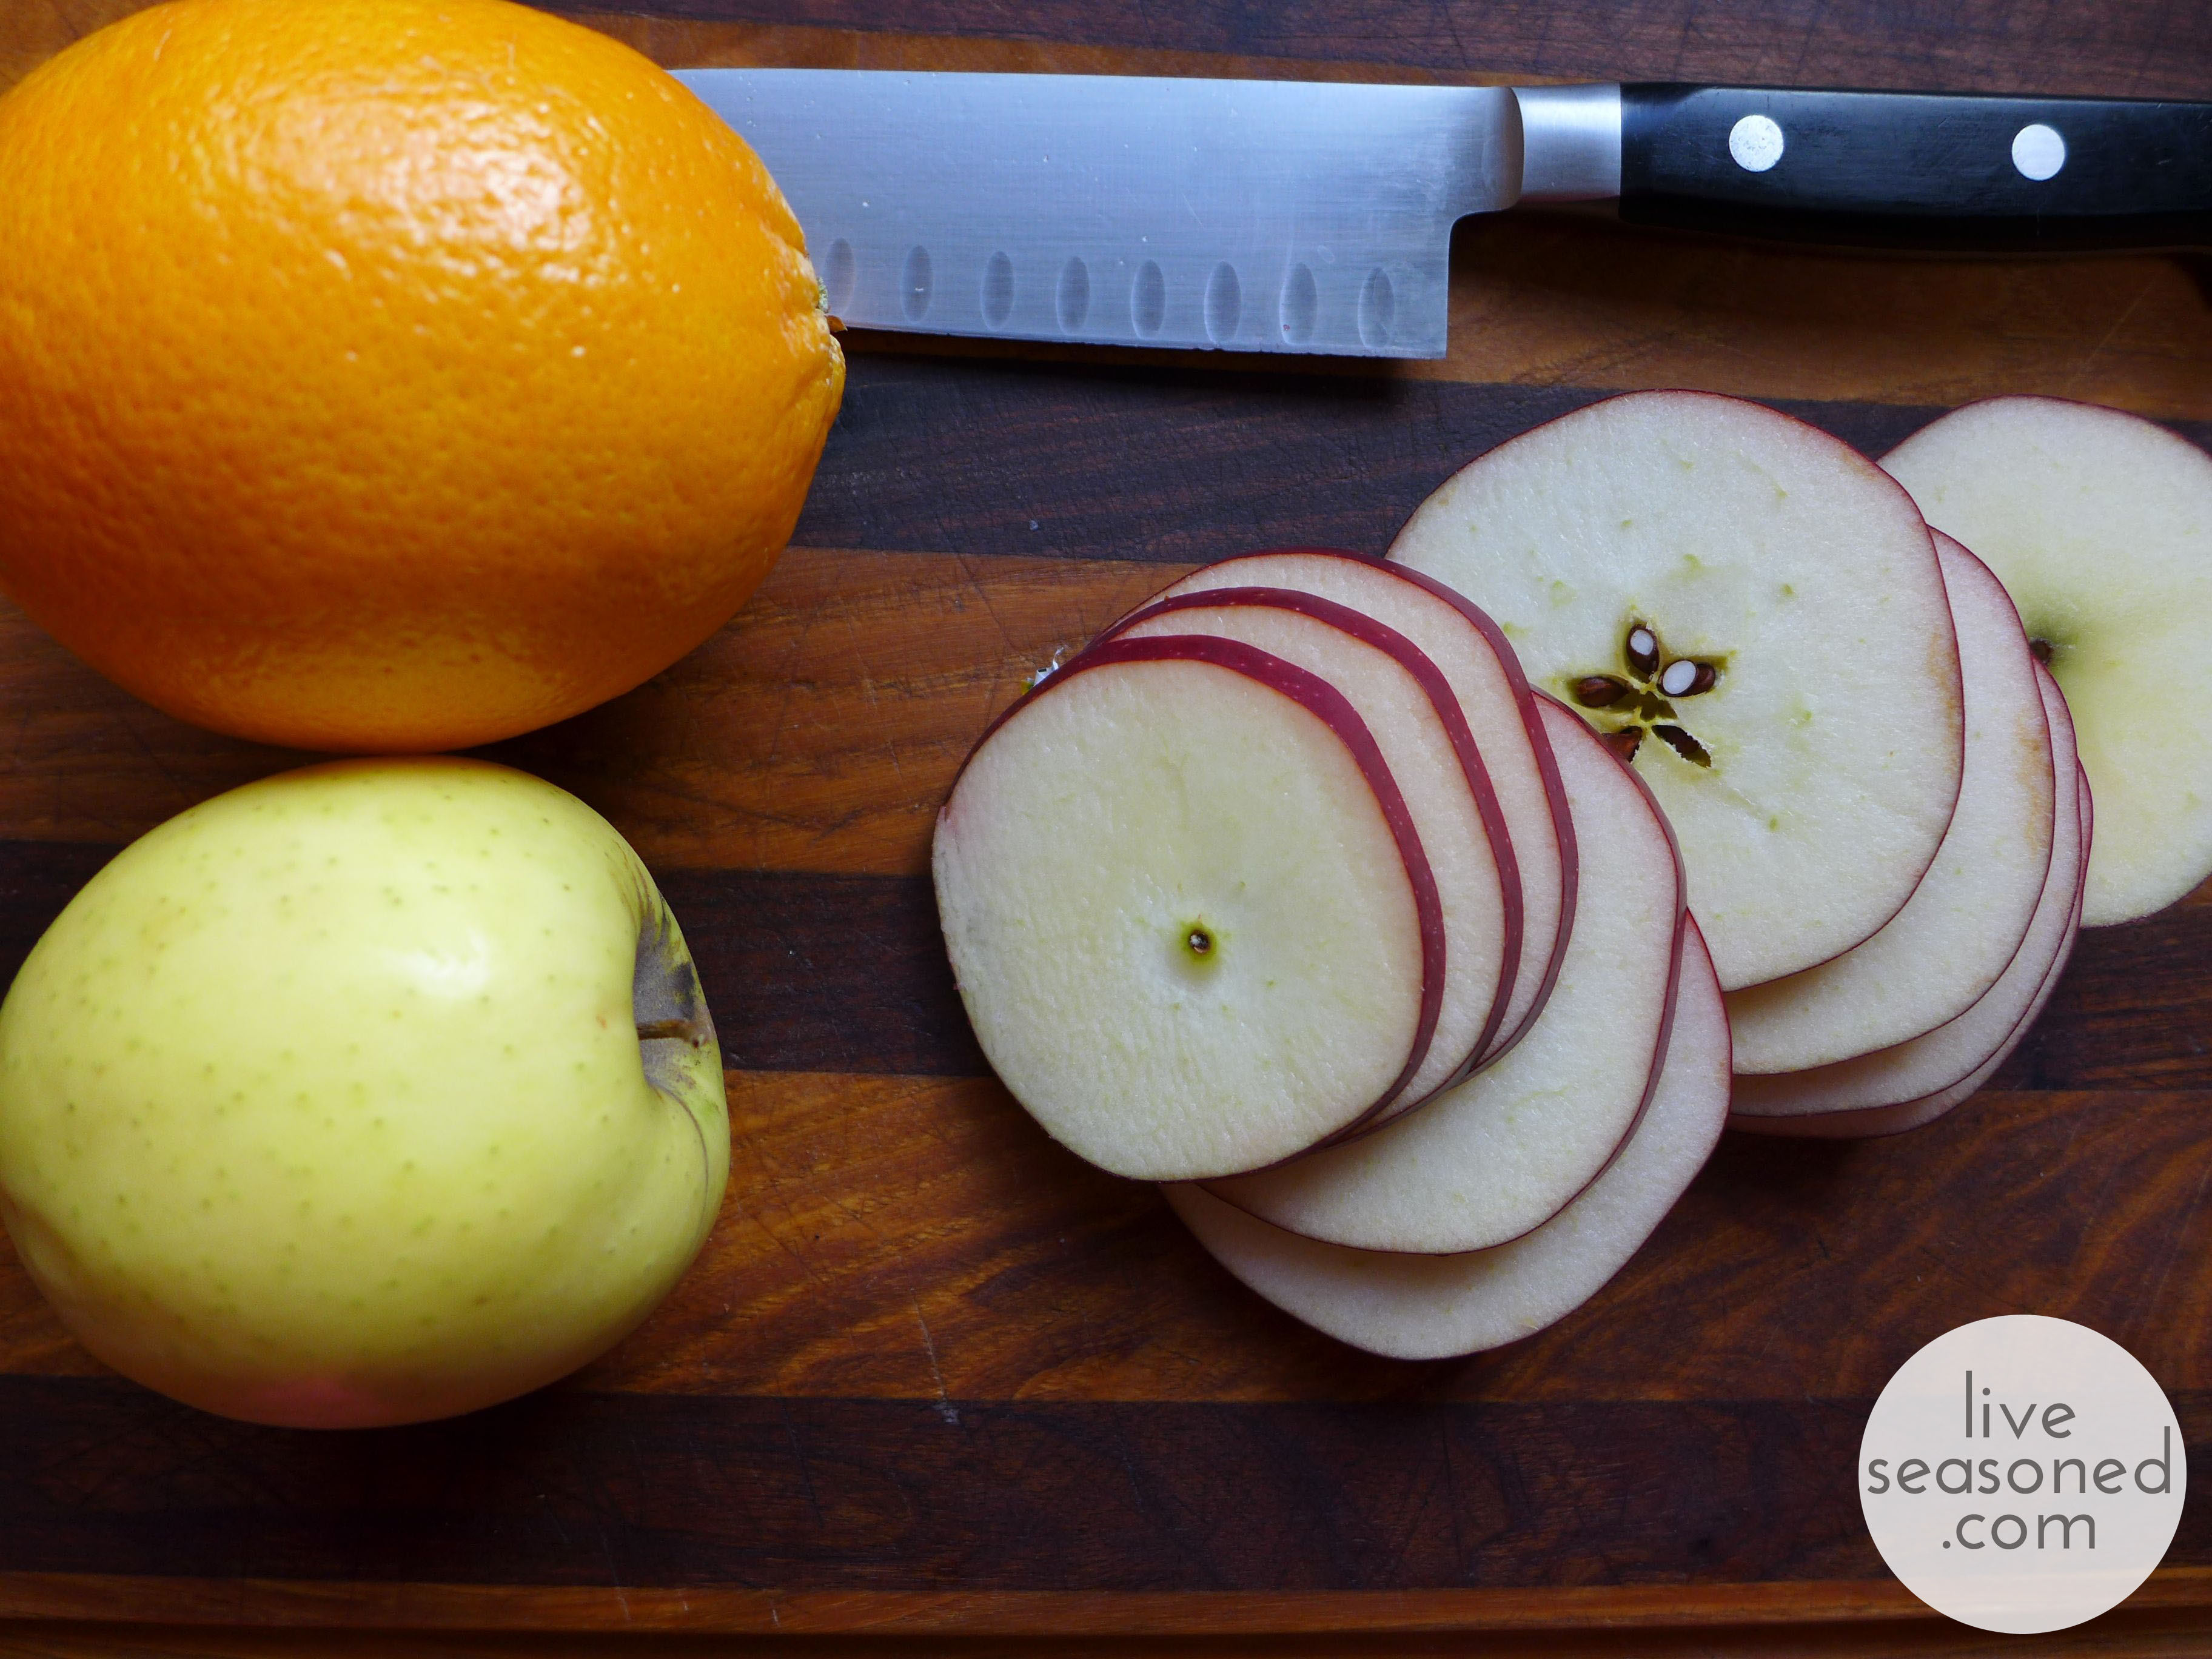
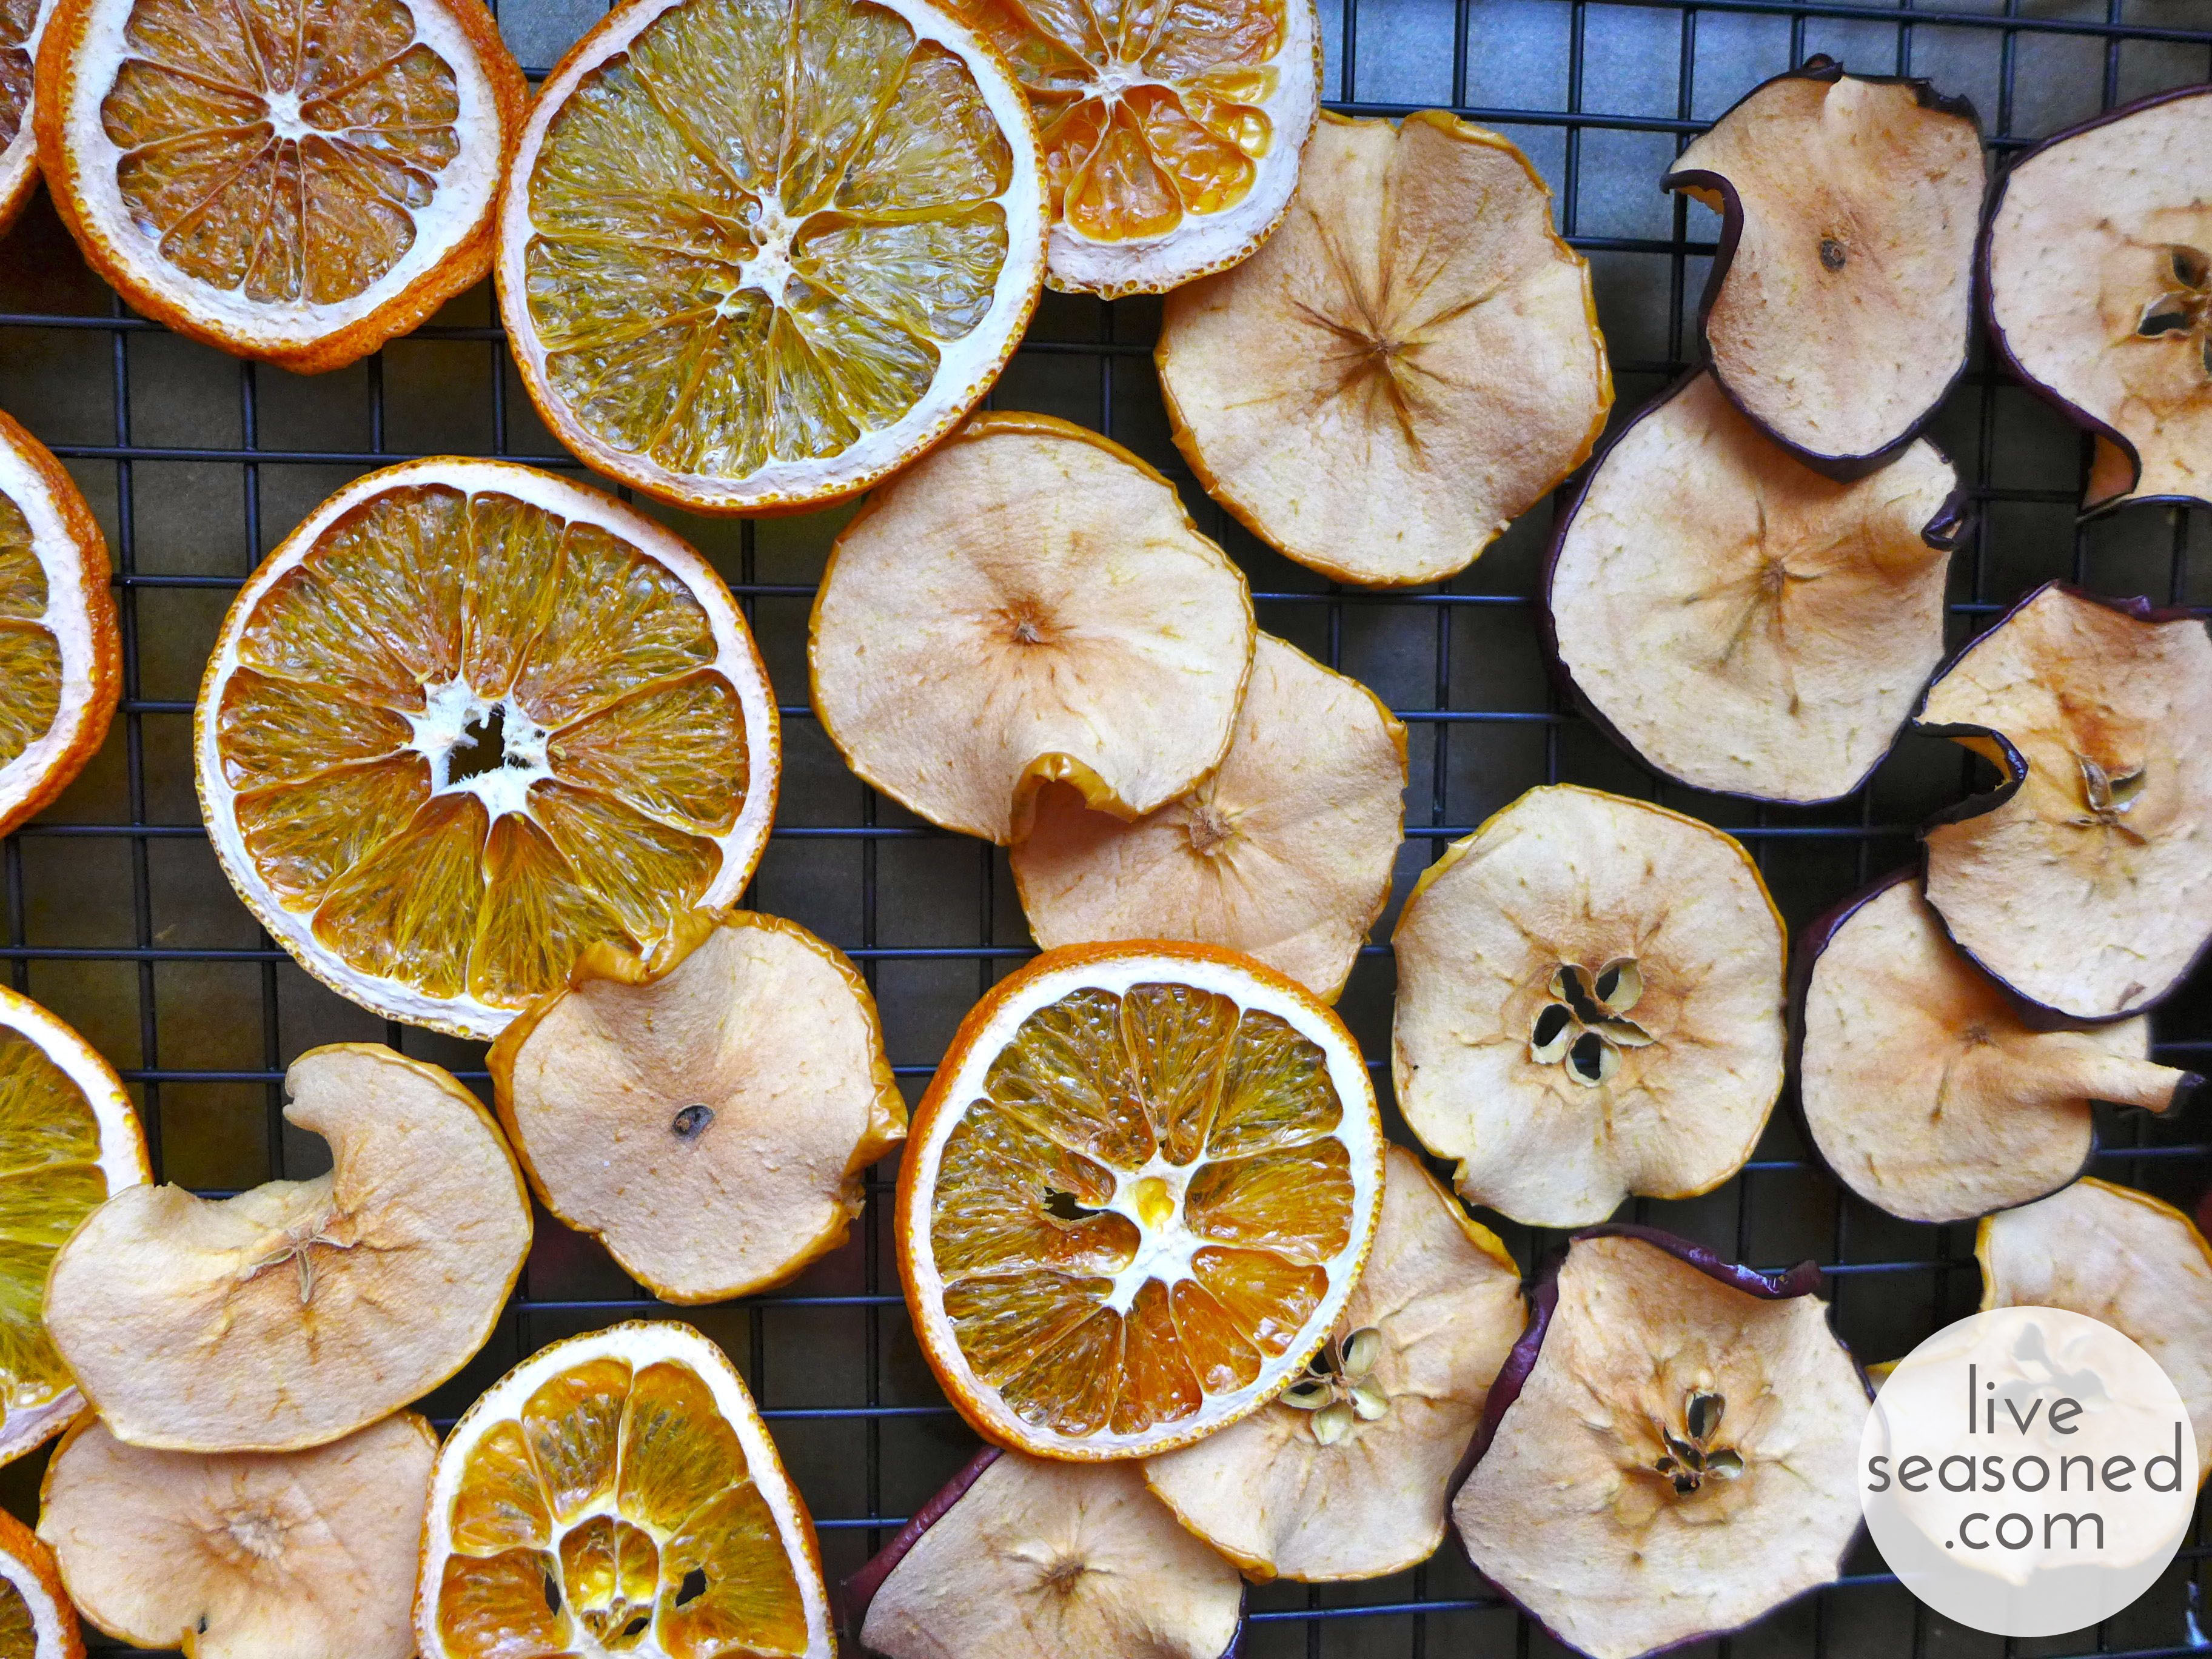
I began the project by slicing and drying three pieces of fruit: red and gold delicious apples and a seedless navel orange. The fruit were sliced into quarter inch discs. Sharpening your knife will go a long way towards helping you make even slices with nice smooth surfaces. You’ll find it difficult to cut through the seeded area of the apples, but my advice is to keep your knife horizontal (rather than pushing the point or handle ends up and down) and to saw back and forth with even pressure.
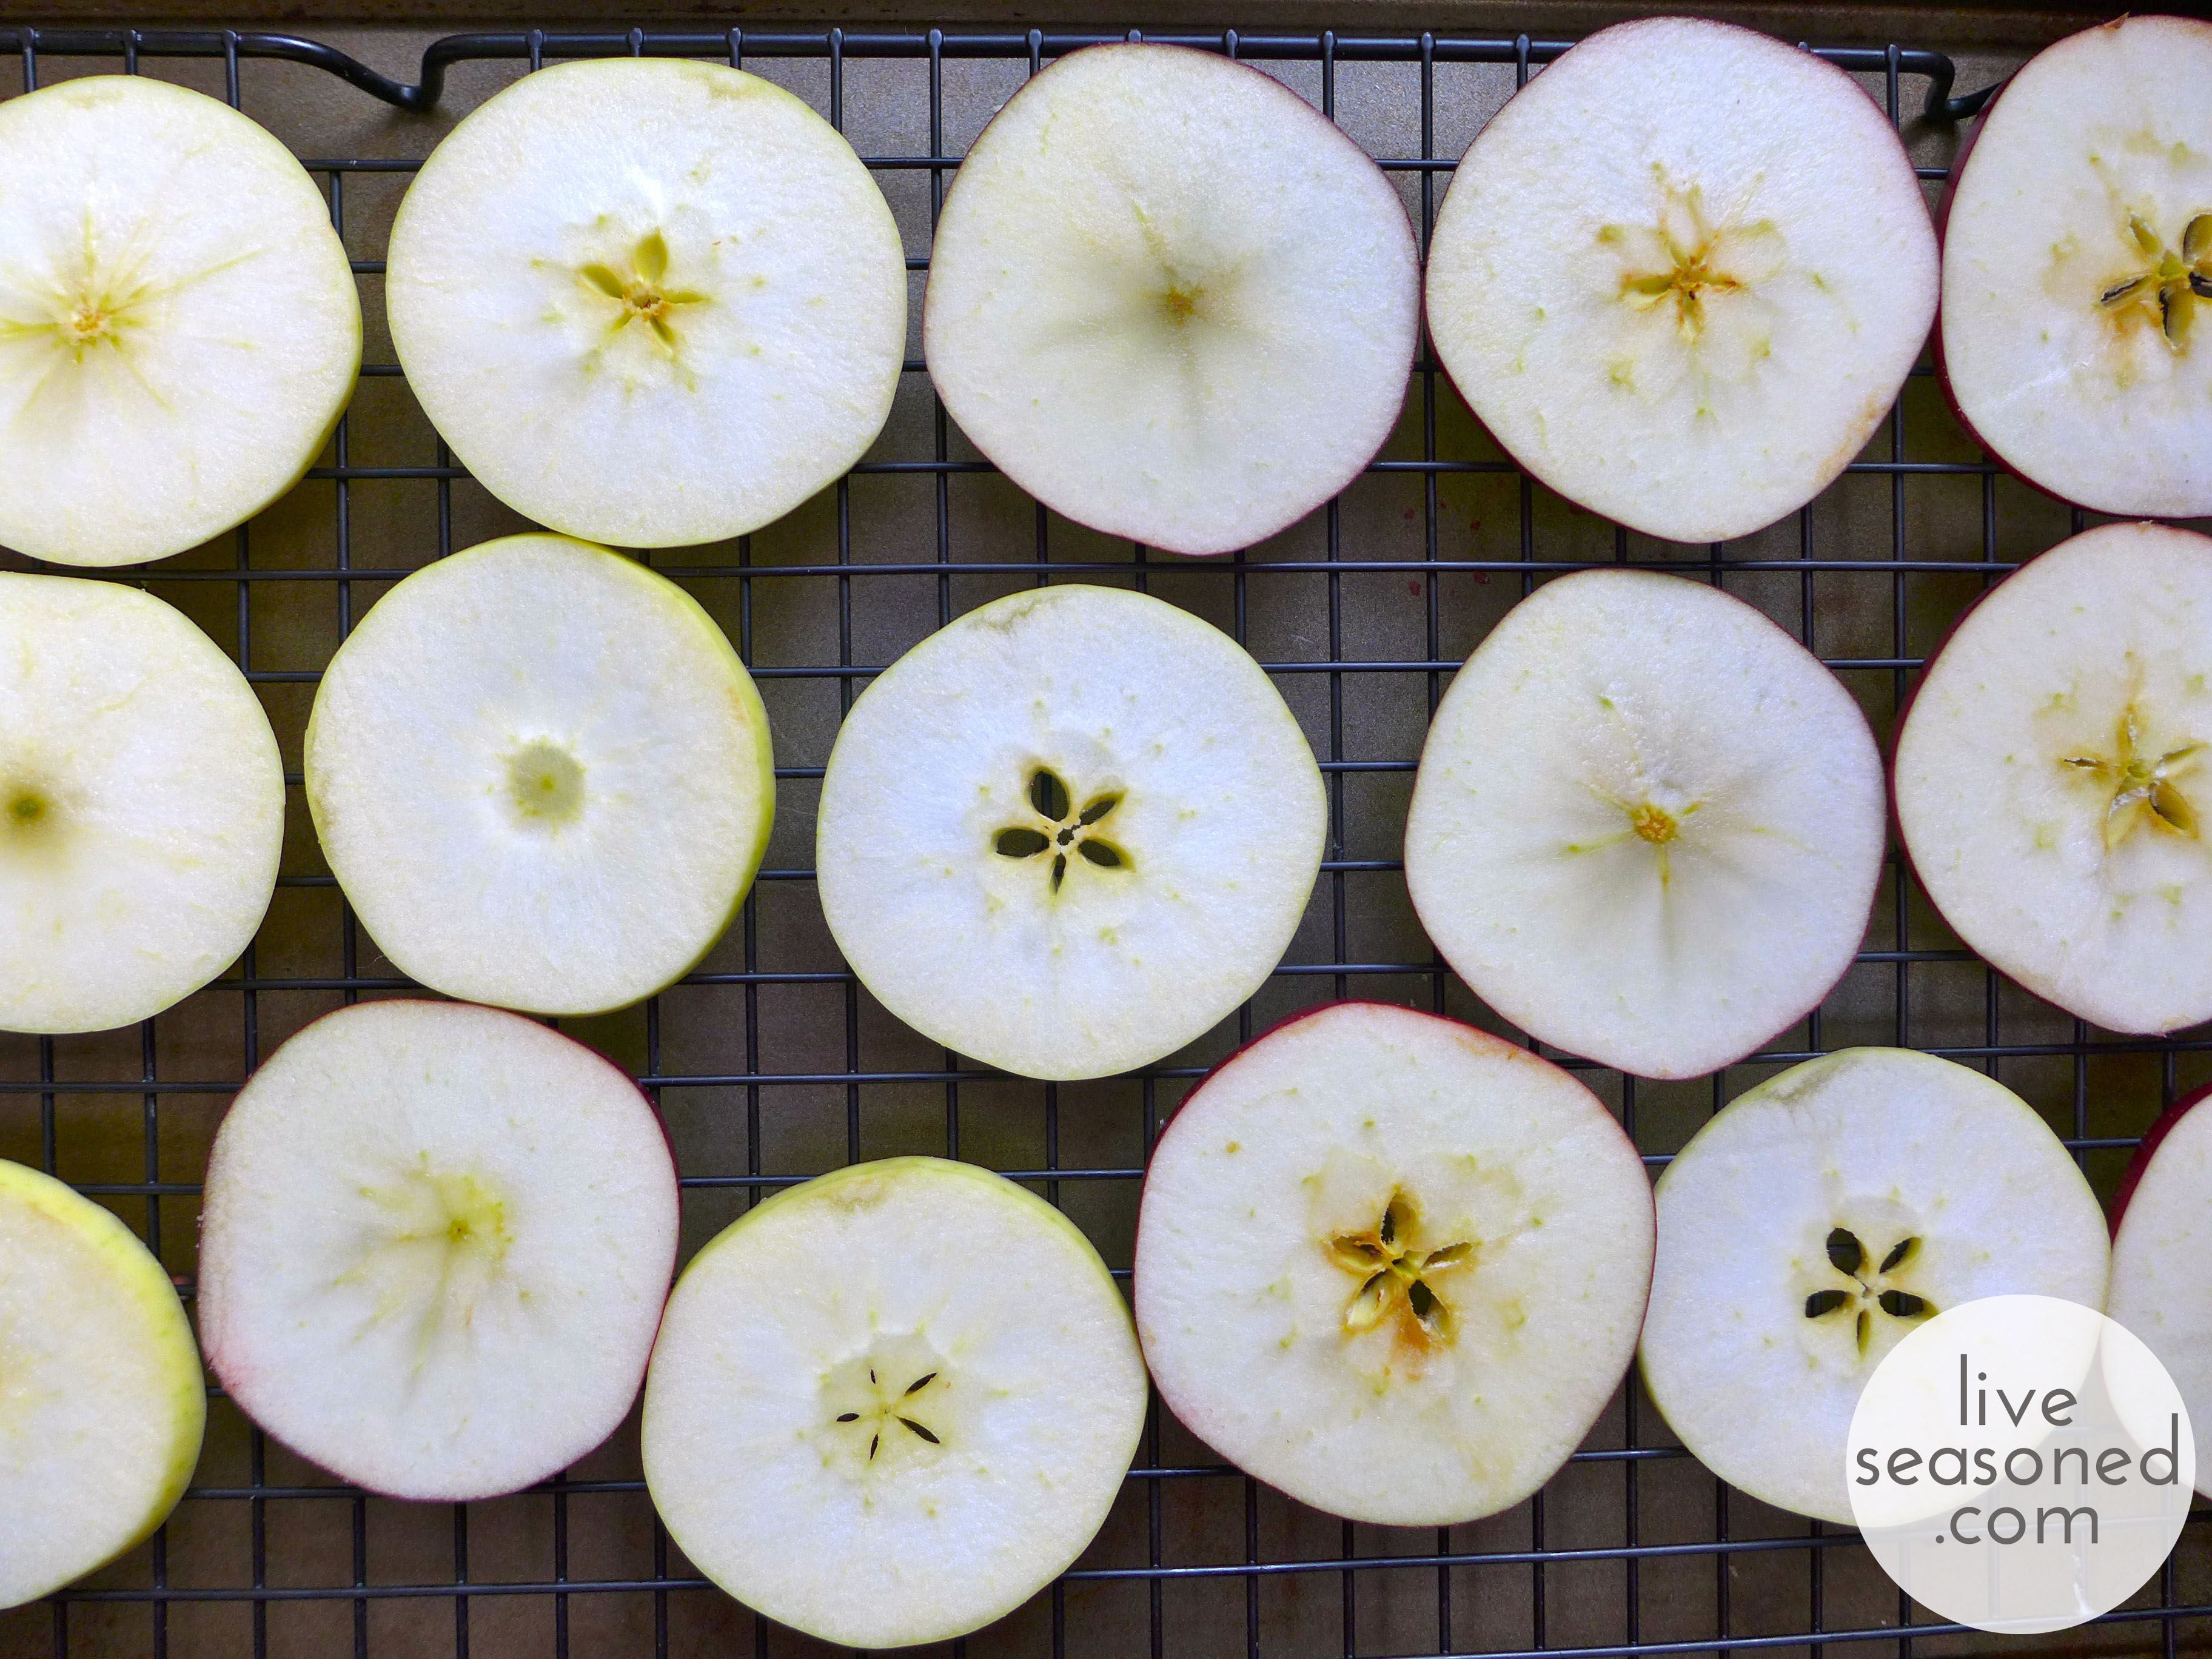
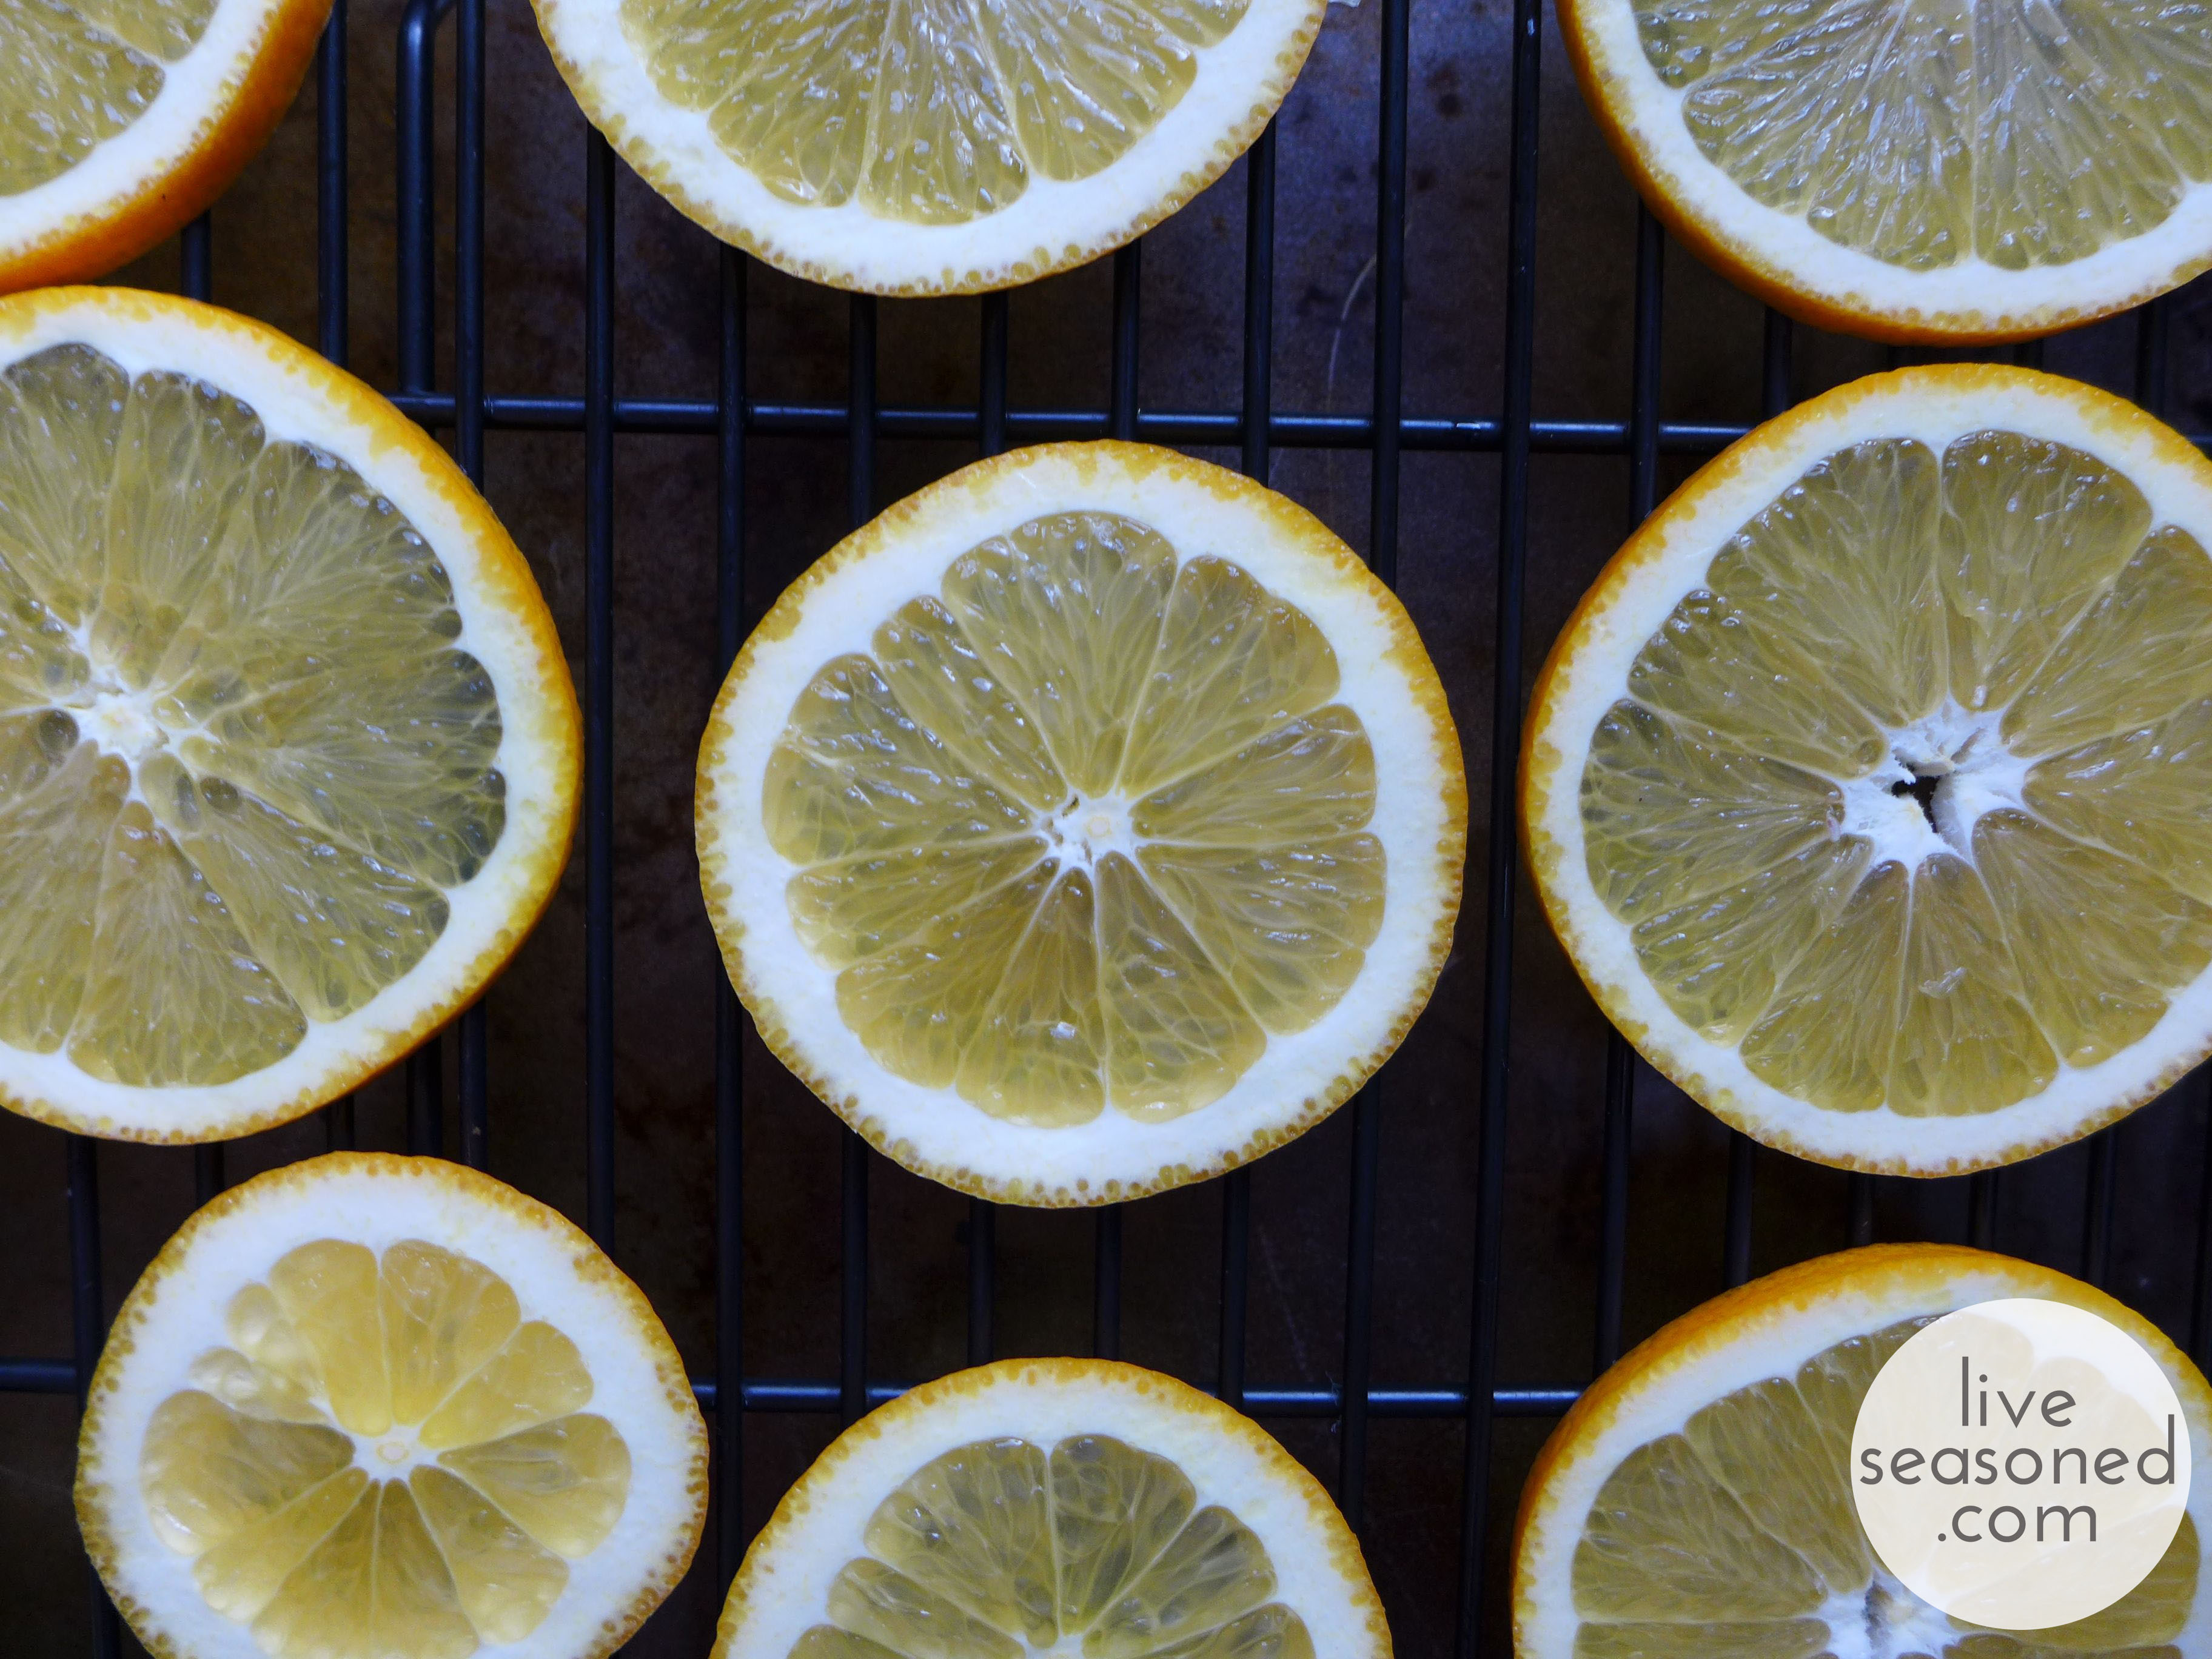
Once sliced, I removed all seeds and placed the pieces on cooling racks over cookie sheets for drying. I then dried the fruit in a 200F oven for about 5-6 hours, flipping the slices twice to help minimize curling of the fruit.
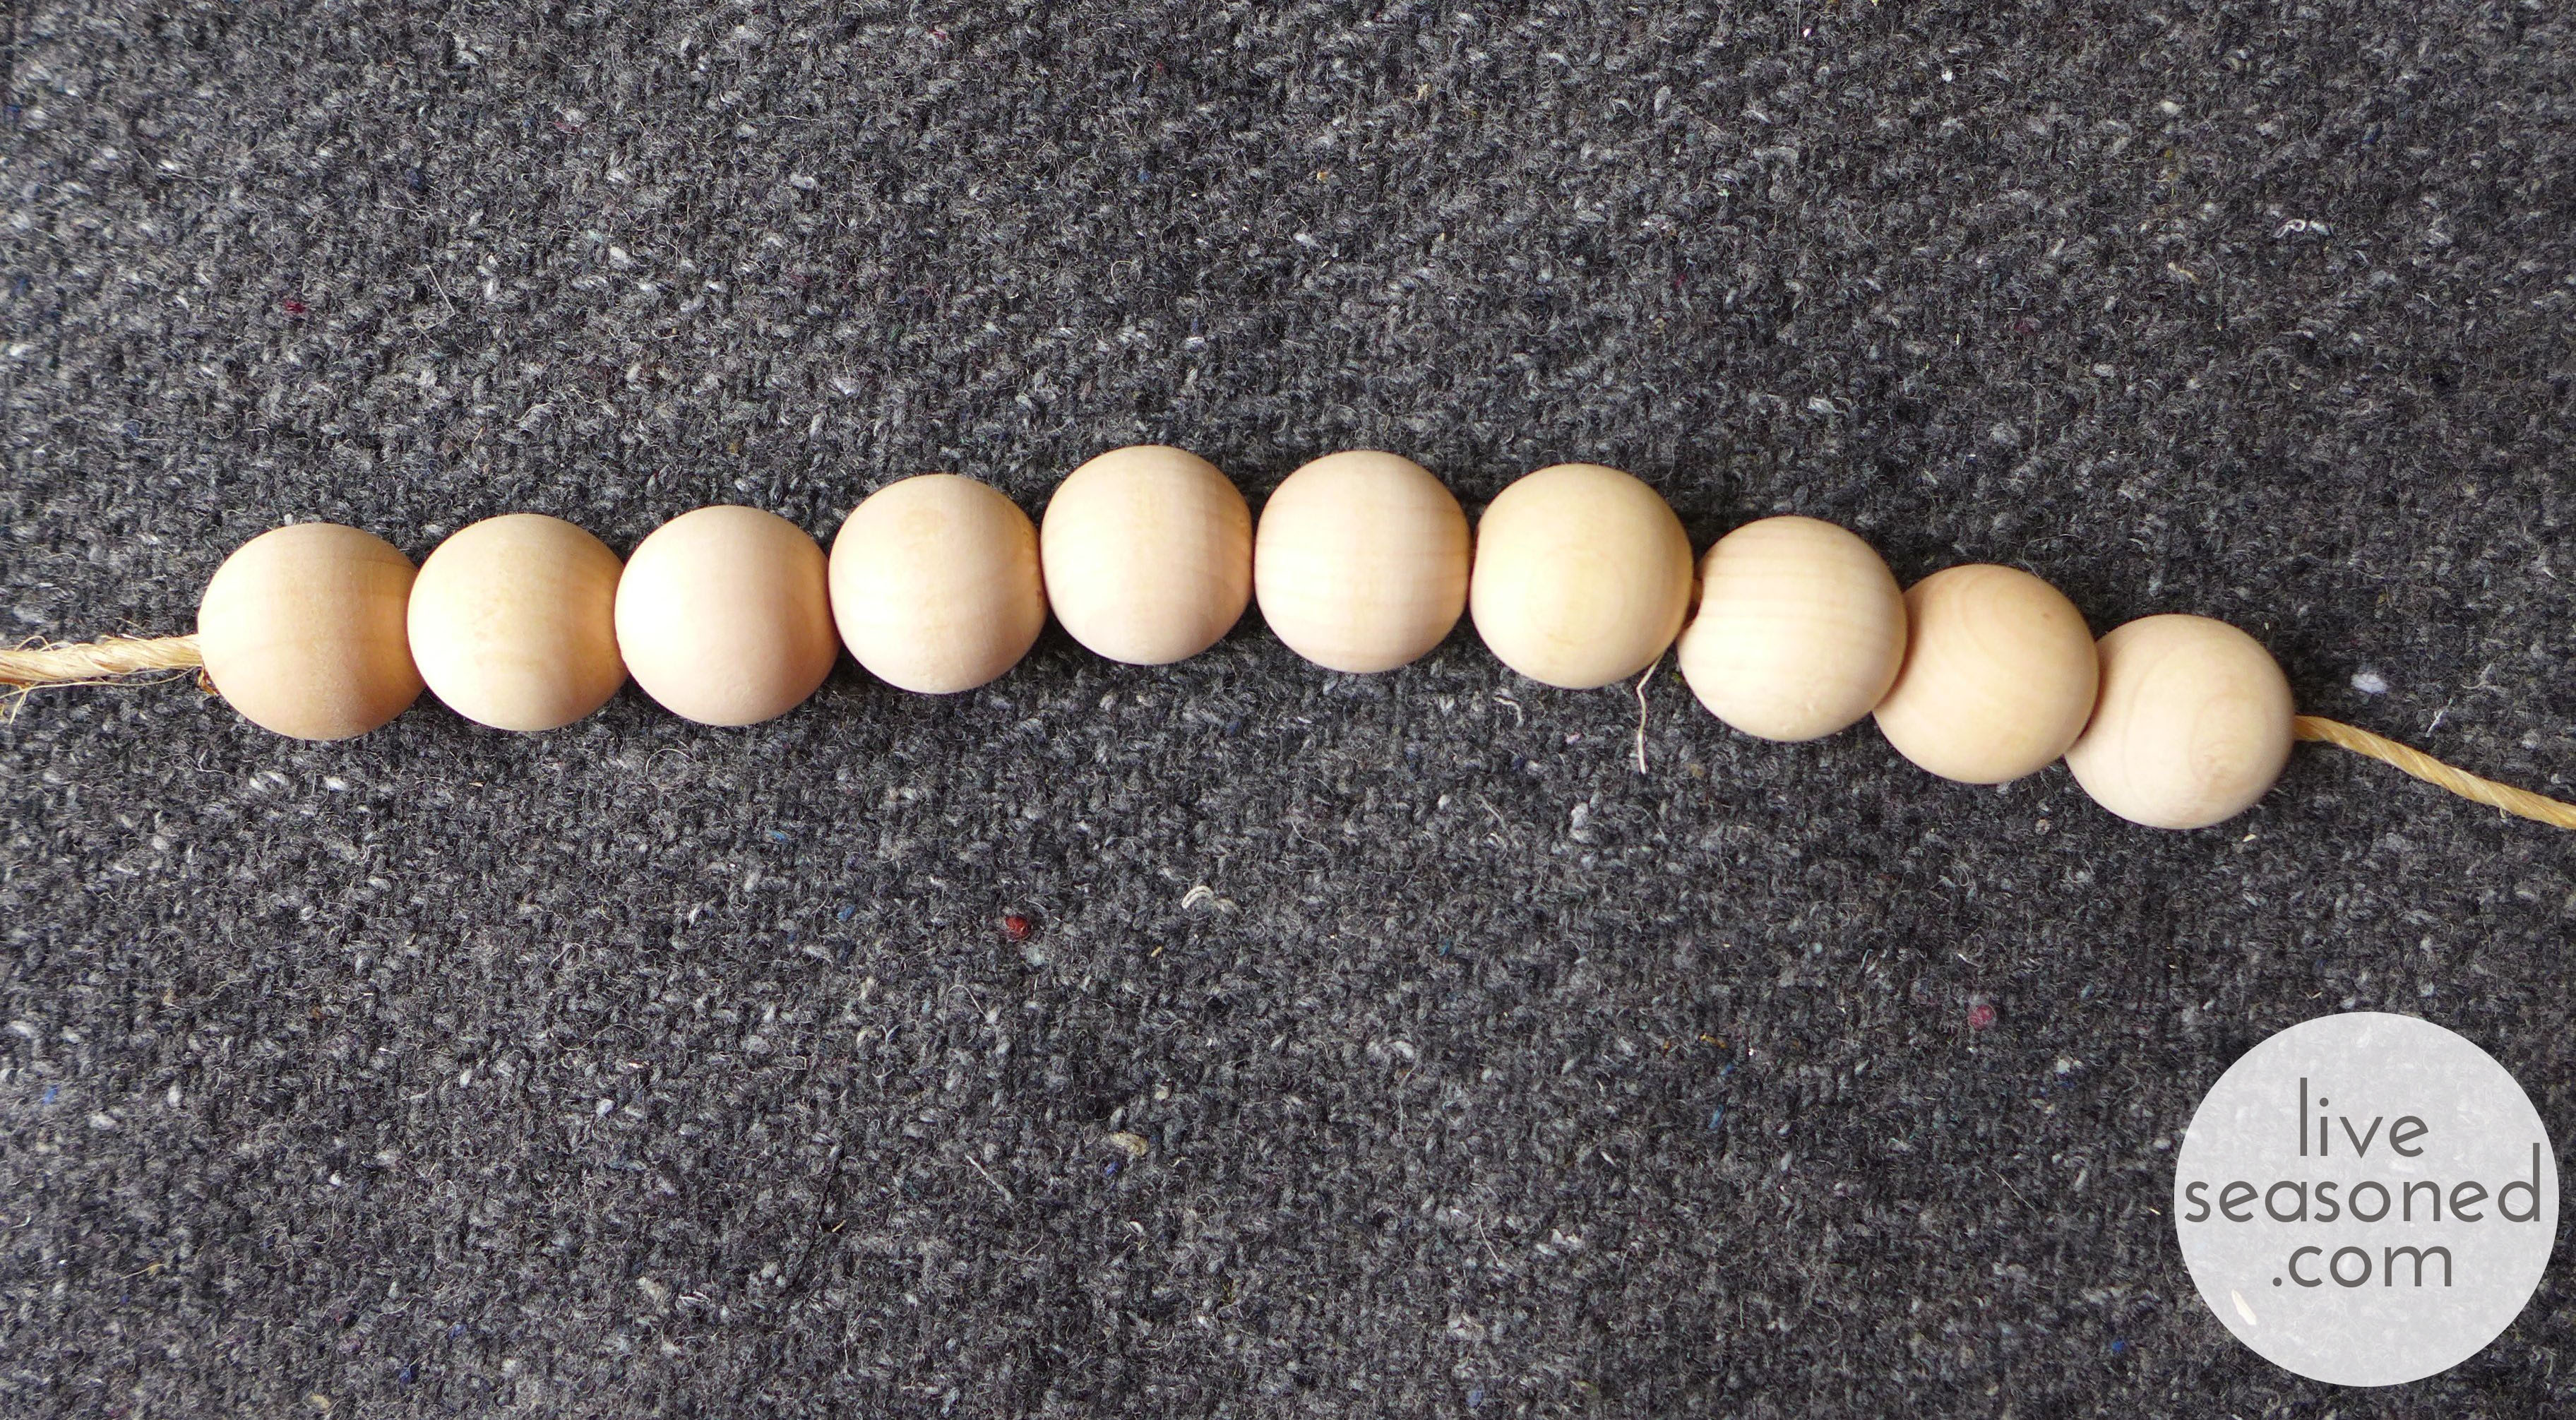
In addition to the fruit, I wanted to add a few other textures and colors to the garland. First up, some natural wooden beads. I bought a 20-pack of these beads at Joann’s. Once home I thought about painting these, but didn’t have any craft paint, so decided to keep them natural and add color with a bit of yarn (something I have plenty of!).
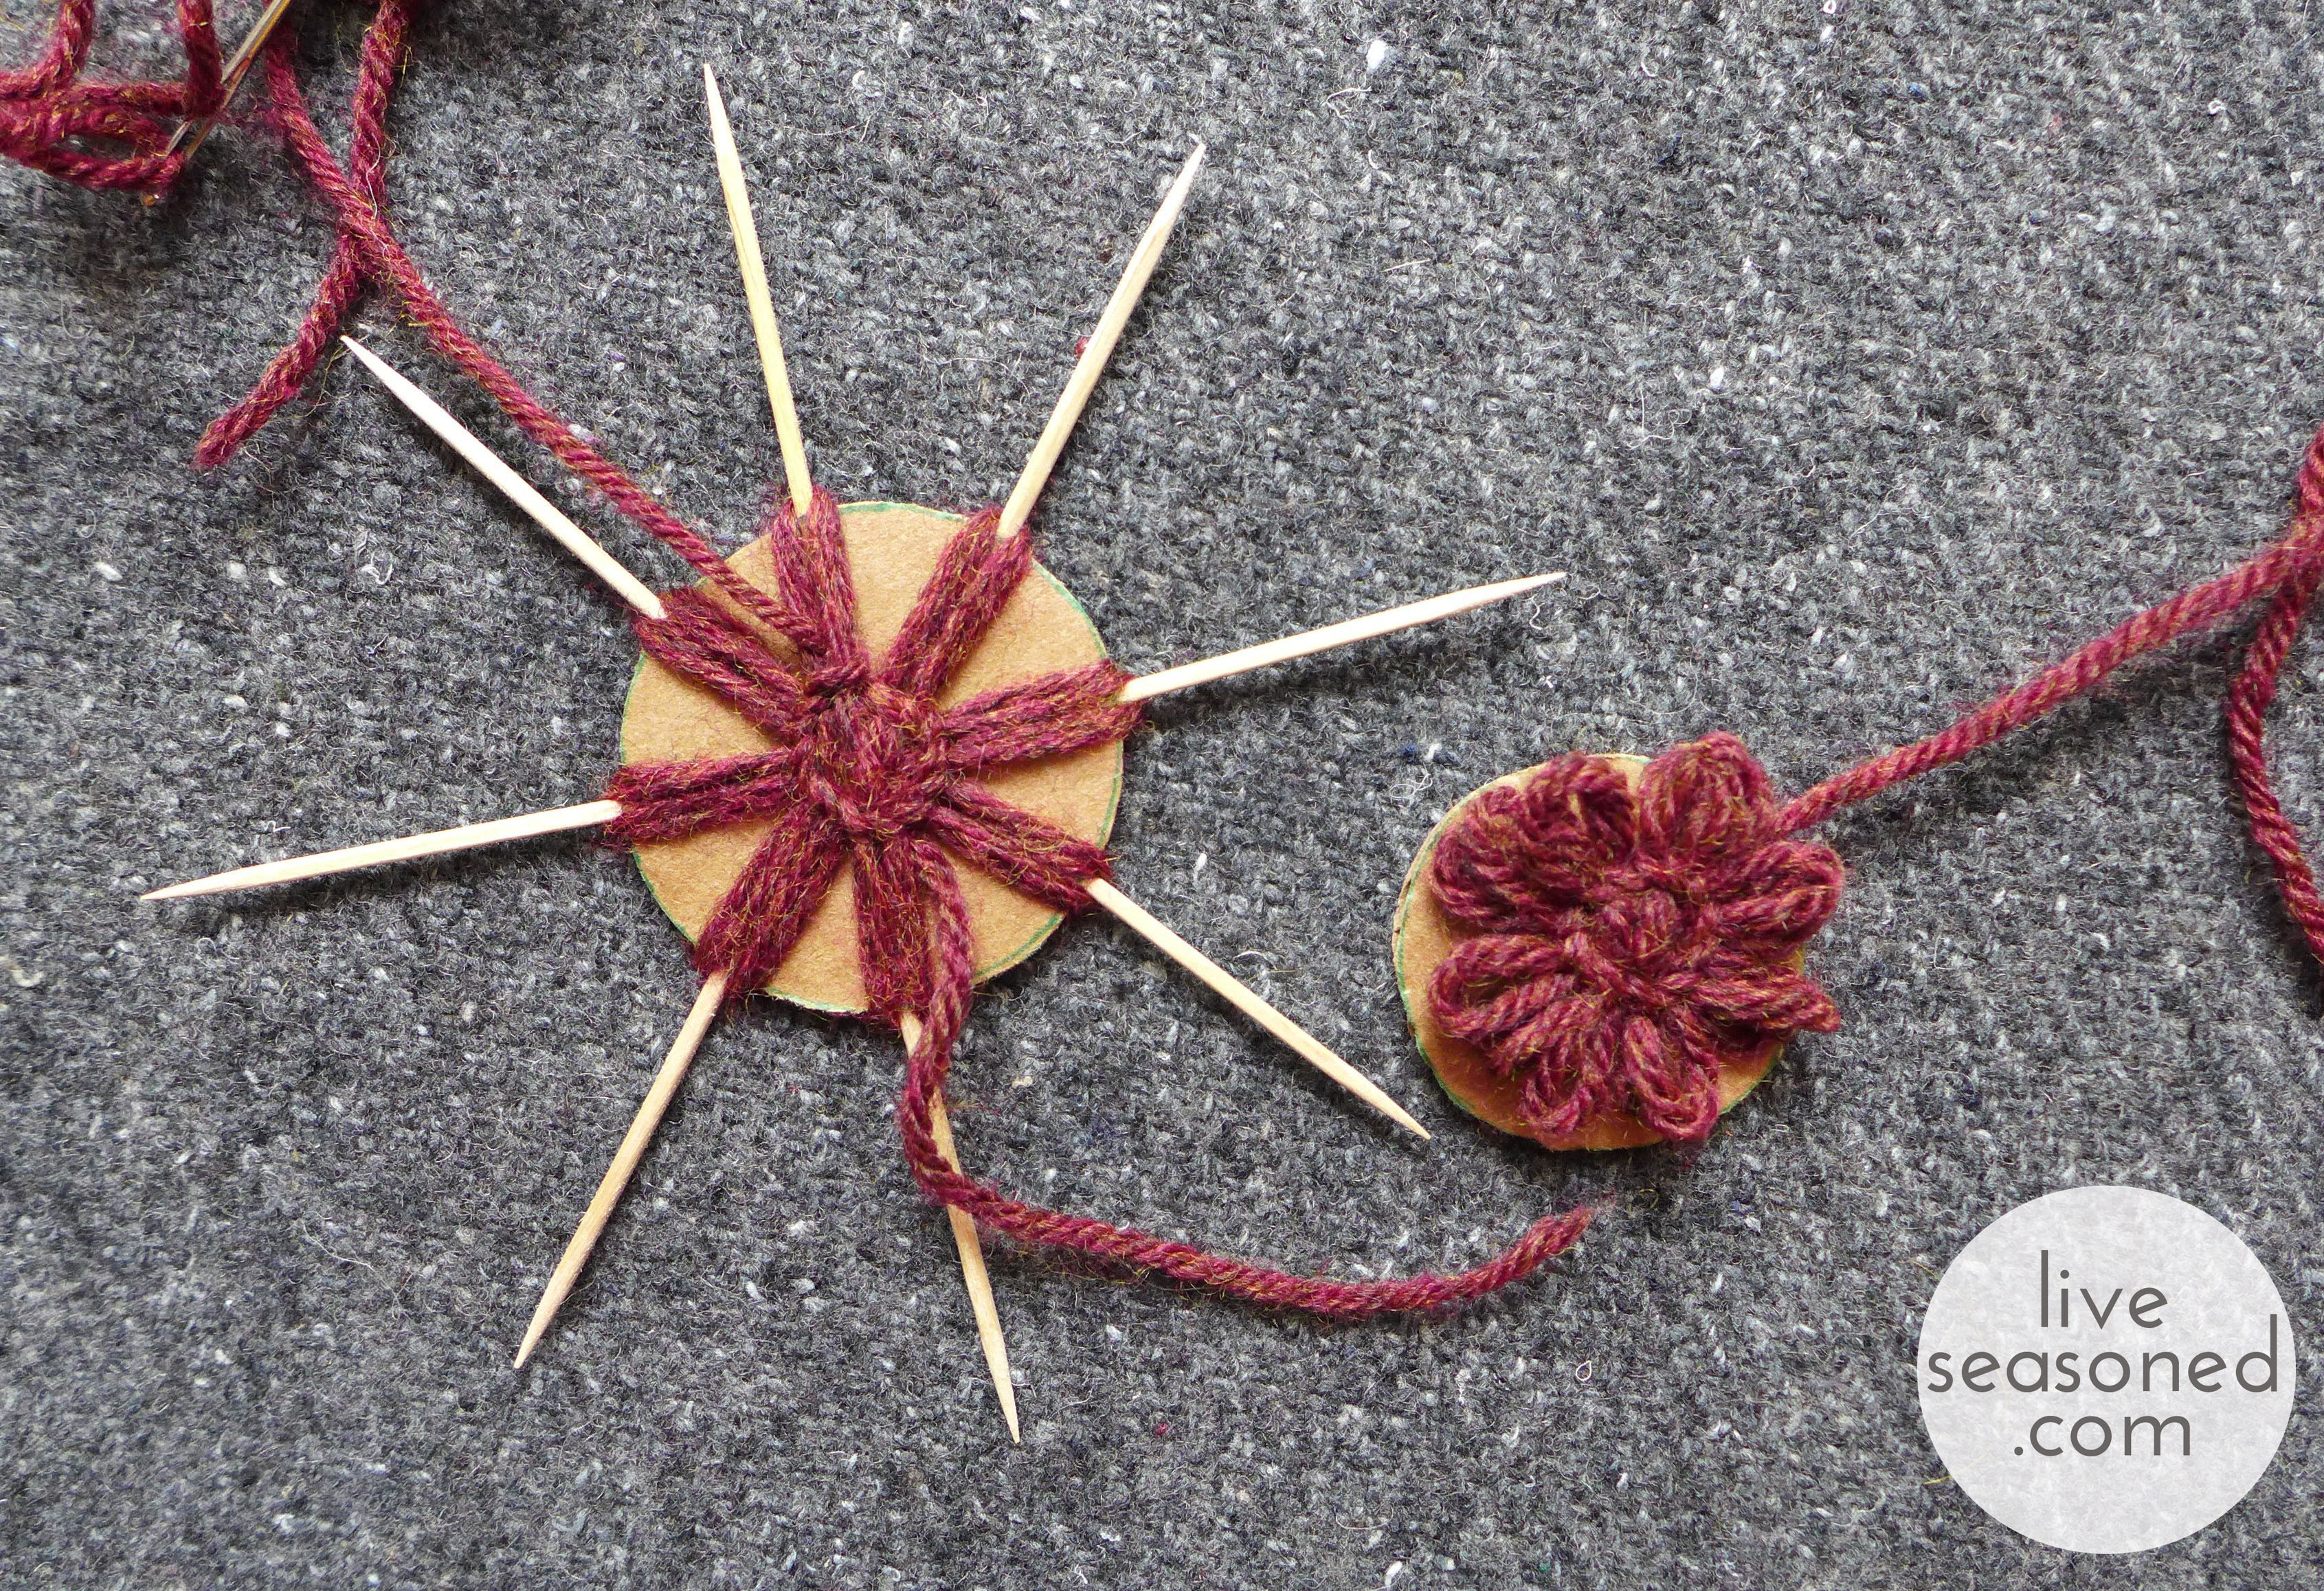
Using some rusty-red yarn, I made a few very simple flowers. I originally saw these flowers on Pinterest and made from twine. The link to that Pin was bad, but a quick Google search led me to this really helpful how-to video.
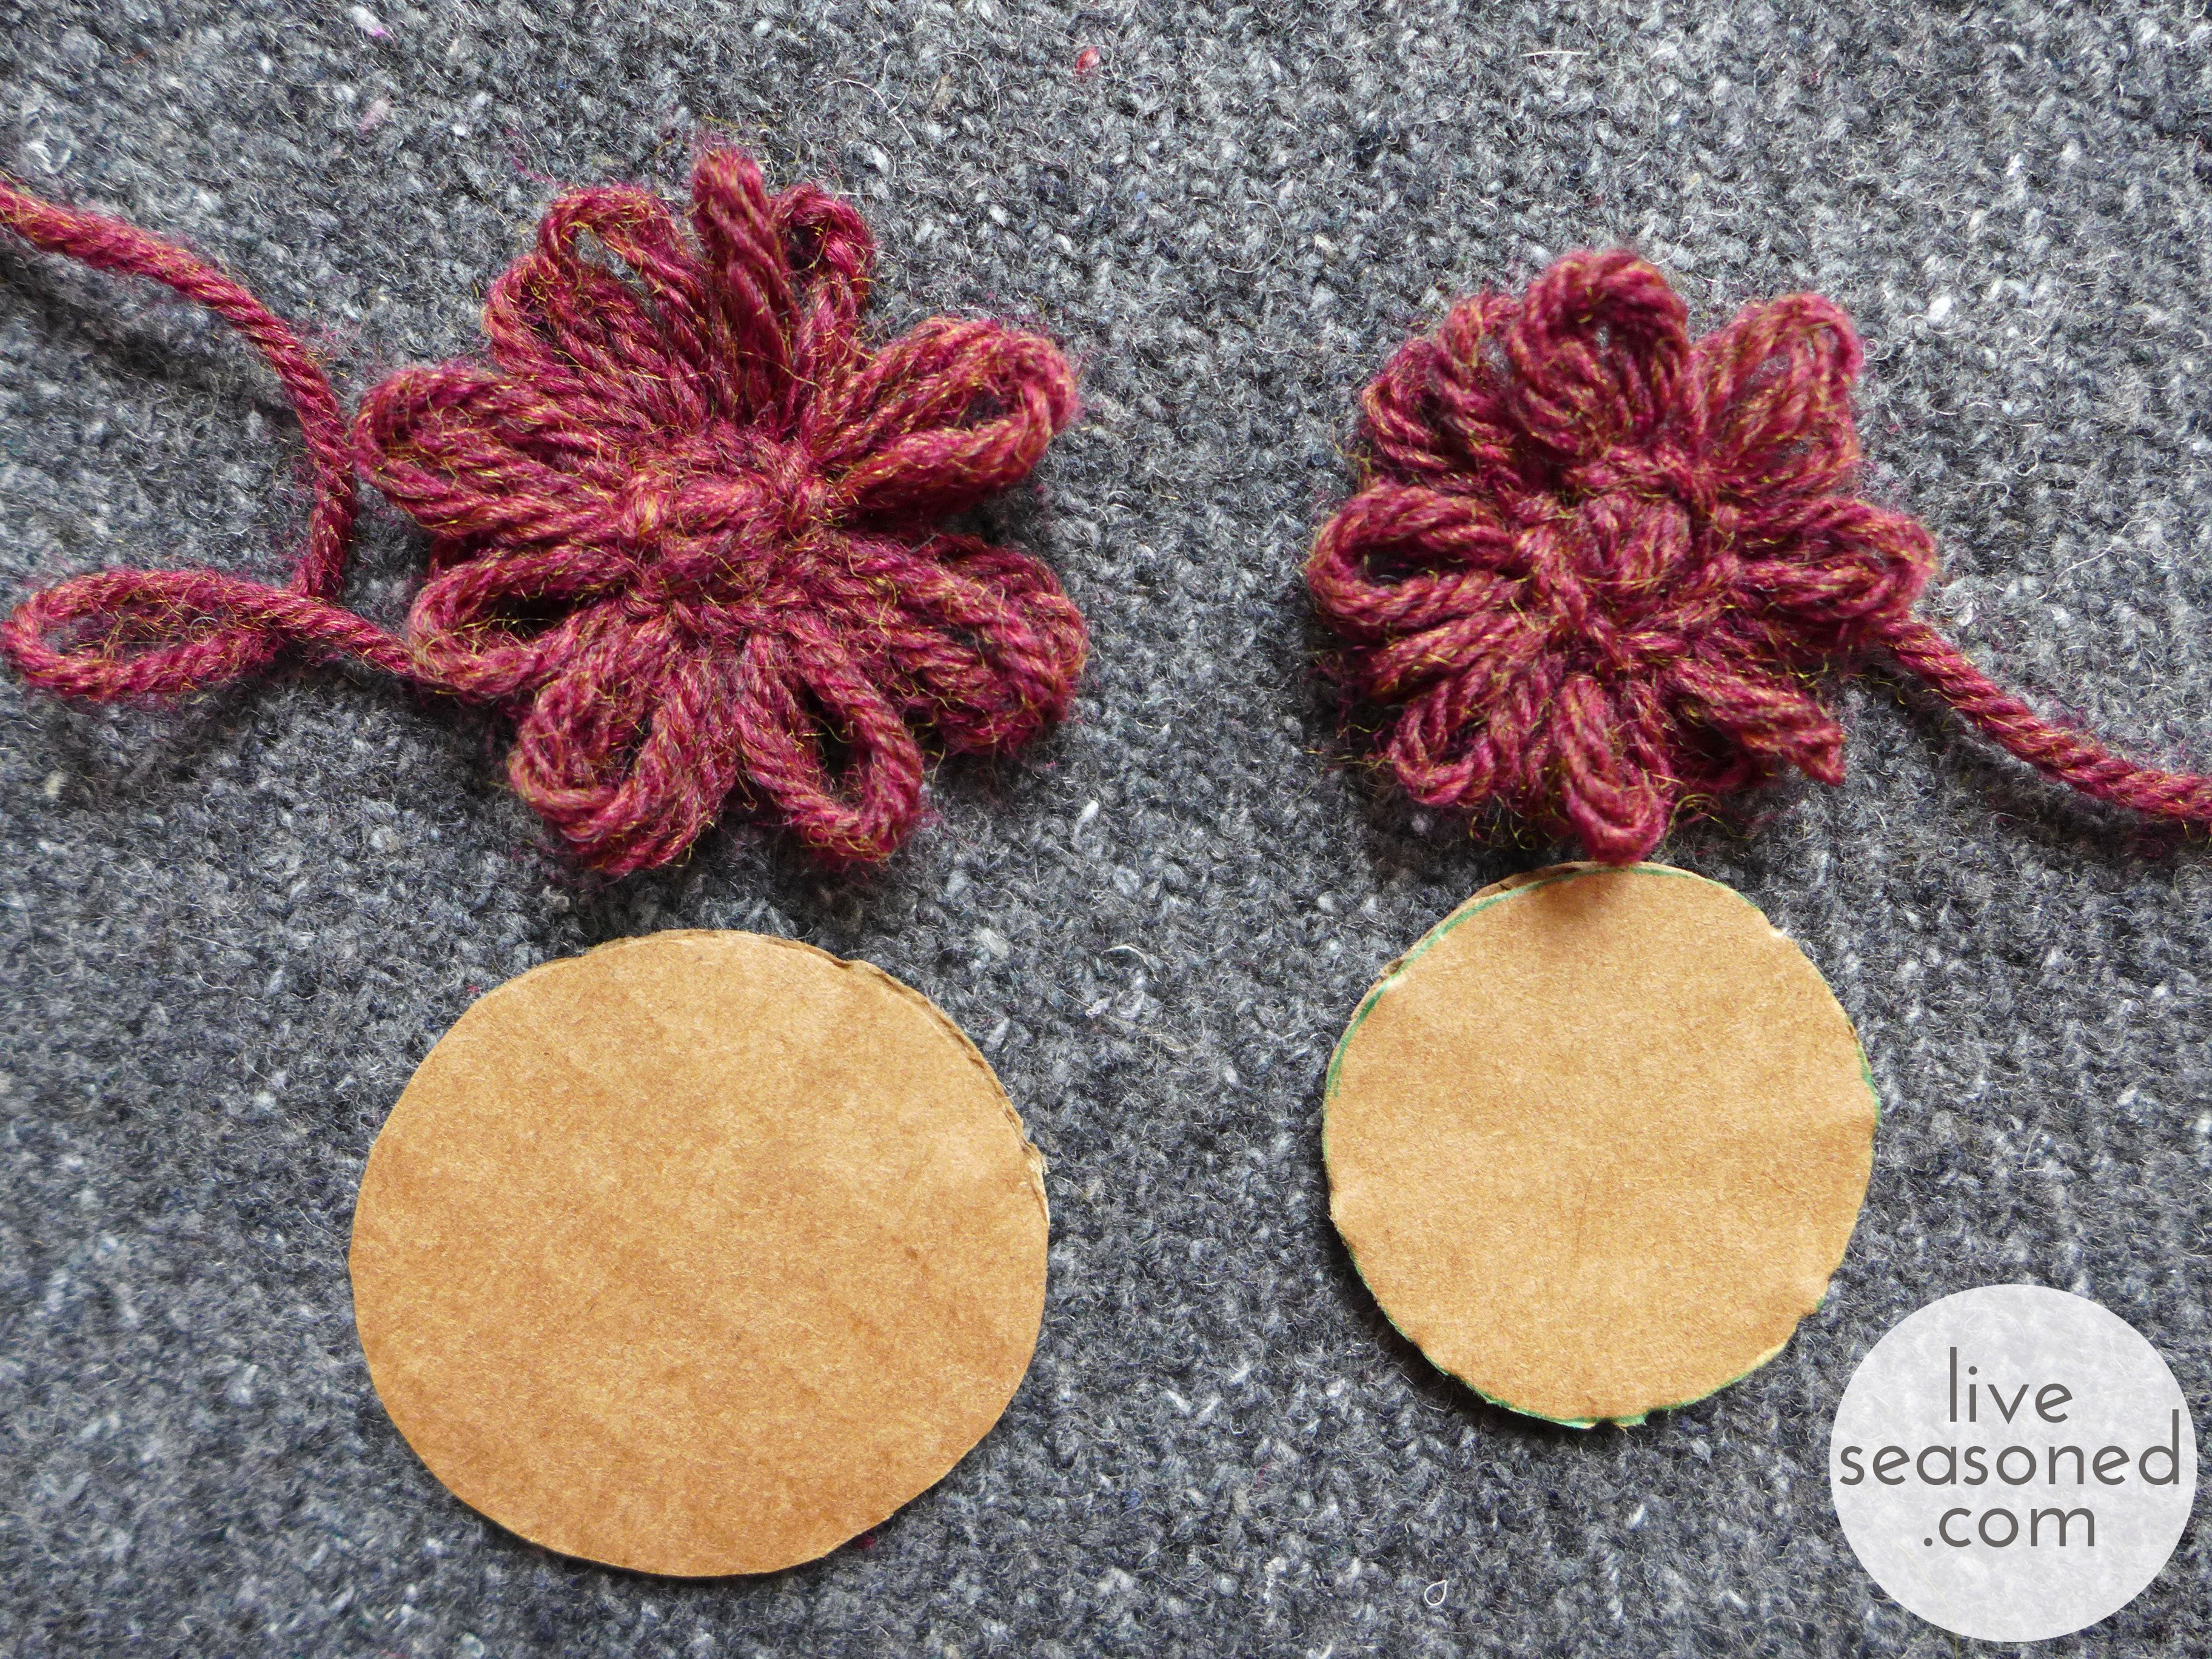
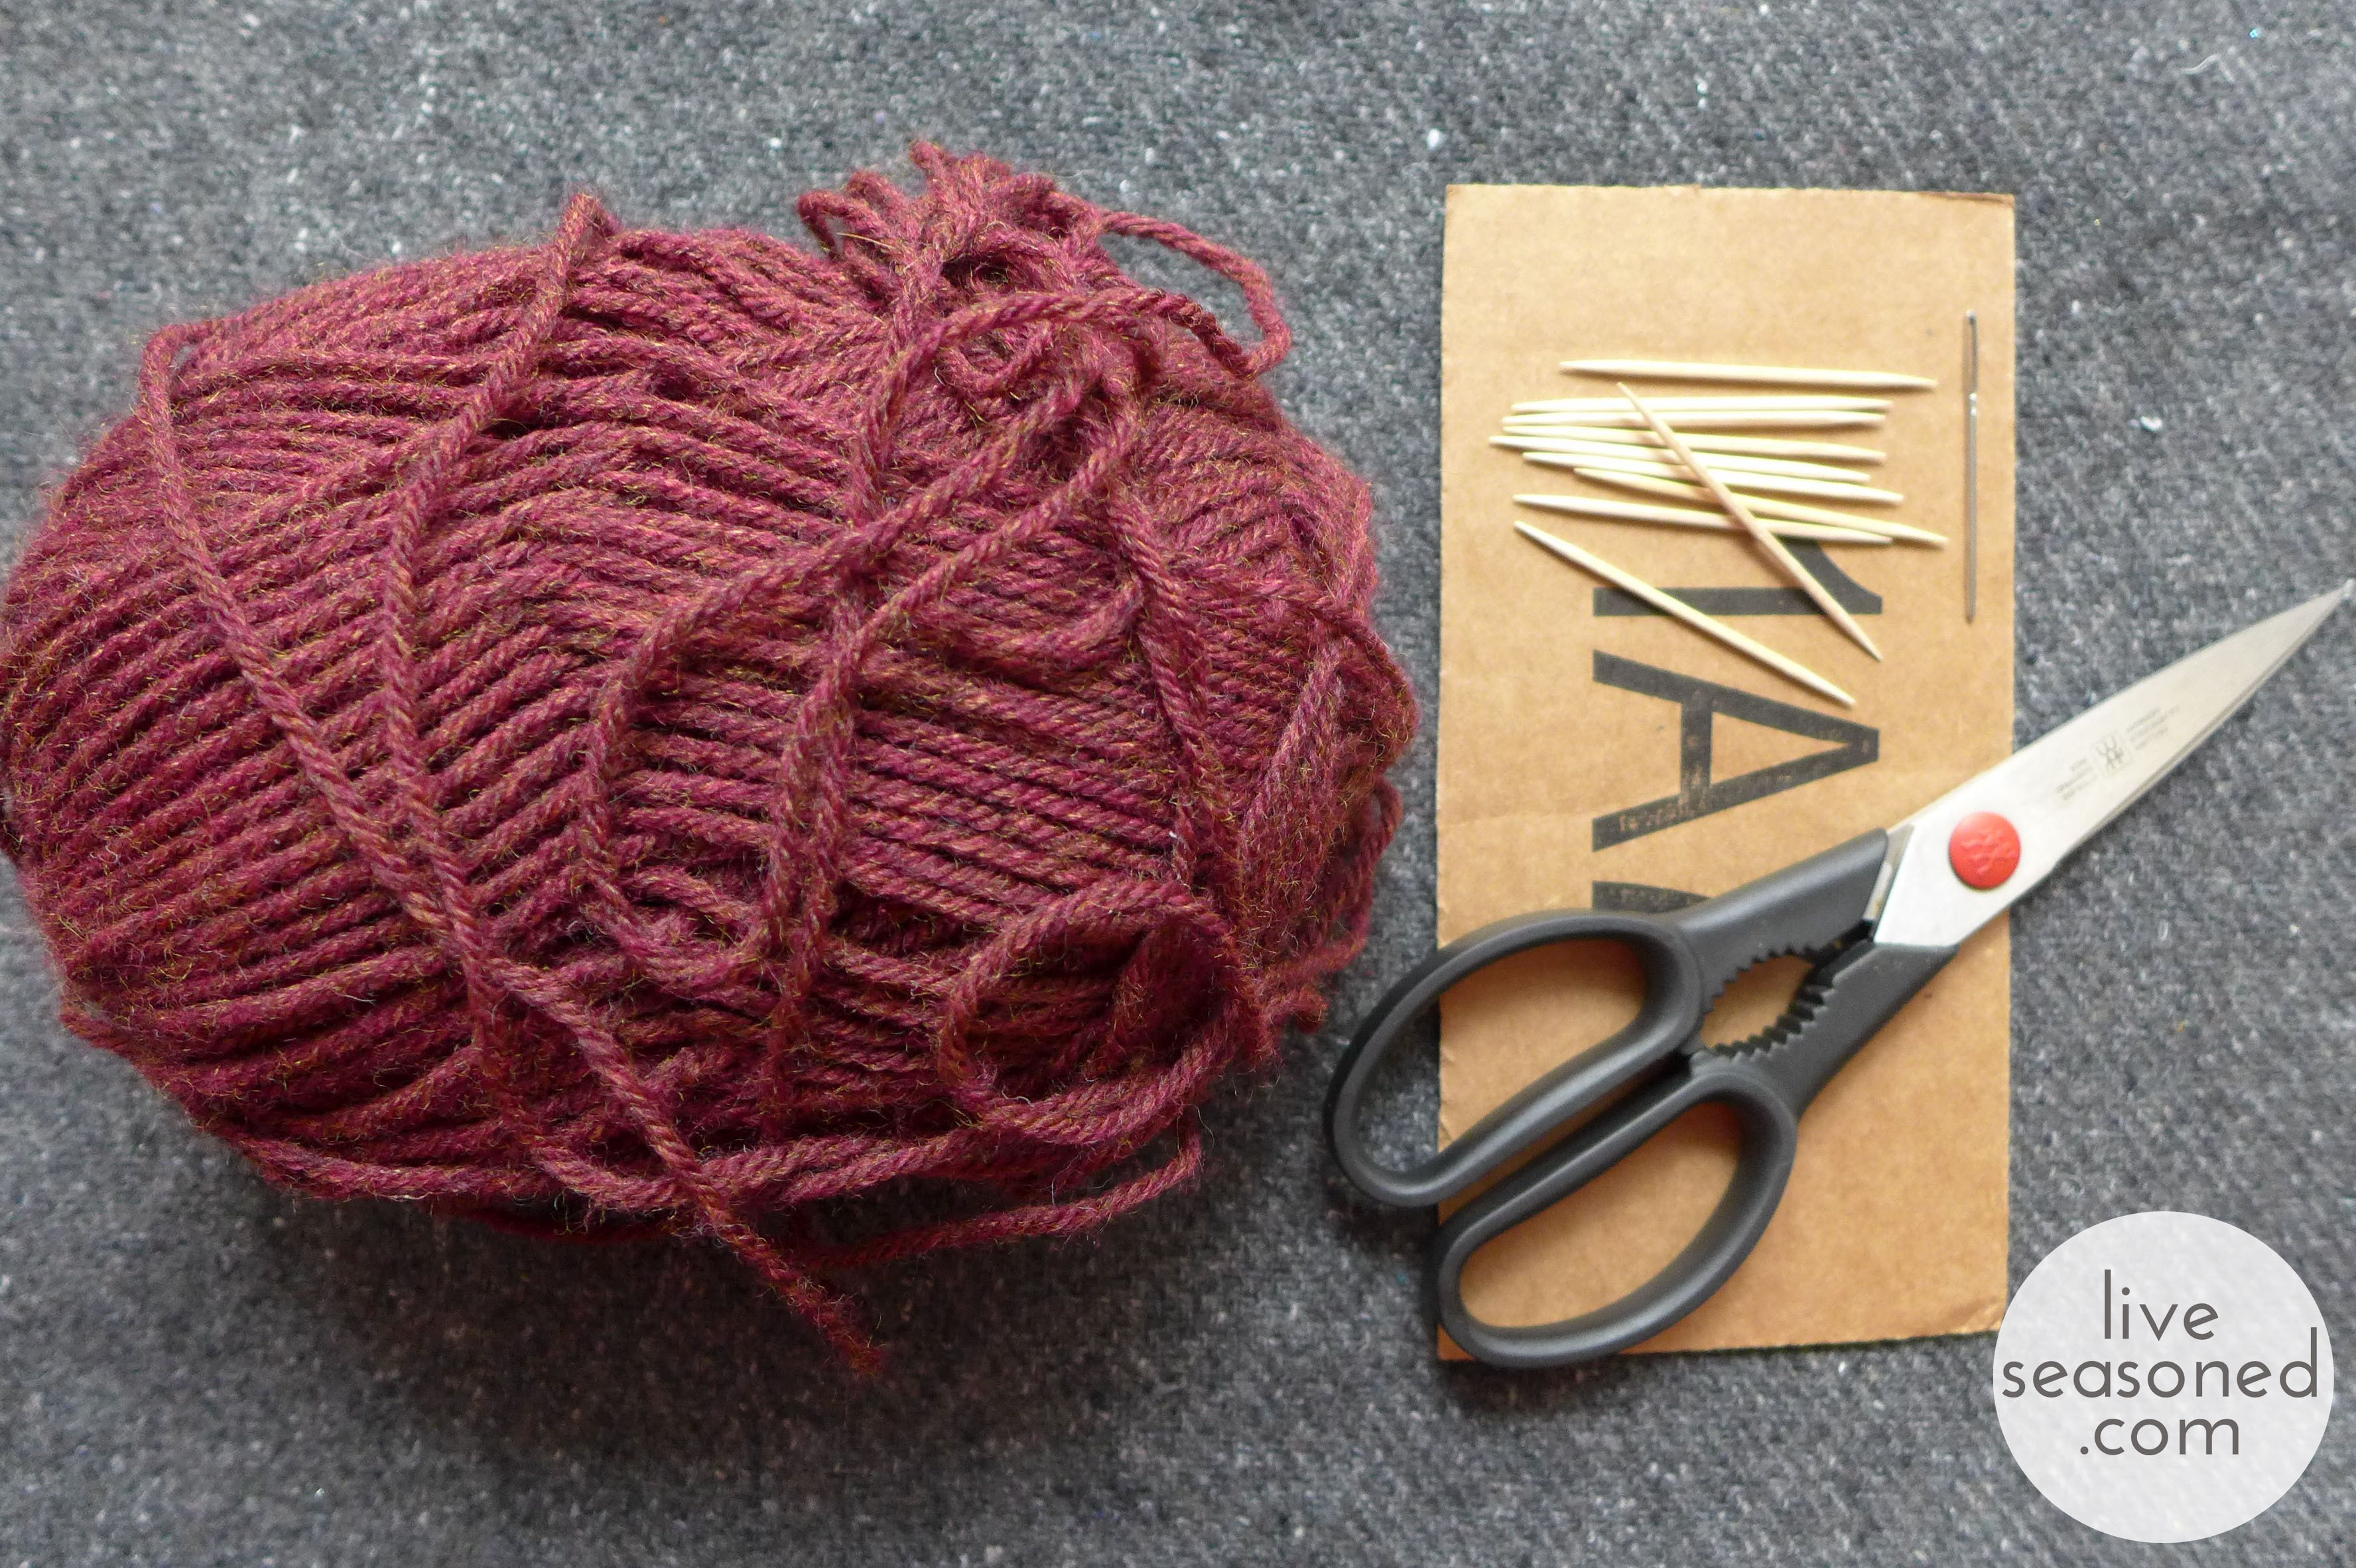
The only supplies you’ll need to make these are a piece of cardboard, yarn or twine, scissors, a yarn needle, and 8-12 toothpicks. If you assemble that, you’ll be able to make a flower right along with the video because she explains everything at a nice slow speed.
In the video, 12 toothpicks are used, but as I mention, you may need as few as 8, depending upon how large and full you make your flower. I made my flowers with cardboard discs that were 1.5 and 2 inches in diameter. As you can see in these photos, the diameter of your disc determines the final diameter of your flower. I wouldn’t go any smaller than 1.5 inches, and if I were to do it again, would probably uses discs that were 2 and 2.5 inches. As you can see, my flowers are quite full with only 8 petals, and I think 12 would have been too much, but may be just right for a 2.5 inch flower.
*Don’t cut off the extra yarn ends when you’re done making your flower – these come in handy for tying the flowers to the twine.
With your garland swag in order, it’s time to assemble! I attached the fruit with hot glue. In order to get the fruit to hang nicely, you should glue the twine on no more than 1/3 of the way down the slice (rather than along the widest part, if that makes sense?). If you glue the twine too far down, the weight of the fruit will cause them to face downwards rather than out. The flowers were tied on by the extra yarn ends. If you cut off the yarn ends, you could easily hot glue these too. Once tied, I then cut any excess yarn off. And to make bead placement easier, I strung a whole bunch at once (as you saw in the photo above), then just knotted the twine on either side of the bead.
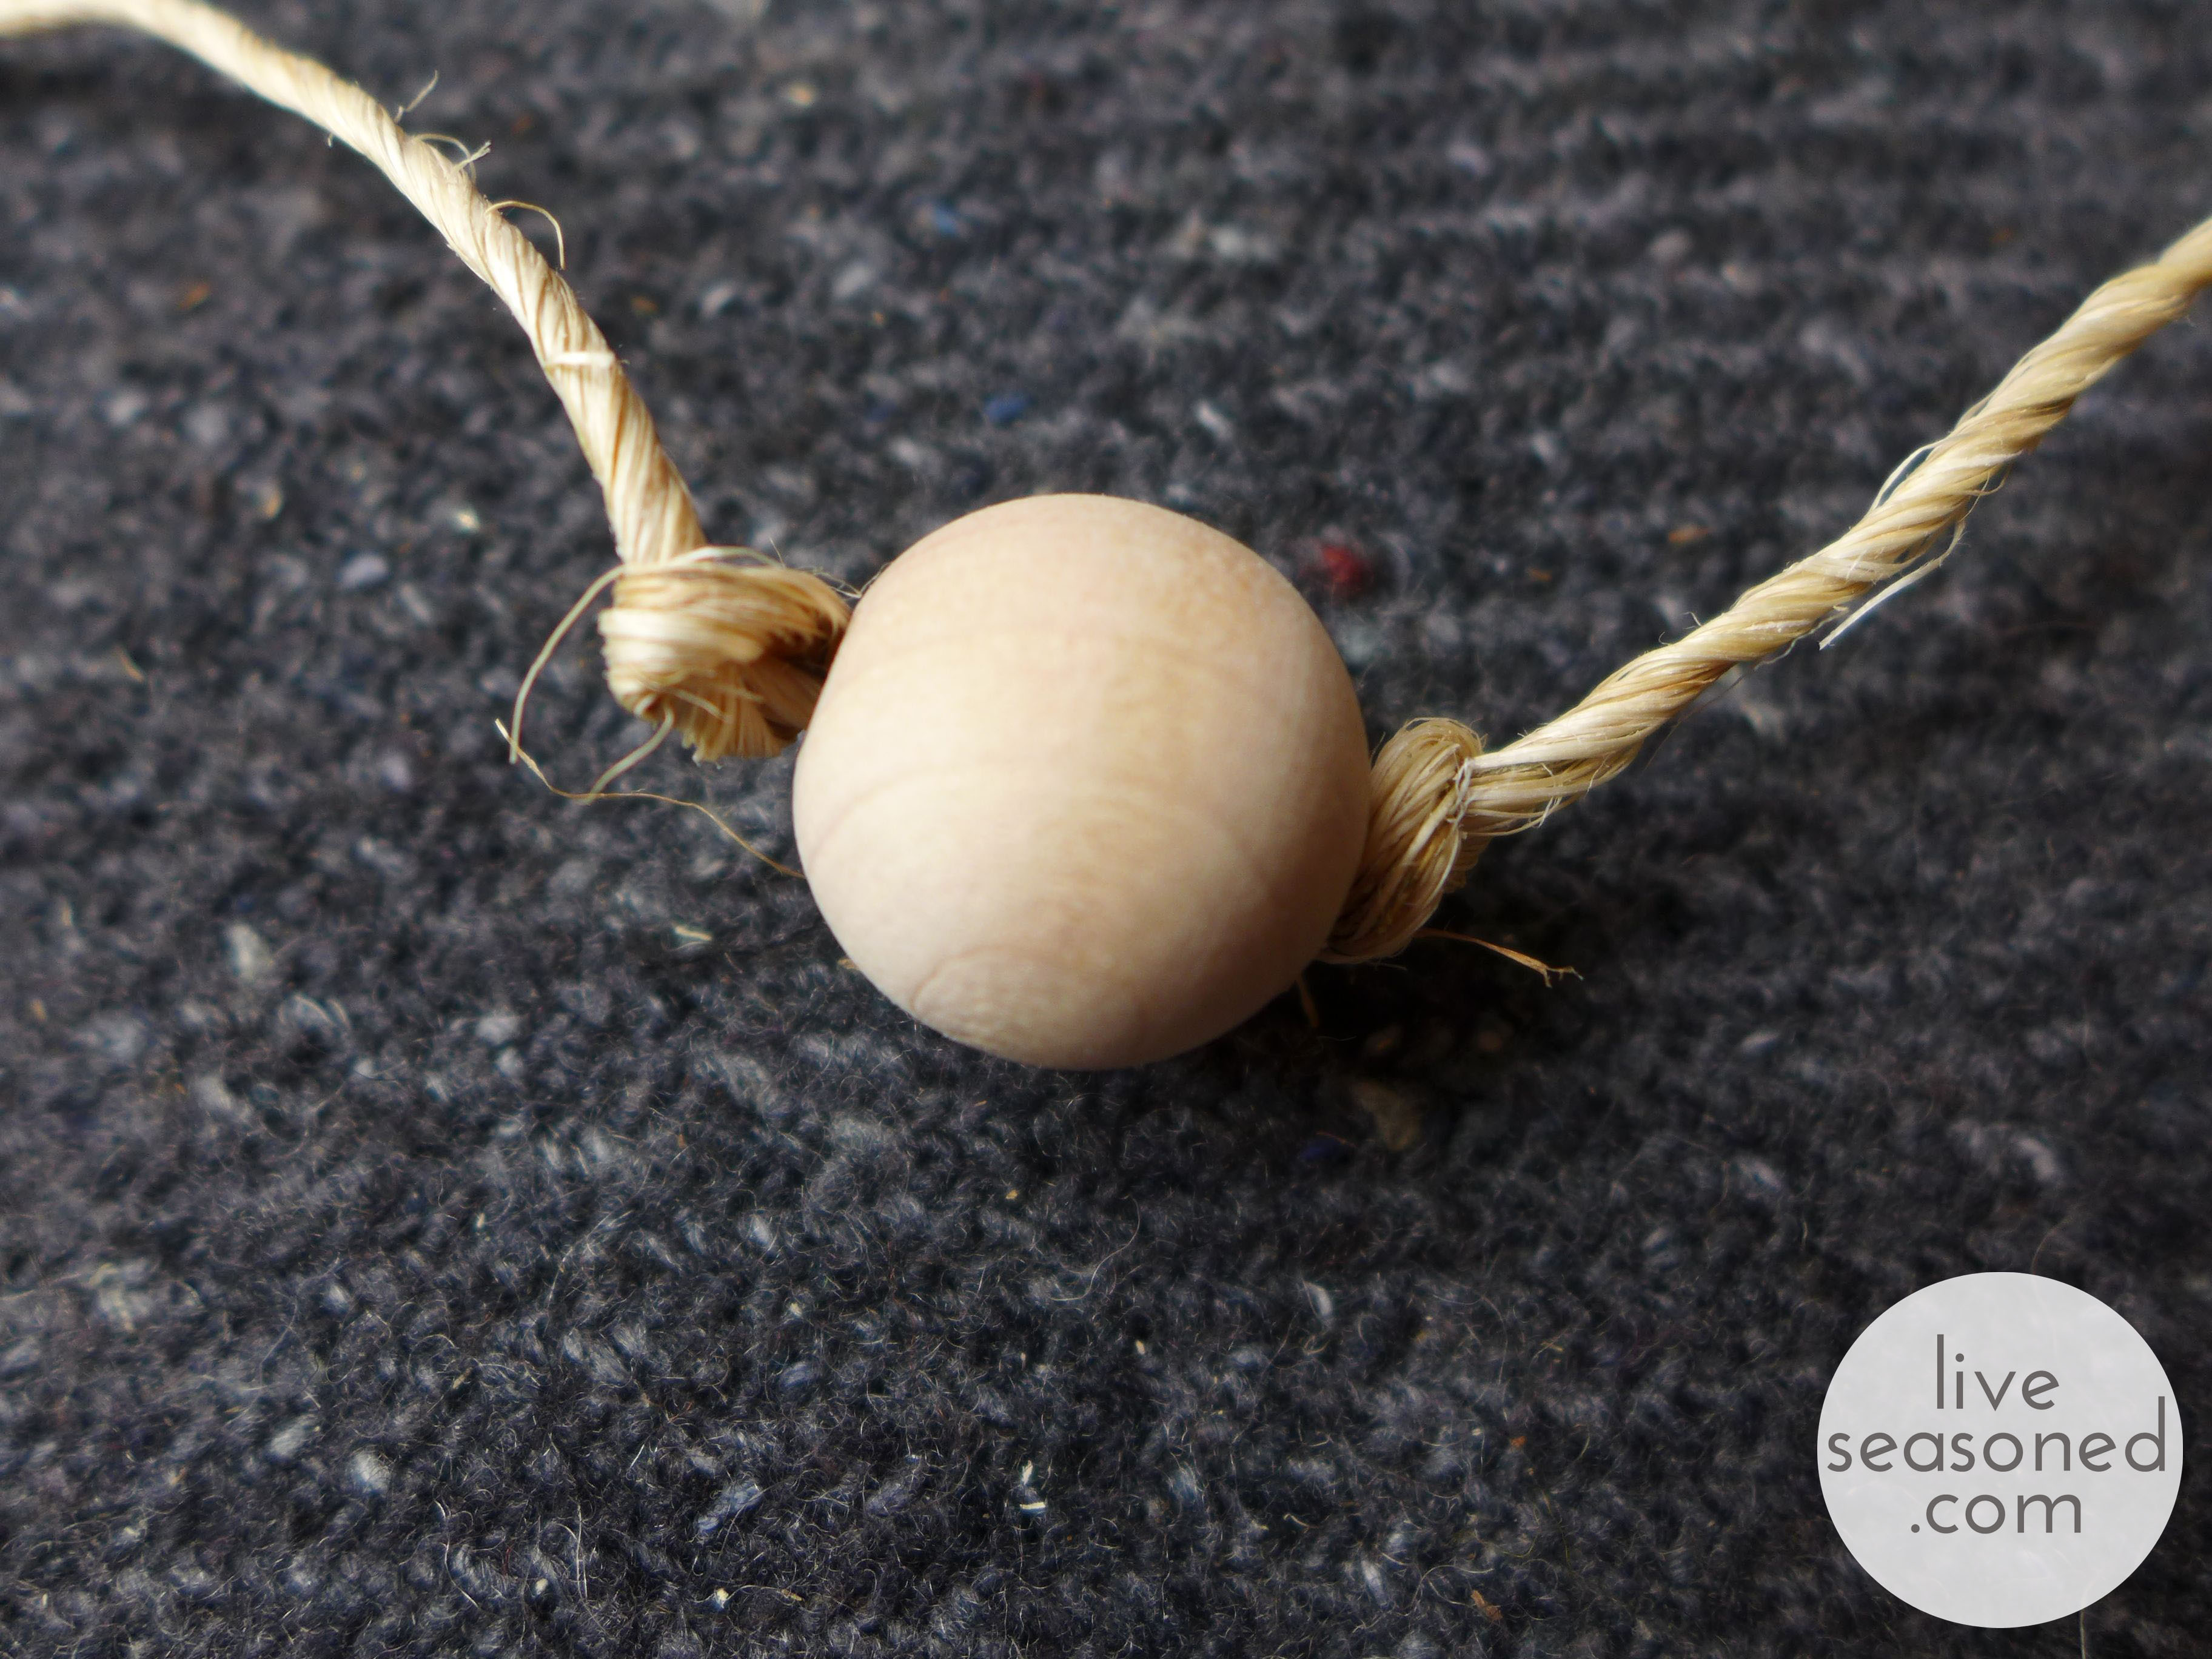
With those instructions, just go for a random placement of your items, but still keeping in mind that odd-numbered groupings are more appealing. The beads sort of act as breakpoints in your garland, so I thought it was useful to place 3 or 5 of the fruit and flower items between any two beads.

And now comes the hardest part, figuring out where to hang your garland. I started by stringing mine along one of our ceiling beams and thought that it looked OK, but maybe a little bit too puny for that space? What do you think?

From there I took the garland over to our fireplace. First, I tried stringing it along the mantel and letting the excess hang down on either side. I loved the look of the garland along the skinny front of the mantel, but knew that if we were to keep it here, I’d have to shorten the ends to keep Little A from pulling on or trying to eat it.


So I moved the garland with the same hanging profile to above the mantel. I’m not completely in love with how it looks here, I feel like there’s nothing specific that’s anchoring the garland to that spot (am I wrong?). I do love being able to see it as we sit on the couch, especially when I catch a look at the fruit in the glow of the candle light. But, now what’s this renter to do with those ugly brown vents? Any tips?


So, that’s our simple bit of decoration for November. Just enough to tide me over until I go evergreen and light crazy!
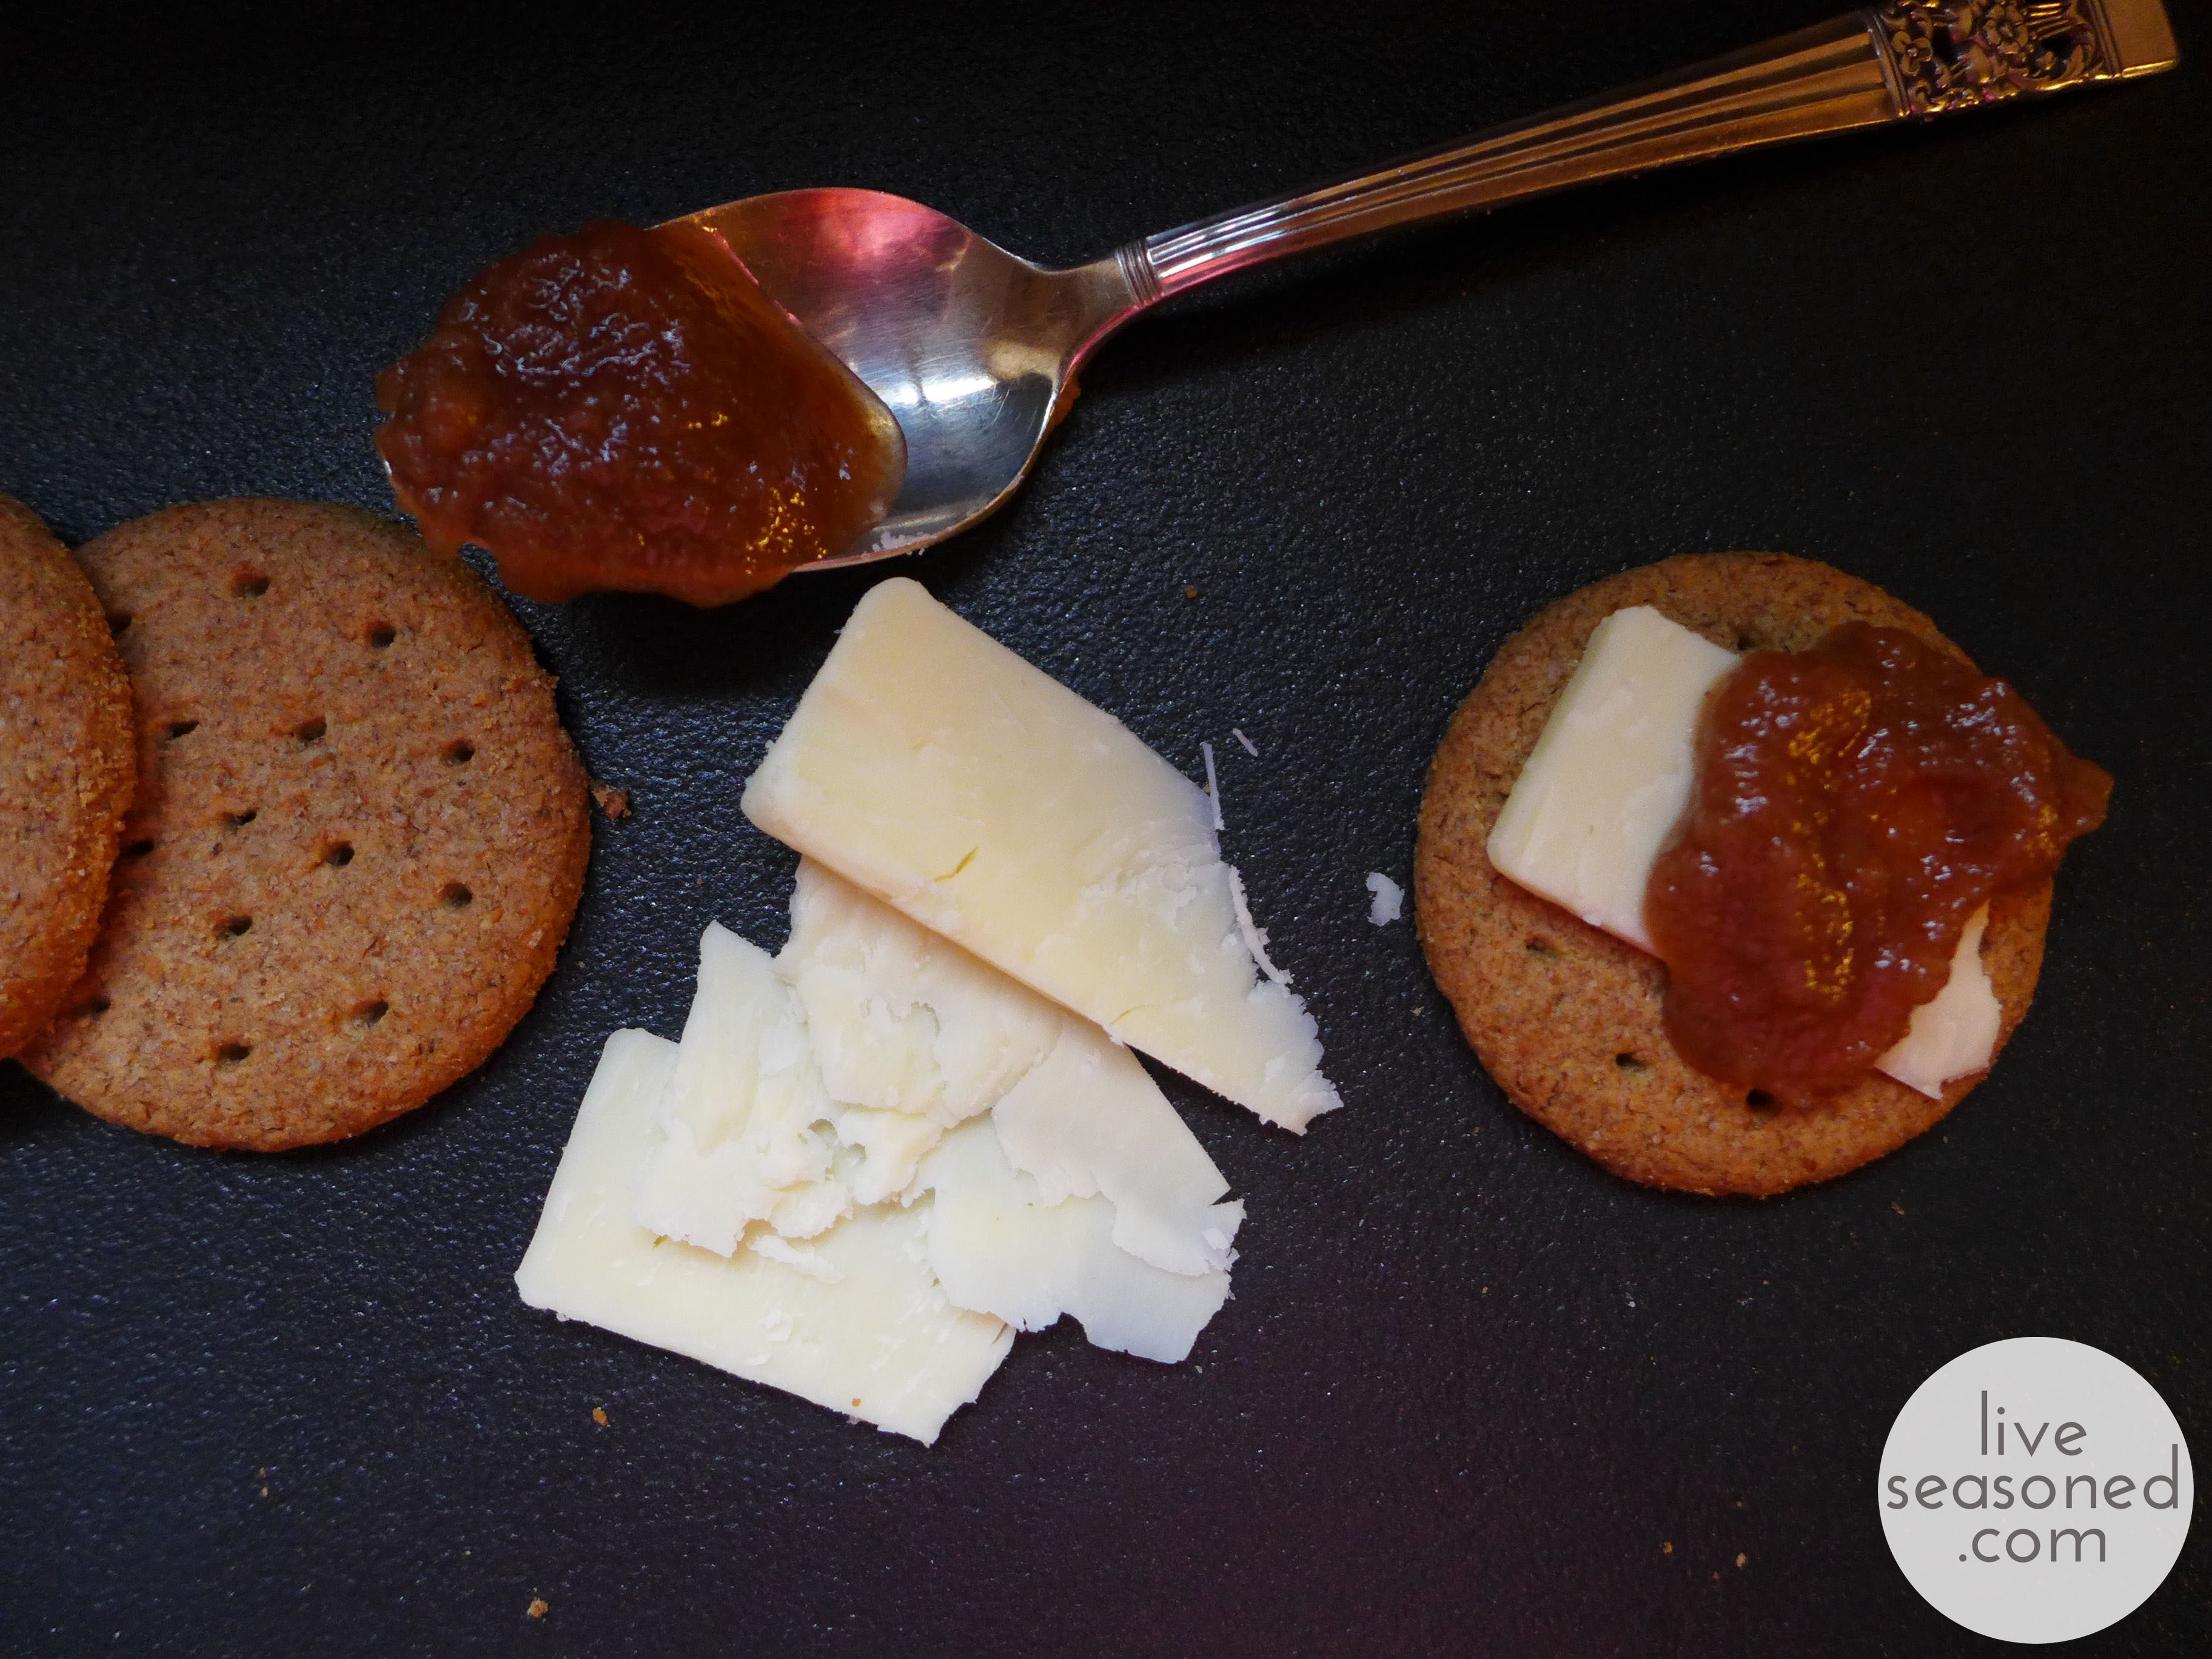
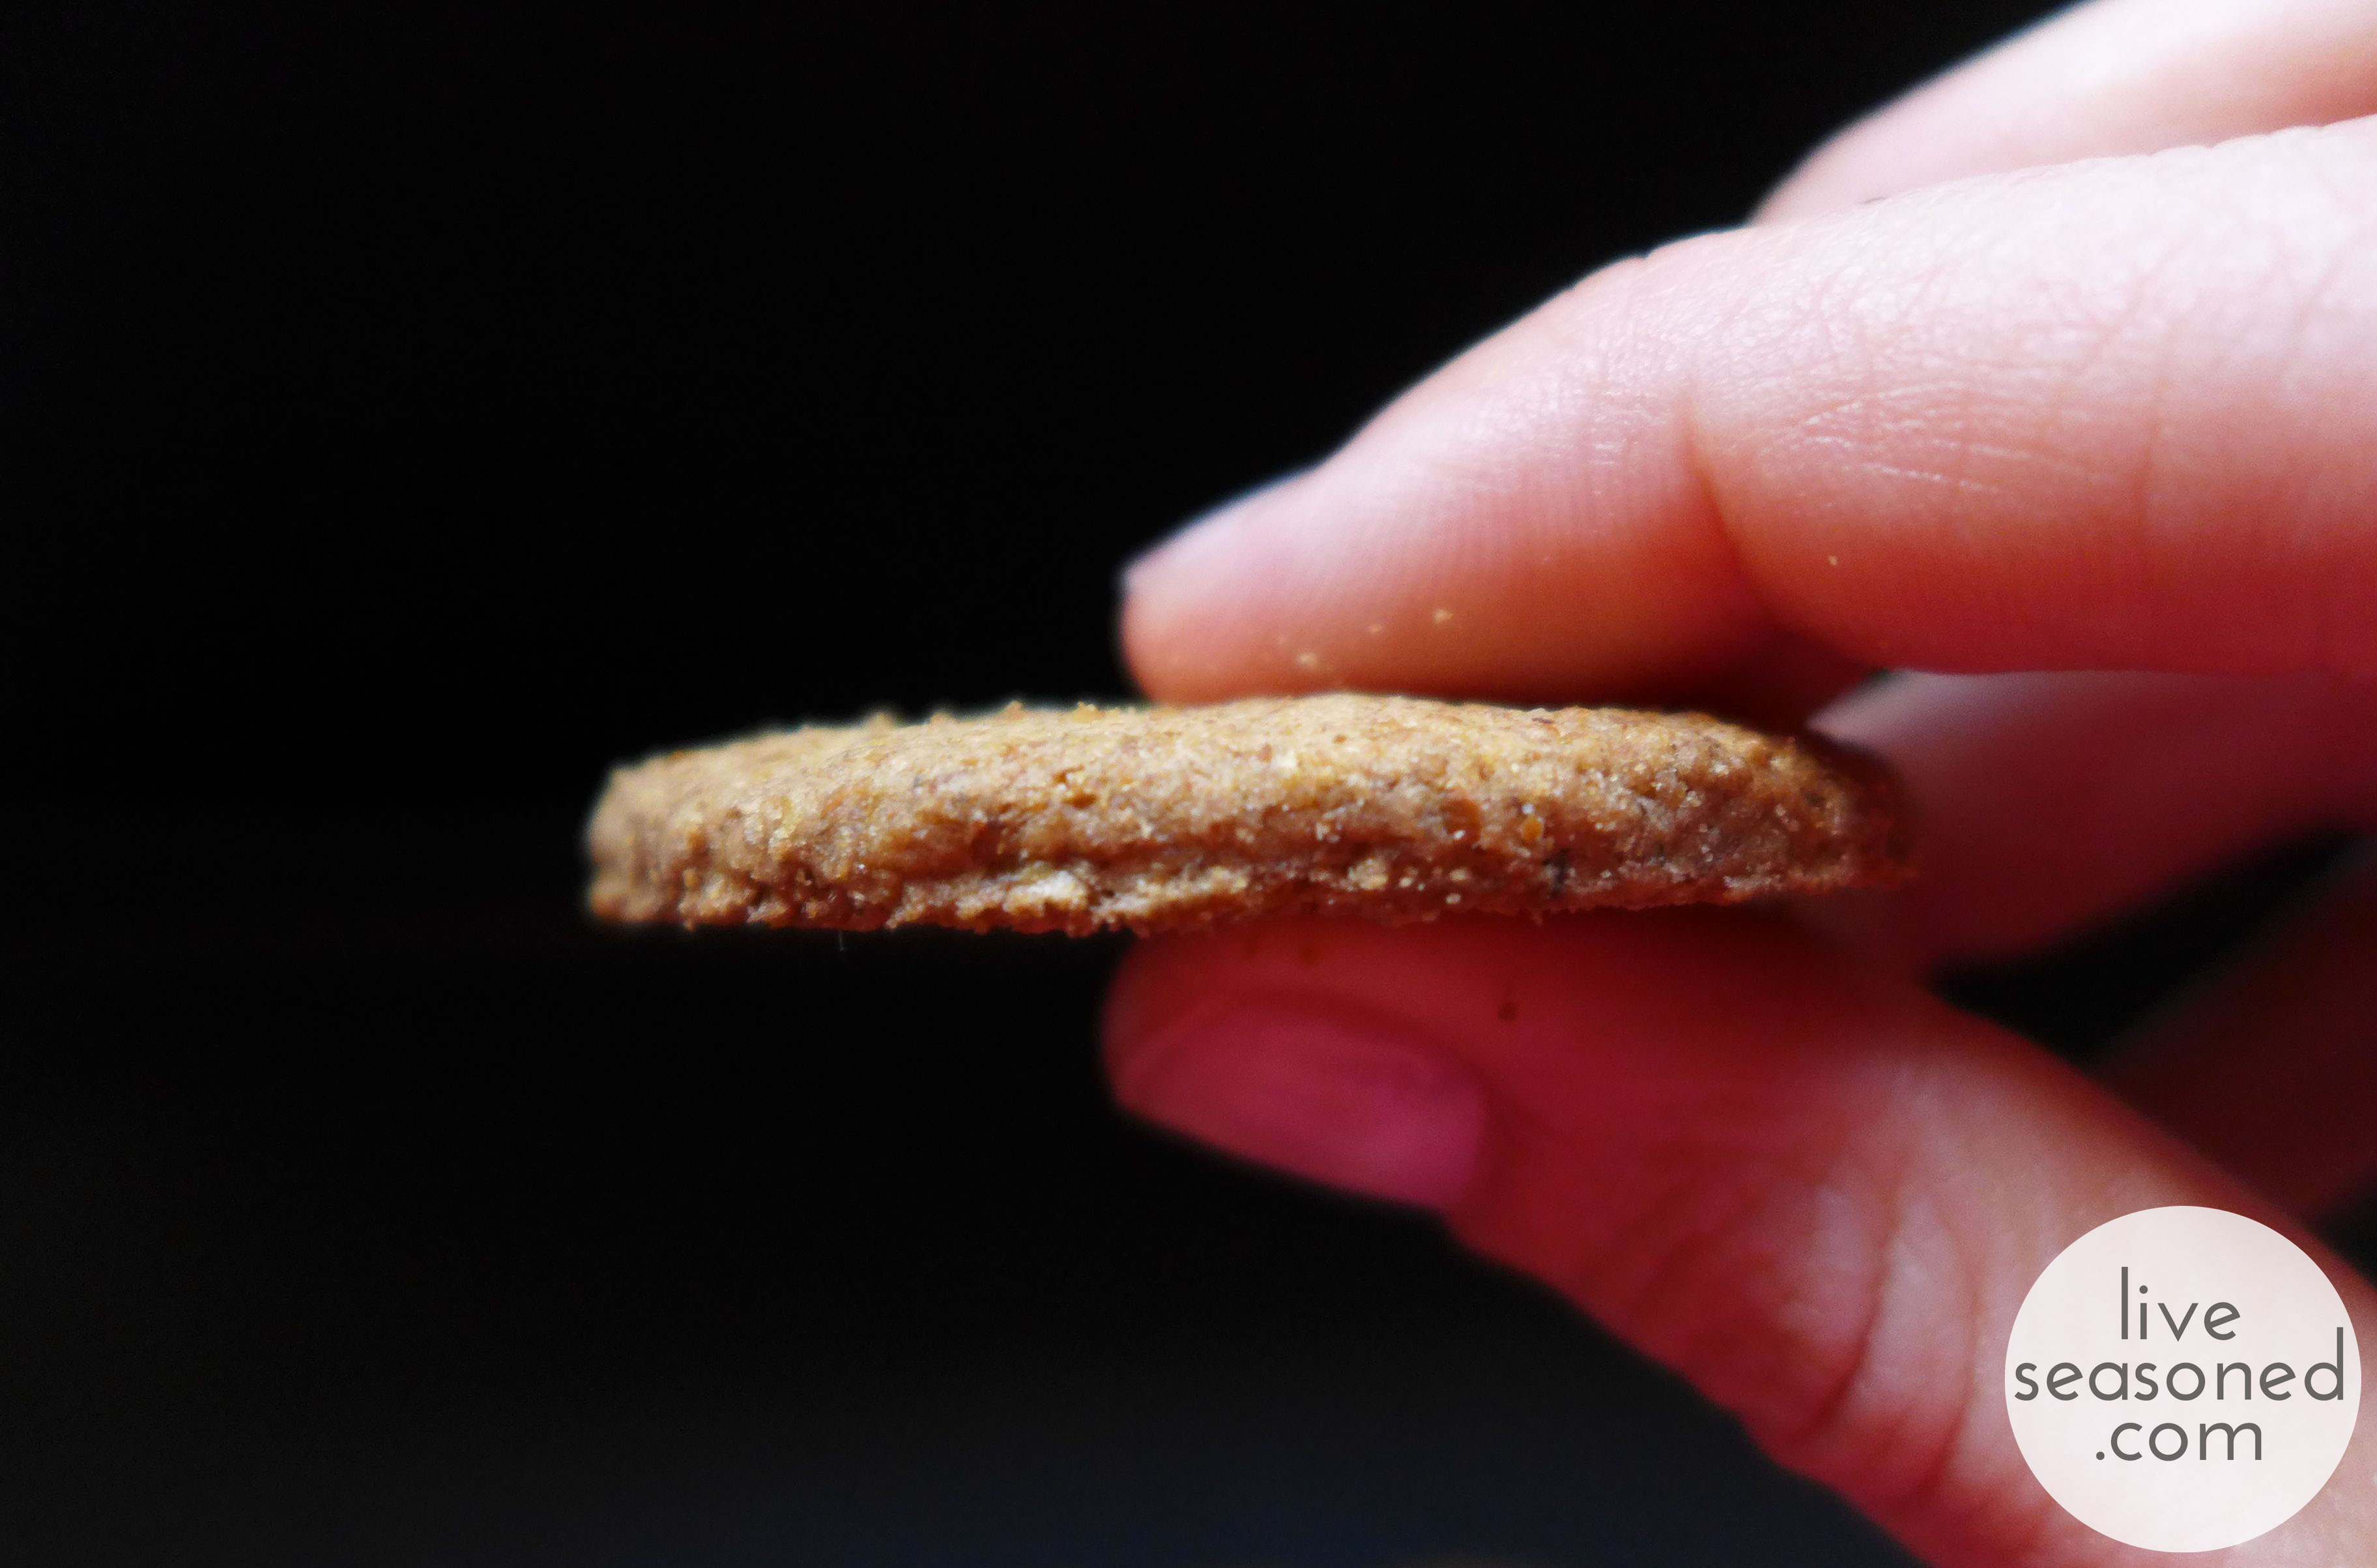
With today’s combination, I’m not sure who’s the star. Our delicious homemade apple butter? Carr’s hearty whole wheat crackers biscuits? Or the ever reliable bite of Cabot’s Extra Sharp cheddar? I do know that when you put the combination together you create a hearty snack that evokes the flavors of season and will satisfy the hunger you build up while outside on these crisp fall days.

If you haven’t had a Carr’s whole wheat cracker yet, add them to your next grocery list. You’ll find them to be much more substantial than a typical cracker. The whole wheat really fills you up, but they also have a touch of sweetness that makes it seem like you’re eating more of a cookie than a cracker. It’s hard to explain, but I know that I can eat two or three with a cup of tea and consider it the perfect mid-morning snack.
We’ve already raved about our love of apple butter in this post, so there’s not much more to say there. Other than to remind you to pick up a sack of apples and get yourself a jar.
Then there’s the cheese. Do you have a favorite cheddar? Whenever I want a basic, not too expensive cheddar that has that perfectly sharp bite, I look for Cabot’s Extra Sharp. The description on their site says it best, the cheese is “creamy white in color with an almost crumbly texture and has a sophisticated, citrusy tang”.

Cheddar gets its name from an extra step in the cheese-making process called cheddaring where loaves of curds are allowed to set until they reach a certain acidity, they are then cut into loaves, stacked, and turned every 10 minutes until further acidity points are reached. While changing the acidity, this process adds flavor and creates the crumbly texture that cheddars are known for. After the batch has been cheddared and salted, the curds are placed into cheese molds and aged for anywhere from 1 month to over 10 years, depending upon the type of cheddar being made. The Cabot Extra Sharp is aged for anywhere from 9 to 14 months (whereas their mild cheddar is aged for just 2 to 3 months).

Want a few more fun cheddar facts?
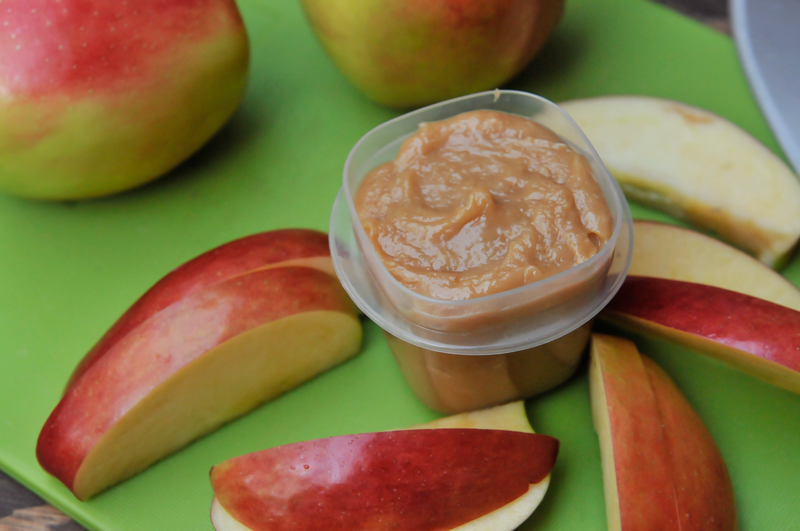
As you know, apples are our ingredient of the season and with that in mind, I decided to make a childhood favorite of mine, caramel dip. Over the years, my tastes for sweets has drastically decreased. I’m now a dark chocolate lover and I tend to gravitate towards salty snacks, but when October rolls around I always think of my mom’s caramel dip. She used to whip up a batch for friendly gatherings, holiday dessert tables and if my memory serves me correctly, the soccer concession stand.


This recipe is dubbed ‘the easiest caramel dip’ because you’re not actually making the caramels, you’re simply melting them and adding a couple other ingredients to achieve the right taste and consistency. Its simple preparation (no knives involved!) makes it a great recipe for the kiddos to help with. It can also be made a day or two ahead if you have a big party approaching and in my opinion, those are the best types of party foods.


The original recipe, which was dictated to me by my mom earlier this afternoon calls for Cool Whip. My mom mentioned that she didn’t really know why the Cool Whip was added (since it’s mainly just oil) and that I could probably find a substitution for it, but that she never bothered. Raising four kids, working full time, and constantly cooking for us, I can understand why she didn’t want to mess with a hit like her simple caramel dip. Can you imagine the moans and groans we would have attacked her with if the dip didn’t taste right? Anyway, after I went grocery shopping and snapped the first shot of the ingredients I realized I don’t have four kids and thus I could manage to experiment without any repercussions and such, this recipe contains Cool Whip no more! I opted to use a couple spoonfuls of coconut oil instead and to my delight, it turned out perfectly and you can’t taste the coconut one single bit.
Along with sliced apples, I also dripped some of the caramel dip onto plain, unsalted popcorn and roasted, unsalted peanuts. It made for a sweet and crunchy treat.


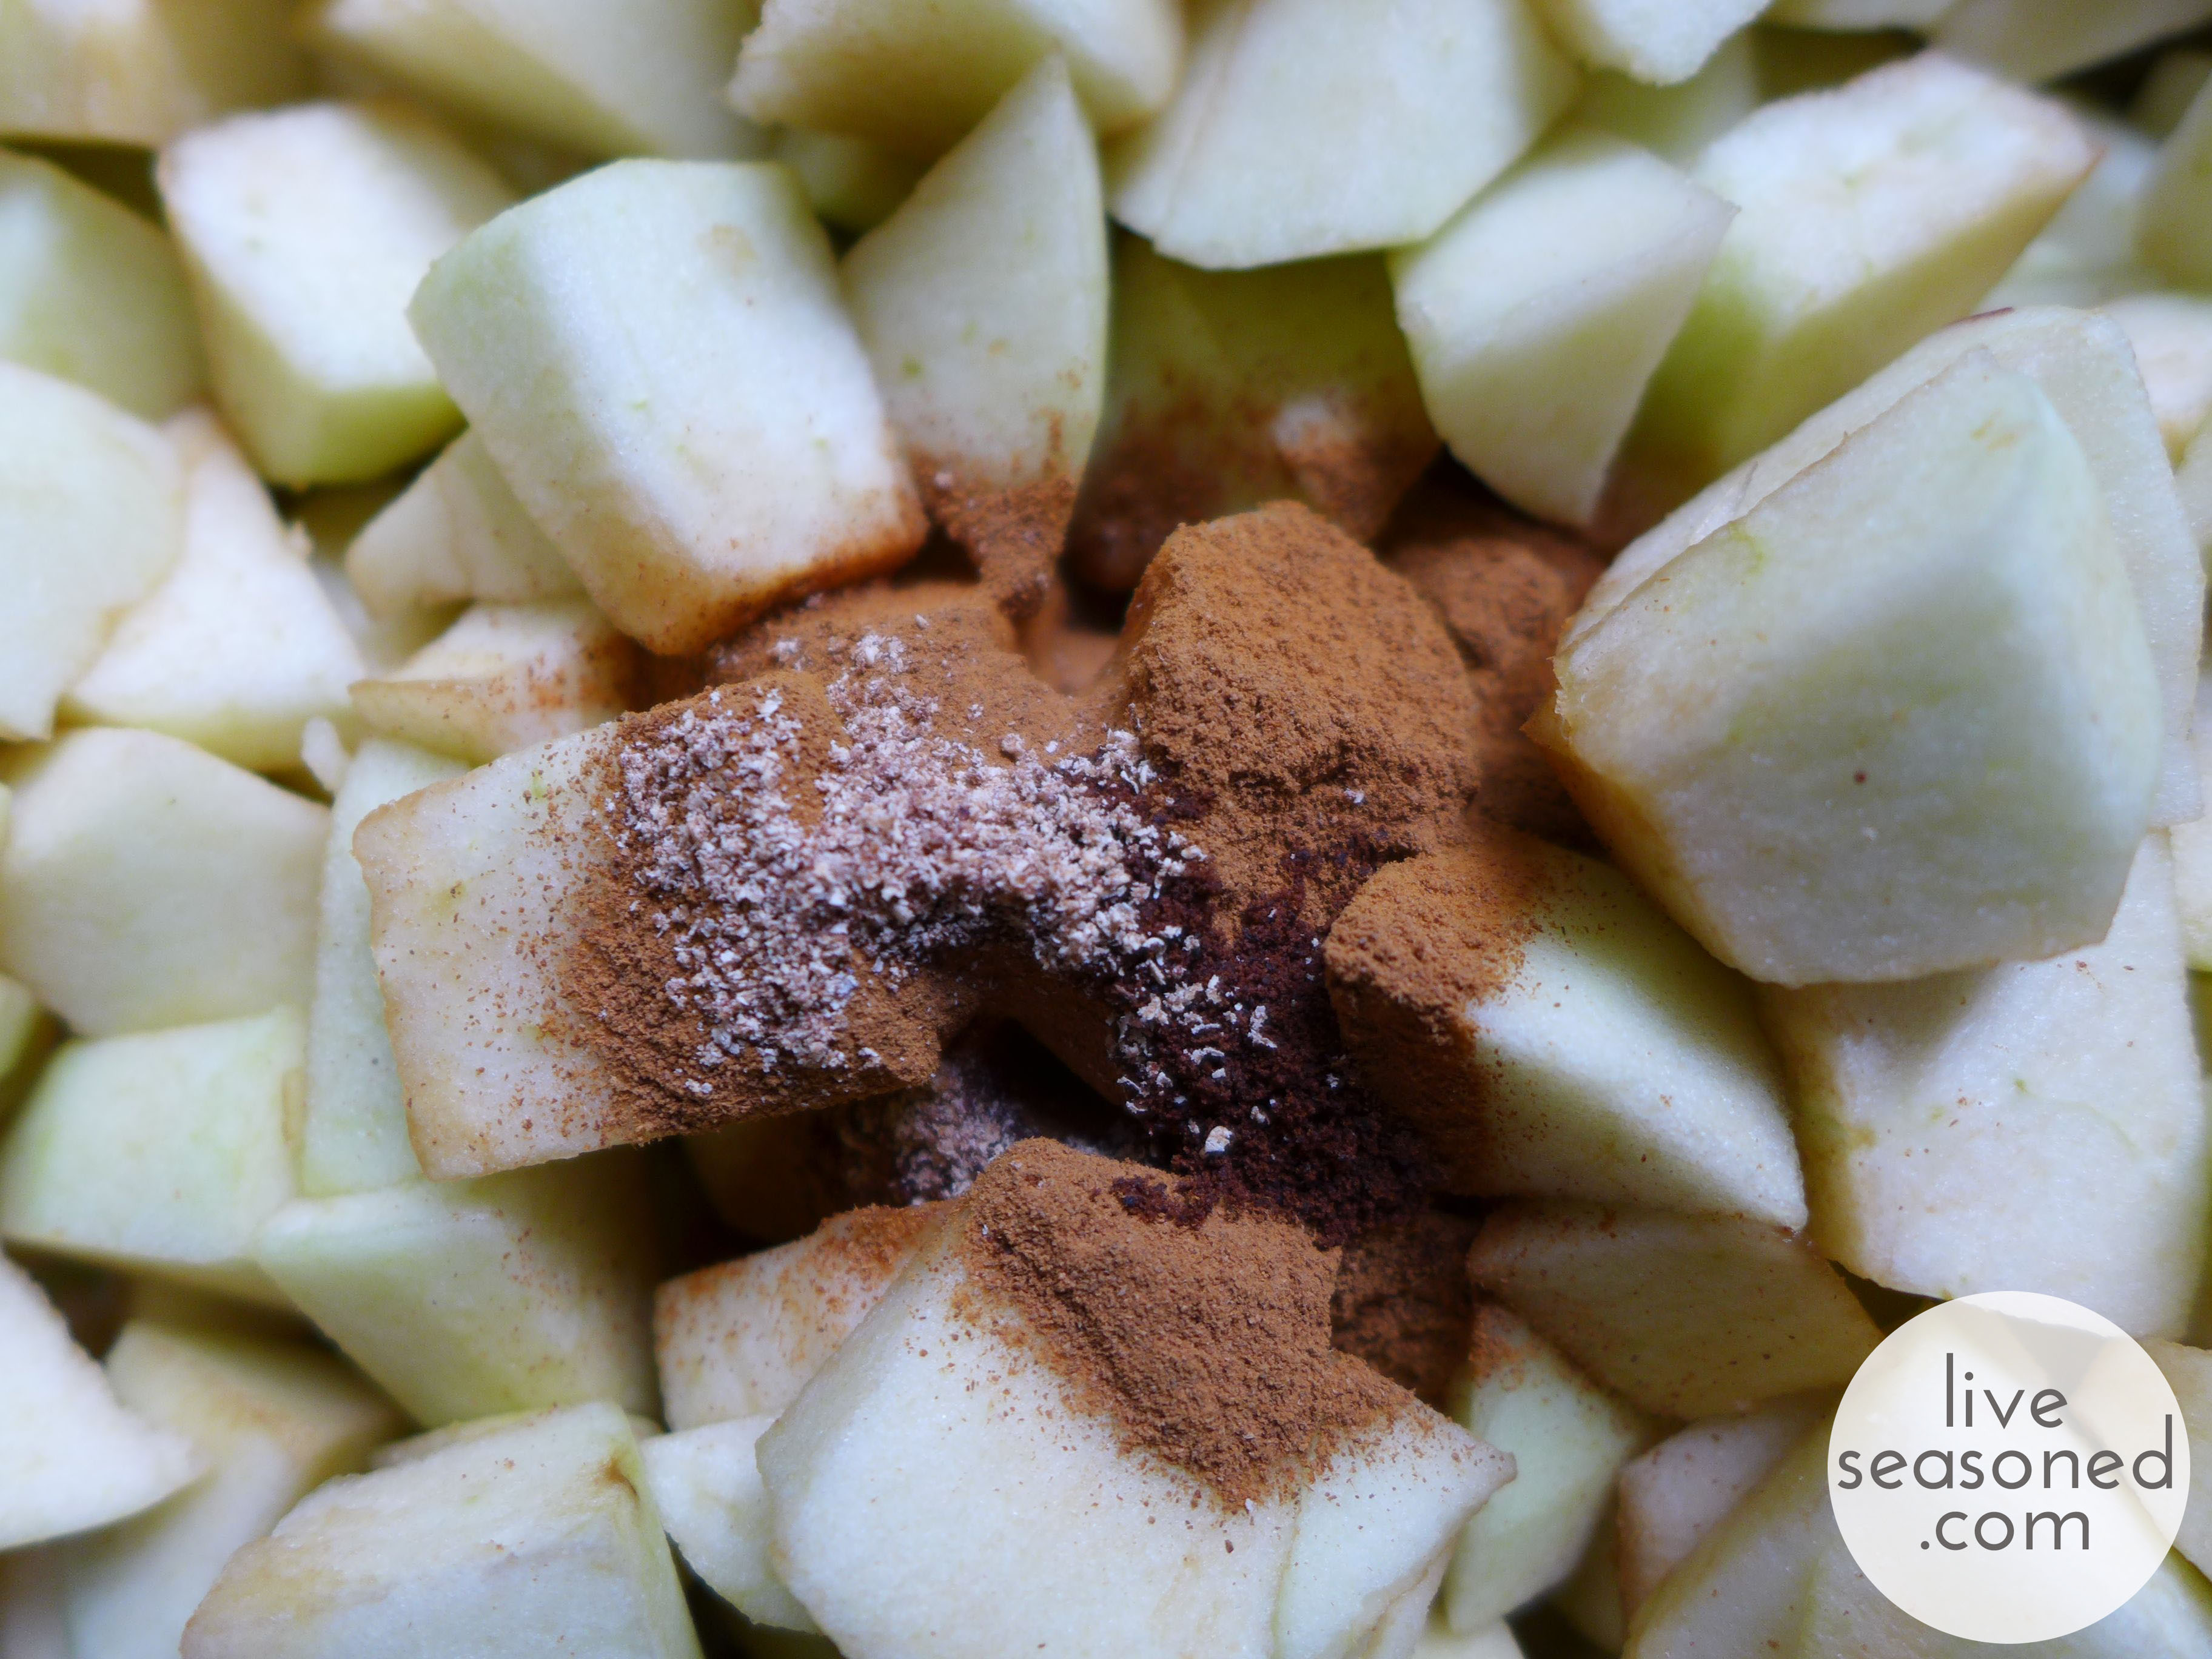
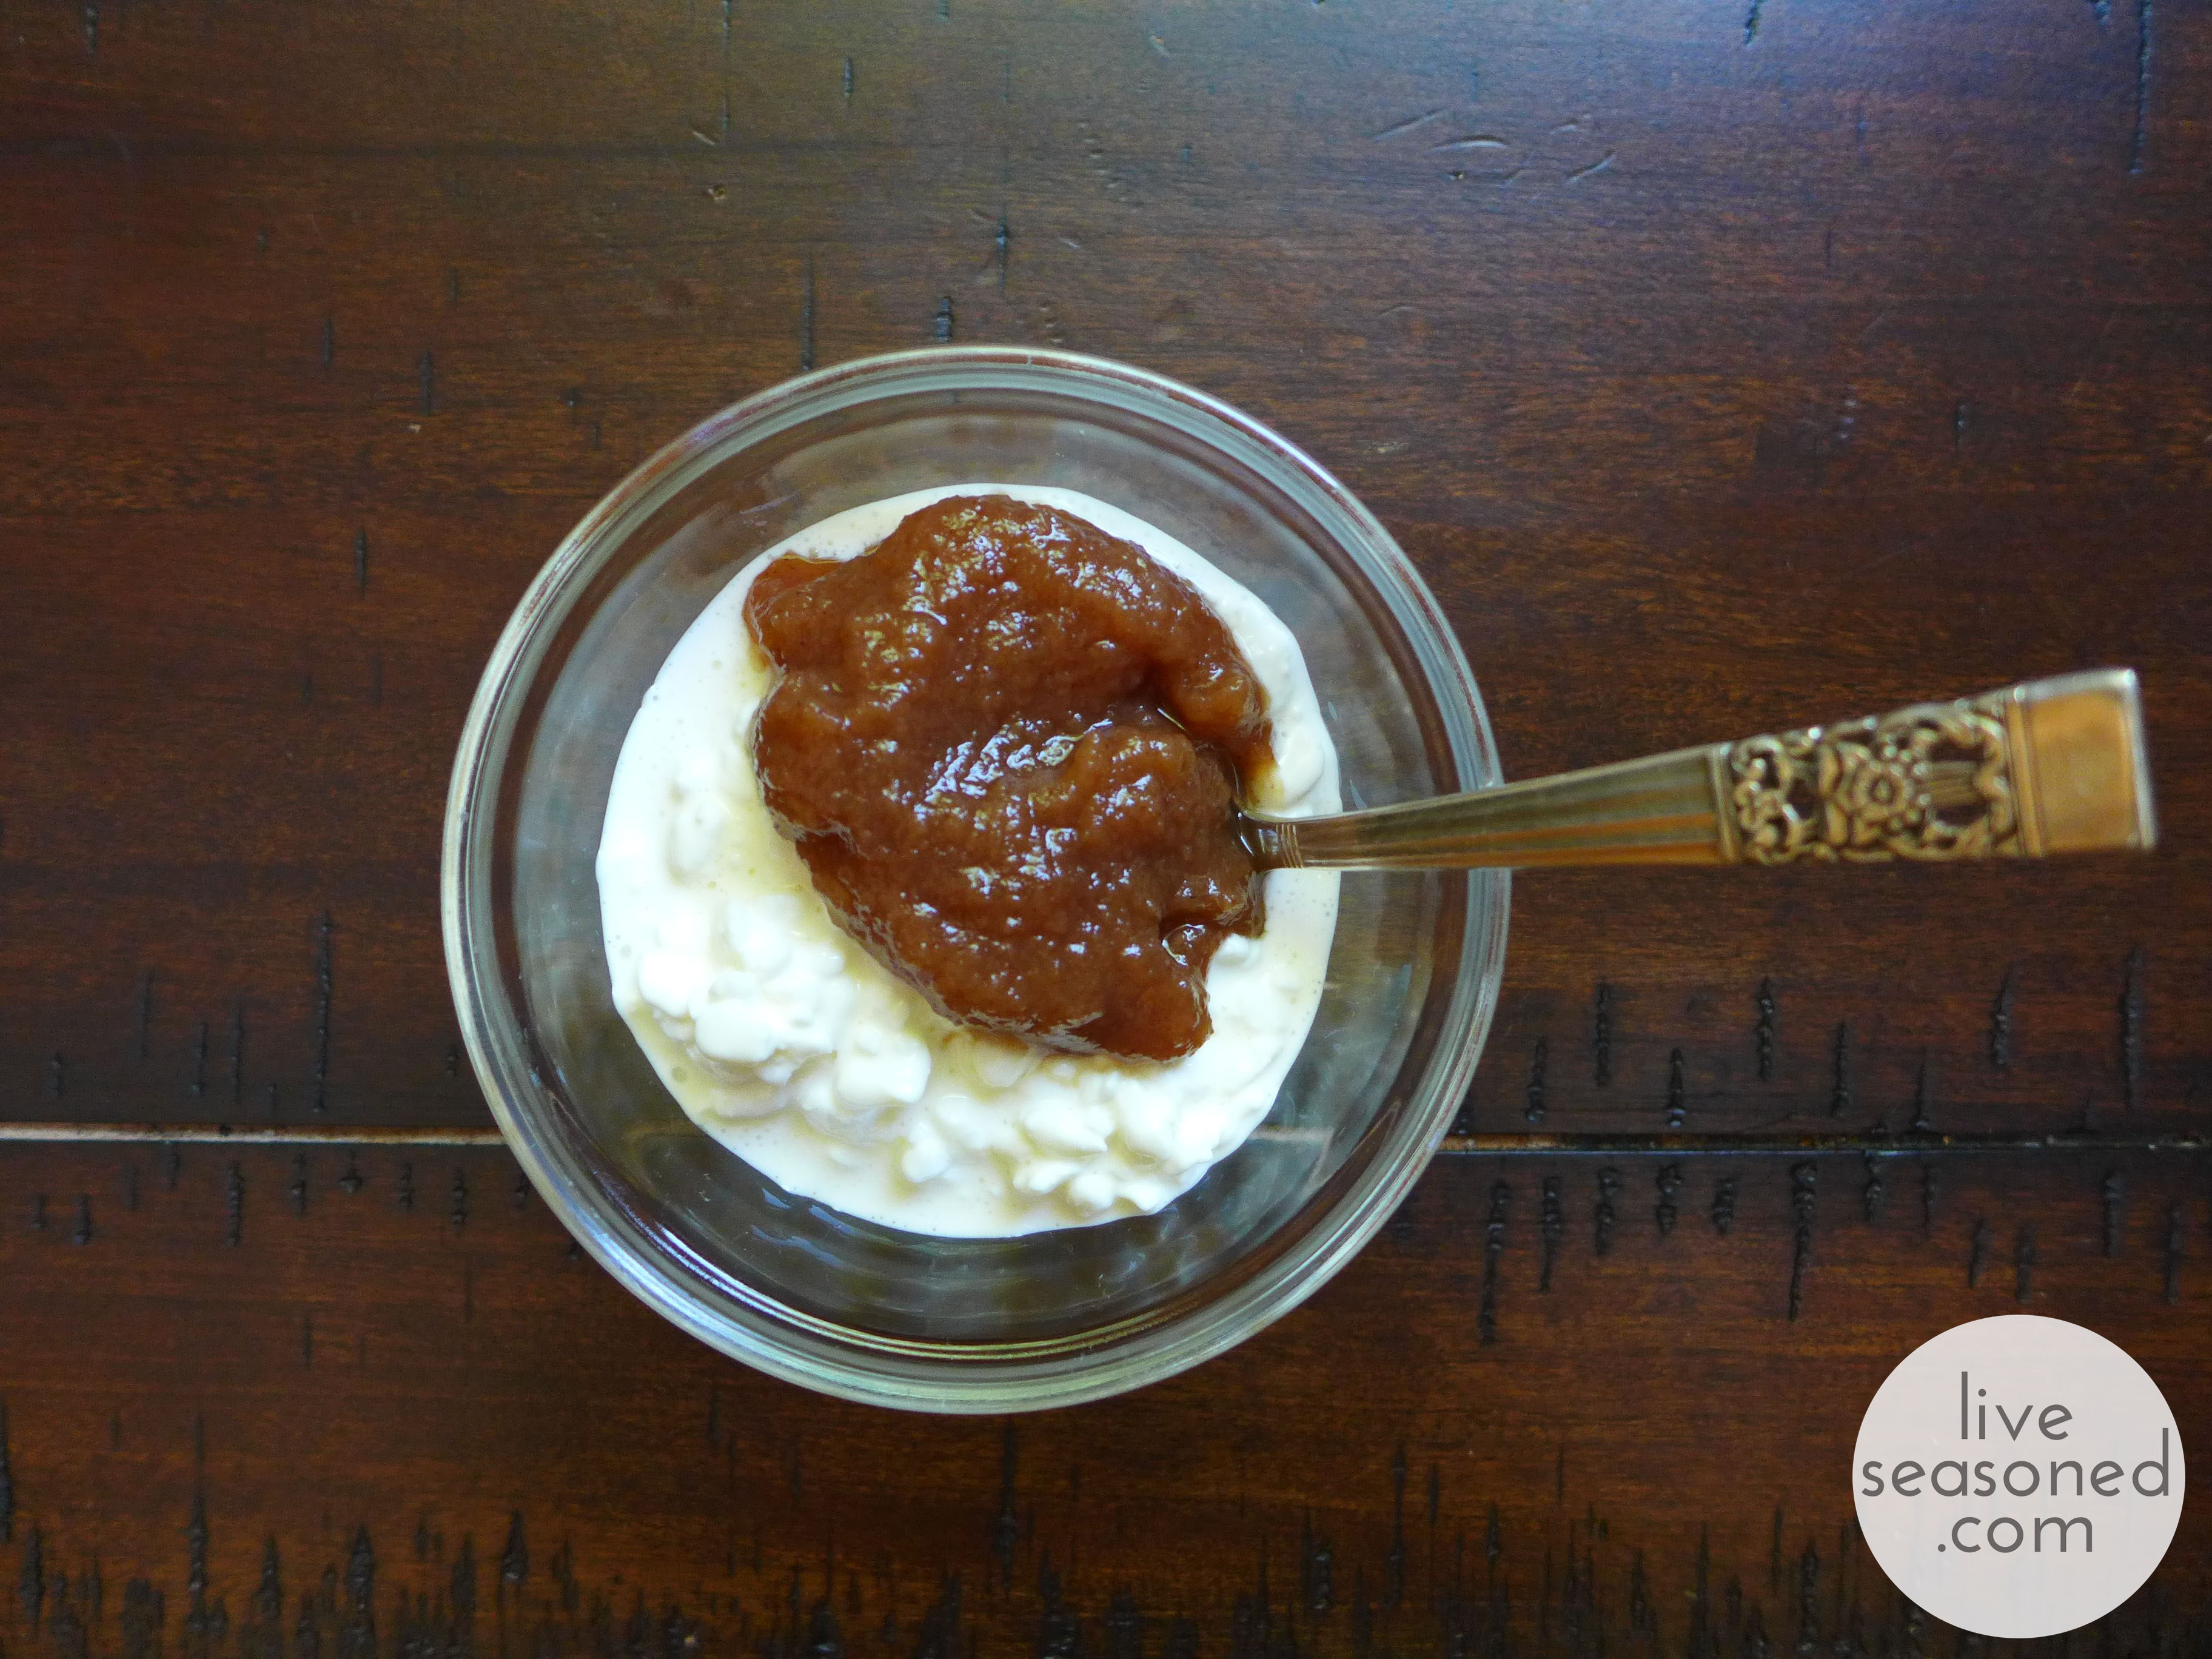
Have you tried apple butter yet? Apple butter is a more concentrated form of apple sauce, taking all of fall’s best flavors and turning them into the perfect little condiment. It was originally developed as a form of preserved apples that would last longer than apple sauce because of its higher sugar content. If you’ve never had it, it may be because it’s more of a regional food. Apple butter was developed in Germany and the Netherlands, making it a more popular condiment in regions of the US that were settled by people from those countries, particularly the Amish. If you haven’t had it, I encourage you to seek out a jar (or jump in with both feet and make our version below) ~ it’s soooooo good! Stumped on how to eat it? The spread is often eaten with bread, but I’ll share a few more fun ideas below.


I have to admit, two weeks ago when I was making this batch of apple butter, I was exhausted and little A was squawking because he wanted to go outside, making me question why I wasn’t just running to the store to pick up a commercial jar. But I quickly had a change of heart. Other than the hour of peeling and chopping, this butter required so little work, that I’m solidly convinced it’s worth the effort, especially since I can tailor the recipe to my wants, being sure to buy organic apples, lowering the sugar, and upping the spices. Plus, the concentrated apple and spice flavor is such a perfect condiment for the season, and that’s what we’re all about!
I have made apple butter many times, and never the exact same way, but every time it turns out delicious. I’ve made batches that started with 40 lbs of apples all the way down to this measly batch that started with 4.5 lbs. I’ve also made it in an electric roaster, an electric frying pan, and a crockpot. I’ve found the crockpot to be the easiest, but use what you have! That’s all to say – this particular condiment is so forgiving. As long as you start with a big pile of apples and allow them to cook down slowly with a touch of spices, liquid, and sugar, you’ll end up with something delicious. I promise.


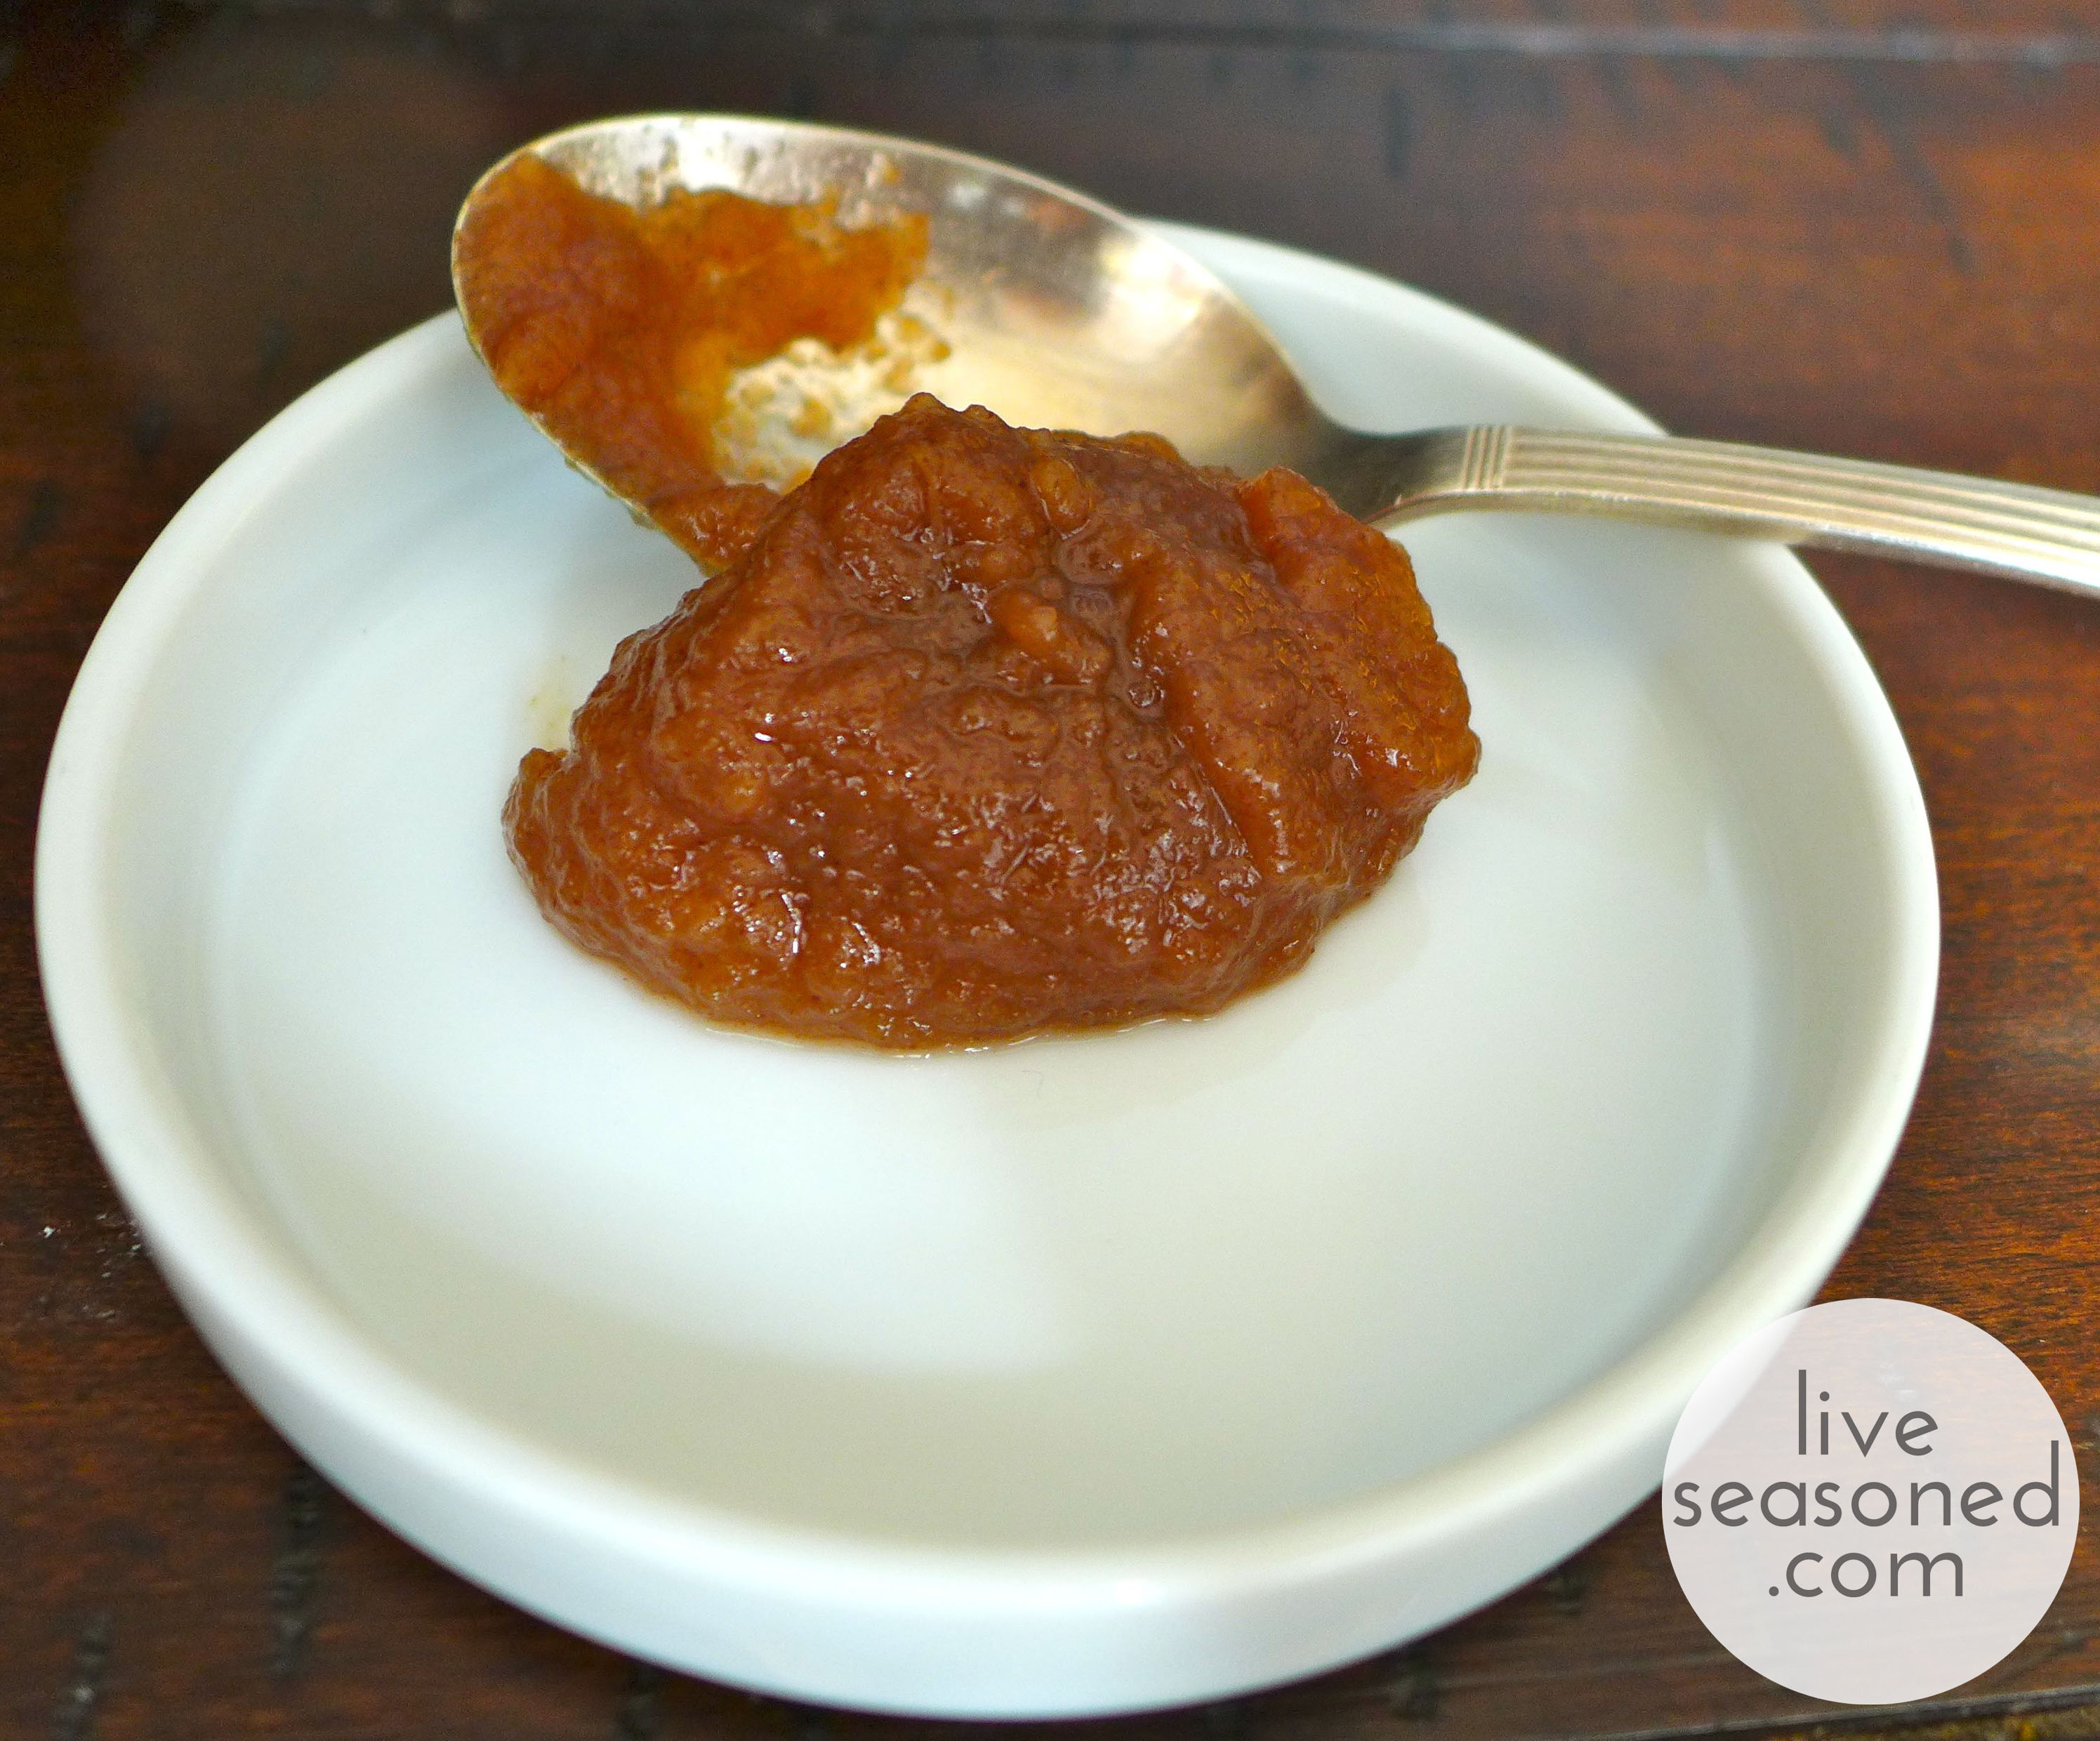
This batch made 5 cups of apple butter. We’re currently down to about 2.5 cups, so yes, we have plenty of serving suggestions!