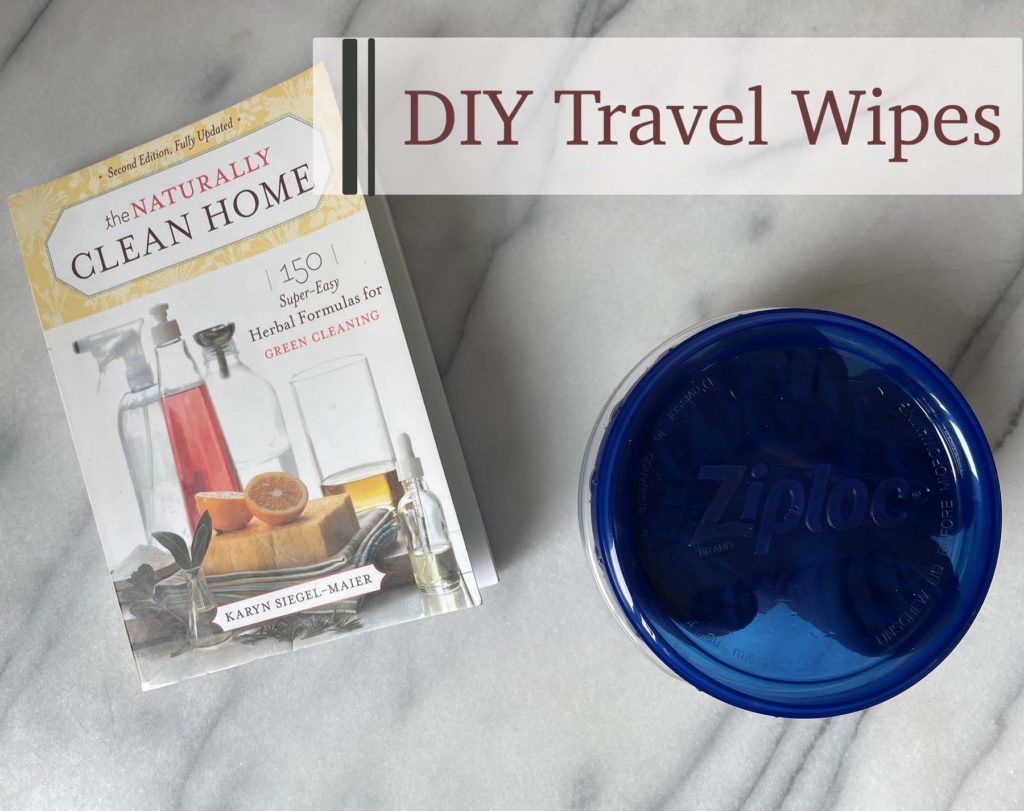
If you’ve started making your own home cleaners, then you may already have all of the ingredients that you need to make these handy dandy wipes.
Continue reading
If you’ve started making your own home cleaners, then you may already have all of the ingredients that you need to make these handy dandy wipes.
Continue readingHave you tried aromatherapy? Aromatherapy is the process of using plant parts or aromatic plant oils (think essential oils) to improve psychological or physical well-being.
 There’s a growing body of evidence that some uses of aromatherapy have measurable success rates. In this post, we are particularly interested in using aromatherapy to improve sleep, and we’ll share a super simple potion with you below.
Jingle bells batman smells… We’re back with another round up of Christmas crafts, but this time they’re ones you can gift to your friends. On Monday, we shared delicious treats that are perfect for giving and today we’ll round out your gift list by adding a few non-edibles for your loved ones. These DIY gifts range from easy to advanced (mostly because of the ingredients), but we explain everything you’d ever need to know in the posts, so hop to it! We also sell a few of these items in our Live Seasoned etsy shop if you’re low on time. All of these homemade gifts have natural, gentle ingredients perfect for any loving home. We also love to pair these items with other handmade goods to really amplify the maker aspect of these presents. We love supporting other crafters and creators so after you whip up these potions, browse around on etsy for perfect pairing gifts if you think your loved ones deserve a little more this holiday season.


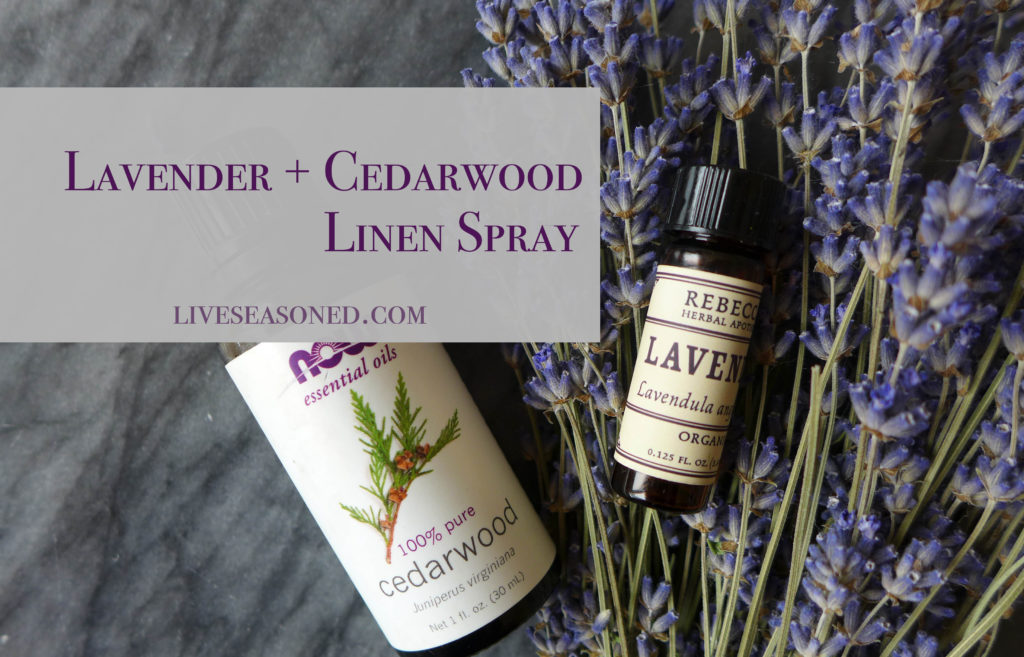
It’s been almost two years since we shared a room spray, which is surprising because these are so easy to make and do a fantastic job of freshening up a room without any of the overbearing artificial fragrances found in many store-bought sprays.
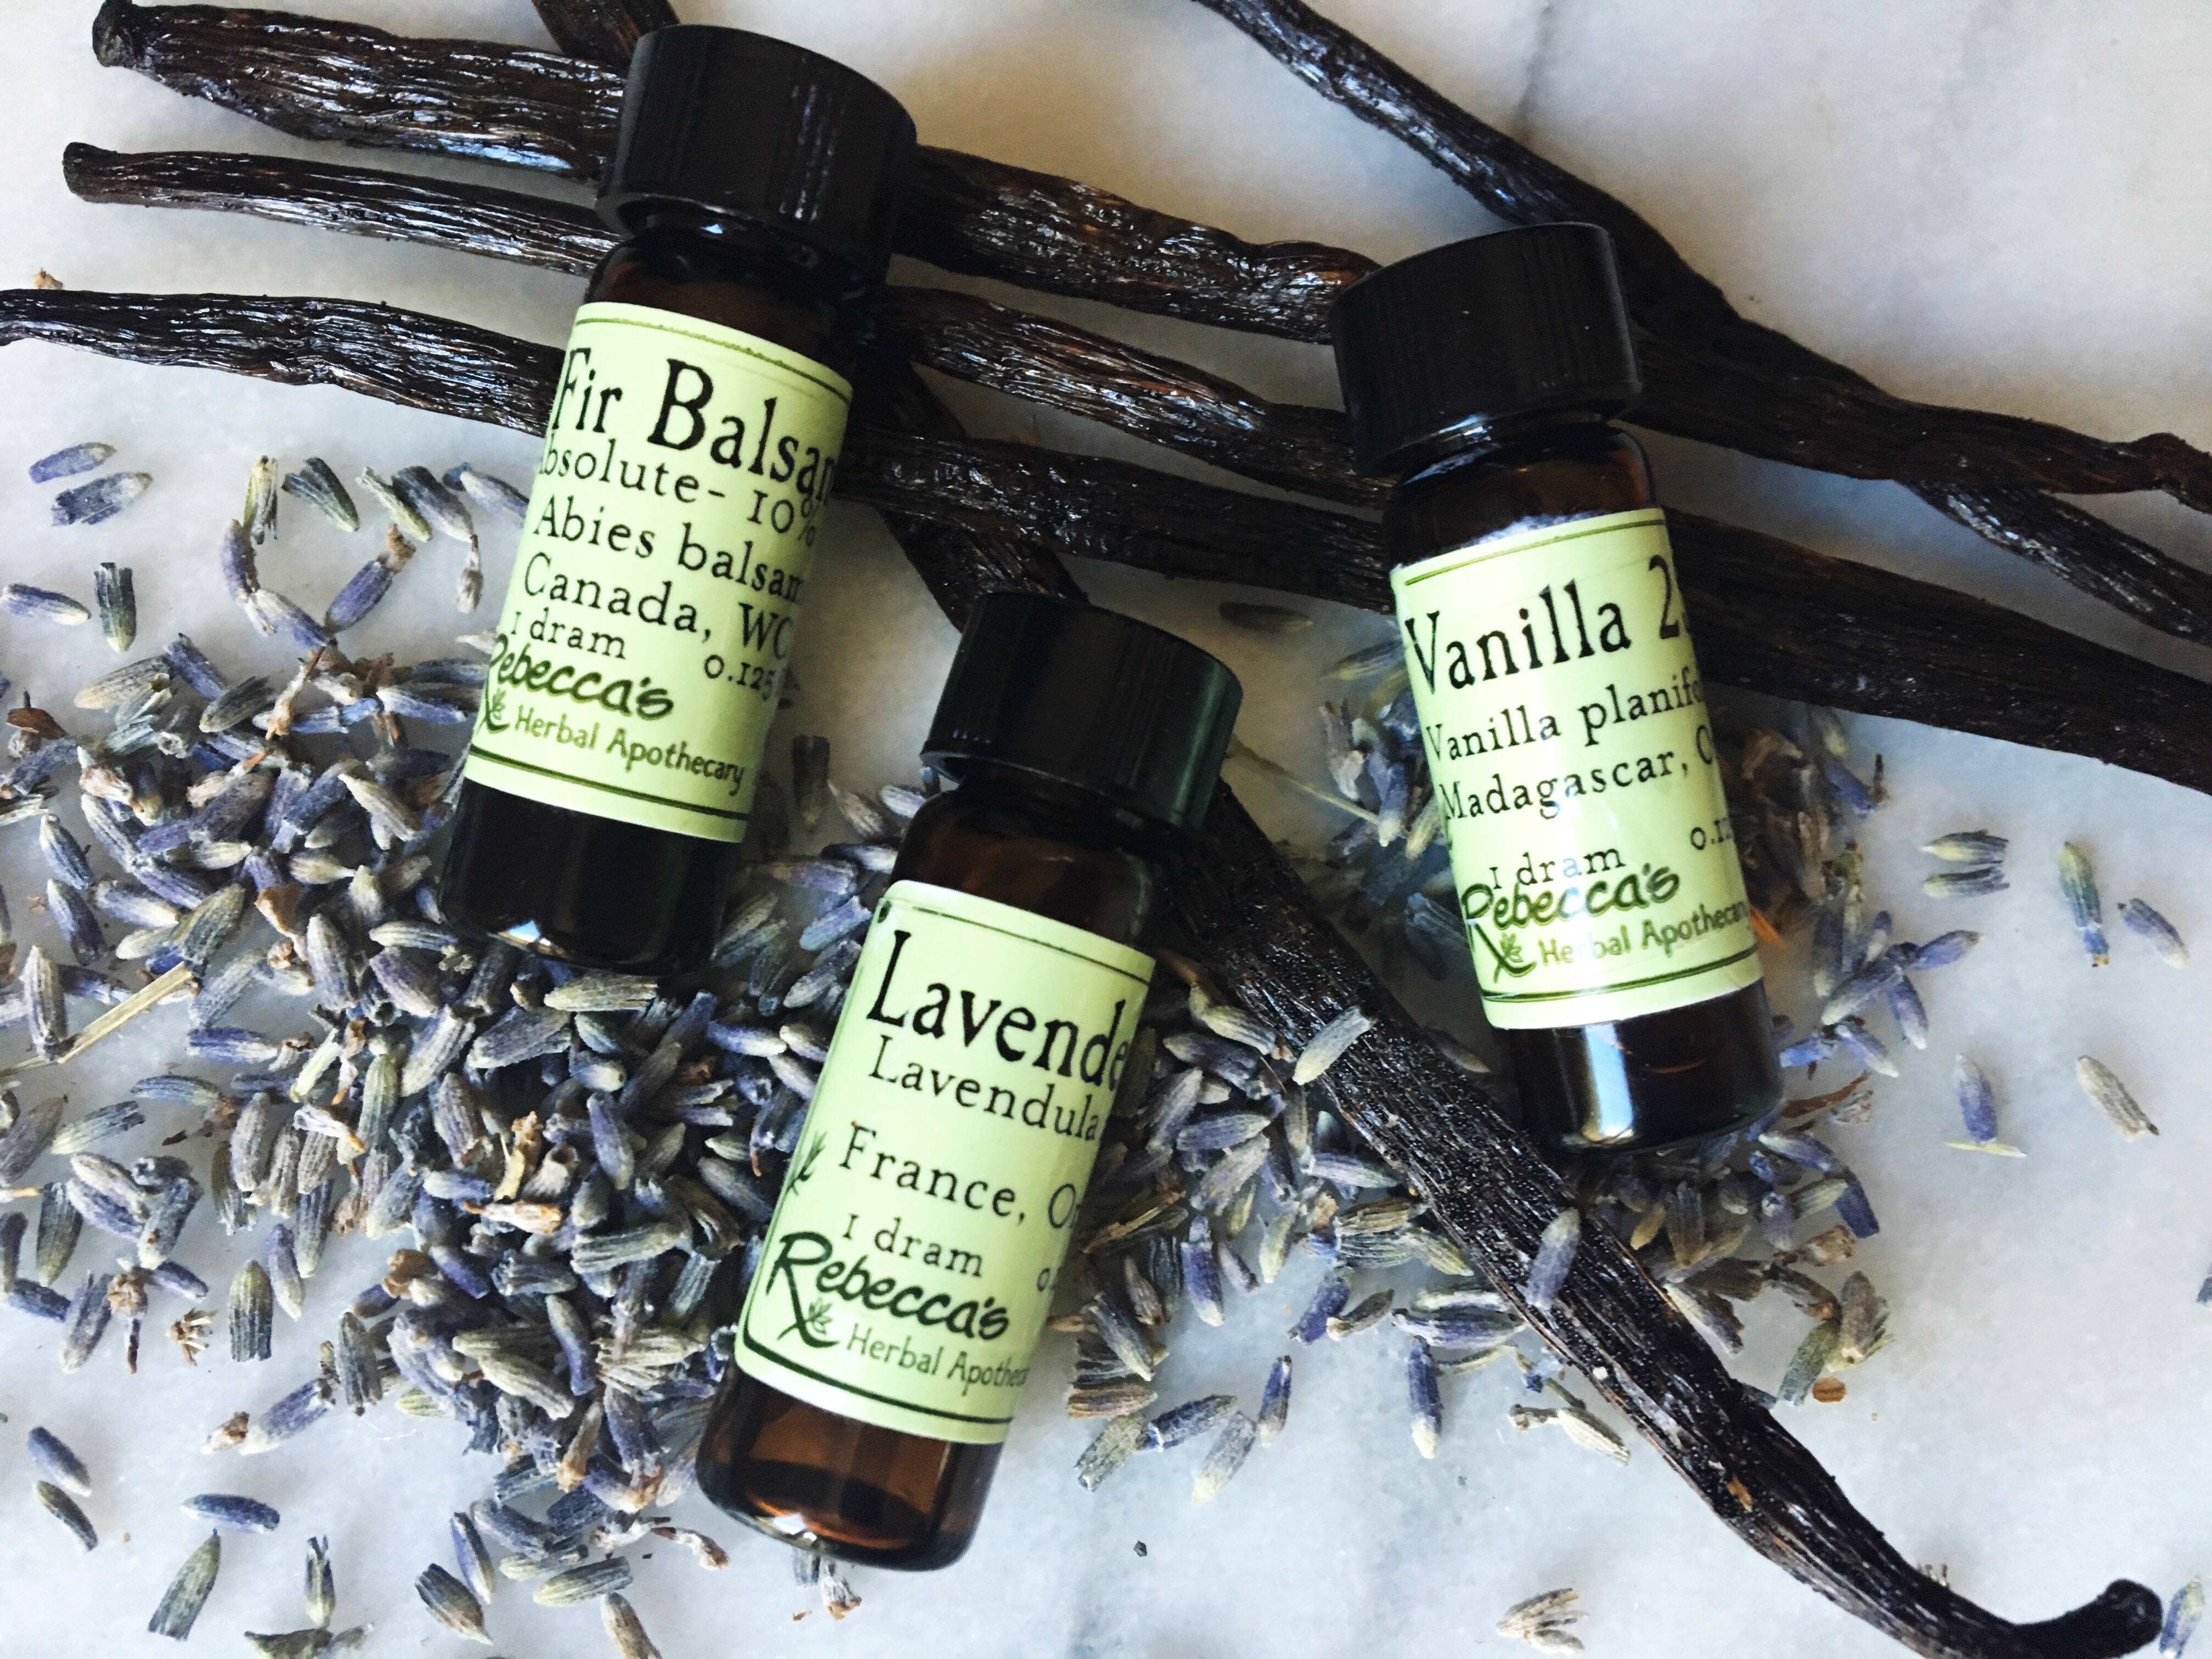
Whereas the rosemary and peppermint created an energizing combination, the lavender and vanilla combination in this spray provides a calming aroma. I added some fir balsam to this spray because I wanted something a little more complex. The fir balsam essential oil does a great job of bringing some of the outdoors in when it’s still a touch too cold to have the windows open here in the mountains.
To further enhance the vanilla aroma of the spray, I used our vanilla-infused vodka for the alcohol.
Pour everything into the bottle, give it a good shake, and spray away! You will have to shake it before every use. Really, it’s that simple!
And as we mentioned in the previous room spray post:
Moving into our new house, I had one thing on my mind when it came to the showers : keeping them clean! Let’s be honest, they are never really squeaky clean, but I wanted to be sure that they stayed free of mold and mildew. We have three showers in the house, and they are all tiled and have glass doors, so there are a lot of grout cracks and door crevices to keep my eye on.


With the limited time I have, I knew I wouldn’t be in there scrubbing them each week, so I was on the hunt for a mold and mildew prevention spray that I could use between deep cleans. I found just what I was looking for in my new favorite cleaning resource, The Naturally Clean Home. That is a great book for anyone looking to rid their cleaning routine of chemicals, and it’s particularly helpful if you’re new to many of the natural alternatives as she provides a great overview of what the common ingredients used throughout the book.
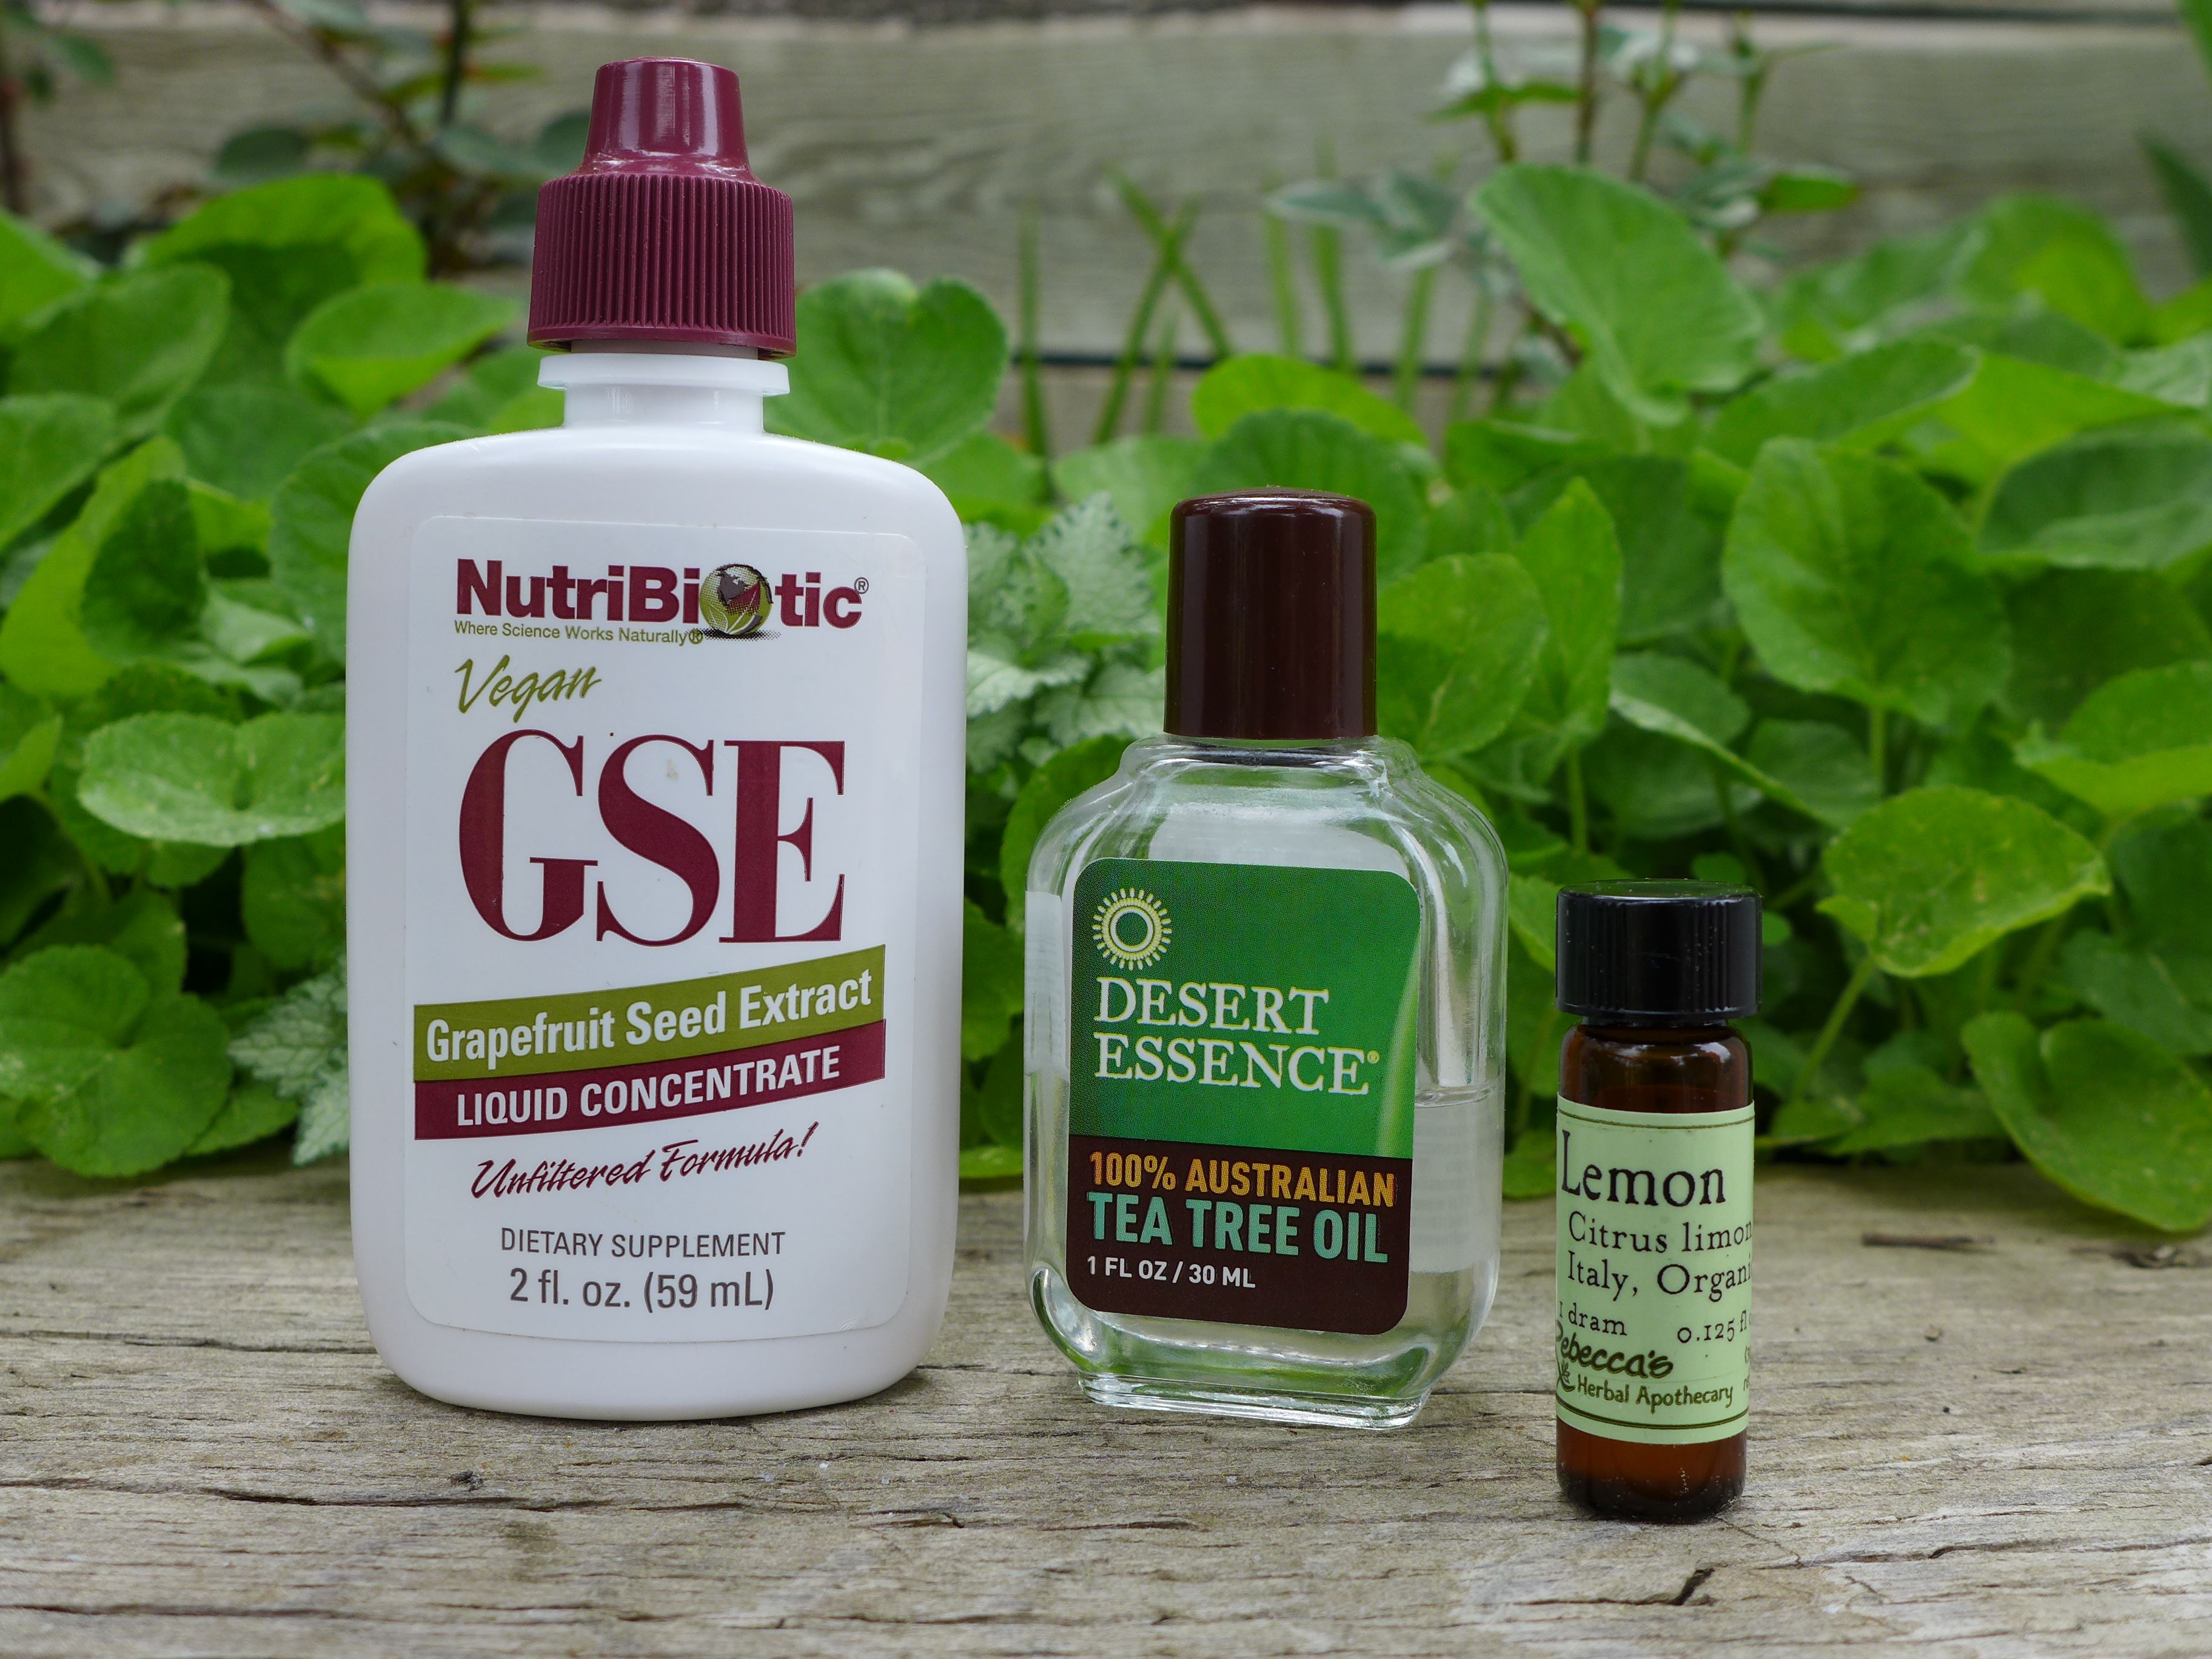
Today’s recipe uses two essential oils and a citrus extract. All three ingredients are powerful antimicrobials, helping to kill mold, mildew, bacteria, and fungus. All of the nasty stuff that you don’t want growing in your shower. Water is used as the diluting agent, because at full strength, the oils and extracts would cause damage to your skin and possibly to some of the surfaces in your shower.
Mix all ingredients together in the bottle and spray on a wet shower surface (a great time is immediately after you shower), paying special attention to cracks and crevices, especially those that are in the darker corners of your shower. I like to give the bottle a good shake before each use, just to be sure that the ingredients are well-mixed.
While this spray does an amazing job of deterring mold and mildew, and even killing the little colonies that start to grow, I’ve found that there are time when I have to add a bit of scrubbing to completely eliminate some spots. When I have them, I love to use magic erasers for this job. I find that at times they are even better than a traditional scrub brush at getting into small crevices and completely removing all signs of mold and mildew.
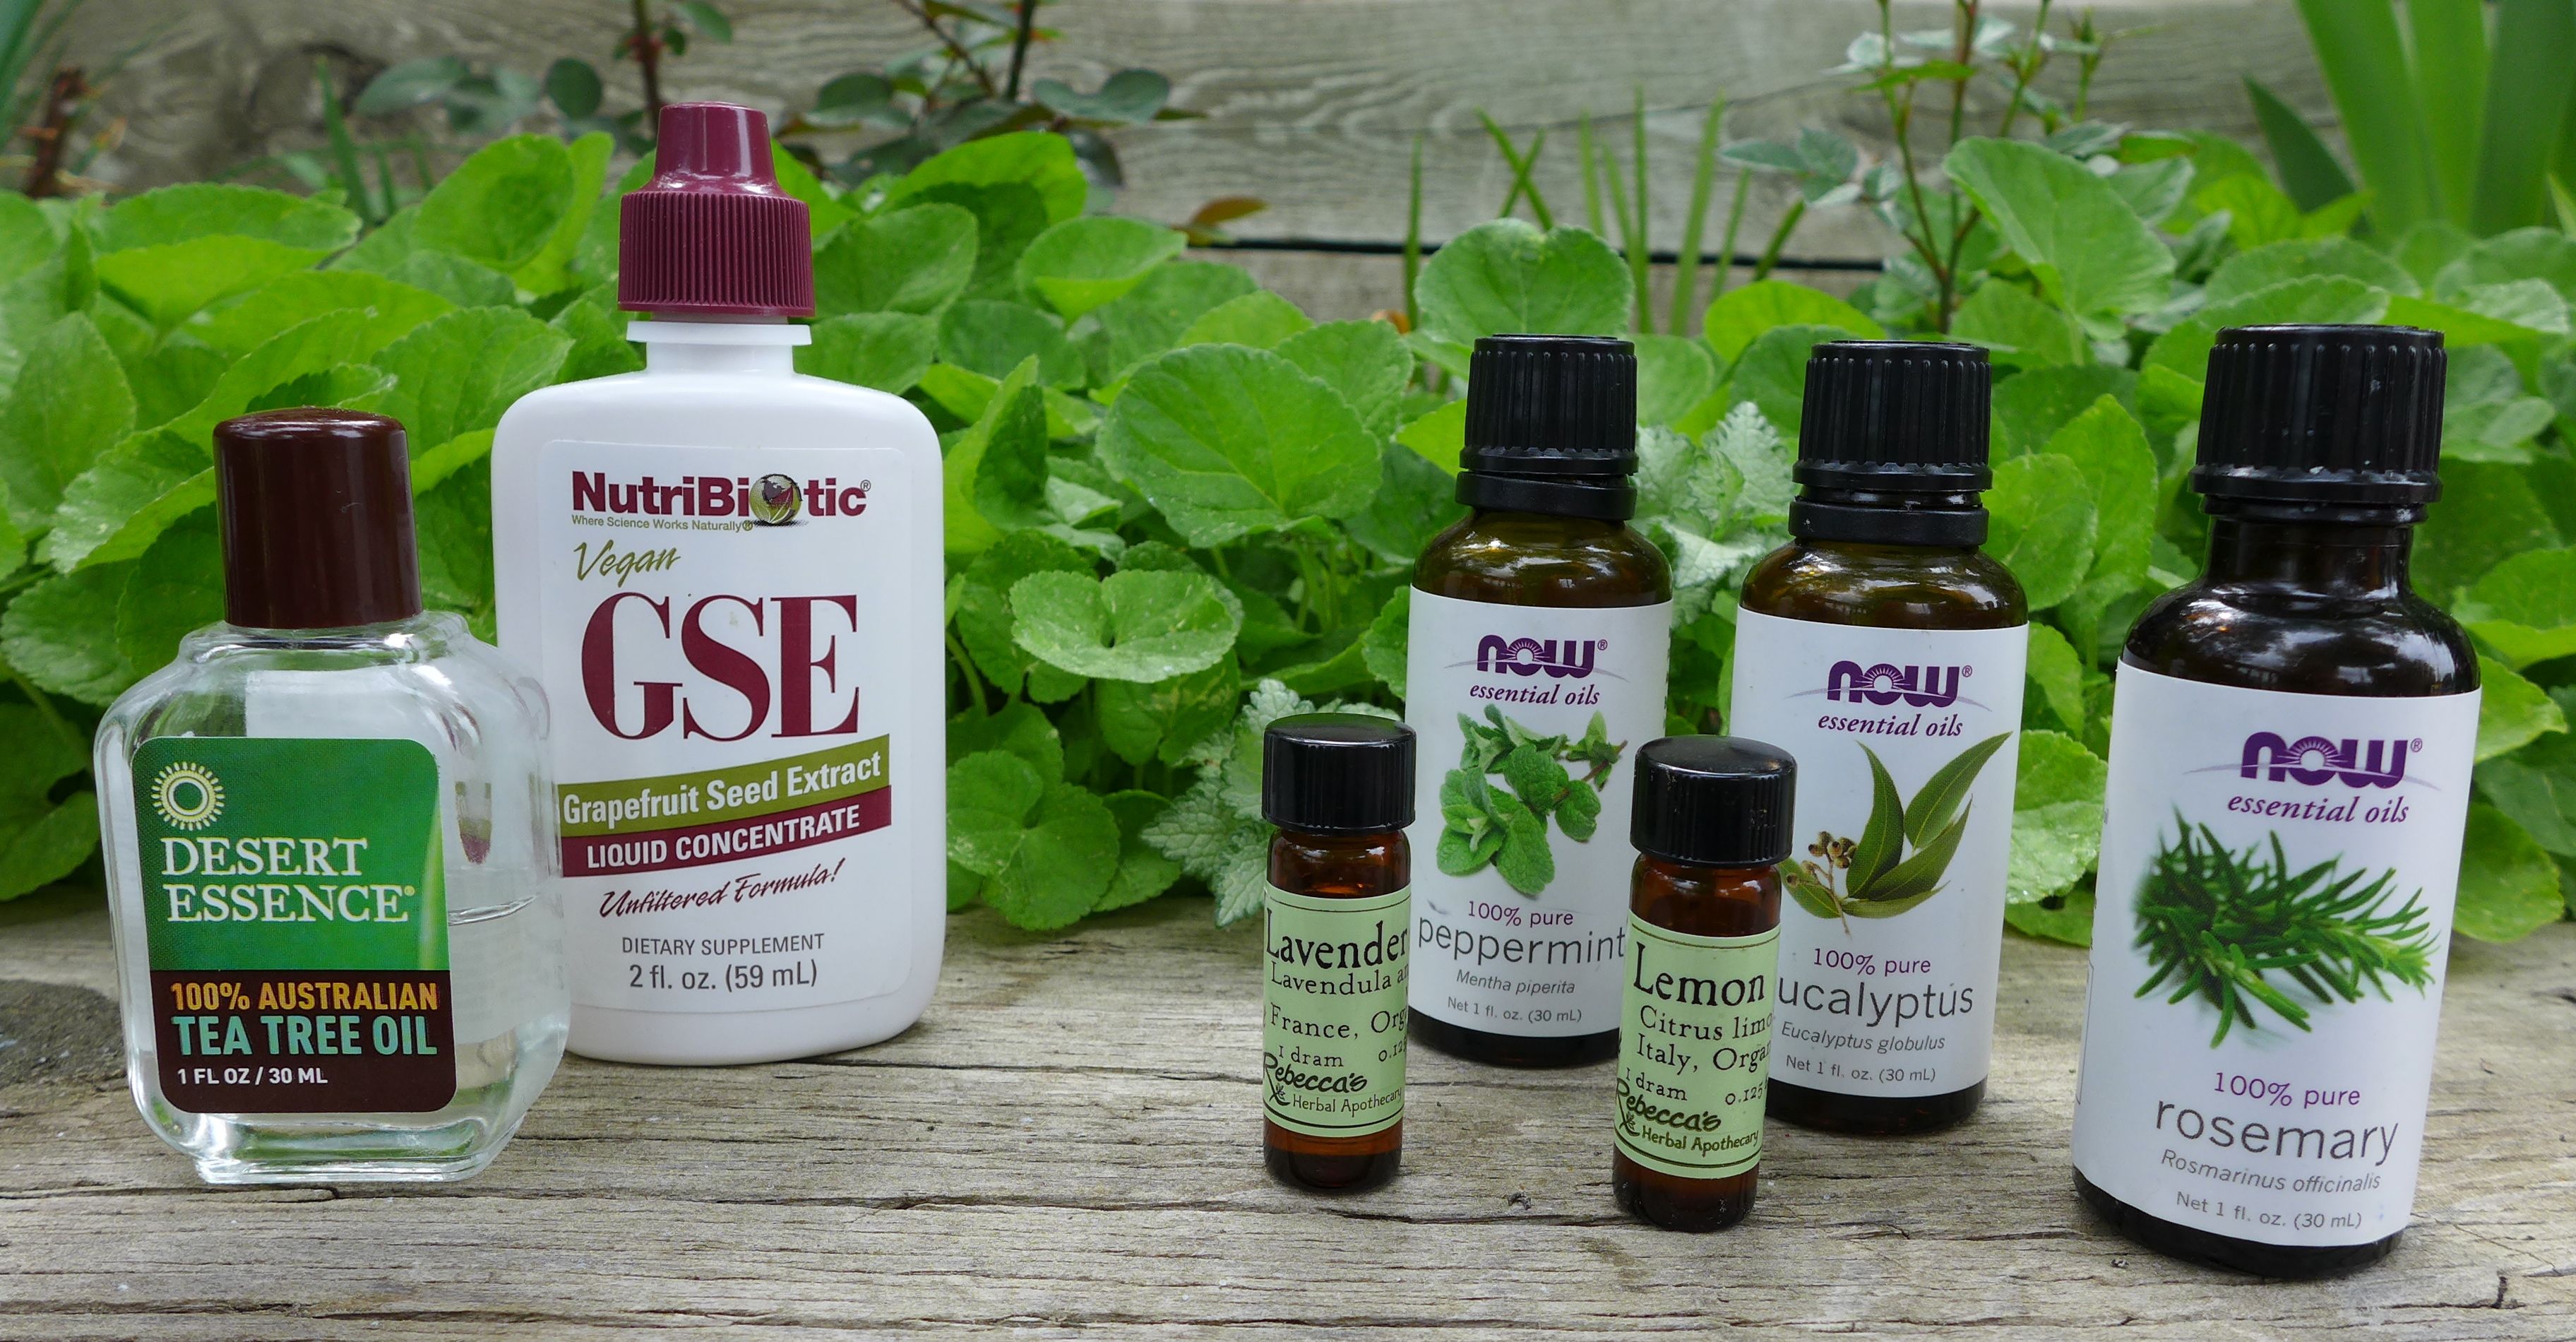
When it comes to this potion, I always use the grapefruit extract and tea tree oil, but will vary which other essential oil I’m using depending upon the season. I’ve used peppermint, eucalyptus, and lavender in the past. If you do experiment, I would recommend sticking with an essential oil that has some antimicrobial properties, but off course, you could always add a few drops of other essential oils if you like their aroma.
Now, do yourself and the planet some good : ditch the bleach cleaners and start crafting your own shower spray with essential oils!
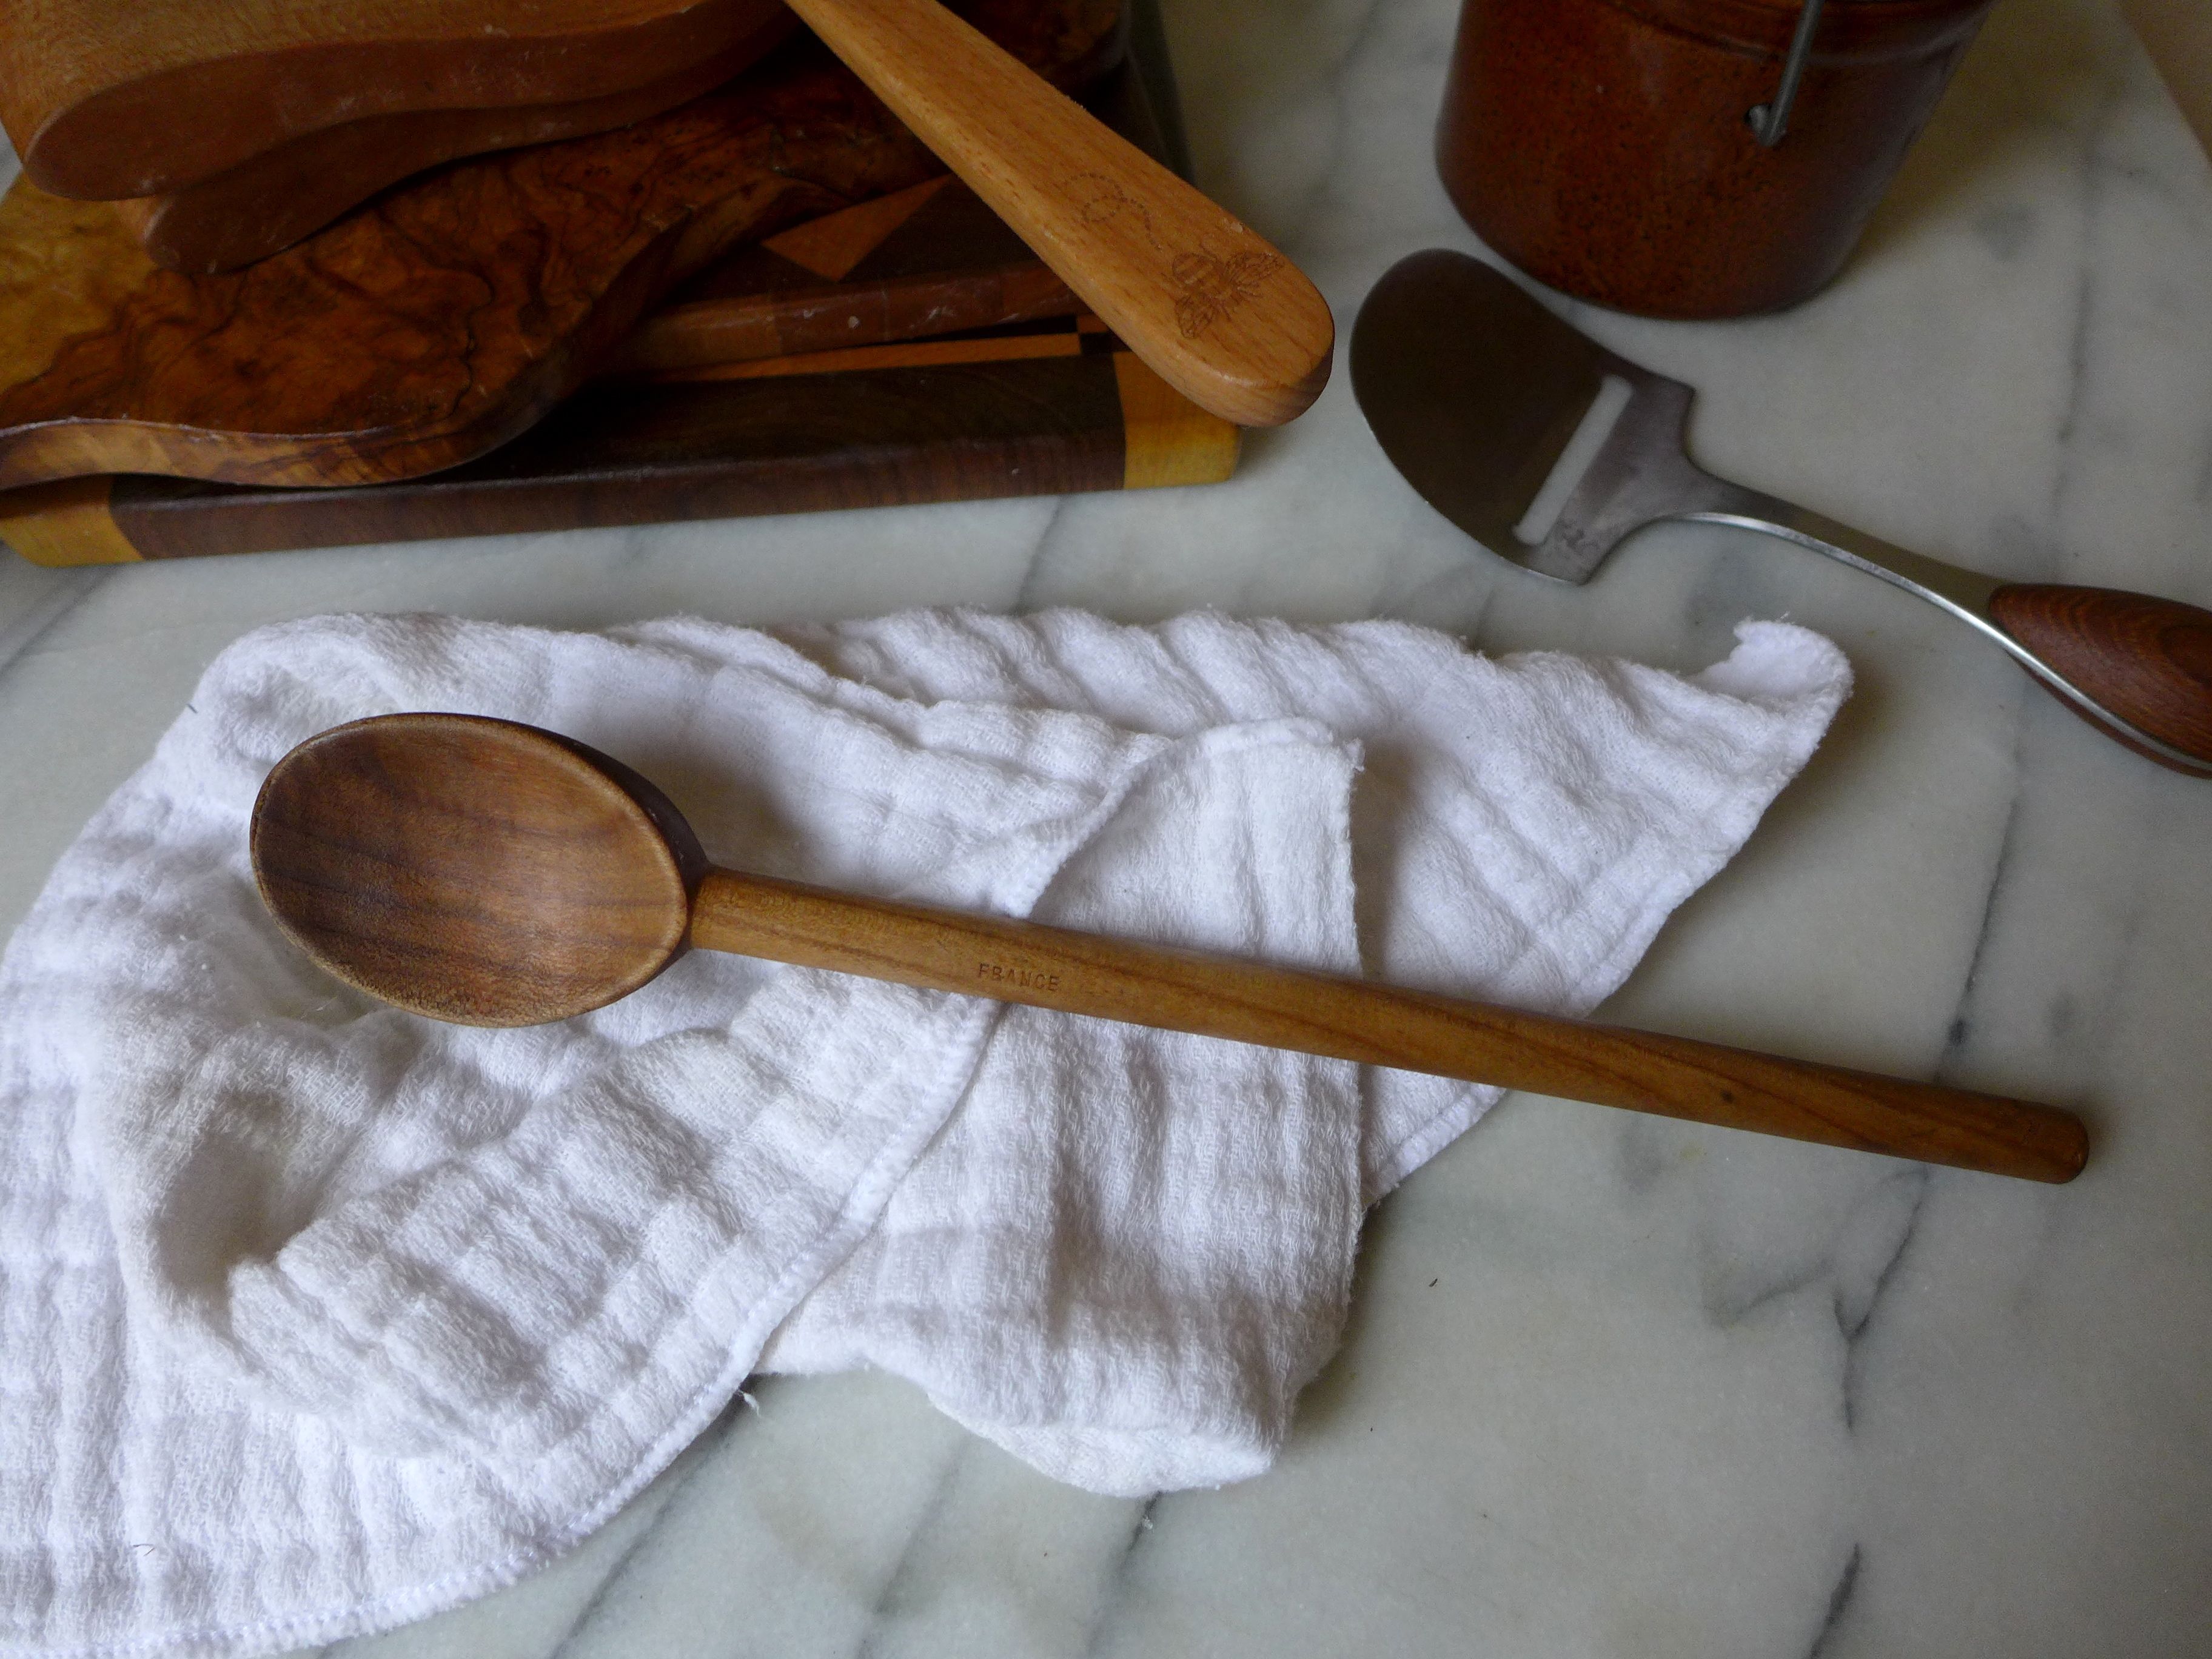
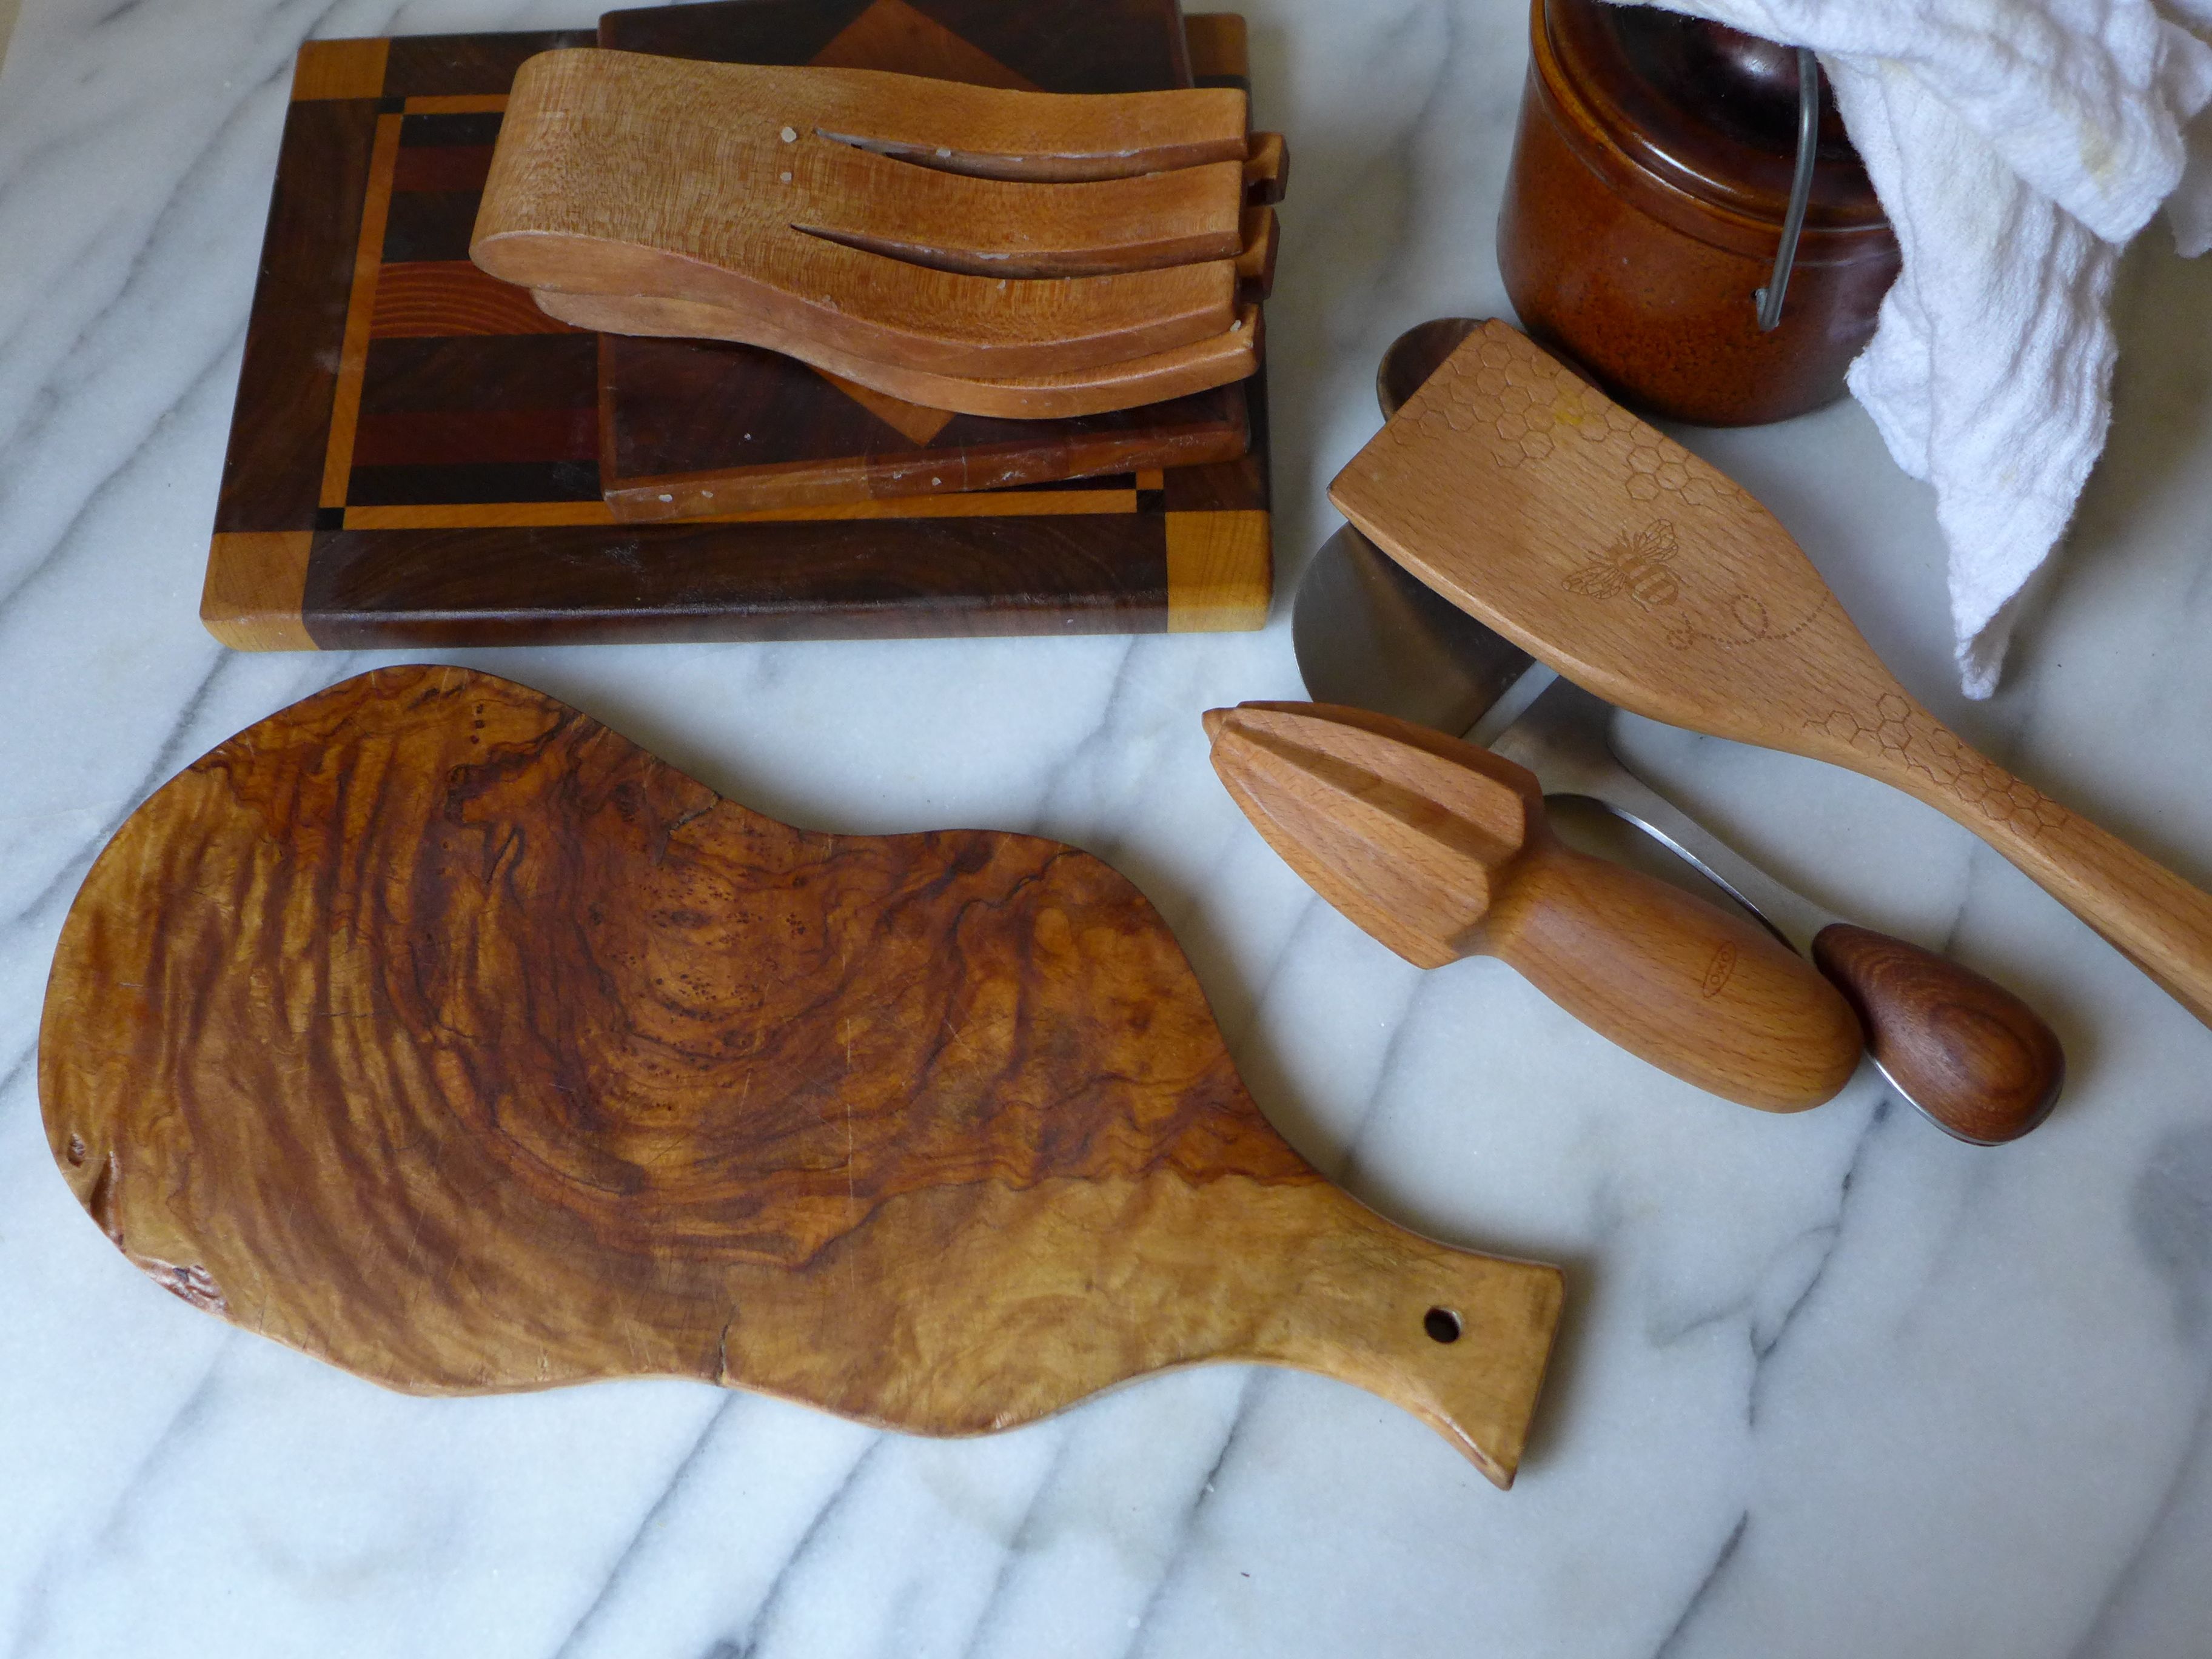
All of us have at least a few wooden items in our kitchen, likely a couple of spoons and a cutting board. Maybe you also have a wooden salad bowl? How about some fancy wood-handled serving pieces? All of these items could use some moisture to keep them looking and functioning at their best. If your spoons are looking dull and your cutting board is starting to crack, then this post is for you!
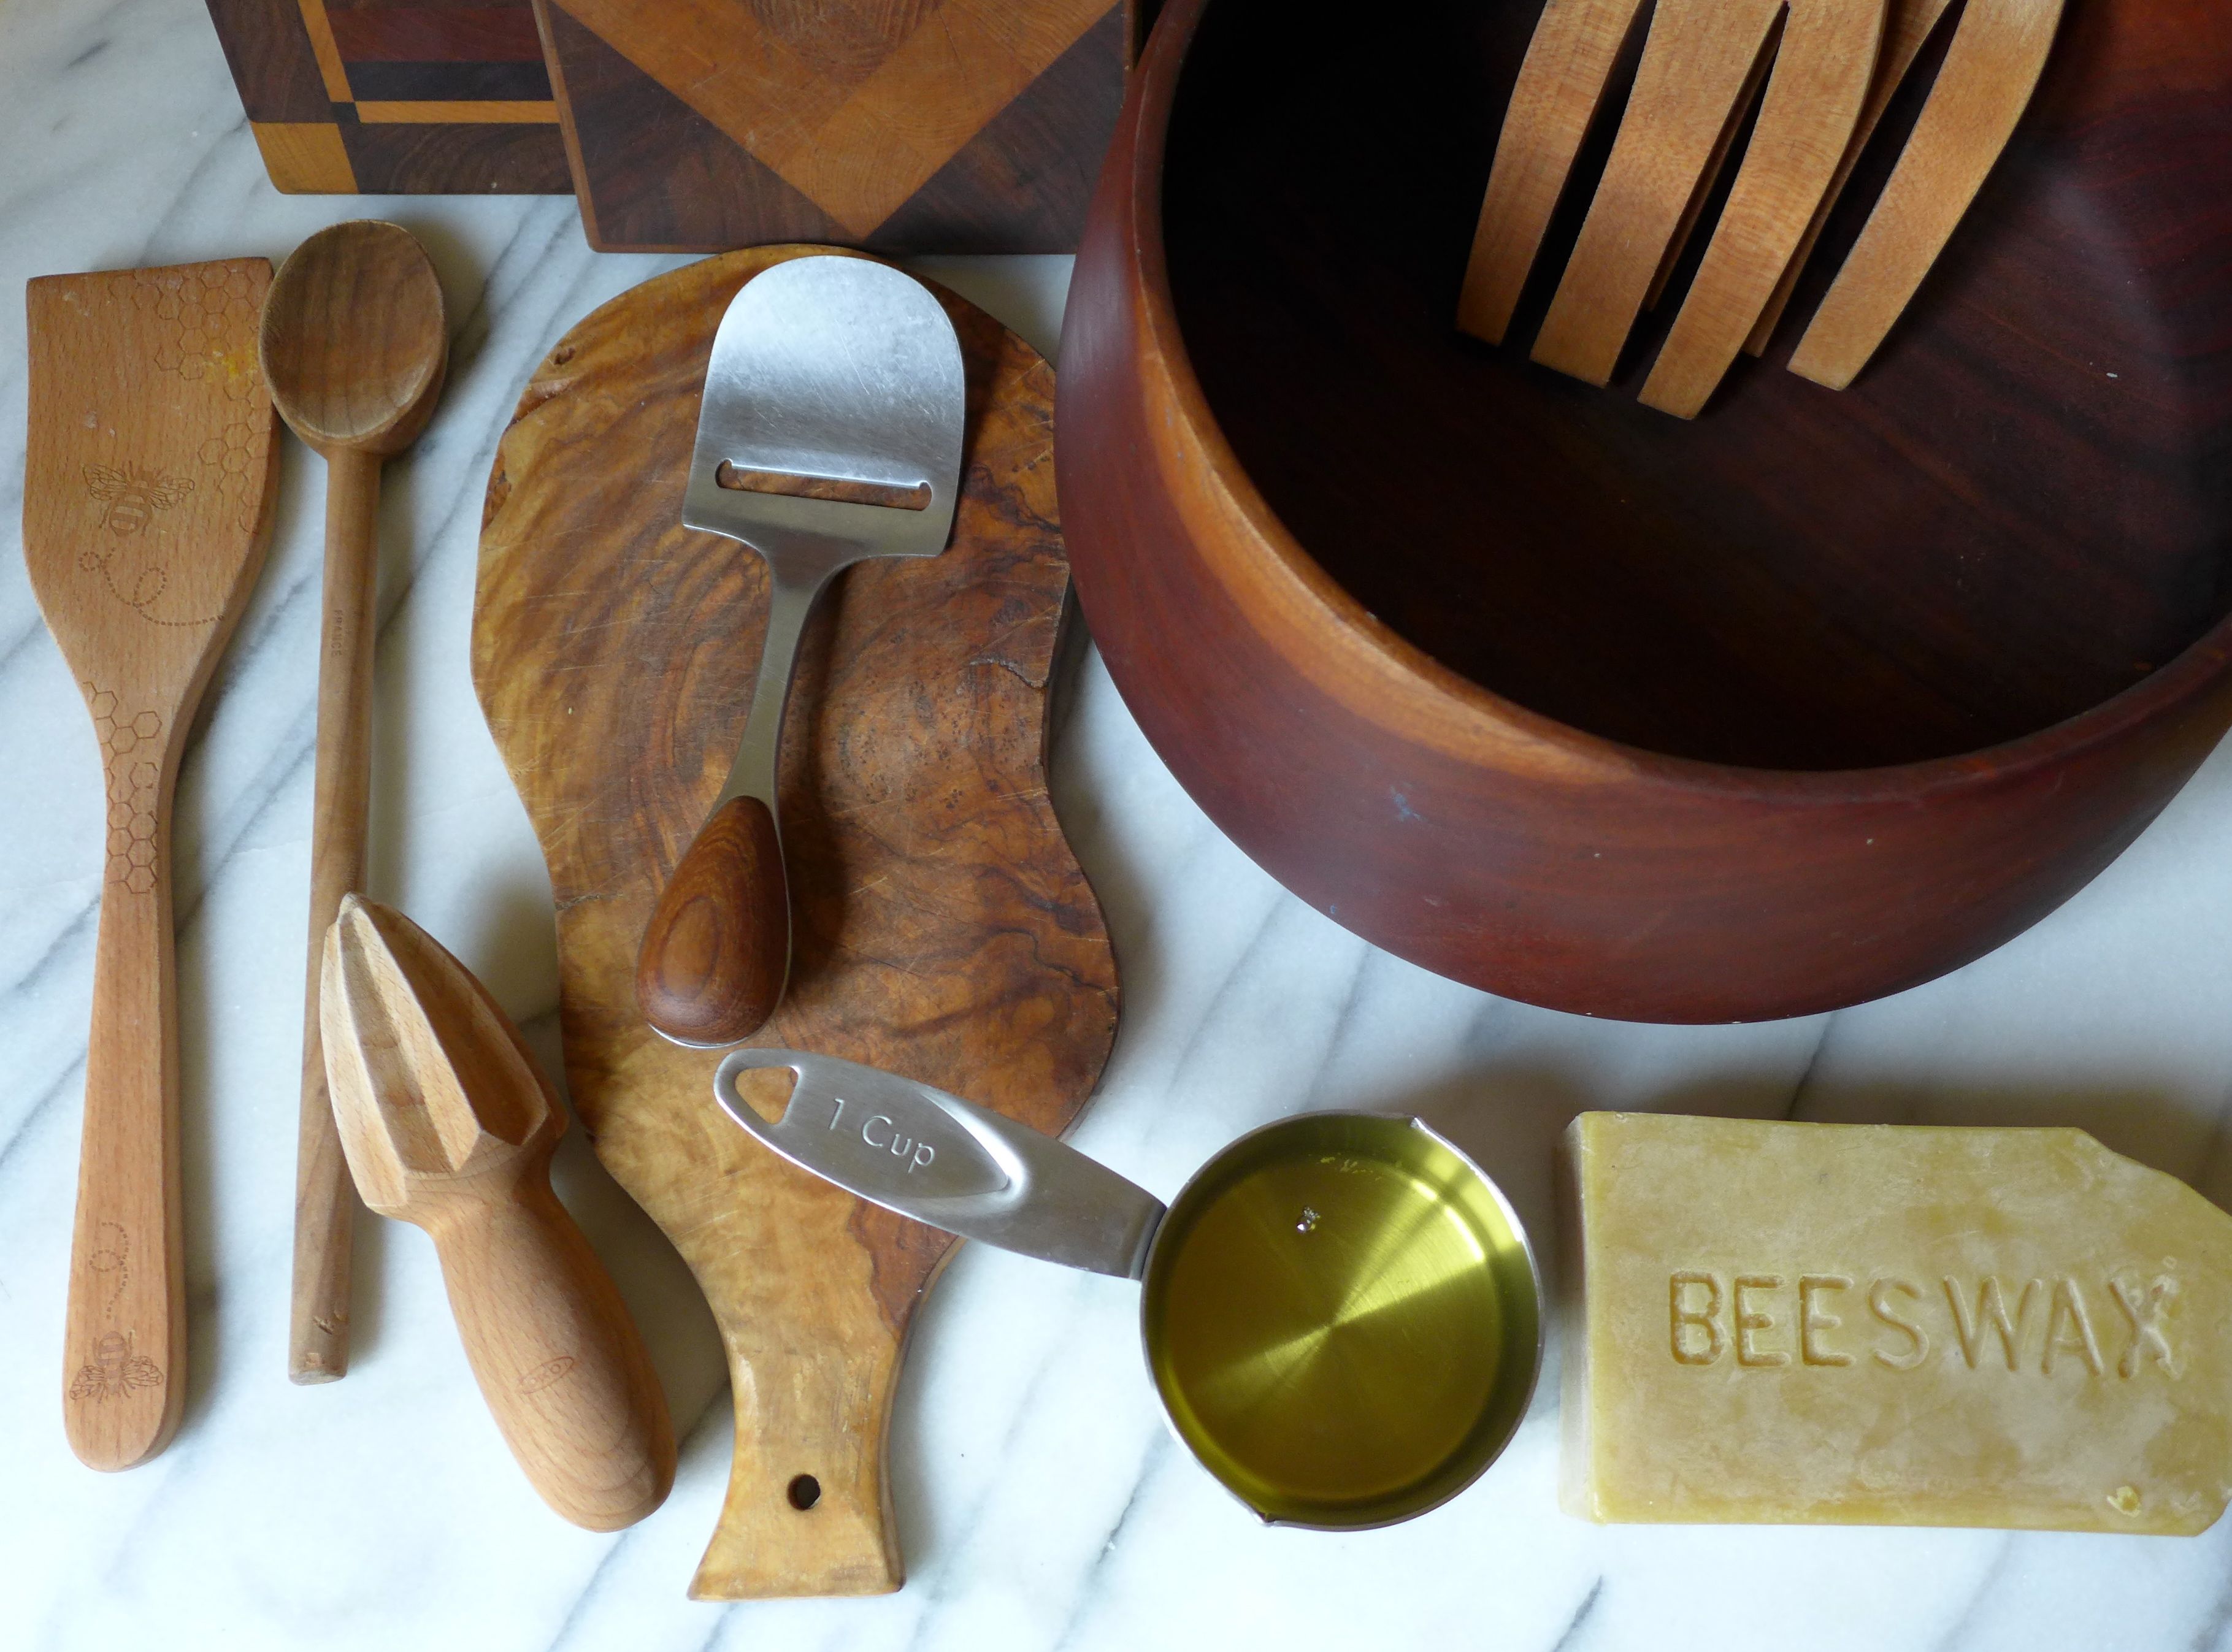
At a bare minimum, you could rub some olive oil into your wood pieces. I used to do this, but I found that that technique never lasted that long, especially for the cooking spoons and cutting boards that I’m using every day. Then, about four years ago I came across 3191’s post about spoon oil. What is spoon oil? It’s really more of a balm and is made by mixing melted beeswax with a food-safe oil. Once the mixture cools, it turns from a liquid state into the balm.


I used the mineral oil-based spoon oil for years now, and it worked well, but I still felt like my wooden pieces needed it sooner than I would have expected. Well, after a bit of research, I learned why! When applied, the mineral oil keeps the spoon oil in a soft state, which is good and bad. This is great for wooden countertops and butcher blocks that you wipe down, but don’t wash with soap and water every day. The liquid state of the mineral oil allows the compound to soak deeper into the wood, especially with each new application. But, the soft nature of the mineral oil means that it’s easier to wash off and doesn’t hold up as well on the items that you wash nearly every day.
What’s the solution? Walnut oil!
After walnut oil soaks into the wood, due to a reaction with the air, it hardens, making it more resistant to repeated washings. You could use walnut oil on its own (many people do!), but I like using it in the balm as the beeswax adds another layer of protection to the wood. The curing of the walnut oil also stops it from turning rancid, which can be an issue with other kitchen oils.


Making the wood balm is super easy: just follow a 1:4 ratio of beeswax to oil. For example, to make this batch I used 2 ounces of beeswax and 8 ounces of walnut oil. Make an improvised double boiler by placing a mason jar or a glass measuring cup in a pot of simmering water. Place the beeswax and oil in the glass vessel and allow them to warm until the wax melts. Once it the wax has melted, be sure to give the mixture a good stir and take it off the heat. If you used a glass measuring cup for the double boiler, you’ll want to pour the wood balm into a storage container while it’s still a liquid (if you used a mason jar, you can just allow the balm to cool within that jar for easy storage). I use a thrifted crock for my balm, adding a new batch without bothering to completely clean out remnants from the previous batch.
**It’s essential to warm both the beeswax and the oil. If you don’t warm the oil, when you mix both together the room temp oil will cause the beeswax to immediately solidify, and they won’t blend together. Of course, if this happens to you, it’s not a problem – just place the whole mixture back in the double boiler and let the wax melt again.
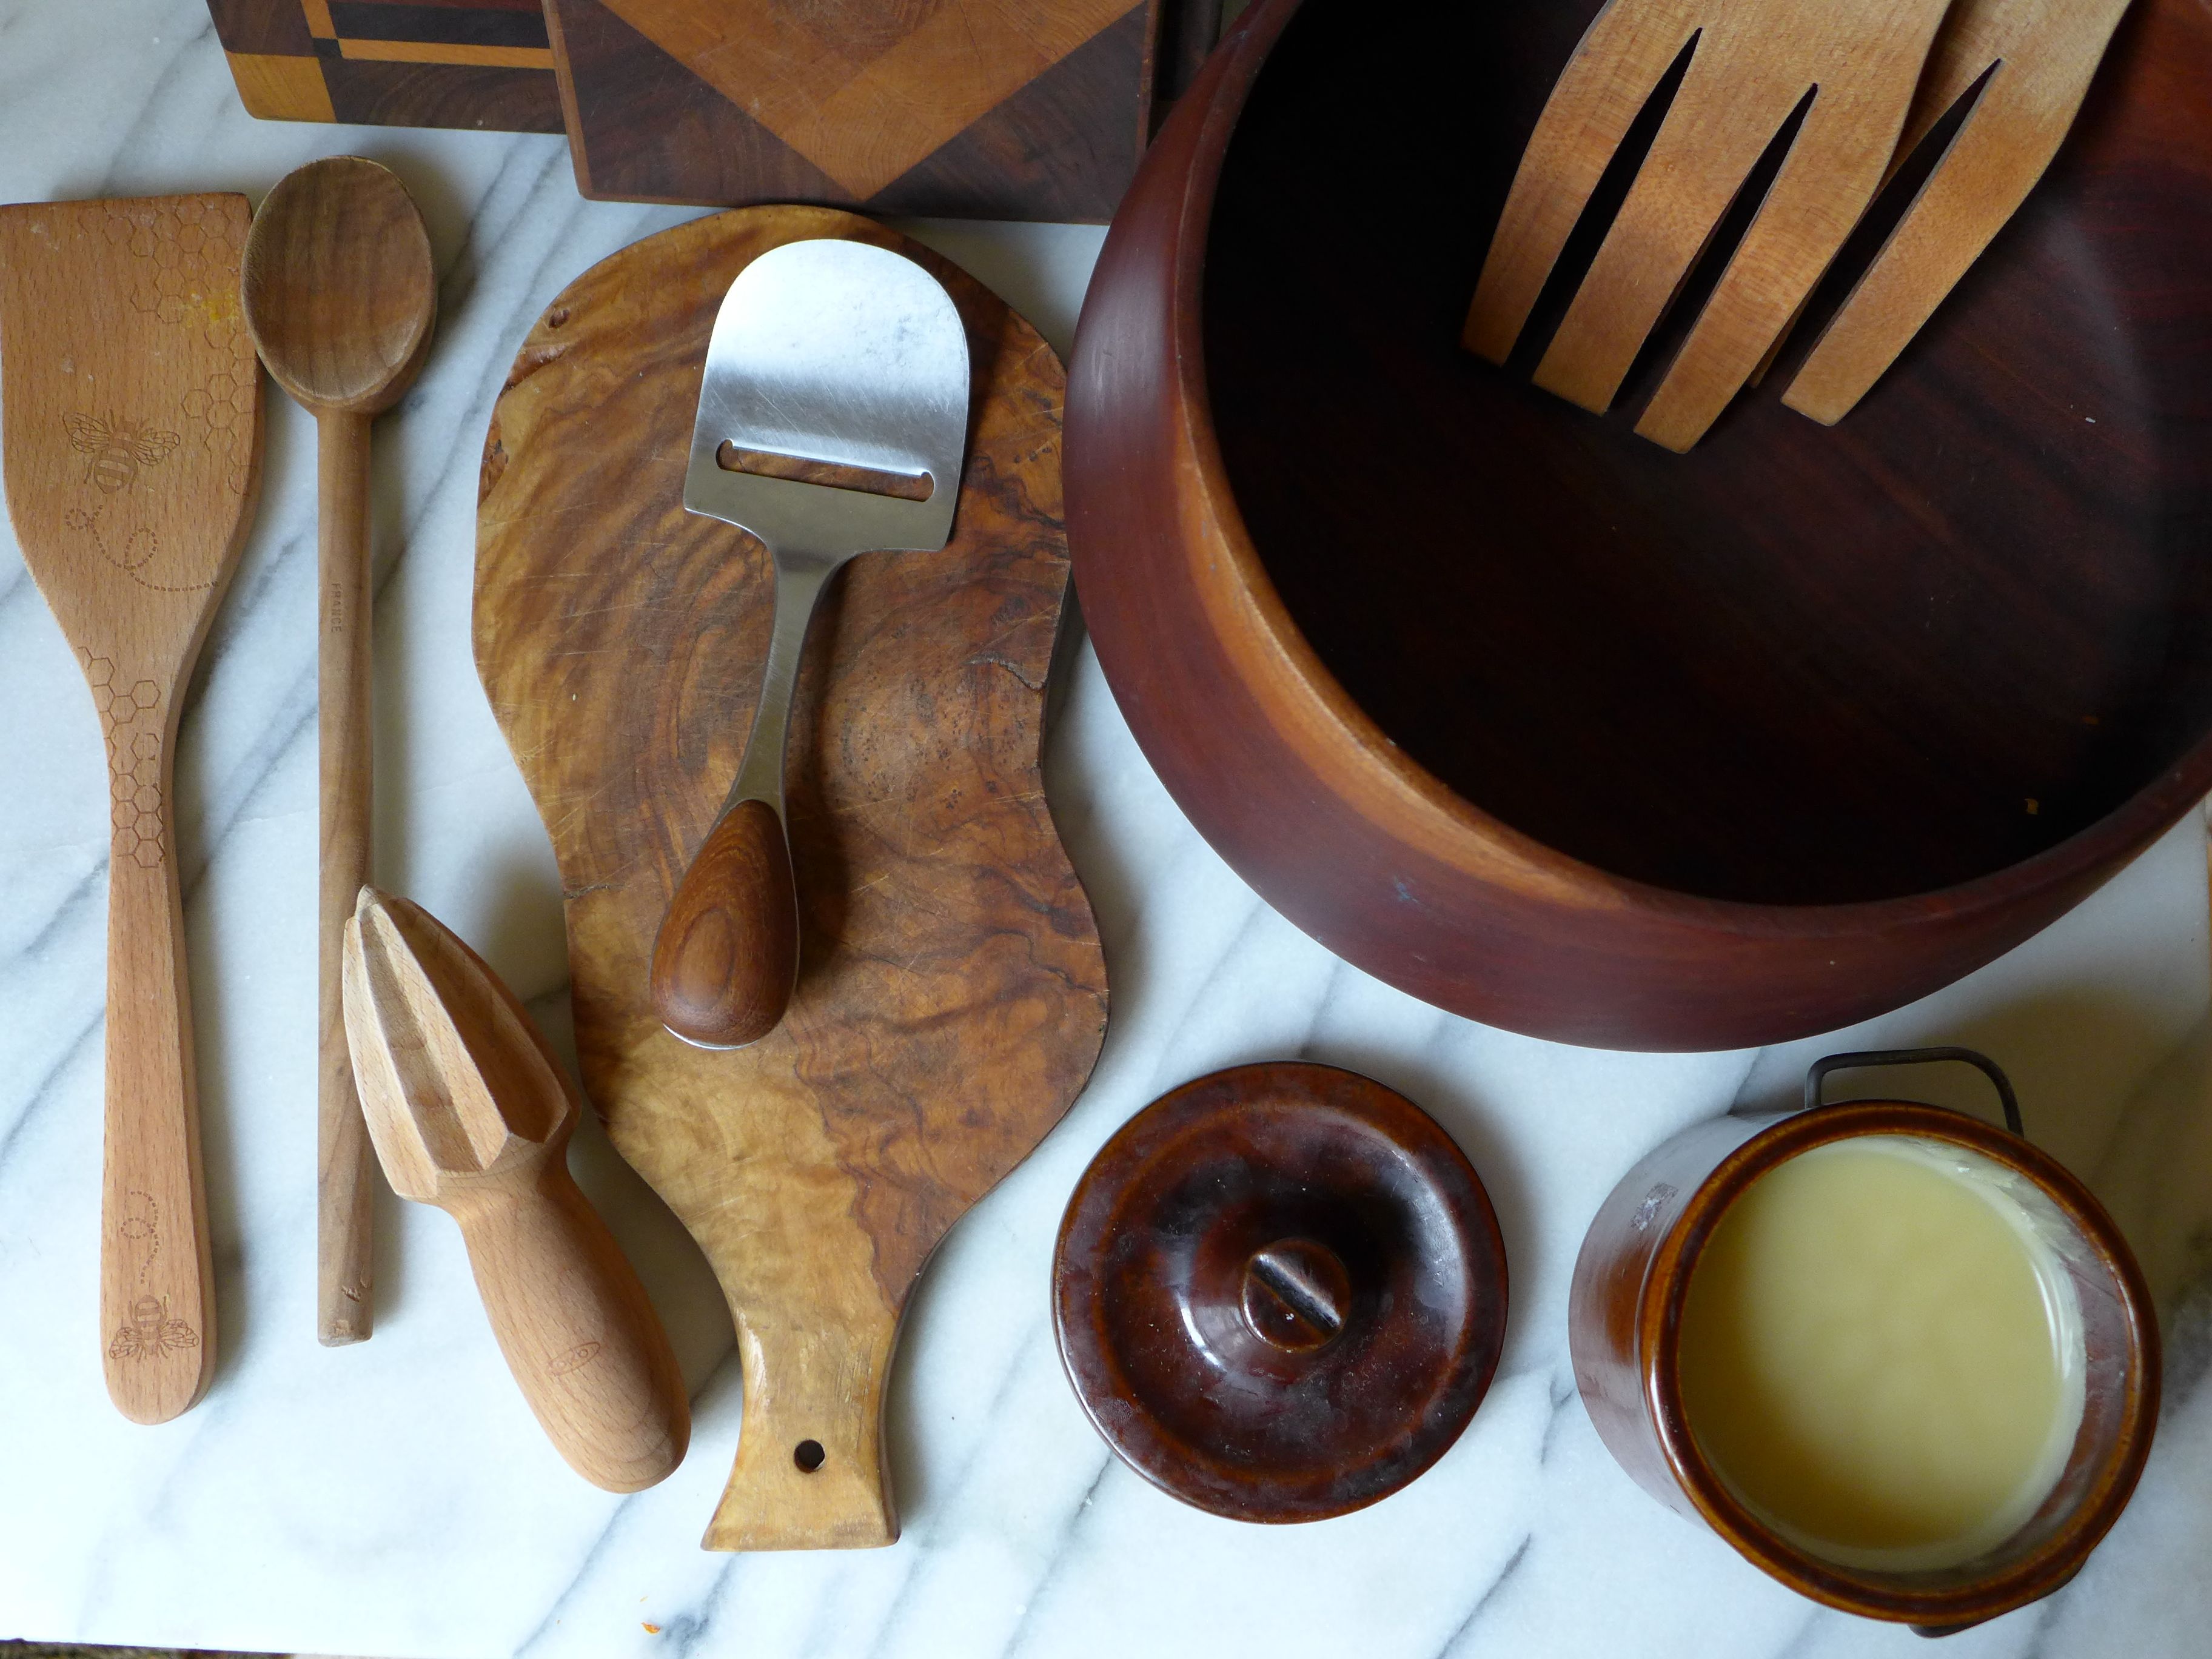
Once made, using the balm is so easy. Just rub a thin layer over your wooden pieces and let them sit overnight, allowing some of the excess balm soak into the wood. I’m so lazy that I pile up my “sticky” pieces and let them sit until I have the time to polish them.
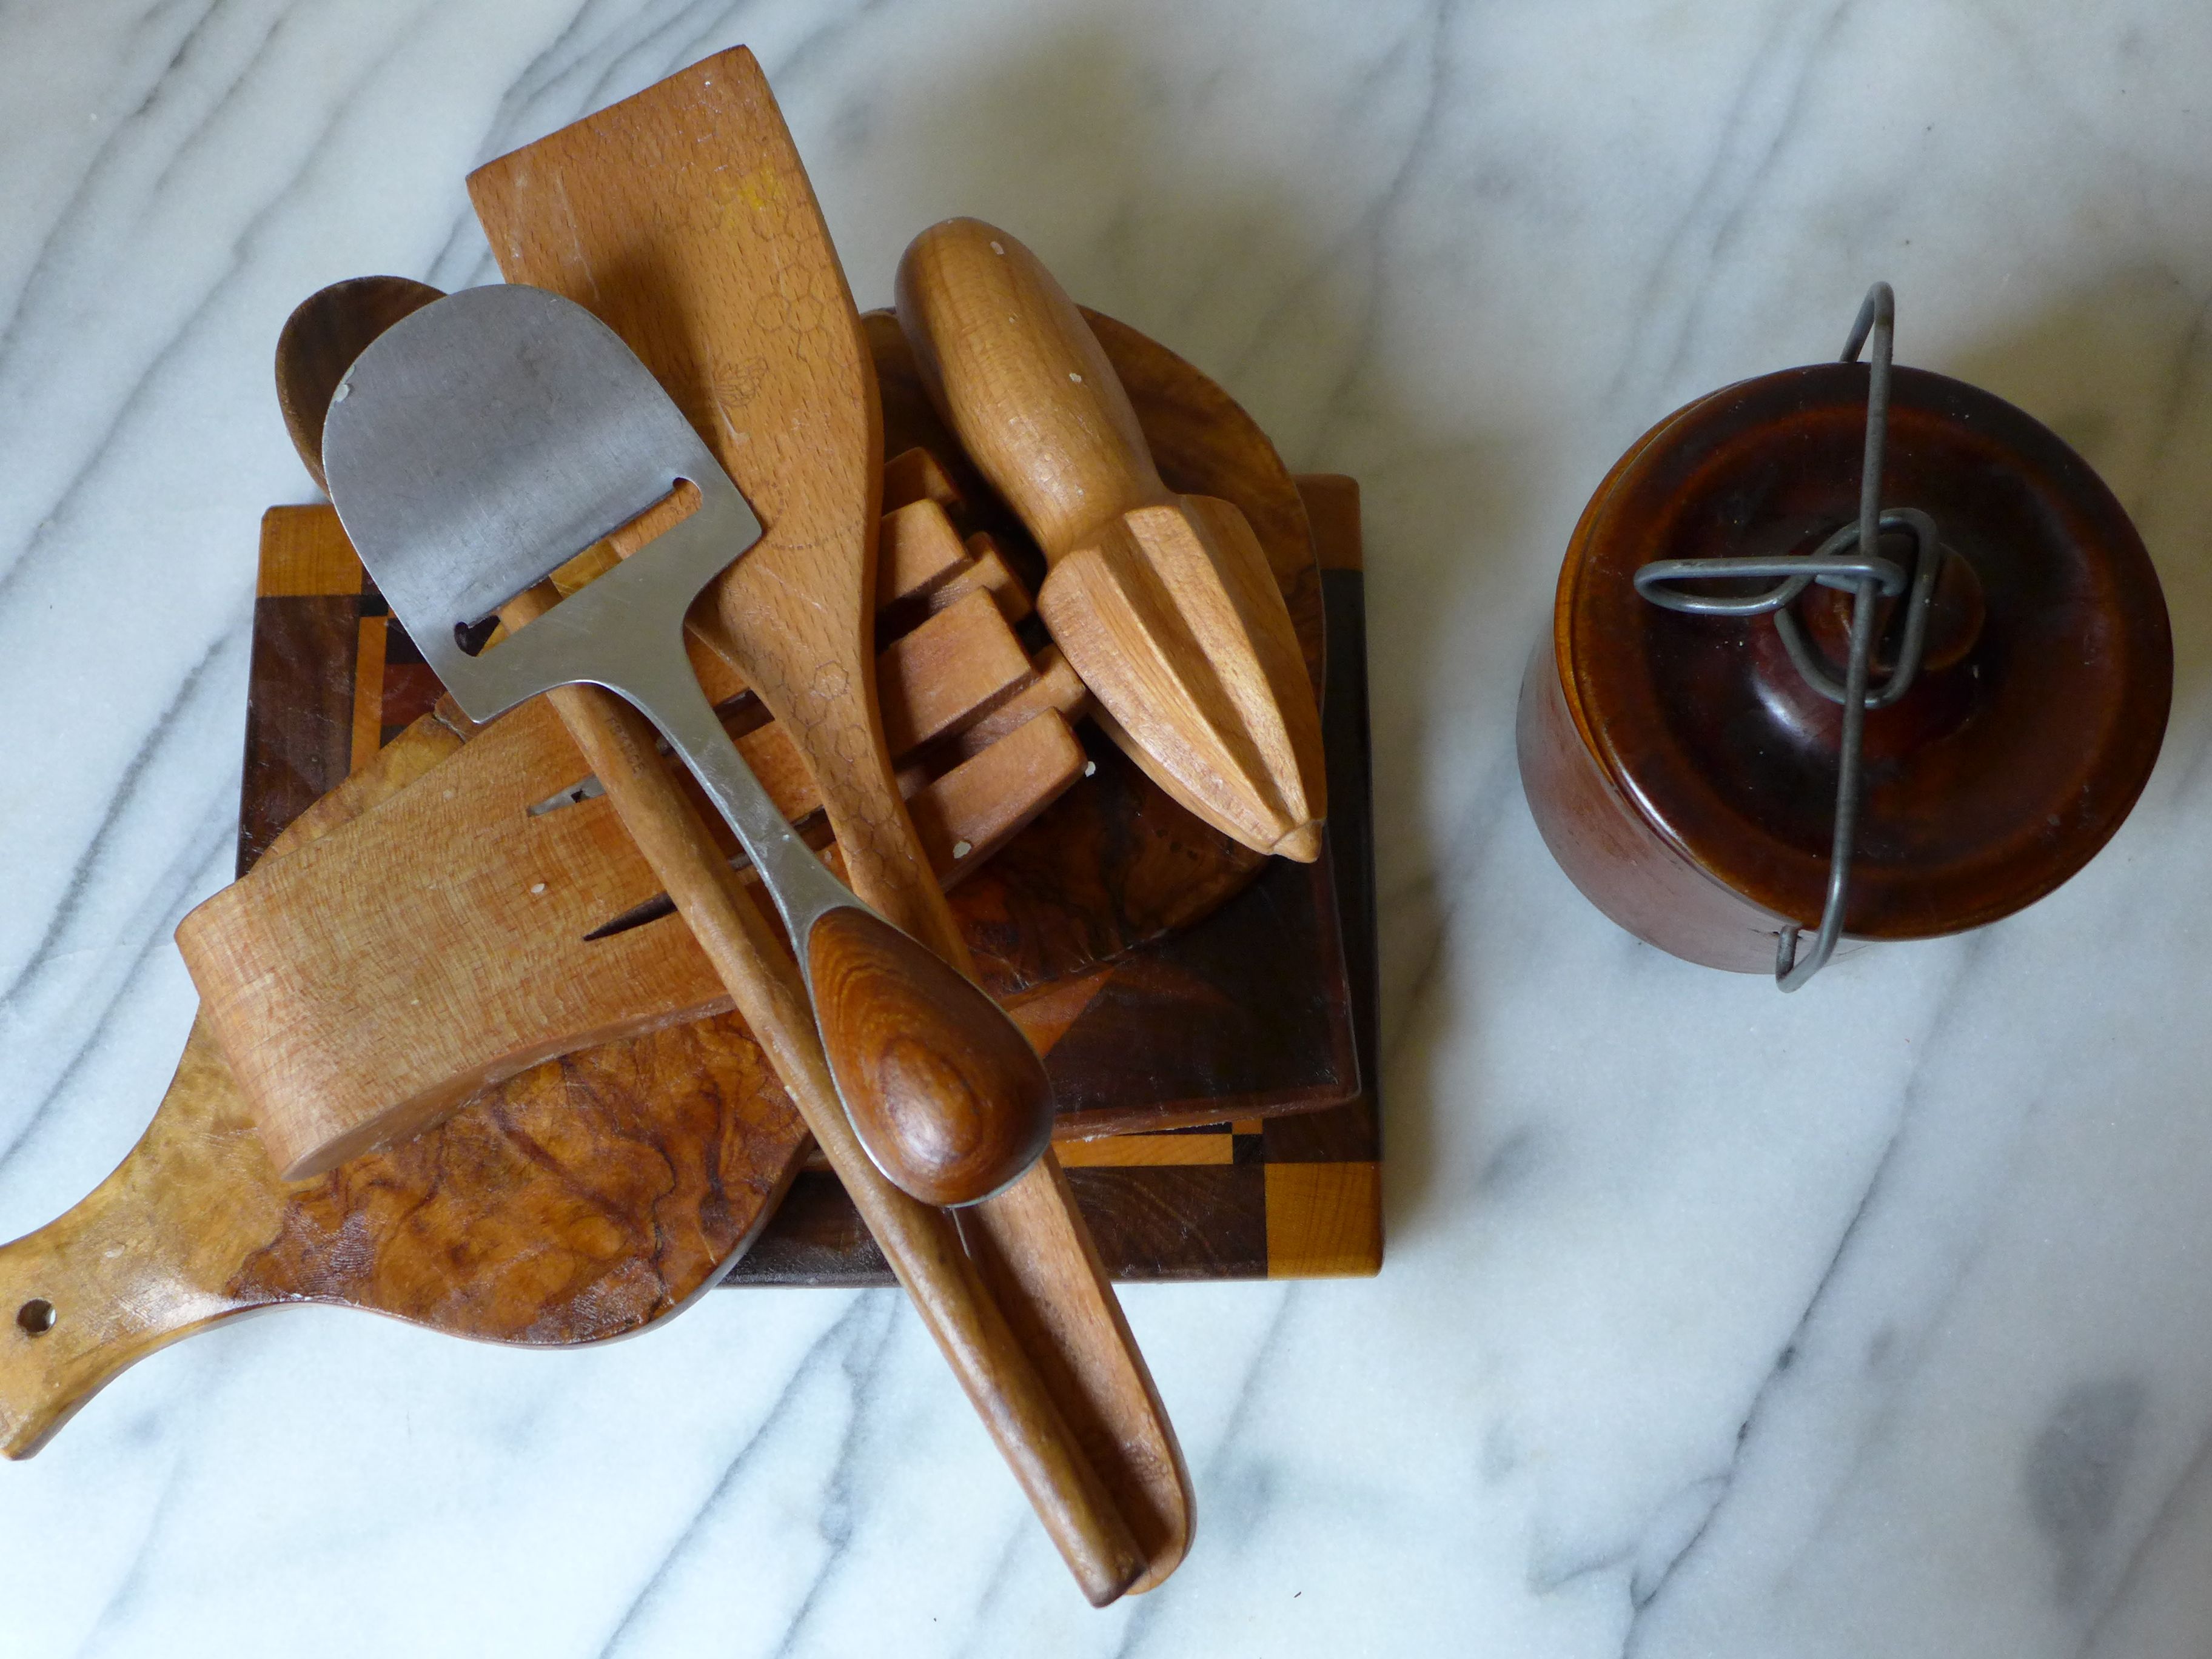
When it’s time to polish, I use a basic cloth diaper to wipe of the excess balm and give the pieces a shine. Side note : I’ve never used the cloth diapers for actual diapering, but find them to be so helpful around the house, particularly for cleaning. I keep my polishing cloth with the crock of balm, reusing it multiple times. The cloth covered with excess balm serves double duty as a polishing cloth for other wooden items in our house (for example, we have a few wooden buddha statues that get a quick wood balm rub once in a while). And that’s that, a super simple, completely safe balm that nourishes your wooden kitchen utensils, the same ones that you use to nourish your family! xo
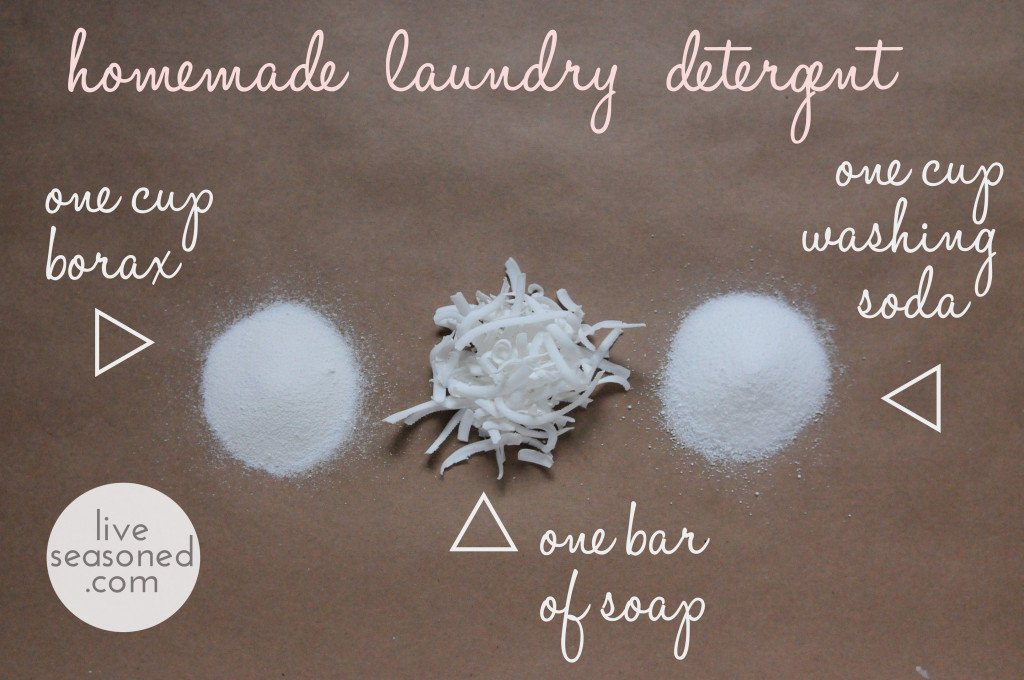
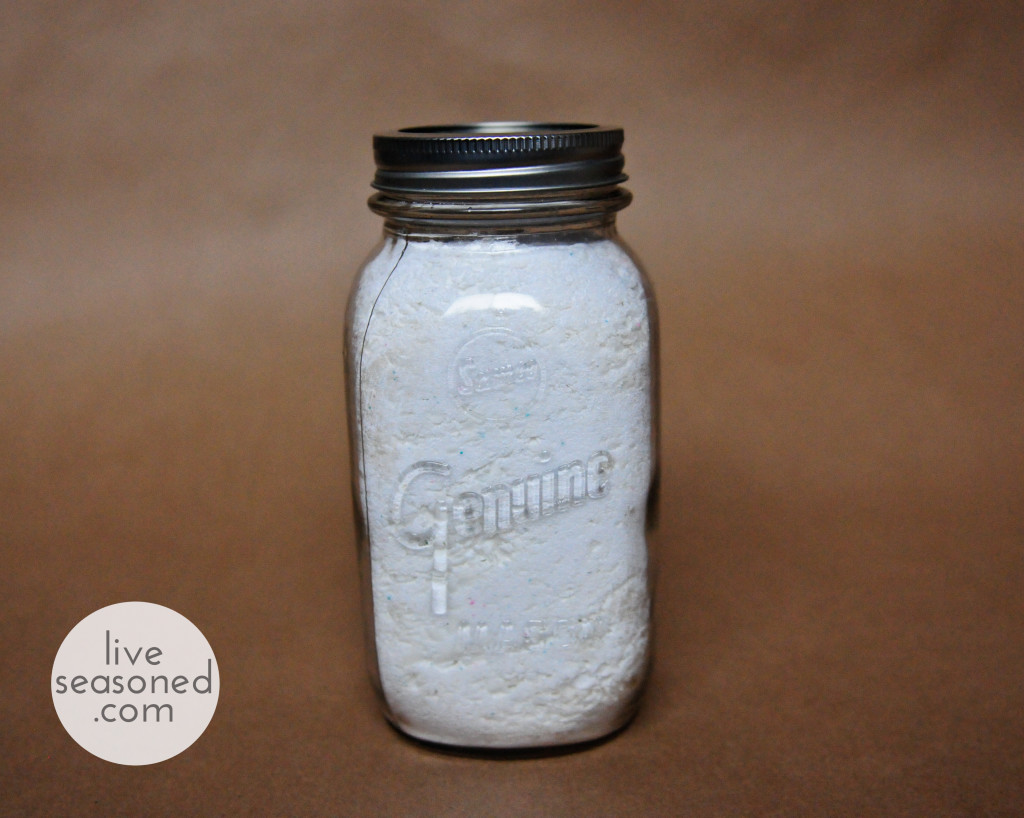
There’s a whole load (har har) of benefits that go along with making your own laundry detergent, but the biggest one for me is cost. Don’t get me wrong, I love knowing exactly what’s swirling around in my machine and feeling comfort in knowing there’s not a whole host of perfumes and chemicals on my cottons, but the cost difference of store bought and homemade detergent is significant.
It only costs $.07 a load compared to the cheapest Tide option, which is almost double at $.12 a load. Also, once you buy the 76oz box of Borax, 55oz box of Washing Soda and 10 pack of Ivory Soap for a grand total of $12.00, you won’t have to worry about laundry detergent for a looooooong time, like an entire year. True story.
While my main motivation for DIY detergent is to save money, I take comfort in knowing I’m not bringing (potentially cancer-causing) carcinogens into my home and rubbing them all over my largest organ and depositing them into the water supply. I’m also saving lots of petroleum-based plastic jugs from entering landfills. DIY detergent is good for the environment, your skin, and your wallet. I guess what I’m saying is, this recipe is a win, win, win.

Quick Tip:

So what do you think? Do you love spending money on Tide or do you think you’ll try this homemade option? Powered detergent is classic so return to your roots people! Really though, I think it’s great and I’ve been using this recipe for three years now. Lemmmmmie know how it goes!
Hey readers, it’s been a fun week around here, hasn’t it? Did you check out Sarah’s profile of Connie Zamorano Tuesday afternoon? Now I’m obsessed with getting one of those cicada prints on my wall!
If the bugs left you squirming in your seat, you can channel that energy into this super simple project: homemade rosemary, mint and eucalyptus room spray. Have you tried store bought room sprays? I have a few, and I have to admit that I love them at first, but find that they can be a bit overpowering in their staying power and/or they just smell chemically over time. I don’t have either problem when I make my own. As for complexity, it’s going to take you longer to read this post than it will to mix up your spray.
