WIPS III

Happy Monday! … or should I use a question mark after that phrase? I’m never sure.

Today I wanted to summarize some of the projects that I’m working on at the moment.

It’s been about a year since I’ve done one of these posts, and looking back at that post made me realize that: 1. I would like to get better at doing these posts more regularly (I find it inspiring to see what people are working on and it’s nice to see some progress shots rather than just the polished and finished pieces), and 2. I have to get better at following-up on the projects that I share. For example, the hat from the last post turned out so good (I wear it all the time!), but the mittens are still in their unfinished state, which is sad because I know that once they’re done I’ll use them all of the time.

{Weaving}
WIPS_march2017b

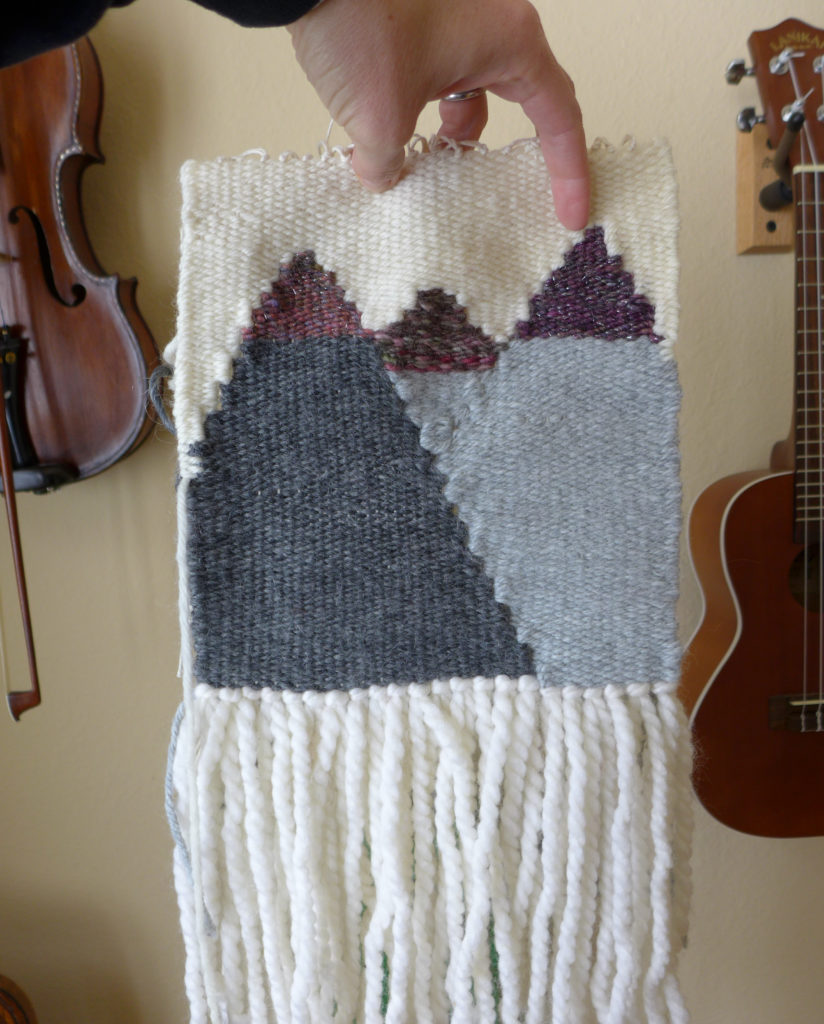
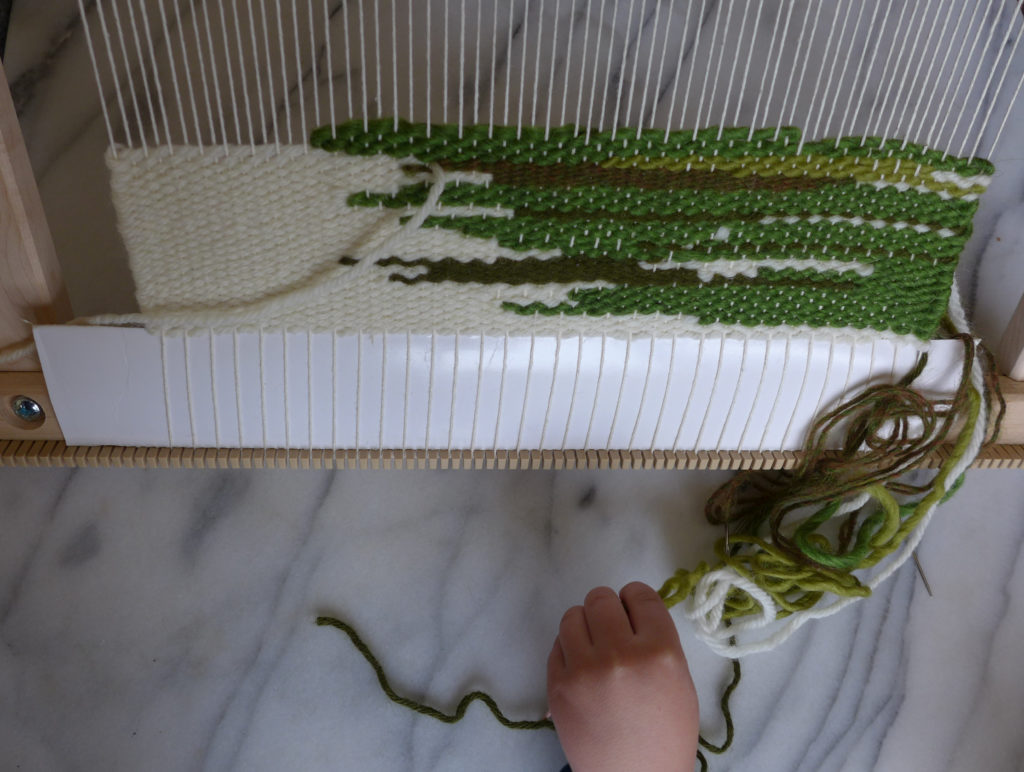
First up is the weaving! My dad gifted me this table/lap loom for Christmas, and I love it. I like the challenge of this art form – thinking about the “picture” I want to create, wether it’s mountains, abstract trees, or just a free-form burst of color. I’m also really happy to have a use for all of the odd bits of yarn that are left over from previous projects.

The other fun side-effect from learning this new craft is that now my eyes are open for examples of weaving everywhere! I’ve become obsessed with project updates from other weavers on Instagram. I fell in love with this huge weaving while shopping (and want to recreate something like it for one of our walls – imitation is the greatest form of flattery, right?).

And as you can see in the photo below, Amax has taken an interest in my new projects, so I’m excited to get him started with a little cardboard frame loom ASAP!
WIPS_march2017

{Knitting}

On the knitting needles, I’m working on a sweater for myself. It’s the Bohus inspired turtleneck from Vogue Knitting Winter 2015/2016. This is a top-down knit (you go back and add the turtleneck at the end). I’m really excited about it, and have been working on it so much over the past week, that I’ve made a lot of progress since the photo below was take. Now the body is nearly complete!
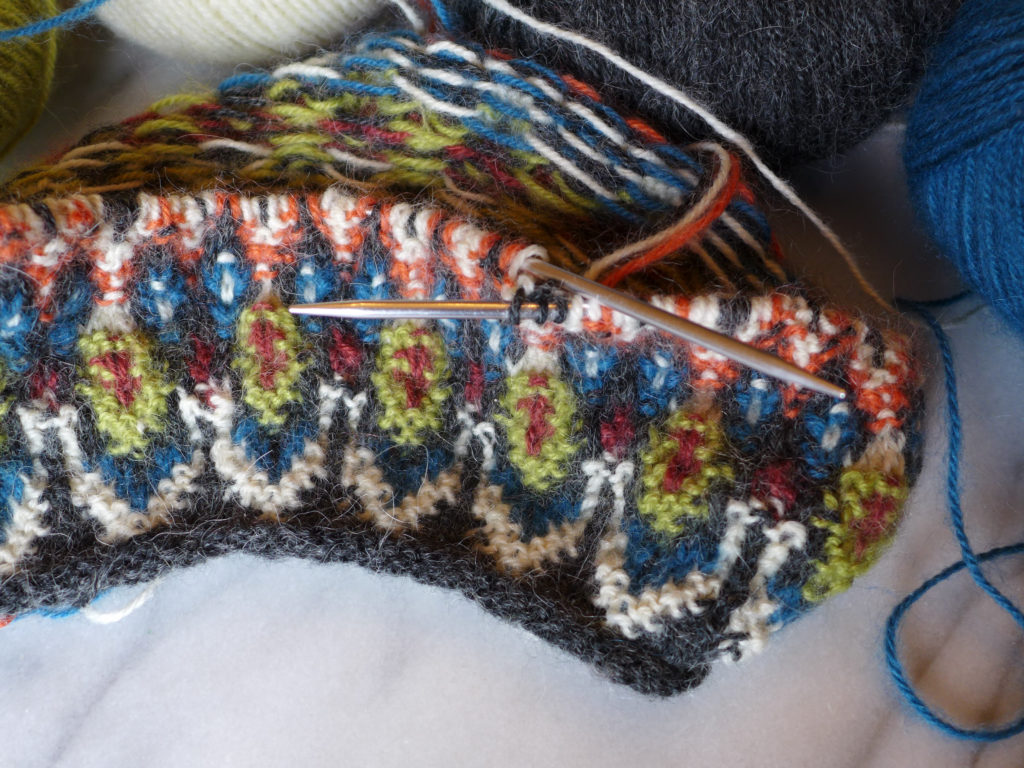
WIPS_march2017c

Not shown in this post are the two sweaters that I’m knitting for the boys that are nearly complete, but have been completely ignored since I started my sweater. eek! I’m hoping to finish up theirs this week and then take them on our next winter camping trip for some photos – nothing like a good finished project photoshoot to inspire actually finishing the project.

{Sewing}

But don’t worry, the boys are getting plenty of DIY attention. I was also gifted a serger for Christmas, so I’ve started to experiment with sewing clothes from knitted and spandex fabrics. This was something that I was always nervous to do on my regular sewing machine, but funnily enough, I’ve since experimented and successfully sewed spandex on the regular machine! WIPS_march2017d
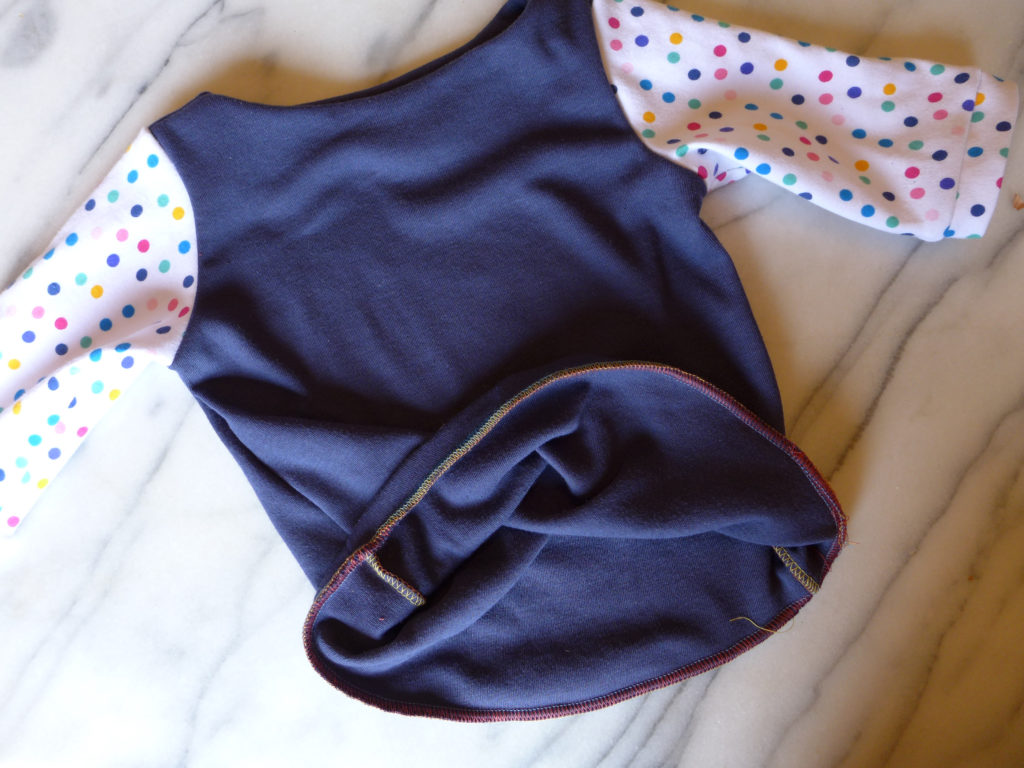
Above is a simple boatneck shirt that I made for Luc. This was my very first serger project, and I’m so happy with how it turned out – look at those seams!

After that project, I sewed a pair of spandex leggings for Alex. The leggings were a bit more complicated with their elastic waist and the more slippery fabric, but they’re passable!

In the process of just those two projects, I’ve learned so many new techniques, and just like the weaving, I’m now paying attention to clothes, patterns, and new-to-me sewing resources online. I have plans to sew a few simple things for myself, and (of course) I want to continue blogging about these projects, so when I do, I’ll share some of those resources, tips, and tricks in a future posts!

~

So, that’s what’s going on in this house, what about you? Do you have any fun projects going on? Any new skills that you’re learning?

And most importantly, what are you doing to calm your mind when you think the news can’t get any crazier, and then {BAM!} someone’s wires are tapped? Or crossed. Yes, the wires definitely got crossed somewhere along the way.

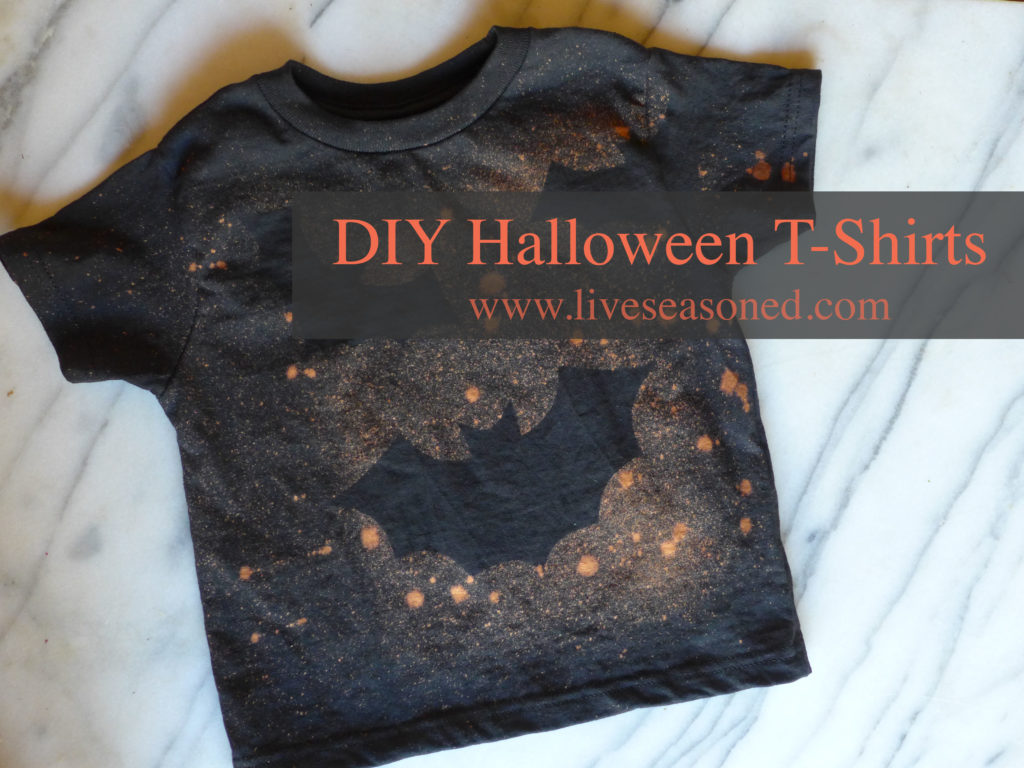
Bat Halloween Shirt

Halloween is just around the corner, and now that we have a 3.5 year-old in the house, every holiday is a big deal! Combining Alex’s current love of bats and the coming holiday, I have a great DIY for you : bleached bat t-shirts!

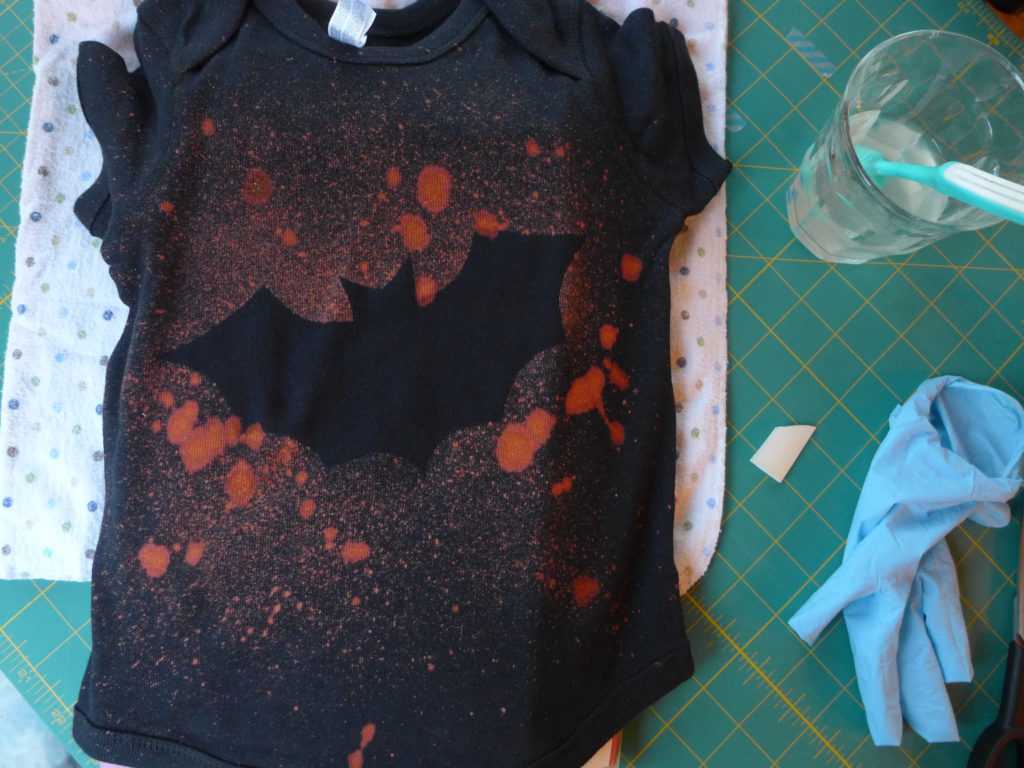
bat_shirts5bThis project couldn’t be easier, but unfortunately, since you’re working with bleach, this is not necessarily a kid-friendly DIY. Don’t worry, they’ll have a great time watching the “magic formula” work!
bat_shirts

Supplies

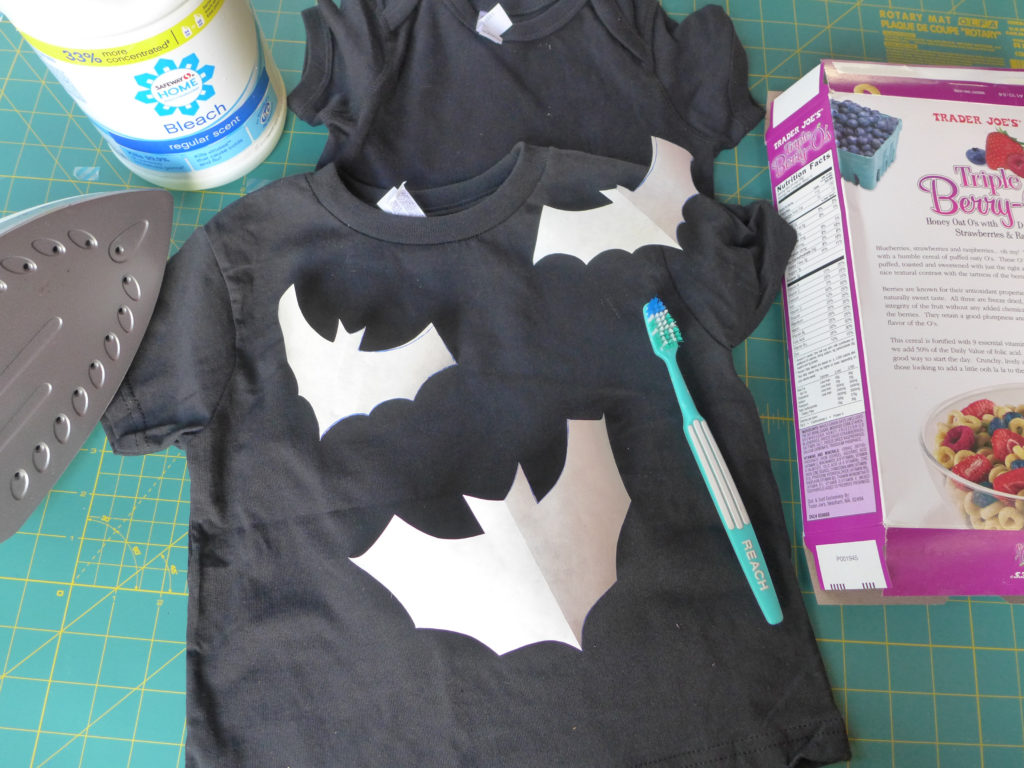
  • black or navy blue t-shirt
  • freezer paper (it has a wax coating on only one side whereas wax paper has a wax coating on both sides)
  • bat stencil (I free-handed on, but you could print out a bat clipart silhouette)
  • piece of cardboard (an empty cereal box works well!)
  • toothbrush
  • bleach
  • water
  • latex glove (to protect your hand will applying the bleach splatters)

bat_shirts8

bat_shirts2

bat_shirts4

Hints

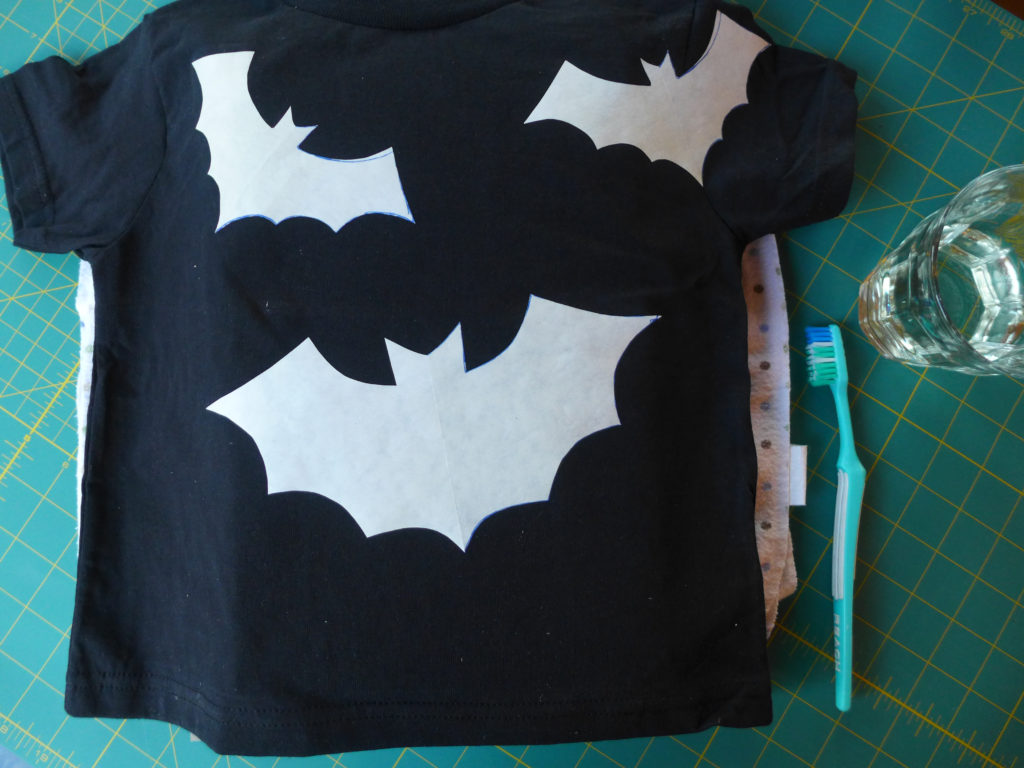
  • Trace and cut-out bat silhouettes from the freezer paper. I made large and small bats, but you have complete flexibility with the size and number of bats you use (whatever you think will look good on your shirt).
  • With the iron on low heat, carefully iron the freezer paper bats onto the shirts (make sure the waxy side of the paper faces the fabric). Keep the iron relatively still, pressing into the paper and fabric and moving it slowly across the stencil. The freezer paper should will stick to the fabric, forming a bond that will stop the bleach from getting under the wax paper.
  • Make a 50-50 water and bleach solution.
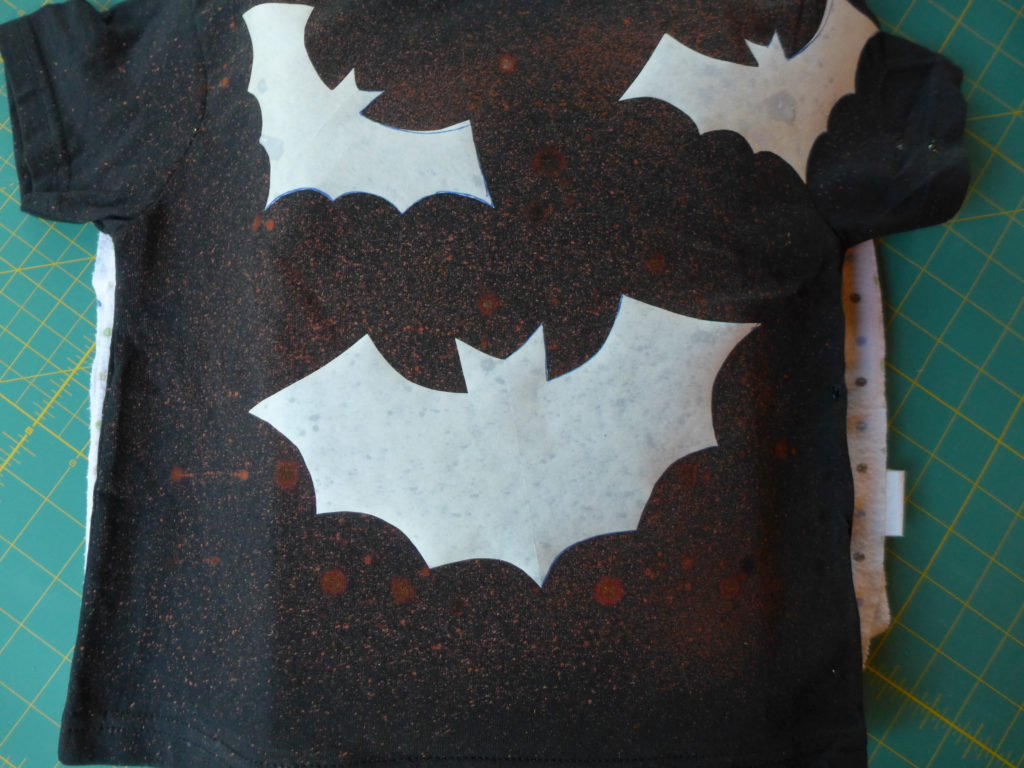
  • With a gloved hand, dip the toothbrush into the bleach solution and splatter the solution on the t-shirt around the bats. It’s ok, and even looks great, to make both large and small splatter marks.
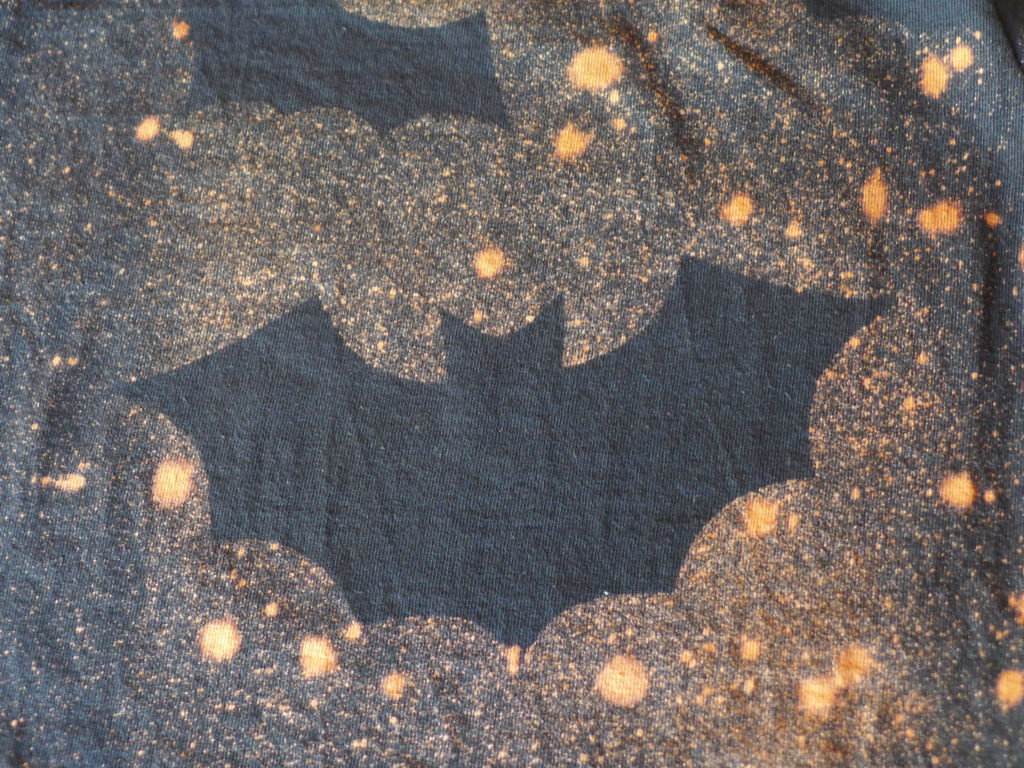
  • You should see the bleach start working on the fabric after a few seconds. Continue to splatter the shirt until you’re happy with the density of “stars” on the fabric, being sure to thoroughly splatter the shirt around the bats so that you get a noticeable silhouette once the wax paper is removed.
  • Watch the bleach activity – when you’re happy with both the density and intensity of the stars, remove the paper stencils and quickly rinse the shirt under water to stop the bleach activity.
  • Wash the shirt, and you’re done!

bat_shirts7

And look at that kid, he loves his new shirt! Such a simple project and it brought this little guy so much joy.

bat_shirts6

Happy Halloween!

Balsa Mat & High School Geometry

Were you one of those kids sitting there in high school geometry thinking about when you’d ever use that stuff? And now you’re crafting up a storm and haven’t thought about Pythagorean Theorem since. Well, today’s the day you’re going to put that famous formula to work! … now before you get the cold sweats, just know that you won’t *have* to use the formula (I’ll show you a trick), BUT if you want to impress your high school geometry teacher, then we’ll also whip out our calculators phones.

What am I talking about? Cutting angles for a super-simple DIY balsa wood mat.

balsa_frame7b


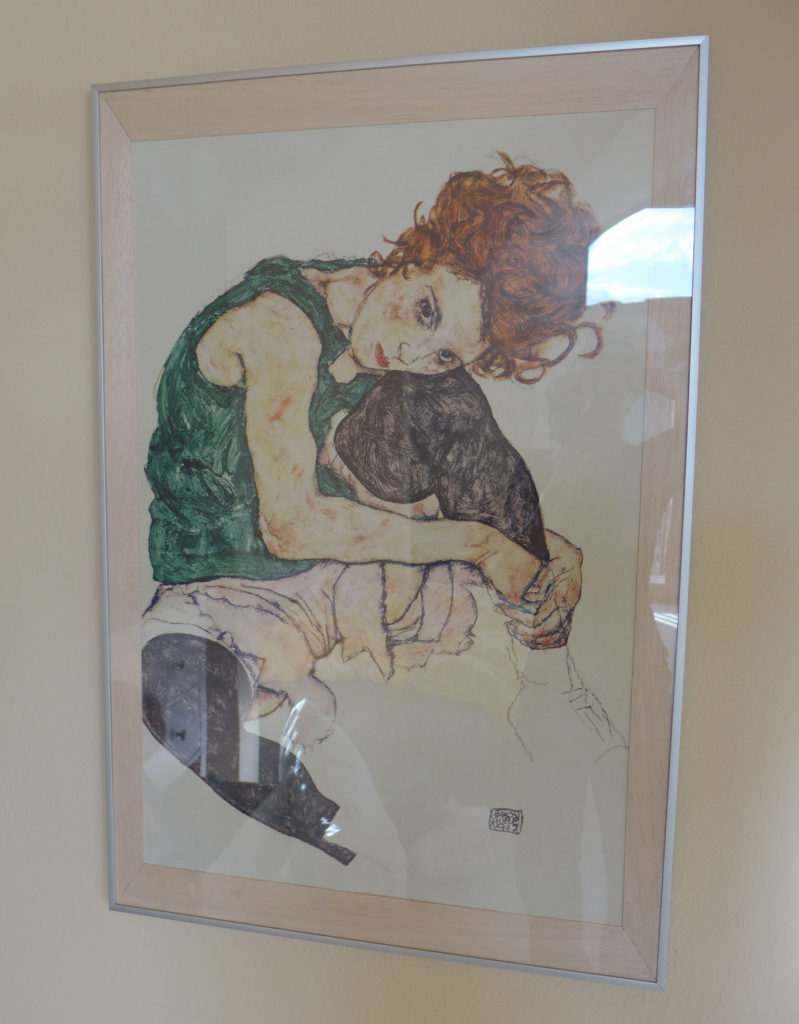
I came up with this project out of desperation. My mom gave us a poster of an Egon Schiele print (I know what you’re thinking – why’d she cheap out and not buy the original? What a bum.), and I wanted to frame it to hang on the wall. The print itself was about 32″ by 21″, requiring at least a 36″ x 24″ frame. The problem was that I couldn’t easily find a mat large enough for the frame. I’m sure I could have ordered one from a framing shop or the framing counter at Michaels, but that would require talking to someone and explaining my problem. Did you know that young kids love to yell and scream at the exact moment you’re trying to talk to someone else?

(Side note, while I love original art on the walls, I’m totally comfortable enough in my house decorating to still use posters of art that I love but can’t afford. Call me crazy.)

Then I came up with an idea to shirk the traditional mat and make something more visually interesting out of balsa wood! If you haven’t worked with balsa wood before, it’s a very soft and lightweight wood that can be cut into thin sheets and used for any variety of craft projects (as well as having many structural uses beyond crafts). Balsa wood for crafts and model building is sold in Michaels, art stores, and some hardware stores. I bought the 36″ x 3″ x 1/16″ sheets for this project.

Supplies

  • balsa wood sheets
  • double-sided tape
  • sheet of paper as large as the framed area (I used the sheet that was already in the frame advertising its size)
  • exacto knife
  • cutting mat or board

Hints

The basic overview of this project is that you’re going to center your print on the large piece of paper and place the pieces of the balsa mat around it, attaching the print and the balsa wood to the paper with double-sided tape. What I’m going to help you with below is making sure that the balsa wood ends are cut at the correct angle so that they fit together nicely in the frame.

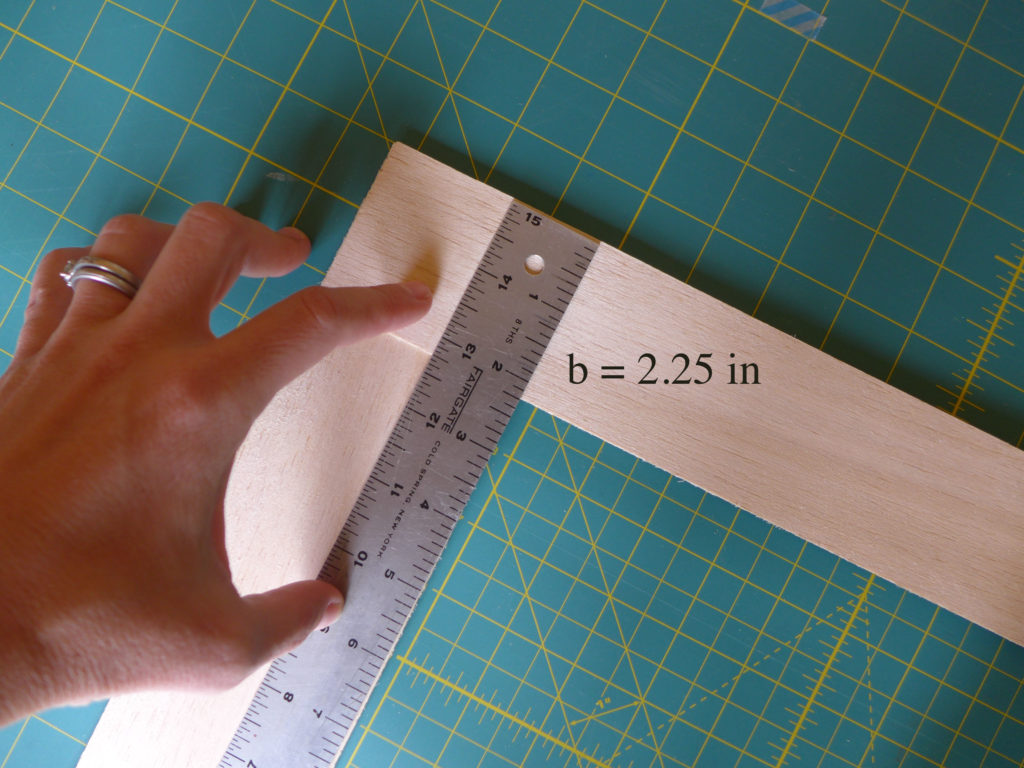
Begin by decided how wide the balsa sheets will be on the top/bottom and sides of the print. For example, in my situation, I wanted the mat to be approximately 2.25 inches on the top and bottom, and only 1.5 inches on each side.

Cut the balsa sheets so that they are the length and width you want for your mat. Again, in my case I had two pieces of balsa that were 24″ x 2.25″ for the top and bottom, and two more pieces that were 36″ x 1.5″ for each side.

balsa_frame

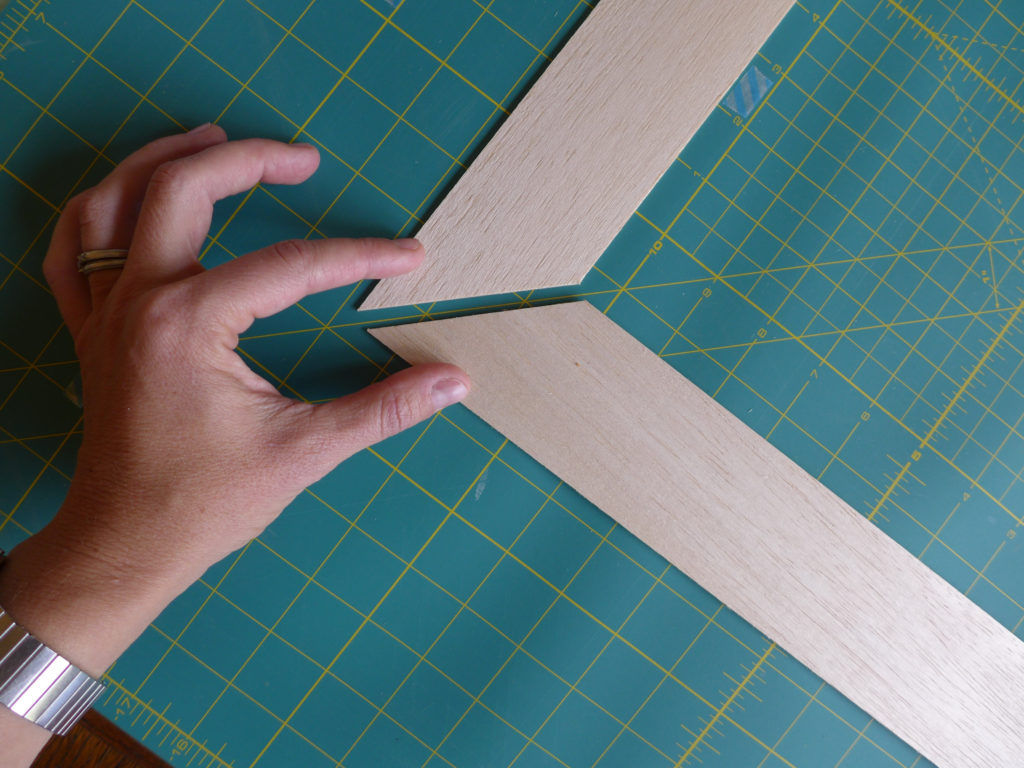
Once you have the four rectangles, you’ll have to cut the corner angles. If your sides and top/bottom pieces are the same width (i.e the mat will be the same width all the way around the picture), then you can easily cut the angles using the 45 degree line on your cutting mat as a guide as in the photo above.

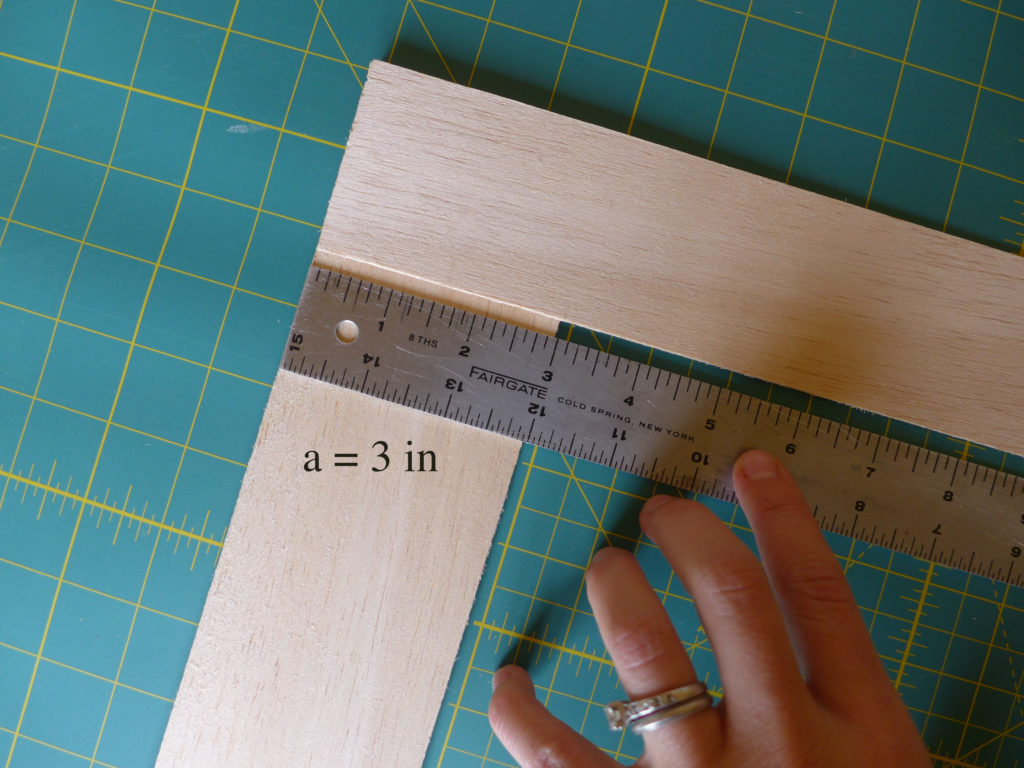
BUT if the width of your side pieces doesn’t match the width of the top/bottom pieces, as in the example photos below, where the width of one piece measures 2.25″ and the width of the other measures 3″, then you’re going to have to use the Pythagorean Theorem to calculate the length of the corner angle.

balsa_frame3-copy

balsa_frame4-copy

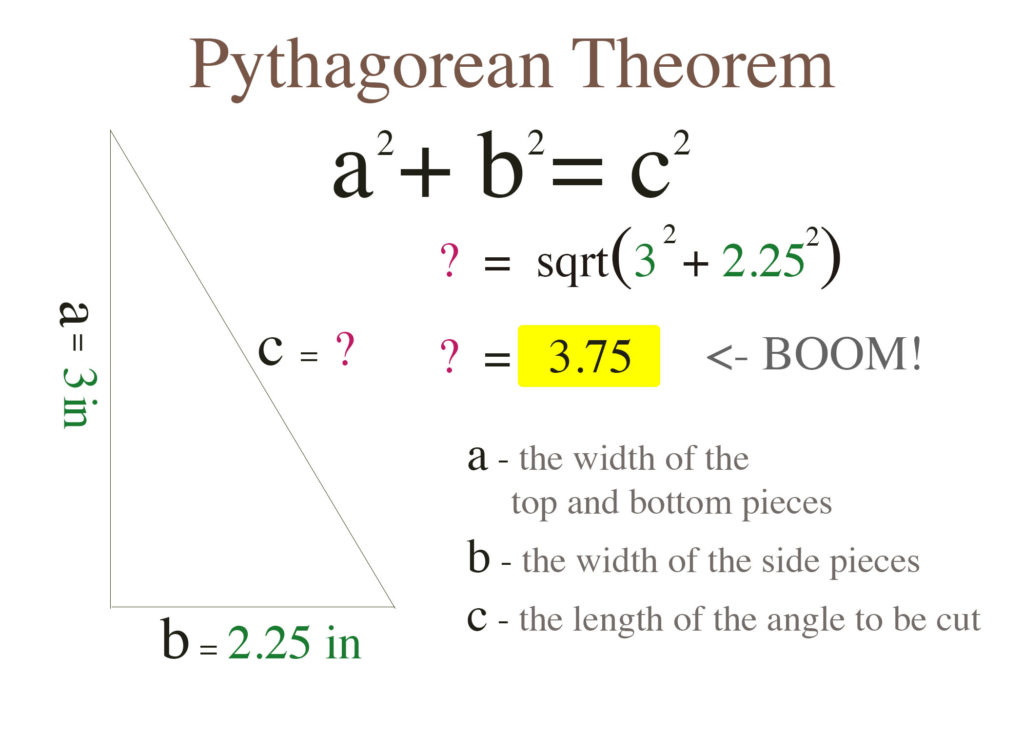
Good Old Pythagoras taught us that “a-squared + b-squared = c-squared”. Remember that? This formula only applies to right triangles, where one corner (the one opposite the hypotenuse) is a 90 degree angle. In this case, if we know the lengths of any two sides of the triangle, we’ll be able to find the length of the third using that equation.

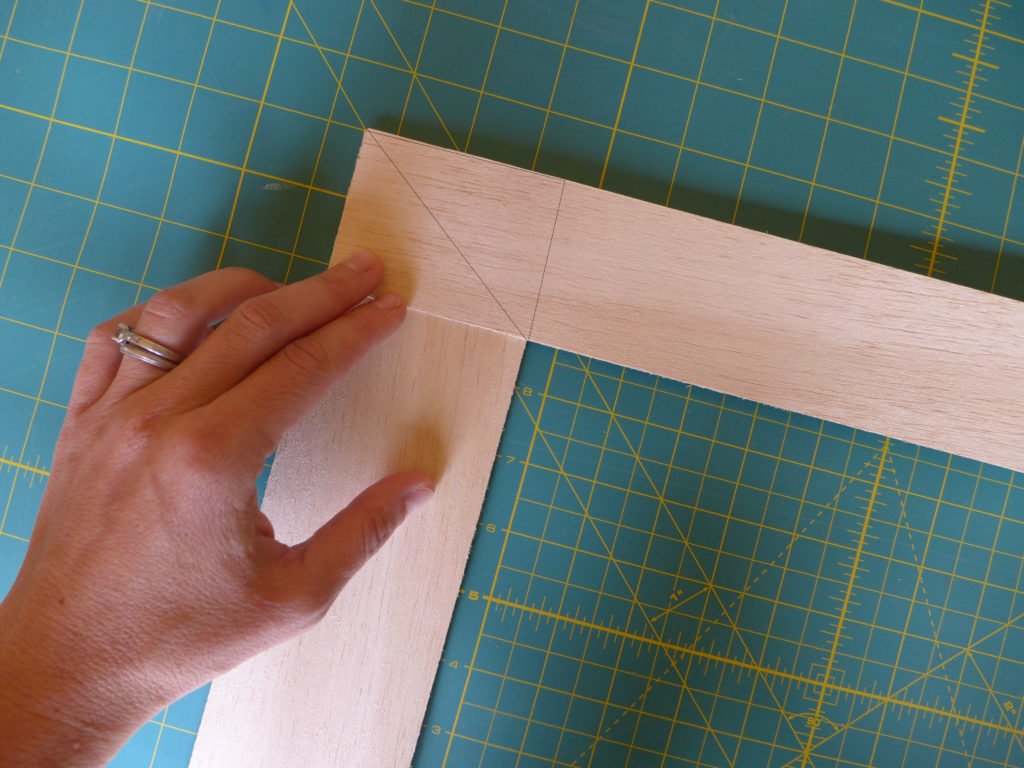
Can you see the faint triangle drawn on the balsa wood in the photo below? That’s our right triangle with the 90 degree angle on the top right (bottom left), and we’re looking to calculate the length of the hypotenuse that runs from the outer corner of the mat to the inner corder.

balsa_frame2b

triangles2

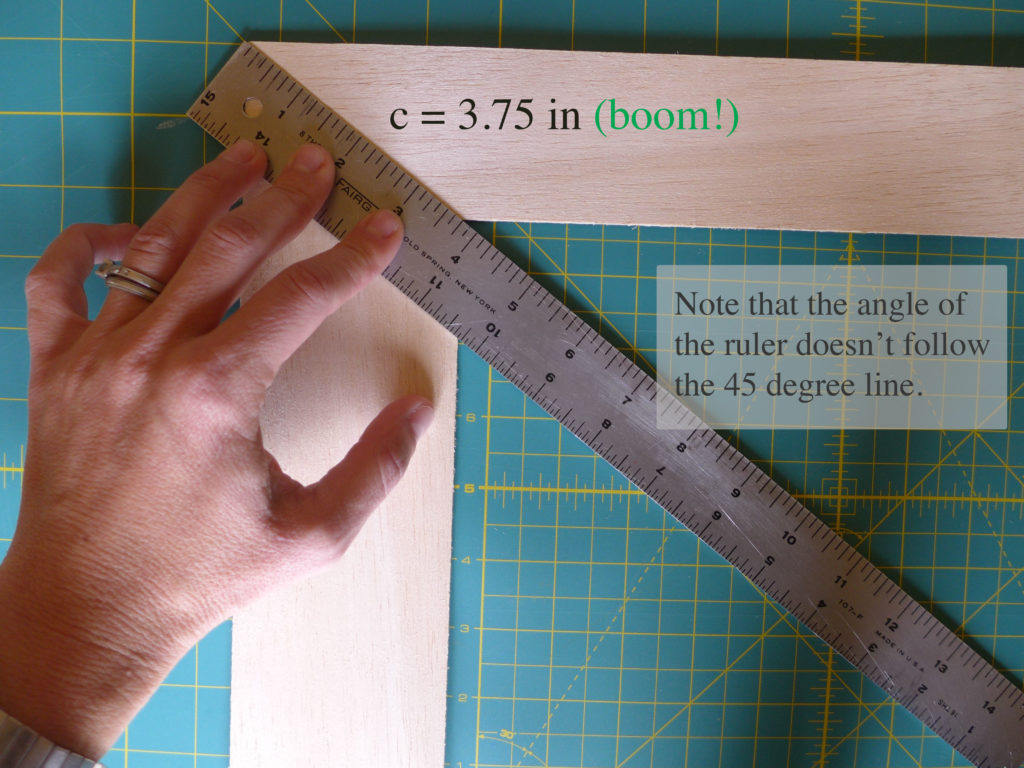
Applying the pythagorean theorem to this problem, I calculate a length of 3.75 inches for the corder cut, and by holding the ruler up to my mat, I see that that number matches the length of the cut from the outer to inner corners – it works! And as I mentioned in the photo, it’s worthwhile to note that the angle of our ruler doesn’t match the 45 degree line on the mat, so using that as your guide would give you corners that don’t line up.

balsa_frame5b

Ok, but as I’m sure you’ve already realized by now, you don’t *have* to make those calculations, you could just hold the ruler up as I’m doing below and use your exacto knife to cut along that edge without giving it’s length a second thought…. but come on, don’t you want to impress your better half? Or at least make your high school geometry teacher proud?

balsa_frame6

After your corners are cut, use the double-sided tape to secure the balsa pieces to the large piece of background paper, and then carefully place the whole thing (art and balsa mat attached to the background paper) into your frame, and your customized mat is done!

Five Best Earth Friendly Products For An Outdoor Shower

This was originally posted on 8/26/15, but with a weekend at the beach coming, I thought we should all give it a look again. Be earth concious, but more importantly, enjoy that outdoor shower!

liveseasoned_summer15_outdoorshower-1-2 copy
liveseasoned_summer15_outdoorshower-2

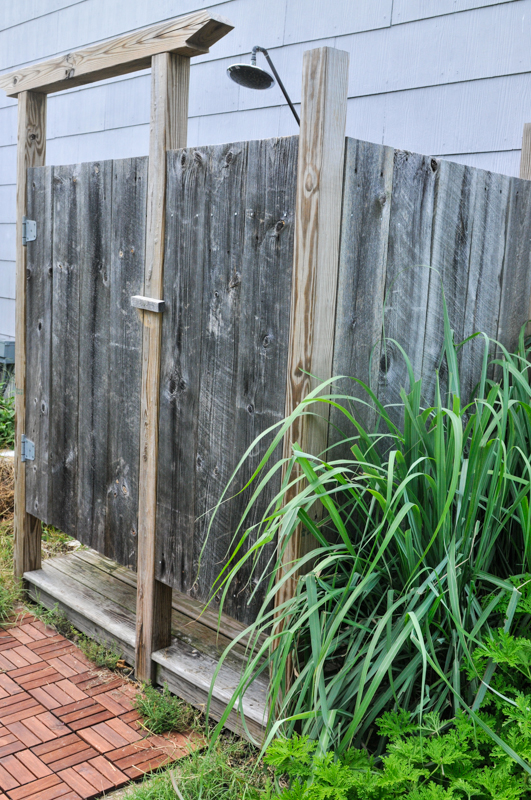
Taking an outdoor shower is hands down my favorite way to bathe.  A couple years ago, our father installed one at the beach and since then the whole crew has paraded in and out trying to wash the sand from our tootsies.  Because I would rather take all my showers outside under the moonlight, I thought it would be helpful to share our five favorite earth friendly products for the outdoor shower.  These products are all biodegradable and earth friendly, but what does that mean really?

Continue reading

DIY Vanilla Extract

Vanilla is our ingredient of the season. So far we’ve made some vanilla-infused vodka (great for milkshakes!), a savory roasted chicken with vanilla bean, and some homemade perfumes with vanilla essential oils.

Forgive me for stating the obvious, but today we’re finally hitting on the key ingredient in every kitchen – vanilla extract! Who doesn’t have a bottle of vanilla extract in their kitchen? It gets used in everything. In fact, yesterday the boys and I baked our favorite chocolate cake, and even that called for two teaspoons of vanilla extract. 

liveseasoned_spring2016_vanillaextract5 - 1

My fist exposure with homemade vanilla extract was a few years ago when I received a bottle from my BFF for Christmas. It was amazing, and I cherished that bottle, wanting to use it but also keep it for ever because it was just so good. As you’ll see, DIYing your own extract is so easy that I probably should have reigned in my emotions a bit…

The key to make a quality vanilla extract comes down to two things : 1. quality beans and 2. time.

liveseasoned_spring2016_vanillaextract3

How-to

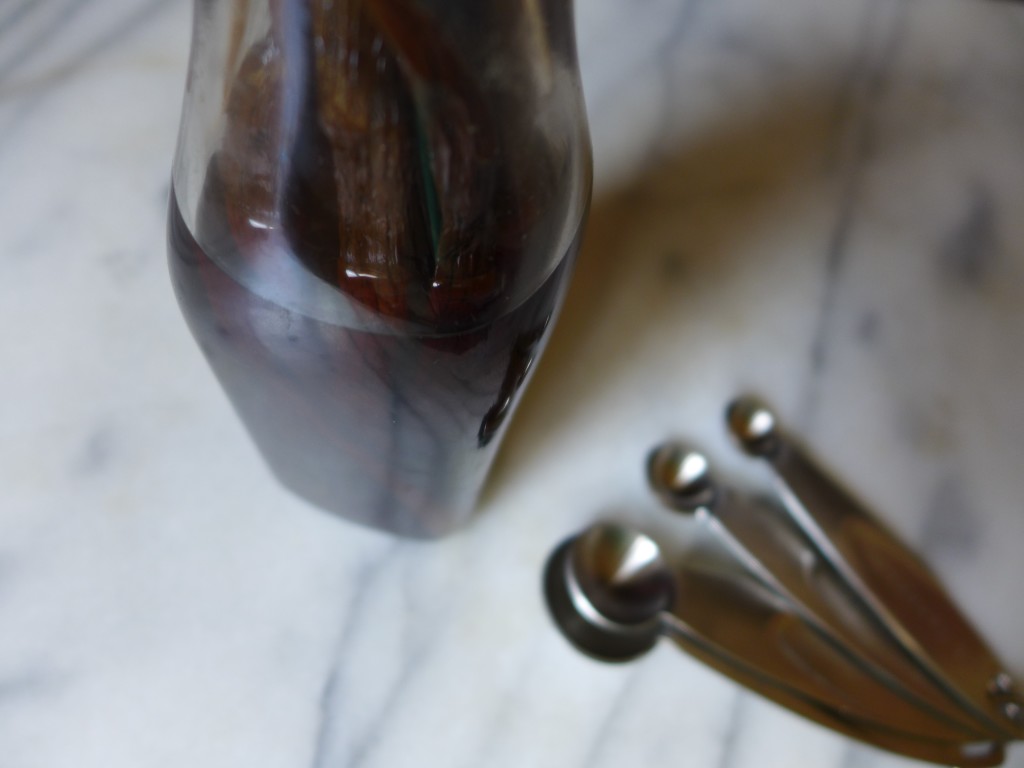
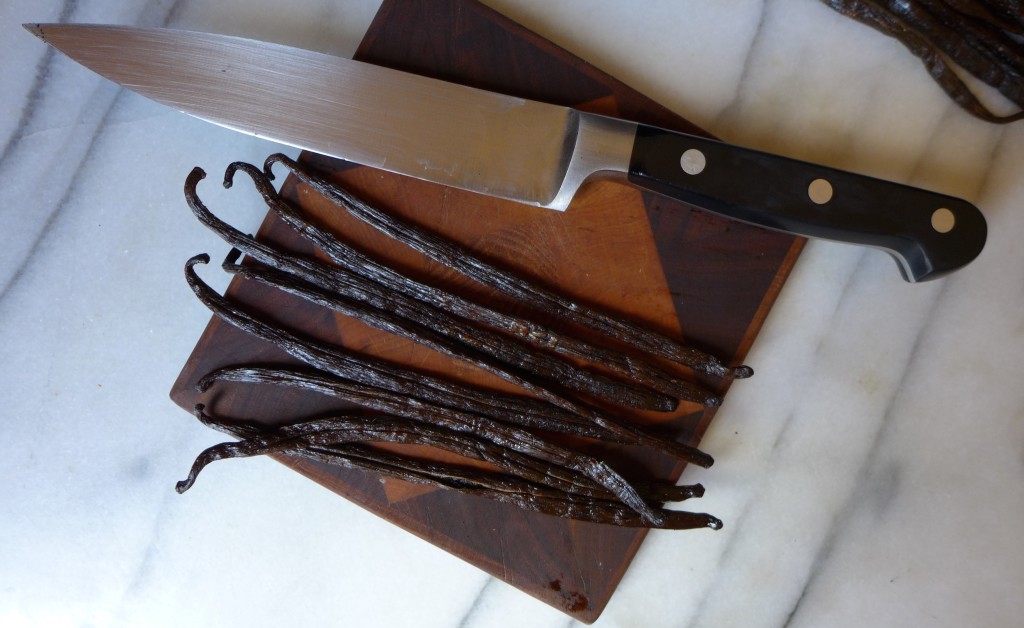
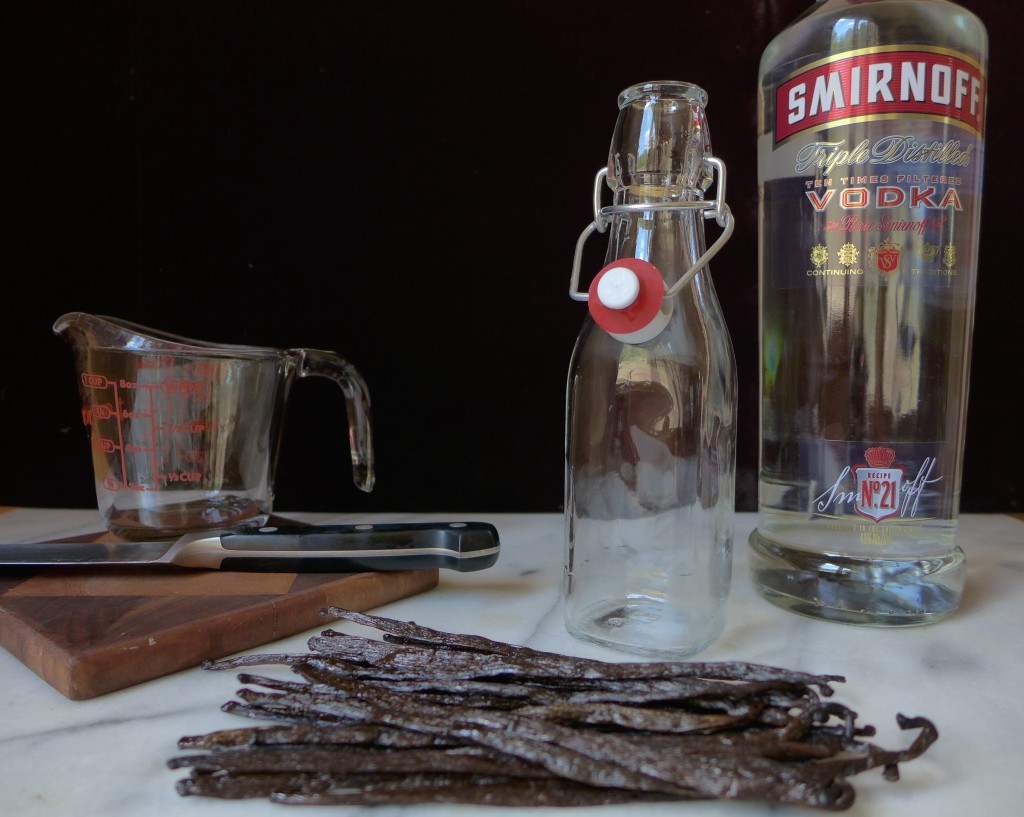
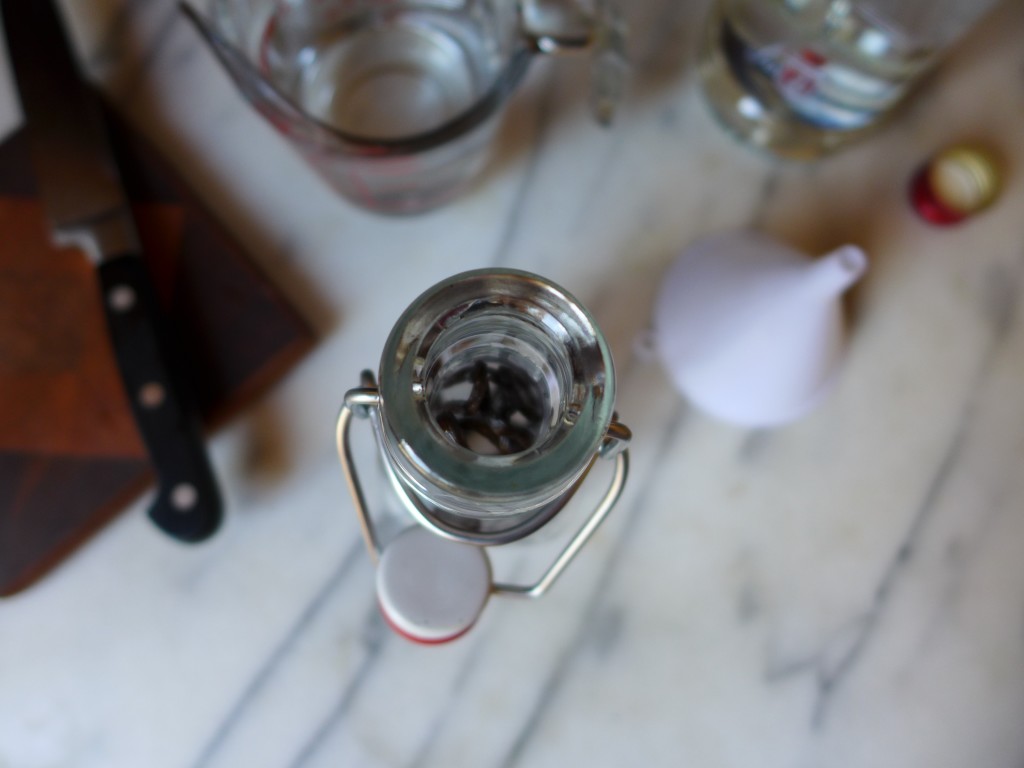
For this bottle of extract I used 8 Madagascar Bourbon vanilla beans and 1 cup of vodka. Split each bean by slicing through it lengthwise, then place the beans in a jar, add the vodka (making sure that it covers the beans), and let sit for at least two months.

After that time, you don’t have to remove the beans. In fact, you can let the extract sit longer to get a richer flavor. And as you use the extract, you can top it off with more vodka to keep your batch going.

That’s it!

liveseasoned_spring2016_vanillaextract2

For how simple this recipe is, there are many ways to personalize it. Try different vanilla beans for different flavors (for example, Ugandan beans are supposed to have a more smokey flavor). You can also use different alcohols. I used vodka because it’s flavorless, so I would really only taste the vanilla from my beans, but you can substitute rum or bourbon. Personally, now that I have this bottle, I’m excited to experiment with a few more bean/alcohol combinations.

liveseasoned_spring2016_vanillaextract4

And if you just happen to have a big bottle of vodka sitting around, don’t forget that with a single vanilla bean and a few days, you can turn it into a smooth vanilla vodka! If you’ll remember, Calder made fun of my idea to make vanilla vodka, but the joke’s on him because that stuff was so good that it’s already gone and I’m thinking about making another batch (maybe with lime this time!).

DIY Fragrances

Vanilla is our ingredient of the season. So far we’ve made some vanilla-infused vodka (great for milkshakes!), a double vanilla cake, and a savory roasted chicken with vanilla bean. And this is just one in a series of essential oil posts.  Check out the rest here.

The idea of creating my own fragrance slowly developed over the past year or so after buying a vial of Victory Wolf. A few things about that purchase : a. it does smell just like a campfire! b. I would have never thought to create a fragrance that smells like smoke, but that inspired me to think outside of the “normal” perfume scents, c. I always thought that perfumes contained a bit of hocus pocus, and maybe they do, but with that purchase I realized that they can be just essential oils in a carrier oil.

liveseasoned_spring2016_perfume3

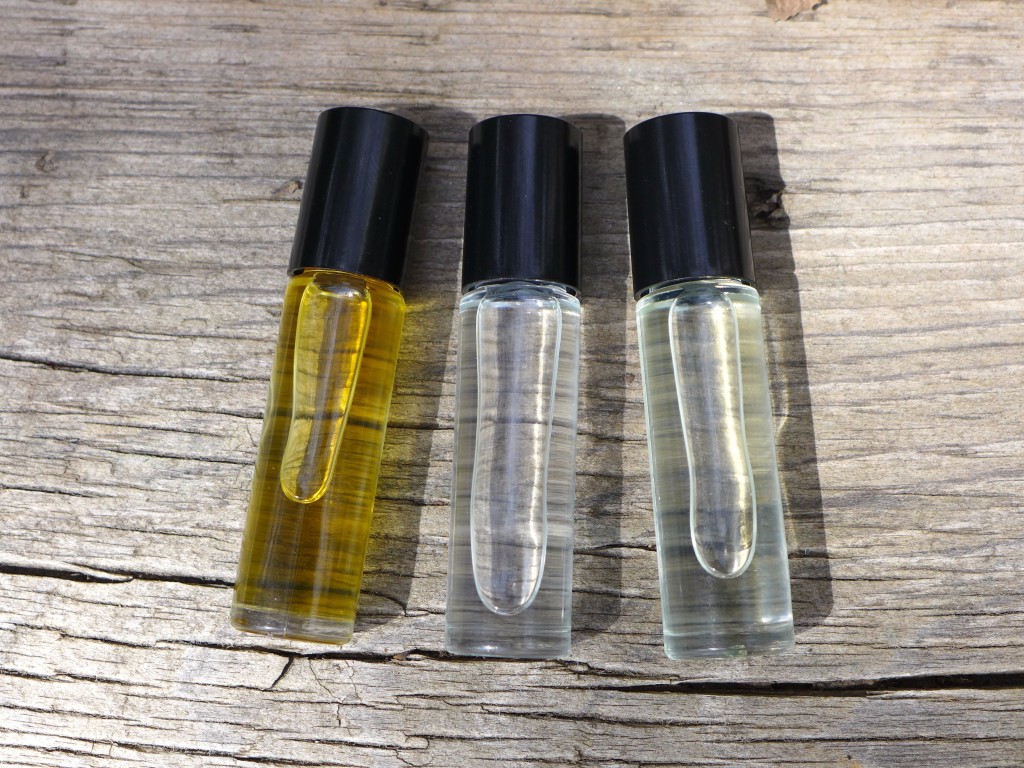
This is our first foray into blending essential oils, so we are by no means experts, but happily, our three blends turned out beautifully and we’re excited to share them today. Throughout the post we provide links to a few resources we found helpful for learning about blending essential oils to create fragrances.

With vanilla as our ingredient of the season, we thought it would be the perfect base note to build upon while trying to create some DIY fragrances. Going into this project, my plan was to create three distinct scents: something minty/fresh, something floral, and something spicy & citrus.

Continue reading

Go Away! Natural DIY Spider Detterent Spray

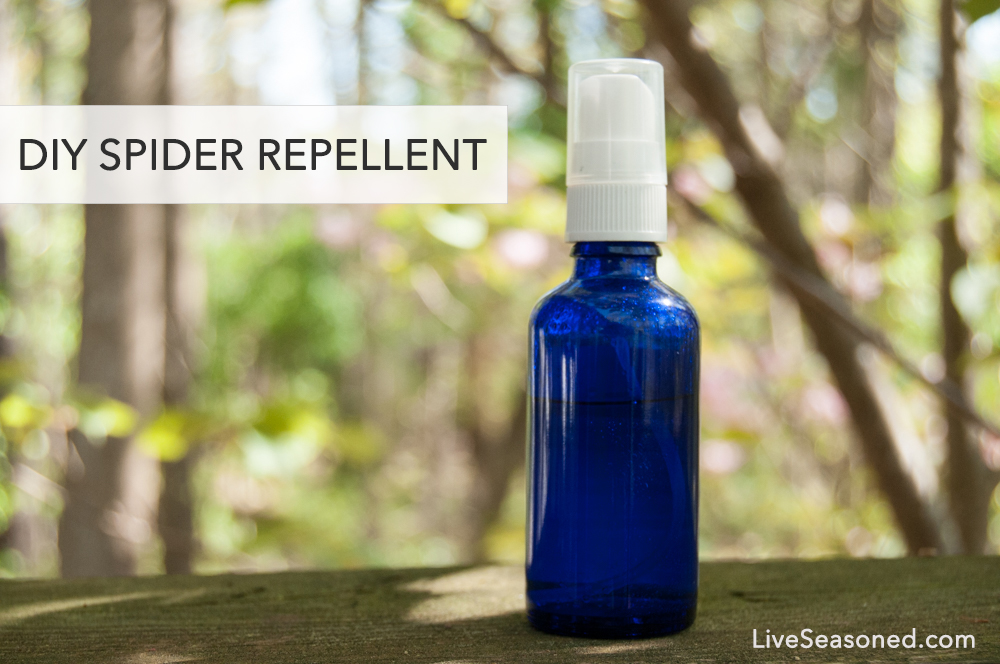
Oh spiders. I love them, but I’m also terrified of them. I definitely keep a handful of them in my house to get rid of little flying pests, but big furry spiders? GET OUT! This past week, we had to catch and release a spider every.single.night. They’re big, brown, and hairy and I’m sick of seizing up in fear every time I see one, so I made this natural DIY spider repellent.  Full disclosure, today is the first day I’m using it so I will definitely report back to let you know how effective it is. live seasoned spring 16 spiders go away spray-2 copy

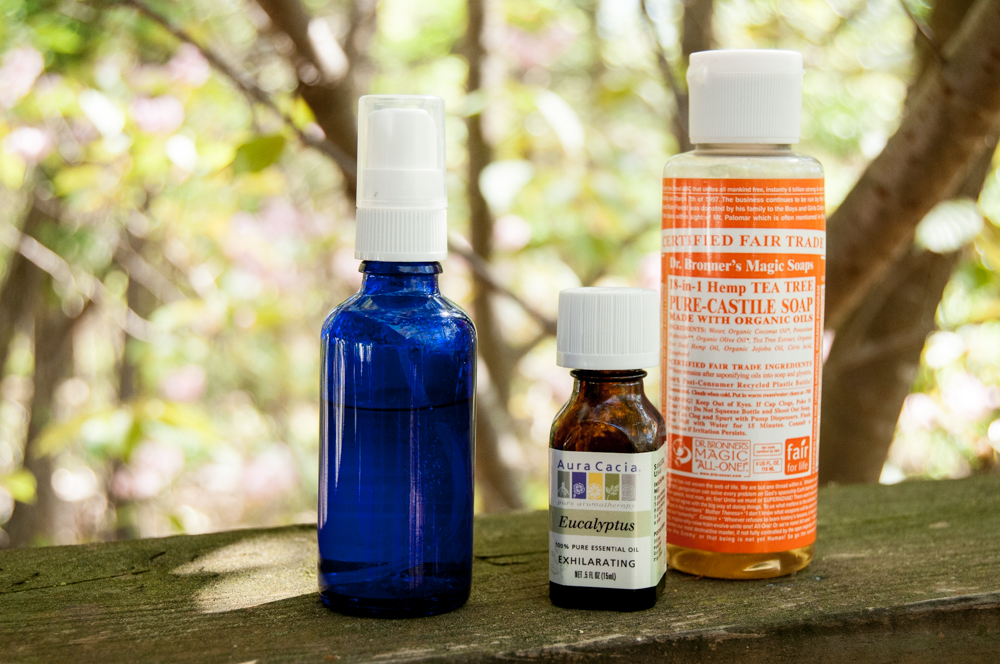
Apparently spiders are discouraged by strong scents like garlic, lemon, peppermint, citronella, and eucalyptus. According to my research, spiders also detest the taste of tea tree oil. While there are plenty of combinations you can mix up to deter spiders, here’s how I went about it:

Add 3 Tablespoons of Dr. Bronner’s Tea Tree Oil Soap & 5 drops of Eucalyptus Oil to a spray bottle and spritz it around all the windows and doors and other area where spiders may enter your house. Don’t spray it directly on spiders, I mean you could, but that’s just cruel.

You could also spray this solution inside, but I’d test an inconspicuous area first to make sure it doesn’t leave soap or oil stains your paint. It didn’t leave stains on my walls, but not all interior paints are created equally 😉  I chose Dr. Bronner’s soap because it’s biodegradable. Interested in other biodegradable bath products? Check out this post.

live seasoned spring 16 spiders go away spray-1

I chose to try this DIY natural spider repellent instead of using toxic chemicals (they’re harmful to kids, pets, plants, insects, animals, our waterways and the earth in general) because they’re just plain overkill. I think very few instances call for harsh chemicals to be used. Often times you can find a natural repellent to tackle your pest problem. Along with the DIY spider repellent, these are a few other tricks to discourage arachnids from entering the apartment.

  • Thoroughly clean around doors and windows inside and outside the house.
  • Clean up any clutter in the corners of the cupboards and house in general.
  • Turn off porch lights so as not to attract flying insects aka a spider’s dinner.
  • Move stacks of wood and other debris far away from your home’s foundation.
  • Seal cracks in the home’s foundation and under doors and around windows.
  • Dust often! Spreading signs of activity and life to normally sleepy corners of your house will prevent spiders from parking there.

Happy spider-free homes to y’all!


Cold Brew Coffee

live seasoned spring 16 cold brew coffee-1 copy The necessity of coffee is fitting for a Monday post, yeah? Brewing your coffee at home is one of the easiest ways to save money each week. I’m so used to it that buying a cup of coffee is a luxury to me and one I really enjoy, which wouldn’t be the case if I was waiting in line day after day at the coffee shop. During the winter, I usually brew a small pot in a french press or opt for the single cup pour over method, but once March rolls around it’s cold brewed coffee all. the. way. Once I discovered this method there was no turning back.

Why cold brew coffee?

  • Extremely easy to make. The directions are straight forward and there’s no fancy equipment necessary.
  • It saves time. It’s brewed in a larger concentrated batch, so you make it once for the week, not every morning.
  • It tastes better. The acidity of cold brew coffee is lower because the grounds are never subjected to boiling water, which makes the chemical profile quite different than that of a conventionally brewed pot of coffee. Lower acidity makes for a smoother taste and naturally sweeter taste and in turn is less harsh on your tummy.
  • It’s never watery. Besides the acidity issues that arise with hot coffee and rapidly cooling hot coffee with ice cubes (iced coffee), you’ll never drink a watery cup of iced coffee again. Watery diluted coffee is awful. Less caffeine and less taste – who want’s that?
  • More caffeine per cup. Cold brew coffee has a higher bean to water ratio and a longer brew time, which means it contains more caffeine. I think of cold brew coffee as a concentrate and I often add water, but more on that below.

Continue reading

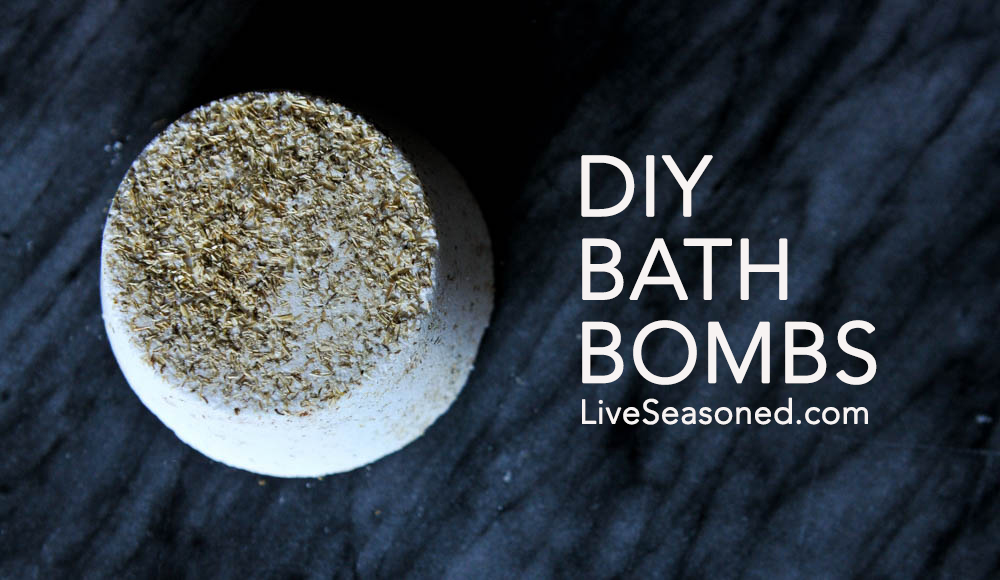
DIY Bath Bombs

 We love mixing and stirring potions around here. Check out the full beauty potion archive here. Click here for our Etsy shop full of lip balms, sunscreens and other natural goodies.

live seasoned winter15 tea bath bombs-3 copy

Today’s post is brought to you Kristin, our middle sister, she’s been known to make a simple craft or two.  She actually makes lots of really neat decor. I think we’ve bugged her enough that she will be contributing here more often. Another thing about Kris? She gives the best gifts! Last year I was gifted the sweetest smelling candles and this year a whole pile of soaps and bath bombs. I’m making a mental note (and a virtual one?!) to get her candle recipe for you too, but we’ll start with what we have and that’s a fiz-tastic recipe for DIY bath bombs. Add that to Webster’s.

Continue reading

Knitting WIPs II

Hey there, I’m popping in this afternoon to share some of the knitting projects that I’ve recently finished, am working on, or are on my mind. I’m exciting. You may need an extra cup of coffee.

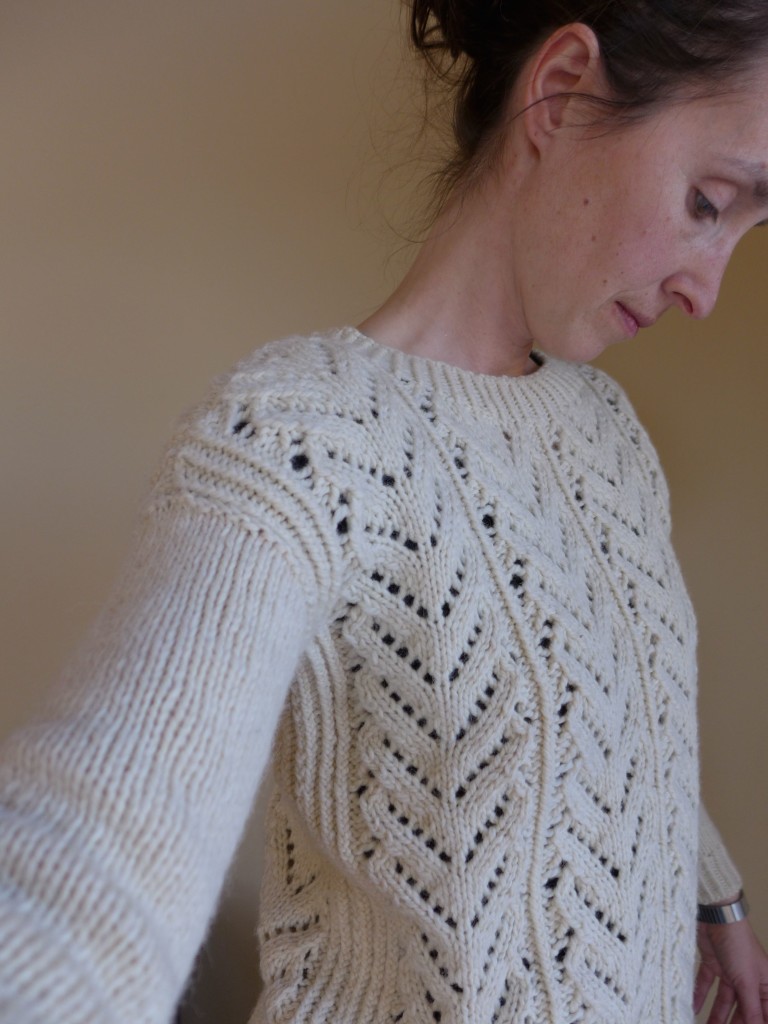
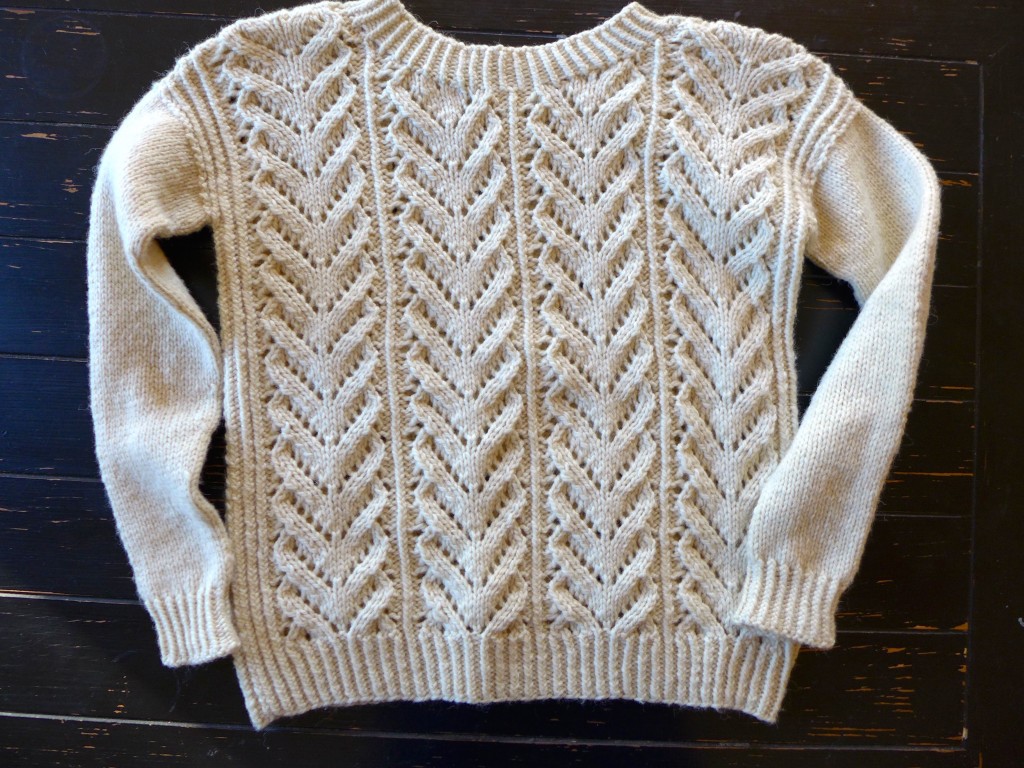
After I finished up the big sweater project, I immediately cast on a sweater of my own, Wolf River. I love how this turned out and now have a case of sweater fever (there are so many good patterns out there!). I haven’t even worn this one yet and I’m already itching to start another sweater, but as you’ll read below, there are a few other little projects that I’m hoping to get out of the way first.

liveseasoned_winter2016_knittingupdate7

Wolf River is a boxy sweater – no waist shaping at all – and it got me thinking that this is a great characteristic to look for if you’re new to sweater knitting. Of course, this sweater’s lace pattern may not be the easiest thing for a new knitting, but there are other simple boxy designs out there.

liveseasoned_winter2016_knittingupdate6

This sweater was knit with less than two skeins of Cascade Ecological Wool, one of my favorites. I have two more skeins in my stash and am thinking that it would be fun to make a second Aidez since I wear my first all of the time.

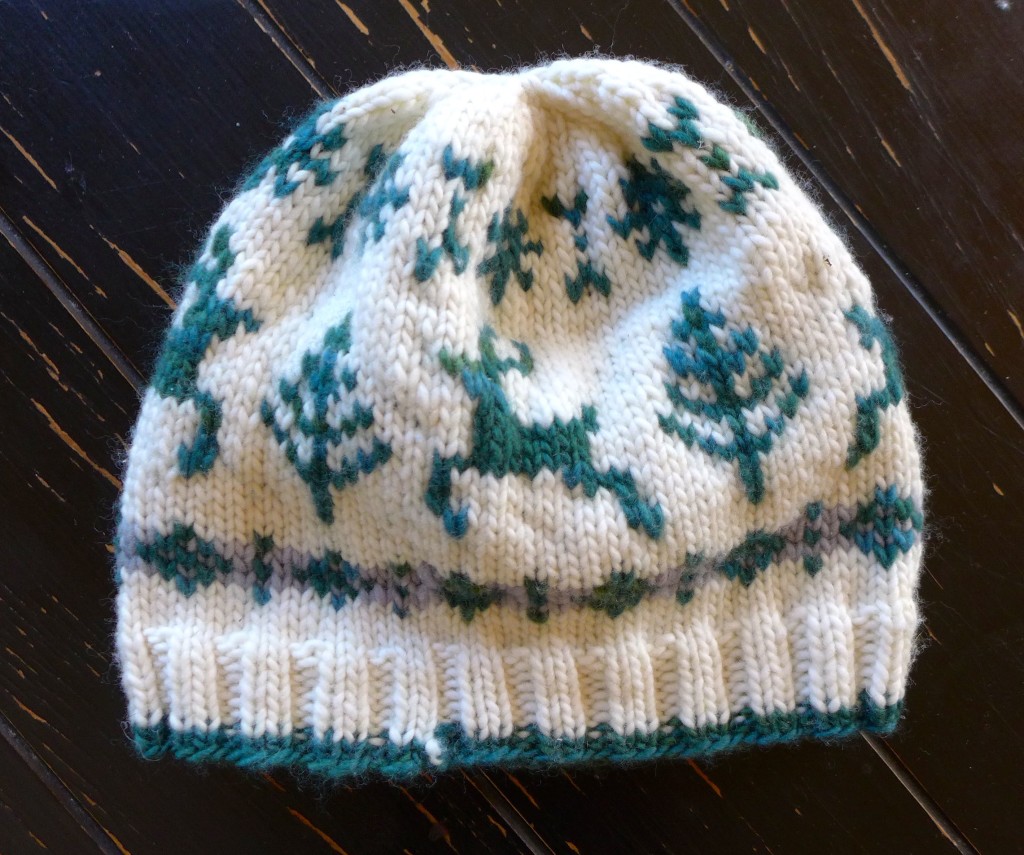
Last year I designed and knit a fair isle hat for Alex and realized that it would be fun to knit the boys new hats every year. I made this one over the weekend (after knitting a sweater, little hats are a breeze!).
liveseasoned_winter2016_knittingupdate5

Continue reading