Ginger & Pomegranate Punch

I made this punch last weekend for a cookbook club meeting (more on that soon!). I’m not normally a punch-maker and was a little bit nervous putting it together, but it ended up being amazing! I think it was all due to the ginger beer… If this is any testament to the punch’s deliciousness, it was the first thing to go at my little cocktail bar that night. This recipe is our party gift to you at the beginning of what’s sure to be a long, fun, and punchy (ha!) holiday season.

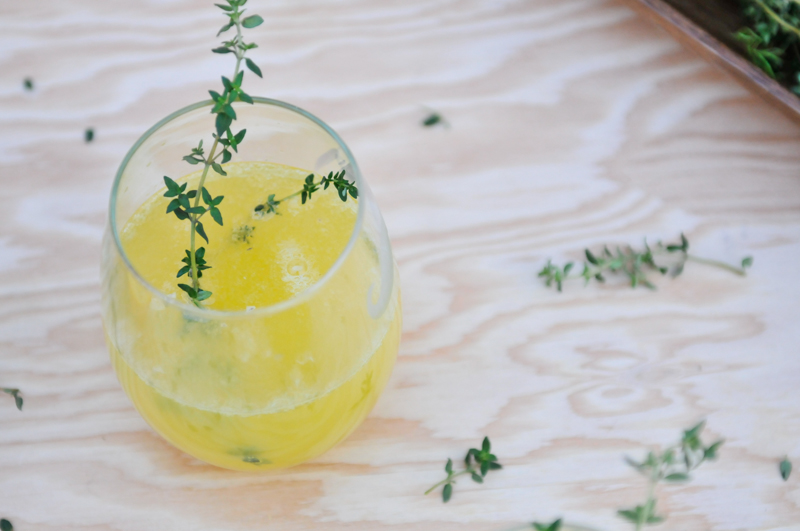
With the realization that we had a winner of drink on our hands, I knew that I wanted to share it on the blog, but forgot to take any beautifully staged drink shots, instead, we have some after-party empties. #oops

liveseasoned_gingerpunch5

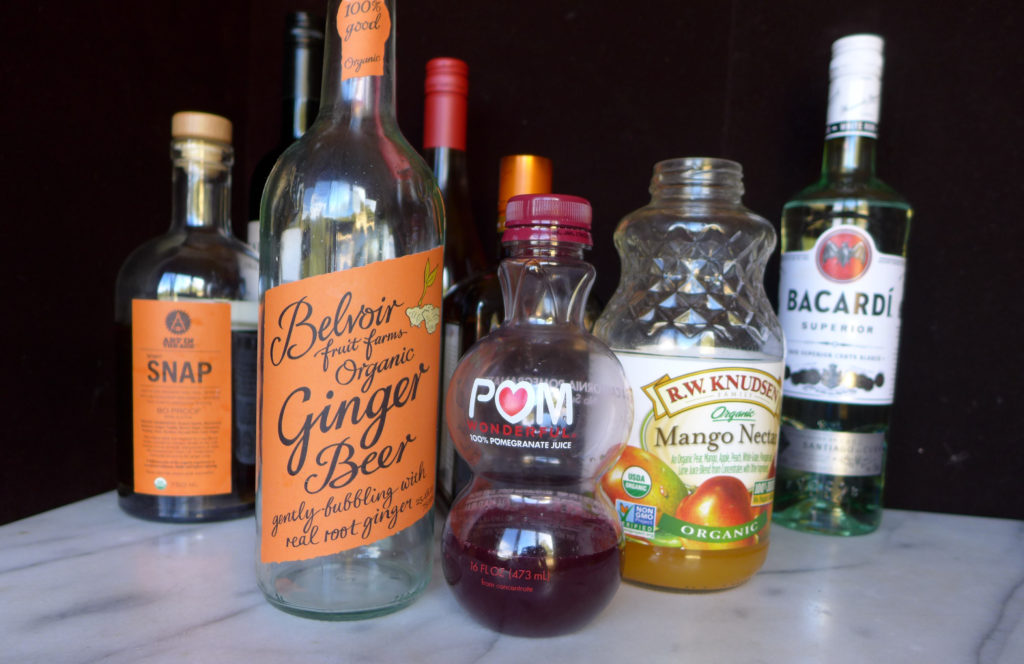
The ingredients for this bad boy couldn’t be simpler : ginger beer, pomegranate juice, and mango nectar. The ginger beer provides a ginger flavor (obvs), but I really like it because it also adds a fiery warmth to the drink that you aren’t going to get with ginger ale. Don’t accept any ale substitutes. The pomegranate juice provides the punch’s tart flavor and the mango juice its sweetness.

I used 25 oz of ginger beer, 8 oz of pomegranate juice, and about 12 oz of mango nectar. After you put that all together, you can give it a taste and adjust things to your preference.

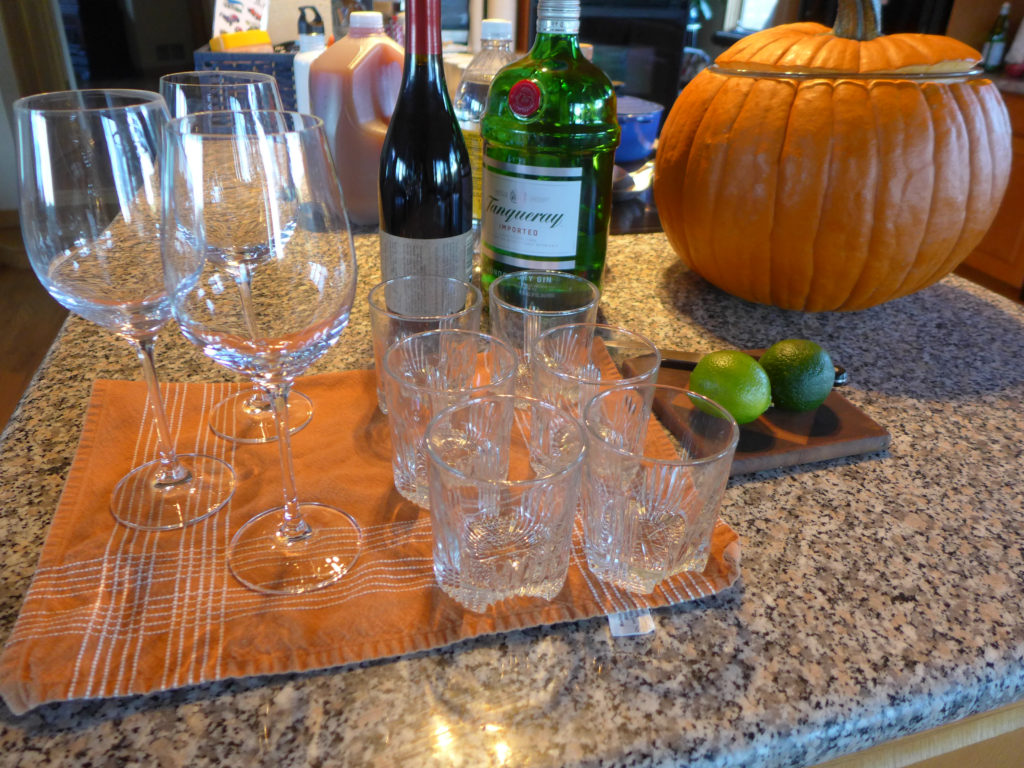
Originally I was going to spike this with light rum, but then decided against it since we were going to have some non and light drinkers in the group. Instead, everyone had the option to add whatever alcohol they would like (we had rum, gin, vodka, and SNAP available). I loved it with rum and stuck with that for my two glasses, but I know a lot of other guests were excited by the ginger-snap description of SNAP and ended up enjoying that paired with the punch.

liveseasoned_gingerpunch2

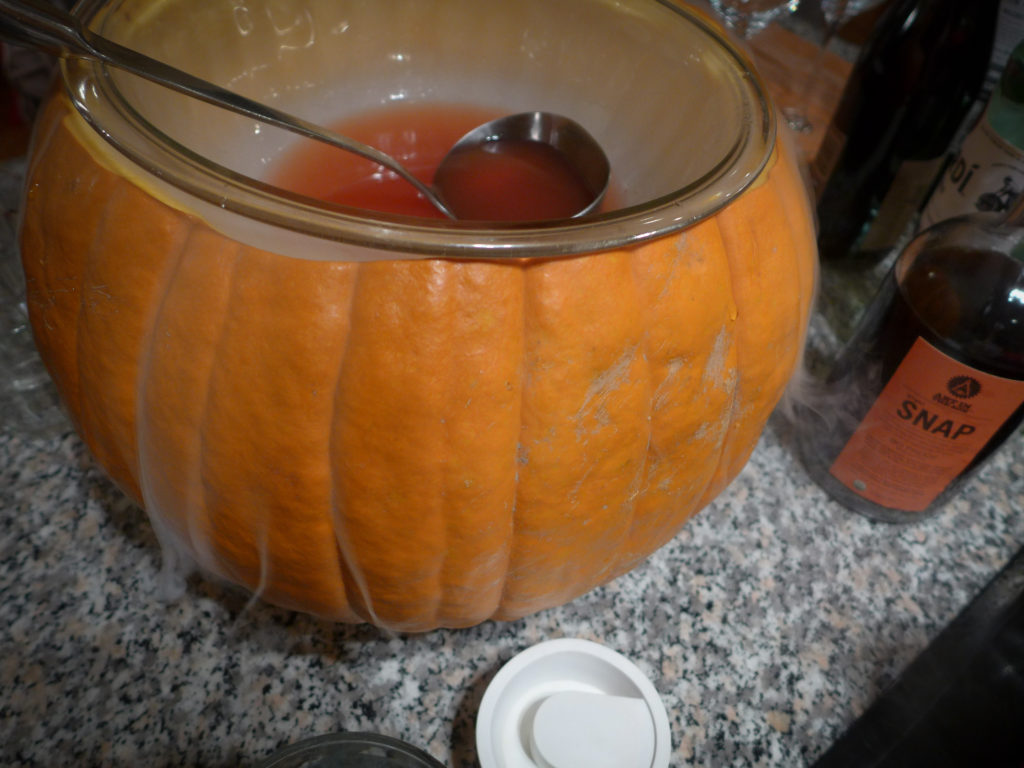
Since I was serving this for an October event, I used it as an excuse to experiment with dried ice for the first time! My goal was to serve the punch in a pumpkin with dry ice creating a smoke or haze that would flow out and around the punch bowl. I would give the final result a C+. The punch in the pumpkin looked super seasonal at the drink station (I even kept the pumpkin top and it made a cute lid on the punch before party time), but I couldn’t get the volume of smoke that I was looking for. Maybe you’ll have better luck.

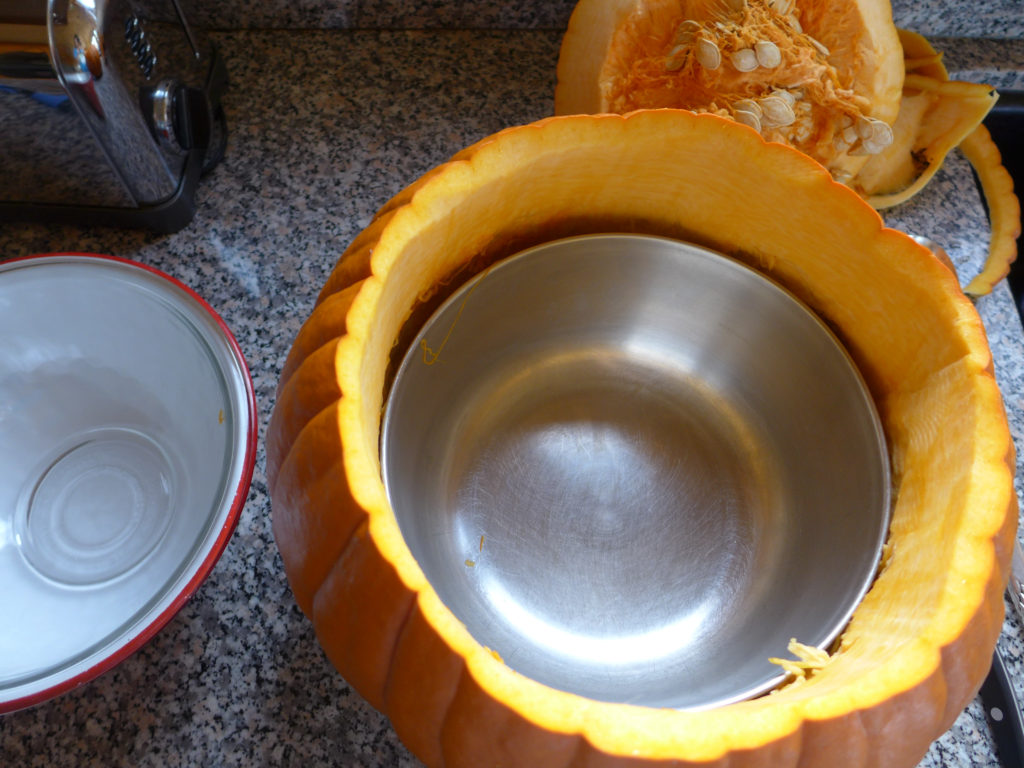
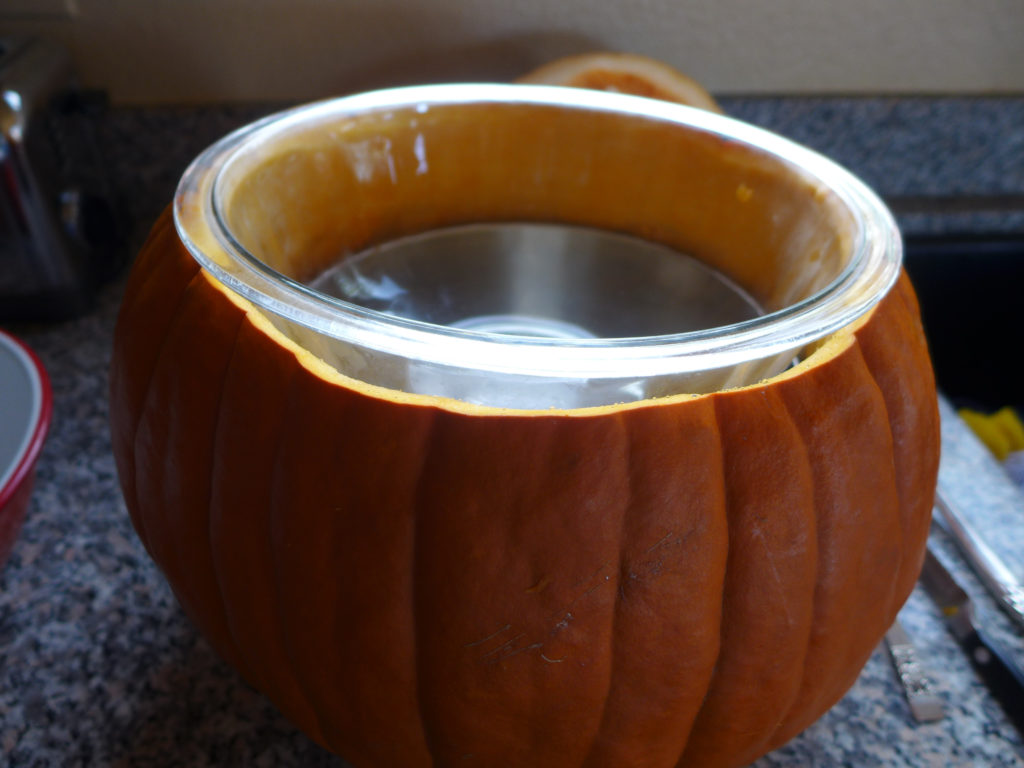
Here’s what I did : I cut the top off of an extra-large pumpkin and cleaned out the insides. Then I carved out the insides slightly until I was able to fit a metal* bowl down inside the bottom of the pumpkin, BUT I tried to not carve too much of the top rim of the pumpkin away so that my glass “punch” bowl could rest on the pumpkin and not sit down in the metal bowl. I think the following two pictures will help to illustrate the set-up.

liveseasoned_gingerpunch3

liveseasoned_gingerpunch4

At party time, I placed the dry ice in the lower metal bowl and poured some water over it to get it smoking, then I placed the glass punch bowl on top for serving. While the ice would smoke some, it would also peter out fairly quickly. We would pour more water over it, causing another big release of smoke, but again, it was quickly exhausted…. maybe I just needed more dry ice in the lower bowl? While it wasn’t a dramatic success this time, everyone loved that we gave it a shot, and I’m still game to do a few more dry ice experiments.

*Metal is essential here since the dry ice gets so cold that it could shatter glass bowls (I even worry about pyrex because there have been some issues with lower quality pyrex being manufactured in recent years).

liveseasoned_gingerpunch

See what I mean? It’s an ehh, on the scale of awesome, but hopefully I’ll have my dry ice game down by the time the boys are teenagers (gotta impress them with something).

Weekend Recipe Roundup

lemonade-10

Hey there! A few friends are visiting this weekend and I found myself looking up old favorites in the archives of Live Seasoned.  I thought I’d share my picks with you 🙂

Best snack EVER. Today we made a vegan version with coconut oil, nutritional yeast (instead of parmesan) and garlic.

Lemonade all the way. This lemongrass tea is exceptional too!

We love making these honey and brie crackers as a party snack.

Remember this meal? I grill up those pork skewers all the time.

Quick pickles and spinach dip are my new summer party staples.

I picked up a mixed six pack of Carolina beers and a sixer of Saranac Prism White Ale tonight.

I’ll probably make an adapted batch of these scones tomorrow for my gluten-free, vegan friend.

Oooo and some of these creamy avocado popsicles or maybe these toasted coconut ones.

Hope you all have a relaxing weekend! I’m out!

Citrus Champagne Spritzers

liveseasoned_winter14_spritzer-5


Cheers to citrus season!  Growing up, my mom would order a half dozen boxes of oranges from the marching band fundraiser, which meant orangeade all winter long.  I miss those big boxes and that orangeade so today I made something a little reminiscent of my childhood + alcohol 🙂  This citrus champagne spritzer has fresh squeeze oranges and lemons, but don’t fool yourself, it is still winter.

This bubbly and fresh drink turned my cheeks pink! It was the perfect pal for present wrapping today.  Do I sound like the loneliest person on the planet?! Wrapping presents with a drink that I’m calling pal? Don’t answer that. But hey, if your holidays are hectic and you need a mocktail, try this recipe sans champagne and cointreau.  Replace the alcohol with sparkling lemonade or use the sparkling orange and lemon soda as the base, but whatever you do, ENJOY IT!

Citrus Champagne Spritzer Ingredients:

  • Prosecco (1 bottle makes six+) refrigerated
  • Cointreau refrigerated
  • 3 TBSP orange juice
  • lemon or orange sparkling beverage refrigerated
  • 2 tsp lemon juice
  • 1 cup water
  • 1/2 cup sugar
  • 12 sprigs of thyme rinsed and dried

Some notes:

  • I use a one ounce shot glass to measure the ingredients, but if you don’t, one ounce equals two tablespoons.
  • You can leave out the cointreau if you want.  The flavor is wildly different, but just as amazing.
  • You could use Korbel Brut or a riesling instead of Prosecco.
  • This is a perfect big batch cocktail because there is no ice!*

liveseasoned_winter14_spritzer-1

 The how:

  • In a sauce pot, stir together a half cup of sugar and a cup of water.  Turn onto medium-low heat until the sugar is dissolved.  Remove from heat, add four or five sprigs of clean thyme and place a lid or plate on top of the pot. Let steep for ten minutes. After ten minutes passes, remove the thyme sprigs and strain simple syrup if necessary (all my thyme leaves were intact so I didn’t have to strain).
  • In a tumbler, mix 1 ounce thyme simple syrup, 2 ounce fresh squeezed orange juice, 2 teaspoons fresh lemon juice and half ounce cointreau. Stir well.  Add prosecco (I didn’t measure, just pour accordingly)
  • Top with a splash of sparkling lemon or sparkling orange soda.
  • Garnish with a thyme sprig or two and serve.
  • *If you are making these citrus champagne spritzers for a crowd, stir up a big batch all at once.  In a large pitcher combine 3/4 + 2 tablespoons simple syrup, 1 + 3/4 cup orange juice, 1/3 cup lemon juice and a 1/3 cup cointreau. Stir well, add the champagne and top with one can of sparkling orange or lemon.

liveseasoned_winter14_spritzer-8


These sparkling citrus champagne spritzers are perfect for a holiday party *ahem champagne toast ahem* or in my case a preholiday wrapping party.  Mix up a whole batch or put on Mixed Nuts and drink one by yourself 😉

liveseasoned_winter14_spritzer-3


Easiest Caramel Dip

liveseasoned_fall14_carmeldip-5

As you know, apples are our ingredient of the season and with that in mind, I decided to make a childhood favorite of mine, caramel dip.  Over the years, my tastes for sweets has drastically decreased.  I’m now a dark chocolate lover and I tend to gravitate towards salty snacks, but when October rolls around I always think of my mom’s caramel dip.  She used to whip up a batch for friendly gatherings, holiday dessert tables and if my memory serves me correctly, the soccer concession stand.

This recipe is dubbed ‘the easiest caramel dip’ because you’re not actually making the caramels, you’re simply melting them and adding a couple other ingredients to achieve the right taste and consistency.  Its simple preparation (no knives involved!) makes it a great recipe for the kiddos to help with.  It can also be made a day or two ahead if you have a big party approaching and in my opinion, those are the best types of party foods.

The original recipe, which was dictated to me by my mom earlier this afternoon calls for Cool Whip.  My mom mentioned that she didn’t really know why the Cool Whip was added (since it’s mainly just oil) and that I could probably find a substitution for it, but that she never bothered.  Raising four kids, working full time, and constantly cooking for us, I can understand why she didn’t want to mess with a hit like her simple caramel dip.  Can you imagine the moans and groans we would have attacked her with if the dip didn’t taste right?  Anyway, after I went grocery shopping and snapped the first shot of the ingredients I realized I don’t have four kids and thus I could manage to experiment without any repercussions and such, this recipe contains Cool Whip no more! I opted to use a couple spoonfuls of coconut oil instead and to my delight, it turned out perfectly and you can’t taste the coconut one single bit.

Ingredients:

  • 1 bag of Kraft caramel
  • 1 package of cream cheese
  • 2 TBSP coconut oil (or more to achieve desired consistency)

Easiest Instructions:

  • Unwrap all the caramels and put them in a small sauce pot along with the cream cheese.
  • Stir continuously on medium low heat until the caramels and cream cheese are completely melted and combined.
  • Stir in two tablespoons of coconut oil.  If you like a thinner dip, add a bit more coconut oil until the desired consistency is reached.
  • Remove from heat. Transfer to a small bowl and serve with sliced apples.

Along with sliced apples, I also dripped some of the caramel dip onto plain, unsalted popcorn and roasted, unsalted peanuts. It made for a sweet and crunchy treat.

Just so you know…

  • I’m moving in a few days and I had already packed up my kitchen so finding utensils, bowls and serving pieces for this post was the most challenging part!
  • The handle of my pot broke off (the screw came loose and slipped out) when I picked up the pot to transfer the caramel to a bowl. It slammed down on the stove and hot caramel splattered everywhere..
  • I almost spelled caramel, carmel for the entire post because I grew up next to Mount Carmel so naturally that’s how I’ve been spelling the sweet treat my entire life.  I never understood why some people pronounced caramel with three syllables, but now I get it.

Upcycled Tiny Vases

Hey party people! Labor day is this weekend and even if you don’t have a barbecue to host or attend, it’s a nice, long weekend that is meant for chillaxin’ and treatin’ yourself.  (Did you know chillax was added to the dictionary? My high school self is punching the air with excitement right now)  If you are hosting a party, you should think about making these spectacular little upcycled hanging glow vases to add to your decor. While you are crafting aforementioned vases, you should sip on these fruity mocktails and decide which one you’ll be concocting this weekend!

liveseasoned_summer14_hangingvases-5-3


My sister Kristin and I sprinkled them about our land to decorate for a camping festival that we hosted this past weekend (more on that to come).  They looked adorable during the day and mesmerizing at night!  These vases were one of the few decorations that really worked well both day and night.  Our enormous dreamcatchers were completely lost at night (they had no light-up features) and our sweet dance floor was plain ol’ grass and sky during the daytime, but these tiny vases looked great at all hours!

If you have some spare time, string and a few small vessels, then this craft is for you.  There is no glue or taped involved, so whatever you choose to use as a vase can be reused again in the future.  We had a large quantity of salt and pepper shakers left over from Katie’s wedding, which is why Kristin (our middle sister) thought up this project.  We saved the tops so that we can easily dismantle and sterilize these shakers if we ever need to use them in the future.

Supplies:

  • String, hemp or embroidery thread
  • small vessels (we used salt and pepper shakers)
  • scissors
  • glow sticks (optional)
  • flowers (optional)

The How:

  • Cut off a length of string at least 2 feet long.  (The length really depends on where you want to hang the vases. Overestimate if you aren’t sure-I didn’t measure any of my strings) Wrap the string around the top of the vessel and leave a quarter inch tail.

liveseasoned_summer14_hangingvases-5-2

  • Hold the tail vertically across the rim so that you can wrap more string around the bottle and over the tail, which will secure the tail and string in place.
  • Continue wrapping the string around the rim of the vessel until you’re satisfied with how it looks.

liveseasoned_summer14_hangingvases-1

  • Place your pointer finger over the wrapped rim and wrap the string over your finger and then loop the string through to create a knot. Repeat two more times.  You should have a long tail leftover so that you can hang your vase.
  • After you hang your vases you can fill them with water and a tiny bloom.  Before dusk, cut a glow stick in half and empty the liquid into the vessels to create tiny glowing orbs. (Be extra careful when cutting open glow sticks.  They contain chemicals, not deadly dangerous chemicals, but chemicals nonetheless. If youngsters are going to be around, please skip the glow stick vases.  They look so super cool that kids will not be able to resist them and we wouldn’t want anyone to ingest the hydrogen peroxide or phenyl oxalate este).
  • Rinse and repeat as often as you’d like.  To be honest, empty vases look pretty as well!

Since I’m being honest, (does it irk you when people say that? shouldn’t you always be honest? I catch myself saying it quite often..) I have to admit this is my favorite craft of the summer.  I can’t take credit for it though, it was all Kristin, our middle sister and {hopefully} future-blog-contributor.  The tiny vases are just *so* cute and the way they glow is really magical.  Party guests were complimenting them all weekend!  It’s pretty neat how something so ordinary becomes so extraordinary when it’s swiped from the table and hung from a branch.  If you don’t feel like crafting these little glow vases, why not bake these galactic brownies?

*Glow vase photo by theflyry and empty vase photo by saleem.


Watermelon Dill Gazpacho + Coconut Lime Crema

I didn’t discover gazpacho until my late teens, but I’ve been in love ever since.  It’s the perfect meal for a hot summer day and you best believe that’s the norm here in North Carolina.  In college, I worked at a catering company and I remember scrunching up my nose when I read gazpacho on the hor d’oeuvre menu.  I had no clue what it was and when another waitress told me it was basically cold soup, I was a little weirded out by the idea.  One of the chefs saw that whole interaction, pulled me aside, listed off the ingredients and gave me a sample.  I was hooked.  It really wasn’t what I was expecting at all.  I thought it would taste like V8 and I really couldn’t imagine eating a whole bowl of it, but it turned out to be thinner and sweeter with a little pang of spice.  Since my catering days, I’ve played around with a few different recipes so today I’ll share my favorite for sweltering summer days.  Watermelon Dill Gazpacho with Coconut Lime Crema is almost like a treat instead of lunch.  It’s slightly sweet, very light and refreshing and there’s no spice so you won’t be sweating over your cold soup 😉

liveseasoned_summer2014_gazpacho-2

Equipment:

  • Blender (I used a ninja)

Gazpacho Ingredients:

  • 1 cup cubed (very ripe) tomato
  • 5 cups cubed watermelon
  • 1/4 cup olive oil
  • 2 TBSP balsamic vinegar
  • 1 cup peeled cucumber
  • 2 TBSP fresh dill + more to garnish
  • salt & pepper to taste

Gazpacho Recipe:

  • Blend the tomato and watermelon until smooth.  Add in the olive oil and vinegar and blend for an additional minute.  Blend in the cucumber and dill for about a minute until incorporated, but not completely emulsified.  Add salt and pepper to suit your tastes.
  • Garnish with a sprig of dill and a slice of avocado and yellow sweet pepper if desired.  I highly recommend serving the gazpacho with a dollop of coconut lime crema.

liveseasoned_summer2014_gazpacho-3

Coconut Lime Crema Ingredients:

  • 1/2 cup raw cashews soaked for at least 4 hours
  • 2 TBSP lime juice
  • 1/4 cup + 1 TBSP coconut milk
  • 1/4 cup cool water
  • Pinch of salt

Coconut Lime Crema Recipe:

  • Add the soaked cashews, lime juice, salt and water to the blender.  Blend until smooth.  Add the coconut milk and blend until creamy.
  • Gently drip the coconut lime crema into the bowls immediately before serving.

liveseasoned_summer2014_gazpacho-1

I truly believe the coconut lime crema makes this dish.  It adds a perfect creamy component to the chilled watermelon.  It’s also a more familiar taste so you can really wrangle in any guests who tend to eat on the safe side.  If you’re not in the mood to make the crema, garnish the gazpacho with slices of avocado and sprigs of dill.  The contrasting colors in this dish make it a pretty party food. I love serving gazpacho in small servings at get togethers that way guests don’t have to commit to an entire bowl of unknown, ya know?  It’s also fun to play around with different designs and patterns in each glass. This watermelon gazpacho will fly off the buffet before you have time to fill up more shot glasses.  I’m actually eating a whole bowl of it as I type!

Pizza: Four Ways (and some more ways)

Show me a person who doesn’t like pizza and I’ll show you a liar.  Pizza is the perfect party pleaser because everyone loves a slice once in awhile a day.  There are trillions of topping combinations and with a little planning, it’s relatively quick and easy to throw together.  Pizza is also the perfect party food because you don’t need utensils or even a plate.  With all that in mind, we decided to throw a little pizza picnic in Saxis, Virginia this past week.  If you’re entertaining for the fourth of July, you may want to give one or four of these pizzas a try!

Start with a cold hors d’oeuvre pizza with lime crema, avocado, cilantro and grilled corn.  Next serve a classic margarita pizza with roasted tomatoes and then bring out the caesar salad pizza (inspired by this idea) and lastly the pesto, pea, parm and artichoke pizza.  We used this recipe for the dough, which we originally read about in this article.

liveseasoned_summer14_pizza-2 copy

Continue reading

We Saw Stripes!

We know, we know, we told you that there was going to be a photography tutorial today, but we couldn’t help ourselves, we had to update you on Alex’s stripe party!  The little guy is turning one on Friday so we gathered the family together for a stripe celebration.

liveseasoned_spring2014_stripeparty-1-2

Baby A looks great in stripes, which is how we came up with the theme.   We also asked all of our family to dig through their drawers and play the part as well.  Katie, Calder and Alex all matched in striped Old Navy shirts (Kate and Alex’s colors are now sold out).  The rest of the gang looked great in their various striped outfits.  The Easter bunny even dropped off party-appropriate footwear for all the guests!  All the guests received goodie bags filled with striped candy, striped kazoos, stunna shades and a party hat.  The instruments, shades and hats were an easy way to add to the stripe theme and the over all goofiness of the party.  They also worked as great props for our photo wall.  Katie simply hung strips of yellow crepe paper on a white wall, which I then encouraged everyone to pose in front of throughout the party.

Continue reading