In Season: Gettin’ Crafty With It

liveseasoned_spring2014_craftlinks_knittinggals

This week I worked two smaller gigs that paid in cash and after each one I stopped off at Michaels, A.C. Moore and Lowes on the way home.  I realized I have a tendency to immediately spend my cash on craft supplies even though I already have a whole room full of fabrics, papers, ribbons and yarns.  Are you the same way?  What are your favorite craft supply sources and items?  We’ve rounded up a few fun ones here, but we’re always looking for those mystical bead shops or that warehouse full of fabrics so let us in on your secret supply stores too.

In a few weeks we’ll be sharing some map-tastic crafts so now would be a good time to stock up on these.

These safety pins make awesome removable stitch markers for your knitting projects, and with 300 in a box, you have plenty to lose, share, or stash!

Our mom left Katie with an extra (EXTRA) large crochet hook. What to do with it? Maybe this cowl? Or a crocheted rug?

And then there’s this yarn. wow.

Need a place to store your supplies? Katie uses a library card catalog she picked up on Ebay.

We also love metal tackle boxes for storage. One for jewelry supplies, another for the tools and bobbins we use when at the sewing machine.

Shop Goodwill is a great site for so many reasons.  Sarah is currently perusing their listings for a good sewing machine.

We don’t own fringe scissors, at least not yet! But don’t they look equally scary and exciting at the same time?

When it comes to making wearable gifts for others, the hardest part is getting the sizes right. Size charts like this one for hats are my go-to reference.

Of course, crafting doesn’t have to require buying the supplies, sometimes you have everything you need at home. Take these wine cork stamps as an example. (We all have wine waiting for an excuse to be opened, right?)

Have a great weekend everyone and hopefully it involves a little pro-craft-tination.

Ps. you can find us here now!

*Image via Library of Congress

Rosemary Vodka & Herb Bloody Marys

As you would expect, we love to eat seasonally, varying our ingredients and menus to take advantage of whatever is fresh at the moment. We thought it would be fun to place extra emphasis on one flavor or ingredient each season, highlighting the variety of ways you can use it in your food and home. To kick things off, this season’s ingredient is rosemary!

Today we wanted to share an amazingly simple way to turn your average bloody mary into something extraordinary: rosemary vodka!

Making the vodka is so easy, and when paired with our bloody mary recipe below, you’ll be the star of your next brunch (honestly, the bloody mary will be the star, you’ll be drunk).  We’ve dressed up the bloody mary with some fresh herbs and cheese stuffed olives, nothing too crazy, but just fun enough to make these bloody marys memorable.

liveseasoned_spring2014_bloodymary_top_wm


First the vodka  ~ I’m going to provide basic instructions, but fom my experience, the process is flexible and can be adjusted based upon how strongly flavored you want your vodka to be.


Vodka Ingredients

  • 4 cups vodka
  • 4-5 sprigs fresh rosemary (more or less to adjust flavor)

Place the rosemary and vodka in a clean jar to steep. After a few days, give your vodka a taste. You should be able to taste a hint (or more) of the rosemary flavor. I wanted an intense flavor (and I may have forgotten about this project for a moment), so I let my rosemary steep for over a week. After that amount of time, the rosemary flavor was perfectly present in my bloody mary, but not overwhelming.

Whenever you are happy with the rosemary flavor of your vodka, remove the rosemary sprigs. Be prepared for your vodka to turn a greenish-brown color as the rosemary’s tannins are released ~ while slightly unnerving, the color change really makes it seem like you’ve made a potion!

Now, you could take your vodka and make a basic bloody mary, but why not dress it up a bit? The recipe below simplifies things by using bloody mary mix, but then we splurge on the goat cheese-stuffed olives and the fragrance from the additional fresh herbs.

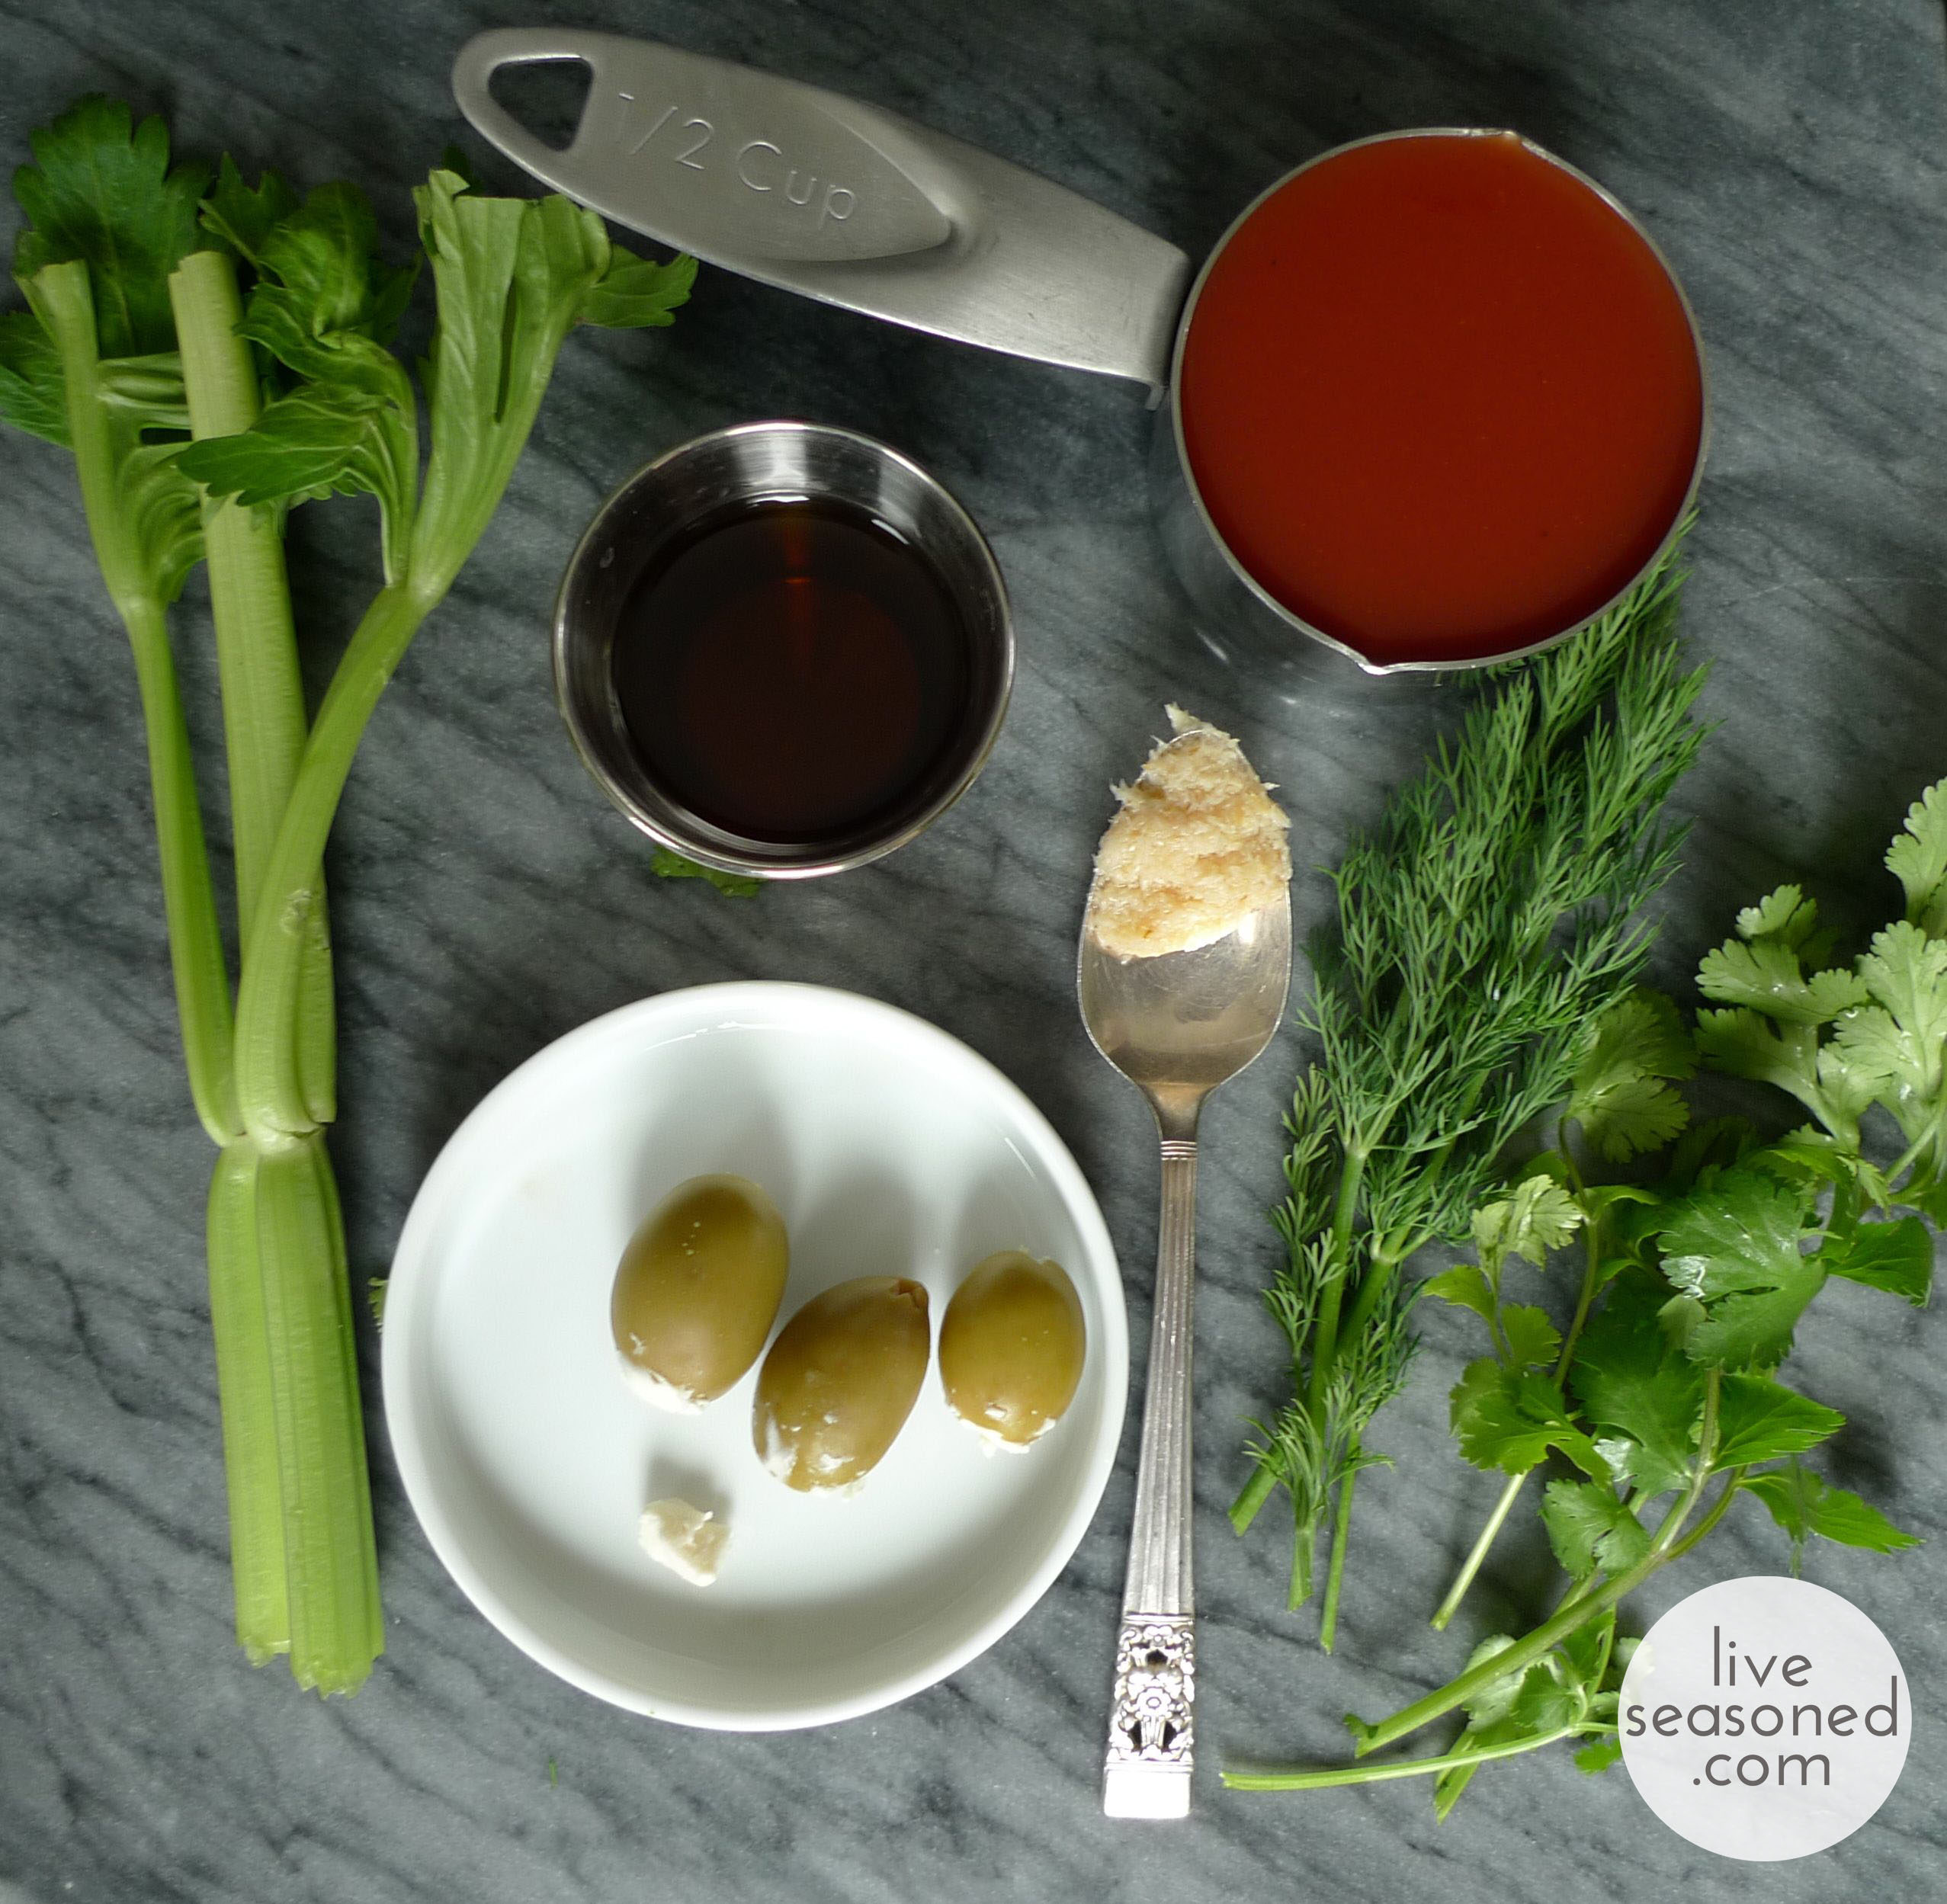
liveseasoned_spring2014_bloodymary_ingredients_wm

Bloody Mary Ingredients

(makes 1)
  • 2 oz vodka
  • 4-5 oz bloody mary mix
  • 1 tsp horseradish
  • 2 dashes worchestershire sauce
  • lime wedge
  • celery stalk
  • goat cheese
  • green olives (I purchased olives without the pimentos)
  • fresh herbs, particularly dill and cilantro

Stuff your olives with the goat cheese. I used a knife to push the goat cheese into the open end of the olive. It wasn’t pretty, but it was relatively easy.

In a glass filled with ice, add the vodka, bloody mary mix, worchestershire, and horseradish. Stir it well. Arrange the celery stalk and herb sprigs in the glass. Add the lime wedge and skewered olives to the glass’s edge.

Enjoy!

liveseasoned_spring2014_bloodymary_side_wm


Have you tried your hand at infused vodkas? Have any favorite flavors?

What about your bloody mary, what are your favorite garnishes?

Welcome March!

On the first Wednesday of every month, you can find us checking in with what’s coming up on the calendar, both literally and figuratively. 

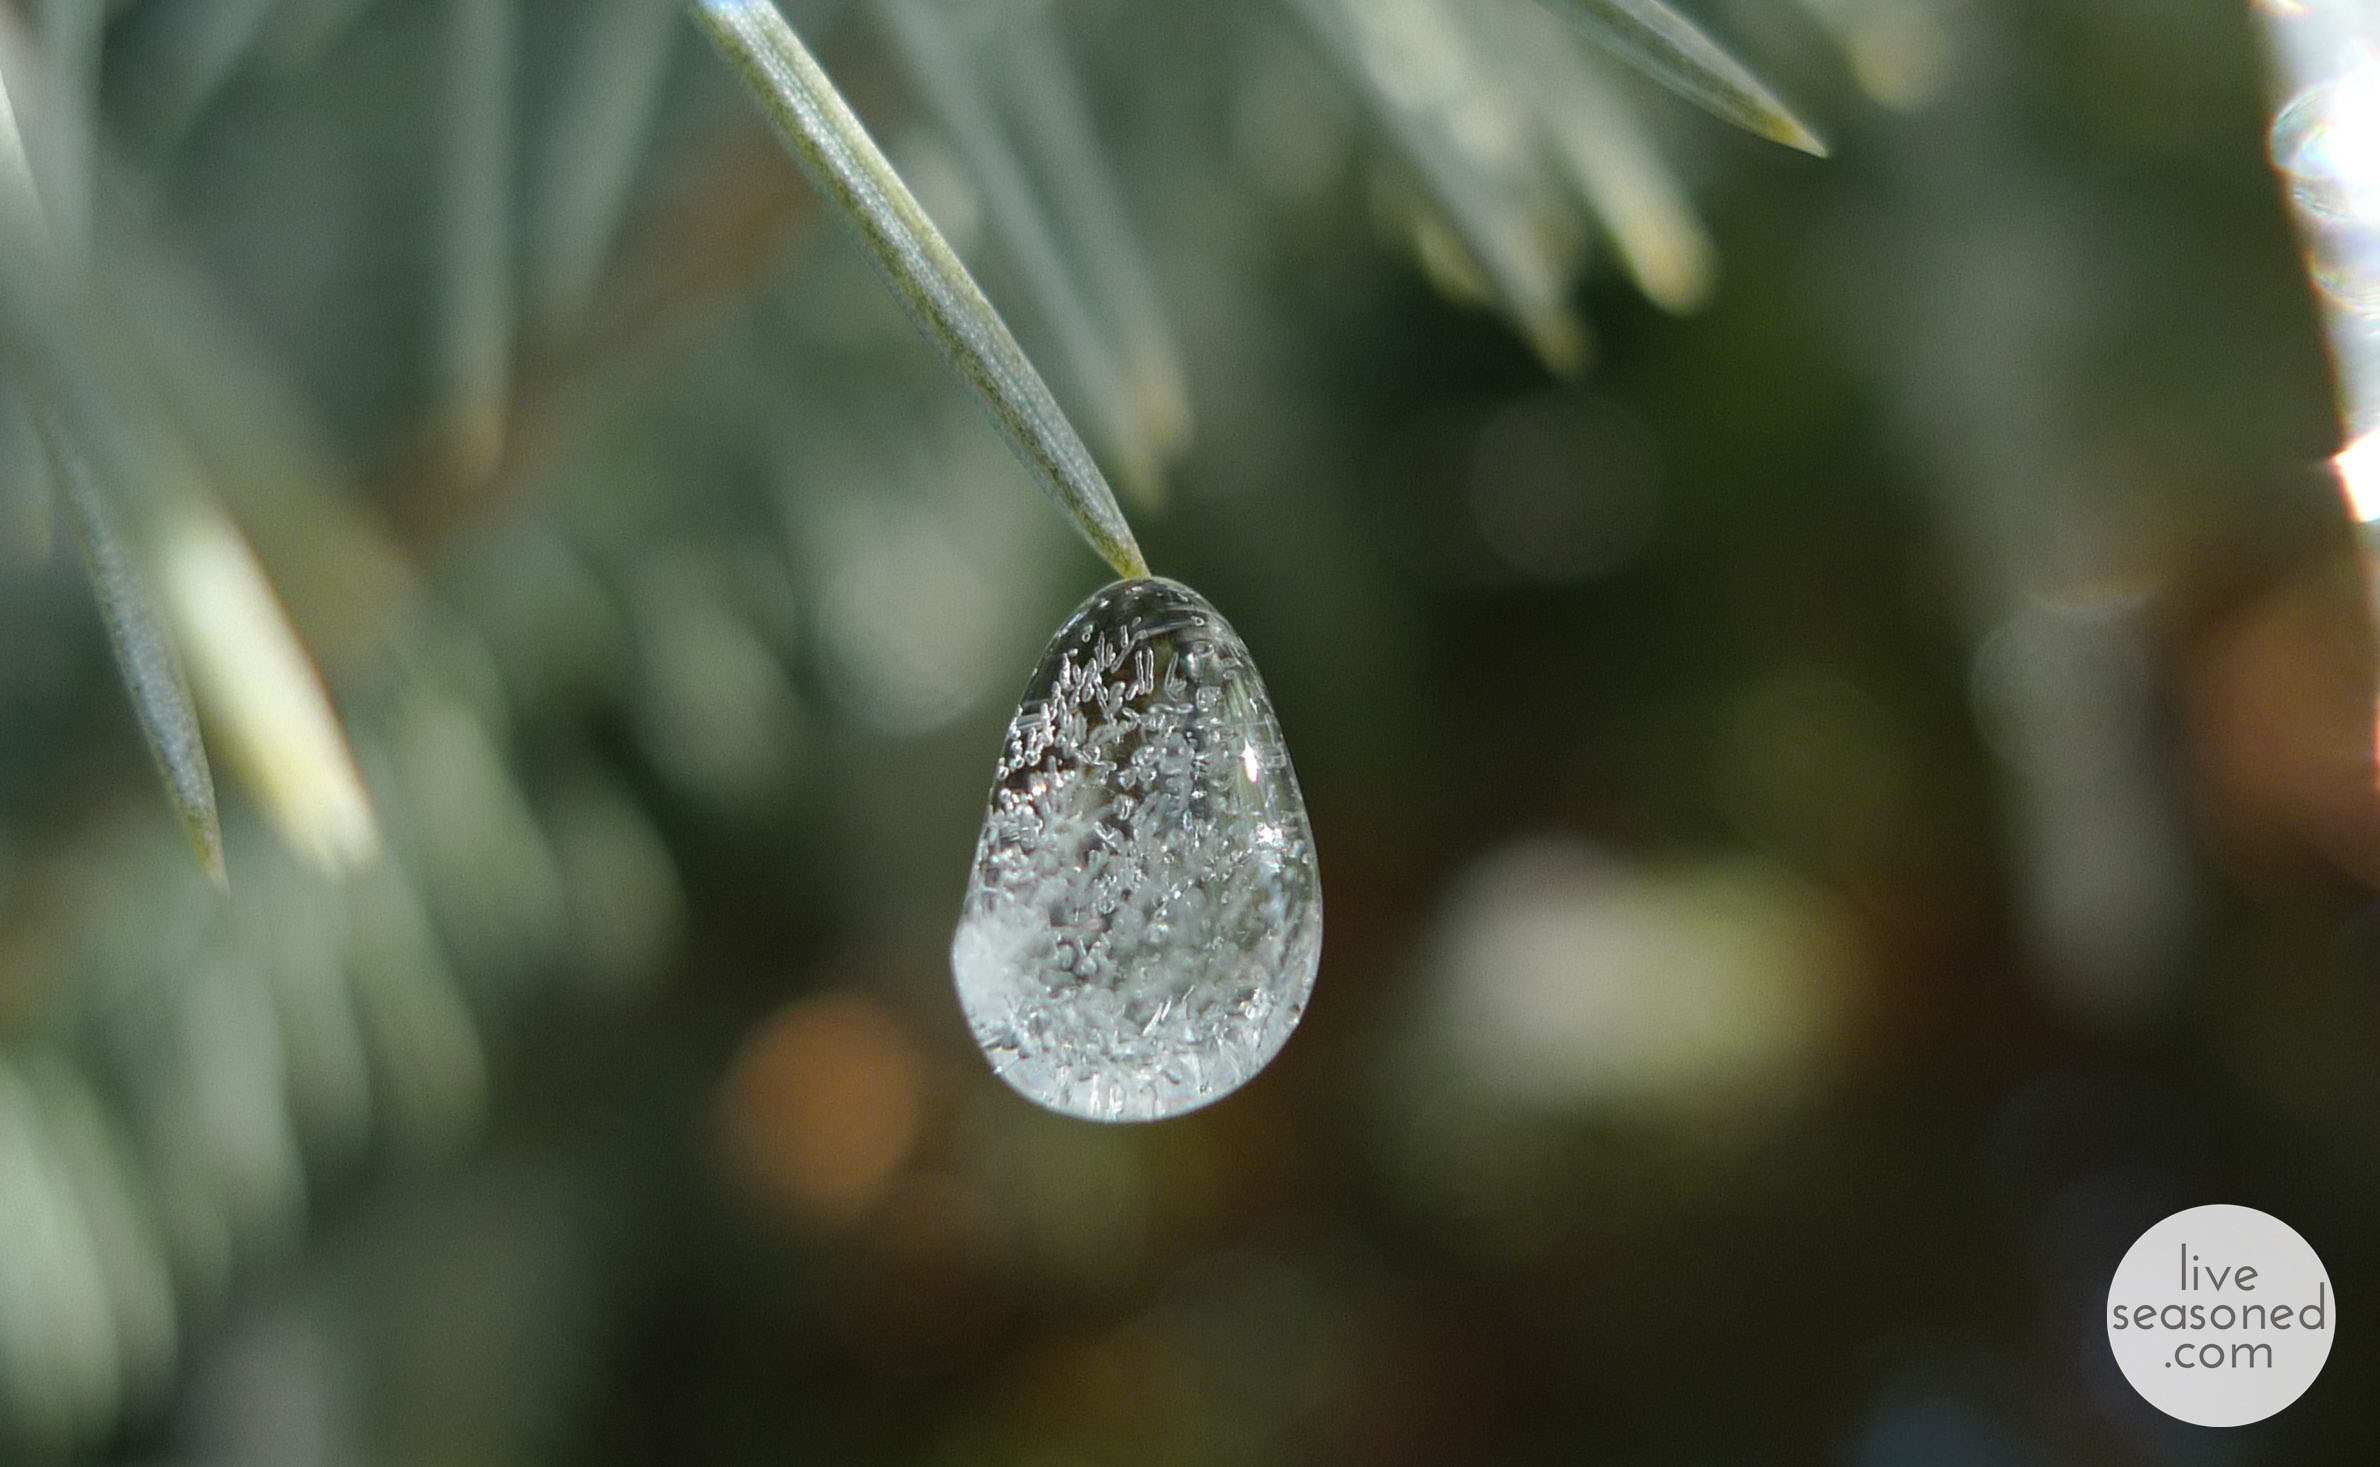
It’s 50F as I type this. I’m at the kitchen table, and the ground outside is covered in a blanket of snow, but there’s a steady drip of water as the snow on the roof begins to melt.

March is truly a month of transitions as we leave winter behind and take that first confident step into spring. Of course, there were a few warm days towards the end of February that hinted at the coming spring, and Mother Nature has started to make her move.
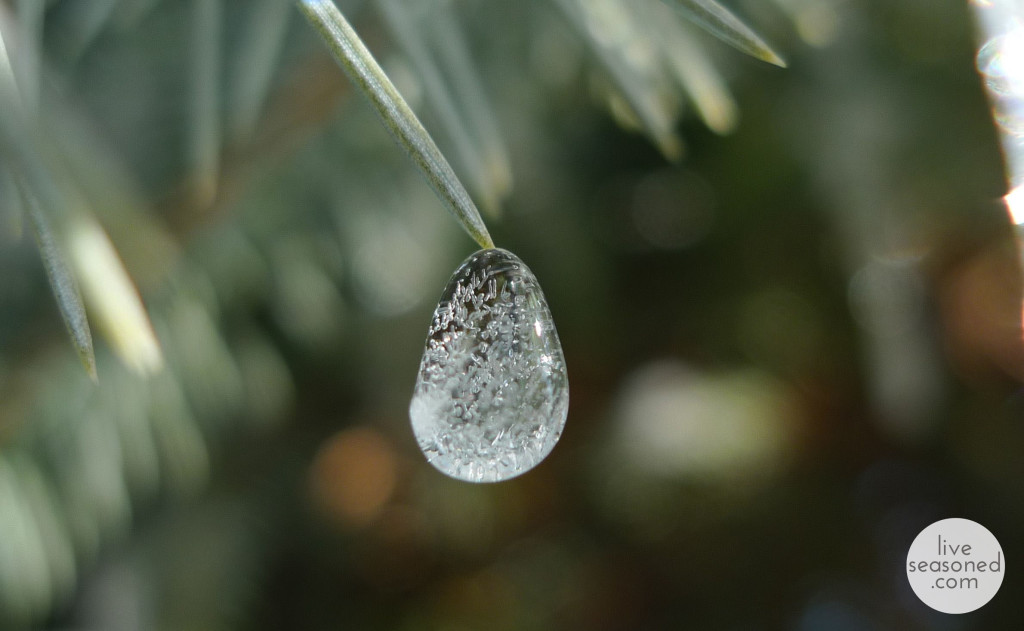
liveseasoned_spring2014_welcomemarch_ice_wmDeciduous trees and shrubs that have stored sugars and nutrients in their roots all winter begin sending it up their trunks to their outer branches as the days warm. That stored energy will be used to open the tree’s buds, making leaves and flowers. It’s during this time of year, that we tap the sap from the maple trees and boil it down into syrup. Maple syrup festivals abound throughout the tapping region and follow the slow warming of the east coast beginning with festivals in Virginia in early March and PA and NY festivals in mid to late March. Along with the maple trees, the opening of the Cherry blossoms are a cause for celebration throughout Japan and here in the US. The month-long National Cherry Blossom Festival begins in DC on March 19th.

Even before the deciduous trees fill out, the earliest of bulbs begin to flower. Crocus may be the typical early spring bloom that pops into your mind, but they are preceded by winter aconite (Eranthis) or snowdrops (Galanthus) bloom.  Of course, all of these will soon be followed by daffodils, hyacinth and tulips.

March is a month of intense activity for many of our migratory animals, including some of our favorites: the monarch butterfly, whooping crane, and ruby-throated hummingbird. Monarchs* are leaving Mexico and southern US for their multi-generation trip north. The endangered Whooping Crane, which is North America’s tallest bird at around 5 feet, take off from their Texas wintering grounds in mid-March. Ruby-throated hummingbirds that flew all the way down to Panama for the winter are now well into their migration north. Many have reached the Yucatan peninsula by now where they will gorge on insects before making the non-stop flight across the Gulf in early March. From there they will continue north following the blooming flowers they rely on for nectar.

Robins have already arrived in central PA. They differ than the other species we’ve mentioned in that they don’t have a direct north-south migration, and their movements are not well understood. They move in large flocks, avoiding areas with deep snow, looking for the availability of fruit in the fall and then returning to their summer breeding grounds as the soil warms and earthworms are available.

The vernal equinox and first official day of spring occurs on March 20th when the sun is positioned directly over the equator. While it may be the most anticipated, that’s not the only fun celestial activity this month. Coincidentally, also on March 20th an extremely rare event will take place shortly after 2 a.m.. An asteroid known as 163 Erigone will pass in front of the bright star Regulus in the constellation of Leo, causing the star to disappear.  This event is even more special because it will only be visible (invisible?) along a 45-mile-wide path that begins in the span between New York City to Oswego, NY and continues northwest into Ontario, Canada. If you’re in the center of this path, the star will remain invisible for 12 seconds.

March’s full moon occurs on the 15th. The native american tribes of the US named the full moons in order to help them keep track of the seasons, most names have to do with natural phenomena or seasonal activities. Many of the moons have a single name, but March’s moon takes the cake in naming. It’s known as the Worm Moon because earthworm casts appear (with the worms feeding the aforementioned robins). The more northern tribes referred to the moon as the Full Crow Moon or Full Crust Moon; the cawing of crows signaled the end of winter, and as many readers can probably relate to this year, the carpet of snow still present in the north thaws during the day and then forms a hard crust overnight when it freezes.  In conjunction with the tapping of the make trees, March’s moon has also been called the Full Sap Moon.
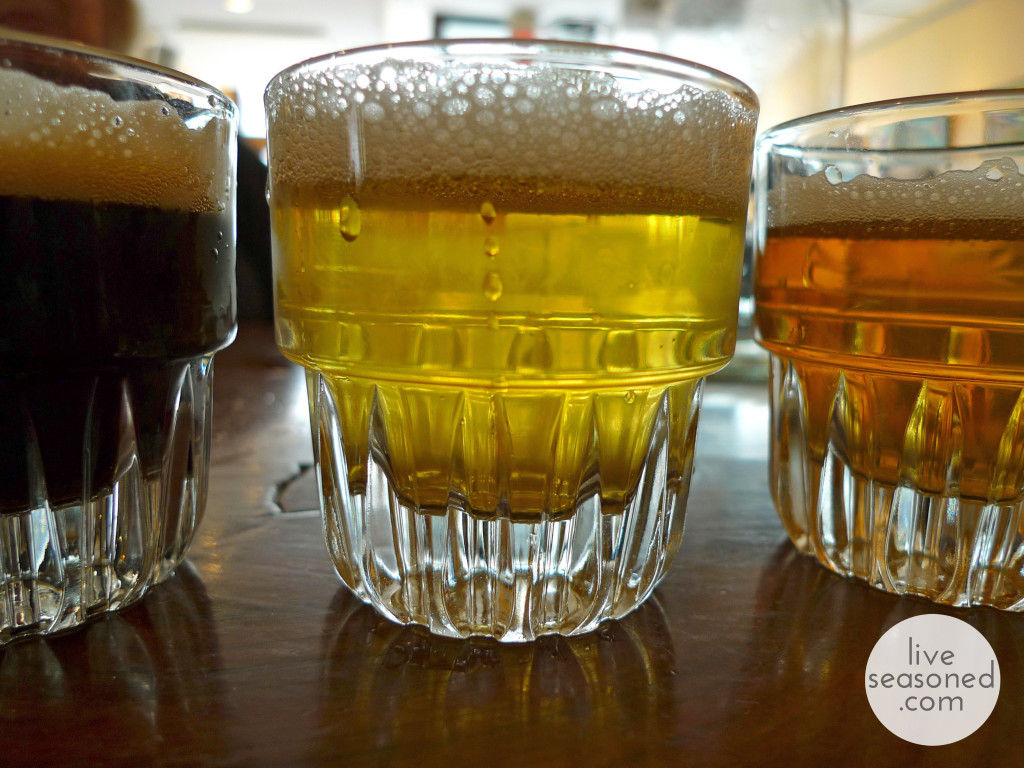
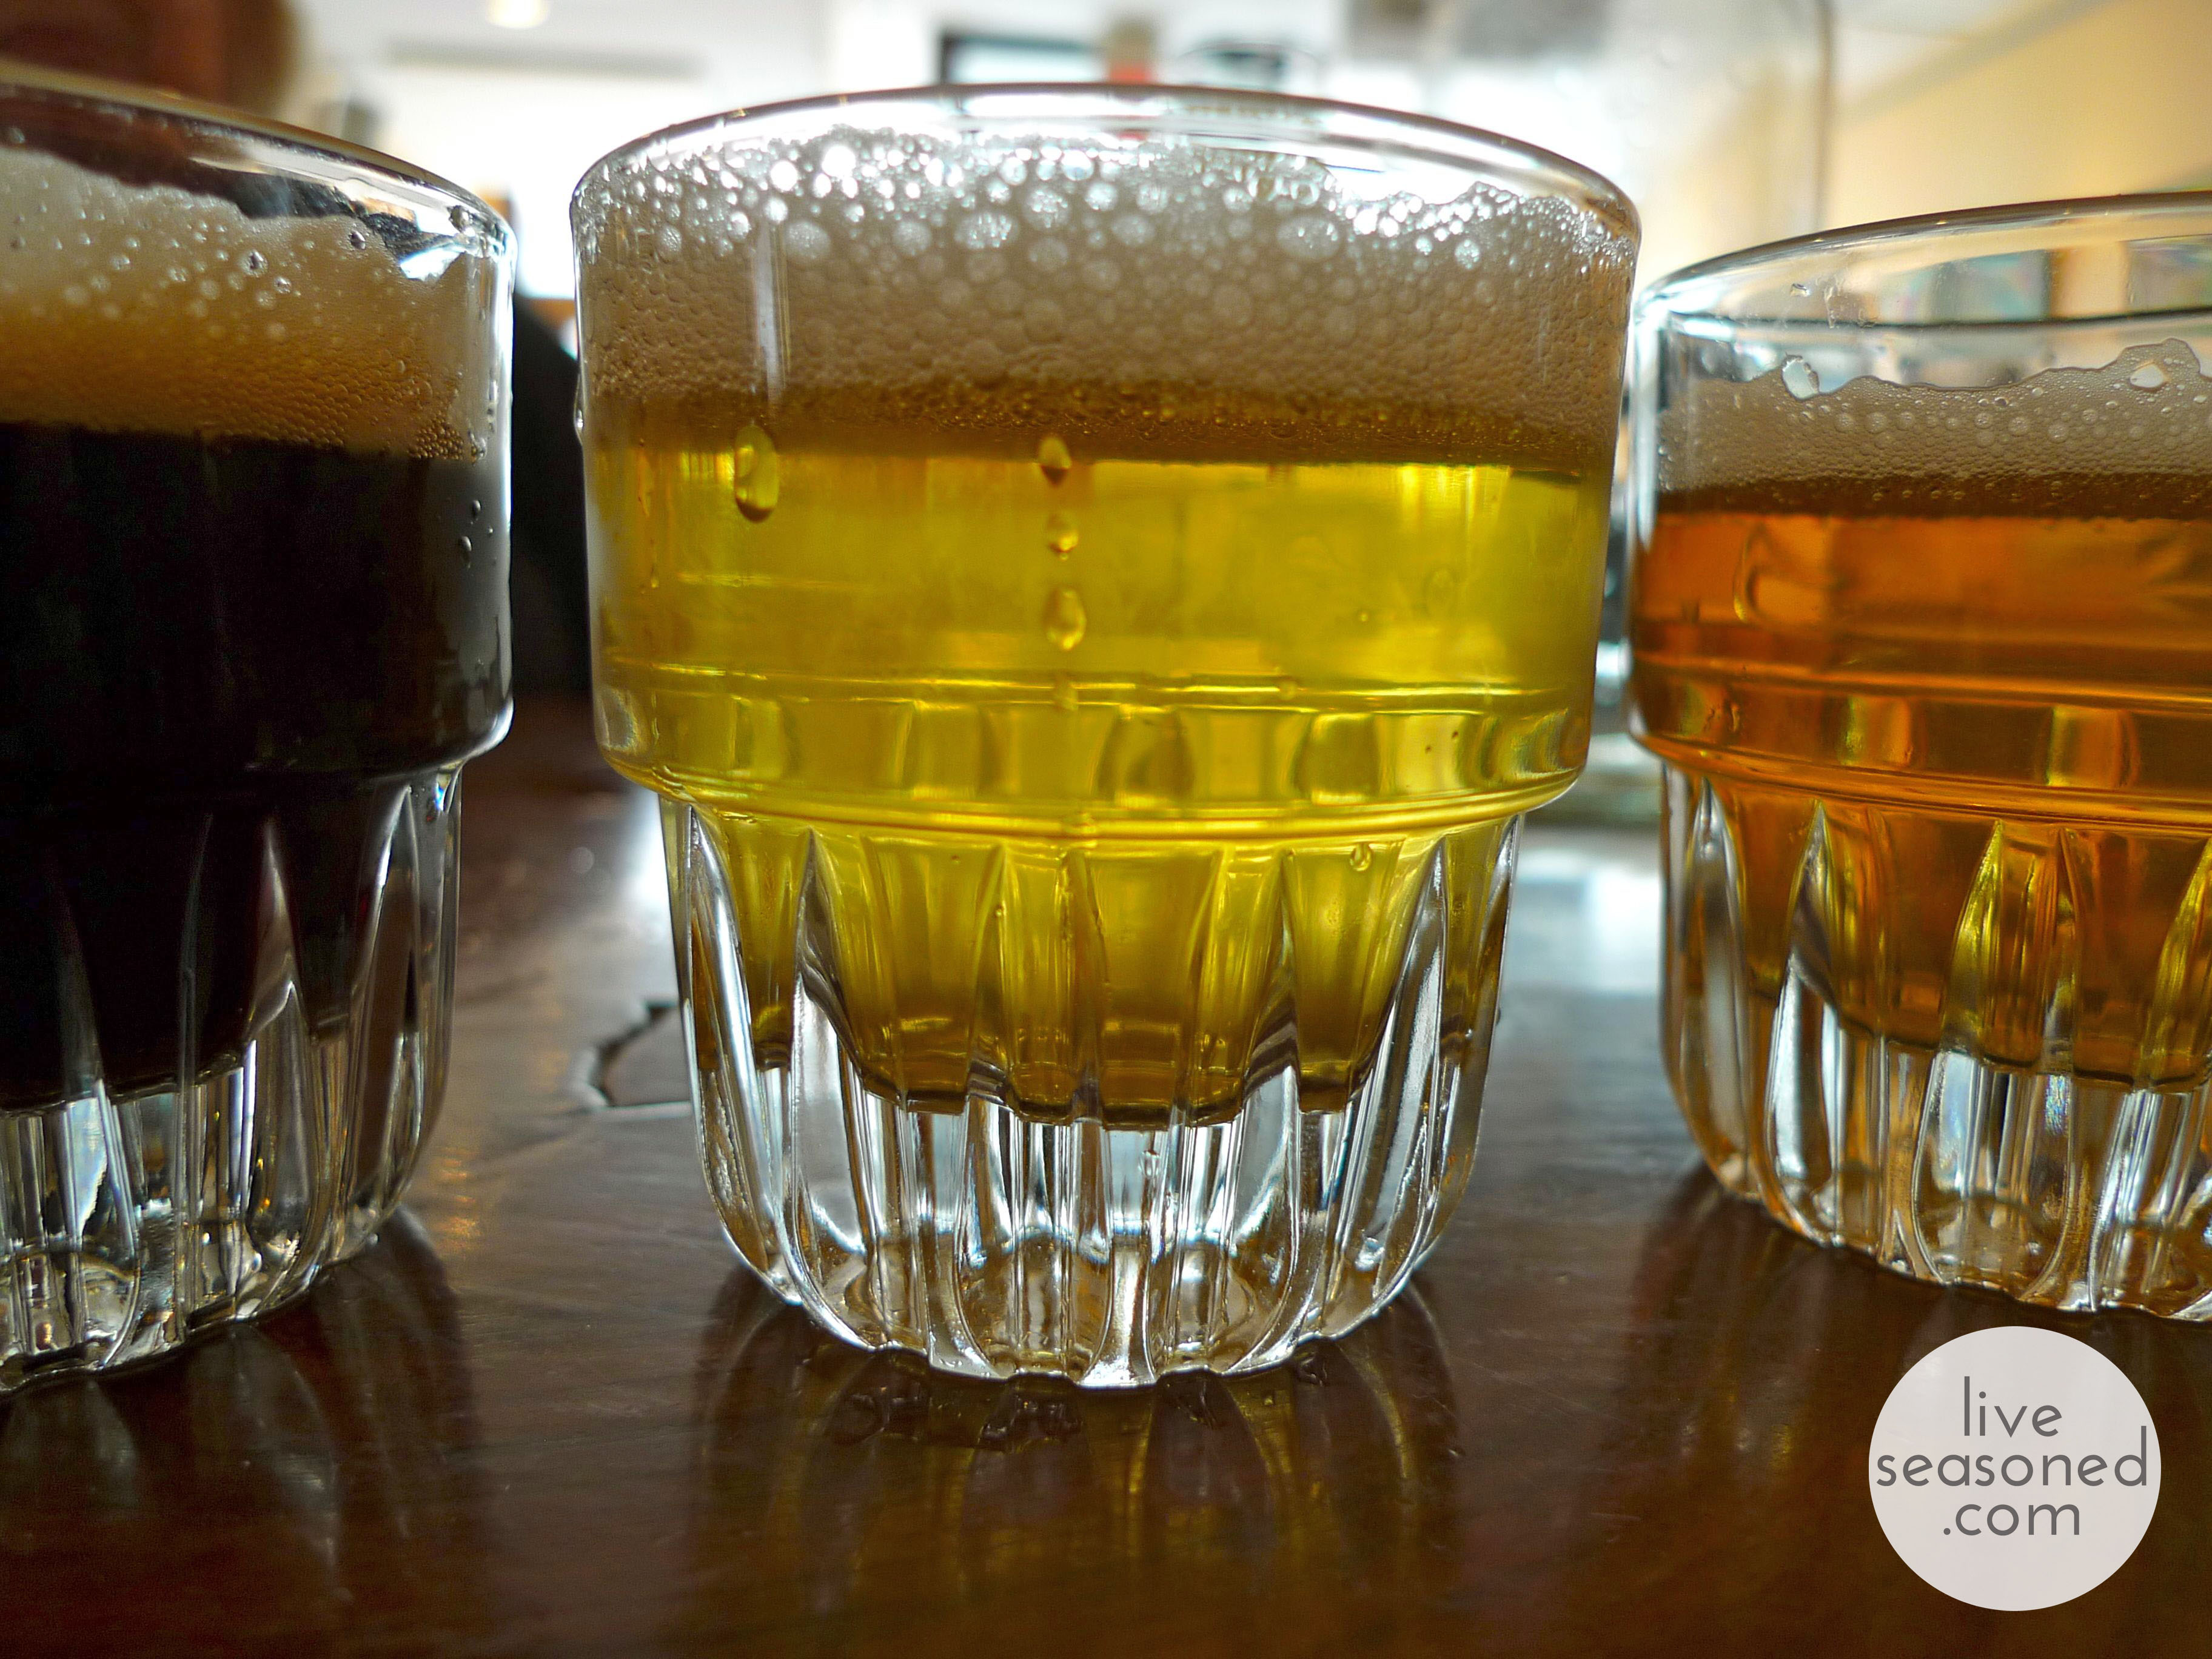
liveseasoned_spring2014_welcomemarch_beer_wm

Back in the human realm, Mardi Gras was celebrated yesterday on March 4th (maybe you’re still recovering? or still snacking on those donuts?). Daylight savings time begins at 2:00 a.m. on March 9th; spring ahead lovelies! March 14th is Pi Day. March 17th is St. Patrick’s Day, don’t worry, we’re doing the heavy lifting and planning a little beer review for you. This year the 17th also happens to be India’s famous Holi Festival, also known as the Festival of Colors, celebrating the coming of spring and the victory of good over evil. If you can’t make it to India, there’s a festival on March 8th in LA and the 29th-30th in Spanish Fork, UT.

Finally, just a little warning from Scottish folklore ~ the last three days of March have a reputation for being stormy, and the story has it that these days were borrowed from April. So if the sun is shining today, enjoy it, but be prepared for the end of March and those pesky April showers.

So, that’s a little bit of what’s going on around here, what we’re excited for, and what we’re looking for in our backyard. What’s on your agenda for March?

*Have you heard that the overwintering populations in Mexico are at record lows? This is a concern that we thought was worth acknowledging here, but we would love to discuss it in more detail in a future post.

Seasoned Bookclub : Spring Pick

wpa_bookmark


Reading is always in season, right? Or do you find yourself to be a beach blanket reader or maybe you’re a curled up under the comforter reader?  I used to be a star summertime reader, saving up all my book picks until the warmest months of the year and then devouring them during my college break.  I would read like it was my job.  If I wasn’t at work, my days including nothing but sipping tea, lathering on suntan lotion and reading up a storm.  Those days have passed, but only because my life no longer consists of only two seasons: college and summer.  Now that I don’t have mounds of required reading, I can read all the books I want. Yipee! I know you’re fist pumping right now or raisin’ the roof with two books in your hands, well let me give you something else to cheer about. Two words: book club.

That’s right my friends, Katie and I are taking our books to the blog.  We want to open up a little dialogue about the great books that are out there and we sincerely hope you’ll join us.  I always hear people say, “I don’t have the time” or “I don’t know what book to read.”  Let us suggest a book for you and come onnn, you don’t have the time?  When was the last time you watched a really dumb TV show or checked your email, facebook, pinterest, blah, blah, blah. You do have the time! Once you start reading I promise time will pop up out of nowhere and beg you to pick up your book. So just do it, commit to reading one (yep, only one!) book per season with us.  We promise you’ll have a good time and you might even learn something along the way. Have you seen this vocabulary test by the way? If that left you feeling a little deflated (I’m talking about me here) then check out Free Rice where you can take vocabulary quizzes among a bunch of other subjects, my favorite being geography.  It’s run by the United Nations World Food Program, which means every correct answer is a donation of 10 grains of rice! I digress, back to our Spring Book Club Pick, drum roll please! (pats hands on thighs in quick succession because I was serious about that drum roll)

Spring Book Club Pick

Spring Book Club Pick

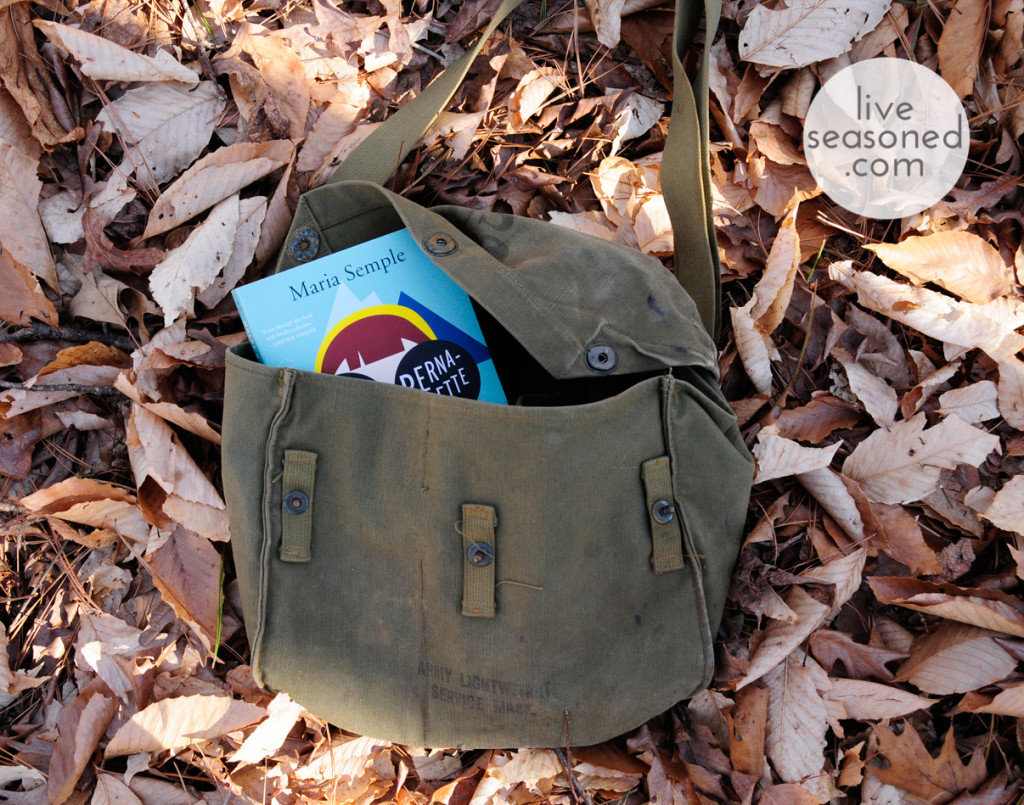
For our first ever book club pick, we’ve decided to go with Maria Semple’s, Where’d You Go, Bernadette.  Katie and I have heard only great things about this extraordinary fiction novel so we had to see for ourselves what all the praise was about.  I knew I recognized the author’s name, but it wasn’t until I read the cover that I realized she wrote one of my favorite sitcoms, Arrested Development.  Side note: were you disappointed by the 4th season? I need to know if I’m the only one.  Semple also wrote for Mad About You (do you guys remember what a great show that was?!) and Ellen, so be prepared to laugh at the insanity that lies within these pages.

Where’d You Go, Bernadette is a novel about seemingly insane yet all too accurate accounts of growing, parenting, aging and making a life for oneself.  You’ll read about personal struggles with both identity and family relationships and while there are some serious undertones, this book will make you smile.  It will snap you out of whatever fog you’re in and somehow encourage you to get it together and start living the life you intended for yourself.

Spring Book Club Pick

Spring Book Club Pick

Taken from the back of the book: “When fifteen-year-old Bee claims a family trip to Antarctica as a reward for perfect grades, her fiercely intelligent but agoraphobic mother, Bernadette, throws herself into preparations for the trip.  Worn down by years of trying to live the Seattle life she never wanted, Bernadette is on the brink of a meltdown.  As disaster follows disaster, she disappears, leaving her family to pick up the pieces.  Which is exactly what Bee does, weaving together emails, invoices and school memos to reveal the secret past that Bernadette has been hiding for decades.  Where’d You Go, Bernadette, is an ingeniously entertaining novel about a family coming to terms with who they are, and the power of a daughter’s love for her imperfect mother.”

Here are some of the rave reviews:

  • “In a time when everything is a version of something else, how extraordinary-and exciting- to read a novel that subverts conventions to create an experience that feels so fresh.” –The L Magazine
  • “You’ll laugh your pants off, and love the takeaway- that a life gone off the rails can propel you in a bright new direction.” –Redbook
  • “A crackingly smart family dramedy.” – Time

There are soooooo many more similarly raving reviews, but I want you guys to decide for yourself and let us know how you think this novel rates.  Ok, one last word about how great this book is: Where’d You Go, Bernadette was named one of the year’s best books by the San Francisco Chronicle, Kansas City Star, Entertainment Weekly, Miami Herald, People, Denver Post and Philadelphia Inquirer.  I’ve worked in a newsroom (Philadelphia Inquirer) and I’ve seen the dozens of books piled on reviewers’ desks, so it speaks volumes when so many have deemed it one of the year’s best.  Ok, I promise I’m done praising it!

Kate and I think it would be super fun if you’d read along with us and then we can all chat about it.  Who doesn’t love a good book chitchat? It’s guilt free gossiping.  You get to flex those judgment muscles (which we hope you don’t do too often!) and talk about fictional characters with us and hey, you might even learn something about yourself along the way.  Sometimes I buy the kindle version, but because of the unorthodox formatting of this novel, I suggest buying the paperback. Oh, and don’t forget about the library option!  That was my plan, but both times I went all three copies were checked out! Probably because this book is all the rage right now, now READ ON! (Head bangs and raises book to the sky)

WPA image provided by the Library of Congress.

In Season : Donuts!

doughnutcontest_libraryofcongress

Next Tuesday is Fat Tuesday, or Donut Day if you grew up in our house. Today we have a few donut-related links to delight your inner child, and on Tuesday we’ll be sharing some donut recipes to satisfy that rumble that just started in your tummy. In doing our research, we learned that  there’s a real “Donut Day” the first Friday of June. Who knew?!  I know that’s a lot of donuts to tend to, but donut stress about it. ha?

This donut balloon DIY is perfect for your next donut party (we’re all wishing we had a donut party).

While we’re on the topic, here’s a serving suggestion for your donuts and milk.

Wear your donut love on your iPhone with this case.

And there’s a surprisingly large variety of donuts on t shirts. This one was our favorite, but it looks like it’s not in stock anymore.

Ok, maybe the tshirts were a bit over the top? Well nothing whispers donut like a pair of  cuff links.

Of course, if your sweetie loves all things sweet, she’ll be smitten with this donut ring.

And your mister will love this donut-holding mug.

Want to try your hand at baked donuts? Here’s a cute heart-shaped pan.

Or you can skip the oven and try this countertop donut machine.

Even easier, you can skip the baking altogether and make a batch of these super-cute Cheerios donuts. They say the donuts are for elves, but I’m sure the garden fairies wouldn’t mind a treat.

These donut printables, and the corresponding ideas look like they would make for some easy fun on a rainy afternoon.

Whatever you do, donut give up.

If you liked these donut links, we’ve created a donut Pinterest board (necessary, no?), follow along and we’ll add fun donut ideas whenever we see them!

Fun fact : while searching for a image for today’s post, I came across this article and learned that during the first and second world wars, the Salivation Army flew “donut lassies” to the front lines to make donuts for the soldiers!

Image from the Library of Congress archive.


Vortex : Hat Pattern

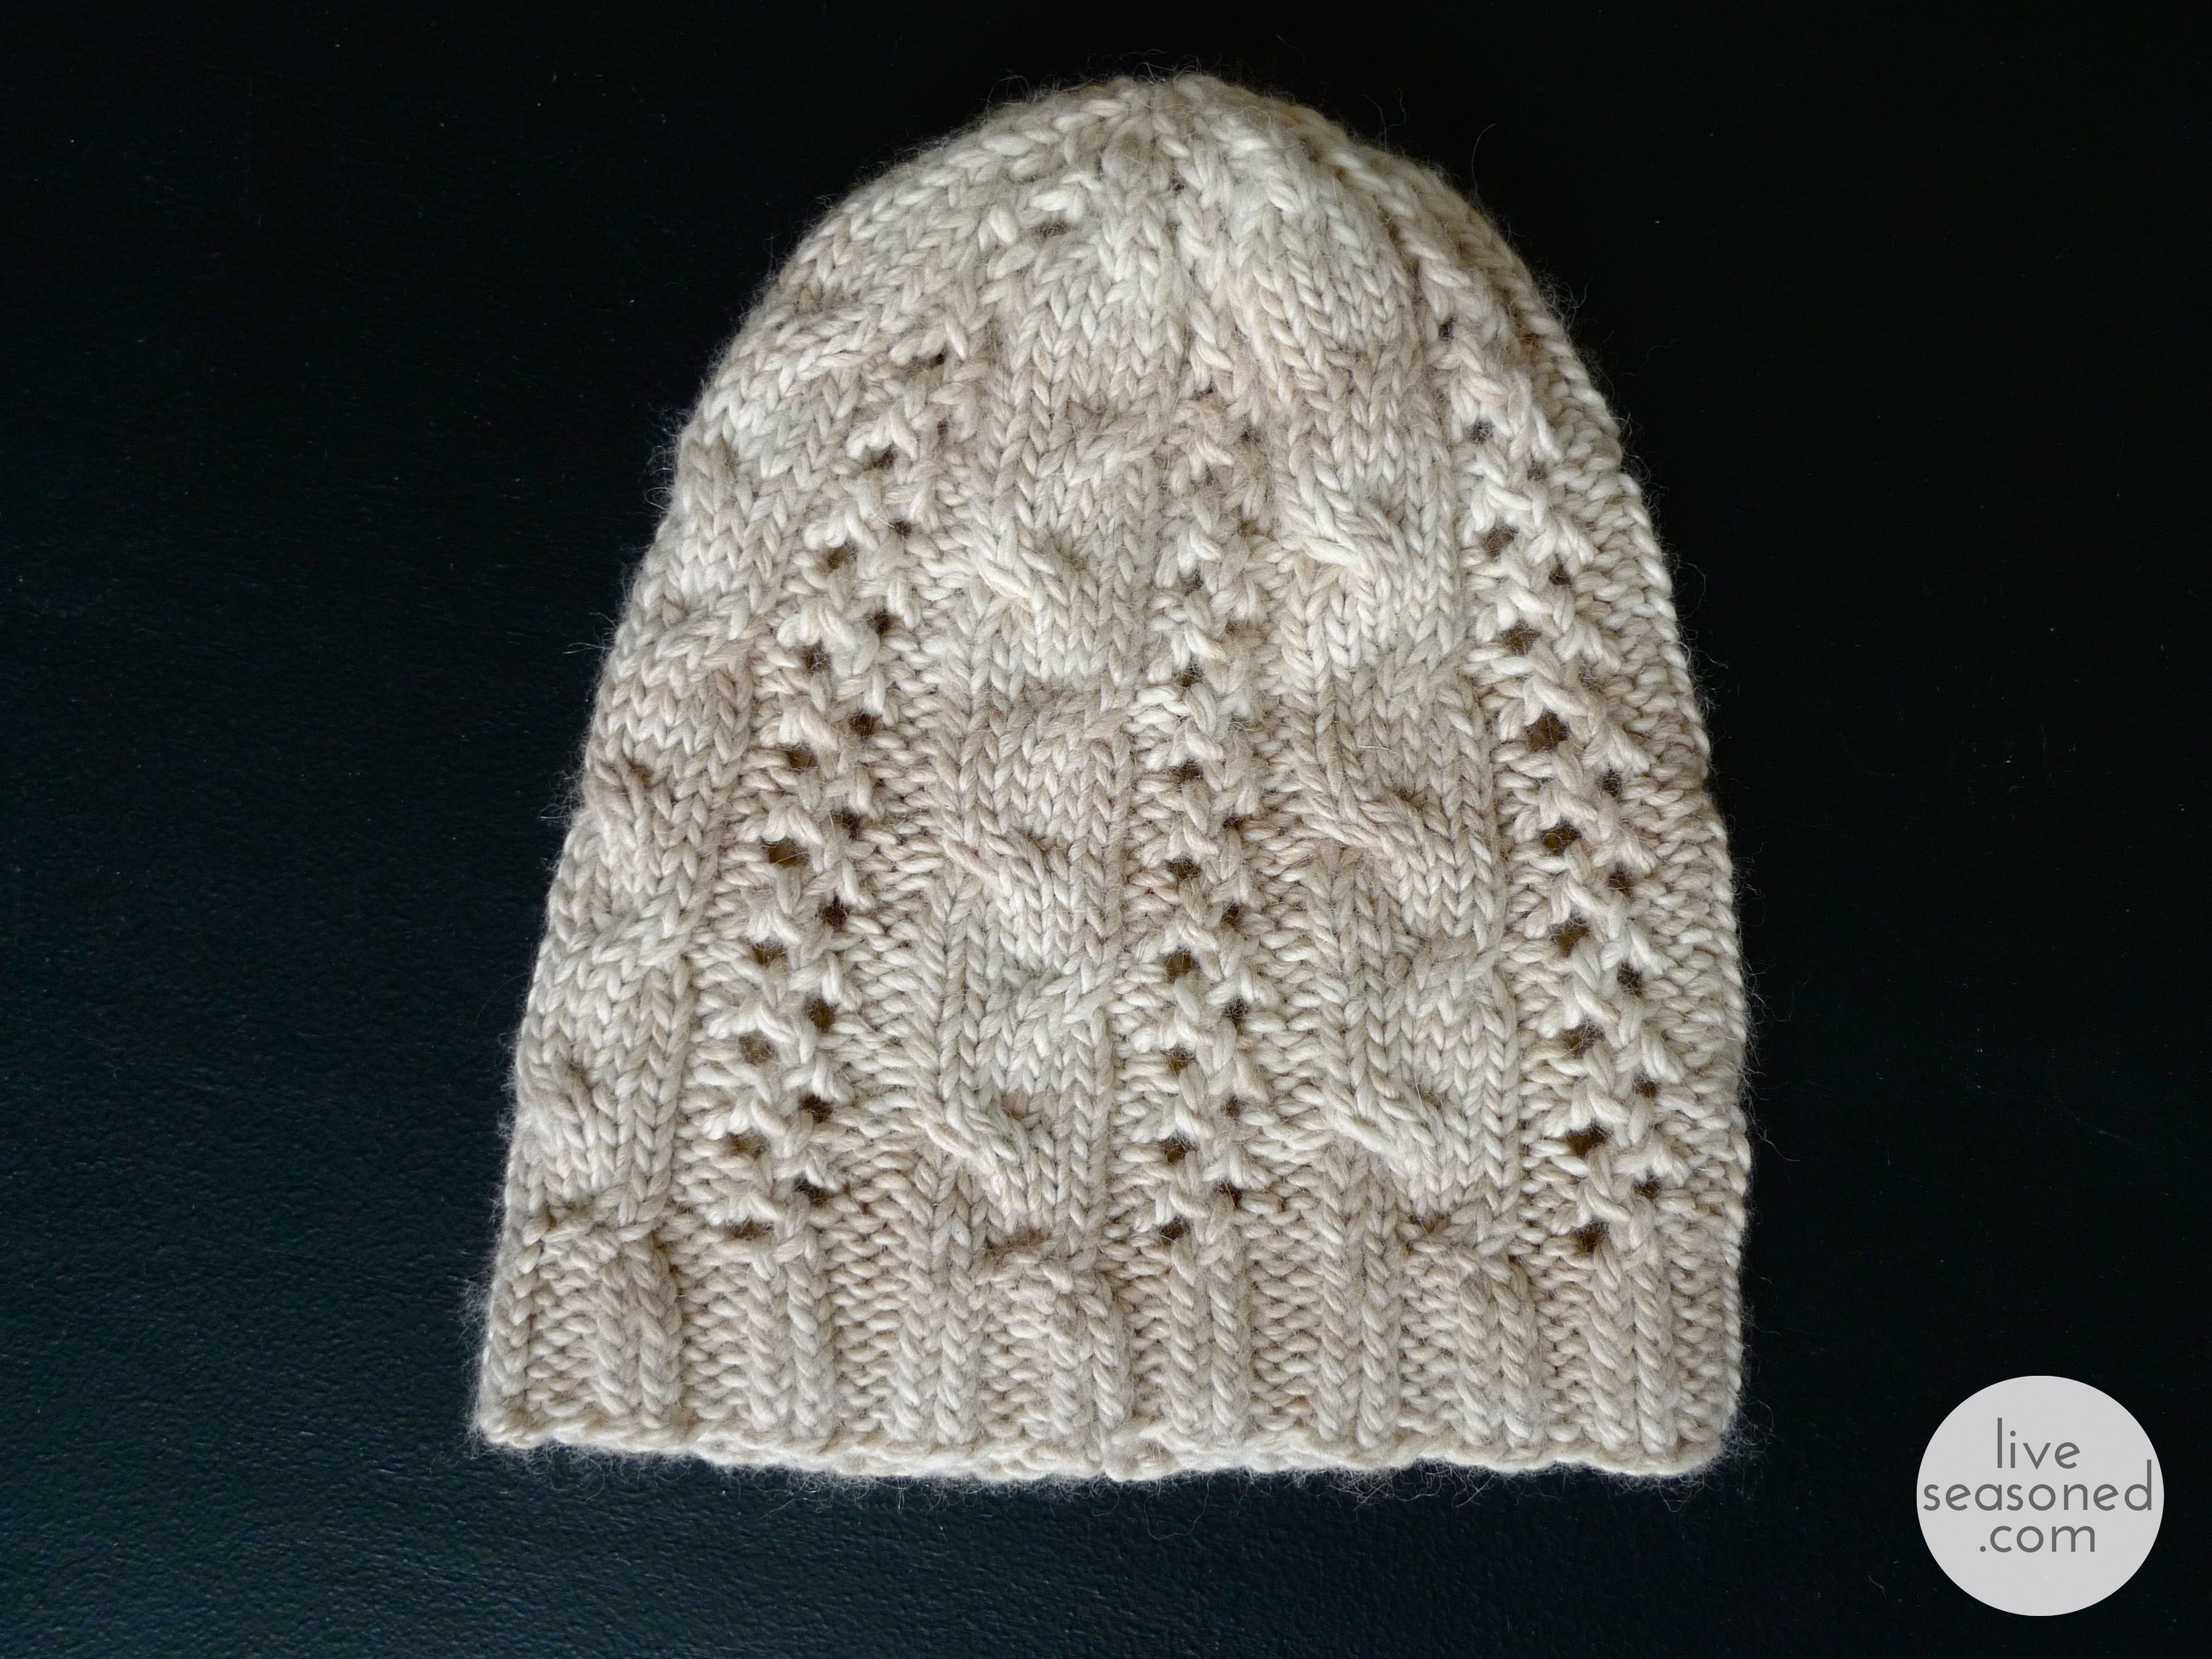
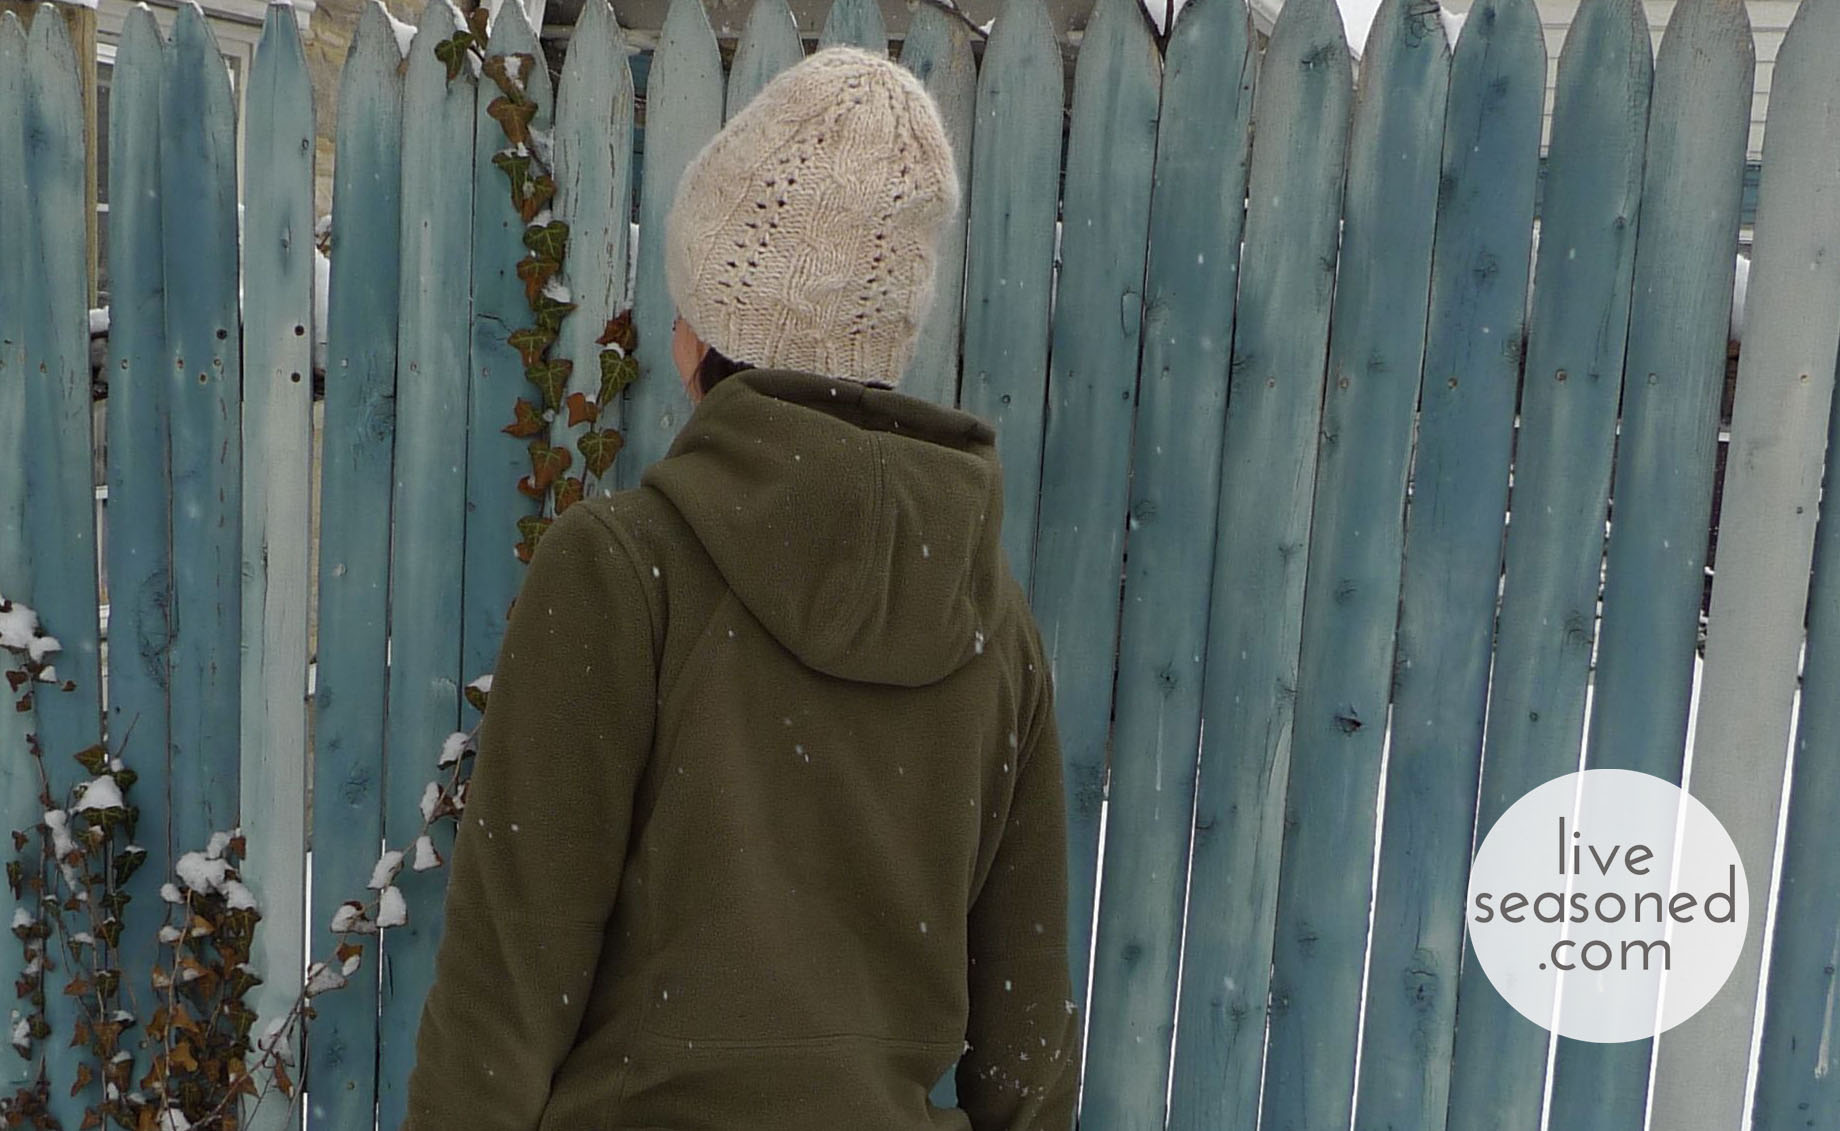
I’m sure this winter’s arctic vortex won’t leave our memories anytime soon, but we felt that it was worth commemorating with a new winter hat pattern. Let me introduce Vortex!

liveseasoned_spring2014_newhat_solo_wm

I know not all of our readers are knitters, but if you’re ever given the opportunity or have the motivation to learn, I highly encourage it! There has been a true resurgence in knitting over the past decade, and this has led to awesome local knitting shops, knitting-focused blogs, and amazing pattern independent designers. If you’re new and wondering where to start, a quick google search will return a variety of handy tutorials and knitting guides. Ravelry is the place to start if you to explore knitting patterns and so much more (my username is winterfoliage, let’s be friends!).

I admit that there’s a slight learning curve, but once you grasp the basics, you’ll be pleasantly surprised to see how much you can do with just a few stitches. Plus, you can knit while watching TV! You know what this means, right? You’ll now have something to justify those marathon House of Cards sessions and the past two weeks spent doing nothing but watching the Olympics.


Continue reading

Become a Woods Warrior

Want more yoga and exercise? Become a woods warrior, try this lower body workout, then end the day with bedtime stretches that relieve lower back pain. Check out my 200hour yoga teacher training experience and read about the school I attended here.

liveseasoned woods warrior

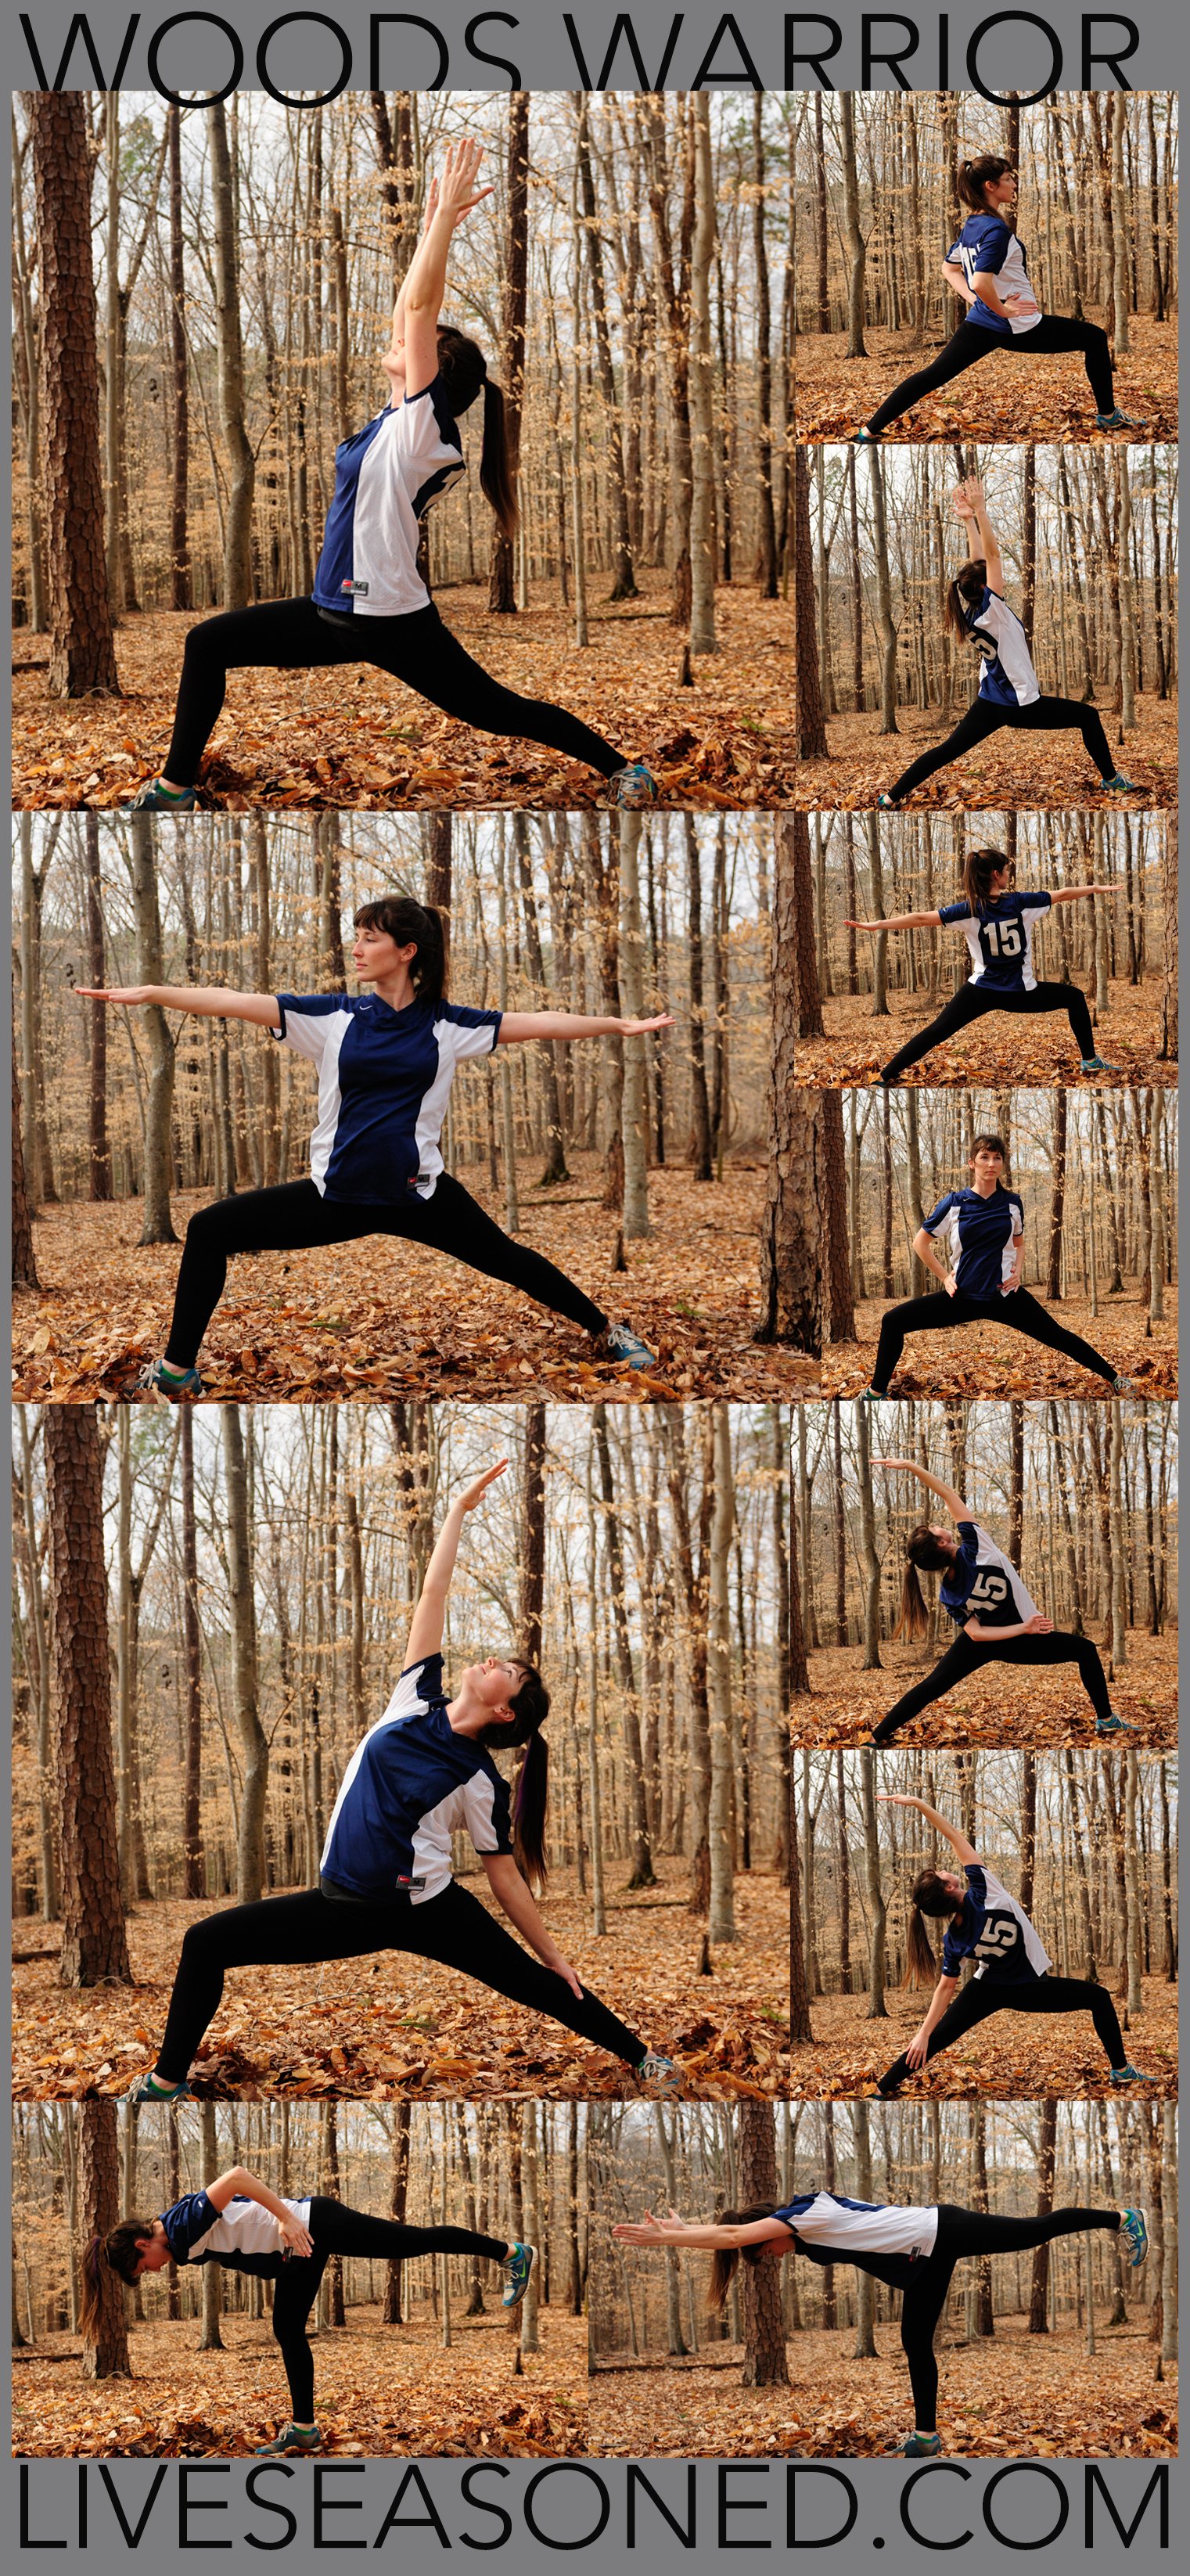
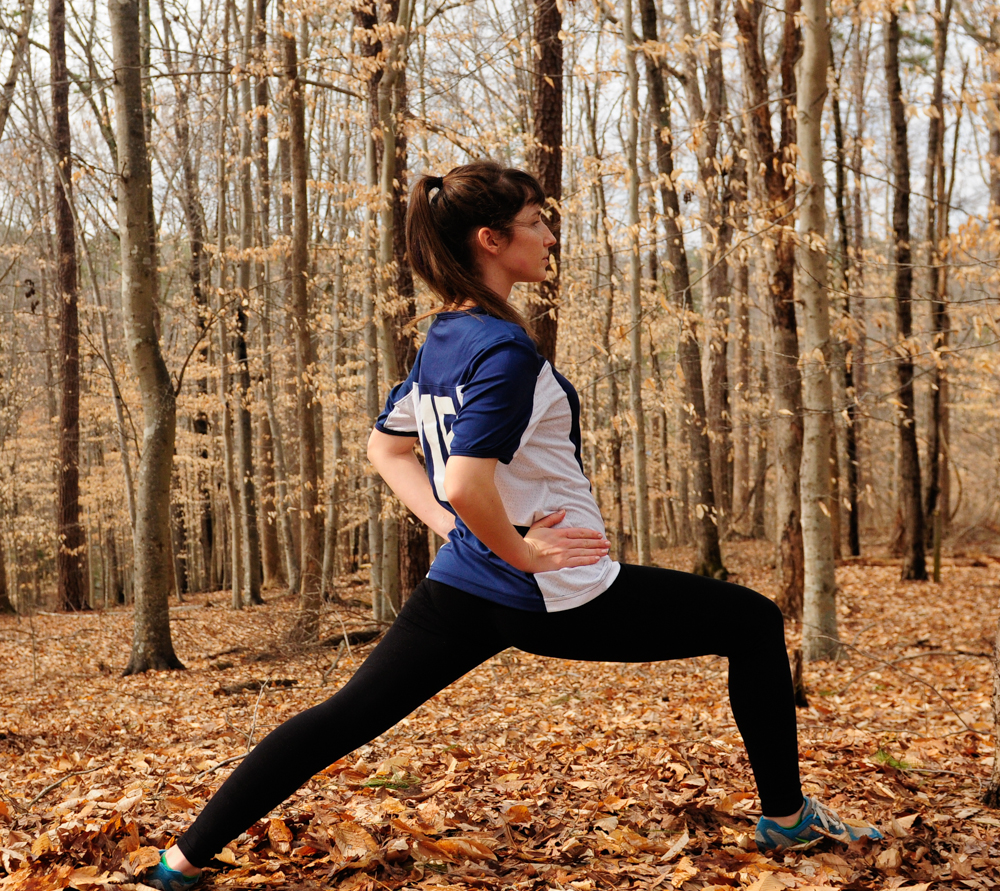
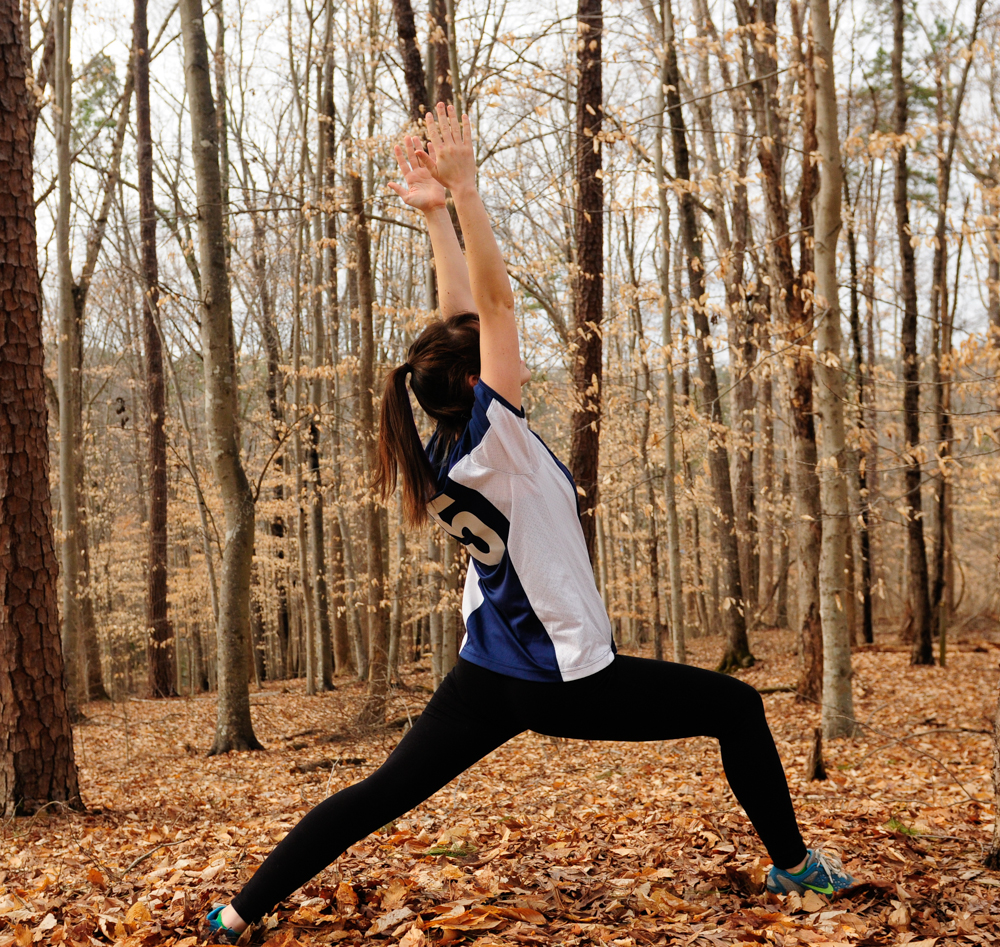
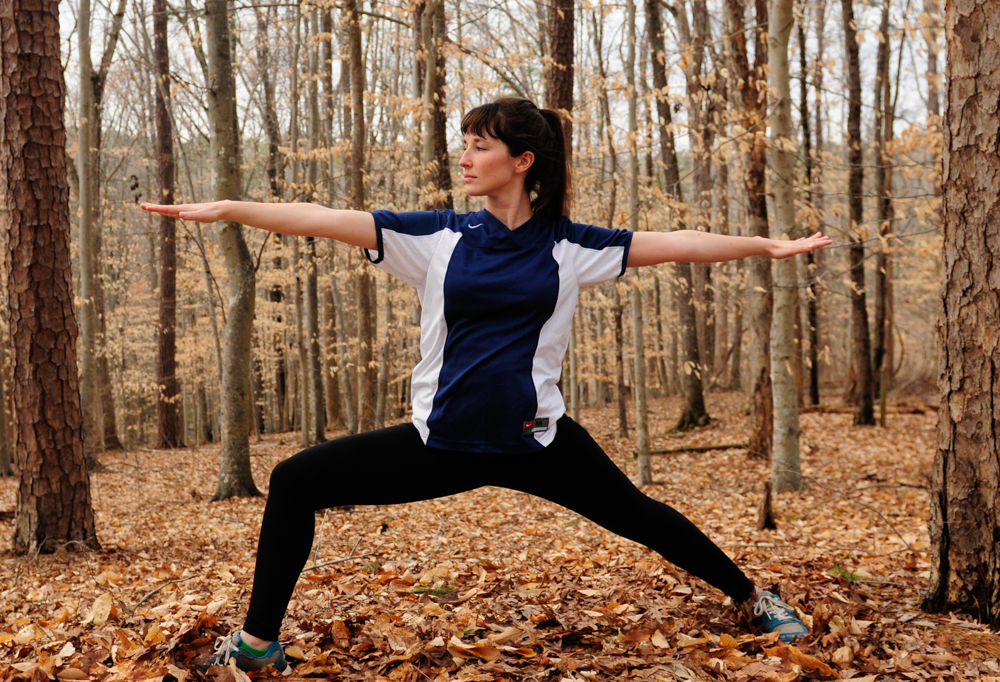
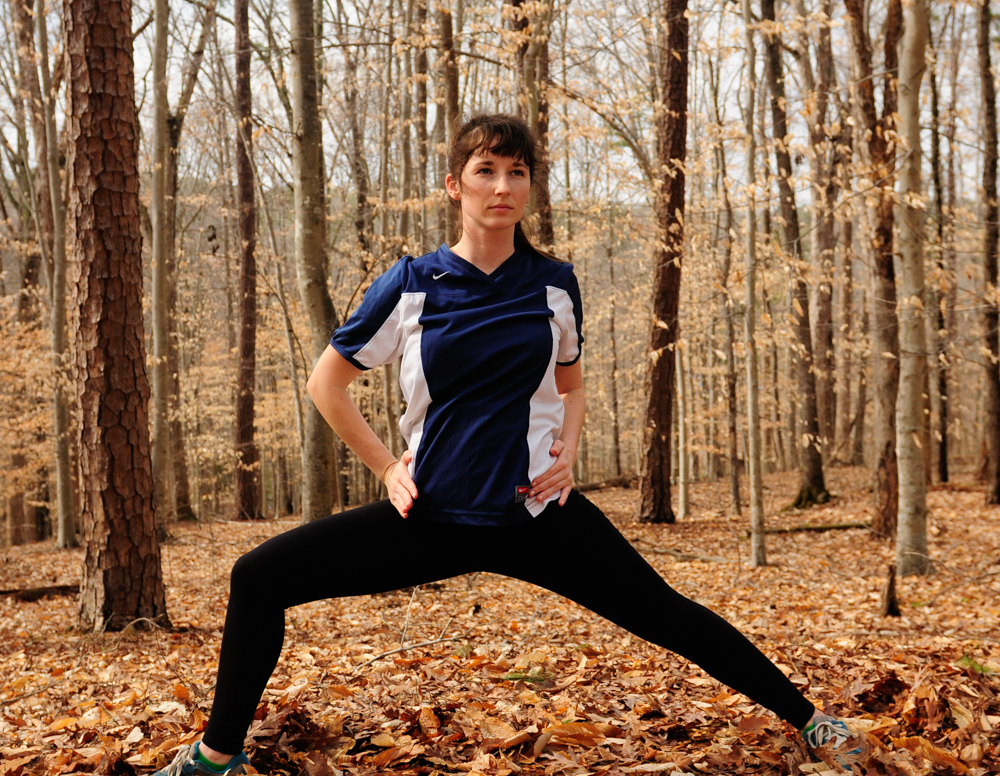
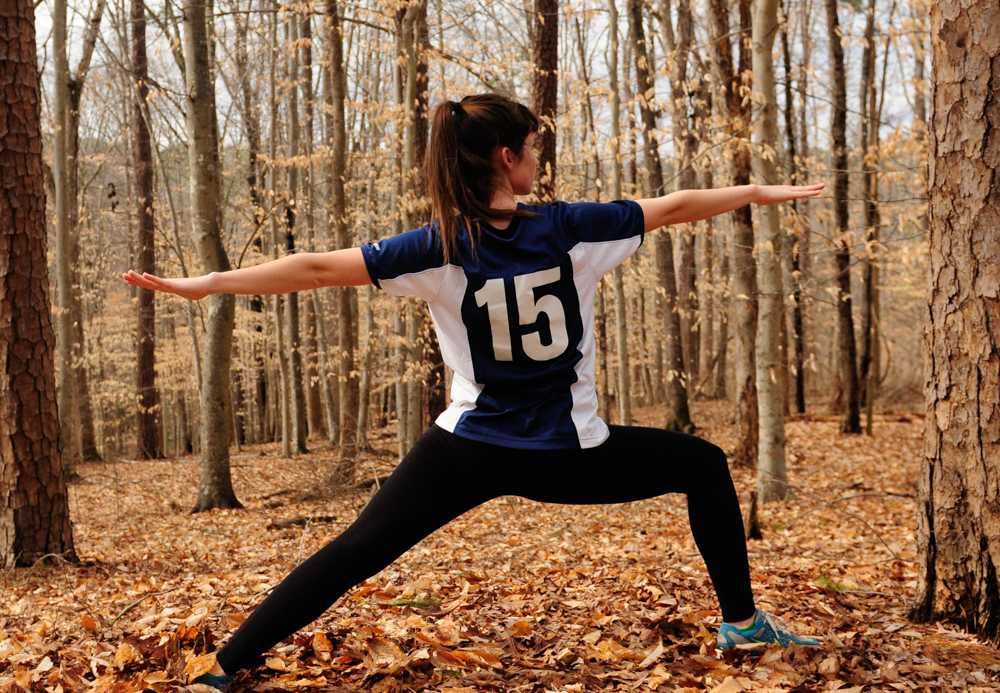
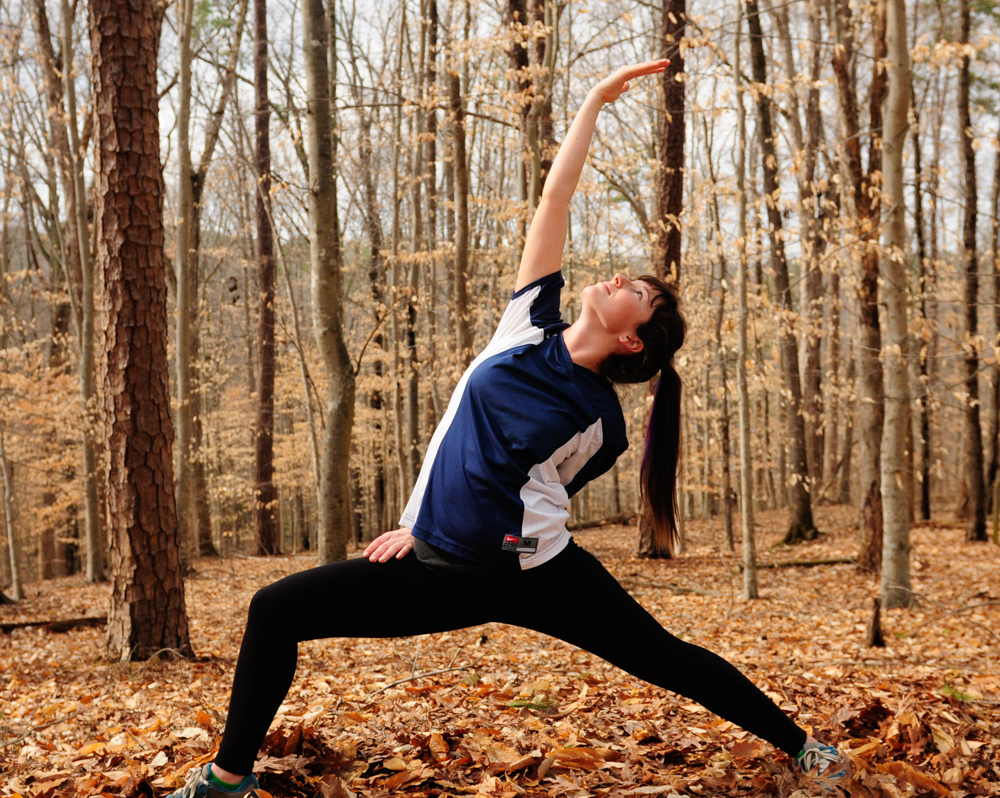
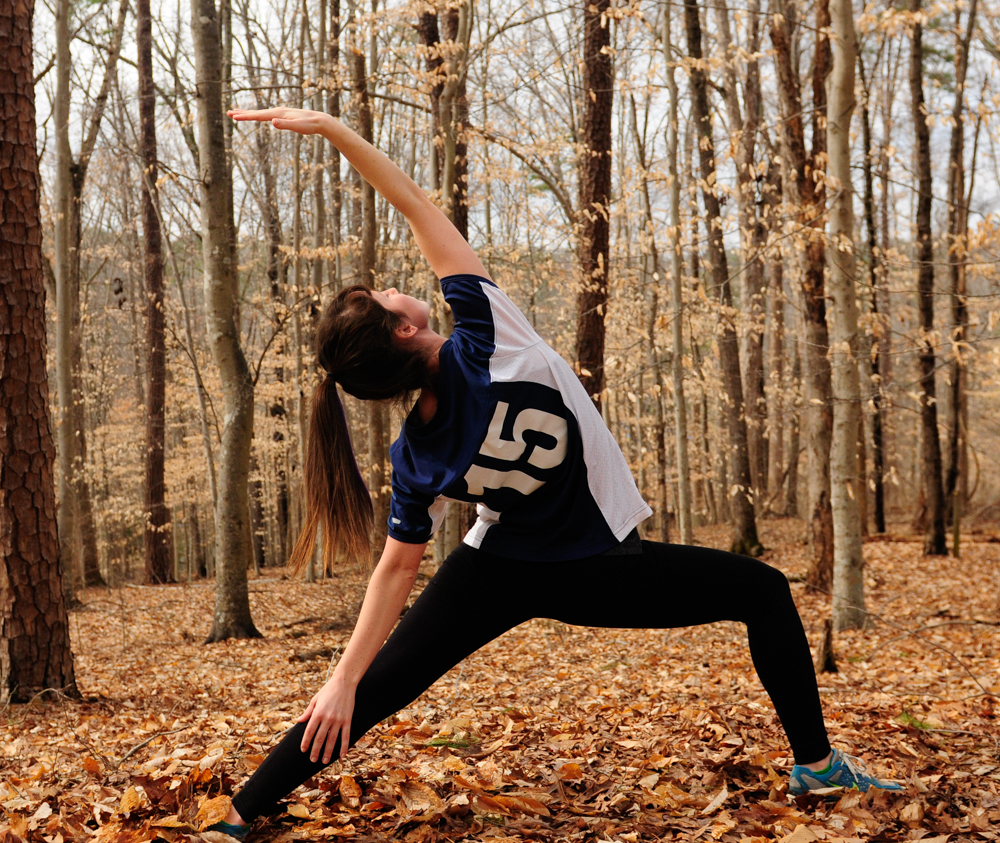
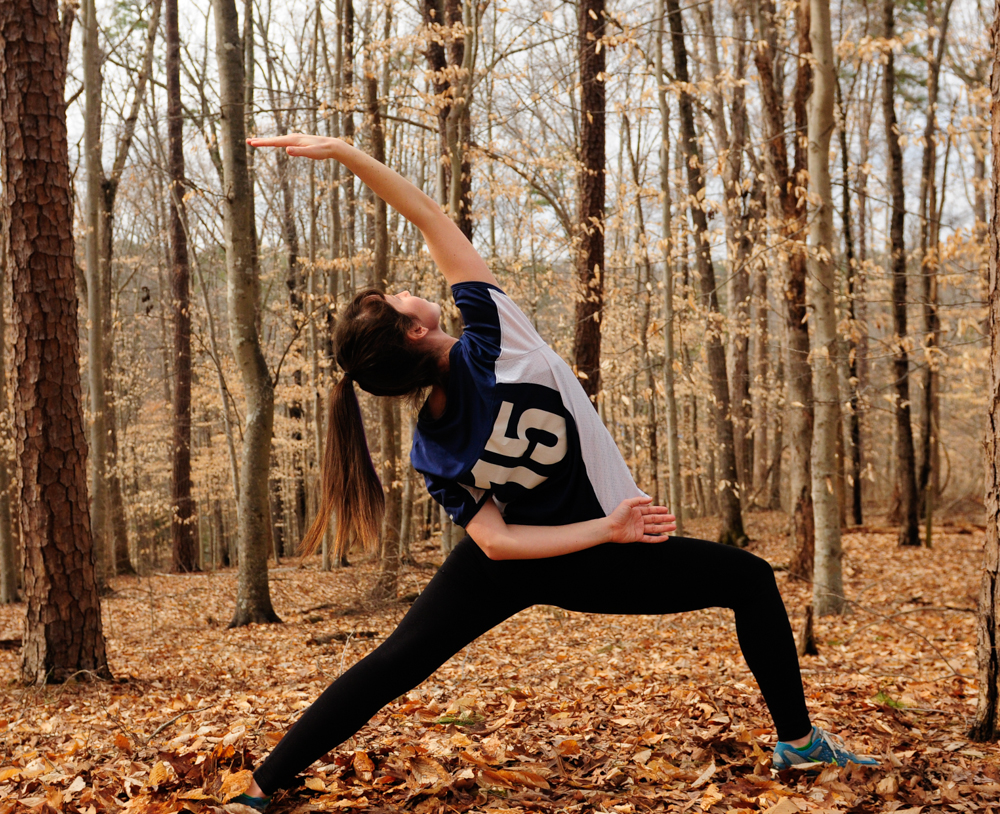
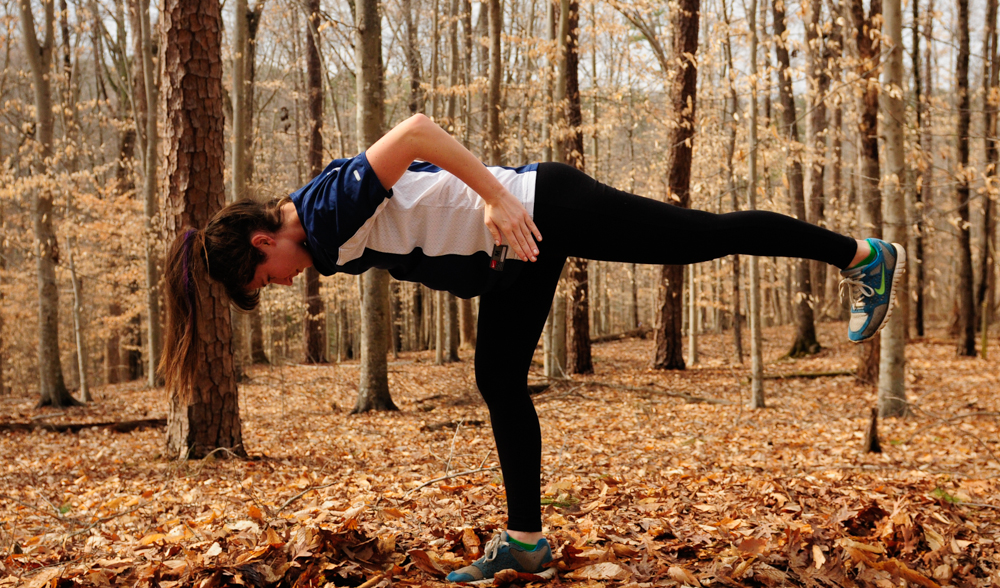
Become a woods warrior.  Nope, not the kind that wields a sword, instead the kind that smiles peacefully and stretches deeply.  Warrior pose is also known as Virabhadrasana (vira=hero, bhadra=gentle, asana=pose).  You can be a warrior anywhere, but I believe the woods to be the calmest and most inspiring space for these stretches.  There’s nothing like holding warrior one while you gaze up at your fingertips and see the tops of tall trees swaying in the wind.  You have the overwhelming sense of feeling grounded yet flexible like those limbs.  Then comes warrior two where you can pause and gaze miles past your fingertips.  The forest gives you ample spaces for exalted (reverse) warrior so you can stretch and lengthen until you’re as limber as the trees that surround you.  I love looking down at my environment in warrior three.  It gives me time to take in the dry leaves and tiny bugs as I breathe, balance, lengthen and stretch with all I’ve got.

live seasoned woods warrior yoga poses-9

After recently completing a month-long yoga challenge, I was a little bored with the warrior poses.  I was eager to move on to harder, more intriguing postures, but I realized that isn’t the yogi way.  It’s important to be present with each pose, no matter how many times you’ve practiced.  The more you appreciate the present, the more space you create for improvement and appreciation.  Of course, the same is true with life.  The more we focus on the task at hand, the more we come to contribute, improve, appreciate and love what we’re doing.  So even if you’ve practiced warrior one, two, and three a thousand times, try them all again and appreciate their presence in your life and your ability to stretch and strengthen your body.

A few tips:

  • Wear stretchy pants or shorts so you can practice your fullest expression of each pose.
  • Pick a relatively flat and non-slip surface.
  • Move into each pose slowly and with intention.  Think about each part of your body in order to achieve the proper alignment.
  • Breathe deeply and evenly through your nose.  If the pose seems tough, focus on your breath.
  • Try each pose for a couple breaths and then go back and hold them longer if you’d like.
  • My form isn’t perfect so don’t just peep at the pics – read through each warrior before practicing.


live seasoned woods warrior yoga poses-7live seasoned woods warrior yoga poses-2live seasoned woods warrior yoga poses-1

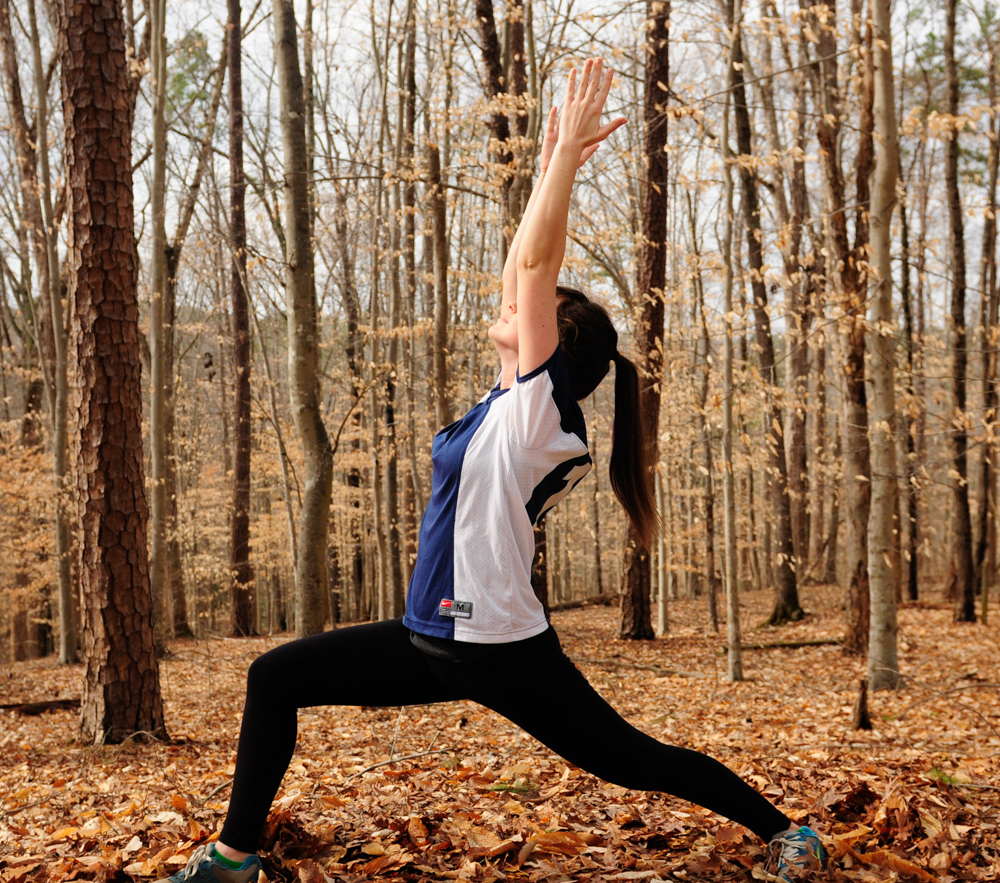
Warrior One

  • Stand up straight with your feet together, arms down by your sides, and palms facing forward.  Inhale and as you exhale, step your right foot forward about 4 feet.  Reach your arms upwards (perpendicular to the floor) as you rotate your palms to face each other and actively reach through your fingertips towards the sky.  Breathe as you roll your shoulders down and back into their sockets.
  • As you inhale, make sure your heels are aligned and turn your back foot (left) out 45-65 degrees to the left (anywhere from 9 o’clock to 11 o’clock). Exhale and rotate your hips and torso to face forward while grounding into your back leg.  You’ll probably have to pull your left hip forward and your right hip back.  Try to square your pelvis as much as possible, this is difficult (especially if you have tight hips like myself) and won’t happen overnight. I like to bring my arms down for a moment, touch both my hips and direct them towards the front of my invisible mat.
  • Keep your back foot firmly planted and as you exhale, bend your right knee over the right angle so the shin is perpendicular to the floor and your thigh is as close to parallel as possible.  You may have to scoot your front foot forward a little bit if your knee is tracking over the front of your ankle (you never want that to happen). Your back leg should be straight and your heel should be touching the ground.
  • Anchor yourself firmly with both legs, even though your front leg is probably burning a little more, your weight should feel equally grounded.  Inhale as you reach towards the sky, look up at your fingertips and those beautiful trees and reach some more.  There can be a slight bend in your back.  You can also bring your palms together overhead and spread your fingers if you’d like.
  • Relax into warrior one with strength, breathing deeply for thirty seconds to a minute.  To release, straighten the front leg while bringing the back leg forward to meet at the front of your invisible mat.

live seasoned woods warrior yoga poses-6live seasoned woods warrior yoga poses-8live seasoned woods warrior yoga poses-3

Warrior Two

  • Starting from warrior one (with your right foot forward), rotate your left arm back and your front arm forward so they create a straight line (parallel to the ground).  Keep a tall spine and feel strength radiating from your core.  At the same time rotate your hips and your back toes outward.  Your shoulders should be stacked directly over your hips and your left toes should be pointed towards the left side of your invisible mat (perpendicular to your right toes) .  The heel of your front foot should line up with the arch of your back foot.
  • Sink lower into your lunge and exhale while relaxing your shoulders.  Just like in warrior one, the weight should be distributed evenly in your legs, which means the outer edge of your back leg is pressing firmly into the ground.
  • Even though you’re actively reaching forward and backwards with your arms, they should be slightly relaxed not rigid.  I like to imagine a string tied to each middle finger, knowing I could sway my abdomen forward and backward if someone came along and pulled either string.
  • When you’re properly aligned, look out over the edges of your front fingertips.  Keep your gaze soft and your face relaxed.  Hold the pose for thirty seconds to a minute all the while breathing deeply. To release, rotate the arms upwards and the back toe and hips forward to return to warrior one and then straighten the front leg while bringing the back leg forward to meet at the front of your invisible mat.

live seasoned woods warrior yoga poses-10live seasoned woods warrior yoga poses-5live seasoned woods warrior yoga poses-4

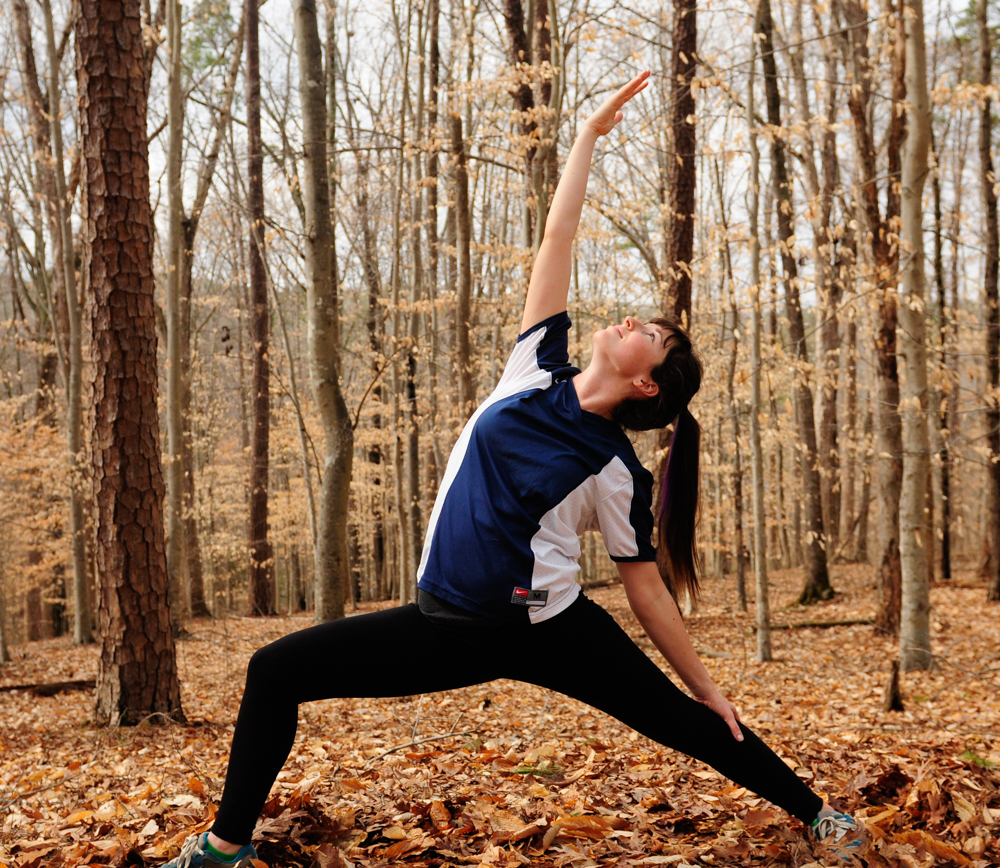
Exalted or Reverse Warrior

  • Starting in warrior two, simply rotate the front palm towards the sky and slide the back palm gentle down your back thigh.  Inhale the front arm towards the sky, reaching and lengthening the front side of your body while your back hand extends lower on your thigh and eventually calf.  You don’t want to put any weight on your back hand, instead use your abdominal muscles and right hand to lengthen and raise your heart towards the sky.  Gently gaze up at your fingertips while keeping your neck relaxed.
  • Deepen the lunge in your front leg and breathe deeply for up to thirty seconds.  To exit, return to warrior two, warrior one and then straighten the front leg while bringing the back leg forward to meet at the front of your invisible mat.
  • *If you’d like to go into a half bind in reverse warrior, bring your lower hand around your back and place your fingertips in your front hip crease.  Make sure you keep a deep lunge and your upper body uplifted.

live seasoned woods warrior yoga poses-11live seasoned woods warrior yoga poses-12

Warrior Three

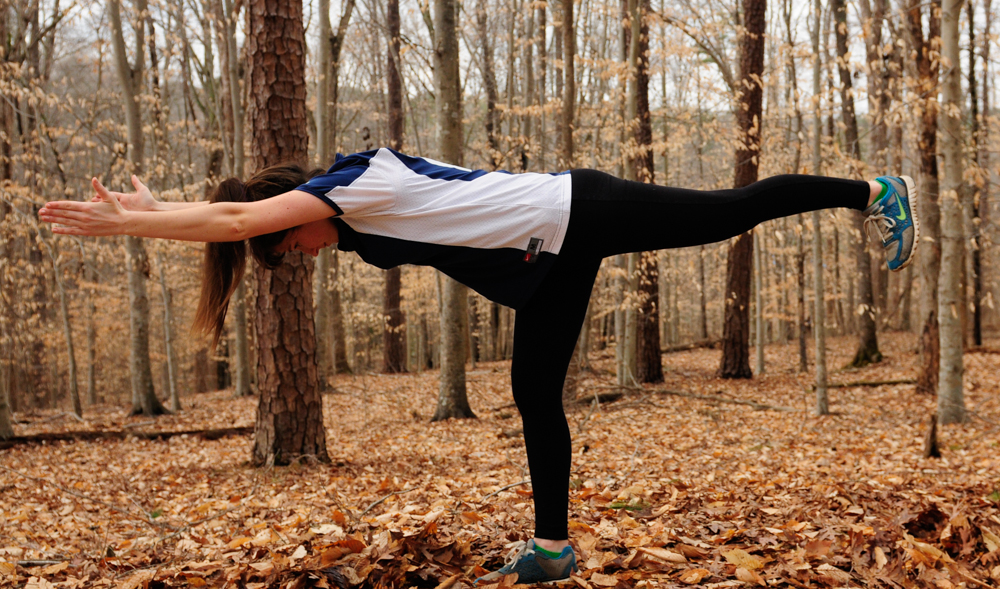
  • Starting from warrior one, simply (ok nothing is simple about this pose) tilt your upper body forward about 45 degrees and simultaneously straighten your front leg while you gently push forward and lift your back leg.  The goal is to look like the letter T.  Your hips should be squared towards the ground.  Stretch your arms forward so they’re parallel to the ground while you flex your back foot and push backward.  I like to imagine a wall directly behind me that I’m pushing against with my heal.  You don’t want your shoulders to sink below your hips so engage your core muscles and lengthen your arms while you gaze at the ground.  Hold this for up to thirty seconds, which is a major challenge, and gently release back into warrior one. To release, straighten the front leg while bringing the back leg forward to meet at the front of your invisible mat.


Now you’re well versed with warrior and equipped to take your calming strength out into the woods.  I hope you enjoyed a magnified look at these important postures.  I’m sure you’ll find yourself in one, if not all four, of these poses during any vinyasa class.  And remember that everyone’s body looks and works differently even though we’re all made up of the same parts, which means everyone’s warriors will differ slightly.  Embrace yours, whatever it may look like today and leave it in the woods when you’re finished.  It may look different tomorrow, embrace that too!

Sweet (Heart) Potato Skillet

liveseasoned_sweetpotatoskillet8 copy

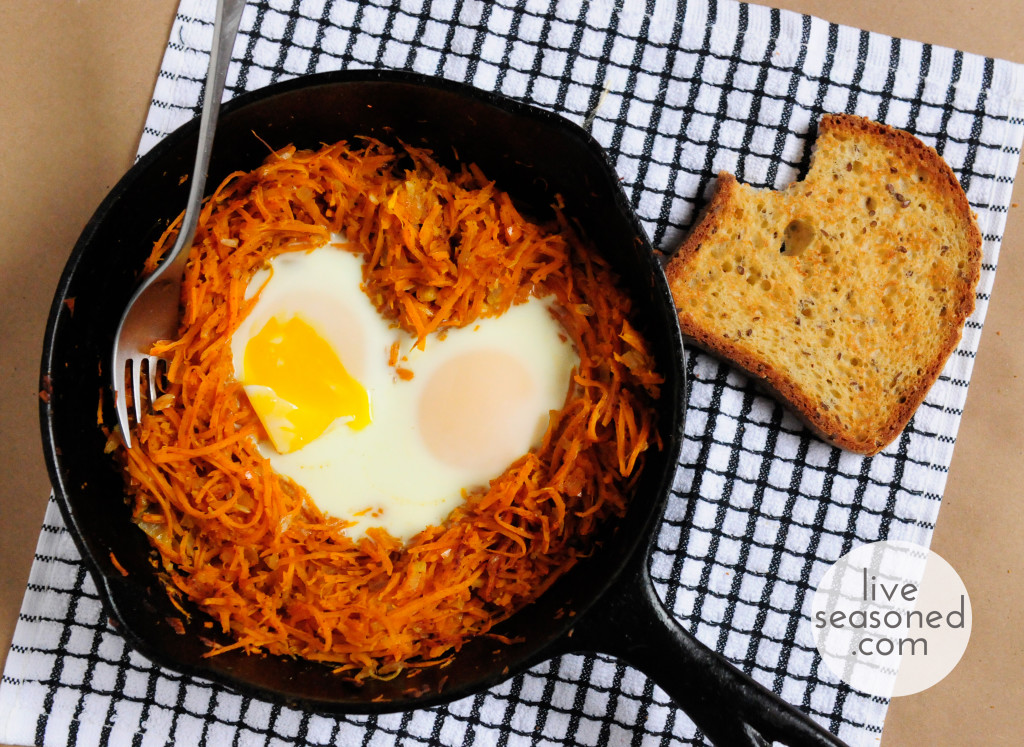
If you’re looking to shake up your breakfast menu, try this sweet potato skillet.  It’s a quick and hardy dish with the perfect amount of spice.  The eggs are a great source of protein and the sweet potatoes add lots of fiber and potassium to the dish.  What’s my favorite aspect of this recipe?  The lack of dirty dishes.  Since you cook and eat out of the  skillet, clean up is easy peasy.

liveseasoned_sweetpotatoskillet3

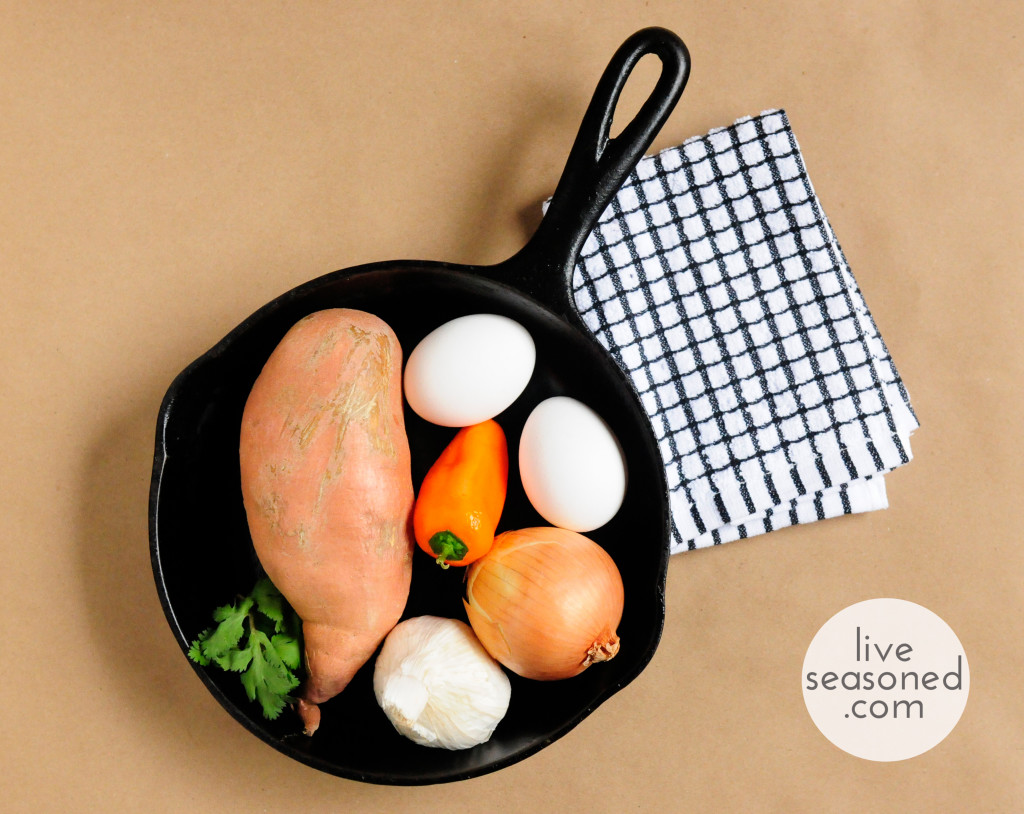
Ingredients:

  • Splash of olive oil (or coconut oil)
  • 1 medium sweet potato
  • 1 clove of garlic
  • ½ an onion
  • 1 small sweet pepper
  • few sprigs of cilantro
  • 2 eggs
  • ½ teaspoon cumin
  • ½ teaspoon cayenne pepper
  • shake of red pepper flakes
  • salt and pepper to taste

Equipment:

  • Finely chop half an onion, the pepper and a clove of garlic.  Over medium-low heat, add a splash of olive oil to a small skillet.  Add the chopped onion, pepper and garlic. Sprinkle a pinch of salt over the onion mixture.
  • Wash, peel and julienne (or grate)  the sweet potato while the onion mixture is sautéing.
  • Stir in the grated sweet potato and turn up the heat to medium.
  • Finely chop the cilantro and add it to the sweet potato mixture along with the cumin, cayenne and red pepper flakes.
  • Stir every so often until the sweet potato begins to soften.  About seven to ten minutes.
  • Place a rack at the top of the oven and turn on the broiler.
  • Make a heart shape in the middle of your skillet and crack two eggs into it.  Sprinkle a little salt and pepper over the raw eggs.
  • Place your skillet in the oven, under the broiler, to lightly cook the eggs.  Anywhere from 2-5 minutes depending on your preference.  I broiled my skillet for only two minutes because I like my eggs runny. (Katie here ~ what? you like your eggs runny? I’m not sure if we can be sisters anymore!)

liveseasoned_sweetpotatoskillet4

If you’re serving it with toast you can put the slices under the broiler too.  I ate my skillet with an expensive ($8!), but delicious gluten-free loaf from the Saturday Farmers’ Market.  I’m not allergic to gluten, but the loaves at Imagine That Gluten Free looked so delicious that I had to give them a try.  It was a cold and windy (read absolutely freezing) Saturday and I was wandering around near closing time so the vendor even gave me a baguette ($6) for free!  That combination of friendliness and deliciousness will keep me coming back for more.  I wish I had a photo of the baguette.  It seriously looked like a piece of art.  My guy and I scarfed it down that day.  Stay tuned via Instagram and I’ll snap a picture of the beautiful baguettes this Saturday.

I hope you enjoyed this simple yet filling recipe.  The heart makes me smile every time I serve this up.  Do you ever play with your food?  Morph your pancakes into any fun shapes lately? If so, snap a picture, share it on instagram #foodart and tag us!  I’m off to make dinosaur pancakes and heart-shaped donuts!


*I highly recommend buying a julienne peeler.  It basically transforms any veggie into a noodle.  It’s my new favorite toy.

In Season : Spring Links

liveseasoned_springlinks

February always flies right past us and soon it will be spring time.  We’re so excited to pull on our rain boots, kick around in some puddles and watch flowers bloom.  Are you with us?  We see you nodding your head!  Here’s a few inspiring links to get you geared up for the rainy, but lovely season we know as spring.

  • Katie just bought this blouse; the detailed flower print makes it a fun winter to spring transition piece.
  • Which reminds Sarah of this lovely pastoral picture of spring. We wish we knew the source!
  • If you’re thinking about doing a little gardening this year, here’s a great starter set.
  • What a creative and cute idea for starting seedlings.
  • If you have the space and you’re really serious, you could try your hand at building some cold frames.
  • There’s still time to knit this sweater, and it will come in handy for those cool mornings and evenings that spring throws at us.
  • Every time Sarah sips this Tazo tea she feels like spring is one step closer.  FYI you can find it at your grocer too.
  • Have you caught this inspiring travel article?  We found it long ago, but it’s too good not to share.  How the heck do you decide what shoes to take?!  Speaking of shoes…
  • It’s almost time to put away your winter boots and switch into your rain gear.  Last year Sarah had these, but this year she’s thinking about purchasing these.
  • Sarah always buys cool umbrellas in case it rains while she’s shooting a wedding; her favorite is the clear bubble style.  It acts like a big soft box, filtering the light and adding a blurred background to the bride and grooms face.
  • Alex is a charmer in stripes, and that onsie will be so cute when he’s crawling around the (snow-less!) back yard.
  • Looking for quick craft? What about a spring embroidery project?
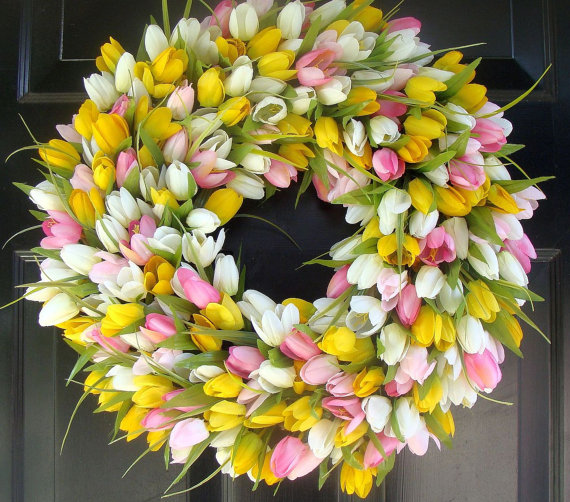
  • Finally, how excited are you to wake up one morning and finally say Hello Spring!
Image via Elegant Wreath

DIY : Touchscreen Compatible Gloves & Supply Giveaway!

I’m one for quality over quantity, but sometimes I run into the problem that the quality items just won’t wear out so that I can get the shiny new version with extra features. Take gloves. Being the winter walker I am, having a good pair of gloves is essential. I have a pair that work fine in every way: warm, give me plenty of dexterity for wiping runny noises and picking up the {ahem} dog poop, and above all else, they magically stay together as a pair. You’ll notice that they look well worn in the photos, please excuse their pilled rough and tumble appearance.  Unfortunately, they are not touch screen compatible, which leaves a few fingers out in the cold when I want to use my phone for anything from taking pictures to making calls. Lucky for me (and you!), with the right materials this is a surprisingly easy problem to fix.


Our smart phones have capacitive touchscreens, which require the flow of electrons between our fingers and screens to function. Unless you already have touchscreen compatible gloves, you’re like me: making this connection requires taking off your gloves. BUT we can easily complete that circuit with just a bit of conductive thread!

Buying conductive thread is not as hard as it used to be. There are a variety of threads and other materials available on Amazon. When I converted my first pair of mittens a few years ago, I remember there being only a few suppliers, and I had ordered a sample pack from Silverell.  Sparkfun is another supplier that’s been around for a while and sells a variety of materials for similar crafty projects. Now, the sky’s the limit and you probably already have supplies in your house to make your own!

That said, if you want to dip your toes in the water but don’t want to order or make your own conductive thread, we’re giving some away! The details are at the bottom of this post.

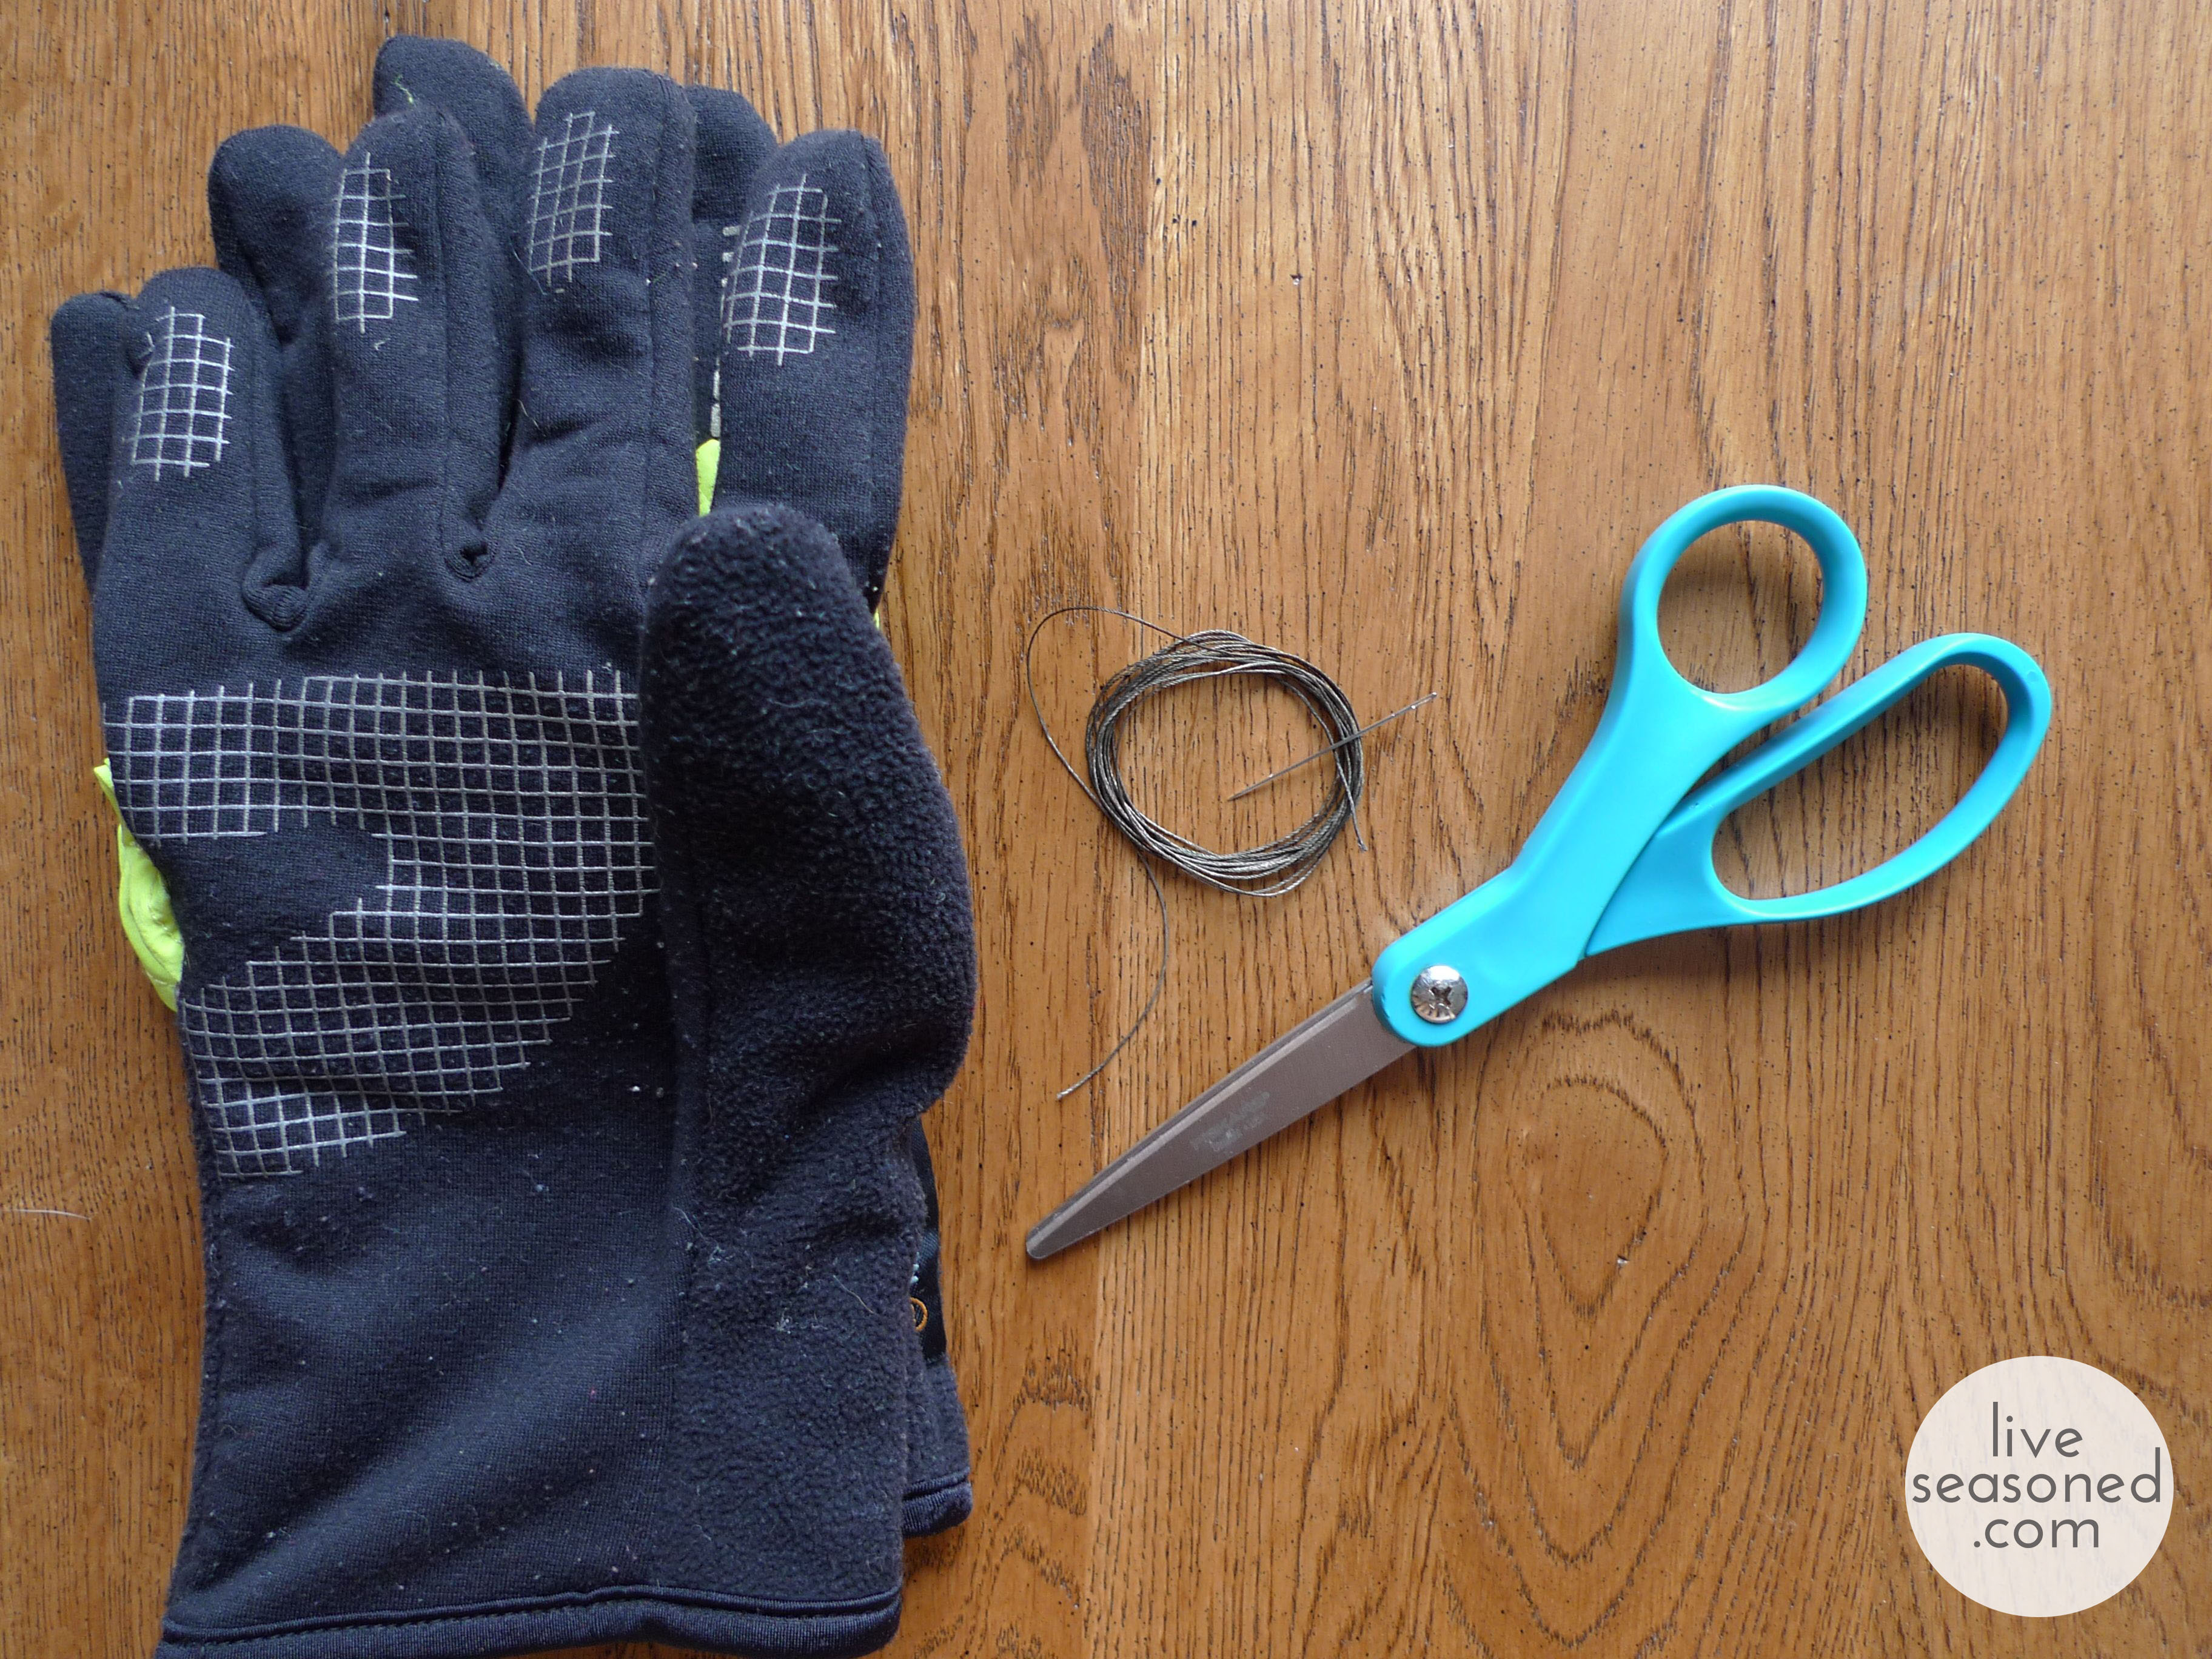
liveseasoned_spring2014_touchscreengloves_supplies_wm 

Materials:

  • conductive thread
  • sewing needle
  • gloves

Instructions:

  • Mark your contact hotspot. Put on your glove, pick up your phone, and swipe the screen as if you’re going to use it. Mark the area on your finger or thumb tip that makes contact with the screen – this is where you’ll want to make your stitches, and often it’s not directly in the middle of your glove’s finger tips, where your instinct may tell you to add the thread.
  • Stitch your marked area! Make a number of overlapping stitches where you marked your glove. *Notice the way I weave the needle in and out of the thumb tip from the outside, it makes your sewing much easier than having to reach into the glove for the needle.* After a few stitches, double check to make sure that the thread is clearly exposed to your thumb on the inside of the glove and the screen on the outside. If it is, continue stitching until you cover the full area of the glove that was making contact between your thumb and the screen.
  • Check your work. Put on your glove and use your phone. Does it work? If it works, great, you’re done! If not, read my first tip below and try again. If you’re still having trouble, add a few more stitches in the same area. The more thread that’s there, the more opportunity the electrons have to will flow!

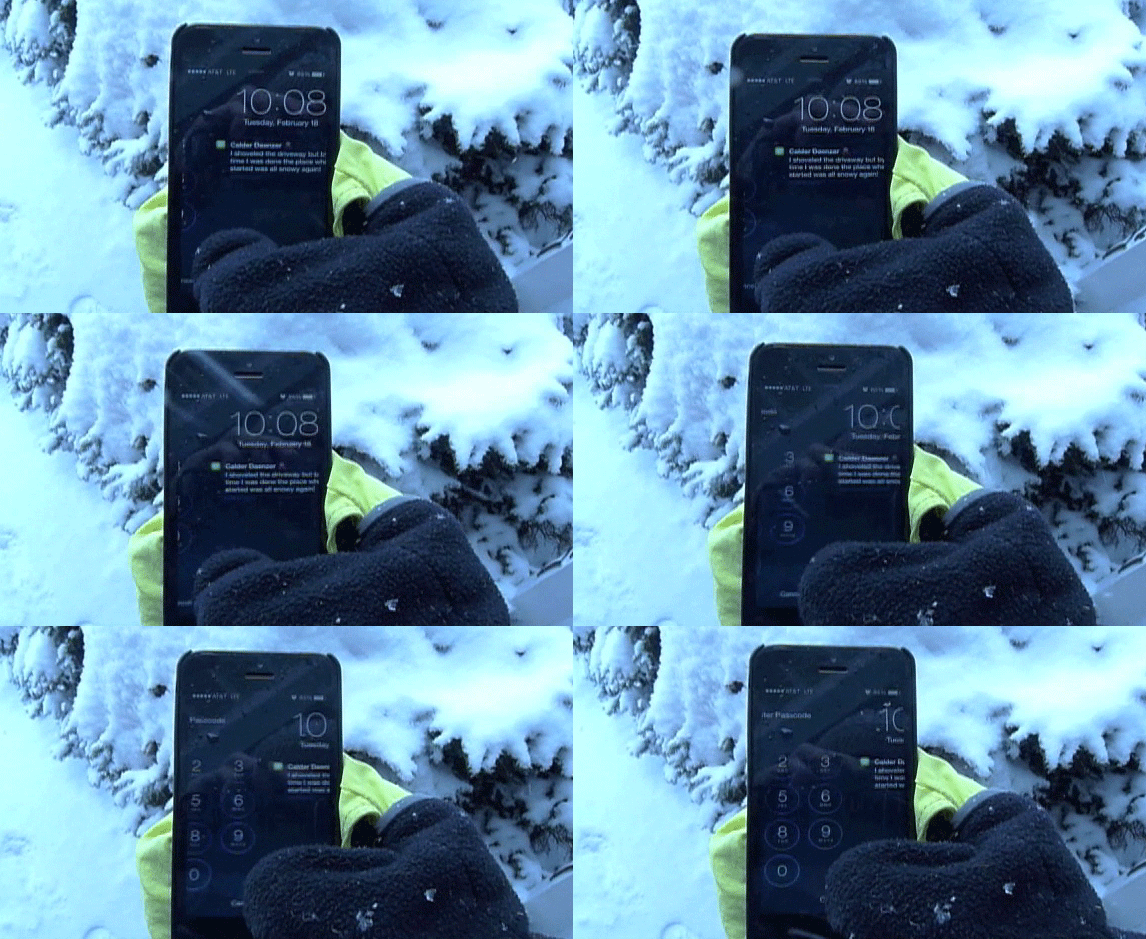
And we couldn’t help ourselves, we had to show a little action clip of the glove at work! If you have a sharp eye, you’ll notice that we took that footage on Tuesday, during the latest storm, and Calder’s texting me to say that he shoveled the driveway (usually my job), but that the snow already covered it up again. There couldn’t have been a more appropriate text for this post!

gloves

This is one of those updates that is so easy that you’ll wish you did it back in November before suffering through the Arctic Vortex.  Back when you could still feel your fingertips and were greeting each day’s snow with a smile because you were going to make the best of this cold!

Has anyone out there attempted a similar conversion? What type of conductive thread did you use? Have any tips to share?

Notes and Tips:

  • I often find that these gloves are not as perfect as our ungloved hand. They work fairly well when I’m doing a big slide motion (like unlocking my phone), but are not as successful with tap motions. Tap performance can be improved if you add a very slight slide at the same time, so often I will slide across the button I want to tap, and that does the trick.
  • The thread I’m using is sold as “sewing thread” and I get the impression that it is meant to be used for machine sewing to stitch two pieces of fabric together. As such, it’s a combination of fabric and conductive material, and the connection is not as strong as it could be using a purely conductive material, but, it does work!
  • If I were knitting a pair of gloves or mittens, I would hold my conductive thread with my yarn when knitting the thumb and finger tips that I want active. Depending upon how well this works, you could then go back over the a specific point on your finger tips, just like the project above, to enhance the conductivity.
  • In the last picture, my stitches look like a big lump, but they are truly not noticeable. This might be more of a problem if your gloves are fitted. If anything, I found that having a slight bump can be helpful in giving you a good sense of where to touch the phone.

Now, about that giveaway ~

We want to share the love and encourage some simple DIY action. The first five commenters on this post will be gifted enough conductive thread to pimp out your own gloves. What do you say, want to give it a try? Let us know!