The Meaning of the Moon

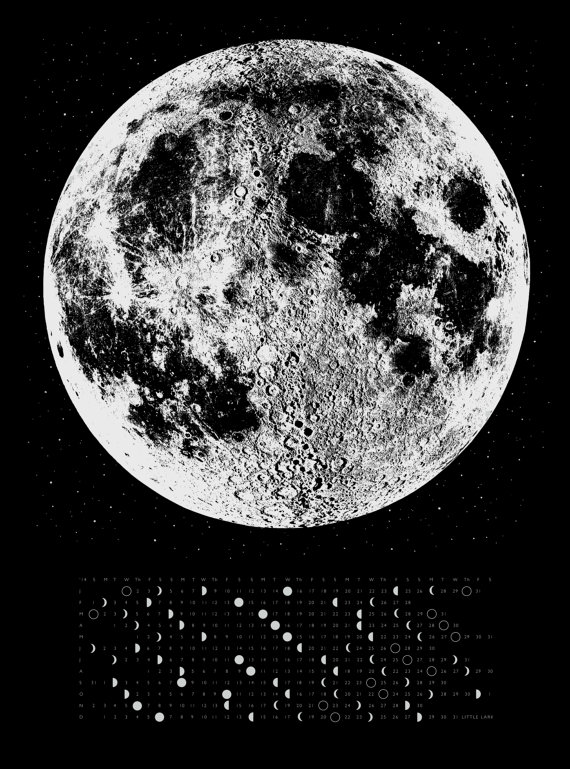
Moon Cycles Calendar

Moon Cycles Calendar

Month after month we gaze up at the full moon in appreciation.  It’s a captivating sight and made even more special by it’s relatively rare occurrence (only 12 or 13 each year).  Personally full moons inspire me to write poems (that aren’t very good) and create cosmic artwork.  I also like to plan goals around the moon cycle, like mini new moon resolutions instead of one big New Year’s resolution.  Each month I stare at that pale disk and fall madly in love.  I feel inspired and giddy with feeling.  We are so small, the galaxy is so big, I love you moon!  Imagine how amazing it would be if we lived on Jupiter? Sixty moons, yes please!  Although maybe if we had sixty moons we wouldn’t appreciate our one full beauty as much.  Sixty moons would also make this post really, really, really long, so thank the solar system for our position while I describe the reasons for our full moon names.

Were you aware that each moon has a different name?  I’ve heard of a few, like the harvest moon (the moon that occurs closets to the autumnal equinox) and the snow moon, but until a few months ago I had no idea each month’s moon was assigned a name. Full moons occur about every 29.5 days as the moon is directly opposite the sun from an earth perspective.  The moon reflects the sun’s rays and appears as a perfectly round disk.  For millennia humans have used the moon cycle to keep track of seasons and to set schedules for planting, hunting and harvesting.  The same is true with the Algonquin Native American tribes that spanned from New England to west of Lake Superior.  These are the names I’ll mainly be describing here and the ones that are most commonly referred to in the United States.  If you’re reading this from the Southern Hemisphere (welcome!) the months and names are listed at the end of the post.

  • January-Wolf Moon is named after angry howling wolves.  During deep snows and cold winters, wolf packs would howl hungrily near the perimeters of Native American villages.  It’s sometimes referred to as the Old Moon, the Ice Moon or the Moon after Yule.
  • February- Snow Moon is named for, you guessed it, the ridiculous amount of snow that falls each February.  Usually this month has the highest recorded snowfall so it’s no wonder why it was deemed the snow moon.  February’s full moon is also known as the Hunger Moon since temperatures were so low, hunting was difficult and food was scarce.
  • March-Worm Moon got its name because worm castings (poop) would appear as the ground thawed.  This also signaled the return of the robins who love to chow down on worms.  March is also referred to as the Crow Moon because of their incessant cawing.  I love crow cawing (am I the only one?) so I tend to refer to this moon as the Crow Moon.  It’s also known as the Crust Moon because the ground thaws during the day, but freezes again at night forming a crust.  Lastly, it can also be referred to as the Sap Moon because trees are prime-tappin’-time during March.
  • April-Pink Moon is named for a species of early blooming wildflower known as wild moss pink or ground phlox.  Coastal tribes refer to April’s moon as the Fish Moon.  Other names include Egg Moon and Grass Moon.
  • May-Flower Moon is a given for the month of May. April showers bring May flowers, ya dig?  Some tribes also referred to May’s moon as Corn Planting Moon and Milk Moon.
  • June-Strawberry Moon is apparently the only name that is universal to all Algonquin tribes.  It was deemed Strawberry Moon because strawberries are in their peak picking season during June each year.  European settlers named it the Rose Moon, but I think Strawberry Moon sounds way cooler. *I’m obsessed with Strawberries*
  • July-Buck Moon is named because male deer begin to grow new antlers each year during July.  Bucks shed their antlers at some point during the year, which means if you scour the woods you may find some! Take a dog with you to increase your odds.  July is also known as Thunder Moon because of the frequent storms during this month.
  • August-Sturgeon Moon was named by Native American fishing tribes.  Sturgeons were caught in abundance every August. It can also be called the Red Moon, the Grain Moon or the Green Corn Moon.
  • September-Corn Moon signifies when corn and other crops are to be harvested.  It’s often called the Harvest Moon, which is the full moon closest to the autumnal equinox (2 out of 3 years it falls in September).  At the peak of harvest, farmers can work late into the night with the help of the light from the Corn Moon.  Another fun fact, usually the full moon rises an average of fifty minutes later each night, but for the few nights around the Harvest moon it rises only 25-30 minutes later across the U.S. and only 10-20 minutes later for much of Canada and Europe.  I always imagine the Harvest Moon to be the happiest of the year for the Native Americans.
  • October-Hunter’s Moon signifies the perfect time to hunt deer and other animals.  Deer are fattened up from summer and easily spotted in the bare forest.  Fox, squirrels and smaller game are also more easily seen now that the fields are bare.  October’s moon is also referred to as the Travel Moon and the Dying Grass Moon.
  • November-Beaver Moon is named for beavers, but it’s not clear why.  It’s either because beavers are highly active preparing winter dams or because it’s time to set beaver traps to stock up on warm winter furs.  The animal lover in me hopes it’s because of the busy beavers.  It’s also known as the Frost Moon.
  • December-Cold Moon because it’s darn cold during December.  It’s also known as the Long Night Moon, which I prefer because I dislike the cold so much that I’d rather it be left out of my vocabulary and because it describes December’s moon so well.  In December, nights are the longest and the moon has a high (above the horizon) trajectory across the sky because it’s opposite a low sun so long nights, long moon.
  • Blue Moon-Full Moons are roughly 29.5 days apart, which leaves 11 days before the Earth finishes its orbit around the sun (one year).  Roughly every 2.5 years there’s an ‘extra’ full moon during a season (usually it’s three full moons per season), which is where the Blue Moon comes in.  It was a common mistake that the Blue Moon referred to the second full moon of the year, but it is actually the name given to the third full moon during a season that has four full moons.  Apparently the big mix-up came about way back in 1946 when Sky and Telescope magazine claimed the Blue Moon fell on the second full moon of the calendar month.  This error caused widespread misunderstanding until it was corrected more than fifty years later in 1999.

Southern Hemisphere Full Moon Names:

  • January-Buck Moon
  • February-Sturgeon Moon
  • March-Corn Moon also usually the Harvest Moon
  • April-Hunter’s Moon
  • May-Beaver Moon
  • June-Cold Moon
  • July-Wolf Moon
  • August-Snow Moon
  • September-Worm Moon
  • October-Pink Moon
  • November-Flower Moon
  • December-Strawberry Moon


Did you learn a little something here?  We’re all about educatin’ [insert your best hillbilly accent here] over here at Live Seasoned.  Do these names still ring true for you or do you label your moons differently?  Since I learned all the names, I’ve been trying to decide which I like best and also adopting some new names for fun.  I love living my life by the lunar cycle.  It’s a fun way to set goals mainly because you can’t do too much procrastinating in only 29 days. Do you find the moon shaping your life in any way?  Tell us about it, we’re all ears.

 

*Image via Little Lark

In Season: Spring Cleaning

loc_bath

What can we really say about spring cleaning? On the one hand it’s a chore, especially during those first few days of perfect spring weather. On the other hand, giving your space a good, deep clean, letting the fresh air in, and even rearranging the furniture may leave you smiling when you’re stuck inside during the inevitable April showers. However you look at it, we’ve found a few fun supplies and useful resources to put a spring in your cleaning.

Do you have a whole closet dedicated to cleaning supplies? Me neither, but check out this amazing cleaning closet overhaul by Little Green Notebook.

You can always count on Kaufmann Mercantile for quality products, including this wool duster.

Perhaps this tells you something about my cleaning tendencies: I bought this scrub brush because I loved the Japanese packaging… and four years later it’s still in that cute paper bag.

Spring is a great time to clean your wool sweaters and coats before packing them away for summer. Be sure to look for any signs of wool moths and pack them with some cedar or lavender as a repellant.

We have a glass shower door with a million nooks and crannies, I kind of want this power scrubber to give it a good clean. Does anyone have one? Does it work well?

I want to make this homemade sage cleaning spray this year. Sarah made a cleaning spray with oranges that she’s going to share soon!

Cleaning with a bit of elbow grease and without harsh chemicals is important to me, especially with a kiddo and pup in the house. This post provides a great overview of the essential ingredients to have on hand and how to use them.

I always find a good list helpful. This one overwhelms me, but I like the “bonus point” encouragement of this one.

Ahhhhhh, and then there’s this dustpan.

Need justification for the dustpan or a bit of encouragement to pare down as you clean? 

Have nothing in your house that you do not know to be 
useful, or believe to be beautiful. William Morris

Happy Friday, friends!

Keeping an Orchid

We mentioned that benefits of having flowers around the house a few weeks ago. Well those mental benefits extend to houseplants too! Today we’re doubling the benefits (we hope!) by talking about a flowering houseplant.

First a little tangent ~ if Calder didn’t have a say, I’d be a plant lady, filling every window with plants of all shapes and sizes in pots of every color and design. I would have airplants in the bathrooms, forced bulbs in the guest bedroom, cactuses next to African violets, and on and on, but I reign in my desires, and go for the plants that I hope will keep the peace. These are the plants that I can keep relatively well-manicured and aren’t too finicky during our week+ adventures away from home. I finally gave away the fern with its perennially falling tiny leaves; it was replaced by a split-leaf philodendron that took up too much space and was then sent off to live out its days in my office (where co-workers, starved for some green and life under the flourescent lights, love it). But the remaining ponytail palm and spider plants have stood the test of time in this houseplant war zone.

liveseasoned_spring2014_orchid-0b_wmNow on to the orchid ~ I was given a Phalaenopsis orchid (the kind that you find at most grocery stores) two Christmases ago. I was embarrassingly giddy to say the least. A new plant to take home, and there could be no naysaying because it was a gift! Best of all, it was something that I would never buy myself. Sure they looked beautiful in the grocery stores, but they also looked like they would be too hard to care for, and I didn’t want to put my neck out in the aforementioned war for something that would shrivel and break my heart a few weeks later.That was over a year ago, and the orchid is still as beautiful as the day it was gifted (except for a week of neglect last spring that taught me a few things).

What are my tricks? A brighter window than you might think, consistent watering, and slight modifications specific to its placement in our house. I keep the orchid in front of our sliding glass door, the brightest window in our house, where it receives afternoon through evening sun. I know the care labels recommend filtered or indirect light, which may lead you to put an orchid in a window with less direct light or with blinds, but if you’re having trouble, try increasing the light. As for the watering, I use the ice cube method I’ve seen recommended on some care tags, just put two to three ice cubes on the soil every two to three days. That is more watering than is recommended (I think once per week is often suggested), but as always, it’s important to adjust care to your specific conditions. That location in front of our sliding door also happens to be above a heating vent, so to compensate for drier conditions, I’ve increased the watering schedule, and it’s been working. We just came back from visiting family in the Rockies where their house is dry, dry dry, and I would definitely do the same thing there, heating vent or not.

That week of neglect last spring lead to a complete flower loss, encouraging me to figure out how to care for the orchid during our weeks away. My orchid pot does not have holes on the bottom, so sitting it directly into a bowl of water alone wouldn’t do. Instead, I sat it in the bowl of water, and then used a strip cut off the end of a cloth diaper (one day we’ll do a post on the many uses for cloth diapers other than actually diapering) to act as a wick, drawing water up out of the bowl and into the plant at a steady and slow pace while we’re away. So far it’s worked like a charm and we come home to an orchid that’s just as healthy as when we left.

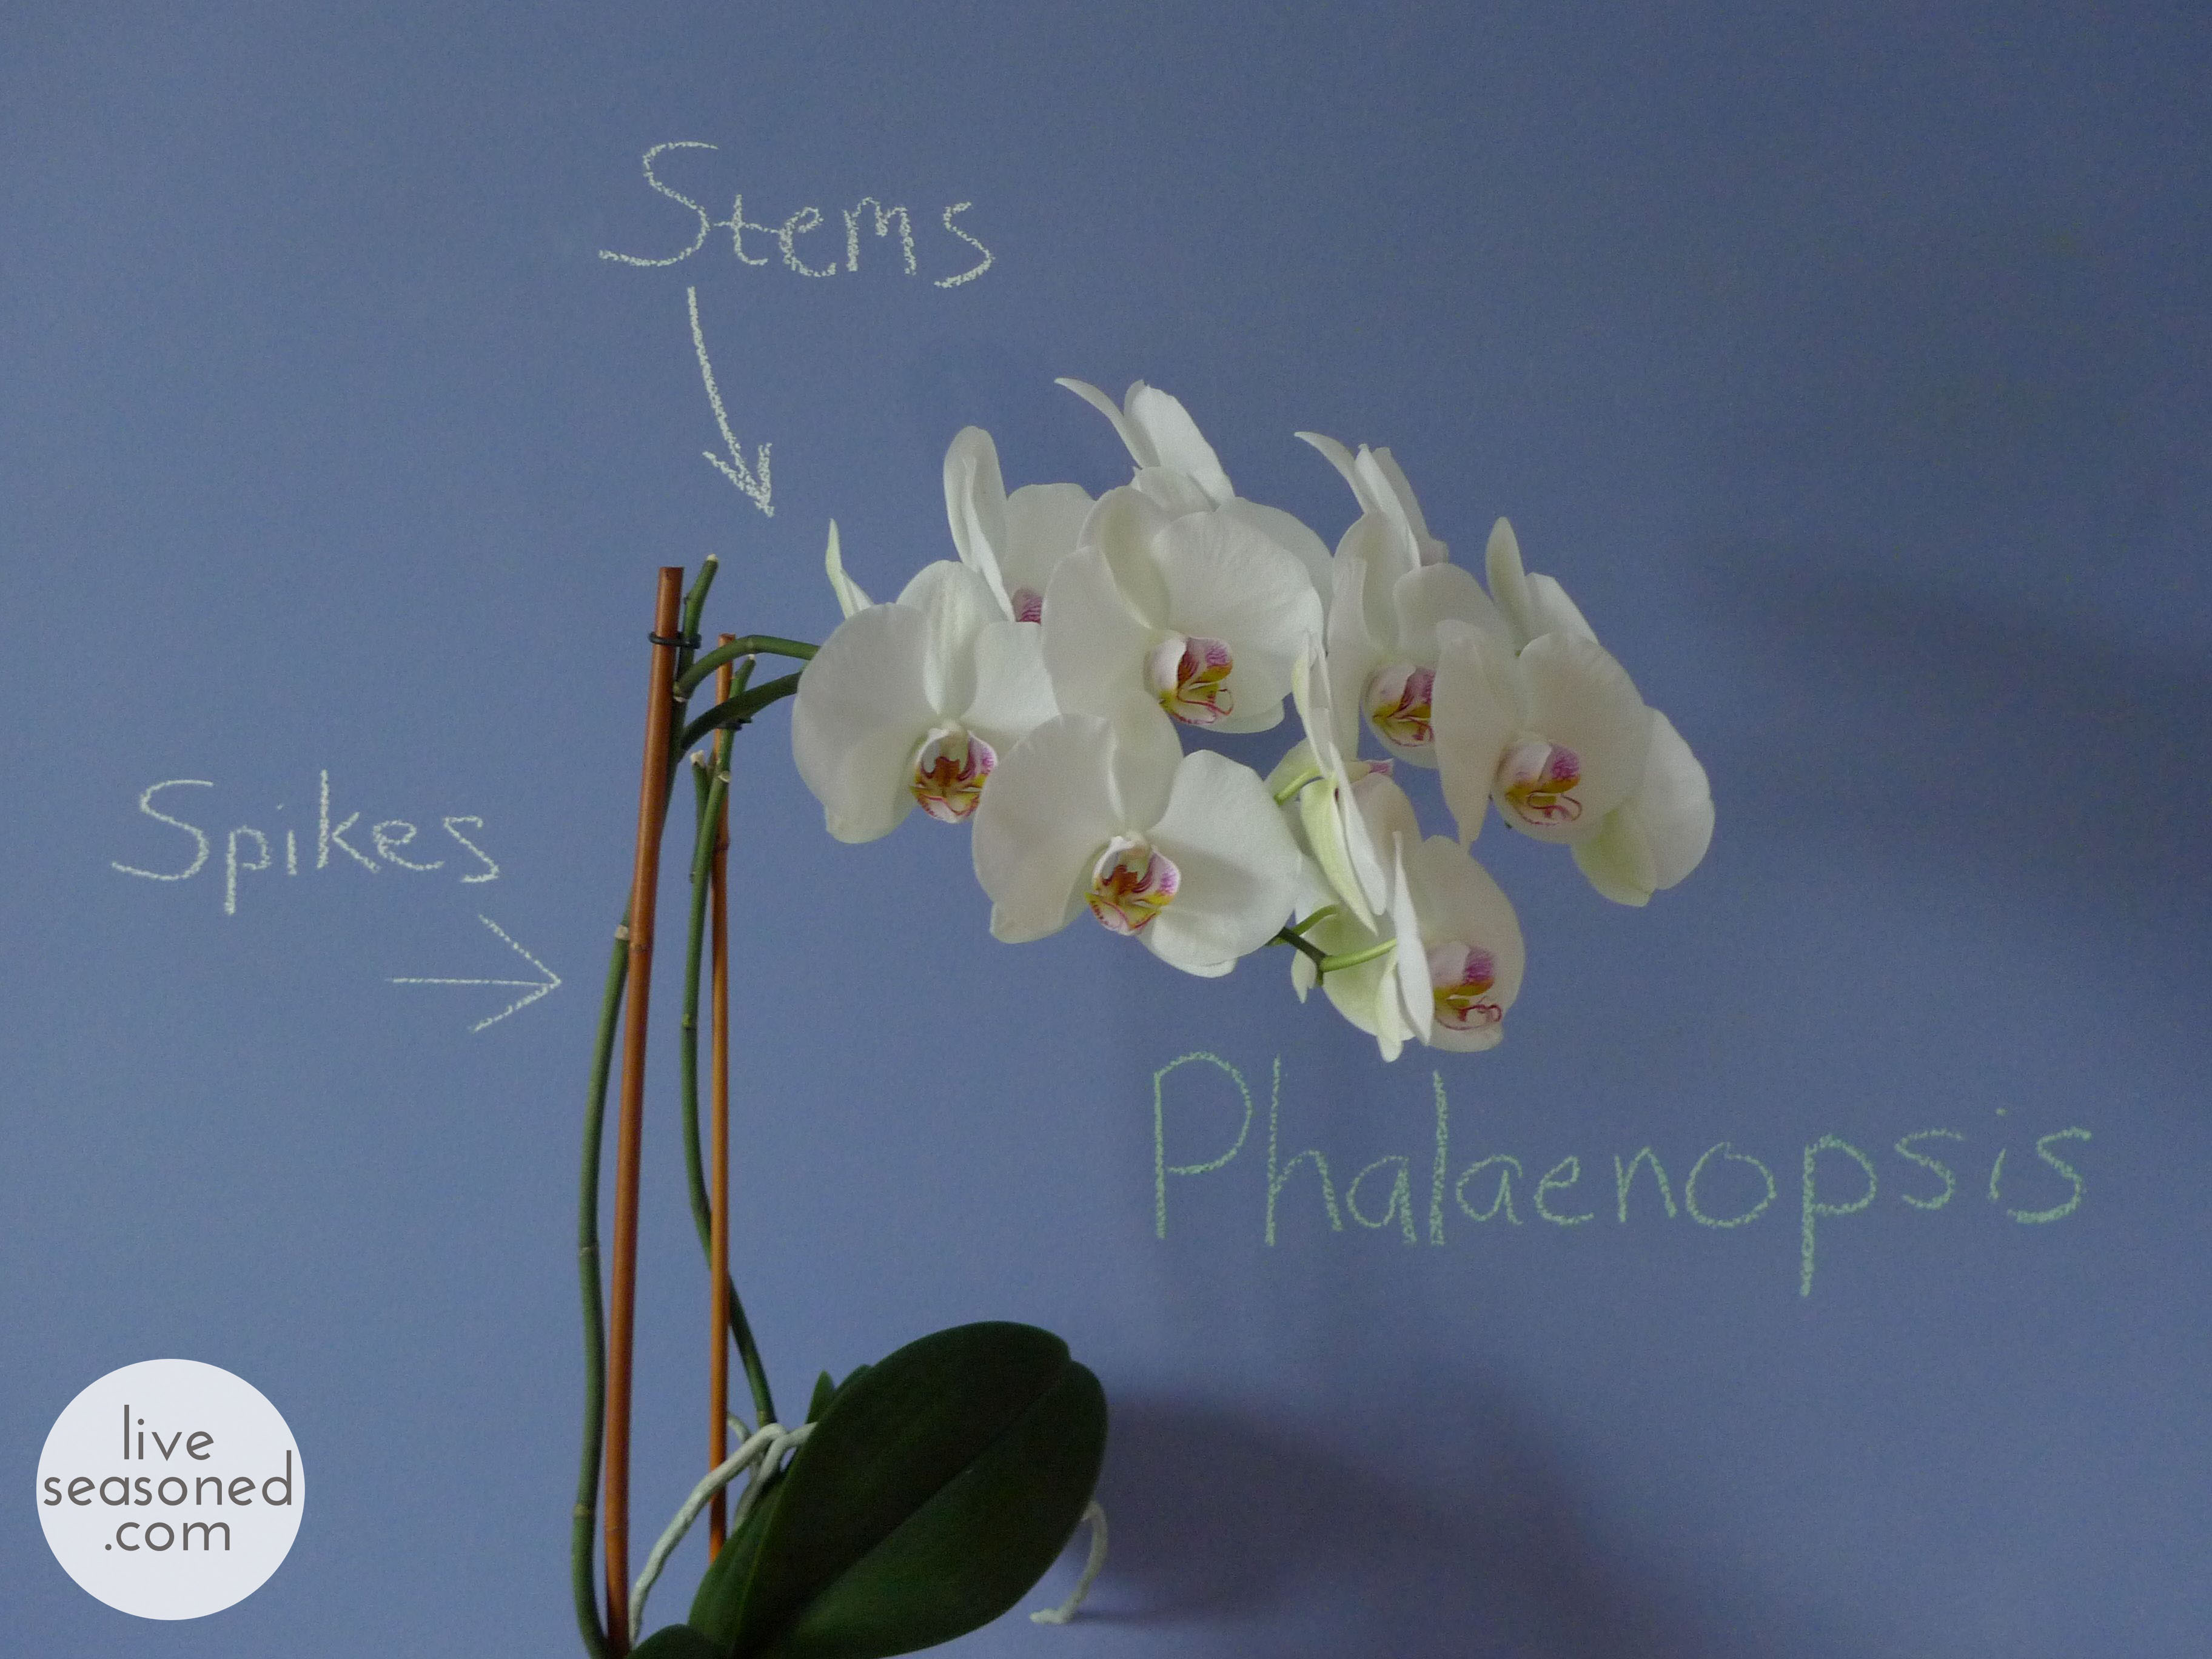
When the flowers fell off last spring, I cut off the horizontal shoot that held the flowers, but didn’t cut back the large stems, or spikes, growing from the base of the plant. A few weeks later, new horizontal shoots started to grow near the tops of those spikes (if you look closely, you can see little buds/segments along the spikes – this is where the new growth occurred), and we were off and running blooming again!

liveseasoned_spring2014_orchid-5_wm

After a year, this plant has been granted a permanent spot in our home (and my plant-loving heart). A compliment from Calder last week sealed the deal…. now that I’ve mastered basic orchid care, we’ve entered a new phase of defending its life against the willful spirit of little Alex the crawler and climber.

Anyone have suggestions for toddler-proofing the plants? The hanging planter had to be the genius invention of a parent.

$17 Saturday: Raleigh Flea Market

This is the first post of our $17 Saturday series.  From time to time we’ll suggest some weekend activities where we challenge ourselves to only spend $17.

If you’ve never experienced the magic of flea markets I’m begging you to drop everything and just go! Get up right now, grab your shopping bags and a fist full of cash and scoot! Oh wait, read this post and get a taste of the magic and a few tips before heading out the door.  First off, it’s not a barn full of fleas like I previously thought.  It’s actually an eclectic mix of old, used and new treasures waiting to be taken home and loved.  Be prepared for a day of searching, sifting and scouting out the best finds at the market.  Also prepare yourself for a few heartbreaks.  You’re bound to come across the most wonderful treasures and obscure finds that cannot be afforded, but don’t mope too long, move on and find something meant for you!  Read on to learn a few tricks before heading to the market.

liveseasoned_spring2014_$17fleamarket-9

I knew I wanted to hit up a flea market or thrift store for an installment of $17 Saturday so this past weekend I decided to check out the flea market in Raleigh, North Carolina.  It has been around since 1971 and it definitely shows.  The grounds were huge!  There were vendors both inside and out selling all kinds of stuff. It’s kind of like a thrift store on steroids with a bunch of individual sellers.  Some sellers price high and others price unbelievably low.  Some stands are organized and have a clear flow of merchandise while others are just piles on the ground.  The sellers inside tended to have new merchandise for sale while the people in the outer lot tended to sell antiques and older items.  While the records, kitchen supply store and handmade furniture inside the building peaked my interests the real treasures were to be found outside.  I knew I wanted the flea market to be a $17 Saturday feature, but all bets were off once I saw the goods to be had.

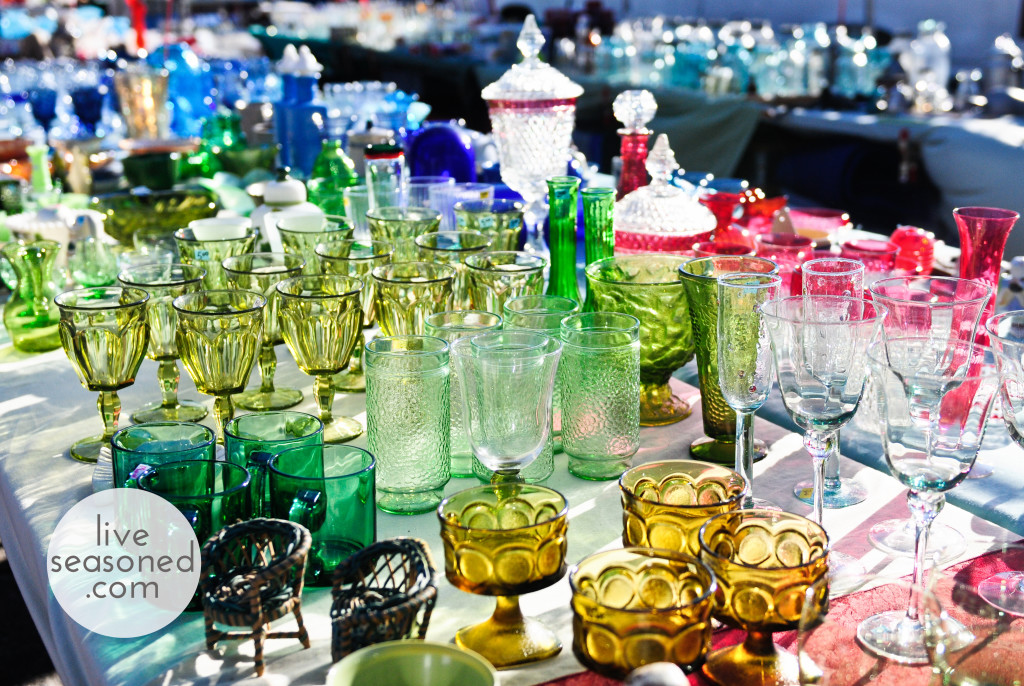
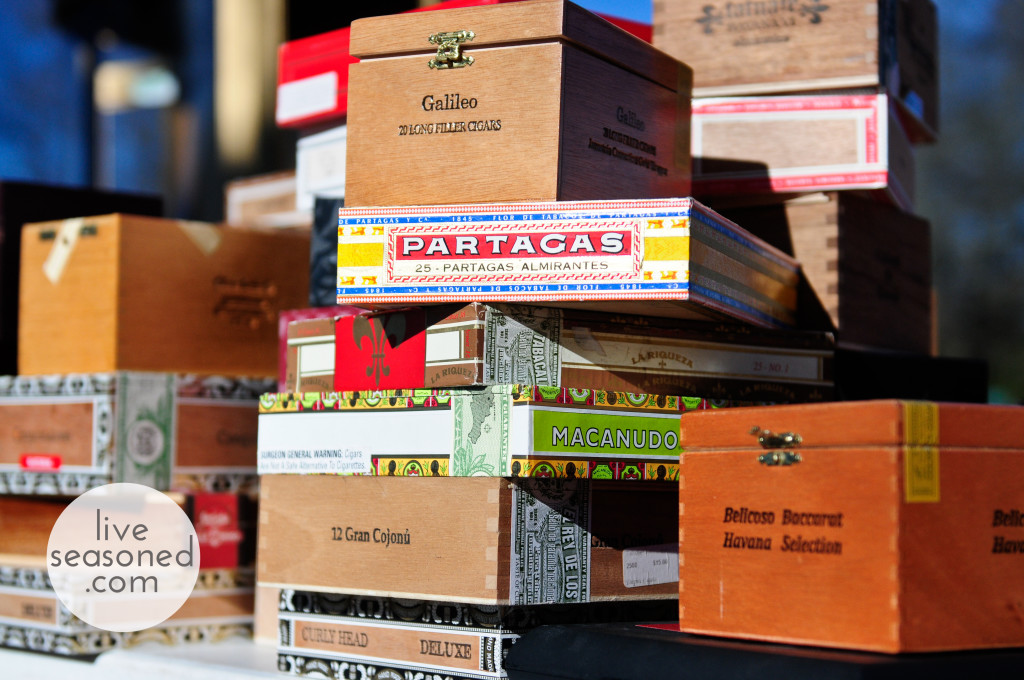
Hundreds of vendors displayed their items on tables, in booths and overflowing out of the back of their vehicles.  There were rows and rows of furniture, antique kitchen gadgets, old license plates, wooden cigar boxes, books, plates, crystal stemware, jewelry and toys.  Some vendors specialized in particular items.  One man had tables and tables of arrowheads that he found throughout North Carolina.  Another man had hundreds of old cigar boxes and yet another had tables of colorful glassware.  You could tell some vendors cleaned out houses for a living while others meticulously picked the collections displayed on their tables.  Once outside I started skipping and prancing from table to table.  It’s hard to contain your excitement when you’re basically standing in the middle of a treasure chest.  At one point I even yelled, “CANDLESTICKS!” and started running in the opposite direction, away from my boyfriend, and towards the shiny objects.  It was a glorious day.  Being led around by my eyes like a dog is by his nose from one pretty item to the next.

liveseasoned_spring2014_$17fleamarket-2


I didn’t go to the market with one particular item in mind.  Since it was my first time at this flea market I didn’t know what to expect and I didn’t want to get my hopes up.  I wandered around for a while before getting in the grove and seeking out special items.  Sometimes it takes a bit of time before you can see individual gems among the piles of stuff.  At first glance some stands look like one big heap of junk, but among those mounds you might find an old dictionary or a seasoned cast iron skillet or an antique film camera.  Once you spot something you like there are a few questions you should ask yourself: How much do I want to pay? How much am I willing to pay?  Is it likely I’ll find this item at another stand?  Do I really need this or is it enough knowing that it’s out there and someone else will enjoy it if I don’t?  I’m pretty thrifty so I always run through those questions before I attempt to buy something.  I also don’t like to get attached to things because I like to move a lot and we all know moving with less stuff is a heck of a lot easier than towing a sixteen-wheel U-Haul.  After I decide how much I’d like to pay, I ask the seller the price of the item.  He or she will either quote a price or ask how much I think it should cost.  If the seller asks me to price it then I’ll knock a couple bucks off the price I’d like to pay.  Usually they’ll ask for a few dollars more and it all works out.  If they tell you a set price and it’s too high you can usually talk them down a few dollars, but if you’re not comfortable haggling, kindly put the item back and skip on over to the next table.  Don’t be discouraged by the prices or lack there of.  Sellers have different ways of pricing their items and you may be surprised by how high and low each will go.

liveseasoned_spring2014_$17fleamarket-16

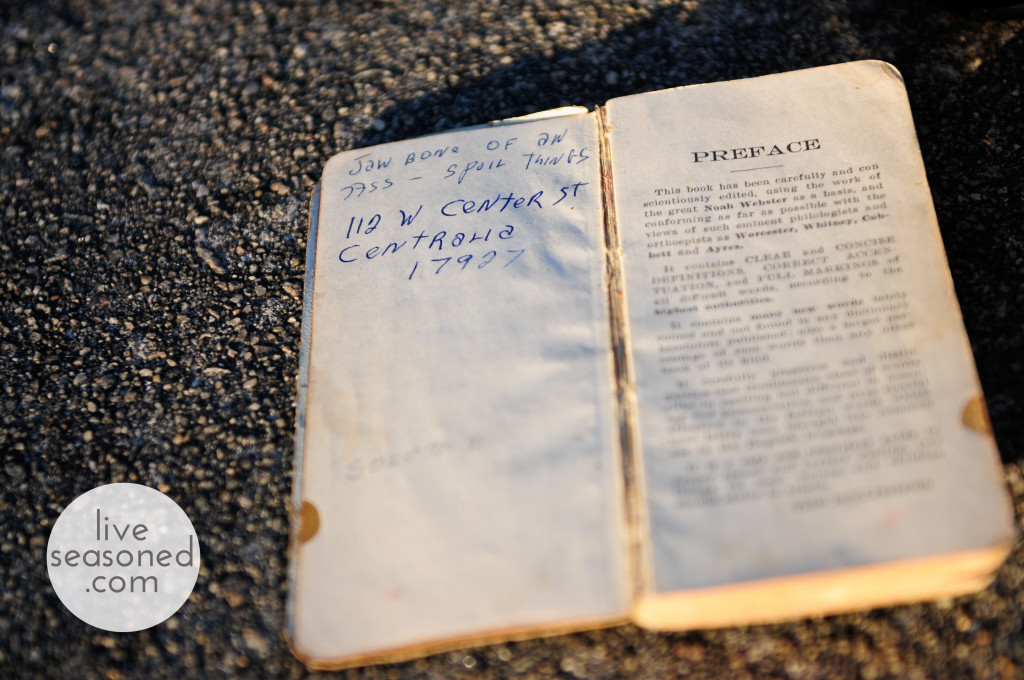
I was reluctant to ask about the price of a vintage Webster’s Dictionary, but it was the second one I saw that day.  When I opened the cover and noticed that it was owned by a man from Centralia, Pennsylvania, I knew I had to at least ask.  Centralia was a tiny little town near the one I grew up in.  In the sixties a vein of coal underneath the town caught fire and it still smolders to this day.  Because of the mine fire most of the residents have relocated and the houses have been torn down.  Less than a dozen houses remain.  It has always been a little fascination of mine, which is why I wanted this dictionary so badly.  I told myself I would only pay $5 for it and to my surprise it was only a dollar!  When the vendor saw the look on my face he said, “Well, now it’s $2.” I smiled, scurried away and tucked my little treasure into my bag.  From that point on I was floating around the market finding one prized piece after another.  I picked up the set of juice glasses for $5 and the little bowl for $4.  I also picked up a small spoon for puddings, sauces and taste testing recipes mid-cook for $3. Lastly, I picked up a black and white bracelet for $1.  It’s rare that I can resist black, white or gold jewelry.  There were a few items I swooned over, but couldn’t justify buying.  I saw a beautiful crystal bottle that would be perfect for alcohol or olive oil and I was extremely tempted to buy an antique lamp, but there was no shade.  I currently have three beautiful lamps that I need shades for, I couldn’t forgive myself if I acquired yet another.  I’m happy just knowing that those items are out there and when I’m ready to buy them I’ll be able to find them.  I finished my day with a huge piece of pizza for the hefty price of $3.  After three hours at the market I was pretty tired.  Sifting and searching takes a lot out of you.  For me it’s mostly mental.  It’s three hours of arguing with myself and talking myself out of purchases, but seeing tables of beautiful old goods makes it all worth it.  I ran through my purchases in my head and couldn’t believe it when they totaled exactly $17!  I hadn’t even kept track of my spending all day until I walking back to the car.  It’s funny how things work out like that.  I almost talked myself out of the pizza because I had delicious leftovers at home, but I must have sniffed it out for the sake of $17 Saturday.

A few market tips:

  • Start your day with an energizing breakfast and a coffee or tea.  That way by the time you’re at the market you’ll have energy to browse and stamina to walk up and down the rows of goodies.
  • Take a bottle of water and a snack along too.
  • Remember to wear comfy shoes and take an empty shopping bag for your future treasures.
  • Credit cards won’t do you much good at a flea market.  Some vendors accept them, but most only accept cash.  It’s best to take a bunch of small bills unless you plan on buying higher priced items.  After haggling down a price it would feel like a slap in the face if you asked the vendor to break a $50.
  • Above all, remember that it takes time to find treasures.  You can’t go into a flea market expecting gems to fall into your purse.  You need to put the time in.  Sift through tables, talk to vendors, hear their stories and get intrigued.  Who knows maybe you’ll find something worth a lot of money or meaning to you.

liveseasoned_spring2014_$17fleamarket-3

Here’s a final rundown of how I spent my dollars:

  • mini spoon $3
  • Webster’s Dictionary $1
  • little bowl $4
  • set of 4 juice cups $5
  • black and white bracelet $1
  • enormous piece of pizza $3
  • Grand Total: $17

Did you ever score something amazing at a flea market?  Do you have a favorite flea market? Tell us about it or show us your treasures on Instagram. Use the hashtags #liveseasoned #fleamarketfinds so we can see your scores.

Irish Soda Bread

Are you still recovering from yesterday? I must admit, it isn’t a holiday that we celebrate in any special way, except that every March I get the urge to bake a loaf of soda bread and drink a Shamrock shake*.

liveseasoned_spring2014_sodabread_baked_wmFor the longest time I baked a basic soda bread sometimes with raisins sometimes without, either way not giving it much thought. Then I tasted an out-of-this world loaf from La Farine in Oakland, and ever since I’ve been on a mission to recreate it. La Farine’s version contains caraway seeds (something I never thought to include), raisins, and, at least to my tongue, it tasted sweeter than what I was accustomed to.

I haven’t been able to find a recipe for their bread, so I’ve made do with sampling from recipes I’ve found online. Today’s recipe is a variation of one found on Whipped. And remember, we usually include some tips and tricks at the end of the recipe, so read it in its entirety before starting.

Ingredients

  • 4 cups flour
  • 1/3-1/2 cup sugar
  • 1 Tbsp baking powder
  • 1/2 tsp baking soda
  • 1 tsp salt
  • 1 Tbsp caraway seeds
  • 1 1/2 Tbsp orange (or lemon) zest
  • 3/4 cup raisins
  • 3/4 cup cold butter
  • 1 cup plus 2 Tbsp buttermilk
  • egg wash: 1 egg + 1 Tbsp water + pinch of salt


Instructions

  • Preheat the oven to 350F and line a baking sheet with parchment paper or a silicone mat.
  • In a large bowl, whisk together the flour, sugar, baking powder, baking soda, and salt. Stir in the caraway seeds, raisins, and zest.
  • Cut your butter into 1/2 inch segments and add it to the dry ingredients. Using a pastry cutter or the paddle attachment on a stand mixer, incorporate the butter until the mixture becomes mealy.
  • Add 3/4 cup of the buttermilk, missing it in for about 30 seconds. Scrape down the bowl, making sure to incorporate the dry ingredients that remain. Add enough additional buttermilk until the dough holds together. I used the full quantity of buttermilk, but you may use more or less depending upon humidity and how arid your ingredients are.
  • Turn the dough out onto a lightly floured surface and form into two evenly-sized disks. Score the loafs into quarters and brush  with the egg wash.
  • Bake the bread for 20-25 minutes, it should be a light brown with a shiny finish when done.

Tips and Tricks

  • If you don’t have buttermilk, you can substitute with regular milk and 1 Tbsp white vinegar or lemon juice. Mix it together and let it stand for 5 minutes before using in the recipe.
  • The original recipe called for 1/3 cup sugar, but in trying to recreate the sweetness of La Farine’s bread, I increased it to 1/2 cup. Either will work depending upon your preference.
  • The original recipe called for orange zest. I would have loved to use it, but alas, I didn’t have any fresh citrus in the house. I did, however, have some dried lemon rind that I rehydrated and used. It was delicious, but I’m craving another loaf with the orange zest.
  • Sarah here: If you’re like me and you don’t own a pastry cutter or stand mixer, hold a butter knife in each hand and cut in the butter that way.

Soda bread is such an easy bread to make, no waiting for the dough to rise or kneading required. It’s delicious hot from the oven, and even better with a pat of butter. If you have the urge to bake, I hope you’ll give this recipe a try!

*Back to the Shamrock Shake. I’m not talking about this disgustingly sweet new version that looks to be 90% neon green syrupy goop, but the old one of my childhood that was a perfectly minted shake (and even if it wasn’t made from 100% ice cream, milk, and mint, it was a good imitation). This may be the year I finally break down and make my own. [insert tiny Sarah on your shoulder chanting dooo it, dooo it!] 

Spring Beer Sampler


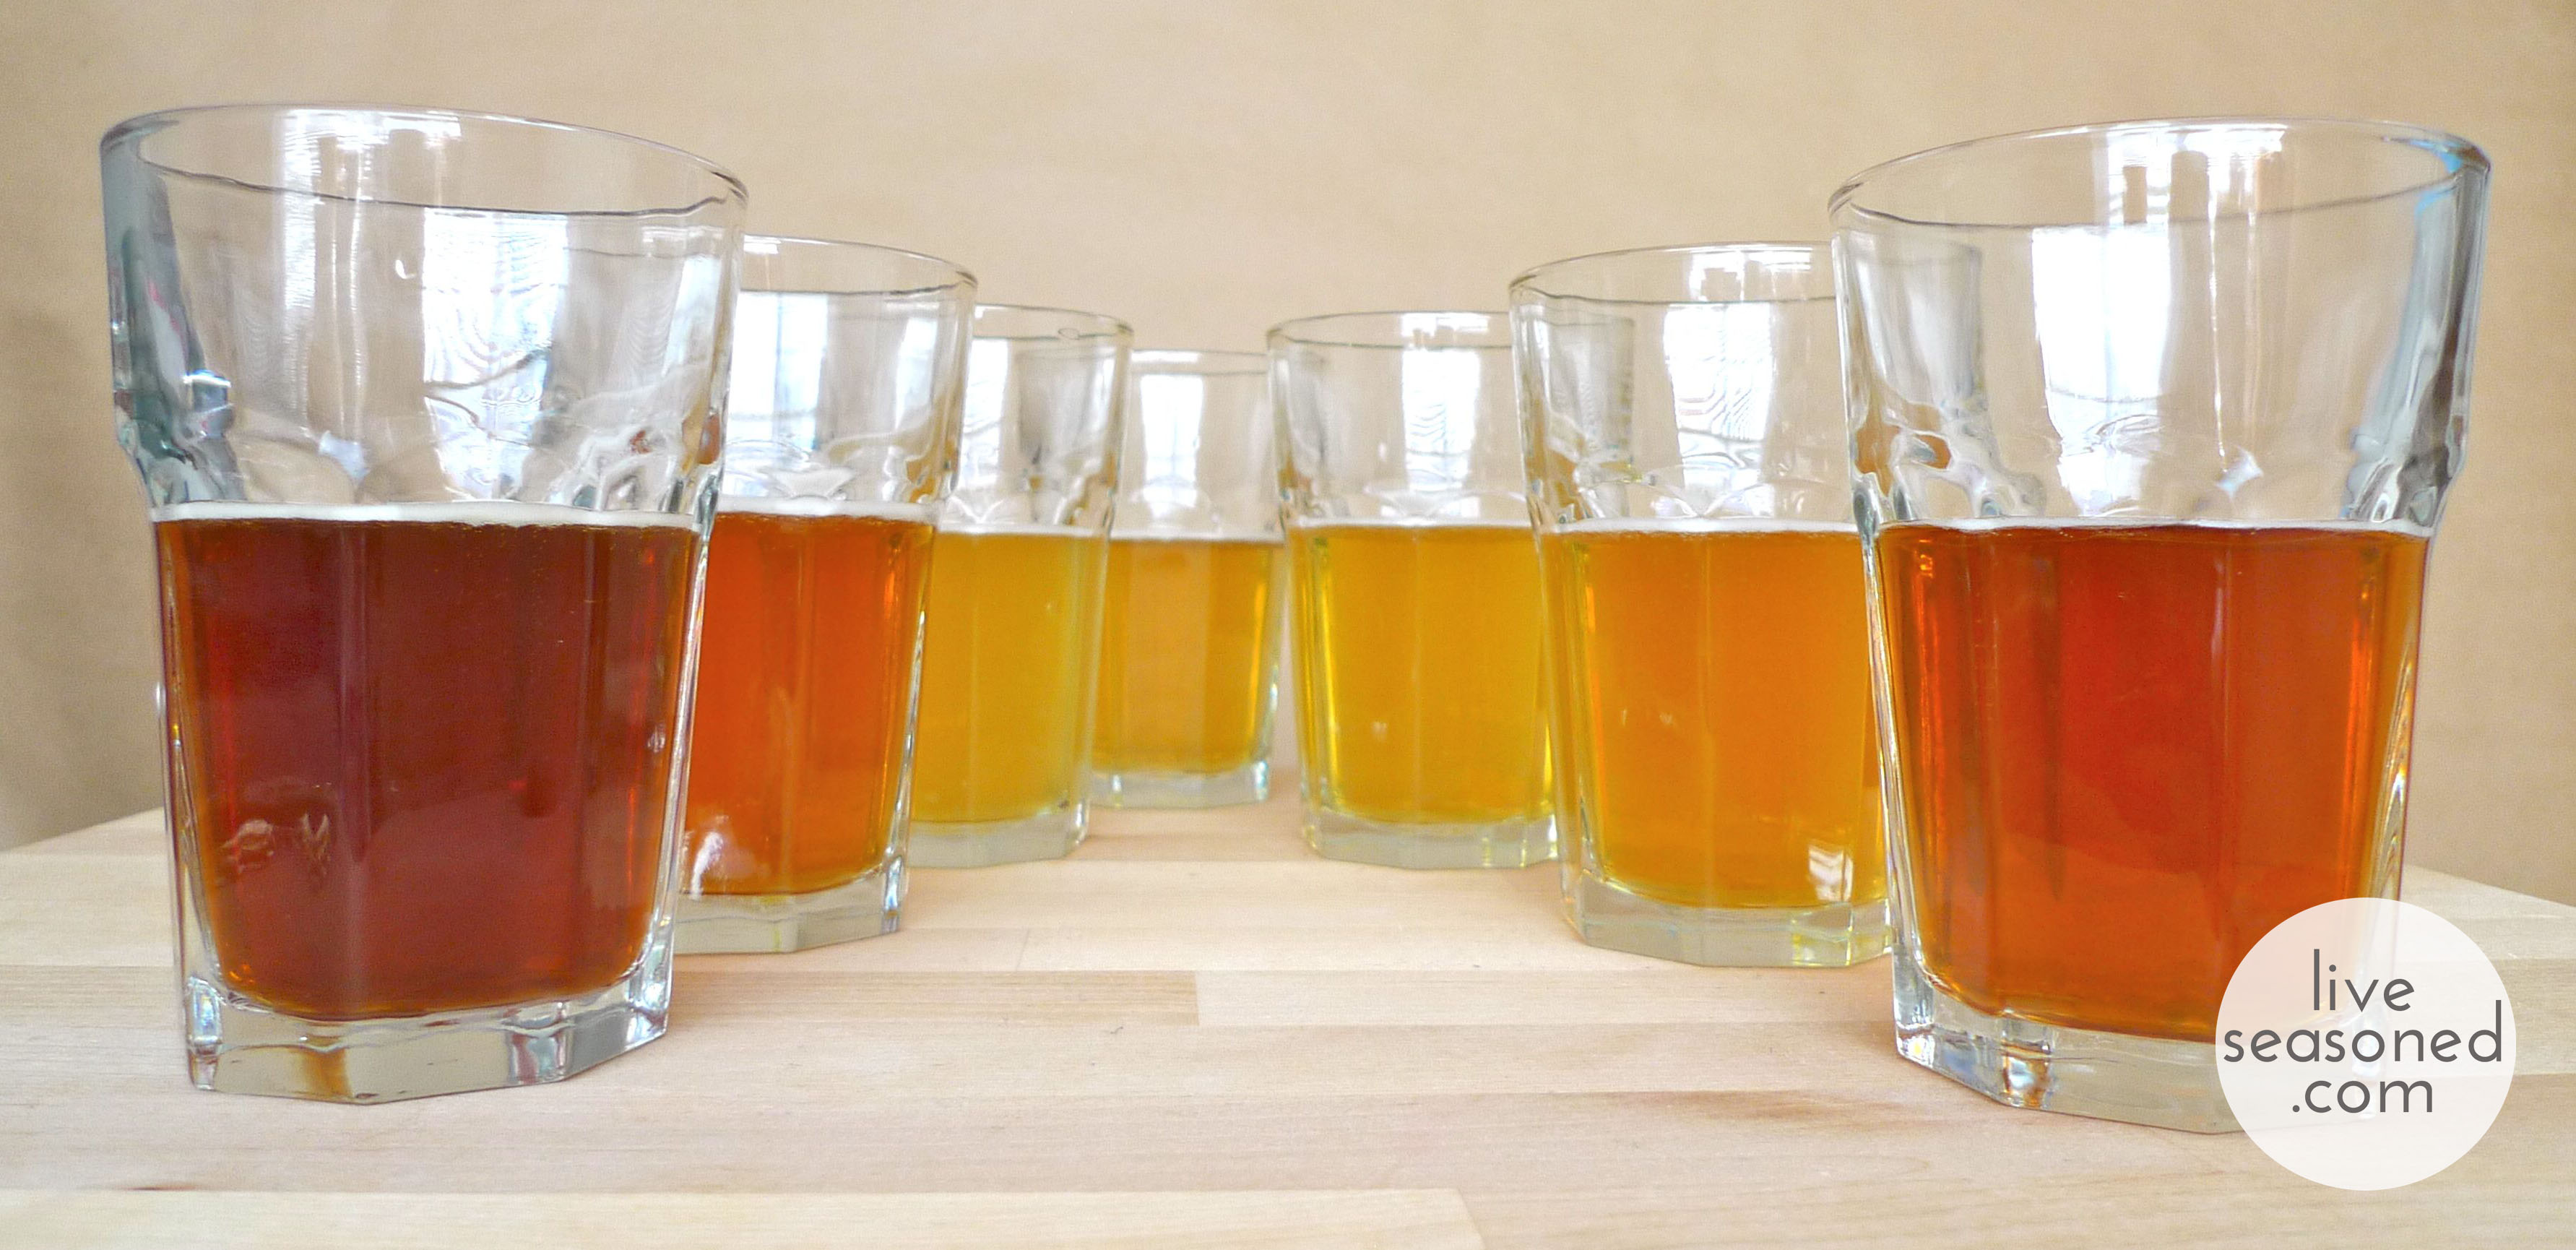
liveseasoned_spring2014_beer_glasses2_wmTop ‘o the mornin’ to ya! Happy St. Patricks Day.  Will you be sipping on a green beer today?  Katie and I agree that drinking beer with your friends is always in season.  Today we’re sharing our spring sampler picks and urging you to go grab yourself a sixer.

I’m more likely to order a beer than a mixed drink or a shot, but sometimes I’m at a loss for what to order.  I find myself sticking to the tried and true (Yuengling anyone?), which always taste great, but fail to surprise and excite my tastebuds like they did in the past.  If this sounds familiar, why not try sampling a six pack of new-to-you brews?  That’s what the Seasoned gang did this weekend and we were not disappointed.  We learned a lot about the various beers and our own tastes.  We also wrote down our views and opinions of each hoping to pinpoint our preferences for future bar and bottle shop visits.

If you were following our Instagram feed, you probably noticed that there was a meeting of the Seasons last week when Katie and her gang were on their roadtrip. Minutes after they settled in, we paid a visit to the  Weaver Street Market, Carrboro’s co-op, to browse for beers.  Other than ordering a flight of beer in one of our favorite PA breweries, we have never sampled a variety of beers in one go at home. That said, we are amateurs when it comes to setting up a tasting, and we went with our guts when it came to making our selection. We scanned the shelves for both spring inspired and local beers and walked away with a great selection brewed in North Carolina, Delaware, Pennsylvania and Maine. Side note from Katie: In addition to the spring brews, I threw in the Sly Fox Christmas Ale as the rogue out-of-season beer because I’m in love with it and wanted to see what Sarah thought. 

liveseasoned_spring2014_beersampler-1

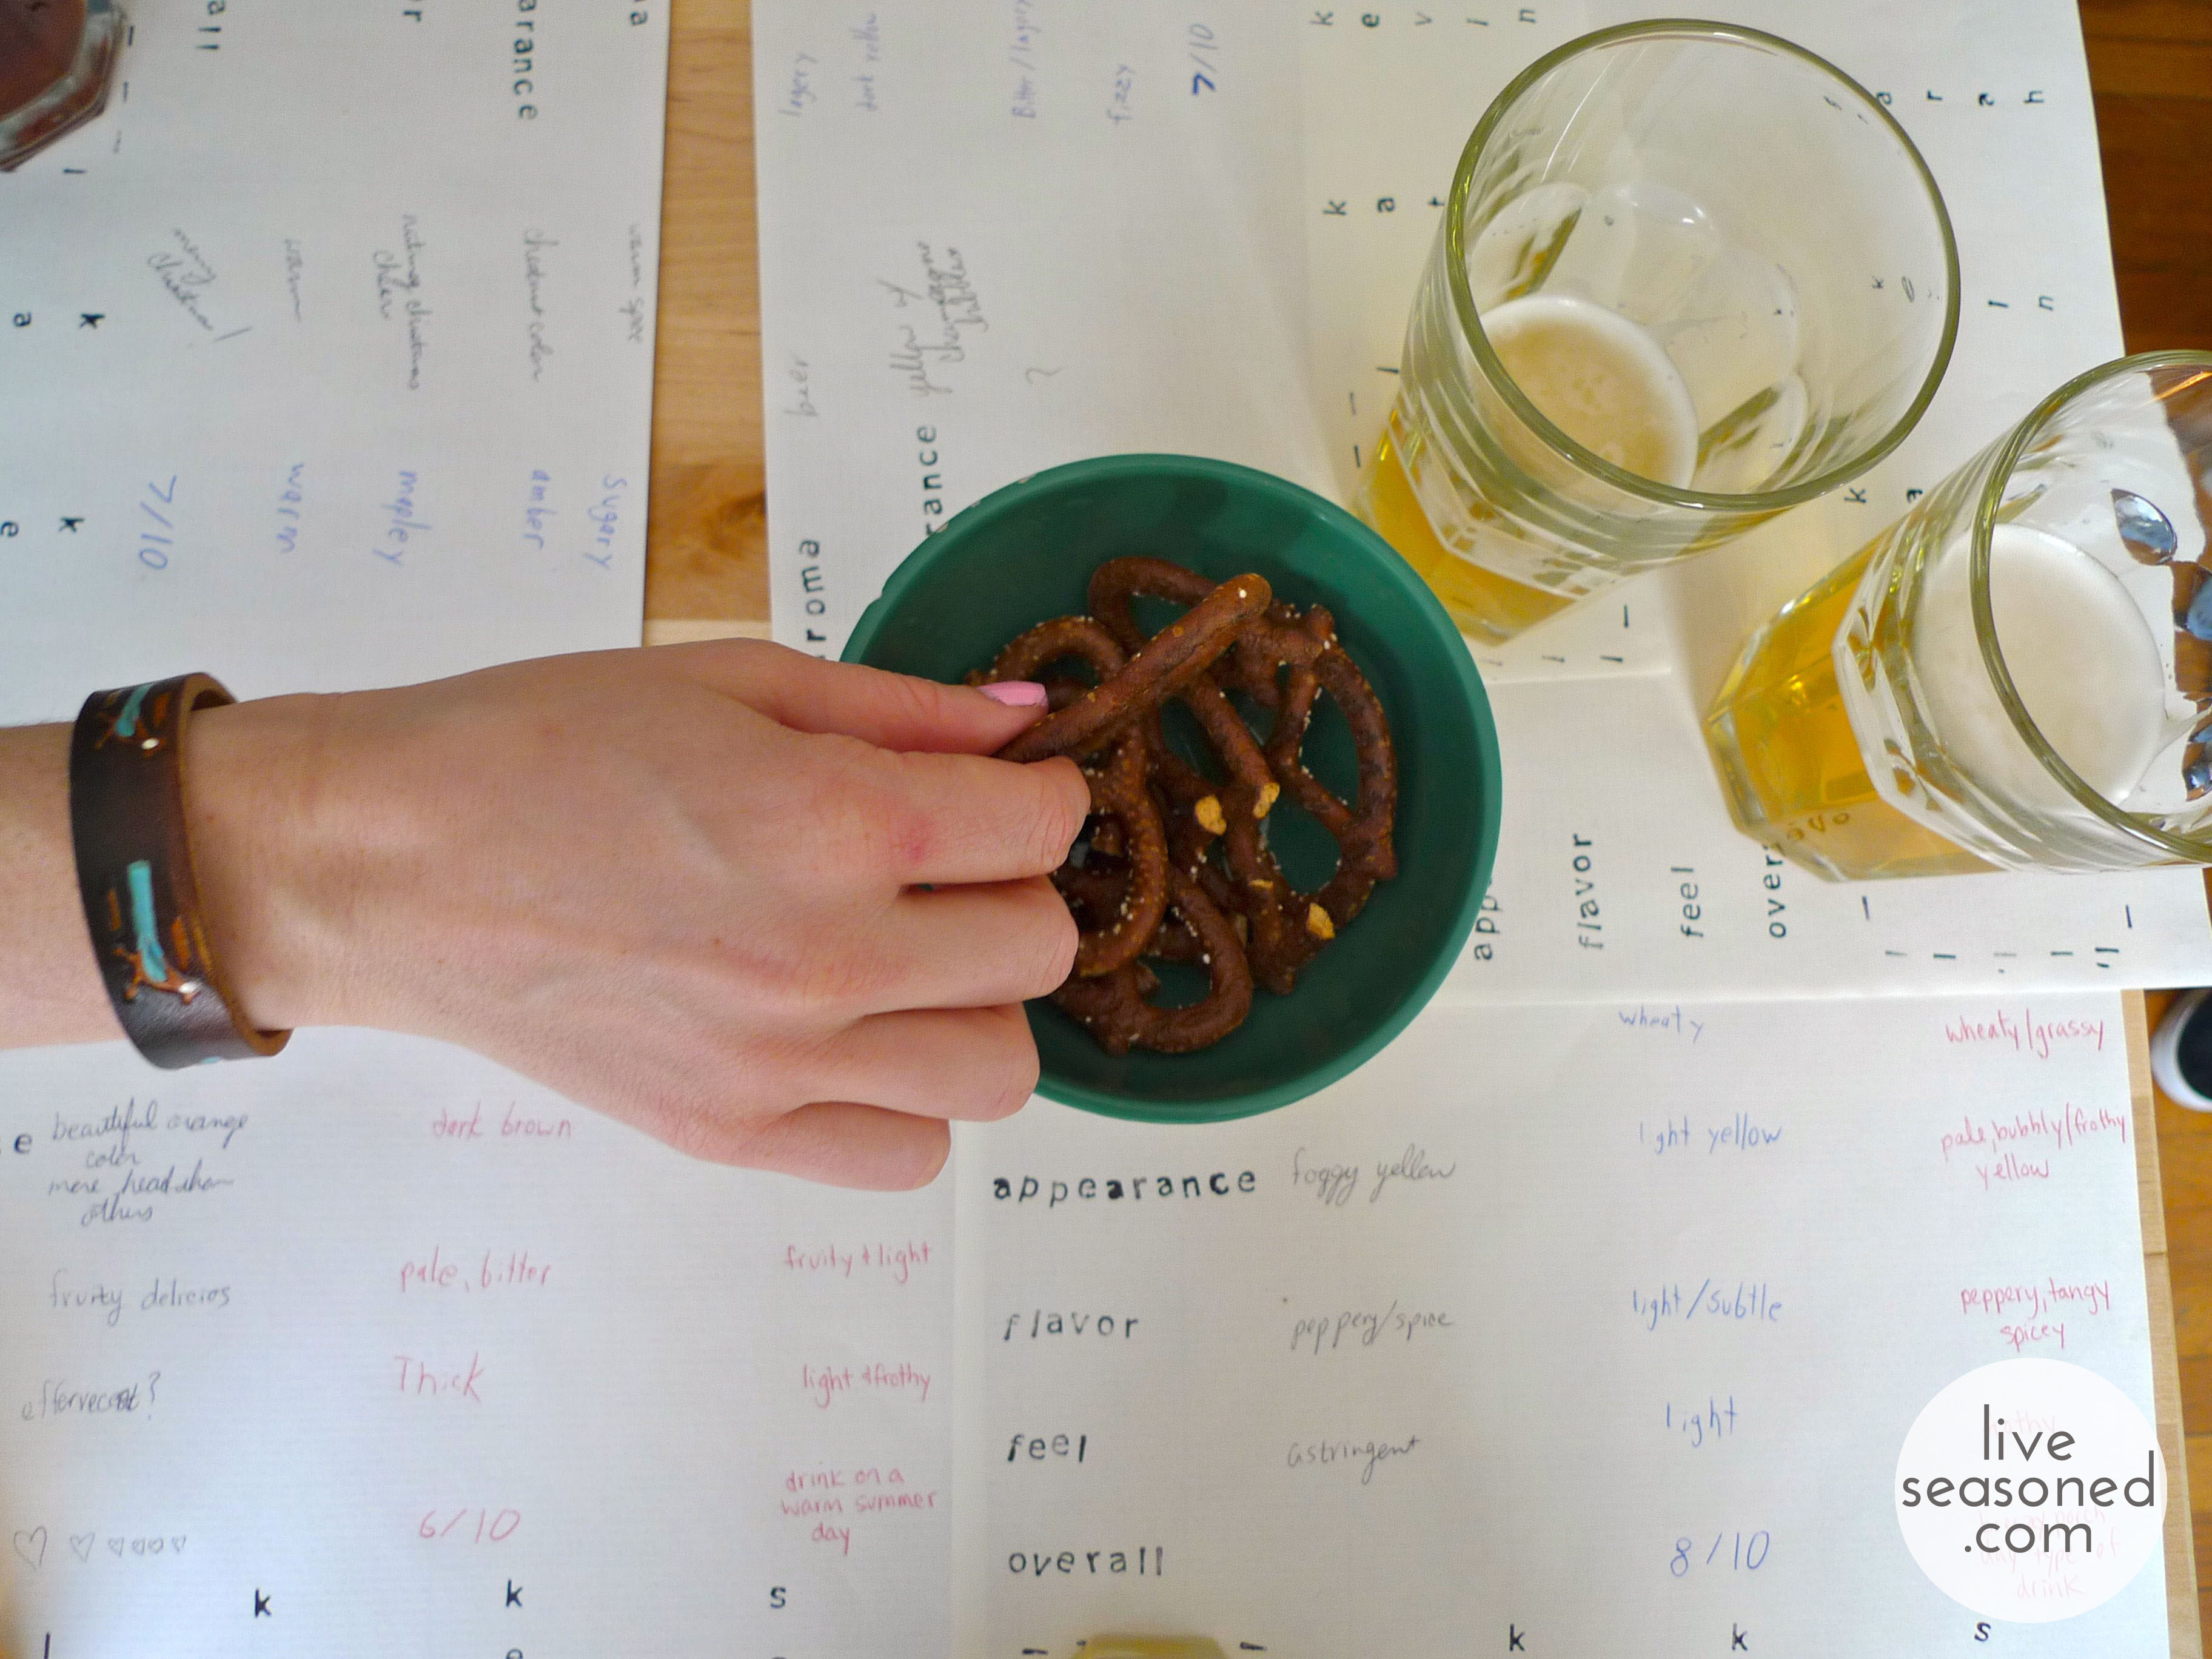
We set up a blind tasting to ensure we weren’t judging our brews by their labels.  If we were, Green Man and Sly Fox tied for the blue ribbon.  Being the Pennsylvania natives that we are, we made sure to include a bowl of pretzels to cleanse our pallet between beers. We also prepared score sheets so that we could keep track of our honest opinions of each beer.  We quickly realized we don’t posses the same vocabulary of experienced brew competition judges, but our simple notes were enough to categorize our tastes: Kate and Sarah on one end and Kevin on the other.

liveseasoned_spring2014_beersampler-1-2

Our Picks:

Carolina Blonde Cream Ale by Foothills Brewing -NC

Carolina Blonde was everything the bottle said it should be.  Clean, refreshing, rich, golden and unmistakably smooth.  We all agreed this smelled like beer.  That’s how articulate we are.  This beer was so smooth it was almost like drinking water.  It was good, but I wouldn’t say it was flavorful and on that same note it had really clean and refreshing qualities.  I commented, ‘replace your water with this,’ and I meant it.  It’s really easy to drink and it seems hydrating at the same time. Katie here: when I read Sarah’s water comment during the tasting, I laughed thinking she meant that it was equivalent to water (flavor-less, color-less, low in alcohol content, etc ), but after reading her explanation, I understood what she meant. This beer fell a bit flat for me, as Sarah said, it wasn’t as “flavorful” as the other more creative picks on the list, but it wasn’t necessarily brewed to have the fruity and hoppy notes that the others do, so perhaps this is an unfair comparison? 

Namaste by Dogfish Head Brewery -DE

Namaste is a white beer brewed with orange slices, lemongrass, coriander and peppercorns.  White beers and wheat beers are very similar, which is why Kevin loved this as much as the Weeping Willow Wit.  Namaste is a beautiful golden brew with a very fragrant aroma.  Kate thought it tasted like tea, Kevin like wheat and I like perfume.  I often taste what I smell so in this case the aroma was too overpowering for me, but for those of you that enjoy fruity, crisp, wheat beers, cheers to you!

Piercing Pils by Dogfish Head Brewery -DE

Piercing Pils is a Czech- style Pilsner brewed with pear juice, pear tea and Saaz hops.  Pilsners are hoppy, which translates to a spicy or floral aromatic flavor.  We all noticed a lemony-fresh scent along with hints of spring in this beautiful orangey golden beer.  Again Katie and I tasted the same peppery hops, while Kevin tasted the opposite: a lemony and light flavor, which was actually the pear ingredients coming through.  If you like a spicy and fragrant beer, this ones for you.

Rambler Spring Ale by Green Man Brewery -NC

Kate and I both fell in love with the beer immediately because of the label, cap, and brand, and it warmed our little tastebuds to know that it was actually one of our favorites in the blind taste test.  Kate and I both smelled orange blossom and Kevin and I also smelled lots of hops.  Rambler is a Pale Ale, which means there’s a balance of both malt and hops.  The Rambler features British malt and American hops with a floral undertone.  Kevin despises Pale Ales so it’s no wonder he didn’t dig this brew, but Kate and I on the other hand loved it.  Kate’s final assessment was ‘double love’ while mine was ‘drink this in the woods or around a campfire.’

Christmas Ale by Sly Fox -PA

We all agreed that this rich chestnut colored ale smelled exactly like Christmas.  Scents of clove, ginger, all spice, cinnamon and nutmeg translates into warm coziness for the nostrils.  Kate thought it tasted like nutmeg and Christmas cheer and while I had never tasted Christmas cheer, I thought it had a spicy, but mainly sweet, warm and maple syrup flavor.  We all agreed it made us feel warm and cozy inside, which is exactly what this ale intends.  If you missed Katie’s earlier note, we threw this one into the mix because she loved it to the moon and back and she had to pass it on and I’m oh so glad because it transported me right back to December. Katie here: I didn’t discover this Christmas Ale until after the season, but when I opened my first can of it, I was blown away by the spicy aroma, and I had one of those weird smell-induced memories that took me back to buying lebkucken in the Christmas markets in Germany. 

Weeping Willow Wit by Mother Earth Brewing Co. -NC

A Wit is a Belgium Wheat Ale that uses at least 25% of wheat malts.  The Weeping Willow Wit has a low hop bitterness paired with orange peels and coriander, which explains why Katie and I both thought it tasted peppery and spicy.  Kevin liked the light and subtle taste, which can be explained by his love of spice and distaste for bitterness (which this beer is not) making this one of his favorites.

Simco Spring Ale by Peak Organic Brewing -ME

This was another favorite of both Katie and I, while Kevin, the pale ale hater, thought it tasted bitter.  We all loved the look of this pretty orange brew and the flowery and sweet scent lulled us into a spring daydream.  Katie and I both described the flavor as fruity and light.  Katie even went so far as to describe the feel as effervescent, which is why we gave her the master judger award. Katie: a couple of days after the test, I’m still thinking about this beer! At the time I tasted it, I picked up on a distinct light and fruity taste, and scouting around online, I noticed that it was described as having “piney” and fruity notes, which is exactly right! There was a taste that I couldn’t describe when sampling, but it is definitely that hint of pine. Just as Sly Fox was so perfectly Christmas, this one is spring in a bottle. On a sadder note, maybe I was delirious from all of the road-trip driving, but throughout our taste test, I was sure that this one was called “Sycamore” Spring Ale, and I loved it all the more for having such a perfect name so I was bummed when I realized my mistake… and now I’m hoping that someone out there will brew up a batch of Sycamore Spring Ale for me. 

liveseasoned_spring2014_beer_pretzels2_wmAfter sipping our sampler pack and reviewing our comment cards we all really got a feel for what types of beer we prefer.  Katie and I steer towards pale ales while Kevin likes wheats and whites.  Usually I feel sleepy when I drink at home, but the blind taste test added a whole other element to drinking beer after beer.  We chatted about each selection, singled Kevin out for his opposite tastes and had a much livelier time than if we were drinking the usual Yuengling.

Katie (ugh, again, I know): I second Sarah’s comment that this was a lot of fun! To do this test, we bought a variety 6-pack from the grocer. And I wanted to butt-in to Sarah’s post just one more time to justify that purchase and encourage all of you to go out and do the same. It’s slightly more expensive than buying a 6-pack of a single beer, but obviously much less expensive than if we were to buy packs of each of the beers tested here. The beginning of the season is the perfect time to do a little test like this. I sampled the now notorious Christmas Sly Fox when I picked up a winter sampler in January, and immediately I wished I had tried it sooner so that I could have enjoyed it all winter. After this tasting, I’m excited for warm evenings on the deck or in the garden with the Simcoe and Rambler spring ales!

What about you, have you tried any of the beers on our list? If so, what did you think? How do you pick new beers to sample? By their label? Or is your choice more informed?

In Season: Pi Inspired Links

PiPineapplePie

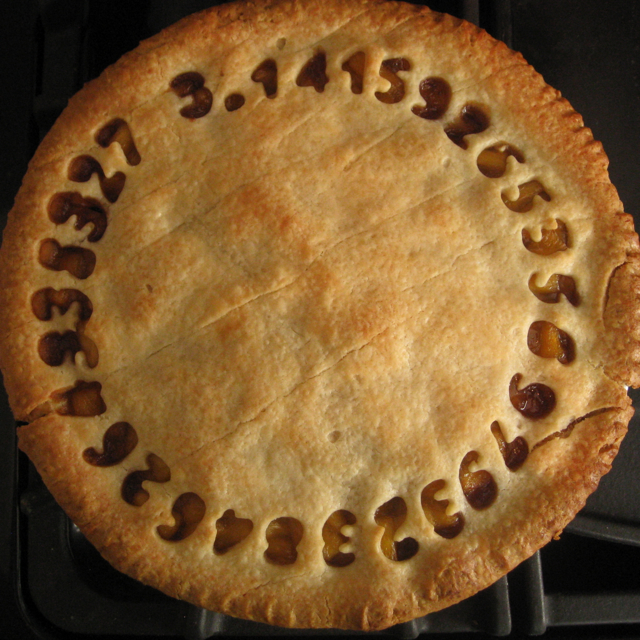
Happy Pi Day from Live Seasoned!  Today we have math and pies on the brain, well mostly pies.  Here’s a few pi (and pie) inspired links for your Friday, there’s still time to make it a Pieday!

New to this whole Pi Day business? Well it’s time to get your act together! Learn a bit about Pi here.

People compete to memorize Pi, which is a challenge since its decimal digits never end and never develop a repeating pattern. If you want to do the same and impress your friends, get this mug. Looking at it every morning is sure to help.

I must admit, it’s rare that I bake a pie, but I recently spent two months on a mountain with an amazing pie baker!  He whipped them up like it was nothing and he also told me about this sweet pie blog that his friend created.  Eating his pies was inspirational, but I still haven’t gotten around to baking one yet. Shh, don’t tell.

What is 3.14 backwards? PIE!

I’m more likely to make a pot pie or shepard’s pie.

One of my favorite Christmas presents this year was a really pretty white ruffled pie dish.  Everyone should own one.  Here’s a few other pretty pieces.

And how cute are these Easy As Pie dishtowels?

One of the best pies I’ve ever had was raw.  I remember my roommates and I all shared it until it was finished, which took about five minutes.

This split decision pie pan is a great idea, especially to accommodate for different diets;  now gluten-freebies and vegans can eat pie with the rest of the gang.

If you succeed at baking and eating a pie today, please order this t-shirt.

Need some more pie inspiration?  Check out our pinterest board for more recipes and cute pie supplies.


*Image via the Nerdista

Potato Stamp Tutorial

If you’ve never transformed a vegetable into a stamp now’s your chance.  It’s a quick and disposable option for those days when you want to create something without too much preparation and effort.  Potatoes are cheap and it’s likely that you have a couple living in your kitchen right now.  Sliced in half, potatoes are a perfectly blank canvas just waiting to be customized.  Cheap, easy and customizable means a perfect craft for groups so test out this tutorial at summer camp, in the classroom or on a rainy day.  We love stamping so much here at Live Seasoned that this is just the first post in a Stamping Series.  From time to time we’ll be back to teach you how to make stamps from just about anything from Styrofoam takeout containers to pencil erasers.  For now grab your spuds and let’s get starchy.

Supplies:

  • Canvas or Cardstock
  • Potato
  • Pen
  • Pairing Knife
  • Paint
  • Exacto Knife (optional)
  • Paper (optional)
  • Stencil (optional)

Instructions:

  • Pick a potato, any potato.  Slice your potato in half and boom, we’re already on our way to making two stamps.
  • First cut the desired letters or shapes out of card stock to create a stencil.  If you’re a confident cutter, by all means skip the stencil step.
  • Stick a stencil on each half of the potato.  The moisture will adhere the paper to the potato; it’s quite convenient.
  • Carve around each stencil, basically tracing its form onto the potato.  I actually did this step with a pen.  I poked it in a little bit and then dragged it along the outside of each stencil.  (I had planned on doing it with the exacto knife, but the pen worked so well and I figured it’s more likely that you have a pen handy.)  If you aren’t using a stencil then carve your chosen shape into the potato using a pen, exacto knife or pairing knife.
  • After your shape is carved into the top of the potato, take your pairing knife and slice into the potato about a quarter to a half-inch.  Drag it all the way around the circumference of the potato making sure not to cut all the way through, which would cut off the design you just created.  Then cut down into the potato on each edge of the design removing any excess potato.
  • You should be left with a raised design, in my case an X and an O.  Clean up the edges of your design with an exacto knife, pairing knife or even your fingernail.
  • Finally make a small mark on the skin of the potato to signify where the top and sides of your design is.  This will help if you want to line up your stamp or space it evenly on your project.
  • Next dip your stamp in paint or brush some directly onto the potato and stamp your heart out.  I found that it worked best to dip my spud in a thin layer of paint rather than a puddle.  Potatoes have a high water content, that mixed with paint can make them slip around on your paper or canvas.  I used an old tin can lid as my paint palette, which worked well as far as pushing around the paint and ensuring only a thin layer was being applied.

Each stamping will look a little different and that’s really the beauty of the potato stamp.  It’s not rigid and formal; it’s unique and playful.  I played around with both repetition and white space.  I could have decorated a dozen canvases, but I only had three.  As you can see, some of the stamps are more opaque than others.  I decided to use a paintbrush on some and others I left alone.  It’s all a matter of personal preference.

I had a great time playing around with these potato stamps and it made me excited to babysit or teach again so that I could pass on the fun.  I’m always looking for cheap and easy household crafts that I can create in a pinch to entertain bored kiddos.  Potato stamps are the perfect solution for creating decorations, invites, or gift wrapping for those random occasions or specific party themes.  I know I’d rather run to my kitchen rather than a craft store whenever I need a simple stamp.  I hope you’ll try this out next time you’re entertaining some art-lovin’ little ones or maybe you’ll throw your first ever ‘Buds and Spuds’ art party.  Be sure to instagram your results and tag @liveseasoned, we’ll love you forever.

*This post contains affiliate links

Smoothie Round Up

liveseasoned_spring2014_smoothies-feature

I’m a smoothie fanatic.  Growing up I’d make milkshakes almost every night of the week, but as I got older my tastes changed and I’ve moved on from ice cream and milk to fruit and juice.  Lucky for me there’s about a million more options in the smoothie department.  A big smoothie is a great substitute from breakfast or lunch.  I especially like to drink them at the start of a big road trip that way I’m not tempted to stop for fast food or right before work as I’m running out the door.

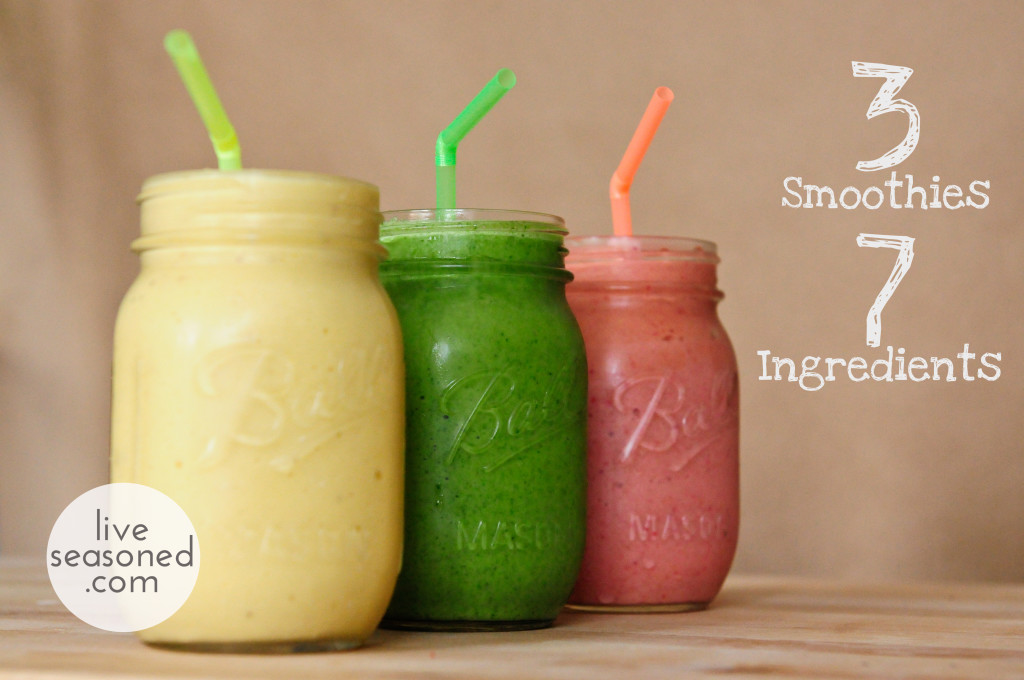
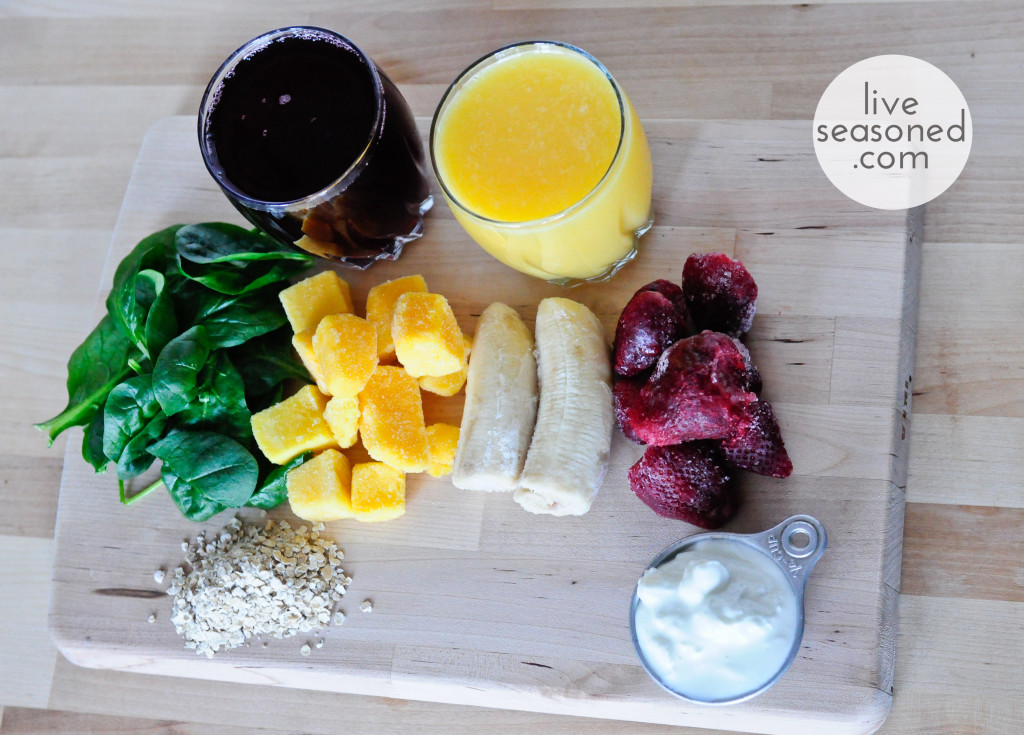
You don’t need to follow a strict recipe for smoothies so feel free to sub in or out any of the ingredients listed.  Today we’ll make three smoothies from seven ingredients (oats are optional).  As long as you have frozen fruit and juice, you’re good to go.  I also like to add greek yogurt and any little extras I have lying around like oatmeal, chia seeds, maca powder or hemp hearts.  Plug in your blender, grab a jar and a straw and let’s blend.

liveseasoned_spring2014_smoothies-1-2

Green Goddess

  • ¼ c yogurt
  • ½ c orange juice
  • 1 frozen banana
  • 2 big handfuls of spinach
  • 6 ice cubes

I drank a Green Goddess every day for a month last summer and I felt light and airy like a little fairy (hehe).  It’s cheap, easy and healthy.   If I’m away from home and there’s a blender where I’m staying I always pick up these four ingredients.  It’s a great way to save money on the road while staying healthy and energized. If you think this sounds like a weird combination, you’re in for a tasty surprise.  You can barely taste the spinach; it’s actually a tangy and sweet smoothie.

Be sure to clean your spinach well since it’s part of the dirty dozen (one of the most pesticide-laden fruits and vegetables) or buy pre-washed or organic spinach. I named it the Green Goddess because among the many benefits of spinach, it’s has a high vitamin A and C content.  Vitamin A is key for sebum production to keep hair moisturized; it’s also necessary for the growth of all bodily tissues, including skin and hair.  Vitamin C is imperative for the building and maintenance of collagen which provides structure to skin and hair, therefore this smoothie will keep you looking like a goddess.

liveseasoned_spring2014_smoothies-1

Berry Blend

  • ¼ c yogurt
  • ½ c cherry juice
  • ¼ c milk or water
  • ½ c frozen mangoes
  • 5 big strawberries

Strawberries and cherry juice blend together to make the perfect mix of sweet and tart in this smoothie.  I used 100% Cherry Juice from Trader Joe’s.  It’s deliciously strong, which is why I also added some milk, but feel free to sub in water (or coconut water), a non-dairy milk or another juice if you’re vegan.  If you go the water route, don’t worry the taste won’t suffer.  Cherry juice is a good source of antioxidants, it helps regulate blood sugar, and is a proven aid in exercise recovery.  It’s also a great source of melatonin, which regulates your body’s internal clock.  Strawberries also pack a punch.  They’re heart healthy, full of vitamins and good for your teeth.  Strawberries are a great source of polyphenols, a compound that inhibits the breakdown of starches in mouth, while also fighting the bacteria that contributes to gum disease and tooth decay. Pretty sweet, right?

liveseasoned_spring2014_smoothies-2-2

Sunrise Smoothie

  • ¼ c yogurt
  • 1 c orange juice
  • ½ c frozen mangoes
  • 1 frozen banana
  • big spoonful oatmeal (optional)

The Sunrise Smoothie is a mild fruity blend to start your day off on the right foot.  It will wake you up, help you get energized and give you a whole host of benefits without you even knowing it.  Orange juice is a great source of Vitamin C, which aids in collagen production and helps control free radicals that cause early aging.  OJ also lowers bad cholesterol, reduces inflammation and balances blood pressure.  Bananas are the most widely consumed fruit and for good reason.  There are too many benefits to mention here, but for starters, bananas help one overcome depression, reduce PMS symptoms and protect against muscle cramps.  Here’s an interesting study conducted by Oklahoma State University concerning new health benefits of mangoes, which include aiding in blood sugar regulation and reducing body fat.  Top it off with a scoop of oatmeal to add texture, fiber and protein and sip away.

I hope you enjoyed these simple smoothie recipes.  Smoothies are a cheap, easy and quick meal substitute if you’re constantly rushing around or just don’t have the energy to cook something up.  Stay healthy friends!

Energy flows where intention goes: Create Daily.

Whether you decide to focus your energy on your profession, home, health or anything in between, it’s important to create a little bit of something each day.  It’s nice to feel a sense of accomplishment at the end of the day instead of worry.  Don’t go to bed thinking I should have, why didn’t I or what if?  Lay your head down knowing that however your day played out, you created a little something for yourself.

I tend to be hard on myself when it comes to making and creating.  I have so many ideas floating around in my brain that I get down on myself when I don’t put them into motion.  Sometimes I intend to finish a huge project, but by the end of the day I’ve only ended up collecting the materials to begin, but that’s ok.  Creation takes time.  Being inspired to do something is a process, but it will feel better if you take a tiny step towards your goal, project or creation every day.

I’m sure you’ve heard the quote by Lao Tzu, “a journey of a thousand miles begins with a single step.”  Think back to your last big project at work, in the kitchen or at your crafting table.  Better yet, think about awful papers you had to write in school.  How much energy was wasted resisting?  Then you put pencil to paper and the first sentence emerged and you realized you can get through this paper and who knows you might even go on to live a happy and fulfilling life.  The crazy thing is, I find myself resisting projects that I know I’m going to enjoy creating.  It must be biology trying to protect me from the unknown-I can’t fathom another reason why time after time I tip toe into projects.  Once I begin, I take off at lightening speed and enjoy every second.  Whether it comes easy or there’s problem solving to be done-it’s a nice creative challenge.  So here’s me encouraging you to take off, just do it, create daily!

It could be something simple like a daily doodle of encouragement, a step or two of a larger project or a workout.  Maybe you want to cook dinner five nights a week or edit and organize your entire photo library.  Maybe you’ve been pining awesome DIYs or filling up your basket of clothes to be mended.  Whatever projects you’ve been putting off or shuffling around, here’s your cue. Go, make, create!  Do a little something every day and I promise you, you’ll feel a whole lot better by the time the end of the week rolls around.

Remember: creation doesn’t have to be material.  Maybe you created space to think by meditating for five minutes or muscles by pumping out ten pushups. Usually my creations are meals or even cups of tea and to do lists.  As long as you set aside a moment for yourself in which you can relax and feel inspired you’re beginning to create. Now go! Think! Make! Create!