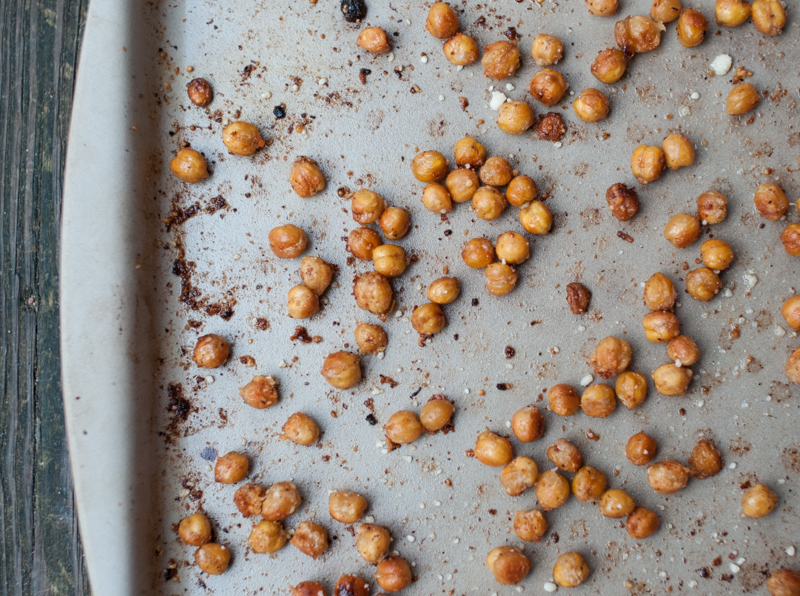
 I’m a big fan of crispy, salty snacks, but I feel pretty bad about myself when I eat an entire bag of kettle cooked chips. Maybe you don’t, which I applaud you for, and that case go open another bag while you read this recipe. I think these garlic and parmesan roasted chickpeas are the perfect substitute for potato chips because they provide the crunch and the salt that I’m craving, but they also pack some protein. They’re baked, not fried like chips, and really you could season them however you see fit. I recently kicked my chips and dip habit (thank you, thank you very much) and I found I’m baking these up quite often to satisfy my salt tooth. Is that a thing? It is for me at least.
Category Archives: snack
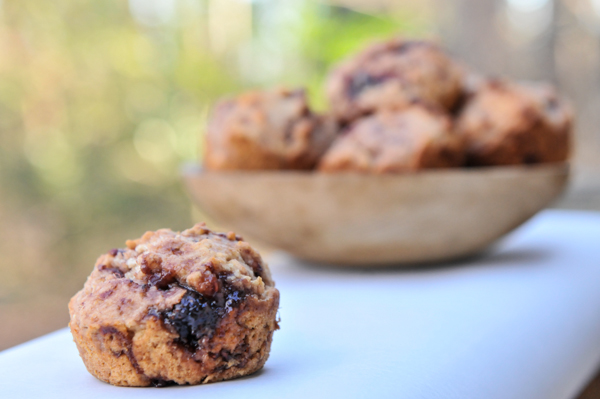
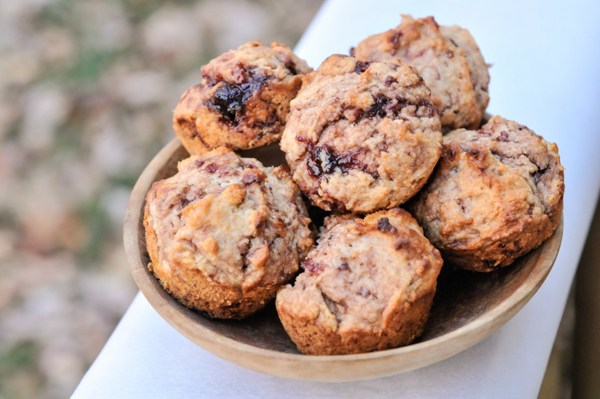
Almost Vegan Jam Muffins
A couple months ago, I was invited to a JAMboree hosted by a dear friend. She described it as, “a sweet swap and contest of sorts.” She had us all cook up a favorite jelly, jam chutney or conserve and bring eleven quarter-pint or half-pint jars of our entry to her home. She served wine as everyone had a taste of all the entries. After all the wine sipping and socializing all the guests voted on their favorite and a winner was chosen.
I’m not here to tell you I won. Before this, I had never canned solo. I’ve done it plenty of times in my mom’s or Katie’s kitchen, but never in my own little apartment. I was a little bit intimidate and overwhelmed by the possibilities. I went to the farmer’s market to purchase supplies and I came home with 12 pounds of onions. I was in a burger with blue cheese and onions phase. I decided to can caramelized onions, which I now realize was the most unexciting offer, but at the time I was really excited about to make a big batch of them. I cried. A lot. It was glorious. Anyway, I mailed in my entry because I couldn’t attend in person (you’ll see me at the 2nd annual JAMboree!) and a month later my mom gave me eleven jars of delicious and interesting jams to try. I had totally forgotten that I would be receiving jars of jam in exchange for my caramelized onion slop. I’m over my blue cheese burger phase and well into my what do I do with all this jam phase.
I intended on creating a vegan jam muffin recipe, but in my morning daze I added honey to the muffins. Technically honey isn’t vegan, which is why I hereby name this batter creation the almost vegan jam muffins! You could swap out the honey for maple syrup or another preferred sweetener, but I love them just the way they are. For the milk, I simply used almond milk; you can use whatever you prefer. Instead of adding an egg, I created a flax meal egg substitute, the easiest and most reliable in my experience.
Ingredients:
- 1 + 1/2 cup whole wheat flour
- 1/2 cup all purpose flour
- 1 TBSP baking powder
- 1/2 tsp salt
- 3/4 cup almond milk (or whatever milk you prefer)
- 1/4 honey
- 1/4 vegetable oil
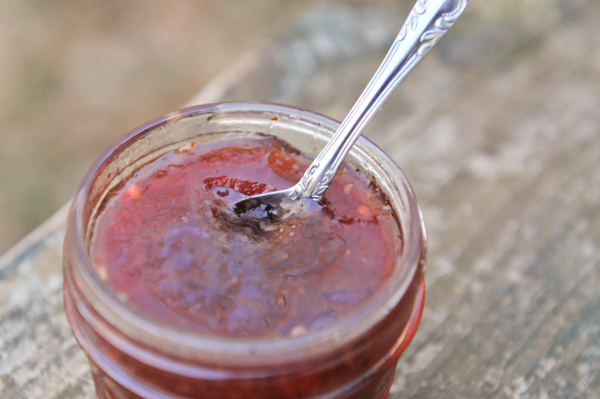
- 2/3 cup jam (I used a friend’s strawberry balsamic)
- 1 tsp vanilla extract
- 1 TBSP ground flax meal
- 3 TBSP water
The How:
- In a small cup stir 1 tablespoon of ground flax into 3 tablespoons of water and set aside. This will transform into your egg substitute.
- Preheat the oven to 350° and grease a standard-sized muffin tin.
- Combine the flours, baking powder, and salt in a large mixing bowl. In a separate bowl whisk together the milk, honey, vegetable oil and vanilla extract.
- By now the flax and water mixture should have a gelatinous texture resembling that of an egg. Incorporate the flax egg into the wet ingredients.
- Pour the wet ingredients into the flours and mix with a wooden spoon until just combined. Pour the jelly into the batter and stir just a few times. You want the jelly to appear in large swirls throughout the batter. Add some more jelly if you want sweeter muffins.
- Fill each muffin tin about 3/4 of the way. Batter should make 12-15 muffins.
- Bake for 16-20 minutes. Test by inserting a toothpick into the center of the largest muffin. If it comes out clean they are done. Remove the jam muffins from the tin and set on a wire rack to cool completely.
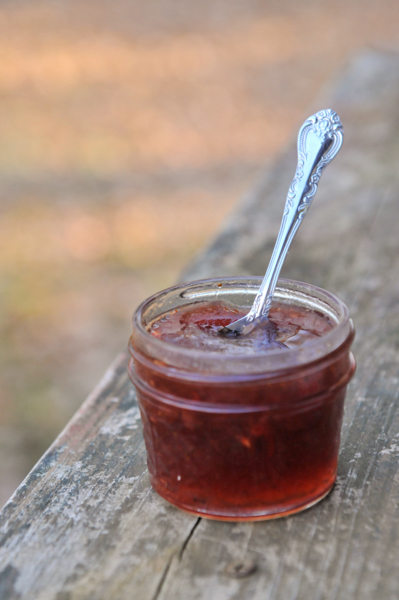
Enjoy with tea, coffee or juice 🙂 These almost vegan jam muffins are hearty enough for breakfast, but delicious enough for dessert too! The strawberry balsamic jam was SO tasty. I was tempted to add nuts or oats to the muffins, but I really wanted the jam to shine in this recipe and it really does. These whole wheat muffins have the perfect about of moisture and sweetness for a breakfast snack. Now that they’re all gone, I’m left wishing I had more strawberry balsamic jam!
Sampling Cheese from the Nibble Nook
We’re snacking on a lot of cheese this season. So far we’ve talked about our favorite way to eat a few staples, but today we’re going out on a limb and trying some new varieties!
There really are so many cheeses out there, and while I’m an adventurous eater, I often find myself sticking to a handful of cheeses that I know and love. Just walking up to the cheese counter is overwhelming ~ so many varieties, where do I even start? And then I would look at some of the prices and just shyly turn around and pick up my Cabot or Brie Supreme and go on my merry way. Or, that was the scene until I discovered Whole Food’s Nibble Nook!
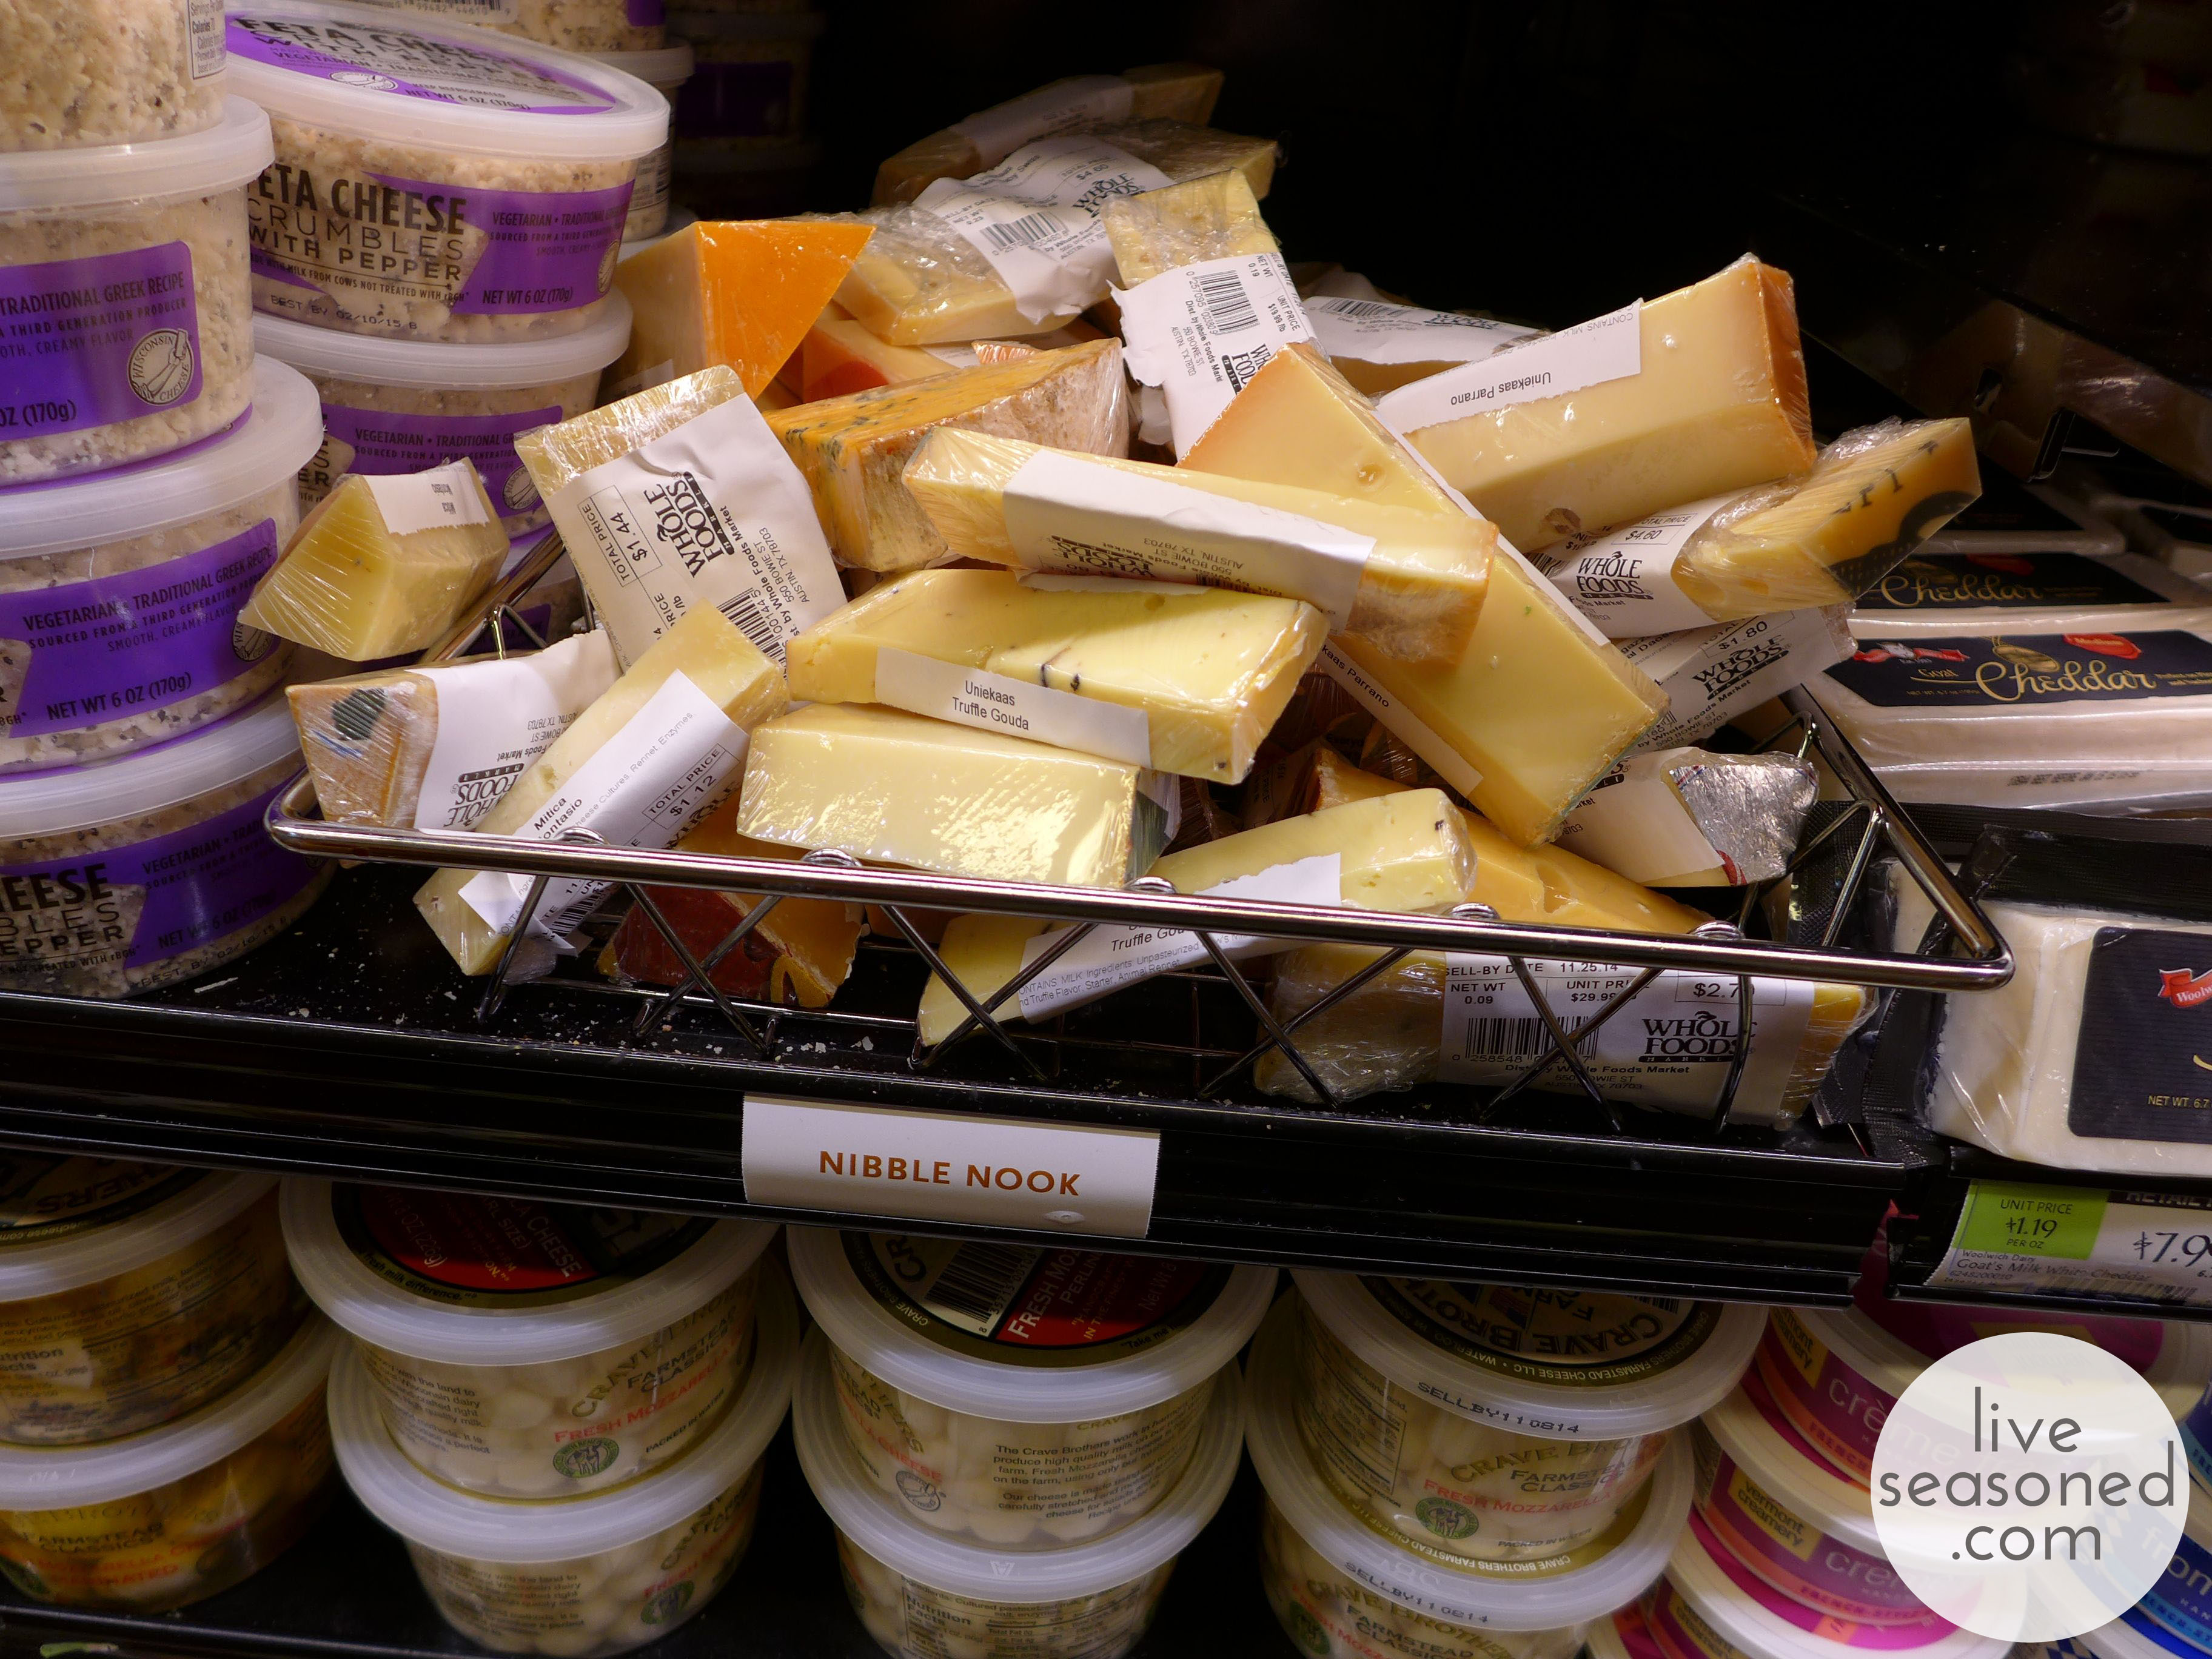
The Nibble Nook is a little basket of cheese ends/remnants (you can see it above tucked in between their off-the-shelf cheddar, feta, and mozzarella). My guess is that many grocers selling cuttings of large cheese wheels may have their version of a nibble nook. If you’re open to trying some new cheese and flexible as to the options available, the Nibble Nook is a great place to look. The selection within the basket is constantly changing as different cheeses are cut and as shoppers pick out their favorites. And the cuts are small, so while I would be hesitant to be a large wedge of a cheese that’s priced at over $20/lb, I’m happy to buy a small bit for nibbling.
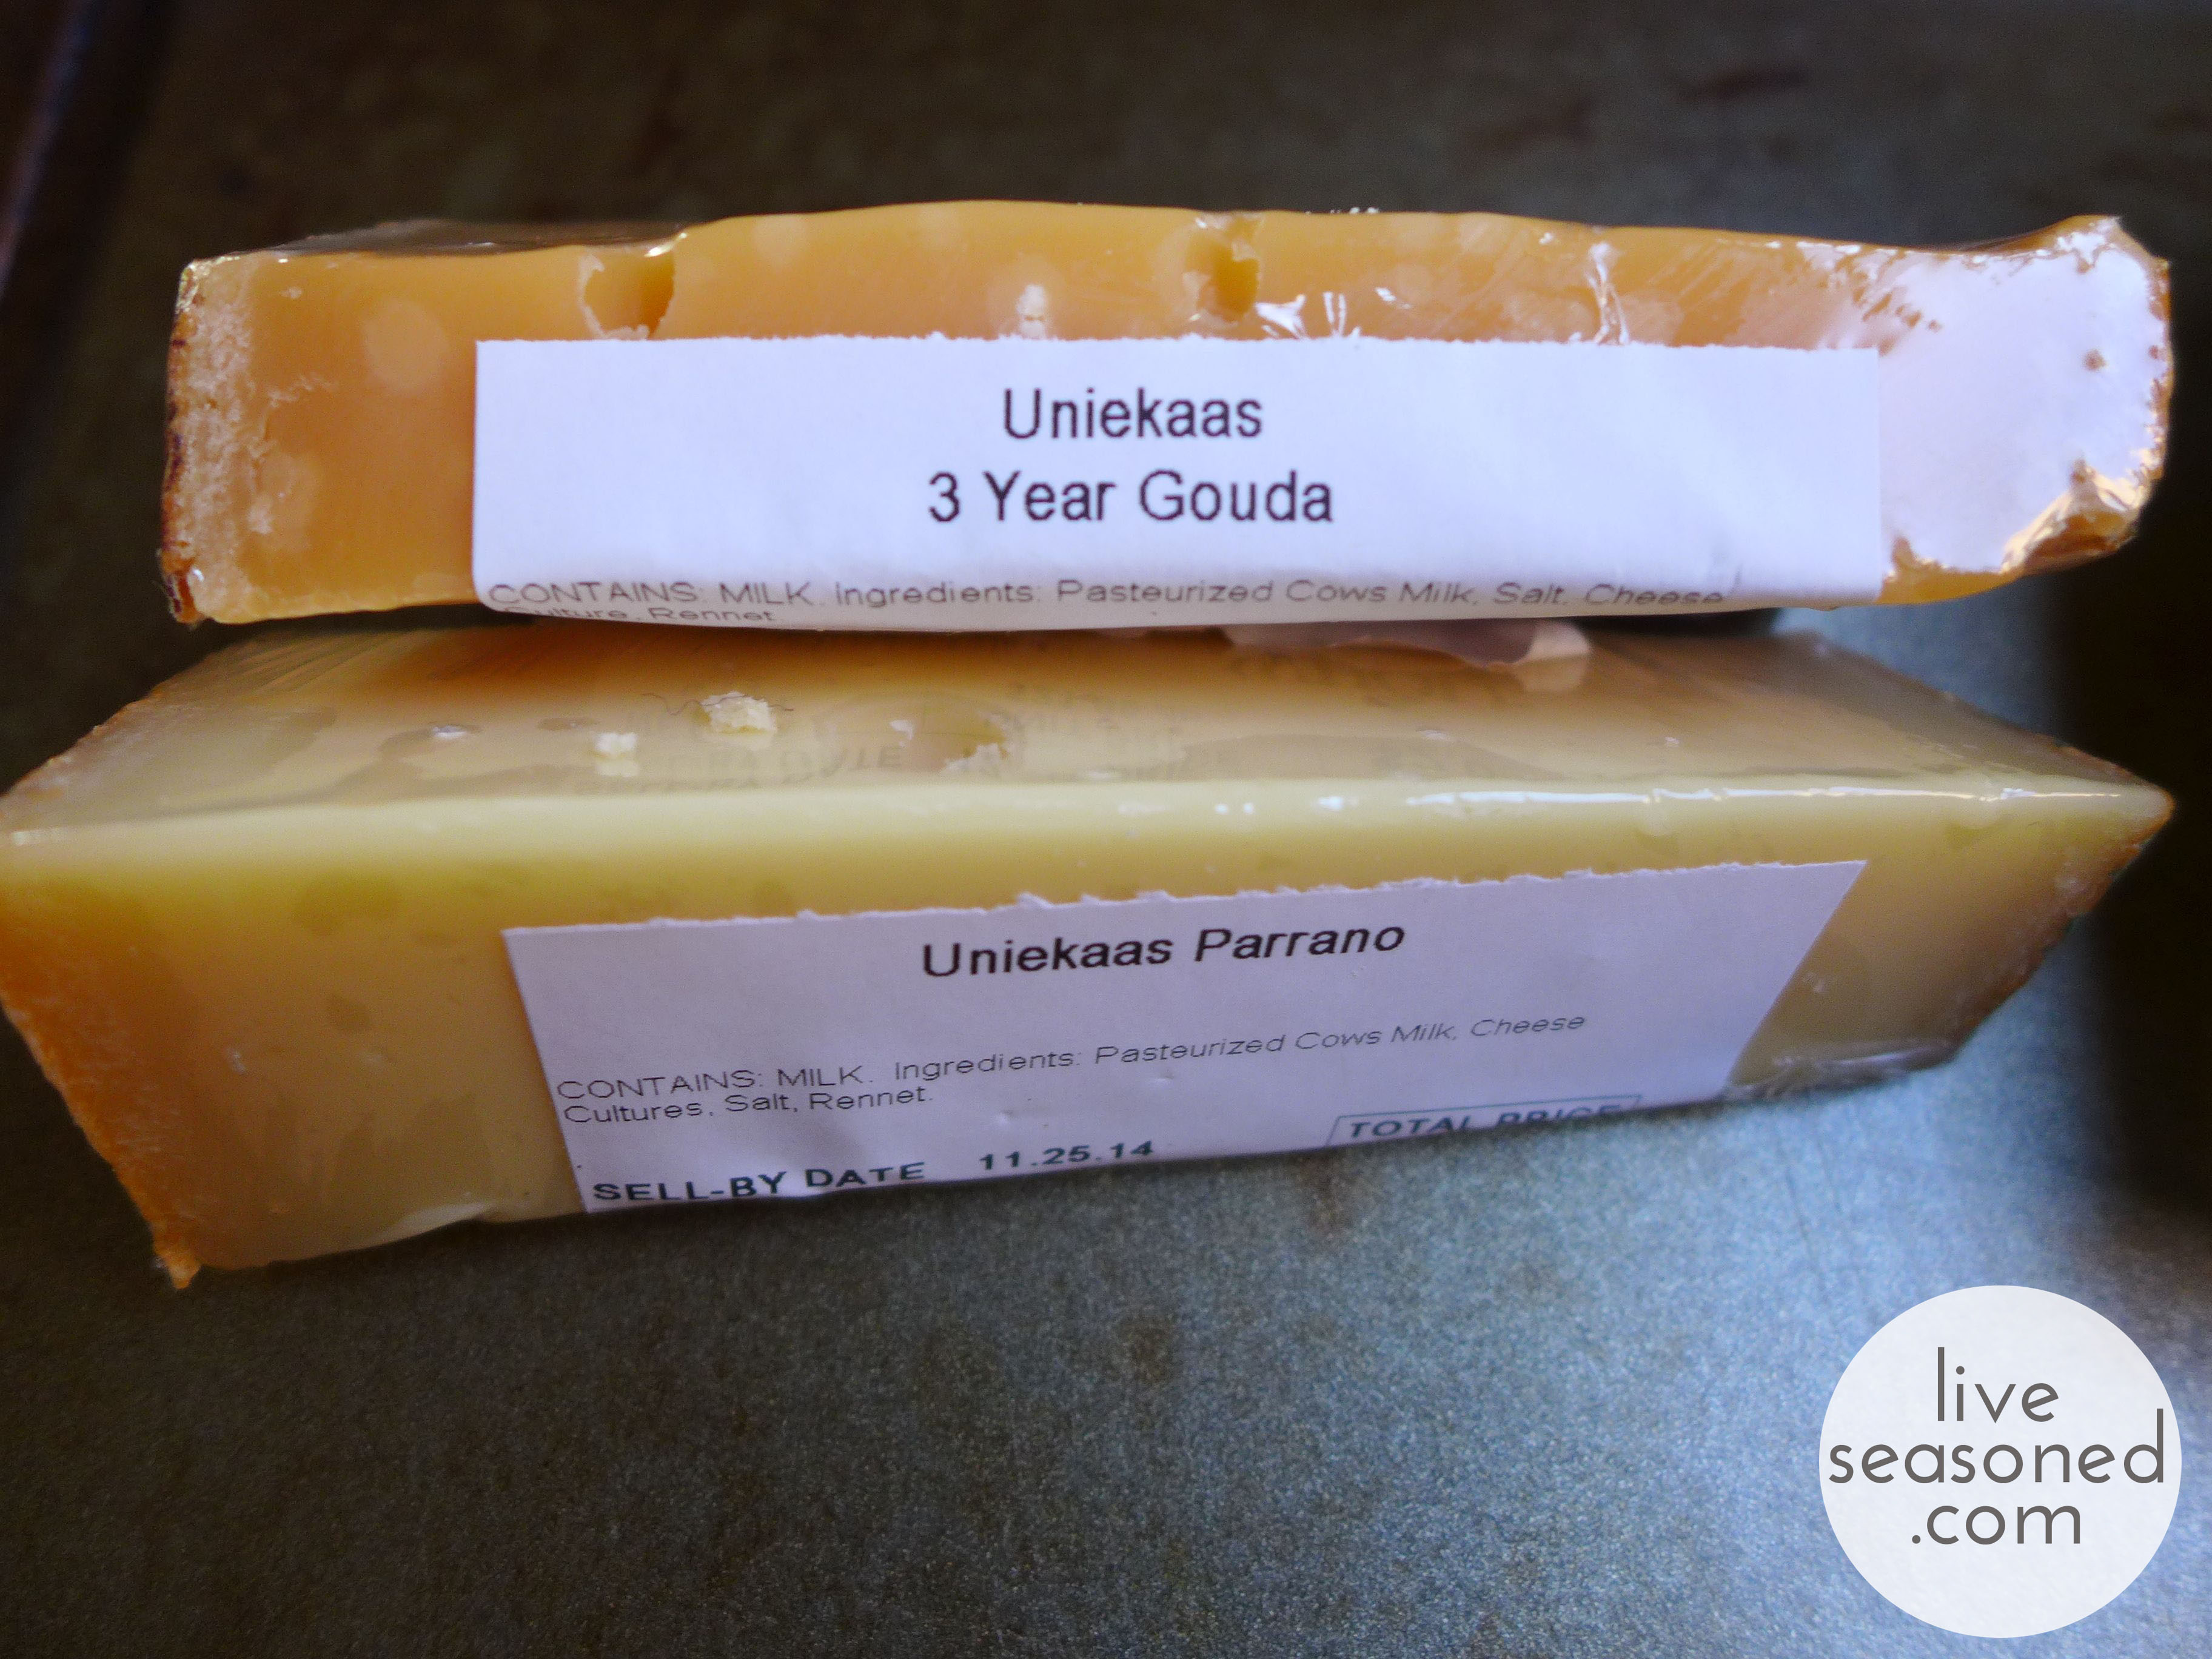
I always approach the bin with an open mind and pick out any cheeses that look promising (that’s every cheese), and right now I’m also sticking to only those made with pasteurized milk. On this particular visit, the bin was overflowing with two varieties of hard cheese from Uniekaas, a Dutch company: a 3 year Gouda and a Parrano. I’m sad to say, I had to pass on a beautiful looking cheese that had bits of black truffle throughout but was made with unpasteurized milk. From the labels, you can see that each of the cheeses I picked has a big price tag ($22 and $15 per pound), but the wedges are both close to a tenth of a pound, making it an affordable splurge (is that a thing?).
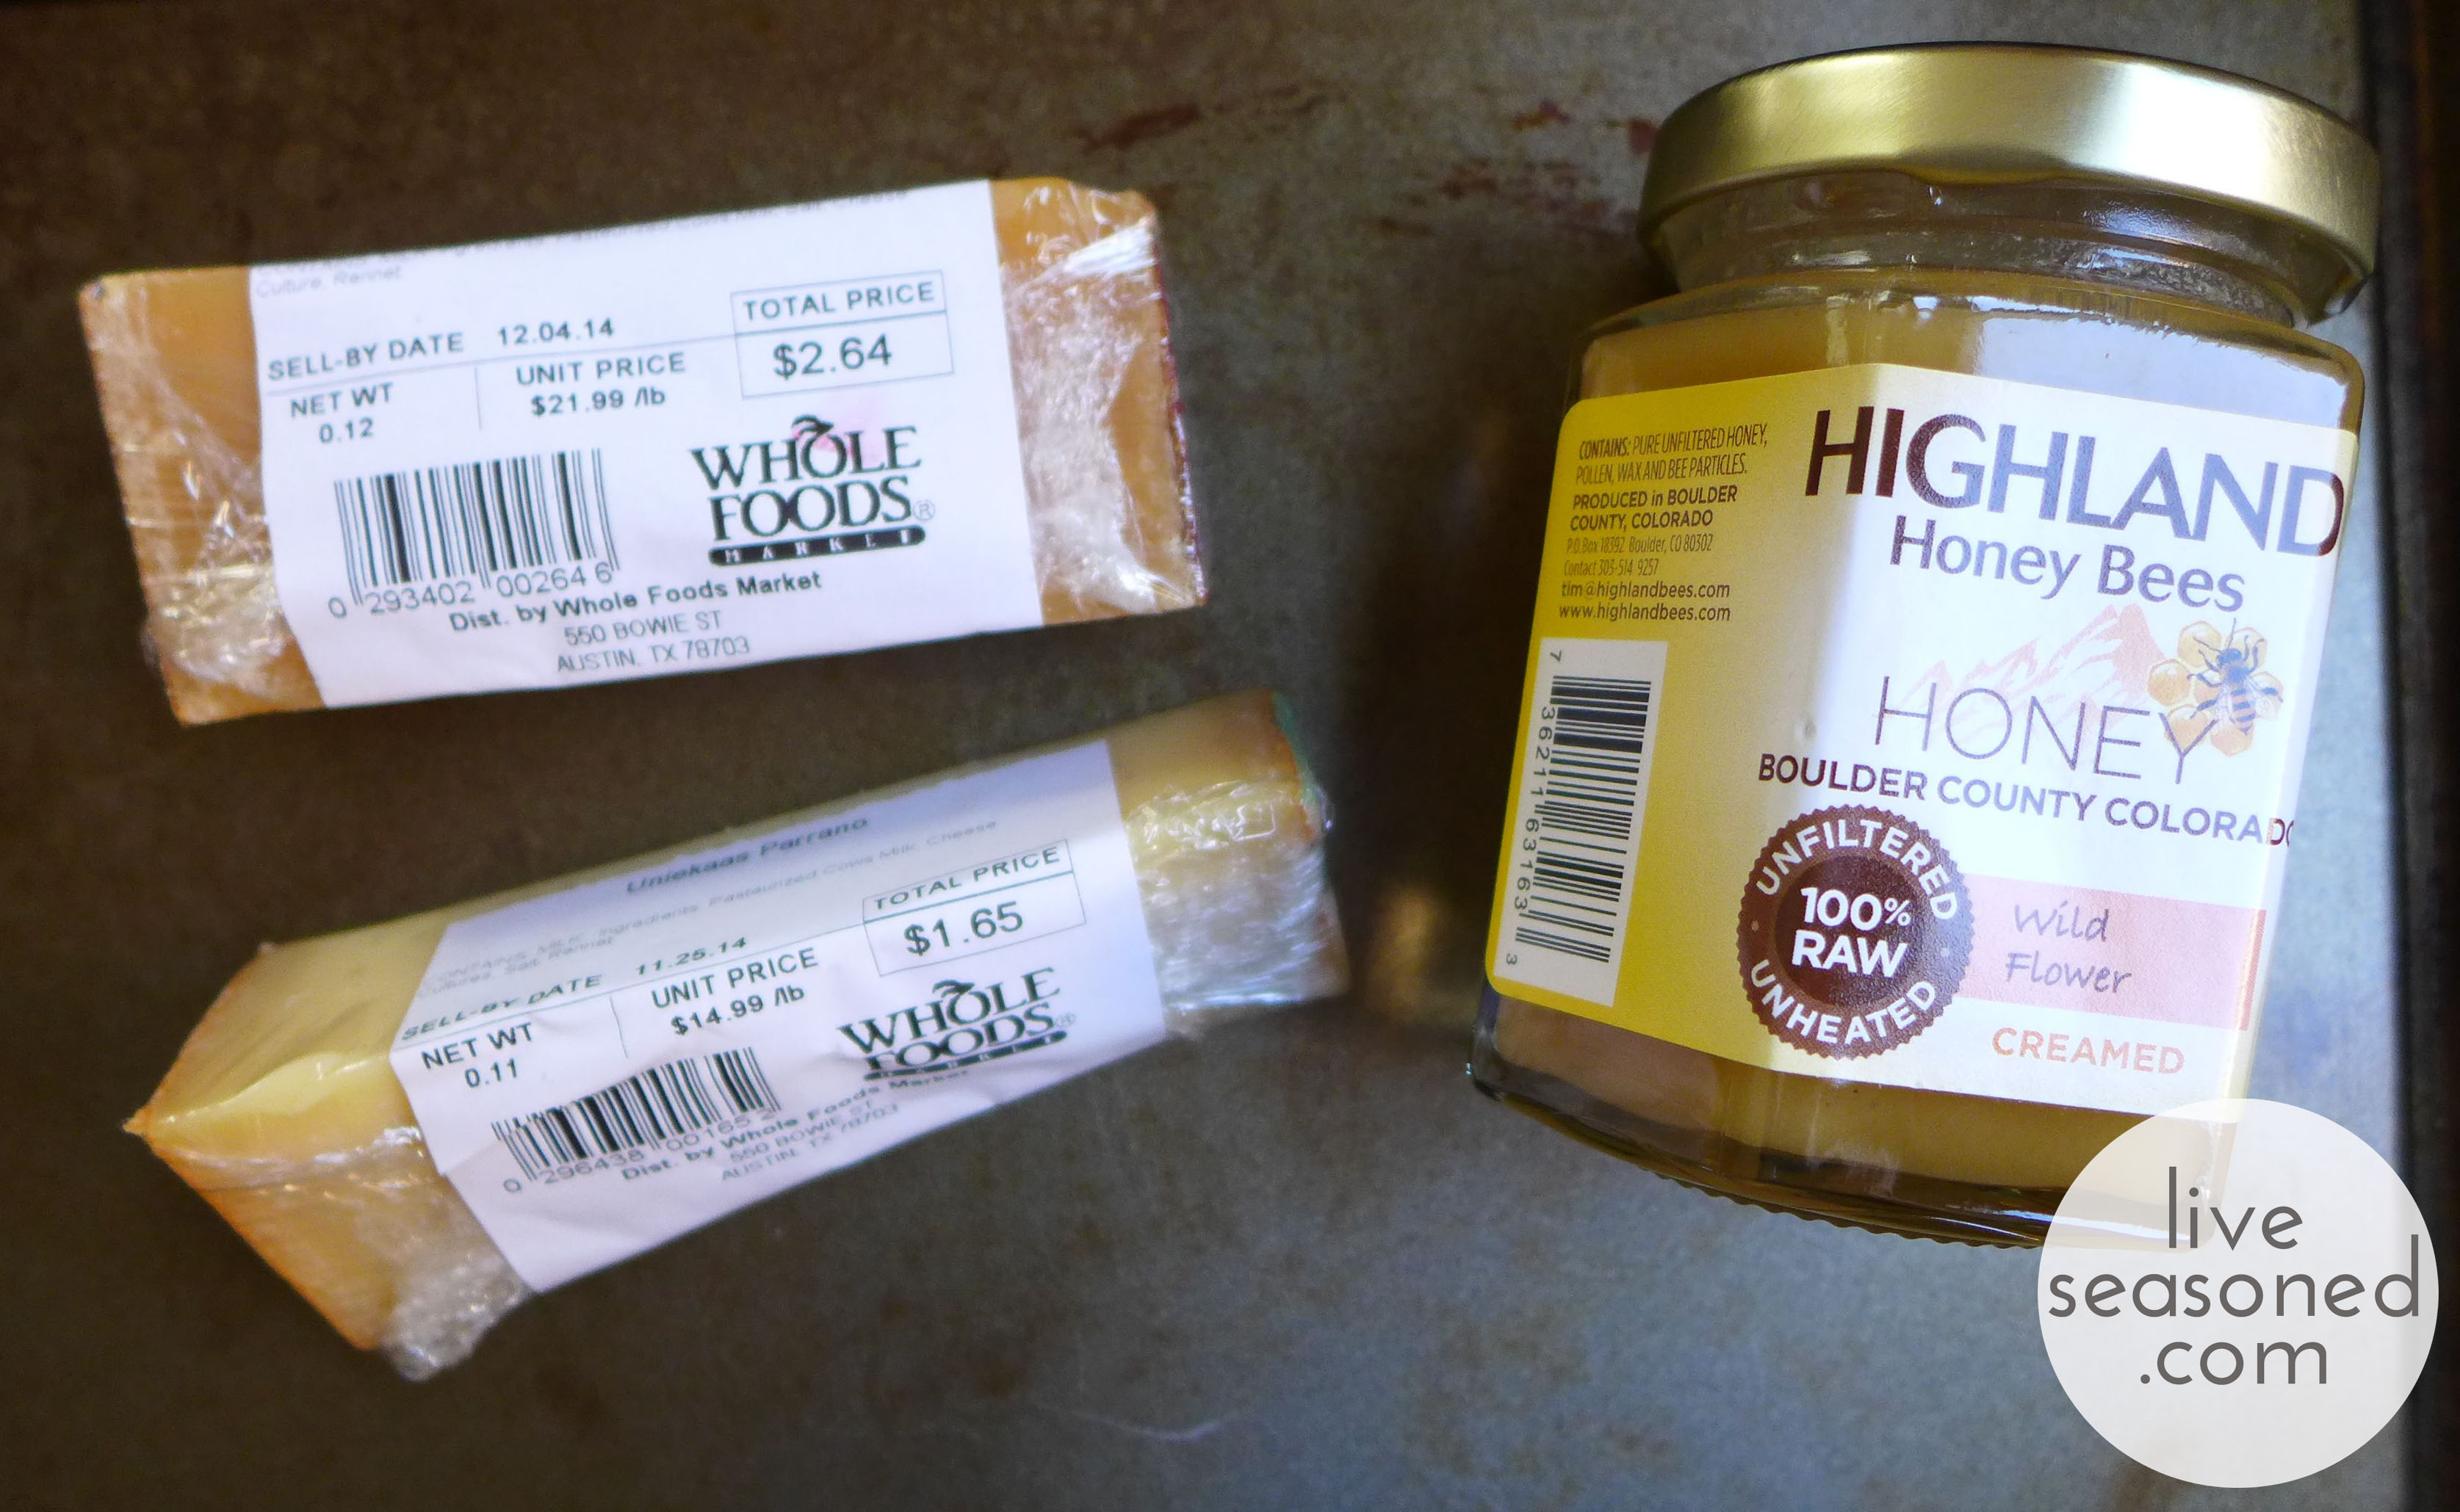 I also love Whole Foods visits for their constant sample tables, on this particular day a table of raw uber-local honey (from hives within our county!), was perfectly positioned at the end of the cheese aisle. They even happened to be serving up the samples with a variety of Parrano, so I had to pick up a jar. And as you’ll see, it ended up making such a perfect treat!
A little bit about the cheeses. Both of these cheeses are considered great snacking cheeses in the Netherlands, their home country.
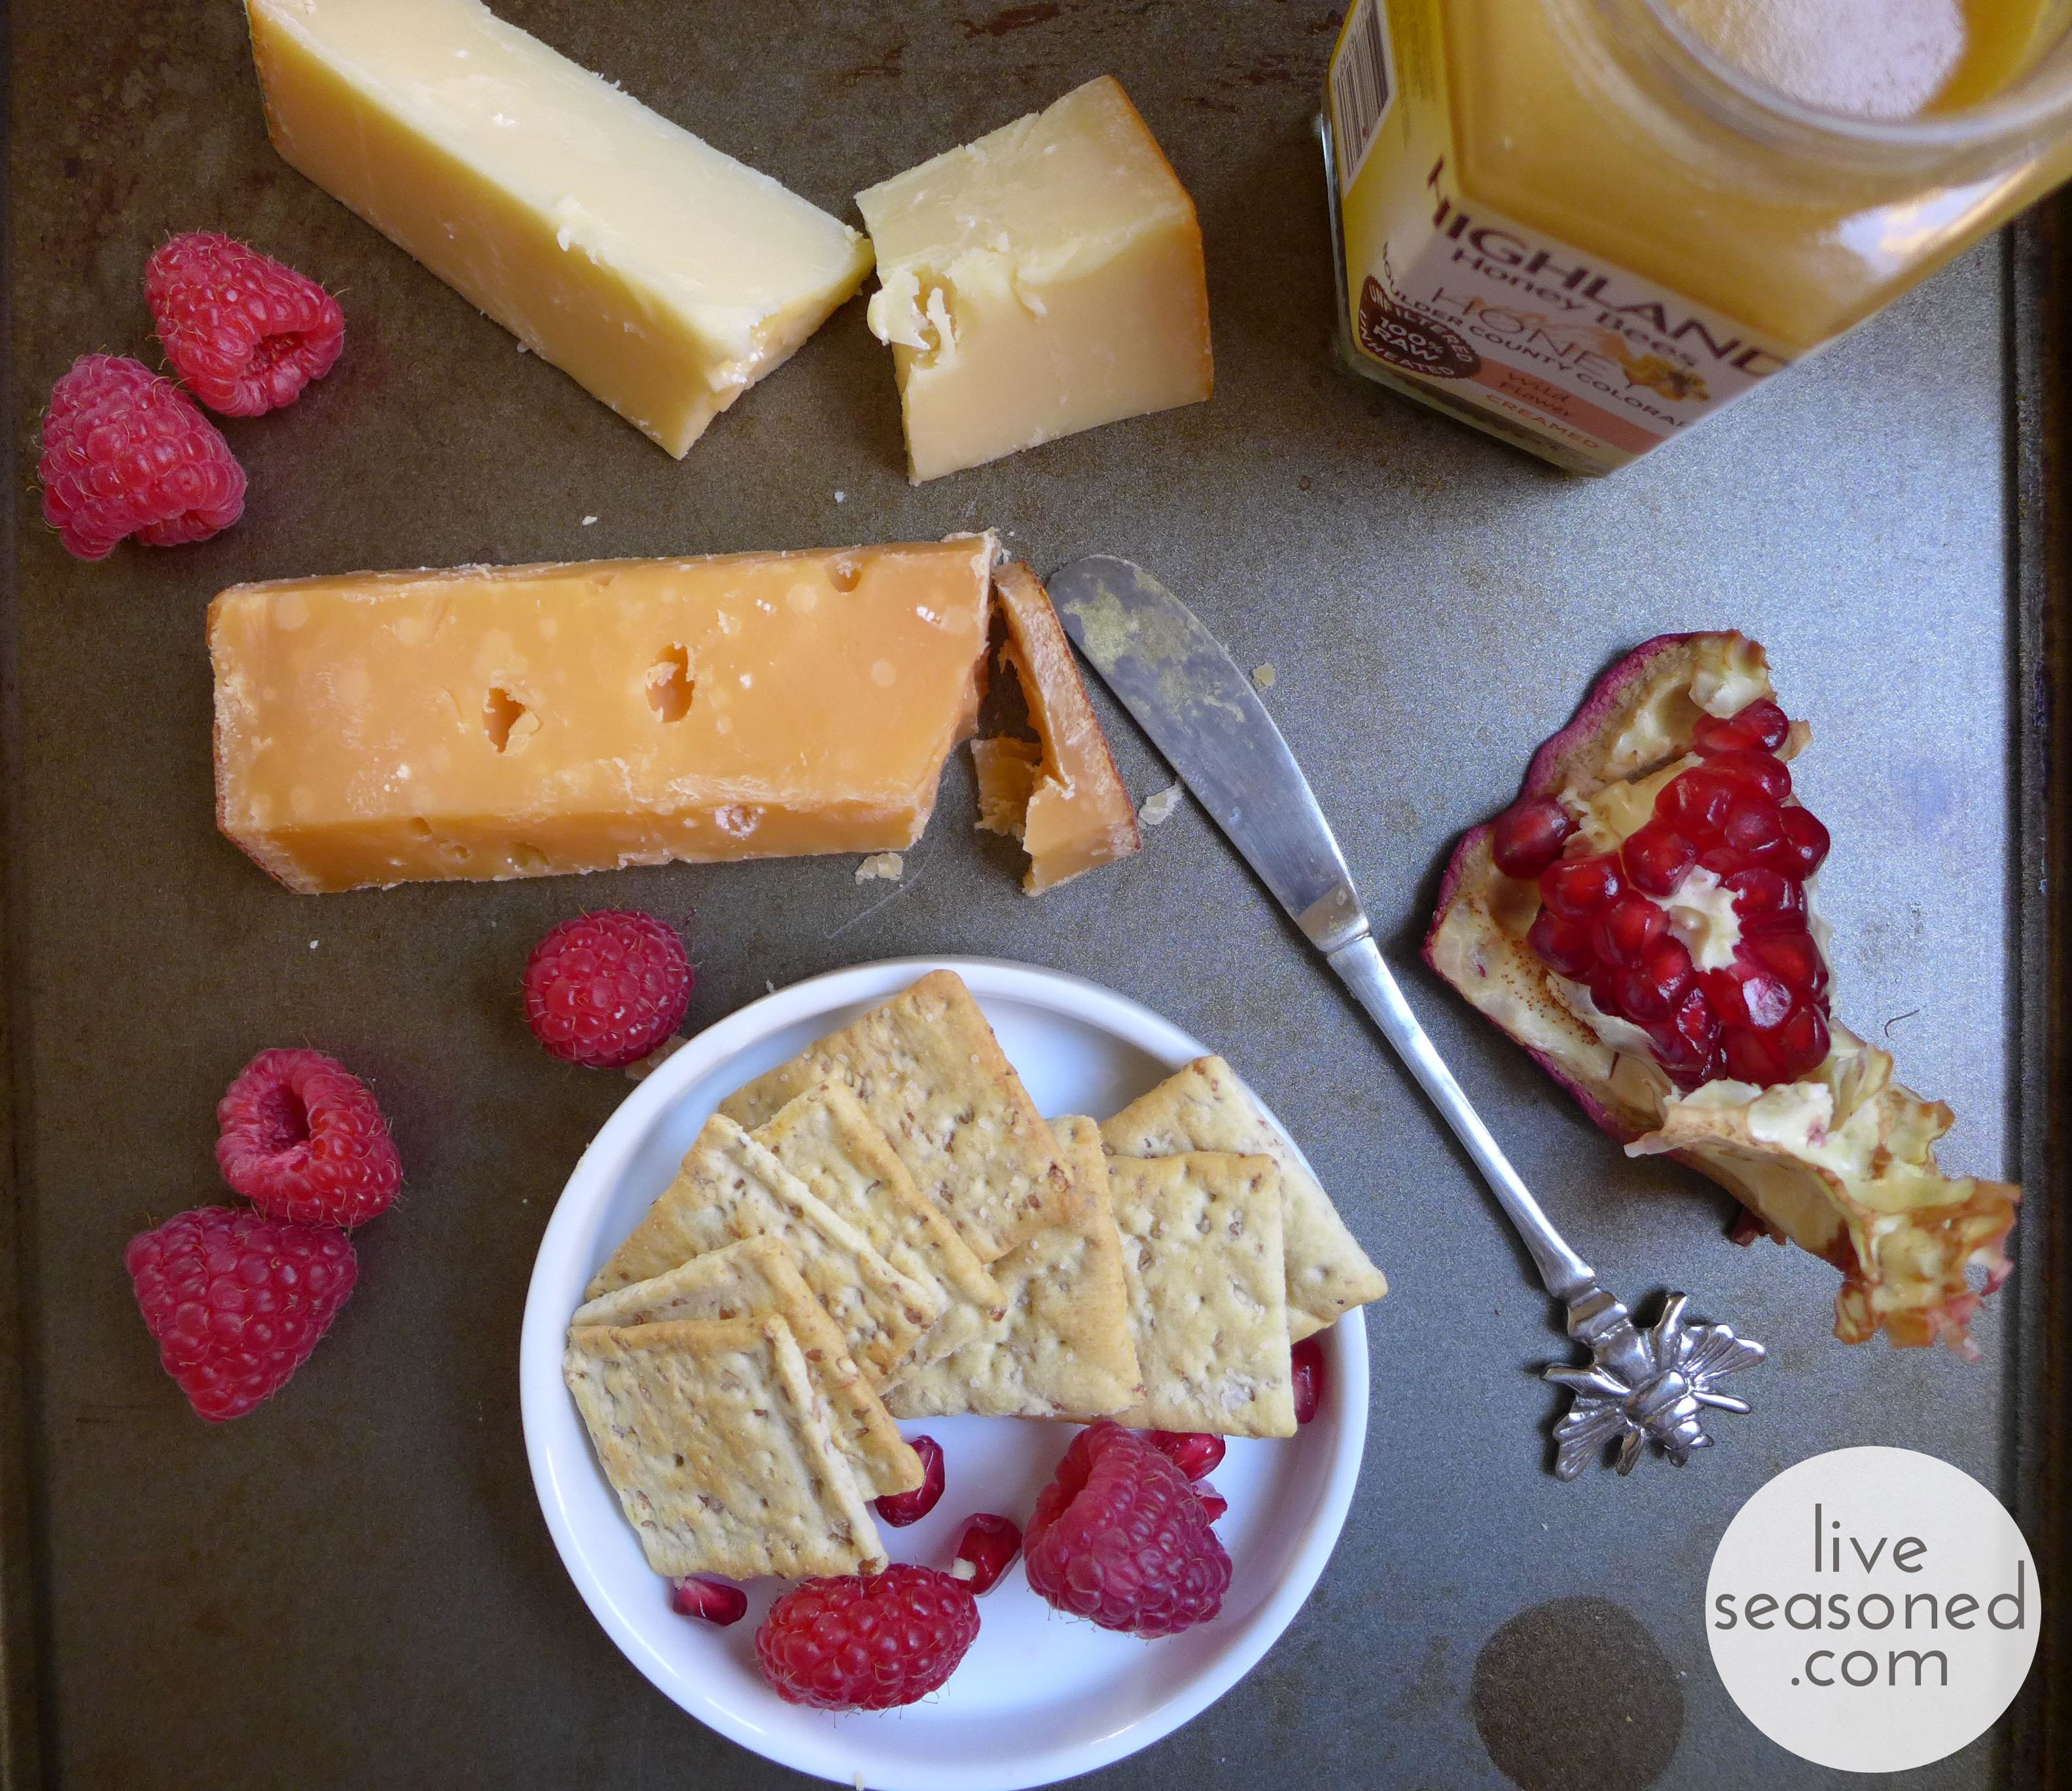
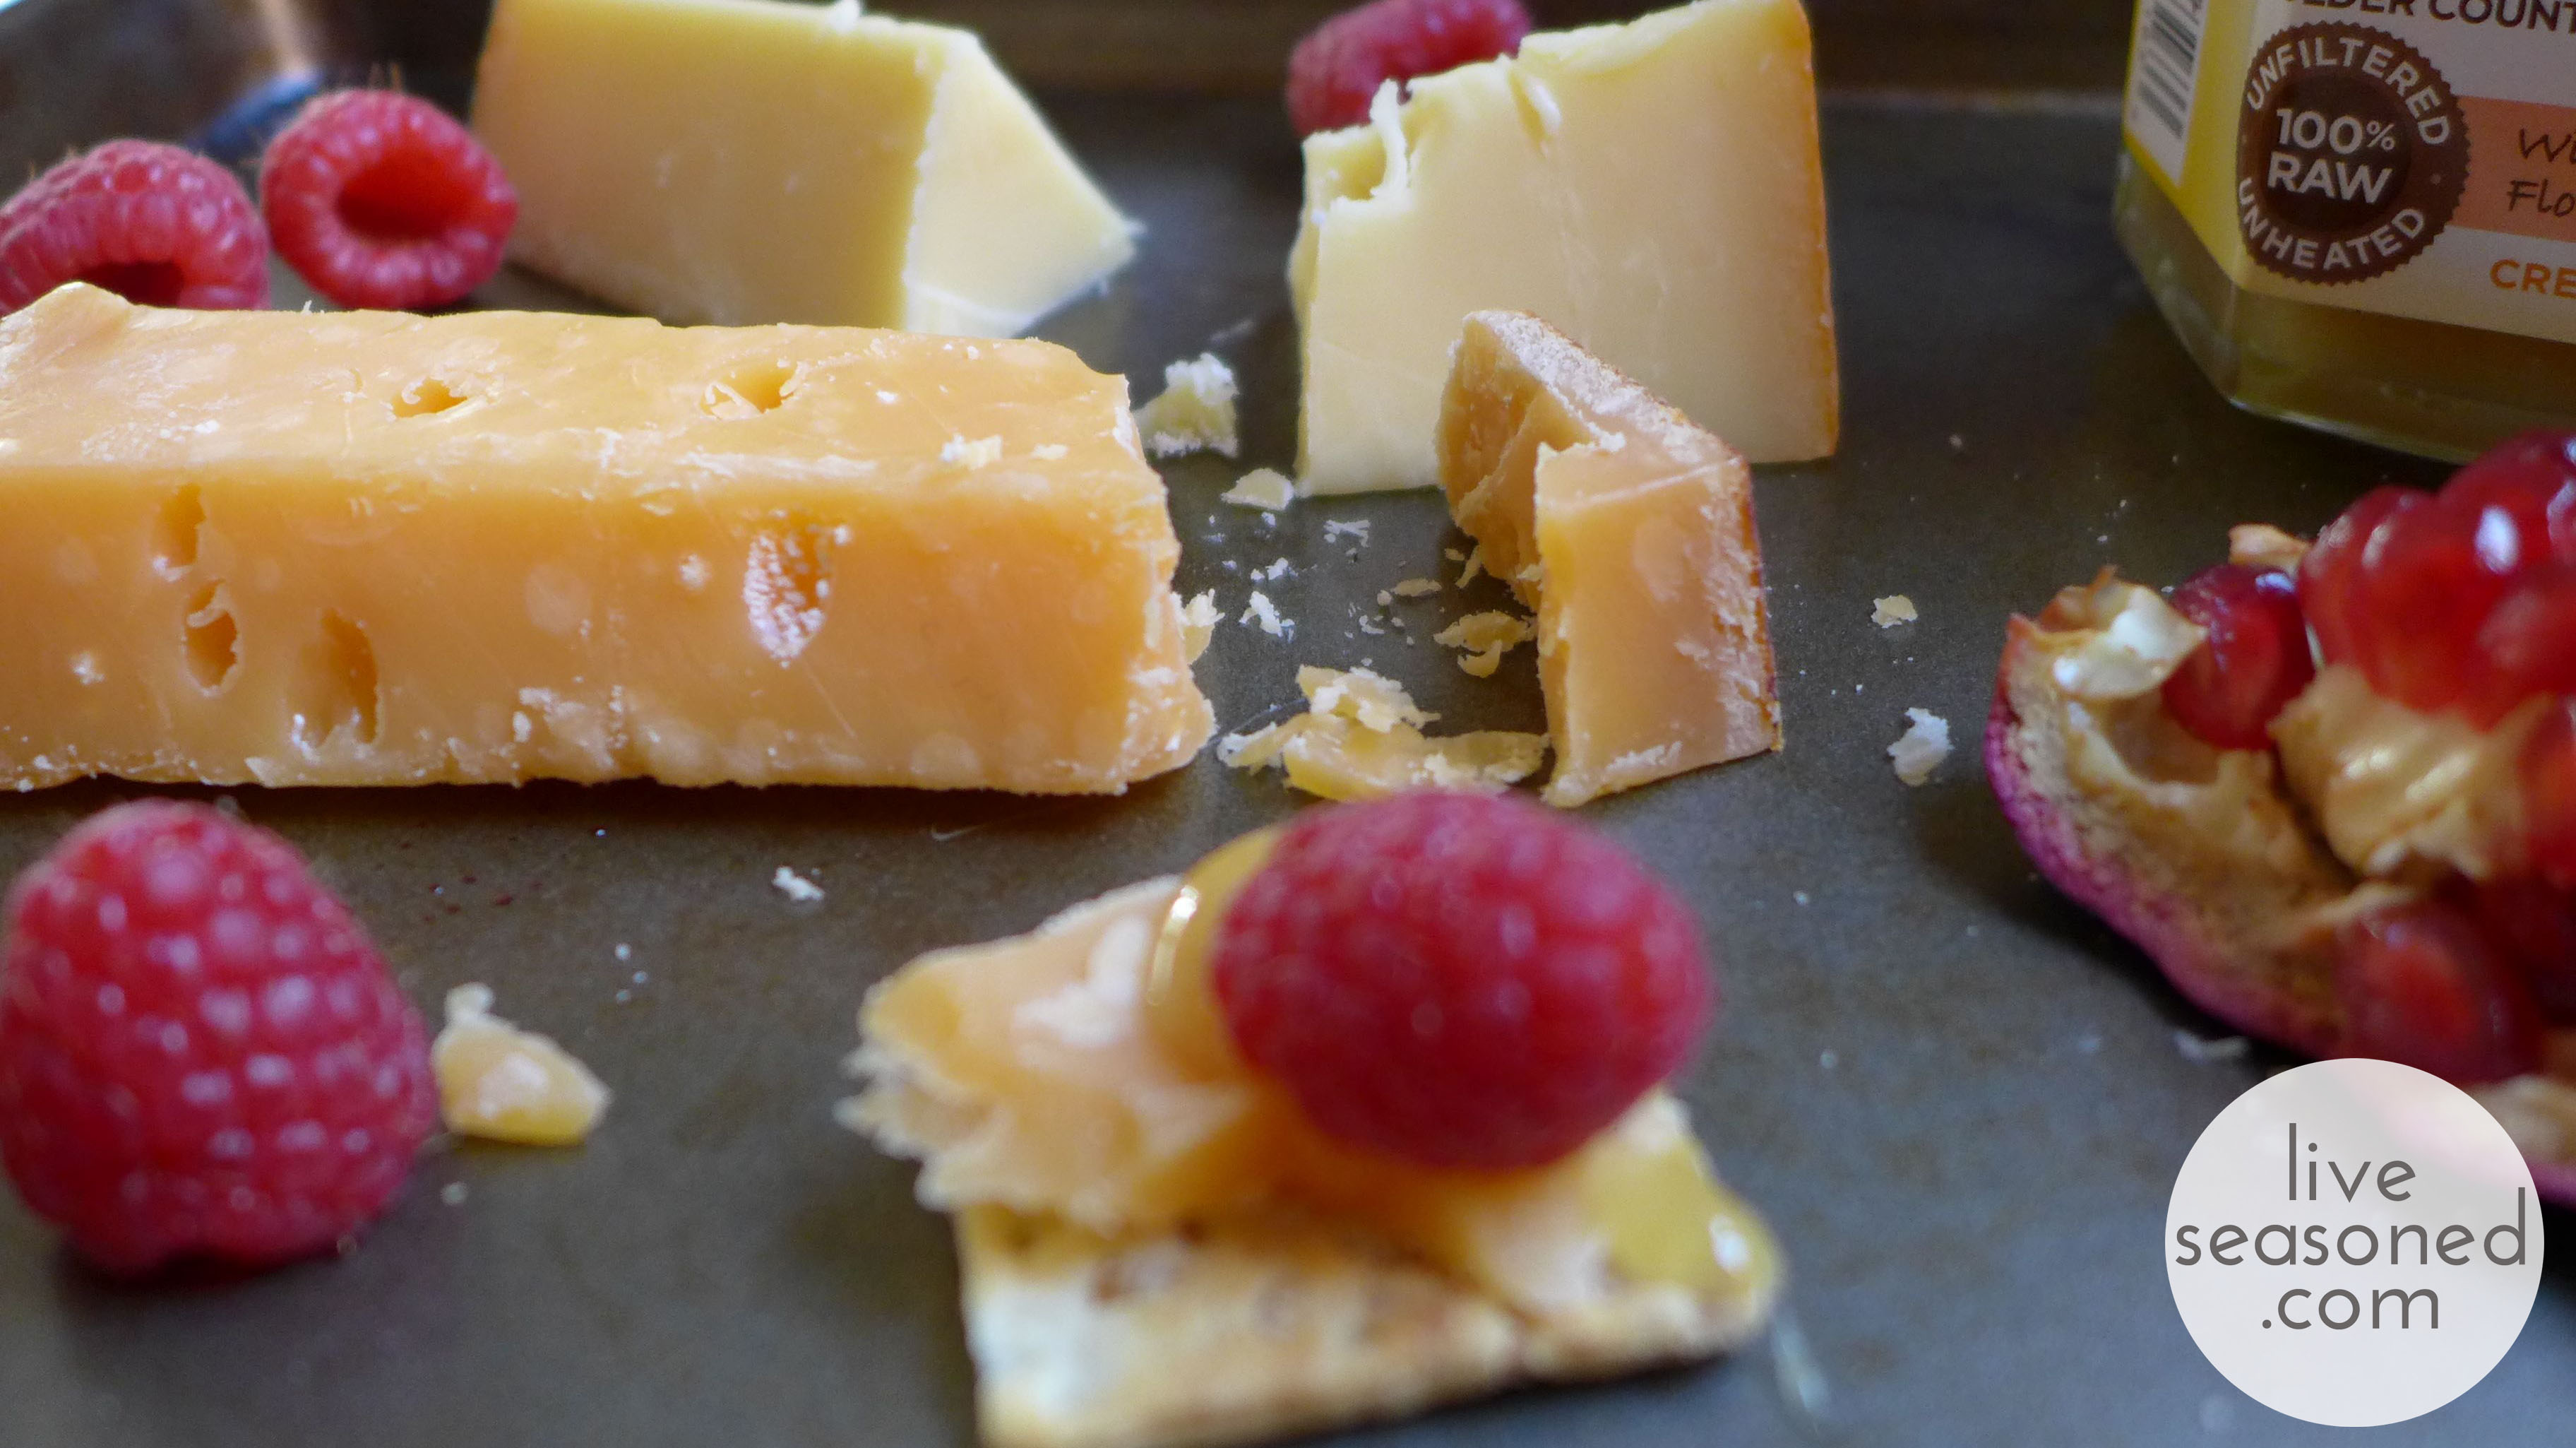
Gouda
(The orange cheese in these photos)
Gouda is a Dutch hard yellow cheese made from cow’s milk. The cheese may be aged anywhere from a month to many years. This particular Gouda was aged for three years, classifying it as a “very old cheese”. As a Gouda ages it acquires a caramel sweetness and develops a slight crunch from cheese crystals that form as water within the cheese evaporates. The cheese’s sweetness is due to removing some of the whey, which also removes some of the lactic acid, early in the cheese-making process and replacing it with water.
Parrano
(The white cheese in these photos)
Parrano is also a technically a Dutch Gouda, but with a flavor similar to aged parmesan. Parranos are aged for about 5 months, giving them a semi-firm texture. As described on the company’s website, Parrano is “slightly sweet, a little bit nutty but still with a deliciously strong flavour”.
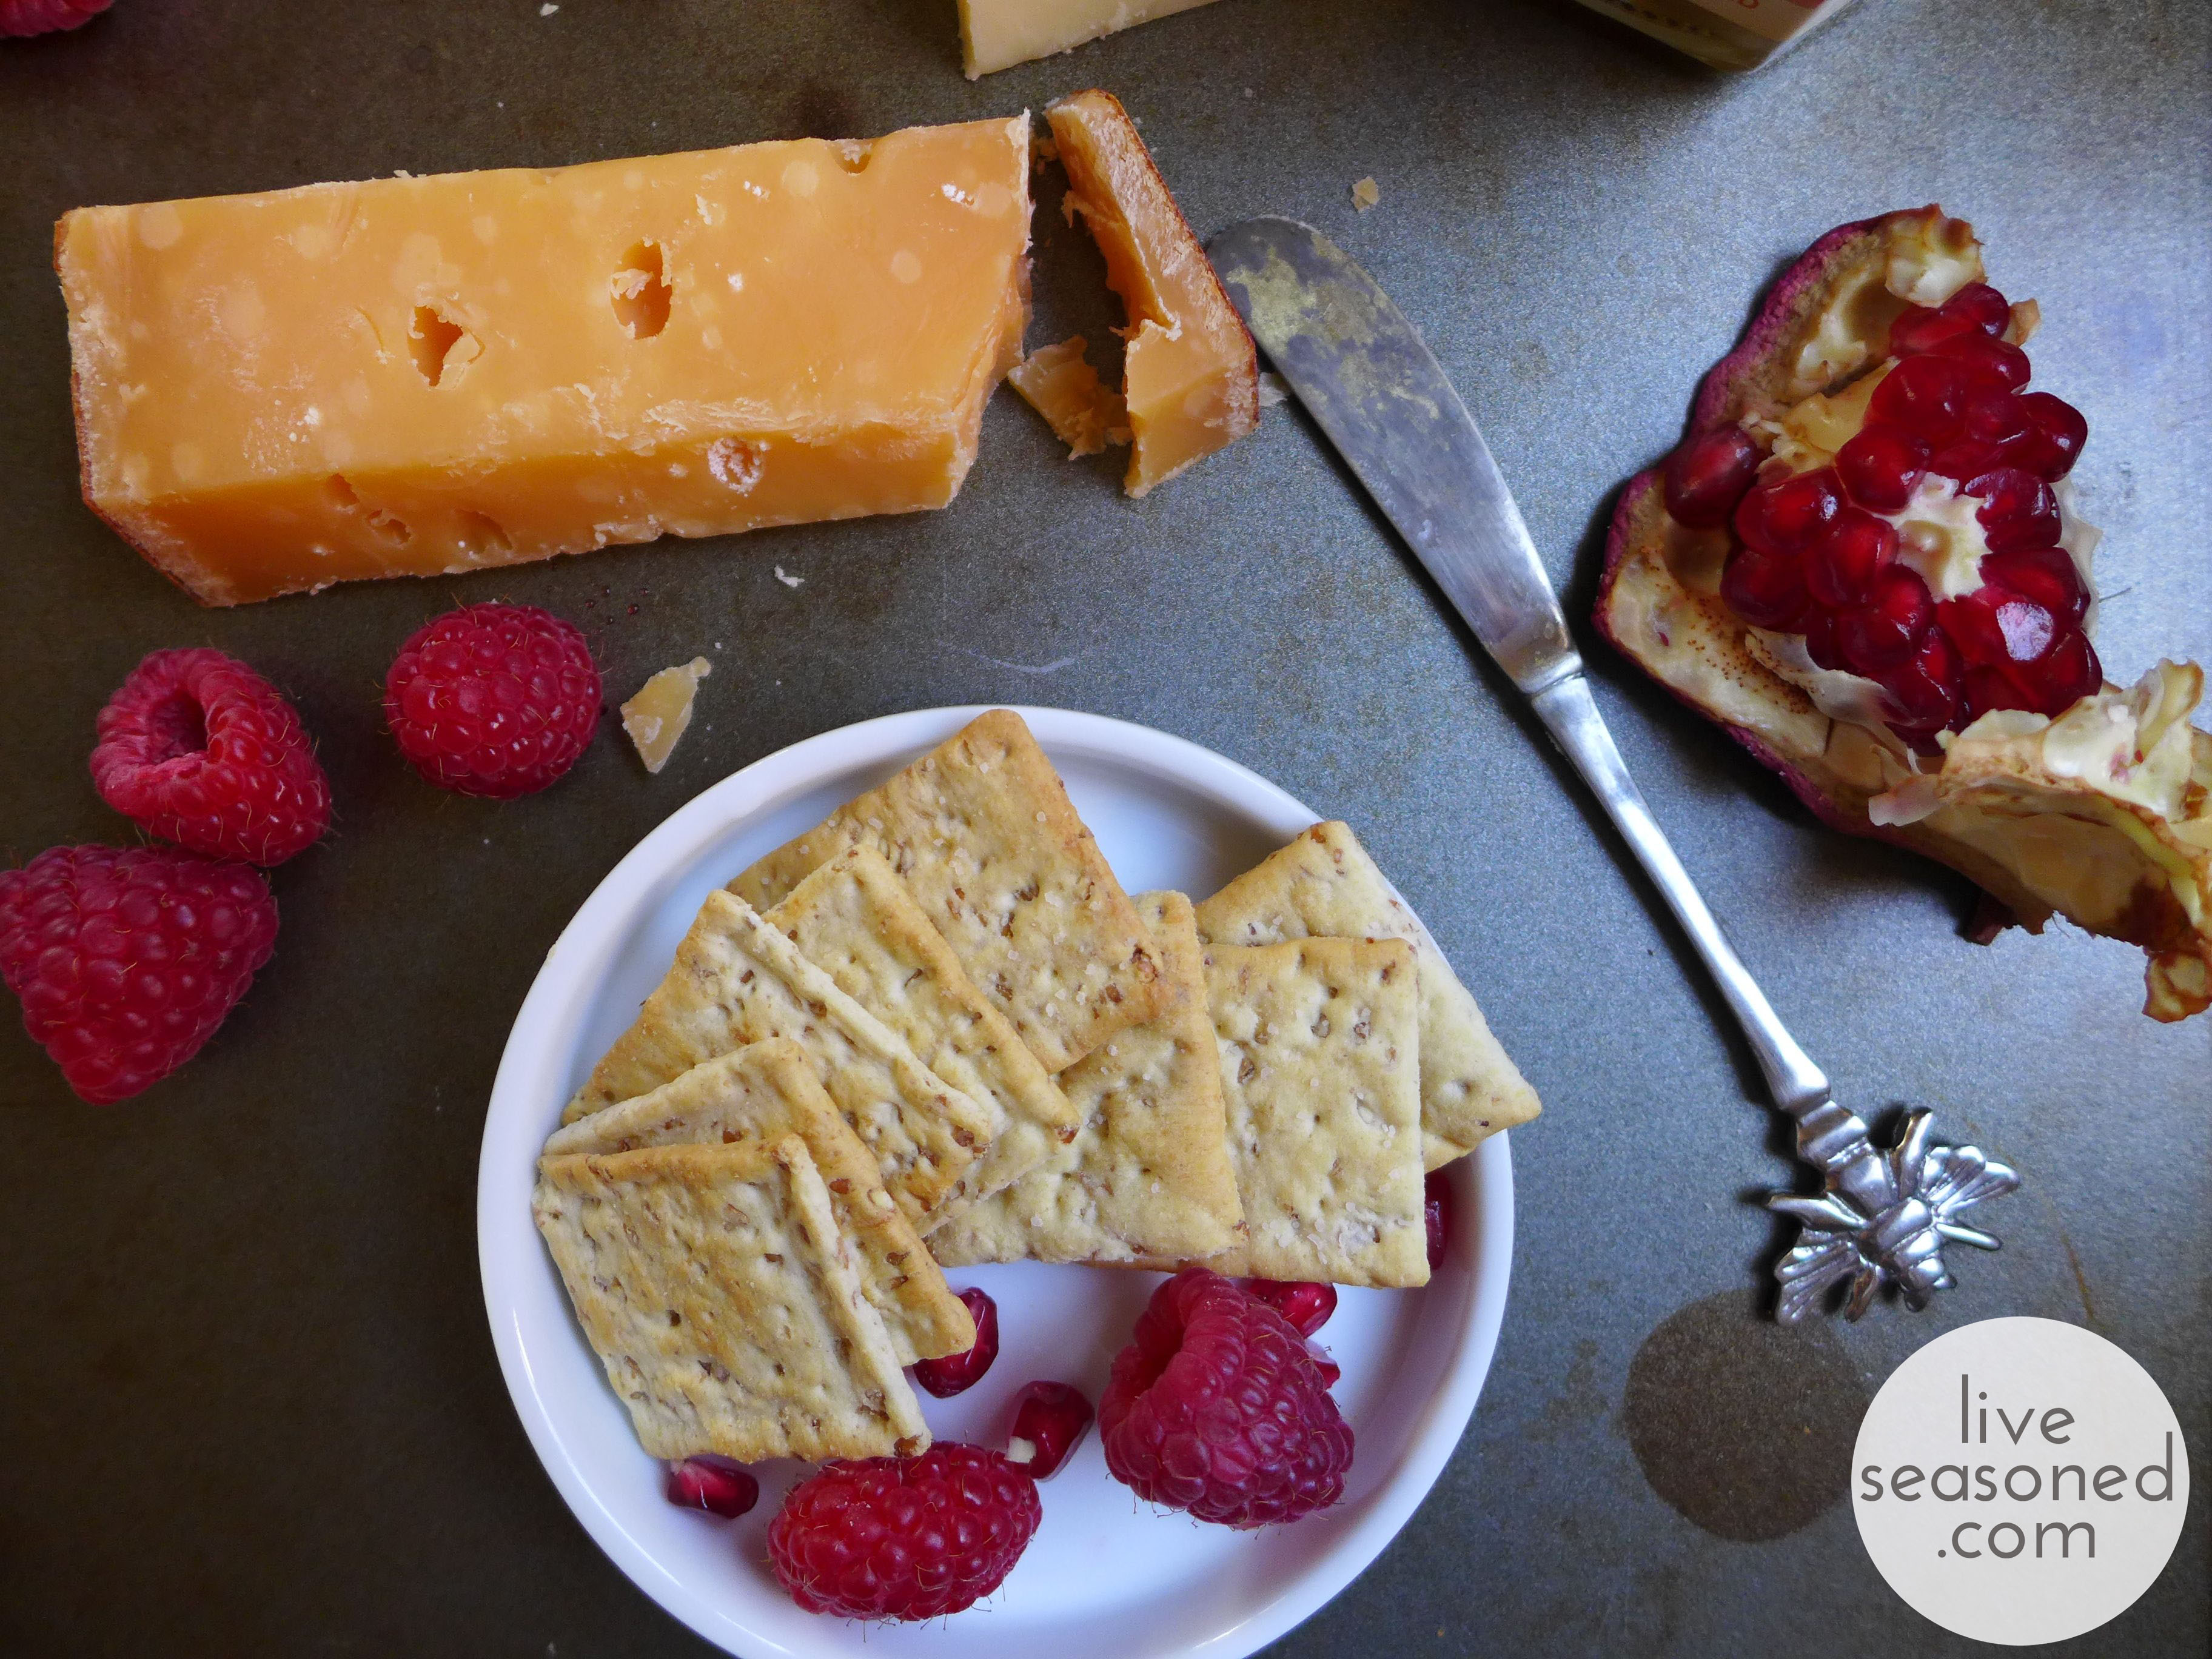
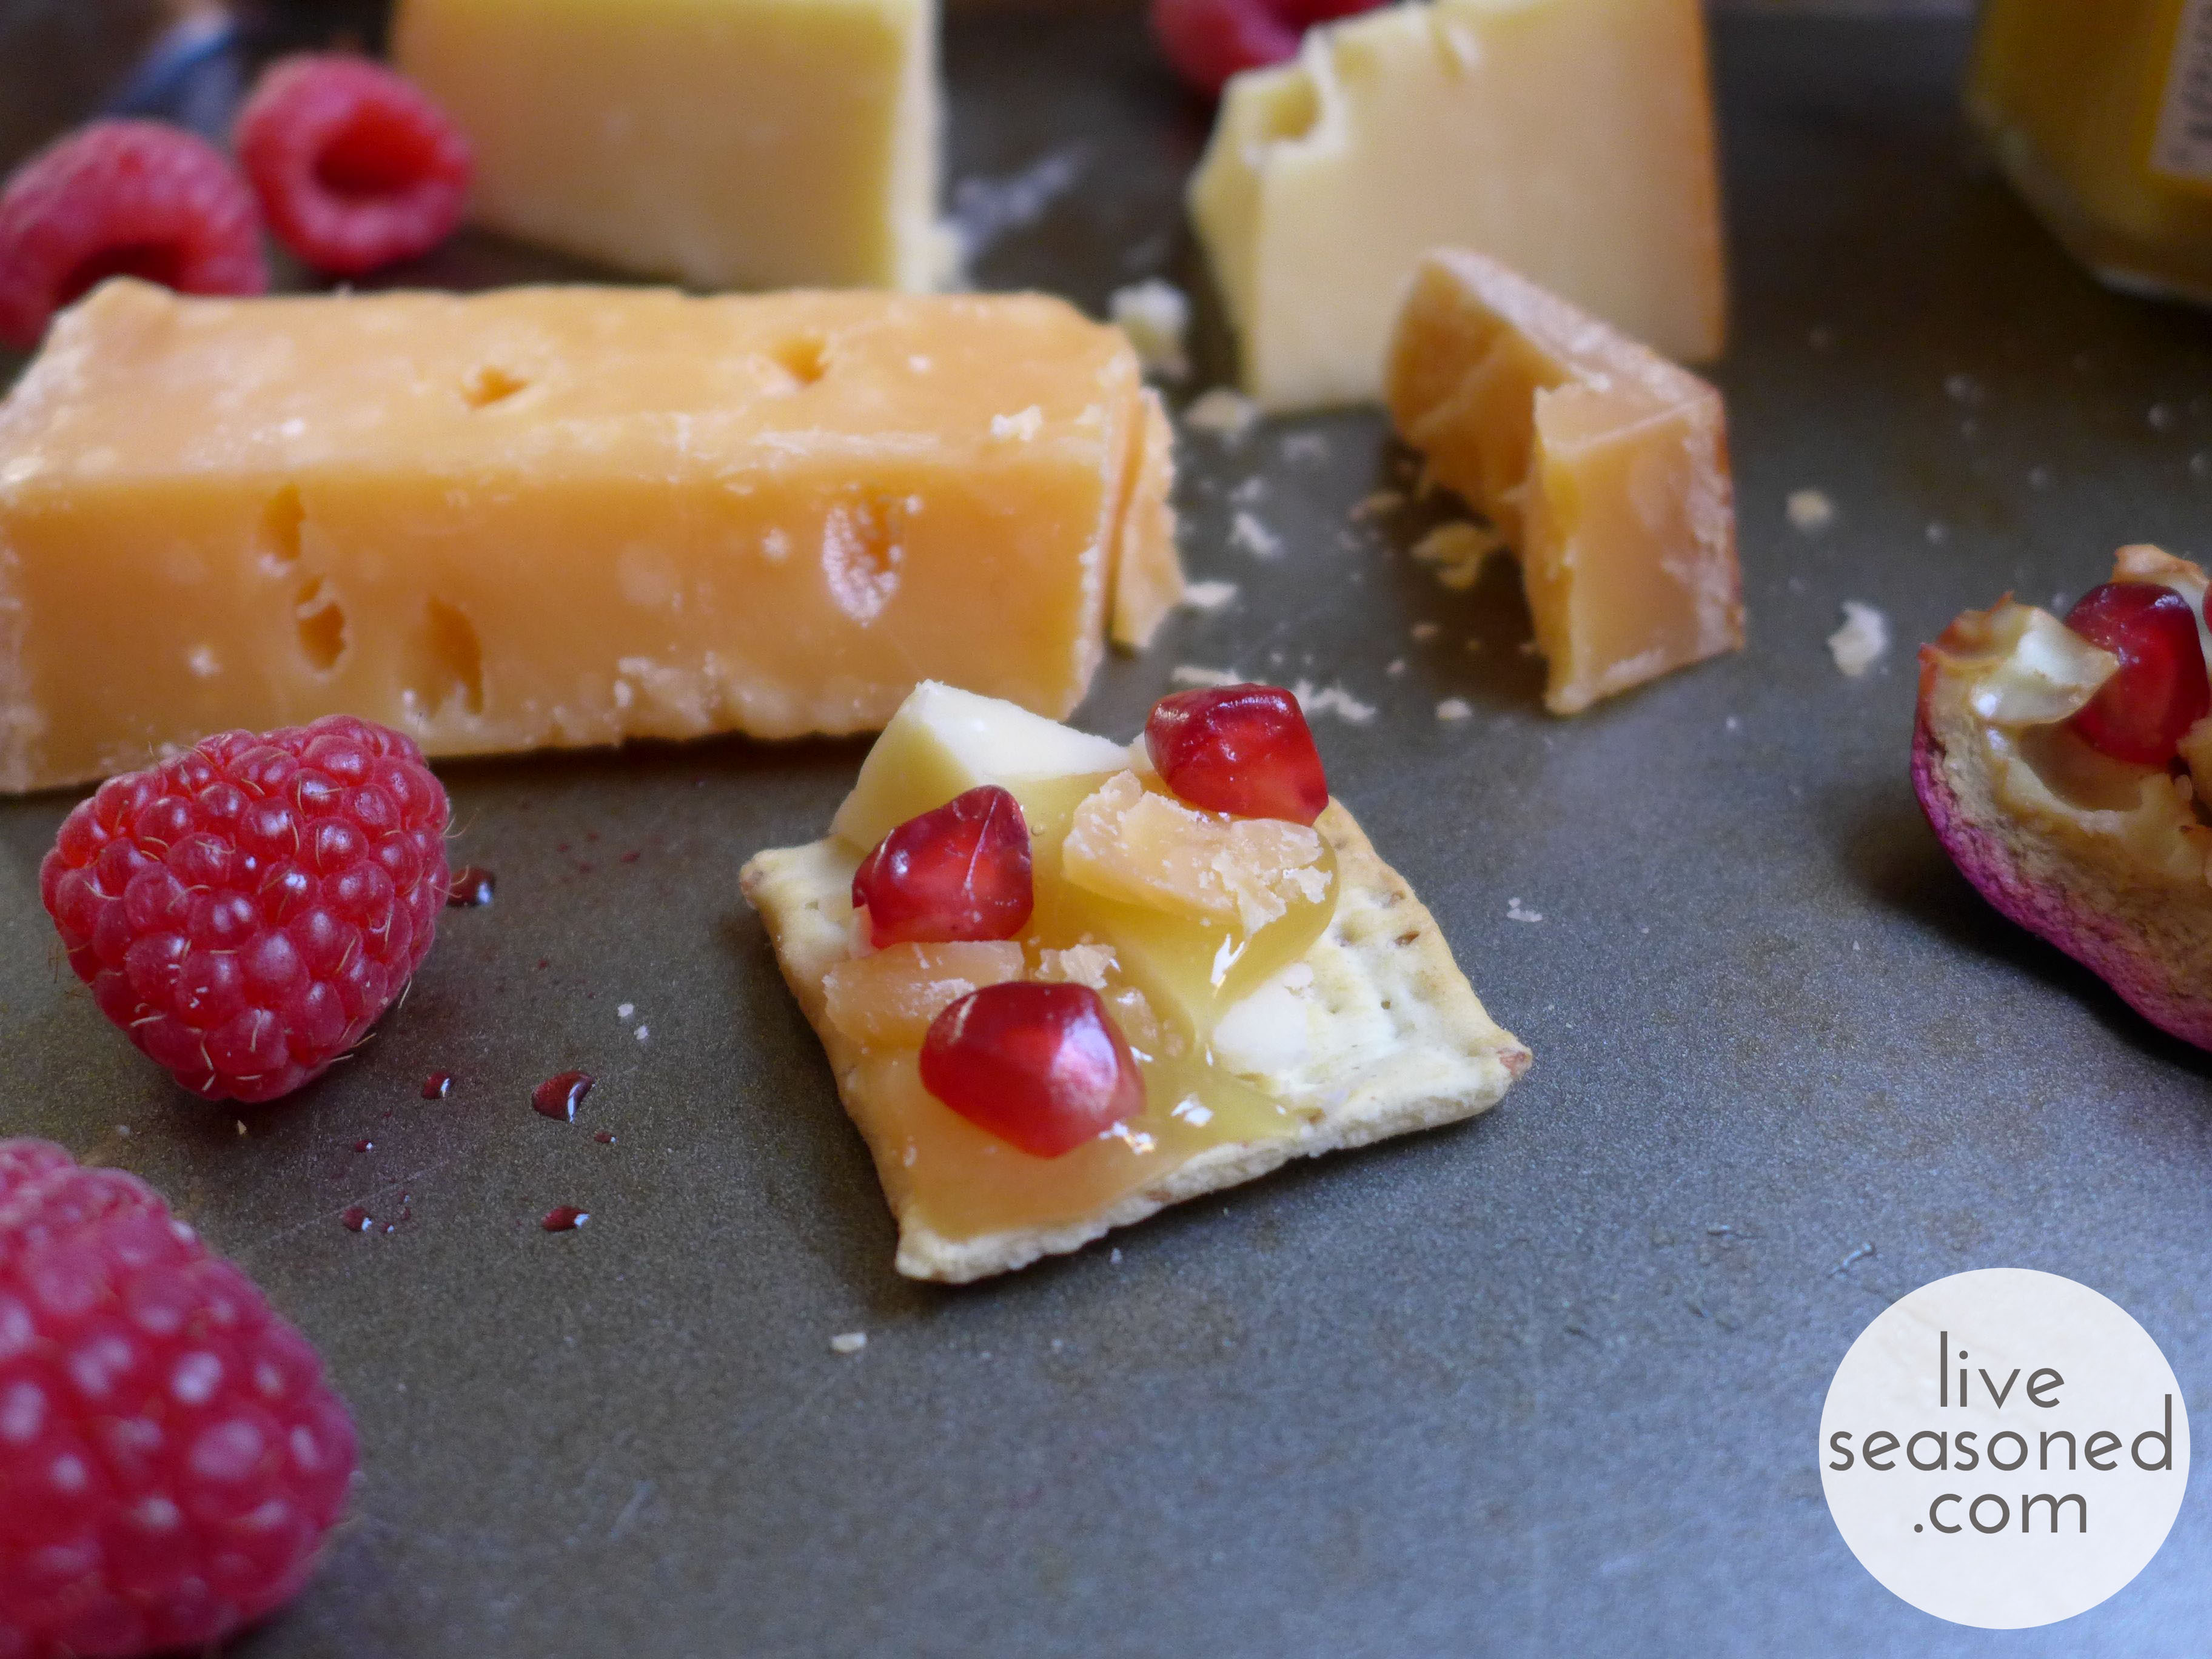
As is common, I like to include some fruit on my cheese plates. Continuing with my adventurous ways, I’m not too picky when it comes to the fruits I choose. I’ll often look for anything in season and deliciously ripe (there’s no point in serving out-of-season strawberries that taste like water, right?). On this particular day, I already had some raspberries and pomegranate in my fridge. As it turns out, their slight tartness was a perfect complement to the sweet honey and sharp cheeses!
The Honey
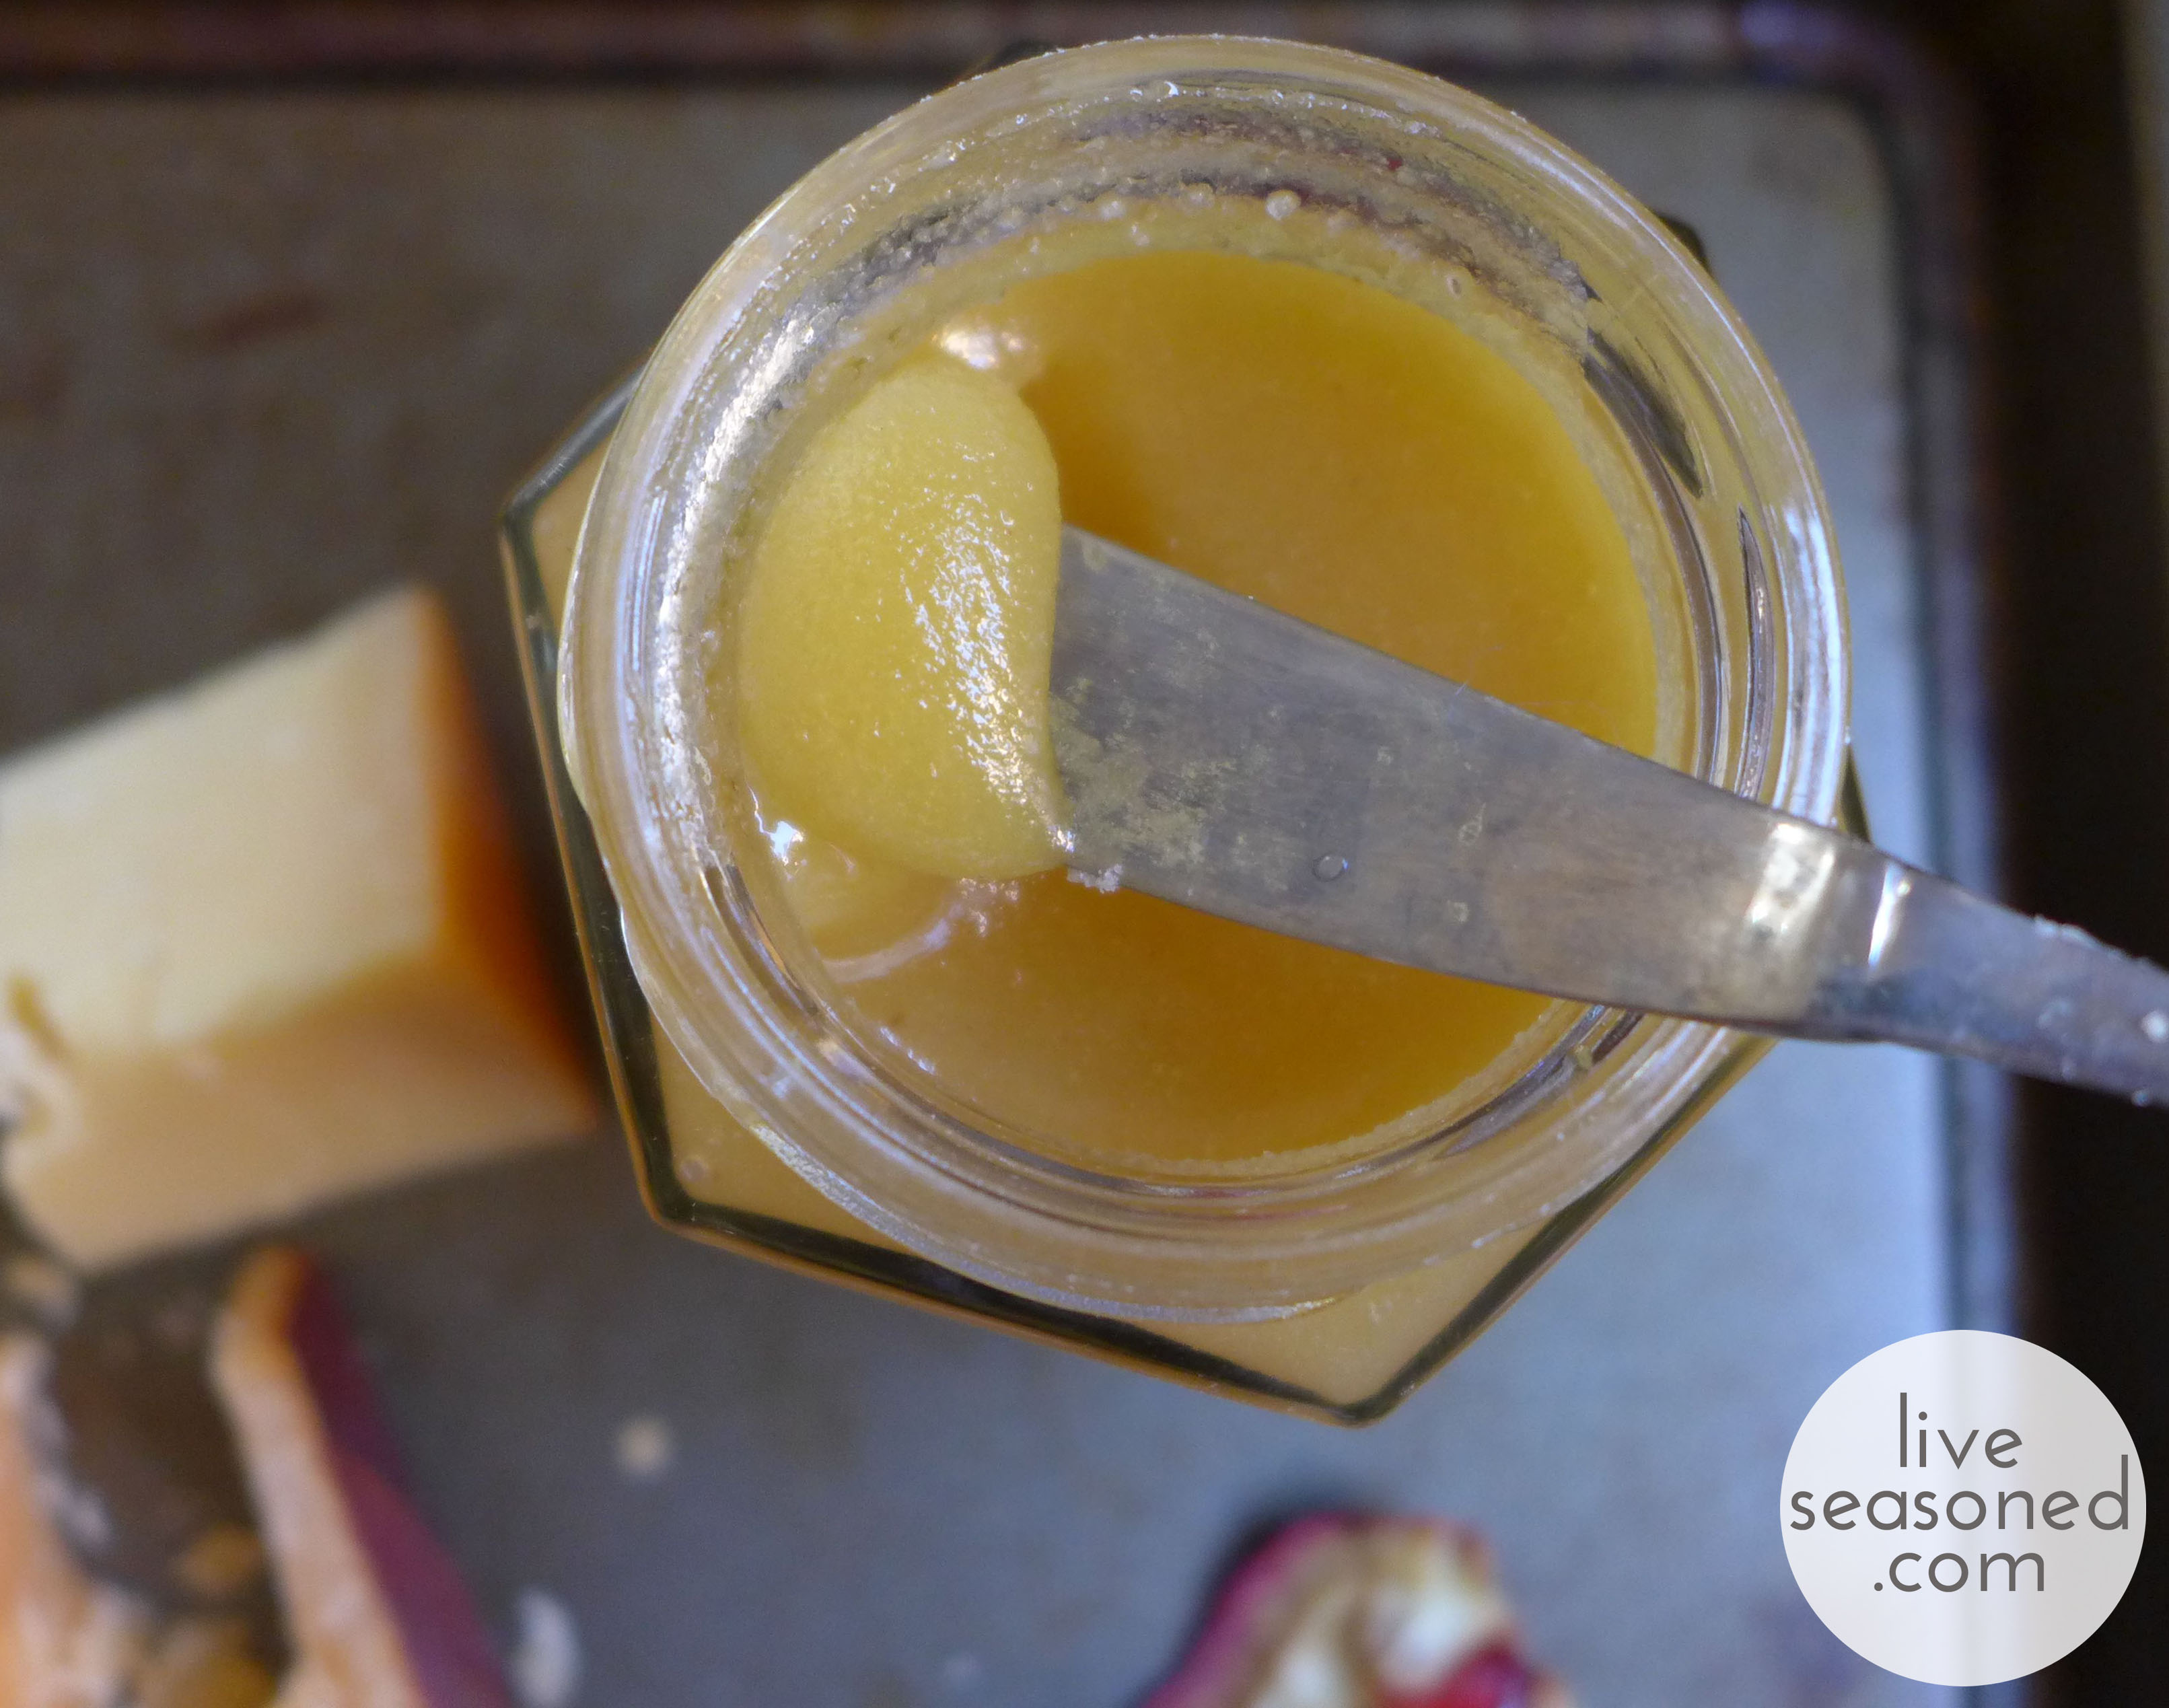
This is a raw, unfiltered, and unheated honey. As a result, it has a cloudy appearance from the honey crystals that have begun to form (it may also have some bits of wax, pollen, bee wings, and such in the jar). If you put a dollop of raw honey on a plate, you’ll find that it spreads more slowly than crystal clear honey. It turns out that this is really useful for gluing some fun cheese/cracker/berry combos together! And here you thought raw honey was just good for its enzymes.
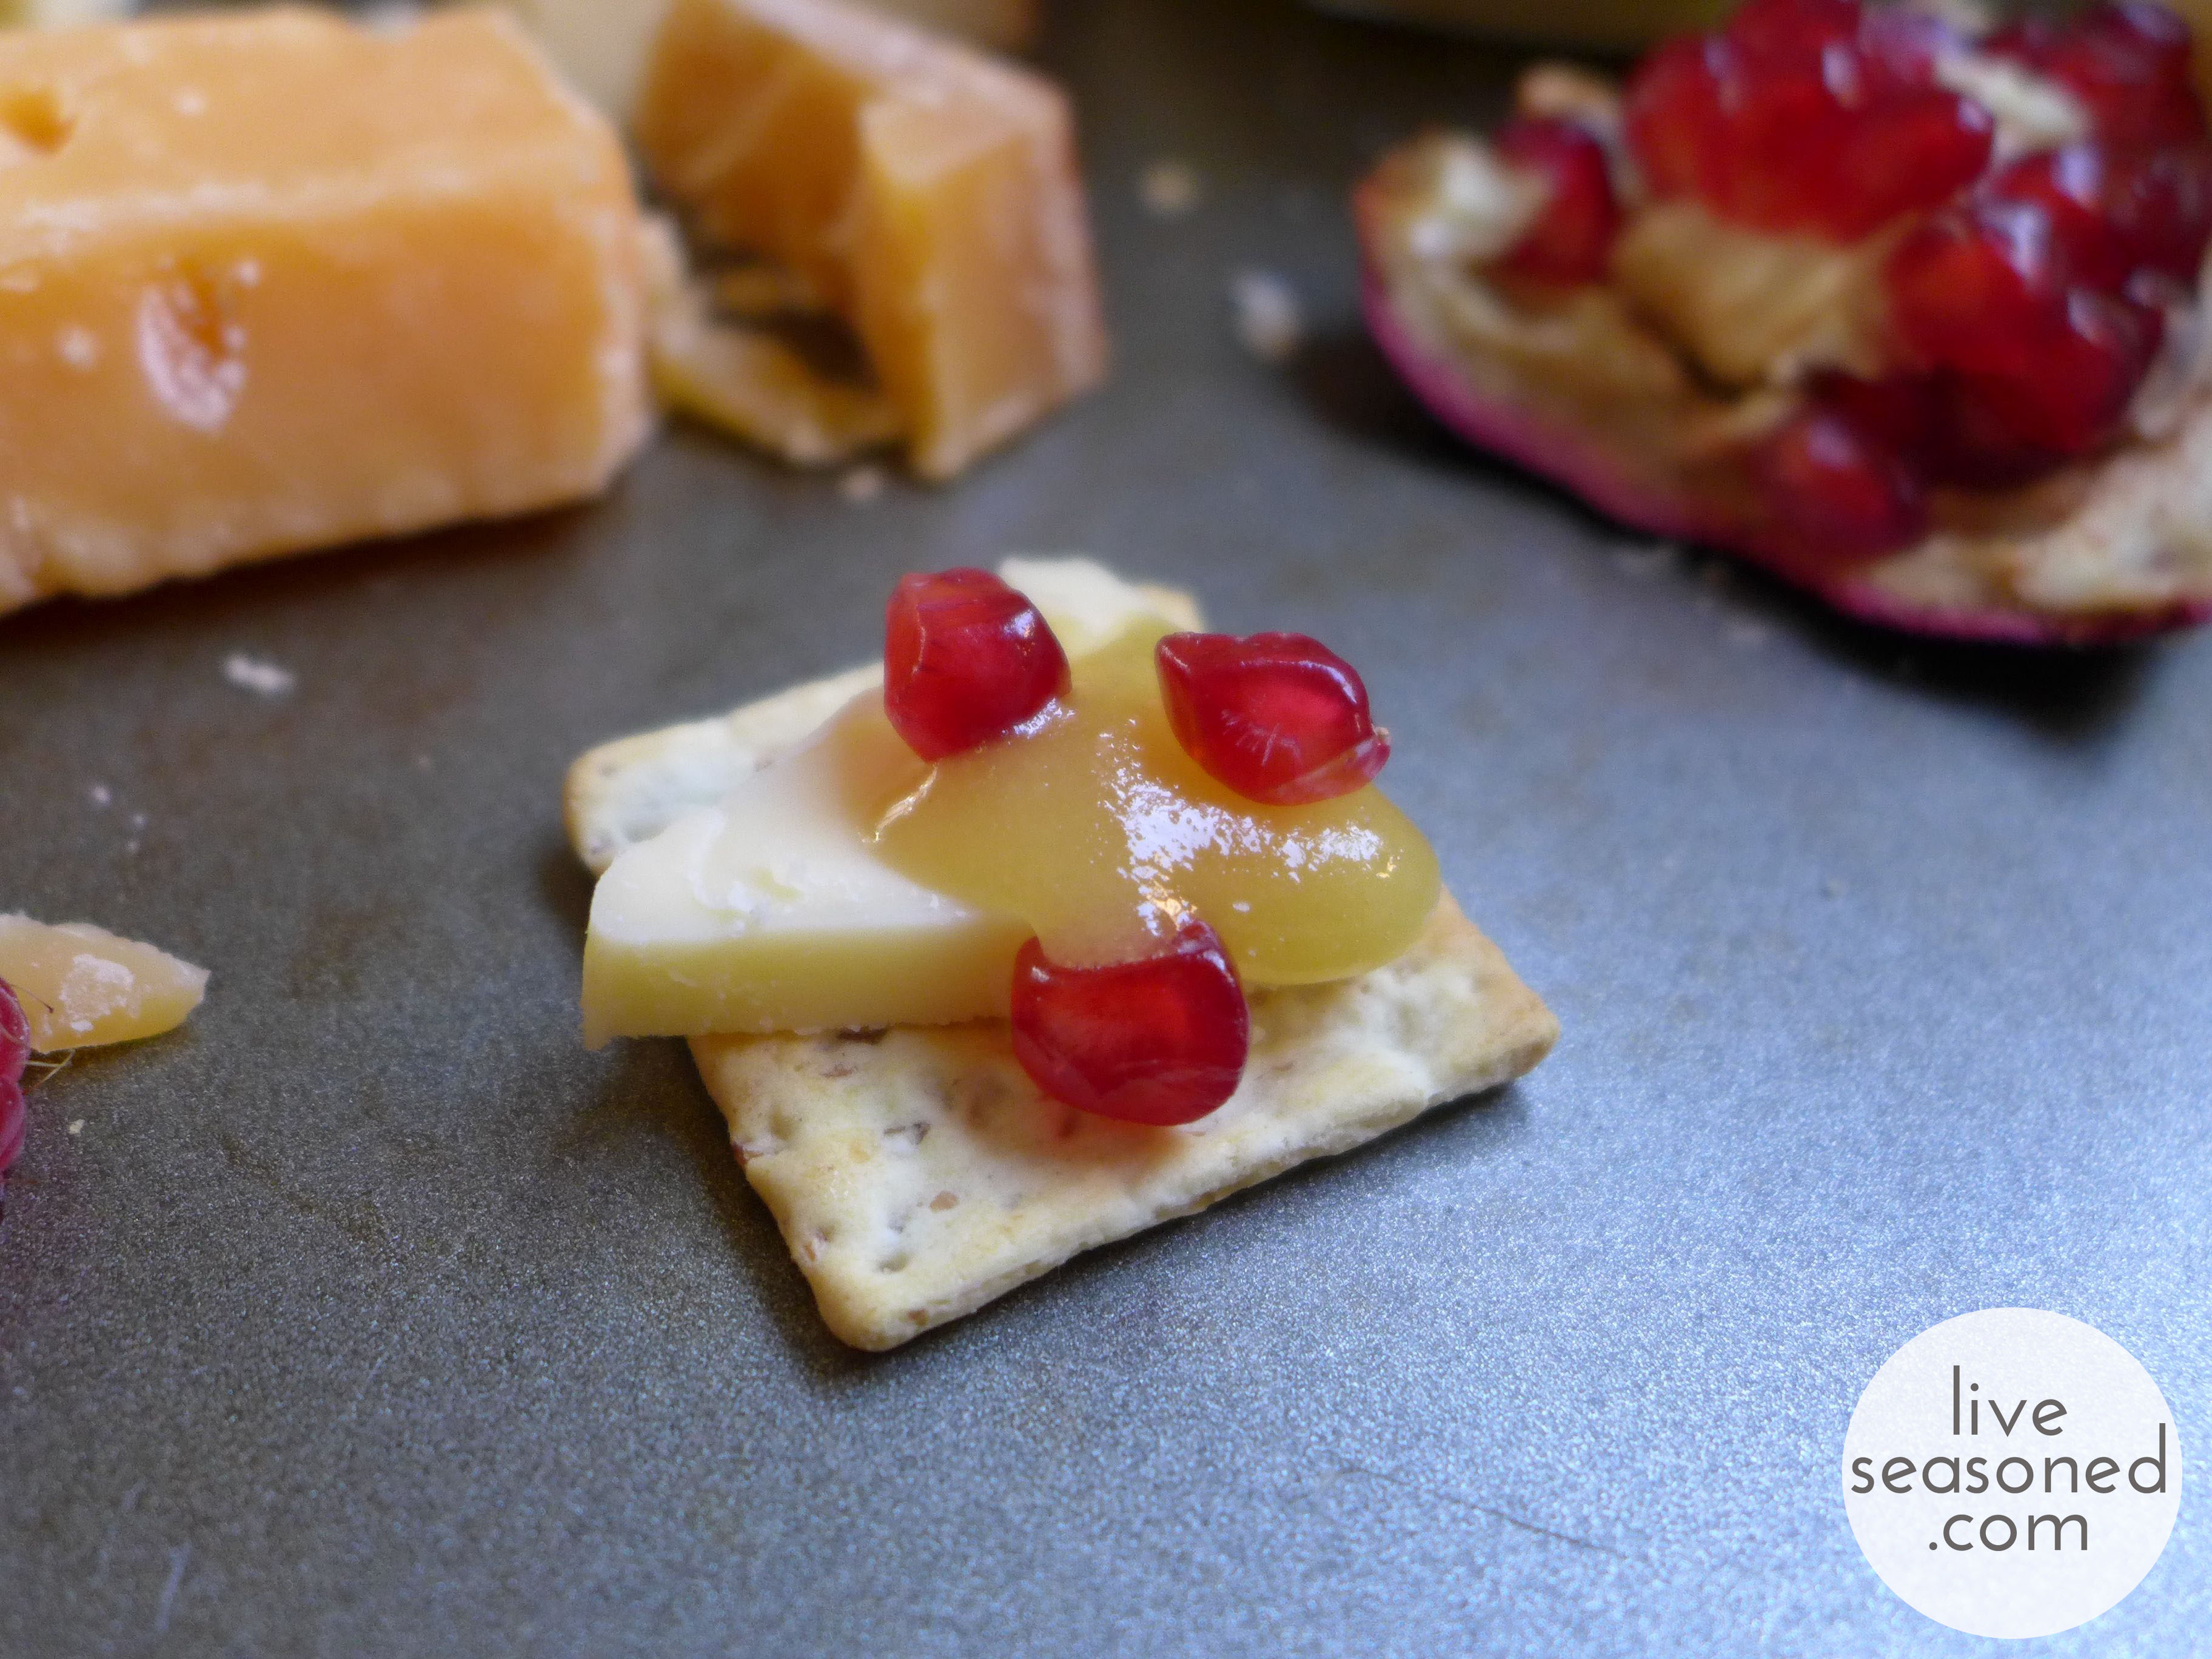
Look at how beautiful that cracker looks with a bit of cheese, dollop of honey, and a few perfectly placed pomegranate seeds! There’s no way those seeds will fall off on the way from the plate to your mouth. This is a particularly handy trick for cocktail parties if you want to make a few fancy cracker/cheese combos rather than having guests make their own. You definitely don’t have to worry about the appetizer falling apart before it’s served. I also found honey to be particularly useful for keeping the crumbly gouda on my cracker. You can see that I double-dipped in the last photo – starting with a slice of Parrano and then adding crumbles of Gouda over the honey. indulge much?

I can’t emphasize enough how delicious these particular combos were. The crackers were just a basic wheat thin. Both cheeses had a bit of a nutty flavor. The honey added that touch of sweetness. And then, as I already mentioned, the fruit added a bit of a tart note. Plus it was extra fun to get that little spray of juice and crunch when biting down on the pomegranate seeds.
And this adventure all started with a quick trip to the Nibble Nook. Who knows what next week’s visit will hold… and I can only hope that come April they add some of that truffle cheese back to the bin!
So tell us – does your grocery store have their own version of the nibble nook? Did you find any really outstanding cheeses there?
Crockpot Apple Butter
Apples are our ingredient of the season, so far we’ve covered a variety of baking and drinking recipes. Today it’s all about the condiment!
Have you tried apple butter yet? Apple butter is a more concentrated form of apple sauce, taking all of fall’s best flavors and turning them into the perfect little condiment. It was originally developed as a form of preserved apples that would last longer than apple sauce because of its higher sugar content. If you’ve never had it, it may be because it’s more of a regional food. Apple butter was developed in Germany and the Netherlands, making it a more popular condiment in regions of the US that were settled by people from those countries, particularly the Amish. If you haven’t had it, I encourage you to seek out a jar (or jump in with both feet and make our version below) ~ it’s soooooo good! Stumped on how to eat it? The spread is often eaten with bread, but I’ll share a few more fun ideas below.


I have to admit, two weeks ago when I was making this batch of apple butter, I was exhausted and little A was squawking because he wanted to go outside, making me question why I wasn’t just running to the store to pick up a commercial jar. But I quickly had a change of heart. Other than the hour of peeling and chopping, this butter required so little work, that I’m solidly convinced it’s worth the effort, especially since I can tailor the recipe to my wants, being sure to buy organic apples, lowering the sugar, and upping the spices. Plus, the concentrated apple and spice flavor is such a perfect condiment for the season, and that’s what we’re all about!
I have made apple butter many times, and never the exact same way, but every time it turns out delicious. I’ve made batches that started with 40 lbs of apples all the way down to this measly batch that started with 4.5 lbs. I’ve also made it in an electric roaster, an electric frying pan, and a crockpot. I’ve found the crockpot to be the easiest, but use what you have! That’s all to say – this particular condiment is so forgiving. As long as you start with a big pile of apples and allow them to cook down slowly with a touch of spices, liquid, and sugar, you’ll end up with something delicious. I promise.

Ingredients
Recipe makes approximately 5 cups of apple butter.
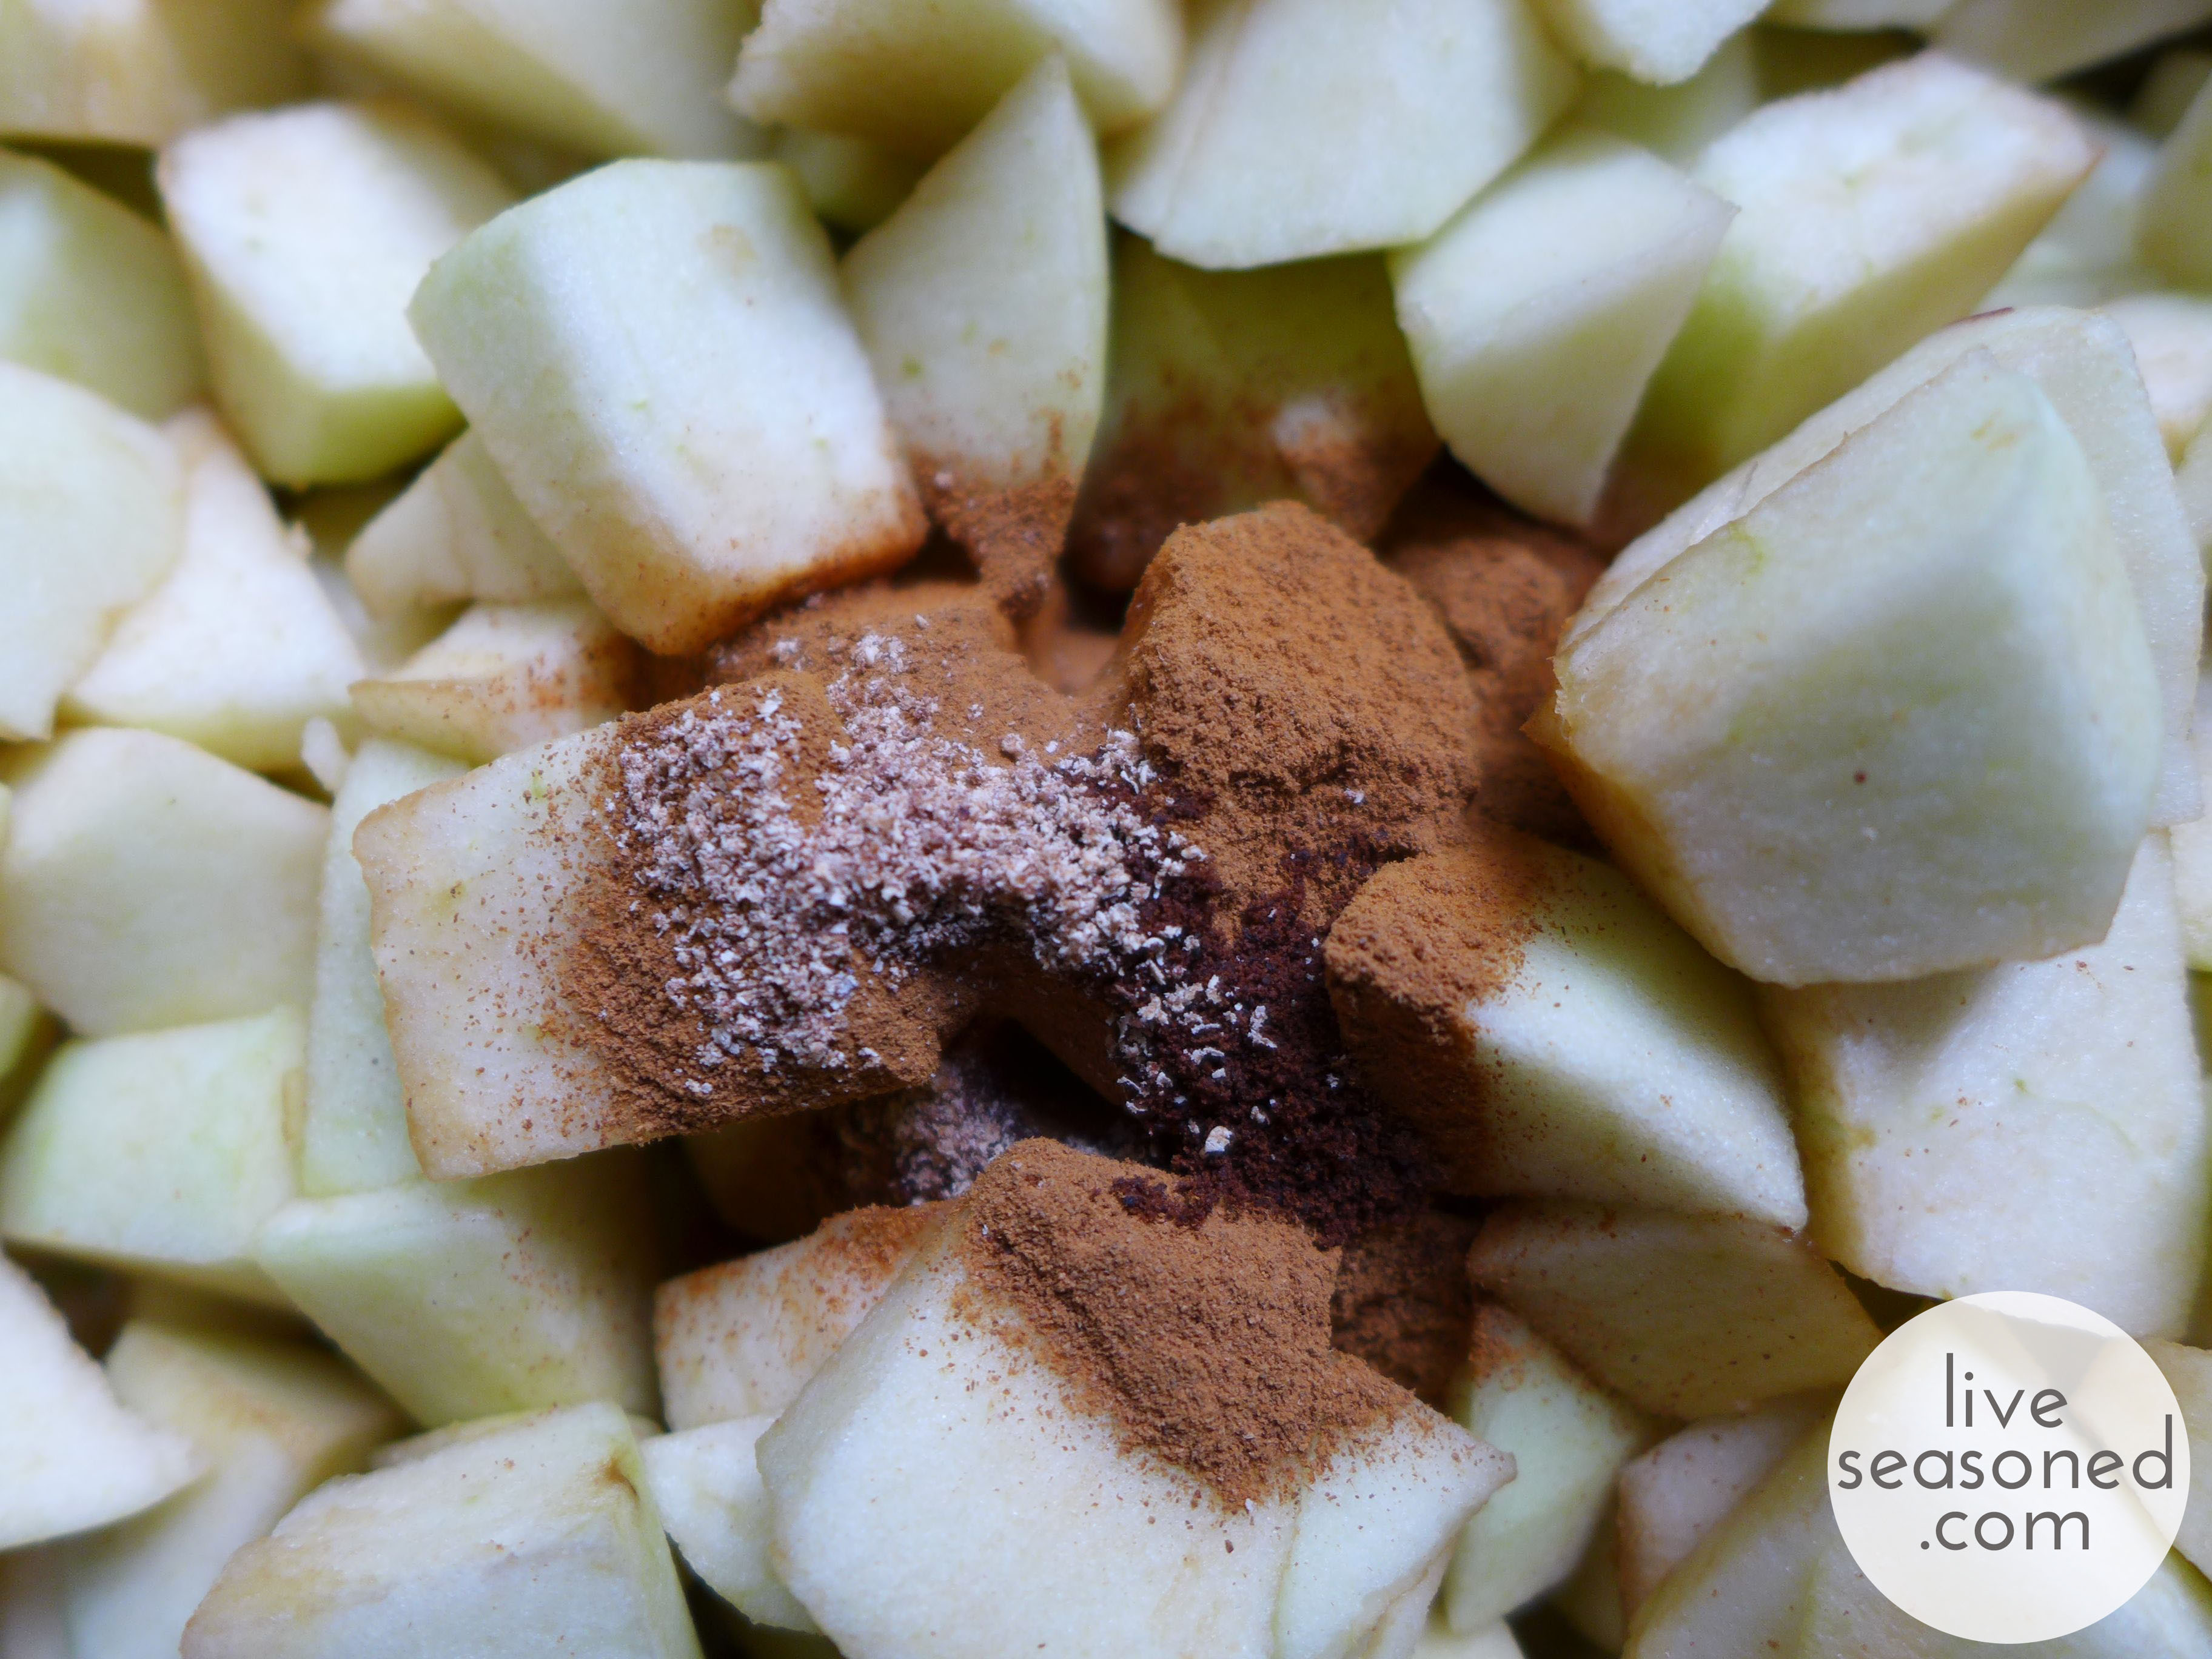
- 4.5 pounds of McIntosh Apples, peeled, cored, and chopped
- 1 cup brown sugar
- 1 tbsp ground cinnamon
- 1/2 tsp ground nutmeg
- 1/4 tsp ground cloves
- 1/4 tsp salt
- 1.5 cups water (or you could substitute apple cider for half or all of the water)
How-to
- Mix all ingredients together in your slow cooker and put the lid on, but leave it slightly ajar to allow steam to escape.
- Turn it on high for 3 hours, at the end of three hours give it a good stir and assess the pot. If there’s a lot of liquid, you could keep it on high for another couple of hours before turning it to low. If the apple butter is more concentrated, you can turn it to low immediately and let it cook for an additional 4-5 hours (or longer) until you reach your desired apple butter consistency. You can even remove the lid in the last few hours of cooking if you want to let more steam out, but as your butter nears the end, be careful to stir it and watch for any signs of burning (this is less of an issue if the lid is partially on, slowing the evaporation).
- When your butter is done cooking, let it cool. I do this with the lid off to allow for that final dose of evaporation and concentration. Transfer it to a container and refrigerate.

A freshly mixed batch.

The same pot after 3 hours of cooking on high in a crockpot.
Tips and Tricks
- Use a wire whisk for all of your stirring. It’s a great way to break up the apples and get a smoother consistency than if you use a spoon.
- If you have to leave the pot for while at work, just start with the crockpot on low for that time. Similarly, some people will start their butter at night and let it cook on low while they sleep. After 8 or so hours, give it a good stir and then you can always turn it up to high for a few hours if there’s still a bit of liquid in the pot (I’ve made apple butter while at work and it’s always turned out fine).
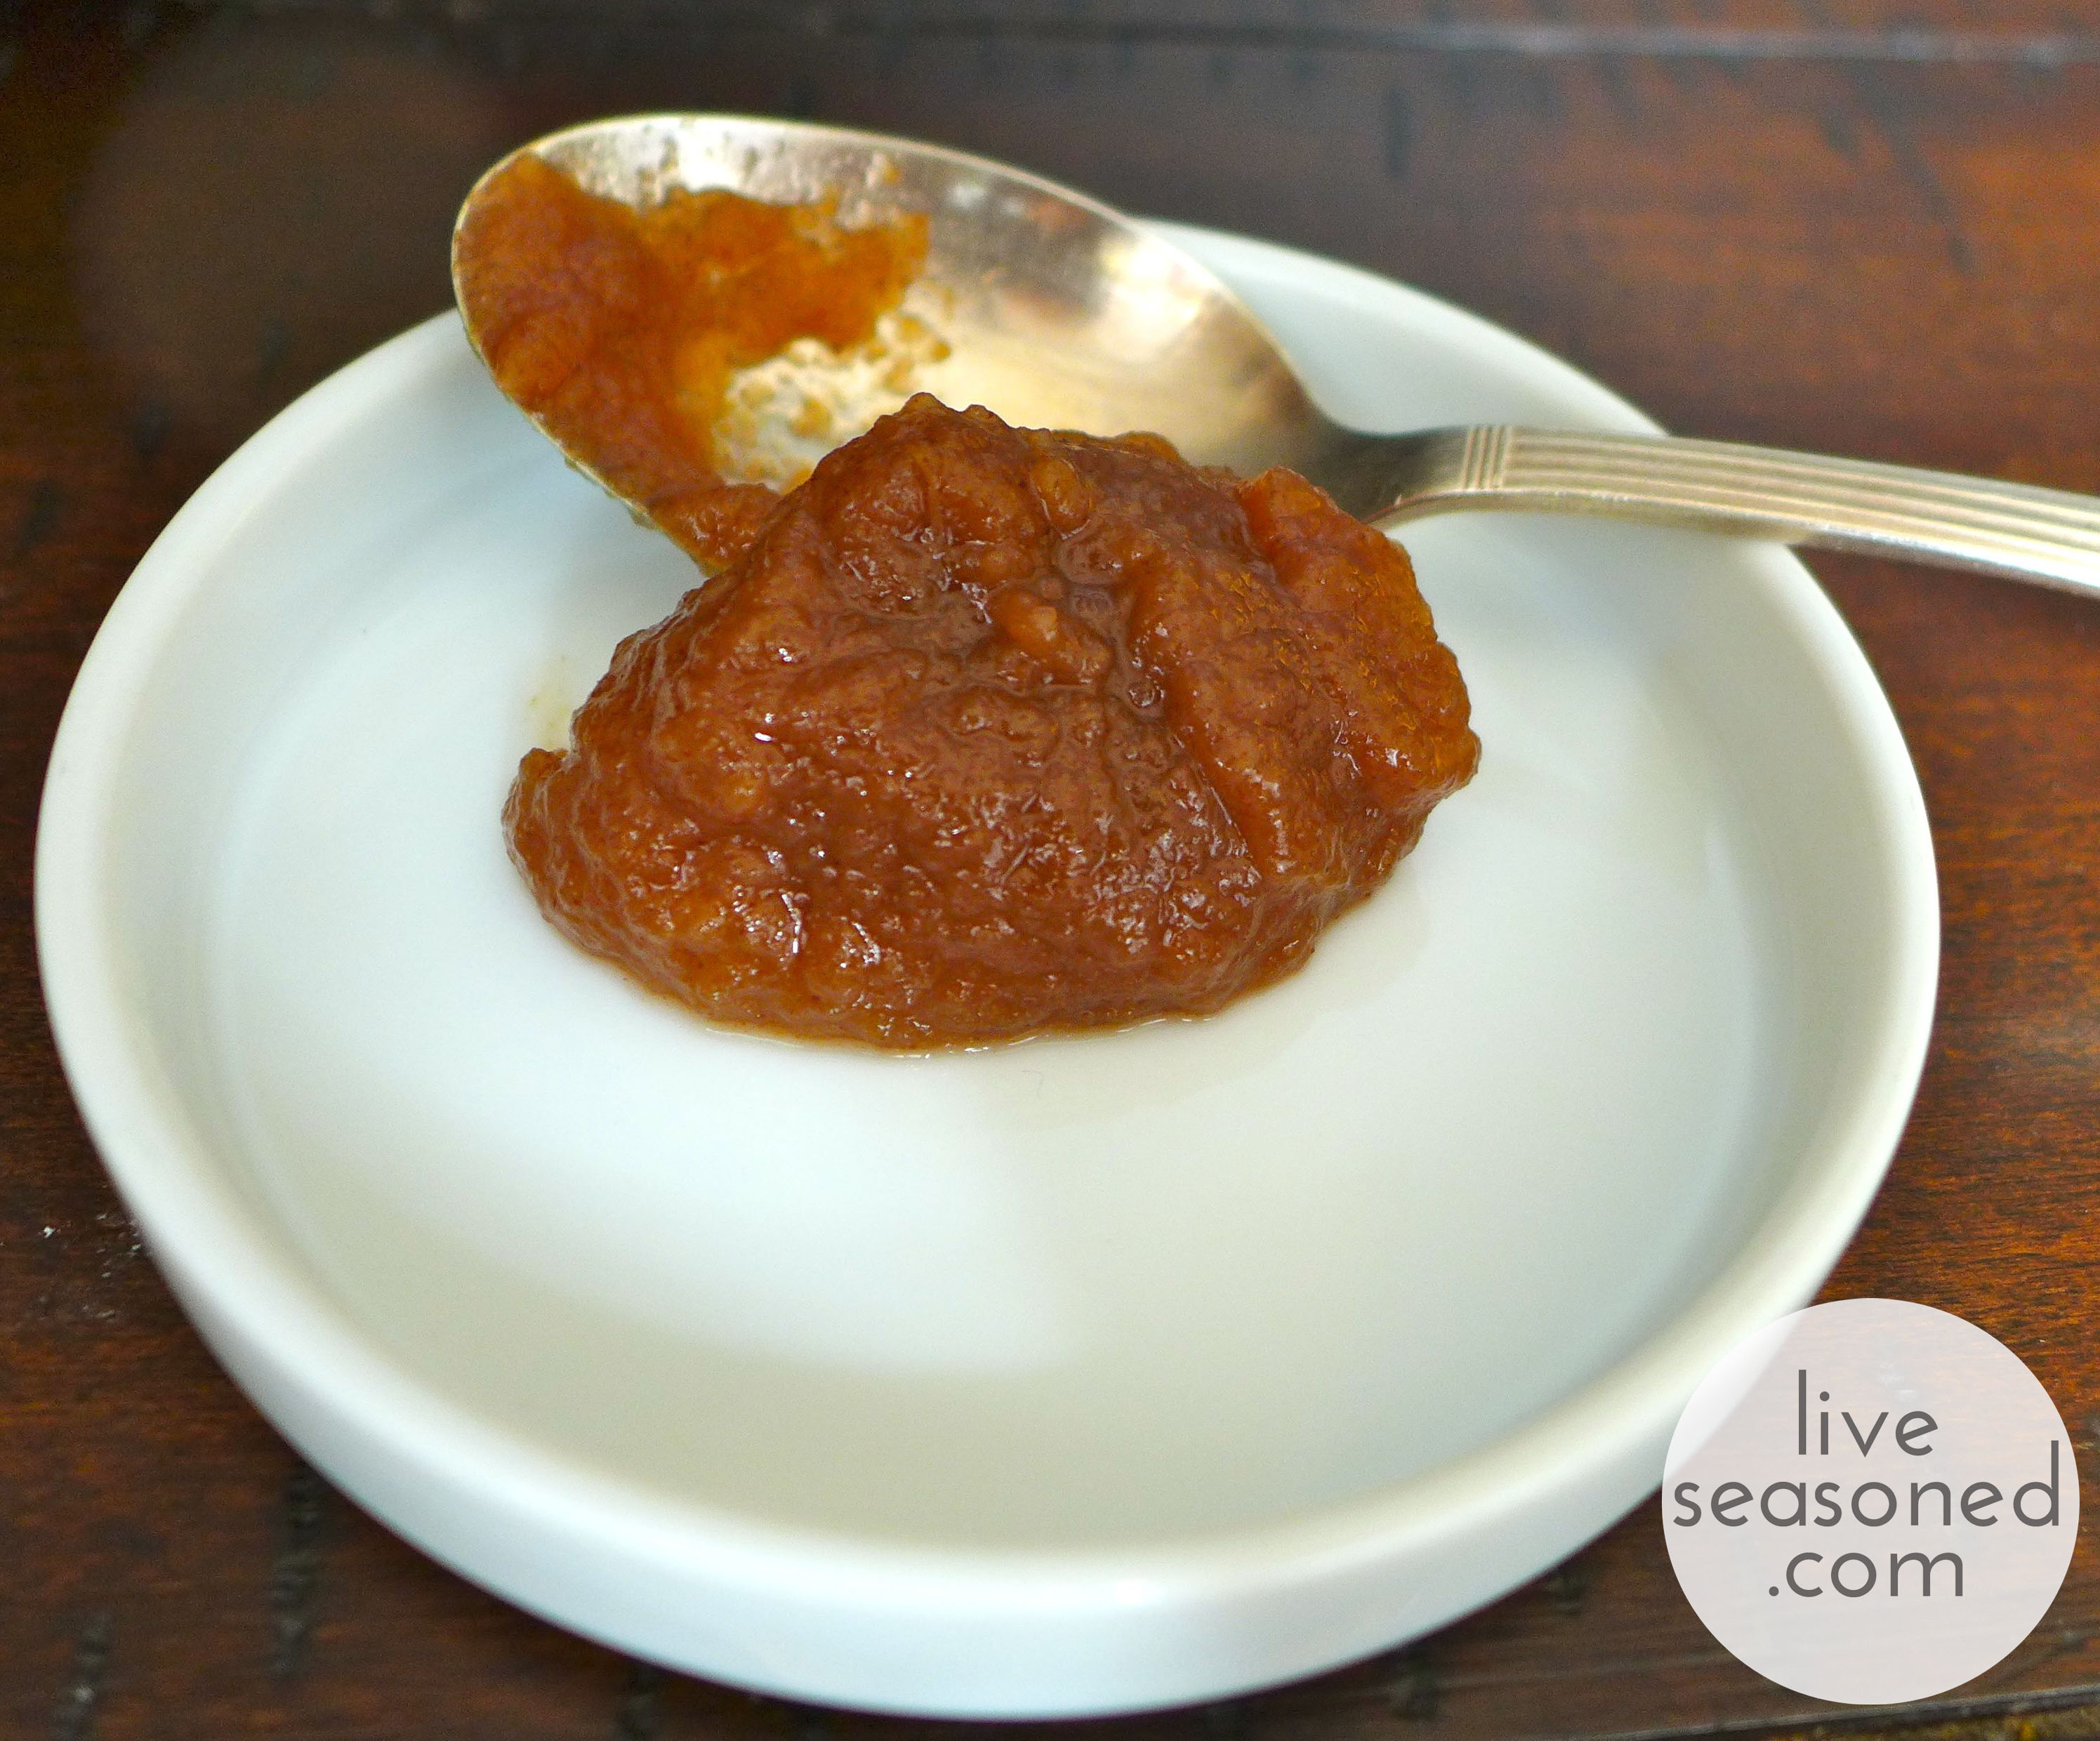
- If you’re unsure about when it’s finished, you can scoop out a bit on a spoon and pour it onto a plate – if it holds its shape and doesn’t become a pool of liquid, then it may be done.
- If you feel like the liquid is evaporating too fast and your apples aren’t cooking down and creating that caramelized brown color, then you can always add more liquid! This was the case for me when I was making big batches in the electric roaster, with such a large opening, it would let out a lot of steam (unless I had the lid positioned just right). Just add a cup at a time, stir it in well, and let the mixture continue to cook.
- As I said, I’m prone to using less sugar and more spices than other recipes may call for. Feel free to adjust those levels as you see fit. There really is so much wiggle room ~ I’ve really never had a bad batch!
Serving Suggestions
This batch made 5 cups of apple butter. We’re currently down to about 2.5 cups, so yes, we have plenty of serving suggestions!
- As I mentioned, it’s common to spread apple butter on bread. As with my jam, I like to spread on a layer of butter first and then the apple butter. It’s particularly good on bagels.
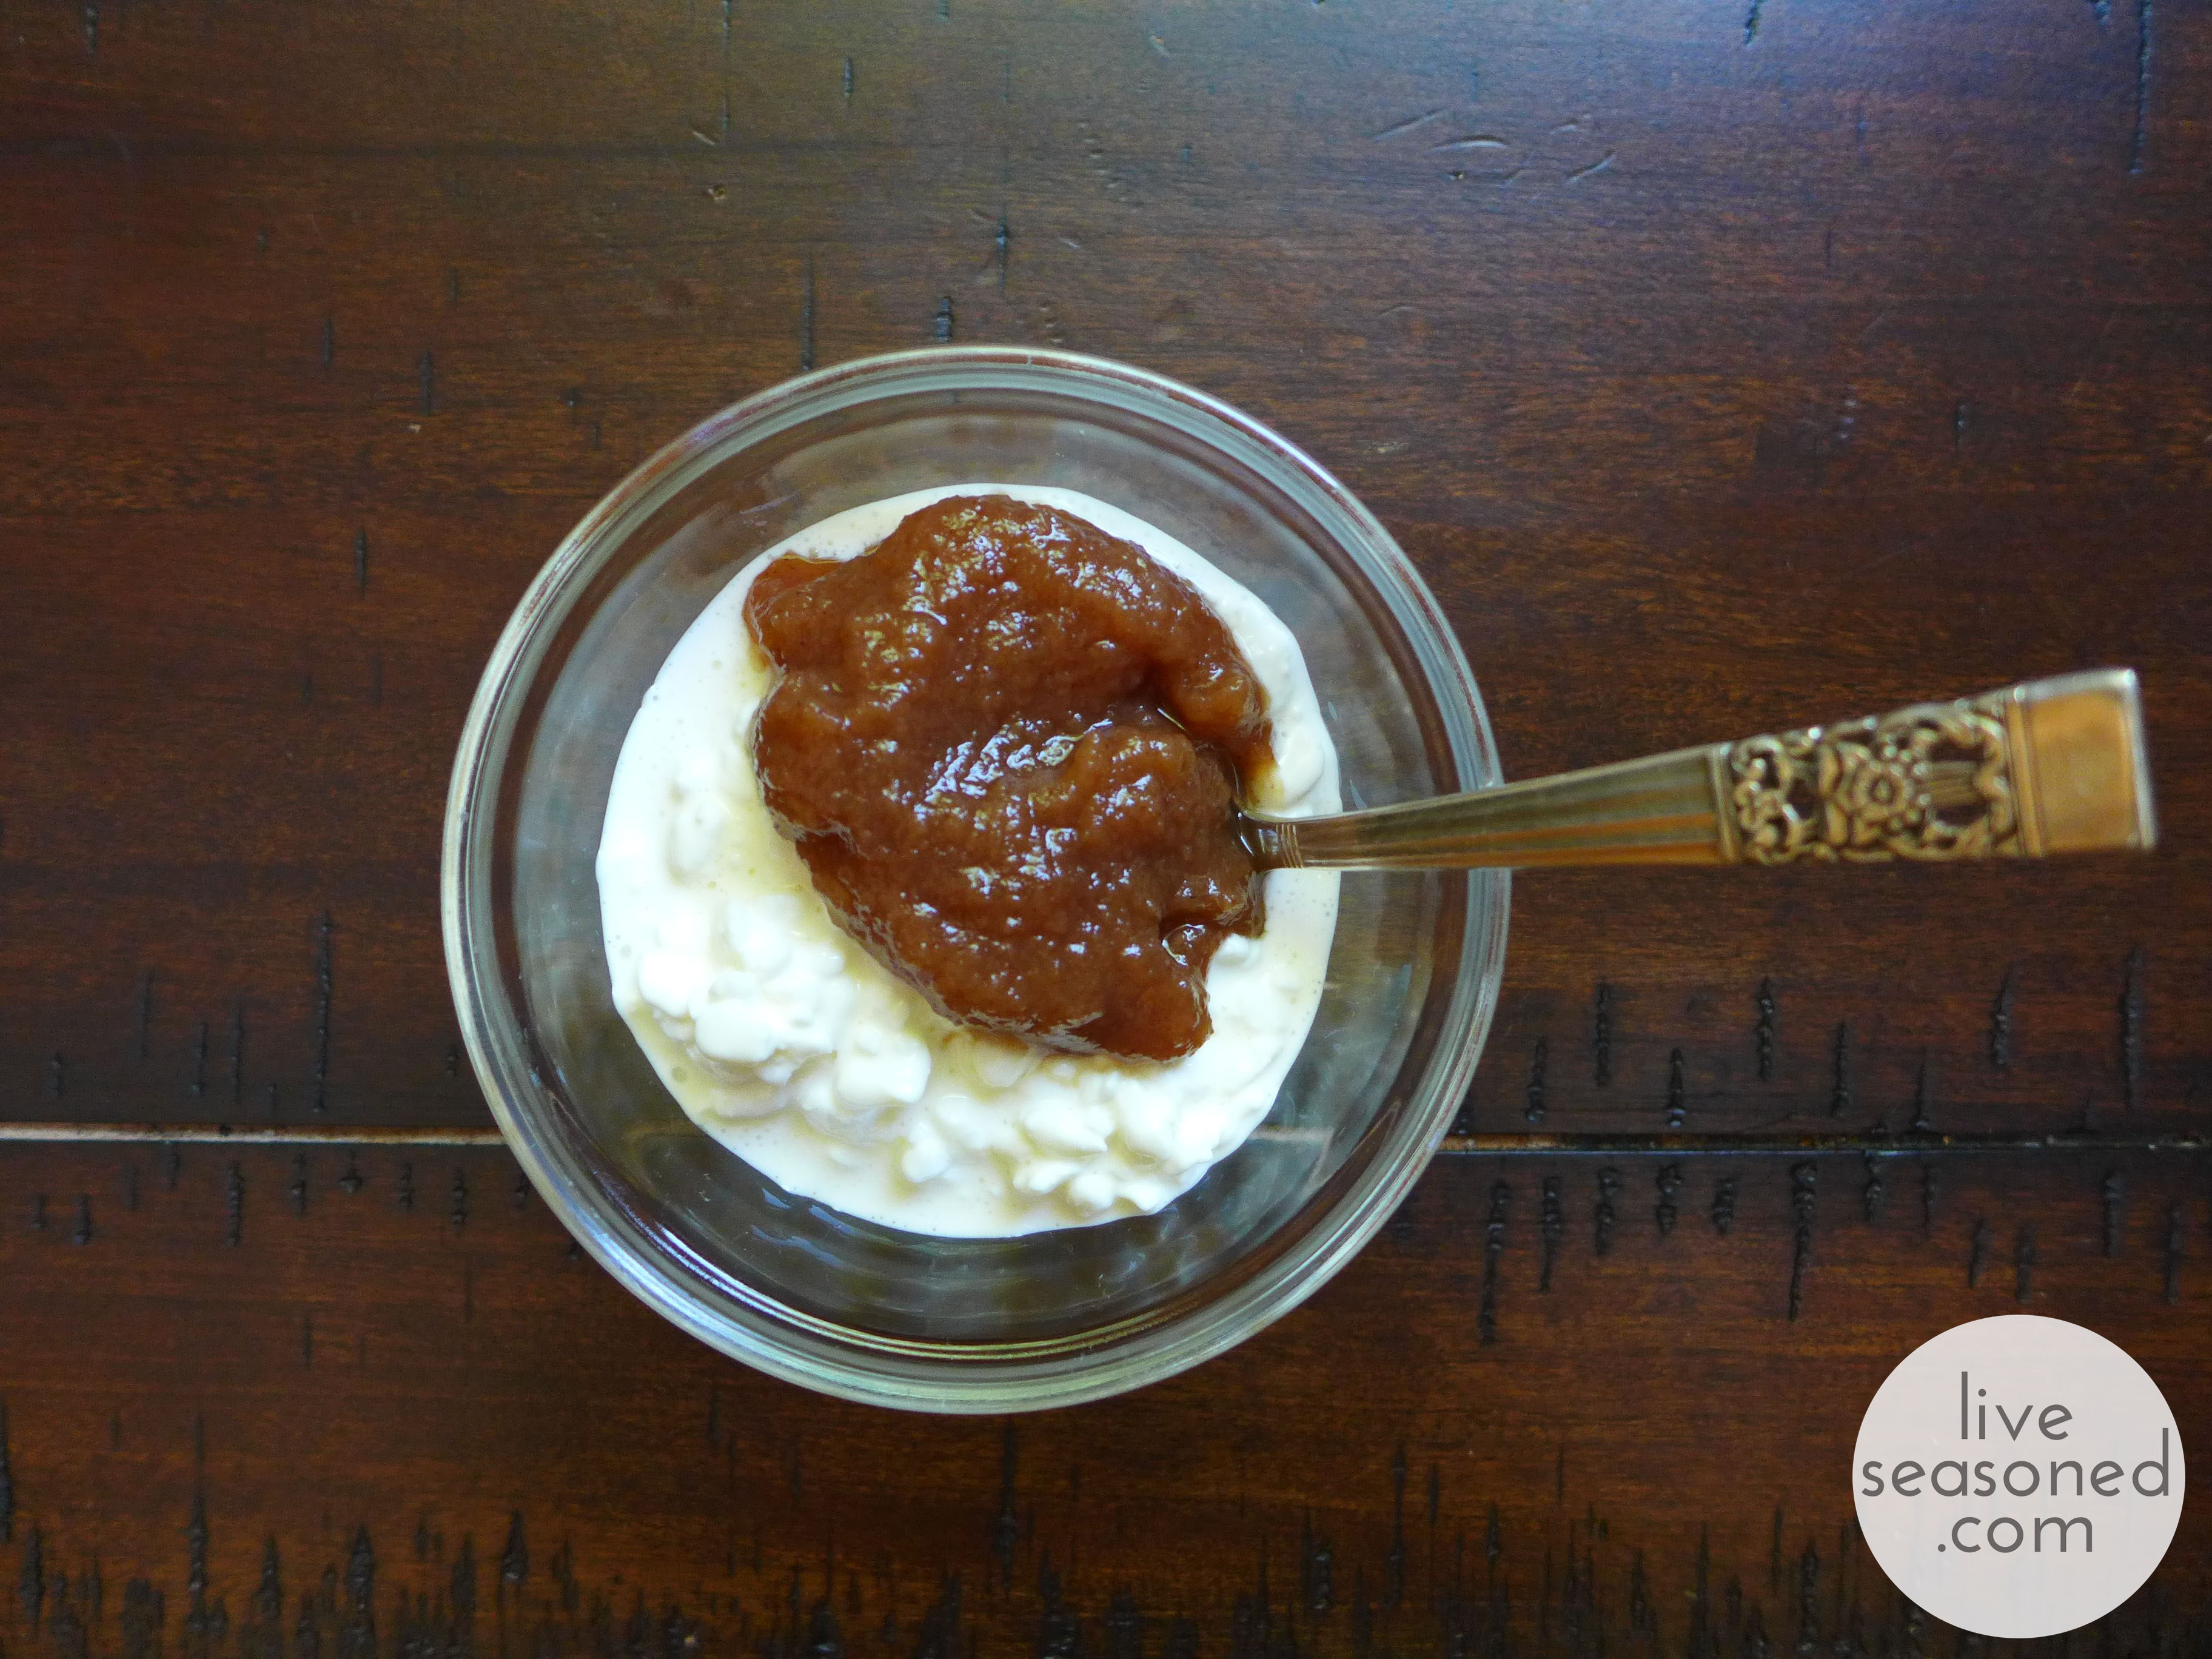
- A very common way to serve apple butter in Amish communities is with cottage cheese. This is one of my favorite ways to eat it (and Alex’s too!). If you’ve ever eaten at a salad bar in the area around Lancaster, PA, it’s very common to see cottage cheese and apple butter next to each other in the salad bar (and now you know why!).
- Similar to cottage cheese, I like to stir some into plain yogurt.
- Last weekend we added a spread of apple butter to our Saturday morning crepes with ham and cheddar cheese (Calder’s figured out a super easy way to use Bisquick for crepe-making, we’ll have to share the recipe soon!).
- When we had some dinner guests last week, I added a ramekin of apple butter to the cheese plate. It was delicious spread on baguette with either brie or cheddar!