Sampling Cheese from the Nibble Nook

We’re snacking on a lot of cheese this season. So far we’ve talked about our favorite way to eat a few staples, but today we’re going out on a limb and trying some new varieties!
liveseasoned_fall2014_nibblenook5_wm

There really are so many cheeses out there, and while I’m an adventurous eater, I often find myself sticking to a handful of cheeses that I know and love. Just walking up to the cheese counter is overwhelming ~ so many varieties, where do I even start? And then I would look at some of the prices and just shyly turn around and pick up my Cabot or Brie Supreme and go on my merry way. Or, that was the scene until I discovered Whole Food’s Nibble Nook!

liveseasoned_fall2014_nibblenook1_wm

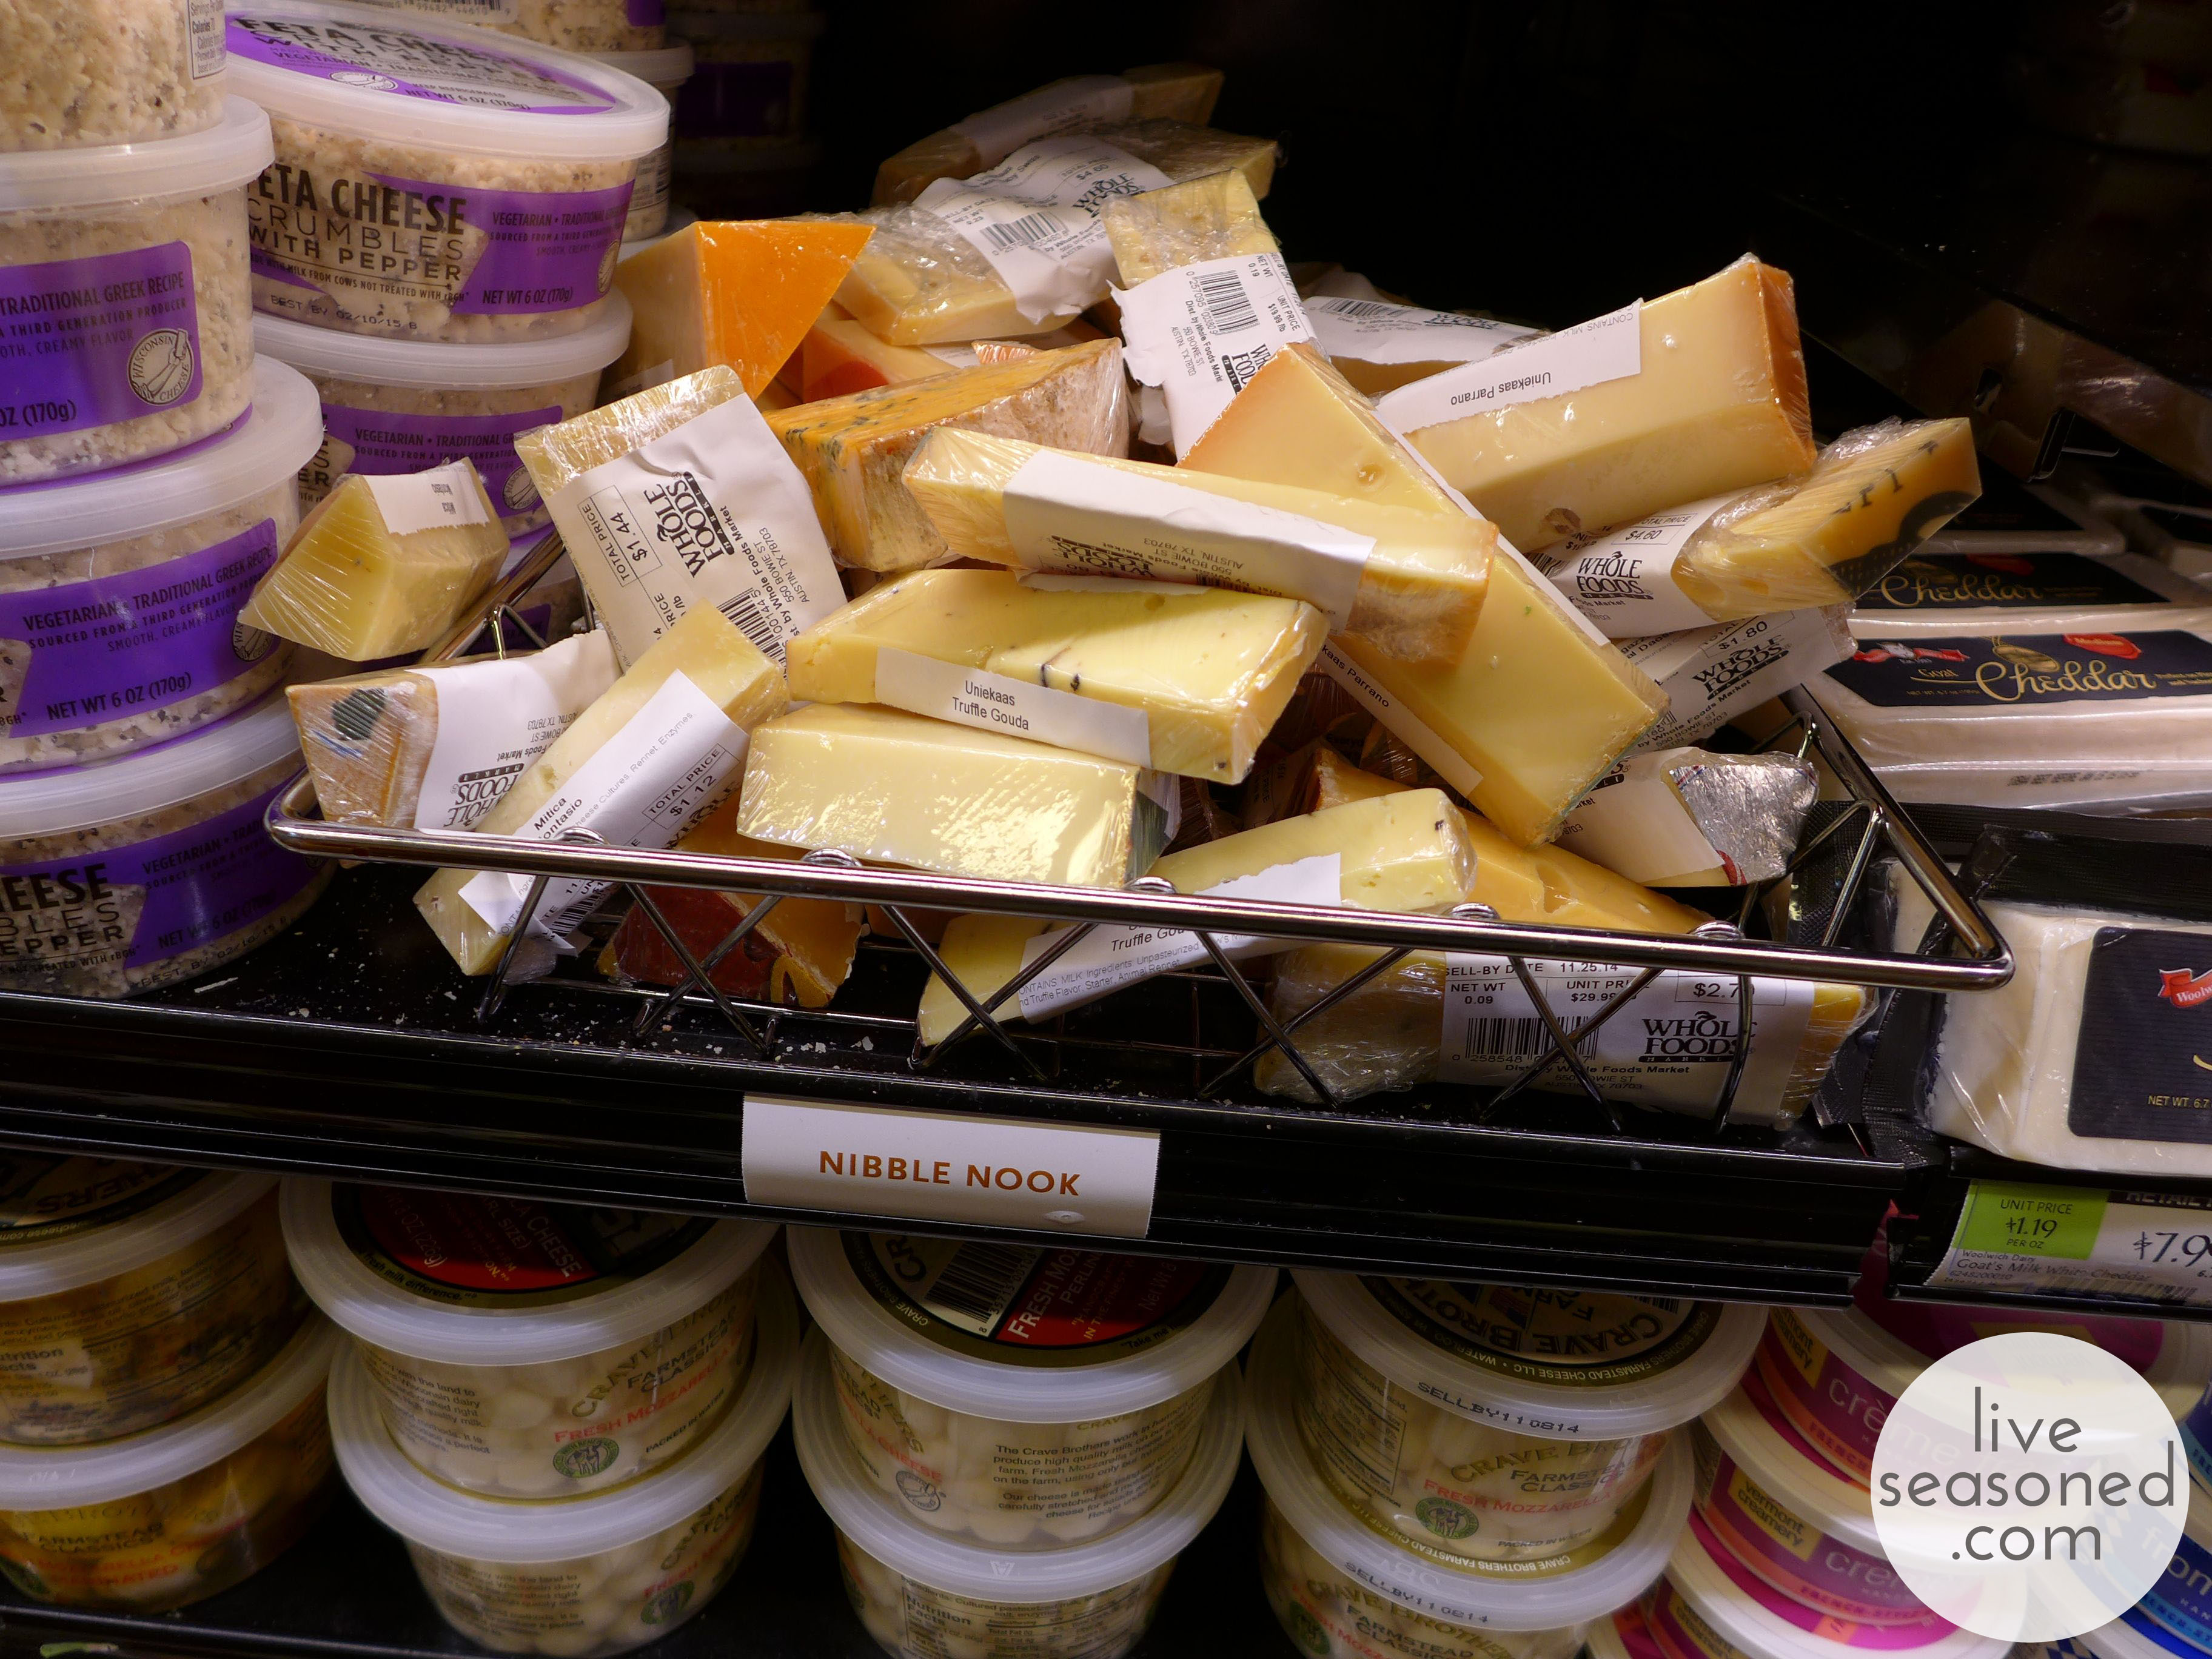
The Nibble Nook is a little basket of cheese ends/remnants (you can see it above tucked in between their off-the-shelf cheddar, feta, and mozzarella). My guess is that many grocers selling cuttings of large cheese wheels may have their version of a nibble nook. If you’re open to trying some new cheese and flexible as to the options available, the Nibble Nook is a great place to look. The selection within the basket is constantly changing as different cheeses are cut and as shoppers pick out their favorites. And the cuts are small, so while I would be hesitant to be a large wedge of a cheese that’s priced at over $20/lb, I’m happy to buy a small bit for nibbling.

liveseasoned_fall2014_nibblenook3_wm

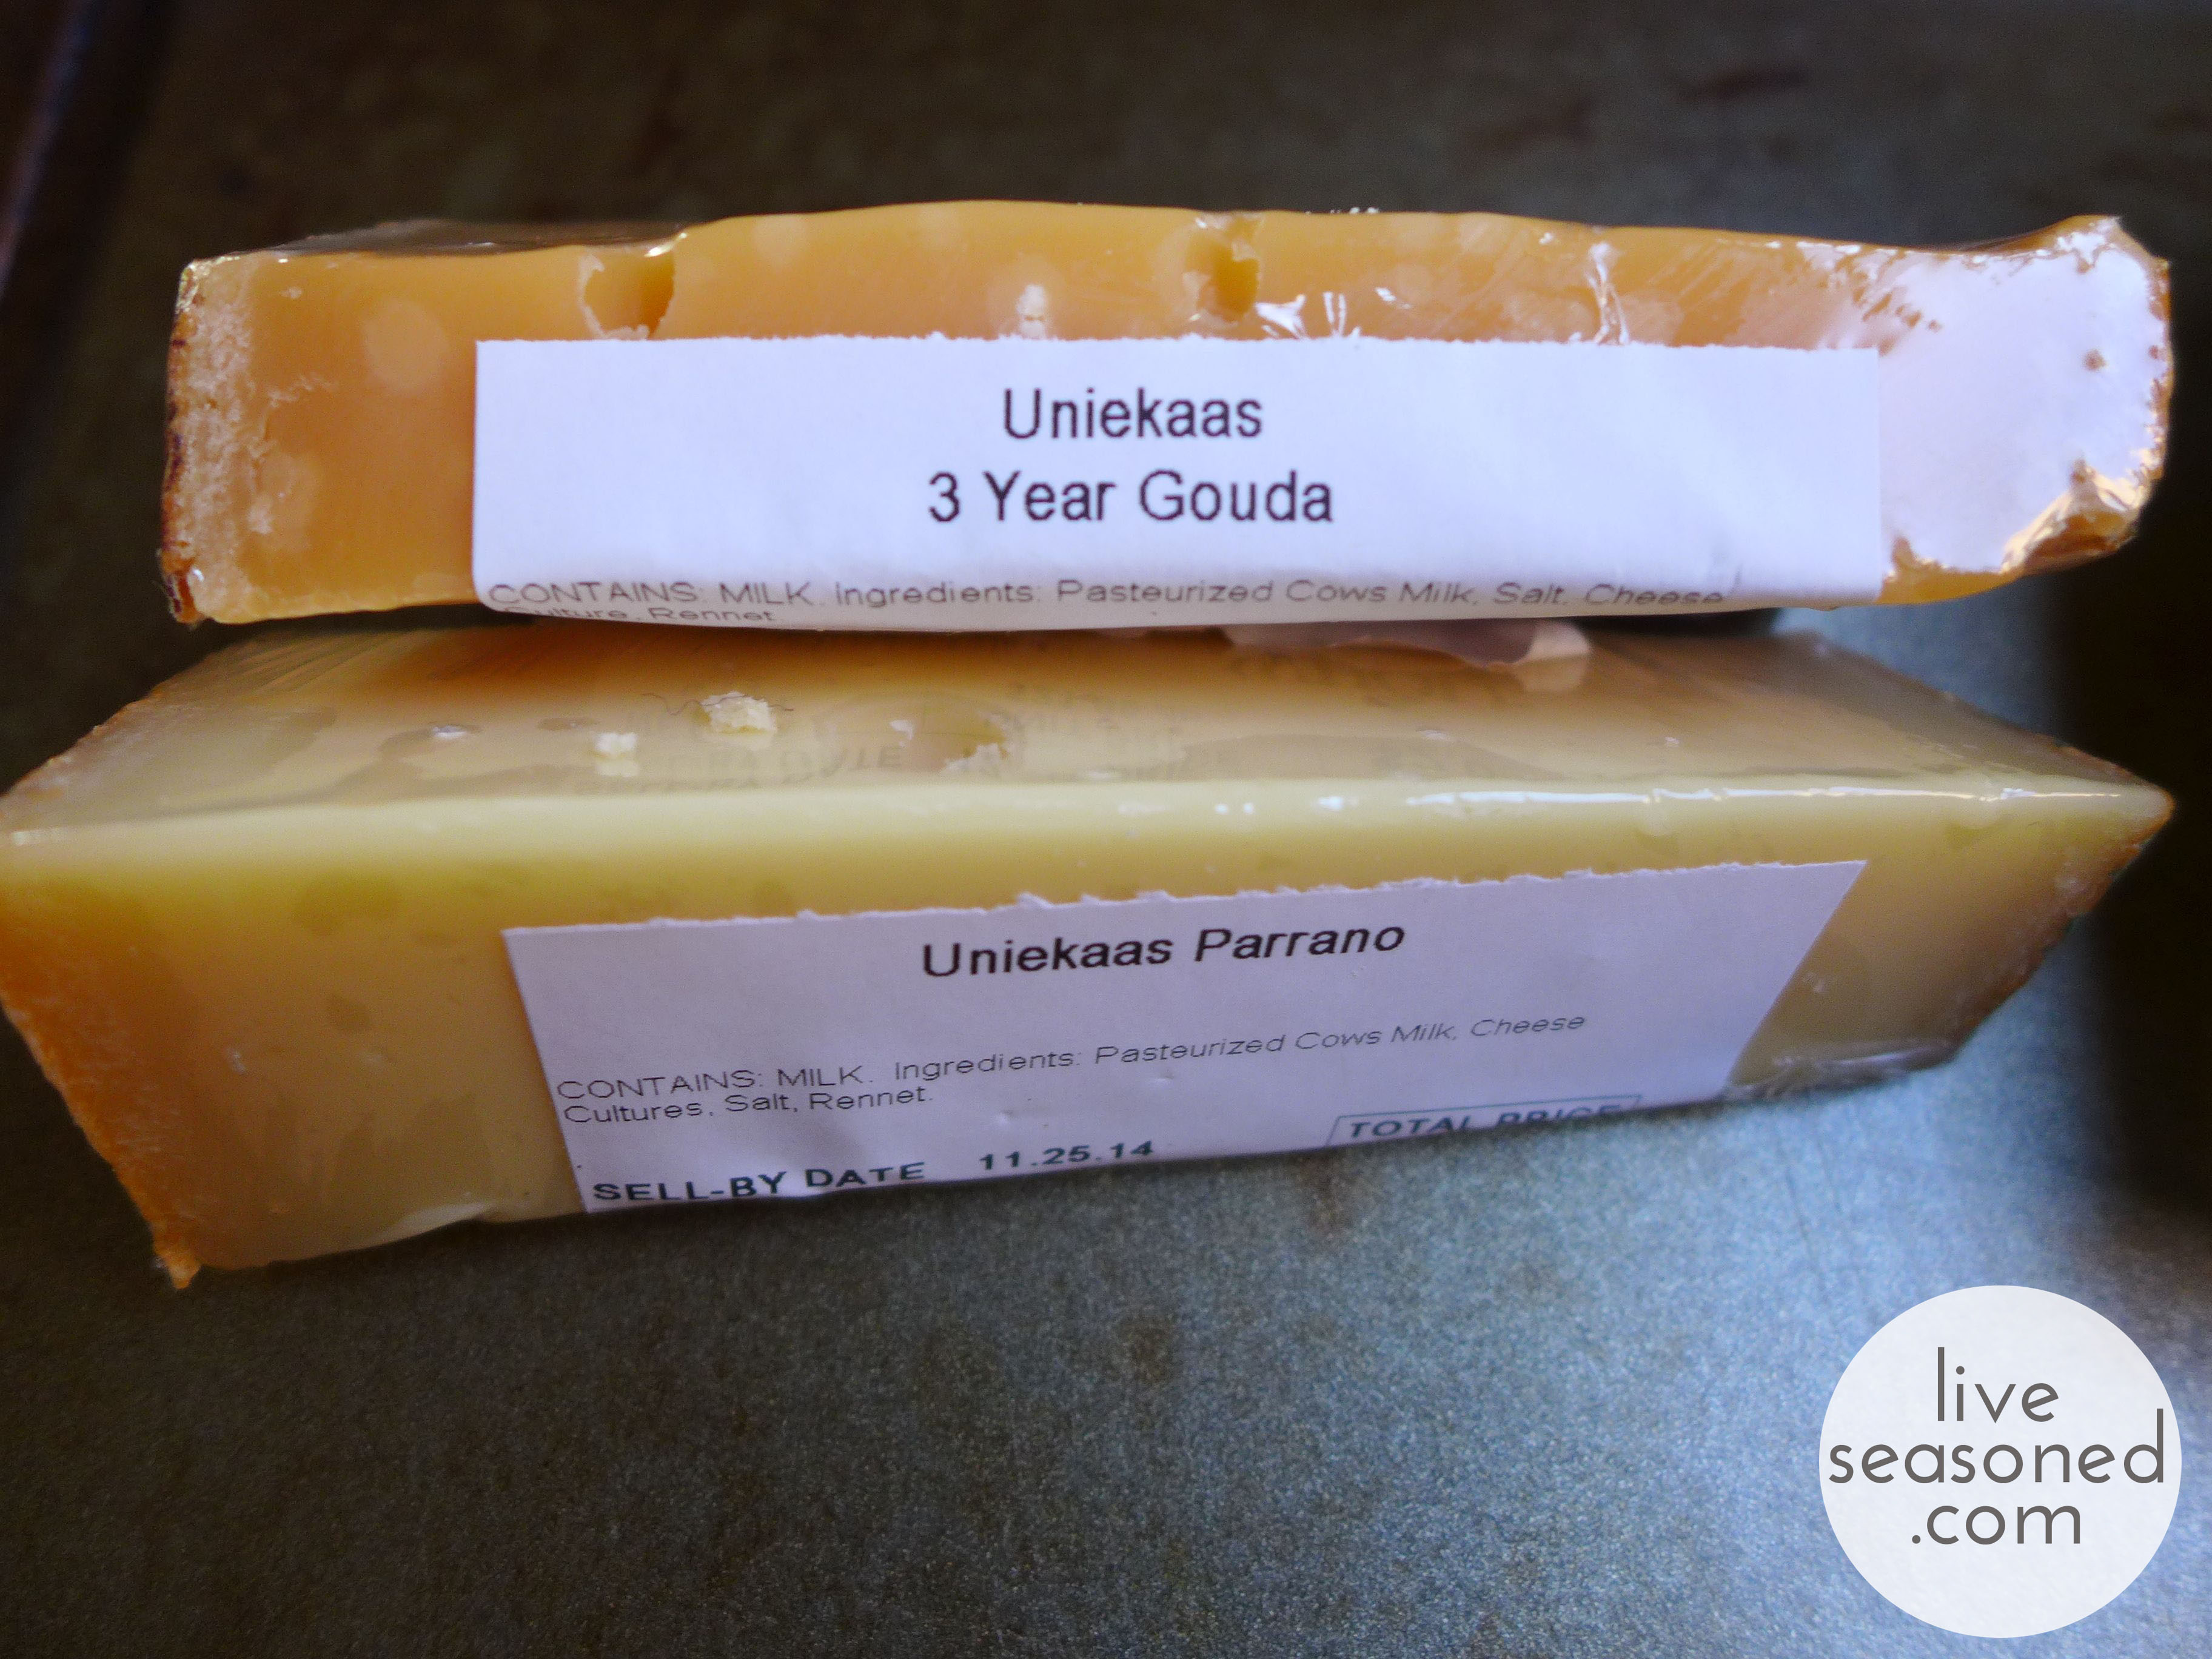
I always approach the bin with an open mind and pick out any cheeses that look promising (that’s every cheese), and right now I’m also sticking to only those made with pasteurized milk. On this particular visit, the bin was overflowing with two varieties of hard cheese from Uniekaas, a Dutch company: a 3 year Gouda and a Parrano. I’m sad to say, I had to pass on a beautiful looking cheese that had bits of black truffle throughout but was made with unpasteurized milk. From the labels, you can see that each of the cheeses I picked has a big price tag ($22 and $15 per pound), but the wedges are both close to a tenth of a pound, making it an affordable splurge (is that a thing?).

liveseasoned_fall2014_nibblenook2_wm
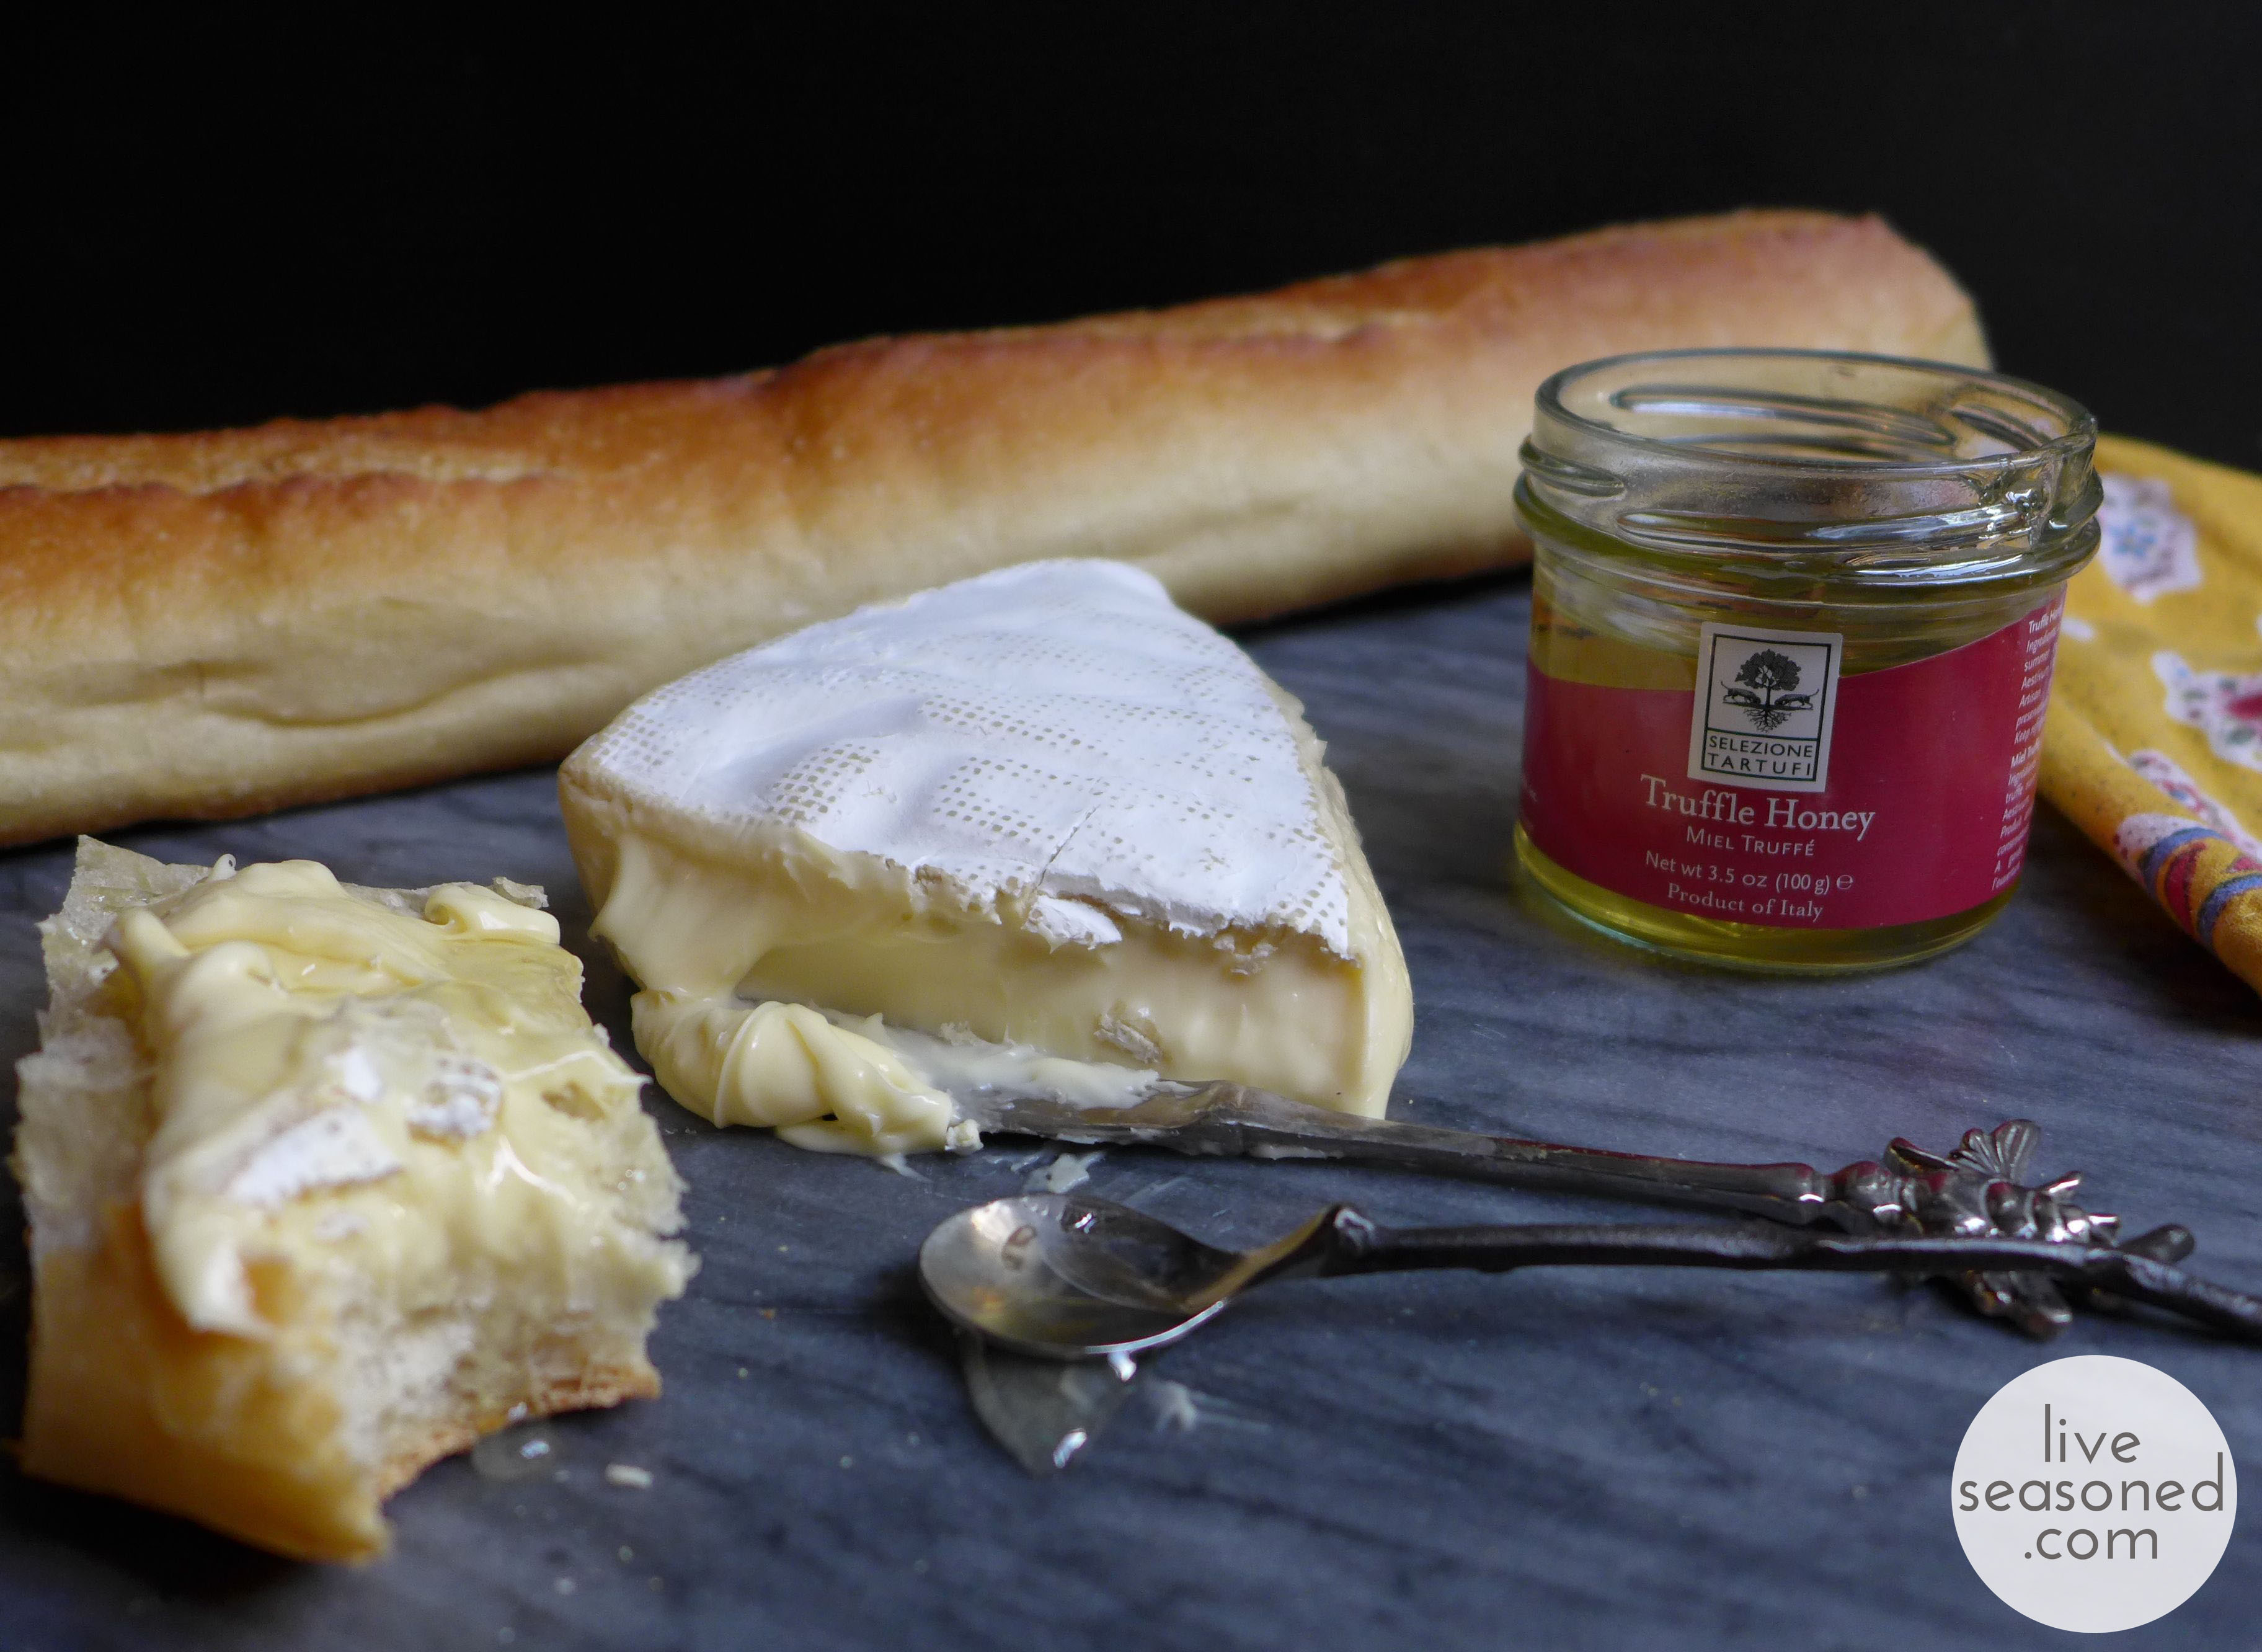
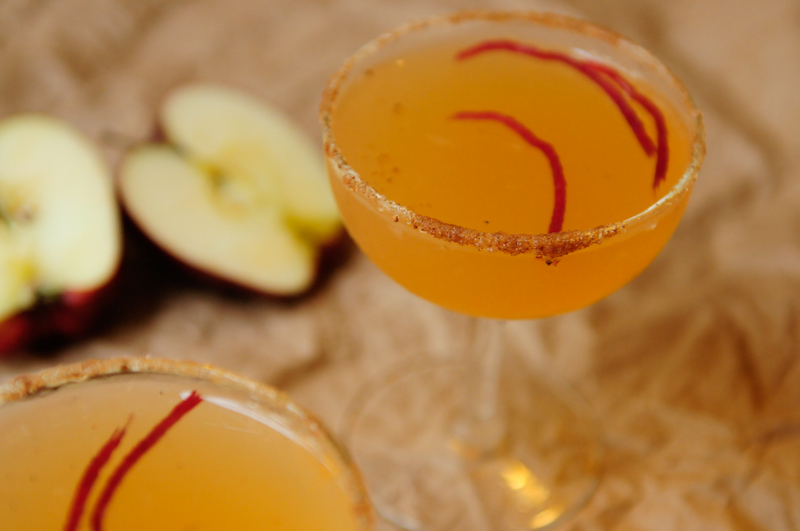
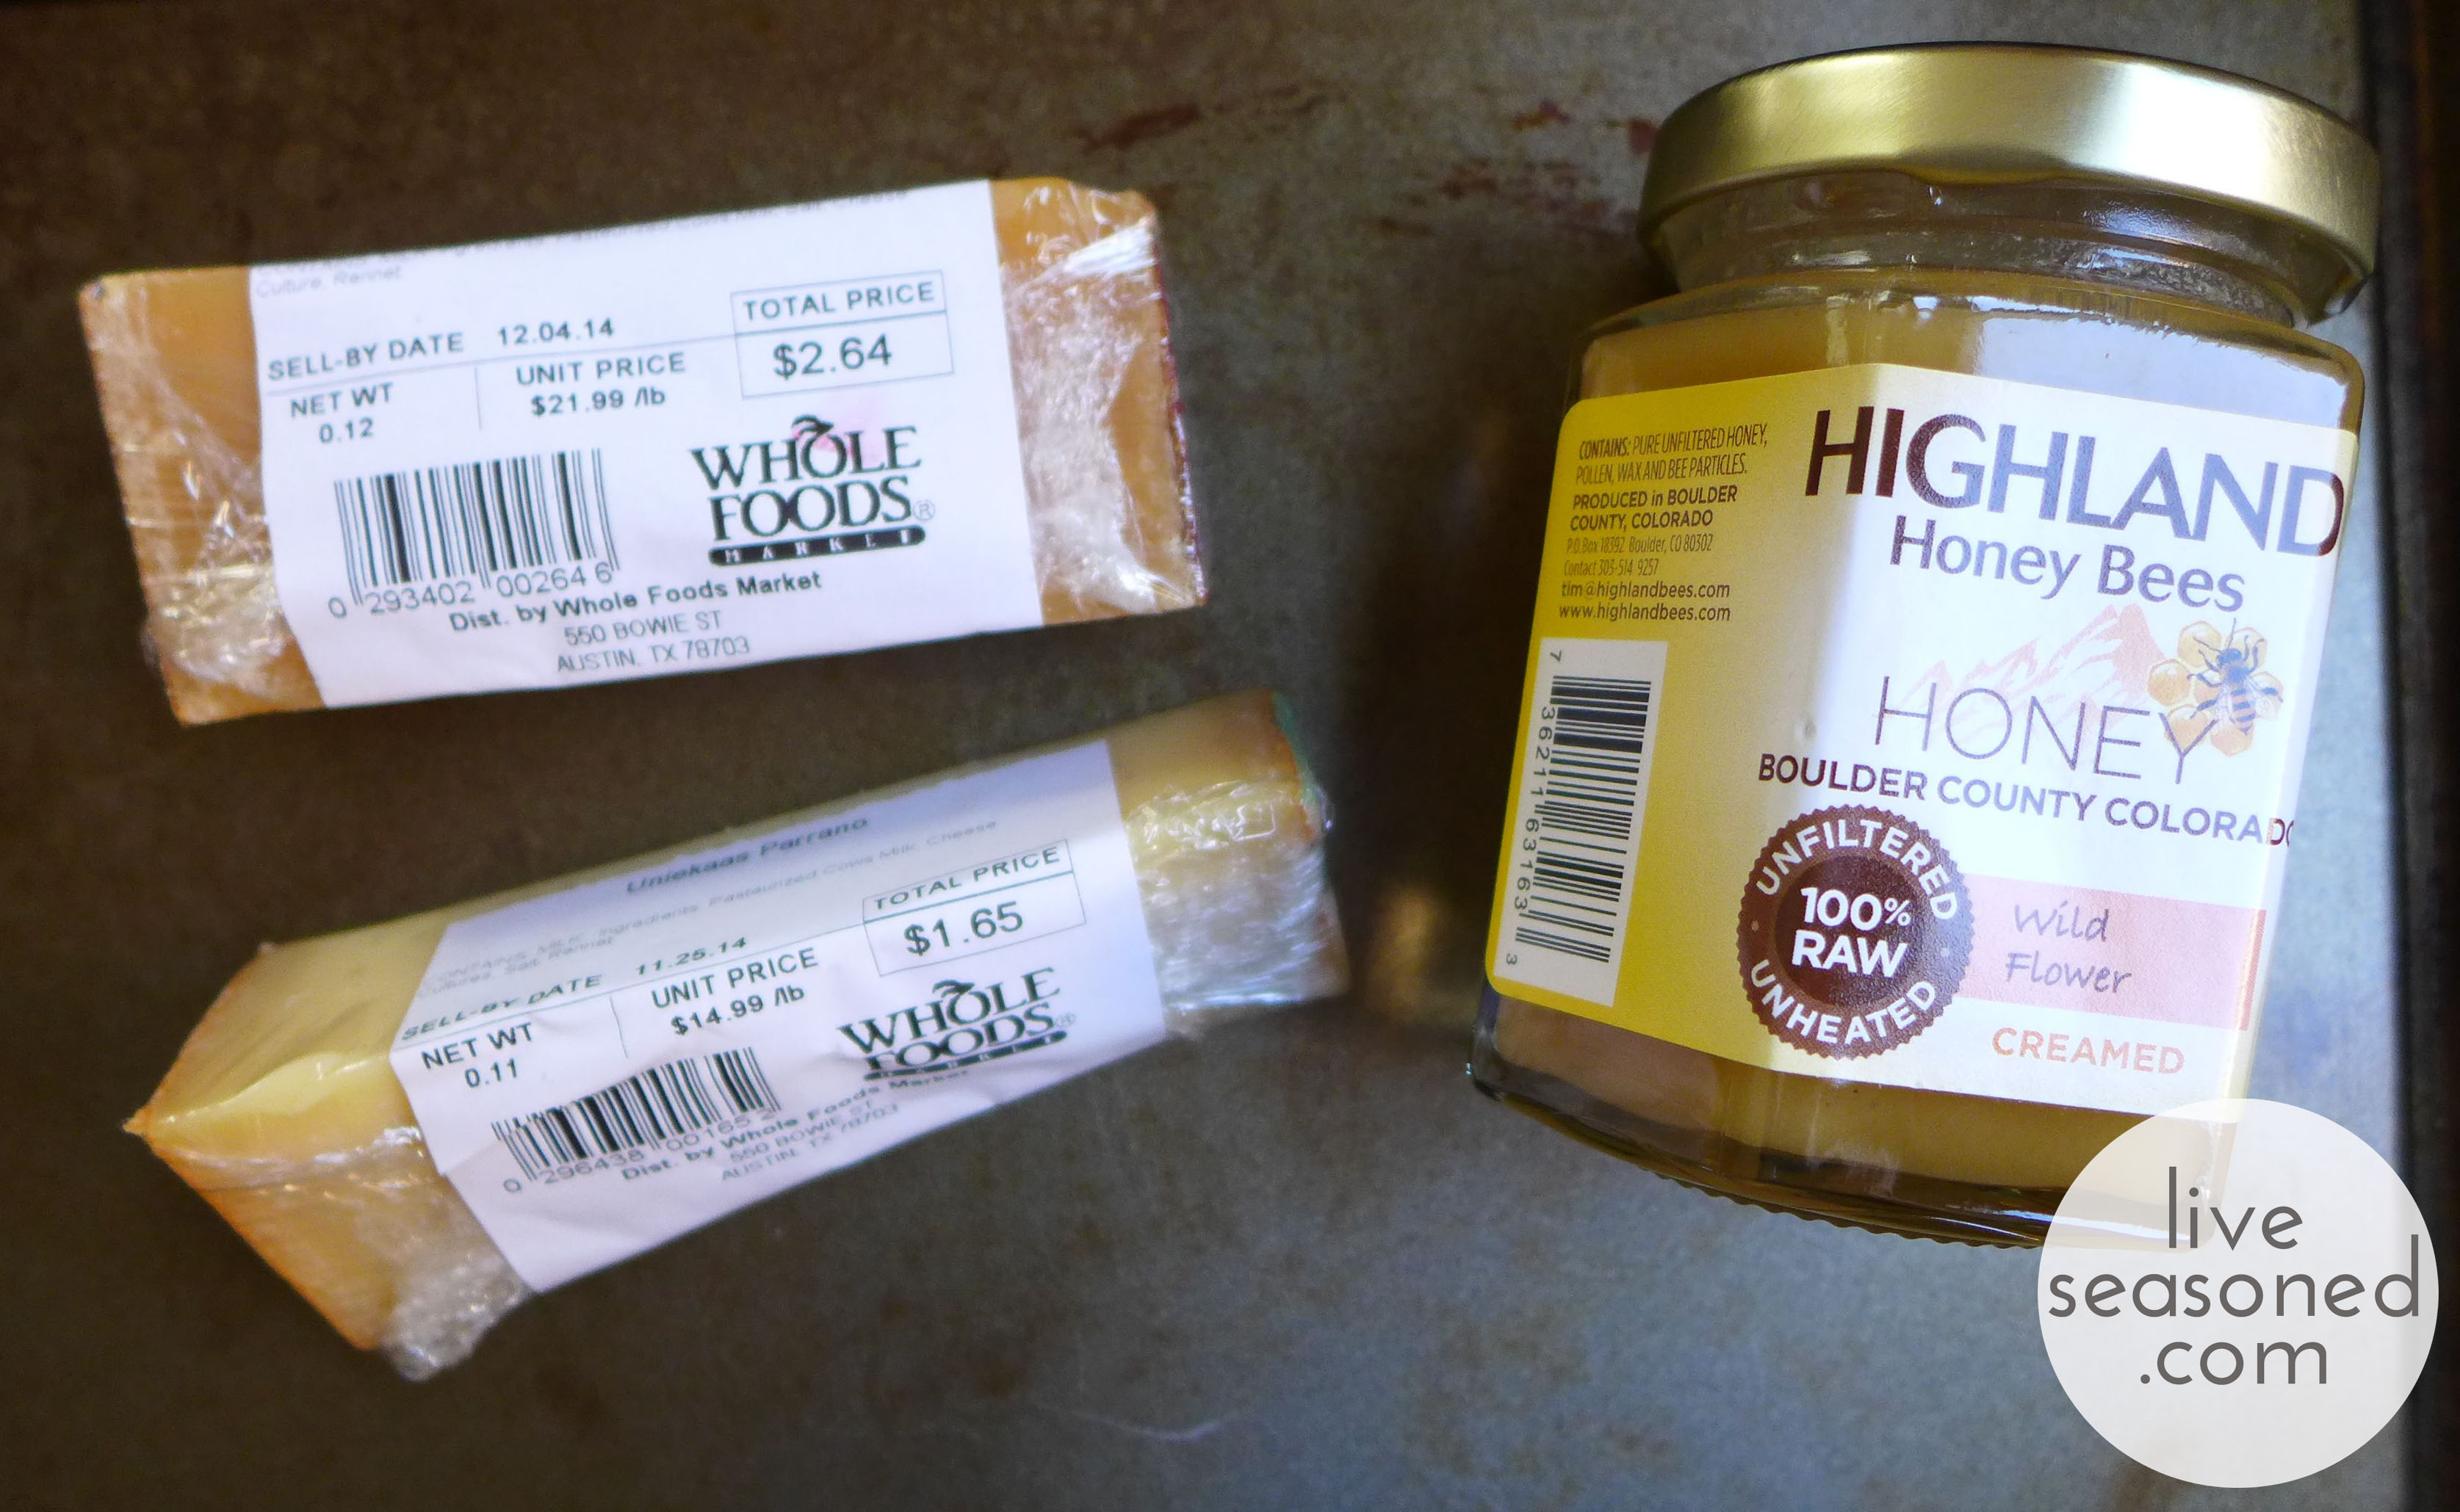
I also love Whole Foods visits for their constant sample tables, on this particular day a table of raw uber-local honey (from hives within our county!), was perfectly positioned at the end of the cheese aisle. They even happened to be serving up the samples with a variety of Parrano, so I had to pick up a jar. And as you’ll see, it ended up making such a perfect treat!

liveseasoned_fall2014_nibblenook10_wm

A little bit about the cheeses. Both of these cheeses are considered great snacking cheeses in the Netherlands, their home country.

Gouda

(The orange cheese in these photos)

Gouda is a Dutch hard yellow cheese made from cow’s milk. The cheese may be aged anywhere from a month to many years. This particular Gouda was aged for three years, classifying it as a “very old cheese”.  As a Gouda ages it acquires a caramel sweetness and develops a slight crunch from cheese crystals that form as water within the cheese evaporates. The cheese’s sweetness is due to removing some of the whey, which also removes some of the lactic acid, early in the cheese-making process and replacing it with water.

Parrano

(The white cheese in these photos)

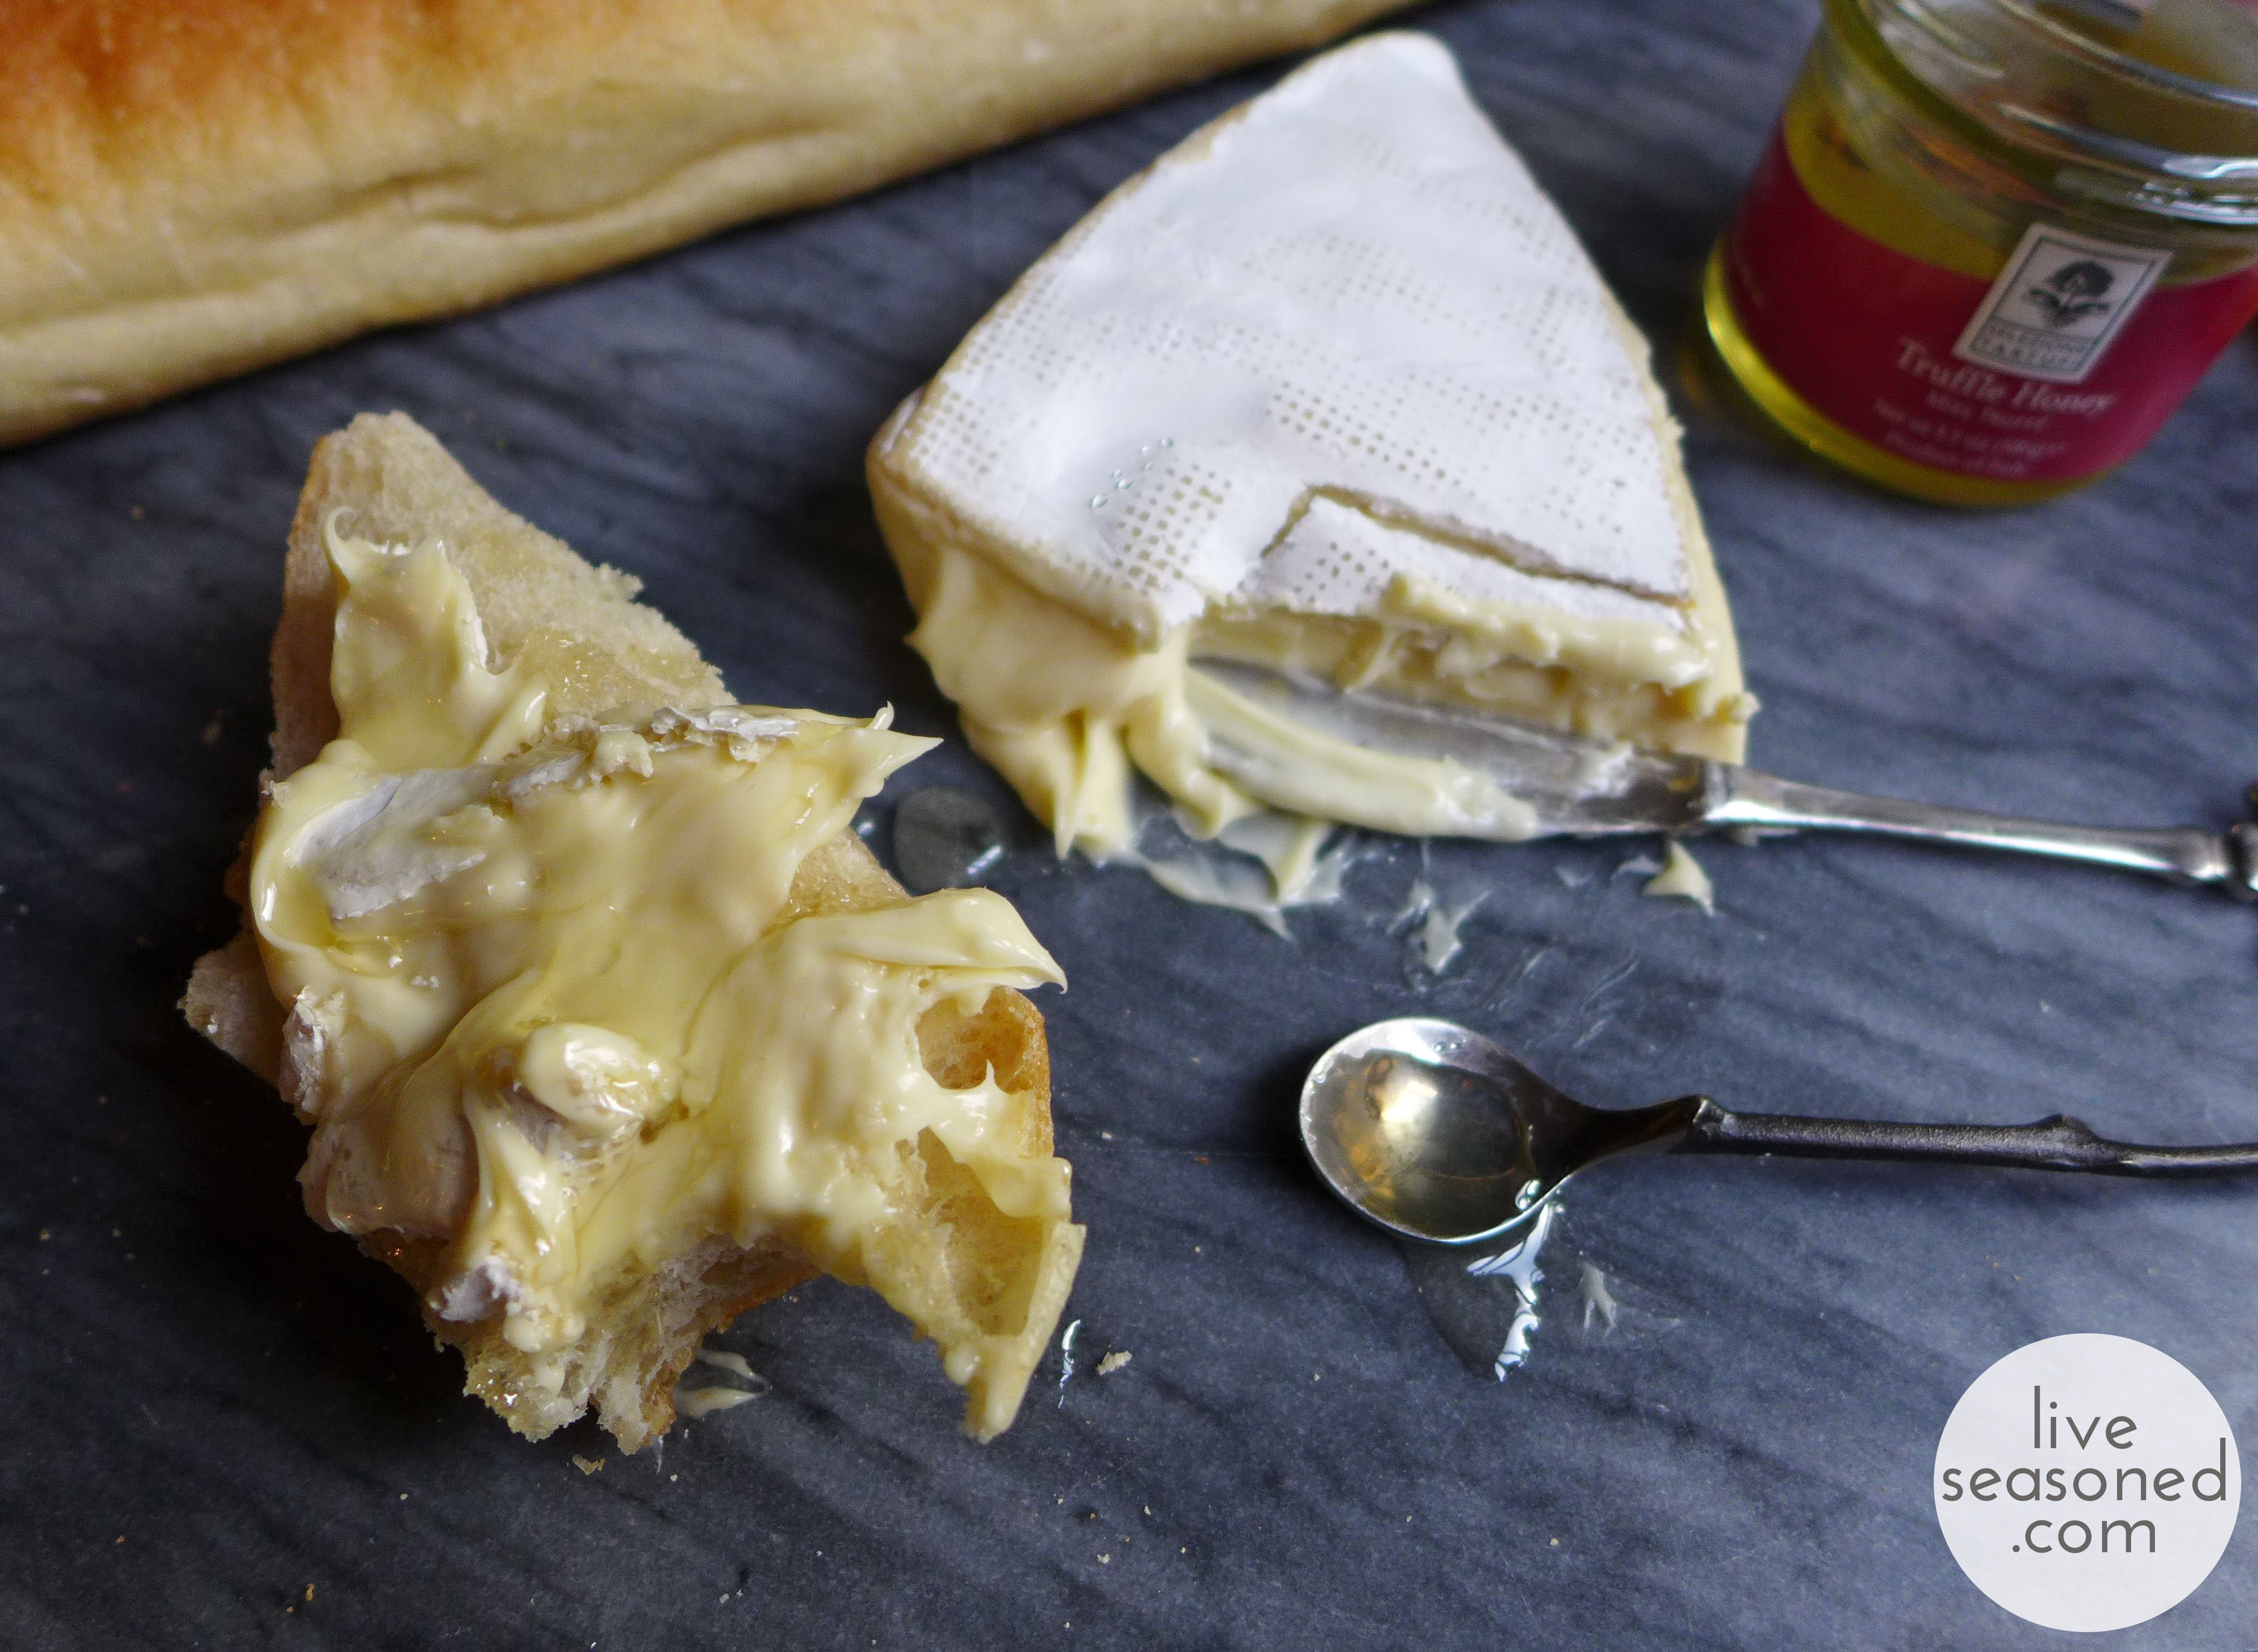
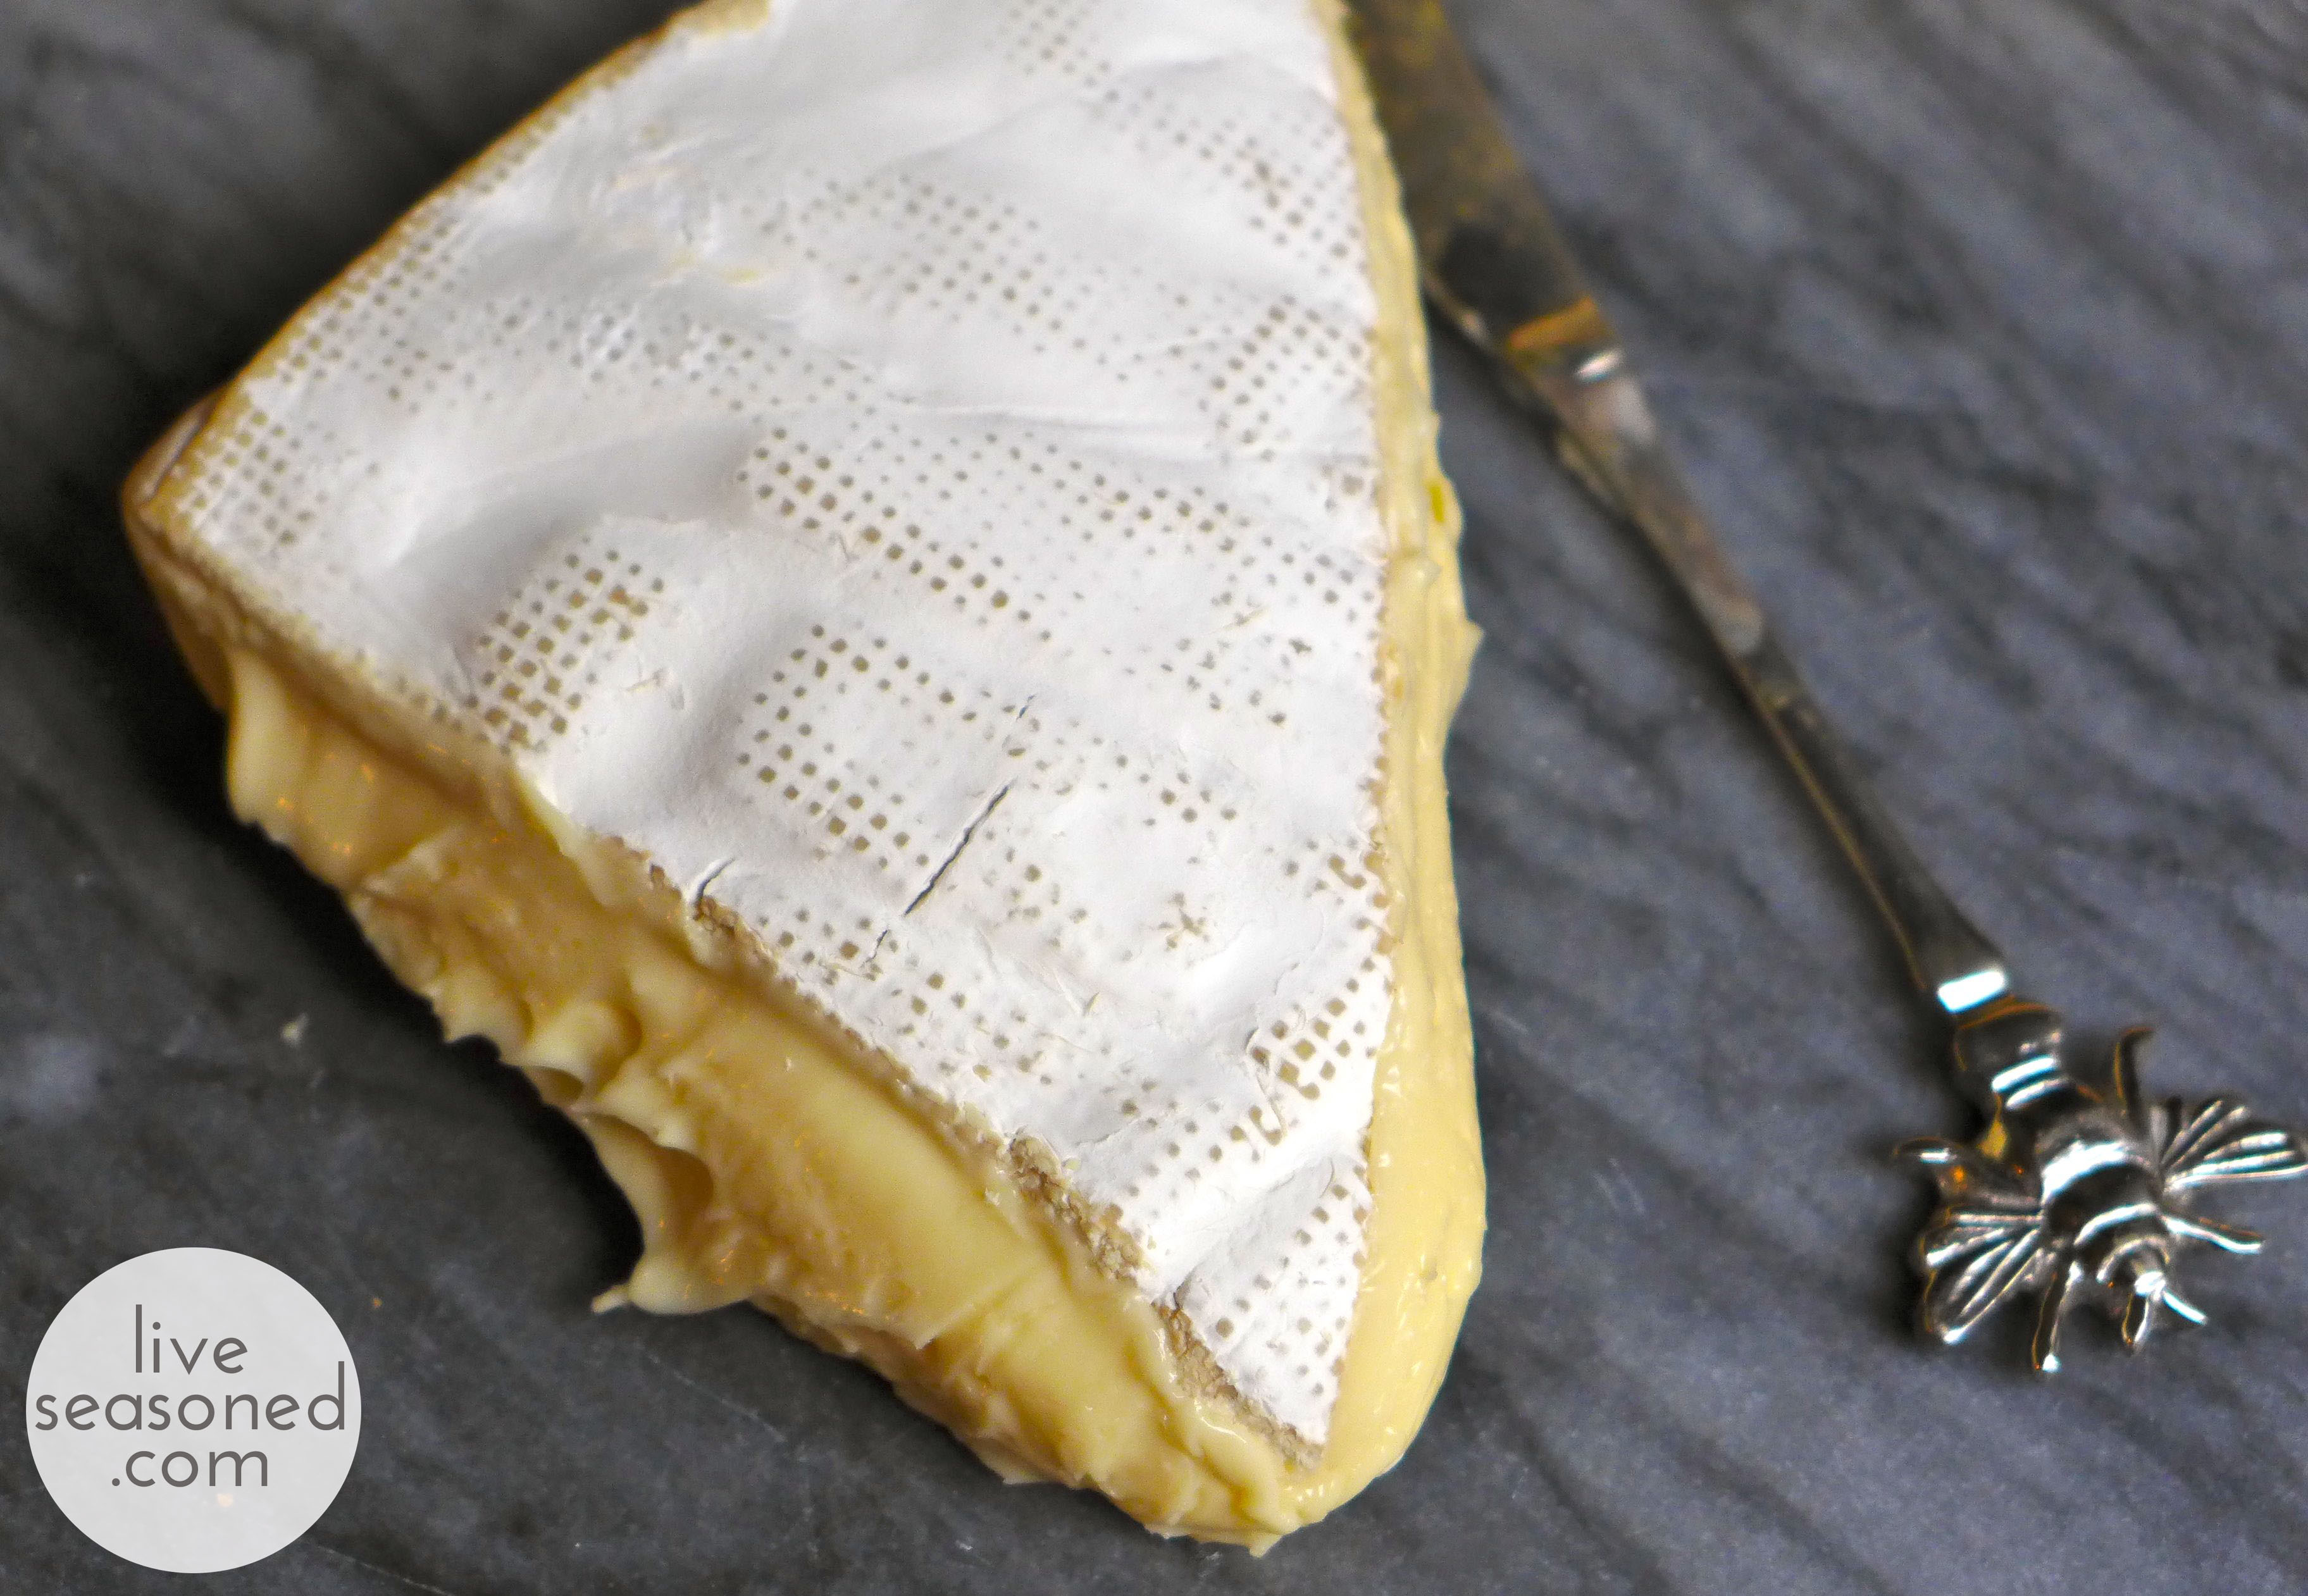
Parrano is also a technically a Dutch Gouda, but with a flavor similar to aged parmesan. Parranos are aged for about 5 months, giving them a semi-firm texture. As described on the company’s website, Parrano is “slightly sweet, a little bit nutty but still with a deliciously strong flavour”.

liveseasoned_fall2014_nibblenook6_wm

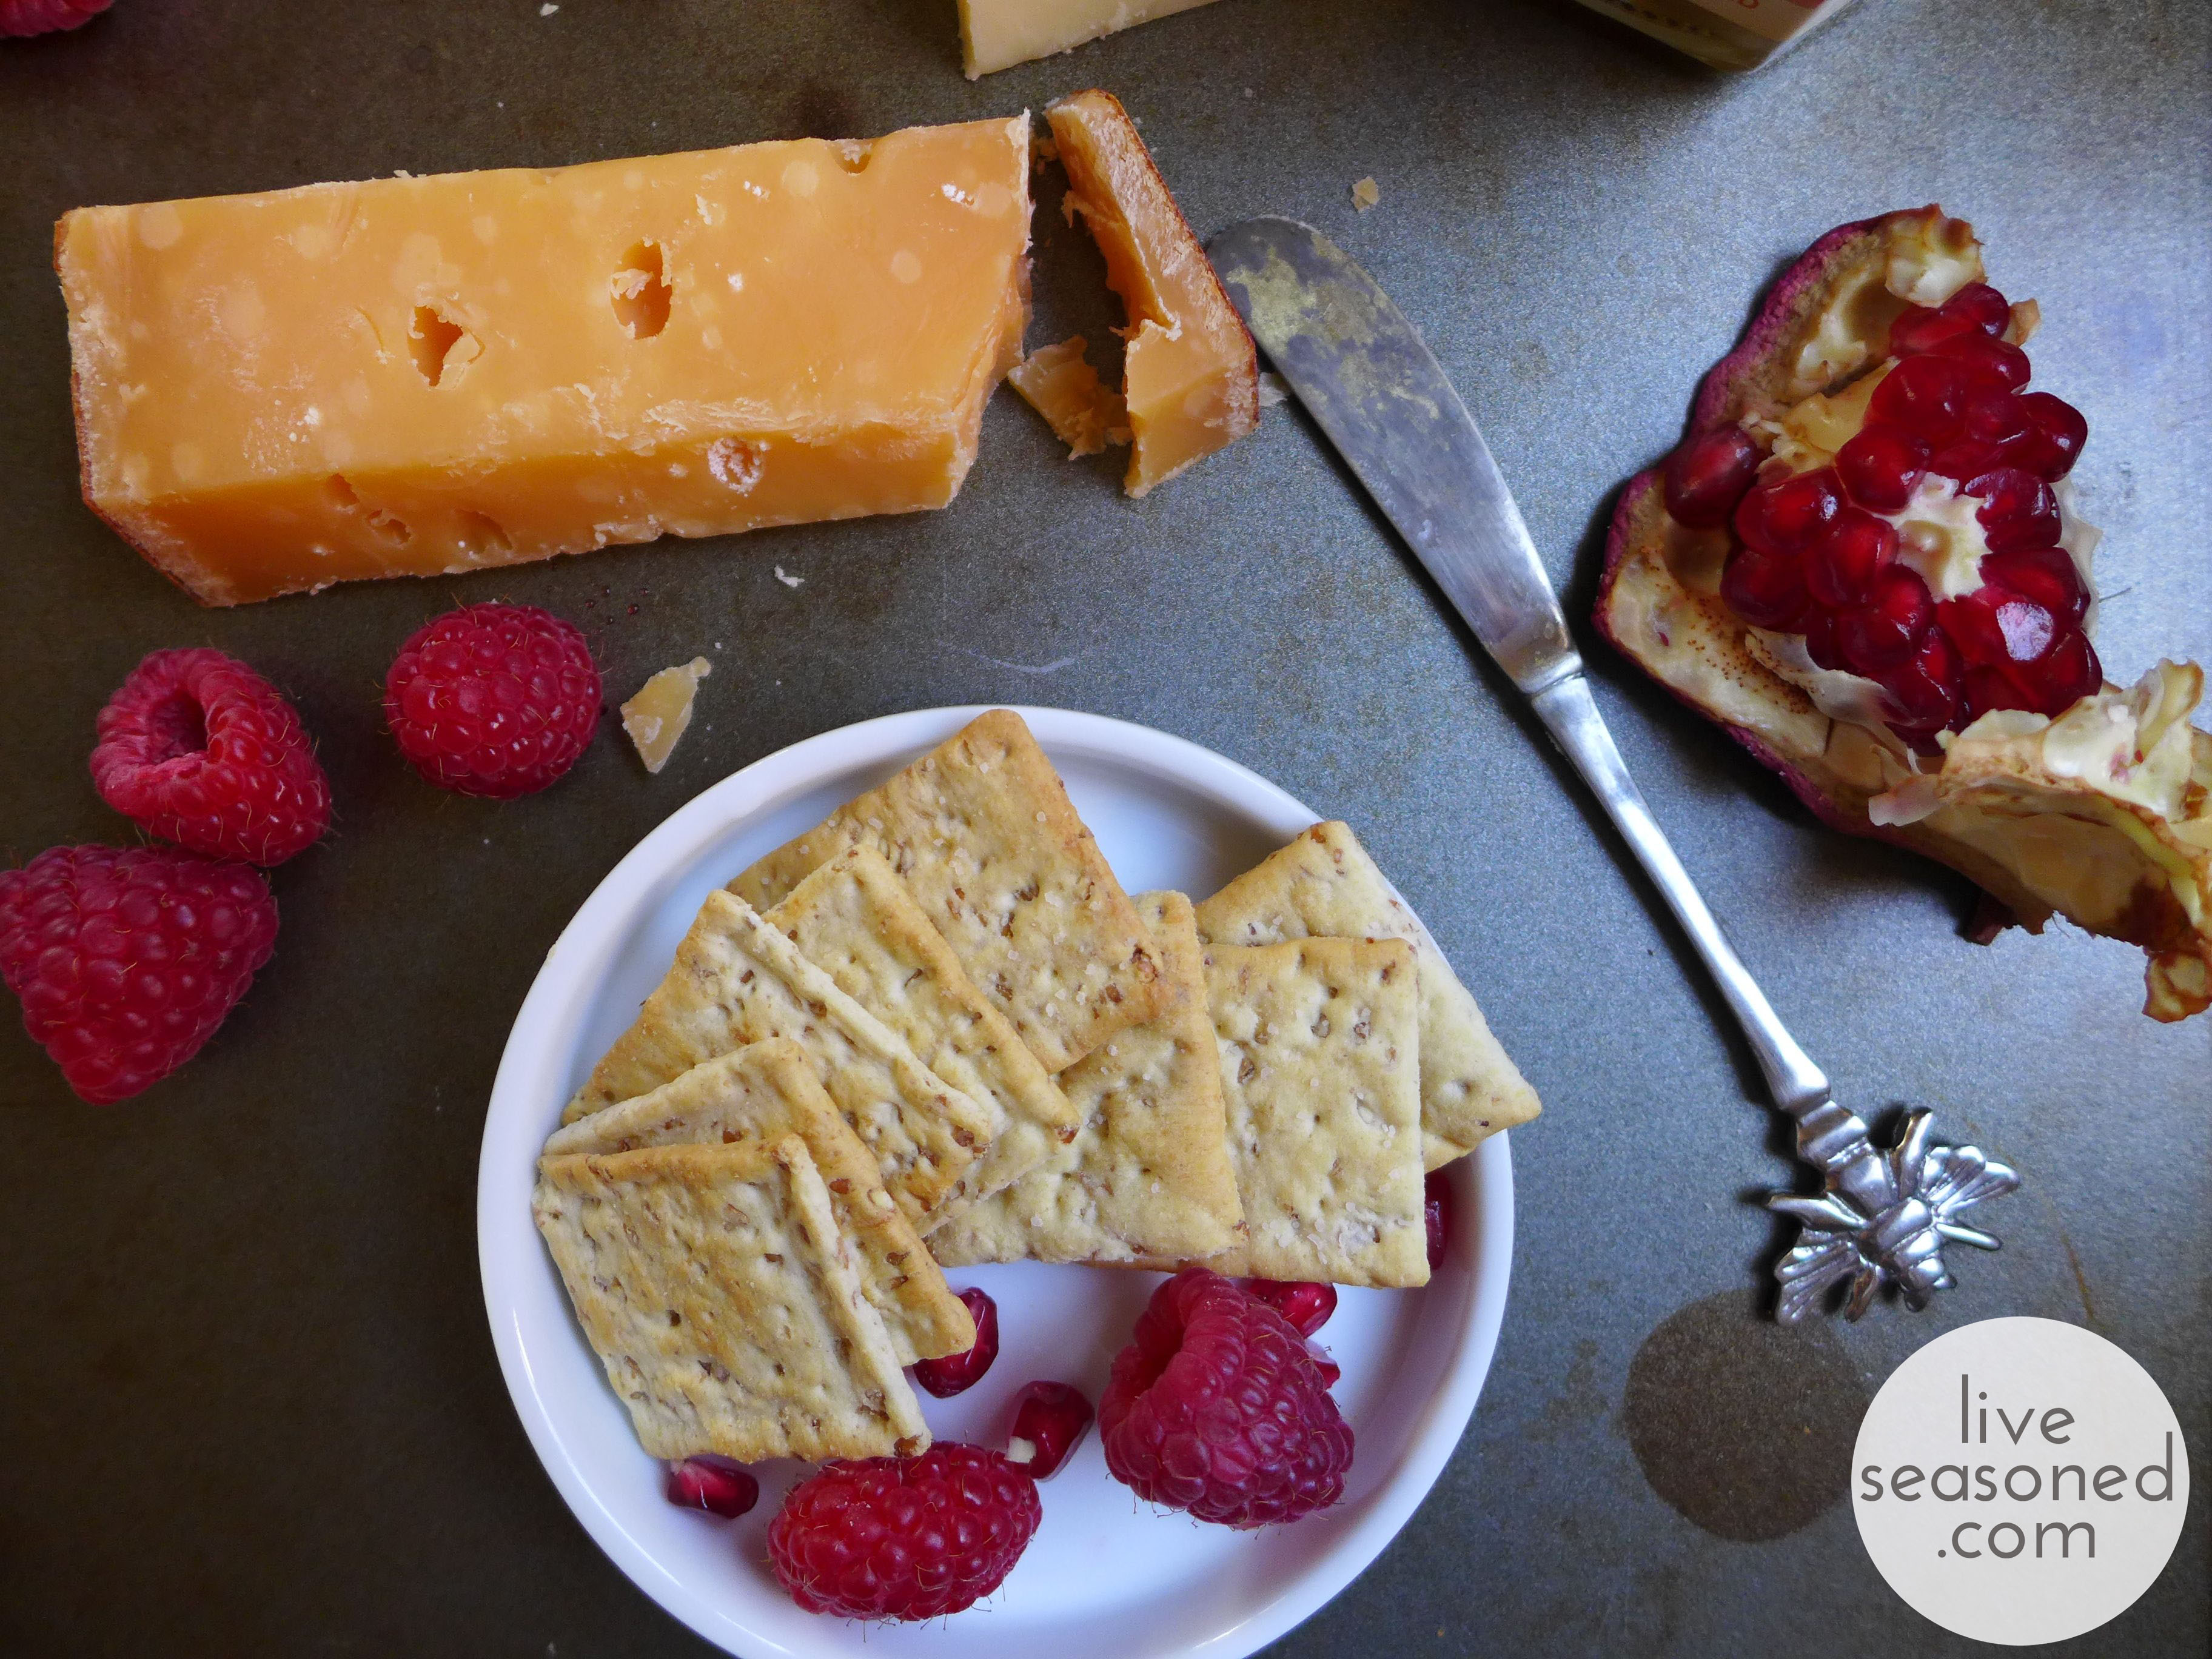
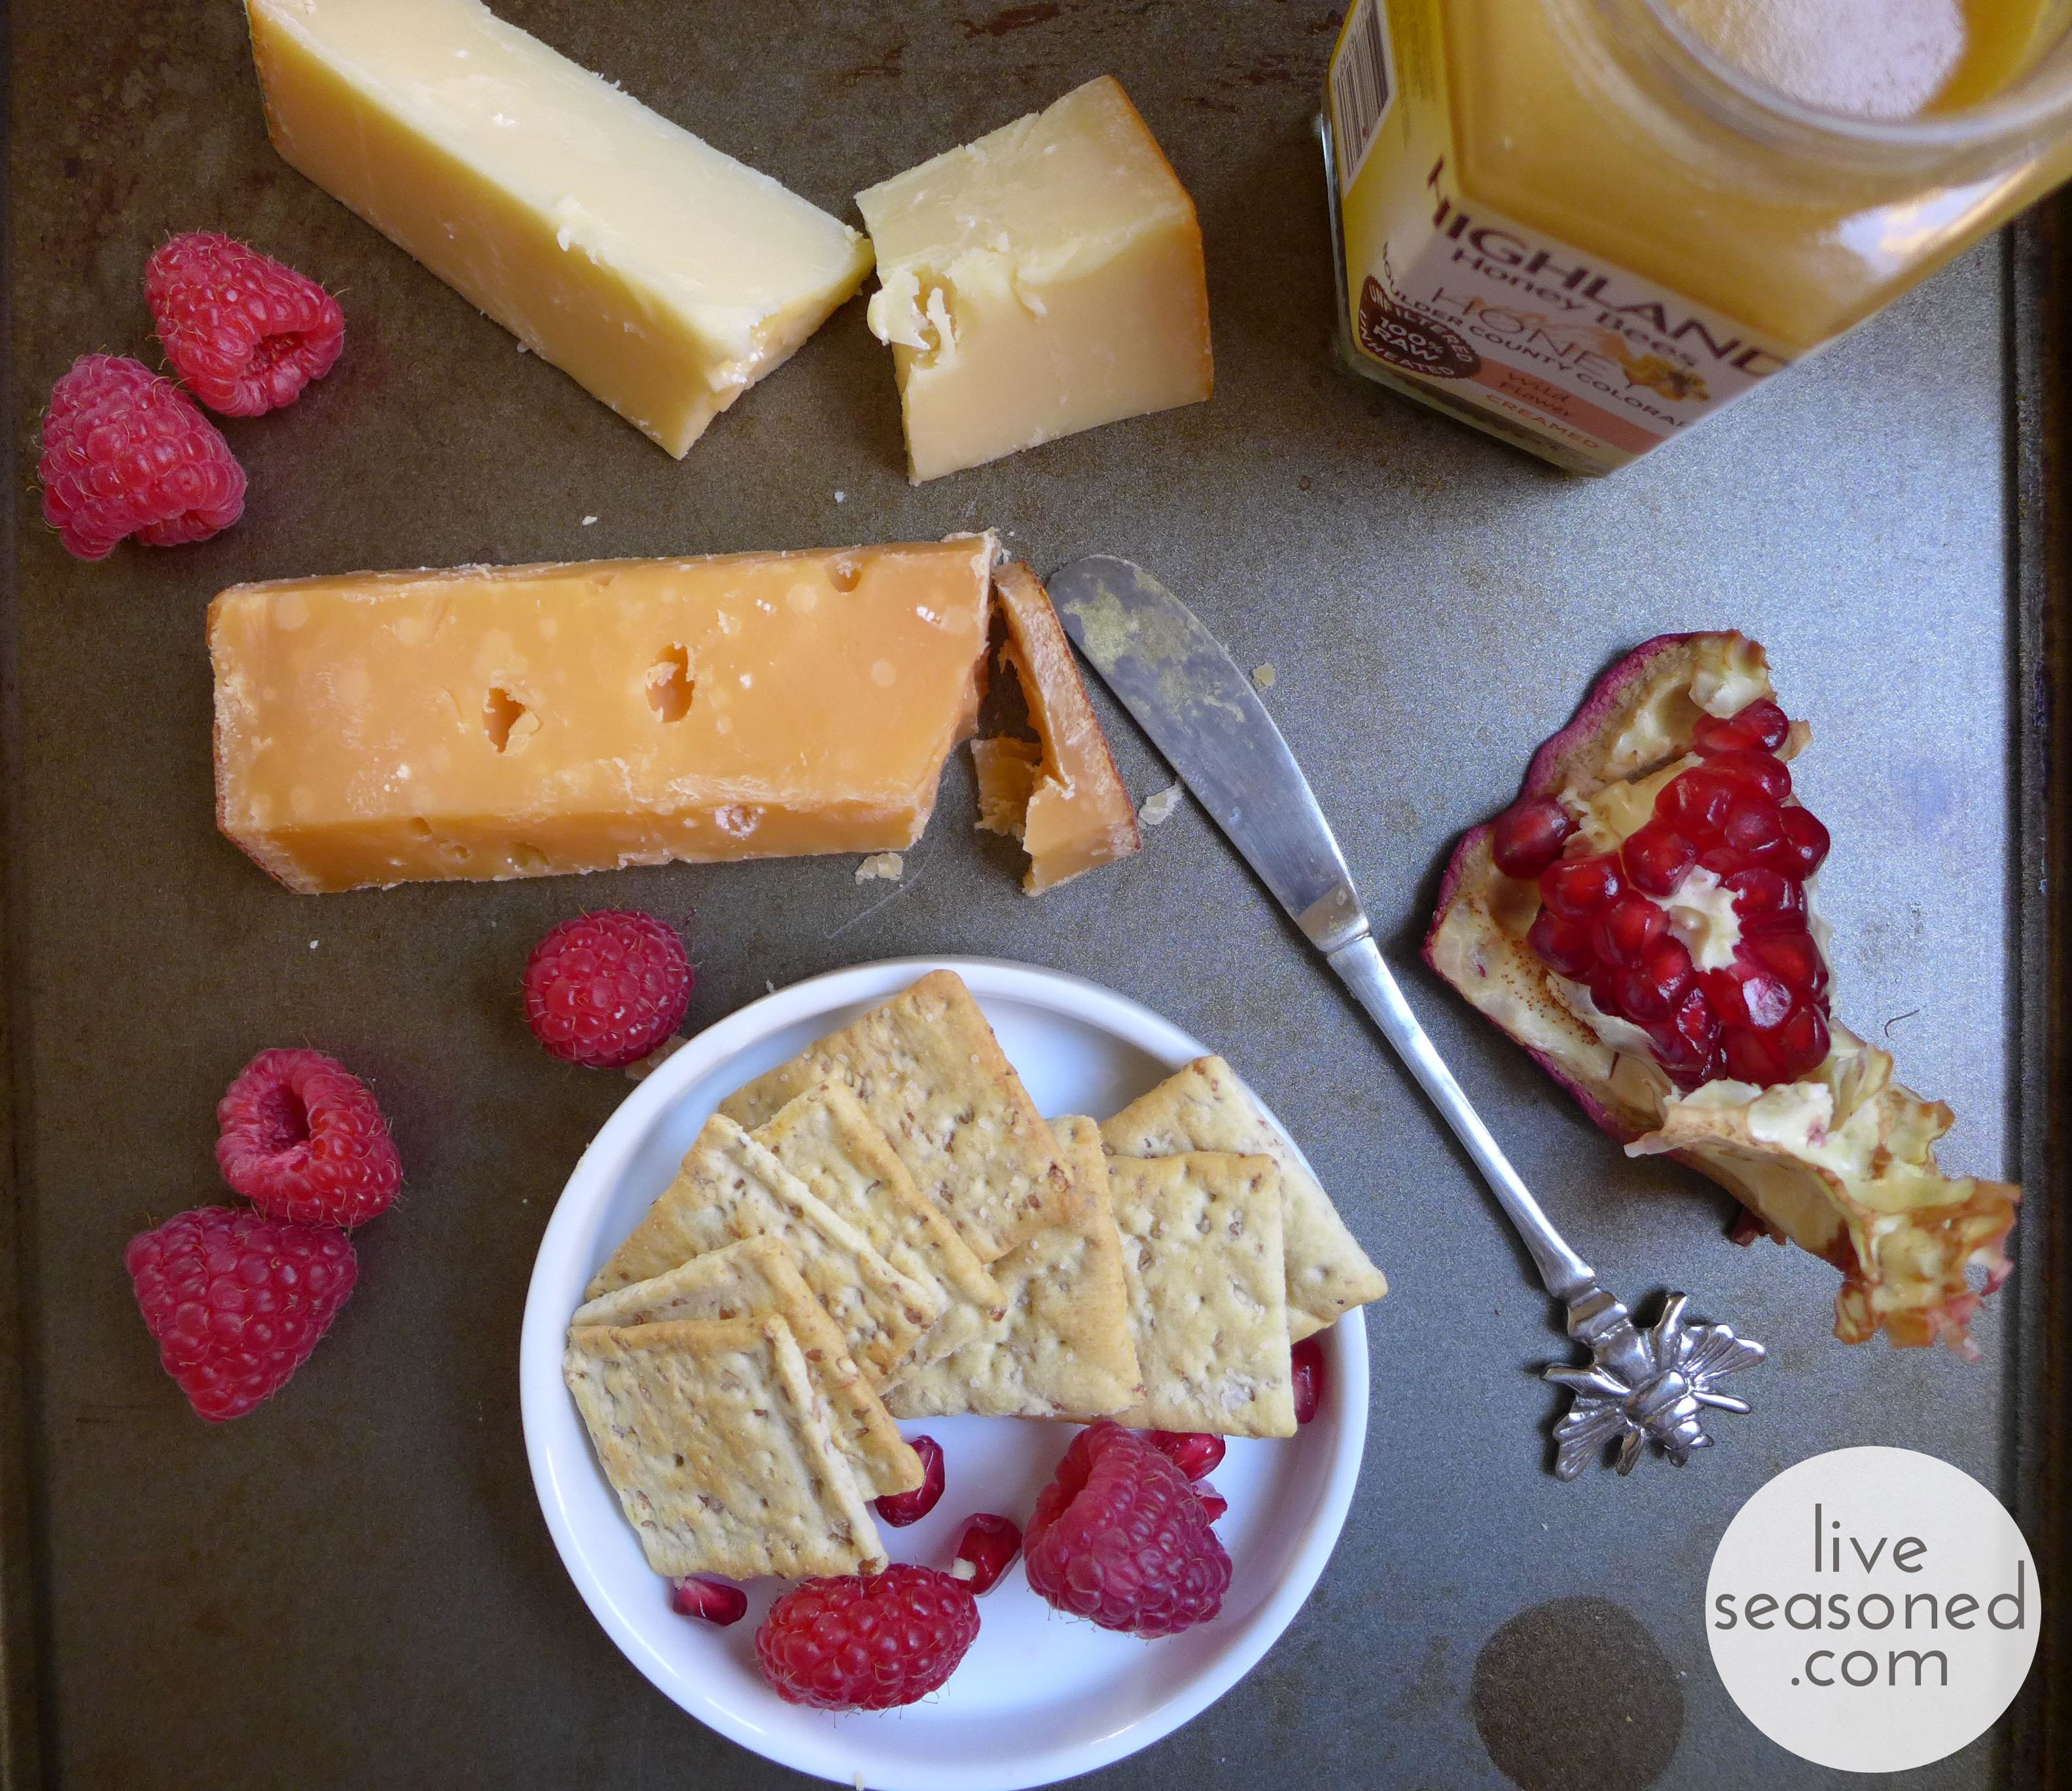
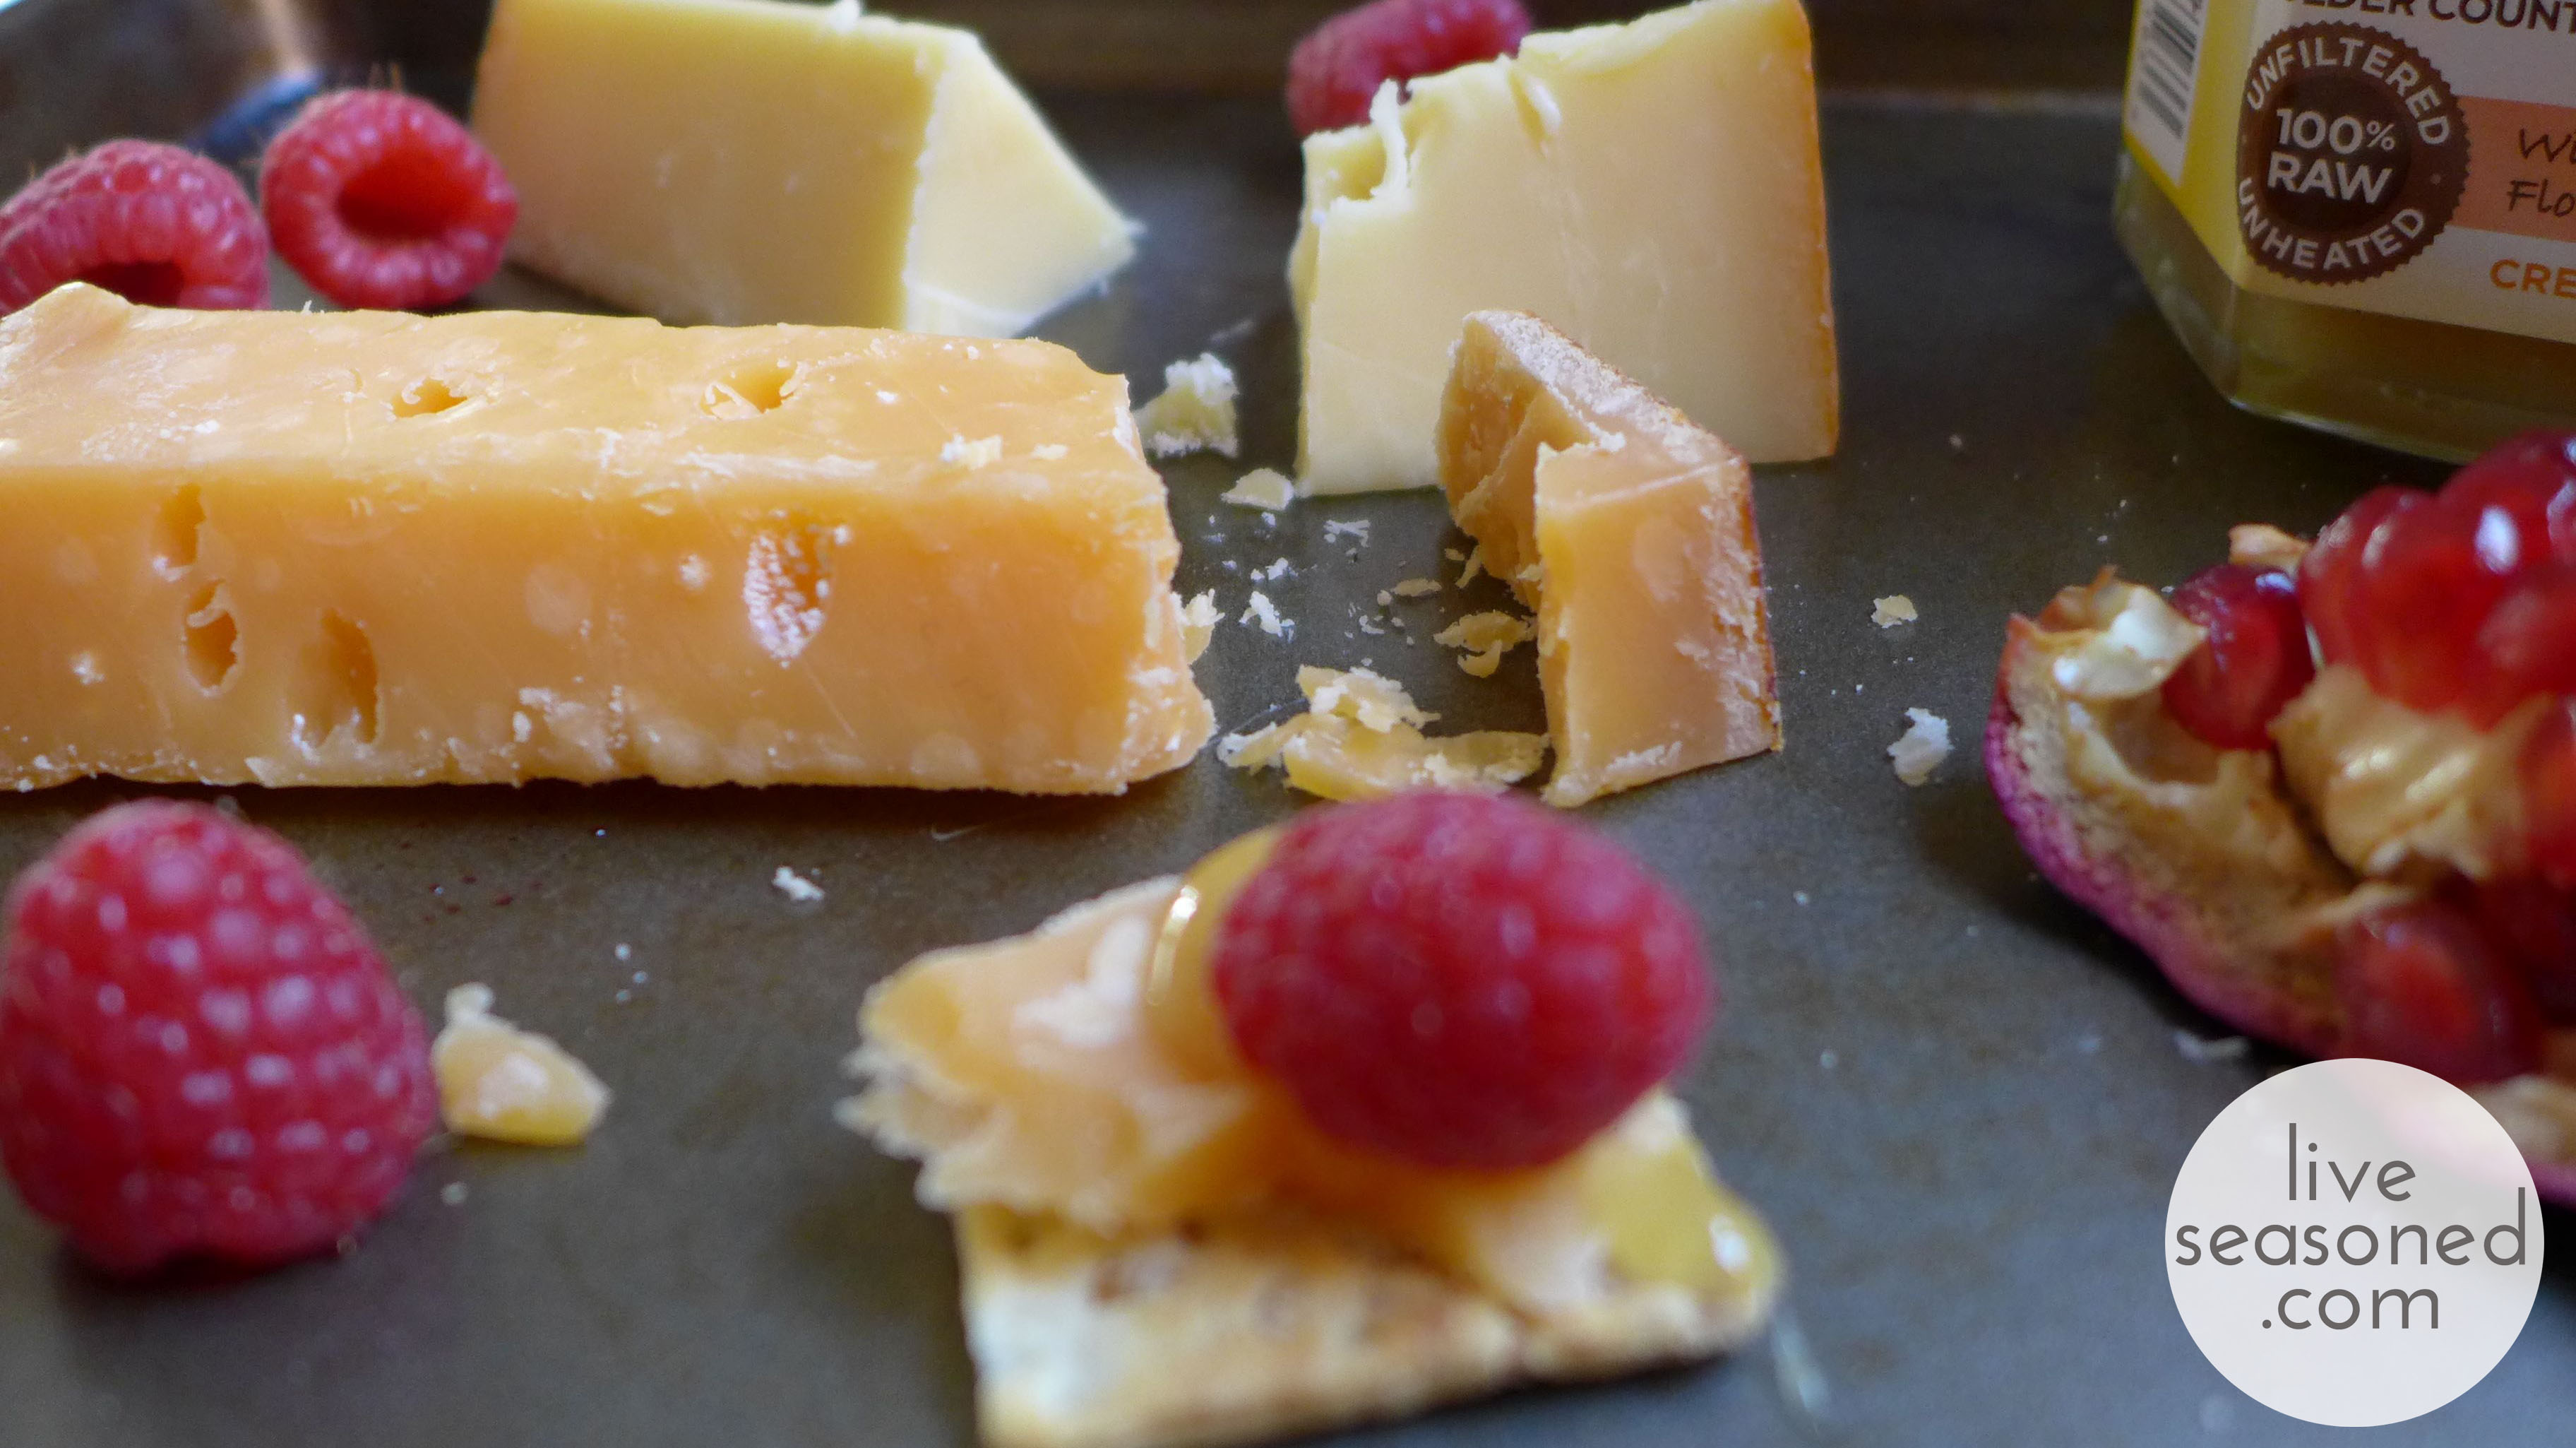
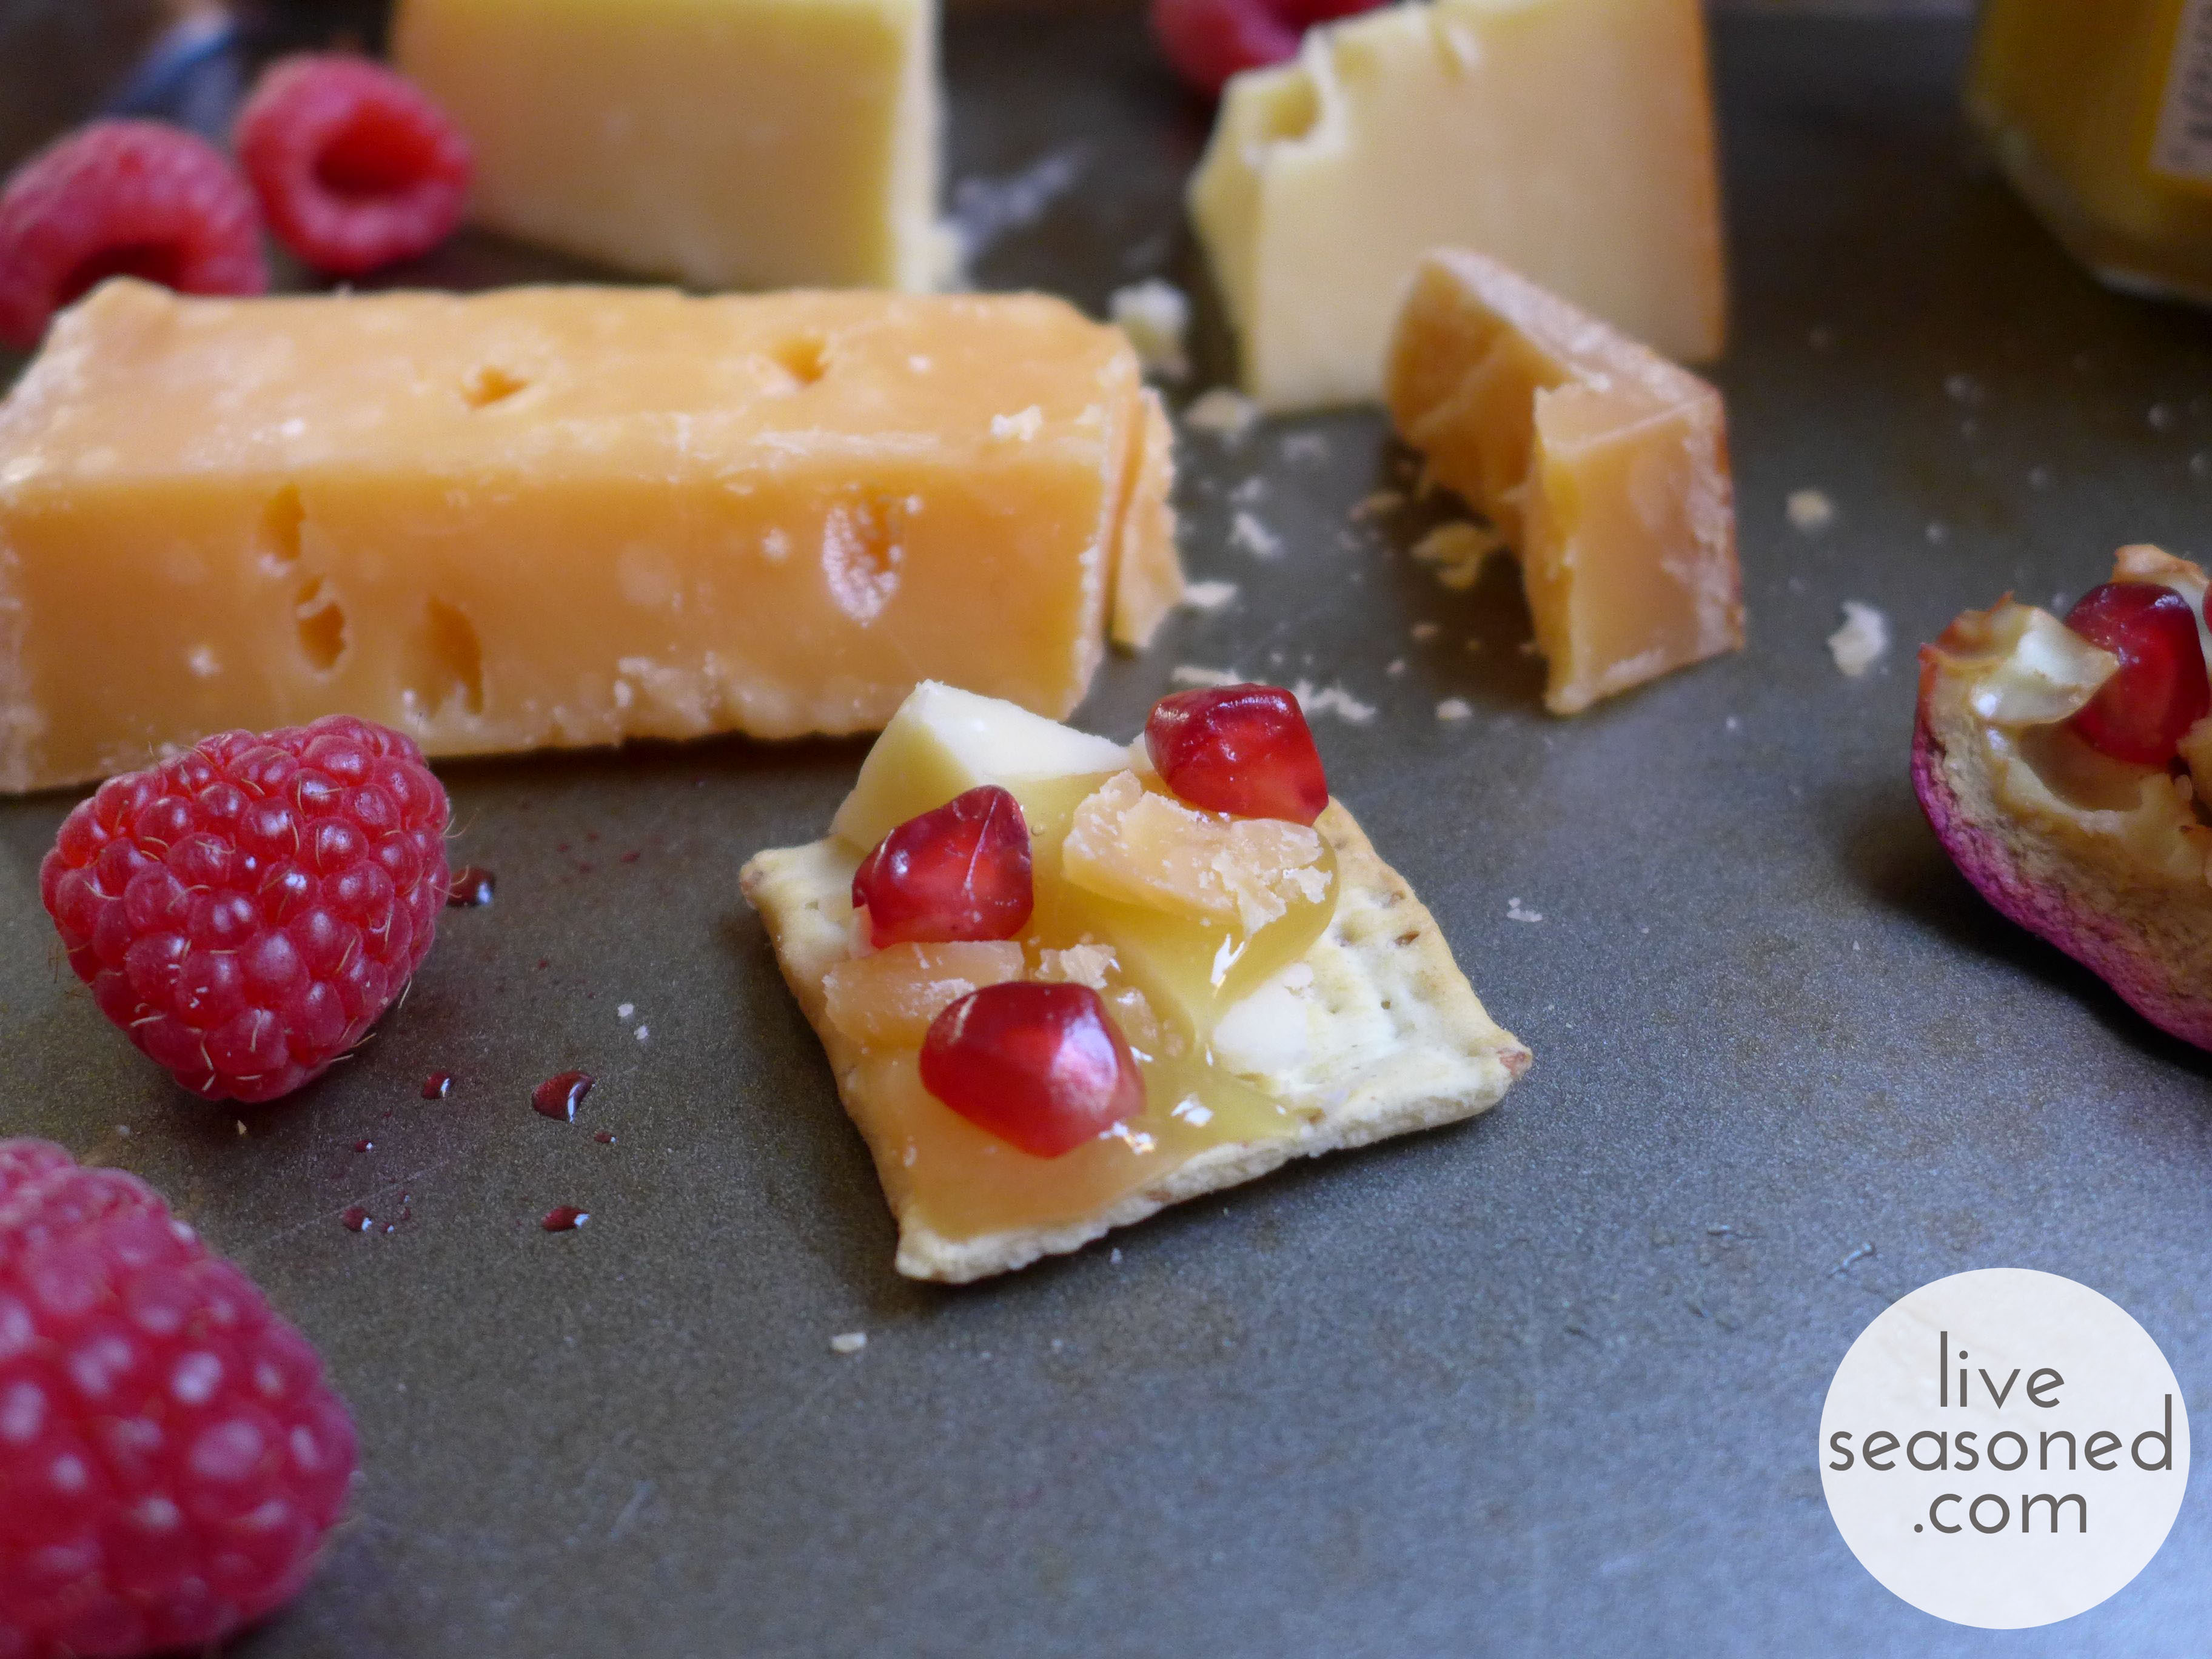
As is common, I like to include some fruit on my cheese plates. Continuing with my adventurous ways, I’m not too picky when it comes to the fruits I choose. I’ll often look for anything in season and deliciously ripe (there’s no point in serving out-of-season strawberries that taste like water, right?). On this particular day, I already had some raspberries and pomegranate in my fridge. As it turns out, their slight tartness was a perfect complement to the sweet honey and sharp cheeses!
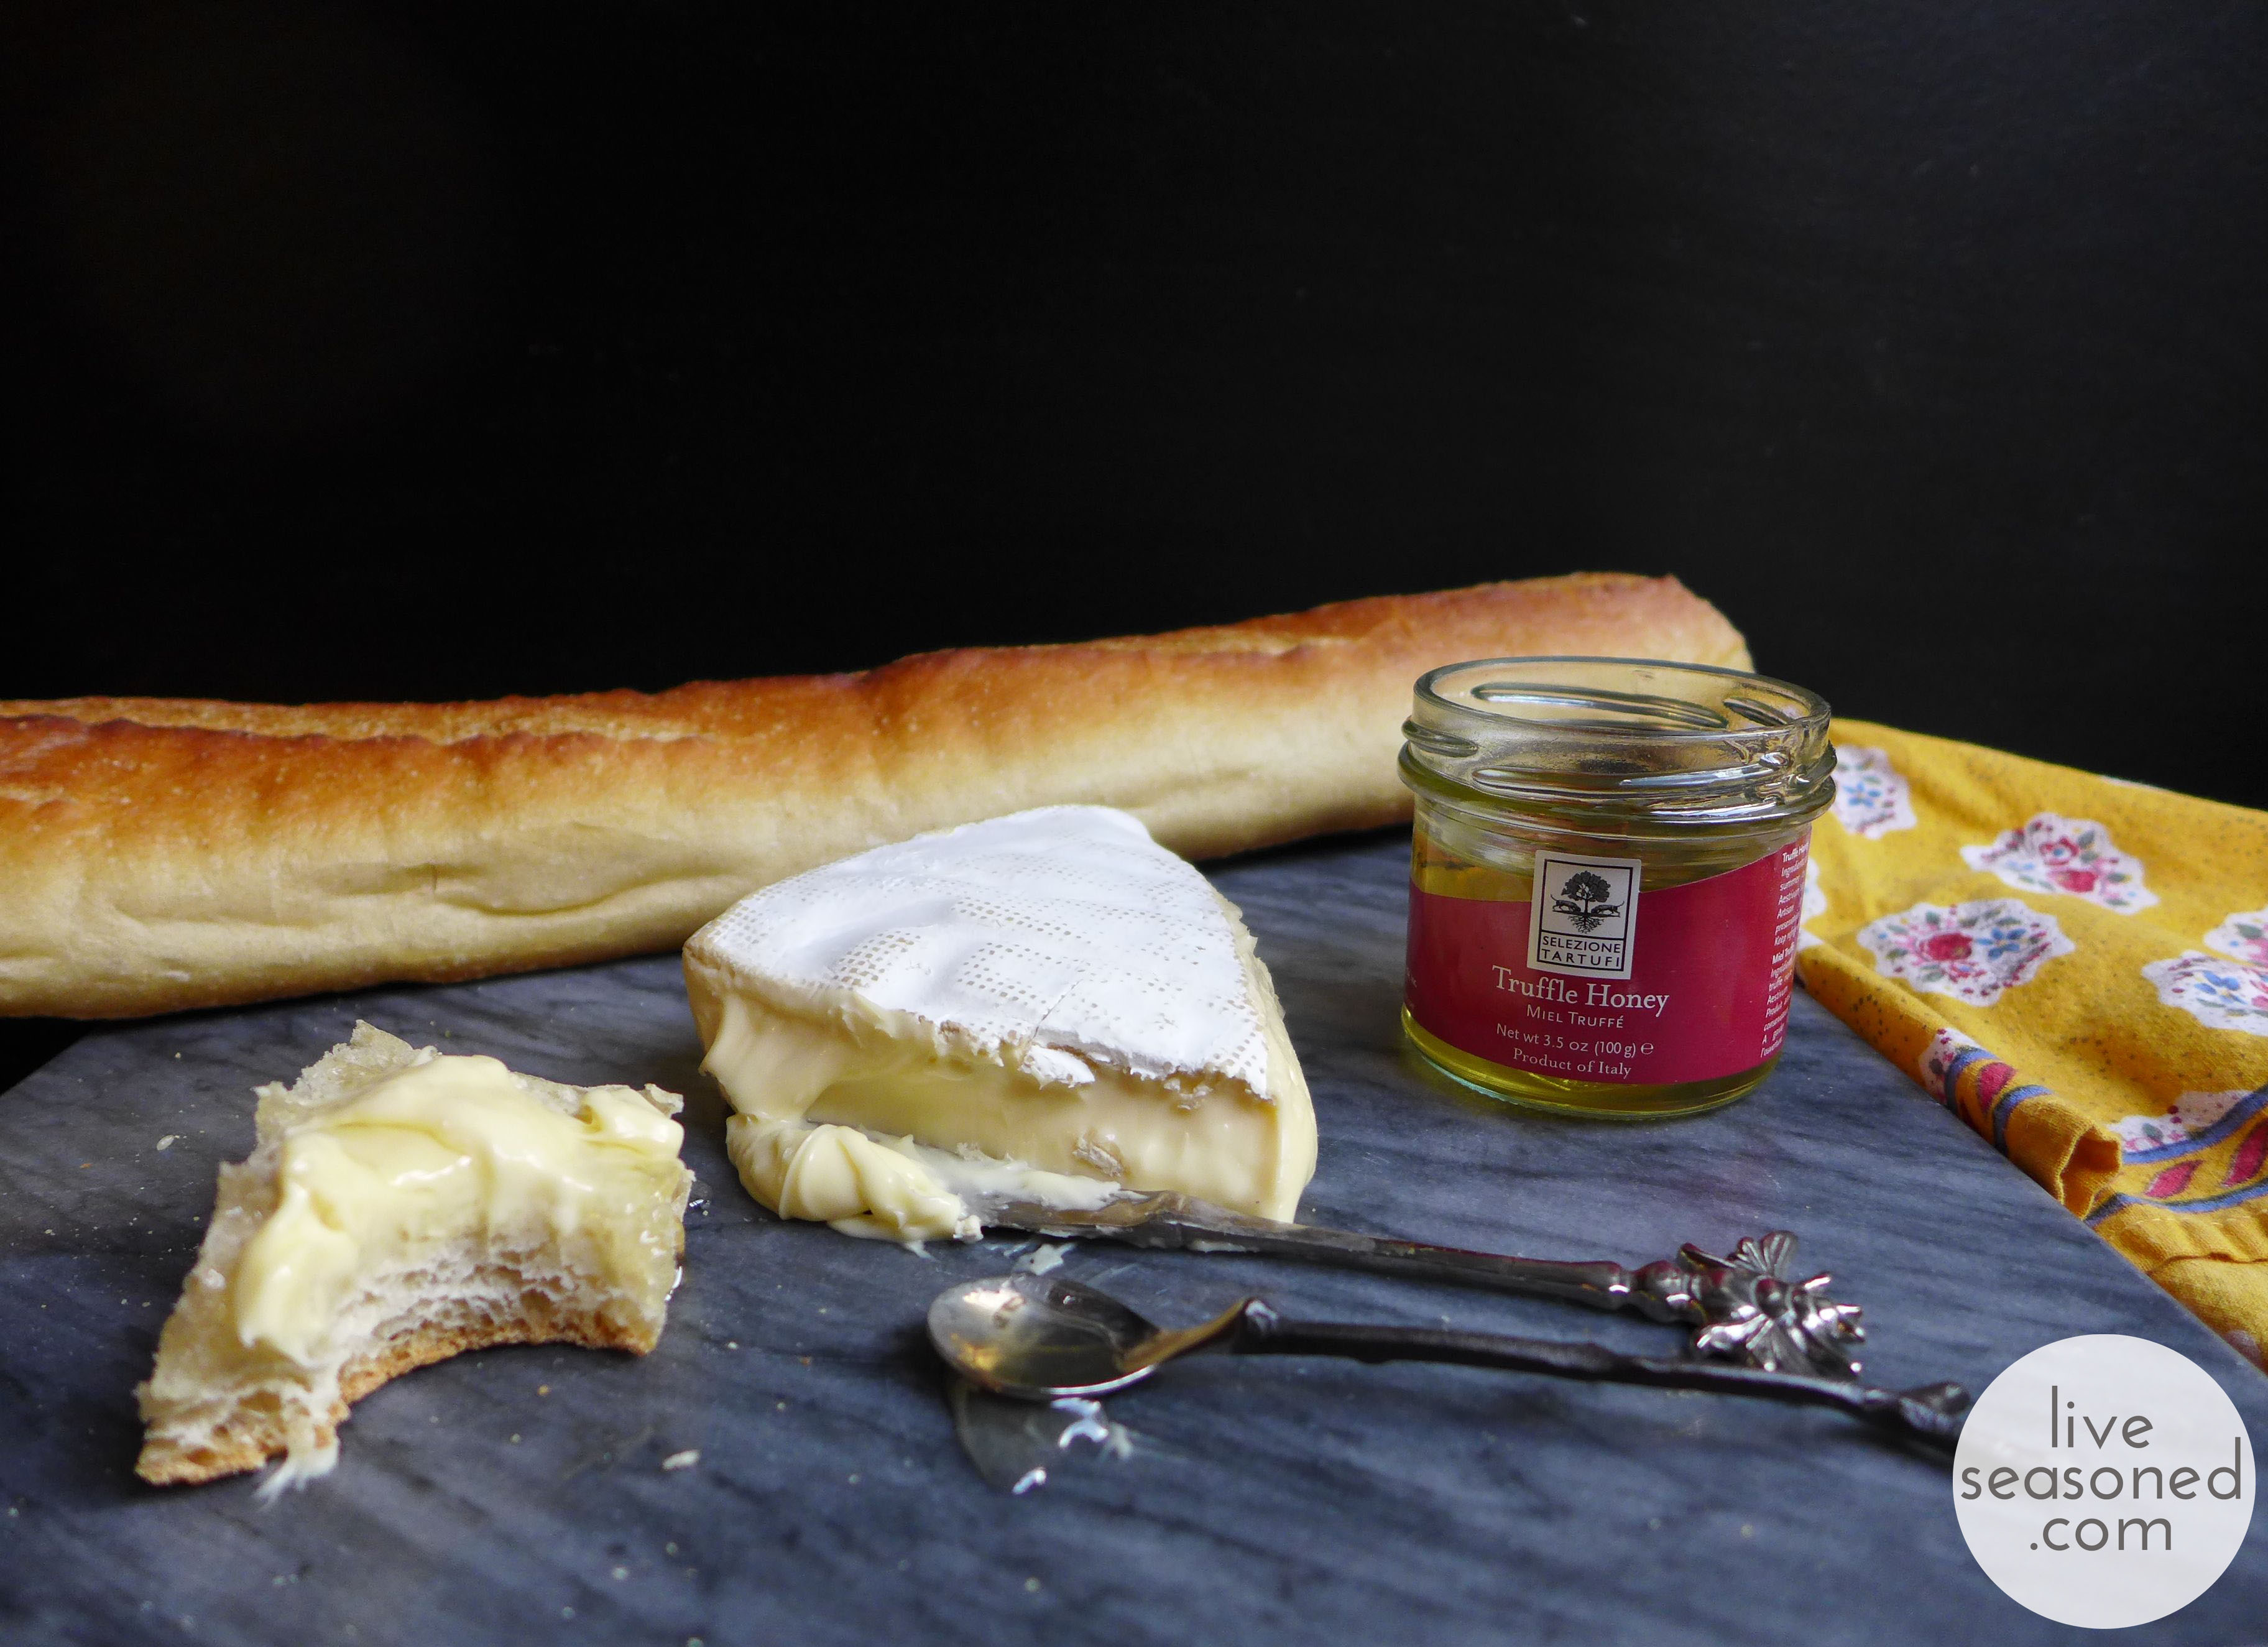
liveseasoned_fall2014_nibblenook7_wm

 The Honey

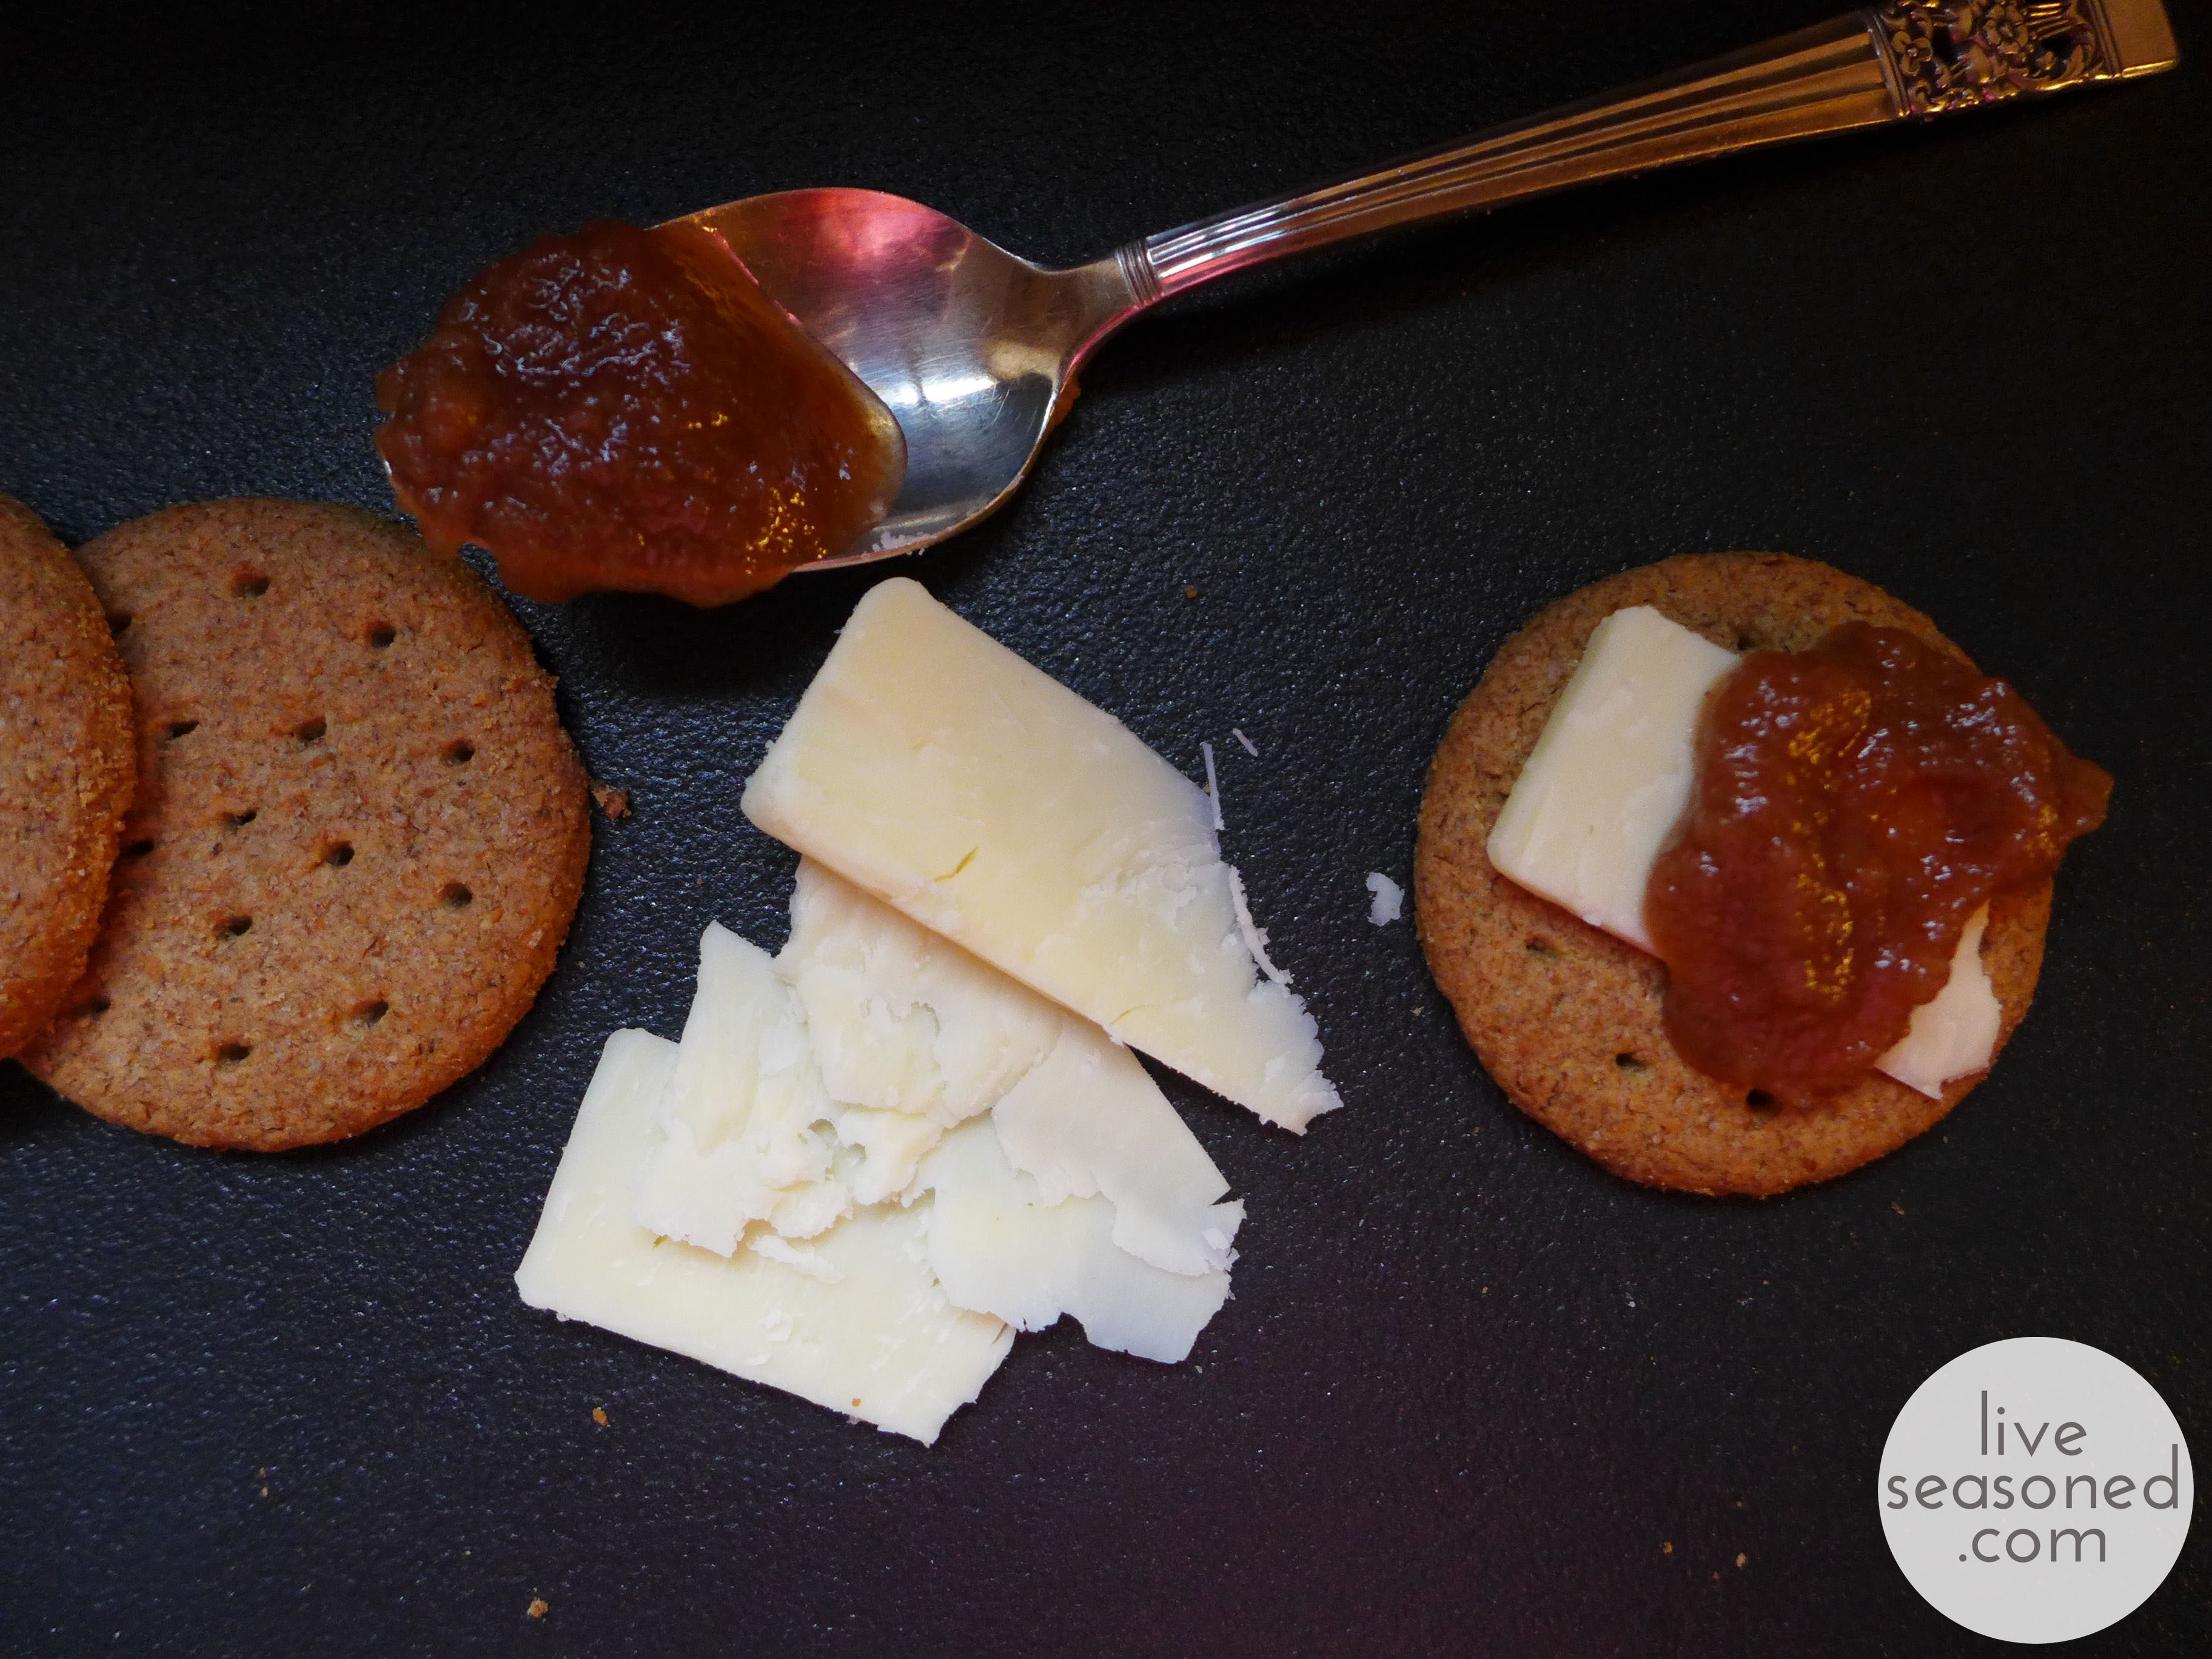
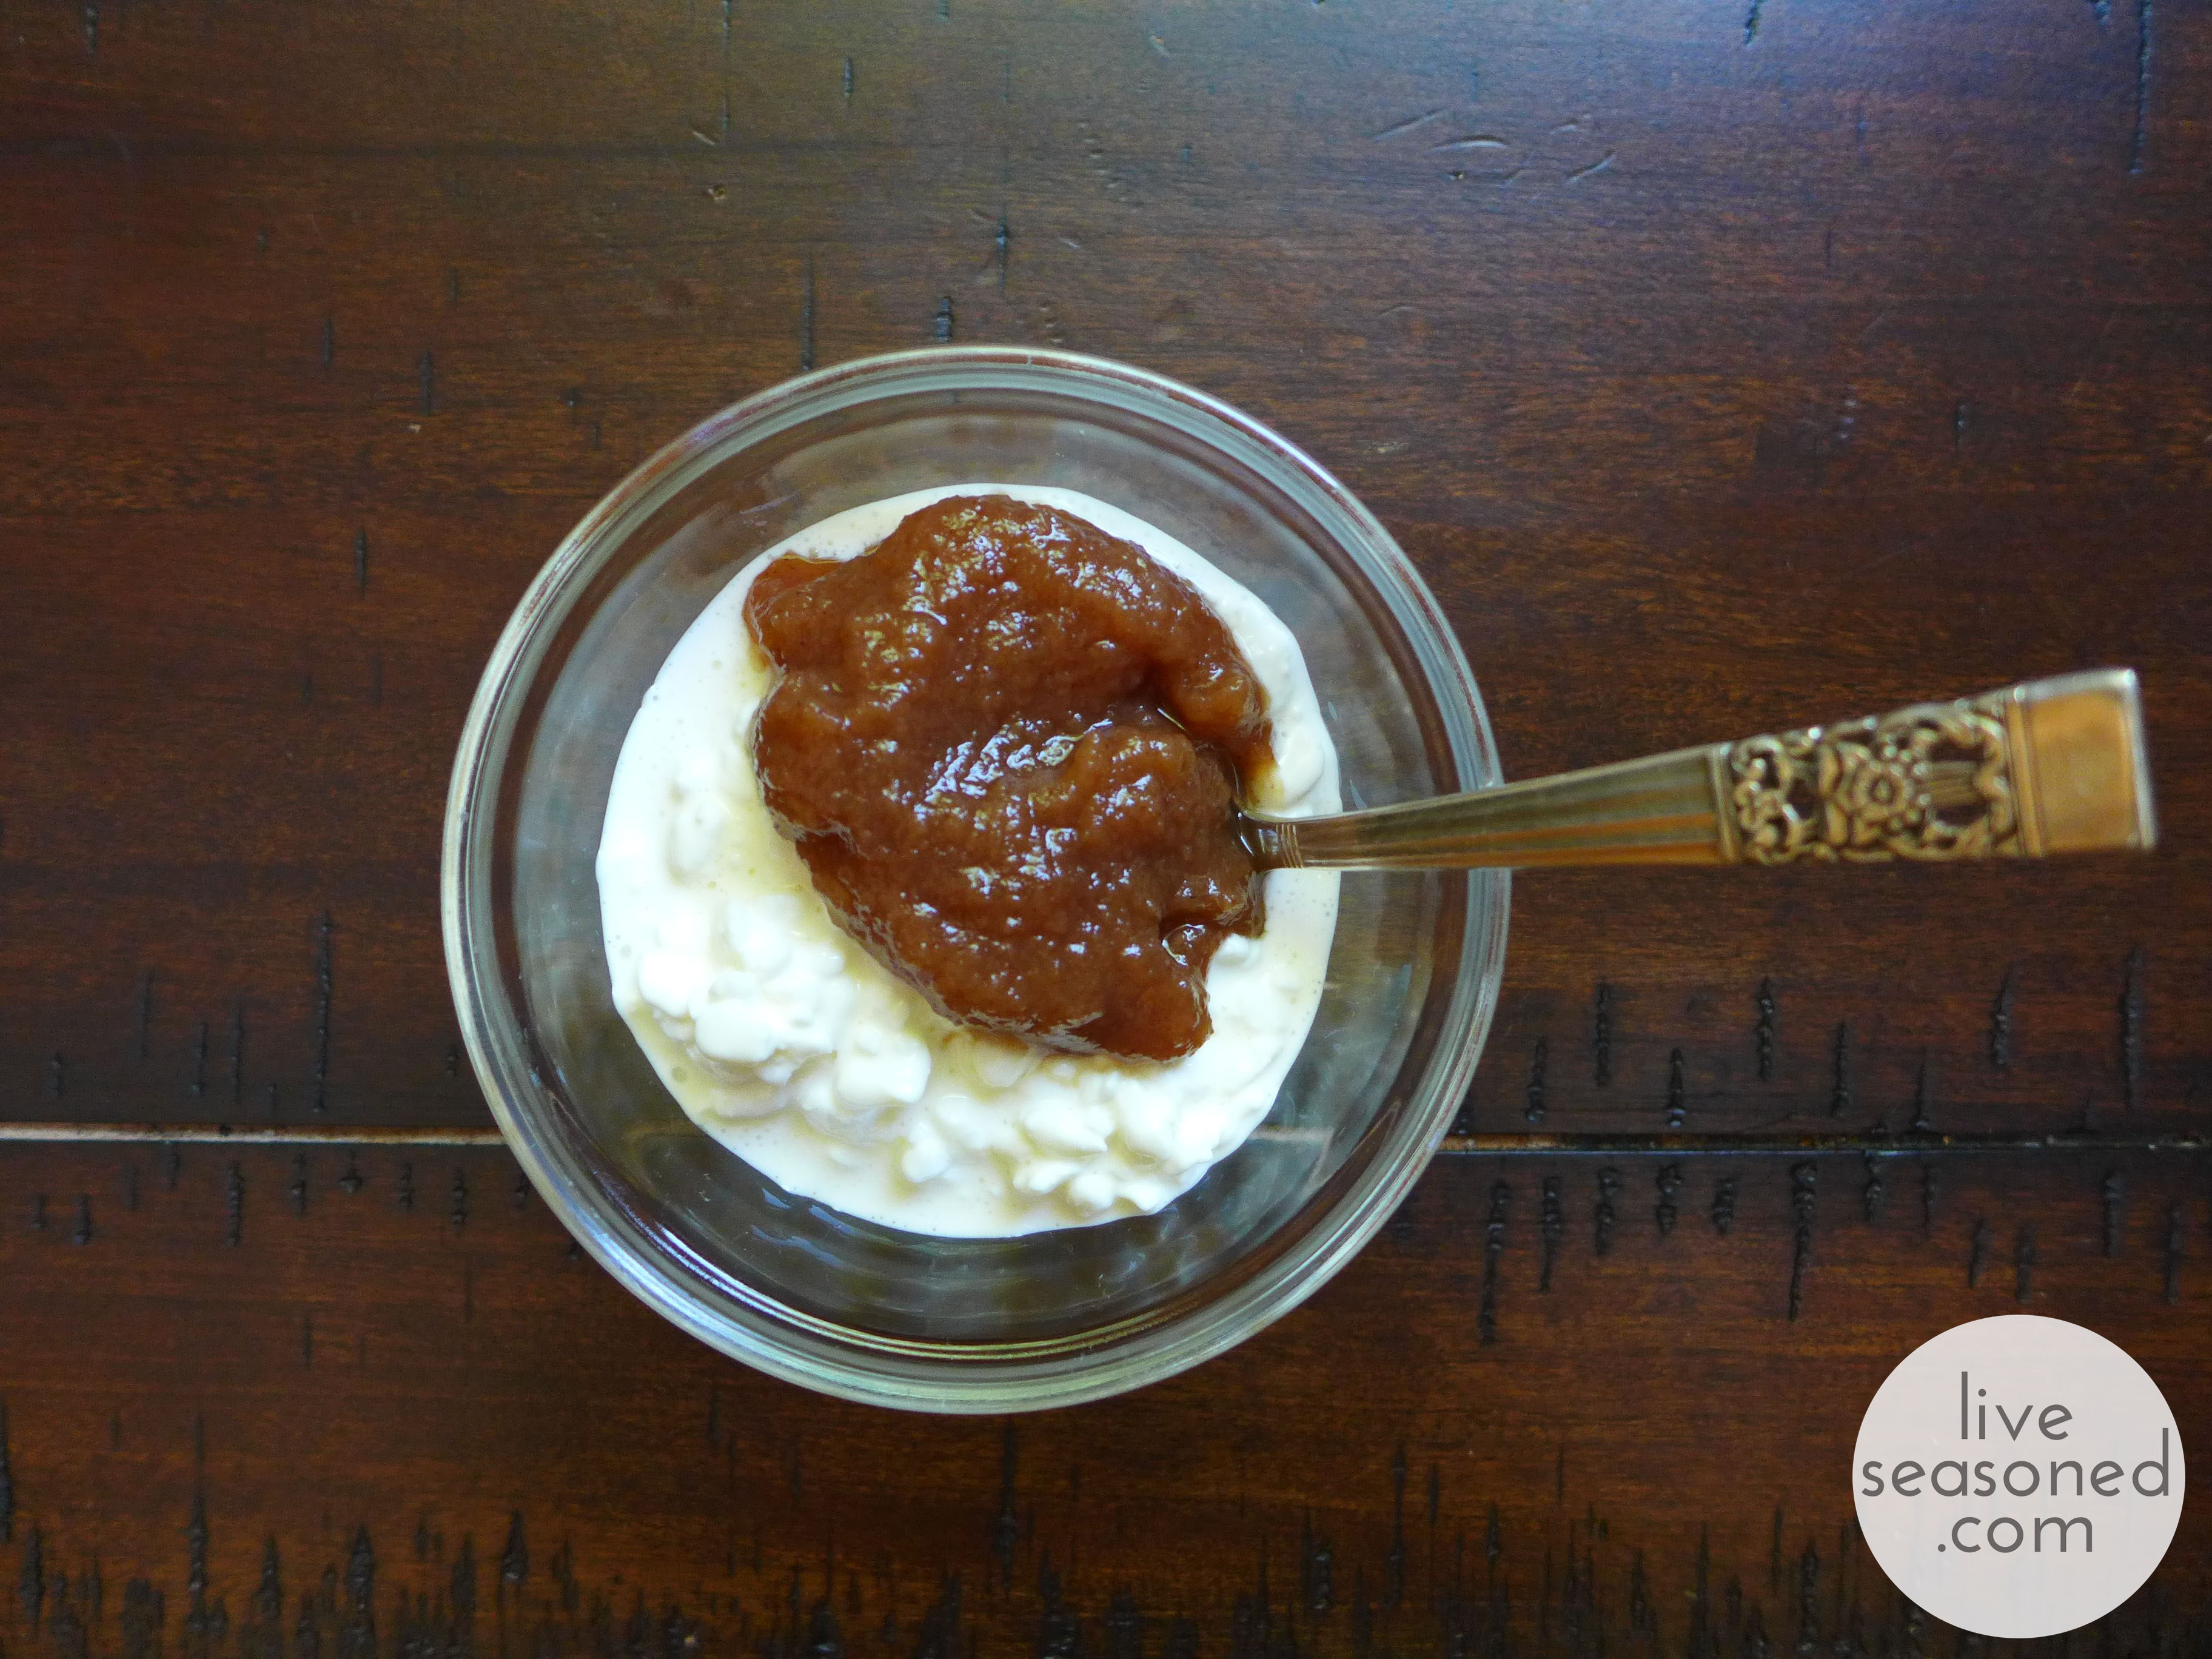
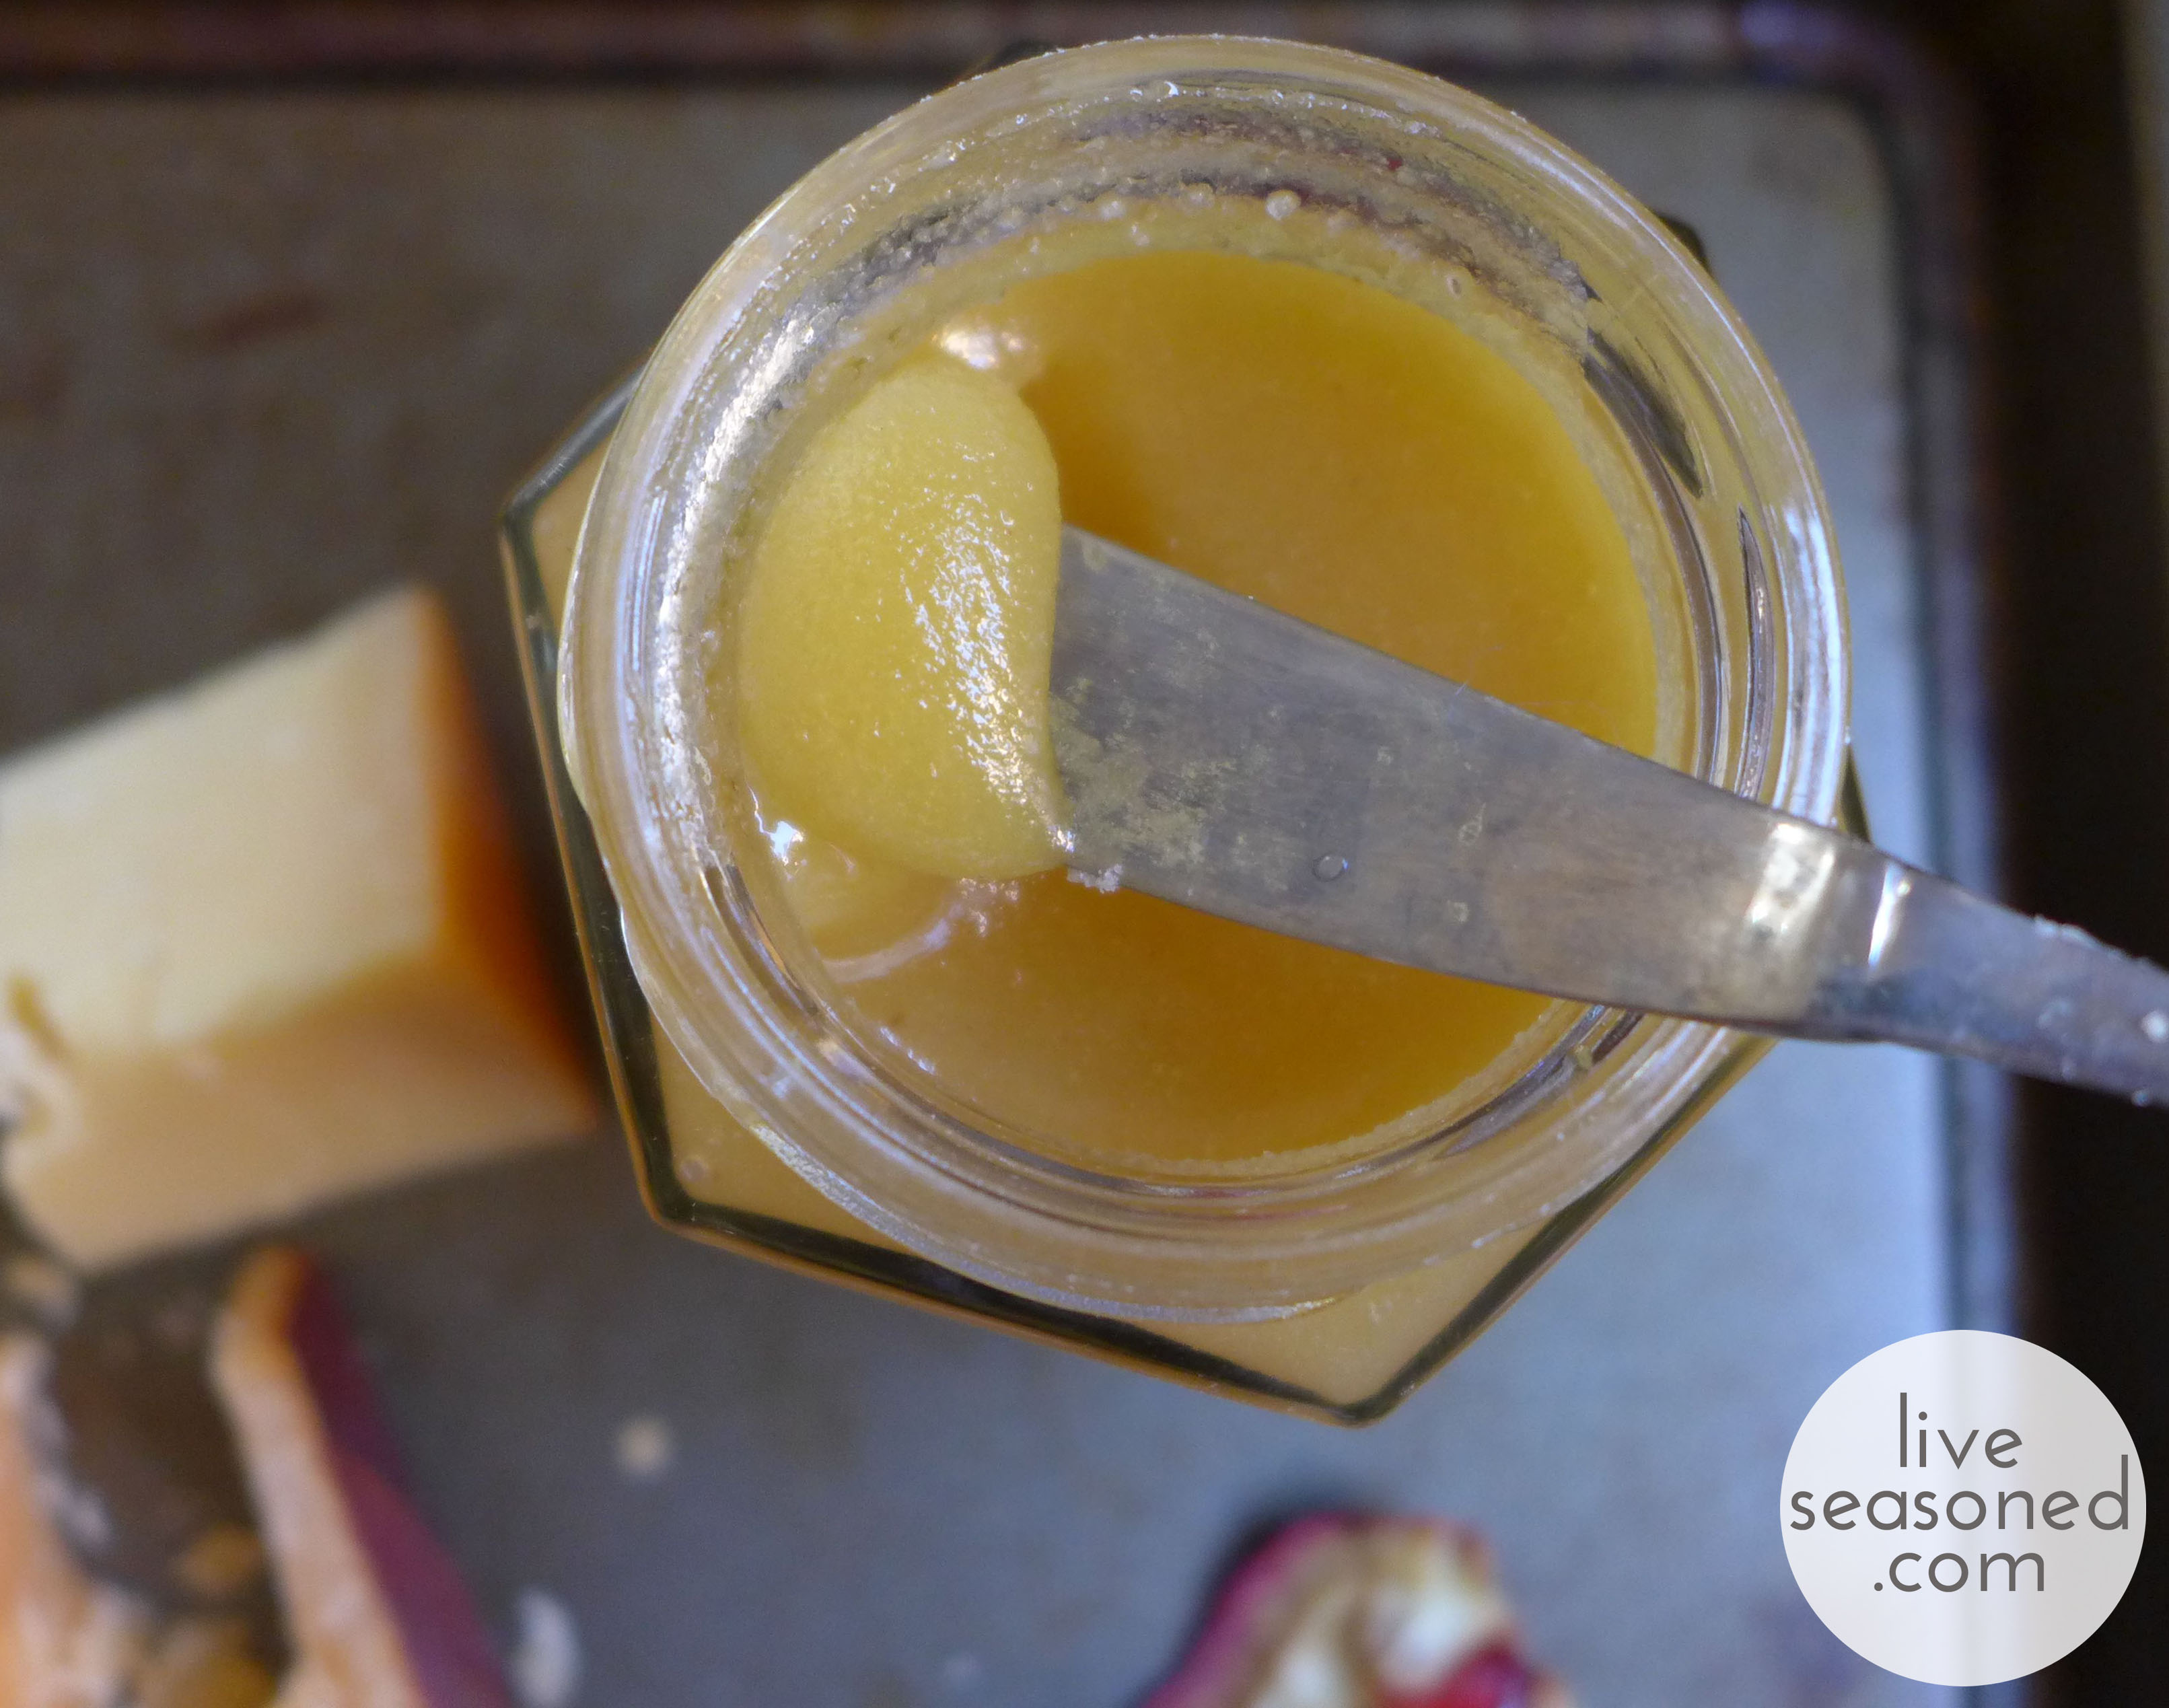
This is a raw, unfiltered, and unheated honey. As a result, it has a cloudy appearance from the honey crystals that have begun to form (it may also have some bits of wax, pollen, bee wings, and such in the jar). If you put a dollop of raw honey on a plate, you’ll find that it spreads more slowly than crystal clear honey. It turns out that this is really useful for gluing some fun cheese/cracker/berry combos together! And here you thought raw honey was just good for its enzymes.

liveseasoned_fall2014_nibblenook9_wm

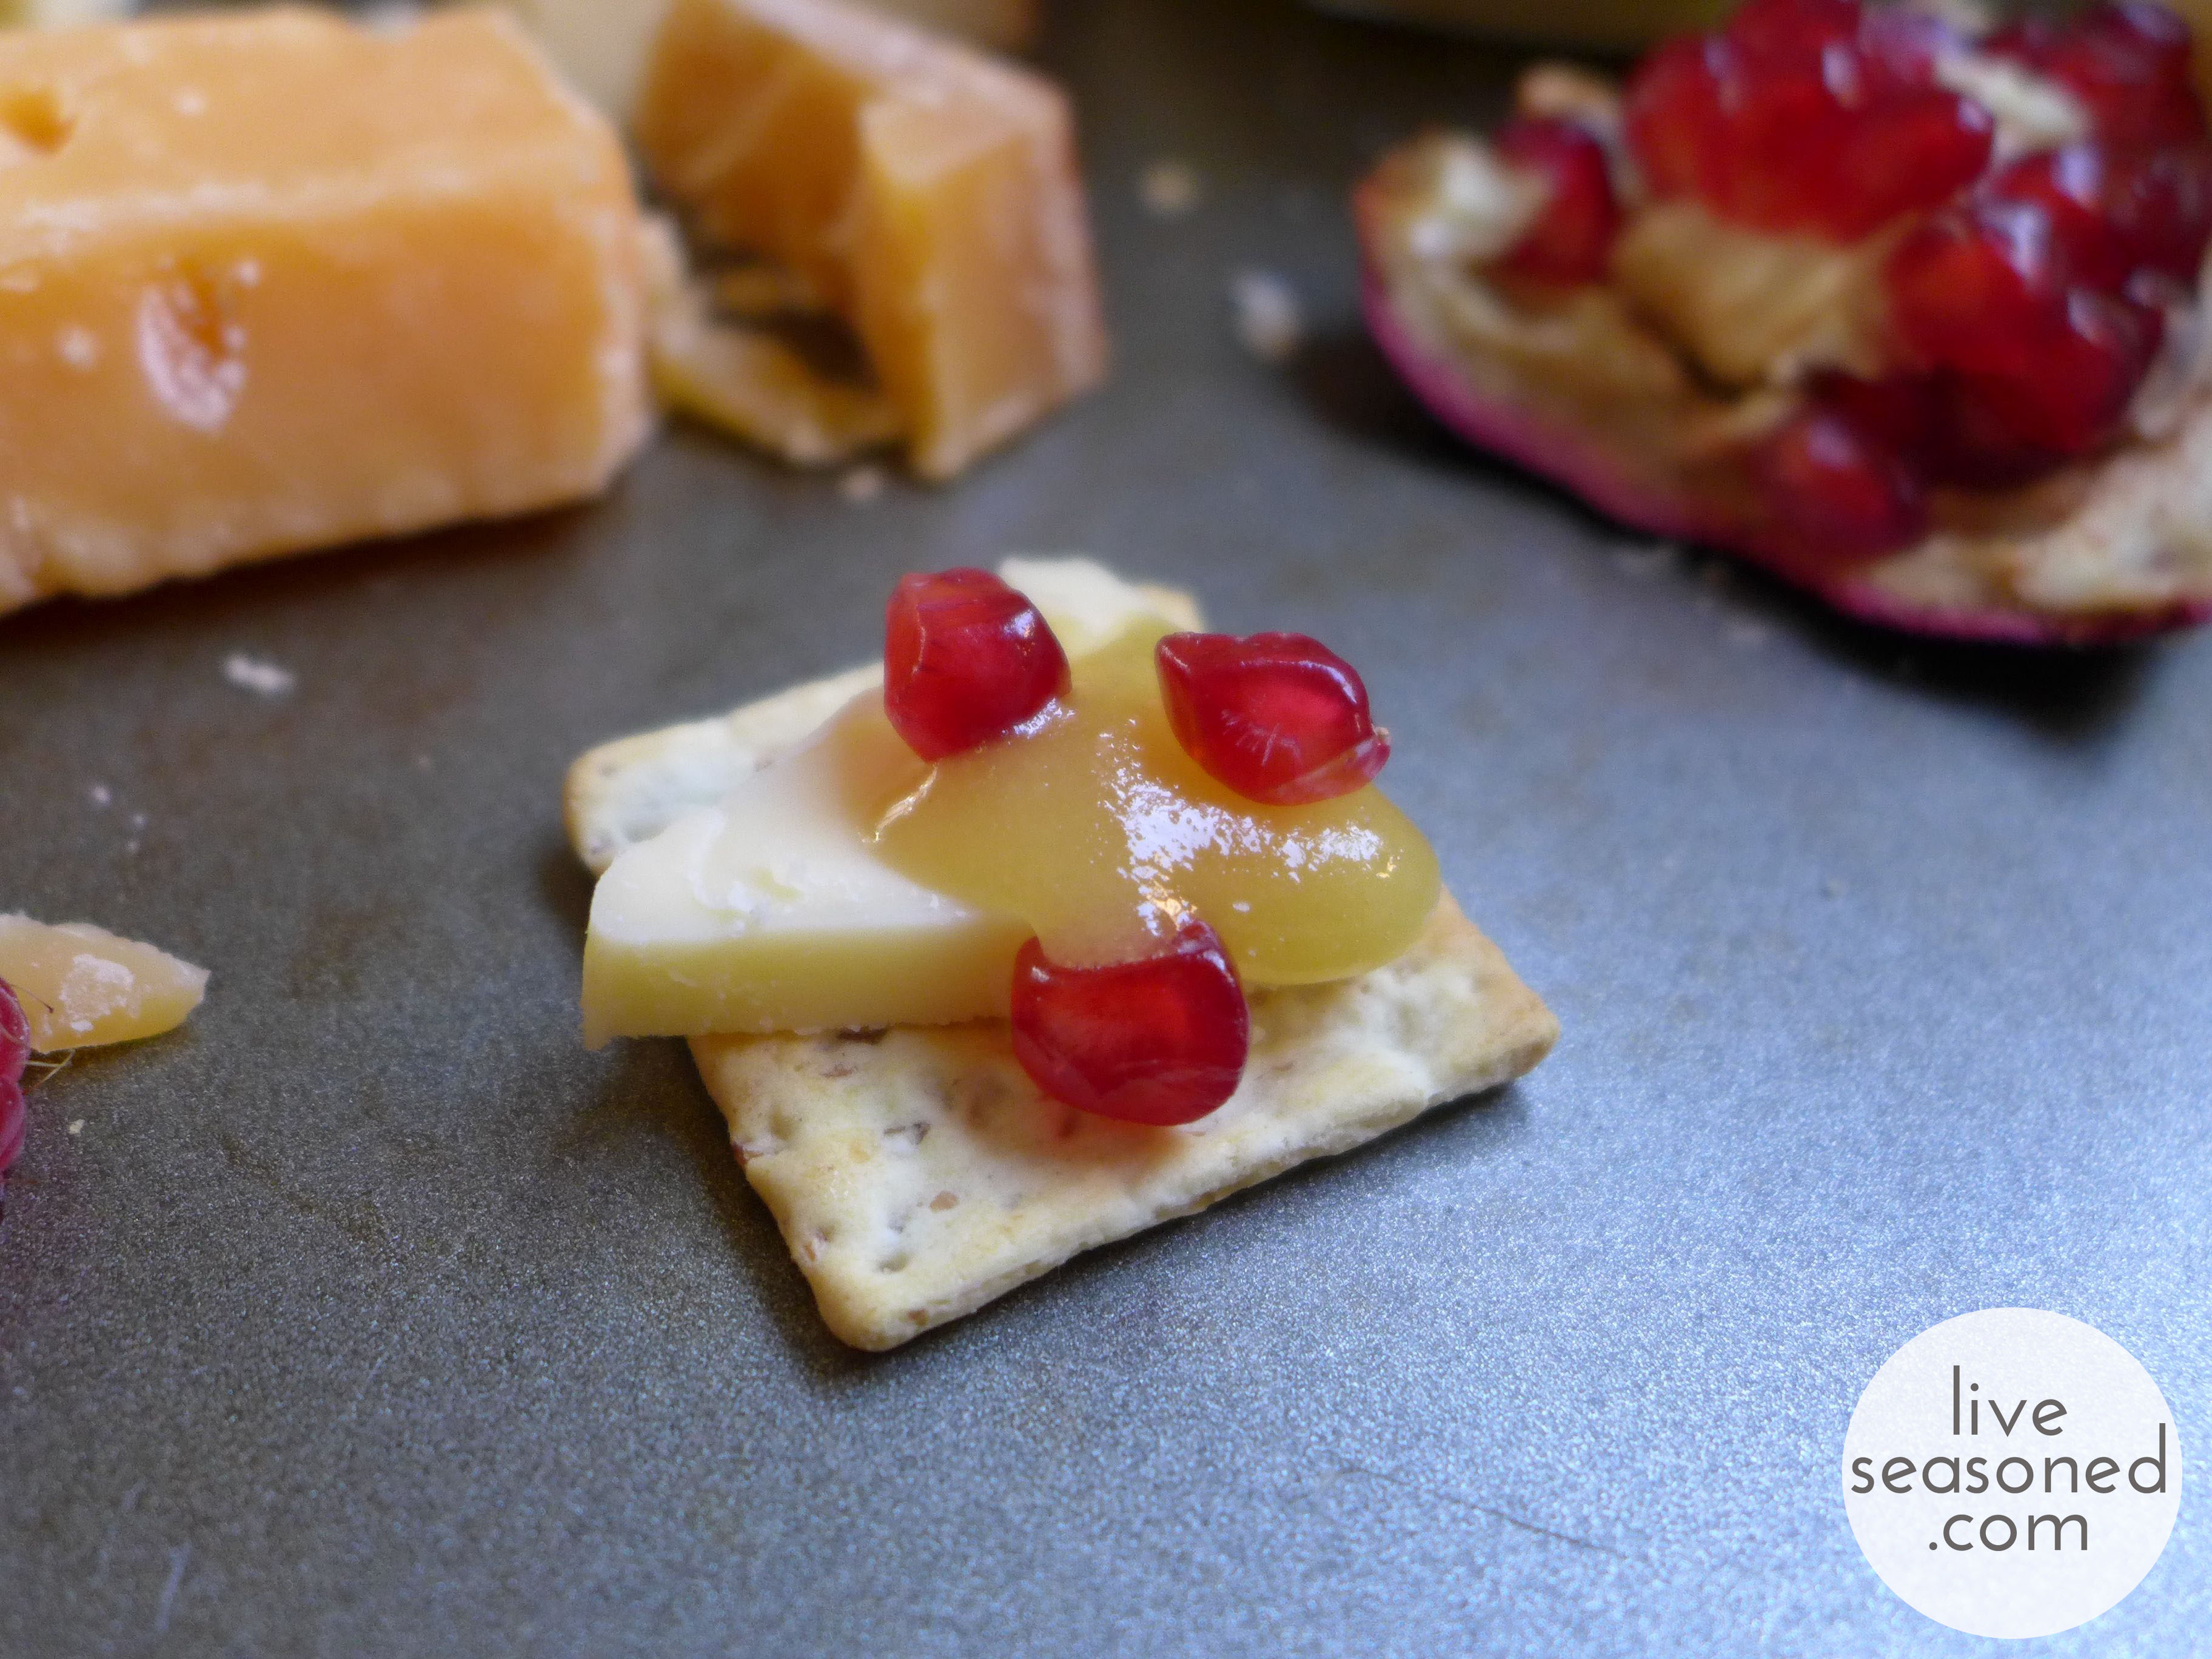
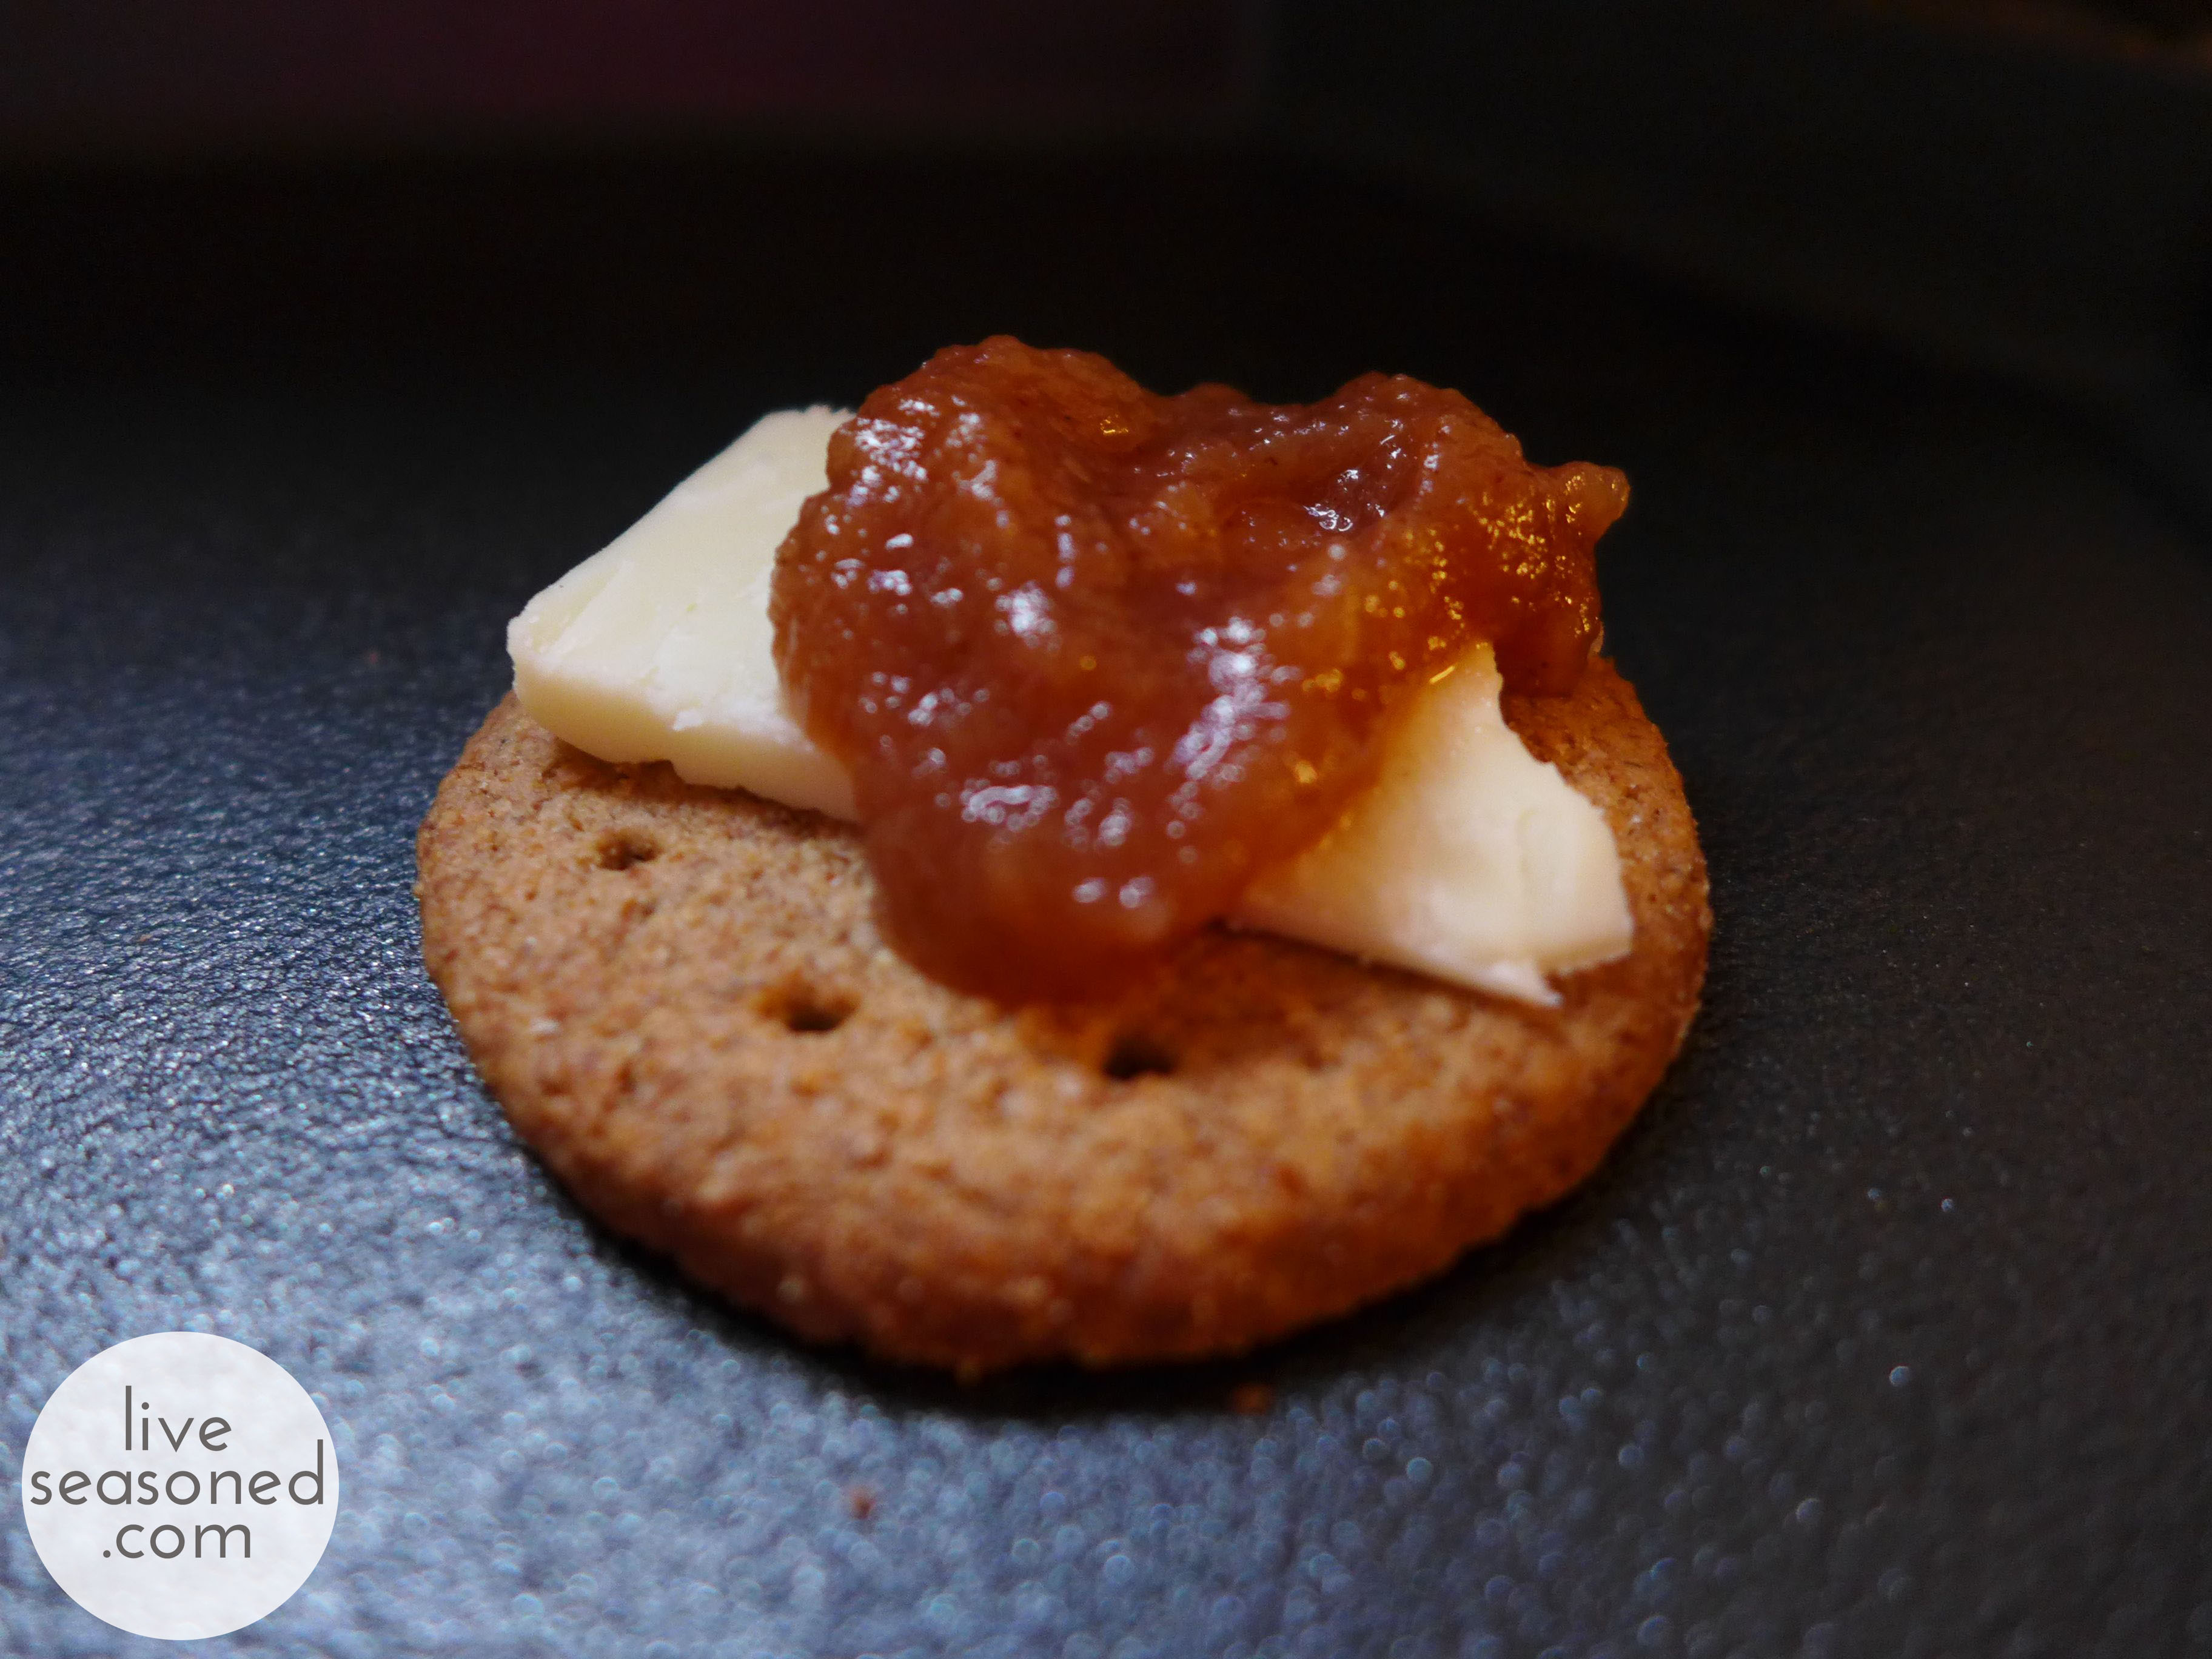
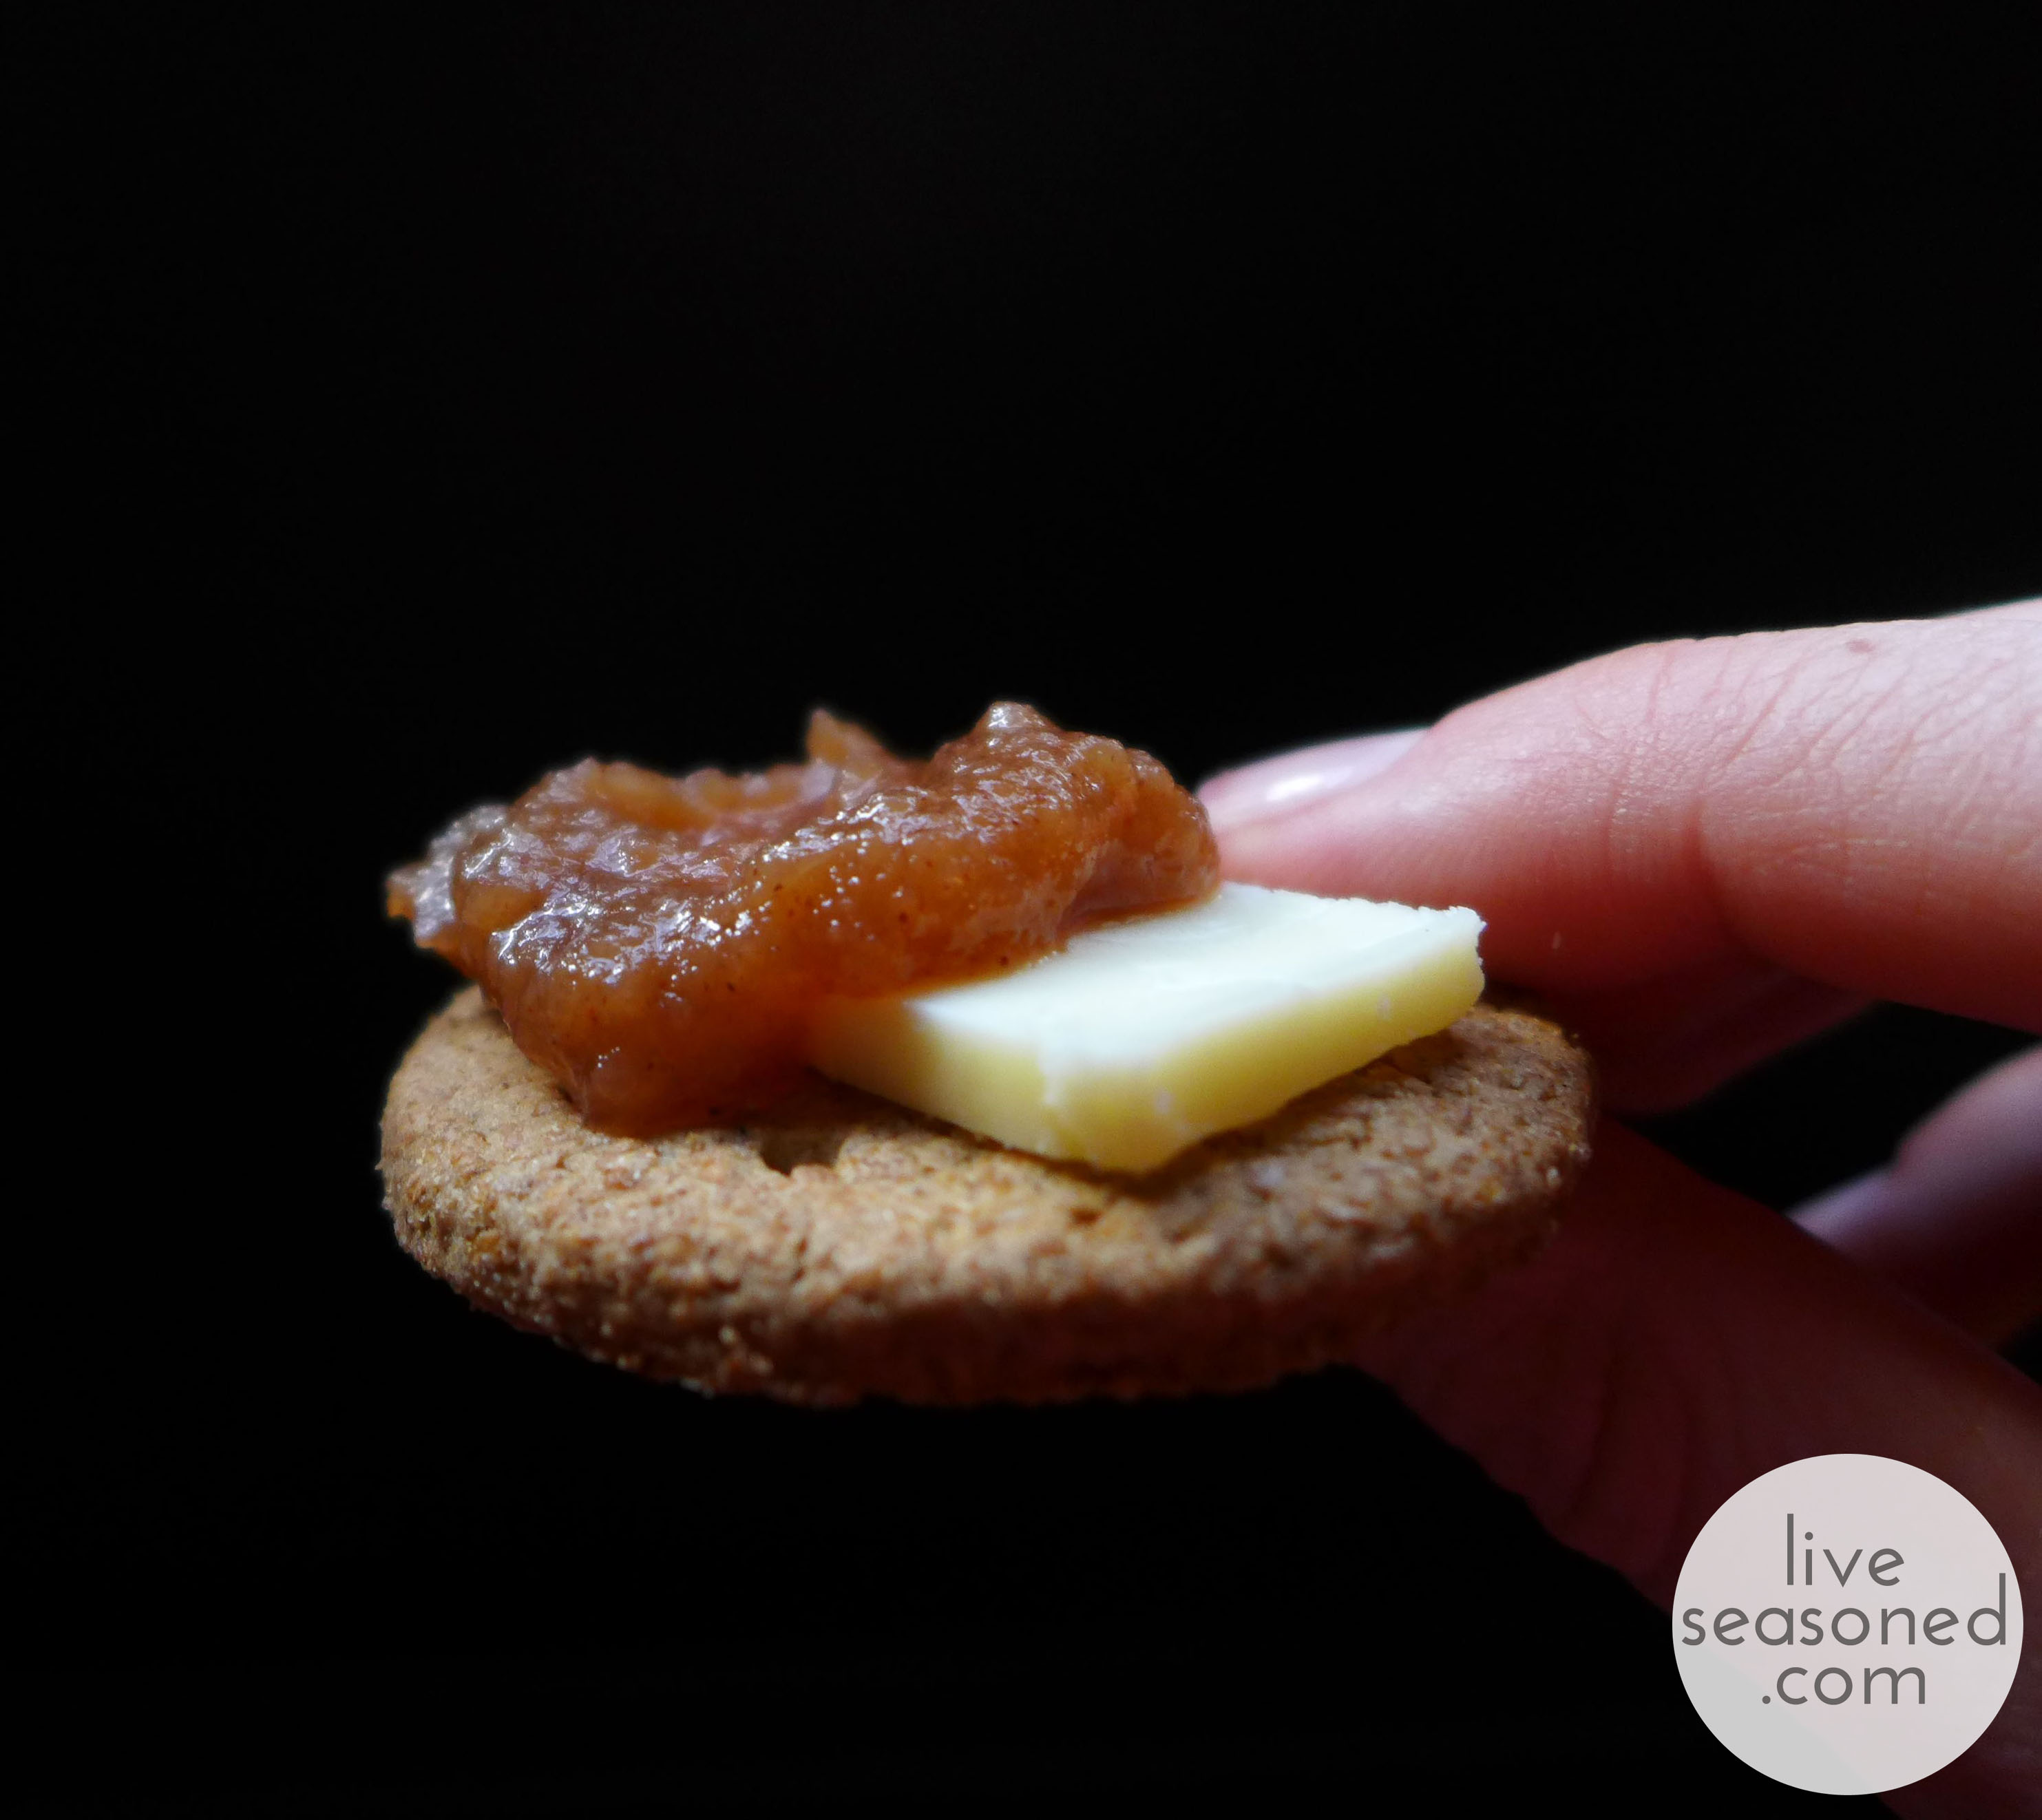
Look at how beautiful that cracker looks with a bit of cheese, dollop of honey, and a few perfectly placed pomegranate seeds! There’s no way those seeds will fall off on the way from the plate to your mouth. This is a particularly handy trick for cocktail parties if you want to make a few fancy cracker/cheese combos rather than having guests make their own. You definitely don’t have to worry about the appetizer falling apart before it’s served. I also found honey to be particularly useful for keeping the crumbly gouda on my cracker. You can see that I double-dipped in the last photo – starting with a slice of Parrano and then adding crumbles of Gouda over the honey. indulge much?

liveseasoned_fall2014_nibblenook11_wm

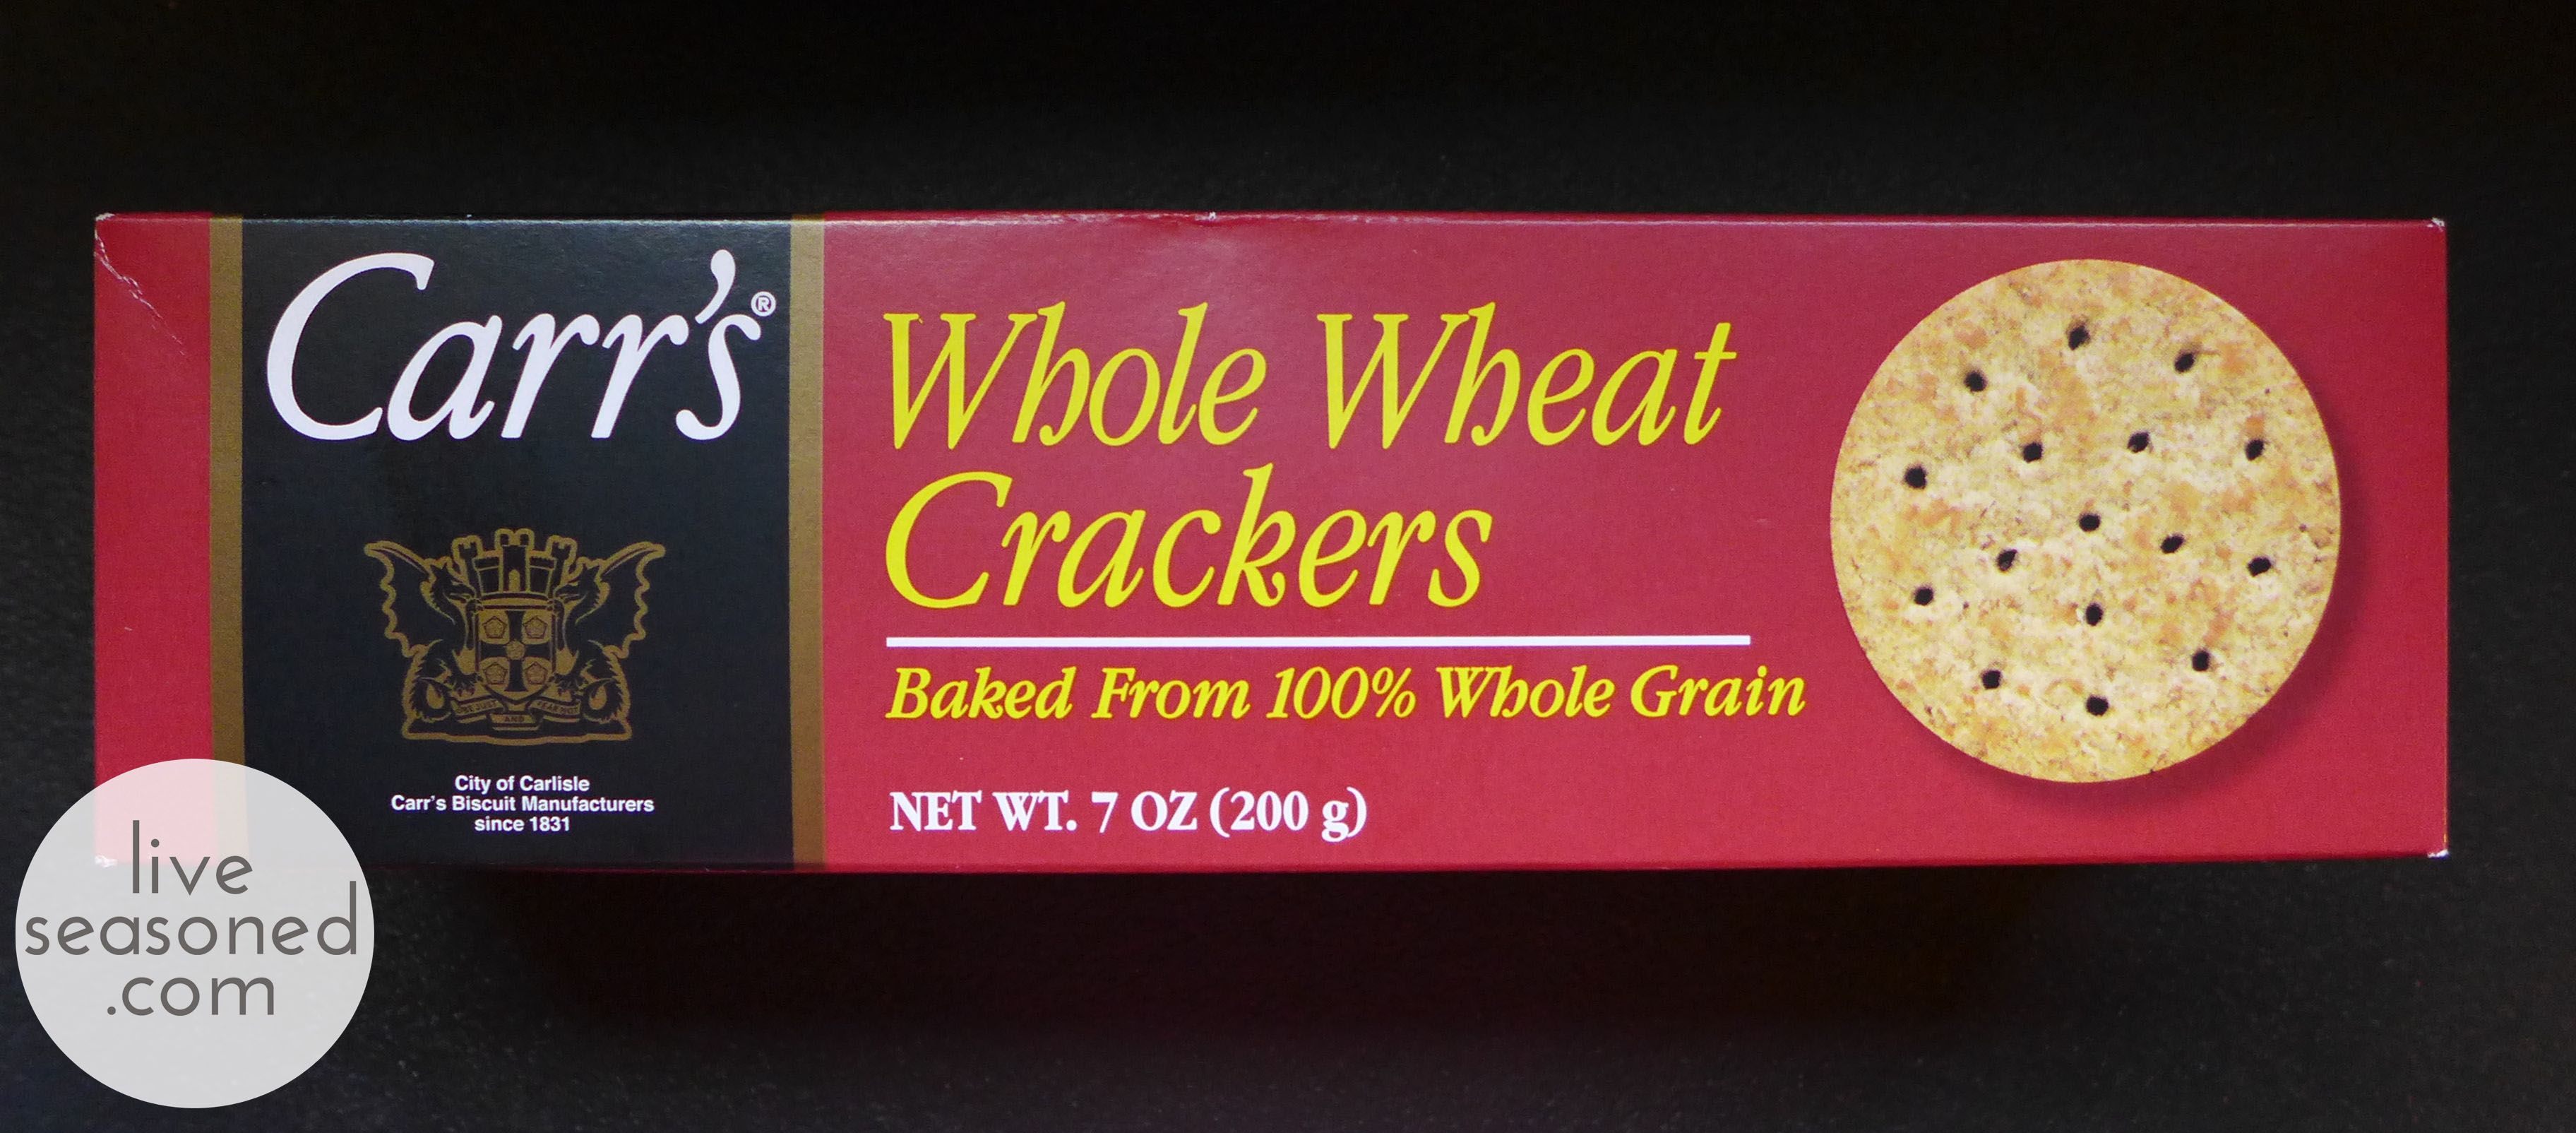
I can’t emphasize enough how delicious these particular combos were. The crackers were just a basic wheat thin. Both cheeses had a bit of a nutty flavor. The honey added that touch of sweetness. And then, as I already mentioned, the fruit added a bit of a tart note. Plus it was extra fun to get that little spray of juice and crunch when biting down on the pomegranate seeds.

liveseasoned_fall2014_nibblenook12_wm

And this adventure all started with a quick trip to the Nibble Nook. Who knows what next week’s visit will hold… and I can only hope that come April they add some of that truffle cheese back to the bin!

So tell us – does your grocery store have their own version of the nibble nook? Did you find any really outstanding cheeses there?


Fall Cheese Trifecta

While apples may be our ingredient of the season, cheese is definitely our snack of the season. So far we’ve spent more time exploring condiments to pair with our favorite cheese rather than the vast world of cheese varieties, but we’re ok with that, because these combinations are top notch!

liveseasoned_fall2014_cheese_applebutter6_wm

With today’s combination, I’m not sure who’s the star. Our delicious homemade apple butter? Carr’s hearty whole wheat crackers biscuits? Or the ever reliable bite of Cabot’s Extra Sharp cheddar? I do know that when you put the combination together you create a hearty snack that evokes the flavors of season and will satisfy the hunger you build up while outside on these crisp fall days.

liveseasoned_fall2014_cheese_applebutter5_wm

If you haven’t had a Carr’s whole wheat cracker yet, add them to your next grocery list. You’ll find them to be much more substantial than a typical cracker. The whole wheat really fills you up, but they also have a touch of sweetness that makes it seem like you’re eating more of a cookie than a cracker. It’s hard to explain, but I know that I can eat two or three with a cup of tea and consider it the perfect mid-morning snack. 

liveseasoned_fall2014_cheese_applebutter1_wm
liveseasoned_fall2014_cheese_applebutter3_wm

We’ve already raved about our love of apple butter in this post, so there’s not much more to say there. Other than to remind you to pick up a sack of apples and get yourself a jar.

Then there’s the cheese. Do you have a favorite cheddar? Whenever I want a basic, not too expensive cheddar that has that perfectly sharp bite, I look for Cabot’s Extra Sharp. The description on their site says it best, the cheese is “creamy white in color with an almost crumbly texture and has a sophisticated, citrusy tang”.

liveseasoned_fall2014_cheese_applebutter7_wm

Cheddar gets its name from an extra step in the cheese-making process called cheddaring where loaves of curds are allowed to set until they reach a certain acidity, they are then cut into loaves, stacked, and turned every 10 minutes until further acidity points are reached. While changing the acidity, this process adds flavor and creates the crumbly texture that cheddars are known for. After the batch has been cheddared and salted, the curds are placed into cheese molds and aged for anywhere from 1 month to over 10 years, depending upon the type of cheddar being made. The Cabot Extra Sharp is aged for anywhere from 9 to 14 months (whereas their mild cheddar is aged for just 2 to 3 months).

liveseasoned_fall2014_cheese_applebutter8_wm

Want a few more fun cheddar facts?

  • It’s the second most popular cheese in the US behind mozzarella
  • Our average annual consumption is 10 lbs per person!… my personal consumption is more like 20 lbs (minimum)
  • The cheese originated in the English village of Cheddar in the 12th century
  • Easy Cheese is not cheddar
  • A single 1 oz serving gives you 20% of your daily calcium requirements
  • And what do you call the hunk of cheddar sitting in my fridge? Nacho cheese! ha!

Easiest Caramel Dip

liveseasoned_fall14_carmeldip-5

As you know, apples are our ingredient of the season and with that in mind, I decided to make a childhood favorite of mine, caramel dip.  Over the years, my tastes for sweets has drastically decreased.  I’m now a dark chocolate lover and I tend to gravitate towards salty snacks, but when October rolls around I always think of my mom’s caramel dip.  She used to whip up a batch for friendly gatherings, holiday dessert tables and if my memory serves me correctly, the soccer concession stand.

This recipe is dubbed ‘the easiest caramel dip’ because you’re not actually making the caramels, you’re simply melting them and adding a couple other ingredients to achieve the right taste and consistency.  Its simple preparation (no knives involved!) makes it a great recipe for the kiddos to help with.  It can also be made a day or two ahead if you have a big party approaching and in my opinion, those are the best types of party foods.

The original recipe, which was dictated to me by my mom earlier this afternoon calls for Cool Whip.  My mom mentioned that she didn’t really know why the Cool Whip was added (since it’s mainly just oil) and that I could probably find a substitution for it, but that she never bothered.  Raising four kids, working full time, and constantly cooking for us, I can understand why she didn’t want to mess with a hit like her simple caramel dip.  Can you imagine the moans and groans we would have attacked her with if the dip didn’t taste right?  Anyway, after I went grocery shopping and snapped the first shot of the ingredients I realized I don’t have four kids and thus I could manage to experiment without any repercussions and such, this recipe contains Cool Whip no more! I opted to use a couple spoonfuls of coconut oil instead and to my delight, it turned out perfectly and you can’t taste the coconut one single bit.

Ingredients:

  • 1 bag of Kraft caramel
  • 1 package of cream cheese
  • 2 TBSP coconut oil (or more to achieve desired consistency)

Easiest Instructions:

  • Unwrap all the caramels and put them in a small sauce pot along with the cream cheese.
  • Stir continuously on medium low heat until the caramels and cream cheese are completely melted and combined.
  • Stir in two tablespoons of coconut oil.  If you like a thinner dip, add a bit more coconut oil until the desired consistency is reached.
  • Remove from heat. Transfer to a small bowl and serve with sliced apples.

Along with sliced apples, I also dripped some of the caramel dip onto plain, unsalted popcorn and roasted, unsalted peanuts. It made for a sweet and crunchy treat.

Just so you know…

  • I’m moving in a few days and I had already packed up my kitchen so finding utensils, bowls and serving pieces for this post was the most challenging part!
  • The handle of my pot broke off (the screw came loose and slipped out) when I picked up the pot to transfer the caramel to a bowl. It slammed down on the stove and hot caramel splattered everywhere..
  • I almost spelled caramel, carmel for the entire post because I grew up next to Mount Carmel so naturally that’s how I’ve been spelling the sweet treat my entire life.  I never understood why some people pronounced caramel with three syllables, but now I get it.

Crockpot Apple Butter

Apples are our ingredient of the season, so far we’ve covered a variety of baking and drinking recipes. Today it’s all about the condiment!

Have you tried apple butter yet? Apple butter is a more concentrated form of apple sauce, taking all of fall’s best flavors and turning them into the perfect little condiment. It was originally developed as a form of preserved apples that would last longer than apple sauce because of its higher sugar content. If you’ve never had it, it may be because it’s more of a regional food. Apple butter was developed in Germany and the Netherlands, making it a more popular condiment in regions of the US that were settled by people from those countries, particularly the Amish. If you haven’t had it, I encourage you to seek out a jar (or jump in with both feet and make our version below) ~ it’s soooooo good! Stumped on how to eat it? The spread is often eaten with bread, but I’ll share a few more fun ideas below.

I have to admit, two weeks ago when I was making this batch of apple butter, I was exhausted and little A was squawking because he wanted to go outside, making me question why I wasn’t just running to the store to pick up a commercial jar. But I quickly had a change of heart. Other than the hour of peeling and chopping, this butter required so little work, that I’m solidly convinced it’s worth the effort, especially since I can tailor the recipe to my wants, being sure to buy organic apples, lowering the sugar, and upping the spices. Plus, the concentrated apple and spice flavor is such a perfect condiment for the season, and that’s what we’re all about!

I have made apple butter many times, and never the exact same way, but every time it turns out delicious. I’ve made batches that started with 40 lbs of apples all the way down to this measly batch that started with 4.5 lbs. I’ve also made it in an electric roaster, an electric frying pan, and a crockpot. I’ve found the crockpot to be the easiest, but use what you have! That’s all to say – this particular condiment is so forgiving. As long as you start with a big pile of apples and allow them to cook down slowly with a touch of spices, liquid, and sugar, you’ll end up with something delicious. I promise.

liveseasoned_fall2014_applebutter2_wm

 Ingredients

Recipe makes approximately 5 cups of apple butter.
  • 4.5 pounds of McIntosh Apples, peeled, cored, and chopped
  • 1 cup brown sugar
  • 1 tbsp ground cinnamon
  • 1/2 tsp ground nutmeg
  • 1/4 tsp ground cloves
  • 1/4 tsp salt
  • 1.5 cups water (or you could substitute apple cider for half or all of the water)
liveseasoned_fall2014_applebutter3_wm

How-to

  • Mix all ingredients together in your slow cooker and put the lid on, but leave it slightly ajar to allow steam to escape.
  • Turn it on high for 3 hours, at the end of three hours give it a good stir and assess the pot. If there’s a lot of liquid, you could keep it on high for another couple of hours before turning it to low. If the apple butter is more concentrated, you can turn it to low immediately and let it cook for an additional 4-5 hours (or longer) until you reach your desired apple butter consistency. You can even remove the lid in the last few hours of cooking if you want to let more steam out, but as your butter nears the end, be careful to stir it and watch for any signs of burning (this is less of an issue if the lid is partially on, slowing the evaporation).
  • When your butter is done cooking, let it cool. I do this with the lid off to allow for that final dose of evaporation and concentration. Transfer it to a container and refrigerate.

Tips and Tricks

  • Use a wire whisk for all of your stirring. It’s a great way to break up the apples and get a smoother consistency than if you use a spoon.
  • If you have to leave the pot for while at work, just start with the crockpot on low for that time. Similarly, some people will start their butter at night and let it cook on low while they sleep. After 8 or so hours, give it a good stir and then you can always turn it up to high for a few hours if there’s still a bit of liquid in the pot (I’ve made apple butter while at work and it’s always turned out fine).
  • If you’re unsure about when it’s finished, you can scoop out a bit on a spoon and pour it onto a plate – if it holds its shape and doesn’t become a pool of liquid, then it may be done.
  • If you feel like the liquid is evaporating too fast and your apples aren’t cooking down and creating that caramelized brown color, then you can always add more liquid! This was the case for me when I was making big batches in the electric roaster, with such a large opening, it would let out a lot of steam (unless I had the lid positioned just right). Just add a cup at a time, stir it in well, and let the mixture continue to cook.
  • As I said, I’m prone to using less sugar and more spices than other recipes may call for. Feel free to adjust those levels as you see fit. There really is so much wiggle room ~ I’ve really never had a bad batch!
liveseasoned_fall2014_applebutter10_wm

Serving Suggestions

This batch made 5 cups of apple butter. We’re currently down to about 2.5 cups, so yes, we have plenty of serving suggestions!

  • As I mentioned, it’s common to spread apple butter on bread. As with my jam, I like to spread on a layer of butter first and then the apple butter. It’s particularly good on bagels.
  • A very common way to serve apple butter in Amish communities is with cottage cheese. This is one of my favorite ways to eat it (and Alex’s too!). If you’ve ever eaten at a salad bar in the area around Lancaster, PA, it’s very common to see cottage cheese and apple butter next to each other in the salad bar (and now you know why!).
  • Similar to cottage cheese, I like to stir some into plain yogurt.
  • Last weekend we added a spread of apple butter to our Saturday morning crepes with ham and cheddar cheese (Calder’s figured out a super easy way to use Bisquick for crepe-making, we’ll have to share the recipe soon!).
  • When we had some dinner guests last week, I added a ramekin of apple butter to the cheese plate. It was delicious spread on baguette with either brie or cheddar!
liveseasoned_fall2014_applebutter7_wm

Brie with Truffle Honey

We plan on eating a whole lot of cheese this fall, and then we’ll talk abut it here. Sarah kicked off the cheese-fest with a nut crusted brie, and while there are many different cheeses in the world, I couldn’t help but share another delicious brie idea. Next time a hard cheese, we promise.

I love the flavor of truffles, and whenever there is a truffled this or that on a menu, I’m going to order it. My last truffle indulgence was the delicious Lamb Bolognese with Truffled Ricotta Gnucchi at The Pullman in Glenwood Springs, CO. So good! And what a great guy Calder is by indulging my truffle love – he hates the flavor (thinks it tastes like gasoline!), but he knew that a jar of truffle honey would be the perfect Valentine’s Day gift.

liveseasoned_fall2014_briehoney6_wm

The Honey

Truffle honey is made by adding shaved truffles to honey and then heating it to speed up the extraction of the truffle flavor. You should be able to find some at gourmet cheese shops, but it’s also easy to buy online. It’s not cheap, but a single jar goes a long way. The jar I have has an intense flavor, so just like dishes that use truffle oil or real truffles, this may not be for everyone. Of course, if you know a truffle lover, I guarantee you that they will love this!

Until receiving this gift, I never had or heard of truffle honey and wasn’t sure what to do with it, but quickly discovered that it’s commonly paired with cheese and bread. But what cheese? It seems that everyone has their favorite pairing, some swear by a hard and strong cheeses like parmesan or cheddar while others gush over a soft and mild brie. I decided that I didn’t want to pair the honey with a strong flavored cheese, so I went with a relatively mild and rich brie. Once I had my cheese, I knew that the soft cheese/honey combination was calling out for a chewy bread that wouldn’t crumble with each bite. So I threw a baguette into my cart and we had the makings for a perfect appetizer.

liveseasoned_fall2014_briehoney5_wm

The Cheese

Bries are soft cheeses from France. They’re made from cow’s milk and surrounded by a hard, moldy or “bloomy“, edible rind. The mold will have a white to light yellow color (not the blues of the molds that come to mind when talking about blue cheese). The mold is essential to creating the cheese as it works to break down the fat and proteins of the milk and cream. Bries vary by the amount of cream used to make them, you may see “double” or “triple” on the label signifying increasing amounts of cream. Increasing the cream level increases the richness and buttery-smooth texture of the final cheese.

liveseasoned_fall2014_briehoney1_wm

When picking a brie you want to look for a “ripe” cut. When brie is perfectly ripe, it won’t be runny or pungent (there are other soft cheeses that are made to be purposefully pungent, brie isn’t one of them). As a brie ripens, you may notice that the wheel of cheese will bulge slightly, especially when cut. You’ll likely buy a wedge from a larger wheel, which makes picking easier. Look for a wedge with a uniform interior consistency that is slowly falling out of the rind. For comparison, an unripe wedge will have a firm interior (or combination firm and soft) that is the same shape as the wedge, i.e. not expanding beyond the original cut.

There are a variety of bries on the market, and I think Supreme is a great, basic example that’s affordable and readily available at many grocers (including Trader Joes if you’re looking for a source).

Serving Suggestion

Once you have your cheese, honey, and bread, serving is easy. We placed everything on a marble board with utensils for self-service. A bread knife for the baguette, a spreader for the cheese, and a small spoon for the honey. That way everyone could personalize their serving. Calder could skip the honey, I could pile it on (and then eat it straight from the spoon), and our civilized guests could take as much or little as they wanted with each slice.

liveseasoned_fall2014_briehoney4_wm

If you have the opportunity, I hope you’ll give truffle honey a try. And with the upcoming holiday/entertaining season, this makes a fantastic surprise to any cheese plate or gift for your truffle-loving friends!

Quick Pickles

If you’ve been following along, you may have heard and seen that our farm share started. I’m still in disbelief that we were able to get a share that is this awesome so late in the season! And now I’m remembering what it’s like to have (the wonderful) pressure of a fridge full of veggies pushing me to get creative with dinner.

liveseasoned_fall2014_quickpickels2_wm

In this first box we received your typical fall fare: a few bunches of kale and chard, potatoes, squash, etc. What I didn’t expect were the couple of cucumbers and the big beautiful bunch of dill blossoms. I thought cucumber season had passed, and I’ve never received the dill blossoms, so this was a new and unexpected surprise. I have to admit that I have a tendency to buy cucumbers and forget about them, but I didn’t want to let that happen this time. So I turned to one of my favorite easy ways to use up those cukes in a jiffy: overnight pickles! We don’t buy pickles often (and when we do they tend to sit in the fridge for months), but these are different. They are so fresh and delicious,  barely lasting a week in our house.

liveseasoned_fall2014_quickpickels4_wm

This recipe comes from my mom, but I adjusted it to make use of what I had on hand: eliminating the green pepper and adding the dill blossoms and a bit of fresh dill. Do you hear that? The blossoms were totally a bonus, this recipe is just as delicious without the fresh herb, but as you’ll see, they sure add a touch of something beautiful to the jar.

Ingredients

  • 3 average-sized cucumbers (here I used 2 large)
  • 1 green pepper
  • 1 onion
  • 1 Tbsp salt
  • 2 tsp celery seed
  • 3/4 cup sugar
  • 1/2 fresh lemon juice
  • 1 sliced lemon
  • optional – dill blossoms

liveseasoned_fall2014_quickpickels3_wm

How-to

  • Slice the cucumbers, green pepper, and onion, and mix them in a bowl with the salt and celery seed. Let this mixture stand for one hour.
  • Mix together the sugar and lemon juice and add it to the cucumber mixture. Add the sliced lemon and stir.
  • Cover the container and refrigerate for 24 hours before eating. I like to go in there and give it a stir once in a while, or if using a jar I just give it a gentle shake, slowly turning it upside down. The juices may not cover your mixture right away, but they will as the 24 hours progresses.

liveseasoned_fall2014_quickpickels5_wm

The blossoms are a really flavorful part of the dill plant. I added a few to a warm veggie mixture as it cooked, and they imparted a fantastic but not overpowering dill flavor. I found that they did a same thing here ~ creating a batch of pickles that had a sweet dill flavor. I added blossoms that weren’t fully open to my jar before filling it with the cucumber mixture (I’m not sure if there’s any difference in the flavor imparted by open versus closed blossoms?).

While the pickles taste delicious, I think I get just as much fun out of opening my fridge and seeing this beautiful jar sitting on the shelf (for the whole 2-3 days that it’s there!).

Ack, ok, maybe it’s even more fun seeing little A gobble them up and then sign for more with celery seeds sticking to his face!

Apple Sidecar

Apples are our ingredient of the season. So far we’ve done some baking and some drinking.

I don’t know about where you live, but here in Boulder we’ve had a string of chilly fall-like days with views of fresh snow on the mountains. What’s better on a chilly Thursday than a cocktail that warms you up from the inside out?! If you haven’t had a sidecar yet, get ready to sit back, enjoy it in front of the fire, and plan on doing nothing for the rest of the night.

liveseasoned_fall2014_sidecar4_wm

Sidecars are traditionally made with cognac, triple sec, and lemon juice. Today we’re substituting an apple-infused brandy for the cognac. Funny thing  – cognac and brandy are the same thing, but to be called a Cognac it must come from a specific region in France. In the past I’ve used Jacques Cardin’s Apple Flavored Cognac. Today we’re making it with Santa Fe Spirits Apple Brandy because we wanted to try something new, and it’s produced closer to home with apples grown in New Mexico!
liveseasoned_fall2014_sidecar1_wm

Ingredients

  • 2 parts cognac or brandy
  • 1 part triple sec
  • 1 part fresh lemon juice
  • ice
  • optional – simple syrup

liveseasoned_fall2014_sidecar2_wm

The How-to

  • Fill a cocktail shaker with ice
  • Add all of the ingredients and shake
  • Pour into the glass of your choosing, traditionally a cocktail glass would be used. I prefer a rocks glass… but then I thought that this would be perfect for drinking around a campfire, so why not use an enamel camping mug?!
  • Garnish with a bit of apple & enjoy!

liveseasoned_fall2014_sidecar6_wm

Extra Tips

  • As I mentioned, this can be a strong drink. You can do a number of things to weaken the drink. Start by using some simple syrup – either adding 1 part to the mix above, substituting it for the triple sec, or using equal parts of your choosing. You can also serve the drink over ice to add even more water as you drink.
  • I enjoyed sampling the sidecar with the Santa Fe brandy, but remember the Jacques Cardin cognac to be slightly smoother (although it’ll still knock your socks off).

liveseasoned_fall2014_sidecar3_wm

Apple Cream Cheese Quick Bread

Apple is our ingredient of the season. Expect quite a bit of baking, a sampling of hard cider, and a house full of aroma (if you’re lucky!) from this series.

The same mystery apple tree that provided the inspiration for our German Apple Cake keeps on giving, so we keep on taking! Alex makes it a daily stop, and I’ve run over a few times when we needed an apple for this or that; today’s bread being the perfect example. We went on a one-night camping trip last weekend, and whenever we’re camping and I know there’s going to be a chill in the air I like to pack along a baked good – just something to snack on when we need an energy boost or want a little treat with our camp breakfast. Since this recipe comes together relatively quickly, it’s an easy last minute treat whether you’re staying home or packing the car (and forgetting the hotdogs!) as you head out for the weekend.

liveseasoned_fall2014_applebread3_wm

In addition to the apple, this bread gets its flavor from a touch of cinnamon, fresh nutmeg, and vanilla. And I loved the hearty addition of cream cheese, reminding me of another fall favorite ~ the pumpkin roll!

Ingredients

  • 2 apples, peeled and grated
  • 1/2 cup vegetable oil
  • 1 cup sugar, separated
  • 3 eggs (2 for the bread, 1 for the cream cheese filling)
  • 1 tsp vanilla
  • 1/2 cup whole wheat flour
  • 1/2 cup + 1/3 cup white flour
  • 1 tsp baking soda
  • 1/2 tsp salt
  • 1 tsp cinnamon
  • 1/2 tsp nutmeg
  • 1/2 cup chopped walnuts
  • 6 oz. cream cheese
liveseasoned_fall2014_applebread1_wm

The How-to

  • Preheat the oven to 350F and lightly oil a loaf pan.
  • Place the apples, oil, 3/4 cup sugar, 2 eggs and vanilla in a large bowl. Mix well. Gently fold in the flour, baking soda, salt, spices, and walnuts until wet. Pour the batter into your prepared pan.
  • With an electric mixer beat together the cream cheese, 1/4 cup sugar and 1 egg. Pour over the top of the bread batter and swirl with a fork or knife.
  • Bake for 30 minutes with a loosely covered foil tent. Remove the foil and continue to bake for an addition 15-20 minutes, until a toothpick inserted into the bread comes out clean.
  • Allow the bread to cool before slicing.
liveseasoned_fall2014_applebread4_wm

As I mentioned, this is a nice hearty bread. It was the perfect treat on our camping trip, especially with a cup of hot tea at the breakfast table. My cream cheese didn’t marble into the bread so much as it sunk into the middle and the bread seemed to bake up around it, but we didn’t mind – it made it more like a filling.

I adapted today’s recipe from Today’s Creative Blog, adding the walnuts, reducing the sugar, and taking her suggestion for a combination of whole wheat and white flour. I found the core recipe to be easily adaptable, so feel free to experiment and make it your own!

Nut Crusted Brie

Apples are our ingredient of the season.  This recipe is perfect served and garnished with a thinly sliced apple. This is also the first of a few cheese plates that we’ll be serving up this fall.  If you are vegan, we apologize in advance.

LIVESEASONED_fall14_brie2

Calling all cheese lovers! This recipe goes out to you…

Autumn is the perfect time to turn on the oven, wouldn’t you agree?  I love heating up my house a bit and making something warm to snack on.  This nut crusted brie is ridiculously simple and it’s classy as all get out.  Need a quick hors d’oeuvre? Having a few friends come over? Wanna feel better about eating an entire wedge of cheese?  Need snacks for Sunday night football?  All those and more are perfectly good reasons to roll your brie in crushed nuts and pop it in the oven. This takes ten minutes max (and only about a minute of active work) and you’re likely to have at least half the ingredients on hand.

Ingredients:

  • Brie (I used Auguste Le Petit. You can use whatever you’re comfortable with)
  • Buttermilk (or heavy cream)
  • Egg
  • Nuts of choice (I used almonds+walnuts. Macadamia would work well.)
  • Apple
  • Baguette

Instructions:

  • Preheat your oven to 300° and line a baking sheet with tinfoil.
  • Pulse the nuts in a blender or food processor until finely chopped, but not powdery.  I used about a half cup of nuts for a medium sized wedge. Set the bowl of nuts aside.
  • Whisk together one egg with a half cup of buttermilk.
  • Coat the brie wedge or wheel in the buttermilk and then press it firmly into the nuts. Repeat on each side of the brie making sure to completely coat it.
  • Delicately transfer the brie to the baking sheet and put it in the oven for 5-8 minutes.  You want the brie to be very warm, but not a melted puddle.  A full wheel will take about 10 minutes.
  • While the brie is baking, thinly slice the baguette and arrange on a baking sheet.  Put the bread in the oven while the brie is baking.  If you like your bread slightly browned, once the brie is done baking, turn the oven onto broil and toast the baguette.  Watch the bread closely so it doesn’t burn!
  • Thinly slice an apple or two and serve it along with the brie and baguette.

LIVESEASONED_fall14_brie4

I love this recipe for fall. Apples, nuts and warm cheeses, I don’t think there is a better combination. Unless you’re talking drinks, then I’m all about the fresh apple juice, cinnamon and vodka…


Sarah’s Appletini

Apples are our ingredient of the season. Check out Kate’s german apple cake right here.

I’m a fairly new martini drinker, but I can see these appletinis showing up on a regular basis around here.  They are full of fresh juice (& alcohol!) and they taste like Autumn!! Really, these apple martinis are fall flavored.  This recipe makes enough for two martinis so grab a pal or drink both. If your plan is the latter then have a great afternoon at home 😉

liveseasoned_fall14_appletini-1-4liveseasoned_fall14_appletini-1-6


Continue reading