
You can find our full archive of knitting projects here. And, of course, we have many projects that don’t involve knitting; there’s embroidery and sewing too!
If you’re following our Instagram stories, then you saw me sewing up the seams of this sweater during the month of December. Knowing that I’d have to knit the sweater in parts and then sew it together almost stopped me from evening making this one, but I’m so glad that I jumped in and learned something new!
Sweater Details
Pattern: Auster from Brooklyn Tweed & Designed by Michele Wang
Yarn: Knit Picks Wool of the Andes Worsted in the Shire Heather color; I really loved Knit Picks heather colors, the little glints of the different colors perfectly blended together is so beautiful. This one has browns, greens, blues, and teals. It’s so good.
Needles: US 8 & 6, but as always your needle size depends upon your tension. I really like the quality of the CHIAOGOO circular needles.
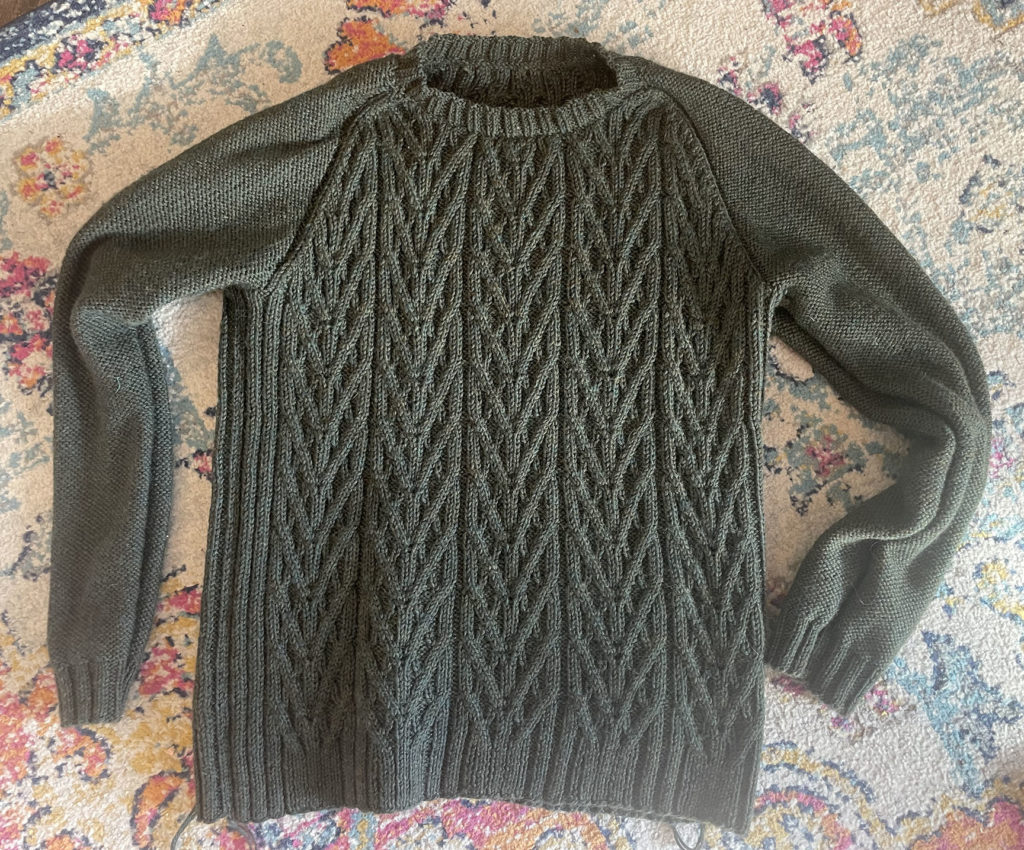
Knitting a Pieced Sweater
I trying my best to remember all of my past projects, because I think that in over 2 decades and dozens of sweaters, this is my first seamed sweater!
Why? I’ve always been intimidated by knitting pieces that will fit together perfectly, and THEN the worry of being able to sew them together without a wonky and uneven seam. It always seemed easier to just knit a seamless sweater and be done with it.
That said, I was aware that seamed sweaters hold their shape better than seamless. The seams provide tension points that help to maintain the shape of the sweater. This can be particularly important to keep in mind if you’re knitting a large sweater where you don’t want the weight of the sweater stretching it out.
Because I was so worried about knitting everything to the correct sizes, I did a few things to simplify the process:
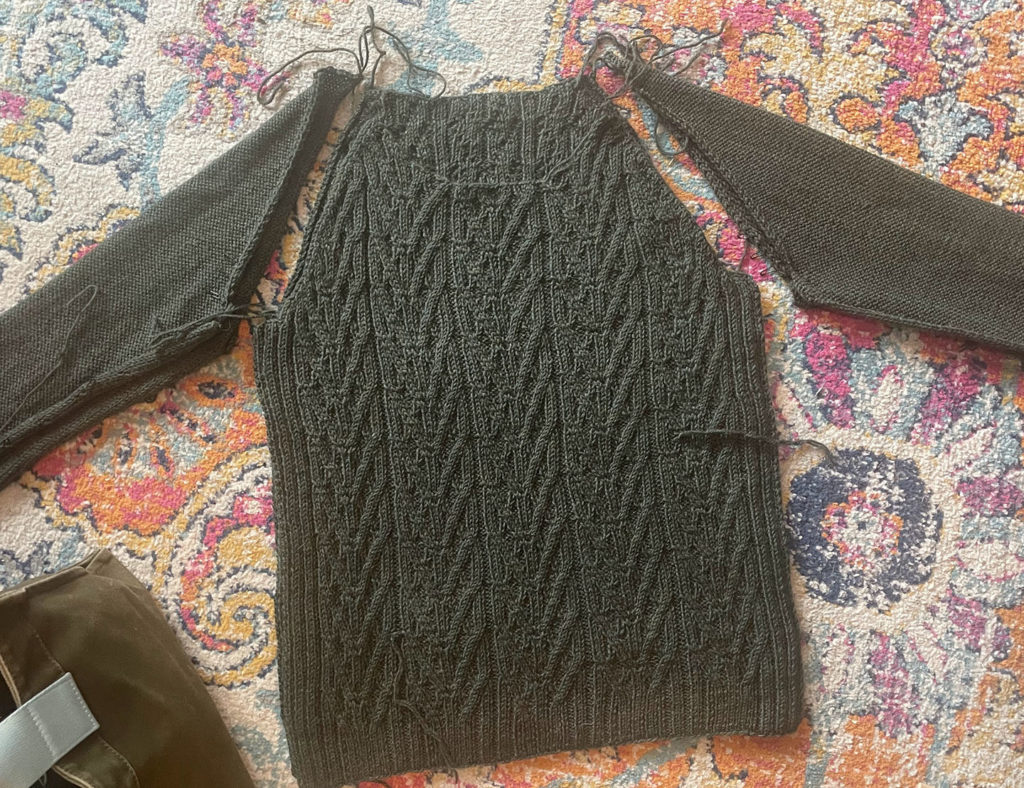
- I knit both sleeves at the same time using one large circular needle. You just cast on both sleeves, each with their own ball of yarn, and start knitting.
- I also knit the front and back body pieces at the same time on one long circular needle up until it was time to do the neck shaping. At that point I’d put one piece aside, finished the other and then swapped.
- Doing it this way made it so easy to ensure that everything lined up from the ribbed hems to the cable pattern at the arm holes without having to meticulously count rows. And for the sleeves, I knew that my decreases were places at the exact same points on each arm.
Piecing Together the Sweater
This is the work that I was dreading.
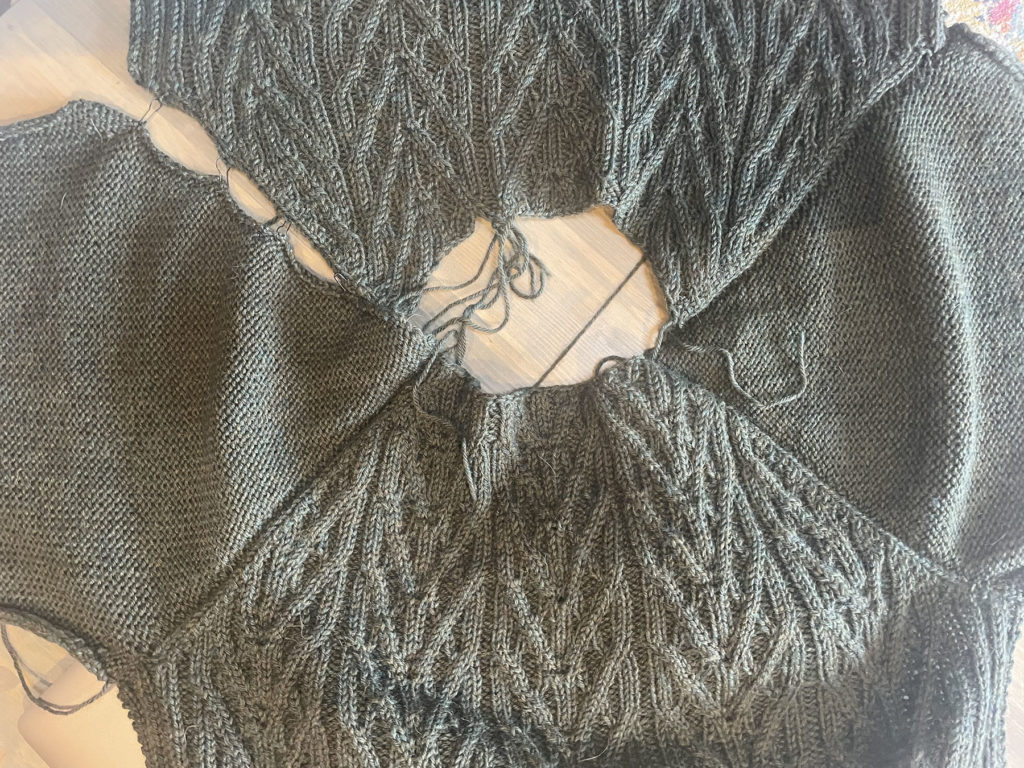
Once the pieces were finished, I used Brooklyn Tweed’s tutorial for seaming the sweater. I also watched a few youtube videos, and they made it look so easy!
I took comfort in knowing that my pieces were knit to the exact same size, so everything “should” line up. In the tutorials, it’s recommended that you pin together the pieces before stitching. This turned out to be fairly easy to do, and from there, the stitching was a piece of cake!
Holding the pieces together with the right sides facing, you’ll stitch together the should seams first before working on the arm and side seams.
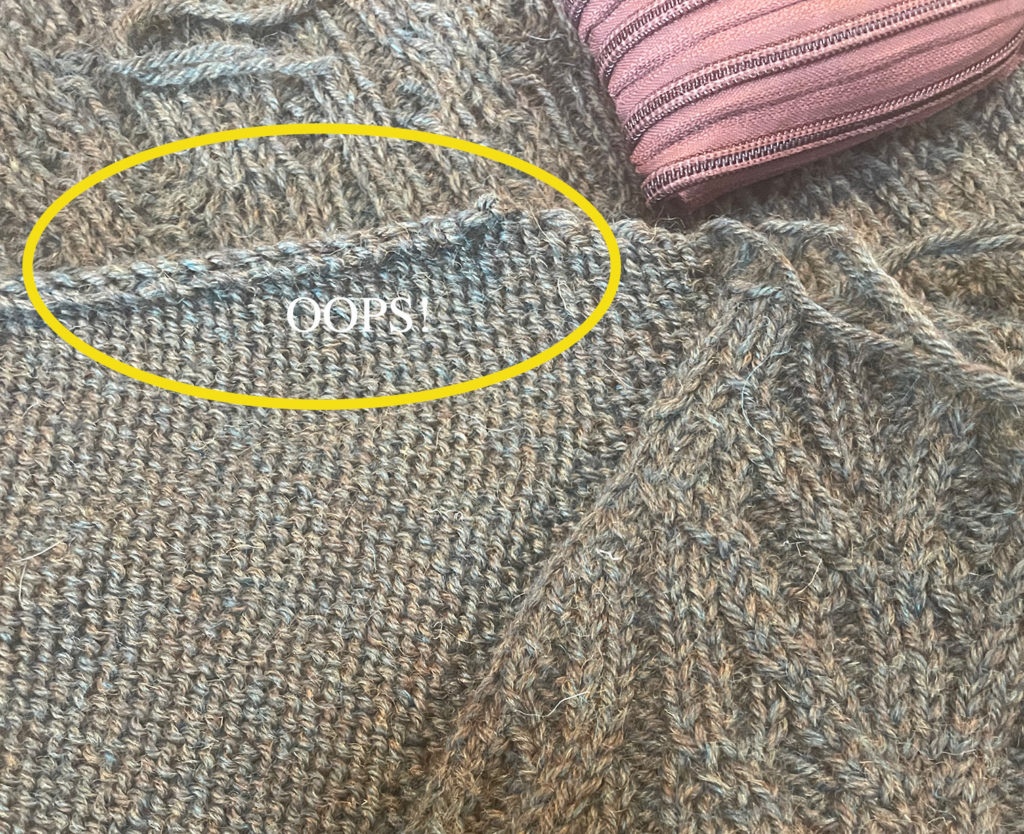
At one point I had seamed two should seams perfectly, finished the third, and realized that I had sewn the seam on the wrong side (it was facing the outside of the sweater rather than the inside). Luckily, it was easy enough to pull out and re-do, but it was a good reminder to stop every once in a while and check my work before going too far.
And Done!
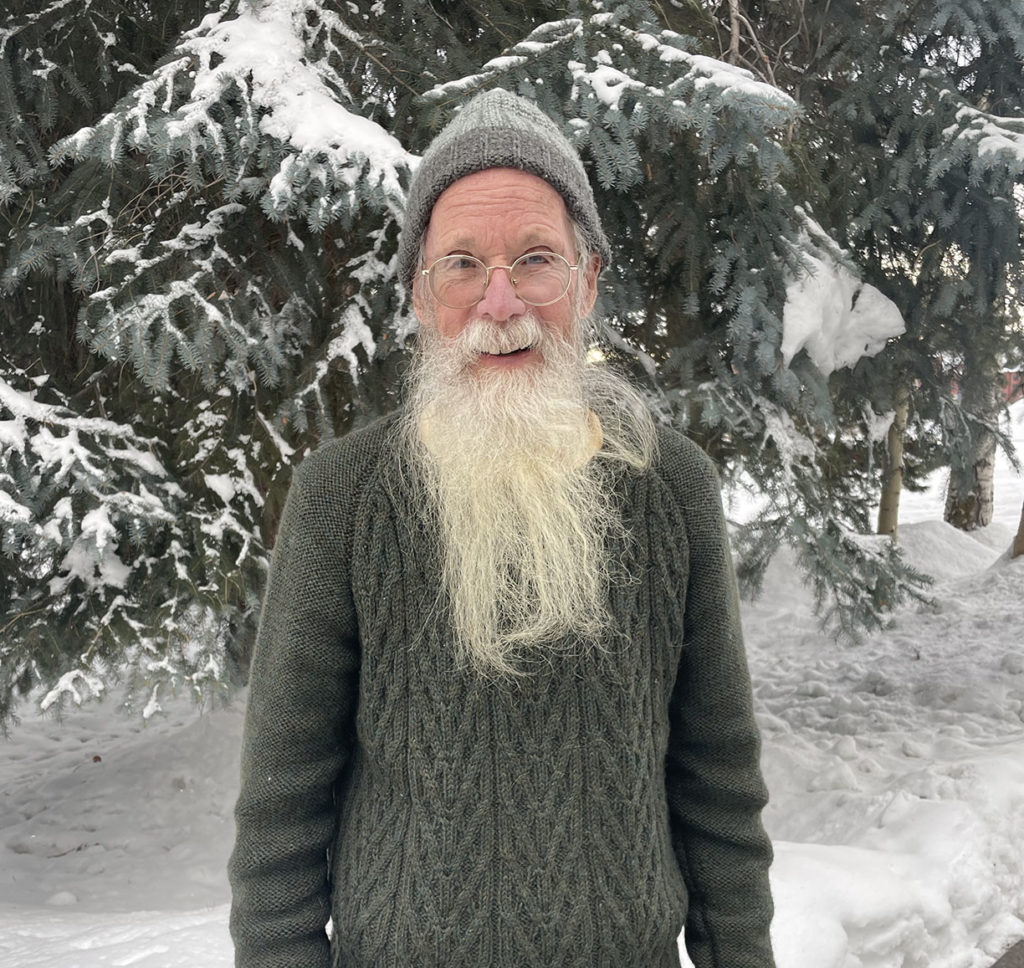
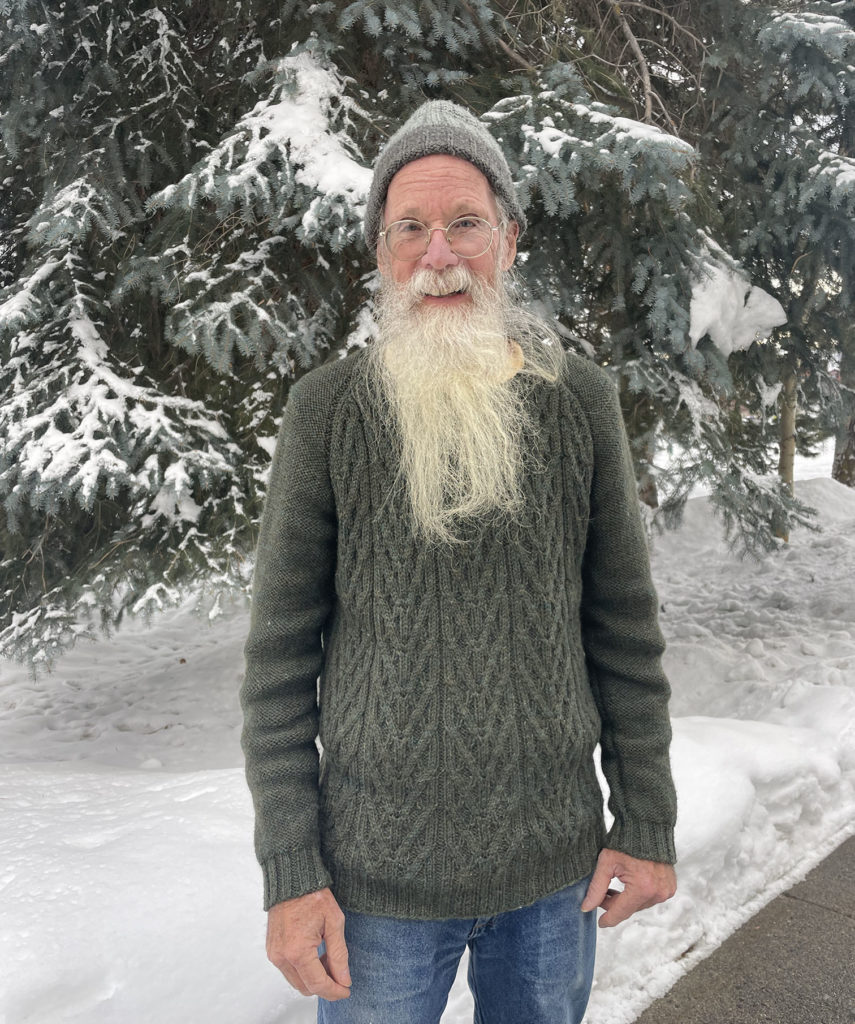
This sweater was a gift for my pop for Christmas. He loved it, but after working on this one for months, I was so happy to see that it fit!
In the photo above, it has a funny wrinkle because he was just sitting.
Sometimes I think that it looks a little long, and maybe an inch could come off the bottom, but that was so hard to judge while knitting. I did block the pieces when I was a little more than half-way done so that I could see how they’d lengthen once blocked, and everything was looking good. But my dad has a long torso, so I went for slightly over-estimating the length and having it come out a touch long rather than underestimating. If I were to adjust this, it would be easy enough to cut off an inch of length from the cabled section and then just reknit the ribbing, but for now we’ve kept it as is.