
For his birthday, Sweet Tooth Luc had one request: a smores cake. There’s nothing that kid loves more than roasting marshmallows and smashing them between chocolate and graham crackers.
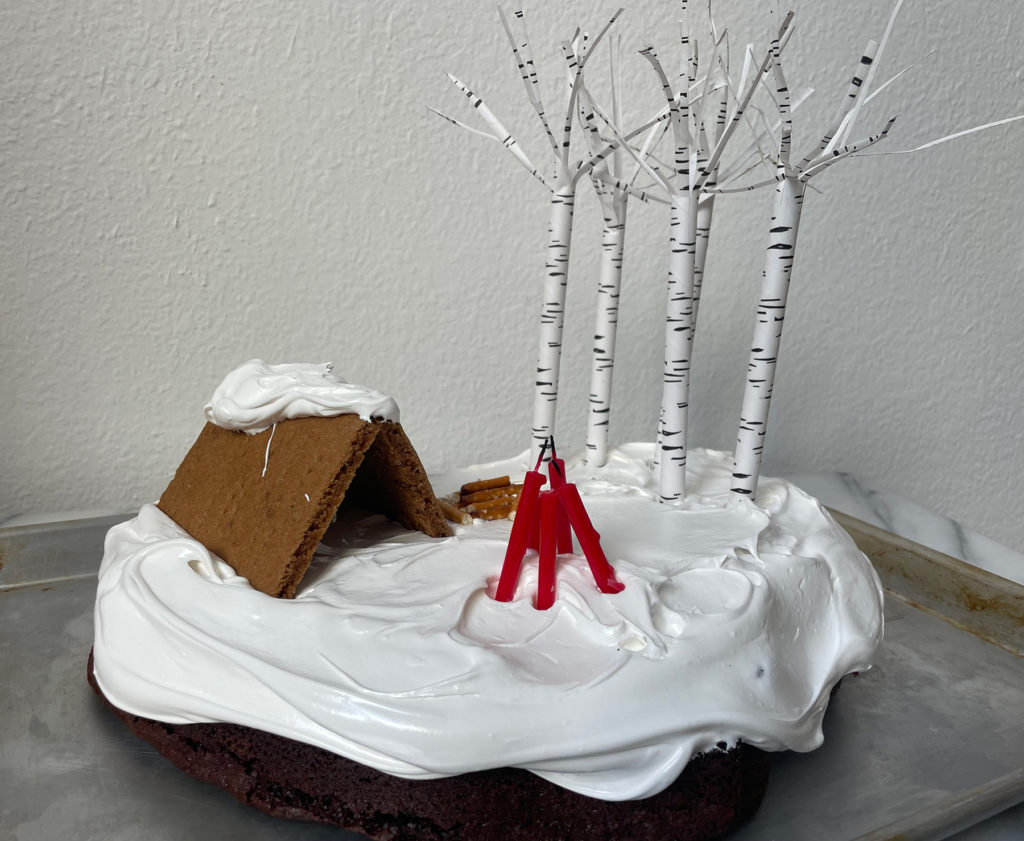
Building on the smores theme, Luc wanted to top a chocolate cake with marshmallow frosting and a graham cracker tent to create a snowy scene. From the moment that he said it, I knew that this was going to be a fun cake to make, AND we were doing the baking on a snow day, as one does when it’s April in the Rocky Mountains. What could be better?!
You already know our favorite chocolate cake recipe, so this post is all about making homemade graham crackers and the delicious Italian meringue frosting.
Homemade Graham Crackers
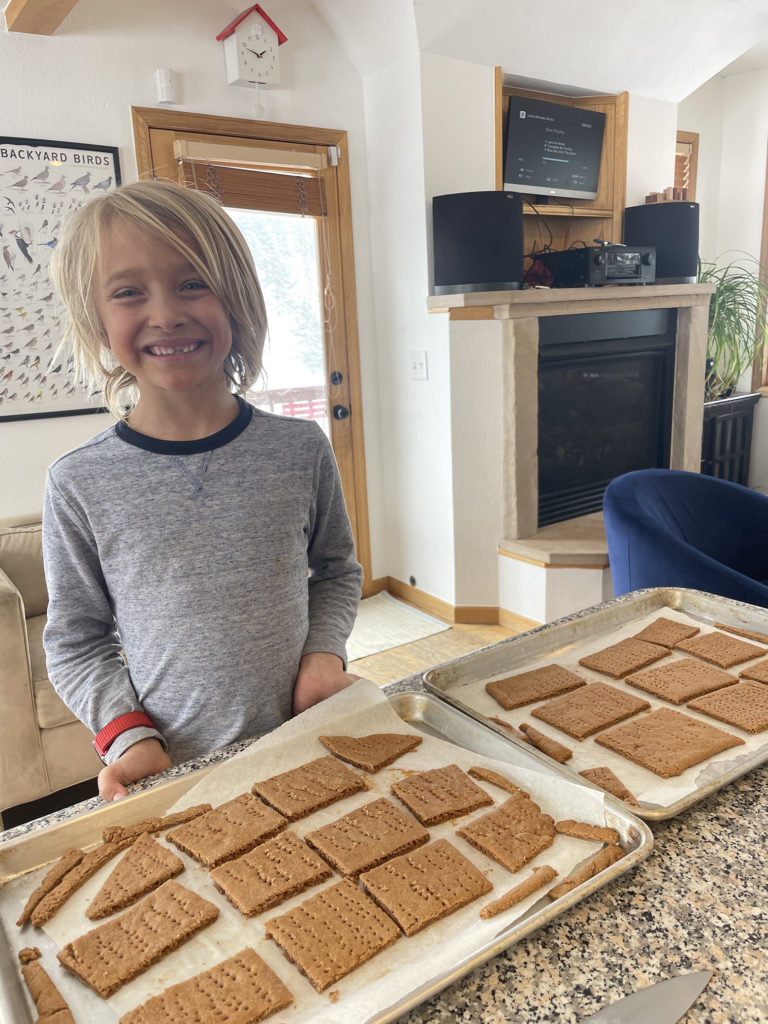
This was our first time making graham crackers, and it was such a success. Luc loves to help in the kitchen, and there’s a part of me that wants to make a recipe first so that I know how to guide him or which steps to help with, but for this one we were flying by the seat of our pants. Luckily, he’s gained enough kitchen experience that he’s developed a good sense of when somethings going well or not. I guess what I’m saying is that this recipe is so easy even your 7-turning-8-year-old can make it!
We used this recipe and our only modifications were to reduce the sugar (I always do this) and add a little bit more moisture, which is what we often have to do while baking because of our dry high altitude air.
Graham Cracker Ingredients
- 2 cups whole wheat flour + more for dusting
- 1 tsp cinnamon
- 1 tsp baking soda
- 1/2 tsp salt
- 7 Tbsp softened butter
- 3/4 cup light brown sugar, packed
- 3 Tbsp whole milk (plus more)
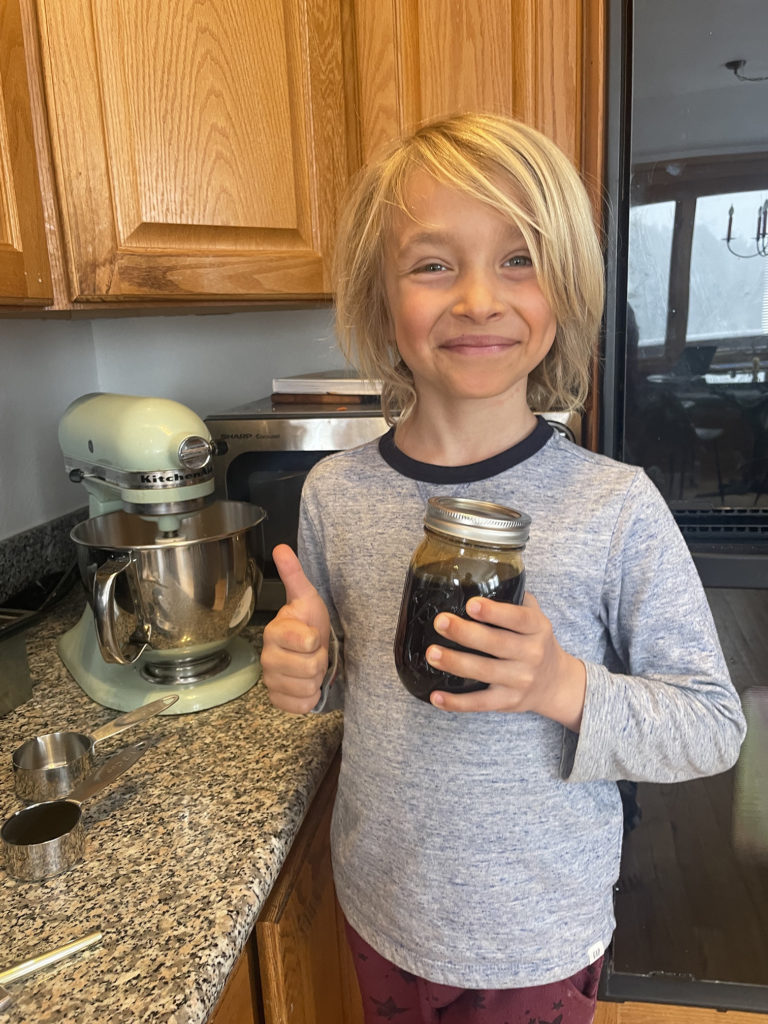
- 1/4 cup honey (from your uncle’s bees, if you have it!)
- 2 tsp vanilla extract
Instructions
- In a bowl mix together the flour, cinnamon, baking soda, and salt.
- With an electric mixer, cream together the butter and sugar until light and fluffy, about 2-3 minutes.
- Add the flour mixture to the creamed butter sugar, and mix on low until incorporated.
- Add the milk, honey, and vanilla extract. At this point the dough should be sticky and soft. If you find that it’s too crumbly, add a touch more milk.
- Divide the dough in half, press each half into a flat disc, wrap in plastic wrap, and chill for about an hour.
- Once the hour is up, preheat your oven to 350F.
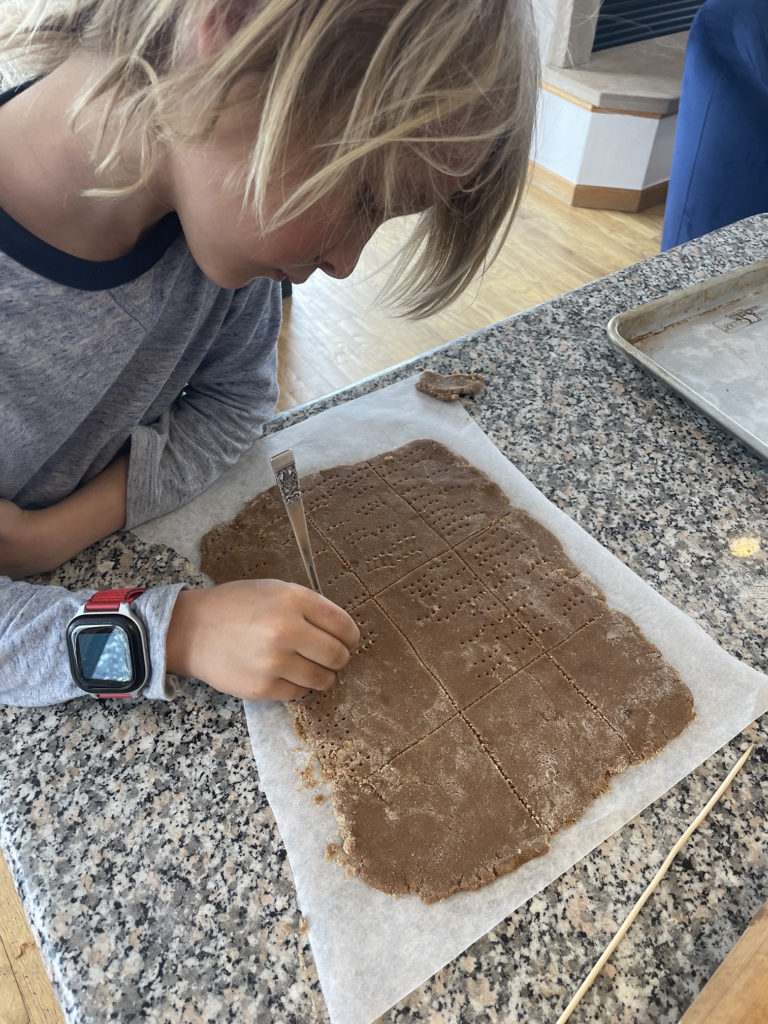
- Generously sprinkle the counter with flour, and roll the disk out into a 15 by 11 inch rectangle, flipping when necessary and sprinkling with more flour to be sure that it doesn’t stick. *Note: I like to roll the dough between two sheets of floured parchment paper because I think this reduces the chances of sticking even further, and makes it easy to transfer to the baking sheet.
- The dough should be pretty thin. We did not roll ours as thin as suggested, and instead made thicker graham crackers, which we all loved.
- Score the rolled dough into cracker-sized rectangles and use a fork to add the customary pricks.
- Bake until the crackers are firm and slightly darkened, about 10-12 minutes. Upon taking them out of the oven, immediately cut them only the pre-scored lines with a knife. Cool to room temperature directly on the baking sheet.
- Store in an airtight container.

Boiled/Italian Meringue Frosting
While I’ve eaten this frosting many times growing up, this was the first time that I made it, and luckily it came together without any trouble. I think it’s one of those things that sounds and looks a lot more complicated than it is. Just follow the instructions and enjoy.
The funny thing about this frosting is that it’s an old recipe that has been given many names over the years: Italian Meringue, boiled frosting, 7 minute frosting, cooked frosting. There is some variation in the recipes that I found online, but they’re really all very similar. In the end I went with this one.
Ingredients
- 1 1/2 cups sugar
- 2/3 cup water
- 1/8 tsp cream of tartar
- 3 egg whites
- pinch of salt
- 1 tsp vanilla extract
Instructions
- Bring the sugar, water, and cream of tartar to a boil until it reaches 245F. Do not mix the mixture while it’s simmering because this may cause the sugar to crystalize.
- While the sugar mixture is simmering, whisk the egg whites and pinch of salt until peaks form.
- Once the sugar has reached 245F, slowly begin pouring the mixture into the peaked egg whites with the whisk on, being careful not to let the hot mixture splatter.
- Once incorporated, beat the meringue on medium-high for about seven minutes, or until the sides of the bowl cool down. You don’t want to over-mix the meringue or it will lose its glossy appearance and thin out.
- Finally, add the vanilla extract and mix to combine.
Once the frosting is ready, I immediately frosted the cake. I’m not sure how well it would work to save the frosting and prepare the cake at a later time.
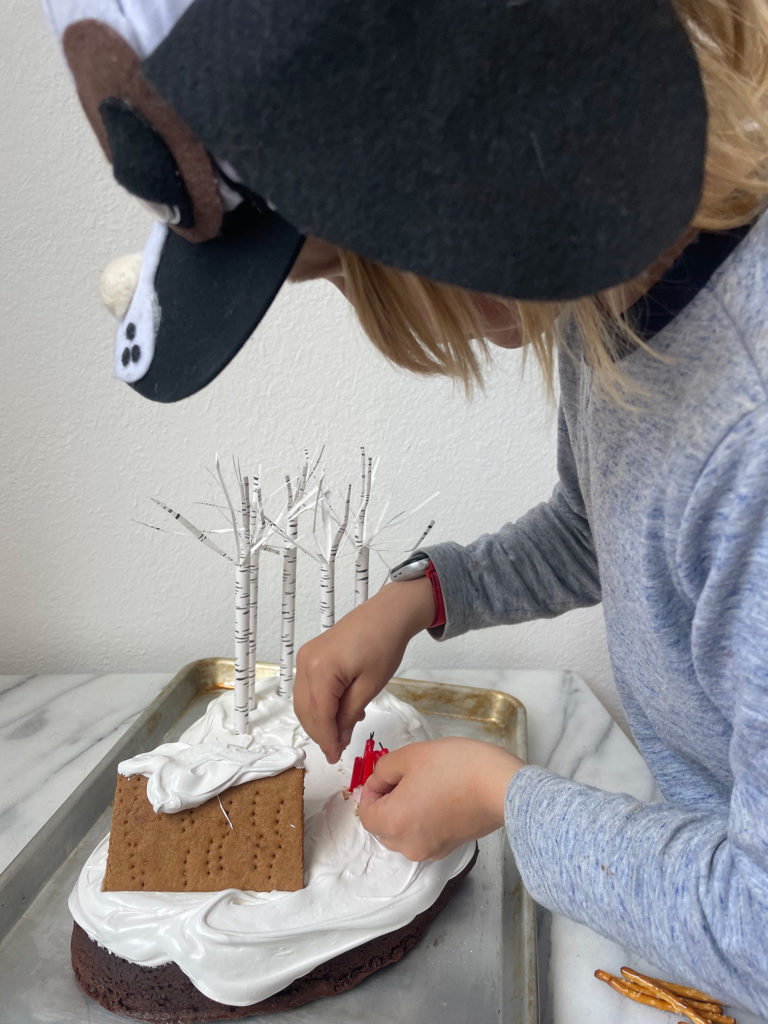
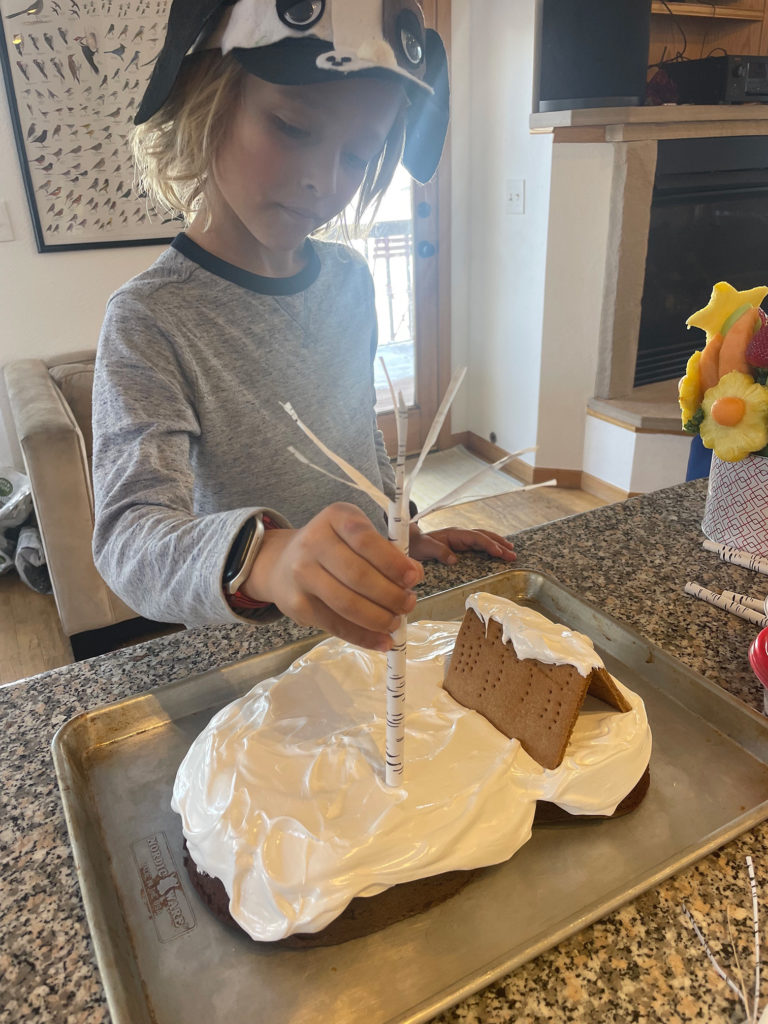
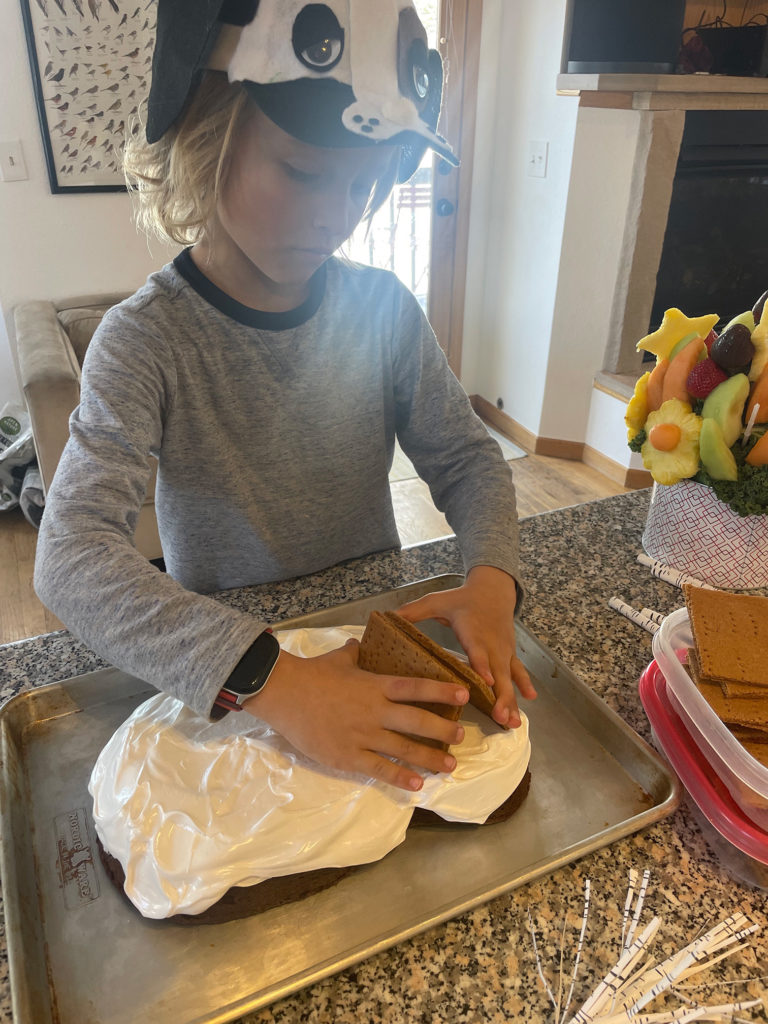
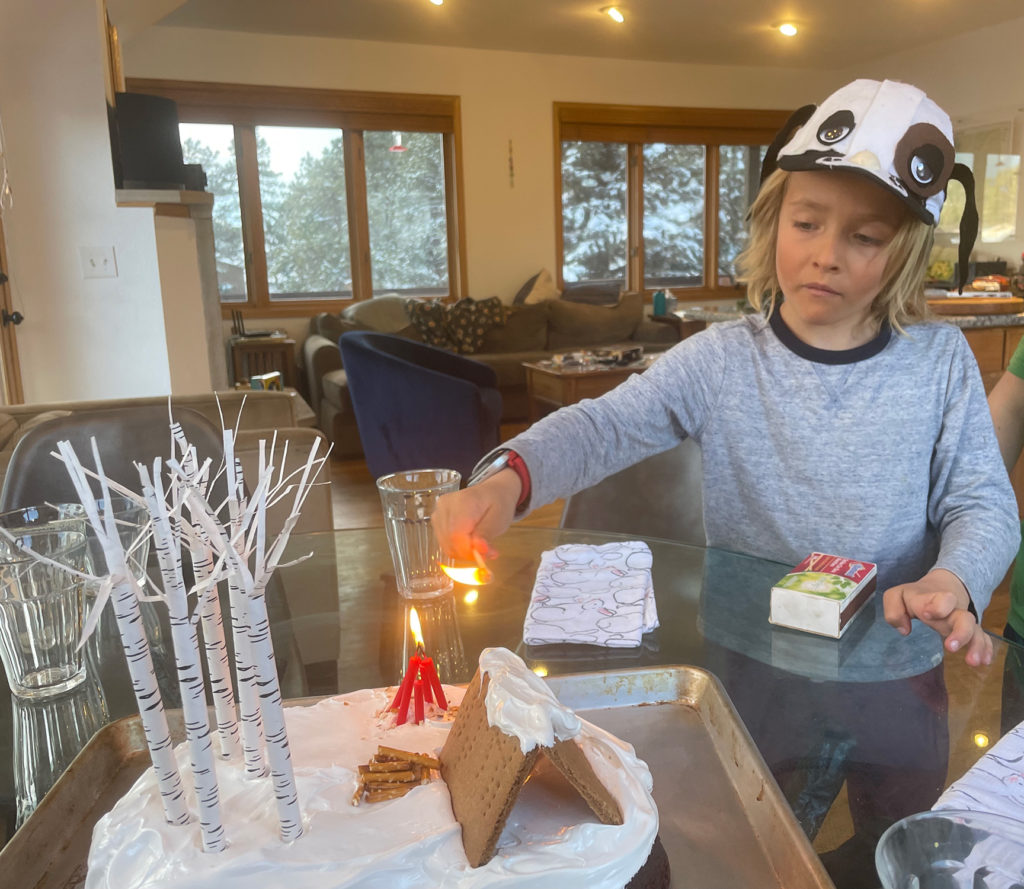
Decorating the Smores Cake
Preparing the ingredients was the hardest part of making this cake (and it wasn’t even that hard!). I think from looking at the photos, you can see that decorating the cake was fairly easy… with one fun twist: paper straws!
Make yourself a cosy tent with the graham crackers.
Use some red or orange candles for the fire. I had long candles and cut them in half for the logs. This allowed me to have exposed wicks on half of them, which provided plenty of flame. If all of your logs have exposed wicks, you might want to cut a few off to reduce the flame size.
We made the trees by cutting down into the top of the straws multiple times. We had the wide paper straws, but I think this would look just as cute with the skinny ones, you may just have to make fewer branches. You can see that some branches start out wide, and then we cut them again near the top to create smaller branches. Once your branches are cut, play around with folding and rolling them to get your desired crown shape. Create your little forest a safe distance from your campfire, and the scene is set.
Enjoy!
ETC.
Want to know our secret to getting that perfect camping-spot shape from our cake? Use a dinosaur pan!
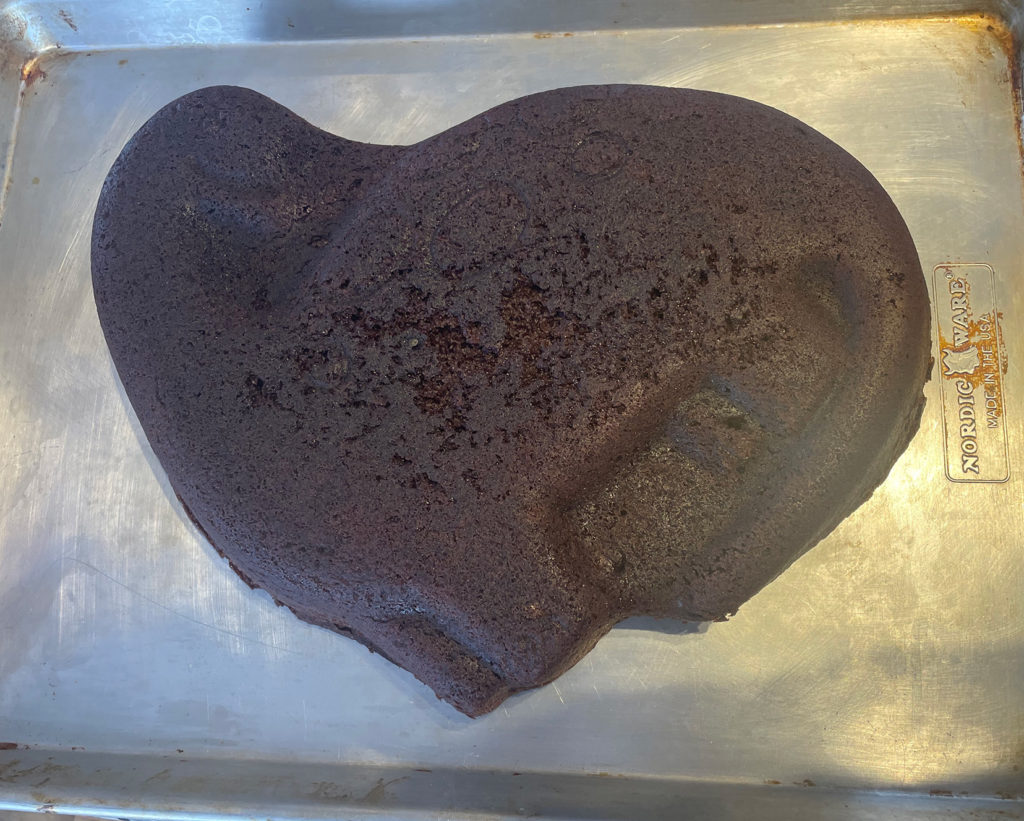
Here’s the real secret, this is the ONLY kid-shaped cake pan that we have, but it has worked perfectly for us in so many different situations. It’s been:
- an excavation site
- a lake & island
- a dinosaur
- and now a campsite!
How should we use it next?!