Ideas For Celebrating New Year’s Eve At Home

liveseasoned winter15 happynewyear-1 copy

Haaaaappy New Year! Well, almost. The past two years I took it easy on New Year’s Eve. In 2015 I was actually at Katie’s house, alone, sitting on the couch watching a movie. All the cool kids (every single person) in the house went to sleep way before midnight! Last year, I hung out in Florida and found myself sitting around a patio table at midnight with a few close friends. It was intimate and amazing. I’ve also had my share of exhausting awesome nights. Two of my favorites were seeing Phish at Madison Square Garden and frolicking on a beautiful island in Thailand. I love it all, the quiet nights and the crazy ones.

This year, I’m attending a Vegas-style house party. Cute dresses, gambling with fake money, and a bit of boozin’. If it wasn’t for this party, I’m not sure exactly what I would be up to, but I’d definitely celebrate in the comfort of my own home. Here are a few unconventional New Year’s Eve ideas if you’re staying in this year. If you have another good suggestion, let me know.

Wine or beer tasting

Buy a couple bottles of different types of wine (Trader Joes has quality, inexpensive wine) or if you know what you fancy, maybe three bottles of the same type of wine. If you’re going the beer route, do a mixed six pack, again several types of beer or six of your favorite variety.

Set it up properly. If you’re drinking wine, allow each bottle to breathe for at least thirty minutes before the tasting. Set out an assortment of cheese, crackers, and some fruit. If you’re doing beer, cheese works, but you could also do some bar snacks or maybe soft pretzels. If you’re really in it to win it, take notes during the process. Document the look, feel, flavor, and your overall opinion of each drink that way you can better choose your fancy next time.

Pajama party

First, bring all the blankets and pillows out into the living room. Pile them on the carpet or on the couch and make the best little nest for yourself. Then shower and change into the coziest pajamas you own. If you have a robe, throw that over the jammies before slipping on fuzzy socks and slippers. Do you have dogs? Where are their pajamas? Put them on. Cue the music or your favorite movie and pj the day away!

Spa day

Everybody (dudes, I know you do too) has a drawer full of bath and body products that never get used. Today is the day. Pull them all out because this is basically a wine tasting, but with face masks.. for your skin.. not your taste buds. At the very least, your day should involve a lot of exfoliation, followed by layers of lotions and creams. If you’re on top of your game, a bath or at least a footbath and epsom salts should consume an hour of your day. Maybe your spa day includes making some of your own potions too. Here’s the recipe for our DIY bath bombs. Also, my dry skin cannot skip a day of Katie’s winter face oil.

Reading marathon

Vow to read a certain amount or maybe as much as possible in a single day. You switch back and forth between a few books to keep it interesting or throw in an article or maybe even a graphic novel, whatever you need to do to read, read, read. The little boy who read 100 books in a day originally inspired this idea. Thanks, Caleb!

Movie marathon

Are you illiterate? Watch some movies or a TV series instead. Apply a theme or pick your absolute favorites from 2017 or maybe your childhood? Can I recommend the movie Fargo and then the entire Fargo the TV series? Whatever you choose, try to do something to inspire the marathon instead of just binging on something random otherwise it will just seem like a day in front of the TV instead of a magical movie marathon, ya know? You could also be inspired by the marathon and dress up like a character or take on their persona for the day. Tell me you picked Cheech and Chong and now you’re stuck smoking weed all day? See how funky this movie marathon could be?!

Vision board

Have you ever created a vision board? I think of it like brainstorming for life instead of an essay prompt. Your vision board can be as complex or simplistic as you deem necessary, I think it’s best to really do it your way. Maybe you like to cut and paste or maybe you have fantastic journaling skills, that we’re all insanely jealous of. Whatever your chosen route, gather any necessary supplies, light a candle, and put on a soothing playlist. Now ask yourself the following questions and make sure you tell the truth when you answer.

Describe the life you envision. What gives you the most enjoyment? Who and what inspires you? What does your perfect day look like? Who do you love?  Set your life’s intention and create!

Declutter + Donate

Let it go, let it goooooo! Really though, just get rid of shit, you absolutely won’t miss it. My roommate and I leave a big cardboard box by the door and day by day we find things we can live without and place them in the box at the end of each week we drop it off at the Goodwill. The fewer things you have, the fewer things you need to organize and clean.

Gratitude List + thank you cards

Everyone loves mail. Everyone. Everyone. Every single person you know will be delighted to see an actual piece of mail in their box instead of a pile of junk. If you aren’t sure what to say, start with ‘thinking of you!’ and if it ends there, sweet, you just finished your first card. If you want to take it a step further, craft a few care packages.

No stamps?! Write out a gratitude list instead. It’s pretty straightforward, just jot down all the things you’re thankful for including big and small, human and inhuman, avocado and nonavocado. You can also be grateful for the absence of negative things in your life. For instance: I’m thankful there is no longer a travel ban on laptops and cameras and that I can fly through Doha without having to check my equipment at the gate. First world problems, ick.

FaceTime friends + family

I’m going to let you in on a revolutionary facetiming tactic. Set down the phone! Just have your partner prop you up somewhere and you do the same. Set your phone on a desk or windowsill or table and get on with your life. Maybe you’re cooking or crafting or watching a TV show, whatever it is, it’s much more fun together. I tend to become some combination of awkward, shy, nervous, and bored when I facetime so setting down the phone and doing something while I chat really relaxes things.

365 of something

sit-ups? push ups? sun salutations? a mantra? focused inhales + exhales? jumping jacks? pages of a book? things donated? wishes or intentions for the new year? ways to use coconut oil? things you’re grateful for? pieces of popcorn eaten? dollars earned? vacations planned? Okay, things are getting ridiculous, but now I’m off to make a list of 365 places I want to go.
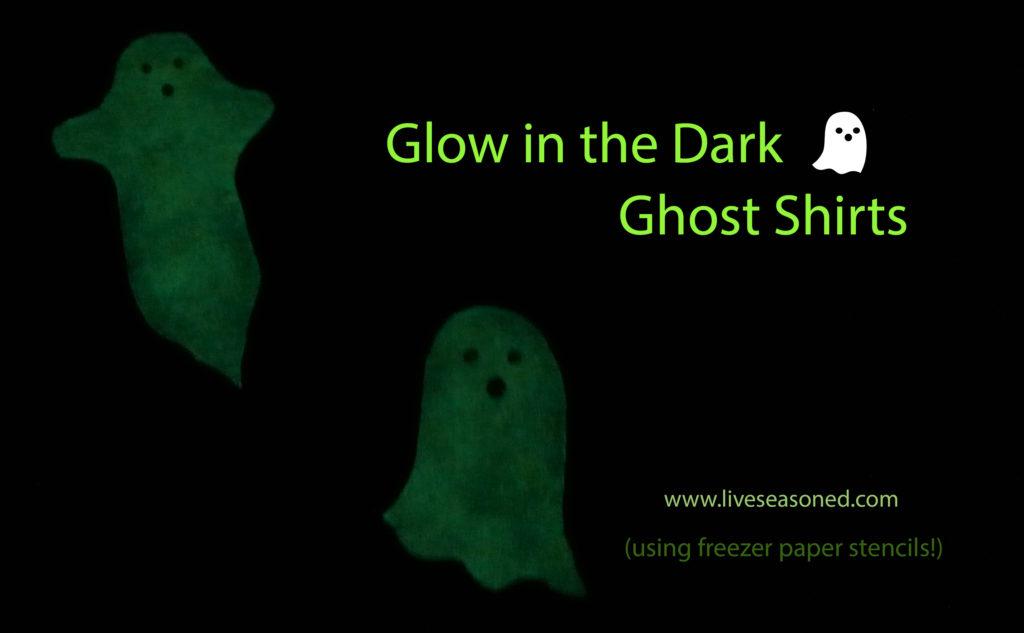
HAPPY NEW YEAR!

Holiday Room Spray

Ginger’s our ingredient of the season, and we love using essential oils for home and body.

We’re popping in with a quick DIY : a holiday room spray! It’s simple, yet it totally adds to the ambiance when hosting visitors (this and a big glass of wine).

room_spray

Honestly, I don’t regularly use room sprays, BUT whenever I have visitors stopping in, I like to know that the house is smelling nice. You can easily accomplish this with a simple essential oils room spray.

Continue reading

Winter Face Oil

The cold and dry air of winter has a way of wreaking havoc on our skin and nails. Our remedies include drinking plenty of water and creating barriers to moisture loss.

For our hands, we’re a huge fan of balms. Most of ours are made at home with a combination of beeswax, moisturizing carrier oils, and nourishing extracts and essential oils (think calendula, lavender, comfrey).

winter_face_oil

We won’t shy away from using a balm on our cheeks if we’re heading out for a day in the elements, but for everyday use, we want some thing a touch lighter than. And that’s when we grab a DIY face oil.

Continue reading

Weekend Project : Knit a Stocking (or three!)

We’re republishing this today as a reminder to take it slow, get cozy, and complete a craft, but I couldn’t bring myself to delete Katie’s original text because it talks about the *first* Christmas as a family of three – wow so much has changed! <3 Here are all the Christmas decoration DIYs BTW.

Ok, maybe three’s a stretch, but we’re all a bit crazy at this time of year. This is the first year we’re celebrating Christmas morning as our own little family of three, and we didn’t have stockings. Knowing that my original plan was to do something fun and easy. Maybe buy a couple pair of festive knee high socks or some cozy looking wool men’s socks and use those for this year. But a month or so ago I ran across some bulky yarn, decided it was perfect for stockings and worth just testing the waters.

liveseasoned_w2015_stockings7_wm

It’s easy to fall down the knitting hole, but with so many other balls in the air, I didn’t want this project to consume me. So I picked up two skeins of yarn (one red and one white) and wanted to see how long it would take to knit a single stocking and how far the two skeins would go. When I knit that first stocking in a weekend using only those two skeins, it was a no-brainer to knit the other two!

If you have ever knit a sock before, this is a project that you can easily finish in a weekend. If you’ve never knit a sock before, then this project may take you a little bit longer, but knitting big is such a great way to learn some new sock-knitting skills, and I include links to some of my favorite resources in this post. Plus, a common problem for a first time sock knitter is finishing that second sock and/or getting it to match the first; you won’t have that problem here!

liveseasoned_w2015_stockings16_wm

Whenever I hear “knit stocking” the one thing I worry about is how dense the stitches are. If you have a loosely knit stocking, then as soon as it’s filled with treats, the stocking will stretch and you’ll get that holey look between the stitches. I wanted to avoid that, and one of the easiest ways to do it is to knit with a bulky yarn on needles that are a few sizes smaller than what you would normally use. That’s exactly what I did here, and it produced a nice dense fabric that doesn’t stretch out of shape too much when filled.

liveseasoned_w2015_stockings19_wm

Resources

  • Cast on. Turkish Cast On
  • Increasing. M1L and M1R
  • Short Row Heel : basic instructions or a video with a method for eliminating the little holes that are common at the start and finish of the heel. This heel is really easy to make, and the holes are so (soooo) minor, so I don’t want that to deter you. I have my own way of dealing with them by picking up extra stitches and then decreasing them later, but since you’re knitting a simple stocking that won’t be worn, you could easily just use some extra yarn to stitch the hole closed – if you even get them!
  • I cord bind off. You will have to use the cable cast on before starting the I cord bind off.

Materials

  • Yarn : Loops & Threads Cozy Wool in fleece (white) and claret (red)
  • Needles : US 10, you will need either one long circular for the magic loop method or a set of double pointed

liveseasoned_w2015_stockings15_wm

Instructions

You will be knitting these stockings from the toe up to the cuff. I’m going to give you a set of generic instructions that can be used to knit any stocking of this size, and then I’ll give you the details for the specific patterns you see in the photographs. I’ll assume that your stitches are split evenly between two needles (i.e. that you’re using the magic loop method).

  • Cast-on. use the Turkish method to cast-on 20 stitches (ten on each needle). Fortunately, these instructions show you how to do the Turkish cast-on with exactly that number of stitches, so you can follow it step by step.
  • Begin Knitting. When I start a sock, I like to knit one and a half rounds before starting my increase rows (I always think that knitting across the first needle creates a single row for the tip of the toe, and then knitting a complete round creates my first official round – I may be crazy).
  • Start the increase rows (this comprises the toe area of the sock). Round 1 (increase round) : k1, M1L, knit to the last stitch on the first half of the stocking, M1R, k1. Repeat over the stitches on the other half of the stocking. Four stitches added. Round 2 : knit all stitches.
  • Continue repeating rounds 1 and 2 until you have 44 stitches on your needle.
  • Knit the foot. Knit straight for 27 rows.
  • Knit the heel. Use the short row method to knit the heel. You will work the heel over the 22 stitches that are on one half of your sock. When making the stockings, I wrapped 7 stitches on each side of the heel, leaving 8 unwrapped in the middle.
  • Knit the leg. Once your heel is finished, knit the leg of the stocking for 53 rows.
  • Bind off using the i cord method. This is a great technique for binding off the stockings because it creates a strong final row that will not stretch out over time (unlike a ribbed cuff) and as you’ll see, it also seamlessly morphs into a loop for hanging your stocking. The only problem is that you may not be able to really stretch the cuff if you want to sneak an over-sized present in the stocking! The other problem that arises is that the loop for hanging your stocking will be placed where ever you start the i cord bind off. Thus far we have been knitting the stocking in the round starting from one side of the sock; you don’t want your loop on the side, but on the back of the stocking. Before beginning the i cord bind off, knit 11 stitches so that you are now positioned at the center back of the stocking. You will work the i cord bind off over three stitches, just like these instructions (lucky you!).  Once you come to the end of the cuff, don’t cast off the three i cord stitches, rather continue knitting an i cord for 21 more rows.
  • Finish your stocking. Sew the live stitches of your i cord to the start of the i cord row ~ creating a seamless-looking i cord band with a loop in the back. Weave in all loose ends. Hang your stocking and cross your fingers that it doesn’t get filled with coal!

Santa’s Sock Stocking Detail

  • Knit the toe. Use the basic instructions from above, casting on with the white yarn and using it to knit the toe area.
  • Knit the 27 rows of the foot in red.
  • Switch to the white yarn and knit the heel.
  • Knit 40 rows of the leg in red.
  • Switch to the white yarn and knit 11 rows in seed stitch.
  • Knit one complete round plus 11 stitches to position the start of the i cord at the back of the stocking. Finish with the i cord bind off.

Striped Stocking Detail

  • Knit the toe. Use the basic instructions from above, casting on with the red yarn and using it to knit the toe area.
  • Begin the stripes. Switch to the white yarn, but don’t cut the end of the red yarn (you can carry both colors up the length of the stocking, drastically reducing the number of loose ends that you’ll have to weave in). Knit five rows in white. Knit five rows in red. Repeat this pattern for 25 rows (ending with five white rows and just before starting a red row). Knit two rows in red.
  • The heel area. I like to work the heel in the middle of a stripe so that there aren’t any funny color switches immediately before or after the heel. Continuing to use the red yarn, knit the heel. Once the heel is complete, knit three more rows with the red yarn. When looking from the front/top of the stocking you should see the five red rows of the stripe pattern.
  • Knit the leg. You are now at the start of a white stripe. Continue working the five row stripe pattern for 50 more rows.
  • You are now at the top of the stocking. Knit 11 more stitches to position the start of the i cord at the back of the stocking and continue using the red yarn for the i cord bind off.

Snowflake Stocking Detail

  • Knit the toe. Use the basic instructions from above, casting on with the white yarn and using it to knit the toe area.
  • Knit the 27 rows of the foot in red.
  • Switch to the white yarn and knit the heel.
  • Knit the 52 rows of the leg in red (not the 53 listed above!).
  • Switch to the white yarn. Knit one round plus 11 stitches to position the start of the i cord at the back of the stocking. Work the i cord bind off.
  • Finish the stocking by embroidering a snowflake design into the side of your stocking. I make a very simple design using a backstitch. I decided to embroider the snowflake because I wanted it to have six points (like in nature), but it’s hard to find and/or to design a knit snowflake pattern with points rather than eight. As for other embroidered embellishments, the skies the limit! I added a line of running stitch around the toe and heel areas. You could add number of snowflakes, varying their size and shape.

liveseasoned_w2015_stockings1_wm

If you knit a stocking, we would love to see it! Leave us a comment below or tag us on instagram @liveseasoned. Happy knitting or happy rushing around buying those last minute presents ~ either way, we hope you have a great weekend!


DIY Edible Gifts

Do you need a reminder that the holidays are right around the corner? We don’t! WE CAN’T WAIT. too much?

Today we’ve rounded up a few ideas that make perfect edible DIY gifts. There’s a range of options on this list, from nuts in solid and liquid form to citrus peels and marshmallow. Some take a bit more preparation than others (some are so easy you’ll have all of your teacher gifts done in an afternoon). But I may be a bit biased when I say that possibly the best gift on this list is the one that takes the longest to make.

And, as we all know, the best part about giving receiving an edible gift is that you don’t have to remember to put out that neon light up statue of Mt. Rushmore every time Aunt Peggy comes to visit. So get on with it.

~

Spiced Mixed Nuts : a truly perfect blend of sweet and spicy. These are super easy to make with basic ingredients (think nuts, honey, cayenne pepper). Just make sure you share more than you eat!

~

Hazelnut Liqueur : give this and you will be loved by all. Especially if you pass along a few key serving suggestions, such as mixing a shot into a cup of hot chocolate or a vanilla milkshake. BUT start making this one ASAP, because you need about three weeks of steeping time.

~

Marshmallows! : There are so many perks to making your own marshmallows. You can personalize the color and flavor. Cut them out with cute cookie cutter shapes. Pair them with hot co for a real treat. And we aren’t kidding when we claim that these are easy to make.

~

Candied Citrus Rinds : Again, another super easy treat. I added chocolate to these, but you can totally skip that. And as a bonus – we shared our orange marshmallows at the bottom of that post.

~

Use this post as an excuse to get a jump start on the eating, drinking, and merriment! xo

DIY Annual Photo Album

Today’s post is about our annual family photo album. If you’d like to catch a glimpse of our DIY wedding album, you can see that post here.

book_shots1

And here it is! We’ve jumped into the holiday season with two feet. Present lists are being written and re-written. Holiday sweaters dreamt up and a few new decorations crafted. I’m doing so much fun knitting in the evenings that I may not be back here until the New Year! Kidding. (hopefully)

book_shots6

But before I could even start in on the knitting, I was busy putting together our annual family photo album. Every year for the past decade or so, I’ve put together an album that chronicles our year in photos. I start with the previous Christmas and end with Thanksgiving. That gives me enough time to create the book and have it printed and ready to give by Christmas morning. I also gift the book to Calder, but I think this year it’s time to say that it’s for all of the guys in the house.

book_shots7

This has become such a special family tradition. When the book is unwrapped, it’s so nice to sit down together and look at it on Christmas morning – a moment of calm amidst the craziness of opening presents and celebrating. Throughout the day the book gets passed around, and one by one everyone in the house gets to look at it.

In this post, I’m sharing a few screenshots from last year’s book. You can see that it’s a little bit of everything. Photos from vacations, from weekend hiking trips, from afternoons at home cooking dinner, and silly snapshots.

book_shots5

I know that making a photo book can seem overwhelming, and many people get paralyzed by the task before they even start. I’ve been making these for so long that it’s become second nature, so I wanted to share some of my tips.

book_shots4

Tips for Creating an Annual Photo Album

  • make it a tradition : having a set time every year when you make, give, and look at the book makes it so much easier to stick to a deadline and actually complete the task. I know that if we weren’t on an annual schedule then I’d put off making these albums.
  • pick a service : You’ll have to decide which printing service you want to go with. There are many out there, and there are also many reviews that will (hopefully) help you pick the one that’s right for you. I always go with Blurb because I like the design flexibility provided by their software, as well as the high number count for their books (some years our albums are 400+ pages!), and the options to upgrade paper quality. You should pick the service that’s right for you.
  • there’s a learning curve : If you’re using software to design your book, expect there to be a learning curve, and don’t get too discouraged when it takes you longer than expected to create your book. Now I speed through a 300 page book when it would have taken me a bit longer years ago. Hopefully you like the printing service you use and won’t have to take the time to learn about a new company in the future.
  • keep the book simple : you can see that my page layouts are pretty simple. This was one of the tricks that I learned early on. We love looking at the photos, and we don’t like too many packed onto a page, so I keep it simple with some variation if there are photos that need special attention (either because of their resolution or because they are so beautiful/awesome/absurd that they deserve a full page of space).
  • be cut-throat with your photos choices : I think this comes with time, but keep reminding yourself that you take thousands of photos every year (I know I’m not the only one). Stick to the big and special moments and pick the best photos. They don’t have to be the best from a design standpoint, but they are the best because they capture the moment, someone’s laugh, someone else’s silly face, etc. After you’ve gotten the big moments in the book, then you can go back and fill it in with second and third tier photos until you feel satisfied with the feel of the book. I think you’ll find that there’s a learning curve with the photo selection task just as there is with using the design software.
  • leave space for the things you forgot : I like to leave a few blank pages at the end of the book. These can be used for writing down memories from the year, new years resolutions for the next year, and for adding extra printed photos that didn’t make it into the book.
  • have fun! You’re doing something so special for your family and leaving them a tangible memory of life in these crazy years. Any book you put together will be better than nothing.

book_shots3

book_shots2

Hexagon Afghan

live seasoned blanket-12

This hexagon afghan was crocheted over five (yes, five!) years. To quote little Luc, “(some things) just take a little time”. Granted, he says that when he’s getting ready to jump off the curb, but it’s a good bit of wisdom to remember when working on those seemingly never-ending projects.

Continue reading

Glow-in-the-Dark Ghost Shirts

Ghost Shirts! With glow-in-the-dark paint! Need we say more? How about that they really glow!

ghost_shirts2_titleLast year we made bat shirts with freezer paper stencils and bleach. This year I wanted to do another shirt, and I was going to use bleach again, but then I saw this paint in Joann’s and thought it was worth a try.

Continue reading

Next Level Landscape Photography

ozette web res edits-1

Ask most photographers what they truly want to shoot and the answer is almost always landscape and travel photography. If there was a viable way to make a living from nature photography, we would all be doing it. It’s not impossible, but it usually comes with the goal of selling something, a product, a place, an agenda, it’s never just a nature shot. That doesn’t stop us from taking our cameras to the woods though. There are landscape shots and then there are landscape shots. Here are a few tips to elevate your game.

Continue reading