My Favorite Stuffing Recipe: Sourdough, Sausage, Leek, and Chestnuts

Looking for a new stuffing recipe? Every year I pull out my well-loved copy of the 2015 Thanksgiving Special of Bon Appétit and use their handy stuffing customizer.

Don’t have your old 2015 copy of the magazine? Never fear, the formula-maker is that good that they republish it annually on their blog.

That article gives you the perfect overview of what makes a good stuffing. Of course there’s bread and butter, but what else should we think about in order to create the perfect combination of both flavors and textures? I love their scientific grouping of the ingredients into specific categories like aromatics, meats, binders, add-ins, etc. And they give you a concise explanation of why you’d want to add something from each category.

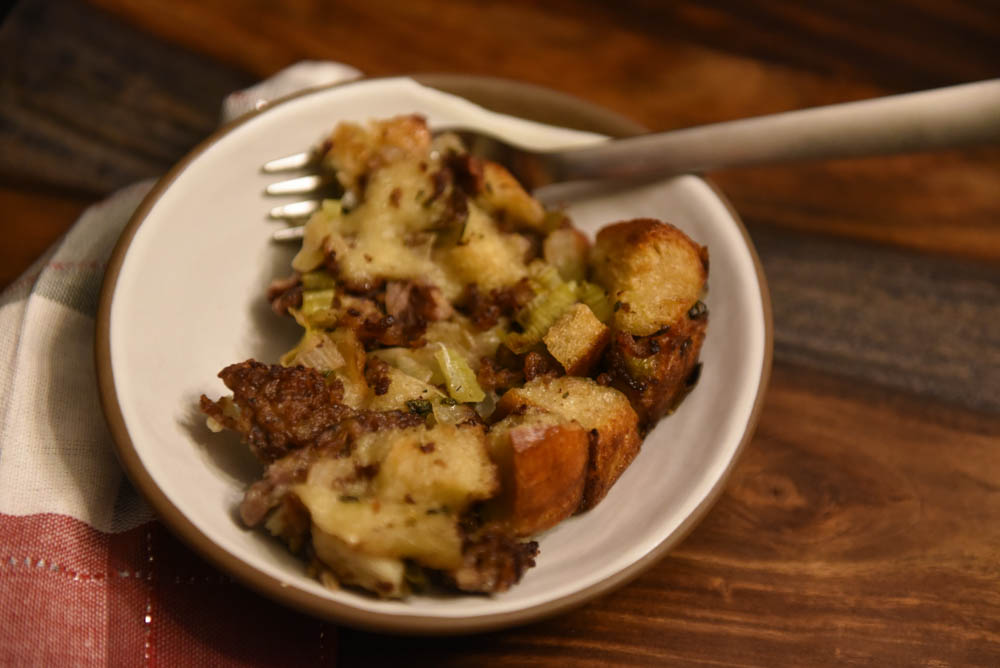
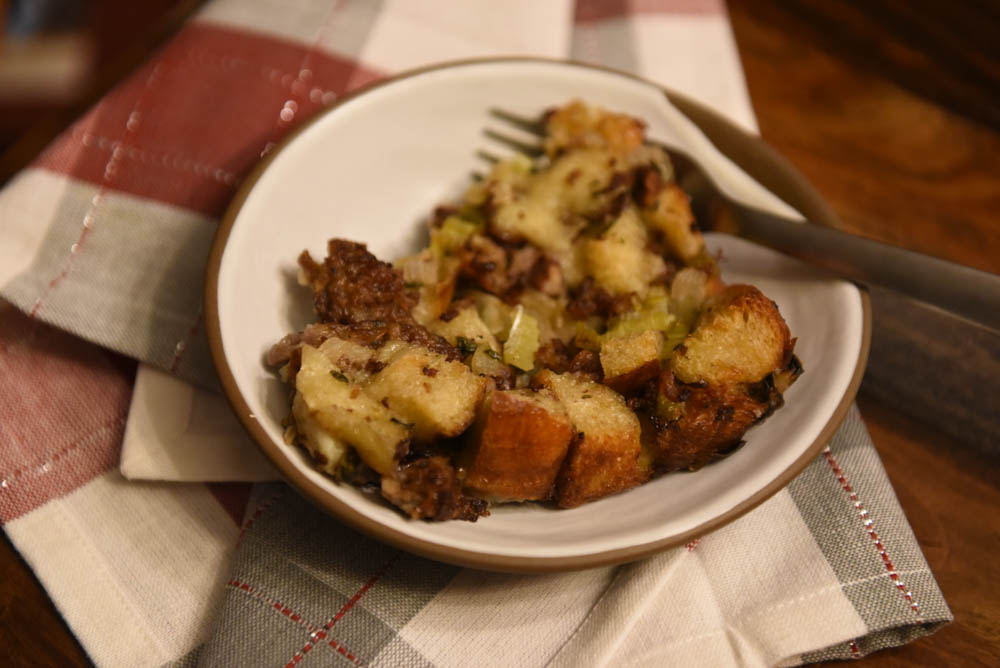
Sourdough, Sausage, Leek, and Chestnut Stuffing

What are you going to put in your stuffing? Read through the article and make choices based upon your family’s tastes. For me there were clear choices in each category. Luckily, I hit the nail on the head in 2015 and have been using that same combination of ingredients ever since.

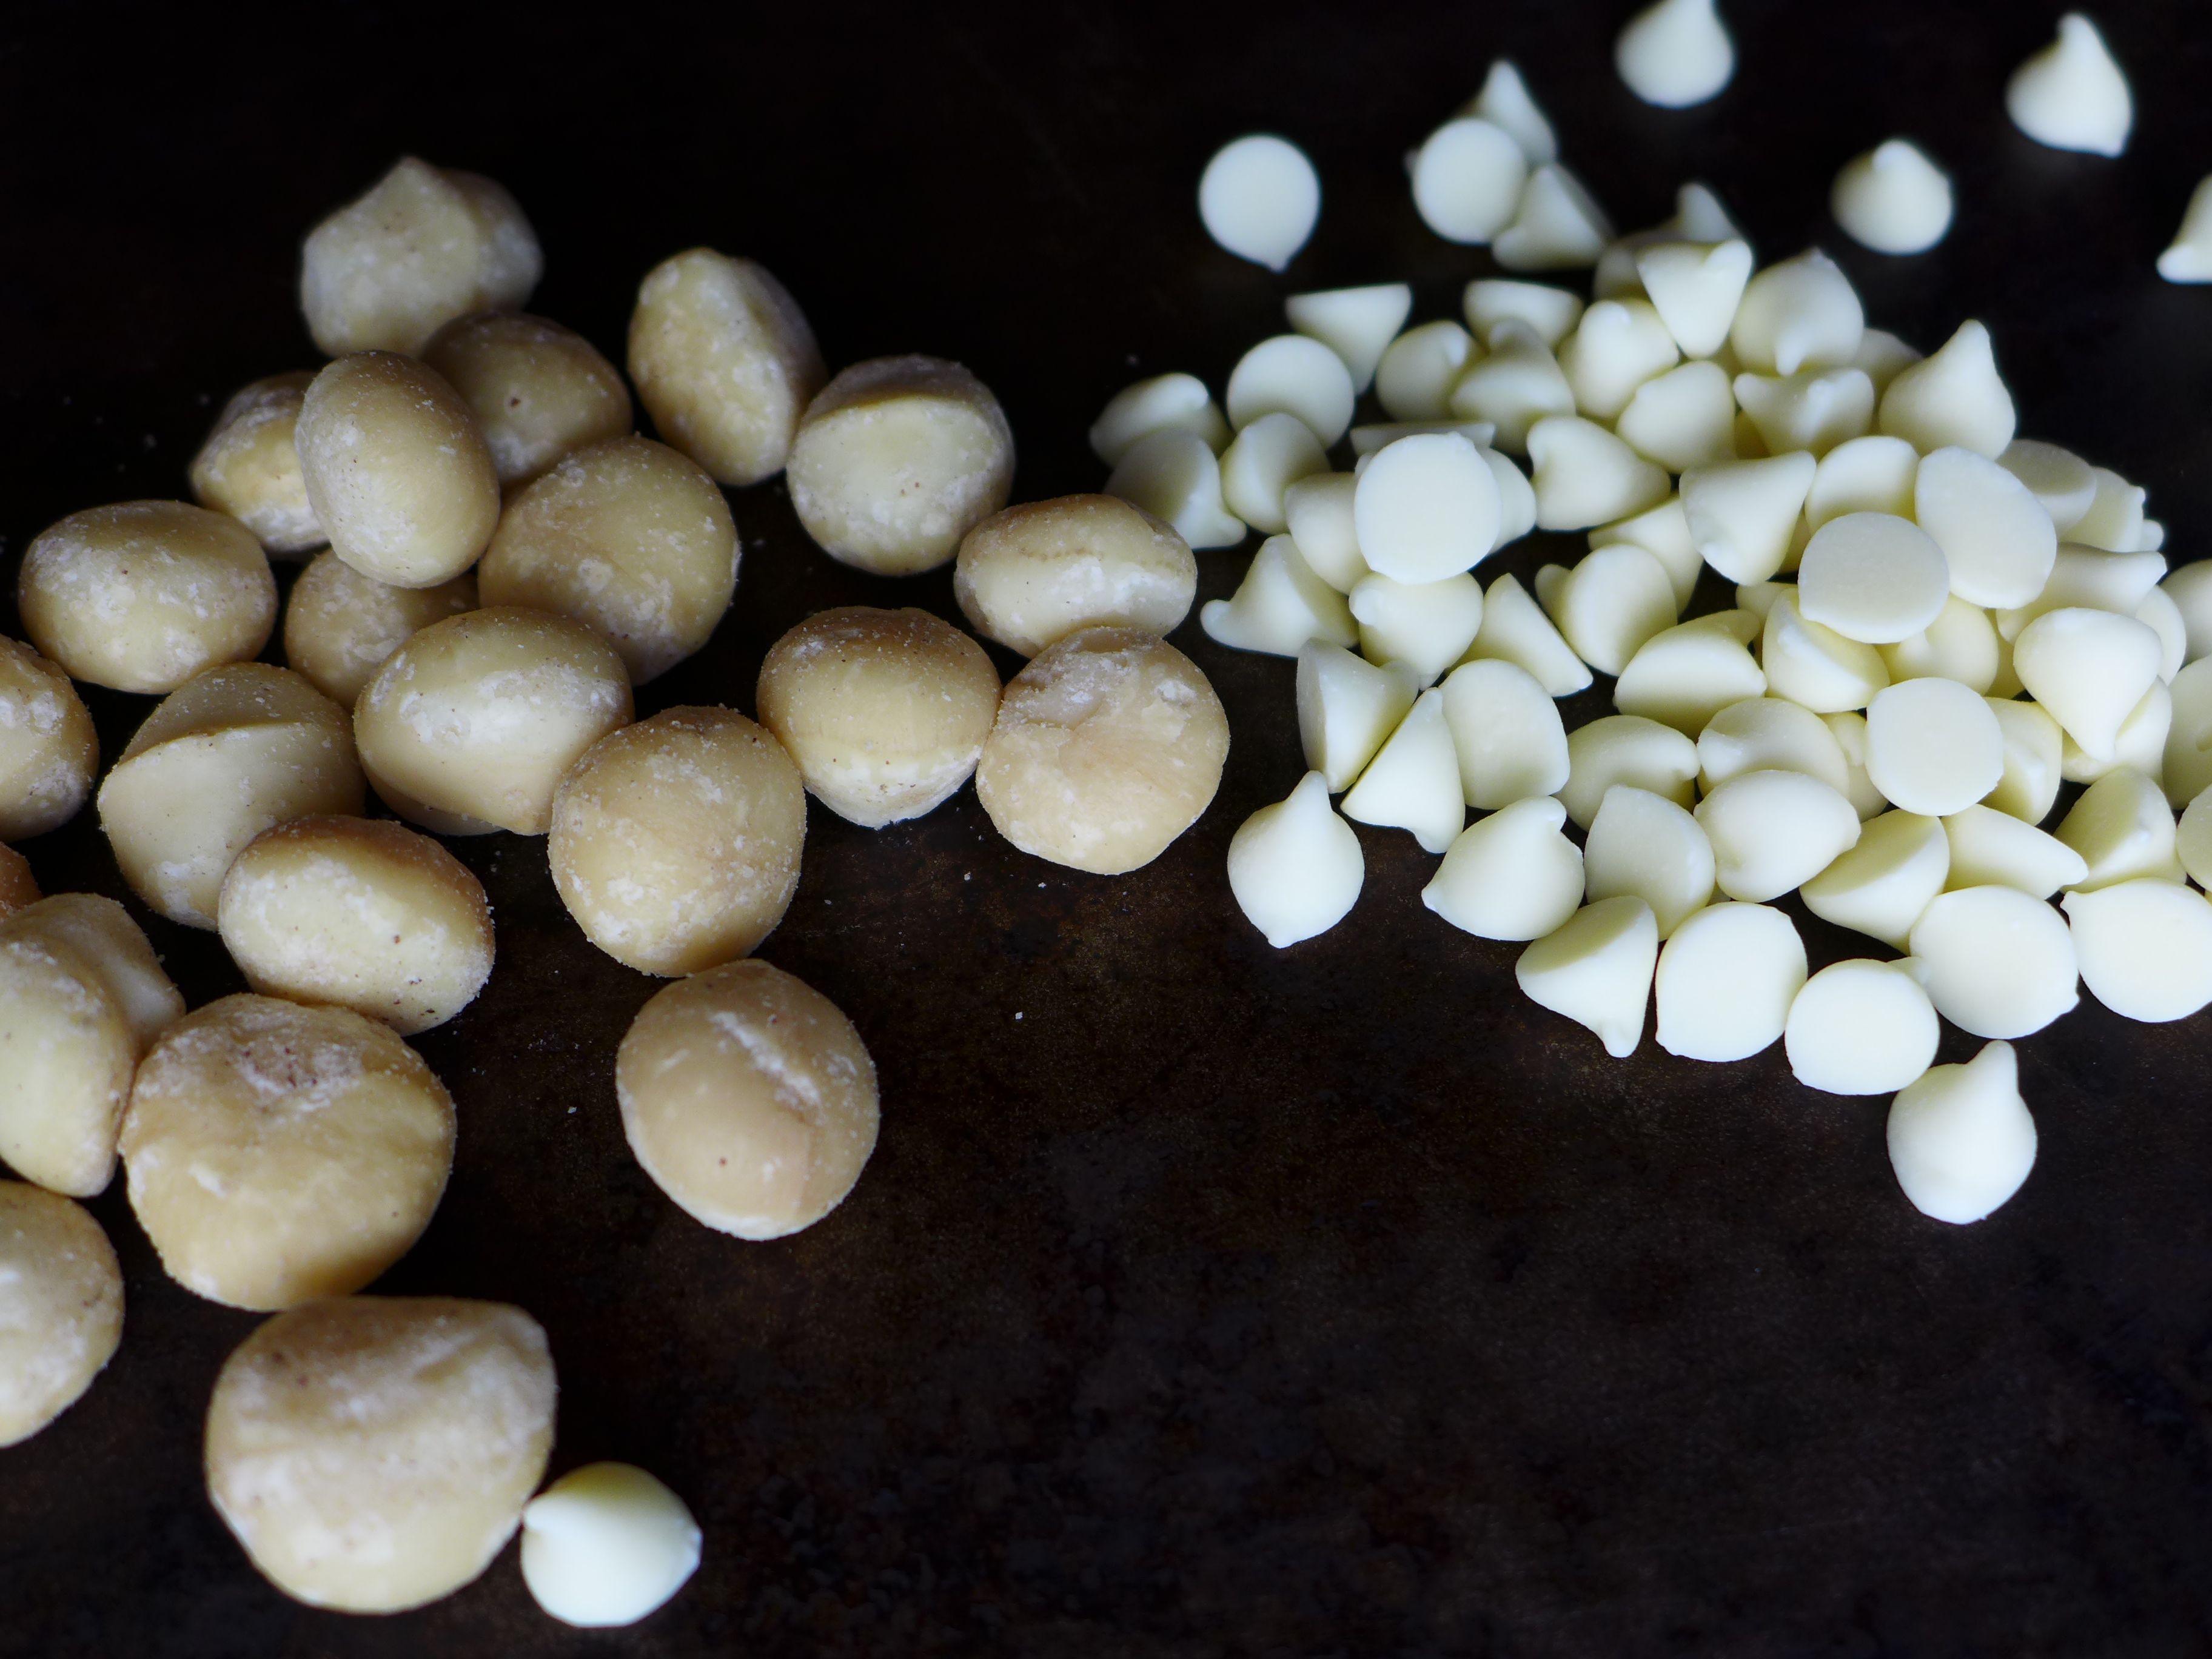
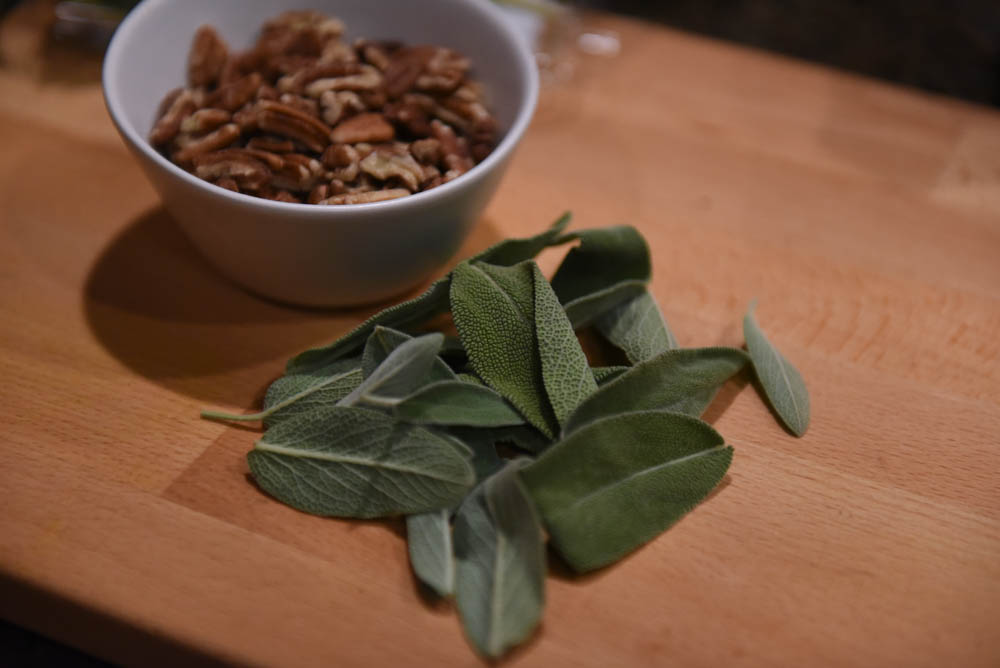
That said, the beauty of the formula is that you can easily make minor (or major) substitutions and still produce a delicious dish. For example, we took this pics last Thanksgiving, and, in pandemic fashion, I wasn’t able to get the chestnuts, so we substituted pecans. Another year we had delicious maple breakfast sausage from our CSA, so I used that in place of the sweet Italian sausage.

Ingredients

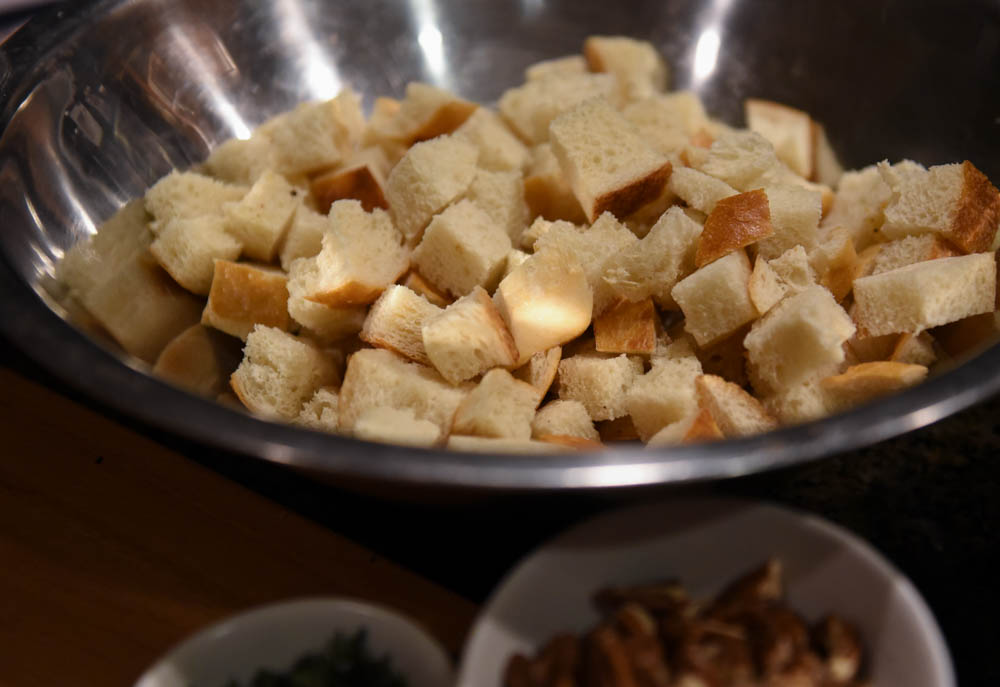
  • bread: loaf of sourdough bread
  • add-ins: 1 cup chopped peeled and cooked chestnuts*, 2 Tbsp chopped fresh thyme
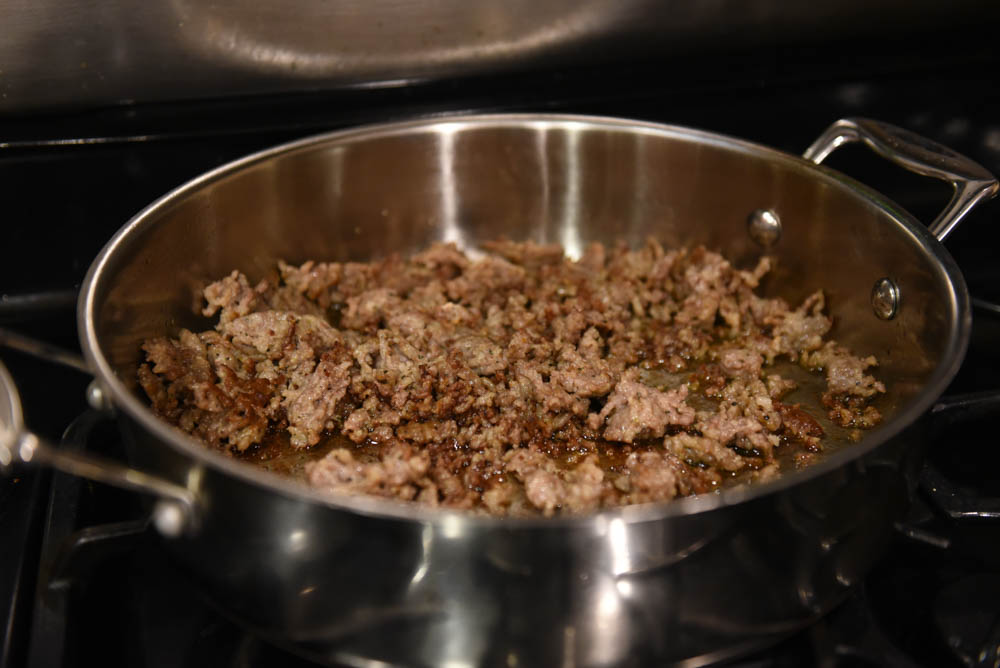
  • meat: 12 oz sweet Italian sausage
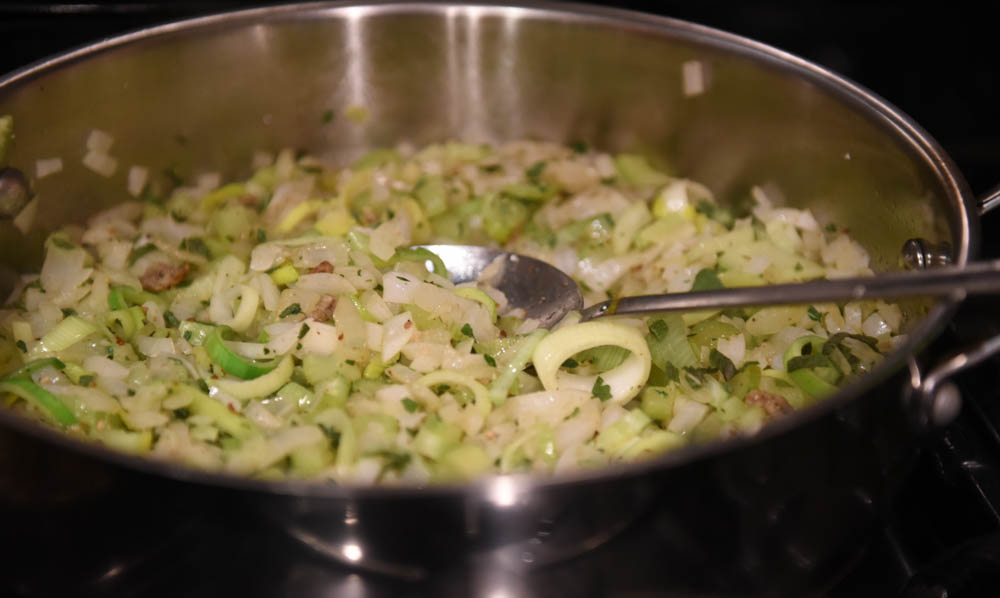
  • aromatics: 2 onions, 3 stalks celery, 2 leeks, 2 Tbsp fresh sage (all chopped)
  • deglazing liquid: 1/4 cup apple cider vinegar
  • binders: 1/2 cup butter, 2 large eggs, 2+ cups turkey or chicken stock
  • pantry staples: olive oil, more butter

How-To

  • The afternoon or evening before baking day, cut the bread into 1″ pieces and let dry on a baking sheet overnight.
  • Preheat the oven to 350F. Butter a 9×13 baking dish AND one side of a sheet of foil large enough to cover your dish.
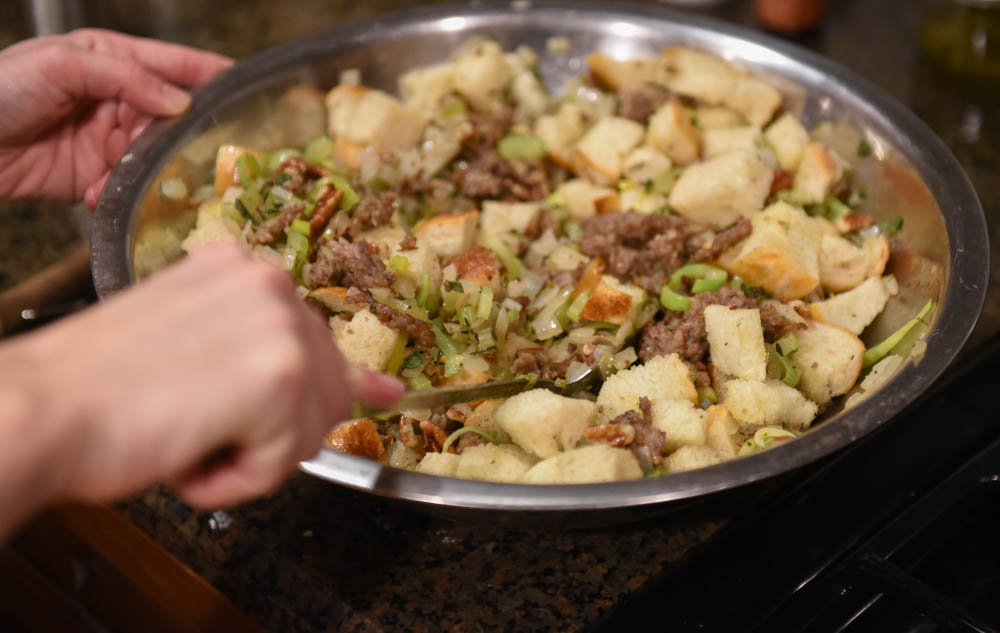
  • Place the dried bread and add-ins in a large (very large) mixing bowl.
  • Heat 3 Tbsp olive oil in a large skillet over medium heat. Add your meat to the pan and cook thoroughly, breaking it up into small pieces as it cooks. Use a slotted spoon to transfer the cooked meat to the bowl of bread.
  • Using the same skillet, add the chopped aromatics. Cook, stirring often, until the onions have softened and are starting to brown around the edges. When ready, transfer the aromatics to the bowl of bread.
  • Place the skillet back on the burner over medium heat. Pour the deglazing liquid into the pan. While it’s simmering, scrape the browned bits from the bottom of the pan. Once the liquid has almost evaporated, add the butter and cook until it has melted. Drizzle this liquid (and bits) over the bread mixture.
  • Whisk the two eggs into 2 cups of the stock. Pour this over the bread mixture.
  • Mix together everything together until well combined. If necessary, slowly add more stock to until the bread is moist.
  • Transfer the stuffing mixture to the baking dish, pressing down the mixture slightly if necessary. Dot the top of the mixture with 4 Tbsp butter, cut into small pieces. Cover with foil (buttered side down, obvs) and crimp it around the edges.
  • Bake for about 30-35 minutes. Remove the foil and bake until the top is starting to brown (another 20-25 minutes). *The original recipe asks you to turn the oven up to 450 for that last 20 minutes. I am never able to do it because we usually have a few dishes going at once. As such, your cooking times may vary depending upon what’s sharing the oven.
  • Remove from the oven and let sit for about 10 minutes before serving.

This stuffing is so good. It’s good enough that I’m already stocking up on chestnuts so that I can make a second batch, because I’m 99% sure that there aren’t going to be enough leftovers to meet my needs.

What are my needs? A 9×13 pan of stuffing.

We hope your scheming, dreaming, and prepping for a delicious day with your favorite people. xo

Horchata

Cinnamon is our Ingredient of the Season. You can find our archive of cinnamon posts here.

This is one of those recipes that I’ve always wanted to make, but didn’t take the initiative until we decided upon cinnamon as our ingredient of the season.

This pitcher of horchata was so easy to make and definitely exceeded my expectations!

Continue reading

Easy Date & Nut Energy Balls

Looking for another nut and fruit snack? Try these nut & fruit bars!

My kids love store-bought date & nut energy balls. I’ve never bought any, BUT some of our play-date regulars often have plenty to share. 🙂

Since these treats have such a simple ingredient list, I thought it’d be fun to try making some at home. Turns out they are super easy to make and easily customizable. I hope you enjoy these energy-packed snacks as much as we do.

Continue reading

Gingerbread Bird House

birdseed_hous

We first published this post last year, but we’re sharing it again now because we love it that much… and because I bet we all have a long evening or two that we’re looking to fill with some holiday fun minus the extra calories.

I love a fully decked out gingerbread house with their Candyland-like sweets. But, last year I had the urge to create a more natural looking gingerbread house, and that’s when we came up with this nutty treat for the birds.  Continue reading

Sweet and Spicy Mixed Nuts

{This post was originally published in 2015. We’re reposting it now because you should whip up a batch for Thanksgiving. Whether you’re hosting or visiting, these will be a welcome snack.}
Nuts are our ingredient of the season. We’ve been using them for sweetsdrinkssnack bars and savory condiments!

With summer approaching I began fantasizing about the hiking, camping, and other outside fun that we’re going to have. I also started thinking about snack ideas for those adventures, and having nuts on hand are a great, healthy option, but to keep things interesting, I like to swap out basic roasted nuts for this sweet and spicy option. A bag of roasted or spiced nuts holds up much better than our favorite fruit and nut snack bars, when stuffed into a pack, but those snack bars do make a great fast breakfast when you’re running out the door to get an early start on that hike!

liveseasoned_spring2015_spicednuts5

Continue reading

Gnocchi with Stinging Nettle Pesto

Potatoes are our ingredient of the season. You can find our full archive of potato posts here. And if you like pesto, give our Arugula Walnut Pesto a spin.

nettle_pesto

Potatoes may be our ingredient of the season, but in this post, nettles are definitely stealing the show.

Read on to see my simple tips for involving kids in your gnocchi making… or you could just teach them how to spell gnocchi and send them on a scavenger hunt in the pasta aisle.  Continue reading

Arugula Walnut Pesto

Nuts are our ingredient of the season. We’ve been using them for sweets, drinks, and snack bars. Today we’re finally using them for a savory condiment!

Sarah here: Comin’ at ya with a republished post today – I’m making this tonight and I’m papapumped about it. Pasta and pesto all day please. Carry on.

I didn’t even know I was looking for it, but I found my new favorite condiment in this arugula walnut pesto! I think I overdid the traditional basil and pine nut pesto, because the past few times I’ve had it, I just wasn’t excited by the flavor, but the peppery-ness of the arugula and parmesan combined with the savory walnuts and olive oil and the zing of fresh garlic allows this pesto to brighten any dish, creating the perfect cure for grey days when you’re faced with another late spring snow!

liveseasoned_spring2015_walnutpesto2

I have to admit, I didn’t go to the grocery store with arugula on my list and the intention of making this pesto, but when a super-sized container of arugula landed in our fridge,  I was looking for a way to use it up!

Continue reading

Notes about Macarons

Nuts are our ingredient of the season. We’ve been using them for sweetsdrinkssnack bars and savory condiments!

liveseasoned_spring2015_macarons9-875x1024 copy

We decided to end our season of nuts with the fanciest and fussiest of all nutty desserts, the macaron. We’re talking French macarons here, the kind made with egg whites and ground almonds, not the double-o macaroons made with coconut. But a funny thing about this food post : we don’t include a recipe! As the title suggests, we’re sharing our baking notes about this fickle treat, because while they may cause us to get flustered while baking, we’re not going to stop trying to perfect our technique any time soon!

liveseasoned_spring2015_macarons12

I have to admit, I don’t remember where I had my first macaron, but what I do remember is the perfectly light and delicious almond flavor and the cookie’s combination of crunchy exterior and soft and chewy interior. Something I’ve been trying to recreate ever since.

Continue reading

Walnut Oil Wood Balm

Nuts are our ingredient of the season. We’ve been using them for sweetsdrinkssnack bars and savory condiments! Today we’re finally getting crafty (sort of)!

liveseasoned_spring2015_walnutoil8

All of us have at least a few wooden items in our kitchen, likely a couple of spoons and a cutting board. Maybe you also have a wooden salad bowl? How about some fancy wood-handled serving pieces? All of these items could use some moisture to keep them looking and functioning at their best. If your spoons are looking dull and your cutting board is starting to crack, then this post is for you!

liveseasoned_spring2015_walnutoil1

At a bare minimum, you could rub some olive oil into your wood pieces. I used to do this, but I found that that technique never lasted that long, especially for the cooking spoons and cutting boards that I’m using every day. Then, about four years ago I came across 3191’s post about spoon oil. What is spoon oil? It’s really more of a balm and is made by mixing melted beeswax with a food-safe oil. Once the mixture cools, it turns from a liquid state into the balm.

I used the mineral oil-based spoon oil for years now, and it worked well, but I still felt like my wooden pieces needed it sooner than I would have expected. Well, after a bit of research, I learned why! When applied, the mineral oil keeps the spoon oil in a soft state, which is good and bad. This is great for wooden countertops and butcher blocks that you wipe down, but don’t wash with soap and water every day. The liquid state of the mineral oil allows the compound to soak deeper into the wood, especially with each new application. But, the soft nature of the mineral oil means that it’s easier to wash off and doesn’t hold up as well on the items that you wash nearly every day.

What’s the solution? Walnut oil!

After walnut oil soaks into the wood, due to a reaction with the air, it hardens, making it more resistant to repeated washings. You could use walnut oil on its own (many people do!), but I like using it in the balm as the beeswax adds another layer of protection to the wood. The curing of the walnut oil also stops it from turning rancid, which can be an issue with other kitchen oils.

Making the wood balm is super easy: just follow a 1:4 ratio of beeswax to oil. For example, to make this batch I used 2 ounces of beeswax and 8 ounces of walnut oil. Make an improvised double boiler by placing a mason jar or a glass measuring cup in a pot of simmering water. Place the beeswax and oil in the glass vessel and allow them to warm until the wax melts. Once it the wax has melted, be sure to give the mixture a good stir and take it off the heat. If you used a glass measuring cup for the double boiler, you’ll want to pour the wood balm into a storage container while it’s still a liquid (if you used a mason jar, you can just allow the balm to cool within that jar for easy storage).  I use a thrifted crock for my balm, adding a new batch without bothering to completely clean out remnants from the previous batch.

**It’s essential to warm both the beeswax and the oil. If you don’t warm the oil, when you mix both together the room temp oil will cause the beeswax to immediately solidify, and they won’t blend together. Of course, if this happens to you, it’s not a problem – just place the whole mixture back in the double boiler and let the wax melt again.

liveseasoned_spring2015_walnutoil5

Once made, using the balm is so easy. Just rub a thin layer over your wooden pieces and let them sit overnight, allowing some of the excess balm soak into the wood. I’m so lazy that I pile up my “sticky” pieces and let them sit until I have the time to polish them.

liveseasoned_spring2015_walnutoil7

When it’s time to polish, I use a basic cloth diaper to wipe of the excess balm and give the pieces a shine. Side note : I’ve never used the cloth diapers for actual diapering, but find them to be so helpful around the house, particularly for cleaning. I keep my polishing cloth with the crock of balm, reusing it multiple times.  The cloth covered with excess balm serves double duty as a polishing cloth for other wooden items in our house (for example, we have a few wooden buddha statues that get a quick wood balm rub once in a while). And that’s that, a super simple, completely safe balm that nourishes your wooden kitchen utensils, the same ones that you use to nourish your family! xo

liveseasoned_spring2015_walnutoil9

White Chocolate Macadamia Nut Cookies

Nuts are our ingredient of the season. We’ve been using them for sweetsdrinkssnack bars and savory condiments!

liveseasoned_spring2015_macademia10-1024x768 copy

For a few years now, we’ve kept a steady supply of the white chocolate macadamia nut Cliff bars in the house. They’re mainly purchased as a quick snack for Calder to take along on bike rides, but honestly, we all love them (even, or especially, Alex) as a quick treat now and then. We also used to pick up more flavors in the past, but over time we finally gave in and admitted that the only flavor we truly loved was the white chocolate macadamia. When I packed one in our bag for the park last weekend, I started to think about how it’s been way too long since I’ve actually had a white chocolate macadamia nut cookie, and it was time to put the Cliff bar down and remedy that. This was the result, and it’s delicious!

liveseasoned_spring2015_macademia2

While writing this post, I became curious about the history of the white chocolate and macadamia nut pairing, but information was really hard to come by. The cookie doesn’t even have it’s own wikipedia page, rather it’s just listed as a variant of the chocolate chip cookie! When I mentioned this to Calder, his response was “but it’s so much more than that”, and I couldn’t agree more. Somewhere, someone came up with this fantastic flavor pairing, and it’s time to recognize their genius.

Continue reading