
Other than decorating our mantel, my Halloween preparations have been totally stalled, but with Halloween so close I really wanted to do something at the front of our house. We have a small porch area and a single window that faces the sidewalk. I was extra motivated to make this happen because we’re also close to the mailbox cluster, so a lot of neighbors pass by, and I wanted them to see something fun. I haven’t made any progress on the ghosts I mentioned, but while walking the Halloween isles I came up with an idea for the window : create a fabric panel with a witch silhouette!


I know that they sell window silhouettes, and some look like they’re great (a full-window design with a translucent background), but others are just the silhouette, so if you don’t have translucent shades or a curtain, the silhouette won’t have as much of an impact because peepers will be distracted by everything else in your window (know what I mean?). Plus, I thought it would be a creative challenge, and if it worked I would be able to re-use it for years!
I’m going to share my general how-to and materials, but not a specific pattern. This is such a simple project that you should be able to easily tailor it to your window and decoration theme (bats! ghosts! ghouls!).
Materials & Tools
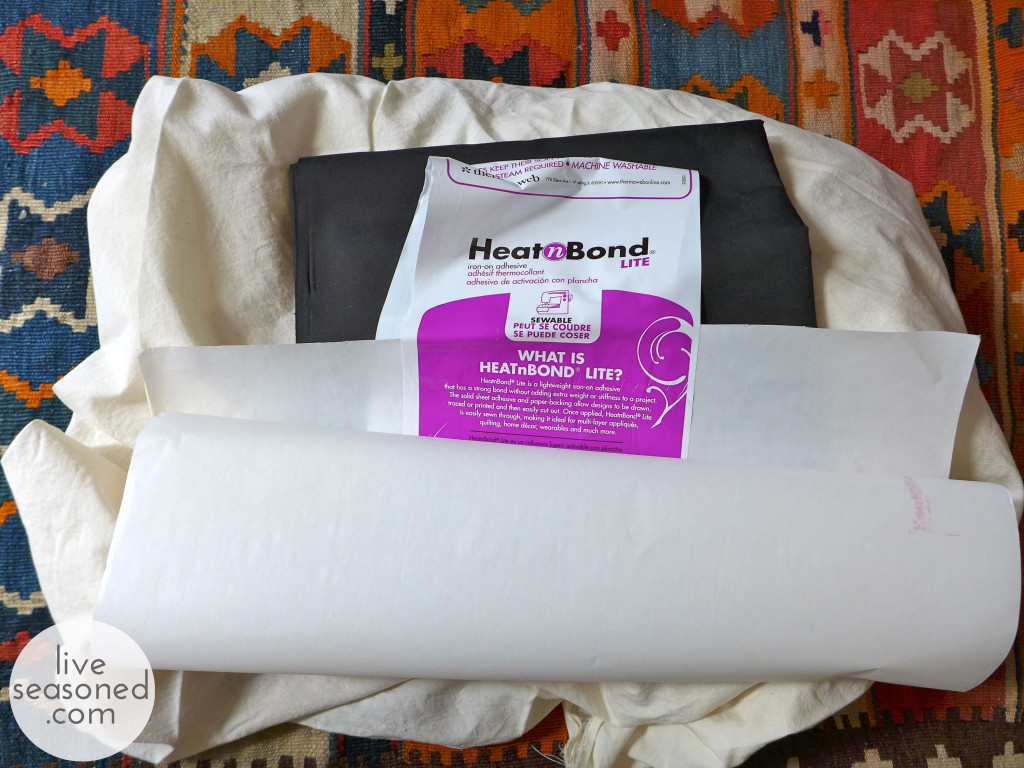
- thin white or creme colored fabric measured an inch wider and at least two to three inches longer than your window. It will be enough to cover your window with a half inch seam along the two sides and bottom and a to sew a wider “hem” in the top for a tension rod.
- black fabric large enough for your design
- Heat’n’Bond large enough for your design. I accidentally bought the thin version that you can sew through, but you should buy the thicker stuff that doesn’t require sewing (note, I still didn’t sew mine, but I’m worried that it might not bond as well over the long run).
- pencil
- ruler (optional)
- scissors
- sewing machine and thread
How-to
- pre-wash and iron all fabrics
- Sew the seams around your white panel.
- Iron the Heat’n’Bond to one side of your black fabric (it comes with instructions for iron temp and timing).
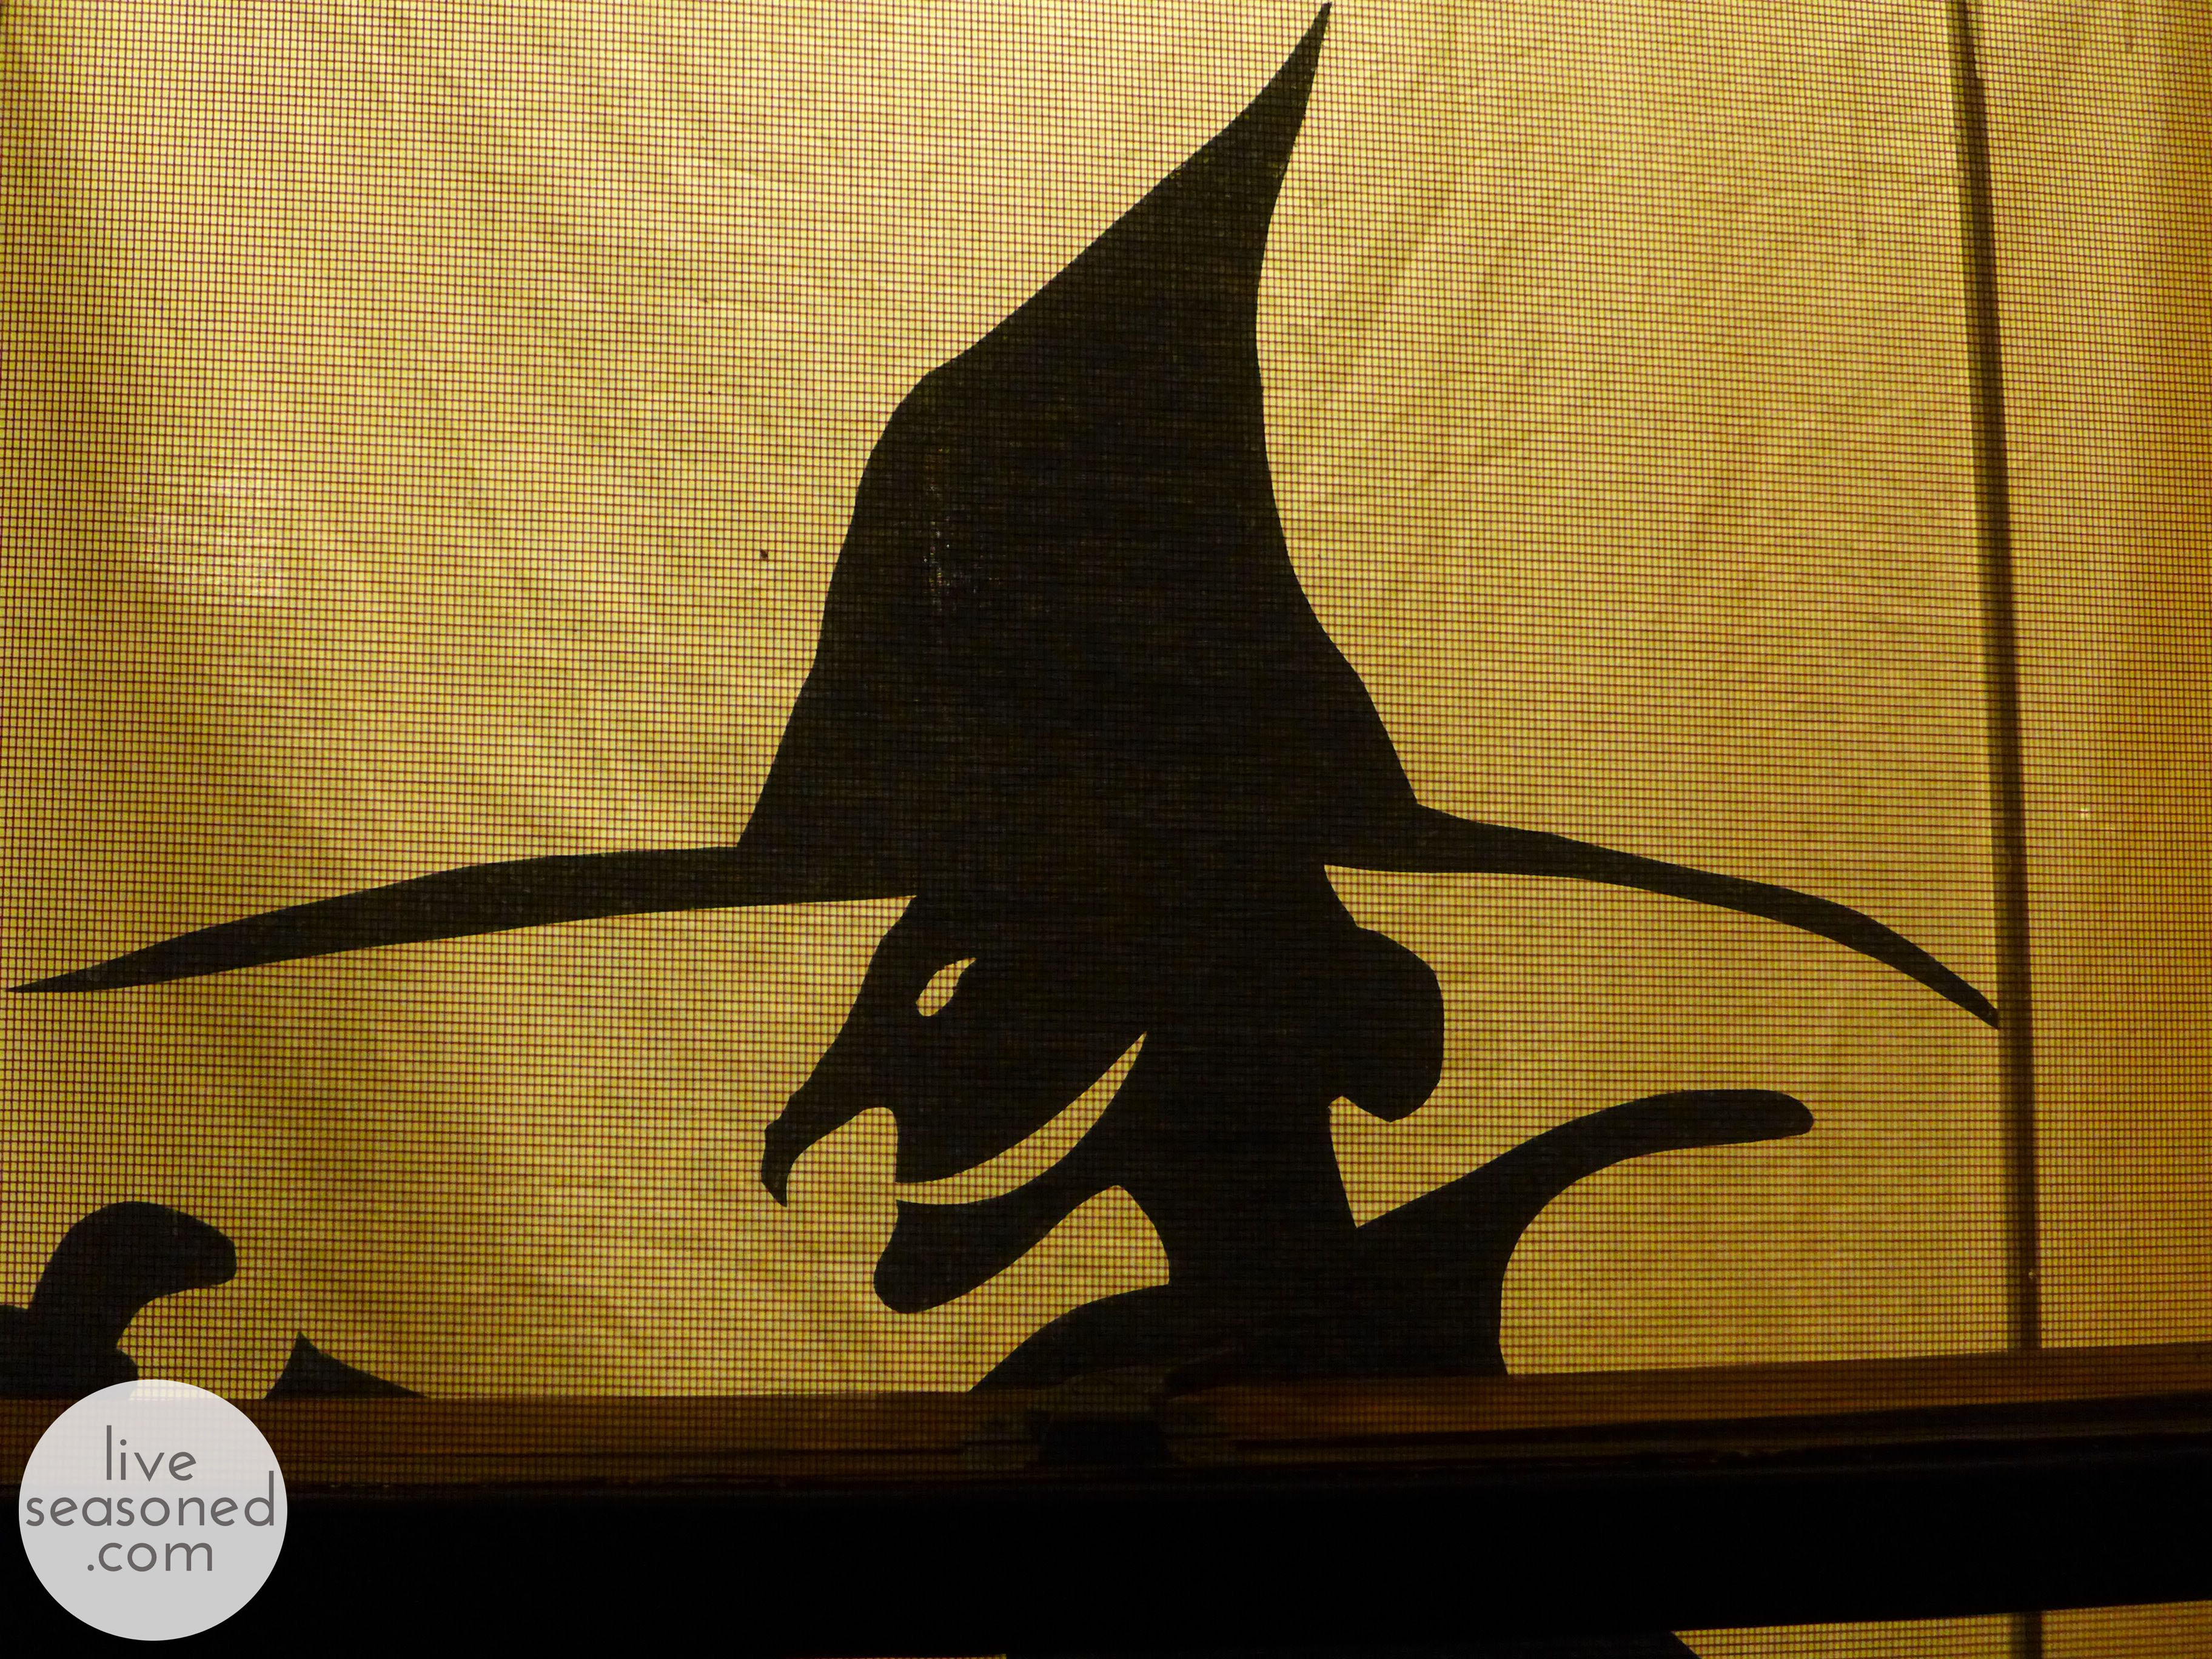
- Draw your design on the paper of the Heat’n’Bond (This panel works when turned either way, so you don’t have to worry about your design coming out backwards – you just flip the curtain, but if you include words, then one side of your window will always read them backwards).
- Cut out your design – cutting through the Heat’n’Bond paper and your black fabric.
- Remove the paper backing from the Heat’n’Bond, place your silhouettes on your white panel. Iron the silhouettes following the Heat’n’Bond instructions.
- Hang your curtain and settle in for a spooky night!


Tips & Tricks
- I Googled “witch silhouette” and found the image that I very closely followed for this project. If you’re looking for ideas just search for “halloween silhouette” and you’re sure to find something perfect.
- Once I had my image, I free-handed the drawing. To help with this process, I began by putting references points on the paper (for example, points where I wanted the top and brim of the hat to be, others for the hands and face, etc.). You can see them in the image above to the left. I then stood back and looked at those points to make sure that I liked the proportion and placement of my witch.
- With those points in place I sketched a witch. I did this relatively quickly (5-10 minutes max), I didn’t go back and erase lines, and I didn’t aim for perfection. I always believe that if you give people the impression of an image they can fill in the details and overlook slight imperfections (our brother will whole-heartedly disagree with me). For example, is the bump at the back of her head a bun (my intention) or a wonky ear? You decide, but either way, you may not have focused on it until I brought it to your attention.
- Finally, as well as giving you a paper to draw on, having the Heat’n’Bond stiffens your fabric so it also makes cutting and placing your silhouette so easy!


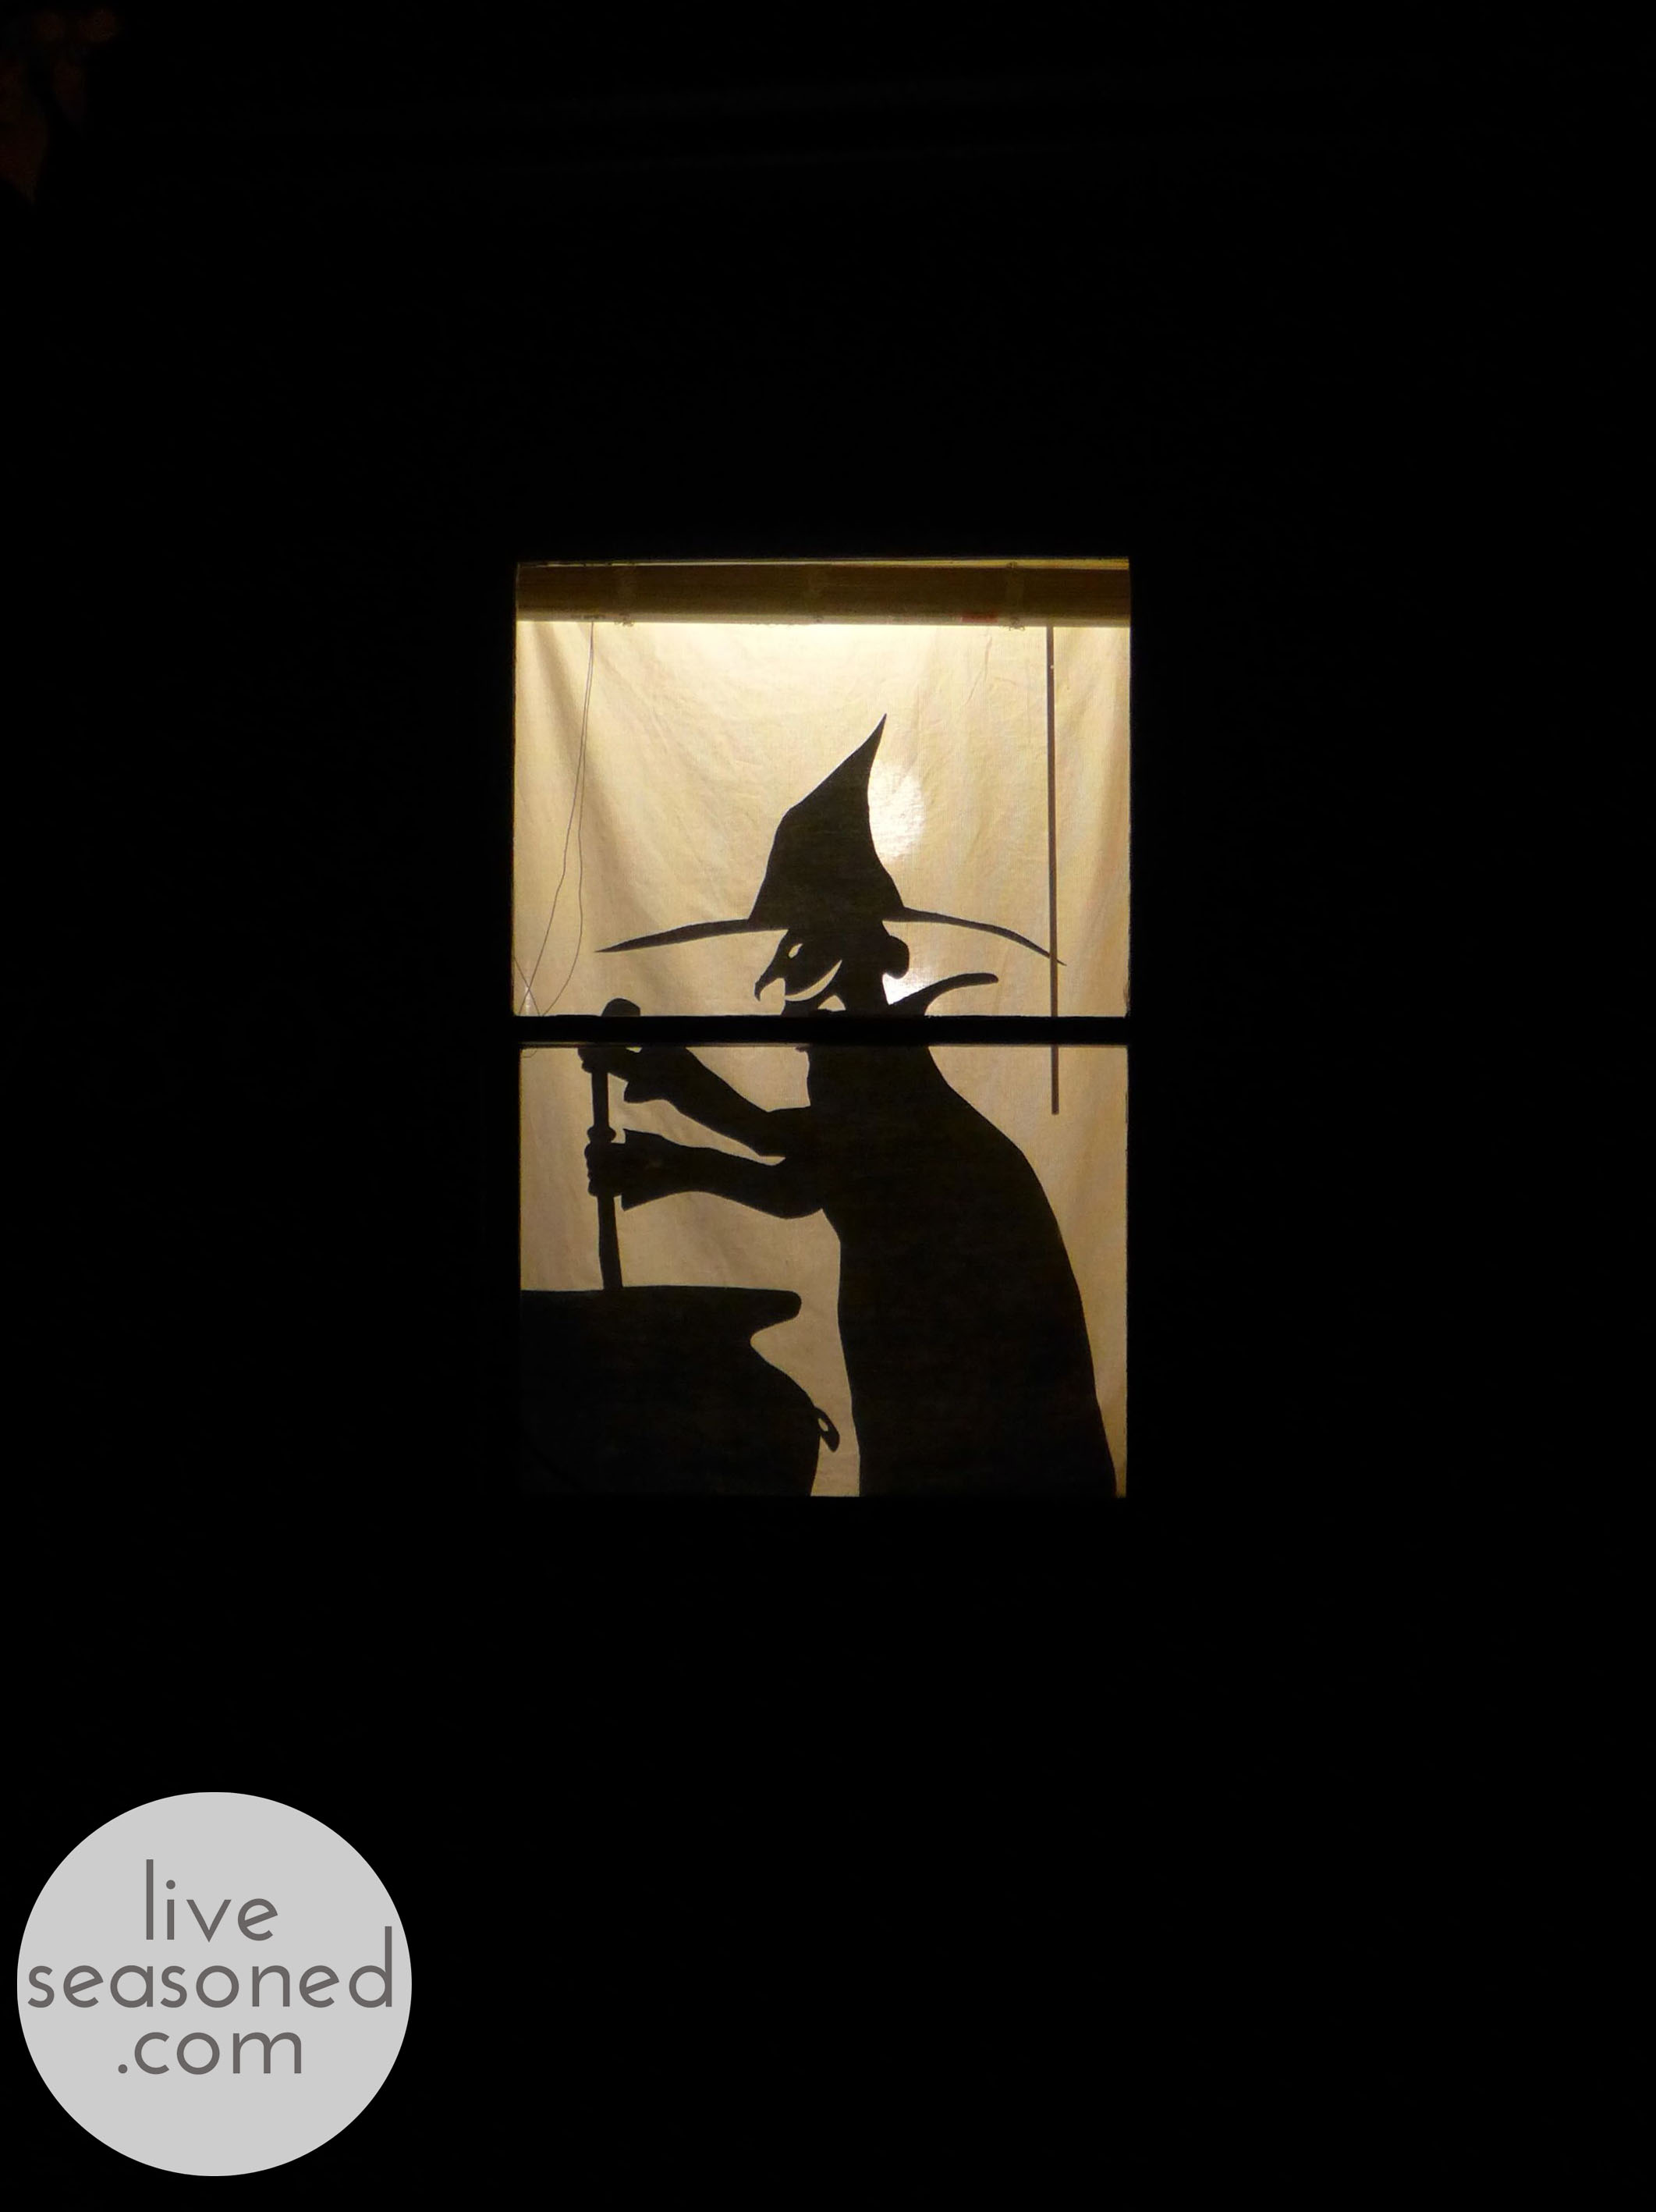
For being a random idea, I really love how this project turned out! It looks great in our window during both day and night. We hung the side with the silhouette facing out. So during the day, we get to see a shadowy silhouette image inside the house as the sunlight shines through, while everyone outside still sees the witch (I don’t think their view would be as good during the day if we hung it the other way around). You’ll get the same shadowy effect at night if there’s a street or porch light outside of your window. And one last hanging tip – Alex loves looking out of this window during the day, so I just use a couple of binder clips to secure the bottom of the panel to the top; it’s folded in half and we can see out of the bottom half of the window.
**Costume update: C and I felt the costume pressure when we realized that the little guy has no less than 3 costume parties to attend! So we had a brainstorming session tonight and came up with some fun ideas!