Dried Fruit Garland

Apples are our ingredient of the seasons. So far we’ve gone crazy with them in the kitchen, but today we’re filing getting crafty!

This year, after taking down our Halloween decorations and while waiting to up a Christmas tree, I was really feeling the urge to decorate. So I put together this simple garland that’s a snap to make, celebrates the bounty of the season, and is perfectly suited for my need to add a little touch of something to our November walls.
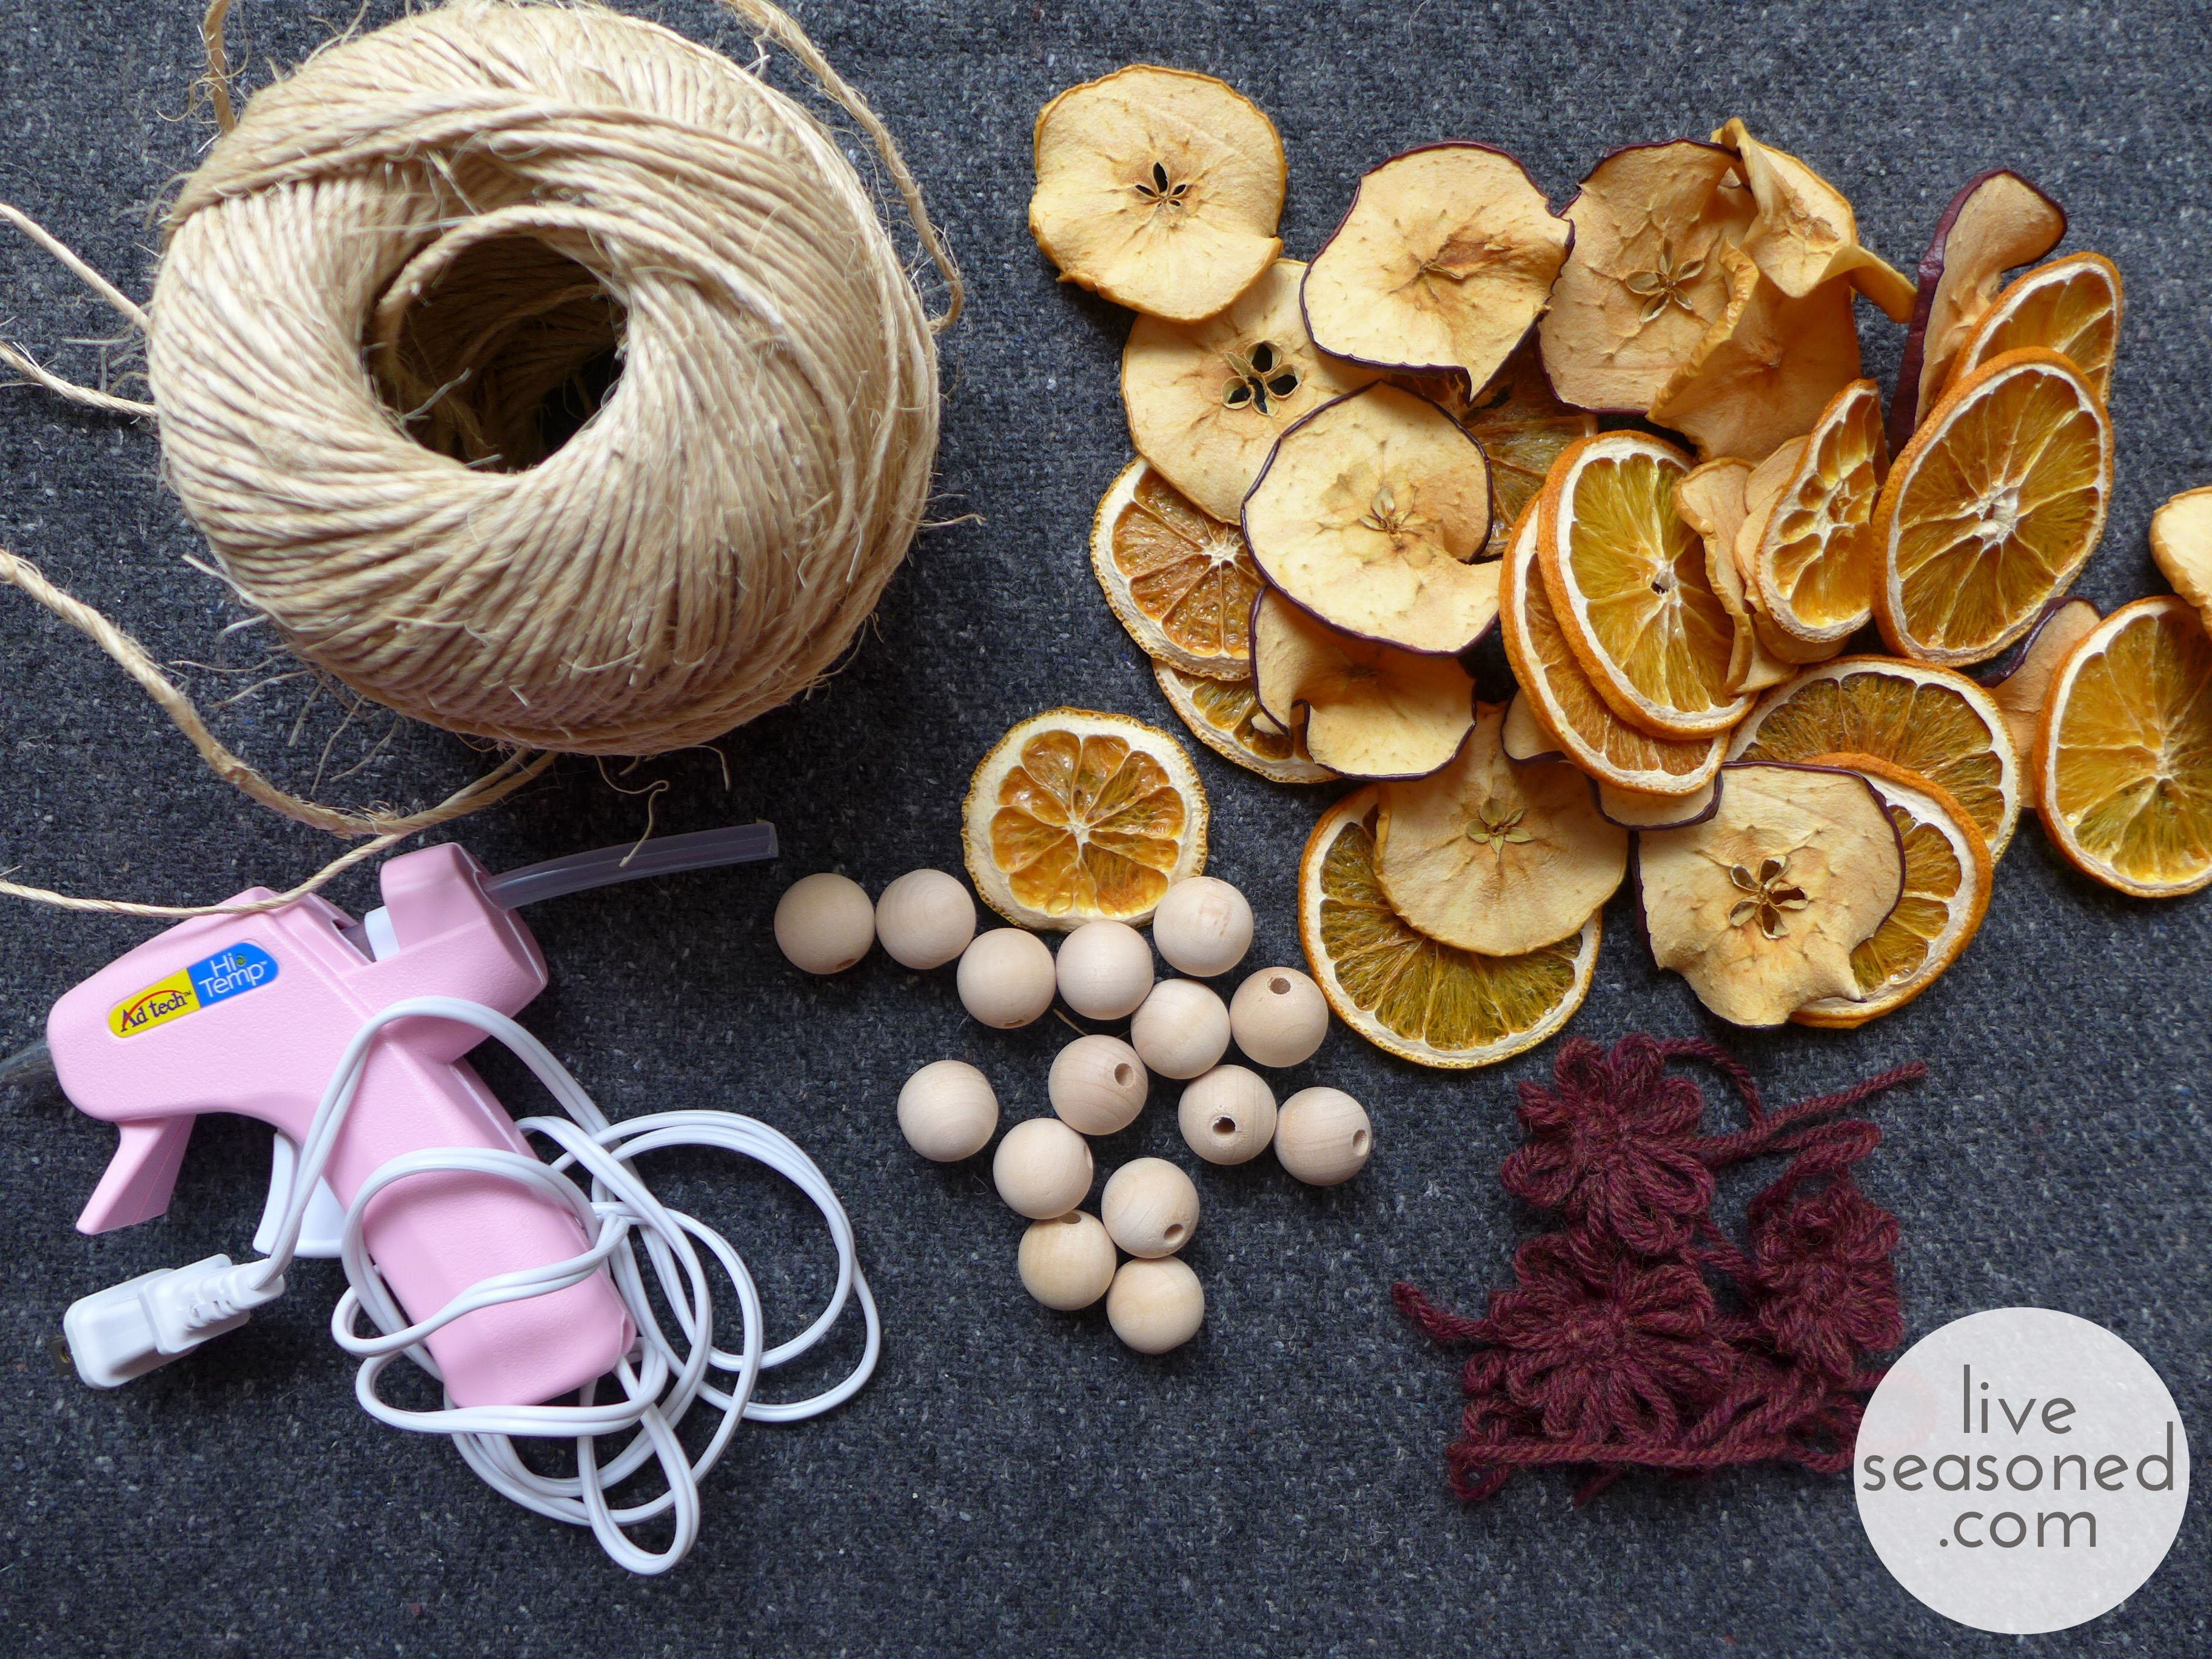
liveseasoned_fall2014_fruitgarland19_wm

Supplies:

This project requires relatively few supplies, but as with everything we do around here, the garland is easily customizable, so look around your craft room and get creative!

  • twine
  • dried fruit (more on this below)
  • wooden beads
  • simple yarn flowers (how-to below)
  • hot glue gun
liveseasoned_fall2014_fruitgarland10_wm

Drying the Fruit

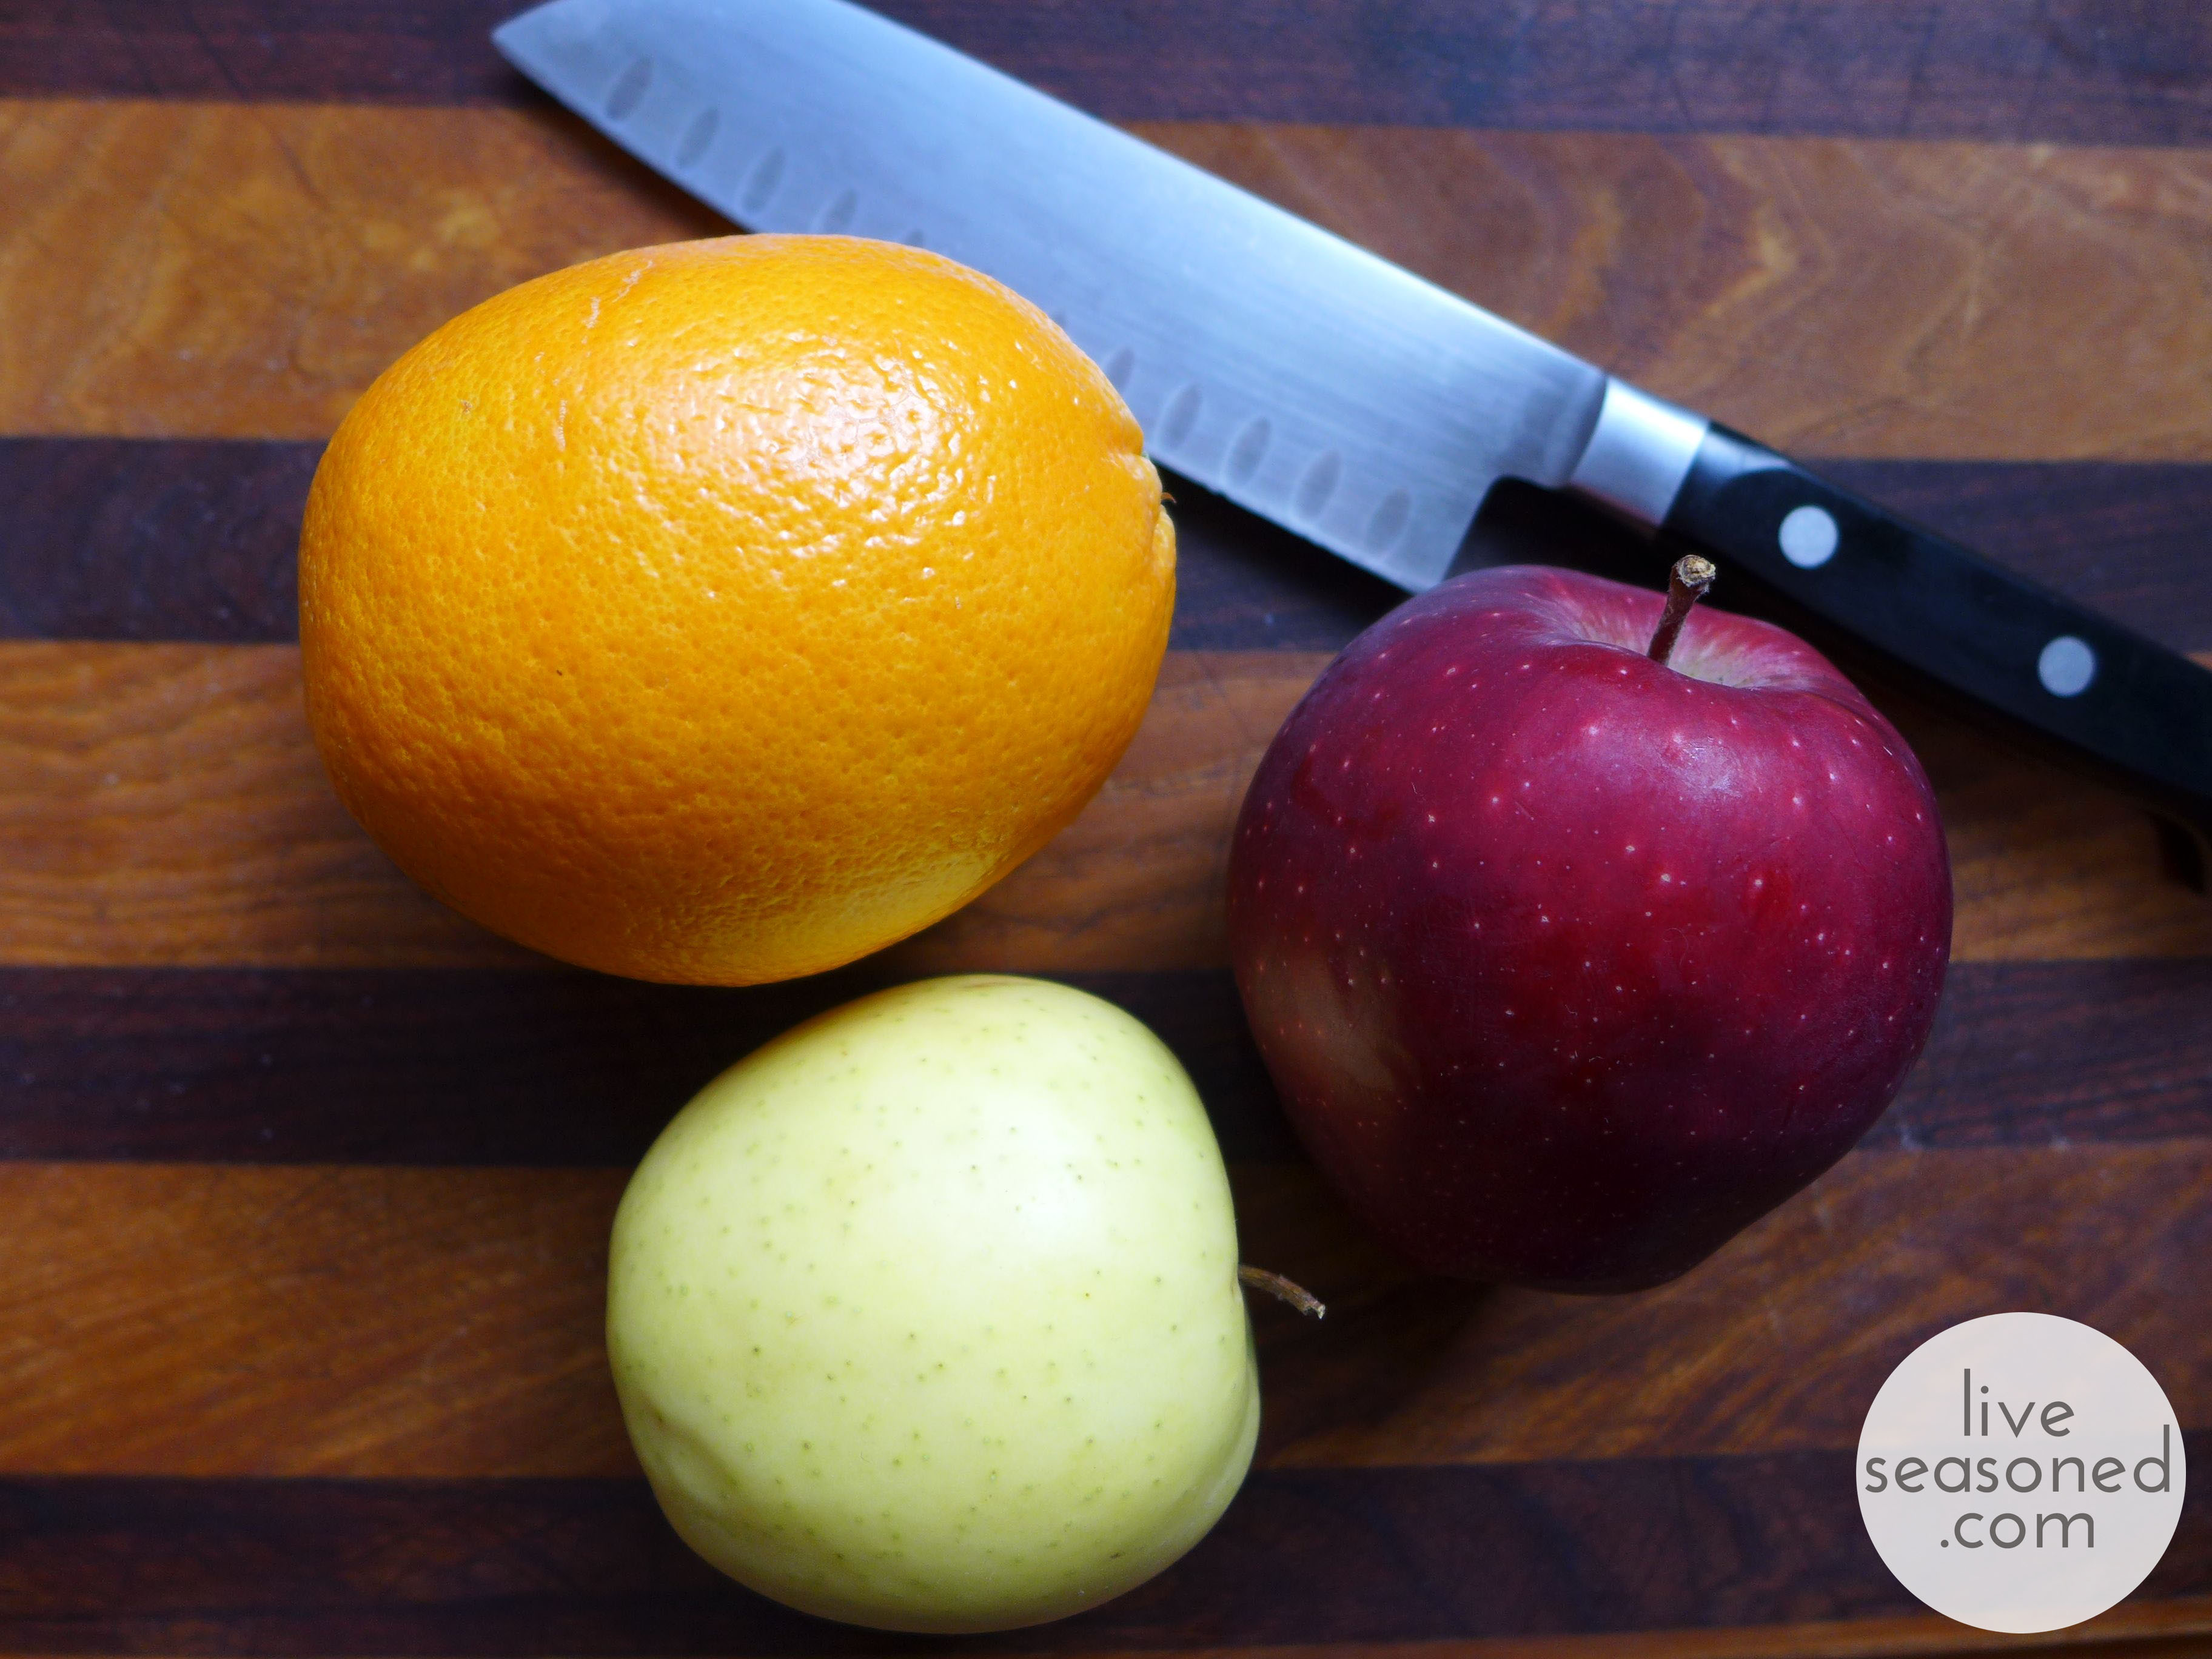
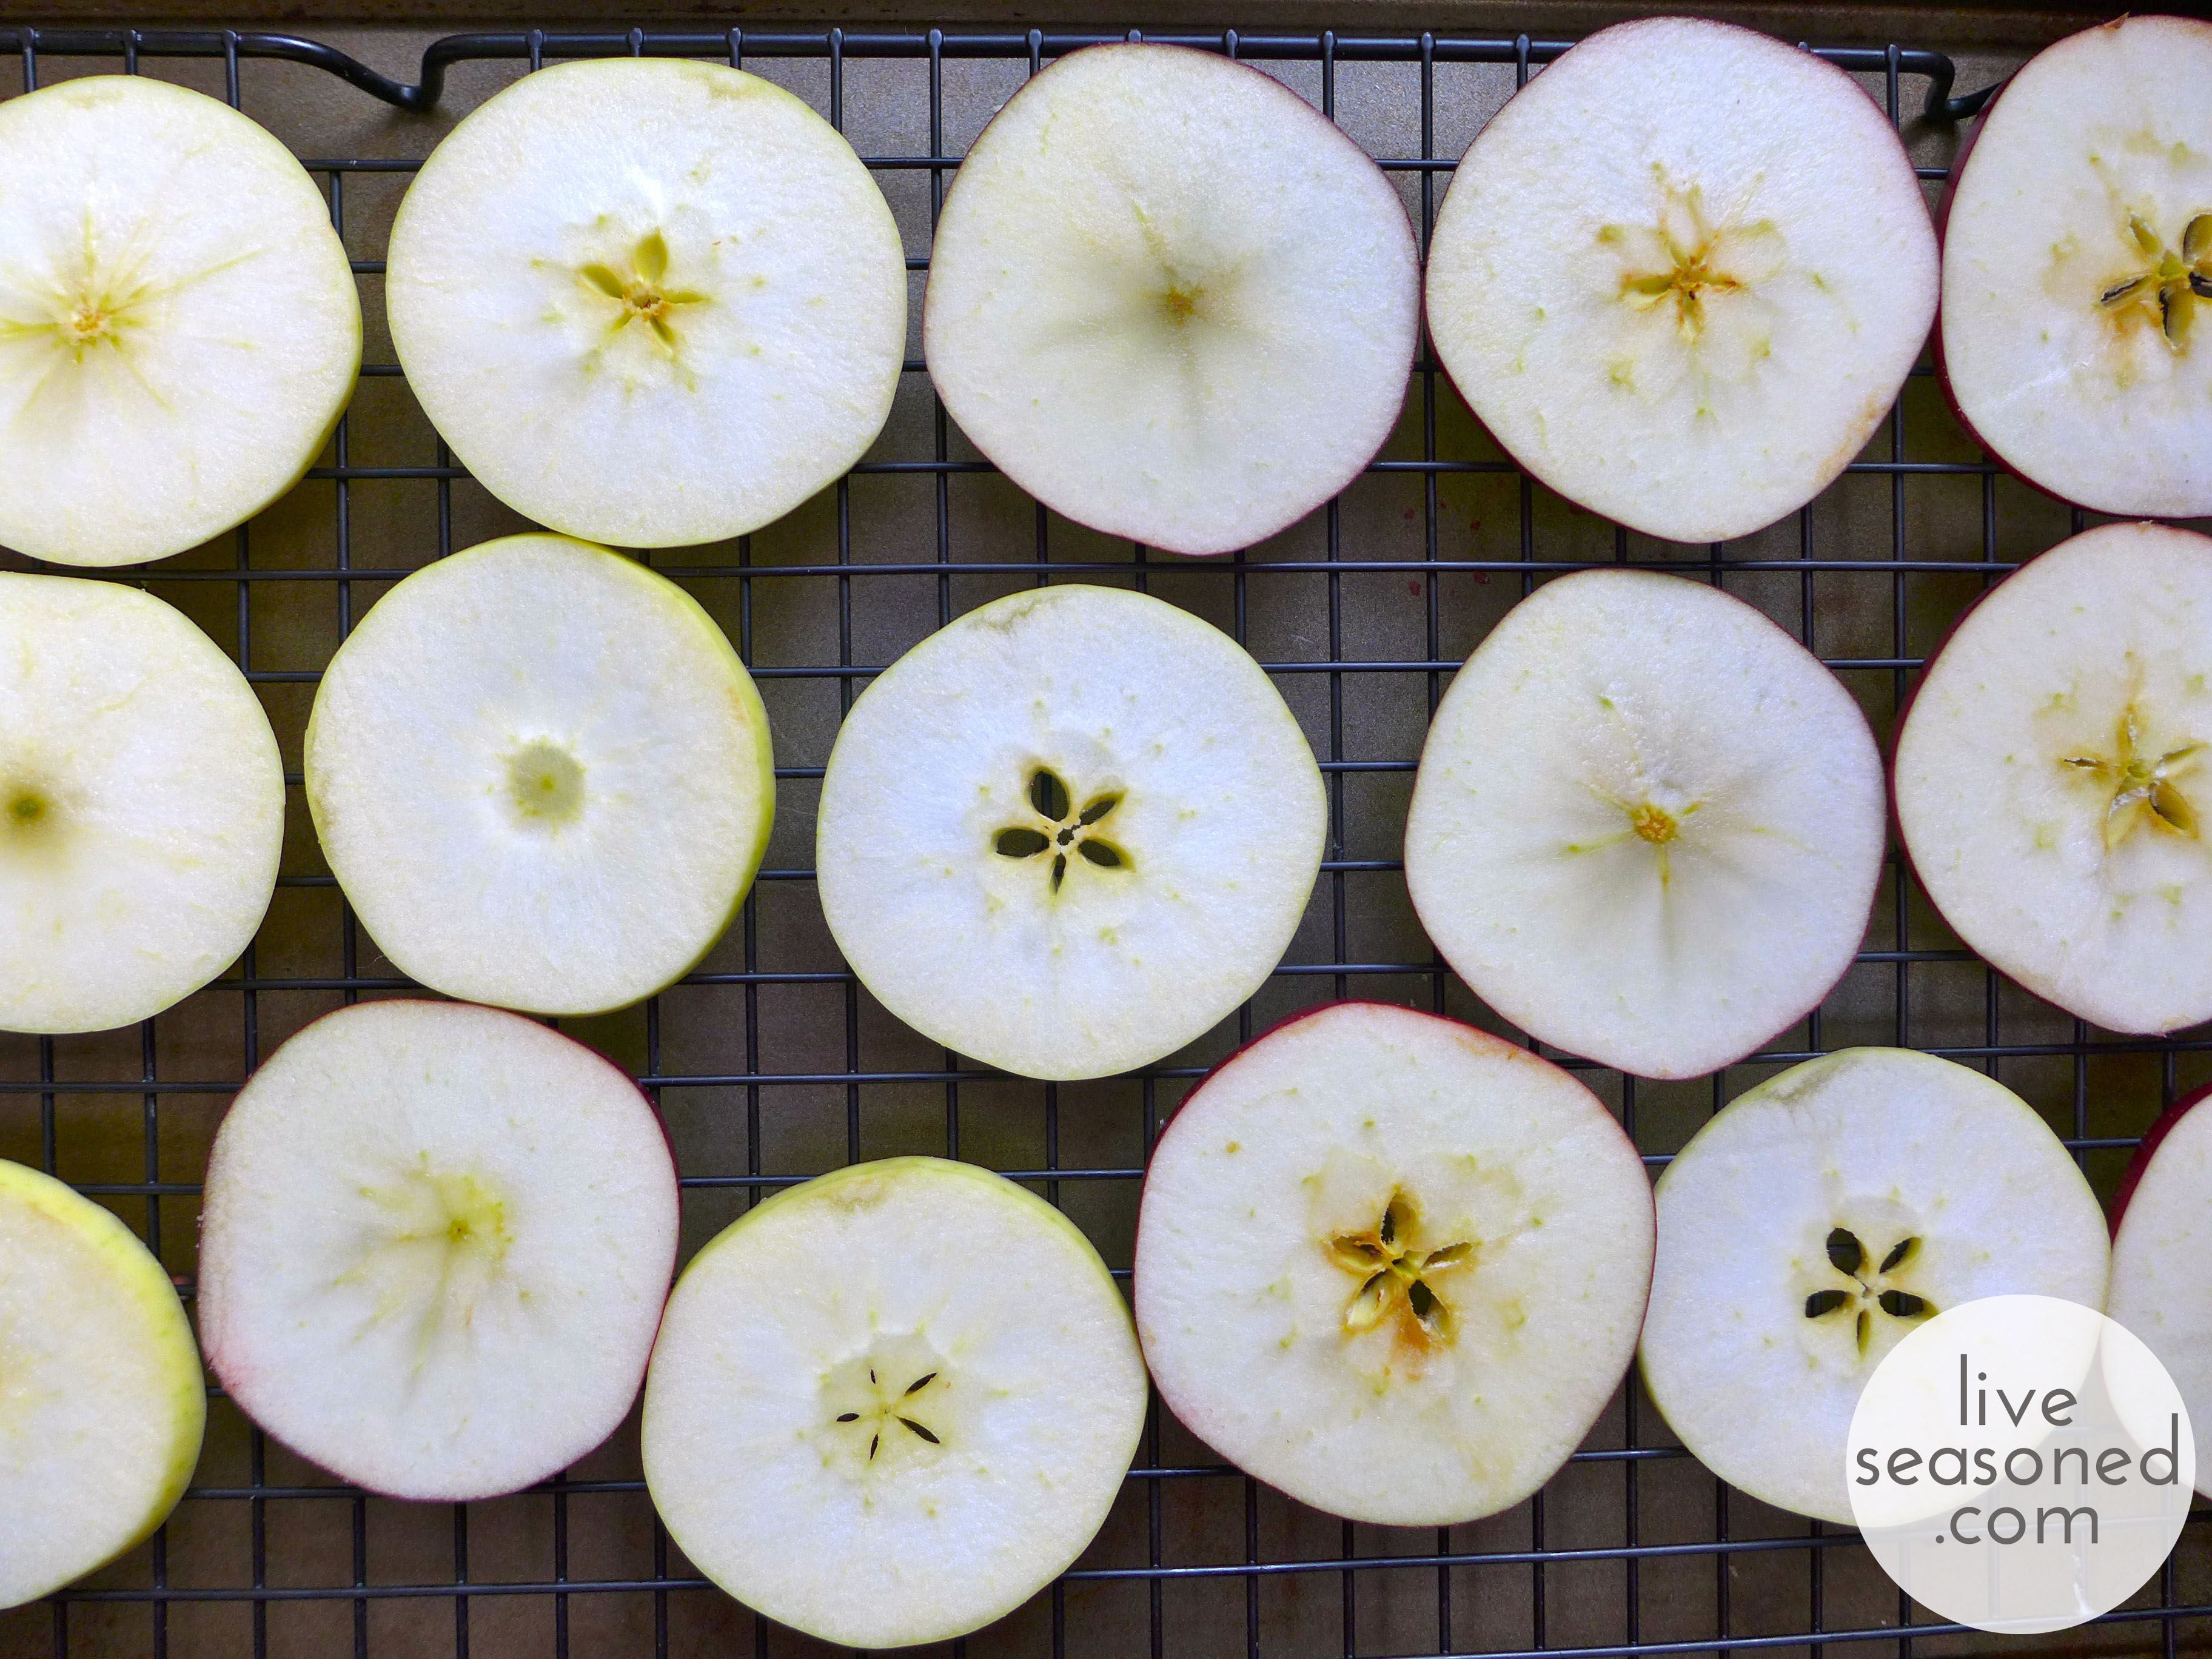
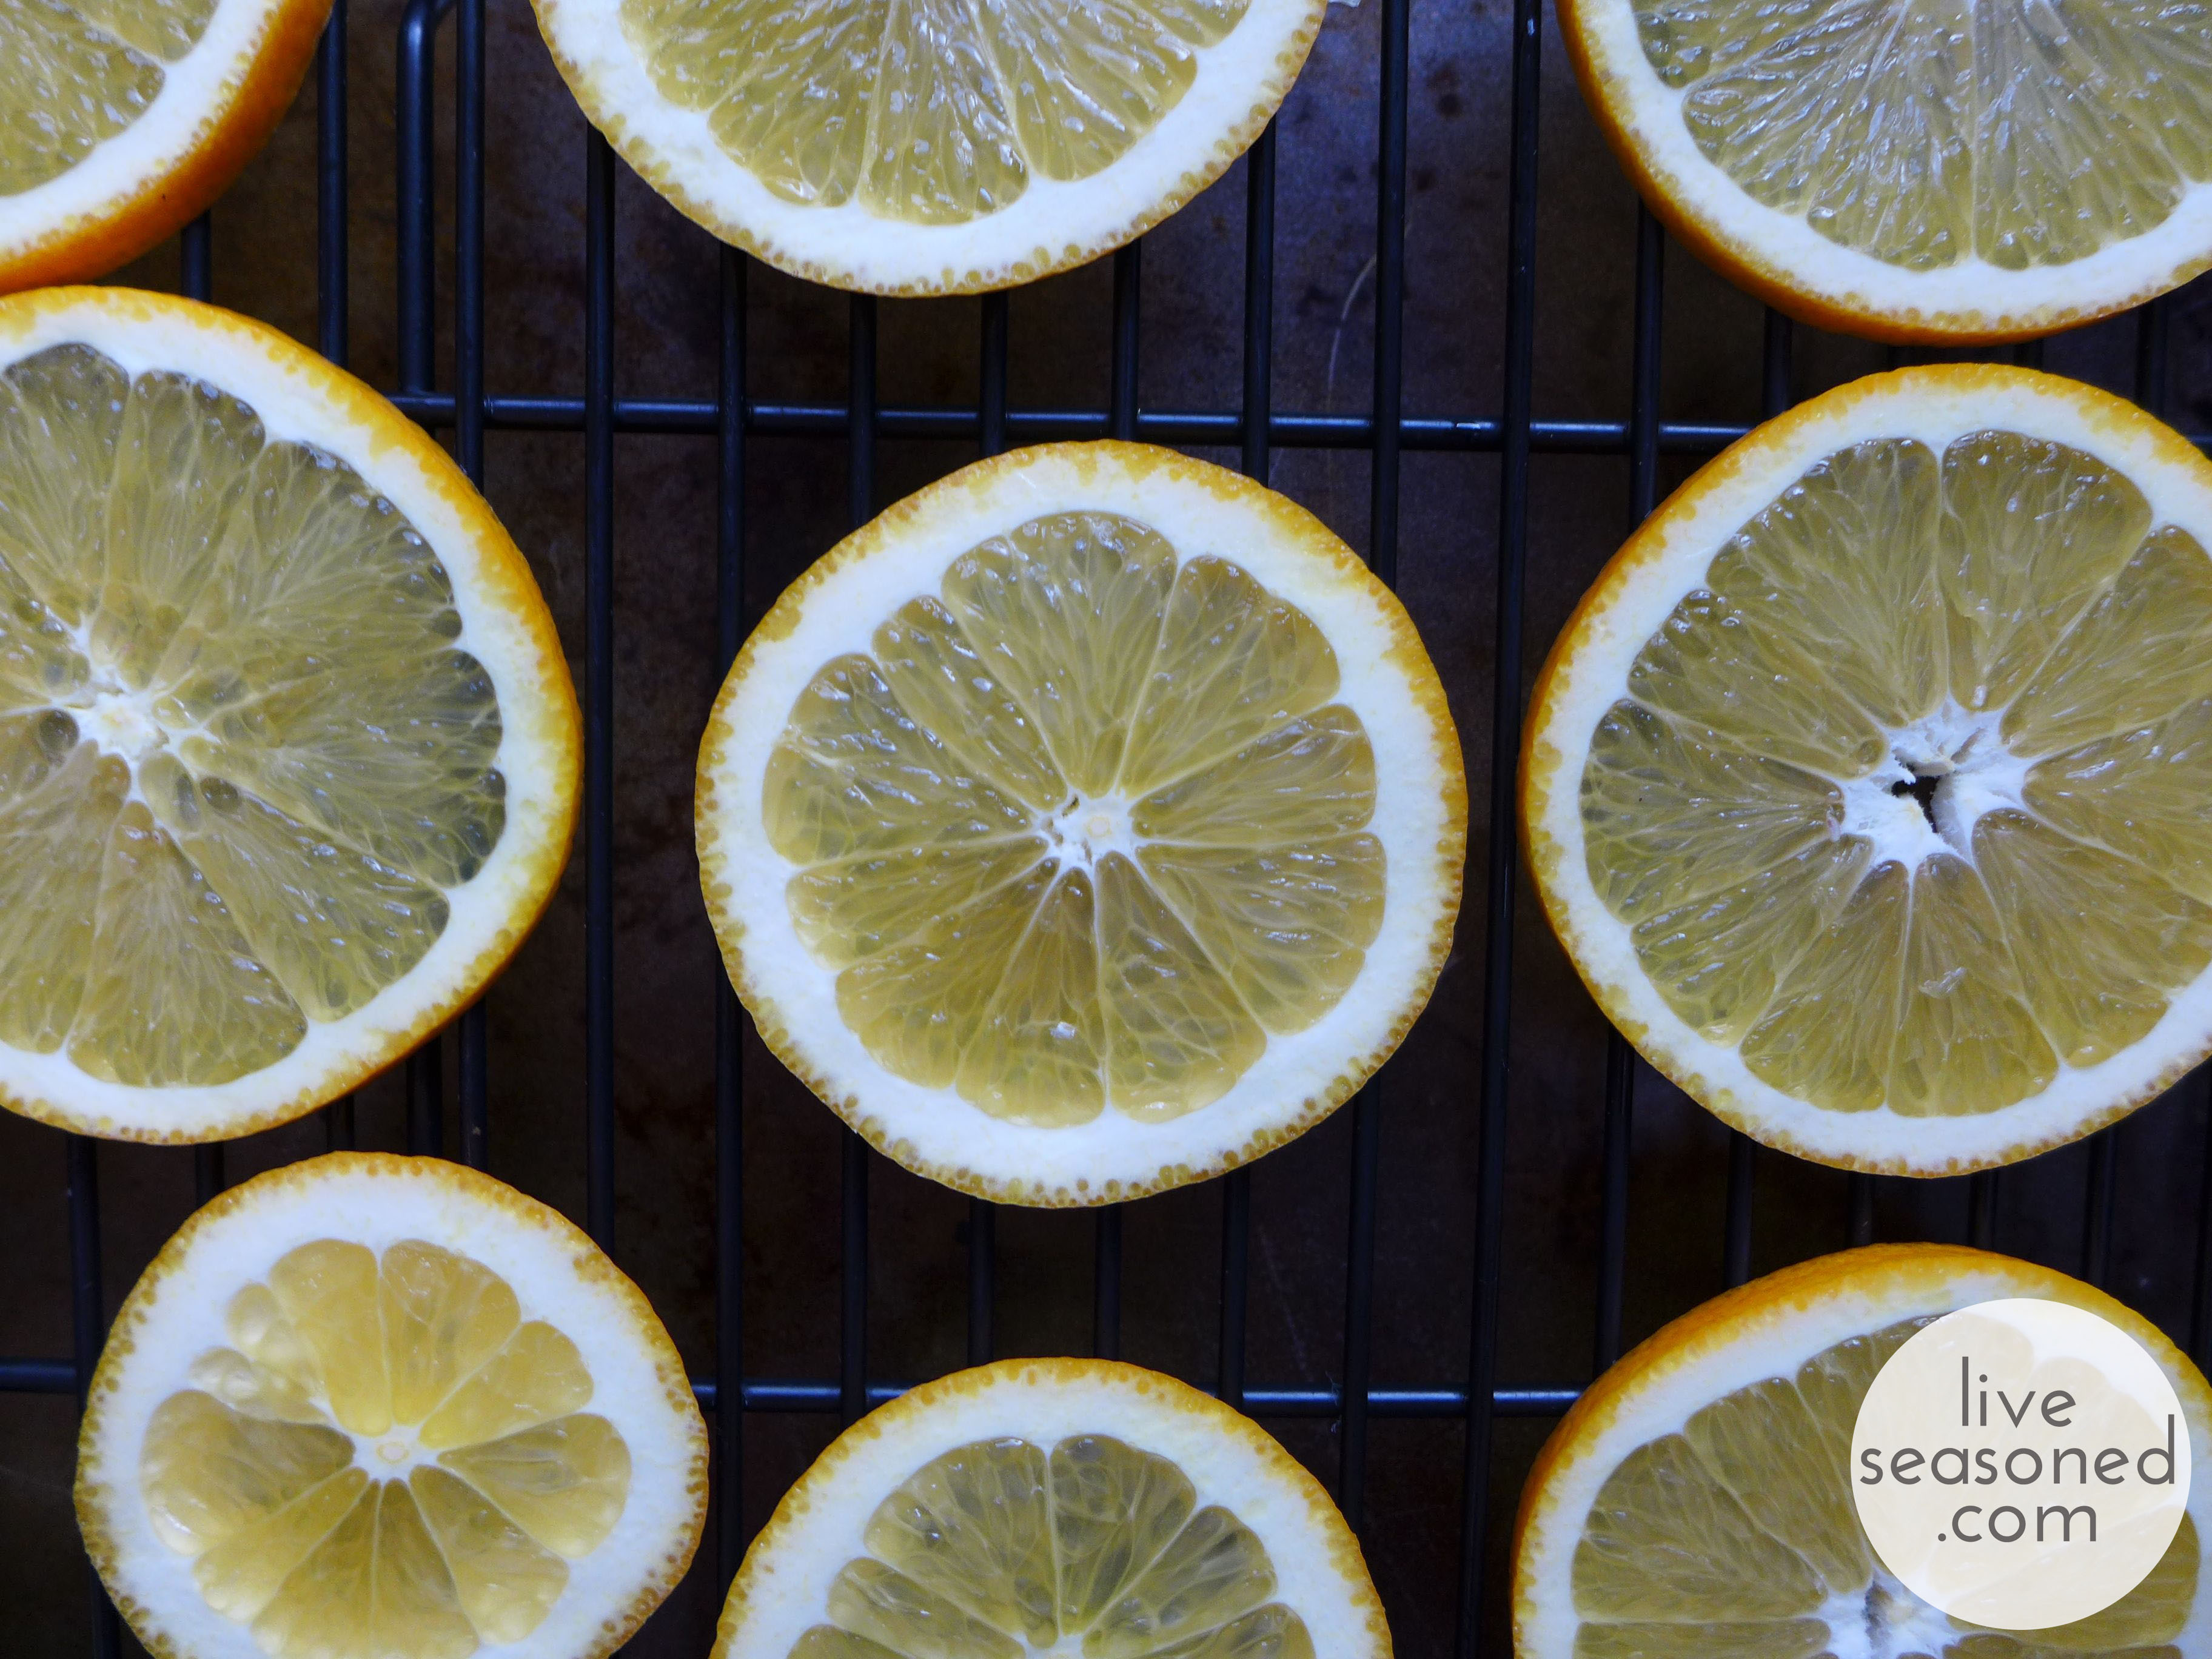
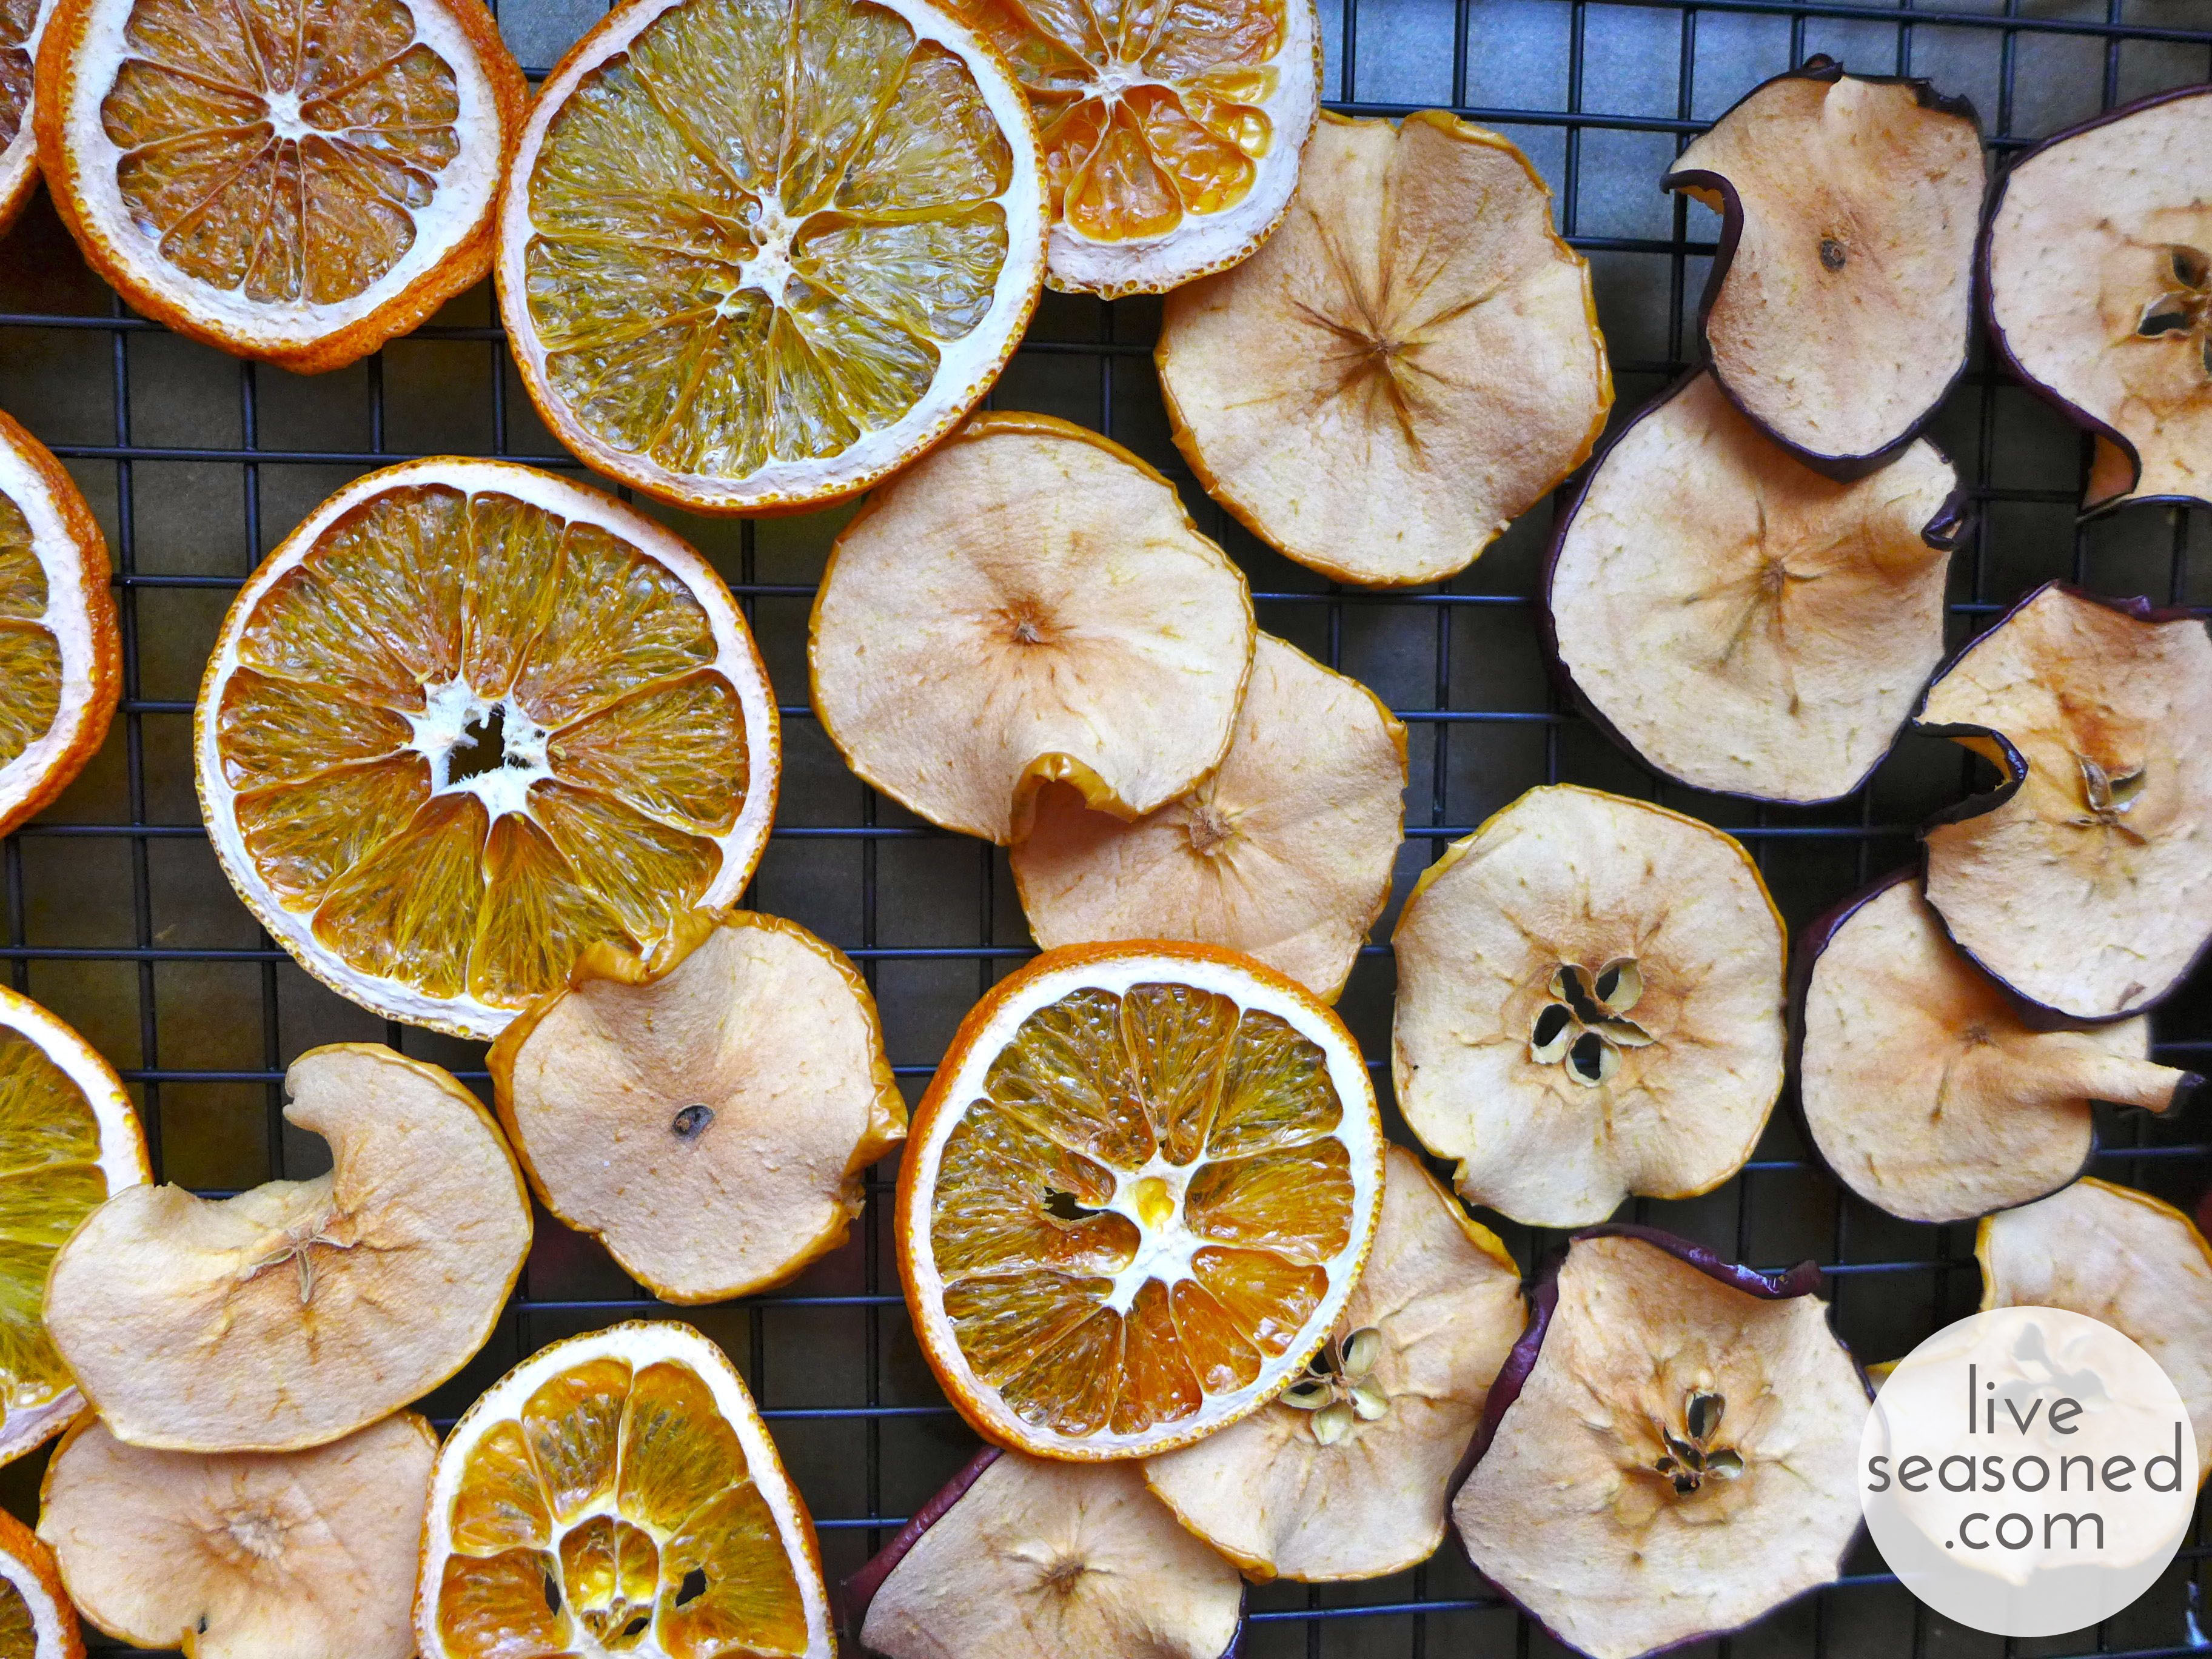
I began the project by slicing and drying three pieces of fruit: red and gold delicious apples and a seedless navel orange. The fruit were sliced into quarter inch discs. Sharpening your knife will go a long way towards helping you make even slices with nice smooth surfaces. You’ll find it difficult to cut through the seeded area of the apples, but my advice is to keep your knife horizontal (rather than pushing the point or handle ends up and down) and to saw back and forth with even pressure.

liveseasoned_fall2014_fruitgarland1_wm


liveseasoned_fall2014_fruitgarland2_wm

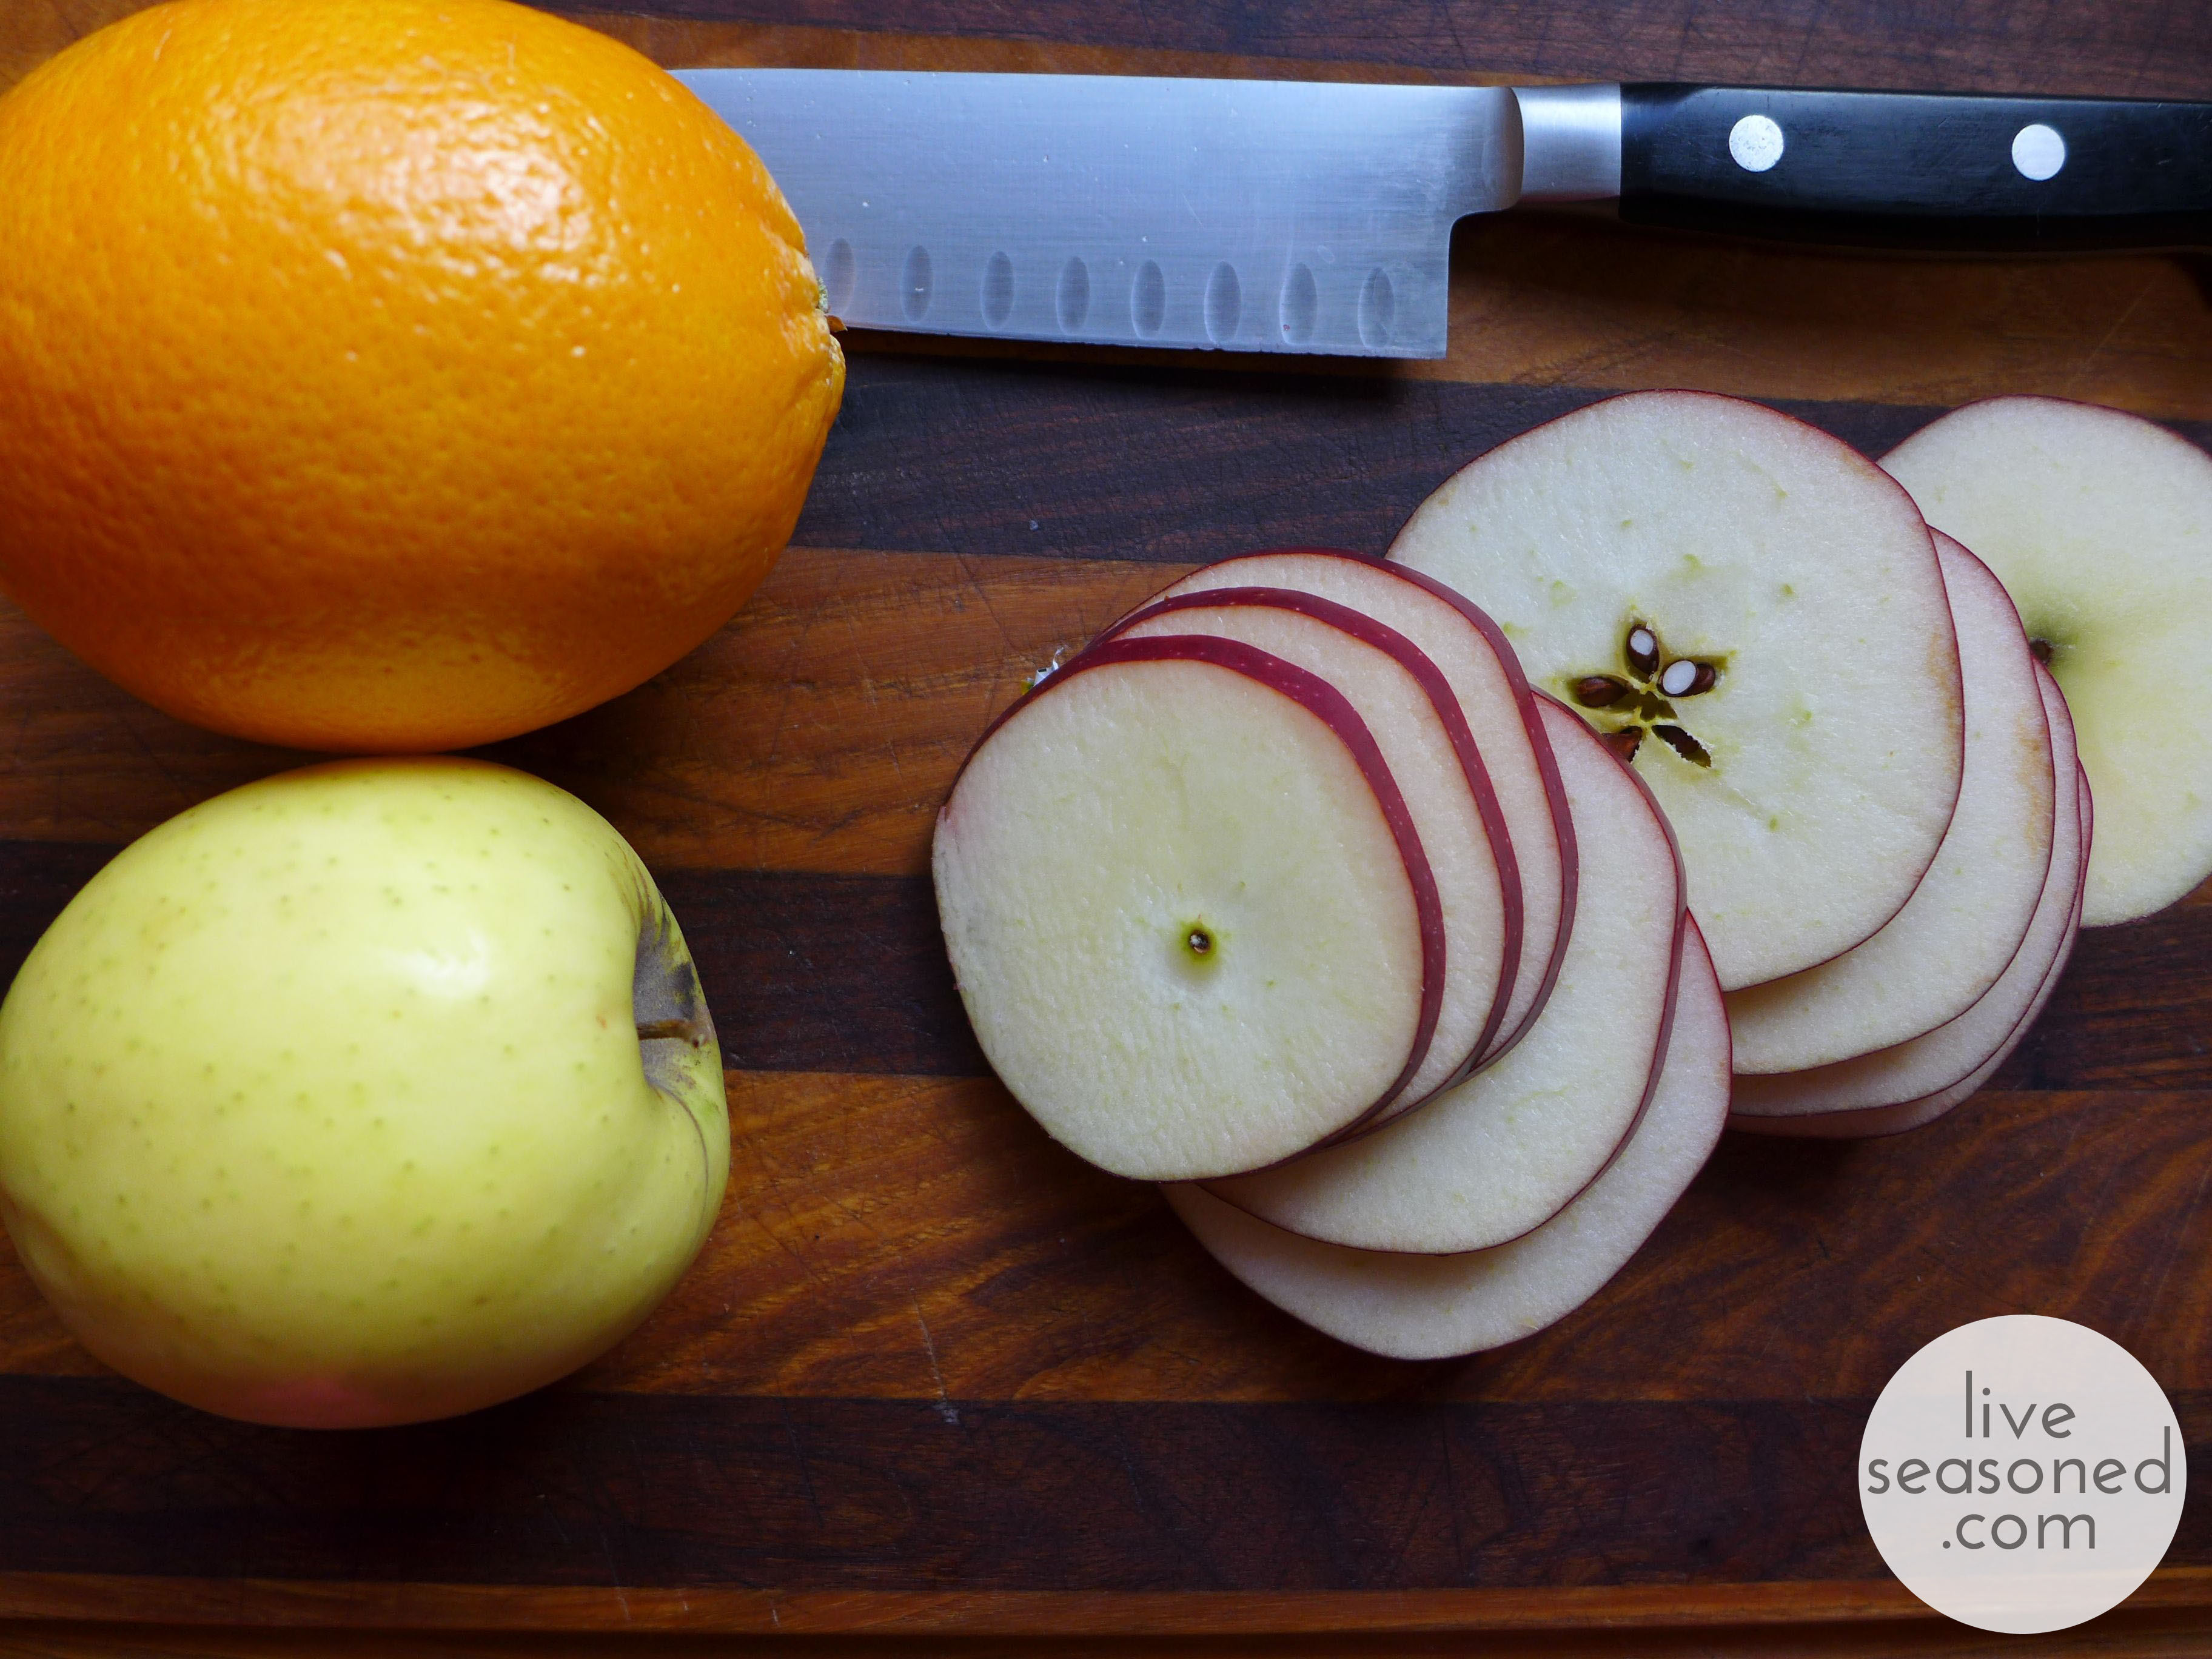
Once sliced, I removed all seeds and placed the pieces on cooling racks over cookie sheets for drying.  I then dried the fruit in a 200F oven for about 5-6 hours, flipping the slices twice to help minimize curling of the fruit.

liveseasoned_fall2014_fruitgarland3_wm
liveseasoned_fall2014_fruitgarland4_wm


liveseasoned_fall2014_fruitgarland5_wm

The Beads

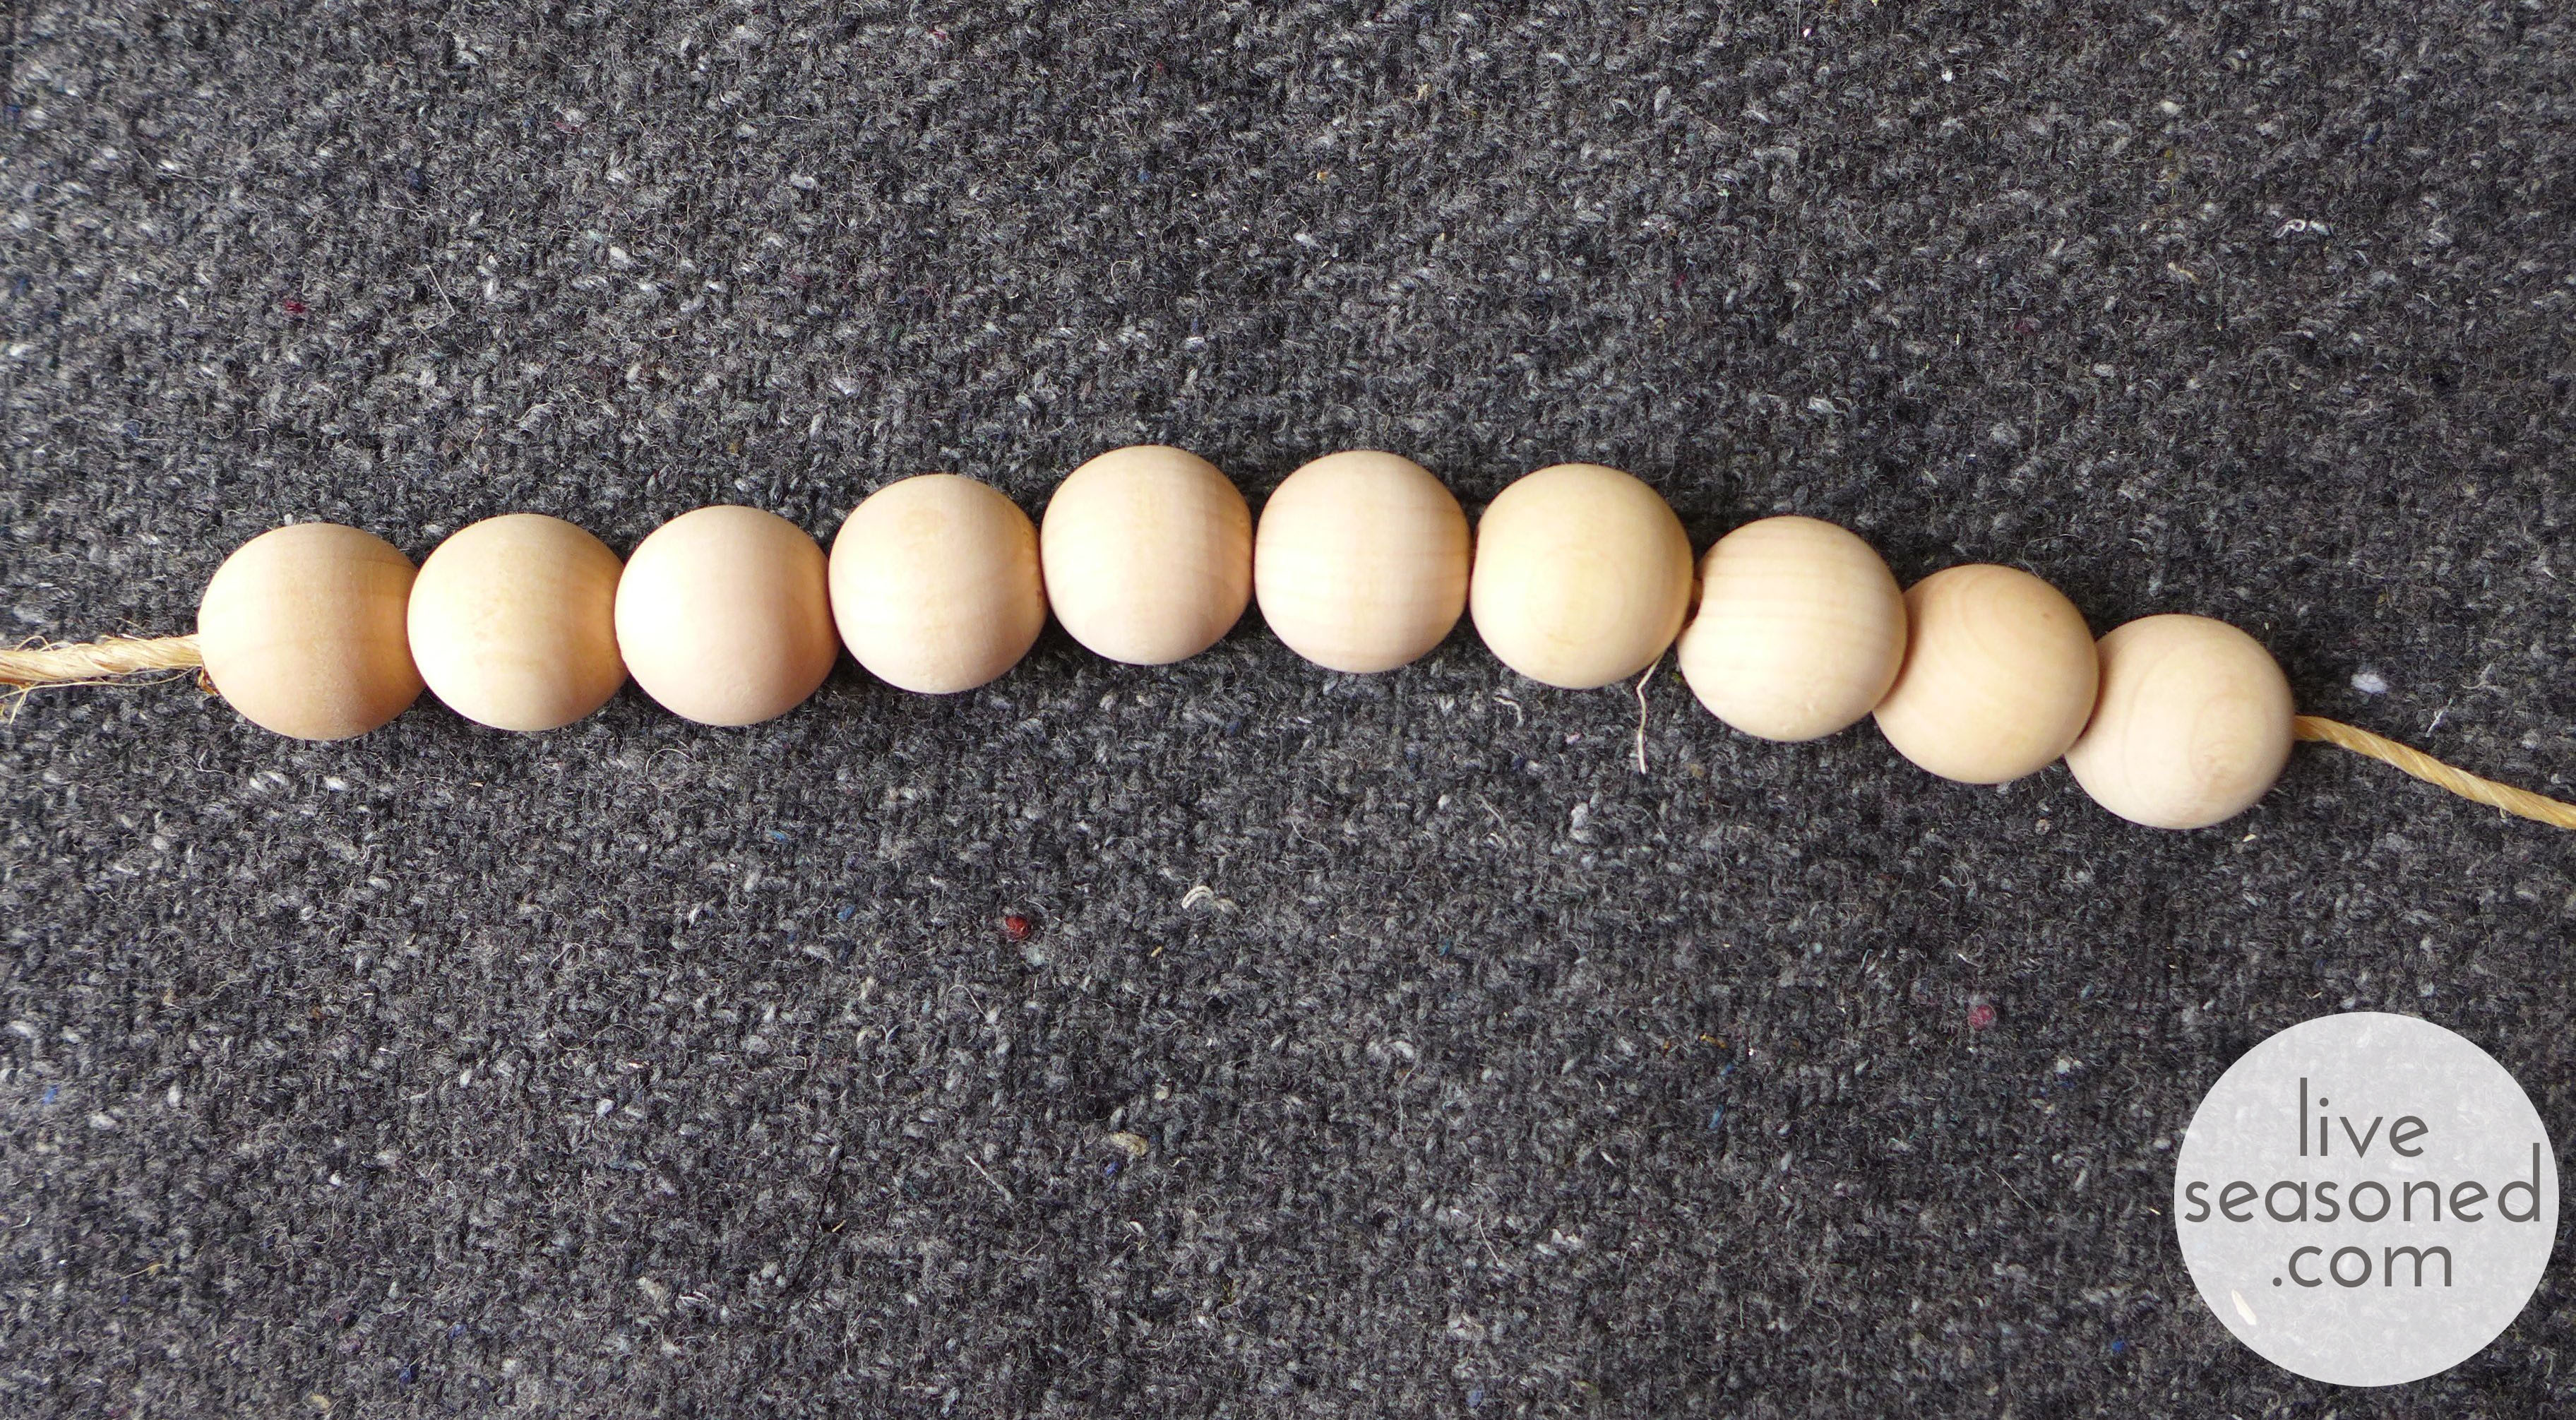
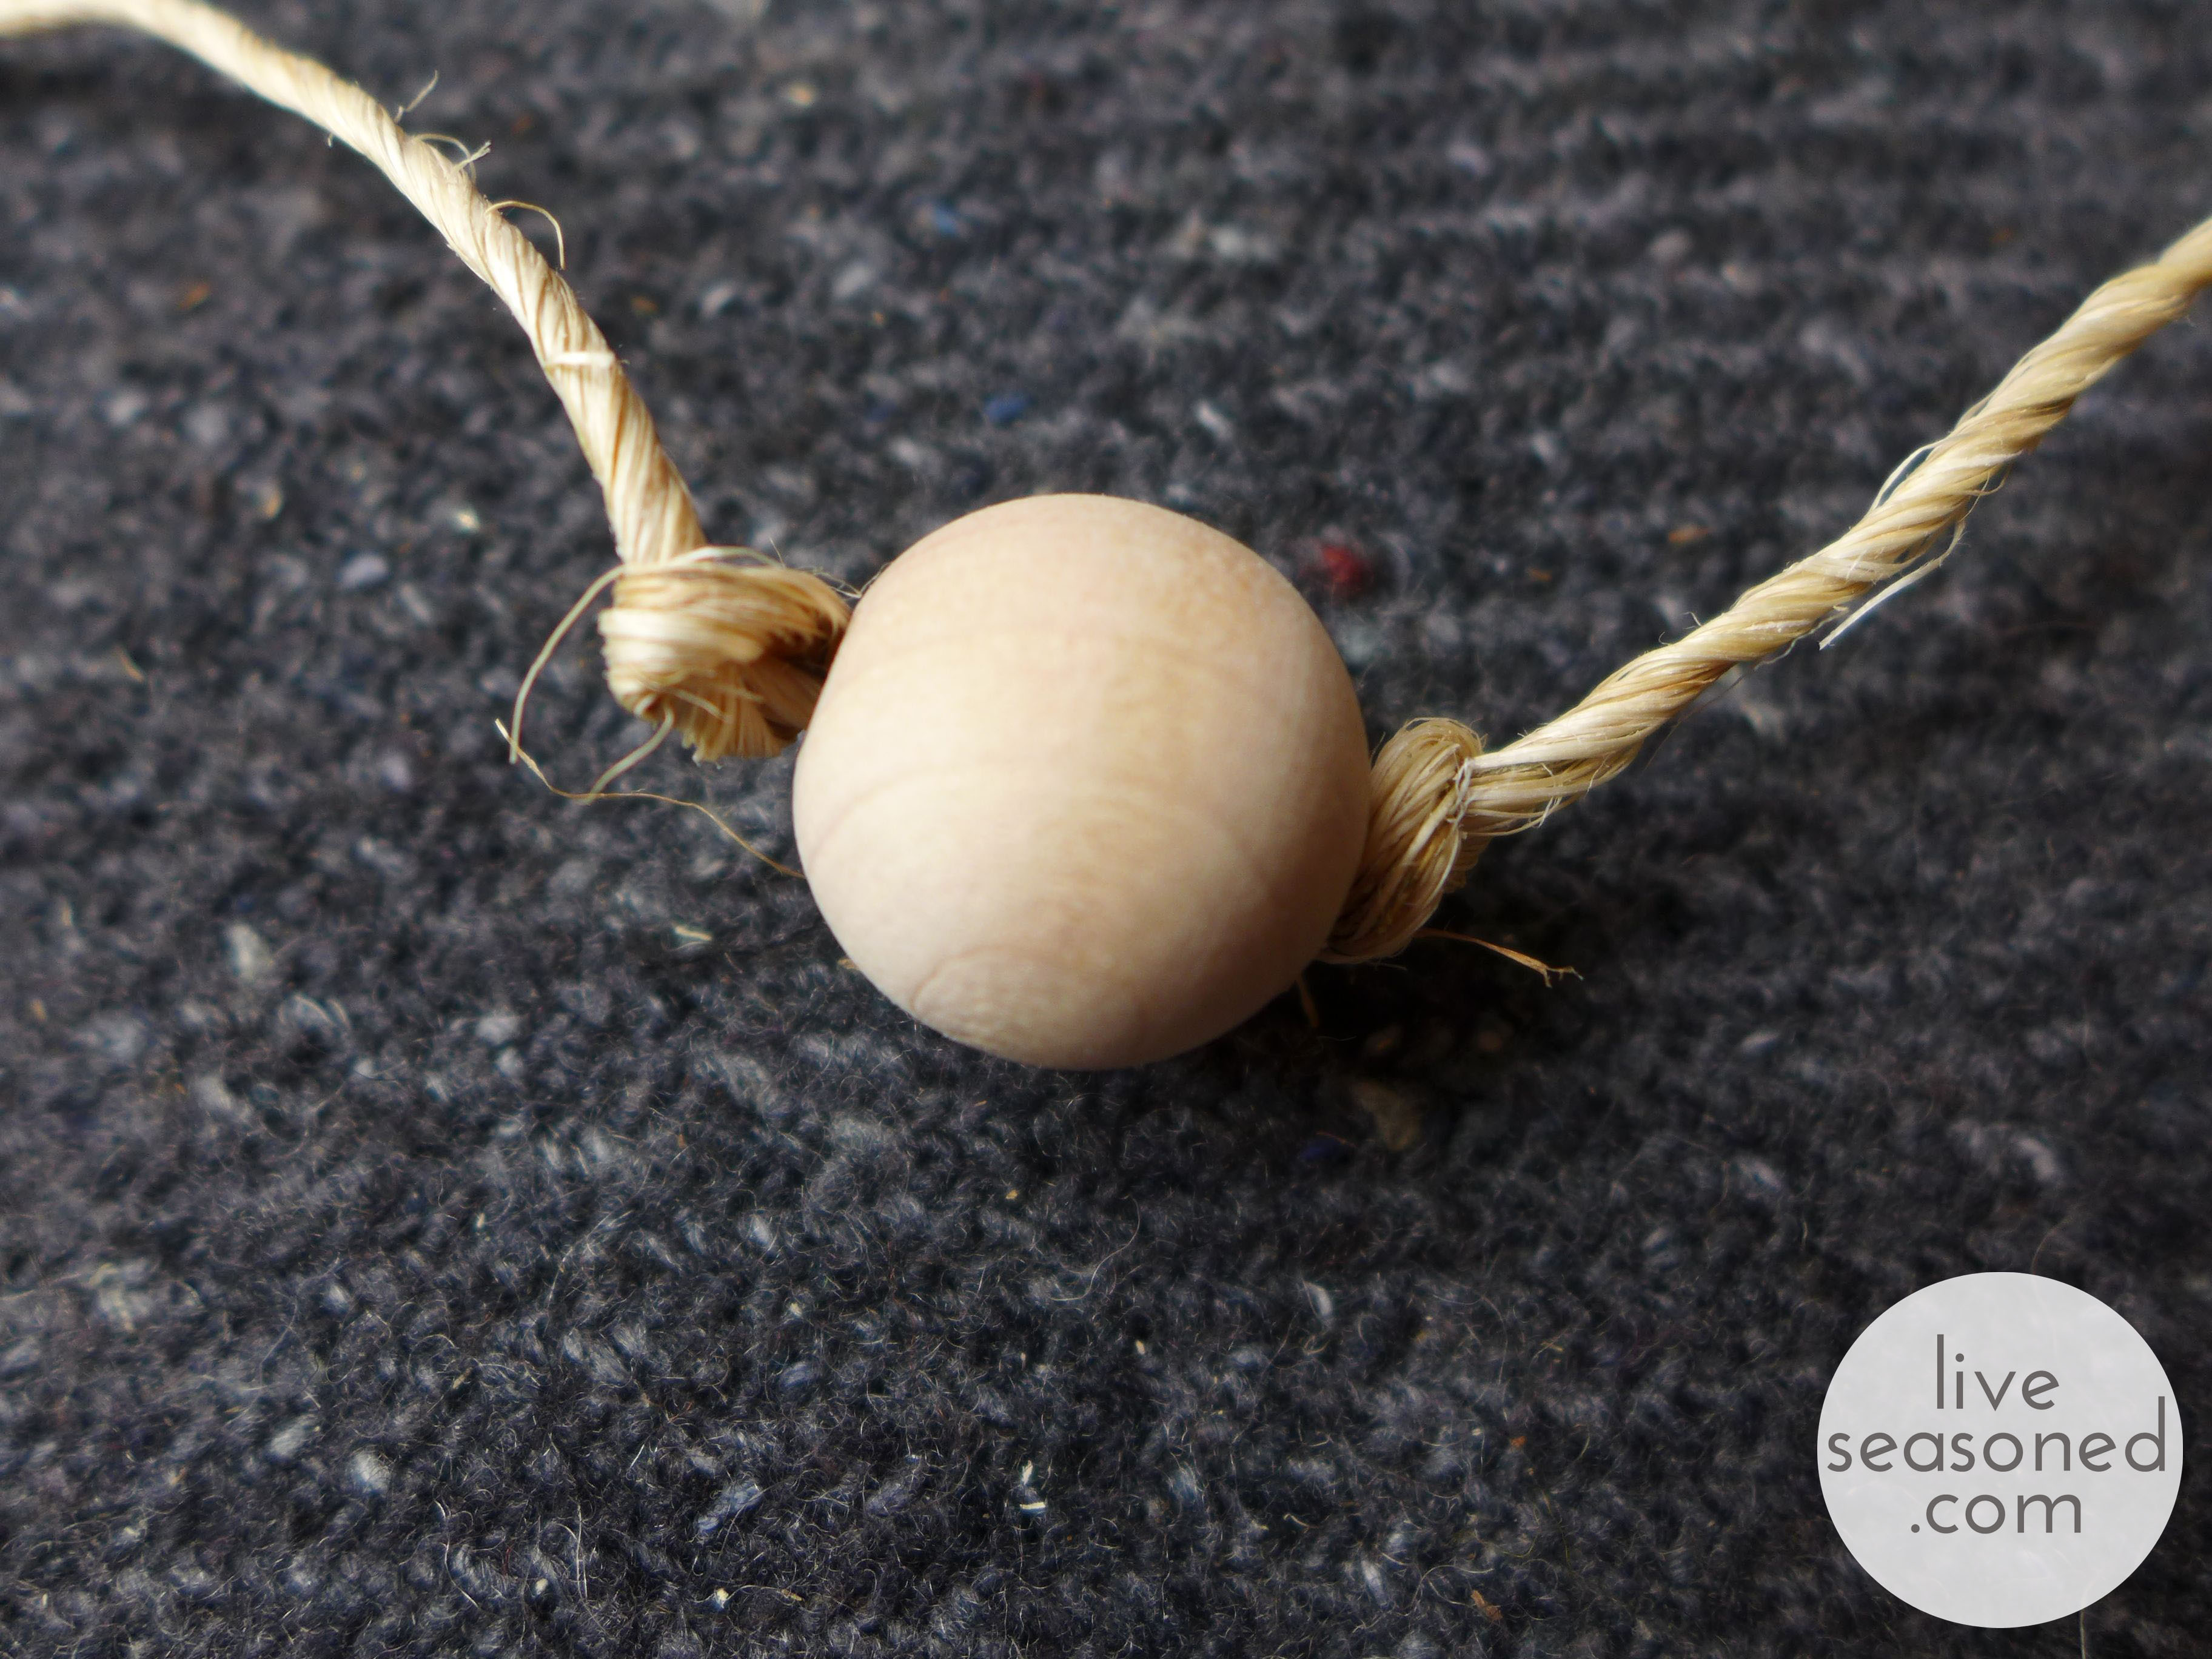
In addition to the fruit, I wanted to add a few other textures and colors to the garland. First up, some natural wooden beads. I bought a 20-pack of these beads at Joann’s. Once home I thought about painting these, but didn’t have any craft paint, so decided to keep them natural and add color with a bit of yarn (something I have plenty of!).

liveseasoned_fall2014_fruitgarland11_wm

The Flowers

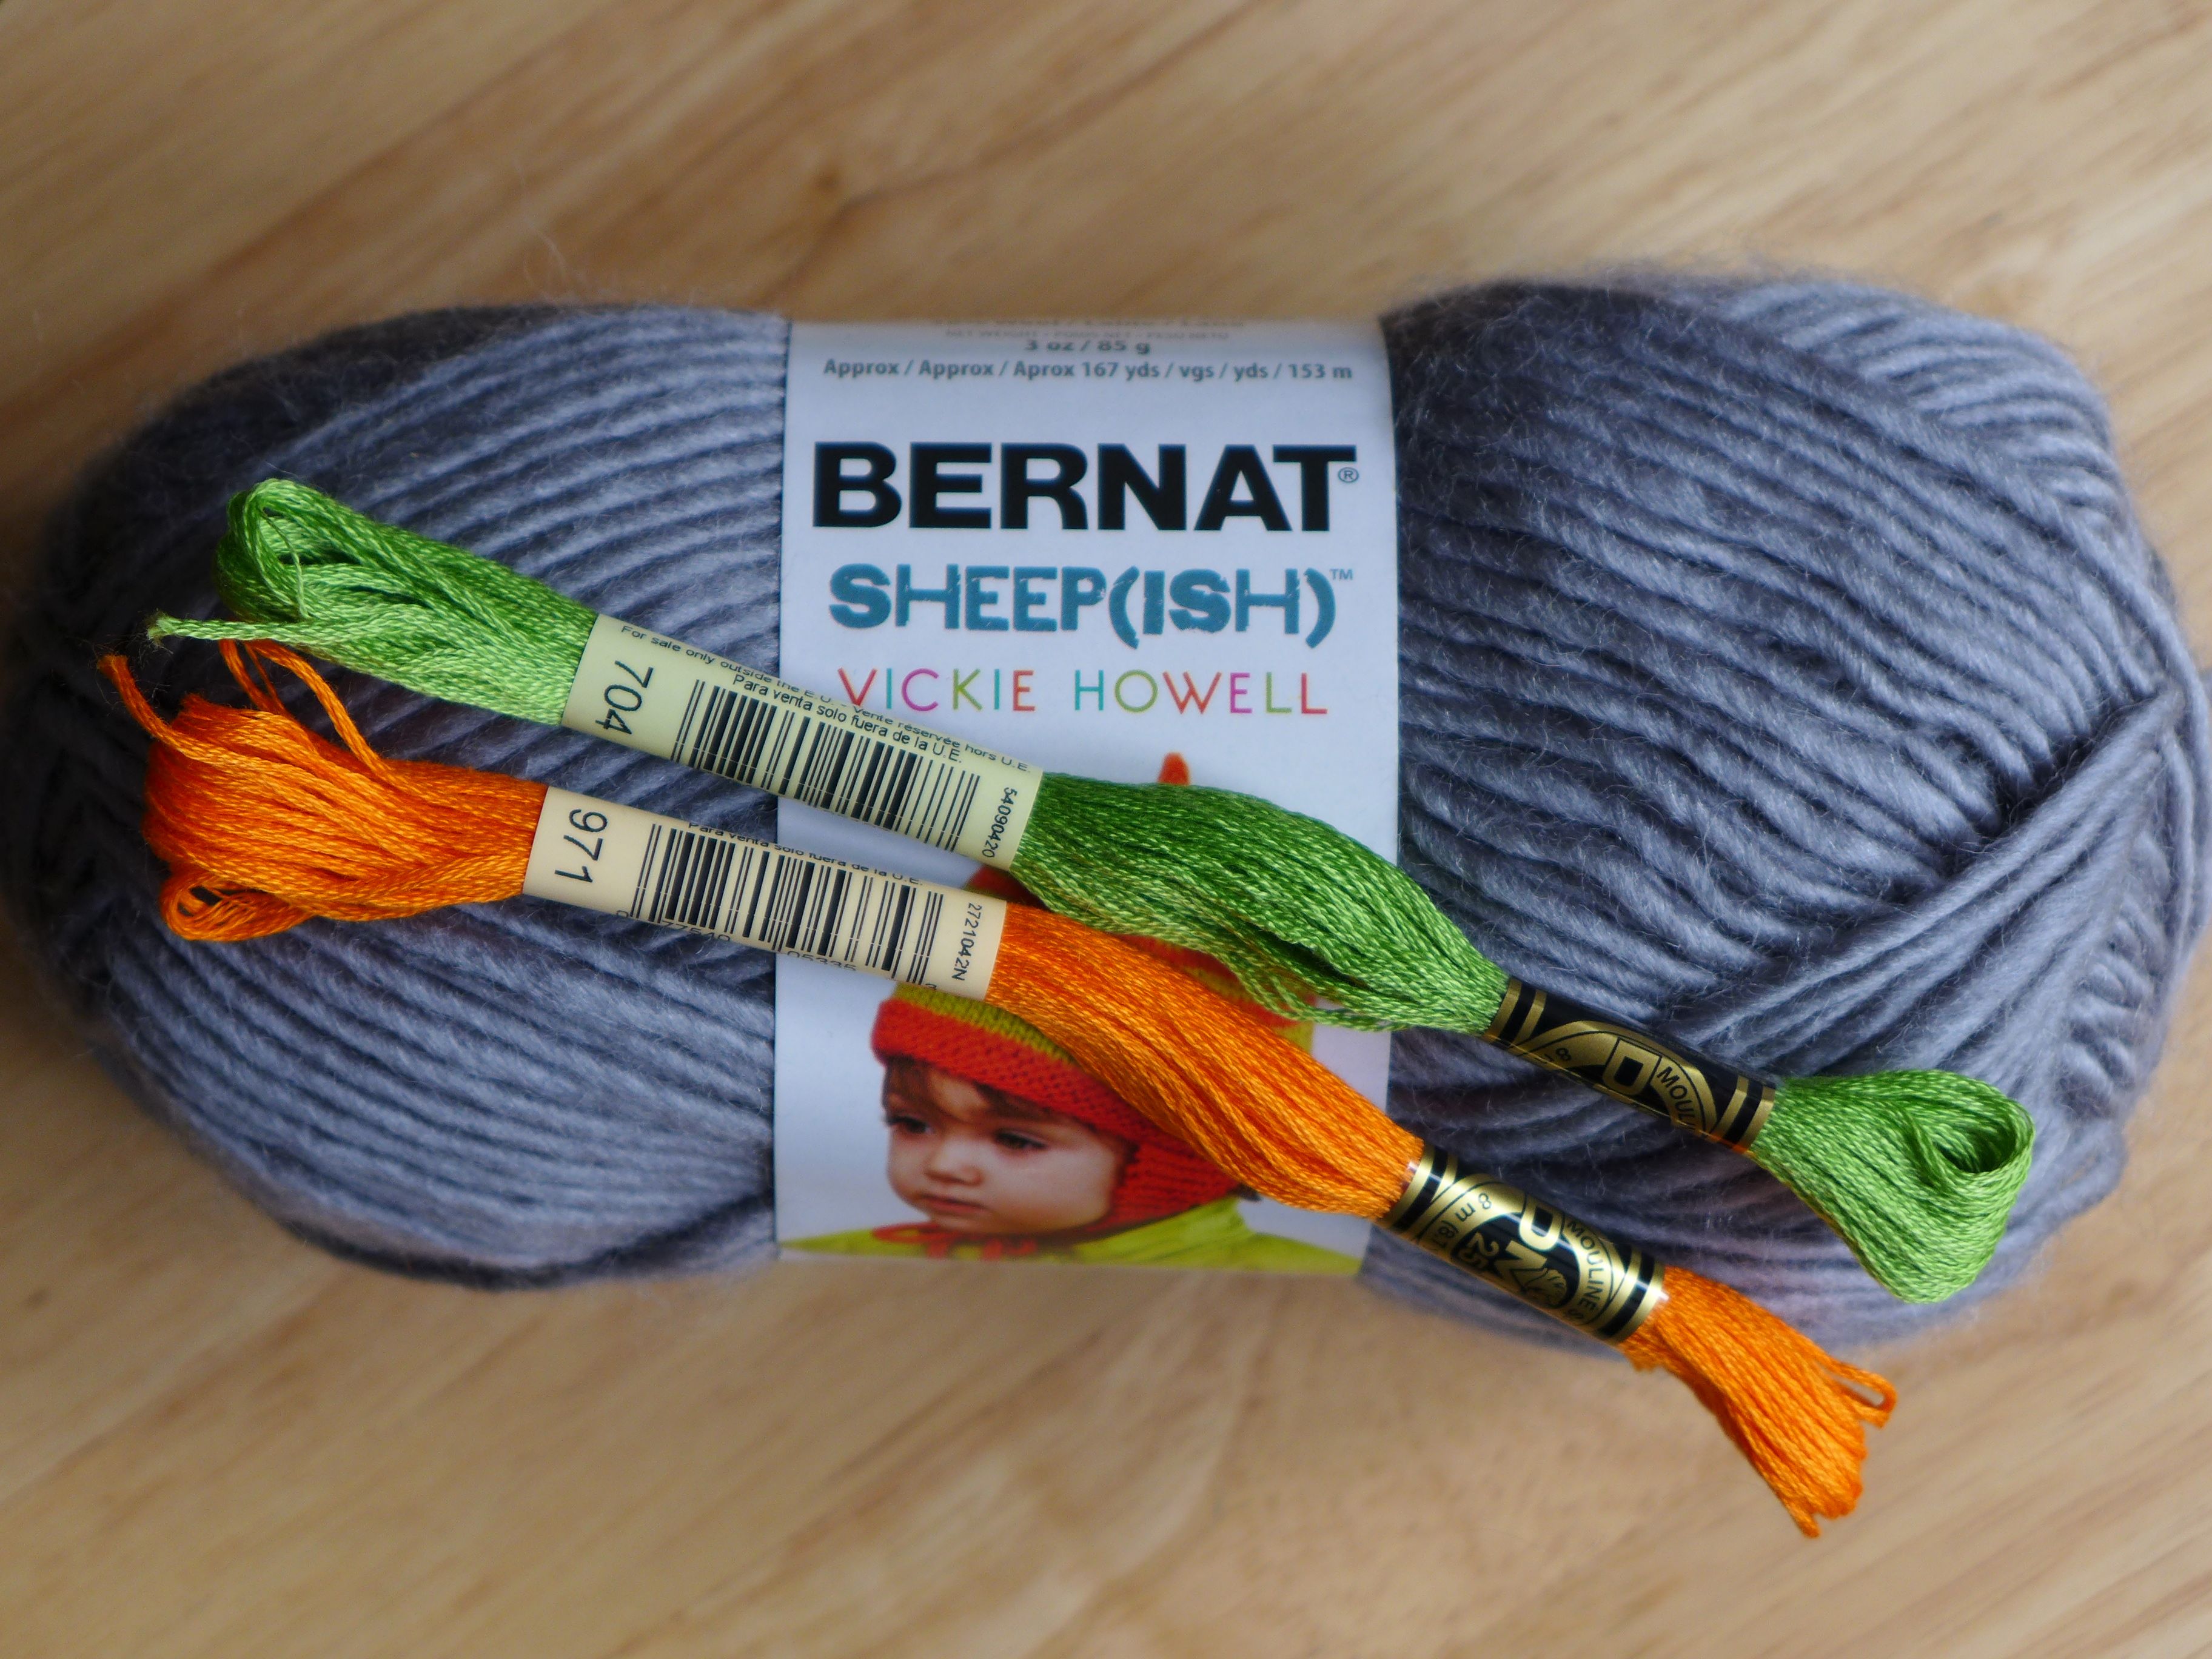
Using some rusty-red yarn, I made a few very simple flowers. I originally saw these flowers on Pinterest and made from twine. The link to that Pin was bad, but a quick Google search led me to this really helpful how-to video.

liveseasoned_fall2014_fruitgarland9_wm

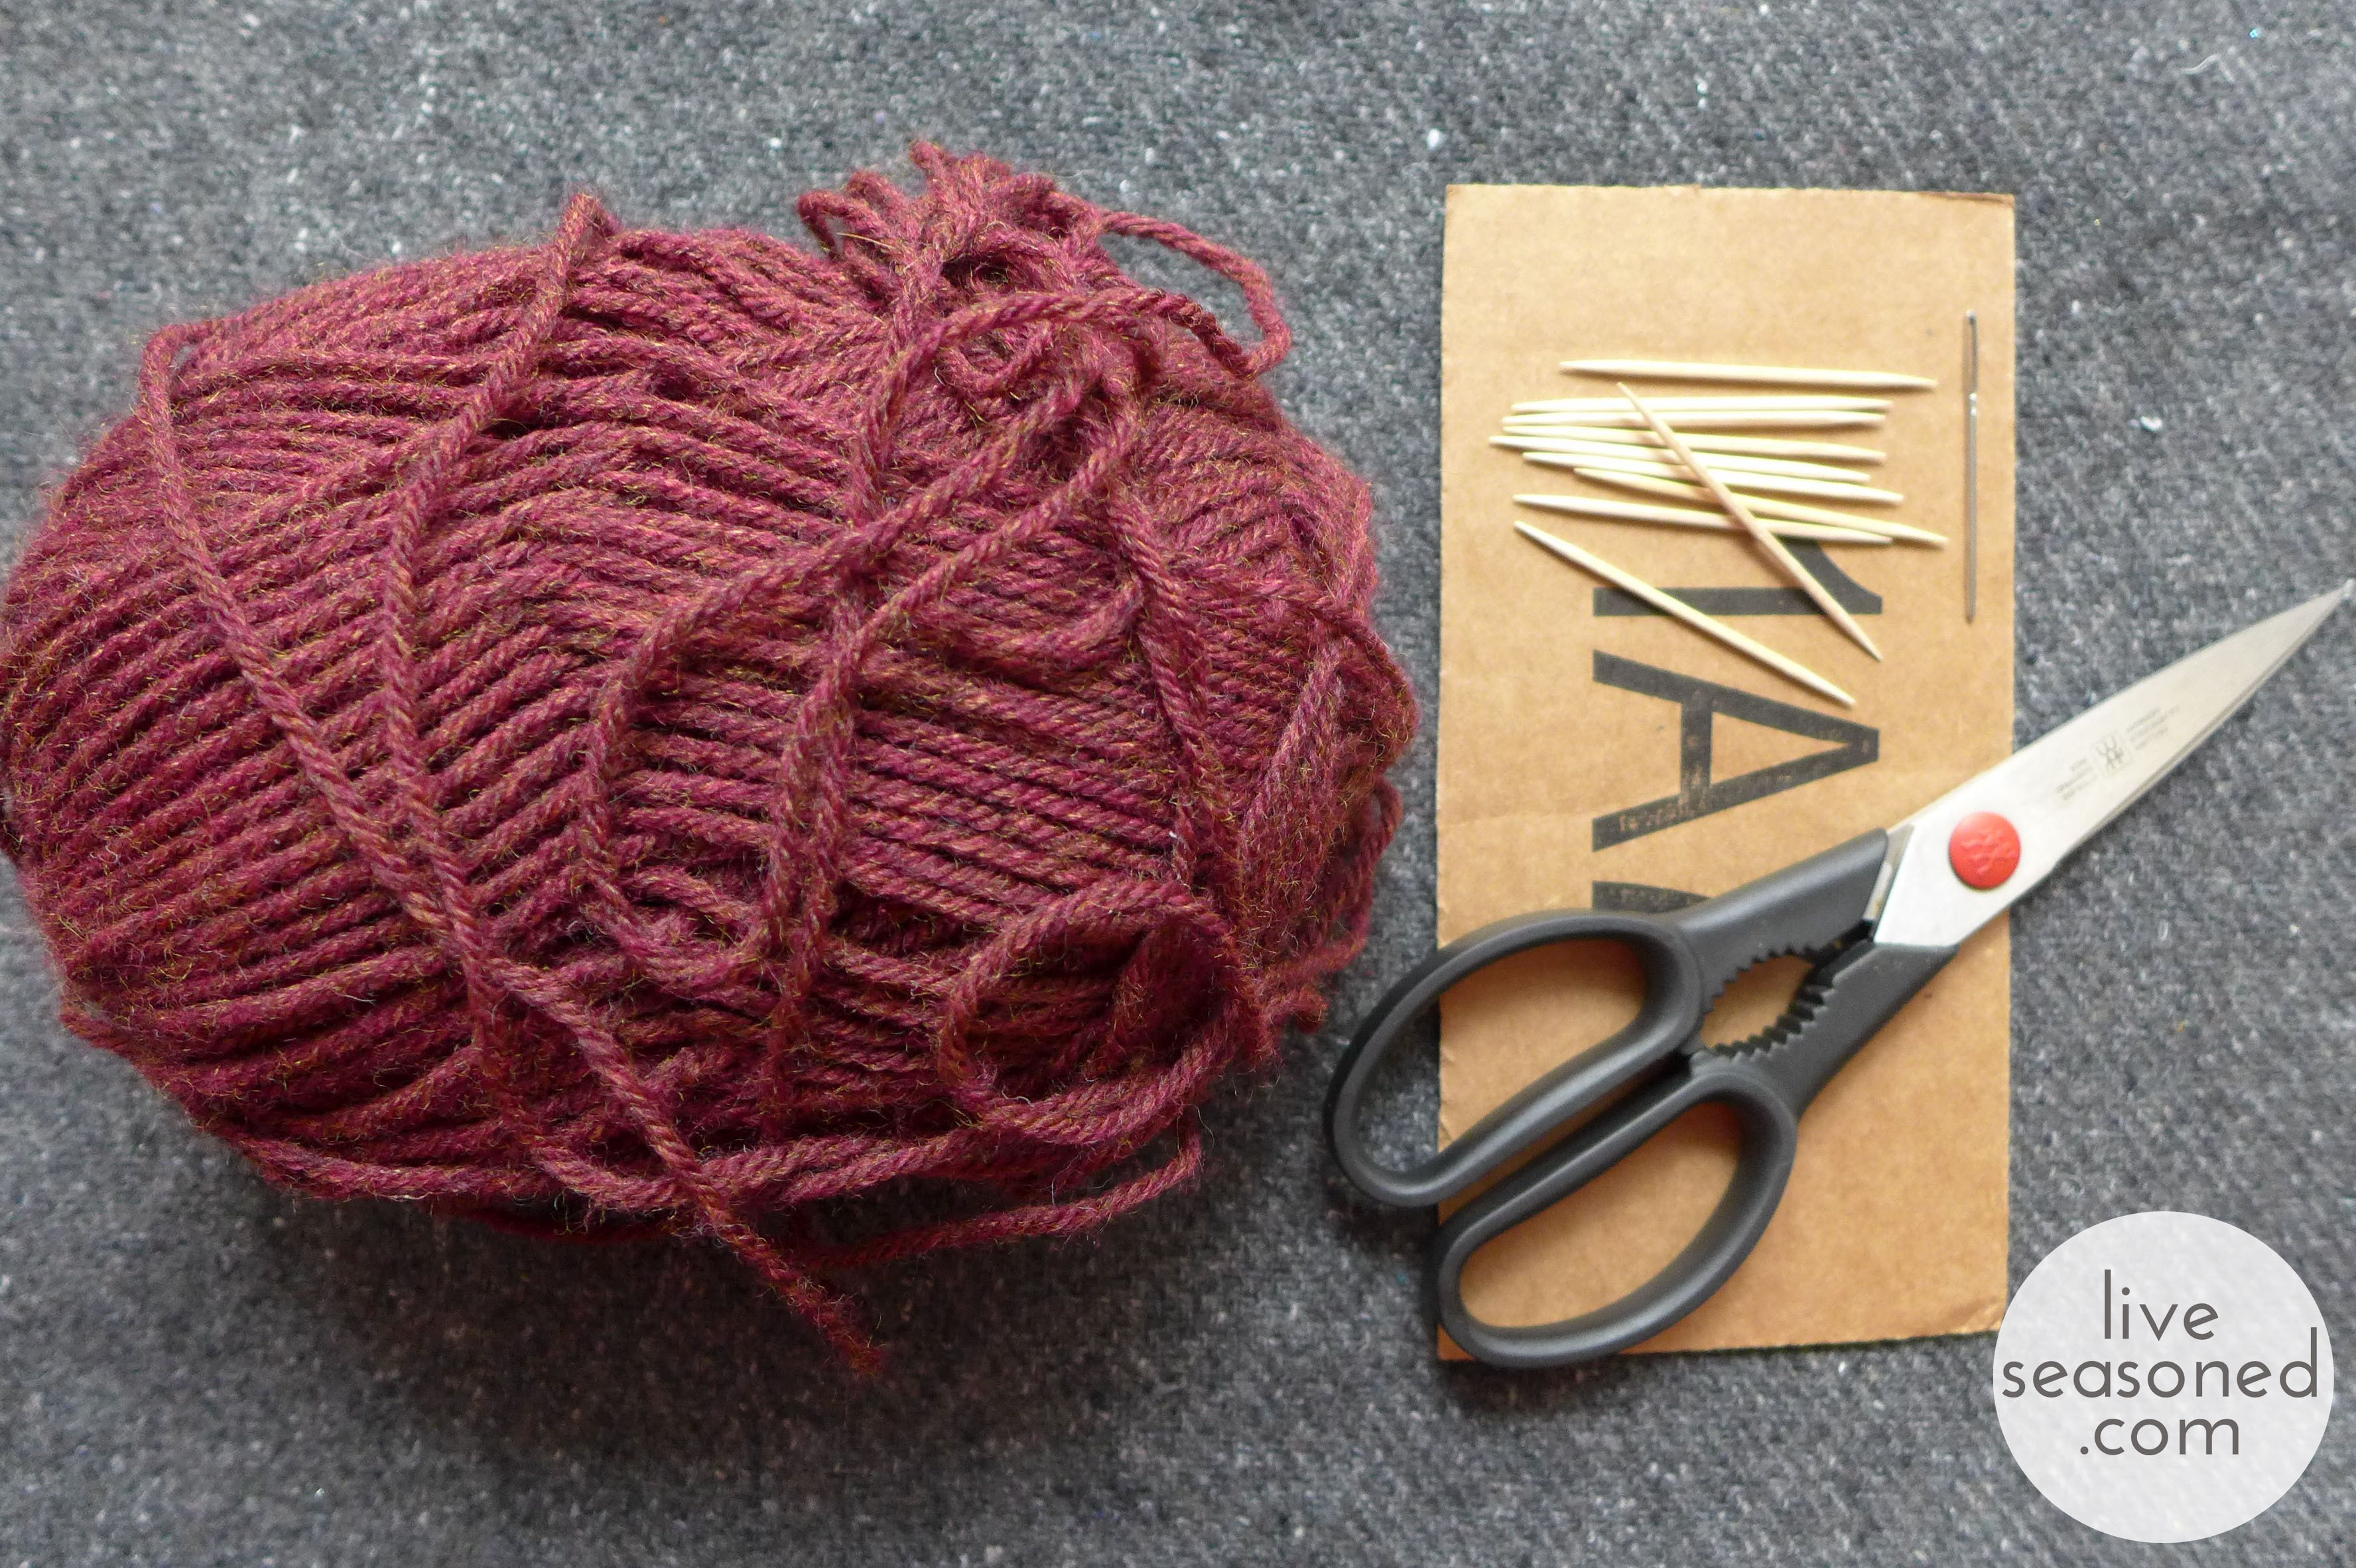
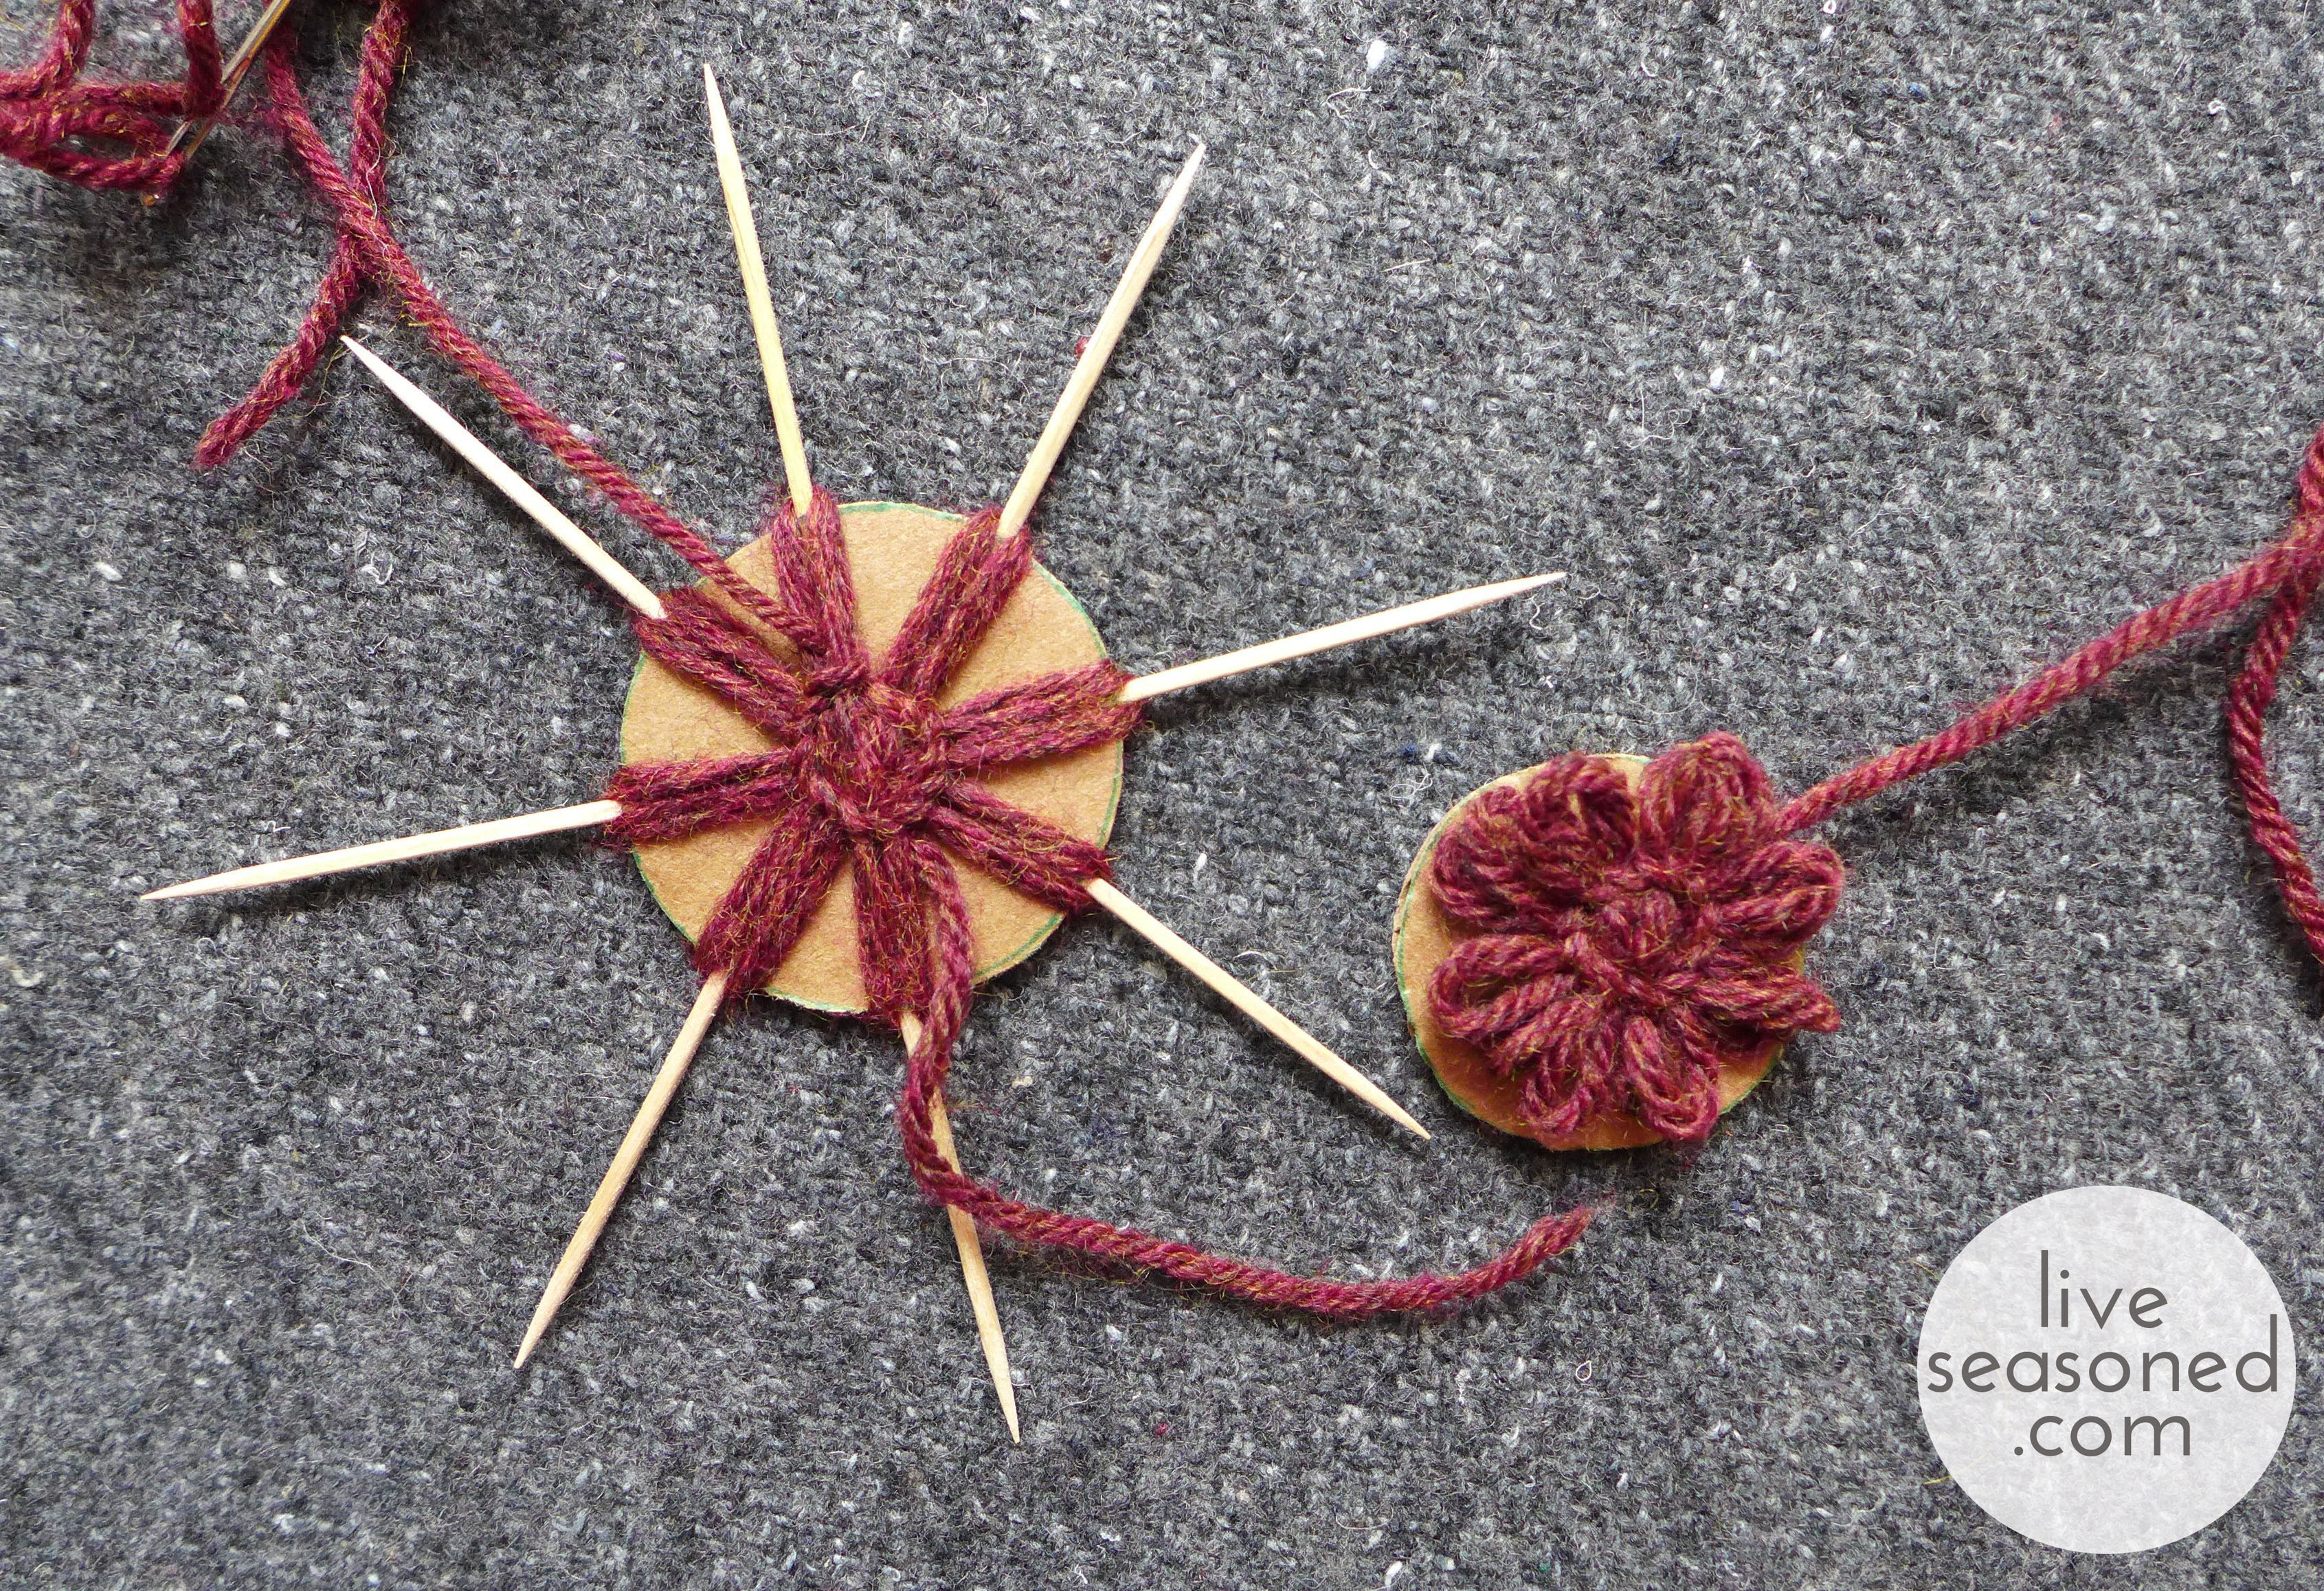
The only supplies you’ll need to make these are a piece of cardboard, yarn or twine, scissors, a yarn needle, and 8-12 toothpicks. If you assemble that, you’ll be able to make a flower right along with the video because she explains everything at a nice slow speed.

liveseasoned_fall2014_fruitgarland6_wm

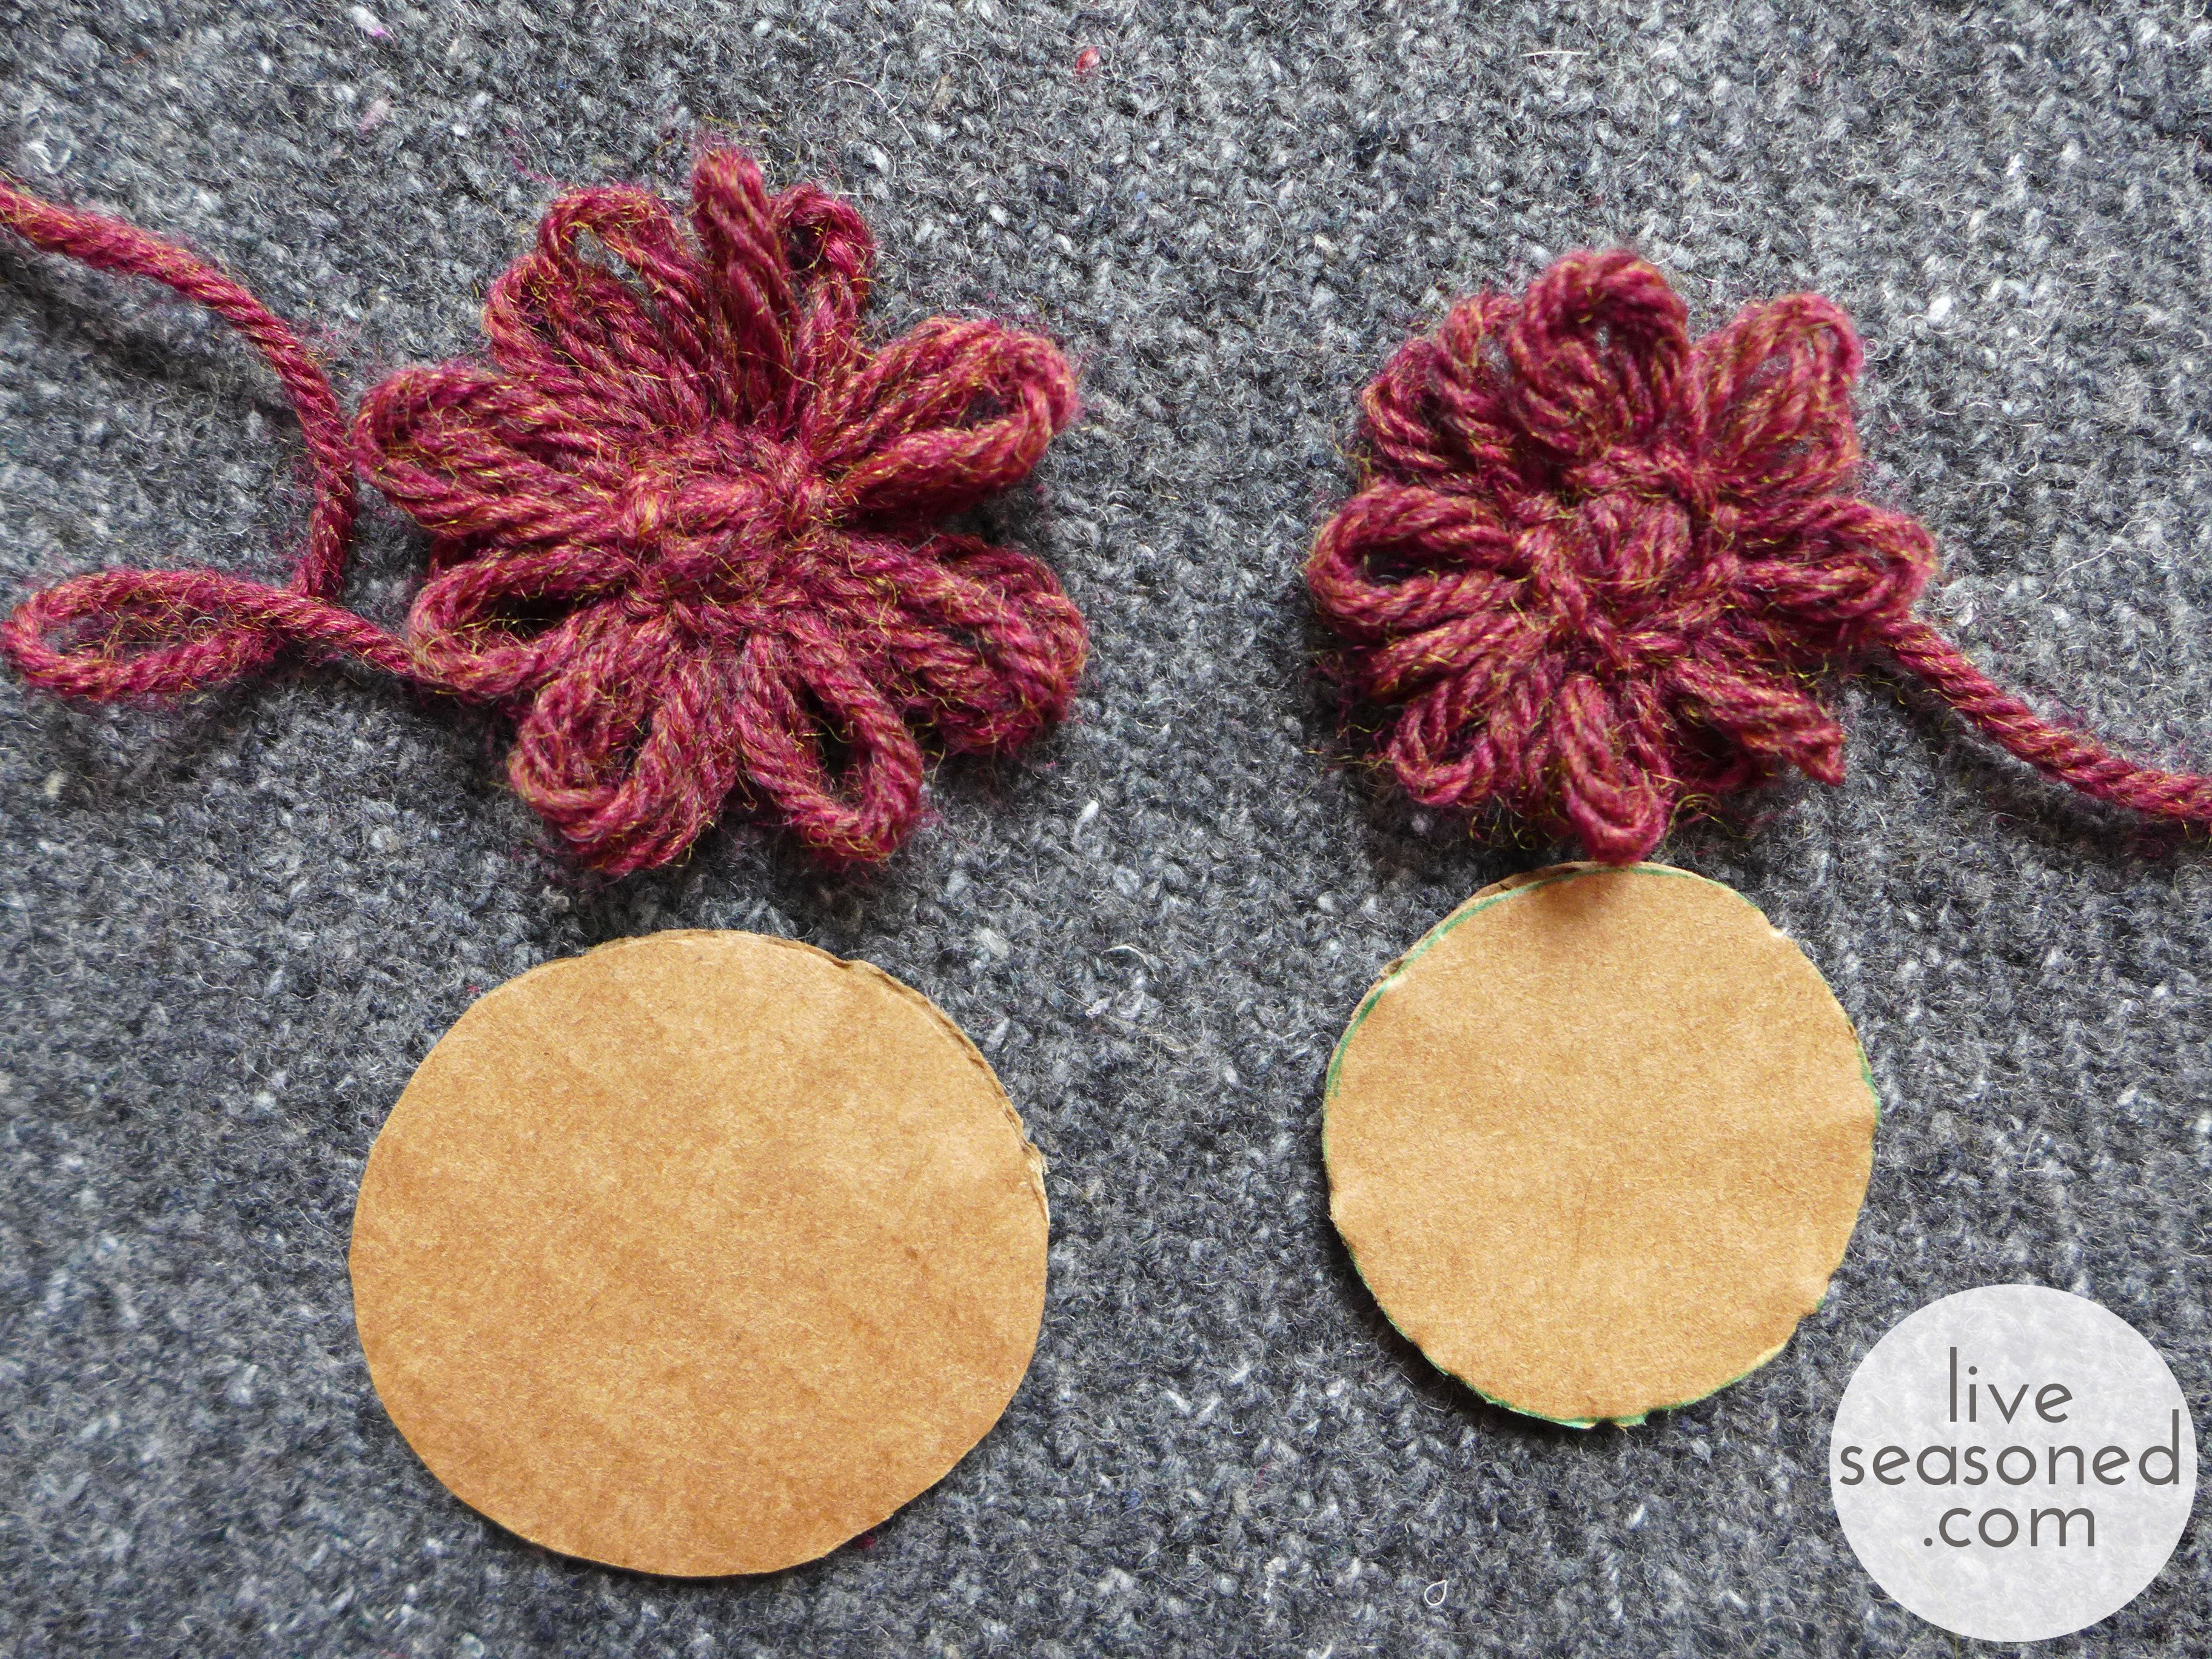
In the video, 12 toothpicks are used, but as I mention, you may need as few as 8, depending upon how large and full you make your flower. I made my flowers with cardboard discs that were 1.5 and 2 inches in diameter. As you can see in these photos, the diameter of your disc determines the final diameter of your flower.  I wouldn’t go any smaller than 1.5 inches, and if I were to do it again, would probably uses discs that were 2 and 2.5 inches. As you can see, my flowers are quite full with only 8 petals, and I think 12 would have been too much, but may be just right for a 2.5 inch flower.

*Don’t cut off the extra yarn ends when you’re done making your flower – these come in handy for tying the flowers to the twine.

liveseasoned_fall2014_fruitgarland8_wm

Assemble the Garland

With your garland swag in order, it’s time to assemble! I attached the fruit with hot glue. In order to get the fruit to hang nicely, you should glue the twine on no more than 1/3 of the way down the slice (rather than along the widest part, if that makes sense?). If you glue the twine too far down, the weight of the fruit will cause them to face downwards rather than out. The flowers were tied on by the extra yarn ends. If you cut off the yarn ends, you could easily hot glue these too. Once tied, I then cut any excess yarn off. And to make bead placement easier, I strung a whole bunch at once (as you saw in the photo above), then just knotted the twine on either side of the bead.

liveseasoned_fall2014_fruitgarland12_wm

With those instructions, just go for a random placement of your items, but still keeping in mind that odd-numbered groupings are more appealing. The beads sort of act as breakpoints in your garland, so I thought it was useful to place 3 or 5 of the fruit and flower items between any two beads.

liveseasoned_fall2014_fruitgarland13_wm

 Hang it up!

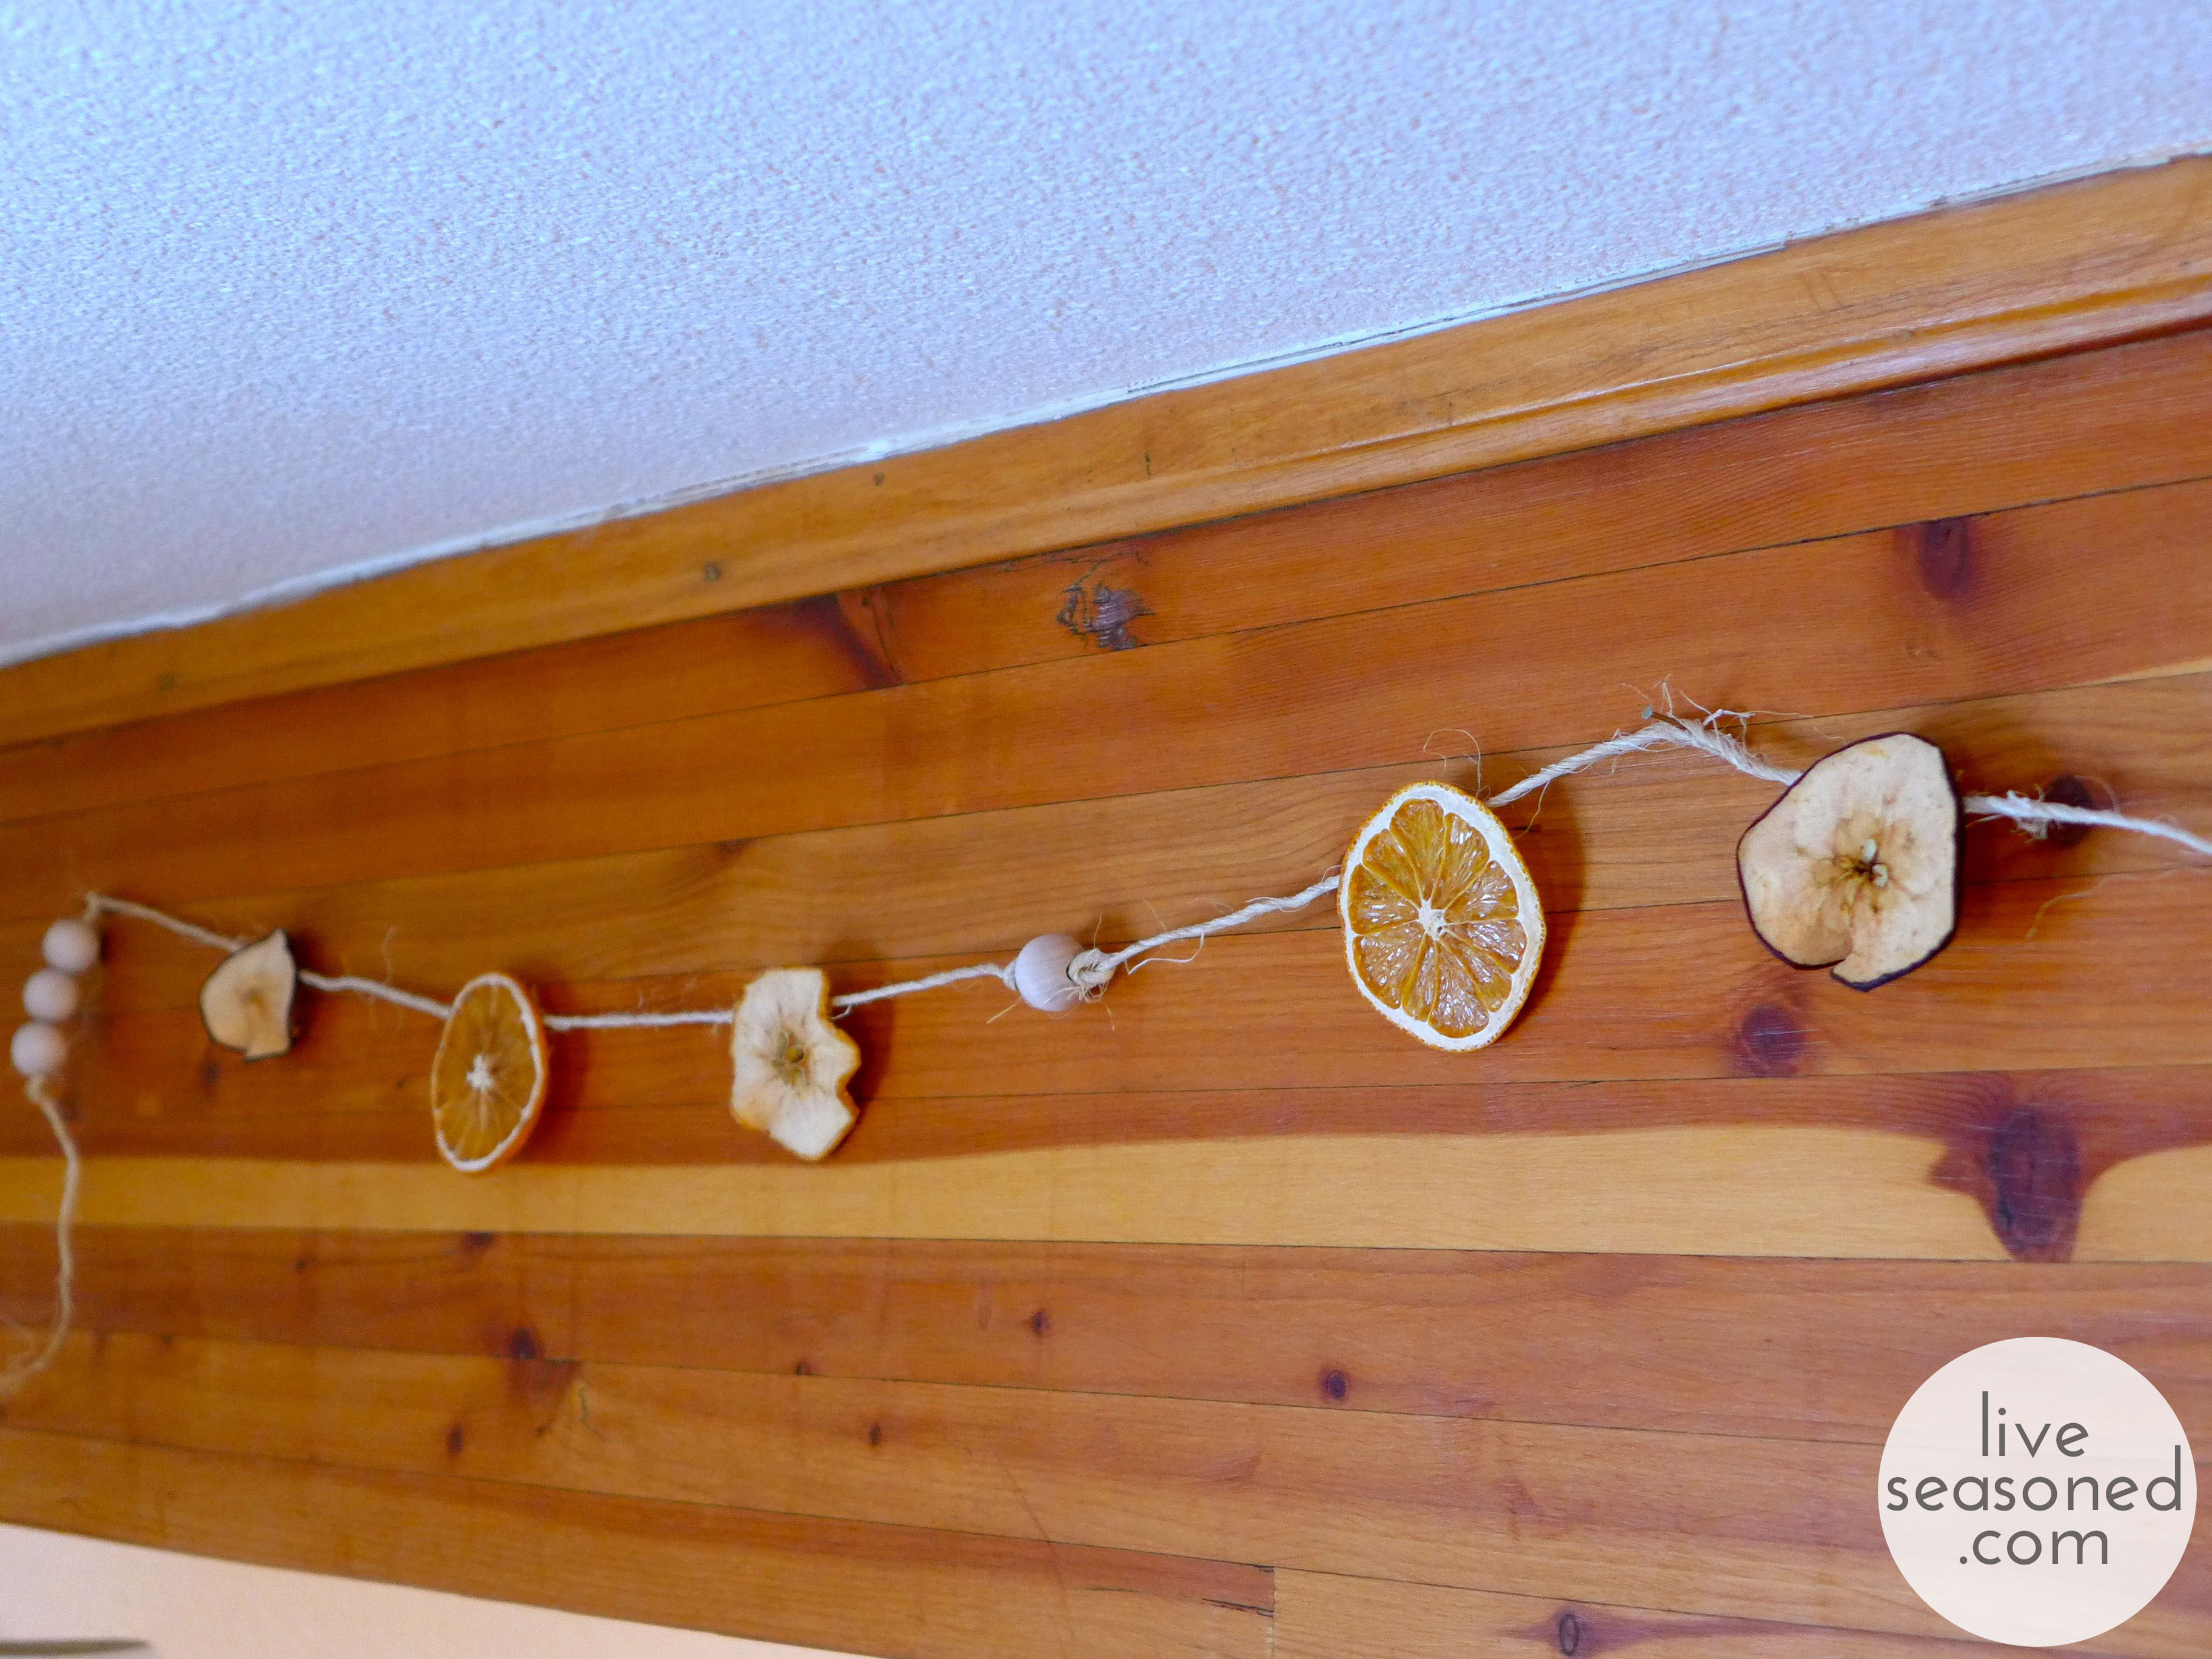
And now comes the hardest part, figuring out where to hang your garland. I started by stringing mine along one of our ceiling beams and thought that it looked OK, but maybe a little bit too puny for that space? What do you think?

liveseasoned_fall2014_fruitgarland14_wm

From there I took the garland over to our fireplace. First, I tried stringing it along the mantel and letting the excess hang down on either side. I loved the look of the garland along the skinny front of the mantel, but knew that if we were to keep it here, I’d have to shorten the ends to keep Little A from pulling on or trying to eat it.

So I moved the garland with the same hanging profile to above the mantel. I’m not completely in love with how it looks here, I feel like there’s nothing specific that’s anchoring the garland to that spot (am I wrong?). I do love being able to see it as we sit on the couch, especially when I catch a look at the fruit in the glow of the candle light. But, now what’s this renter to do with those ugly brown vents? Any tips?

So, that’s our simple bit of decoration for November. Just enough to tide me over until I go evergreen and light crazy!

Squash Soup with Citrus

liveseasoned_fall14_squashsoup-4

If you’re starting to feel the chill of winter (shoutout to the northern peninsula of Michigan with its 15 inch snowfall forecast!) this squash soup with citrus is exactly what you need.  The butternut squash will warm your belly and the time it takes to roast in the oven will warm your house.  It all comes together in about thirty minutes so you can quickly cozy back up on the couch.

My mom actually blended up this soup when I was visiting last weekend and it was so tasty that I had to share it.  Usually I find squash soups a little bland, but that is not the case here.  The lemon and orange zest add a lot of flavor, so please don’t skimp on those two ingredients.  While this soup fits perfectly into the fall since squash is in season, the citrus flavors really remind you of summer, which seems so far away now.  It’s also a hearty vegetarian dish to add to your soup rotation for the coming cold months.

liveseasoned_fall14_squashsoup-2

Ingredients:

  • 1 medium to large butternut squash
  • 5 TBSP olive oil
  • 2 carrots
  • 1 celery stalk
  • 1 onion
  • 4 cloves garlic
  • 1 TBSP orange zest
  • 1 TBSP lemon zest
  • handful of roasted pumpkin seeds
  • 1 small sweet red pepper
  • small pinch of saffron threads
  • sprinkle of nutmeg
  • salt and pepper to taste

liveseasoned_fall14_squashsoup-3

The how:

  • Preheat the oven to 400°. Cut the ends off of the butternut squash, peel it, cut in half, remove the seeds and cut into chunks. Spread the squash on a baking sheet and drizzle with 2 TBSP olive oil and sprinkle with salt, pepper and a dash of nutmeg.  Roast in the oven until the squash begins to caramelize, about thirty minutes.
  • While the squash is roasting, chop the onion, garlic carrots and celery.  In a large soup pot, drizzle the bottom with the remaining 3 TBSP of olive oil (no measuring necessary-just drizzle enough olive oil to coat the bottom of the pan).  Turn the pot onto medium-low and add the carrots, onions, garlic and celery.  When the veggies start to turn translucent and soft, stir in the saffron, lemon and orange zest.  After a few minutes, add a quart of water, turn the heat up to medium and allow the veggies to fully soften, about 15 minutes.
  • By now your squash should be starting to caramelize.  Add the soft squash to the soup pot.  Using an immersion blender, puree the soup. If you don’t have an immersion blender (welcome to the club!) simply add the soup to your regular blender little by little and puree.  It’s a little bit messier and delicate since the soup is hot, but it works just as well. Once the entire contents of the pot is pureed add salt if necessary.
  • Dish out the soup into small mugs and sprinkle roasted pumpkin seeds and finely chopped sweet red peppers on top.
  • This recipe is enough to feed 8-10 people.  If you plan on reheating the soup, I recommend doing in on the stovetop on low heat.


liveseasoned_fall14_squashsoup-5

I don’t know about you, but I am chest (cheeks?) deep in soup season.  This is the fourth soup I’ve made in two weeks!  I love the simplicity of only having to watch over one pot and I have to admit I love standing next to a hot stove.  My fingers and toes are always freezing so I tend to stand over the soup and stir it the entire time.  Maybe I was a witch in a past life?

*This recipe was slightly altered from a recipe found in Rachel Ray magazine.

Project Sweater : Update 1

liveseasoned_summer2014_sweaterproject1_wmb

A little over a month ago I introduced you to my big fall sweater project. At that point, I introduced you to the sweater’s main stitches and showed you my first two swatches. Neither swatch was spot-on, as both reproduced the stitch pattern at a smaller scale than the sweater. I was able to decide that I liked the bulkier second yarn better than the worsted weight first yarn, so my plan was to make at least one more swatch (and maybe more) with the second yarn using larger needles. In this post, I’m going to share the rest of my swatching and final yarn selection.

I began by adding a third swatch to the initial two using the Knit Picks bulky yarn (the same used for Swatch #2) and US size 11 needles. Below I listed the yarn and needle combinations for the first three swatches. After finishing the swatches, they had to be blocked.

  • Swatch #1 : Yarn: Cascade Eco ~~~ Needles: US9
  • Swatch #2 : Yarn: Knit Picks Wool of the Andes ~~~ Needles: US10.5
  • Swatch #3 : Yarn: Knit Picks Wool of the Andes ~~~ Needles: US11

Blocking Wool

Whenever knitting with wool and other natural fibers, the last step of your project or swatch should always be to block it. Blocking wool helps to relax the stitches into their final formation, it will even out the stitches within their rows and columns, making a swatch more square. Additionally, blocking may be used to adjust the size and fit of a finished garment (to some extent you can make something a touch bigger if needed such as adding length to sleeves or adding curves to a sweater if to fit more appropriately around your bust or hips without using darts).

There are a number of different ways to block your fibers, but I’m partial to the wet method. In this case I soaked the swatches in a lukewarm bath for 15 minutes. Removed them from the bath and gently squeezed out as much excess water as I could before laying them out in their final dimensions to dry. When I placed these pieces on a yoga mat for drying. I wasn’t interested in increasing their size, I was just interested in staying as true to their natural size as possible, so I tried not to stretch them at all, just to lay them down keeping the stitch rows and columns even. Once in their final place, I added a few straight pins around the edges to keep the swatches from shrinking for morphing as they dried.

In the photos above, you can see the difference between the unblocked (right) and blocked (left) swatches. Notice that the blocked swatches have a neater shape with straighter edges… except for swatch #3, where I tried something slightly different to start the bobble section and it ended up backfiring by adding too many stitches to that section.

liveseasoned_fall2014_sweaterupdate8_wm

The photo above shows the blocked swatch #3 laying on top of the sweater. You can see that it’s a spot-on match for the sweater’s pattern gauge. Exciting! My one concern was that with the larger needle, the stitches were starting to look slightly too loose for my liking. What would this mean for the final sweater? When it’s being worn, the stitches that are carrying a lot of the weight, such as the ones over your shoulder, would look really stretched out and you would be able to see through them.

One way to fix this would be to find yet another thicker yarn (this is why I switched yarns between Swatch #1 and #2). But I really liked the feel and shade of this wool, and I was concerned that that search could lead to many dead ends (and unsuccessful swatches) before I found another contender. So, I decided to go in another direction: hold a smaller gauge yarn together with the bulky weight, increasing the thickness of the yarn being stitched. So it was time to swatch again.

liveseasoned_fall2014_sweaterupdate4_wm

For this swatch I simplified things and just tested the ribbing, bobbles, stockinette stitch, and garter stitch. I started by holding the bulky yarn with a worsted weight yarn and then switched to a fingering weight yarn halfway up the swatch. The worsted-bulky combination was too thick, but the fingering-bulky combo was just right!

liveseasoned_fall2014_sweaterupdate5_wm

In the photo below, I placed Swatch #3 and #4 over the sweater. You can see that the gauge is still great – matching the sweater. I “fixed” the bobble problem by going back to my methods from Swatch #2 (specific stitch details will come in a future post).

liveseasoned_fall2014_sweaterupdate1_wm

Below is a final closeup of the two swatches, with Swatch #3 on top and #4 on the bottom (fingering-bulk yarn combo showing). In that photo it’s obvious that there isn’t as much empty space between the stitches, rather they are producing a nice fabric. So, that’s my final solution – to knit the sweater holding the Knit Picks bulky yarn with a fingering weight yarn on size US 11 needles. I’ve ordered the yarn and my next post will be an actual sweater-knitting update!

liveseasoned_fall2014_sweaterupdate3_wm

Tid Bits

Each Friday we share some tidbits from our week.  We want to break down these internet barriers and invite you into our lives and we’re hoping you’ll do the same.  You are welcome to share a bit of your week or day in the comments, or if they’re better represented by a photo, tag us on instagram @liveseasoned

Katie here  :

liveseasoned_fall2014_nov6


I totally felt like this week was recover from Halloween week. As you know, our costumes weren’t even that involved, but not having them done was weighing on me all last week. So, when Monday evening came, it was nice to sit down and work on a project without that Halloween guilt. I started a hat for Calder. It’s a bit of an experiment using the yarn and thread in the photo above… I realized that I’m going to need about twenty more skeins of thread to finish this puppy (in fact, I took the photo so that I wouldn’t forget the numbers for the colors I’m using). If it’s a successful venture, I’ll be sure to share the finished hat here!

My other bit of fun this week was going for our 20 week ultrasound. That means we’re about halfway through this pregnancy. It was so much fun to see the little guy and know everything was developing as it should, but it also makes me so impatient for a few days afterwards – I can’t wait to meet him for real! (and you don’t know how much willpower it took to not use an exclamation point after every sentence in this paragraph)


Sarah here:

halloween

Just like Kate, I felt like this week was recover from Halloween week. Chapel Hill is the place to be on Halloween!  There were over 40,000 costumed lads and ladies roaming around Franklin street until all hours of the morning and I was one of them.  I was huuuungover on Saturday, which prompted me to create The Morning After blog.  If you ever have one heck of a night and you’re feelin’ it the next morning, submit your Morning After photos here.

Screen shot 2014-11-07 at 1.11.48 AM

After the great work distraction that is Halloween passed, I got down to business and edited hundreds of photos this week.  Sitting in front of my computer hour after hour got old pretty fast. I started daydreaming about alternate careers and future travels and I decided I really want to complete my yoga teacher training abroad.  For the past few years, I’ve toyed with the idea of getting my RYT200 certification and I think 2o15 is the right time. I’ve been looking into this program in Nepal, but of course I have a lot of research to do about teachers, ashrams and programs.  I’d love to return to Nepal (pictured above), but I’m also open to traveling to whichever country hosts what I think to be the best fit for me. Let me know if you or someone you know has been certified abroad. I’d love to chat about the experience.


Sampling Cheese from the Nibble Nook

We’re snacking on a lot of cheese this season. So far we’ve talked about our favorite way to eat a few staples, but today we’re going out on a limb and trying some new varieties!
liveseasoned_fall2014_nibblenook5_wm

There really are so many cheeses out there, and while I’m an adventurous eater, I often find myself sticking to a handful of cheeses that I know and love. Just walking up to the cheese counter is overwhelming ~ so many varieties, where do I even start? And then I would look at some of the prices and just shyly turn around and pick up my Cabot or Brie Supreme and go on my merry way. Or, that was the scene until I discovered Whole Food’s Nibble Nook!

liveseasoned_fall2014_nibblenook1_wm

The Nibble Nook is a little basket of cheese ends/remnants (you can see it above tucked in between their off-the-shelf cheddar, feta, and mozzarella). My guess is that many grocers selling cuttings of large cheese wheels may have their version of a nibble nook. If you’re open to trying some new cheese and flexible as to the options available, the Nibble Nook is a great place to look. The selection within the basket is constantly changing as different cheeses are cut and as shoppers pick out their favorites. And the cuts are small, so while I would be hesitant to be a large wedge of a cheese that’s priced at over $20/lb, I’m happy to buy a small bit for nibbling.

liveseasoned_fall2014_nibblenook3_wm

I always approach the bin with an open mind and pick out any cheeses that look promising (that’s every cheese), and right now I’m also sticking to only those made with pasteurized milk. On this particular visit, the bin was overflowing with two varieties of hard cheese from Uniekaas, a Dutch company: a 3 year Gouda and a Parrano. I’m sad to say, I had to pass on a beautiful looking cheese that had bits of black truffle throughout but was made with unpasteurized milk. From the labels, you can see that each of the cheeses I picked has a big price tag ($22 and $15 per pound), but the wedges are both close to a tenth of a pound, making it an affordable splurge (is that a thing?).

liveseasoned_fall2014_nibblenook2_wmI also love Whole Foods visits for their constant sample tables, on this particular day a table of raw uber-local honey (from hives within our county!), was perfectly positioned at the end of the cheese aisle. They even happened to be serving up the samples with a variety of Parrano, so I had to pick up a jar. And as you’ll see, it ended up making such a perfect treat!

liveseasoned_fall2014_nibblenook10_wm

A little bit about the cheeses. Both of these cheeses are considered great snacking cheeses in the Netherlands, their home country.

Gouda

(The orange cheese in these photos)

Gouda is a Dutch hard yellow cheese made from cow’s milk. The cheese may be aged anywhere from a month to many years. This particular Gouda was aged for three years, classifying it as a “very old cheese”.  As a Gouda ages it acquires a caramel sweetness and develops a slight crunch from cheese crystals that form as water within the cheese evaporates. The cheese’s sweetness is due to removing some of the whey, which also removes some of the lactic acid, early in the cheese-making process and replacing it with water.

Parrano

(The white cheese in these photos)

Parrano is also a technically a Dutch Gouda, but with a flavor similar to aged parmesan. Parranos are aged for about 5 months, giving them a semi-firm texture. As described on the company’s website, Parrano is “slightly sweet, a little bit nutty but still with a deliciously strong flavour”.

liveseasoned_fall2014_nibblenook6_wm

As is common, I like to include some fruit on my cheese plates. Continuing with my adventurous ways, I’m not too picky when it comes to the fruits I choose. I’ll often look for anything in season and deliciously ripe (there’s no point in serving out-of-season strawberries that taste like water, right?). On this particular day, I already had some raspberries and pomegranate in my fridge. As it turns out, their slight tartness was a perfect complement to the sweet honey and sharp cheeses!

liveseasoned_fall2014_nibblenook7_wm

 The Honey

This is a raw, unfiltered, and unheated honey. As a result, it has a cloudy appearance from the honey crystals that have begun to form (it may also have some bits of wax, pollen, bee wings, and such in the jar). If you put a dollop of raw honey on a plate, you’ll find that it spreads more slowly than crystal clear honey. It turns out that this is really useful for gluing some fun cheese/cracker/berry combos together! And here you thought raw honey was just good for its enzymes.

liveseasoned_fall2014_nibblenook9_wm

Look at how beautiful that cracker looks with a bit of cheese, dollop of honey, and a few perfectly placed pomegranate seeds! There’s no way those seeds will fall off on the way from the plate to your mouth. This is a particularly handy trick for cocktail parties if you want to make a few fancy cracker/cheese combos rather than having guests make their own. You definitely don’t have to worry about the appetizer falling apart before it’s served. I also found honey to be particularly useful for keeping the crumbly gouda on my cracker. You can see that I double-dipped in the last photo – starting with a slice of Parrano and then adding crumbles of Gouda over the honey. indulge much?

liveseasoned_fall2014_nibblenook11_wm

I can’t emphasize enough how delicious these particular combos were. The crackers were just a basic wheat thin. Both cheeses had a bit of a nutty flavor. The honey added that touch of sweetness. And then, as I already mentioned, the fruit added a bit of a tart note. Plus it was extra fun to get that little spray of juice and crunch when biting down on the pomegranate seeds.

liveseasoned_fall2014_nibblenook12_wm

And this adventure all started with a quick trip to the Nibble Nook. Who knows what next week’s visit will hold… and I can only hope that come April they add some of that truffle cheese back to the bin!

So tell us – does your grocery store have their own version of the nibble nook? Did you find any really outstanding cheeses there?


Welcome November

On the first Wednesday of each month we like to pause and take a look at what’s going on in the world around us, with a particular focus on animal activity, celestial events, and our farmers’ fields.

liveseasoned_fall2014_nov5_wm

I don’t know what happened this year, but as soon as the calendar flipped to November I had a twinge of nervousness that the season’s passing to quickly. Did you feel that way? It’s the mix of looking forward to and preparing for Christmas while at the same time trying to live in the moment and enjoy every bit of the slow days before Thanksgiving. In an effort to mix the two, I have big plans for long evenings in front of the fire slowly crafting away on holiday projects… we’ll see how that goes. It was nice to look through photos from Novembers past and realize just how much we are able to pack into this one month. From the ones I’m sharing in this post, it’s a pretty even mix of travel, time outside, and of course, the Christmas prep that I love. I hope your month is a mix of all the good things you love too.

We’ve had such a mild fall in Boulder so far, it’s hard to believe that at the end of the month we’ll be visiting Calder’s family in CA, where, if we’re lucky we’ll be knee deep in snow, risking our life sledding, and (unsuccessfully) dodging stray snowballs!

Earth & Sky

As the seasons change from summer to winter, fall is another important and busy time for migrating animals. I thought it would be fun to move from land to sea this month and look up the migration activities of animals that live in or are closely linked to an ocean.

Humpback Whales

Every year populations of humpback whales cross the Pacific from north to south as they move from their summer feeding grounds along the shores of Alaska and Russia to their winter breeding grounds off the coasts of Hawaii, Mexico, and Asian Pacific Islands.


The largest winter calving grounds are in the waters around Hawaii, and particularly off the island of Maui in the Humpback Whale Marine Sanctuary. You can expect the first whales to begin arriving in these waters by September or October, but you are guaranteed to see them starting in November. The whales will stay in the area through May, birthing their young and teaching them basic behaviors, from breaching to tail and fin slapping. If you’re lucky enough to vacation in Hawaii this winter, listen for the male humpbacks singing!

Christmas Island Red Crabs

Christmas Island, located in the Indian Ocean, is home to an endemic species of land-dwelling crabs. For most of the year, the crabs live a solitary life inland, eating leaves and flowers, but every year between October and January, the crabs migration en mass to the coast to mate and spawn. With a population of over 40 million crabs all moving at once, this migration is awe-inspiring, and can cause a bit of a headache for local travels. The crabs can take-over roadways, and often roads that cross their migration route are closed off to let the crabs pass. The start of the migration coincides with the wet season on the Island. Generally, the crabs have to be very conservative with their movements in order to conserve body moisture, but with the rains, they are able to move more freely and make the migration to the coast.

Once at the beach, the male crabs will create a burrow where they will mate with the female crabs. After mating, the males will return to the forest while the females will stay in the burrows for up to two weeks as the eggs develop. The females will then deposit their eggs in the ocean where the larva will hatch and spend 3-4 weeks before returning to land as young crabs. What’s really interesting about the whole event is that the female crabs deposit their eggs in the ocean precisely at the turn of high tide during the last quarter of the moon!

Understanding the timing of that activity, the possible spawning dates for this year are October 19th, November 18th, or December 18th. It all depends upon when the rains begin to fall.

Fields & Festivals

I think of November and I think about good, hearty, home-cooked meals. What about you? Our farm share continues to deliver into December, so I’ve started researching some new-to-me savory veggie recipes for the season. On Monday I made my own version of this savory galette using fresh kale, leeks, and butternut squash. Tonight it’s a spinach and salmon quiche, and tomorrow it’s short ribs with a side of roasted acorn squash.

liveseasoned_fall2014_welcomenov1_wm

There are still plenty of veggies coming out of the farmers’ fields, and plenty going into storage for the winter, so don’t reduce yourself to iceberg lettuce and applies shipped from New Zealand yet! If you’re lucky, your local farmer’s market may still be in operation. Don’t wait to get out there and pick up something fresh. I took the photo above at an evening market in Berlin as I passed through a couple years ago for work.

liveseasoned_fall2014_nov7_wm

When it comes to festivals, there are still some great food-focused events going on. Sarah’s heading to Saxis (photo above taken as the sun rose over the town’s marina two Novembers ago) to hit up the Saxis Oyster festival this weekend! If you’re looking for something fun to do this weekend, you may find the calendar dominated by craft fairs and festivals – we think they’re a great way to support independent artists and pick up unique gifts for holiday giving. Below are a few we would love to check out. If there’s anything fun going on in your area, let us know!

liveseasoned_fall2014_nov6_wm


As I’m signing off, I’m thinking about ways to wrangle this baby-turned-toddler for some Christmas card photos!

Whale map from KQED. Whale image from Animalians wikispace. Red Crab image from here.

Post-Halloween Costume Update

Last Monday I shared a progress post of our Halloween costumes. At that point Little A’s disco ball costume was all ready to go, but his strong man still needed some work. Today I’m back to share the final strongman costume and some family photos from our fun weekend.

halloween_fall2014_family3

Here we are, ready for the disco, and I have to mention that Alex’s costume really worked like a disco ball! On Saturday we went to a party at our friend’s house, which had plenty of large windows and sliding doors facing the setting sun. Anytime Alex would walk past a window or in/out the doors, his shirt would reflect sunlight all over the room, just like a disco ball! Needless to say, everyone, especially the adults in the room, loved it!

Finishing the Strongman

When we left off, I had the onesie and leggings for Alex’s costume, but was still working on his tattooed arms. I made the original set shown in the previous costume post out of a pair of women’s stockings, but they were pretty large, so the tattoos were super wrinkly unless I decided to stuff the arms and give him BIG muscles. I thought about stuffing them, but knew that our finicky guy might refuse that look, so I decided to go back to the store and pick up a pair of girl’s stockings.

After buying them, I immediately realized a second benefit – if I turned the stockings upside down, and cut a hole in the crotch area, I could slide the one piece over Alex’s head rather than cut off the stocking legs to create two sleeves (that I would then have to attach to the onesie in order to keep them up)! win. win. In addition to cutting the hole for his head, I cut off the tighter elastic material around the stocking’s waist area as well as cutting off the toe seams.

I then drew the tattoos (a heart, cloud with lightening, kite, mermaid, whale, sailboat, anchor, spiderweb, rose, stars, and a shell). I only drew the tattoos from his shoulder area down to about his wrist, this still left a bit of stocking length, and rather than cut it off, I folded it under the sleeves to create a double layer for added warmth. They were still a touch wide for his arms, but his cuteness totally distracted anyone from noticing ;-).

And speaking of cuteness, here we are on Friday night, just before going trick-or-treating at the most amazing/bizarre house (we only went to two houses, because that was more than enough for the little guy).

halloween_fall2014_family

Funny thing, I had just finished Alex’s barbell (two styrofoam balls and a wooden dowel spray painted black), so this is his first time holding it. As we were about to take the picture, we told him to hold his barbell in the air, and he surprised everyone by doing it!  So that’s us, surprise smiling/laughing as he performs on cue.

halloween_fall2014_family2

After these photos, he was more than happy to walk down the street holding his barbell and lifting it up whenever prompted. What a little guy! And what a great Halloween.

Seasoned View: Vol. 8

Each month we share our Seasoned View.  Snapshots of nature taken by the Seasoned sisters. Find last month’s here and past month’s here.

November is here. I’m in disbelief! Where the heck did October go? All of a sudden there is a serious chill in the air and day light savings time is here.  A new month calls for a new Seasoned View and while perusing through my photo archives, I realized most Novembers I’m traveling. Three years ago I was in Thailand, two years ago I spent the month in Brazil and last year I slept in a tent in northern California for six weeks.  I guess I shouldn’t complain about chilly November weather since history reminds me I haven’t experienced it much, but here I am bundled up under an afghan wondering how I’m going to survive the winter ahead.

Screen Shot 2014-11-02 at 10.16.42 PM

This month’s photos are all from high atop Foster Mountain near Willits, CA.  As you can see, half of them are either sunrise or sunset photographs because I was busy working during the day. I hope you don’t mind some natural color palettes this month.   You can upload one or all of them to use as your desktop background or even as phone and tablet wallpapers.  Simply click on the download link below each photo and save the image.  Enjoy!

liveseasoned_fall14_novemberseasonedview-3Click here for pastel sunrise.

liveseasoned_fall14_novemberseasonedview-2-3Click here for the point.

liveseasoned_fall14_novemberseasonedview-1Click here for fiery sunset.


liveseasoned_fall14_novemberseasonedview-1-4Click here for mountainside.


liveseasoned_fall14_novemberseasonedview-3-2Click here for flight.

liveseasoned_fall14_novemberseasonedview-1-3Click here for clarity.

How’d you like the northern Cali November view?  Do you like knowing where the photos are shot or could you careless?  Happy Monday! xo