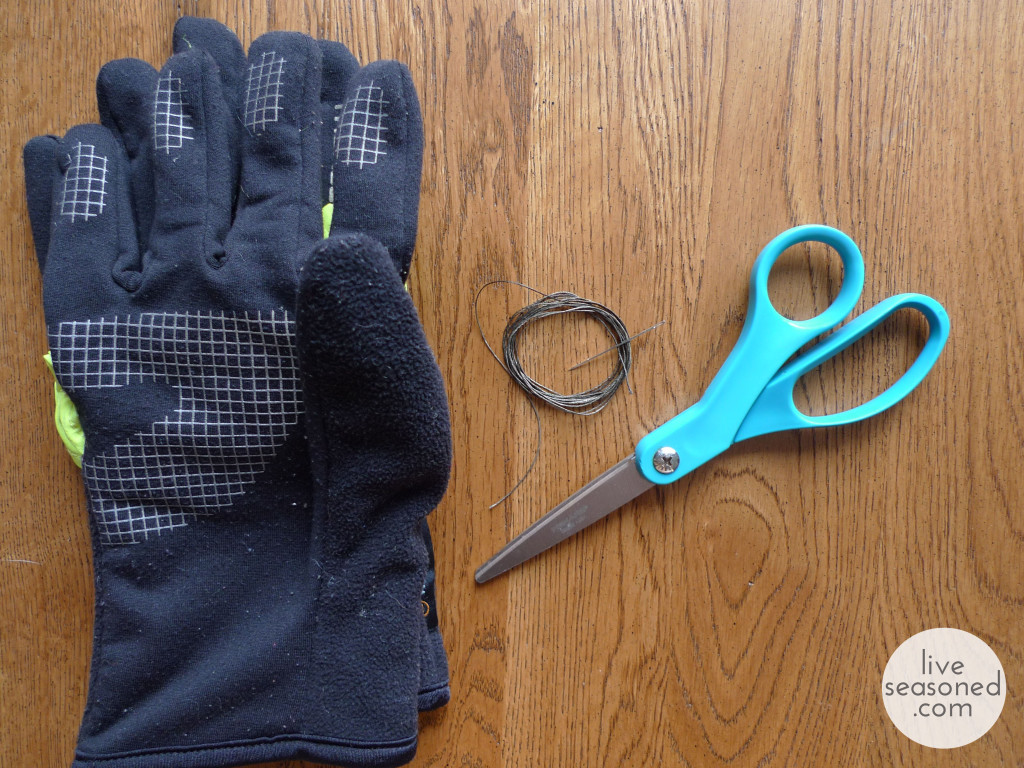
I’m one for quality over quantity, but sometimes I run into the problem that the quality items just won’t wear out so that I can get the shiny new version with extra features. Take gloves. Being the winter walker I am, having a good pair of gloves is essential. I have a pair that work fine in every way: warm, give me plenty of dexterity for wiping runny noises and picking up the {ahem} dog poop, and above all else, they magically stay together as a pair. You’ll notice that they look well worn in the photos, please excuse their pilled rough and tumble appearance. Unfortunately, they are not touch screen compatible, which leaves a few fingers out in the cold when I want to use my phone for anything from taking pictures to making calls. Lucky for me (and you!), with the right materials this is a surprisingly easy problem to fix.
Our smart phones have capacitive touchscreens, which require the flow of electrons between our fingers and screens to function. Unless you already have touchscreen compatible gloves, you’re like me: making this connection requires taking off your gloves. BUT we can easily complete that circuit with just a bit of conductive thread!
Buying conductive thread is not as hard as it used to be. There are a variety of threads and other materials available on Amazon. When I converted my first pair of mittens a few years ago, I remember there being only a few suppliers, and I had ordered a sample pack from Silverell. Sparkfun is another supplier that’s been around for a while and sells a variety of materials for similar crafty projects. Now, the sky’s the limit and you probably already have supplies in your house to make your own!
That said, if you want to dip your toes in the water but don’t want to order or make your own conductive thread, we’re giving some away! The details are at the bottom of this post.
Materials:
- conductive thread
- sewing needle
- gloves
Instructions:
- Mark your contact hotspot. Put on your glove, pick up your phone, and swipe the screen as if you’re going to use it. Mark the area on your finger or thumb tip that makes contact with the screen – this is where you’ll want to make your stitches, and often it’s not directly in the middle of your glove’s finger tips, where your instinct may tell you to add the thread.
- Stitch your marked area! Make a number of overlapping stitches where you marked your glove. *Notice the way I weave the needle in and out of the thumb tip from the outside, it makes your sewing much easier than having to reach into the glove for the needle.* After a few stitches, double check to make sure that the thread is clearly exposed to your thumb on the inside of the glove and the screen on the outside. If it is, continue stitching until you cover the full area of the glove that was making contact between your thumb and the screen.
- Check your work. Put on your glove and use your phone. Does it work? If it works, great, you’re done! If not, read my first tip below and try again. If you’re still having trouble, add a few more stitches in the same area. The more thread that’s there, the more opportunity the electrons have to will flow!
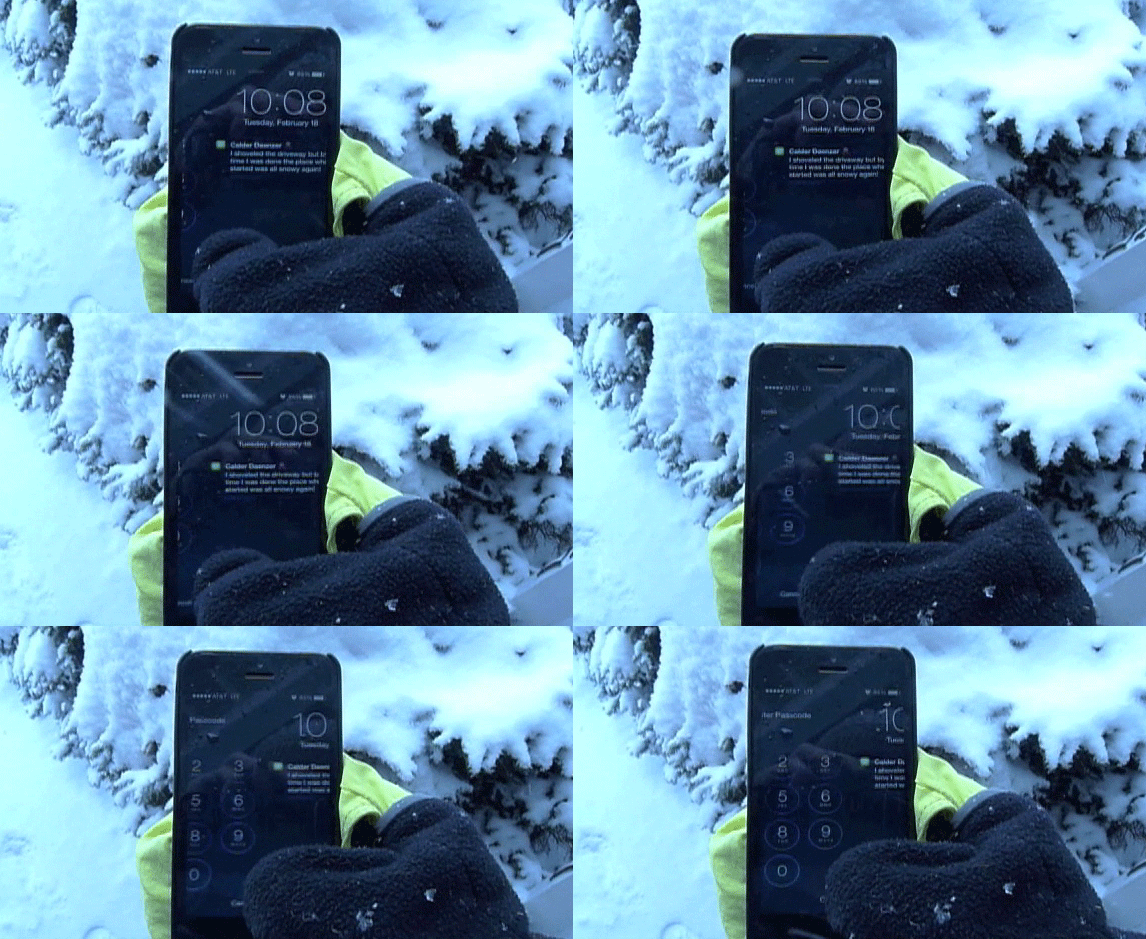
And we couldn’t help ourselves, we had to show a little action clip of the glove at work! If you have a sharp eye, you’ll notice that we took that footage on Tuesday, during the latest storm, and Calder’s texting me to say that he shoveled the driveway (usually my job), but that the snow already covered it up again. There couldn’t have been a more appropriate text for this post!
This is one of those updates that is so easy that you’ll wish you did it back in November before suffering through the Arctic Vortex. Back when you could still feel your fingertips and were greeting each day’s snow with a smile because you were going to make the best of this cold!
Has anyone out there attempted a similar conversion? What type of conductive thread did you use? Have any tips to share?
Notes and Tips:
- I often find that these gloves are not as perfect as our ungloved hand. They work fairly well when I’m doing a big slide motion (like unlocking my phone), but are not as successful with tap motions. Tap performance can be improved if you add a very slight slide at the same time, so often I will slide across the button I want to tap, and that does the trick.
- The thread I’m using is sold as “sewing thread” and I get the impression that it is meant to be used for machine sewing to stitch two pieces of fabric together. As such, it’s a combination of fabric and conductive material, and the connection is not as strong as it could be using a purely conductive material, but, it does work!
- If I were knitting a pair of gloves or mittens, I would hold my conductive thread with my yarn when knitting the thumb and finger tips that I want active. Depending upon how well this works, you could then go back over the a specific point on your finger tips, just like the project above, to enhance the conductivity.
- In the last picture, my stitches look like a big lump, but they are truly not noticeable. This might be more of a problem if your gloves are fitted. If anything, I found that having a slight bump can be helpful in giving you a good sense of where to touch the phone.
Now, about that giveaway ~
We want to share the love and encourage some simple DIY action. The first five commenters on this post will be gifted enough conductive thread to pimp out your own gloves. What do you say, want to give it a try? Let us know!


