
At the beginning of the year, I encouraged our readers to “make with me“. In that post I shared a few of the many benefits that you may get from picking up a hobby, and I gave you a few simple suggestions for how to turn your hobby into a regular habit (that’s good for you!).
If you follow our Instagram feed or have been a long-time reader, it’s no surprise that my primary hobby is knitting. I always have a project (or ten) in the works. While I don’t need the encouragement to knit more, I’m taking this resolution as a nudge to share more of my projects, in their many phases, on the blog. And if you’d like to find me on Ravelry, my username is winterfoliage.
If you like this project, you may want to check out our large-scale cross-stitched pillow.
~
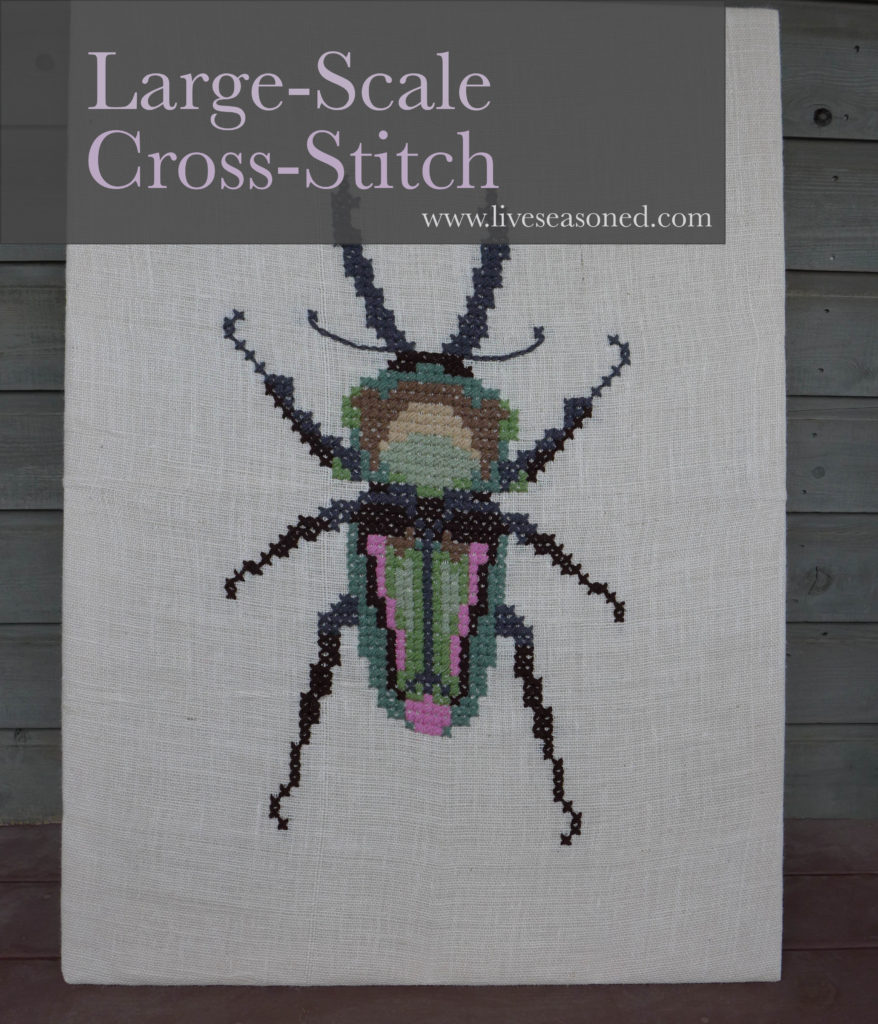
Have you ever tried cross-stitch? It’s a relatively simple embroidery technique where you make a picture by sewing a series of x-shaped stitches using colored thread. Today I’m improvising on that basic technique by making everything BIGGER (and bug-ier).
If you follow us on Instagram, you may have noticed that we’ve gone buggy. My boys, especially Alex, have become obsessed with bugs. He loves catching them, learning about them, and telling everyone (including our friendly market cashiers) all of the bug facts that he’s learned.
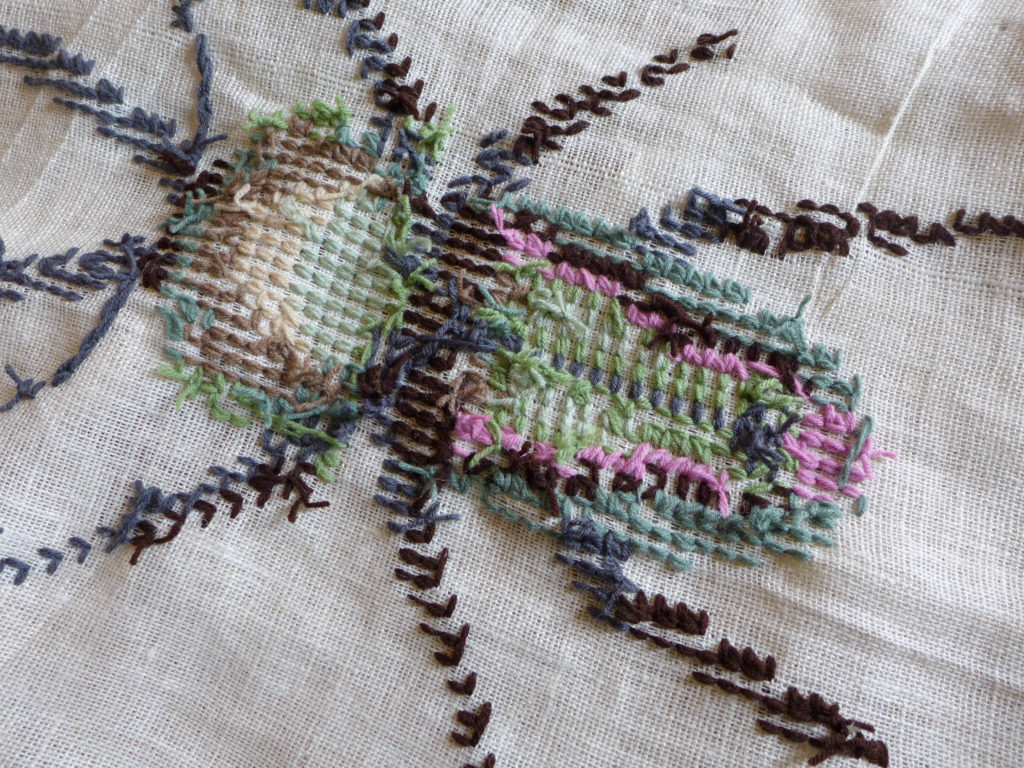
This bug-love is starting to spread around the family. During the last visit from our mom, she cross-stitched a beetle to be used as a patch (more on that in another post). I loved that little beetle and realized that it would make a beautiful piece of large-scale art for our wall.

Beetle Pattern
There are numerous sources for cross-stitch patterns. You can pick them up in craft stores, from independent designers on Etsy, and directly from the cross-stitch suppliers’ websites.
Just a quick google search for “cross-stitch beetle” returns a wide array of results! I want to sew them all.
This particular pattern is available for free on the DMC website. They have a variety of free cross-stitch options, including other bugs.
Large-scale Cross-stitch Materials
Making a large version of the pattern was super simple. I did not change the actual pattern at all, instead, I just used larger materials.
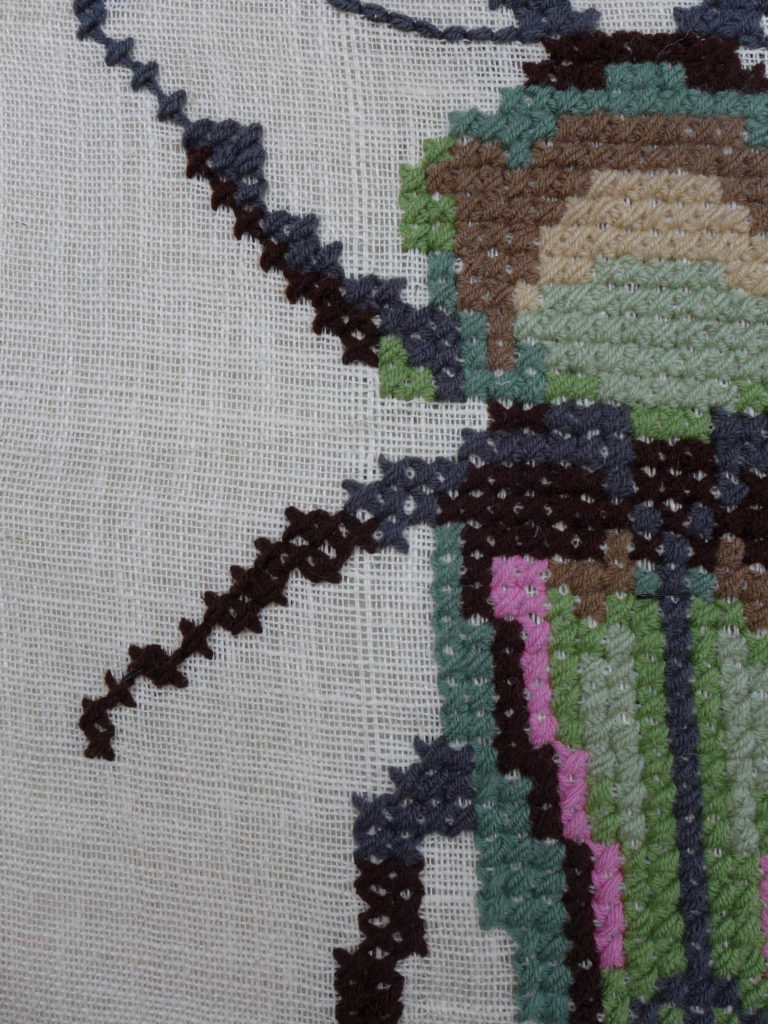
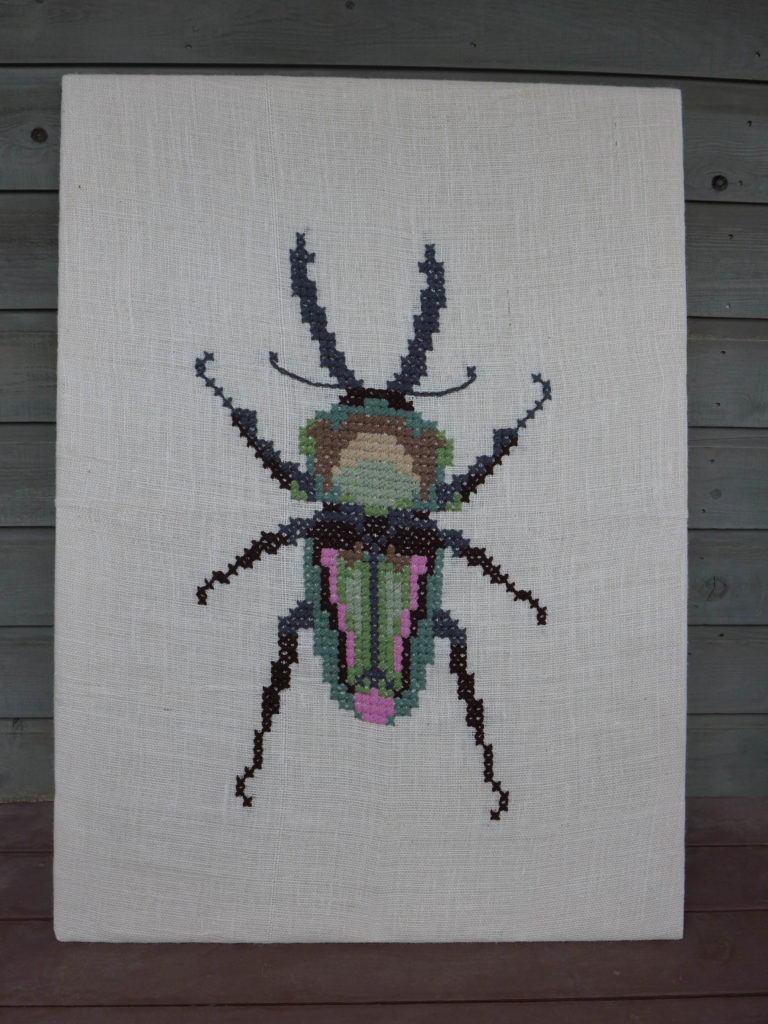
- Choosing a Fabric : Rather than using aida cloth, which is the standard cross-stitch cloth, I used a light-colored burlap. For something of this size, the burlap is a much cheaper option. You can even look around for something to recycle; we used an old coffee sack for this cross-stiched pillow. The important thing is for your fabric to have some sort of grid that easy to follow. As you can see in the photo below, the lose weave of burlap creates a grid.
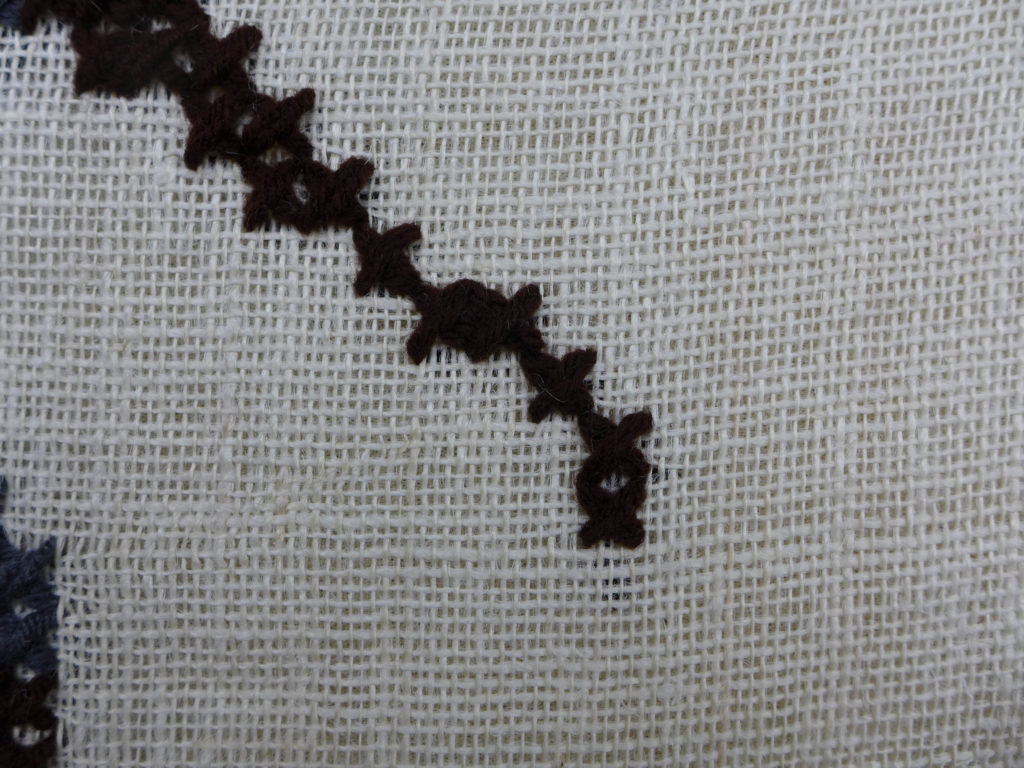
- Compensating for Uneven Weaves : The only challenge is that the weave isn’t perfectly symmetric. The vertical fibers are more closely spaced than the horizontal ones. To compensate, I made my stitches “5×4” (skipping 5 strands across and 4 down). You’ll also notice that some of the burlap fibers are thick and some are thin. To keep things simple, I purposefully overlooked that and stuck to the 5×4 measurement for all stitches.
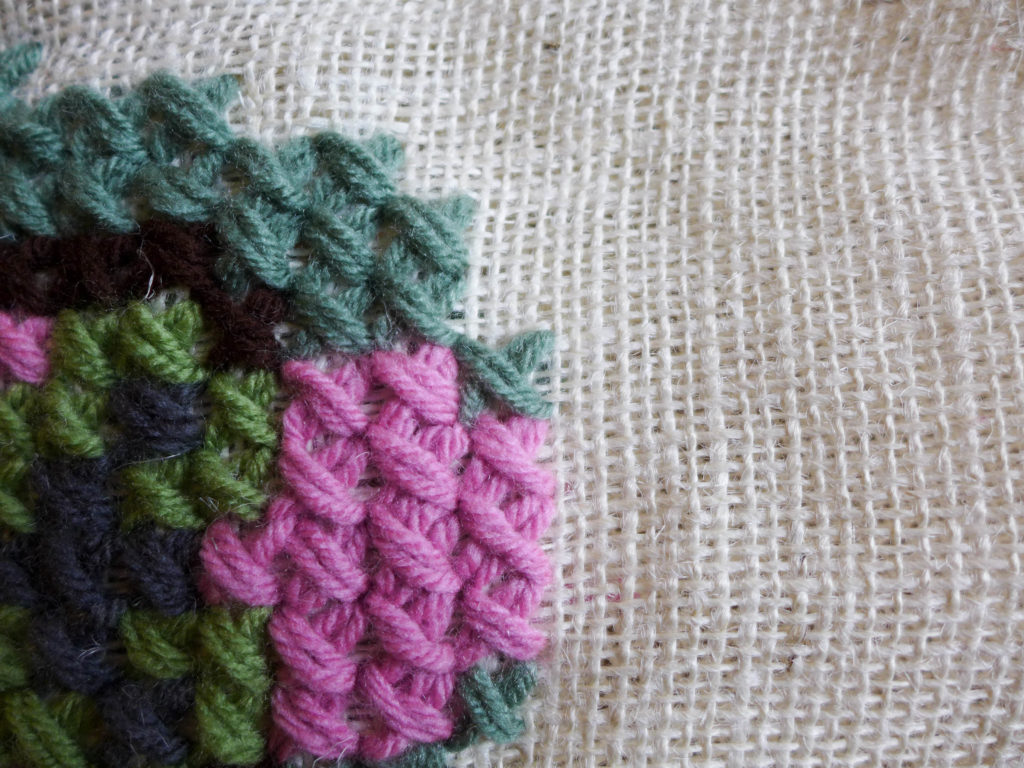
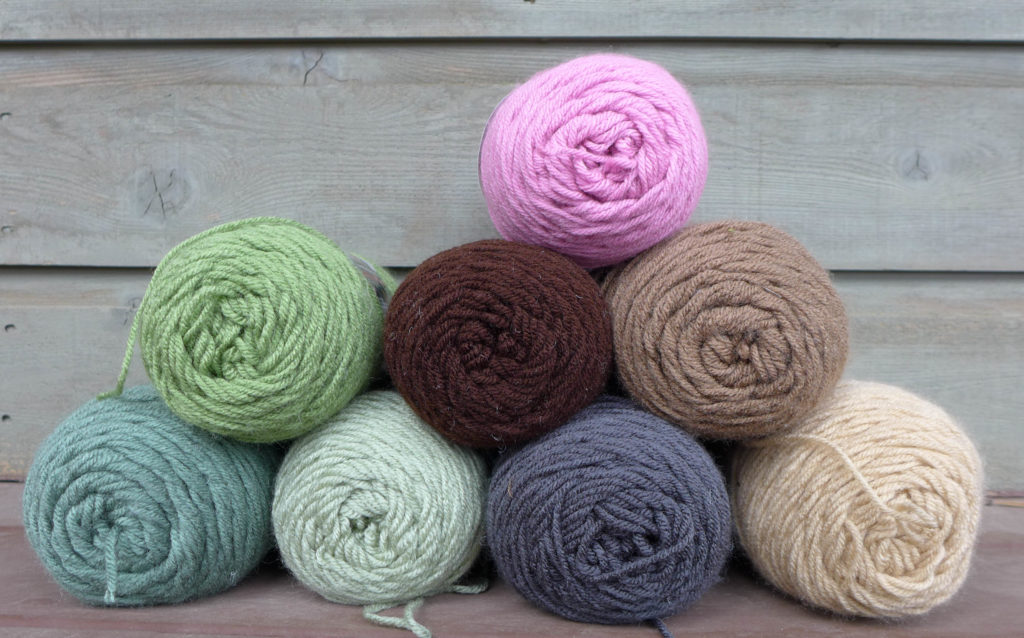
- Choosing Yarn : Most cross stitch patterns will list specific thread colors that should be used for the pattern. Since you’ll be working with yarn, you will have to use your best judgement for this step. You may want to pick up thread samples and match them as closely as possible, or you can walk down the yarn aisle, and go with your gut. That’s what I did. I knew that I needed three greens, three browns, a grey and a pink, so I picked a combination that I liked.
- Determine Scale : As I mentioned above, I used a “5×4” stitch size. On this particular fabric, that created stitches that were a 1/2 inch in length. The size stitch that you want to use will depend upon your pattern and your desired final size. This will require a little bit of math. Count the number of stitches going across your pattern in both the horizontal and vertical directions;mine was approximately 43×64 stitches. Now you can play around with numbers. For example, if I want something that is 32 inches high, 32/64 = 0.5 inches. If I want something that is 64 inches high, 64/64= 1 inch per stitch.
- Start Stitching! : Once you have the pattern, fabric, and yarn, it’s time to start stitching. Take a little bit of time to visually lay out your pattern on your fabric. I like to start the middle of the pattern in the middle of my fabric so that I end up with a symmetric border around the piece. For this pattern, I held the yarn doubled so that I produced thicker stitches with less burlap showing between them.

- Tie up Lose Ends : Depending upon your pattern and the number of colors involved, you may end up with a lot of yarn ends on the back side of your work. To clean them up, I tied each end off around a big of the stitch on the back side. Then I cut the ends short.
Framing Your Work
To frame this piece I wrapped the work around a simple wooden frame.
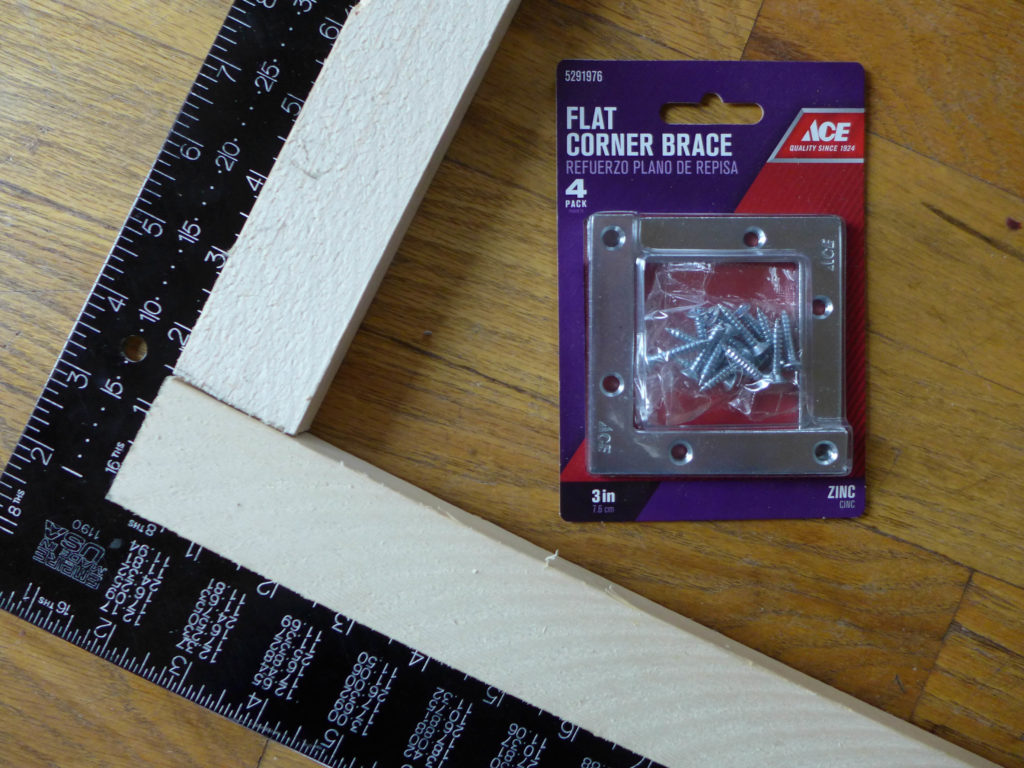
- Make the Frame : I bought those cheap long pieces of pine from the hardware store. I cut them to my desired size and connected them using flat corner braces. A Beautiful Mess provides a detailed tutorial about making this sort of frame. Since this particular frame will be hidden behind the wrapped fabric, there’s no need for the wood filler.
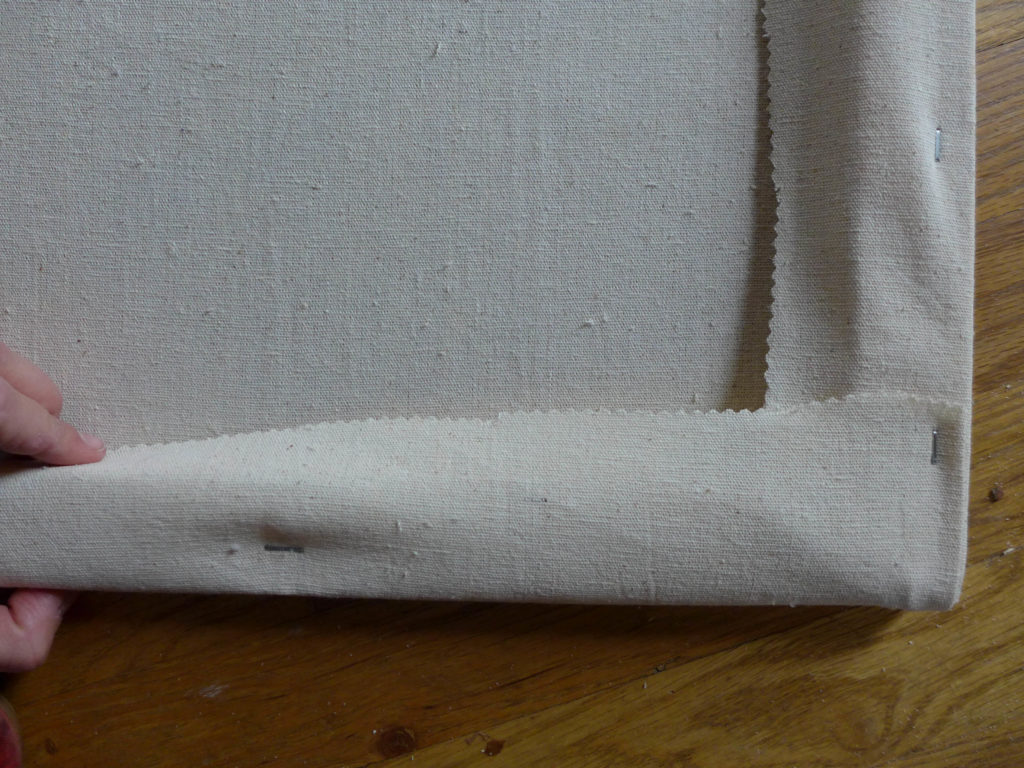
- Background Fabric : Begin by wrapping and stapling a base layer of fabric around the frame. The purpose of this fabric is to fill in the gaps between the loose weave of the burlap, but the background fabric doesn’t have to be anything special. I used a scrap piece of canvas painters cloth for my background. When stapling, try to keep the fabric equally taut around the entire frame.
- Staple Main Piece : In my opinion, this is the most stressful step of the whole project. You’ll want to carefully line up your work so that it’s centered on the frame. Then carefully begin stapling it while keeping it as evenly stretched as possible. I like to start by stapling the middle of each side, and then I slowly work my way to the corners. This step is made all the more difficult because the areas with more stitches in will have less give than the areas of burlap with few or no stitches.
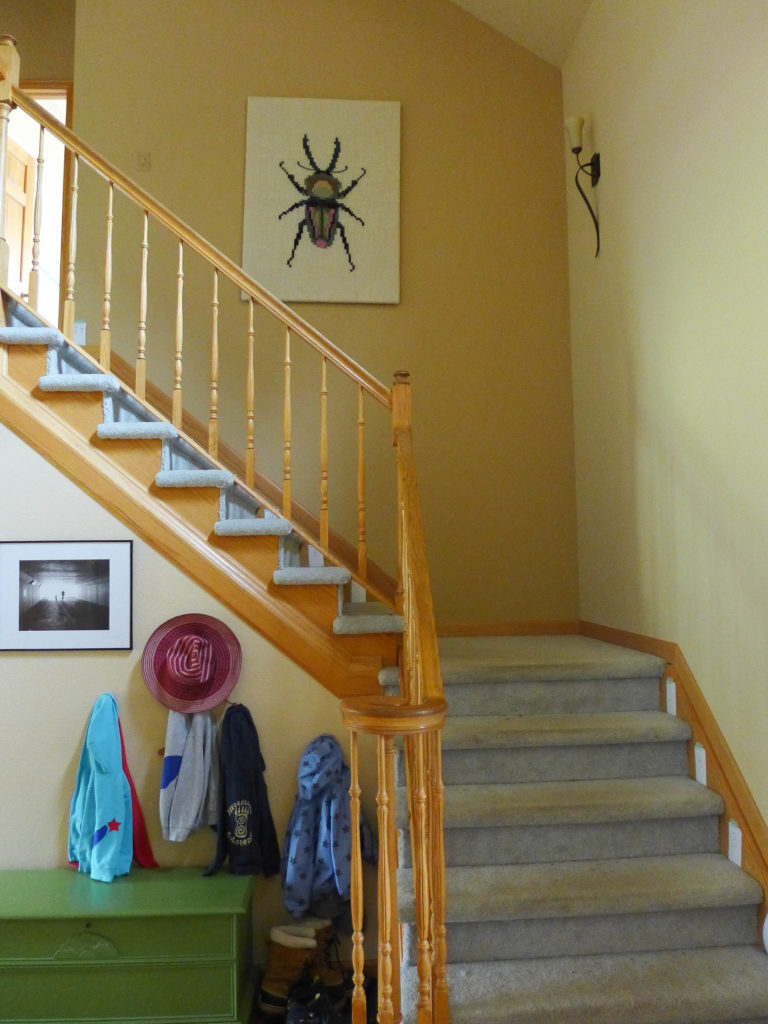
This is truly a fun project, from picking out your pattern and yarns to seeing major progress thanks to the large-scale easy stitches. Really, the only bit of stress you’ll have is with the final step when you’re stapling your piece to the frame. Just go slow, be patient, and learn from my mistakes. As you can see, there is a curve to the burlap fibers because of differences in how I pulled the fabric before stapling. I will never go back and fix that, but I still think it looks great hanging on the wall.
I’m so happy with how this turned out! And while a large-scale beetle isn’t for everyone, fortunately, everyone in my house loves it. <3
If you start your own project and have any questions, let us know.
Very nice post thanks.