
It’s been a while since we’ve done any sort of DIY craft post! We’re definitely making like crazy, so that’s no excuse. If anything, it means that we have a backlog of Make with Me posts to work on.

Well, the DIY drought ends today. I recently learned a great way to wind yarn around an object and tie it off without any tricky knots or loose ends. This is so simple, and for some of you, this may already be a tool in your DIY toolbox, but I’m hoping that there are a few of you that will appreciate this new trick as much as I do.
Click on for our step-by-step guide and a short list of places where this technique may be useful.
I totally get it if your first question is “why?”. Why would you ever need to do this? Here are a few uses that we’ve thought of:
- the top of a hiking stick
- the end of a magic wand
- adding a bit of color and texture to an object for decoration (could be a stick, the leg of a chair, the stair railing, a lamp cord…)
- making tassels
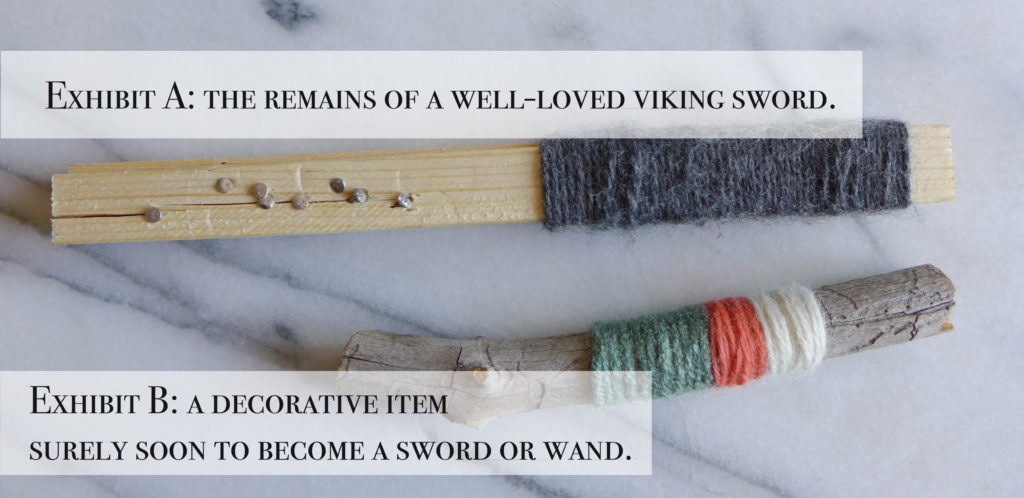
- wrapping the handle of your kiddo’s homemade Viking sword (see Exhibit A above)
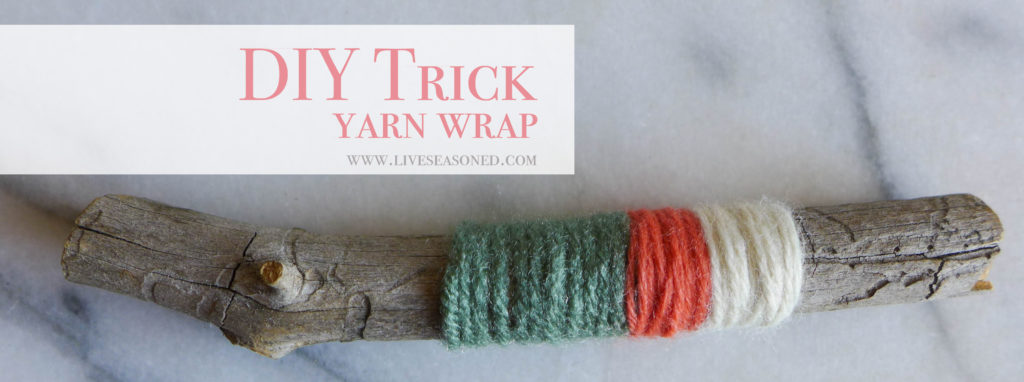
DIY Yarn Wrap
This technique is super simple, but I thought that an over abundance of photos would make my instructions even easier to understand.
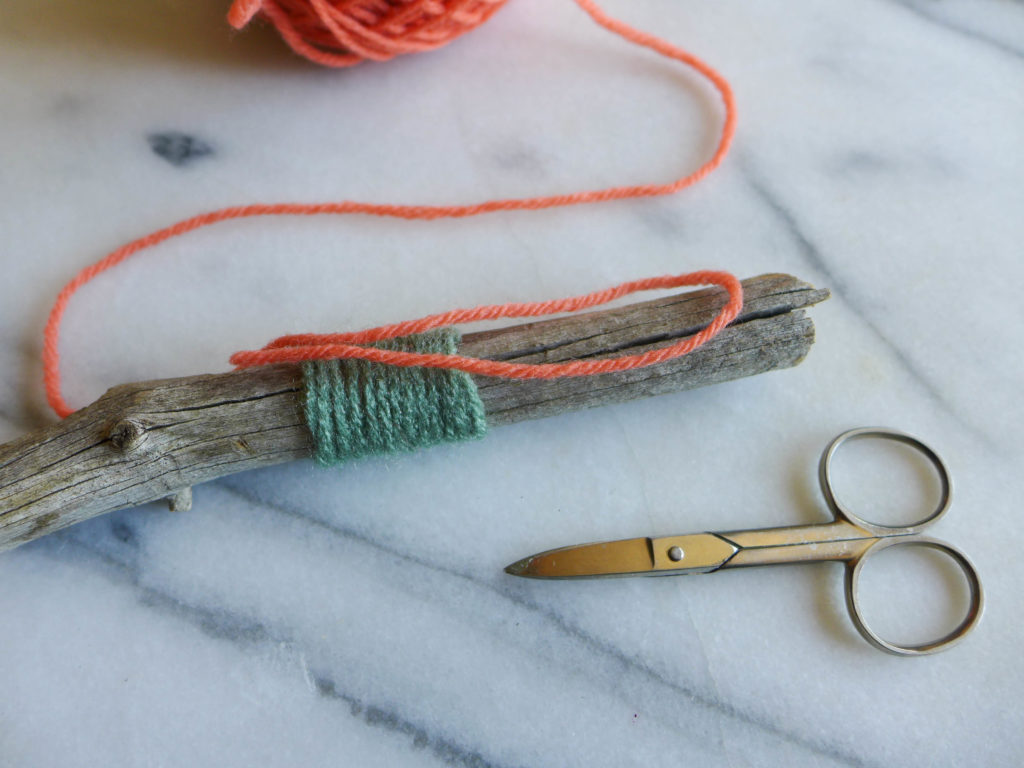
Start by gathering your supplies: a stick, yarn or rope, scissors
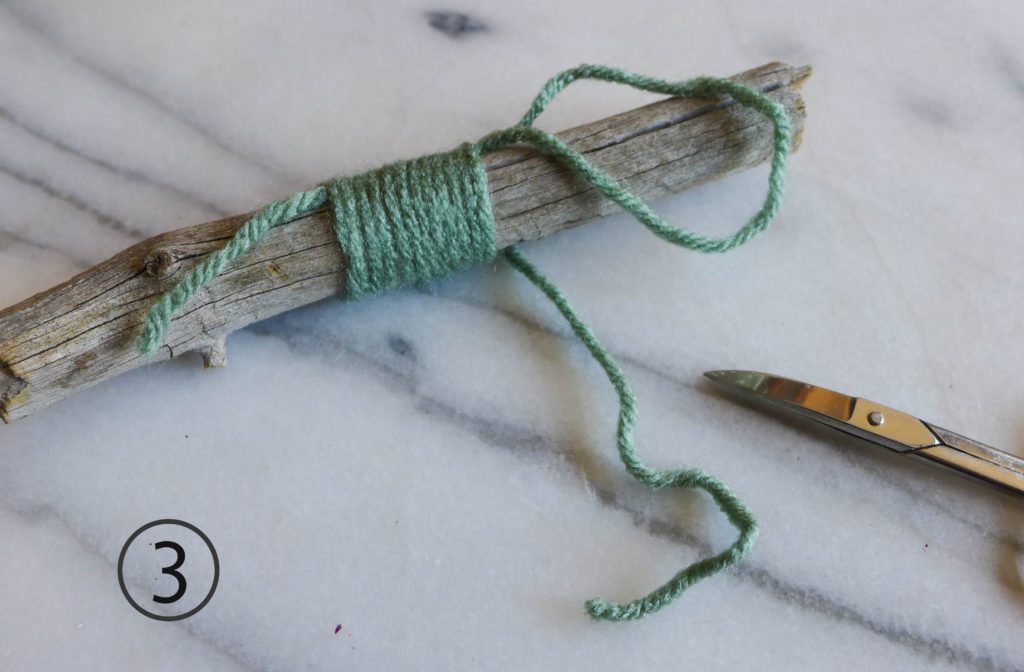
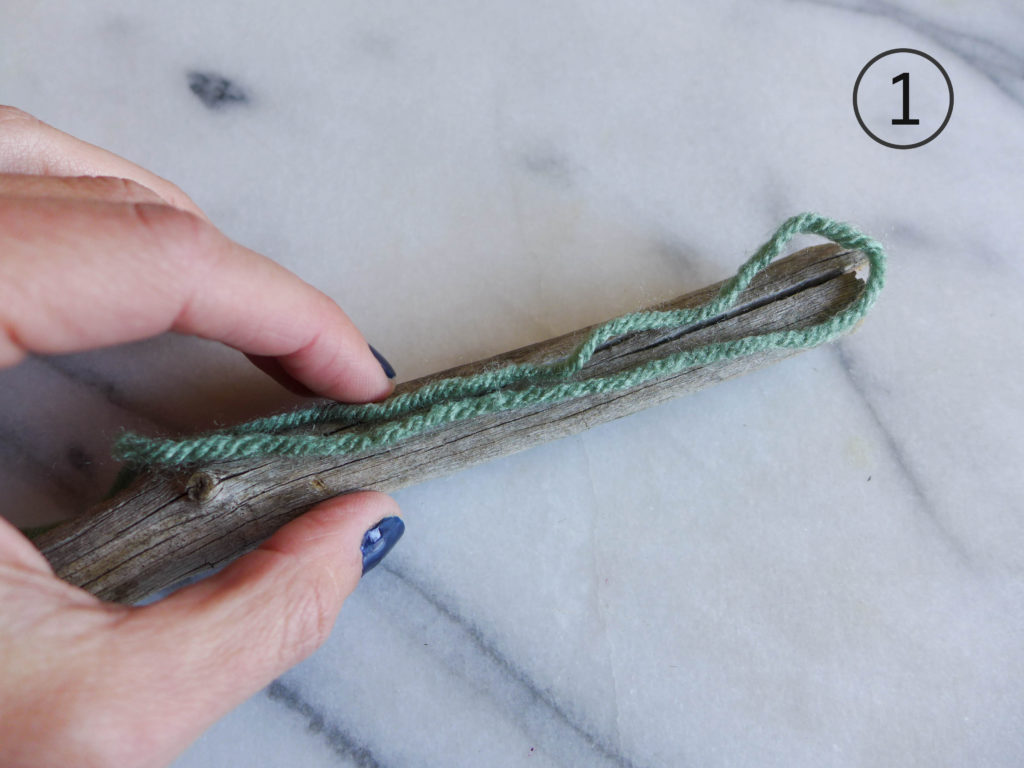 1. Hold the end of your rope above the area that will be wrapped. Bring the yarn down along the stick to a point at least a couple of inches below where the wrapped area will end, and then bring the yarn back up to the starting point. Basically you’re forming a long U shape with the yarn.
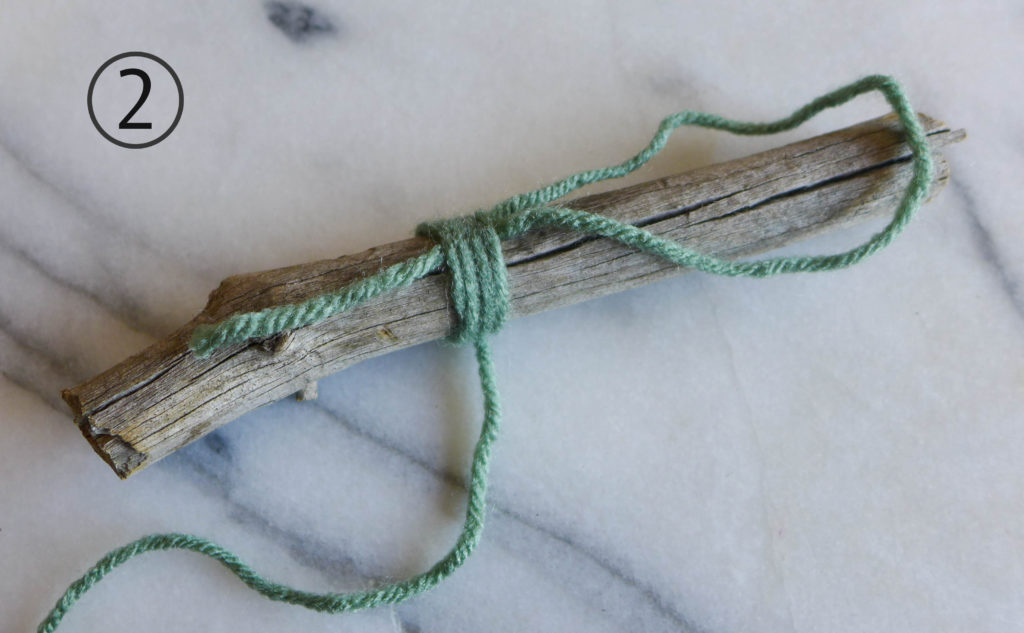
2. Start wrapping the yarn around both the stick and the U-shape that you created with the yarn. All the while, be sure to keep the cut end of your yarn above the wraps and the loop made by the U exposed below the wraps.
 3. Continue wrapping until you reach your desired point, but do not cover up the loop that you made in step 1.
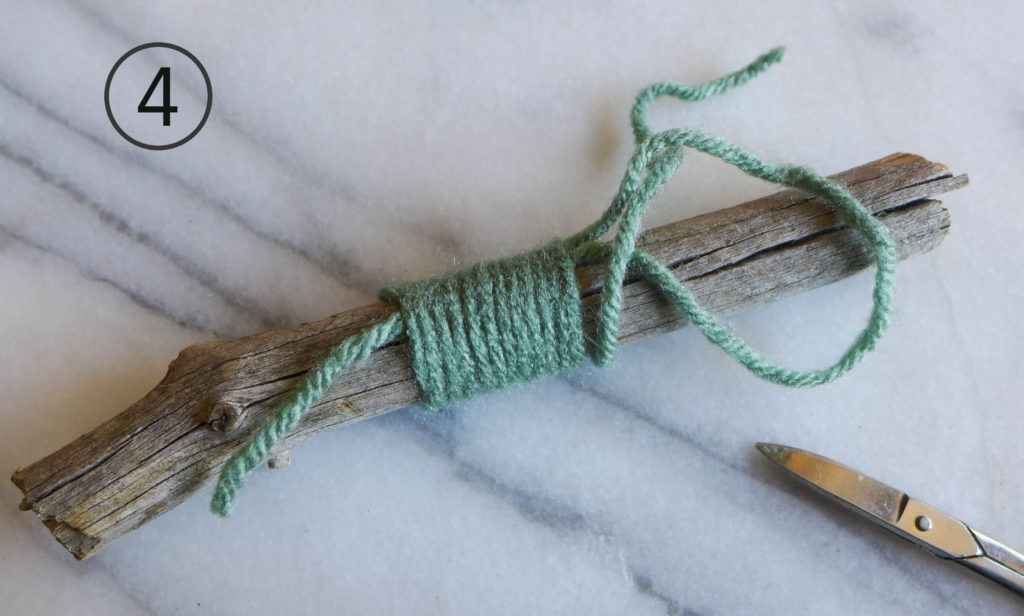
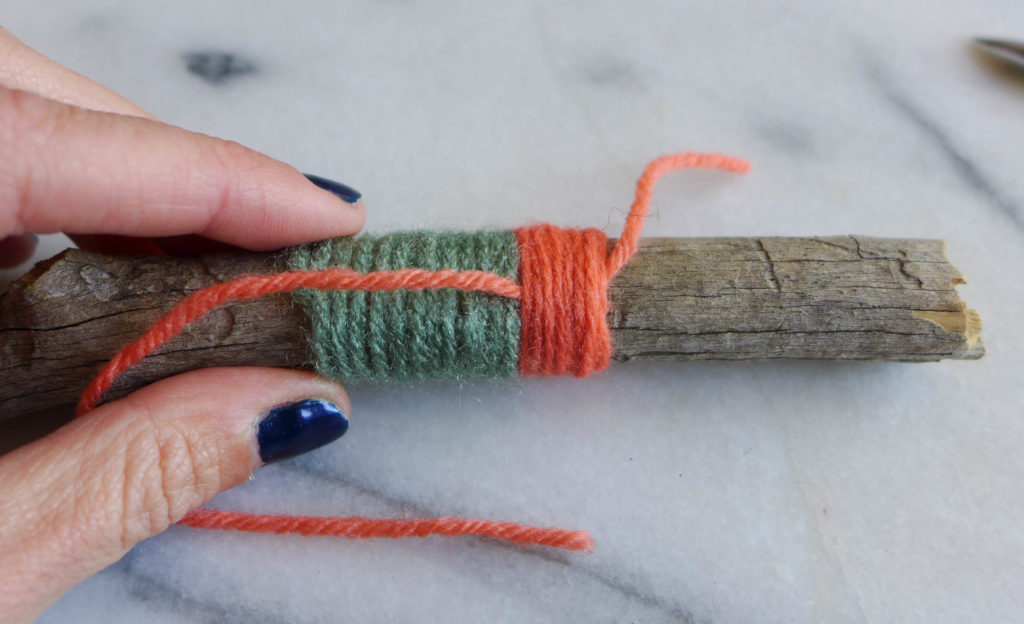
4. Cut the yarn, leaving at least 3-4 inches for ease of handling. Pass the cut end through the loop.
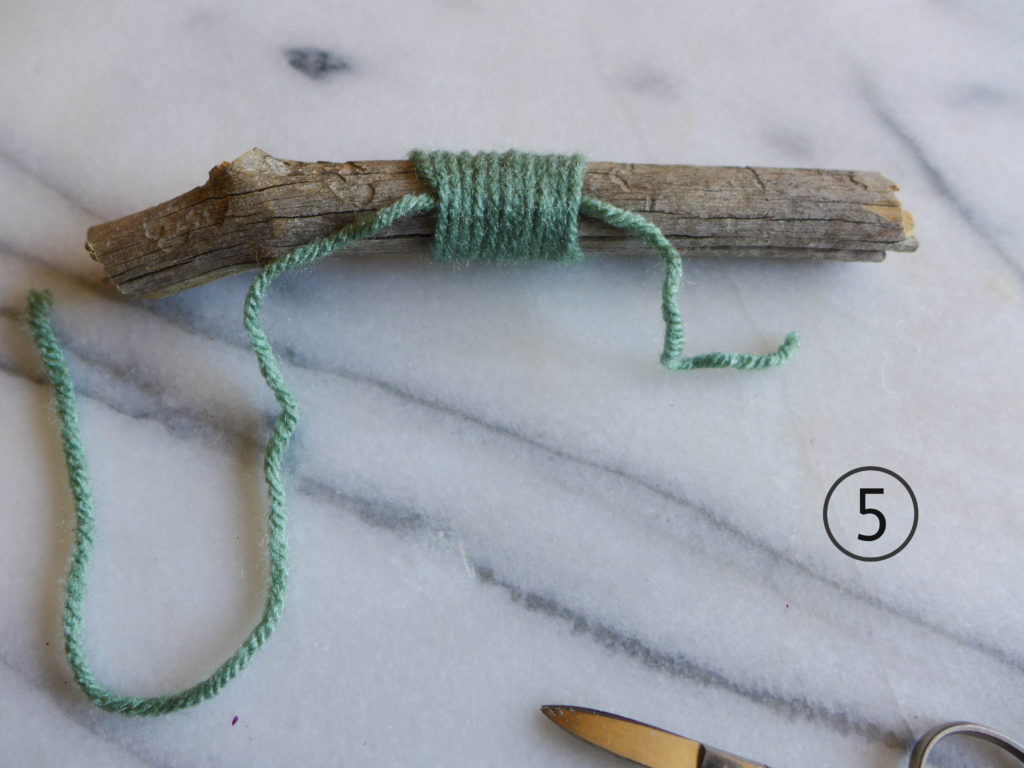 5. Pull the top yarn until the loop is drawn under the wrapped area.
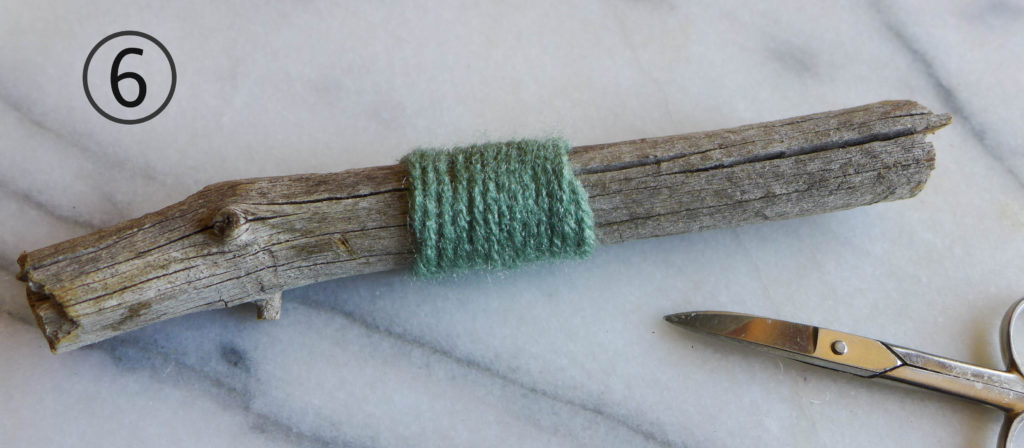 6. Cut off both the top and bottom ends, and you’re done!
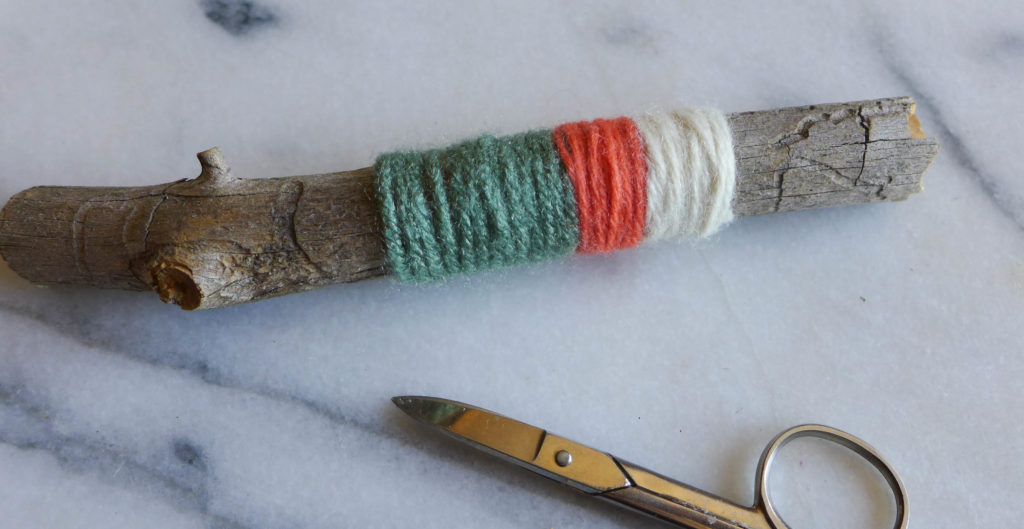
At this point you can add more colors, following the same steps as you did for the first color.
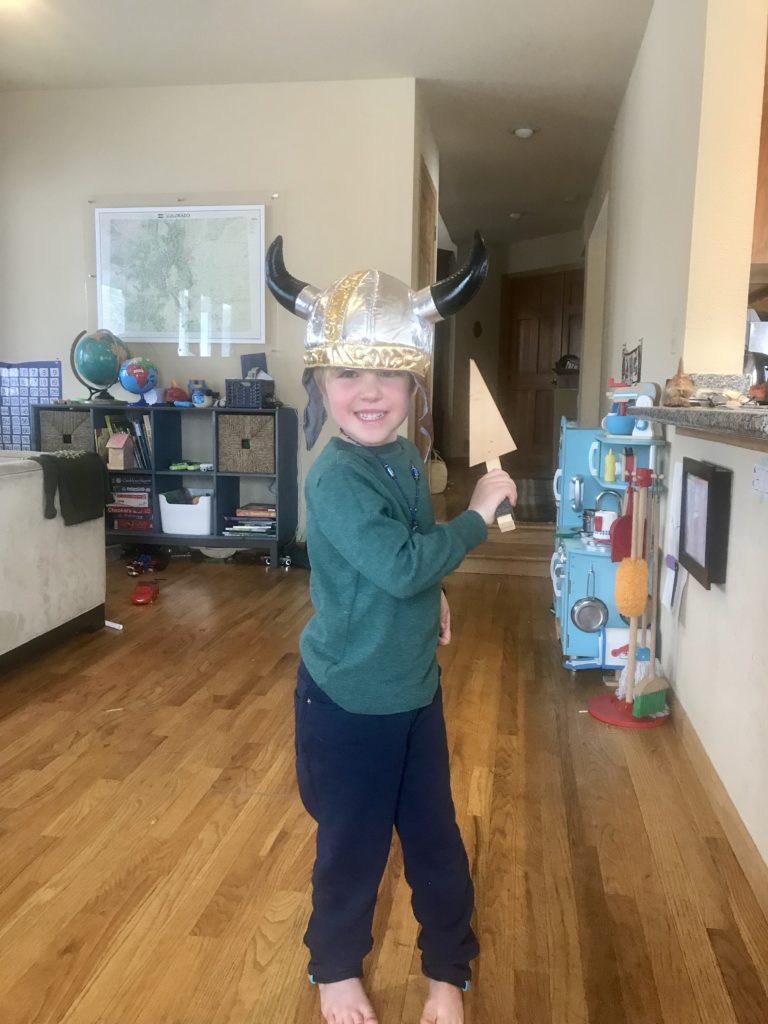
What do you think? Isn’t this an awesome and super simple way to wrap an object? I love that there are no tricky knots and you don’t need super agile fingers to get it done. When I showed it to my 5yo Viking, he acted as if I had just pulled a rabbit from a hat. And no joke, that’s about how I felt the first time I tried this technique.
I hope you’ll give this a try, and if you make something awesome, we’d love to hear about it! xo
Thank you.