Garden & Pond Update

I’m documenting the growth, successes, and failures in our backyard space. It’s been about a month since I introduced you to the pond, and two months since I introduced the garden.

We have reached the height of summer here in the mountains. This is our hottest month, and while it seems dry out there, August is usually even drier. As you’ll see in the photos, there have been some real successes here in the garden, but what you don’t see is that there have also been a few failures/areas for improvement.

Fist, a surprising success : look at this clematis!

clematis

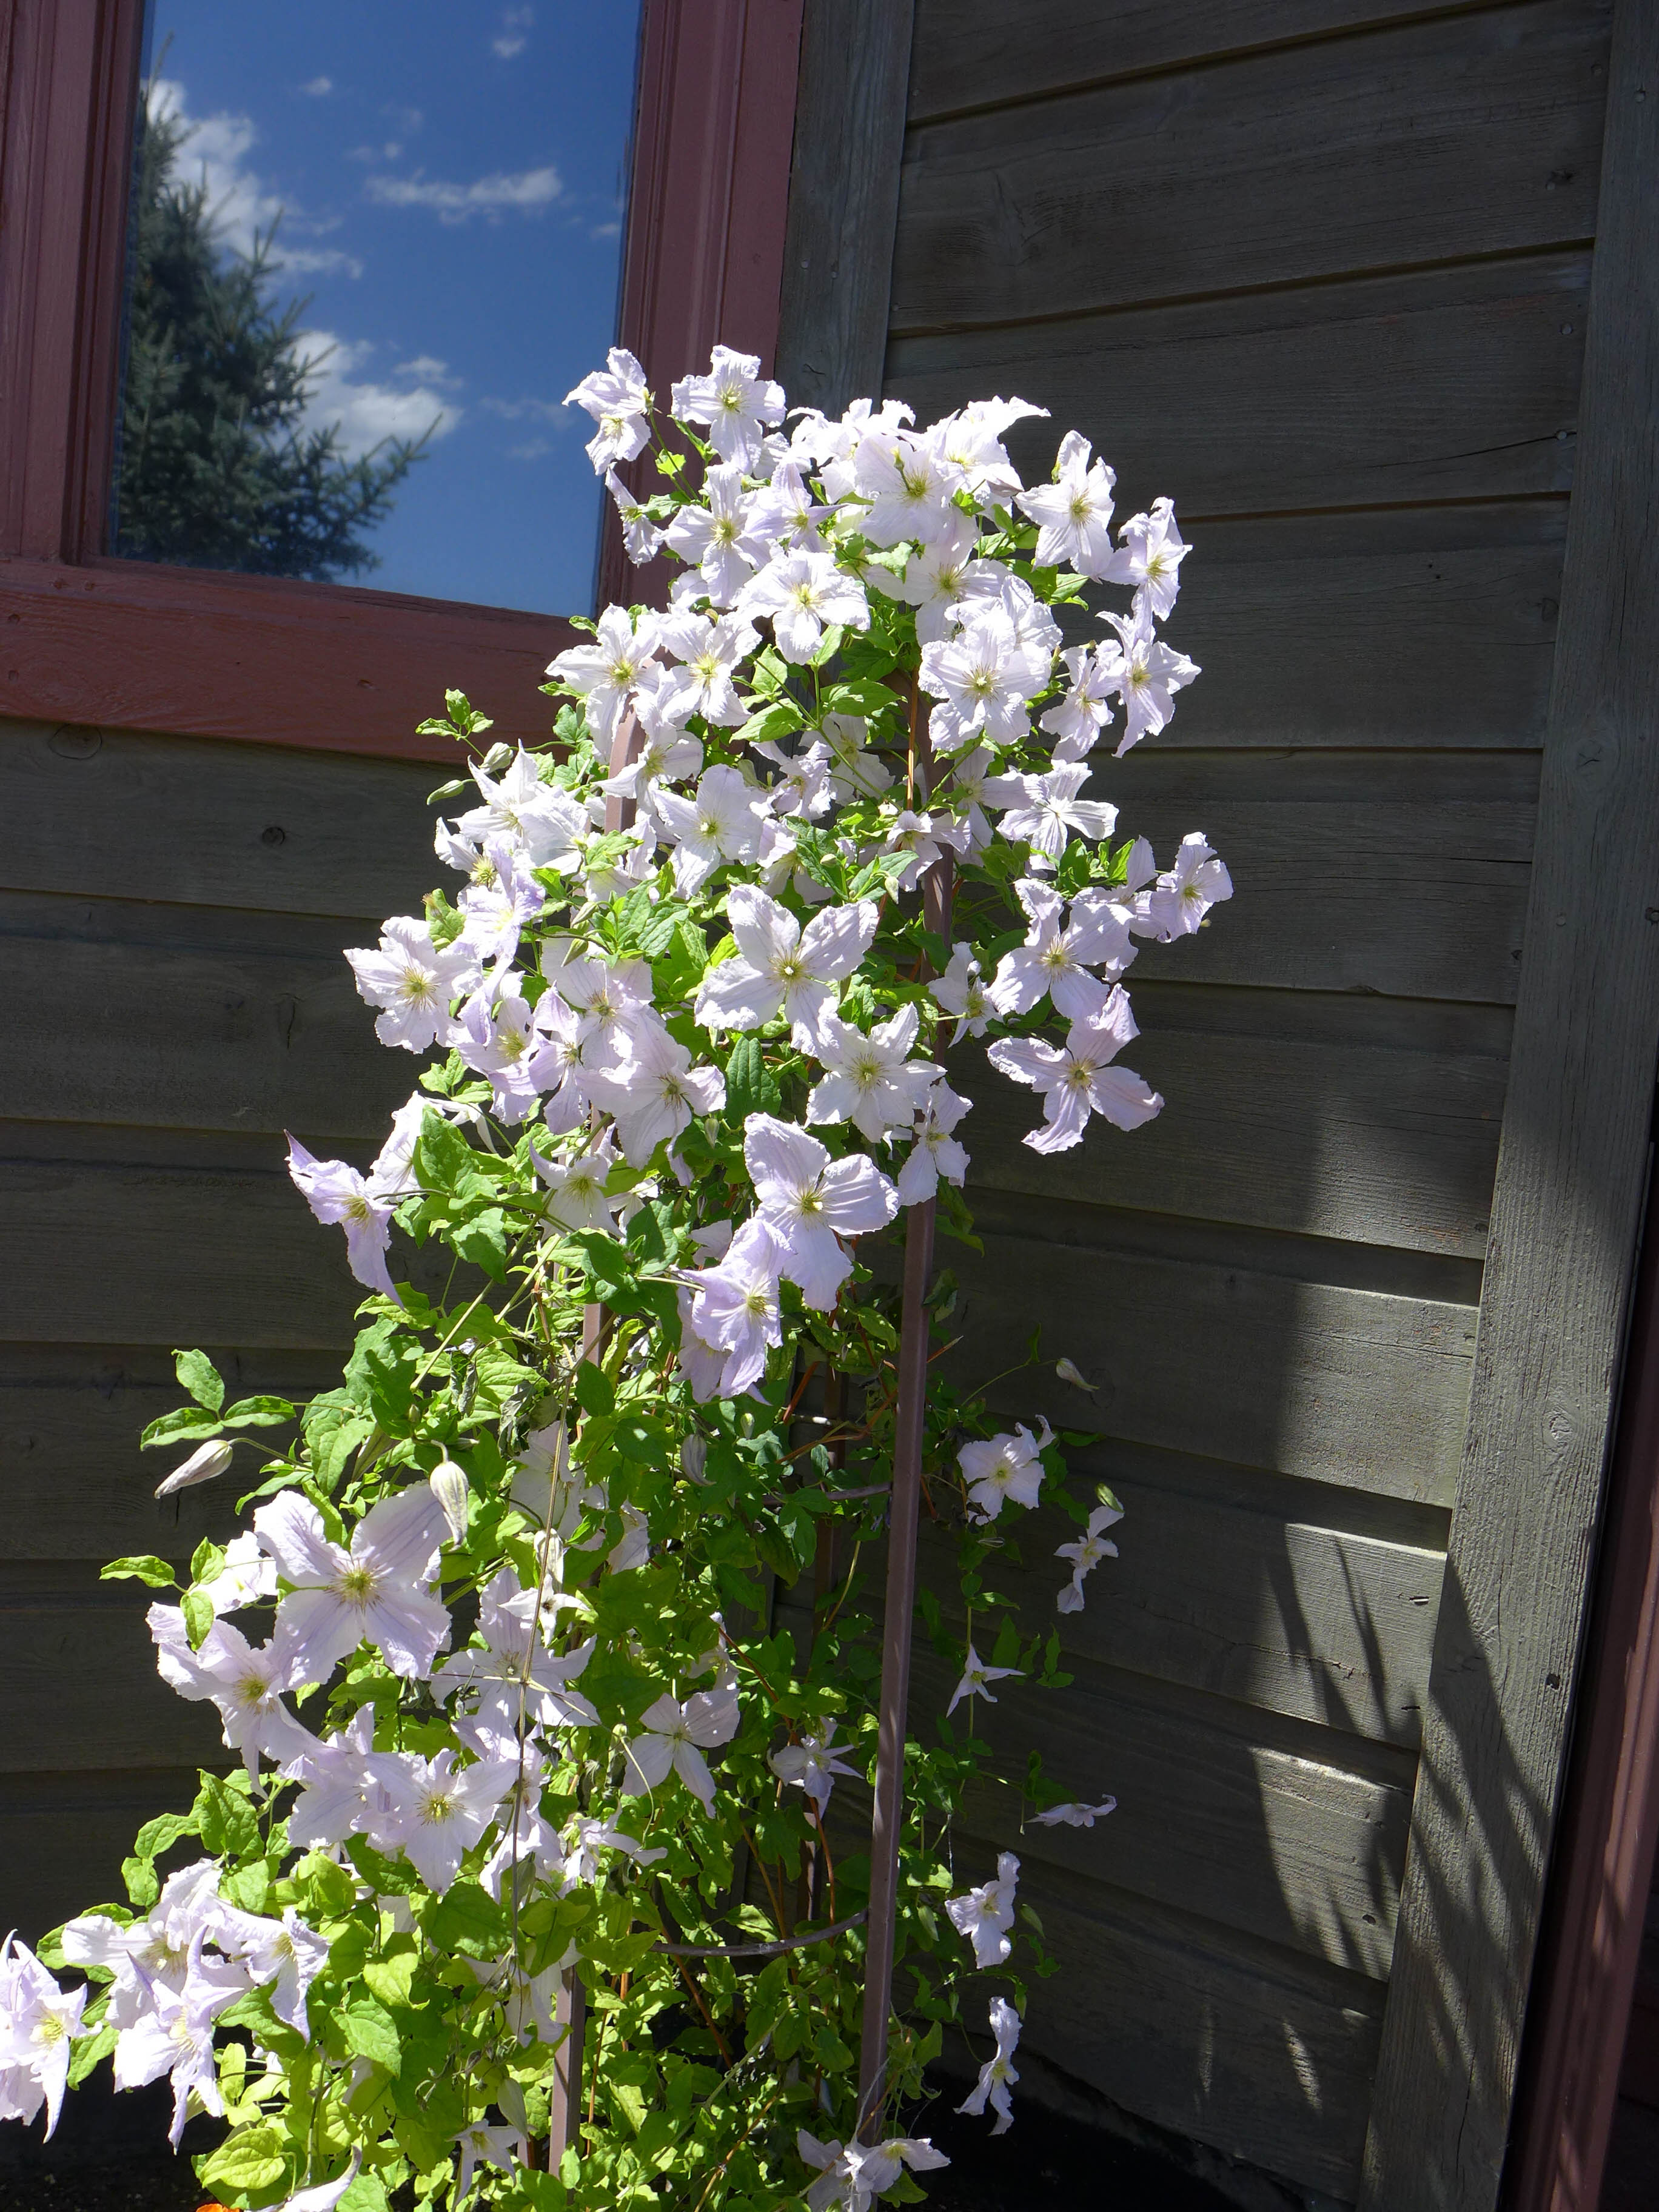
That vine grows in a small bed, that’s more like a container built into a little nook in our deck. It doesn’t have any irrigation, so the soil is extremely dry if not watered regularly. Last summer I was so busy with baby Luc, that I completely ignored this area. I barely watered it, and I didn’t care that the vine never grew (seriously, it grew maybe 10 inches and then died). Fortunately, with ample water, it came back in full force this summer and is covered in beautiful blooms!

I think that it also serves as a great reminder of the resilience of plants, and about how lush a garden can be with just a bit of care.

coneflower

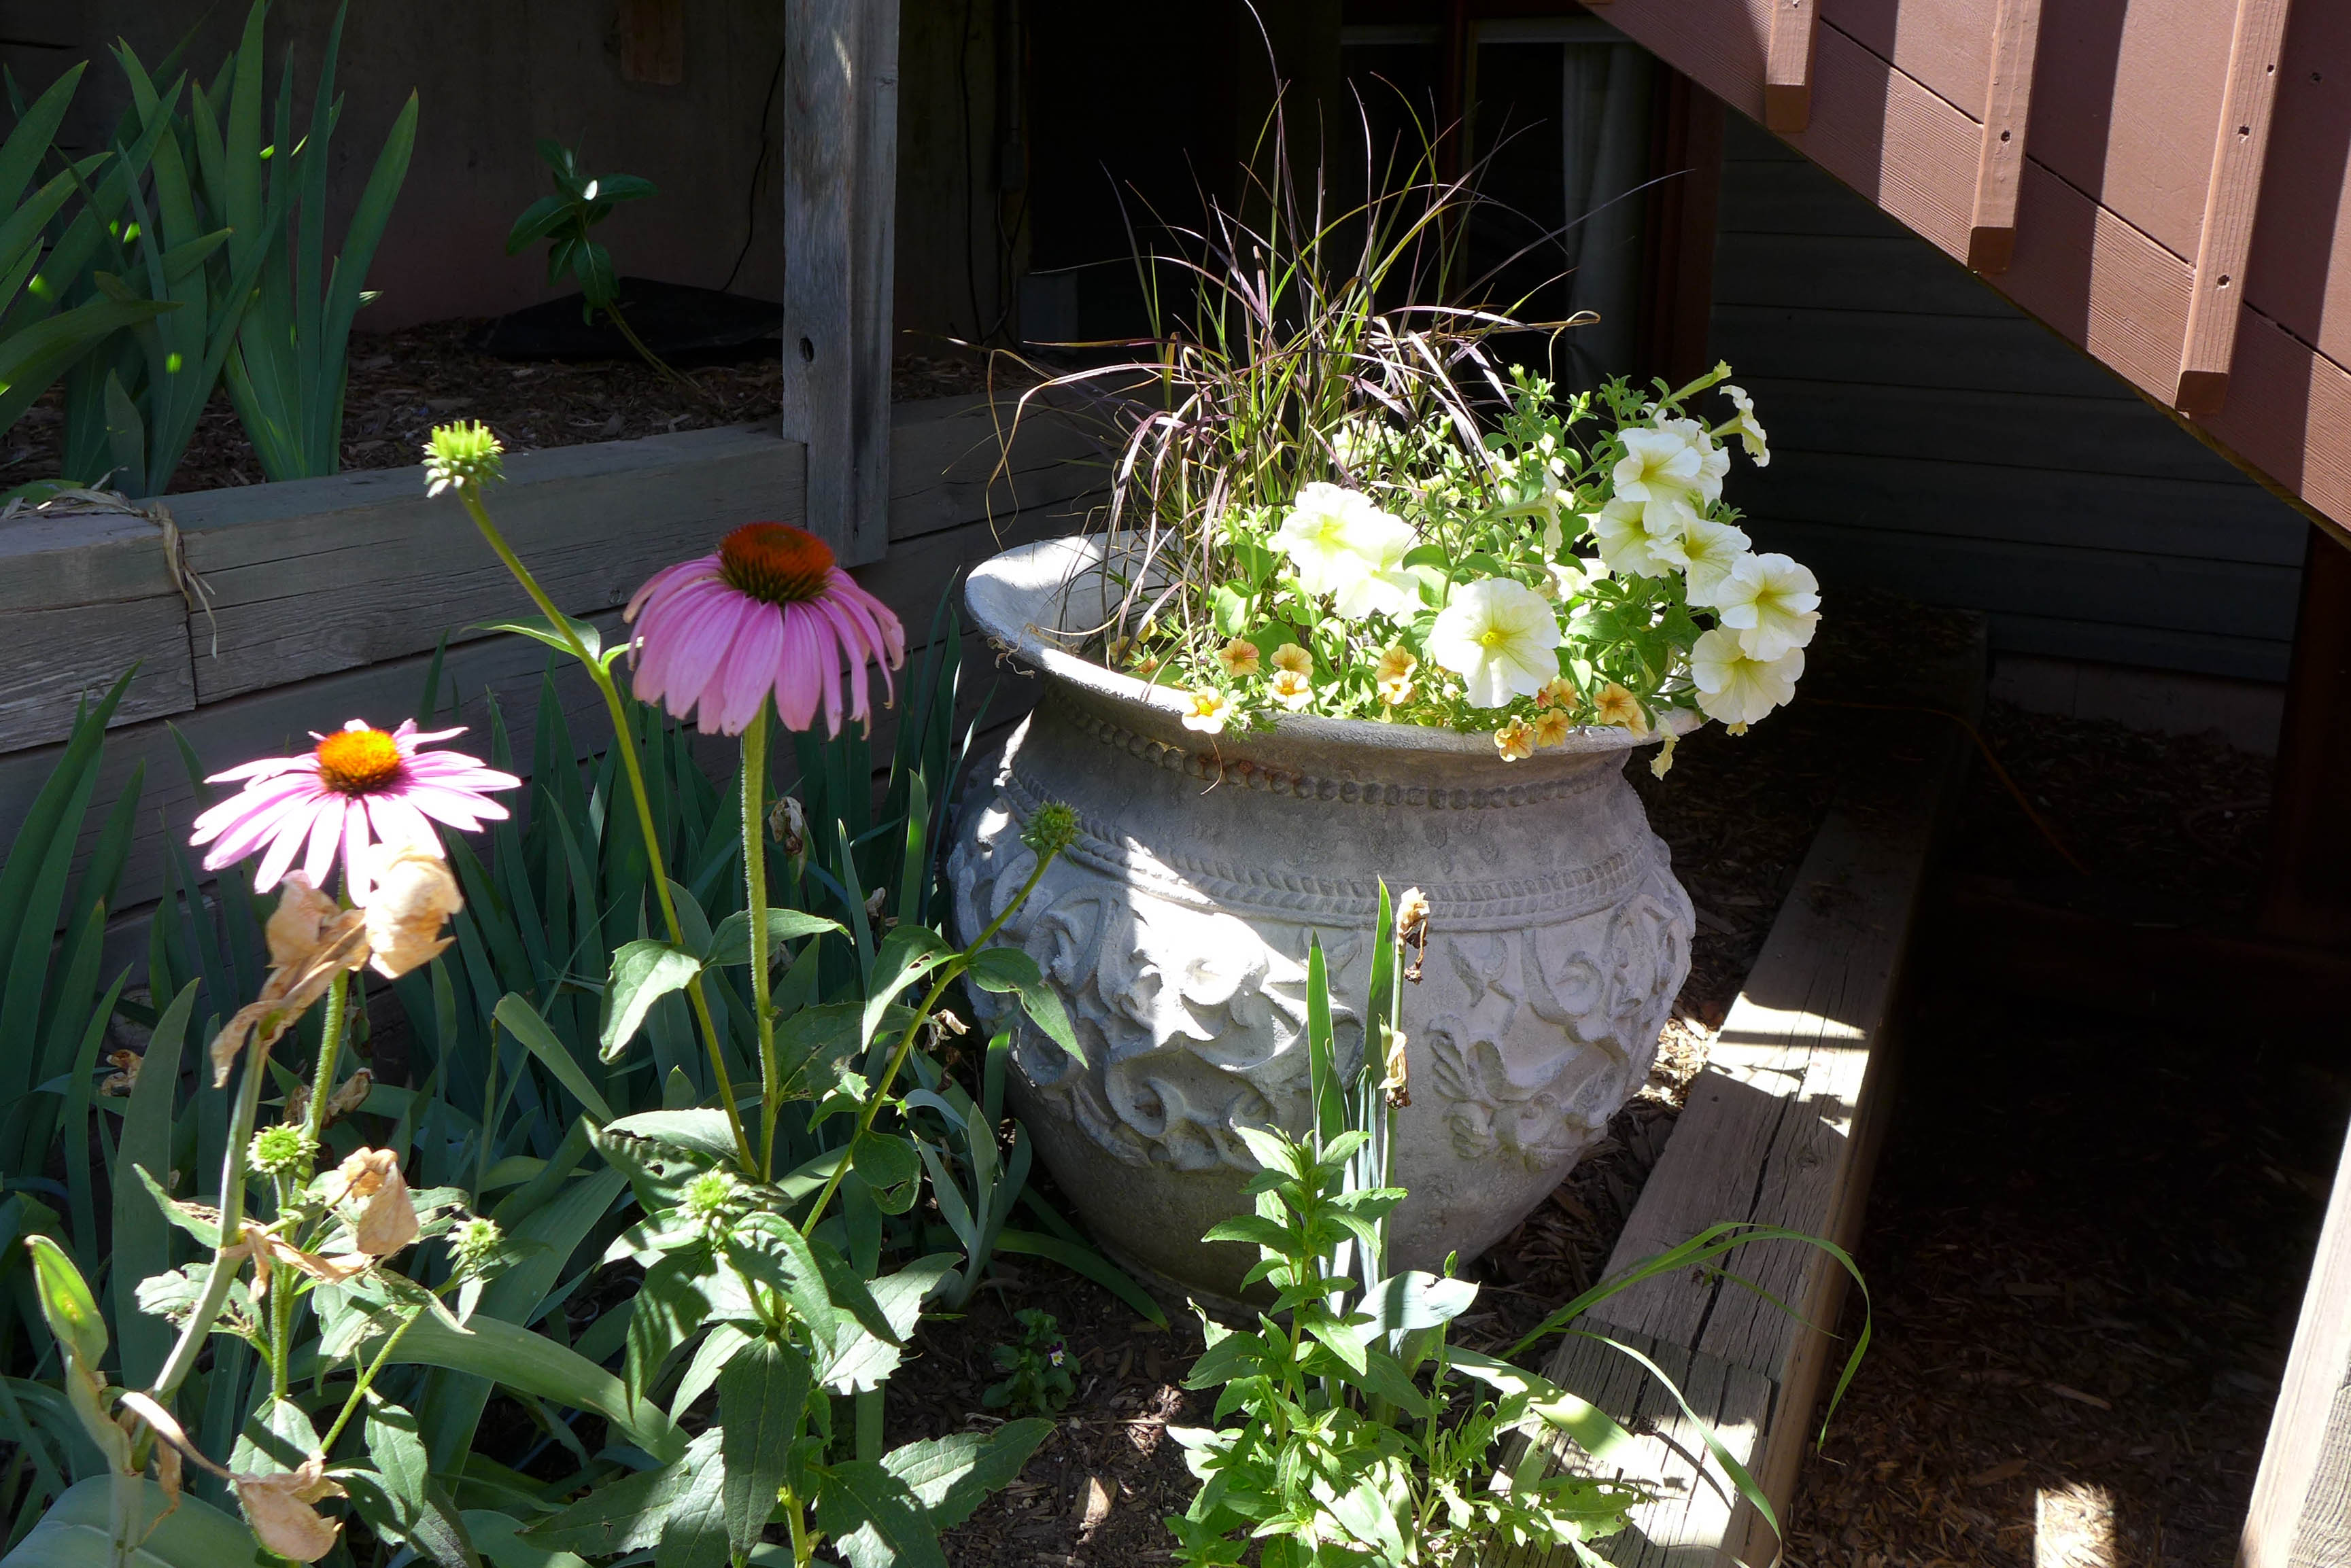
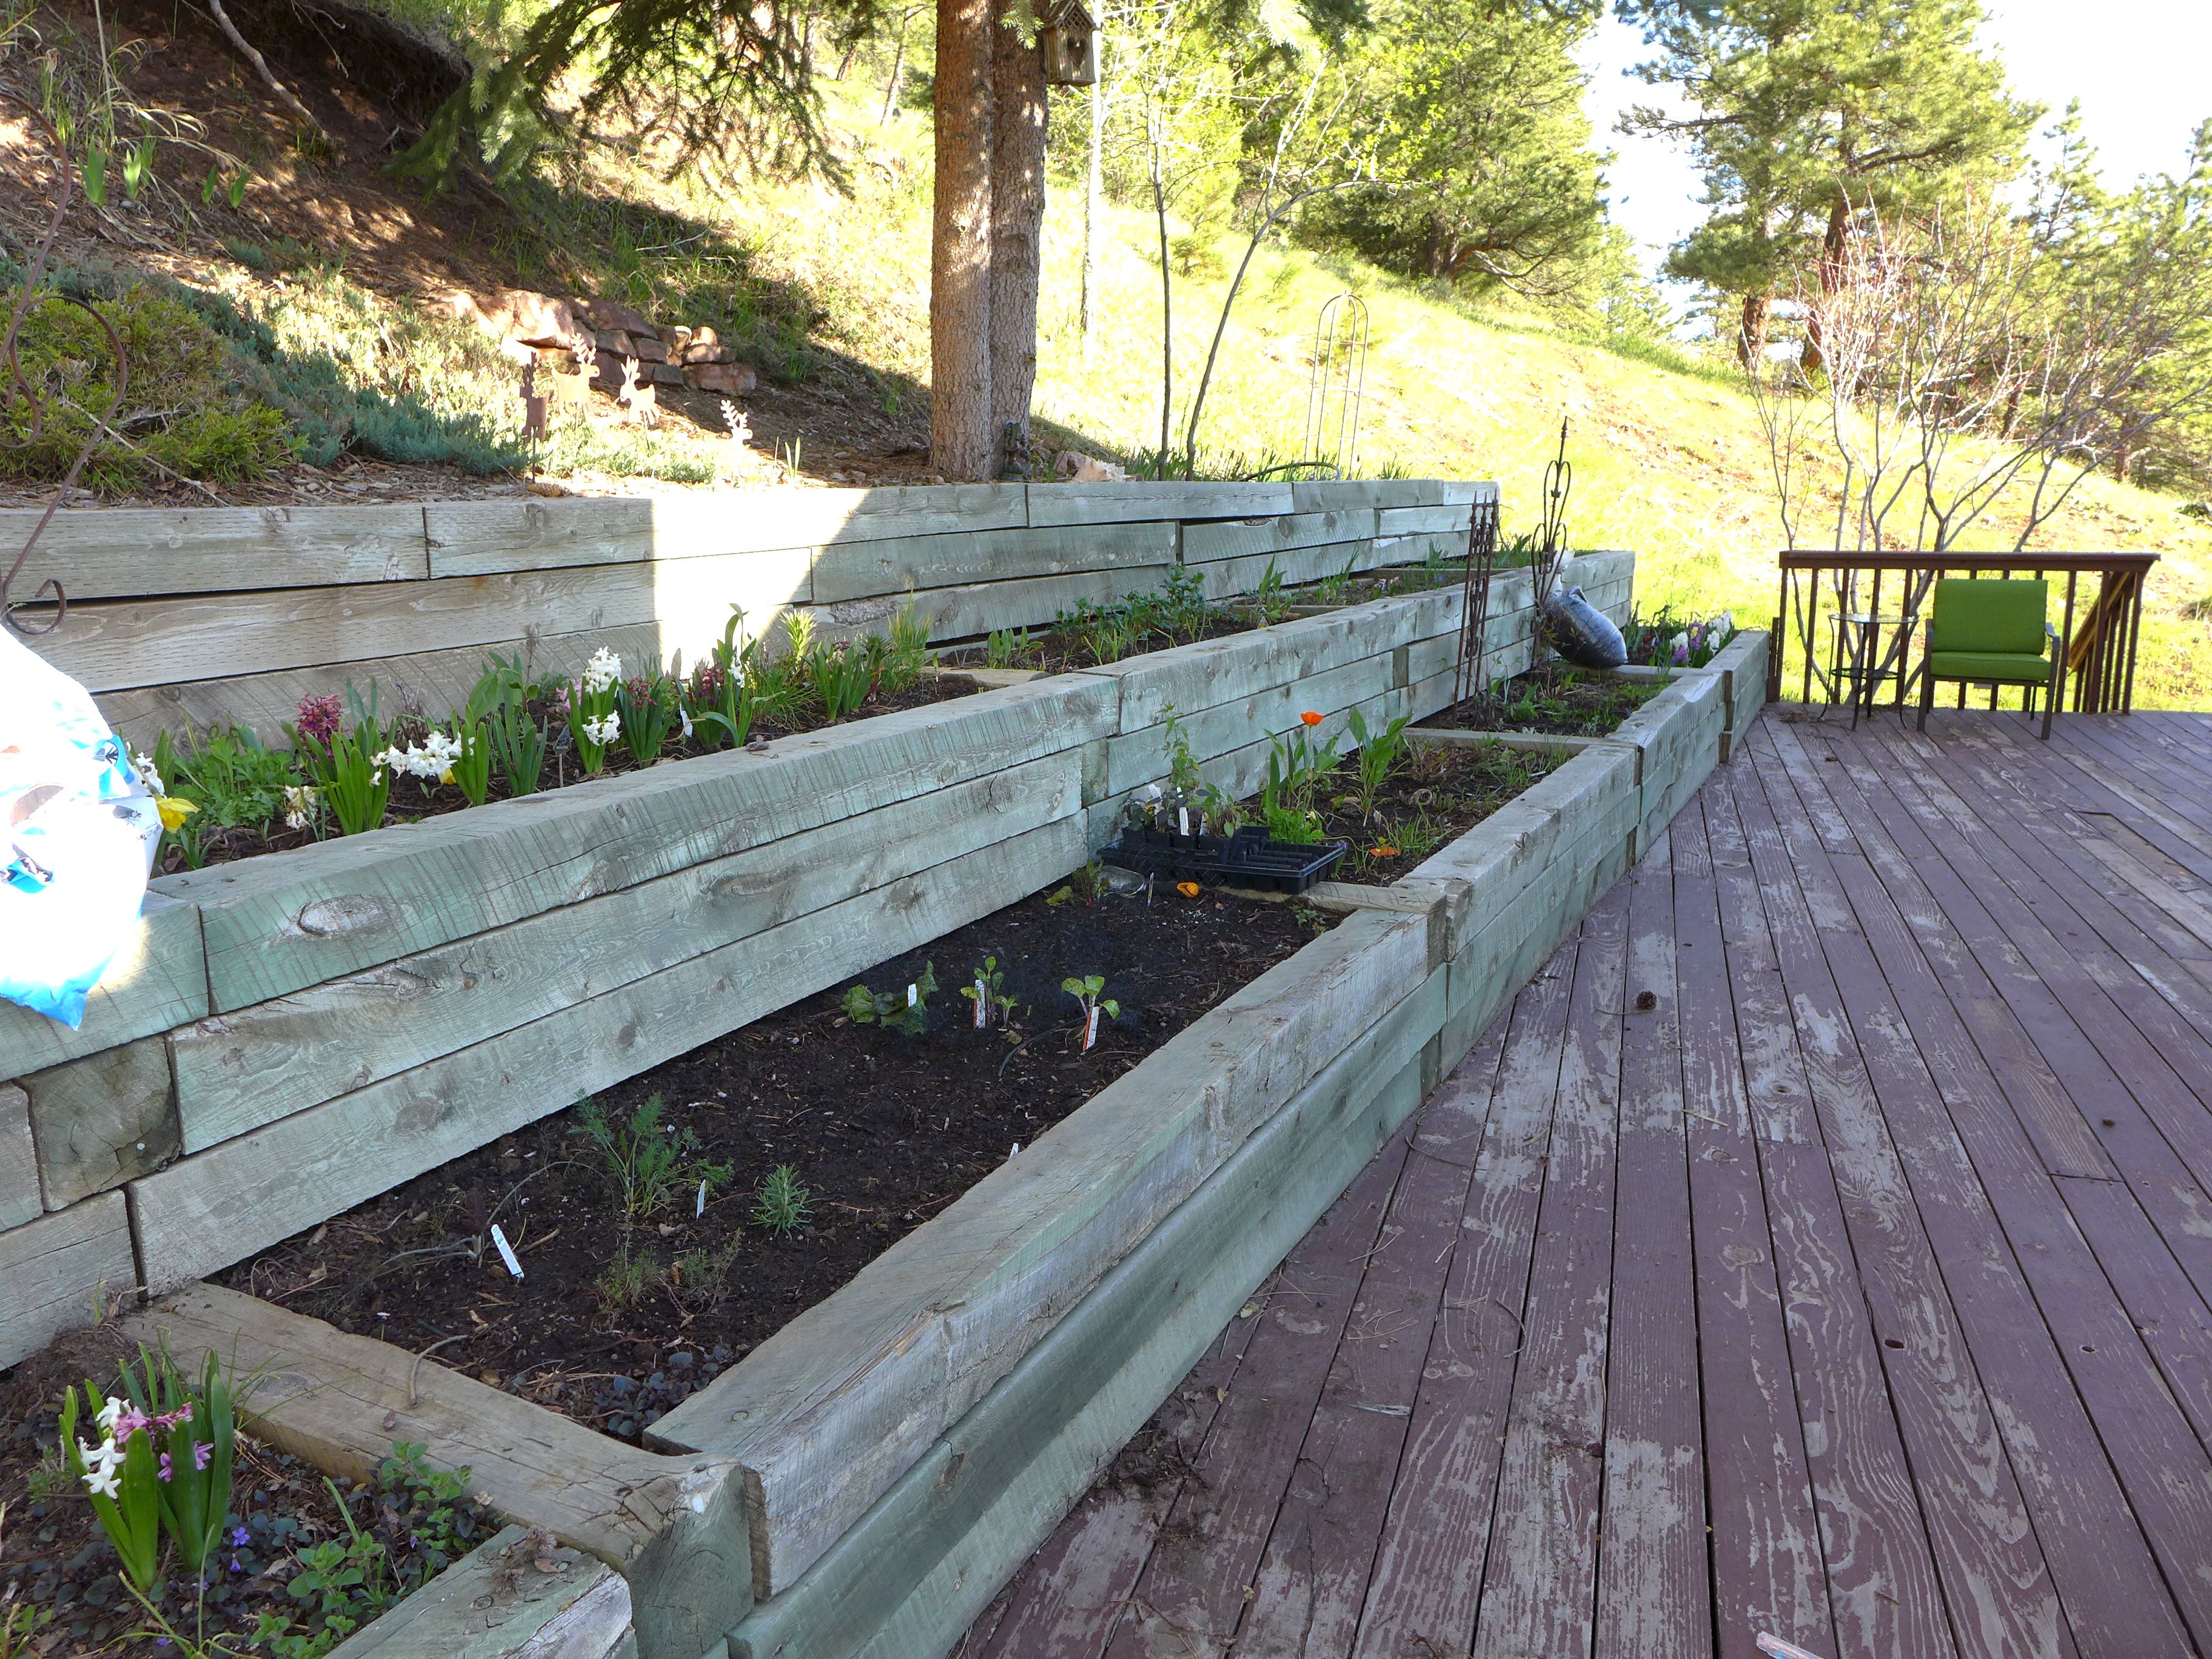
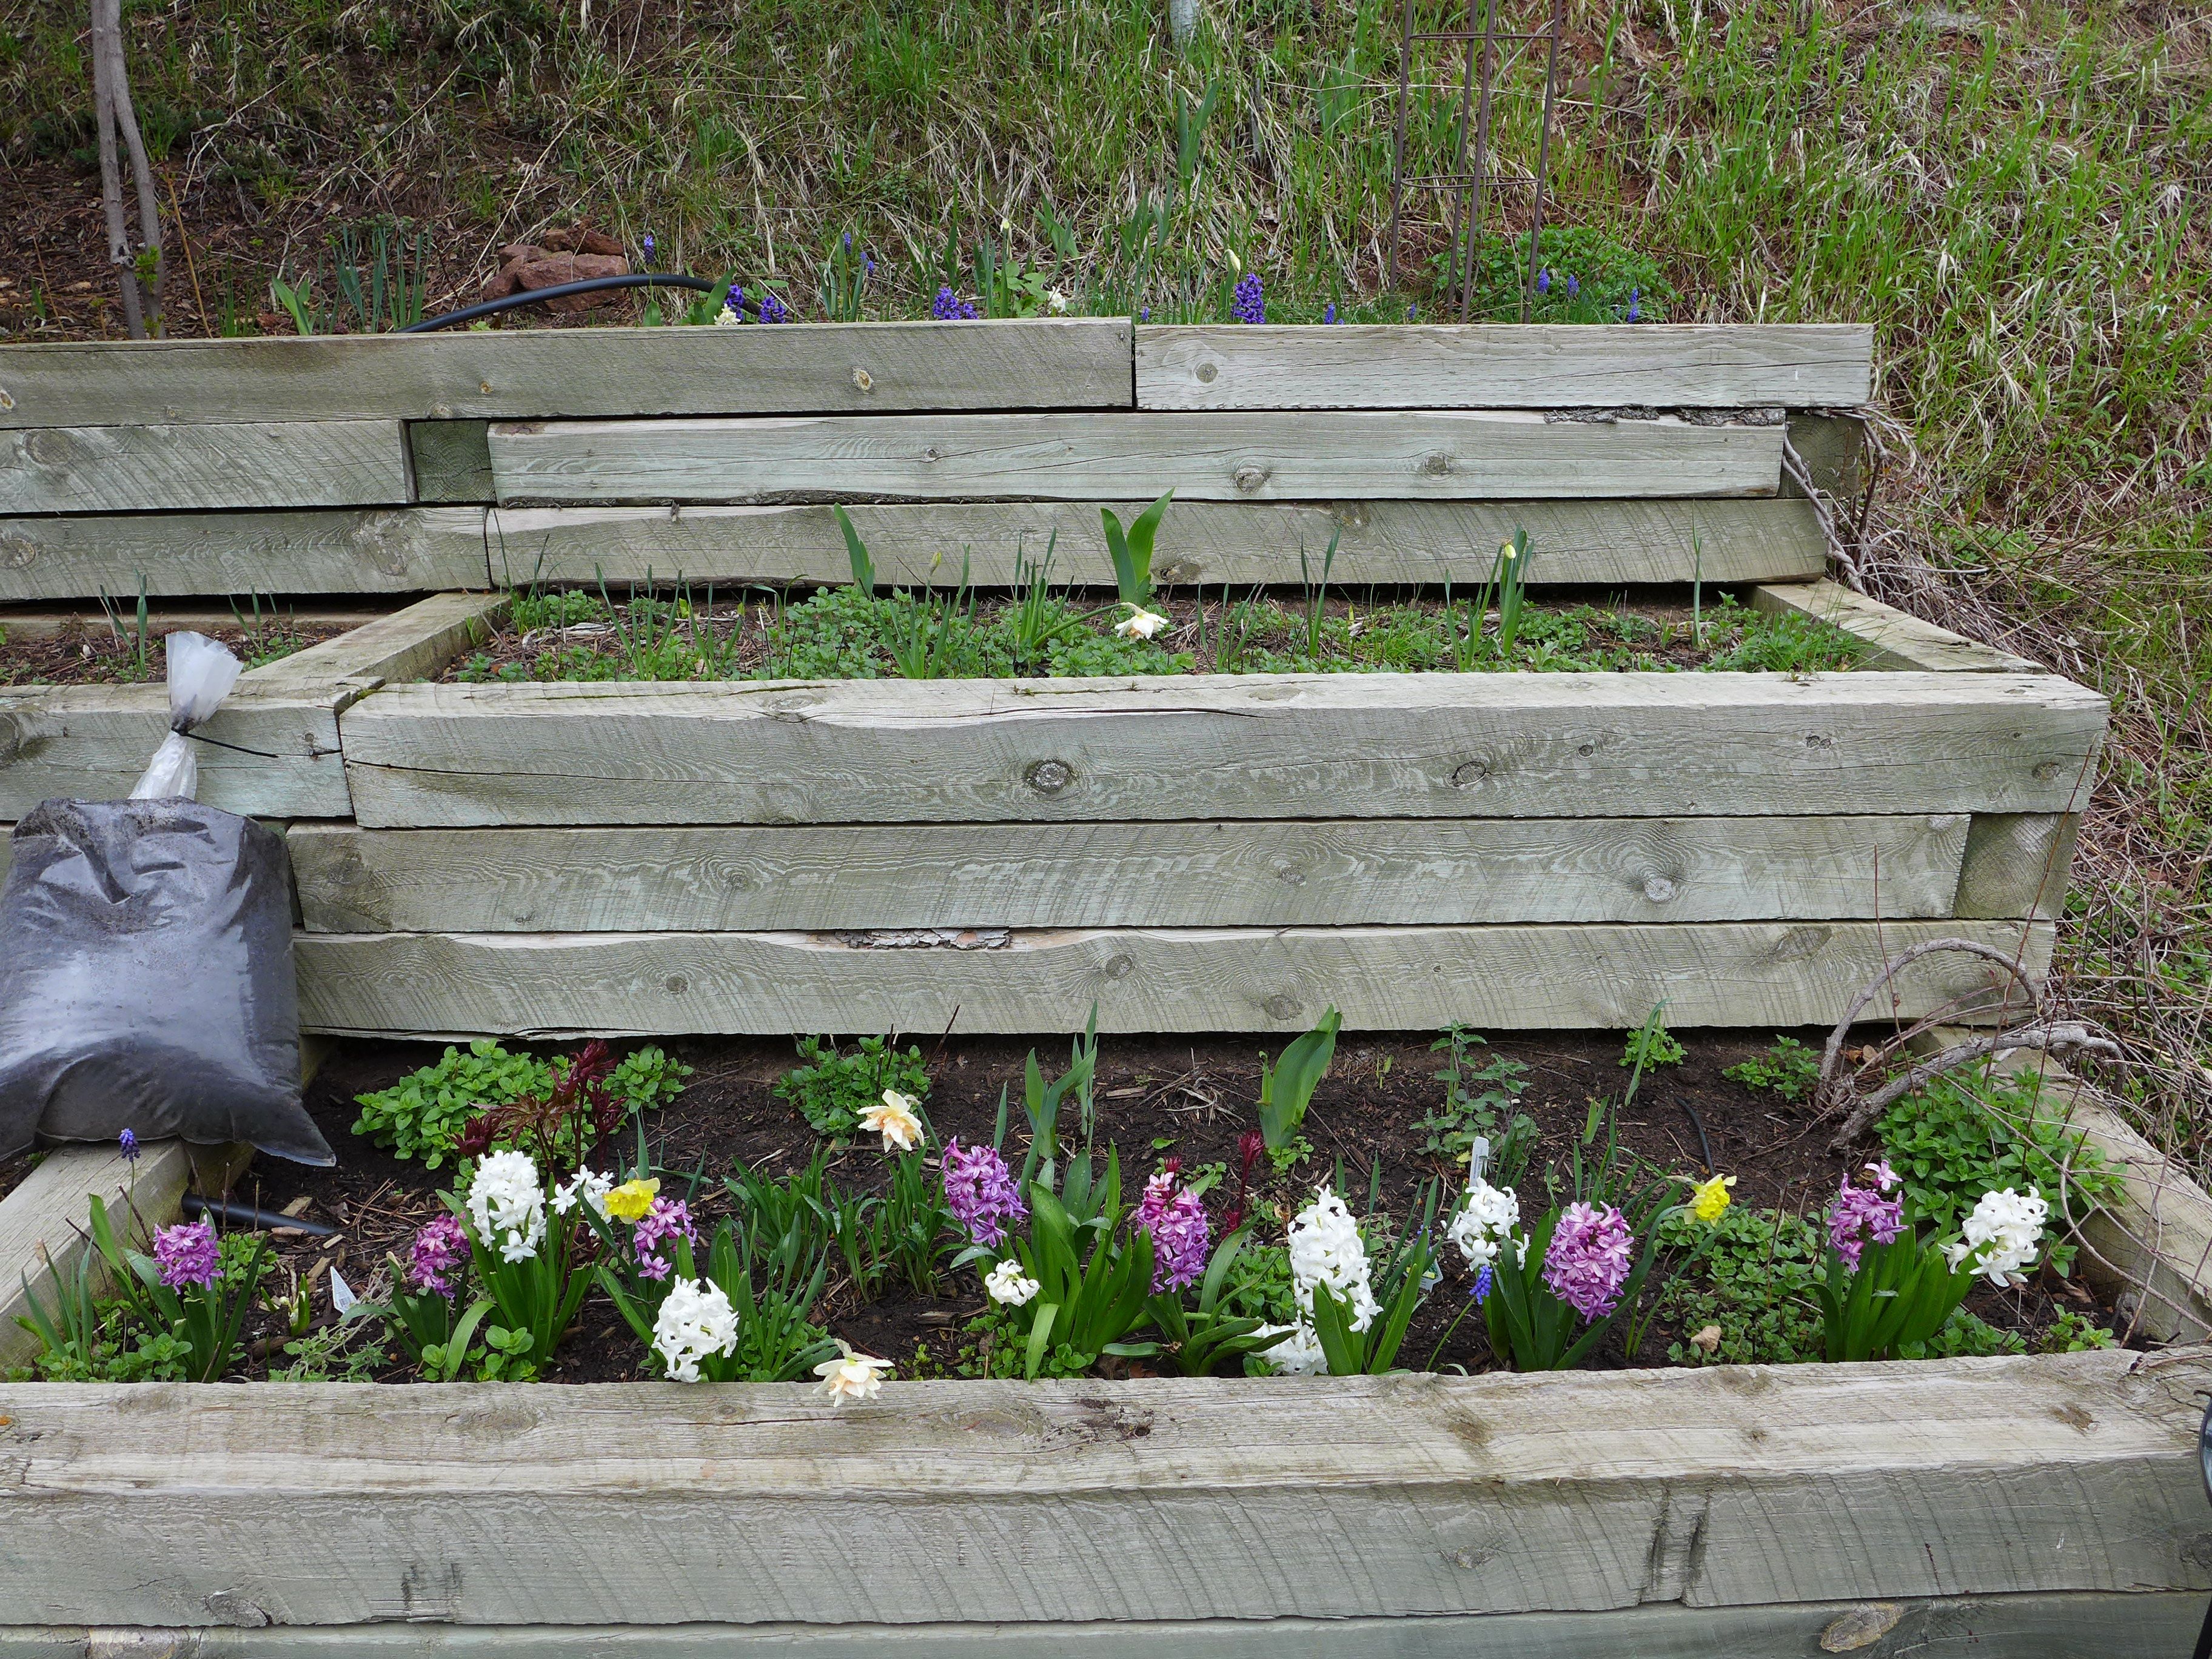
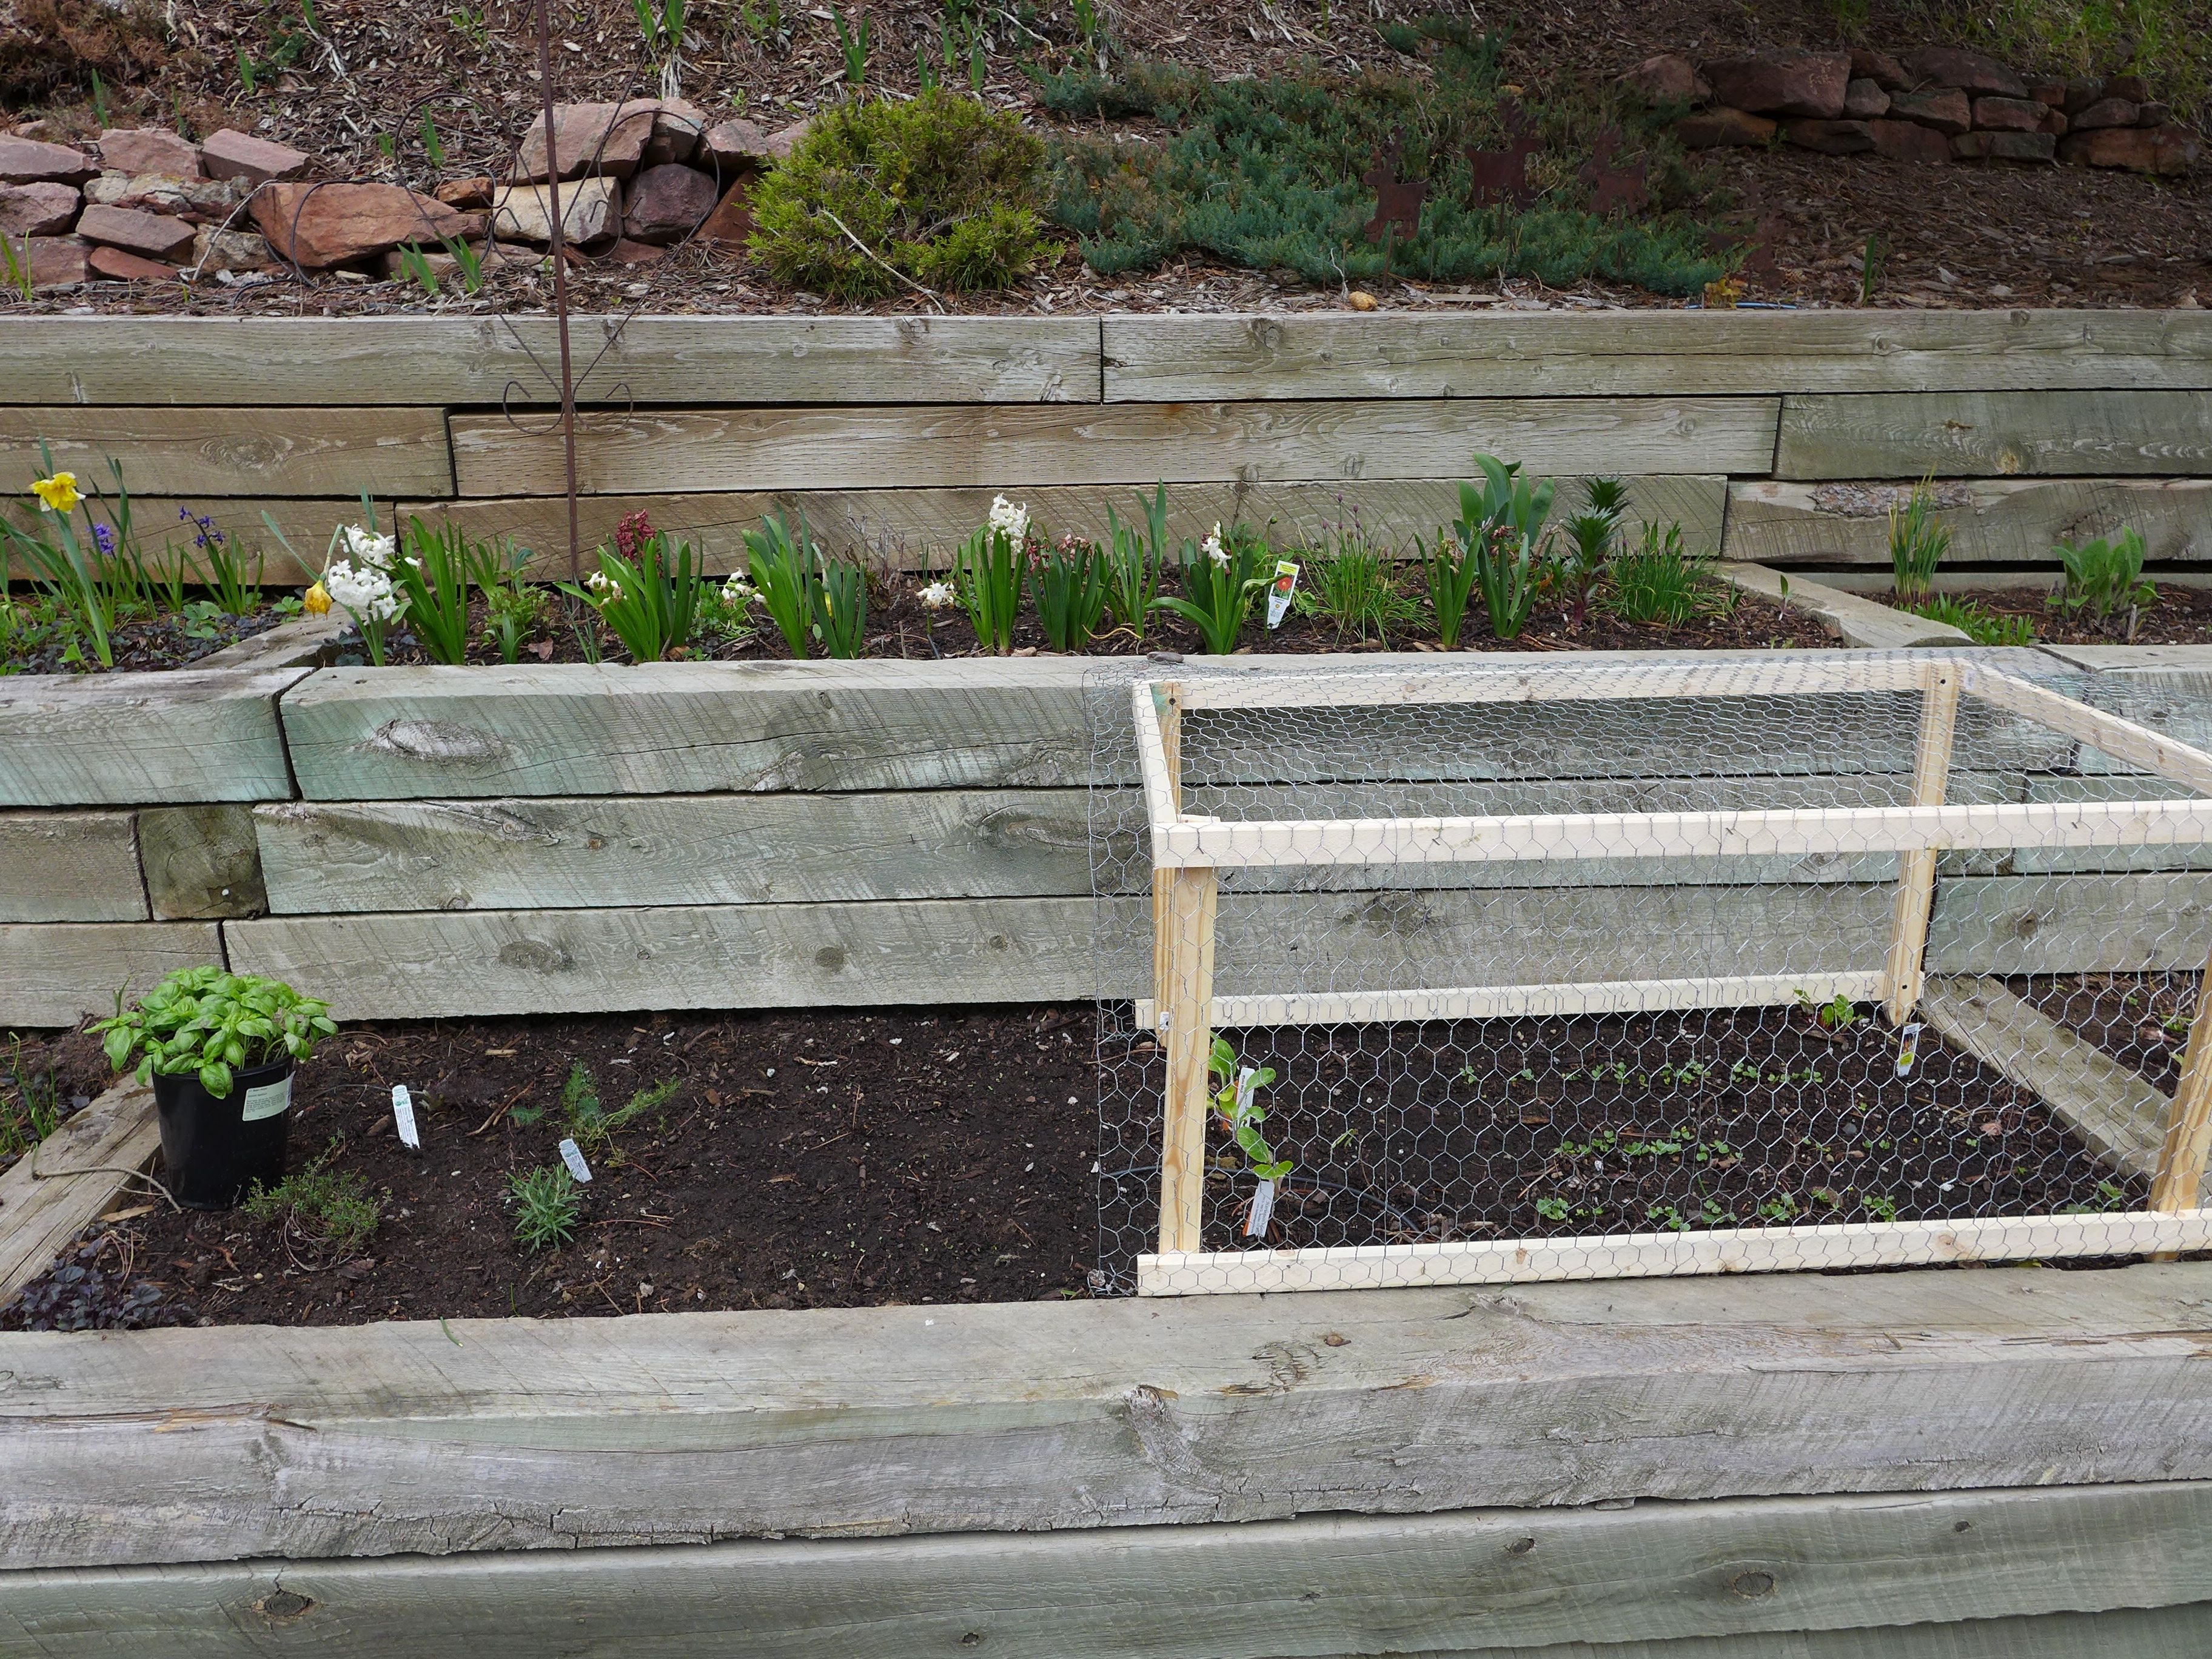
In the photo above, I’m showing off the echinacea that I planted this summer. I planted four of these around the yard (two in this bed and two near the pond). As you can see, these are successfully blooming, and I’m hoping to let their seed ponds fall into the bed for some self-seeding action. Unfortunately, one near the pond died – it suffered from a lack of watering and also an attack by our garden mice!…

The mice seem to be living in the beds along the deck, and I’m looking for ways to get rid of them or at least minimize their foraging. They’ve been eating some of the black-eyed susan flowers that I planted as well as the veggies in our veggie patch (so we haven’t been eating the vegetables, just to be safe). Any mice advice?

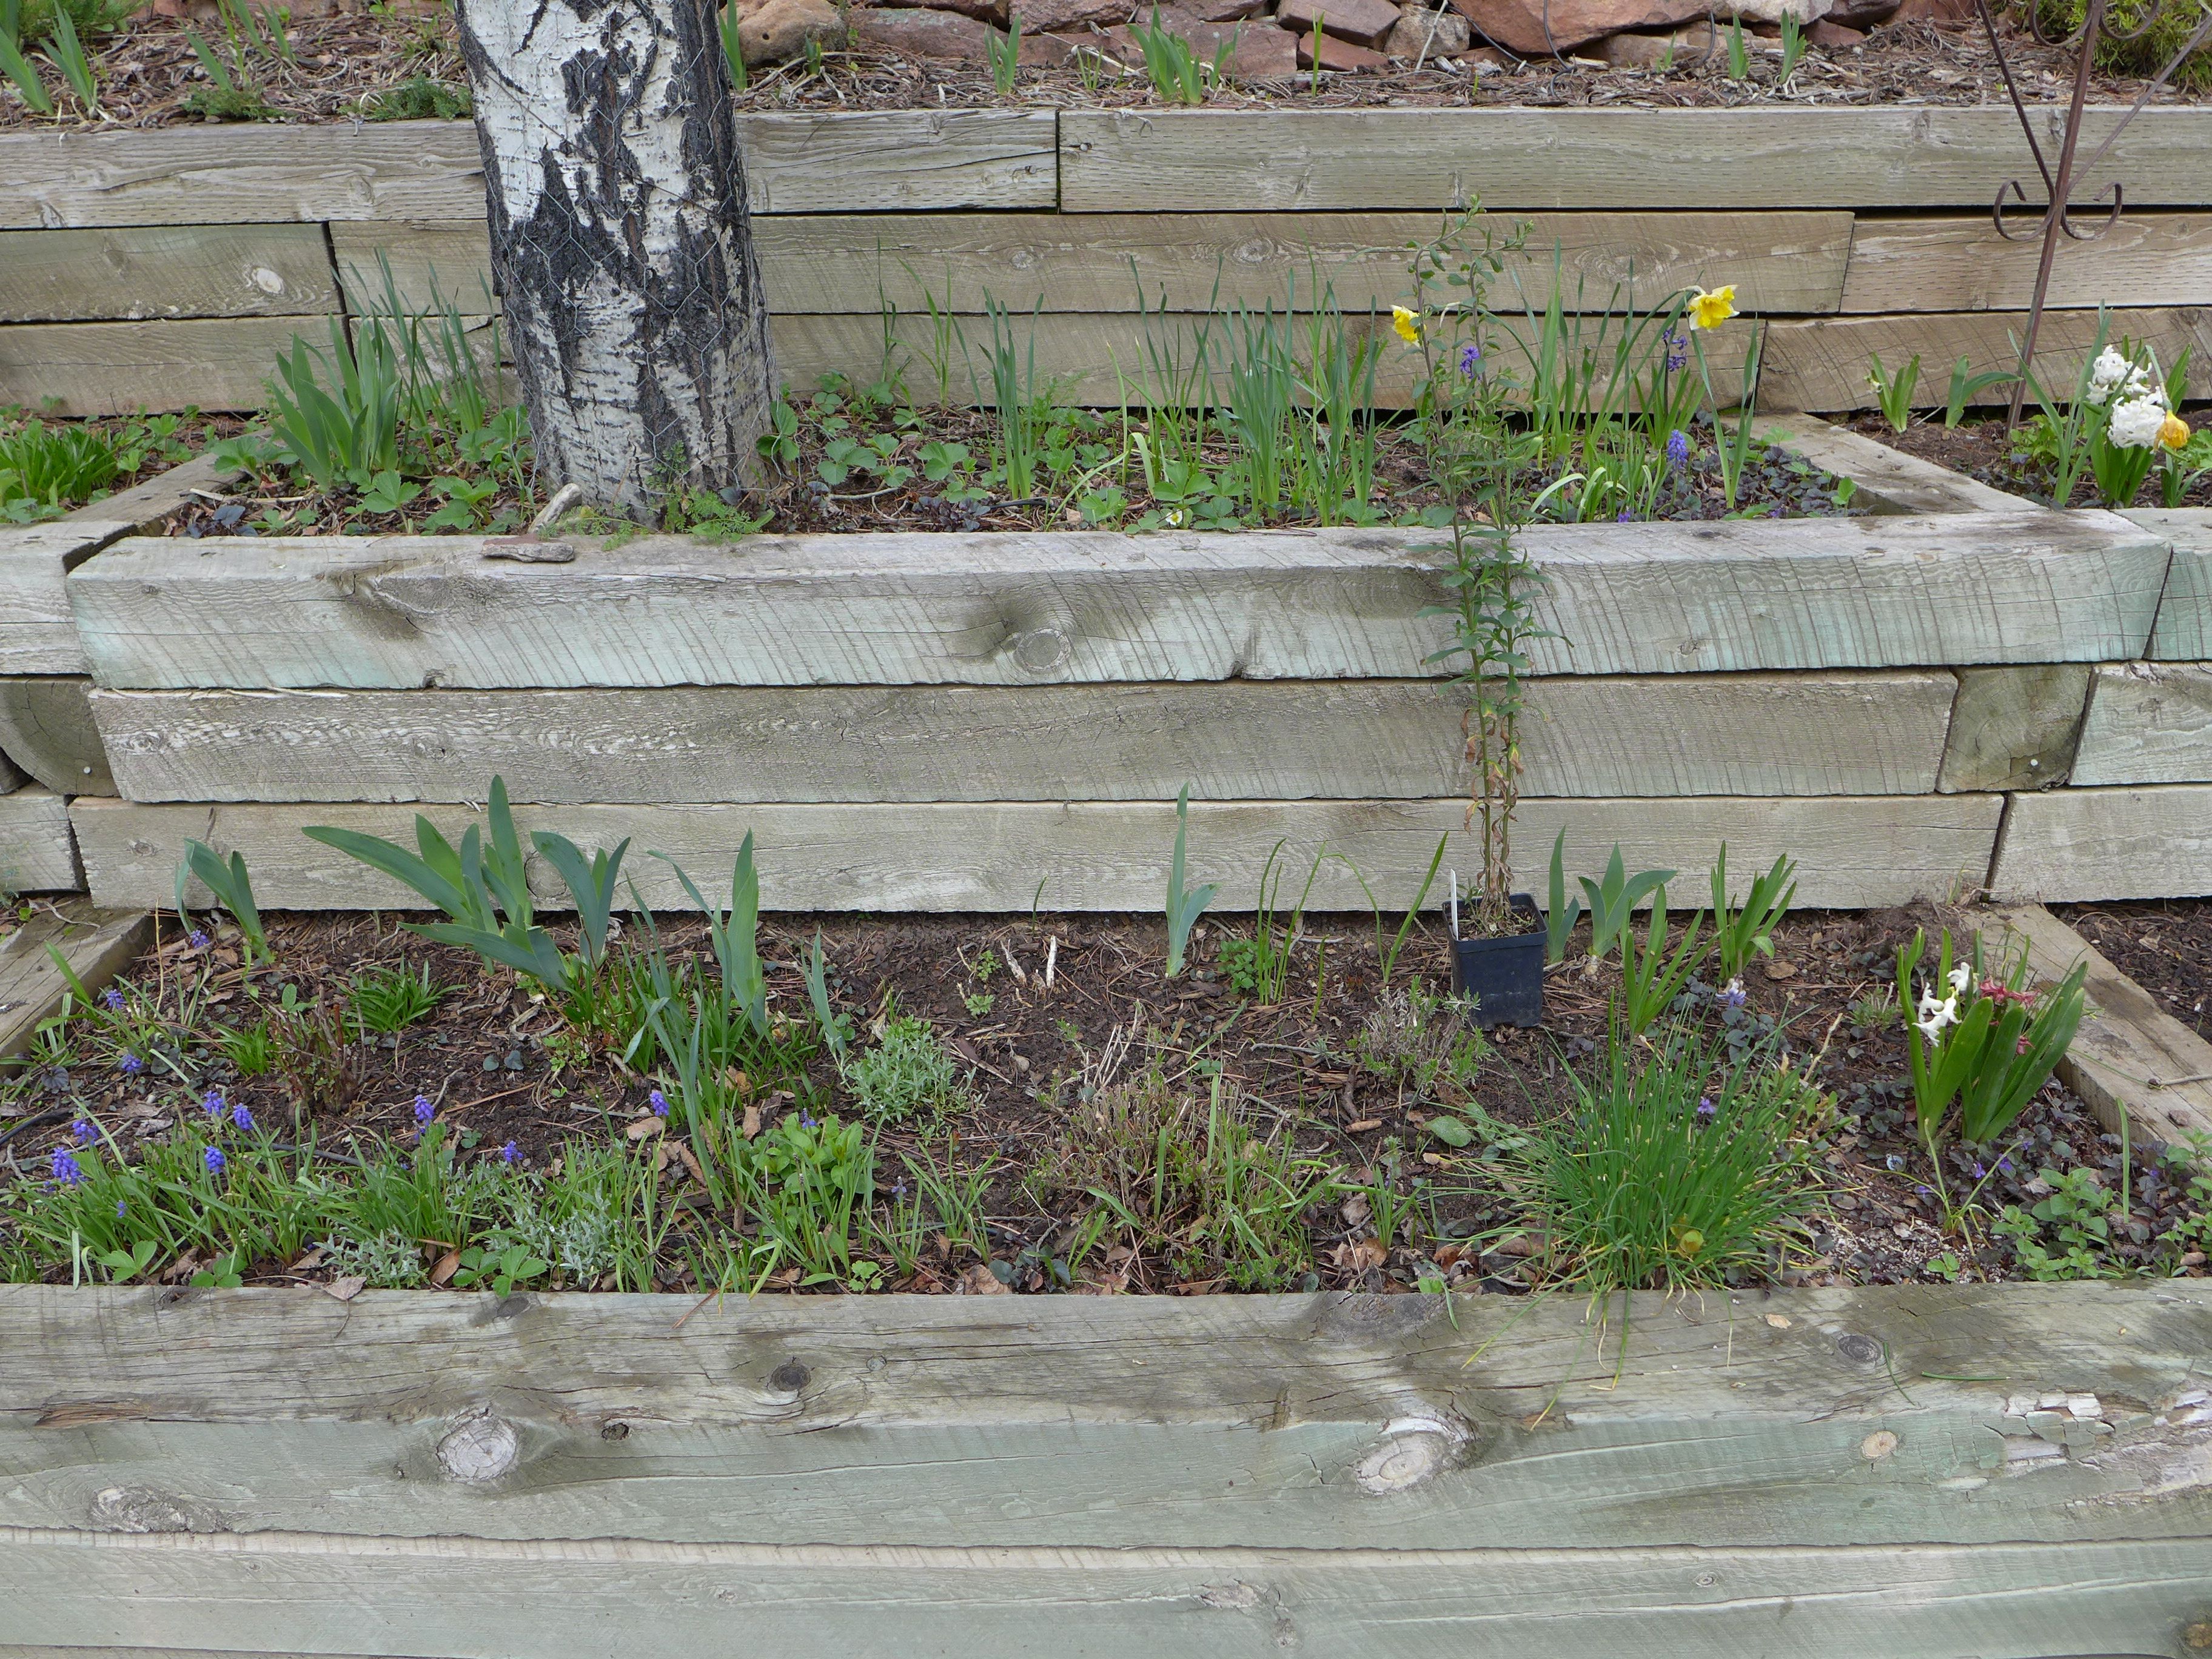
Behind the echinacea is an extremely large pot – I have two of these, and both are planted with a purple grass and those flowers. I’m totally blanking on the name of those flowers. It’s a nice combination that’s done well for me two years in a row.

front_door_pots

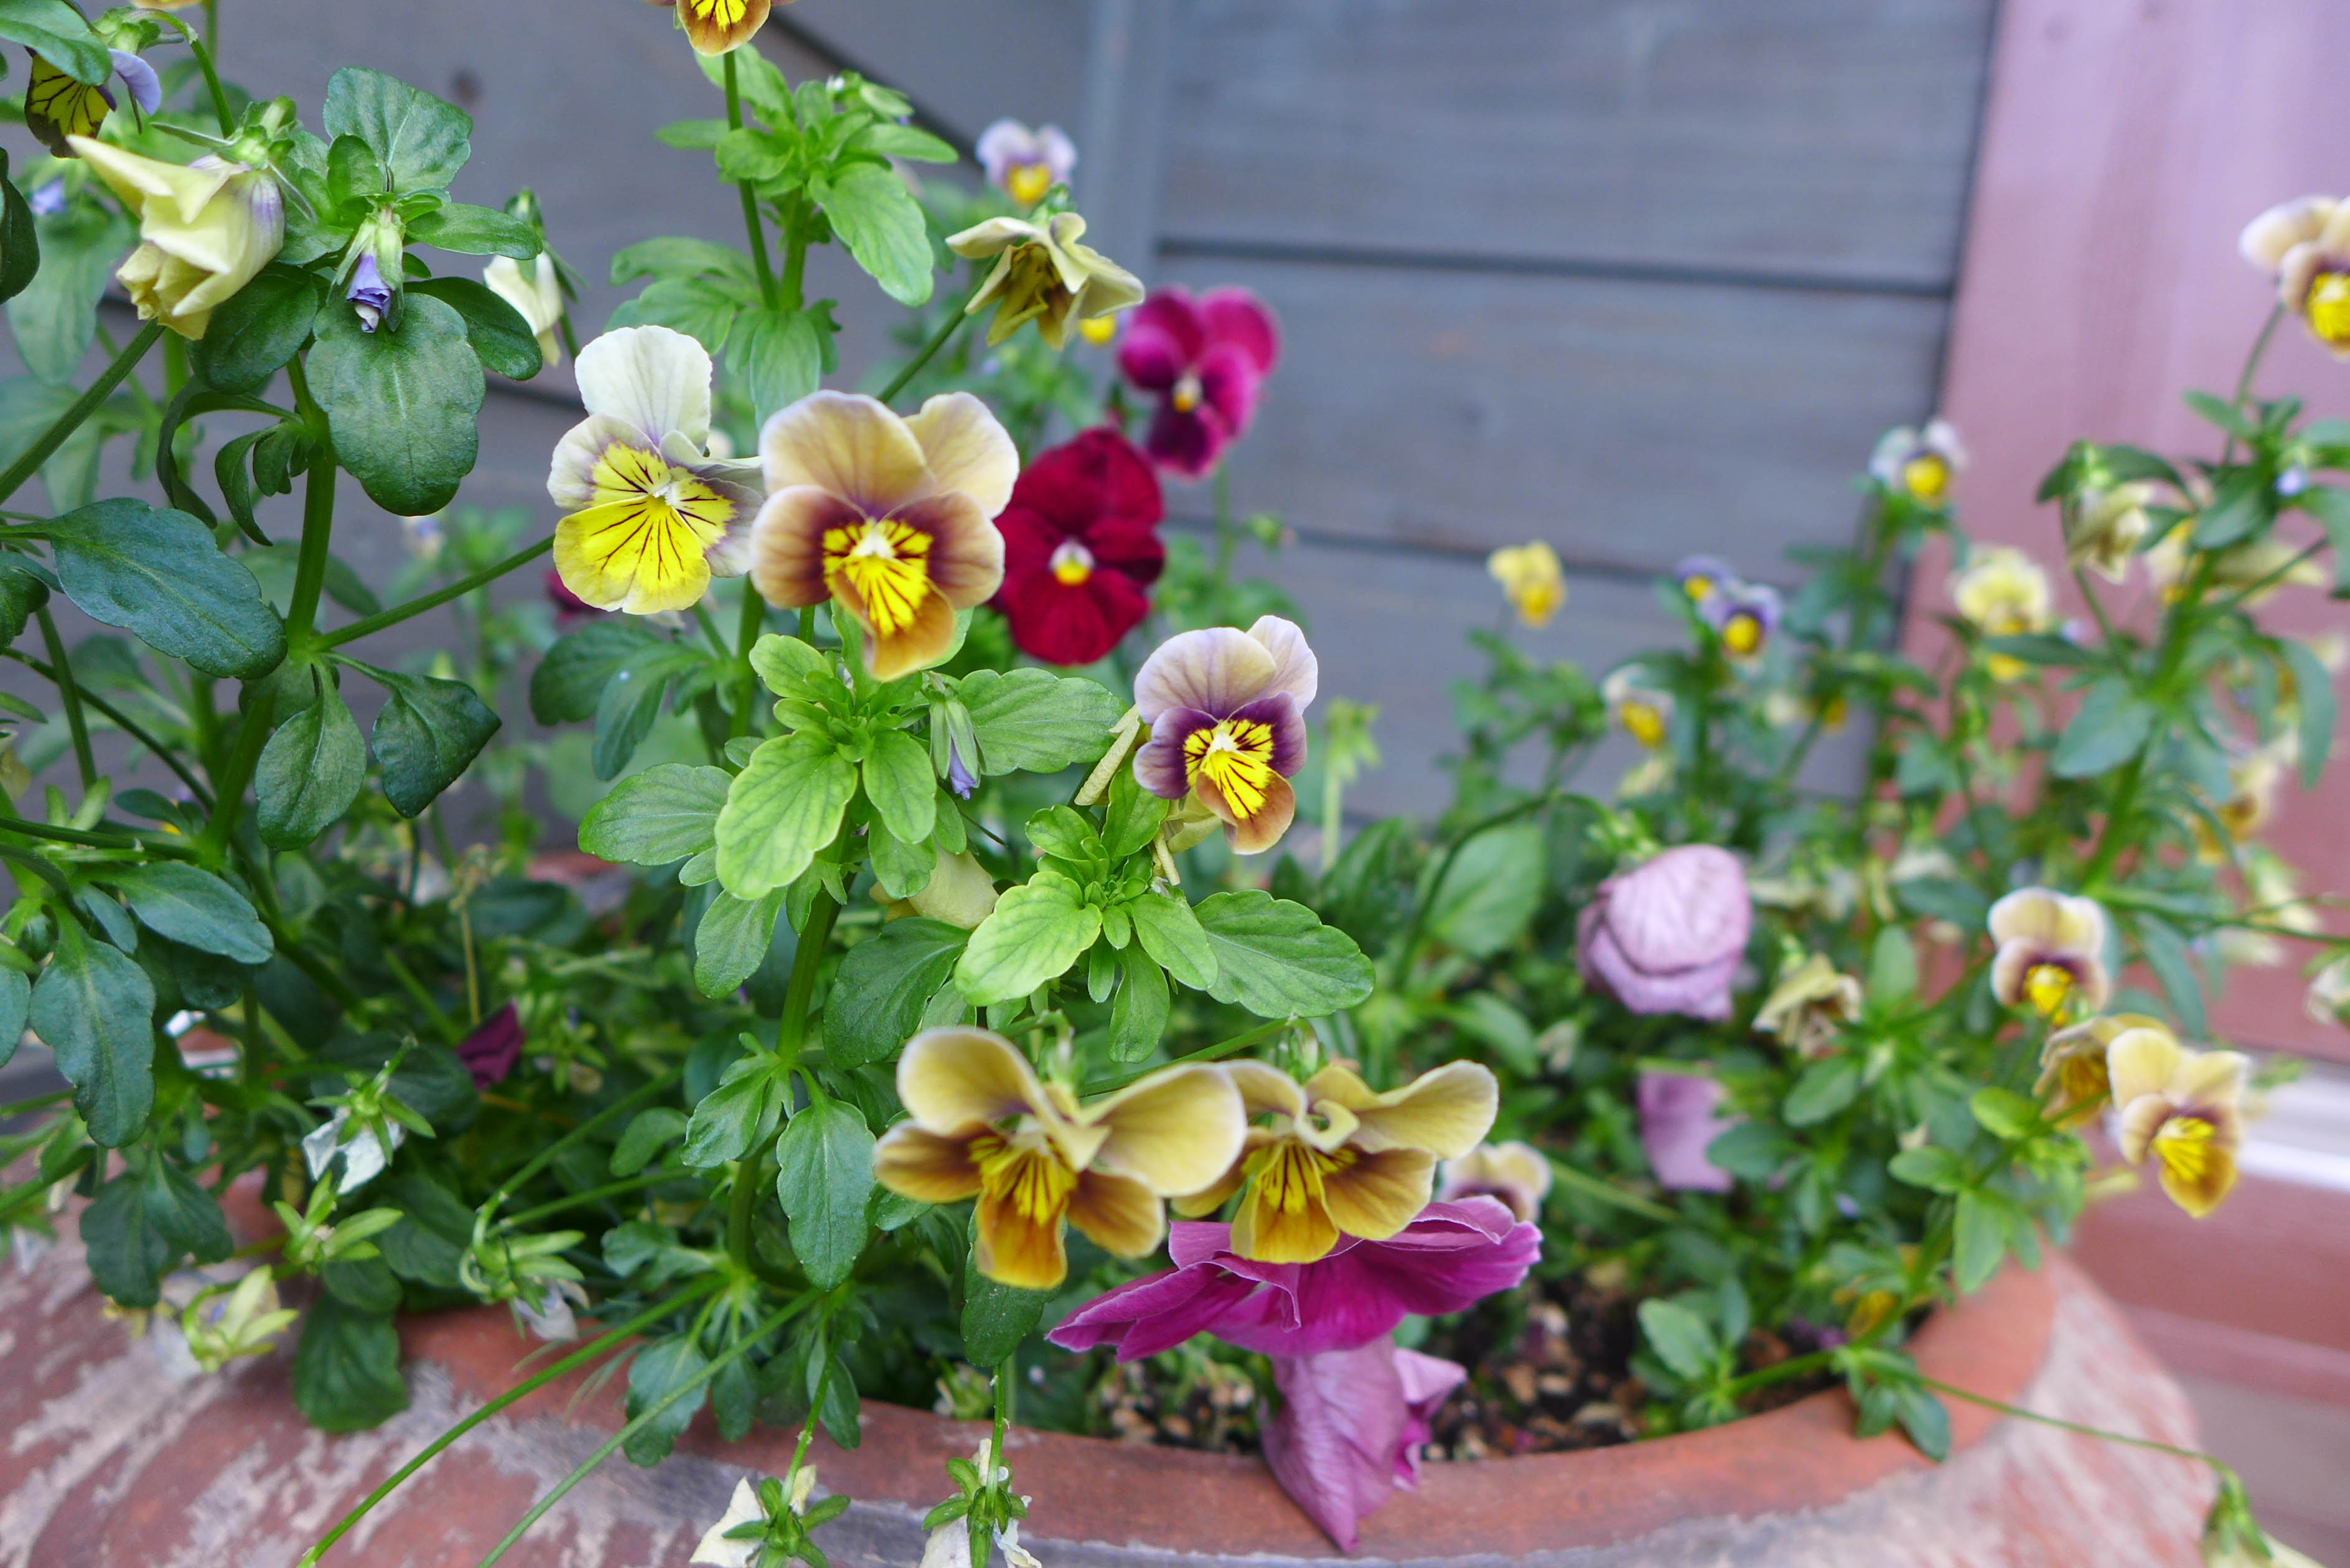
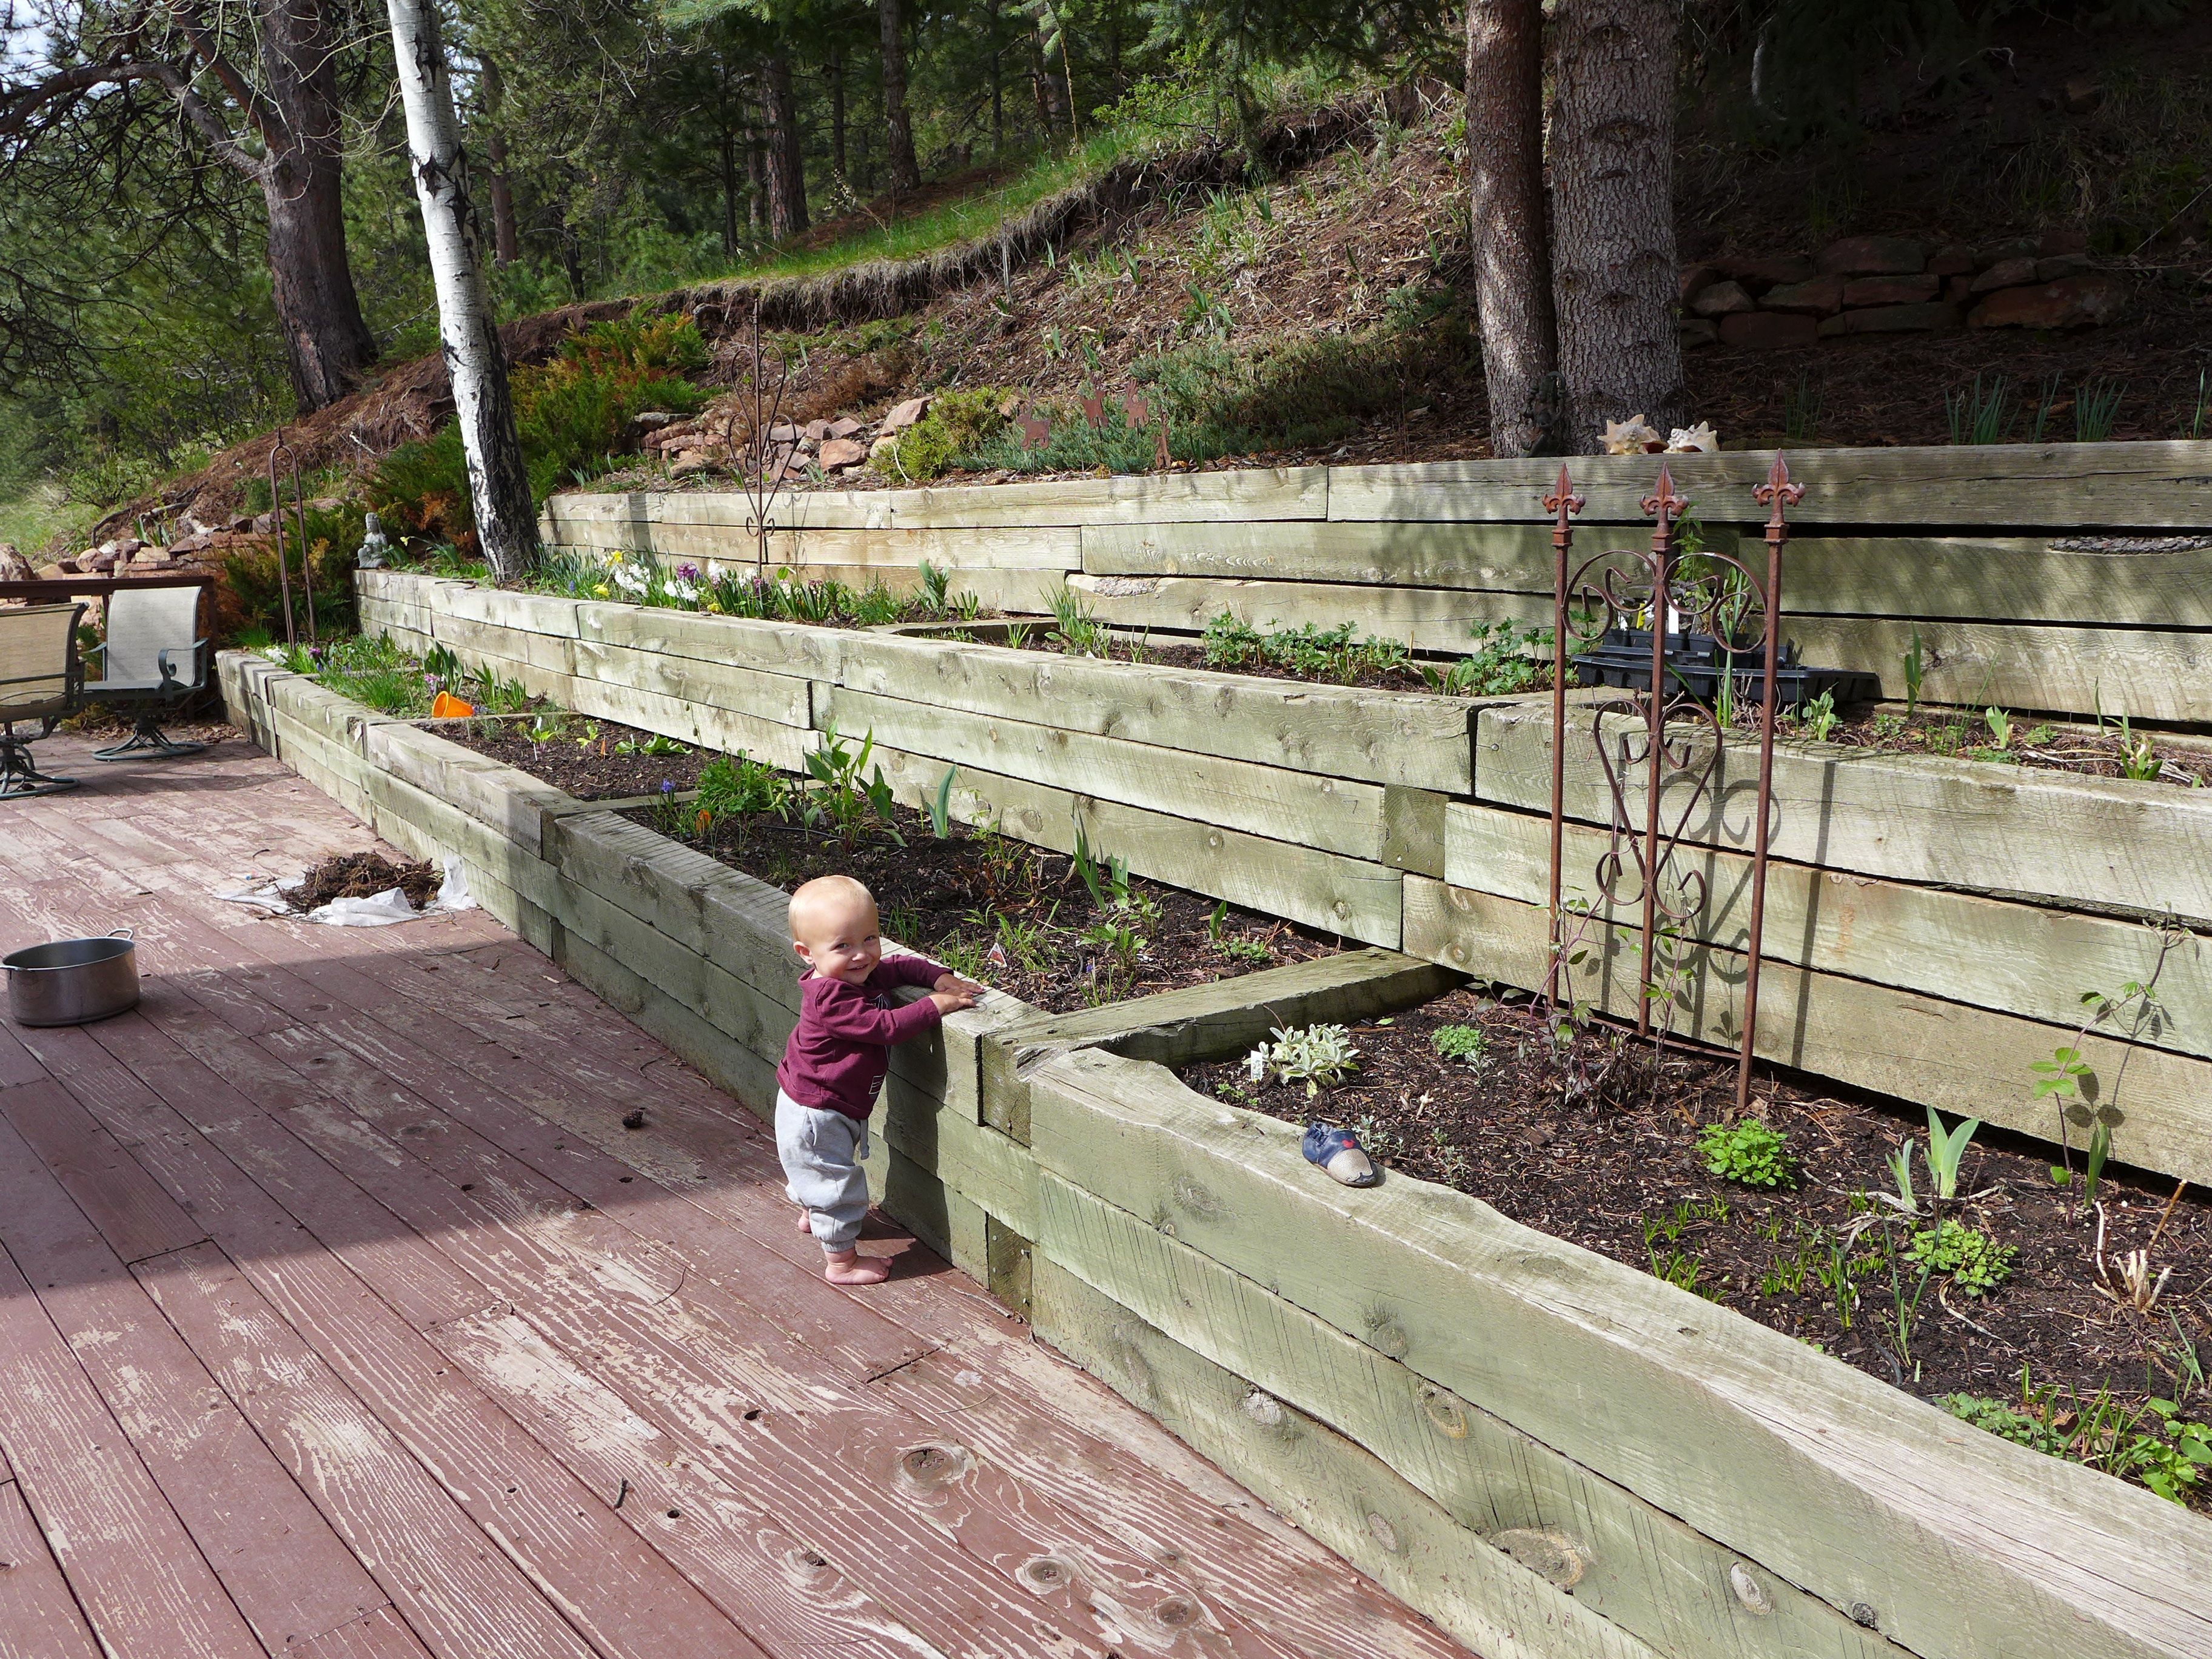
The photo above shows one of my potting surprises. I planted these violas and pansies in early spring when I wanted something to fill the pot but knew that only something cold-hardy would do. I expected to fill the pots with something more heat tolerant once summer arrived, but these beauties keep flowering! They do look a bit leggy, but really not that bad, so I’m going to keep them here for a bit longer and then I’m hoping to transplant them to a shade spot under one of our Aspen trees, and see how well they do there (the violas should come back as a perennial).

raspberries

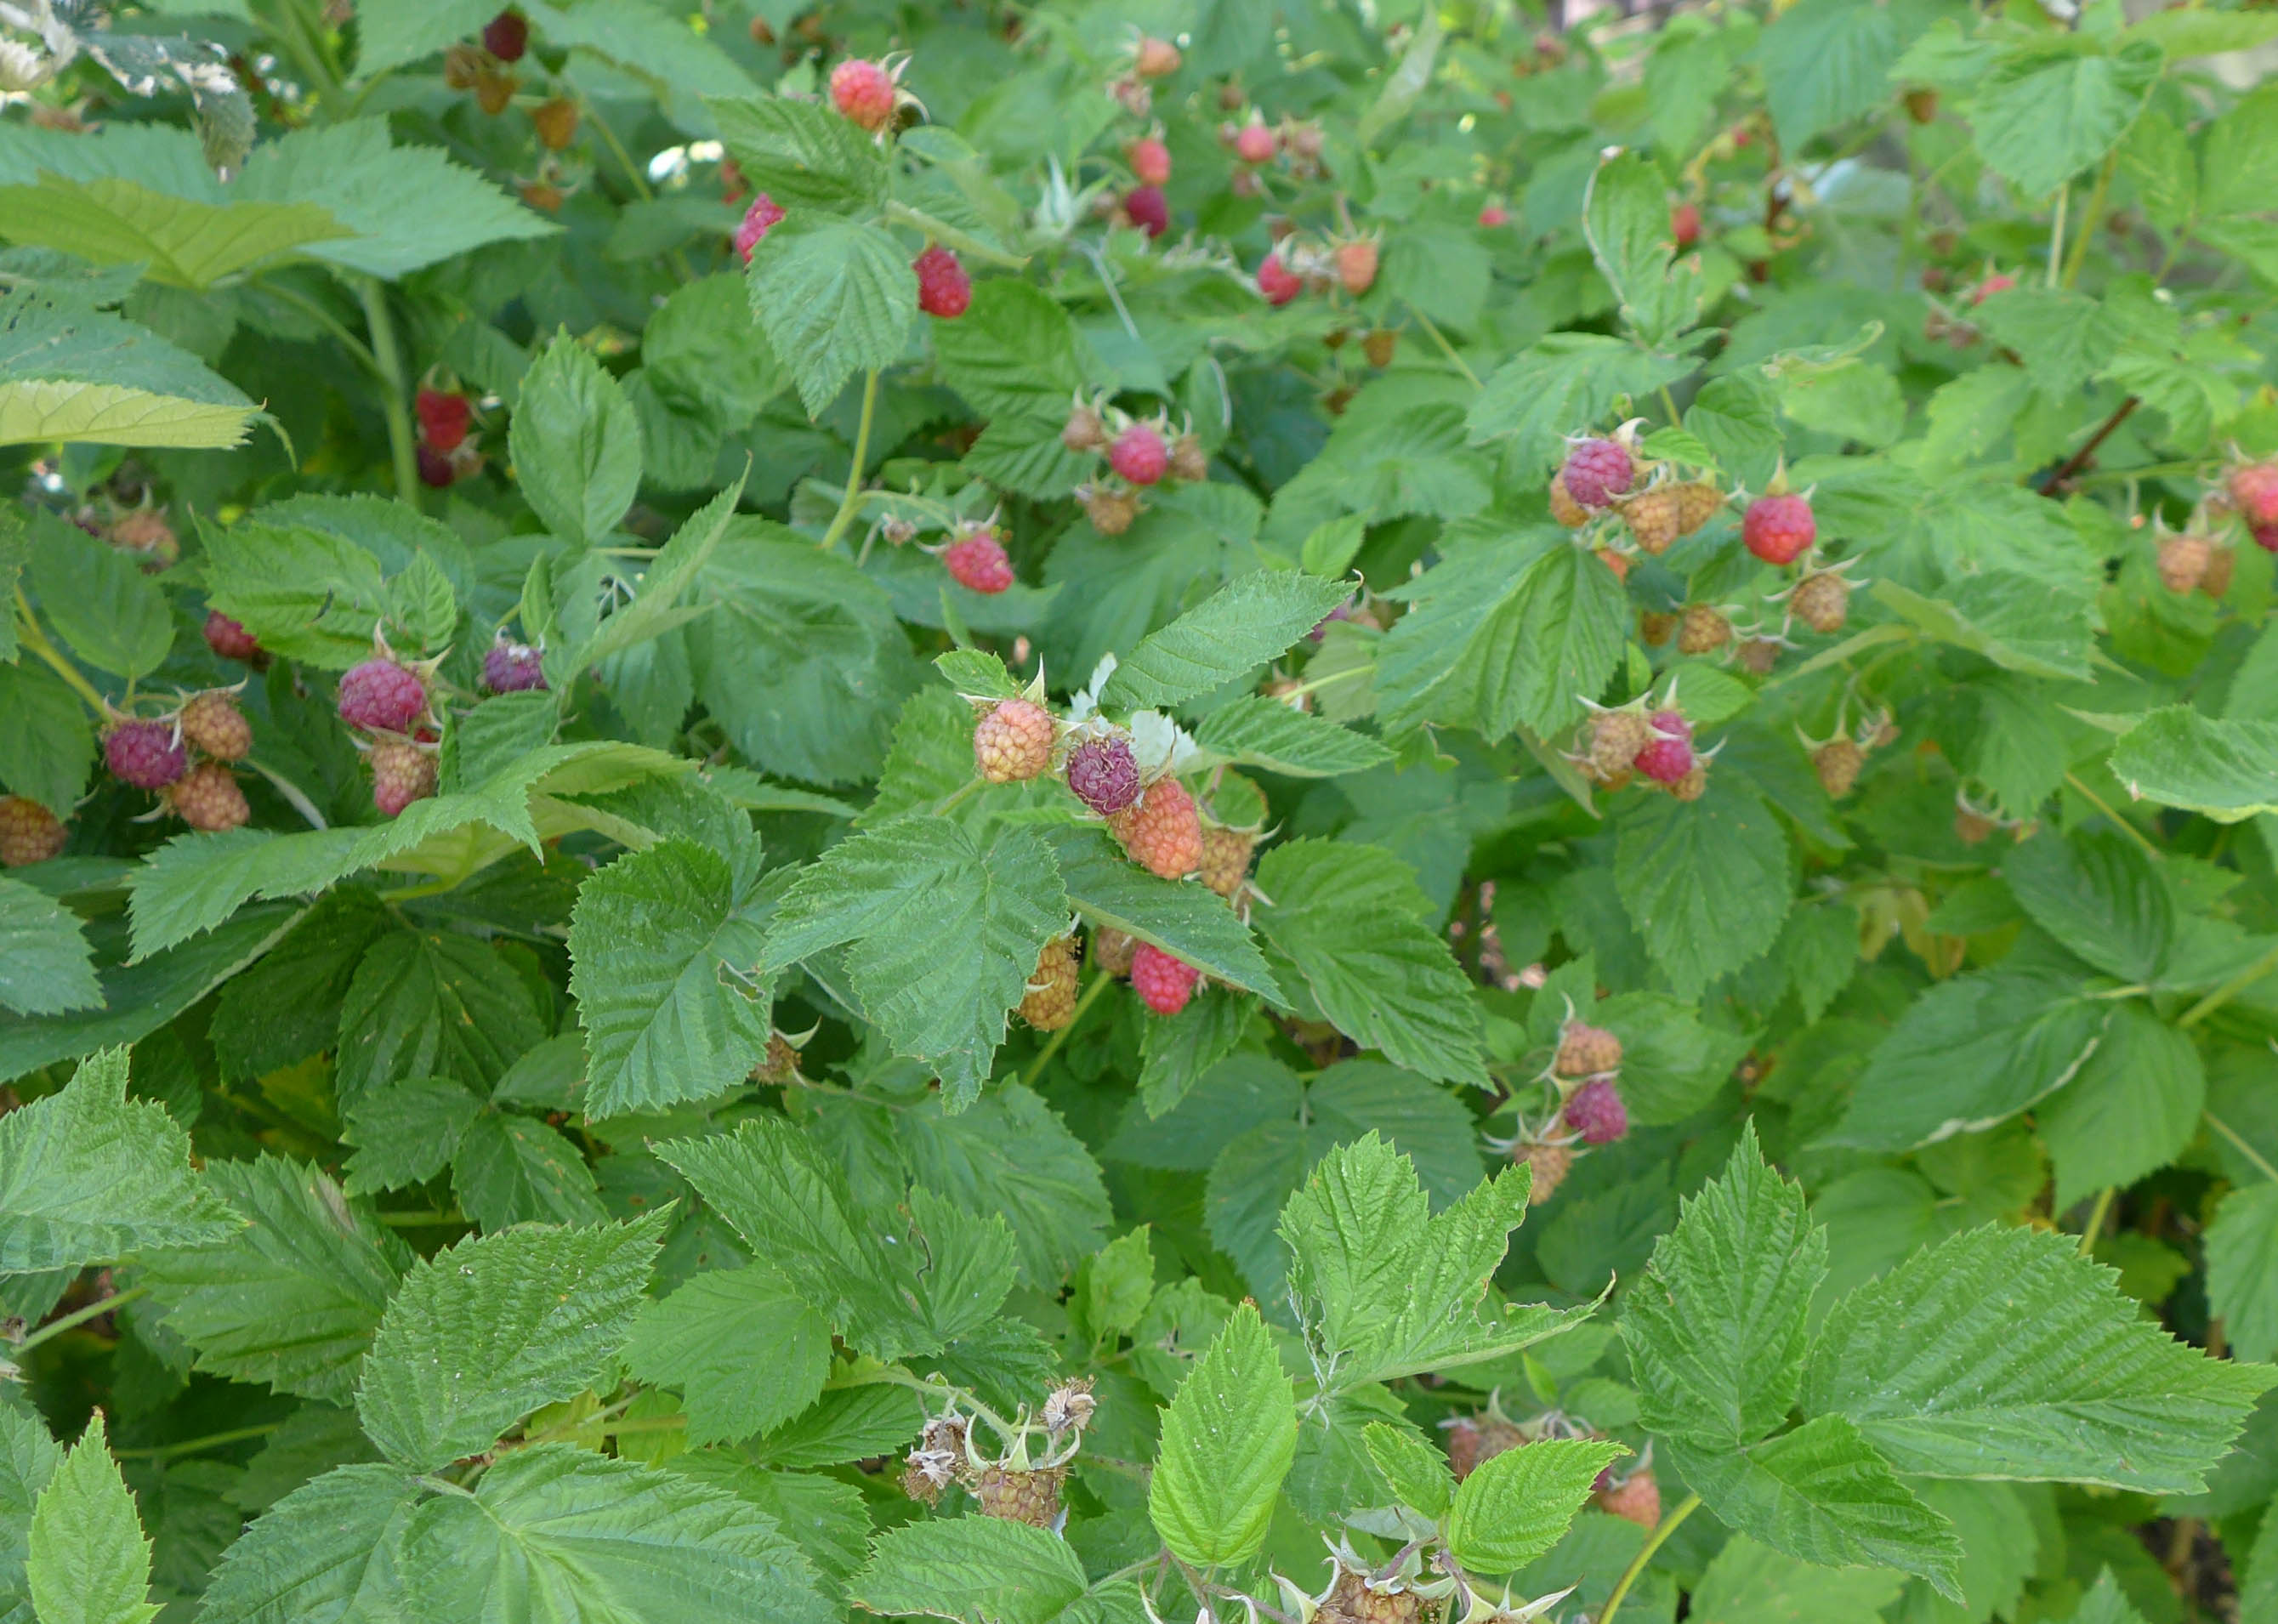
As I surmised in my introductory post, we have raspberries that fruit on old growth (known as floricane-fruiting). Since I cut down all of the canes when we moved in (spring of 2015), new canes grew last summer and now they are all producing fruit! We have so many berries out there right now, only a small handful of really ripe ones so far, but more and more and ready every day.

I’m not sure what method I’m going to use for maintaining the raspberries. Part of me wants to cut down all of the canes again after this growing season (new and old growth), but that would meant that then we won’t have any fruit next summer. Or, I could go in and selectively thin the canes – cutting down the old growth and keeping the new growth. If I’m feeling ambitious and have the time, I may try this method… either way, I’ll keep you posted, and in the meantime, we’re enjoying this year’s bumper crop! 
pond

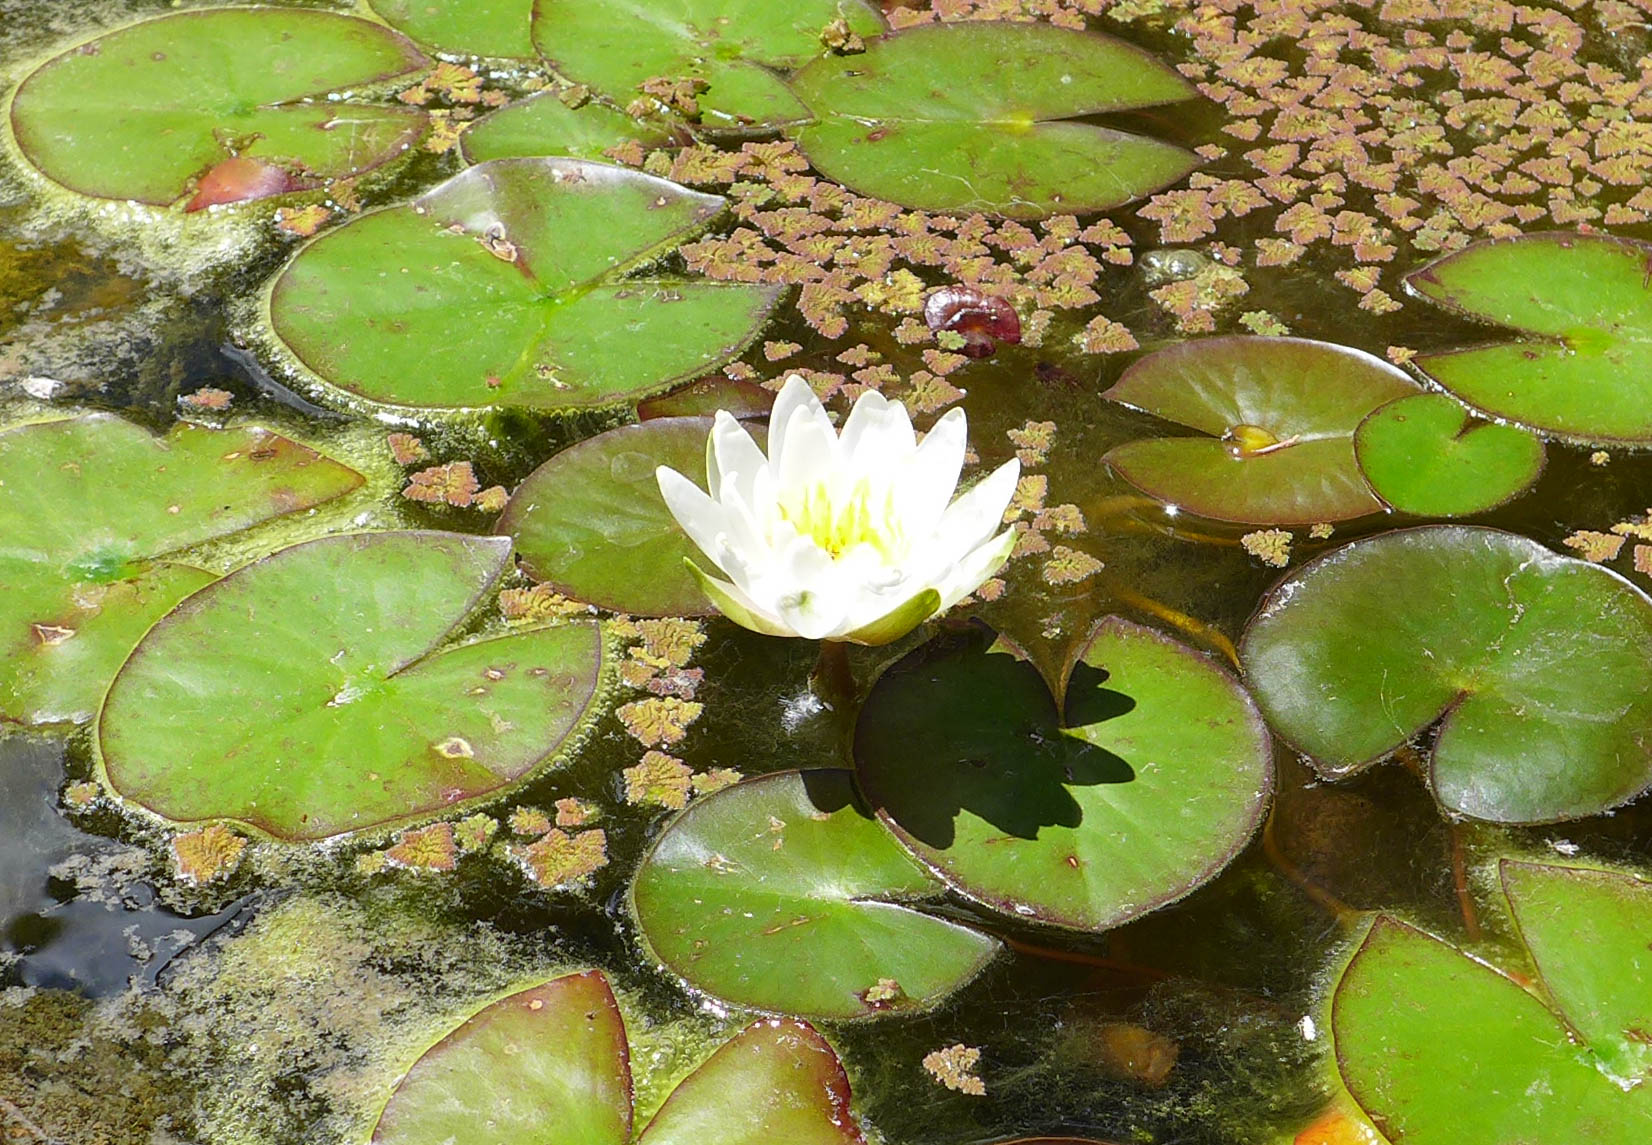
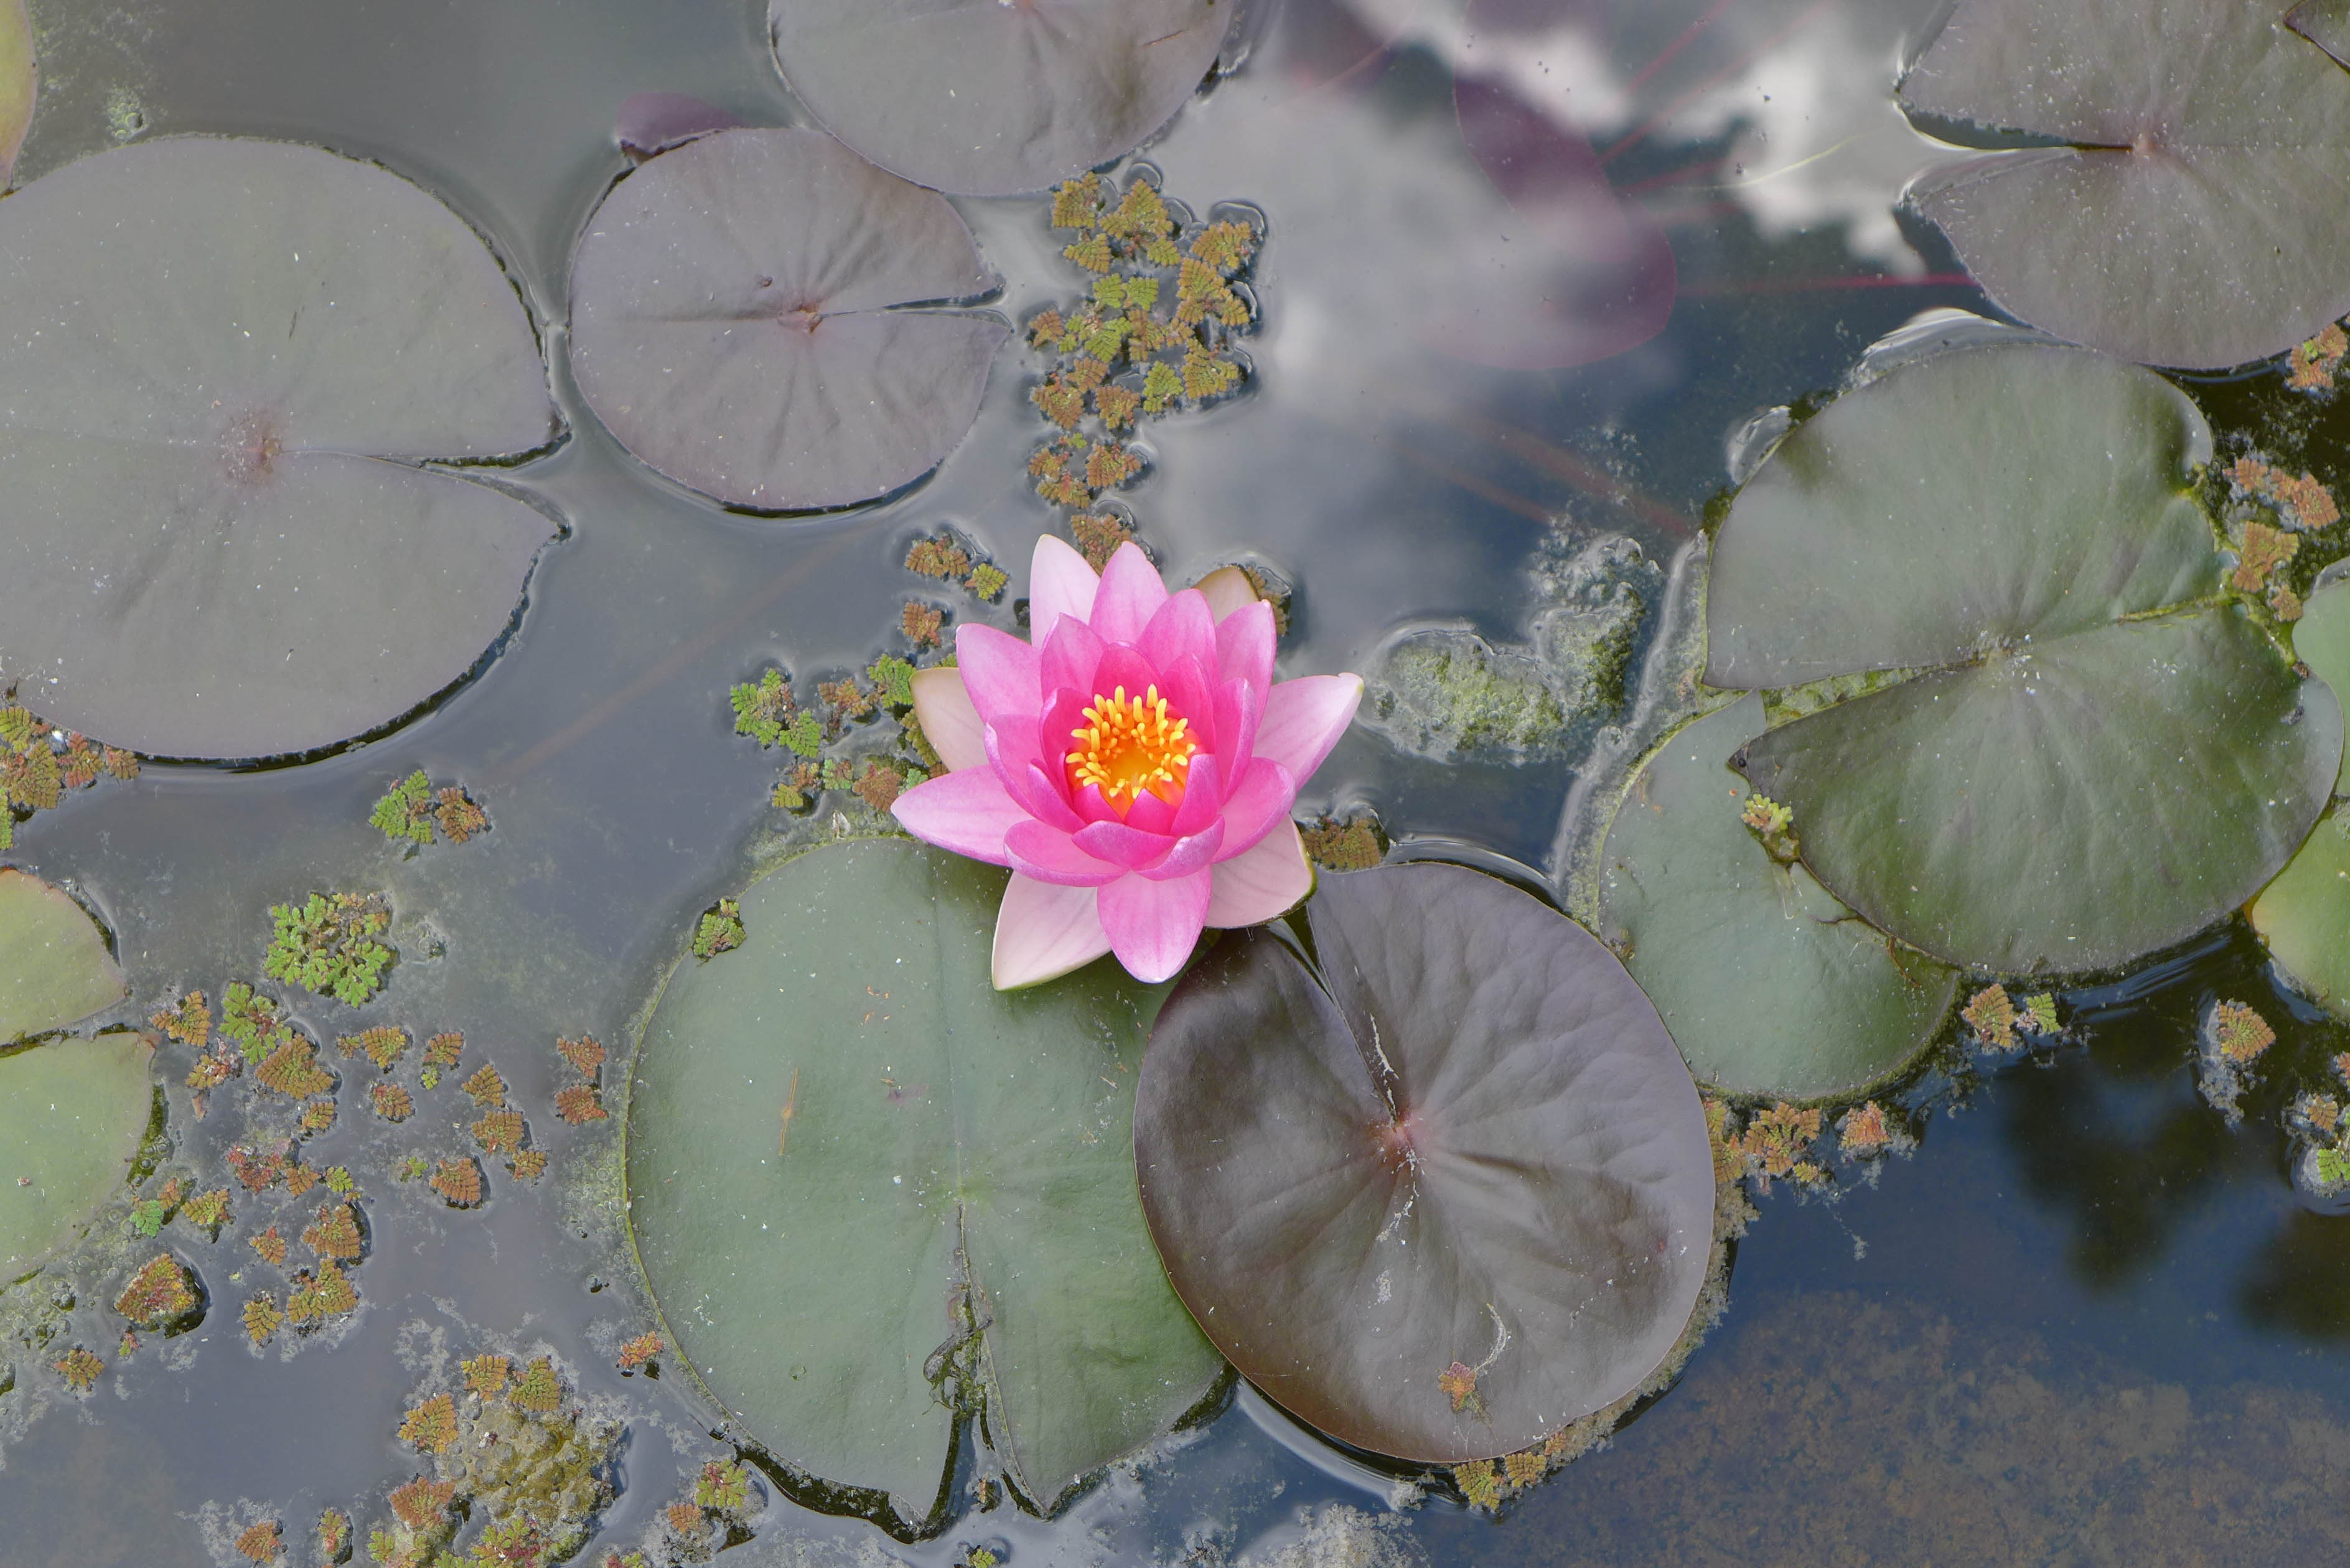
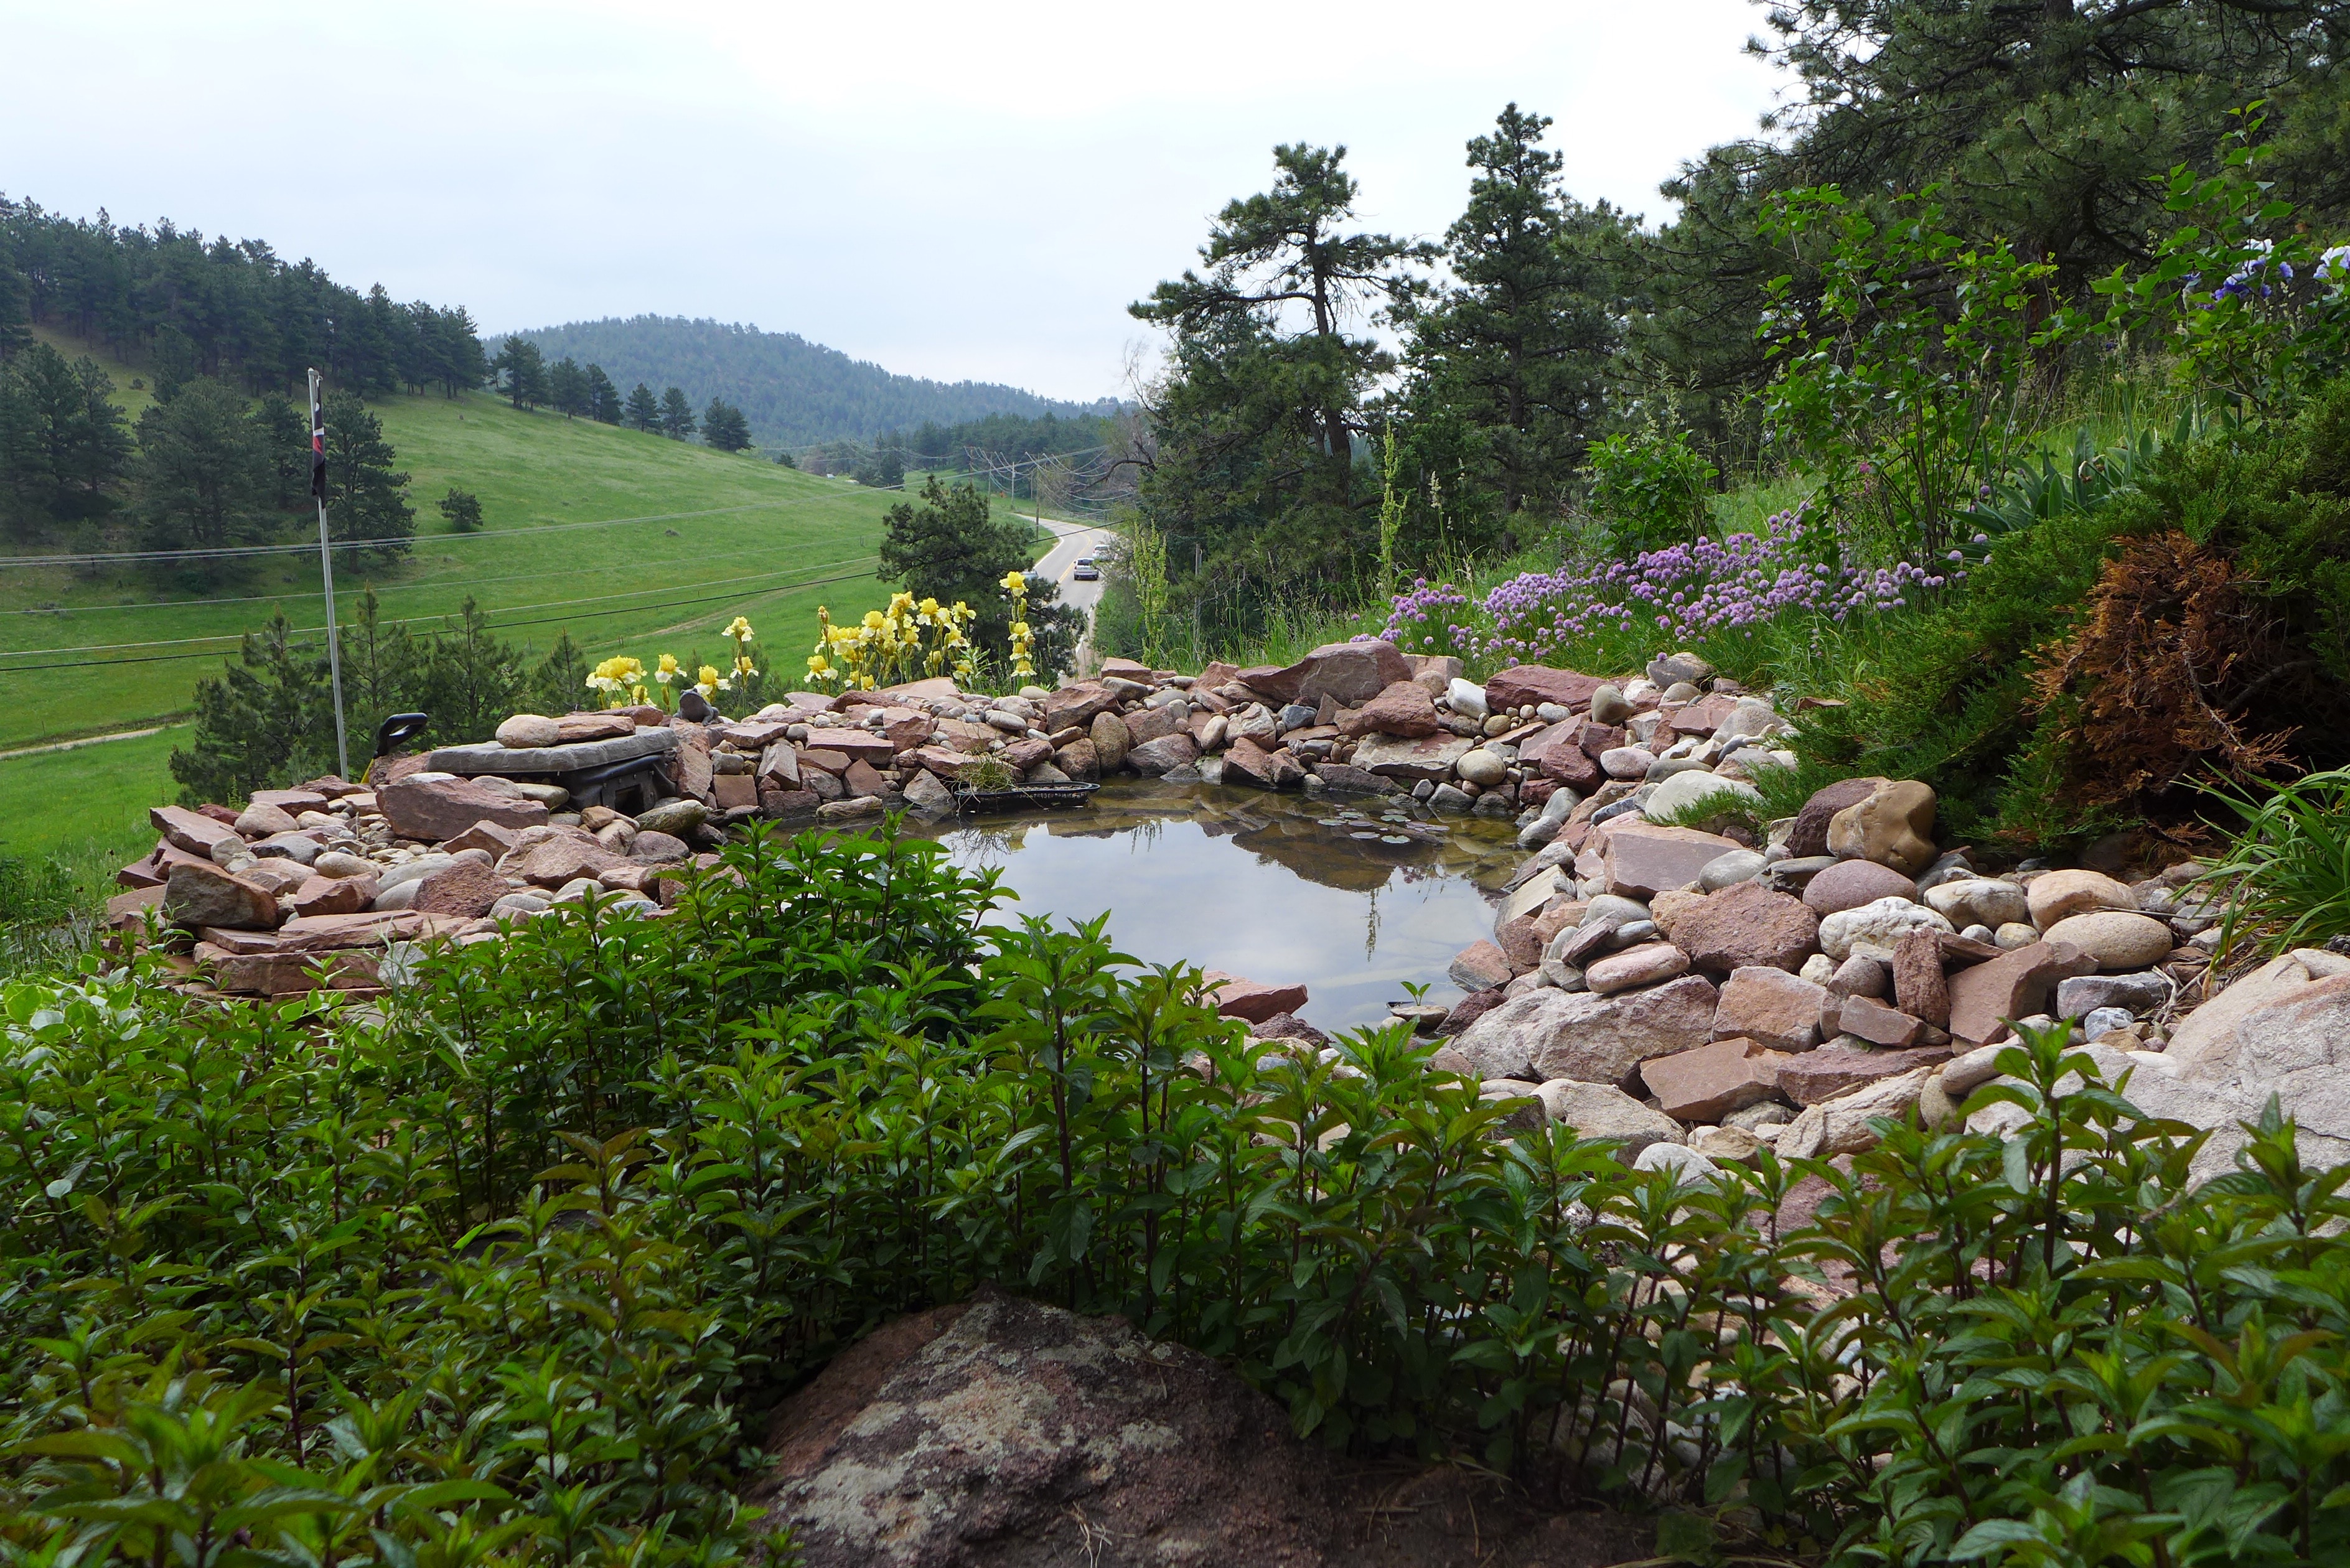
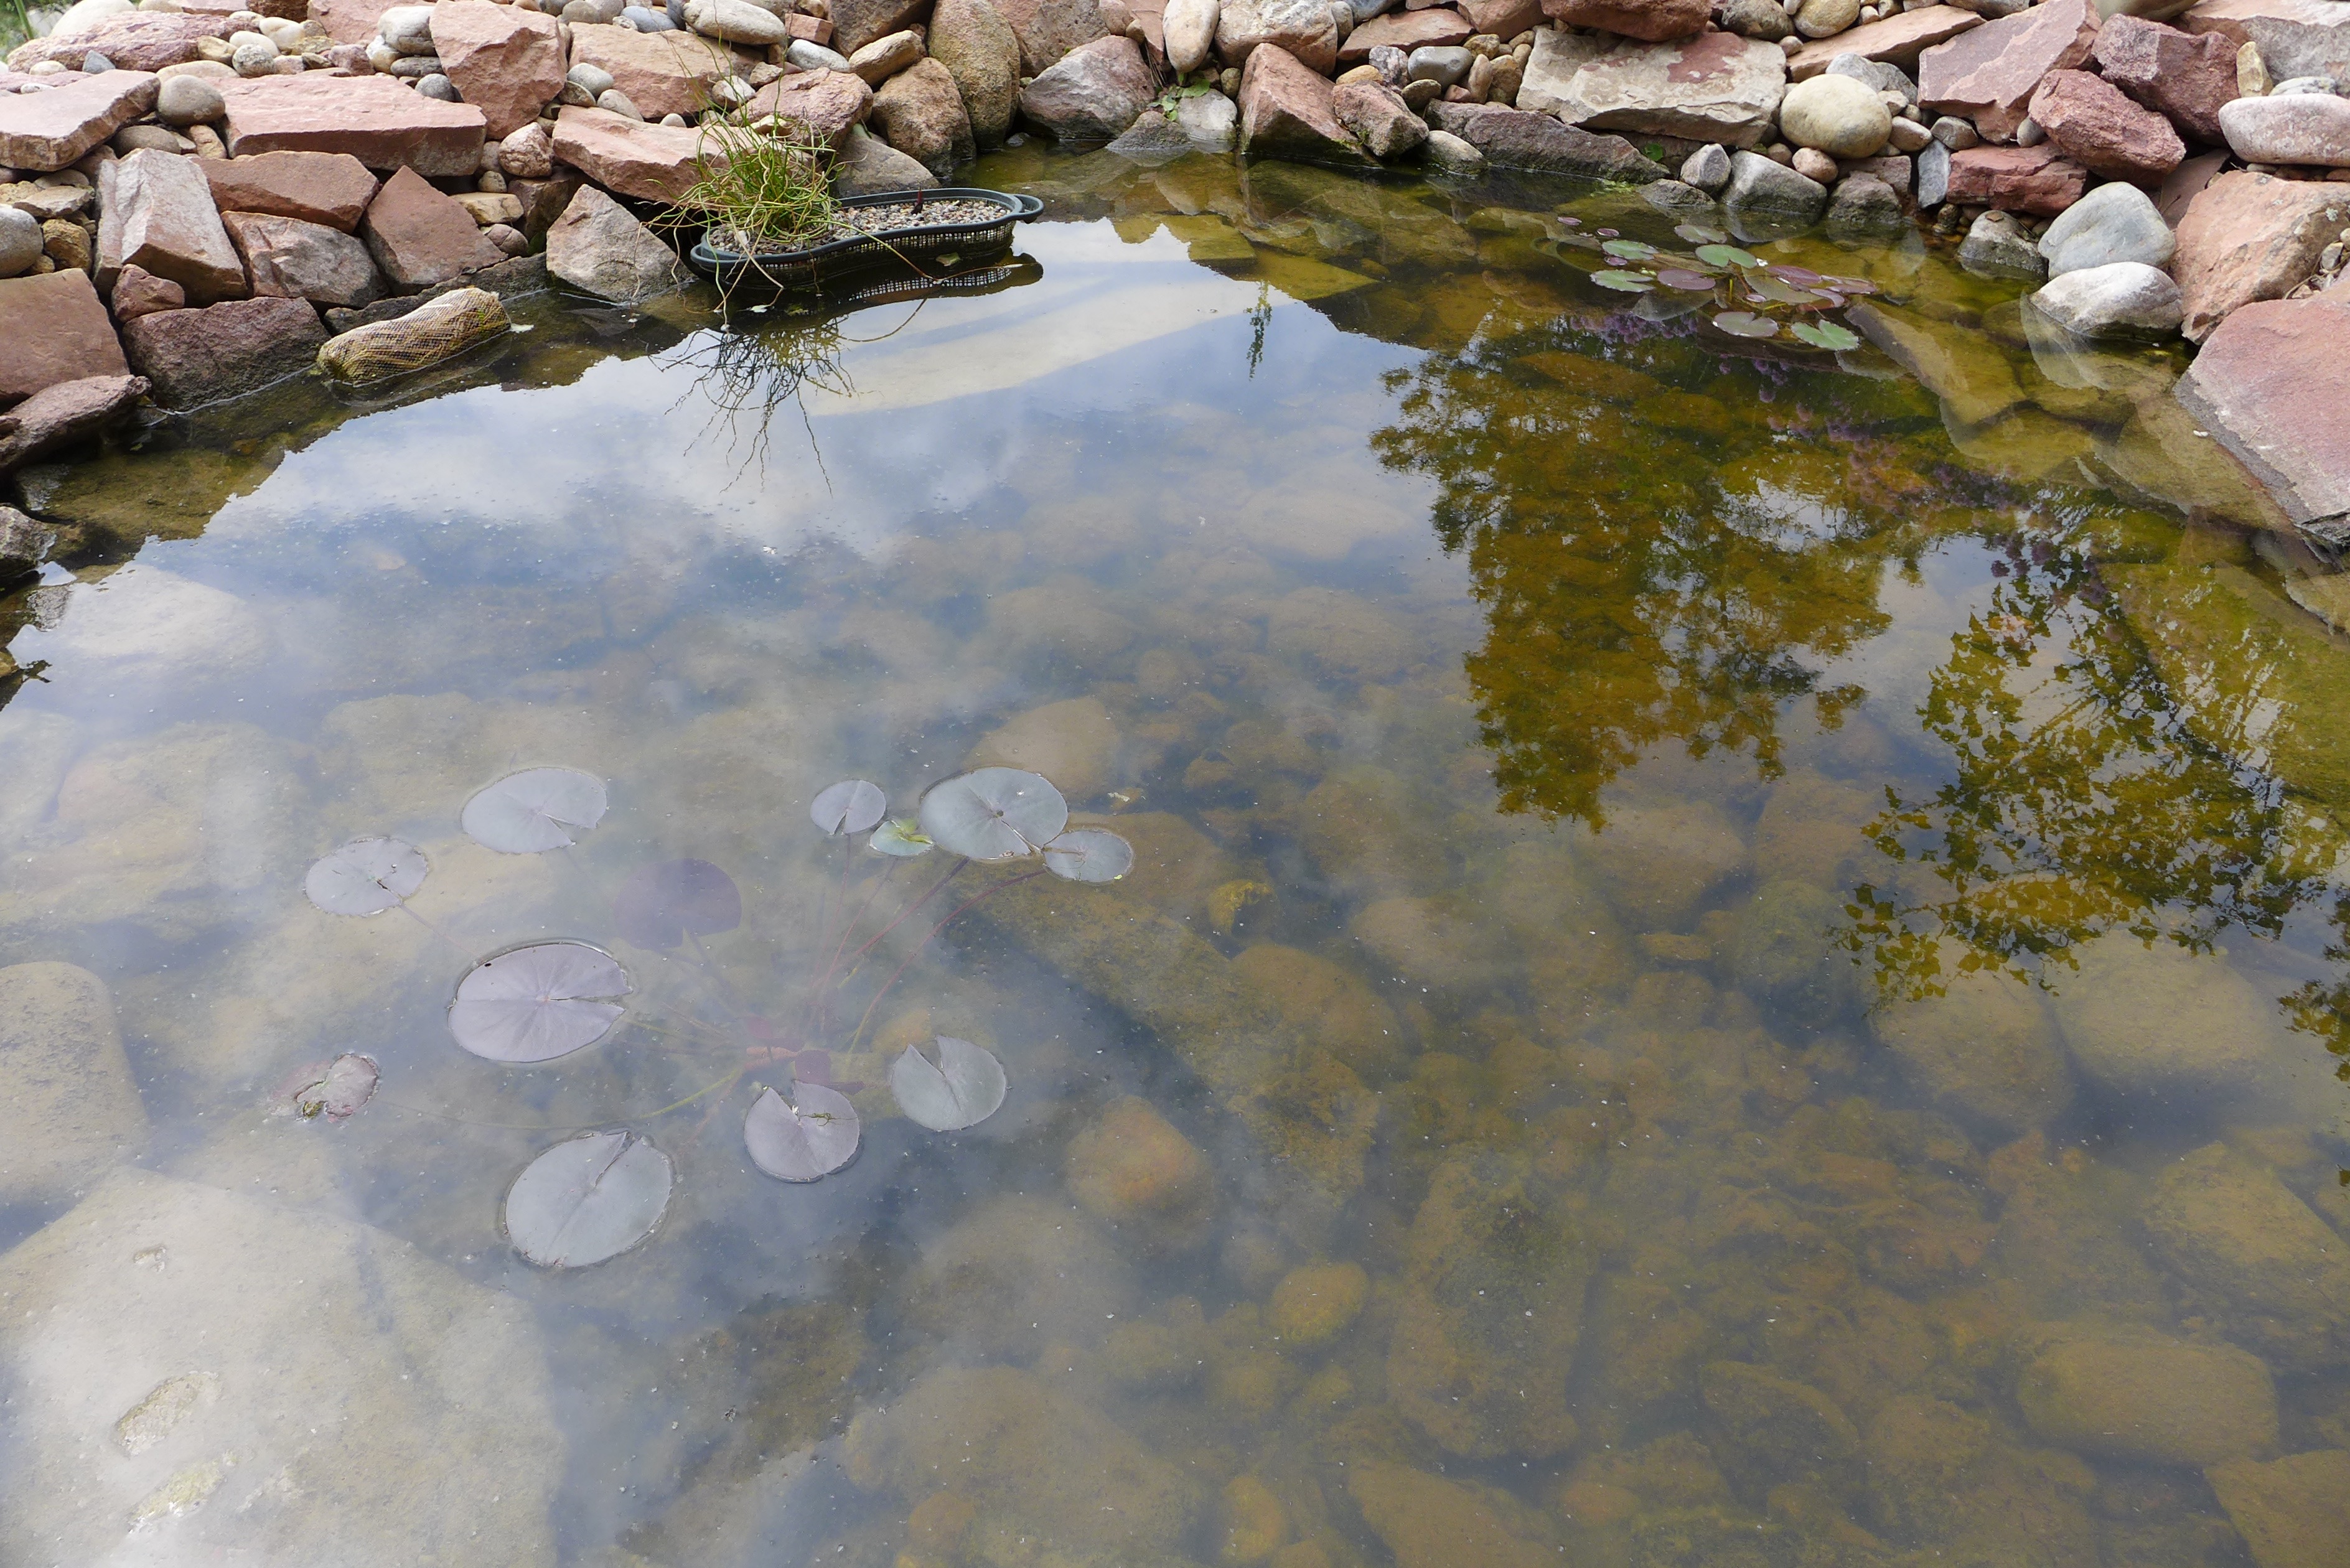
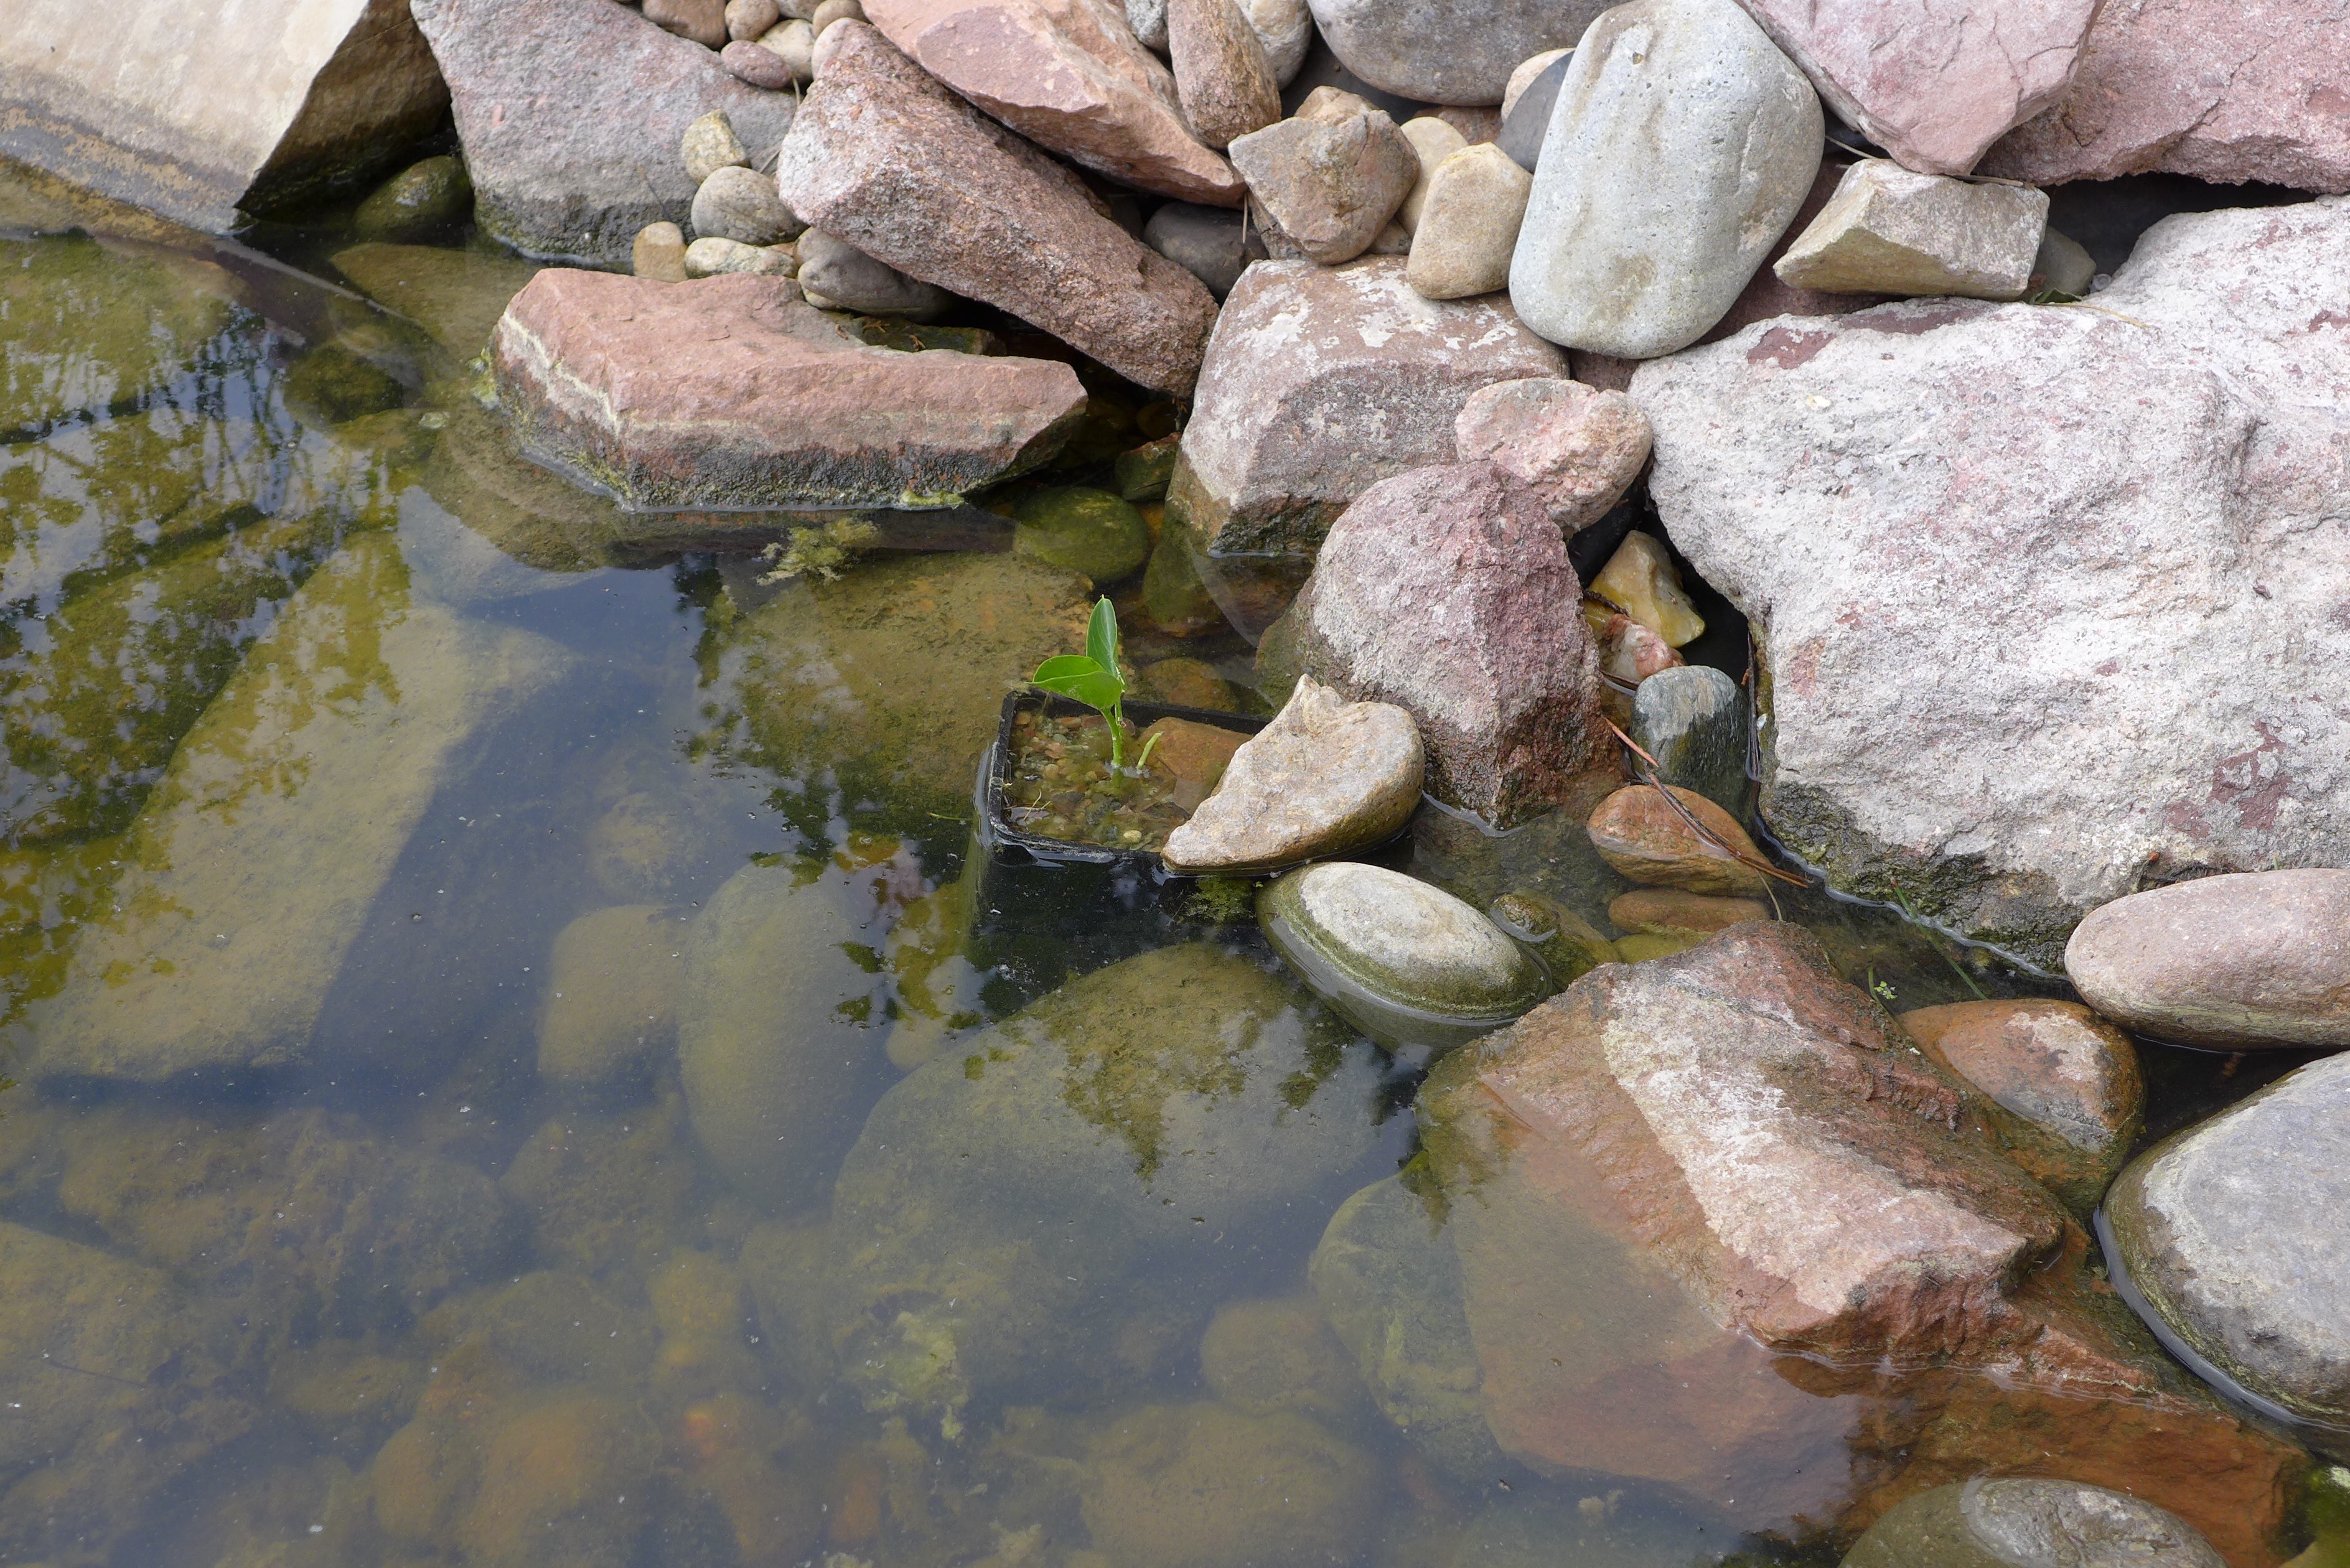
In the pond, our waterlilies are doing fantastic!… so is the algae! It’s a daily battle to go in and remove the string algae, but if I stay on top of it, the pond looks beautiful. We have these two lilies blooming right now, and I can see that the plants are multiplying – sending out new roots and plants within the containers. They seem to be such vigorous growers that I’m thinking about putting them in even bigger containers next year to encourage new plants.

The smaller plants floating around the lillies are the fairy moss. It’s growing well, but I think that next year I’ll order even more, because it’s not covering the pond as quickly as I’d like (I want it to cover the pond to help shade-out the algae).

A few of our other pond plants are doing well, but are still relatively small, so I’ll share updates on those in a future post.

pond2

I’d still like to add a couple of fish to the pond, but without more plant cover, I think they’d be immediate prey for the birds and other wildlife around our house…

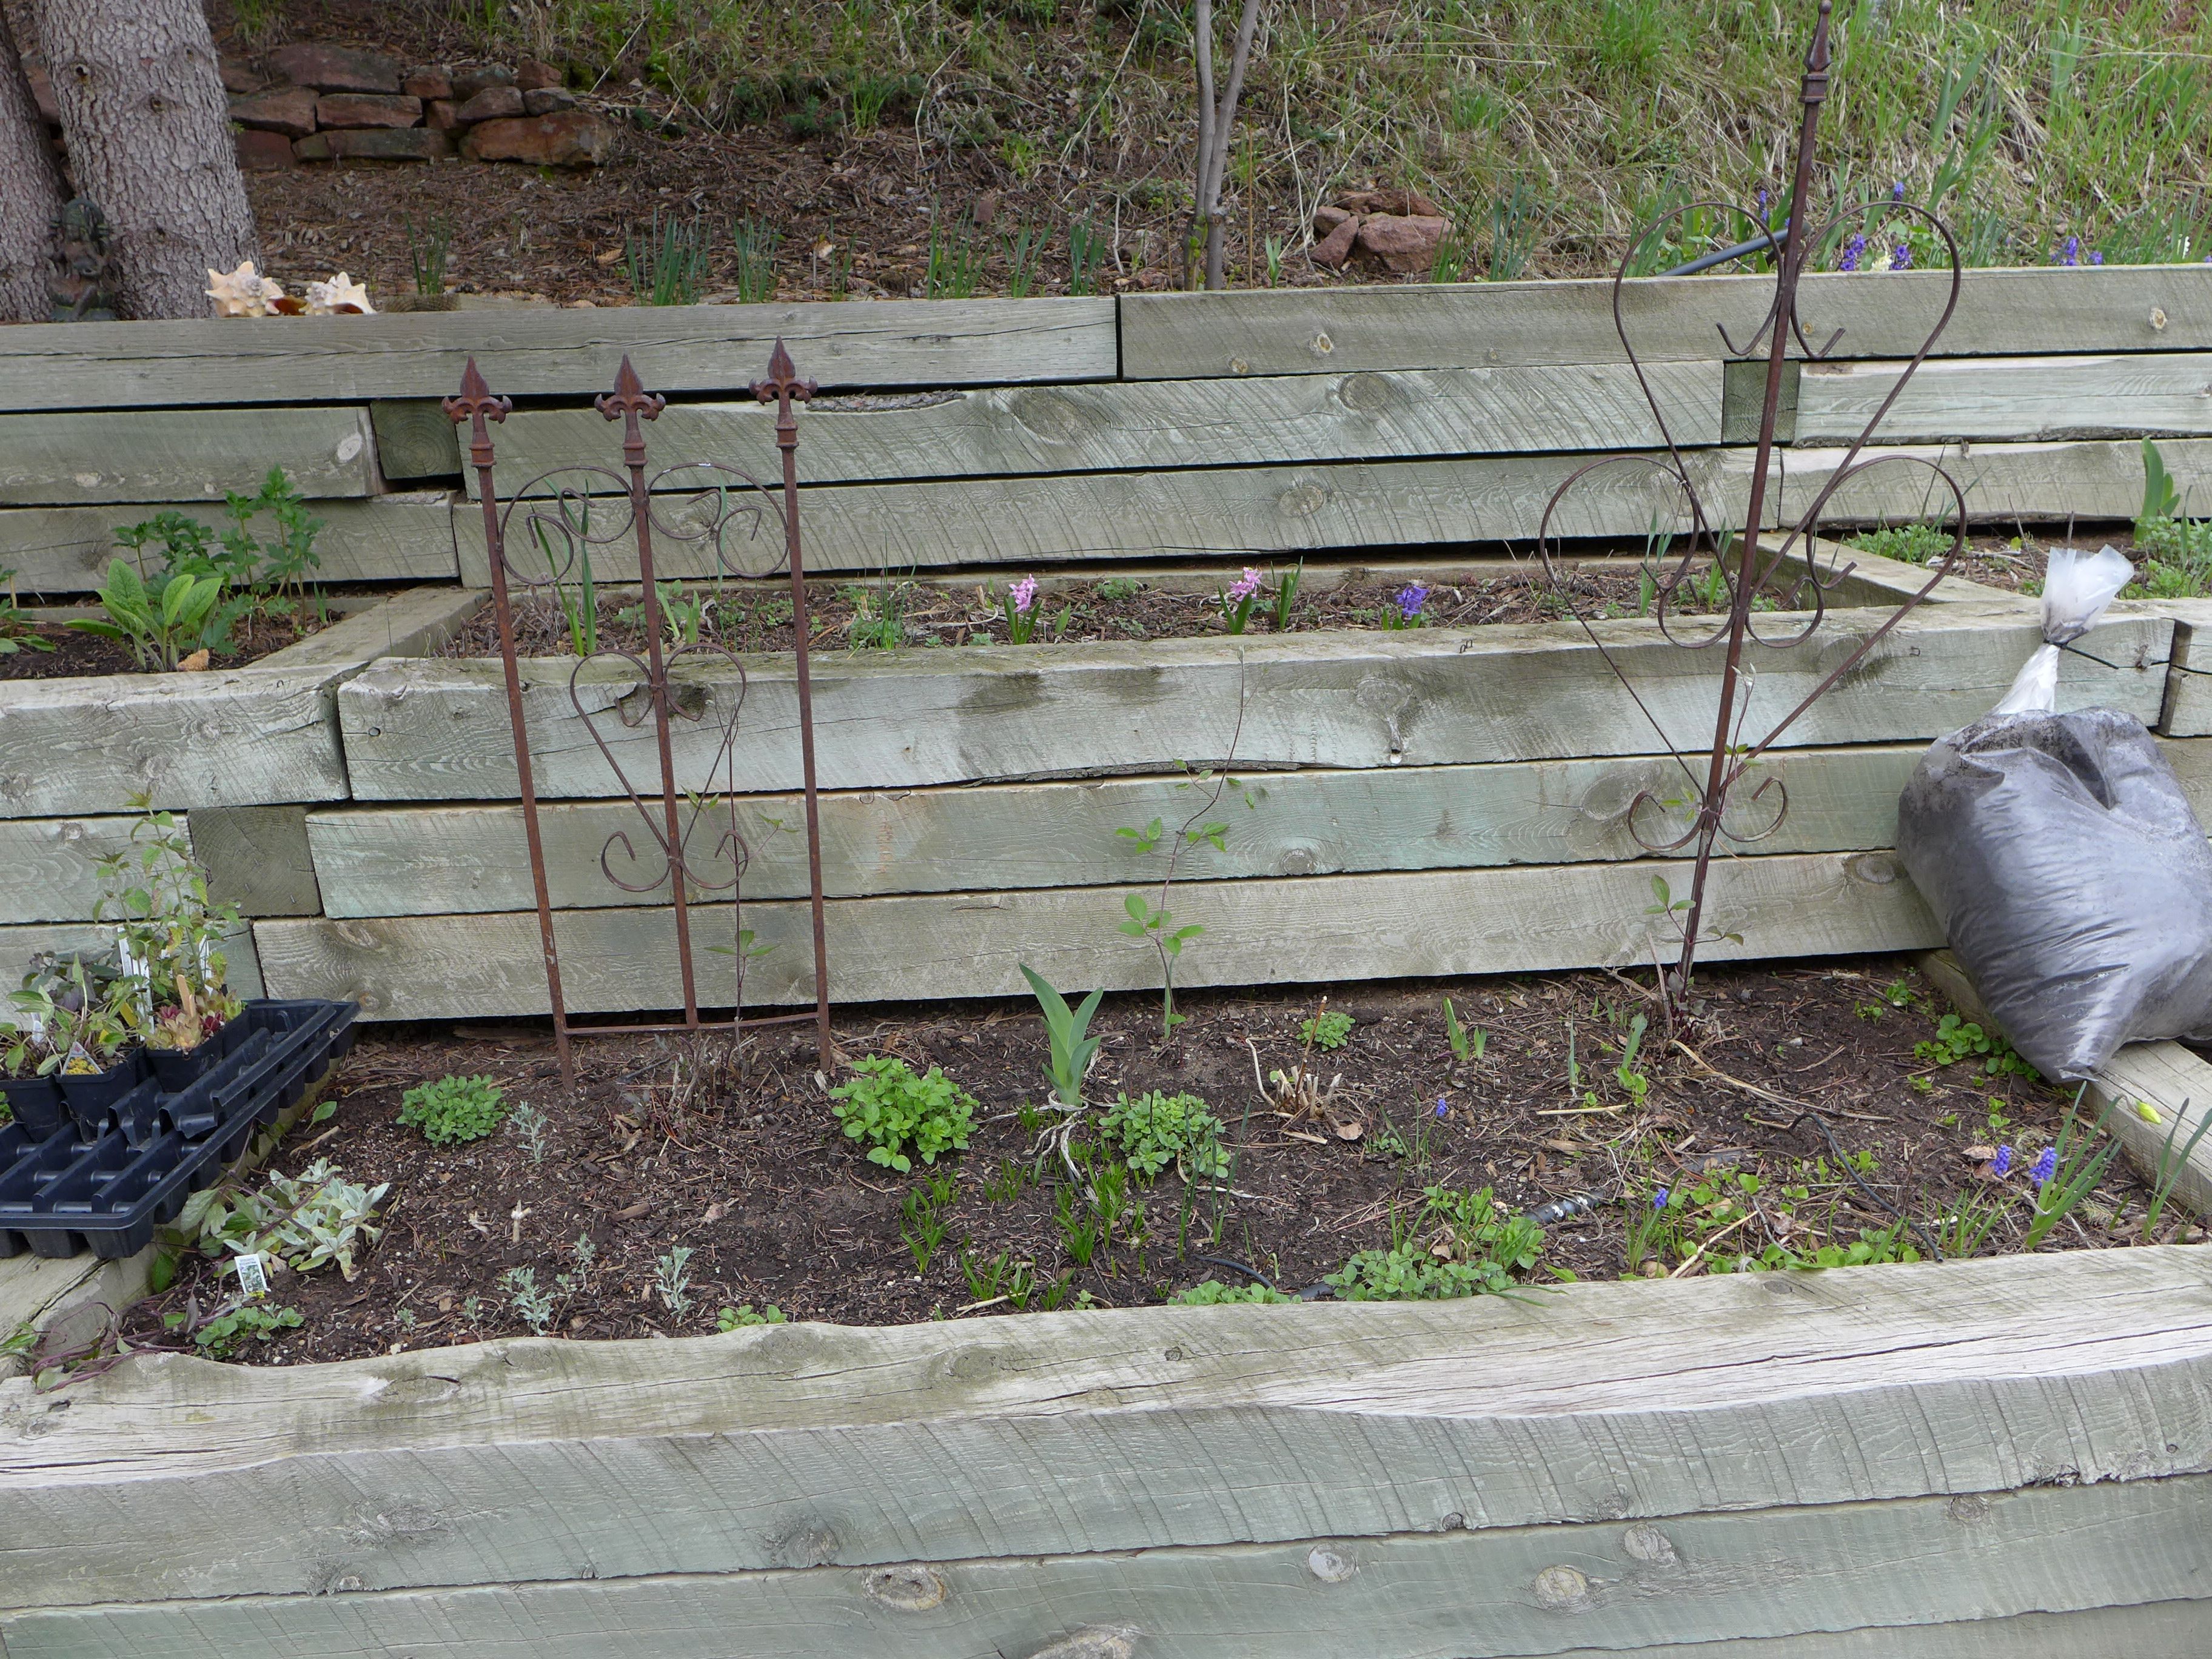
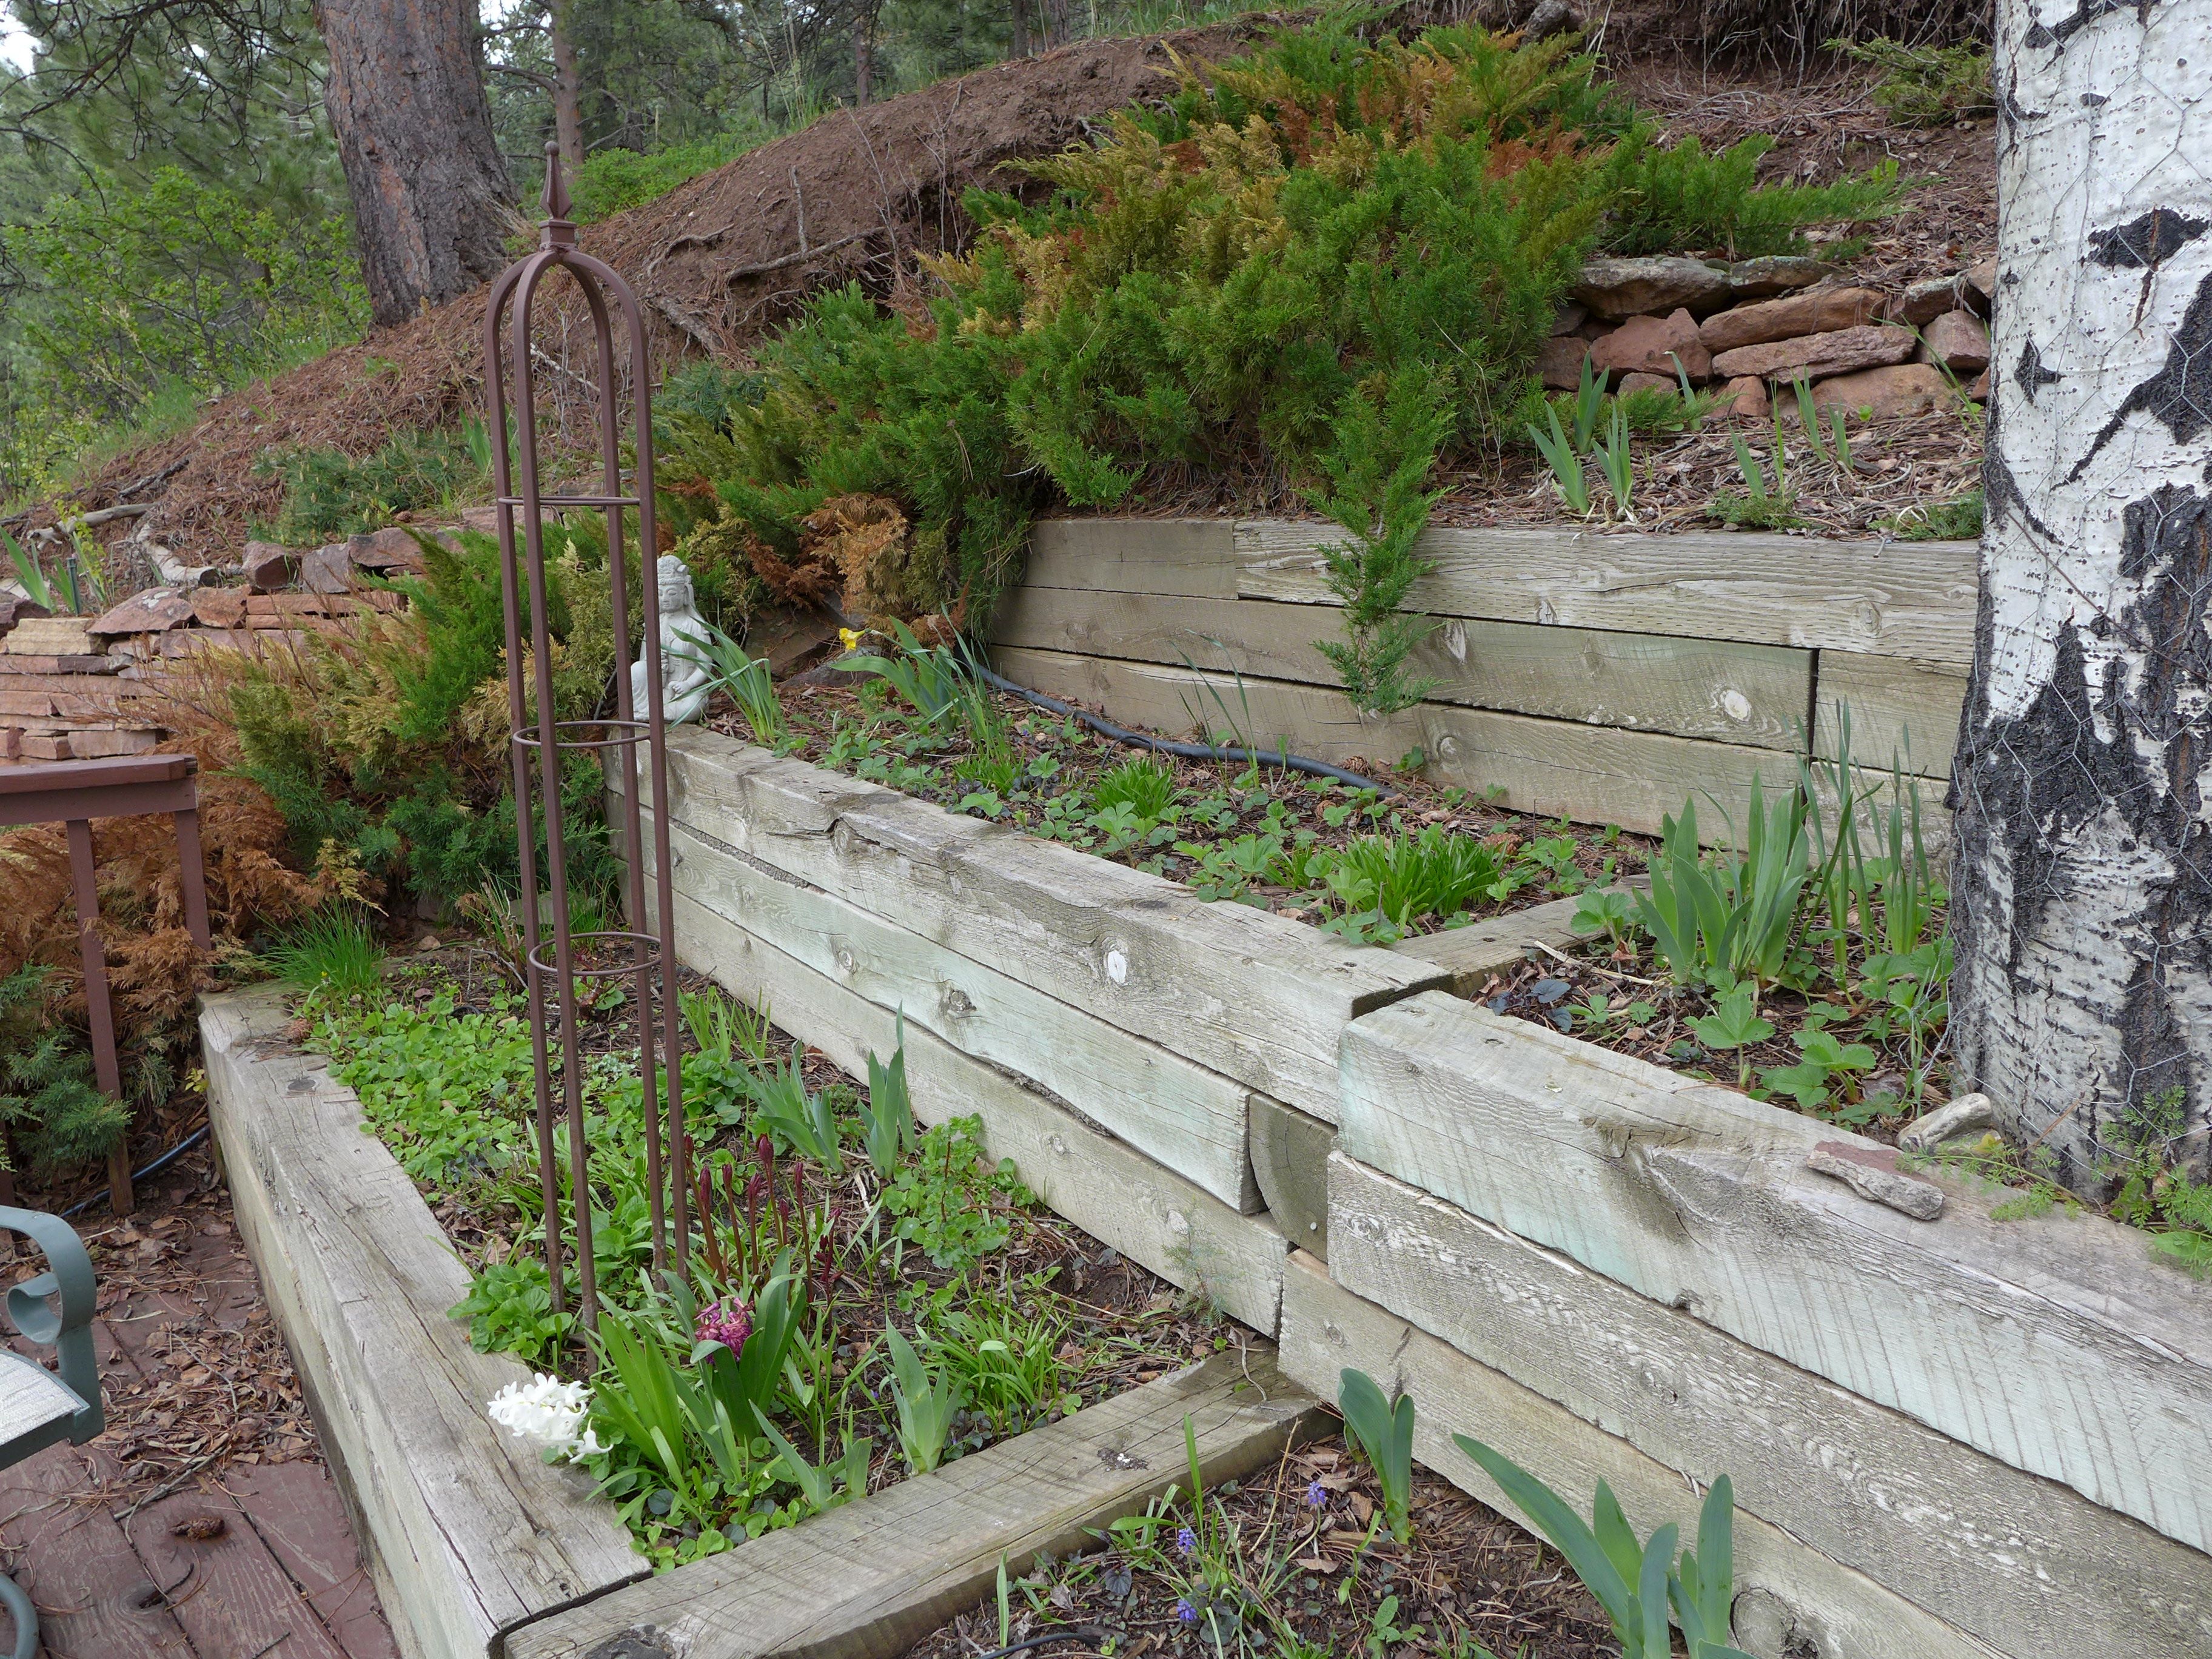
I’m definitely highlighting the successes, because that’s what makes the gardening fun, and these are the areas my eyes turn to every time I walk out the door. Maybe I’ll share more of my “eh” areas in the next post. There are a few spaces where I was hoping to see big changes this year, but I’m starting to realize that I may have to settle for a slower evolution of the space.

Garden Update : The Pond

Throughout this summer, I’m documenting our garden. How it’s growing, what we’ve planted, and any changes we make to the space. Here’s my introduction to the bulk of our flower and veggie beds here.

Ugg, we’re such lazy bloggers lately! I realized that if I didn’t put this post up soon, then I’d miss my window of opportunity for pond introduction photos. Without further ado ~

When we lived in PA, I experimented with a few water gardens on our deck. Click here to read more about those experiments and the Thai water gardens that inspired my experiments.

With this house we inherited a small pond. It’s not something that either Calder or I would want to instal in our yard, especially in such a dry area where it seems a bit frivolous, but since it’s here, I’m so excited to expand my water gardening to this bigger space!

pond - 1

The Pond

This pond is created using a waterproof rubber liner that is then covered with rocks. The pond is about 10 feet from our deck, and between those to spaces is a flagstone path with mint growing between the rocks (that’s what you see in the foreground above). The pond has a filter and pump system that pump water to a waterfall that’s about 6 feet high and 10 feet away from the pond. The water then trickles down a stream and into the pond. Last season we turned on the pump once (right after cleaning it), but then never used it again. This summer we’re hoping to tweak it slightly and use it a bit more, but I’ll discuss that feature in a future post.

Spring Cleaning

Both last year and this year we started the season by draining the pond and spraying it down to try to remove as much algae and silt as possible. I didn’t photograph that process, but realized I should next year. We learned a lot of things last year that made what was at least a 12-hour project the first time just a 2-hour jaunt this time.

We drain the pond with a big hose using this technique. You just fill the hose with water, submerging one end in the pond water and putting the other end at a lower point, letting gravity do the rest.

With a pond of our size, it takes a while for it to drain completely, so while it’s draining, I get to work removing the algae. I drag a large pitchfork through the water, picking up sheets/strings of algae that I then dump outside of the pond. As the water level goes down, I’ll hook another hose up to a water source and start spraying down the rocks on the side of the pond, trying to remove any algae and slime on them.

Once the pond is almost completely drained, you have to be careful that the draining hose doesn’t lose suction. It’s just a pain because then you have to fill it with water and get suction going again to get any remaining water. During this phase, I’m almost constantly spraying fresh water onto and between the rocks to wash out as much silt, slime, and algae bits as possible.

I don’t remove every bit of gunk from the bottom of the pond, but once I’ve done a fairly good job, the process is done and I start filling it again with fresh water.

pond - 1 (2)

Algae

If left unchecked, our pond came become overgrown by string algae. From what I understand, the algae is not a danger to us or other organisms, but cosmetically, it’s a bit unsightly and makes the pond look more like a swamp than an oasis.

One of the reasons that our pond seems to be a prime target is because it gets a lot of direct sunlight throughout the day, and just like other plants using chlorophyl to make their food, sunlight will encourage growth. I was told that I could eliminate the algae and have crystal clear water by adding bleach to the pond, but this is only a solution if I don’t want to have any other plants or animals growing in the pond (and if I don’t mind dumping bleach into the environment, which I do). There are a few other solutions, so this summer I hope to keep you updated with my algae successes and failures.

In addition to physically removing the algae (as described above) and using an algaecide (discussed below), I can try to physically limit the amount of sun reaching the water’s surface. One easy way to do this is by adding water plants that will grow on top of the water, so that’s what I’ll be experimenting with this summer.

pond - 1 (1)

Mosquitos

Because of the cool weather in the mountains and the lack of standing water in our dry climate, the mosquito population in the mountains is generally low. That said, we don’t want this pond to become a mosquito breeding ground. There are a few ways to avoid that.

Generally, mosquitos will successfully breed if they have access to the surface of still water and if nothing eats the larva. If we keep the waterfall on, this would agitate the water enough to deter mosquitos from laying their eggs. It’s unlikely that we’ll do that because of the noise, energy use, and increase in water loss that would happen. Another option is to cover the surface of the water in plants so that it’s hard for the mosquitos to lay their eggs. I’m going to attempt to cover most of the water with plants (more below), but it’s unlikely that we’ll completely cover the surface. If I do achieve relatively good plant cover, then I would love to add a few goldfish to the pond, and they would help to eat the larvae. So, there are some options, but they aren’t guaranteed to work at this point in our pond’s lifecycle.

So, for now, we’ve decided to add Mosquito Bits to the water. The mosquito pellets/dunks contain BTI, which is a bacteria that is toxic to the larvae and will kill them. The dunks are considered safe and non-toxic (when used correctly) for all other animals.

pond - 1

Plants

This year I’m hoping to do some experiments and expand the variety of plants that I grow in the pond.

Right now our pond contains two groupings of water lilies. Both are made up of lilies that I put in the pond last summer and they successfully spent the winter out there. Not only did they survive in our little pond, but they thrived, multiplying successfully in their pots. This year I repotted them and added another one that came as a dry root from Home Depot. I bought that one because it was so much cheaper than the live plants and I wanted to grow it as a test this year to see how well it does.

I’ve also added a curly rush, two canna lilies (from dried roots), and another mystery lily that I picked up in the pond section at Home Depot. You can see the leaves of the mystery lily just starting to sprout in the photo above. All of these plants live on the “margins” of waterways ~ along the edge where their roots may be submerged in water, but their stems and leaves aren’t. So I have them in pots near the surface of our pond. It isn’t the most beautiful presentation, but I’m hoping that the floating plants will disguise the pots, and if they plants are successful, then I’ll come up with a better solution next year.

I was going to use duckweed as a floating plant to cover the water surface, but I wasn’t happy that the batch I received in the mail. So just this week I placed an order for fairy moss (it’s the small floating plant growing in the photo above), and a couple of water lettuce (another floating plant that is larger, like a small head of lettuce, and multiplies like crazy).

~

That’s our pond in early spring. I’m hoping to get some lush growth from the plants this year. I would love to add a couple of goldfish, knowing that they will be super attractive treats for birds (thus wanting some good plant cover for them to hide under). We have a couple of frogs out at the pond now; we hear them but can never see them! Last year they laid eggs, so we’re hoping for another batch of tadpoles this year.

I’m excited to keep you updated as the pond grows and evolves this summer!

A Garden Introduction

Throughout this summer I’m excited to keep a journal documenting the growth, updates, and general observations of the gardens around our house. Since it’s the start of the season, I thought it would be appropriate to begin with a little overview of the outdoor space. Admittedly, the photos in this post aren’t that exciting, but I’m happy for the visual record they’ll provide as the season progresses.

liveseasoned_spring2016_garden10

We have a very large deck, a number of raised beds, a small-ish pond with a waterfall/stream powered by a pump that we can turn on and off. There’s a small rock path leading from the deck to the pond, and then this path continues down the side of the hill to our driveway. The rest of our outdoor space is rustic. Our house is built on the side of a hill/mountain, and fortunately there is no landscaping, instead, we just get to walk off the porch and and are immediately immersed in the native Rocky Mountain foothills ecosystem, full of evergreen trees, cactuses, native grasses and flowers, and small shrubs, all dotted with many rock outcroppings.

Location

For anyone interested in the nitty gritty – I’m gardening in Boulder, CO in the foothills of the Rocky Mountains. We’re at about 6000 feet altitude, and in USDA zone 5b.

The Challenges

This is going to be my first real season gardening in Colorado. For the past two summers, I mainly grew herbs and a few things in pots on our deck, but this year my goal is to start improving the permanent spaces around our house. The main challenges that I want to keep in mind are water supply, animal predation, and length of the growing season.

liveseasoned_spring2016_garden11

I think I’m already doing a good job of reining in my expectations when it comes to that last item. If this were PA, I would have been actively working in the garden and adding new plants back in April. But here, we saw some of our biggest snow storms just a month ago! That definitely helped to keep my expectations in check. It also helps that the nurseries (knowing what’s what) don’t put out many of their plants until we’ve entered the window where putting them in the ground is ok. So, I’ve just started to add some perennials to the flower beds, and while it *feels* late, I think I’m right on schedule.

When it comes to plant choices, I want to create a responsible garden, so I’m really focusing on plants that will do well in a more arid environment. Fortunately for me, many of the flowers that I like also fit the bill as having low-water needs. After their first season, that is. You want to water plants well in their first season to ensure that they become established in the beds, growing nice deep roots that will help them  in future seasons with lower water supplies. We have a drip irrigation installed throughout the beds, so that will help with watering but even so, I want to make sure we’ve installed a water-wise garden.

liveseasoned_spring2016_garden5

The other challenge that I’m trying to keep in mind are the foragers that frequent/live on our property. There are families of Mule Deer living in this area, and they love to graze in our yard. They are often eating the native grasses growing on the hillside, but they also walk right onto the deck and will look for anything tender growing in the garden. We also have rabbits living in the yard and they have no qualms about eating from the garden. Again, I’m lucky that many of the flowers I want to add to the garden are generally considered to be deer and rabbit-safe, but this is not the case for most vegetables, so as you’ll see below, I have a plan…

The Raised Beds

There are twelve tiered beds along one side of our deck, a few more that line the stairway from our driveway to the front door, and a couple more on the east-facing slope of our mountain below the house. We don’t see those last two on a daily basis, so I think I’ll end up ignoring them for most of this summer while I keep my focus on developing the plantings in the other beds.

Flowers

All of the planted areas currently contain a collection of early-season bloomers (daffodils, snowdrops, hyacinths). There are a few peony plants, lavender, roses, and a lot of bearded irises.

liveseasoned_spring2016_garden1

This year I’m hoping to expand the variety of flowers growing in these beds. My plan is to add black-eyed susans, purple coneflowers, bee balm, catmint, yarrow, goldenrod, and milkweed. From my research, these all fit the bill as having low water needs and also being relatively unattractive to foraging from deer and rabbits. And while I’m trying to keep away some animals, I’m hoping to attract others. These flower choices are all attractive to a combination of hummingbirds, butterflies, and bees.

In addition to the flowers, we have a number of ornamental shrubs – butterfly weed, flowering hydrangea, and lilacs. I don’t plan on adding any more shrubs at the moment; I just want to maintain what we have.

liveseasoned_spring2016_garden3

liveseasoned_spring2016_garden2

Edibles

We inherited a few edible plants in our garden. There are perennial herbs (sage, chives, oregano, and mint), a raspberry patch, and a few old strawberry beds.

A lot of people flinch when they here about mint in the garden because it’s so invasive. We’re fortunate in that all of our mint is planted in the rock pathway between our deck and the pond. It’s slightly shaded and is an area with soil that stays more moist than other beds (perfect for water-loving mint), and fortunately, it can’t really spread beyond that zone because it’s cornered by the pond, stream, and deck.

liveseasoned_spring2016_garden9

I didn’t know anything about raspberries before moving in, and I still feel like there’s a lot to learn. I know that there are some varieties that produce berries late in the season off of new canes and other varieties that produce berries throughout the season off of old growth. Right?

Last summer I cut all of these canes back. We only ended up getting two berries (no joke!), but they were delicious! It could have been that we didn’t water the area enough? Or it could be that this is a variety that produces berries on old growth? I didn’t prune anything this season and am going to see what happens. I’ve also signed up for a “small berries” class at a local nursery. I’m hoping to walk away from the class with both tips for growing and caring for our berry plants as well as information about different varieties that do well in our area.

liveseasoned_spring2016_garden6

I think our strawberry beds are all past their prime. I’ve read and been told that a strawberry plant only has a few years in it before its production slows down. Last year we had quite a few flowers, and I think I saw a berry or two, but we never got to any of them before the animals (this might be an unavoidable problem). I’d like to re-energize our beds, but I think I’ll wait to do anything until after the class.

When we moved in, every one of our raised beds had something growing in it – some were more full than others. Calder and I were both excited to completely empty at least one bed for growing veggies. We don’t have high expectations, or necessarily a high demand since we have a farm share, but we want to grow a few things that we can pick and eat, and more importantly to give the boys the exposure to growing something that they can pick and eat.

liveseasoned_spring2016_garden7

liveseasoned_spring2016_garden4

So this spring, I cleared one of the beds right off of the deck, moving most of the plants to open spaces in the surrounding beds. We then turned over the soil, added compost, and planted a few early-season veggies and herbs. Right now we have a little area of loose-leaf lettuces and another area of radish varieties (I’ve heard radishes are absurdly easy to grow, and I’m looking for an easy success in our first season). One side of the bed is dedicated to herbs – we have thyme and a hardy rosemary, if we’re lucky, both will be perennials in that space. We also added a dill and a fennel plant. In the middle of the bed I put in a couple of bok choy plants and one rainbow chard because we like to eat those greens. I think that as it gets too hot for the lettuce area, I’ll plant some basil in that zone.

This past weekend we built a couple of fenced boxes to fit over the vegetable bed. Nothing fancy just a super-simple frame using the cheapest wood from the hardware store with chicken wire stapled to it. I built the box in two pieces so that it would be easy to pick them up and move then aside when we’re working in that bed, and we can use only one if we only need half of the bed covered.

liveseasoned_spring2016_garden8

~

So that’s the state of the garden as of this week. Between the late snowstorms and recent rain, we’ve had a relatively wet spring, which is getting everything off to a really nice start (even if we are all going a bit stir-crazy inside!). The radish and lettuce seeds have sprouted! And all of the perennials I’ve planted thus far seem to be thriving. I’ll be excited to update this series throughout the summer as a record of how the beds change, and I’m hoping that the visuals will really help me each year as I think about what I’d like to add/change in the garden.

In the next post I’ll introduce you to our pond and my dreams for a big, lush water garden… they’re competing with Calder’s dream to turn the pond into our hot tub!


DIY Vanilla Extract

Vanilla is our ingredient of the season. So far we’ve made some vanilla-infused vodka (great for milkshakes!), a savory roasted chicken with vanilla bean, and some homemade perfumes with vanilla essential oils.

Forgive me for stating the obvious, but today we’re finally hitting on the key ingredient in every kitchen – vanilla extract! Who doesn’t have a bottle of vanilla extract in their kitchen? It gets used in everything. In fact, yesterday the boys and I baked our favorite chocolate cake, and even that called for two teaspoons of vanilla extract. 

liveseasoned_spring2016_vanillaextract5 - 1

My fist exposure with homemade vanilla extract was a few years ago when I received a bottle from my BFF for Christmas. It was amazing, and I cherished that bottle, wanting to use it but also keep it for ever because it was just so good. As you’ll see, DIYing your own extract is so easy that I probably should have reigned in my emotions a bit…

The key to make a quality vanilla extract comes down to two things : 1. quality beans and 2. time.

liveseasoned_spring2016_vanillaextract3

How-to

For this bottle of extract I used 8 Madagascar Bourbon vanilla beans and 1 cup of vodka. Split each bean by slicing through it lengthwise, then place the beans in a jar, add the vodka (making sure that it covers the beans), and let sit for at least two months.

After that time, you don’t have to remove the beans. In fact, you can let the extract sit longer to get a richer flavor. And as you use the extract, you can top it off with more vodka to keep your batch going.

That’s it!

liveseasoned_spring2016_vanillaextract2

For how simple this recipe is, there are many ways to personalize it. Try different vanilla beans for different flavors (for example, Ugandan beans are supposed to have a more smokey flavor). You can also use different alcohols. I used vodka because it’s flavorless, so I would really only taste the vanilla from my beans, but you can substitute rum or bourbon. Personally, now that I have this bottle, I’m excited to experiment with a few more bean/alcohol combinations.

liveseasoned_spring2016_vanillaextract4

And if you just happen to have a big bottle of vodka sitting around, don’t forget that with a single vanilla bean and a few days, you can turn it into a smooth vanilla vodka! If you’ll remember, Calder made fun of my idea to make vanilla vodka, but the joke’s on him because that stuff was so good that it’s already gone and I’m thinking about making another batch (maybe with lime this time!).

How To: Fill and Hang a Hummingbird Feeder

 Here is the feeder I have & here’s one double the size. Katie has one similar to this (because she’s shmancy). These feeders are extremely easy to fill, hang and clean. The red color attracts hummingbirds, but not stinging insects – bees, wasps, hornets, etc can’t see red, but are attracted to yellow. BTW we love bees, just not near our hummingbird feeder.

It’s that time of year again 🙂 hang up those feeders, plant flowers to attract pollinating insects and watch your yard come alive with activity. We originally posted this just about a year ago, but thought it was a fun reminder – so here it is again.

liveseasoned_sp15_hummingbirdfeeder-6

I spotted my first hummingbird of the season yesterday, which means it’s time to hang up the feeder.  This post is kind of a no-brainer, but who knows, maybe you’ve never hung up a hummingbird feeder? Maybe you didn’t even think of doing it until this post and then you were like DUH, I should totally hang up a hummingbird feeder. Is that you? Cool, keep reading.

liveseasoned_sp15_hummingbirdfeeder-11

Continue reading

Winter Photography Tips

Sarah is a professional freelance photographer – she’s always sharing tutorials. Learn how to find flattering natural light for selfies and portraits or catch tips on photographing kids and pets. See what camera Katie shoots with or check out my favorite lenses.

Live Seasoned Spring 16 Photographing Winter Landscapes08Live Seasoned Spring 16 Photographing Winter Landscapes14 
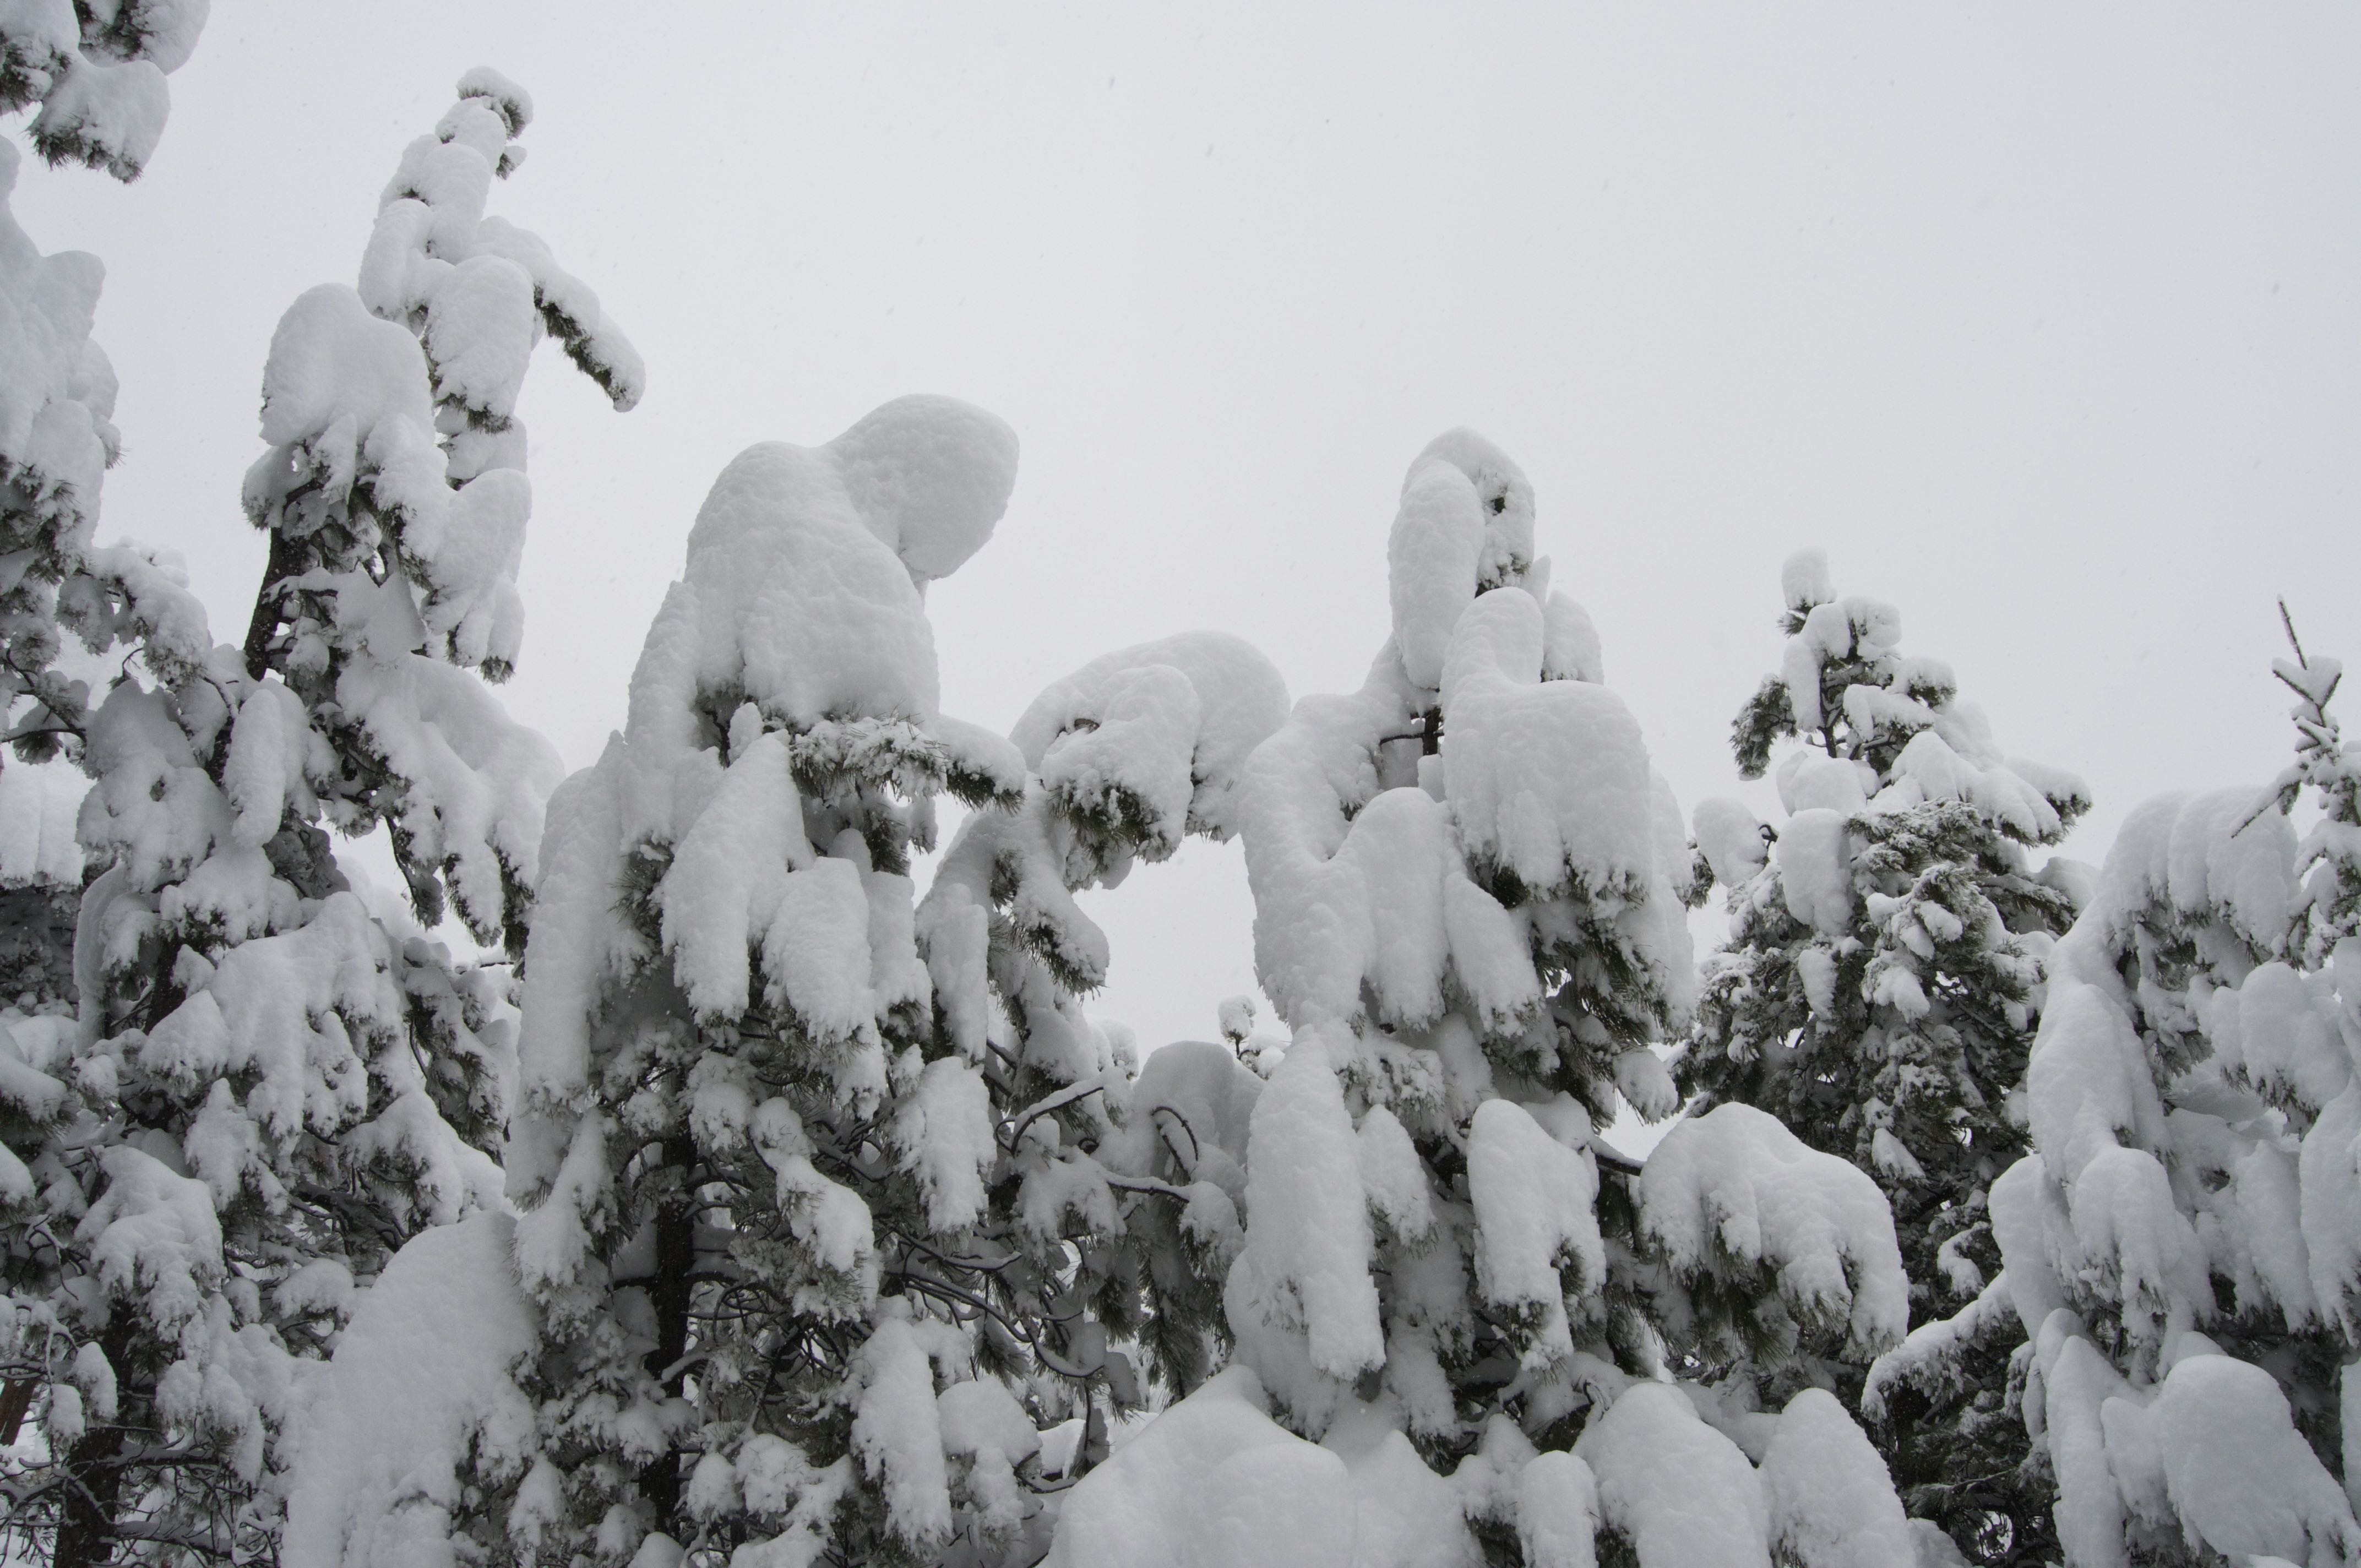
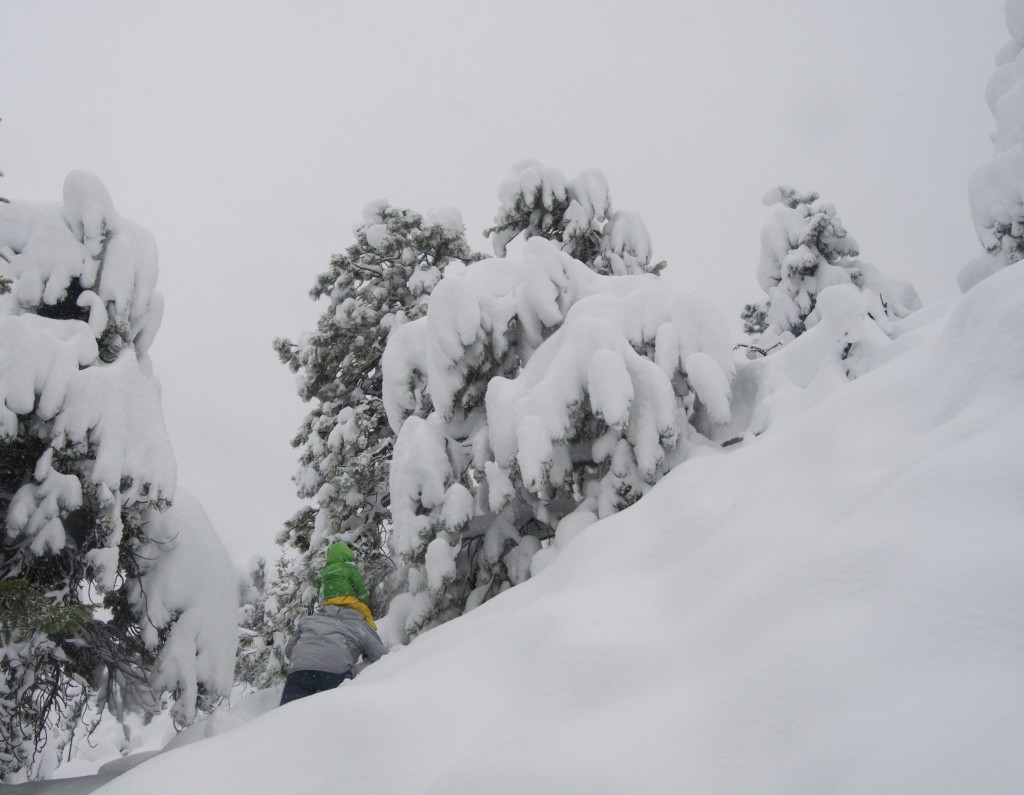
We agree, it’s a little bit strange to talk about Winter Photography Tips in mid-April, but did you see all the snow that fell in Boulder this past weekend? It wouldn’t stop! With a house full of food and relatives and the fire on full blast, we enjoyed every second of the snow.  We even made it outside for a hike up the mountainside.  If you’re still enjoying wintery snowscapes, here are a few practice pieces of advice for photographing in the snow. Continue reading

Our Camera Equipment – Sarah’s Camera

We often get asked about the cameras we use to take pictures for the blog and our instagram account, so today we thought it would be fun to do a series of posts where we each talk about our equipment and how we use it. This won’t be a lesson in photography, rather just a discussion about what we use and why it’s worked for us.

live seasoned spring 15 sarahs camera

Sarah here:

I use a Nikon D300s with 24-70mm f2.8 & a 35mm f2.

If I’m being honest, (which of course I’m always striving to be) I’m due for an upgrade. I’ve had this camera for over five years, but I truly love it so the years fly by and I keep clicking with this babe.  The tricky thing about shooting with DSLR cameras is that the lenses are just as important (some would argue more important) than the camera body and the good lenses tend to cost more than the camera body itself, so it’s always a struggle, for a frugal freelancer like me.

25464_D300S_34l

Continue reading

Our Camera Equipment – Katie’s Camera

We often get asked about the cameras we use to take pictures for the blog and our instagram account, so today we thought it would be fun to do a series of posts where we each talk about our equipment and how we use it. This won’t be a lesson in photography, rather just a discussion about what we use and why it’s worked for us.

Katie here :

I use the Panasonic Lumix DMC-LX7. And sometimes my iPhone 6s.

In the best of ways, I sort of fell into my camera. Calder gave it to me for a gift about five years ago (maybe longer!), and once I started using the LX7, I’ve never wanted anything else. Below I’m listing some of the selling points for me, together these may not seem worth the ticket price for this camera, but what I’ve left out is that this camera is just f’ing amazing for its size. It’s packed with features, and I’m only highlighting a handful.

lumix_lx7

Continue reading

DIY Fragrances

Vanilla is our ingredient of the season. So far we’ve made some vanilla-infused vodka (great for milkshakes!), a double vanilla cake, and a savory roasted chicken with vanilla bean. And this is just one in a series of essential oil posts.  Check out the rest here.

The idea of creating my own fragrance slowly developed over the past year or so after buying a vial of Victory Wolf. A few things about that purchase : a. it does smell just like a campfire! b. I would have never thought to create a fragrance that smells like smoke, but that inspired me to think outside of the “normal” perfume scents, c. I always thought that perfumes contained a bit of hocus pocus, and maybe they do, but with that purchase I realized that they can be just essential oils in a carrier oil.

liveseasoned_spring2016_perfume3

This is our first foray into blending essential oils, so we are by no means experts, but happily, our three blends turned out beautifully and we’re excited to share them today. Throughout the post we provide links to a few resources we found helpful for learning about blending essential oils to create fragrances.

With vanilla as our ingredient of the season, we thought it would be the perfect base note to build upon while trying to create some DIY fragrances. Going into this project, my plan was to create three distinct scents: something minty/fresh, something floral, and something spicy & citrus.

Continue reading

Go Away! Natural DIY Spider Detterent Spray

Oh spiders. I love them, but I’m also terrified of them. I definitely keep a handful of them in my house to get rid of little flying pests, but big furry spiders? GET OUT! This past week, we had to catch and release a spider every.single.night. They’re big, brown, and hairy and I’m sick of seizing up in fear every time I see one, so I made this natural DIY spider repellent.  Full disclosure, today is the first day I’m using it so I will definitely report back to let you know how effective it is. live seasoned spring 16 spiders go away spray-2 copy

Apparently spiders are discouraged by strong scents like garlic, lemon, peppermint, citronella, and eucalyptus. According to my research, spiders also detest the taste of tea tree oil. While there are plenty of combinations you can mix up to deter spiders, here’s how I went about it:

Add 3 Tablespoons of Dr. Bronner’s Tea Tree Oil Soap & 5 drops of Eucalyptus Oil to a spray bottle and spritz it around all the windows and doors and other area where spiders may enter your house. Don’t spray it directly on spiders, I mean you could, but that’s just cruel.

You could also spray this solution inside, but I’d test an inconspicuous area first to make sure it doesn’t leave soap or oil stains your paint. It didn’t leave stains on my walls, but not all interior paints are created equally 😉  I chose Dr. Bronner’s soap because it’s biodegradable. Interested in other biodegradable bath products? Check out this post.

live seasoned spring 16 spiders go away spray-1

I chose to try this DIY natural spider repellent instead of using toxic chemicals (they’re harmful to kids, pets, plants, insects, animals, our waterways and the earth in general) because they’re just plain overkill. I think very few instances call for harsh chemicals to be used. Often times you can find a natural repellent to tackle your pest problem. Along with the DIY spider repellent, these are a few other tricks to discourage arachnids from entering the apartment.

  • Thoroughly clean around doors and windows inside and outside the house.
  • Clean up any clutter in the corners of the cupboards and house in general.
  • Turn off porch lights so as not to attract flying insects aka a spider’s dinner.
  • Move stacks of wood and other debris far away from your home’s foundation.
  • Seal cracks in the home’s foundation and under doors and around windows.
  • Dust often! Spreading signs of activity and life to normally sleepy corners of your house will prevent spiders from parking there.

Happy spider-free homes to y’all!