Wedding Crafts : Tags

This June I’m sharing some of the crafts that made their way into my wedding, which was four years ago this month! A couple of weeks ago I showed you the bunting that decorated our reception tents and ceremony. Last week I shared the homemade purses that I embroidered for each of the bridesmaids (you also got a sneak peak at the sash that my mom made and hand-beaded to go with my wedding dress!). Today, I want to show you the tags that we made for both our place cards and as the labels on our favors. As you’ll see below, in each case, the cards were the icing on the cake of even bigger DIY projects!

liveseasoned_summer2015_favors

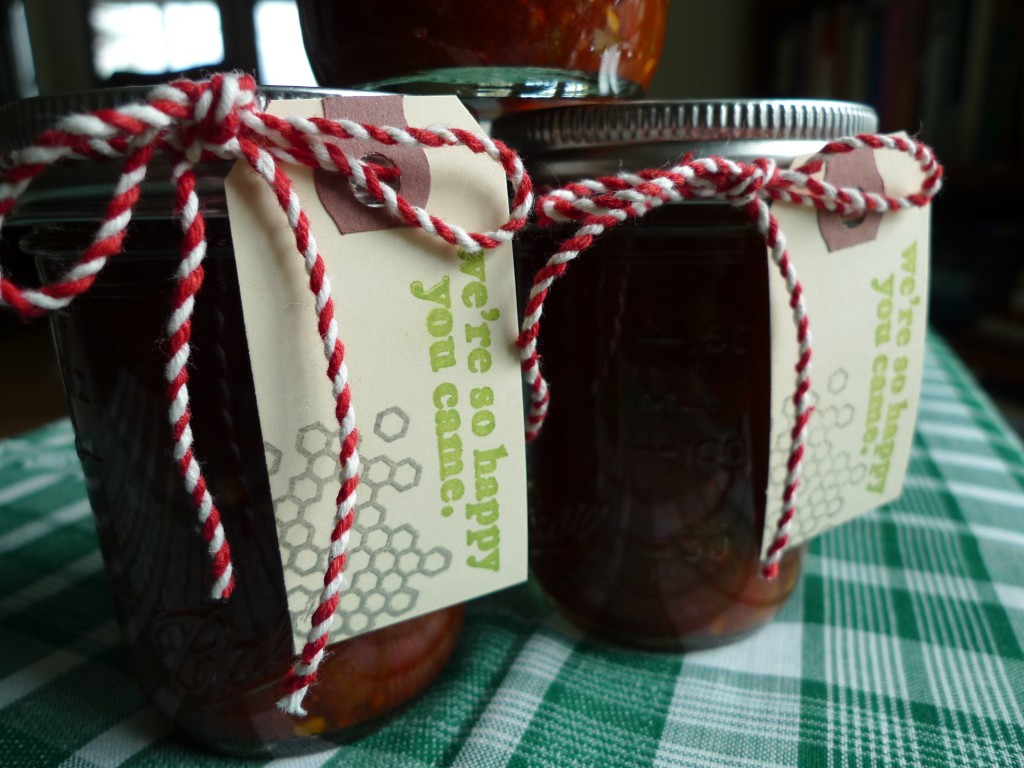
We used rubber stamps that were custom ordered  for these projects, yet while we were planning, we knew that these stamps would have a use well beyond the wedding. It was important to me that we didn’t purchase too many items that would only have a one-time use for the wedding, and four years out, I’m happy to see how often we’ve reused some items (and how well-loved others are). On another note ~ I know that the thought of using rubber stamps can drive people nuts when you think about having to line things up and make your stamping straight. As you’ll see, we tried to eliminate that problem. We didn’t worry about making our words perfectly straight, and we let some stamps, like the honeycombs, have a design that would fall off the edge of the tags. This strategy helped to minimize the stress and time that would go into projects like these.

Continue reading

Orange and Clove Pomanders

Oranges our our ingredient of the season. We have big plans for a winter of zesty recipes and sweet crafts.

liveseasoned_w2015_pomander6_wm

Today we’re sharing a super simple craft that you often see around the holidays : the orange and clove pomander.

Pomanders are balls made of some sort of scented or perfumed material. They are considered an original form of aromatherapy and have a long history dating back to the Middle Ages!

The orange and clove pomander is considered a modern version, and if properly dried, you can use these sweet and spicy smelling balls year after year as holiday decorations or in place of sachets in your dresser drawers.

liveseasoned_w2015_pomander1_wm

This is a very easy and kid-friendly craft! To make a bare-bones pomander all you need are oranges and cloves (buying your cloves in bulk is the way to go here). If you want to get fancy, you can add ribbon, either tied around your orange and incorporated into the design or looped through your orange for hanging.

liveseasoned_w2015_pomander2_wm

With your supplies ready, start making a design on your orange. I did all of these over the course of a couple of days ~ whenever A. Max was busy playing and I had a minute to myself. So rather than fuss over a specific design, I just played with the cloves and did a few free-form patterns.

liveseasoned_w2015_pomander3_wm

There were curved lines.

liveseasoned_w2015_pomander_wm

That looked like swirls from the top.

liveseasoned_w2015_pomander4_wm

One had a vine with flowers.

And there were polka dots!

The one issue you’re likely to have, especially if you’re in a more humid climate, is some mold growth. I’m hoping that the dry CO climate is going to help us out here! But to be on the safe side, once I was done with the designs, I put these in a cool, dark closet for about a week to dry out more. As they dry, you’ll notice that the cloves are sticking out a touch, so you can go around a poke them back in.

A traditional way to avoid mold growth is to sprinkle your finished oranges in orris root powder. This will help to dry out the orange and will add a violet scent to your pomander. In an effort to keep this project simple and low cost, I’m taking my chances and skipping the orris root!

liveseasoned_w2015_pomander8_wm

Putting them all together, it’s a nice little display of pattern that smells unbelievable! Alex loves to walk over to them and take a big whiff, which is unbelievably cute!