Hey Ya’ll! (I swear I’m developing a southern accent already) If you recall, last Friday I shared some tillandsia (commonly known as air plants) and succulent display inspiration. I’m truly obsessed with both. Tillandsias and succulents are easy to maintain and display and both are easy to propagate as well – win, win, win. For the past few years, I have pinned countless air plant displays with the hopes of making one myself. Well, that day has come my friends. That day is today. Actually, it was yesterday, but the big unveil is today, it’s right now, so scroll on!
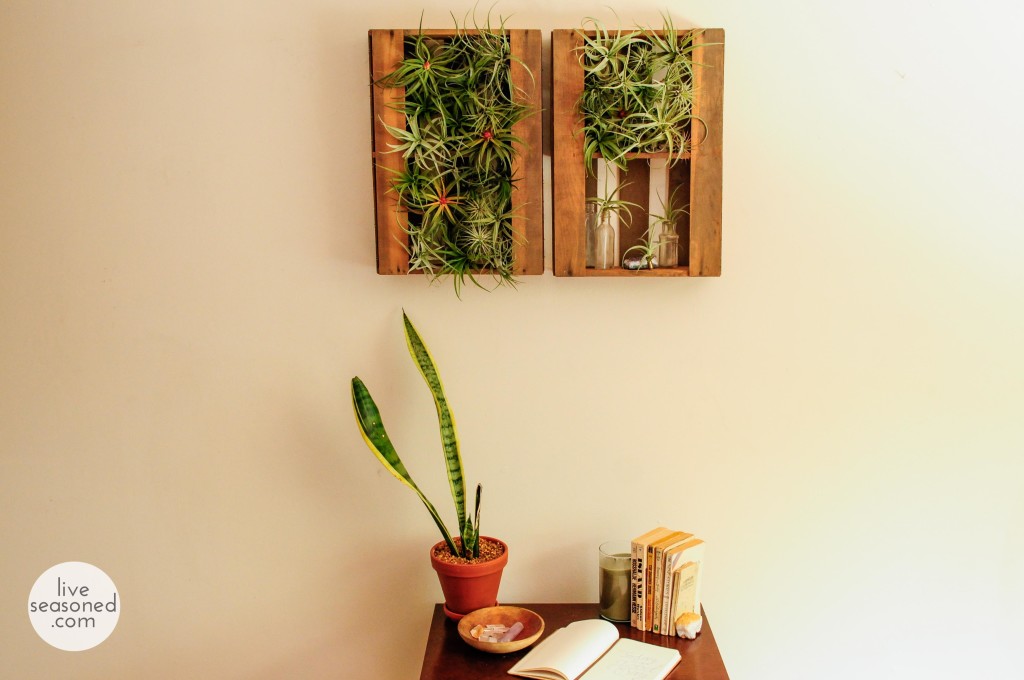
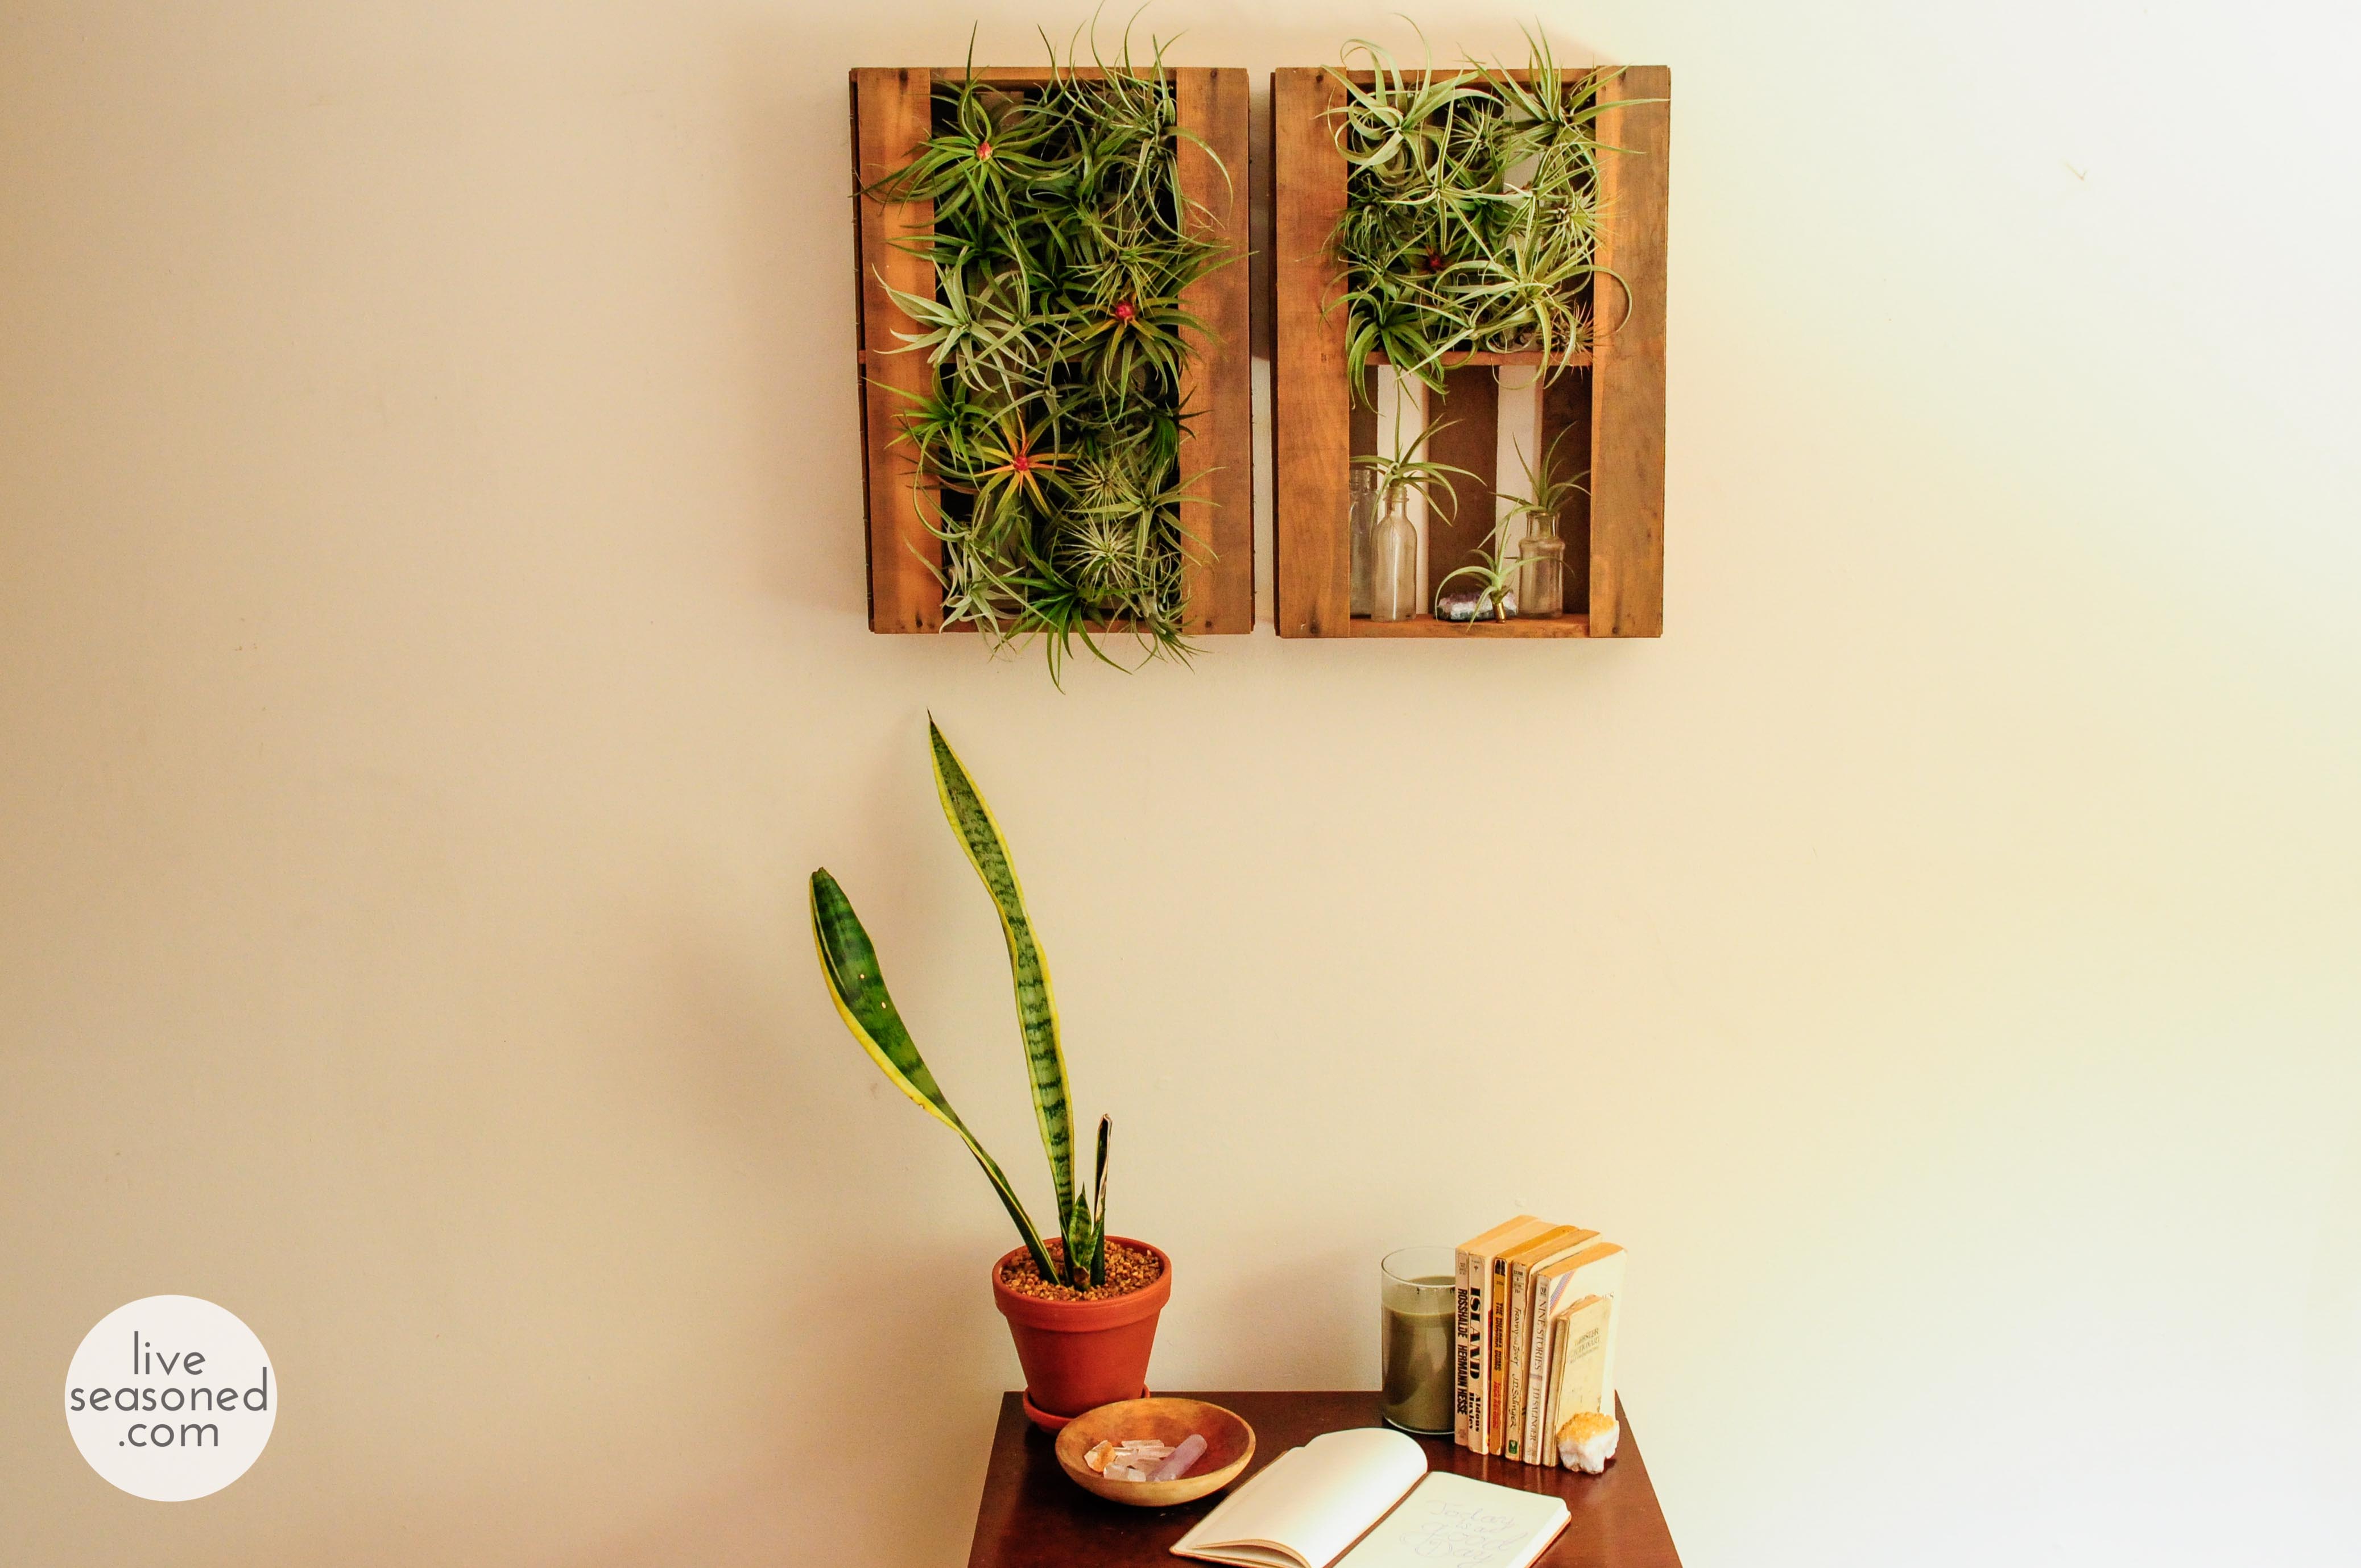
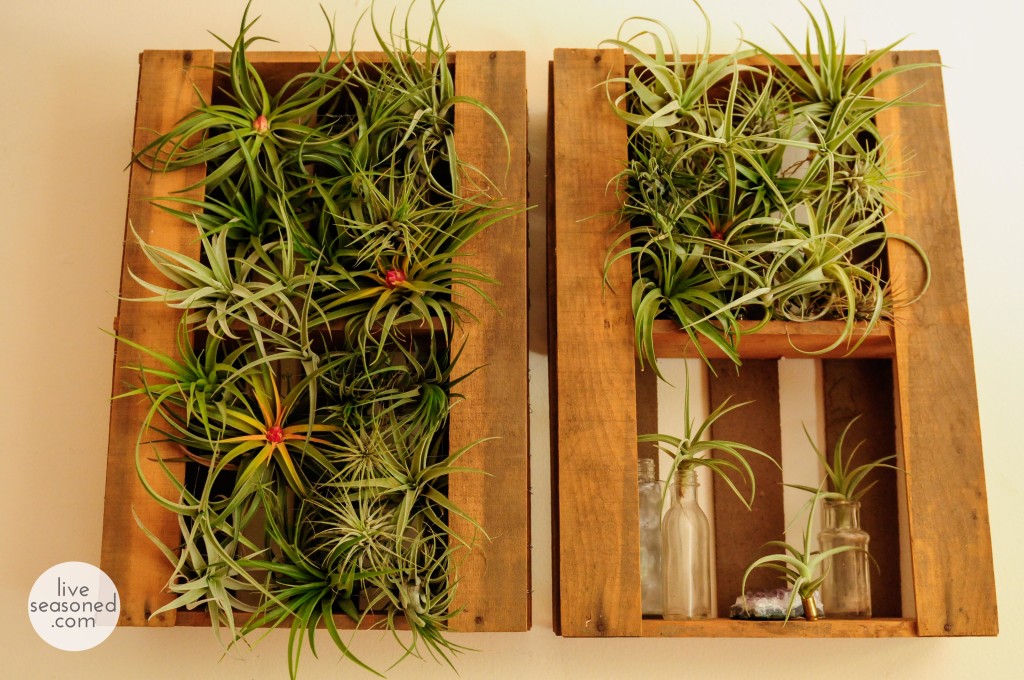
I really like the idea of displaying the tillandsias like artwork so I knew I needed some type of frame. I picked up two antique berry boxes from my local flea market for 75 cents a piece. The vendor told me they were about 35 years old. They definitely had 35 years of dirt on them, which I didn’t wash off BTW. I figured it added to the feel of the whole project, but who am I kidding? I was just too lazy and dry dirt is ok with me, wet dirt is when things get messy, right? I bought my air plants from this wholesale vendor. The site isn’t flashy and I wasn’t really sure what I was getting since there aren’t photos for each individual item, but I was blown away by my package of plants. It arrived severely dented (because it was so light), but not a single plant was damaged or dead and I ordered sixty plants! Yes, I spent $84 on air plants, but the most expensive kind was only $2.20! Now I have a whole little colony of air plants. They’re my children. Don’t come too close. After spreading them out on my kitchen table and looking at them for days (that is not an exaggeration) I finally came up with this easy display idea. While I had enough plants to fill up the berry boxes, I also wanted a display shelf for crystals and treasures and thus my design:
Air Plant Display DIY Supplies:
- air plants
- 25 gauge wire
- scissors
- pile of clear (or really whatever color) thumbtacks
- frame of choice (I used a berry box. You can use an empty photo frame, crate, pallet, random rusty frame you found in the woods (I did that also!) or whatever you have on hand)
Air Plant Display DIY Instructions:
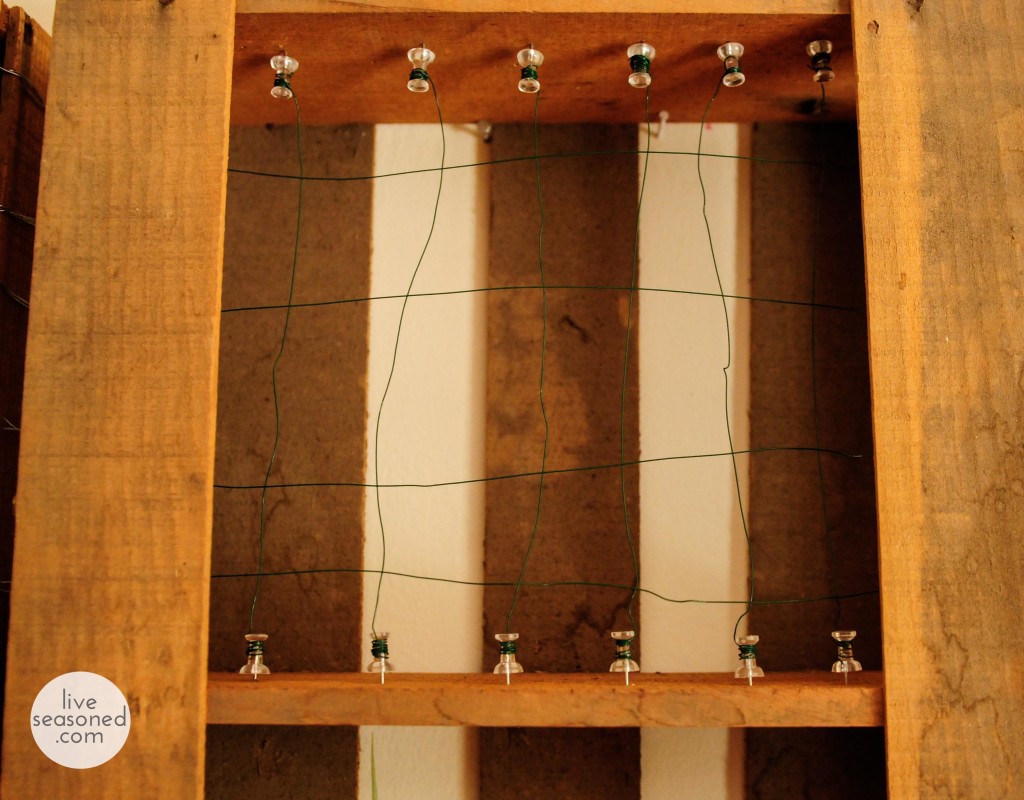
- Depending on what type of frame you are using, your DIY instructions may differ. Use this as a guideline and if you have any questions just drop me a line. Because everyone’s frames will be a little bit different, I’ll show you two basic ways of setting up your display. Here we go: The first option is to wrap the wire around the frame edges (in my case the frame is a crate, but it’s the same basic structure) to create a wire grid. Thread the wire (length depends on your frame width) through and behind the frame, bring it around in front of the perimeter and tightly twist it around itself (the length of wire that will run horizontally across the frame). Repeat by threading the length of the wire through and behind the frame, bring it around the front of frame and this time run it in a straight line across the frame. Repeat on the other side by wrapping it around the outside and back of the frame and pulling it through the frame opening two times and finishing it off by twisting it around the straight horizontal wire. Cut the excess with scissors. Repeat this process down the entire length of the frame. Leave 1-2 inches in between each row.
- After you have completed the horizontal rows, it’s time for the vertical columns. Cut a piece of wire 3 inches longer than the inside of your frame. Twist the wire onto the top rung of the horizontal wire “ladder” and thread the wire behind the rungs. Twist the wire onto the bottom rung as well. Repeat across the entire frame leaving 1-2 inches between each vertical column.
- Now you are ready to add the tillandsias, but first let me briefly explain the thumbtack method. If you are using a wooden crate or pallet, this method is nice because it completely hides all the wiring. Simply create a wire grid like previously mentioned, but instead of wrapping the wire around the frame, wrap it snuggly around a thumbtack and stick it in place inside the edge of the crate. Continue the process starting with horizontal rows and moving on to vertical columns until a grid is formed.
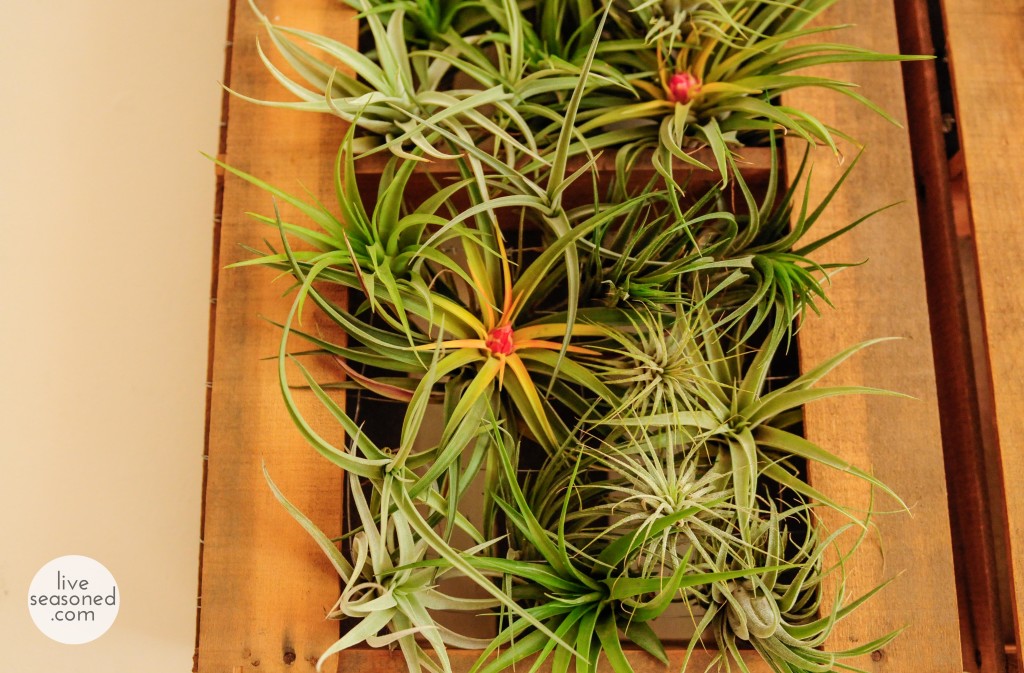
- Placing the tillandsias is quite easy, but it must be done with care. Simply push the bulb of the plant through a wire square and thread a couple leaves behind and then through adjacent squares. Two or three leaves should do it. Start with the largest plants and don’t put them too close together. Tillandsias need good air circulation to survive. As you add plants, you can thread them into place by using larger tillanndisa plants’ leaves. As you can see, some of the plants aren’t threaded through the squares rather they are held in place by other plants.
- Remember you’ll have to mist or submerge your plants every so often to water them. I plan on taking my frames off of the wall, misting my plants, waiting until they dry (they dry pretty quickly) and hanging them back up.
*If you want to hide the wrapped wire, try wrapping your entire frame in hemp, jute or yarn.
**If chicken wire is available to you (I didn’t buy it because I didn’t want 20 yards for a .3 yard project) you can easily attach it to the center of your frame by wire wrapping or the thumbtack method instead of creating a grid with 25 gauge wire.
Air Plant Care:
As you can see, there are endless ways to display these little gems. Since you don’t have to worry about soil you can get really creative. I love the little Peru Inca Gold in the shell casing. Don’t you? In case you were wondering, the plants with the pink buds are a Xerograhica x Brachycaulos hybrid and they were only $2.20 a piece! Also, the potted plants from left to right are Harrisii ($1.65), Ionantha Guatemala ($.61), and Kolbii Large ($.94). I also purchased 10 Brachycaulos ($1.38), which is the lone plant in the wire grid and lastly, six Velutina ($1.83), which kind of look like a bigger version of the Harrisii. I would recommend doing a quick google search of each plant before you buy them to get a better understanding or at least a general idea of what you’ll receive. Like I said, I was ecstatic with my package and I’m dying for an excuse to buy more. Christmas come quick!