Project Sweater : Seaming and Finishing

Do you also think that this time of the year with its chilly days, long dark evenings, and plenty of new TV is perfect for knitting? If so, maybe you want to knit some Christmas stockings or a new hat.

liveseasoned_summer2014_sweaterproject1_wmb

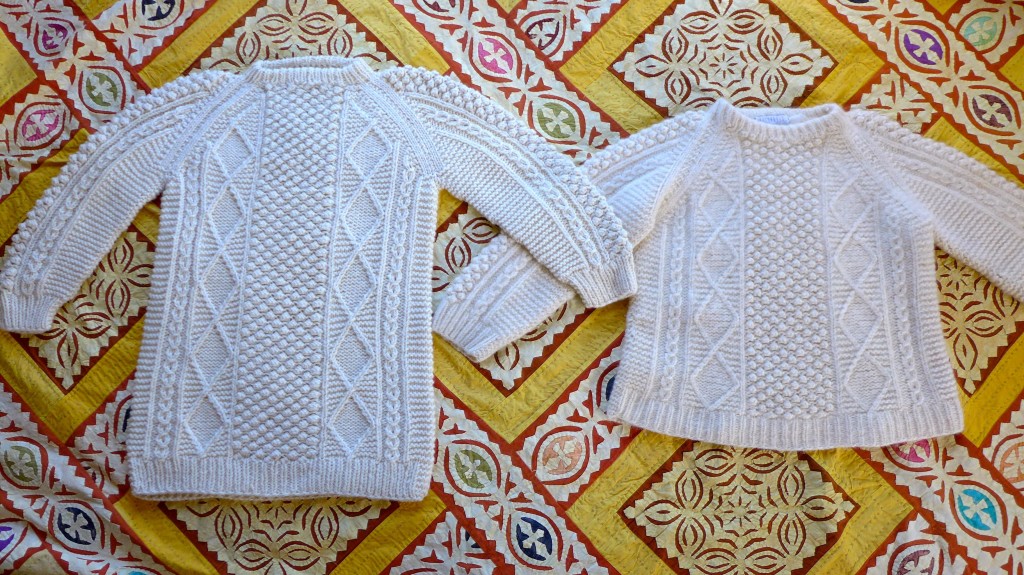
If you’ve been following along for a while, you may remember the big sweater project I’ve been working on. A quick recap : my friend had a sweater that she loved, but had been worn a lot and was slightly felted from washing. She asked me to knit another sweater just like the first, but slightly longer. In the first post I introduced the project and share my process swatches as I figured out the stitch patterns, then I wrote about finding the right yarn for the job, and in February I shared an update and the detailed stitch patterns. The project took a minor hiatus when we moved and had a baby, and finally, when things settled down this summer and fall, I finished the sweater! I wouldn’t let myself work on any other knitting projects until this was done, so there was major motivation to move it along :-).

liveseasoned_fall2015_sweaterfinal2

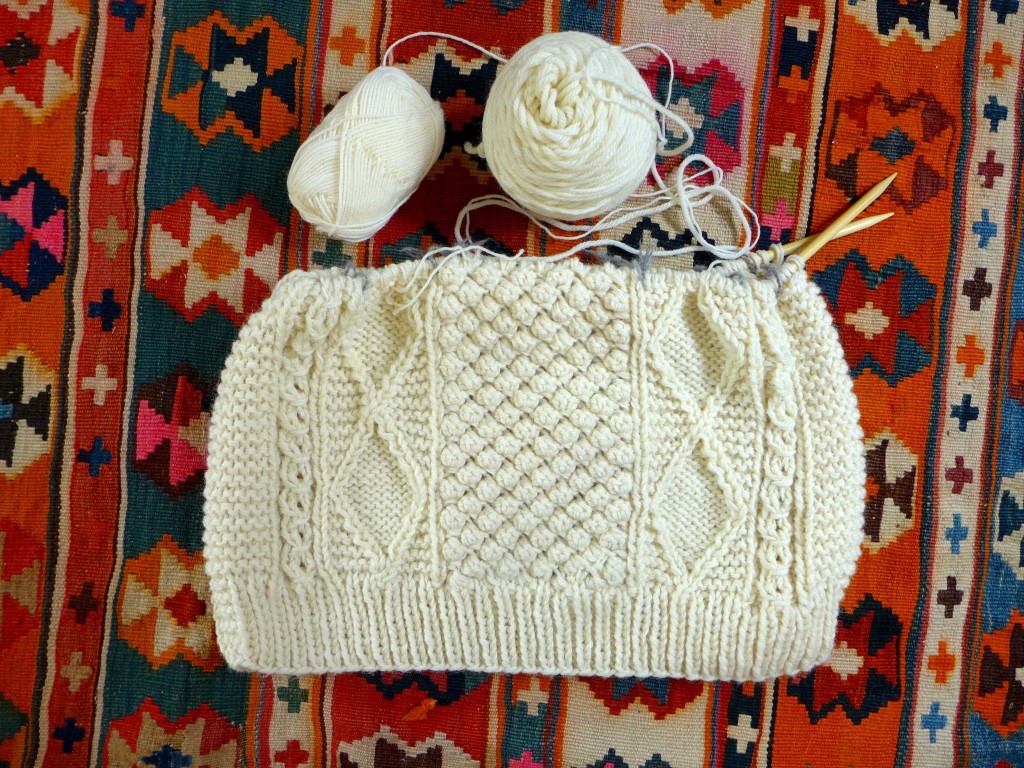
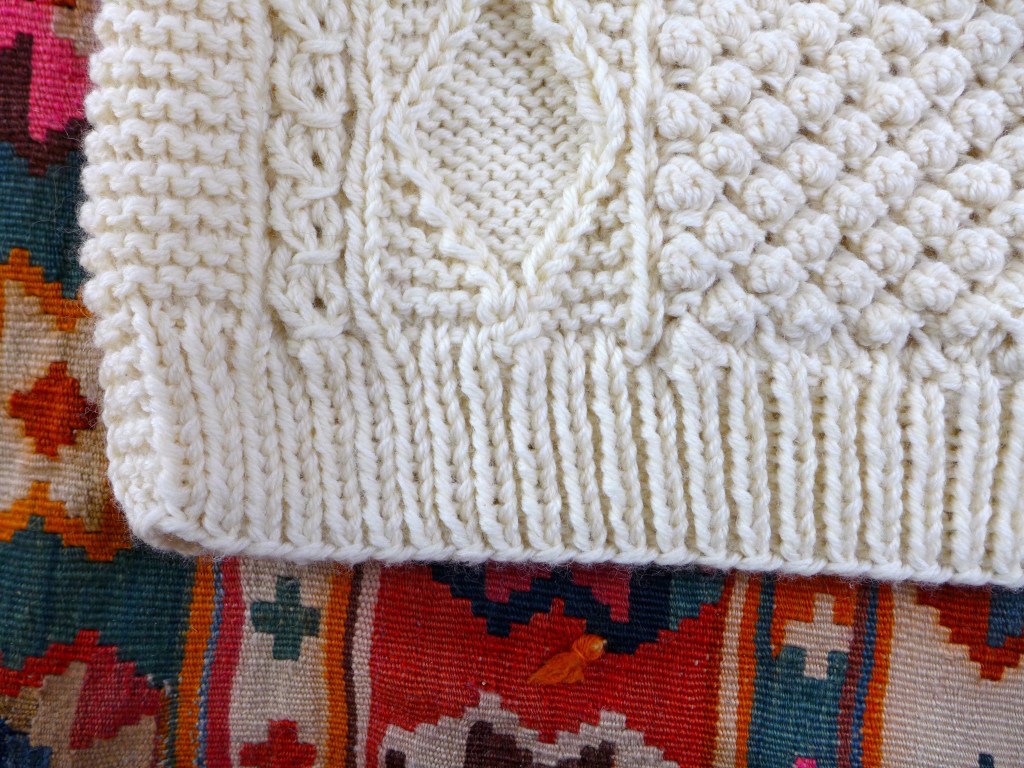
In addition to sharing photos of the finished sweater, today I wanted to talk about constructing the yoke (the area of the sweater around the shoulders, across the chest and back, and up to the neck).

If you’re new(ish) to sweater knitting, let me start by explaining that there are a variety of ways to construct a sweater. Broadly speaking, some sweaters are knit flat and others in the round. When knitting flat, you will knit one piece for the front, one for the back, and one for each sleeve. Those pieces are then sewn together, creating seams up the sides of the body, along the sleeves, and then between the sleeves and body. Sweaters knit in the round are almost completely seamless, except for minor seams in the armpits, and you can start from either the top and work your way down or from the bottom and work your way up.

Continue reading

Project Sweater : Update II

liveseasoned_summer2014_sweaterproject1_wmb

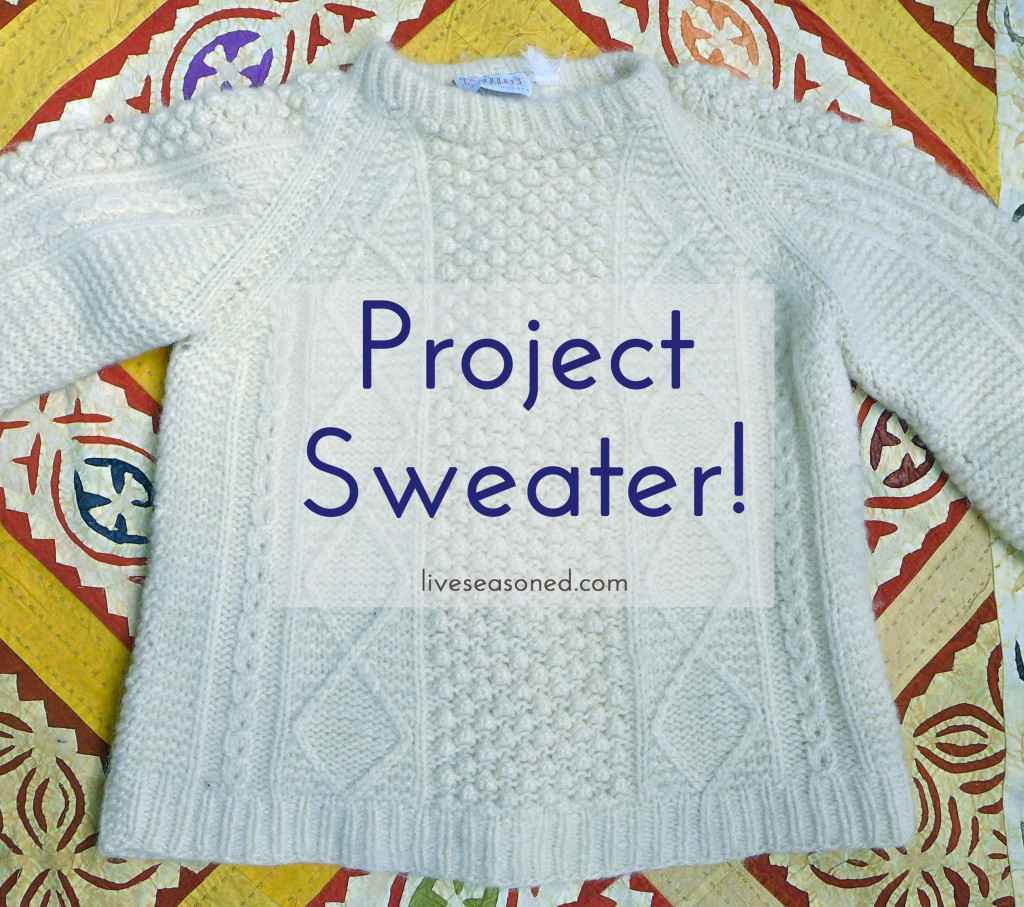
This is the third post in a series where I’m slowly taking you on the adventure* of figuring out how to recreate the sweater above. The original sweater belongs to a friend and has been well-loved and well-worn for at least a decade or so. Over that time, it also became slightly felted. I’m knitting a new sweater to be exactly like the old in every way except length – the new one will be a touch longer (one diamond cable’s length).

In the first post, I introduced you to the sweater, it’s three cable patterns, two yarn options, and two swatches using those yarns. Both of those swatches were too small to match the original sweater, but I was able to work out the stitch patterns. By the second post, I had found a yarn and needle combination that produced a swatch that was the perfect match to the sweater! I also discussed blocking in that post.

liveseasoned_summer2014_sweaterproject6_wm

Today I’m back to share a minor update ~ mainly that actual sweater knitting has commenced, and I’m about halfway done with the body of the sweater!

I also wanted to share my initial pattern notes for each of the cables. I often see a cable stitch that I’d like to incorporate into my own projects, but if it’s part of another pattern then I either have to buy the pattern of figure it out through trial and error. Of course, sometimes I get lucky and will find exactly what I’m looking for in a stitch guide, but even that takes a bit of hunting. Each of these distinct cable patterns can be incorporated into any variety of projects, from hats and sweaters, to throw pillows and afghans.

liveseasoned_w2015_sweaterproject4

The notes are written as if you’re knitting in the round and moving along each row from right to left, which is often the case for a sweater. If you need any help translating them to a flat piece of knitting, please let me know!

Cable 1

Worked over 7 stitches and 4 rows.

  • Row 1 : purl 2, knit 3, purl 2
  • Row 2 : purl 2, pass the third stitch on the left needle over the two stitches before it, knit 1, yarn over, knit 1, purl two
  • Rows 3 & 4 : purl 2, knit 3, purl 2

Cable 2

Worked over 14 stitches and 22 rows.

  • Row 1 : knit all stitches
  • Row 2 : knit 1, purl 5, c1b, purl 5, knit 1
  • Row 3 : knit all stitches
  • Row 4 : knit 1, purl 4, c1r, c1l, purl 4, knit 1
  • Row 5 : knit 6, purl 2, knit 6
  • Row 6 : knit 1, purl 3, c1r, purl 2, c1l, purl 3, knit 1
  • Row 7 : knit 5, purl 4, knit 5
  • Row 8 : knit 1, purl 2, c1r, purl 4, c1l, purl 2, knit 1
  • Row 9 : knit 4, purl 6, knit 4
  • Row 10 : knit 1, purl 1, c1r, purl 6, c1l, purl 1, knit 1
  • Row 11 : knit 3, purl 8, knit 3
  • Row 12 : knit 1, c1r, purl 8, c1l, knit 1
  • Row 13 : knit 2, purl 10, knit 2
  • Row 14 : knit 1, c1l, purl 8, c1r, knit 1
  • Row 15 : knit 3, purl 8, knit 3
  • Row 16 : knit 1, purl 1, c1l, purl 6, c1r, purl 1, knit 1
  • Row 17 : knit 4, purl 6, knit 4
  • Row 18 : knit 1, purl 2, c1l, purl 4, c1r, purl 2, knit 1
  • Row 19 : knit 5, purl 4, knit 5
  • Row 20 : knit 1, purl 3, c1l, purl 2, cir, purl 3, knit 1
  • Row 21 : knit 6, purl 2, knit 6
  • Row 22 : knit 1, purl 4, c1l, c1r, purl 4, knit 1

Cable Abbreviations:

  • c1b ~ place next stitch on cable needle and hold to the back, knit 1 next stitch from left needle, knit the stitch on the cable needle
  • c1r ~ place next stitch on the cable needle and hold to back, knit next stitch from left needle, purl the stitch on the cable needle
  • c1l ~ place next stitch on the cable needle and hold to front, purl next stitch on left needle, knit the stitch on the cable needle


liveseasoned_w2015_sweaterproject3

 Bobbles!

The pattern below is for four bobbles, two worked in one row and two worked in a second row, with the bobbles alternating in a vertical pattern. The four bobbles are worked over a multiple of 10 stitches 4 rows. I like this bobble pattern because they lay flatter and don’t seem to eat up as much yarn as some of the more traditional bobbles.

  • Cast on 3 stitches.
  • Set-up row. Knit 1, k1fb into next two stitches, knit 1, k1fb into next two stitches, for a total of 10 stitches.
  • Row 1 : (k1,p1,k1,p1) into the first stitch, k4tog through the back of their loops, (k1,p1,k1,p1) into the next stitch, k4tog through the back of their loops
  • Row 2 : purl all stitches
  • Row 3 : k4tog through the back of their loops, (k1,p1,k1,p1) into the next stitch, k4tog through the back of their loops, (k1,p1,k1,p1) into the next stitch
  • Row 4 : purl all stitches
  • Repeat rows 1 – 4

*Go ahead, you can laugh at my use of the word adventure to describe this series, and if you do, know that I won’t be inviting you over for knit night ;-).


Project Sweater : Update 1

liveseasoned_summer2014_sweaterproject1_wmb

A little over a month ago I introduced you to my big fall sweater project. At that point, I introduced you to the sweater’s main stitches and showed you my first two swatches. Neither swatch was spot-on, as both reproduced the stitch pattern at a smaller scale than the sweater. I was able to decide that I liked the bulkier second yarn better than the worsted weight first yarn, so my plan was to make at least one more swatch (and maybe more) with the second yarn using larger needles. In this post, I’m going to share the rest of my swatching and final yarn selection.

I began by adding a third swatch to the initial two using the Knit Picks bulky yarn (the same used for Swatch #2) and US size 11 needles. Below I listed the yarn and needle combinations for the first three swatches. After finishing the swatches, they had to be blocked.

  • Swatch #1 : Yarn: Cascade Eco ~~~ Needles: US9
  • Swatch #2 : Yarn: Knit Picks Wool of the Andes ~~~ Needles: US10.5
  • Swatch #3 : Yarn: Knit Picks Wool of the Andes ~~~ Needles: US11

Blocking Wool

Whenever knitting with wool and other natural fibers, the last step of your project or swatch should always be to block it. Blocking wool helps to relax the stitches into their final formation, it will even out the stitches within their rows and columns, making a swatch more square. Additionally, blocking may be used to adjust the size and fit of a finished garment (to some extent you can make something a touch bigger if needed such as adding length to sleeves or adding curves to a sweater if to fit more appropriately around your bust or hips without using darts).

There are a number of different ways to block your fibers, but I’m partial to the wet method. In this case I soaked the swatches in a lukewarm bath for 15 minutes. Removed them from the bath and gently squeezed out as much excess water as I could before laying them out in their final dimensions to dry. When I placed these pieces on a yoga mat for drying. I wasn’t interested in increasing their size, I was just interested in staying as true to their natural size as possible, so I tried not to stretch them at all, just to lay them down keeping the stitch rows and columns even. Once in their final place, I added a few straight pins around the edges to keep the swatches from shrinking for morphing as they dried.

In the photos above, you can see the difference between the unblocked (right) and blocked (left) swatches. Notice that the blocked swatches have a neater shape with straighter edges… except for swatch #3, where I tried something slightly different to start the bobble section and it ended up backfiring by adding too many stitches to that section.

liveseasoned_fall2014_sweaterupdate8_wm

The photo above shows the blocked swatch #3 laying on top of the sweater. You can see that it’s a spot-on match for the sweater’s pattern gauge. Exciting! My one concern was that with the larger needle, the stitches were starting to look slightly too loose for my liking. What would this mean for the final sweater? When it’s being worn, the stitches that are carrying a lot of the weight, such as the ones over your shoulder, would look really stretched out and you would be able to see through them.

One way to fix this would be to find yet another thicker yarn (this is why I switched yarns between Swatch #1 and #2). But I really liked the feel and shade of this wool, and I was concerned that that search could lead to many dead ends (and unsuccessful swatches) before I found another contender. So, I decided to go in another direction: hold a smaller gauge yarn together with the bulky weight, increasing the thickness of the yarn being stitched. So it was time to swatch again.

liveseasoned_fall2014_sweaterupdate4_wm

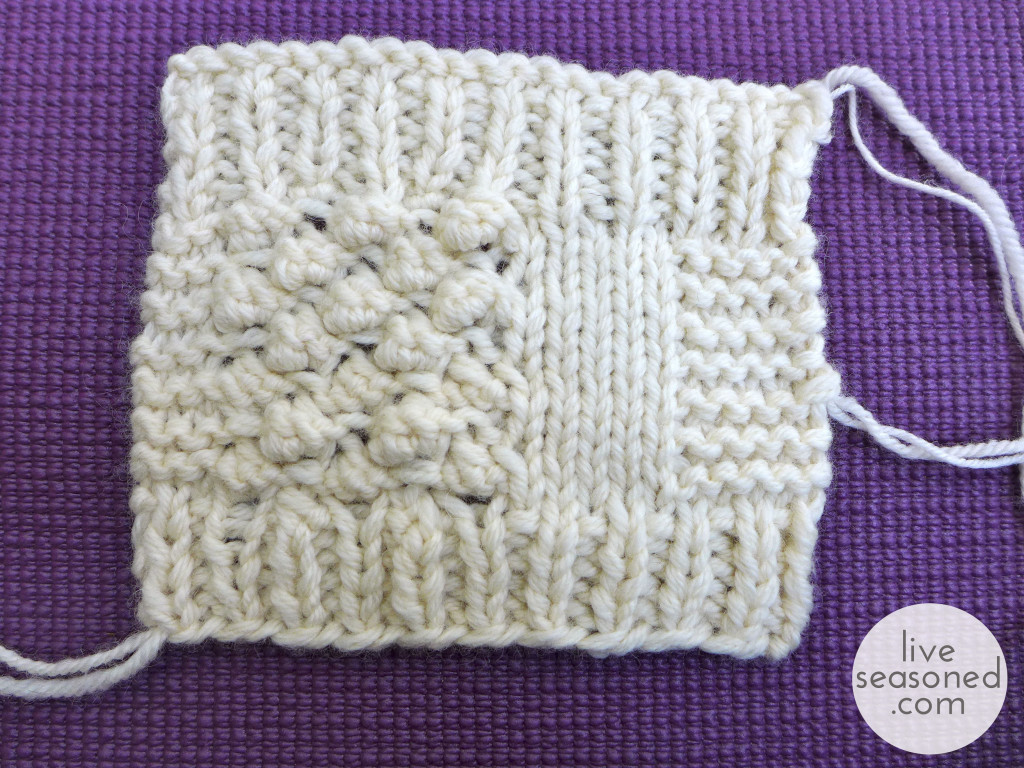
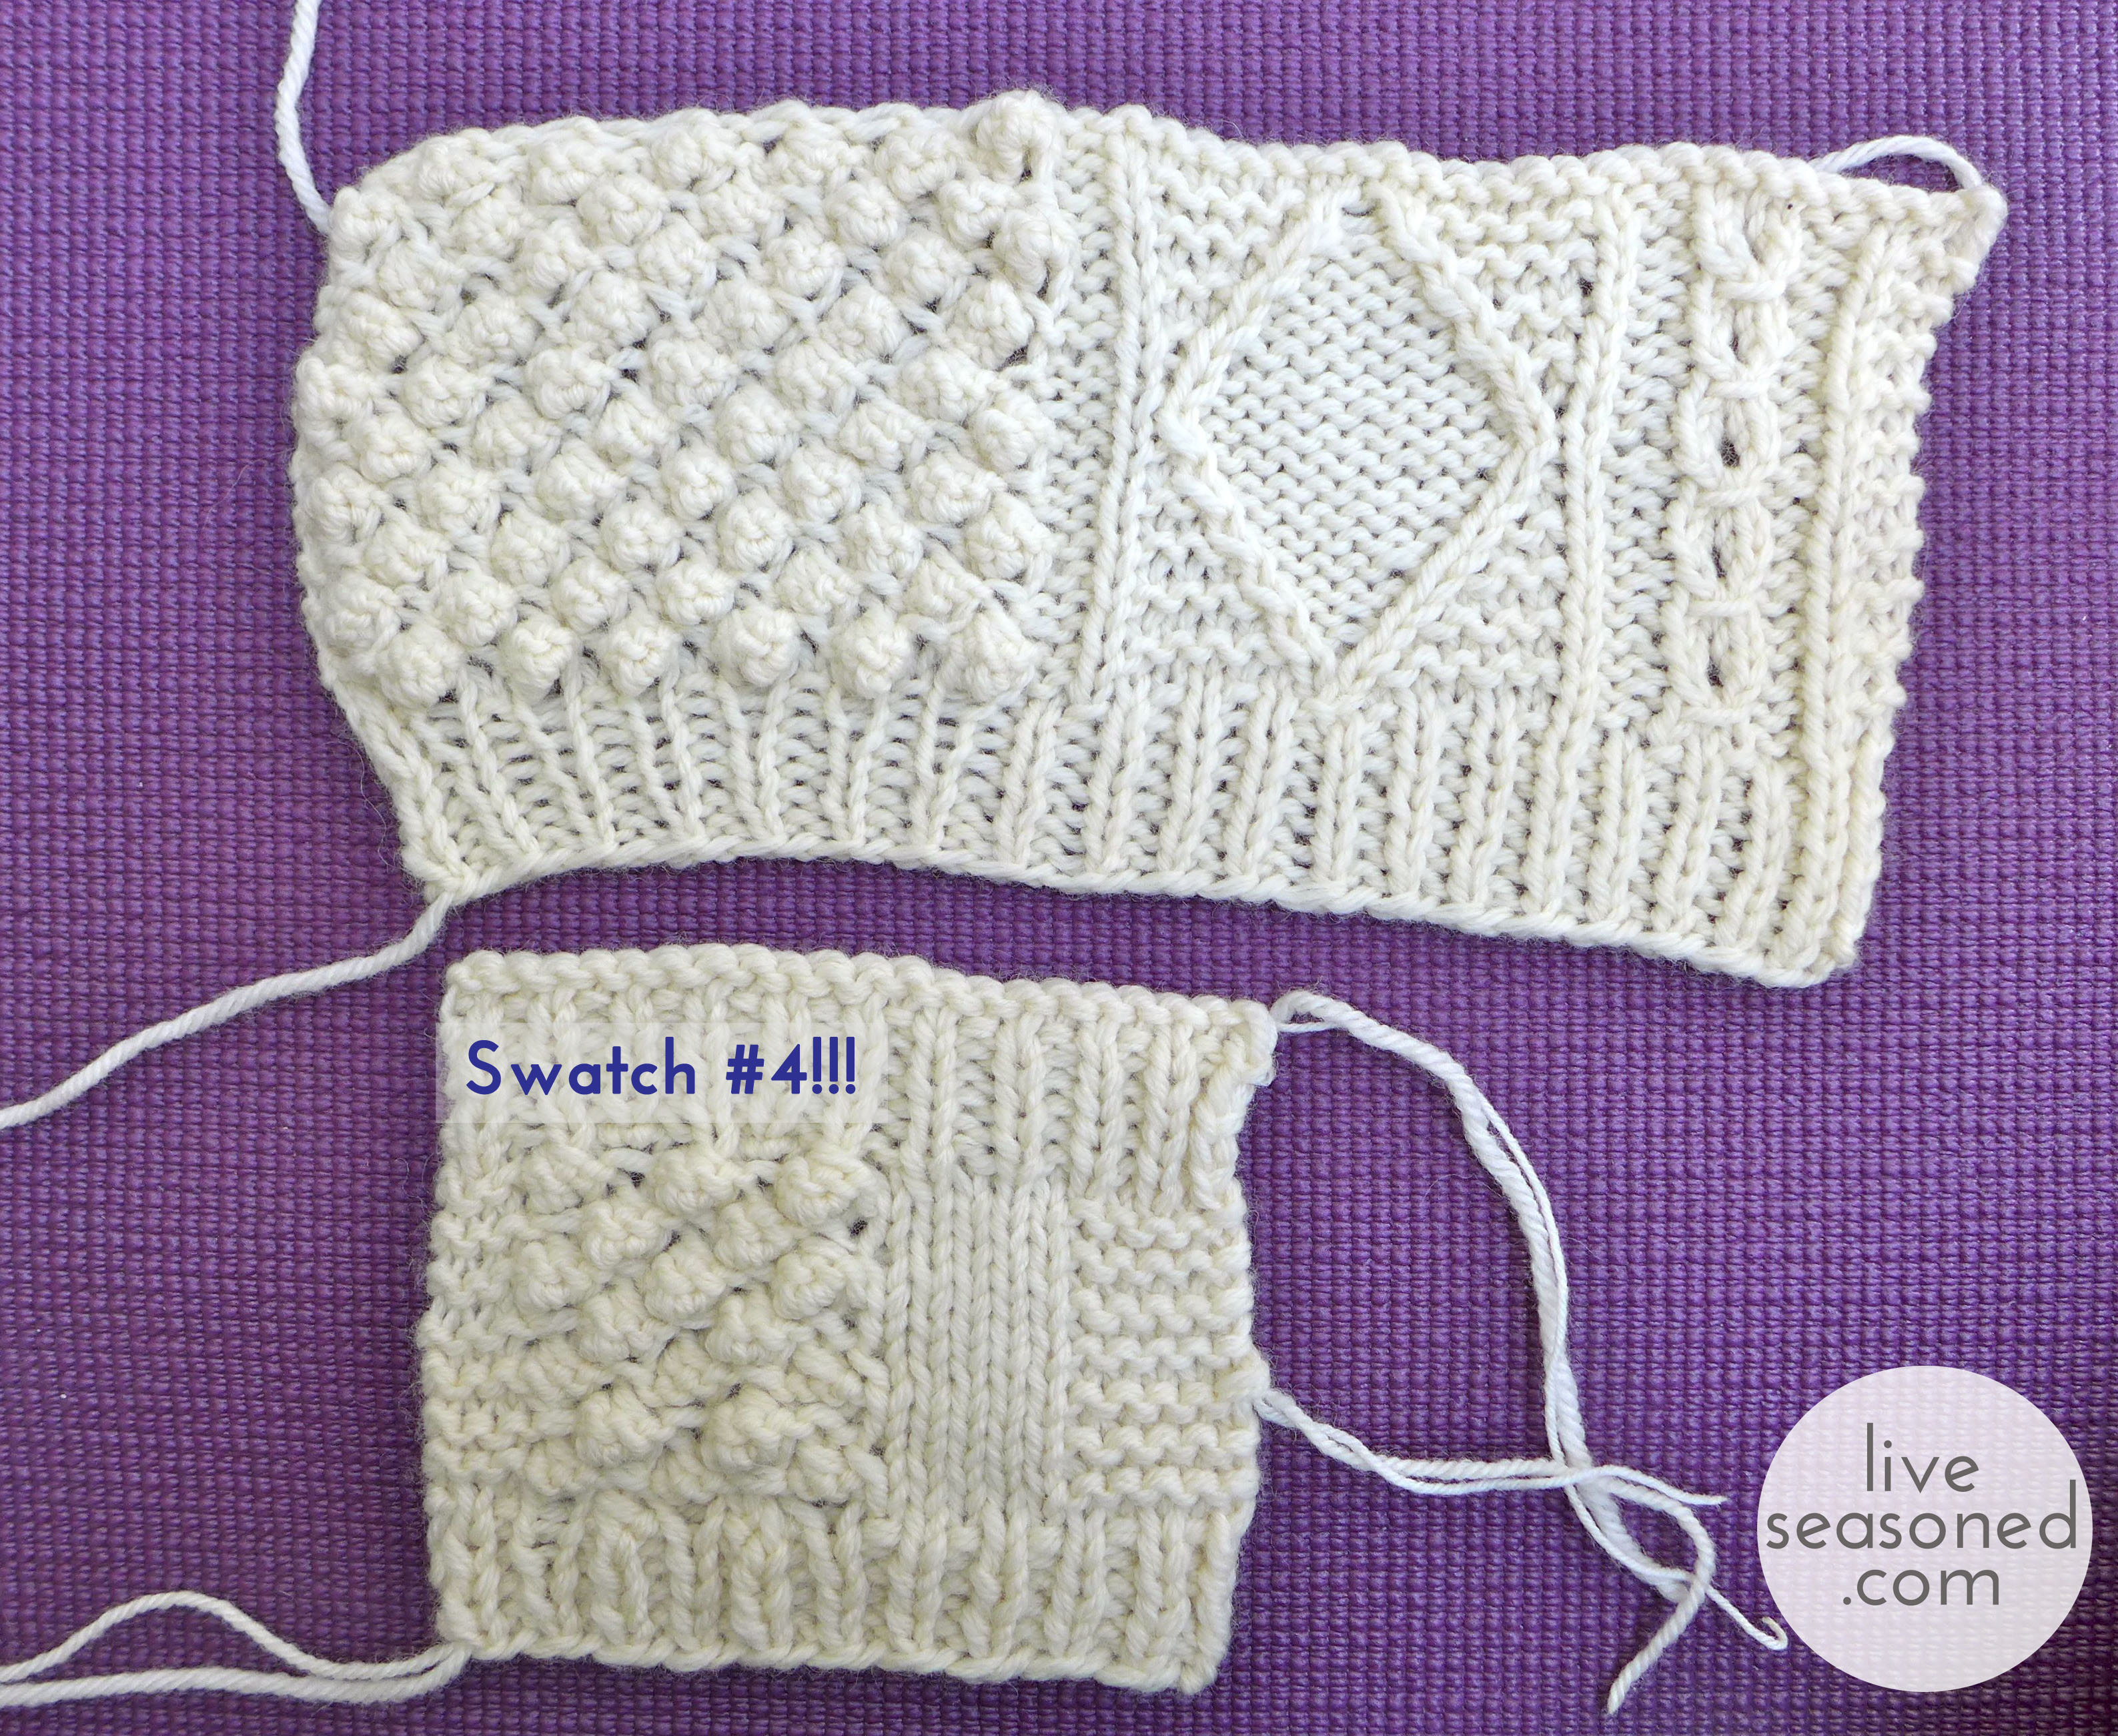
For this swatch I simplified things and just tested the ribbing, bobbles, stockinette stitch, and garter stitch. I started by holding the bulky yarn with a worsted weight yarn and then switched to a fingering weight yarn halfway up the swatch. The worsted-bulky combination was too thick, but the fingering-bulky combo was just right!

liveseasoned_fall2014_sweaterupdate5_wm

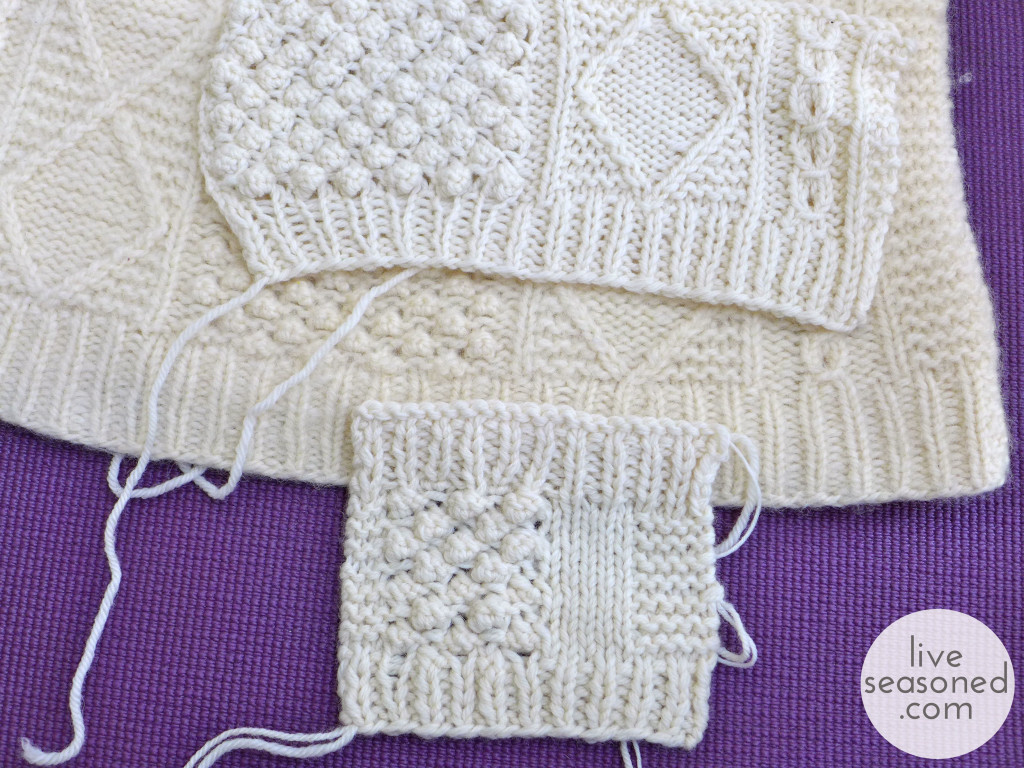
In the photo below, I placed Swatch #3 and #4 over the sweater. You can see that the gauge is still great – matching the sweater. I “fixed” the bobble problem by going back to my methods from Swatch #2 (specific stitch details will come in a future post).

liveseasoned_fall2014_sweaterupdate1_wm

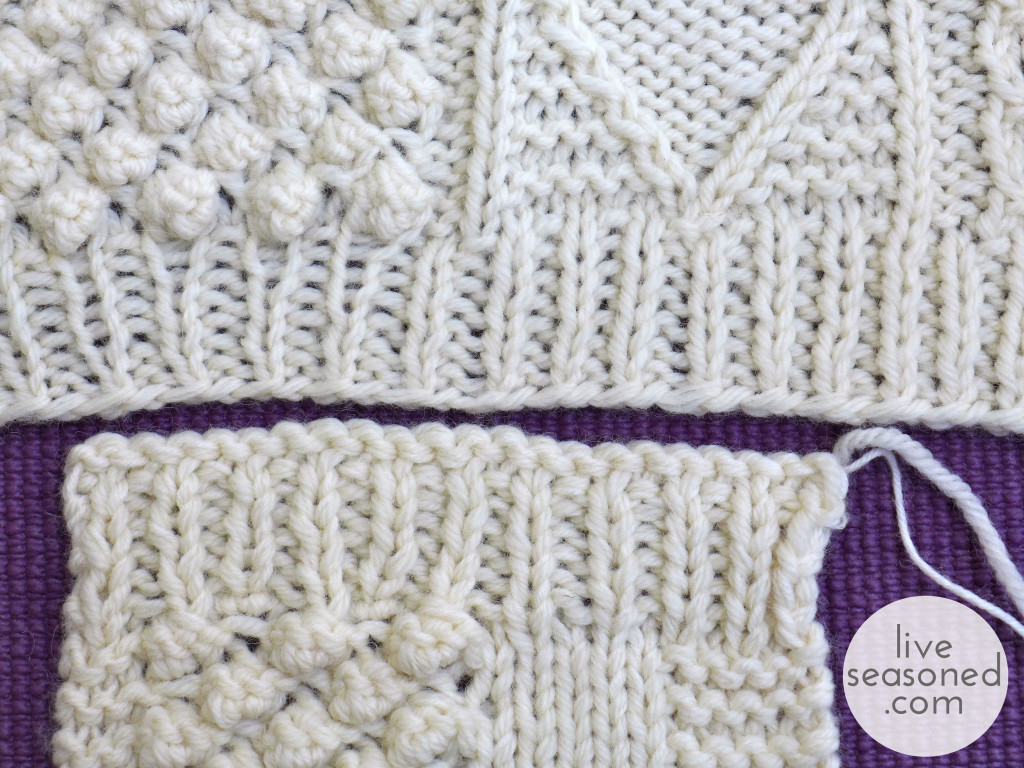
Below is a final closeup of the two swatches, with Swatch #3 on top and #4 on the bottom (fingering-bulk yarn combo showing). In that photo it’s obvious that there isn’t as much empty space between the stitches, rather they are producing a nice fabric. So, that’s my final solution – to knit the sweater holding the Knit Picks bulky yarn with a fingering weight yarn on size US 11 needles. I’ve ordered the yarn and my next post will be an actual sweater-knitting update!

liveseasoned_fall2014_sweaterupdate3_wm

My Big Sweater Project

liveseasoned_summer2014_sweaterproject1_wmb

As I mentioned in this post, I have a growing uncontrollable pile of knitting projects going on. One of those is this sweater project. This is a friend’s sweater that she’s worn and loved for many years (I don’t remember how many, but she bought it at Pier One when they still imported and sold clothes!).

I’m not sure if you can tell in these photos, but the sweater is well-worn and has been slightly felted. She asked me to re-knit the sweater and add some length (about 4 inches or so). Rather than work on the whole project behind the scenes and share the finished sweater, I thought it would be fun to turn this into a series and share the process. Today I’m going to talk about my first two steps, which I try to conquer at the same time: 1. choosing the appropriate yarn and 2. working out the stitch pattern.

liveseasoned_summer2014_sweaterproject6_wm

The Stitch Pattern

I start by just looking at the sweater and identifying simple stitches and bigger blocks. If you look at the first picture in this post, you’ll see that the areas on the sides of the sweater and the underside of the arms are garter stitch (the most basic knitting stitch). The cuffs and sweater bottom are knit 1 purl 1 ribbing. The bigger blocks are identified in the photo above: Cable #1, Cable #2, and the bobbles. The next trick is figuring out exactly (or approximately) how those blocks of stitches are made.

Cable #1. I work from right to left because that’s how the rows are knit. Cable #1 is relatively simple to figure out because it’s so small, worked across just 3 stitches. The area where it narrows is typically a point where the cabling actually occurs (where we would change the order of one or more stitches moving them in front of or behind others). In this case, that doesn’t happen, and at the same time you will make the small eyehole that’s in the cable! It was a fun puzzle to work this one out, but I’ll save the exact pattern for a future post. 

Cable #2. If you’ve ever knit a simple cable pattern before, Cable #2 should look relatively easy. There are two stockinette stitches that are forming the diamonds: moving out from the middle to the sides and then back in again. Inside the diamonds is a stockinette stitch and outside the diamonds is garter stitch. 

Bobbles! The bobbles were definitely the hardest stitch to work out (as you’ll see below in Swatch #1). I was able to figure out the cable stitches within a few attempts, but the bobbles took a lot longer. I began by looking at a few stitch guides online and knitting the bobble patterns. It took a long while to find a bobble that wasn’t too big or too small and with a spacing between bobbles that matched the original sweater. 

Choosing the Yarn

The easiest way to narrow your choices is decide what type of fiber you want. In this case we wanted to go with a wool again, then comes narrowing in on weight. I knew that this sweater was knit with a bulkier yarn, but the lines between yarn weights can be fuzzy. I started with a yarn that I used before and loved, Cascade Eco. Eco is a softer wool, and the Ecru color was a fairly good color match. As you can see, it’s considered a bulky wool on the Cascade site, but it’s really on the thinner side of bulky. The second yarn I tested was Knit Picks Bare Wool of the Andes. A slightly thicker bulky weight yarn and again a good (even better) color match but not as soft to the touch.
liveseasoned_summer2014_sweaterproject2_wm

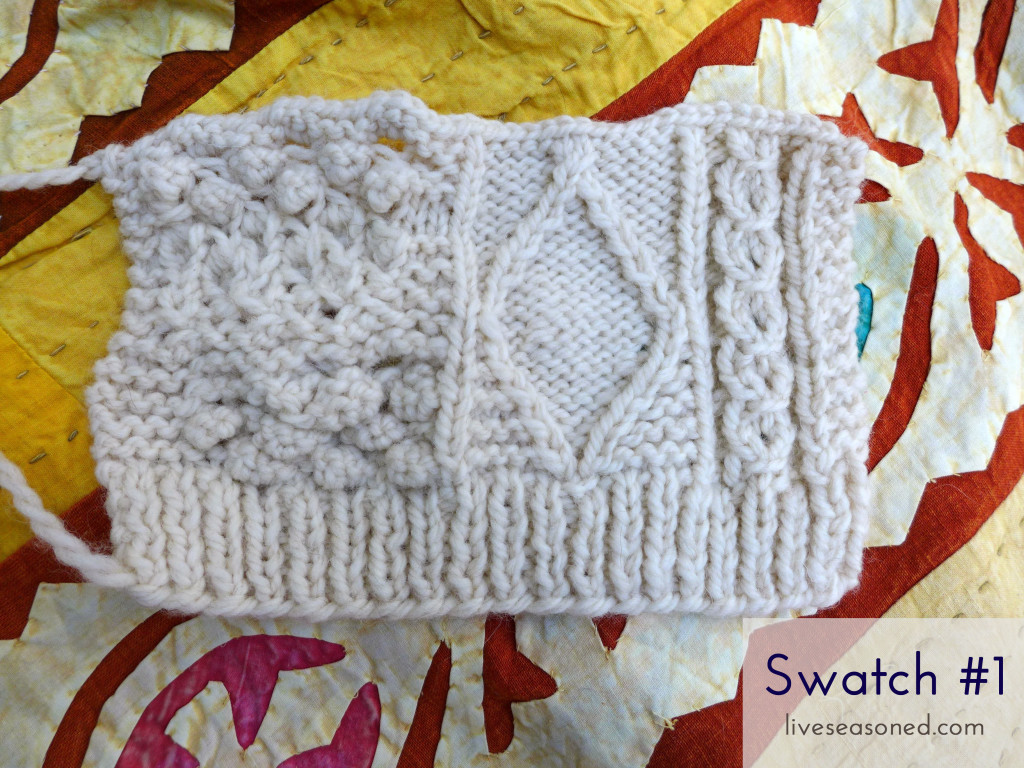
Swatch #1

Yarn: Cascade Eco ~~~ Needles: US9

This is the swatch where I worked out most of my stitch confusion, particularly the bobbles as you can see in the left panel. As mentioned above, the cables were easy, but the bobbles are a mess. I finally worked things out in the last few rows at the top of the swatch. You can also see that I made a mistake in Cable #2, using stockinette rather than garter on the top half of the diamonds. It’s good to see where you make those absent-minded mistakes in the swatches, so that you know where to be extra careful while knitting the sweater.
liveseasoned_summer2014_sweaterproject3_wm

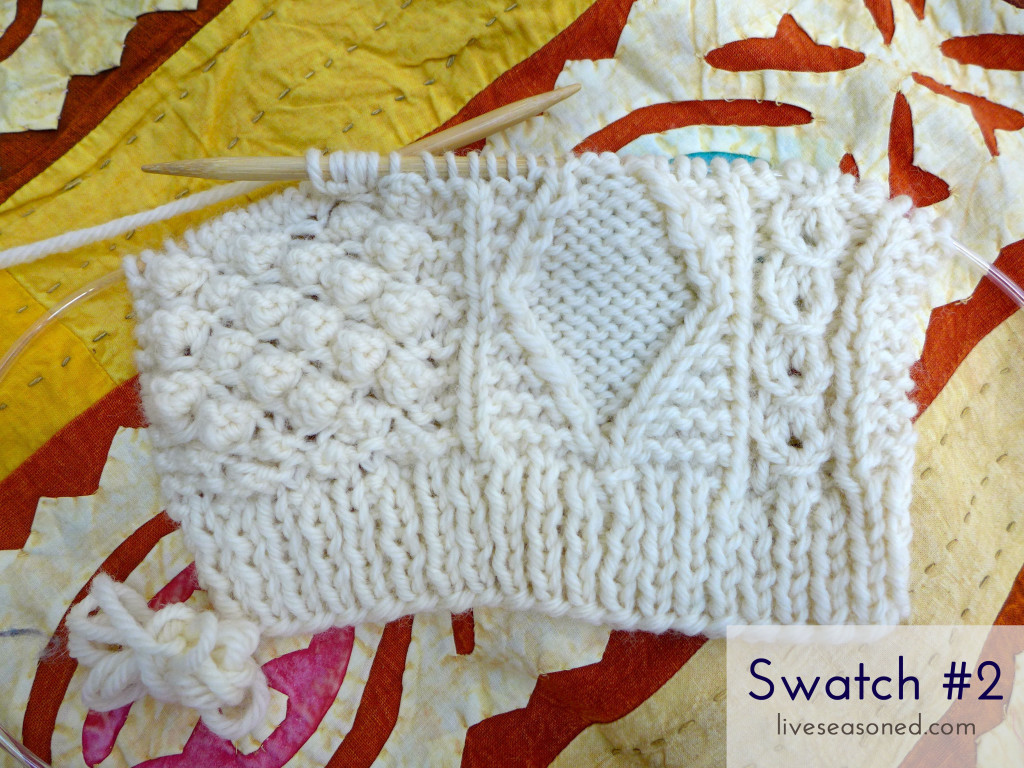
Swatch #2

Yarn: Knit Picks Wool of the Andes ~~~ Needles: US10.5

With the stitches worked out, this swatch was more about testing the second yarn and double-checking my notes to confirm the patterns.
liveseasoned_summer2014_sweaterproject4_wm

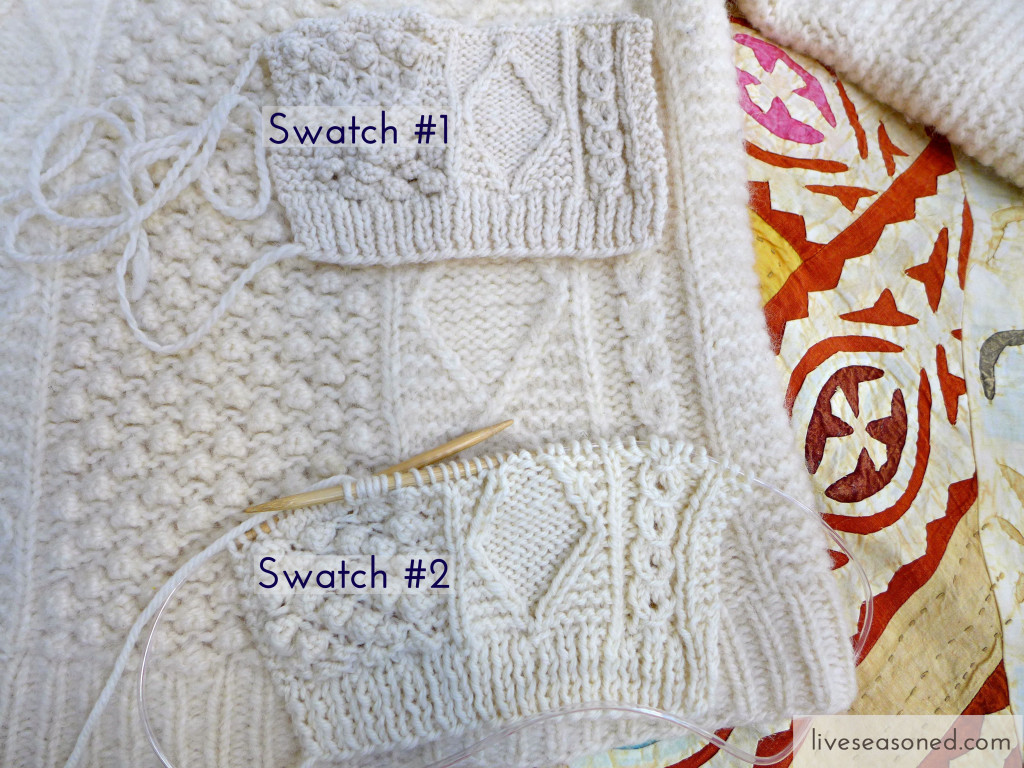
Putting both swatches on the sweater, a few things are apparent. The gauge (the size of the swatch over a standard number of stitches or pattern) of the first swatch is definitely too small for this sweater. The gauge for the second swatch is slightly better, but still looks to be on the small side, but the stitch patterns look like a perfect match!

What’s next?

It’s time to test the second yarn in a few more ways. First, before ruling out a swatch that is close to the final object, I’ll block it (more on this in the next post). If it seems slightly too small after blocking, then I’ll move up a needle size and see how that works. There’s a risk that it could make the knitting look too loose, but in this case the original sweater looks to have a more loose weave so that might be the ticket.