This summer we have a weekly farm share that provides our family with a slew of fresh and local vegetables, meats, dairy products, and other goods. I’m doing a series of posts documenting how we’re using the food. You can read more about the share and our first month of meals here. And you can find our second month of meals here.
Officially, the boys and I were on the east coast for month 3, and the food I’m sharing below is from month 4, so we may have missed some late summer veggies, but we’re jumping feet first into fall and calling this month 3 of recipes. While we were away, it was Calder’s job to eat all of the food and blog about it…
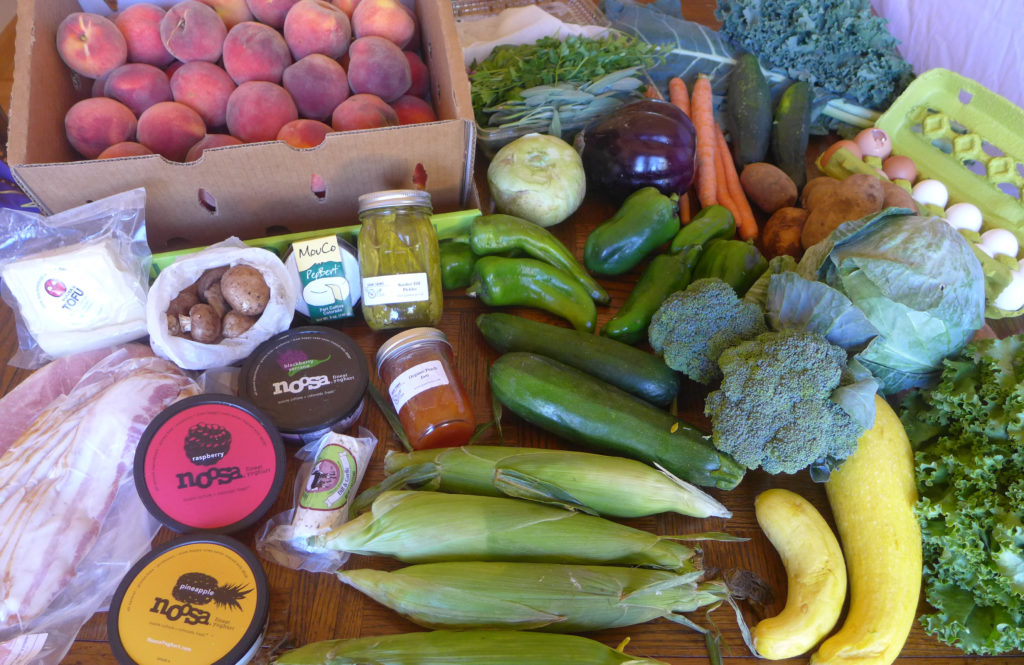
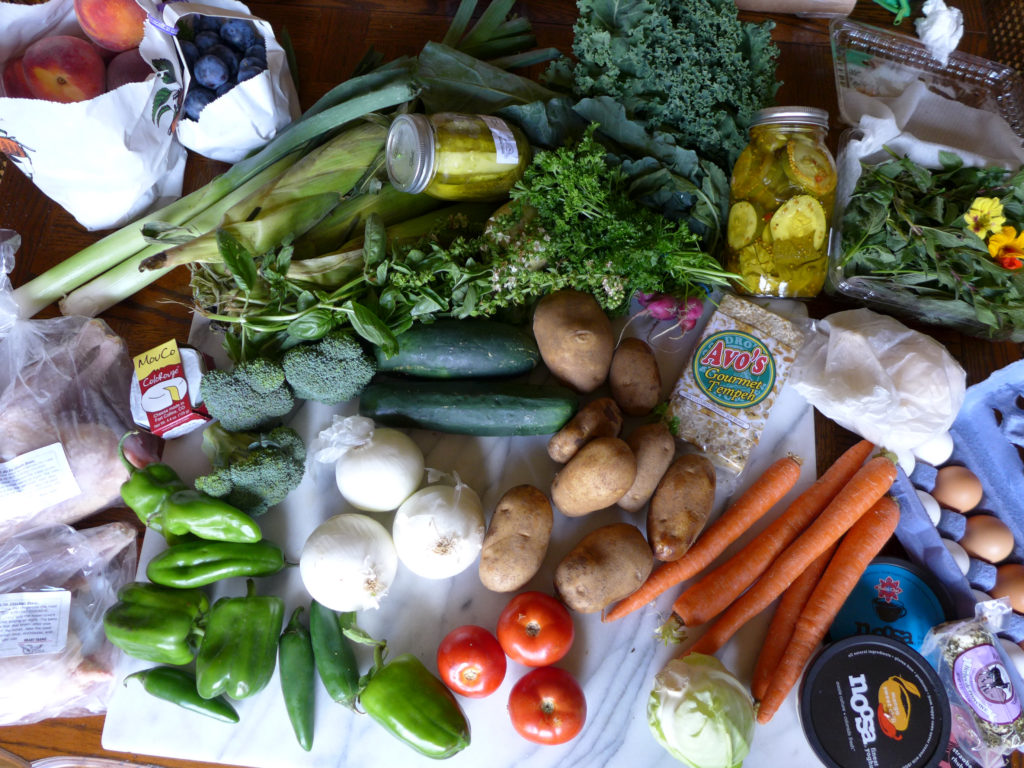
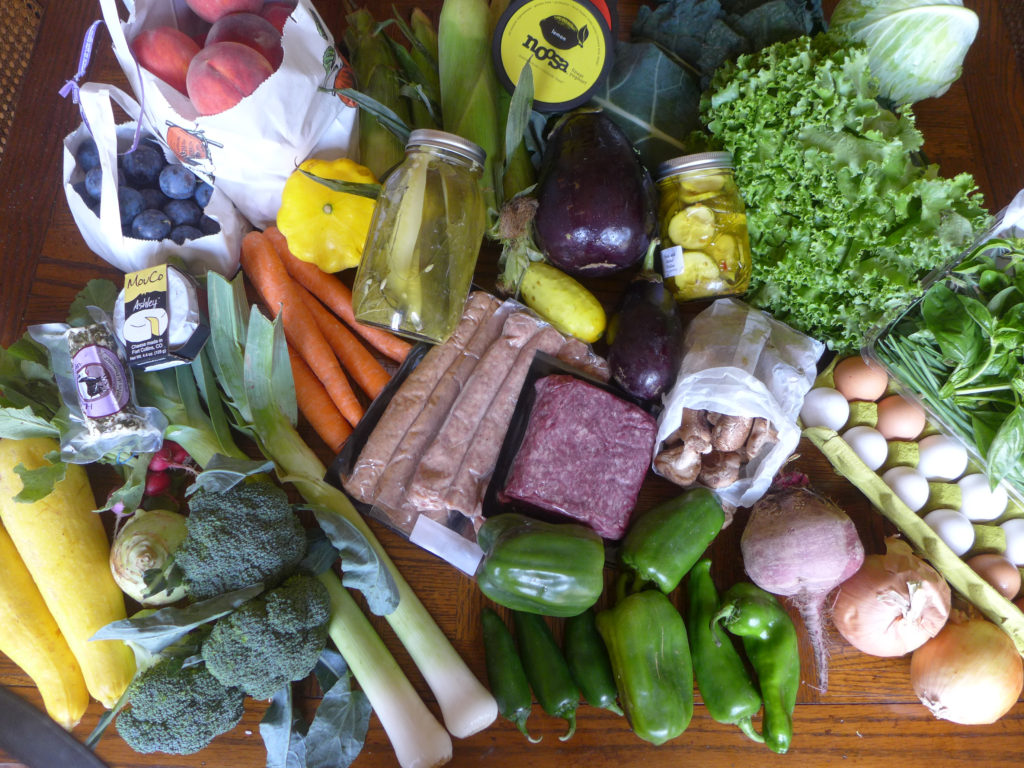
This month seems to have been more plentiful than previous months. We’re seeing a natural change in what’s being harvested from crops with shorter growing seasons, like radishes and turnips, to some of the slower-growing crops, like corn and carrots. We’ve also been the lucky recipients of a full case of Colorado peaches. With all of this food, I realized that I have a lot more to share this month and am breaking the post up into two parts. Today I’m sharing most of the main course recipes and in the second post I’ll follow-up with desserts, canned goods, and fermented foods.
… and it’s so frustrating that the days are getting shorter as the veggie boxes are getting heavier!
 Early in the month, I leaned on a couple of my favorite cookbooks, Jerusalem and Plenty, for new vegetable recipes. If you like to experiment in the kitchen and are open to trying new spices and food combinations, I recommend both books. Jerusalem includes meat and vegetable dishes, but Plenty is all vegetable.
I haven’t discussed it much on the blog, but I’m part of a cookbook club, and I’m excited to host our October meeting where we’ll be cooking from Jerusalem. I can’t wait to taste all of the dishes and document our meeting for a future post!
Meal Planning – Month 3
The table below lists the variety of foods that we’ve received for the past month. I don’t know the exact quantity of vegetables we receive each week (it’s a large grocery bag filled with veggies, and I would say it’s about 20+ lbs), definitely enough to feed our family for the week. During the month of September, the vegetables have been some combination of those on the list below. In the protein category, we receive about 3-5 lbs of meat each week, made up of a combination of the items on the list. The tofu and tempeh each arrive once per month. Under the dairy & misc. category, we receive the yogurt & cheeses each week, we receive 1 lb of coffee once per month, and approximately two canned goods each week. While in season, we receive fresh fruit and some variety of fresh herbs.
| veggies |
proteins |
dairy & misc. |
fruit & herbs |
| cucumbers |
stewing chickens |
herbed goat cheese |
peaches! |
| green lettuce |
hot German sausage |
camembert |
plums |
| carrots |
italian sausage |
yogurt |
basil |
| cabbage |
bacon |
coffee |
parsley |
| eggplant |
ground beef |
fruit jam |
dill |
| onions |
tofu |
pickles |
sage |
| zucchini |
tempeh |
|
edible flowers |
| summer squash |
eggs |
|
|
| mushrooms |
|
|
|
| beets |
|
|
|
| chard |
|
|
|
| kale |
|
|
|
| kohlrabi |
|
|
|
| peppers |
|
|
|
| broccoli |
|
|
|
| leeks |
|
|
|
| radishes |
|
|
|
Above each photograph, I list the farm share ingredients used for the dish and, where available, I’ve linked to the recipes. Where necessary, I also include some notes about that day’s meal.
~
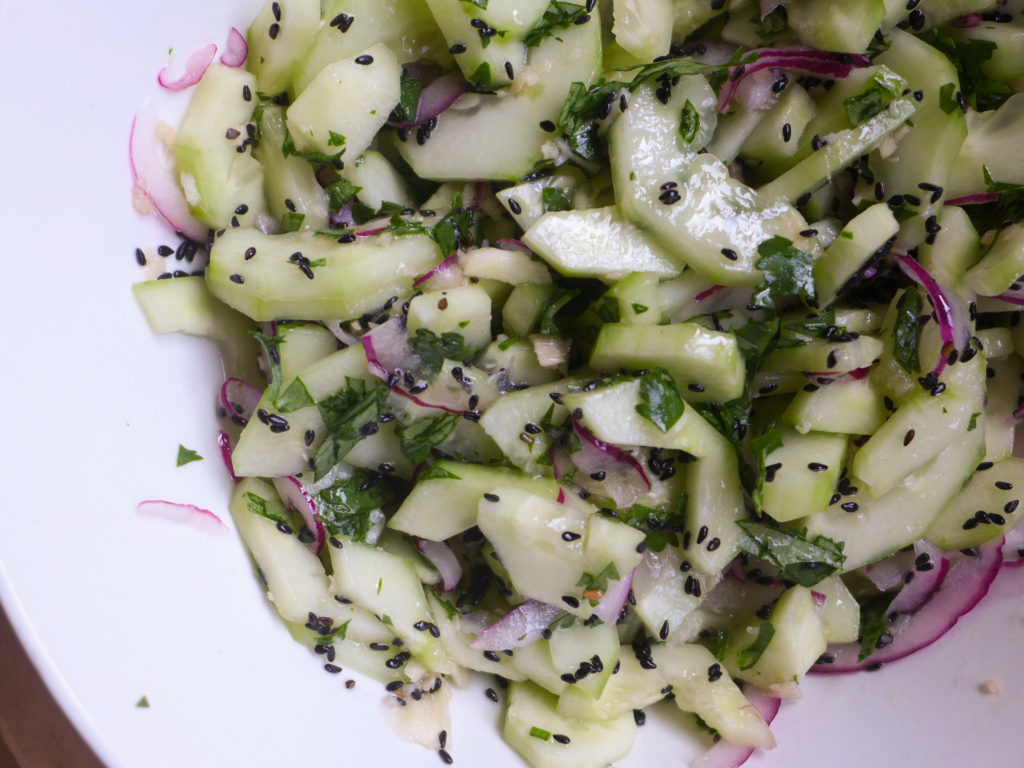
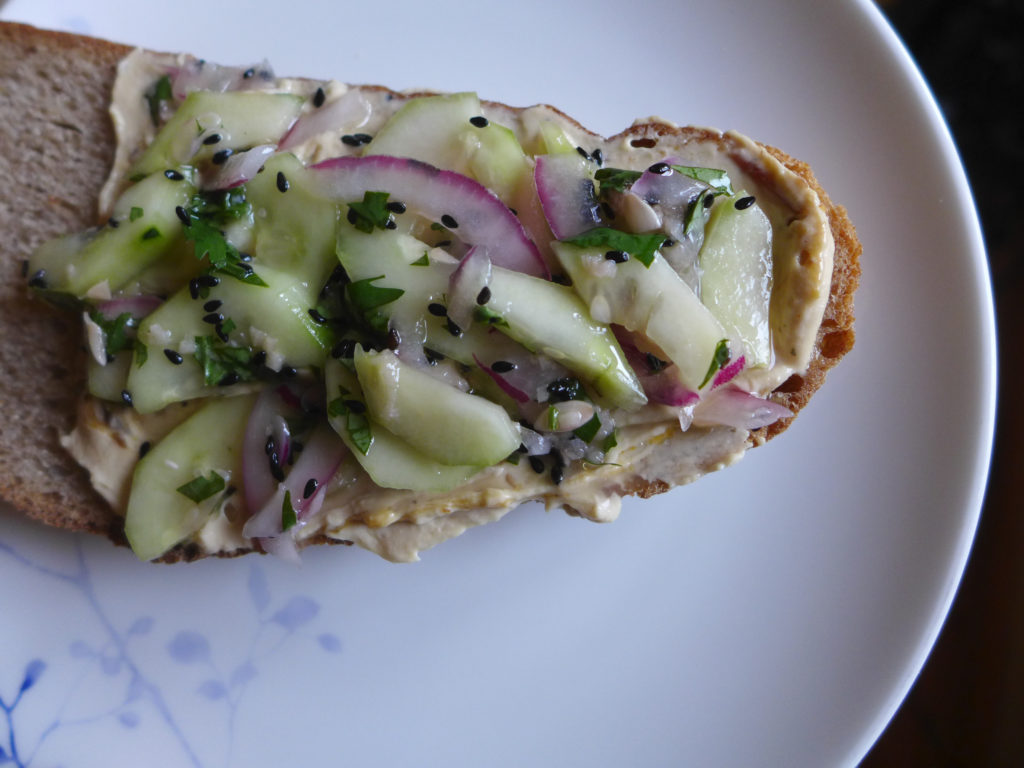
Cucumber salad with smashed garlic and ginger (from Plenty) : cucumbers, onion, herbs
This was a delicious and refreshing side dish for a summer meal. It was a bit spicy for the boys, so we had plenty of leftovers, and I loved eating it on rye bread with humus (it was good that just typing that makes me was to make more right now).
~
Teryaki tempeh : tempeh
We liked this DIY teryaki sauce enough that it’s worth keeping for future recipes.

~
Chard with tahini, yogurt, and buttered pine nuts (from Jerusalem) : chard
~
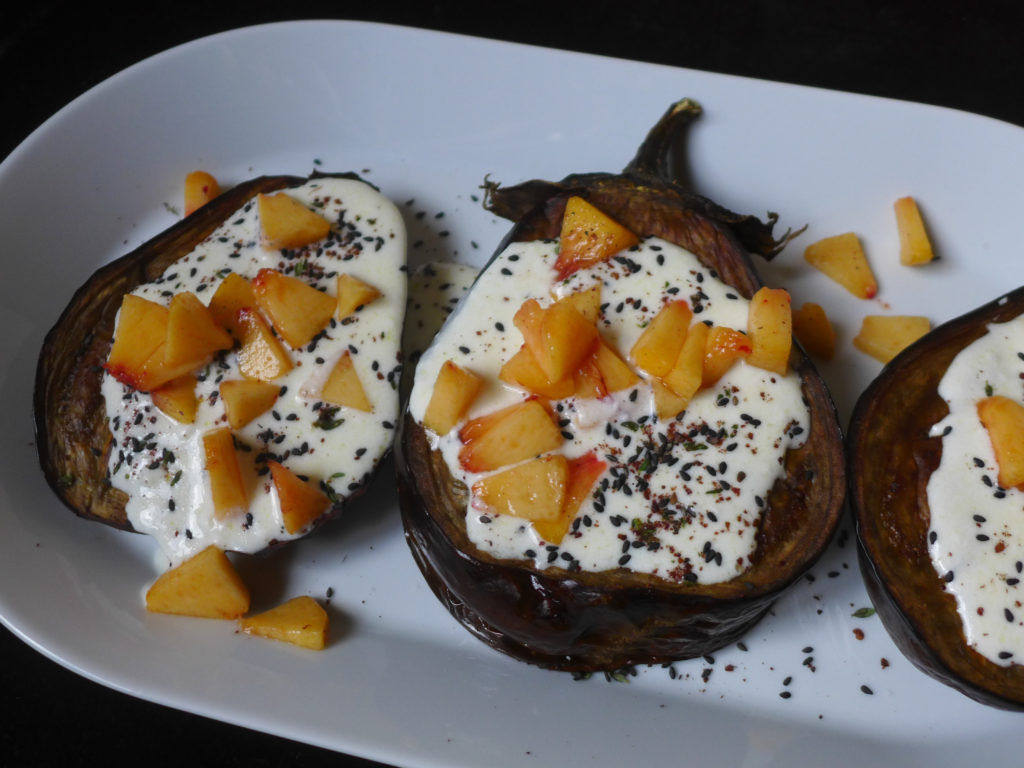
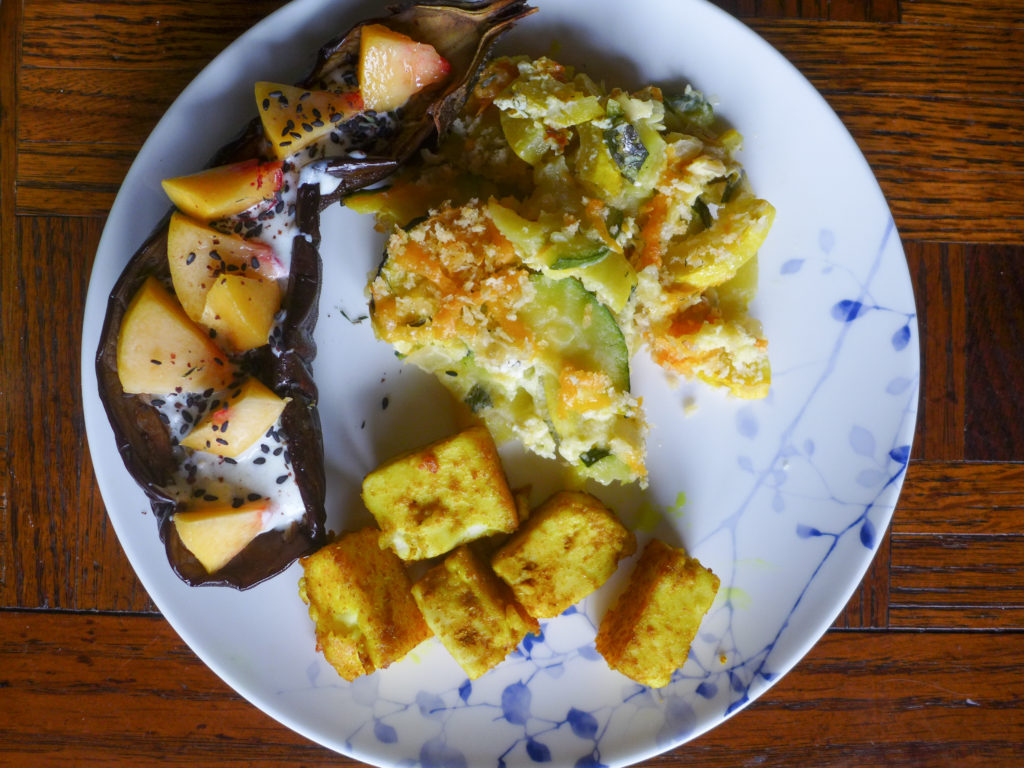
Roasted eggplant with buttermilk sauce (from Jerusalem) : eggplant, peaches
This ingredient combination may seem odd, but it was amazing! So good, in fact, that we ate this dish at least three different times over the month. The original recipe called for pomegranate seeds, but since we had an abundance of peaches, I decided to experiment. Luckily, the odds were in our favor and this turned out so delicious that now we’re excited to experiment with other fruits. Pears? slightly cooked apples? definitely pomegranates.
~
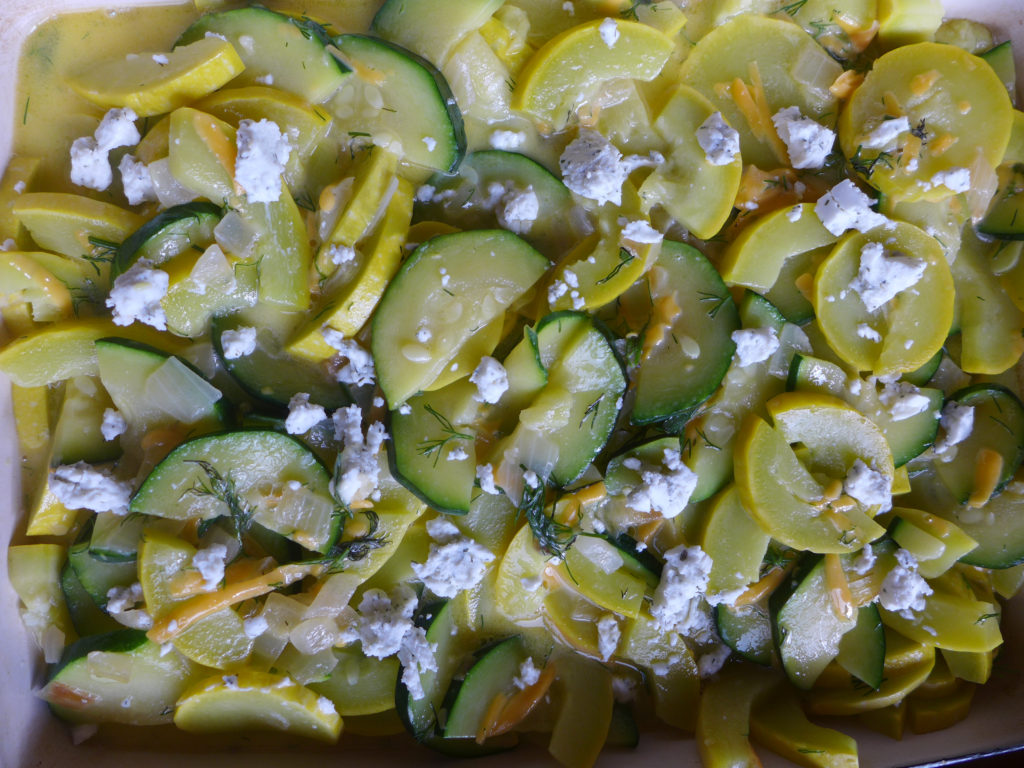
Squash casserole : zucchini & yellow squash, goat cheese, eggs
I added fresh dill and dill goat cheese to the casserole, and I subbed panko bread crumbs for the crushed crackers that were called for in the recipe. I served this casserole with round two of the roasted eggplant and some sauteed paneer with Indian spices.
~
Scotch eggs! : Italian sausage, eggs
I only had a Scotch egg once in my life, but loved it enough that I was craving one three years later. If you’ve never had one a Scotch egg is a hardboiled egg wrapped in sausage, coated in bread crumbs, and deep fried. I barely had enough bread crumbs and vegetable oil to make this batch, but they turned out delicious and have me excited to make another batch!

~
Chard with tofu and black bean sauce, stir-fried rice : chard, tofu, onion, corn, bell pepper, carrots, eggs
For a while we were ordering Chinese about once a week from a local restaurant. That habit has transferred to our favorite pizza

~
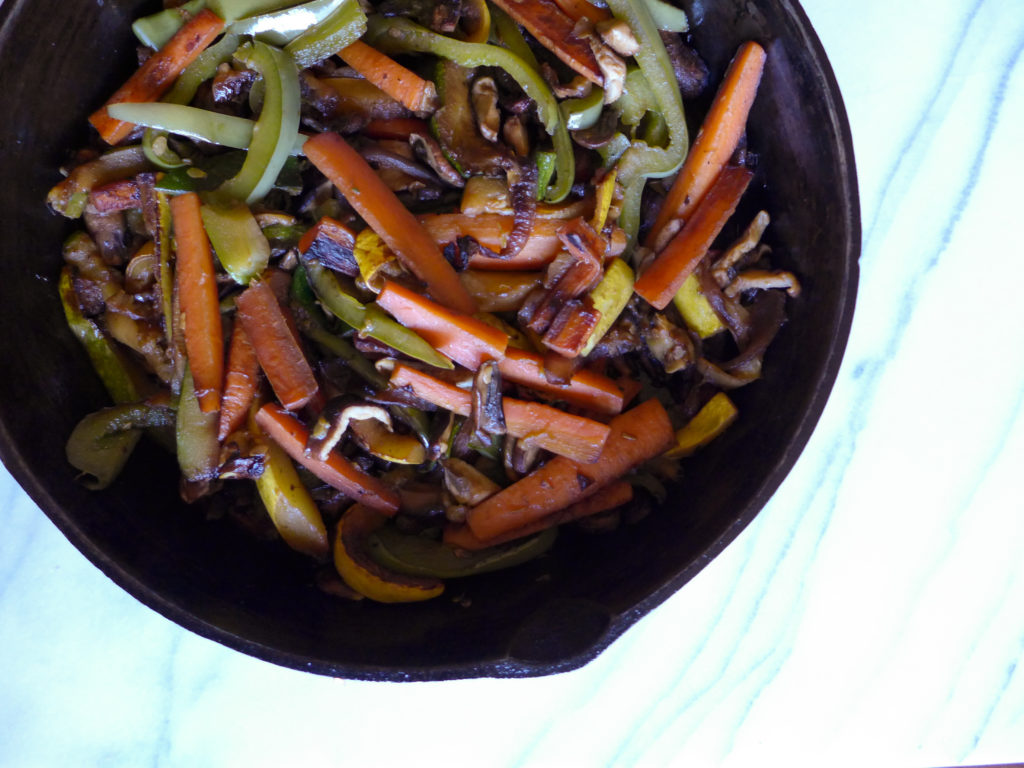
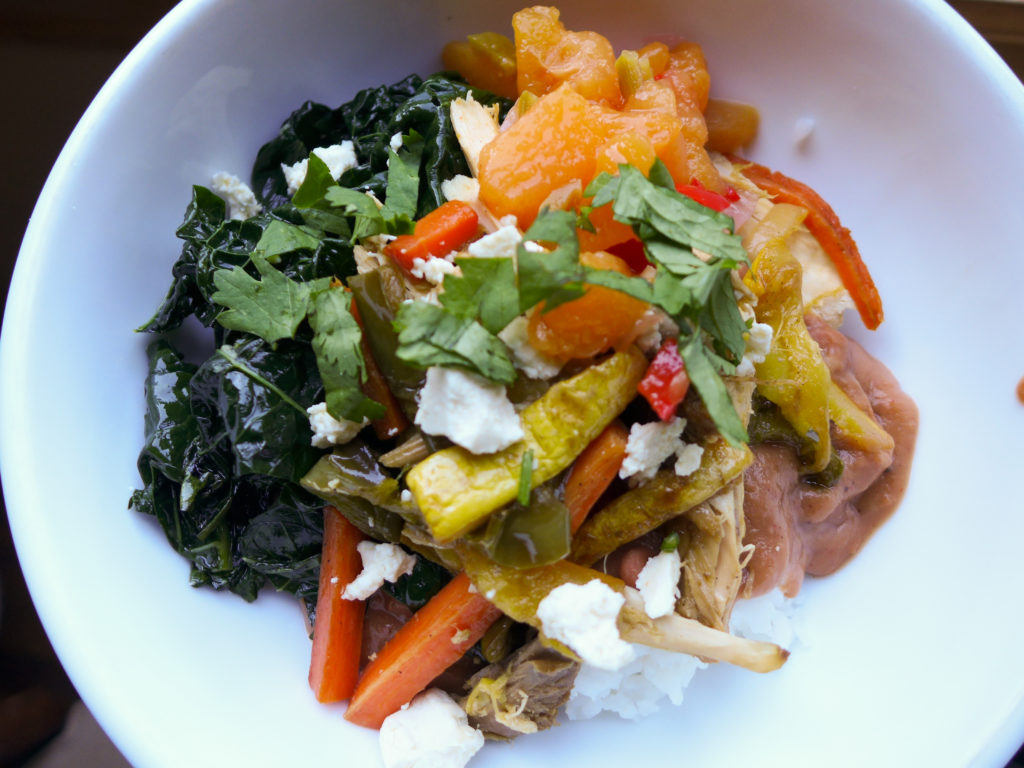
veggie burritos with homemade peach salsa (more on that tomorrow!) : onions, green peppers, zucchini, yellow squash, mushrooms, sauteed greens, peaches, chicken, green chili goat cheese
The next day, I used the leftover burrito ingredients to make an amazing burrito bowl for lunch : just pile everything into a bowl over the rice and enjoy!

~
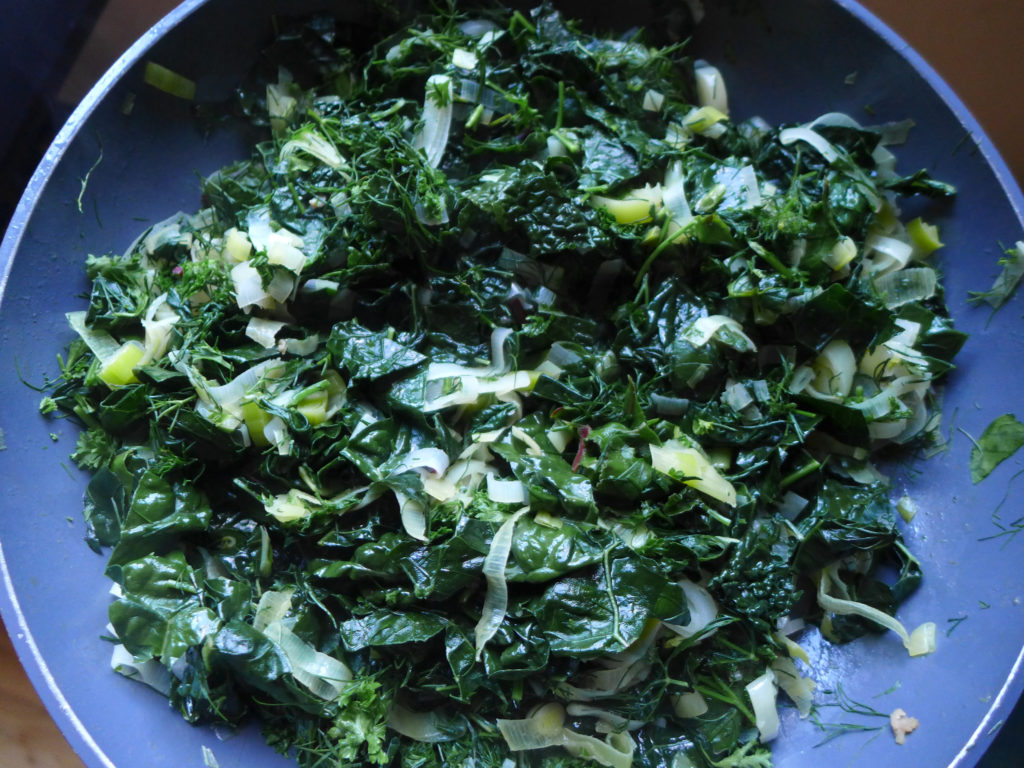
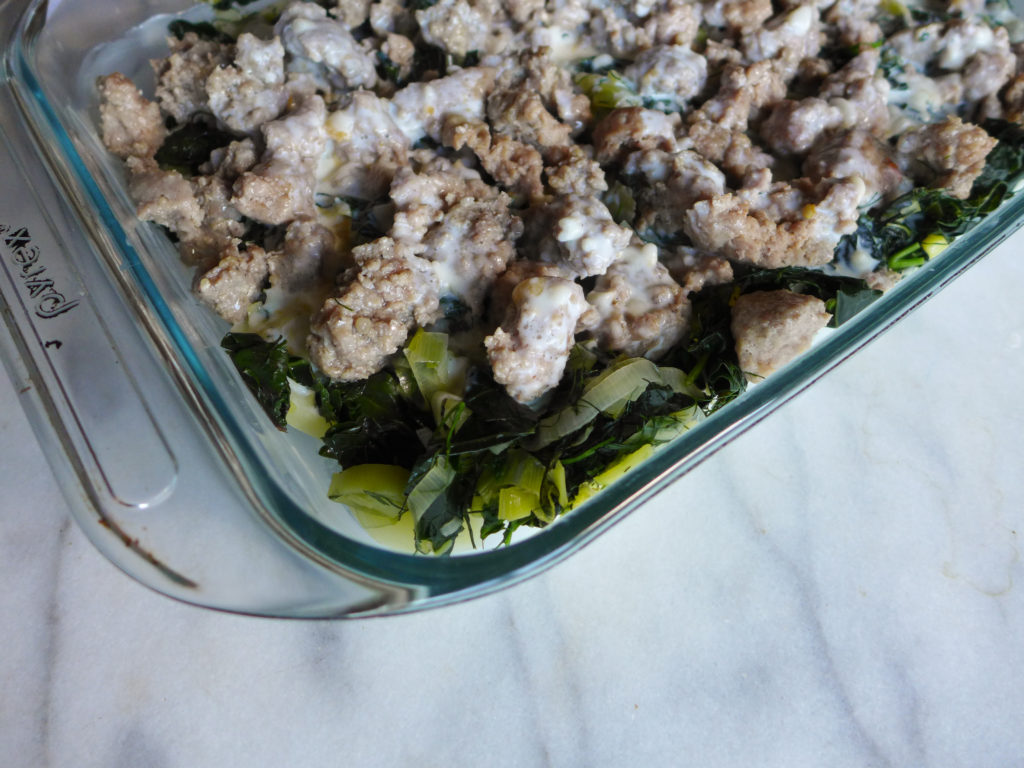
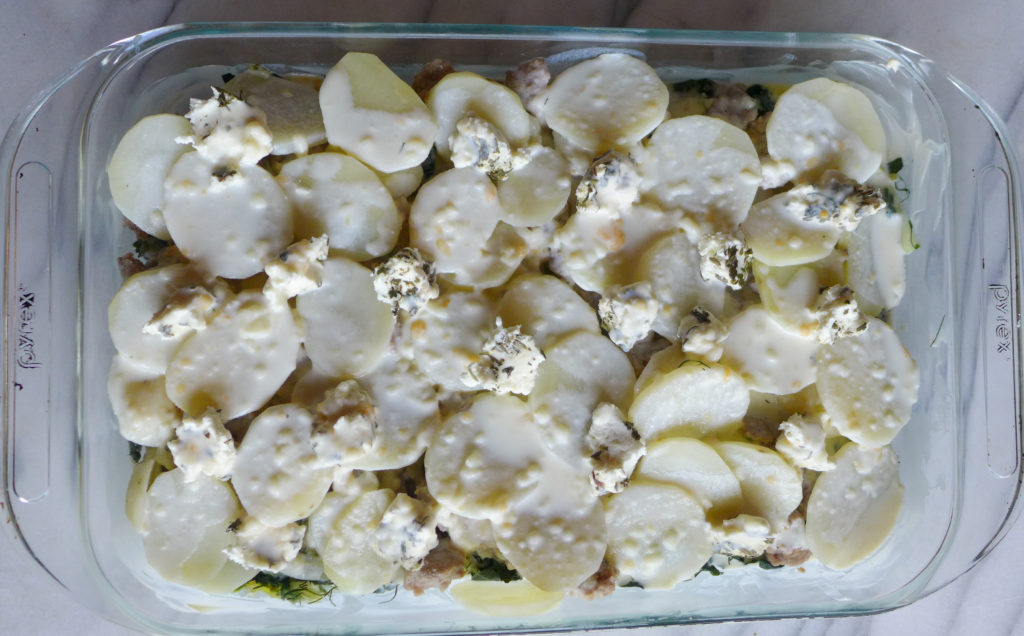
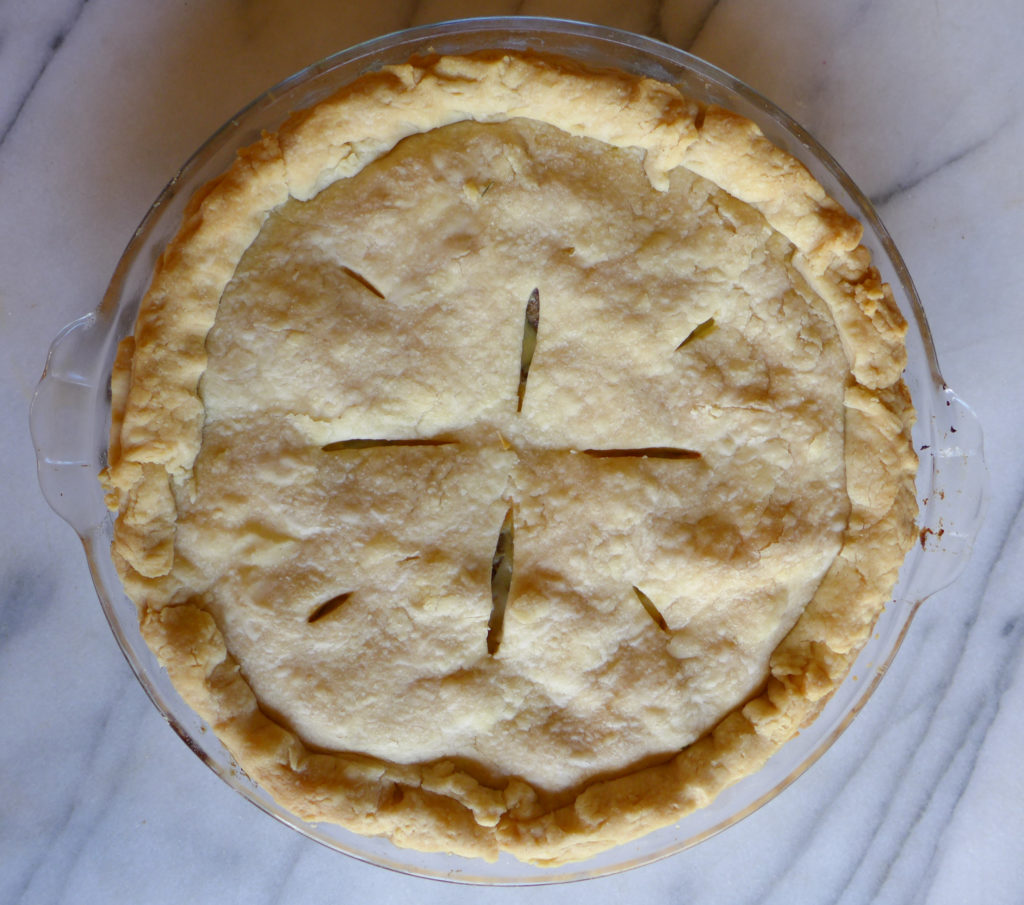
Savory vegetable pie : collard greens, caramelized onions, parsley, mint, potatoes
I baked this pie on a Friday and we took it with us the next day on a weekend camping trip. It served as the perfect, portable lunch on both Saturday and Sunday, with many small slices eaten as between-meal snacks.
I didn’t follow a specific recipe, just looked at a few things and came up with this formula: place the bottom crust inside a pie dish, add the sauteed greens and mushrooms mixed with the caramelized onions and fresh herbs, add a layer of grated cheddar cheese, top with a layer of cooked diced potatoes that are lighted mashed/blended with some buttermilk (could sub regular milk for less tang), add the top crust, and bake in a 350F oven until done.
While I’m comfortable making quiches, this was my first savory pie. It came out so delicious (and easy to serve) that I’m excited to make a few more this fall and winter. I think they’ll be perfect for dinner-time picnics in the park or packed lunches on ski days.

~
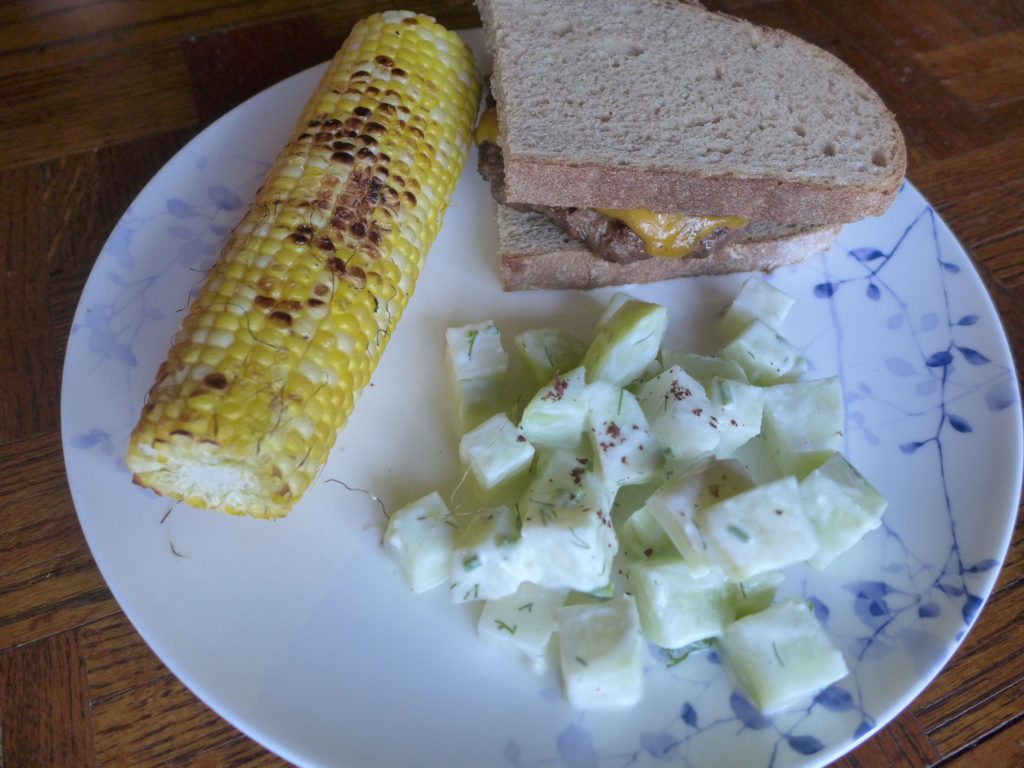
Burgers, grilled corn, and kohlrabi salad (salad recipe from Jerusalem, but we didn’t love it) : ground beef, corn, kohlrabi
~
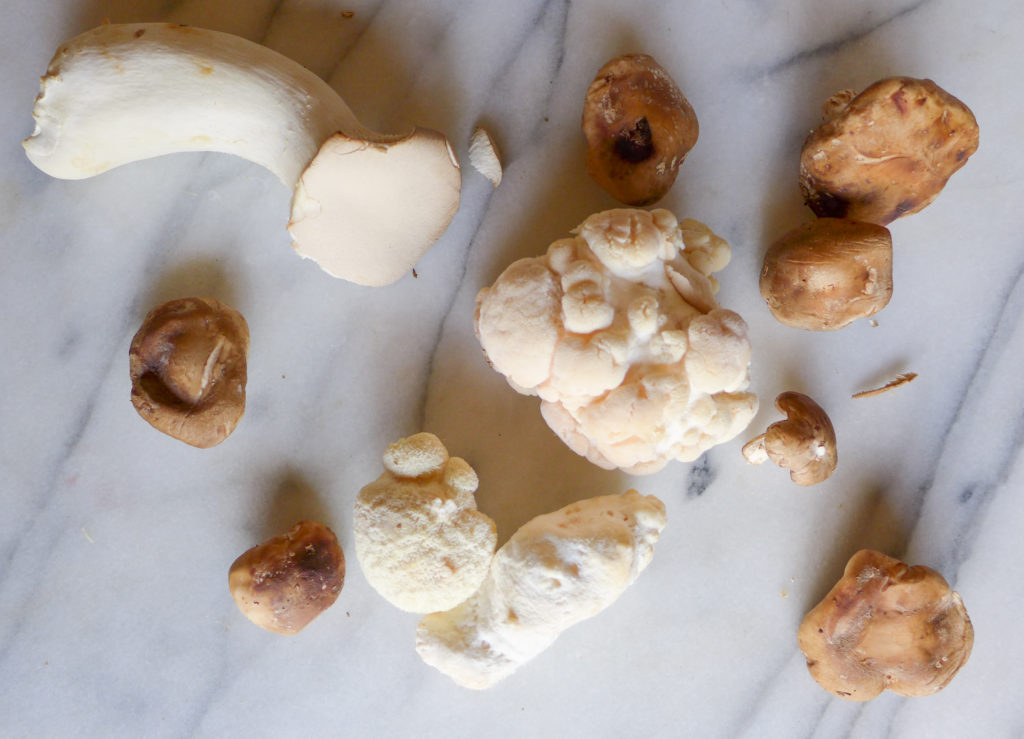
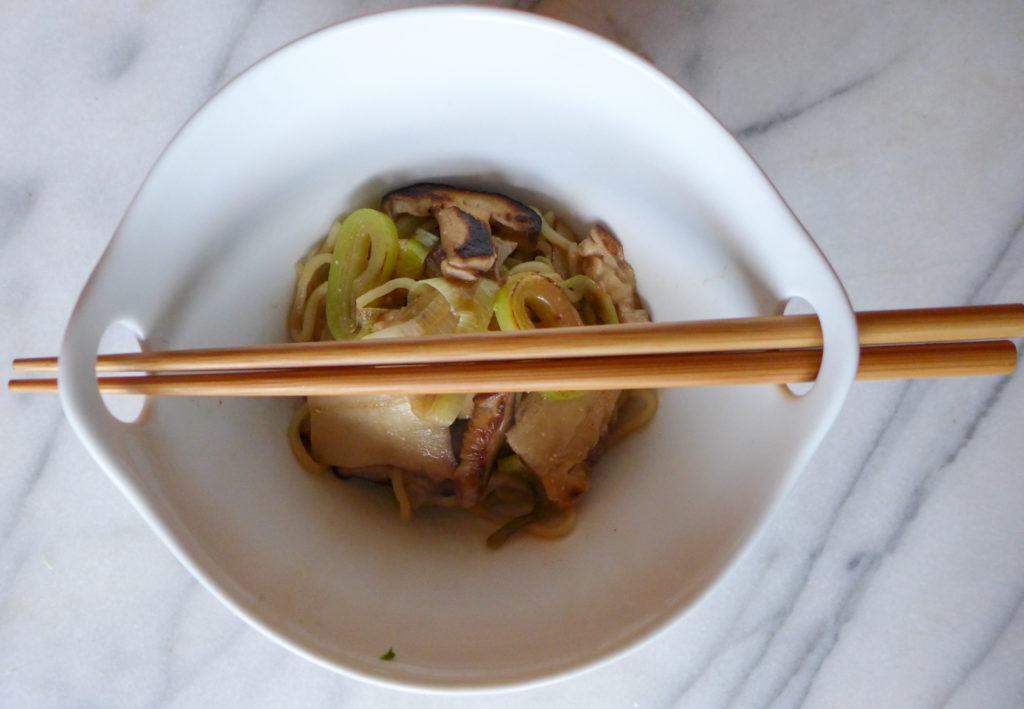
soba noodles with mushrooms : mushrooms, leeks
We had such a great combination of mushrooms this month! I don’t know the names of all of them pictured below, but as soon as we saw them, we were excited to do something special with them.
This dish is super simple, just sauteed leeks and mushrooms added to soba noodles in a miso broth. Its simplicity really lets the flavor of the mushrooms stand out, and their meatiness adds a nice hearty texture to the dish.
~
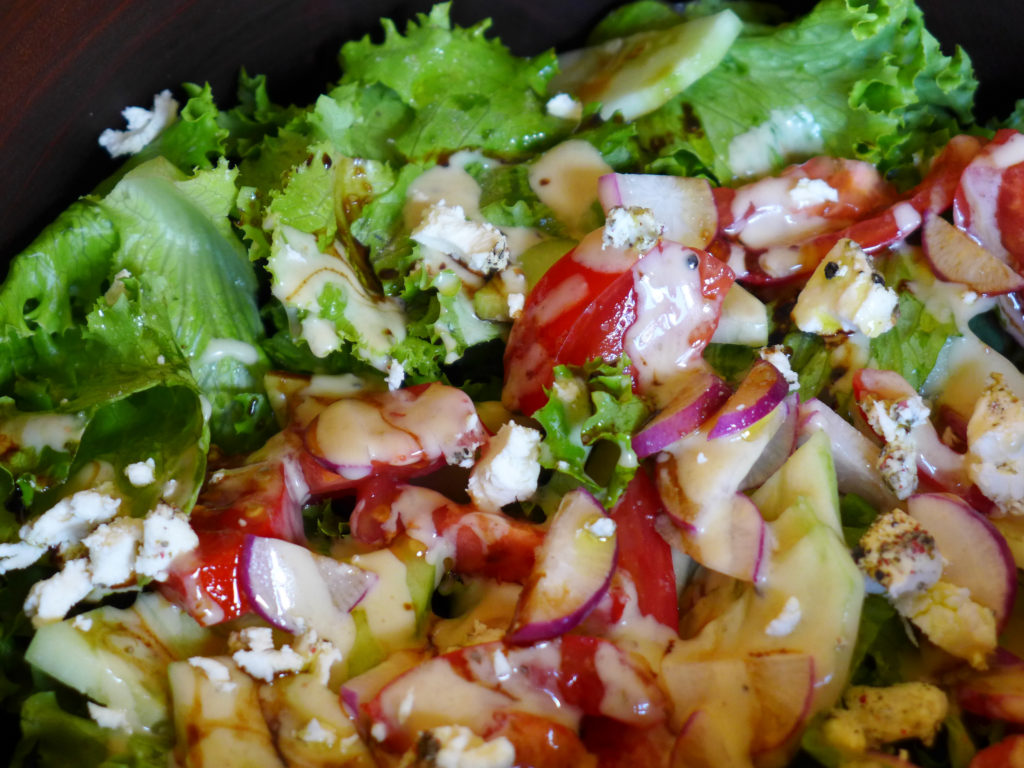
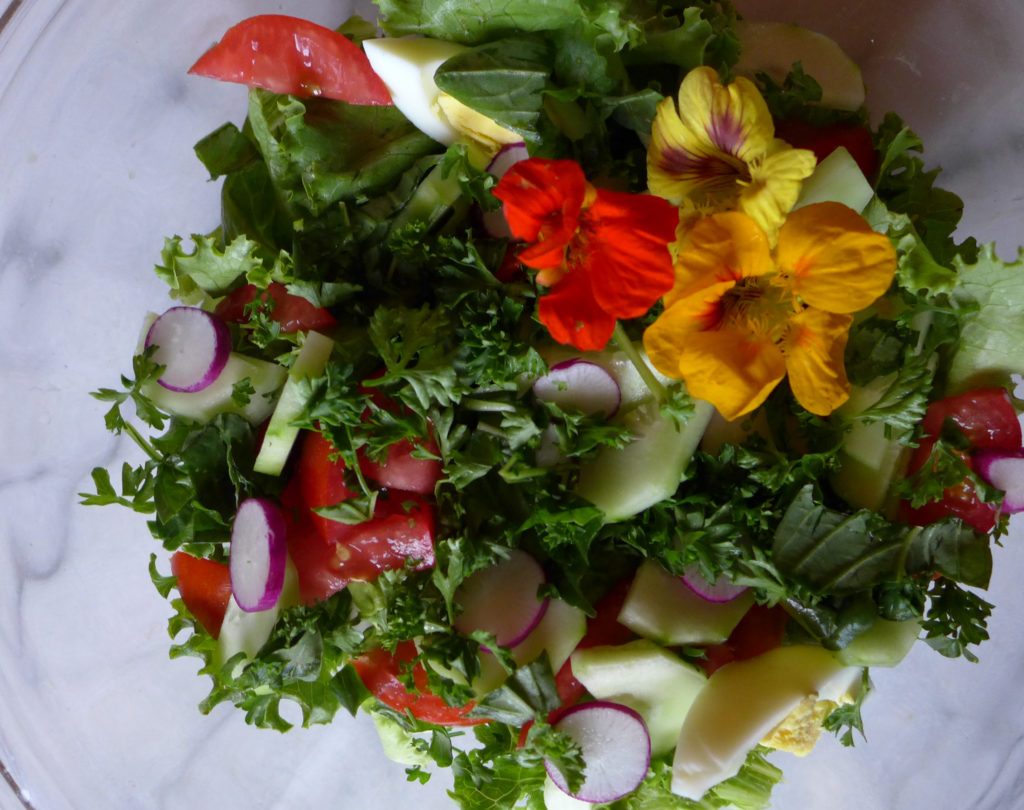
Salads : lettuce, tomatoes, radishes, cucumbers, peppercorn goat cheese
Nothing special here, just delicious simple salads. I really loved adding the peppercorn goat cheese to the salads (and the carrot soup), and am thinking that I may be hooked on this as a new garnish.
~
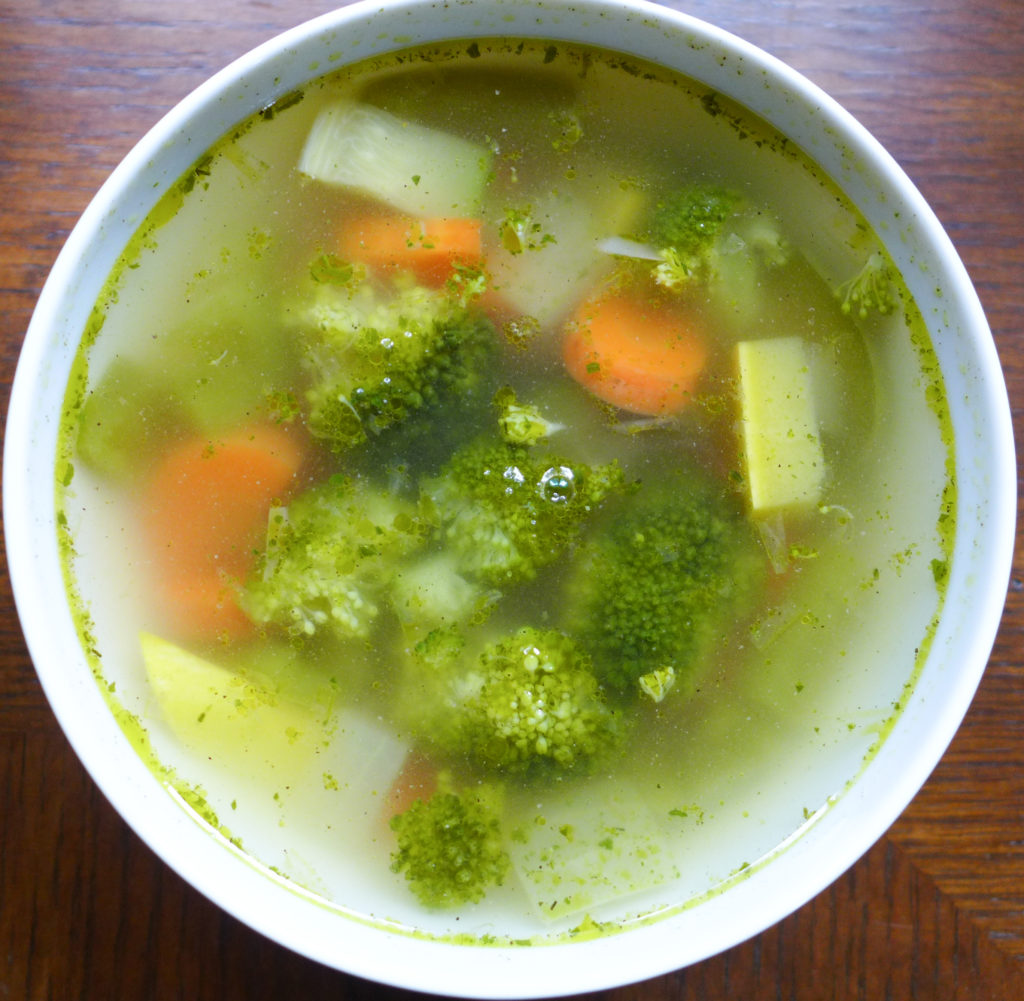
Light vegetable soup : onion, carrots, broccoli, green pepper, yellow squash
~
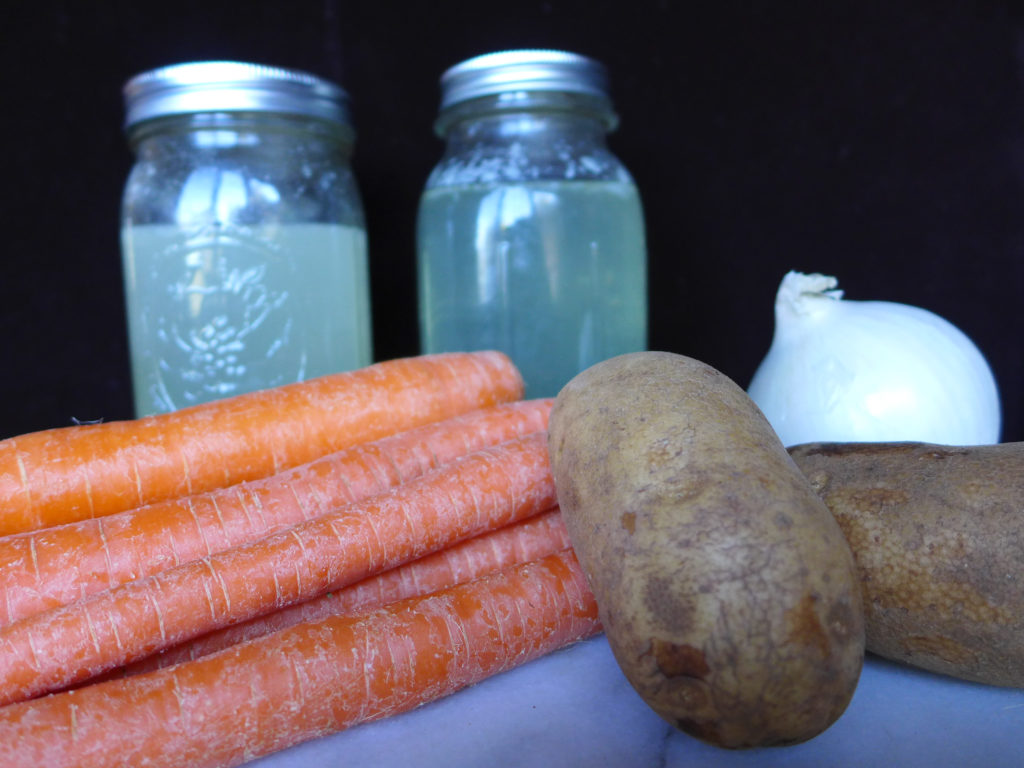
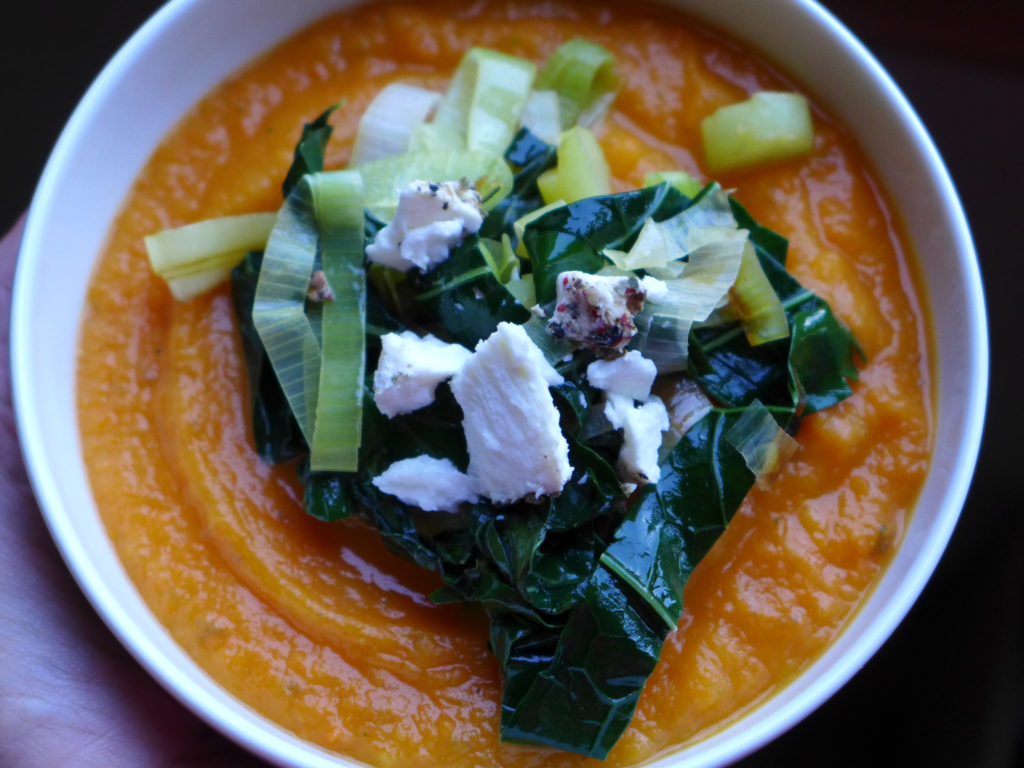
Carrot soup : onion, potato, carrots, collard greens, leeks, chicken broth (from the stewing chickens), peppercorn goat cheese
There’s nothing I love more than adding some good garnishes to a blended root vegetable soup. For this one, I sauteed the greens with leeks and garlic. After placing the greens on the soup, I sprinkled it with some of the peppercorn goat cheese.
~
Beet tart : sauteed greens, caramelized onions, roasted beets, goat cheese.
After seeing an apple tart where the apple slices were arranged in a rosette on top of the tart, I wanted to try to make a savory version using beets. This was my first go at it, and while it tasted good (we ate it all!), I think there’s room for improvement in both the presentation and the taste… I’m sure I’ll have an update with a recipe in a future post!

~
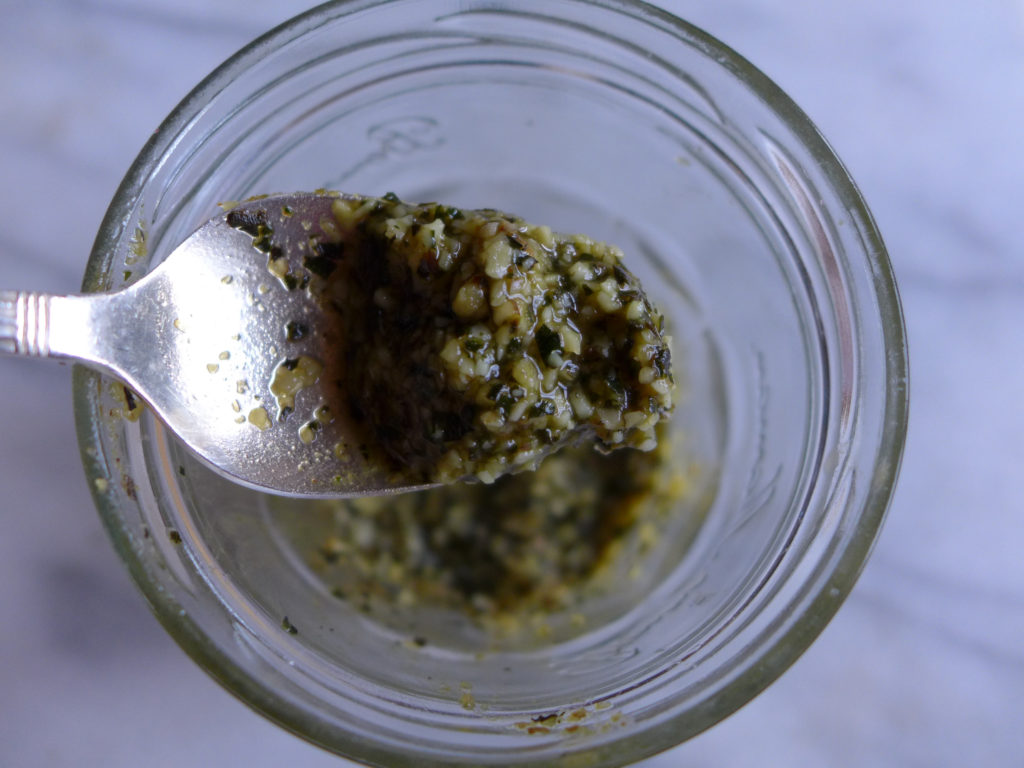
Pesto : basil
I don’t use a particular recipe for making pesto, although it would be handy since there are times where I forget key ingredients (cheese! garlic!). Calder doesn’t like pine nuts, so I made this batch with walnuts, and think it’s just as delicious.
~
And that’s it for the main courses. Looking back, we ate so well this past month! Tomorrow I’ll post the desserts, canned goods, and fermentation projects from the month.