Do you also think that this time of the year with its chilly days, long dark evenings, and plenty of new TV is perfect for knitting? If so, maybe you want to knit some Christmas stockings or a new hat.
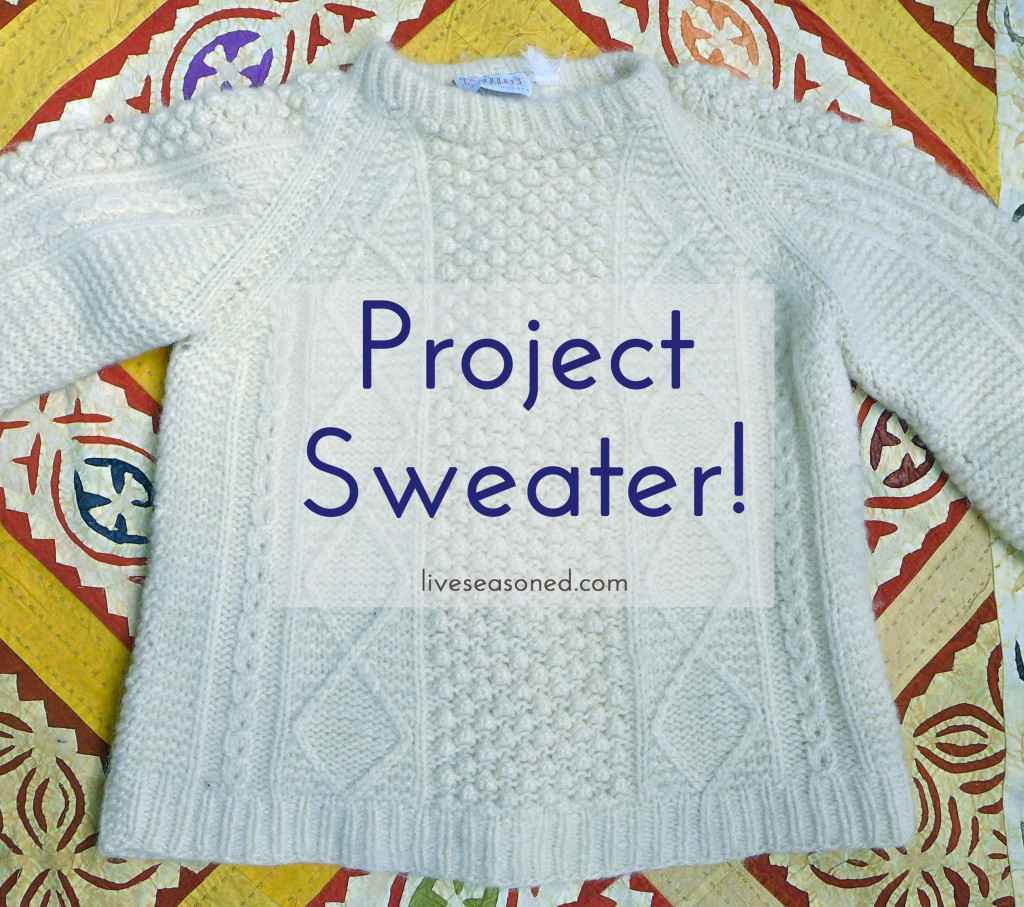
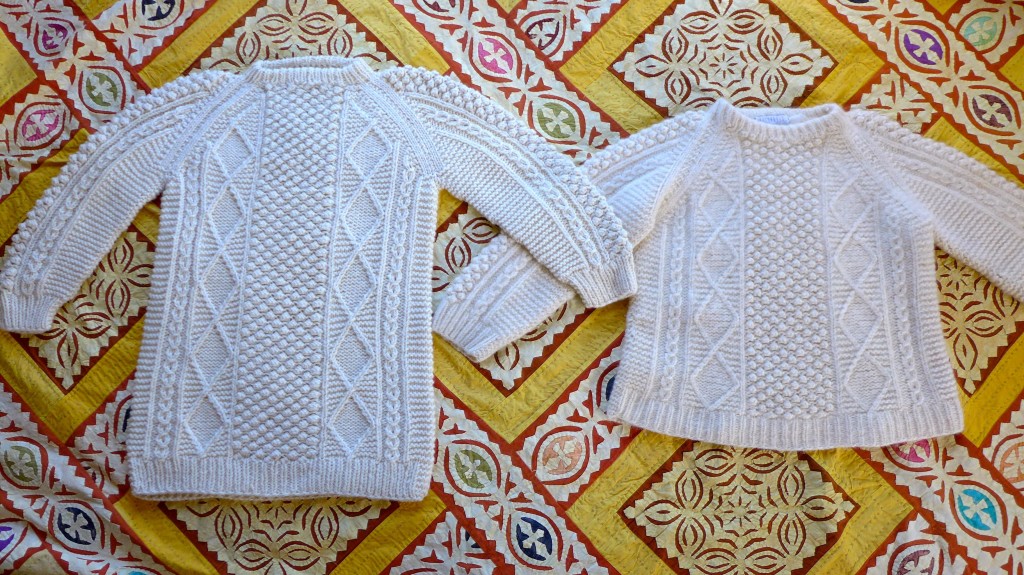
If you’ve been following along for a while, you may remember the big sweater project I’ve been working on. A quick recap : my friend had a sweater that she loved, but had been worn a lot and was slightly felted from washing. She asked me to knit another sweater just like the first, but slightly longer. In the first post I introduced the project and share my process swatches as I figured out the stitch patterns, then I wrote about finding the right yarn for the job, and in February I shared an update and the detailed stitch patterns. The project took a minor hiatus when we moved and had a baby, and finally, when things settled down this summer and fall, I finished the sweater! I wouldn’t let myself work on any other knitting projects until this was done, so there was major motivation to move it along :-).
In addition to sharing photos of the finished sweater, today I wanted to talk about constructing the yoke (the area of the sweater around the shoulders, across the chest and back, and up to the neck).
If you’re new(ish) to sweater knitting, let me start by explaining that there are a variety of ways to construct a sweater. Broadly speaking, some sweaters are knit flat and others in the round. When knitting flat, you will knit one piece for the front, one for the back, and one for each sleeve. Those pieces are then sewn together, creating seams up the sides of the body, along the sleeves, and then between the sleeves and body. Sweaters knit in the round are almost completely seamless, except for minor seams in the armpits, and you can start from either the top and work your way down or from the bottom and work your way up.
Personally, I love knitting sweaters in the round because I don’t really enjoy sewing seams and because when I’m done knitting I just want to slip the sweater on and start wearing it! BUT, there are some times, as I’ll explain below, when seams are useful and can help to maintain the integrity of the final garment.
In addition to the knitting methods, there are also different yoke styles. This particular sweater has a raglan yoke (similar to the typical raglan baseball shirt). It is defined by the four diagonal lines (two on the front and two on the back) that go from under the arms to the neck where the arms meet the body of the sweater. The raglan yoke can be easily created when knitting both seamless and flat sweaters.
(I think it’d be fun to talk about sweater construction and show examples of different sweaters, so I’ll stop this discussion here and save the remainder for another post!)
To pick up where I left off in my last post, I knit the body of the sweater in the round from the bottom up to where it would join with the arms. I also knit both arms from the cuffs to where they would join the body. The next step was to join these three pieces (the one body and two sleeves) and create the raglan yoke.
There were two ways I could do this. 1. I could put all of the “live” stitches from these pieces onto one circular needle and continue knitting towards the neck (while knitting, I would have to decrease the number of stitches on the needle at four points around the yoke where the sleeves connect to the front and back of the body). This would create a seamless sweater as explained above. 2. I could continue knitting the body of the sweater up to the neck, but I would have to separate the front from the back, so I would knit the front of the sweater, then knit the back (basically, I’m knitting them “flat” at this point). I could then knit the top section of each sleeve flat up to the neck. While I’m knitting back and forth on each of these pieces, I would decrease stitches along the sides that will be seamed together, creating the diagonal raglan shaping. Then, once each piece is knit to the neck, I would seam them together along the raglan lines.
Even though I hate seaming, I decided to go use method 2 for a couple of reasons. The original sweater was constructed that way, and since the seams are so prominent in the sweater’s design, I thought it would be easier to replicate that construction than to try to fake it by knitting in the round while trying to create the appearance of seams. I also decided to use seams because this is a big sweater, and with all of that weight hanging on a person’s shoulders, it can make the sweater start to stretch and pull downwards, which could cause it to lose its shape and create bigger “holes” in the fabric as the stitches stretched. When you use a seam between two different pieces of the sweater, it acts as a barrier to this stretching – the weight of the body of the sweater is distributed along the seam rather than on the point where the sweater rests on the wearer’s shoulders.
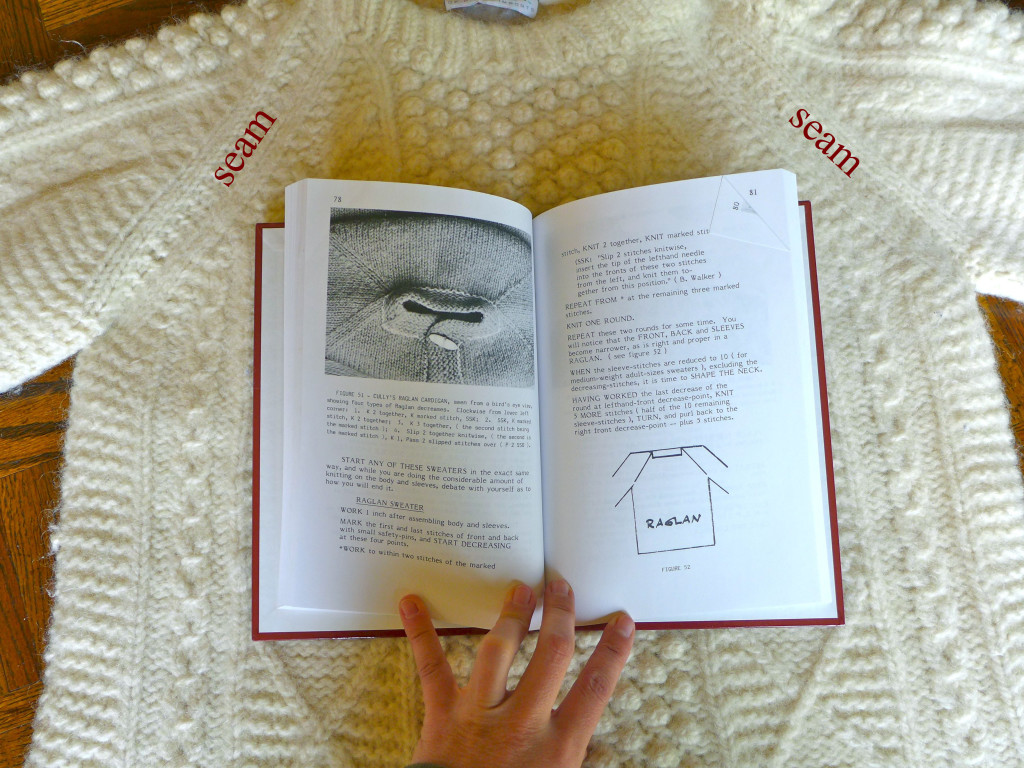
Side note : If you are interested in knitting sweaters in the round, there are some really great resources available, personally, I love the books by Elizabeth Zimmermann. She goes into great detail about sweater construction and the ways to get different looks/designs while knitting a sweater in the round. It can be a lot to digest if you’re new to knitting, but her writing style is very relaxed and encourages you to not take yourself (or your knitting) too seriously. In the photo above, I have her Knitting Workshop opened to the page that shows different raglan yoke constructions.
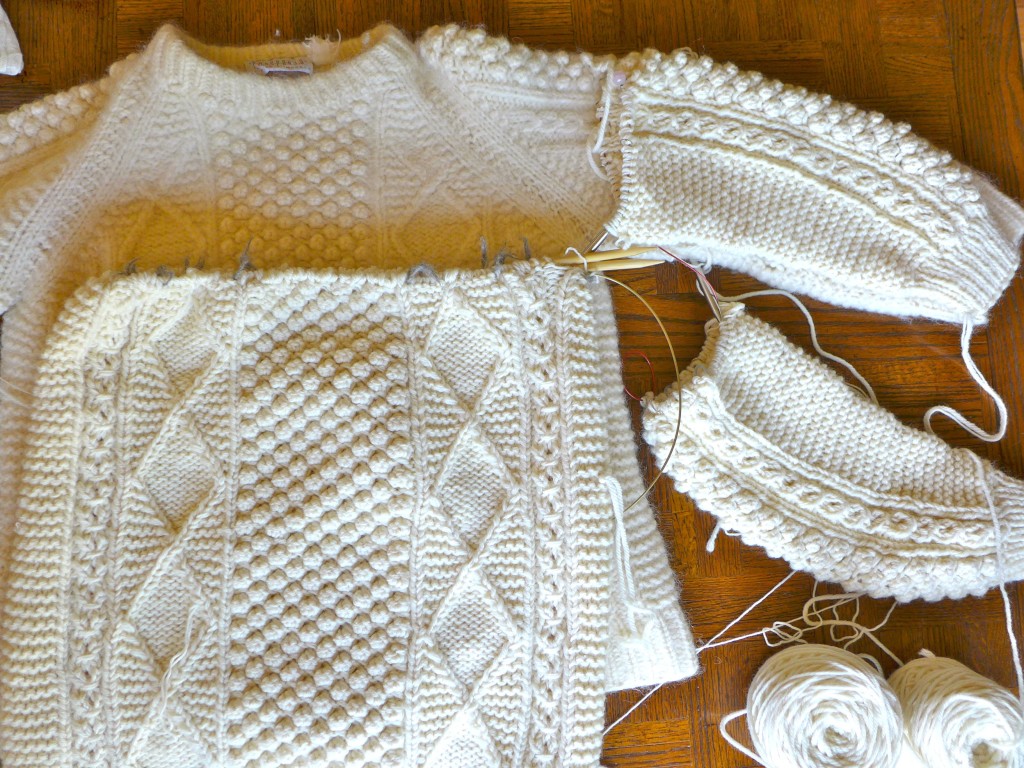
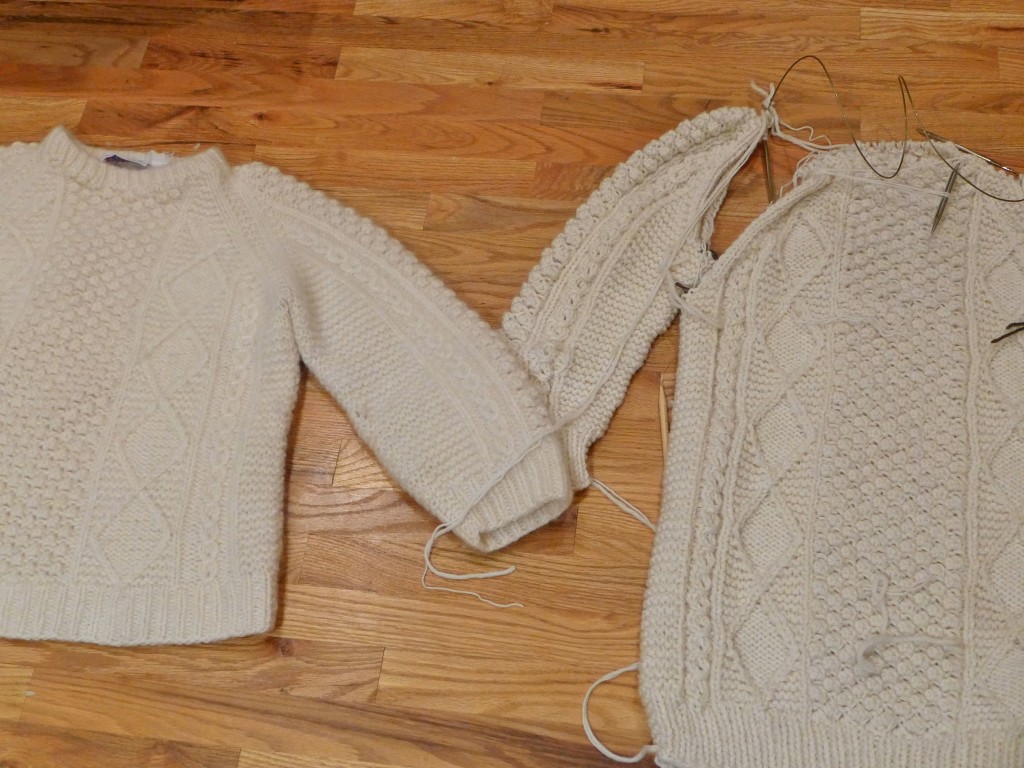
So, I knit the front, back, and sleeves of the seater following the stitch patterns, and decreasing one stitch on each side of the pieces when I was knitting across the front of the piece. By decreasing on each side of each knit piece, I am creating the diagonal lines that will then get seamed together. The end result is on the right in the photo above. The next step was to sew the sleeves to the body. To do this, I lined up the side of one sleeve with the body, used safety pins to hold the pieces together, and then used a whip stitch for the seam (the same seaming method as the original sweater).
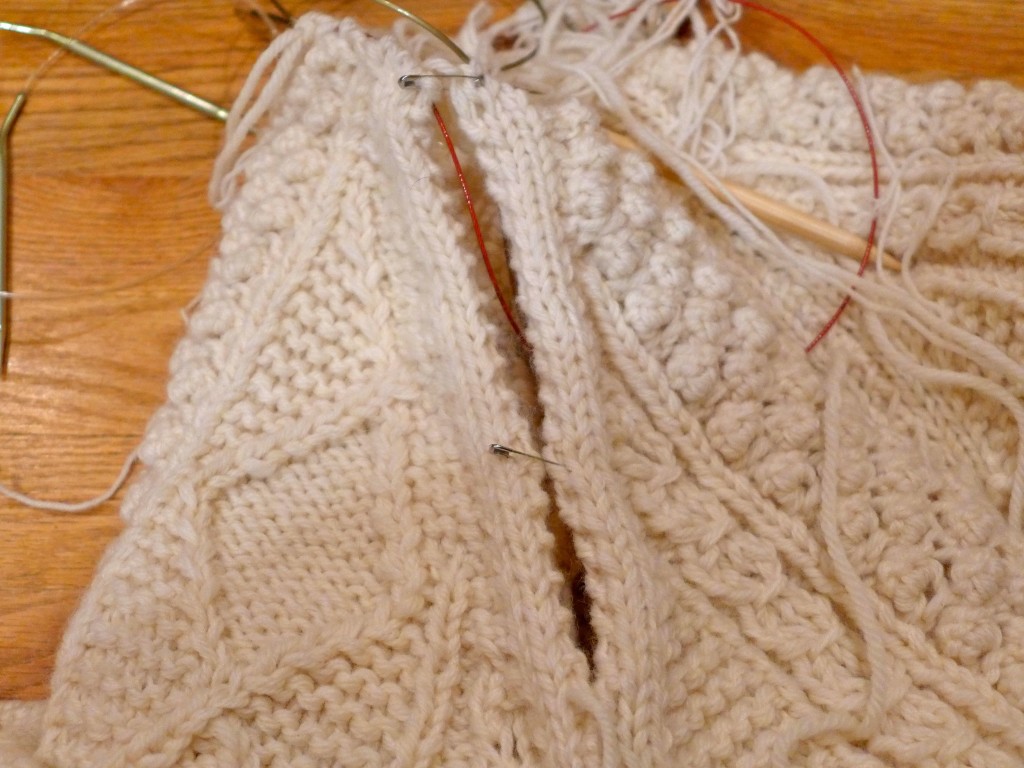
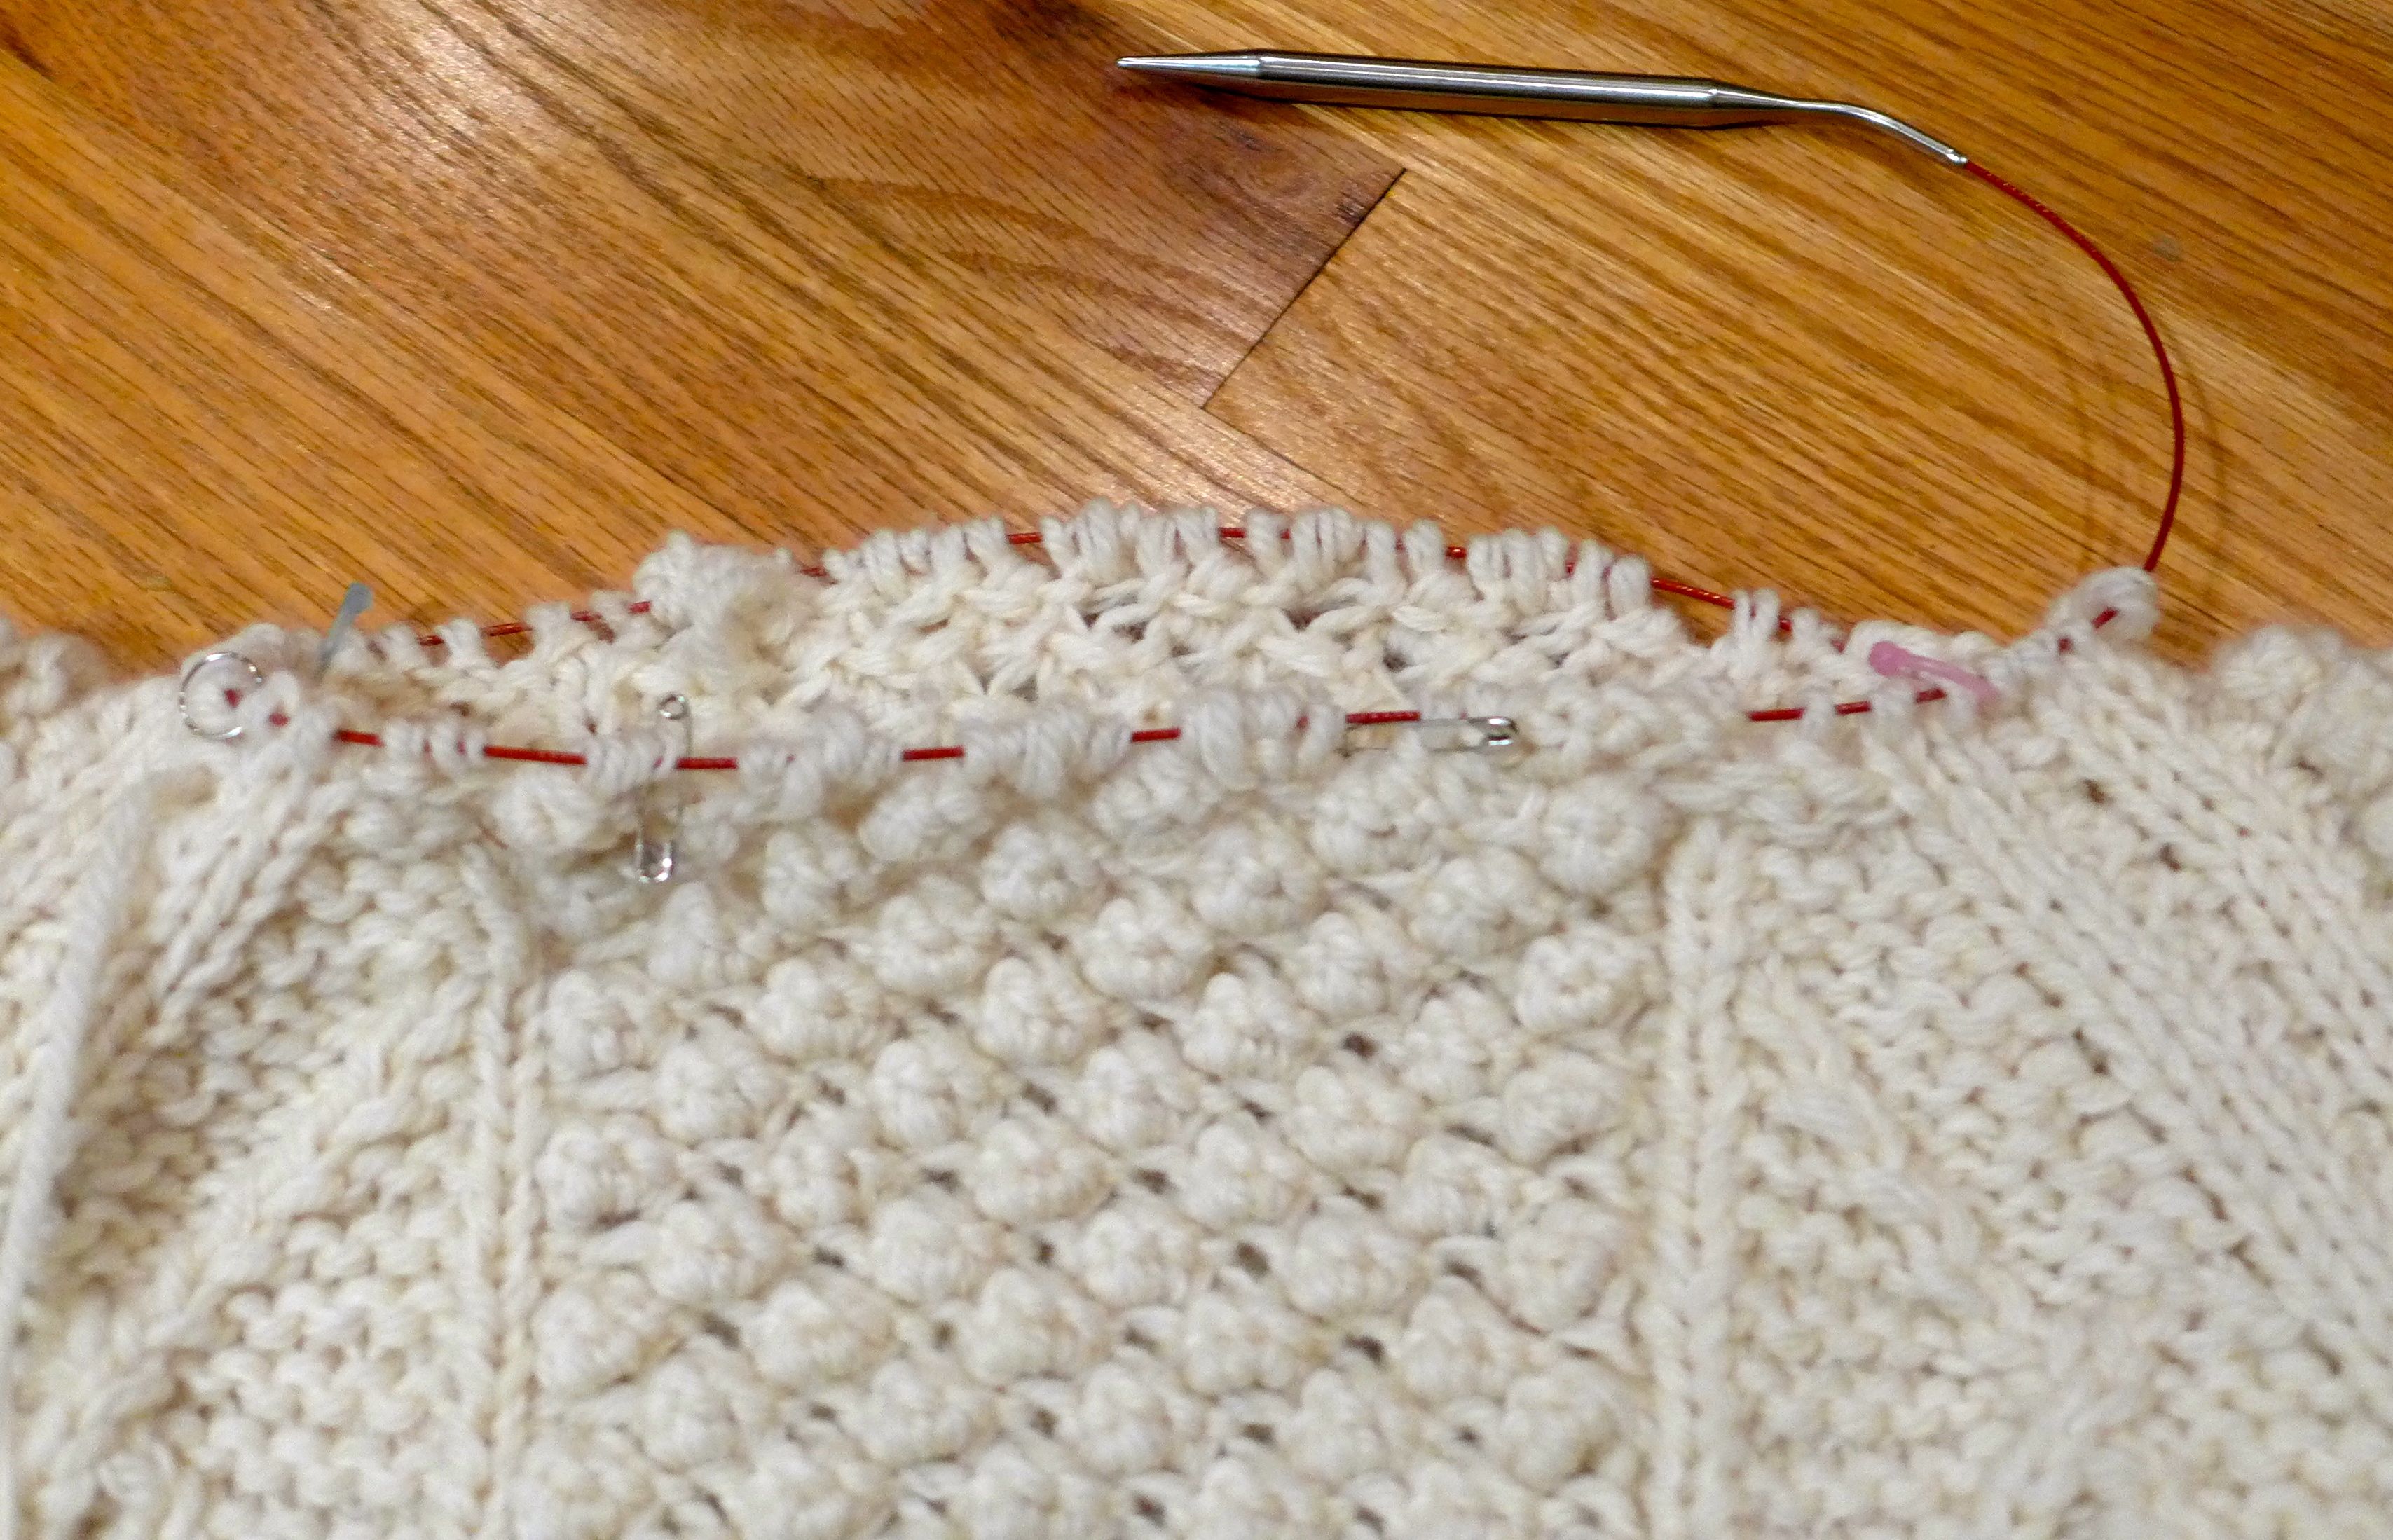
Once the seaming was complete, I had one sweater that was knit up to the neck, and the only thing I had to do to complete it was to knit the ribbing for the neck and make the back of the neck slightly higher than the front (if you look at your sweaters you’ll see that this is a common feature). In the photo above, you can see all of the live sweater stitches on one circular needle, ready for me to knit the neck.
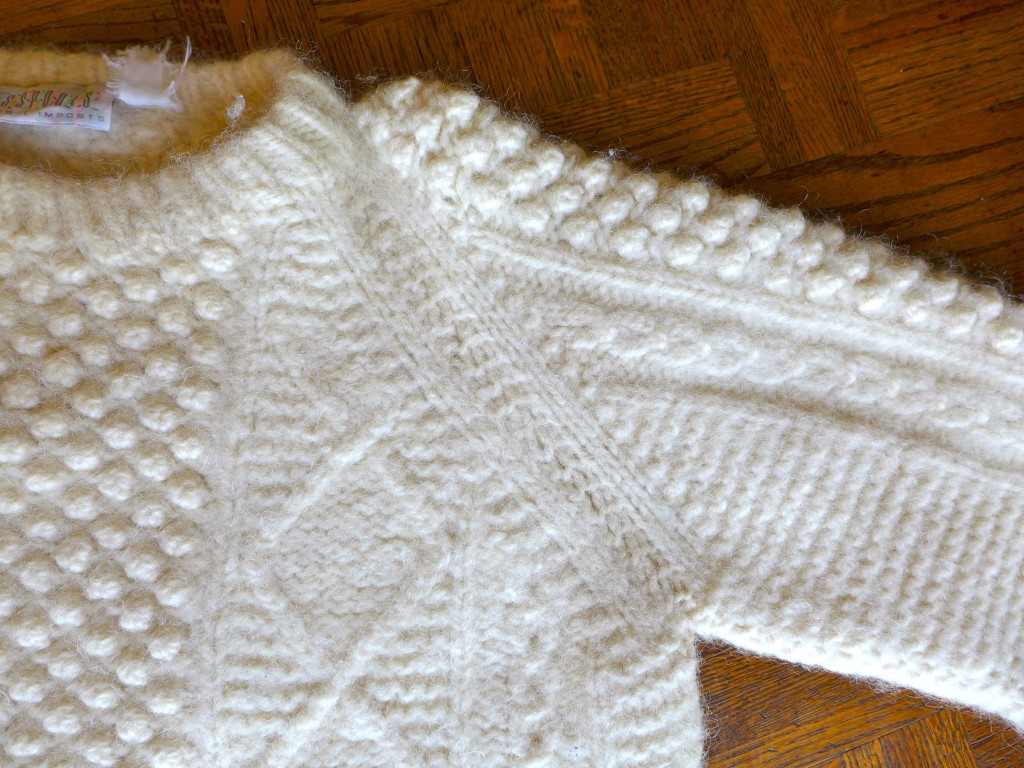
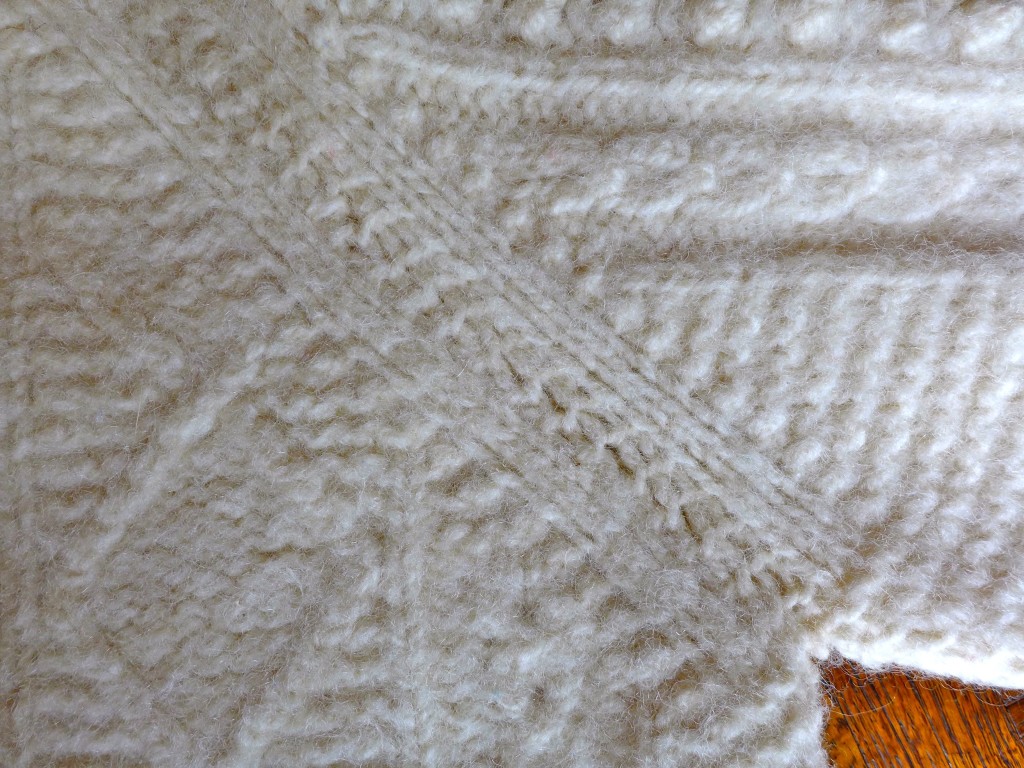
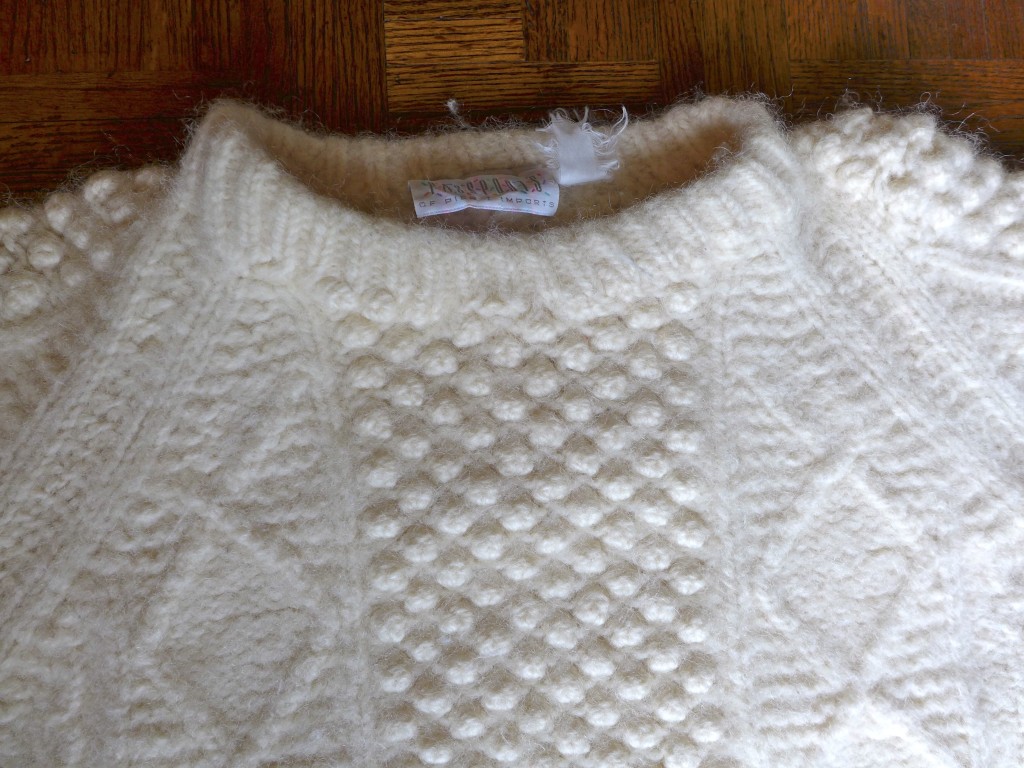
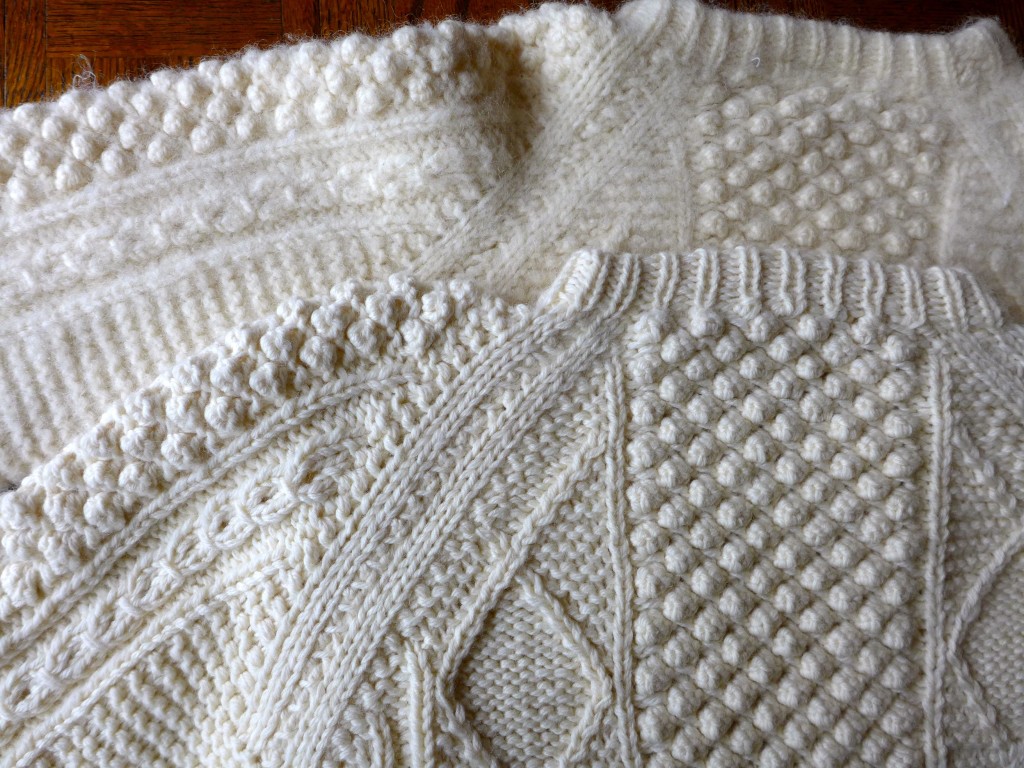
In addition to being ribbed, the original sweater’s neckline (photo below) is also folded over. This is a nice feature because it adds extra structure/stability to the neck, again, helping to eliminate and problems that could develop from the heavy sweater pulling down and possibly stretching out the neck.
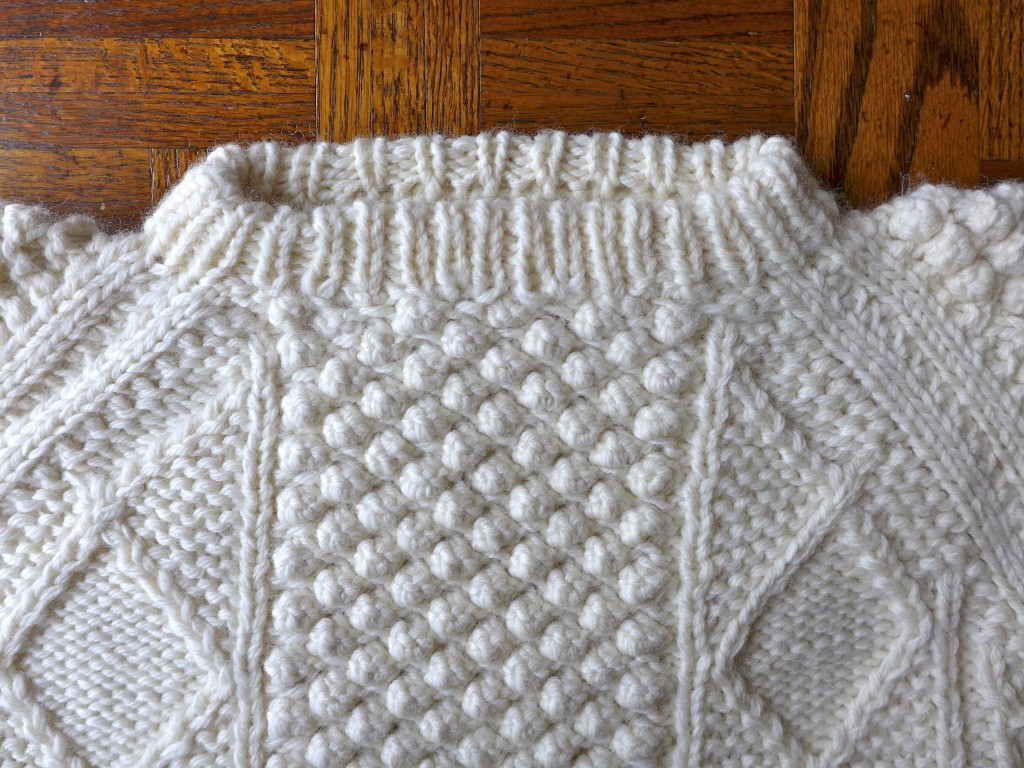
I did two things to make the back of the sweater slightly higher than the front. First, I added in two short rows across the back and over the shoulders of the sweater. This requires knitting back and forth over these areas, but not knitting across the front of the sweater. By adding rows to the back but not the front, the back is now higher. But these rows alone weren’t enough to create the back/front height difference that the original sweater had. Looking at the original’s construction, I saw that when they folded over the ribbed neck, it was folded over more in the front than the back, again, creating more height in the back. This combination of techniques worked well to imitate the original sweater’s neck design, and you can see the final neck in the photo below.
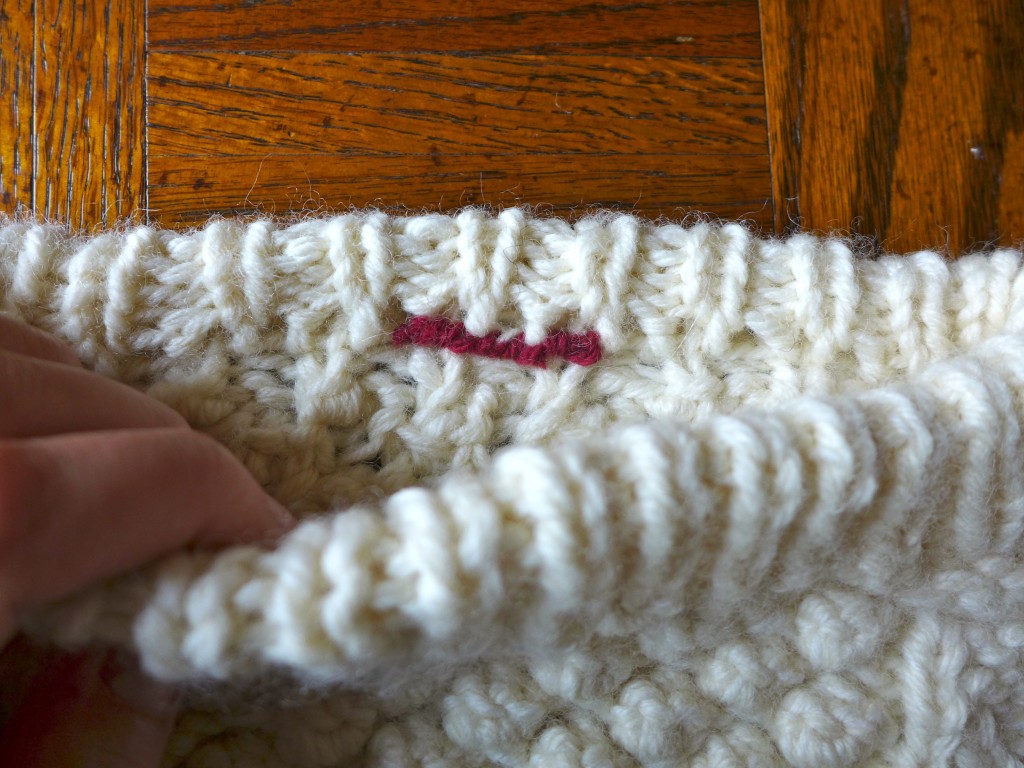
When we were growing up and wearing the sweaters knit by our grandmother, we were taught early on to look for the side with the higher neck and make that the back of the sweater (many of our hand knits didn’t have tags). But if you’re dressing in a hurry, sometimes you can still get it wrong, so to make it a little bit easier on this sweater, I used a piece of red yarn and just added a dash of color where you would typically see a tag. It’s not noticeable from the outside of the sweater, but you can’t miss it when getting dressed.
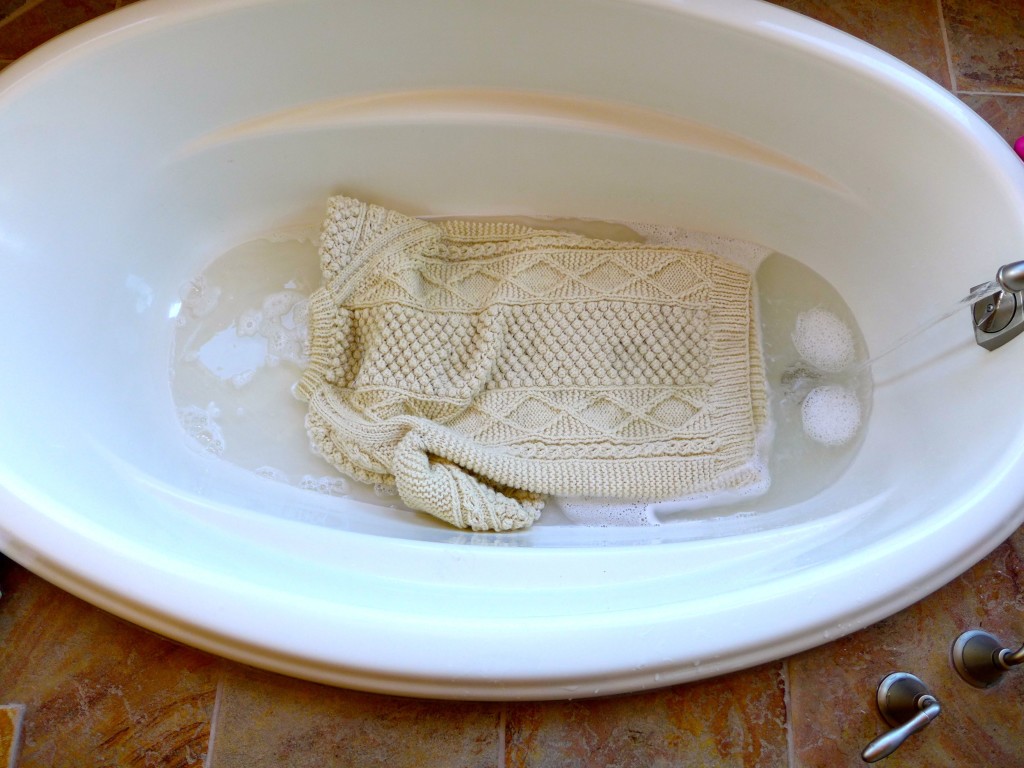
With that, the sweater was done and just needed to be blocked. I discussed blocking in an earlier post and mentioned that I prefer the wet method. I used that method again here, soaking the sweater in our tub, but as soon as I went to pick it up, I realized that this should have been a job for steam blocking. The wet sweater was soooo heavy that I had to be really careful to not stretch it out while trying to pick it up out of the water. If I had steam blocked it, the weight of a water-logged sweater would not have been a problem.
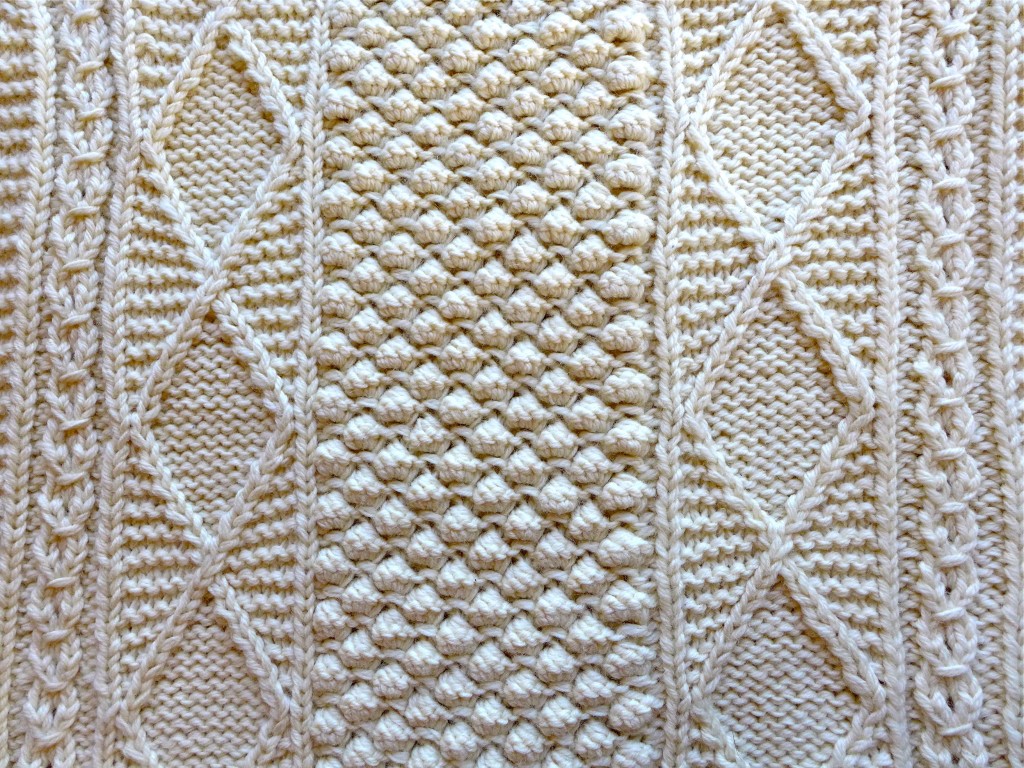
When laying it down to dry, I was careful to match the new sweater to the dimensions of the old sweater (adjusting for length). This allowed the sweater to settle in to its final shape, while also allow the stitches to settle and the cable designs to really pop.
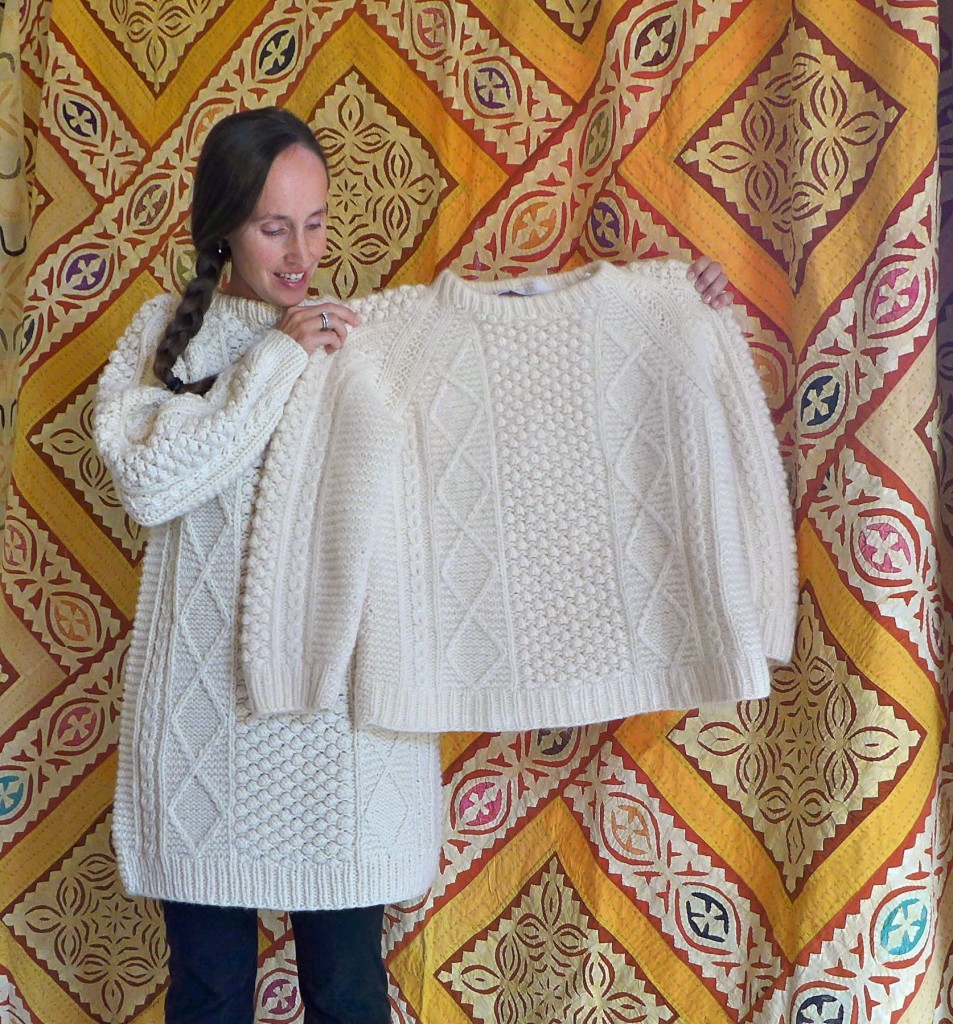
I’m so absurdly happy with how this sweater turned out! It really is a carbon copy of the first (except for length). It was my first attempt at recreating a store-bought sweater, and it became such a fun puzzle to figure out the pieces step by step stitch by stitch. I sent it off to its owner and was happy to hear that she loves it too!
Now, my mind is exploding with ideas for what I’ll work on next. New winter hats for the boys, a stocking for Luc, a sweater for me! Totally dorking out.

What a great blog! I followed a link about van camping to arrive here. And there’s knitting too! Beautiful sweater, btw. So many wonderful ideas. I will return to read more.
Thank you!
Welcome, Li! We’re so glad you found us!
AMAZING JOB!!! It was really hard to tell the dimensions of the sweaters until I saw it on you. I thought the final, new sweater would barely hit your hips! Reading through your posts makes this complicated knitting seem much easier and I love knowing about how much care and thought, and hard work, it takes to make a really well-made garment. Now that I’ve buttered you up, there’s a certain Nancy Schu special that could use a re-knit (wink wink, I’ll give you a few years to recover from this one).
ha! I would love to do a Nancy re-knit! I’m not sure which one you have in mind… because now I’m thinking that all of them should be replicated!