
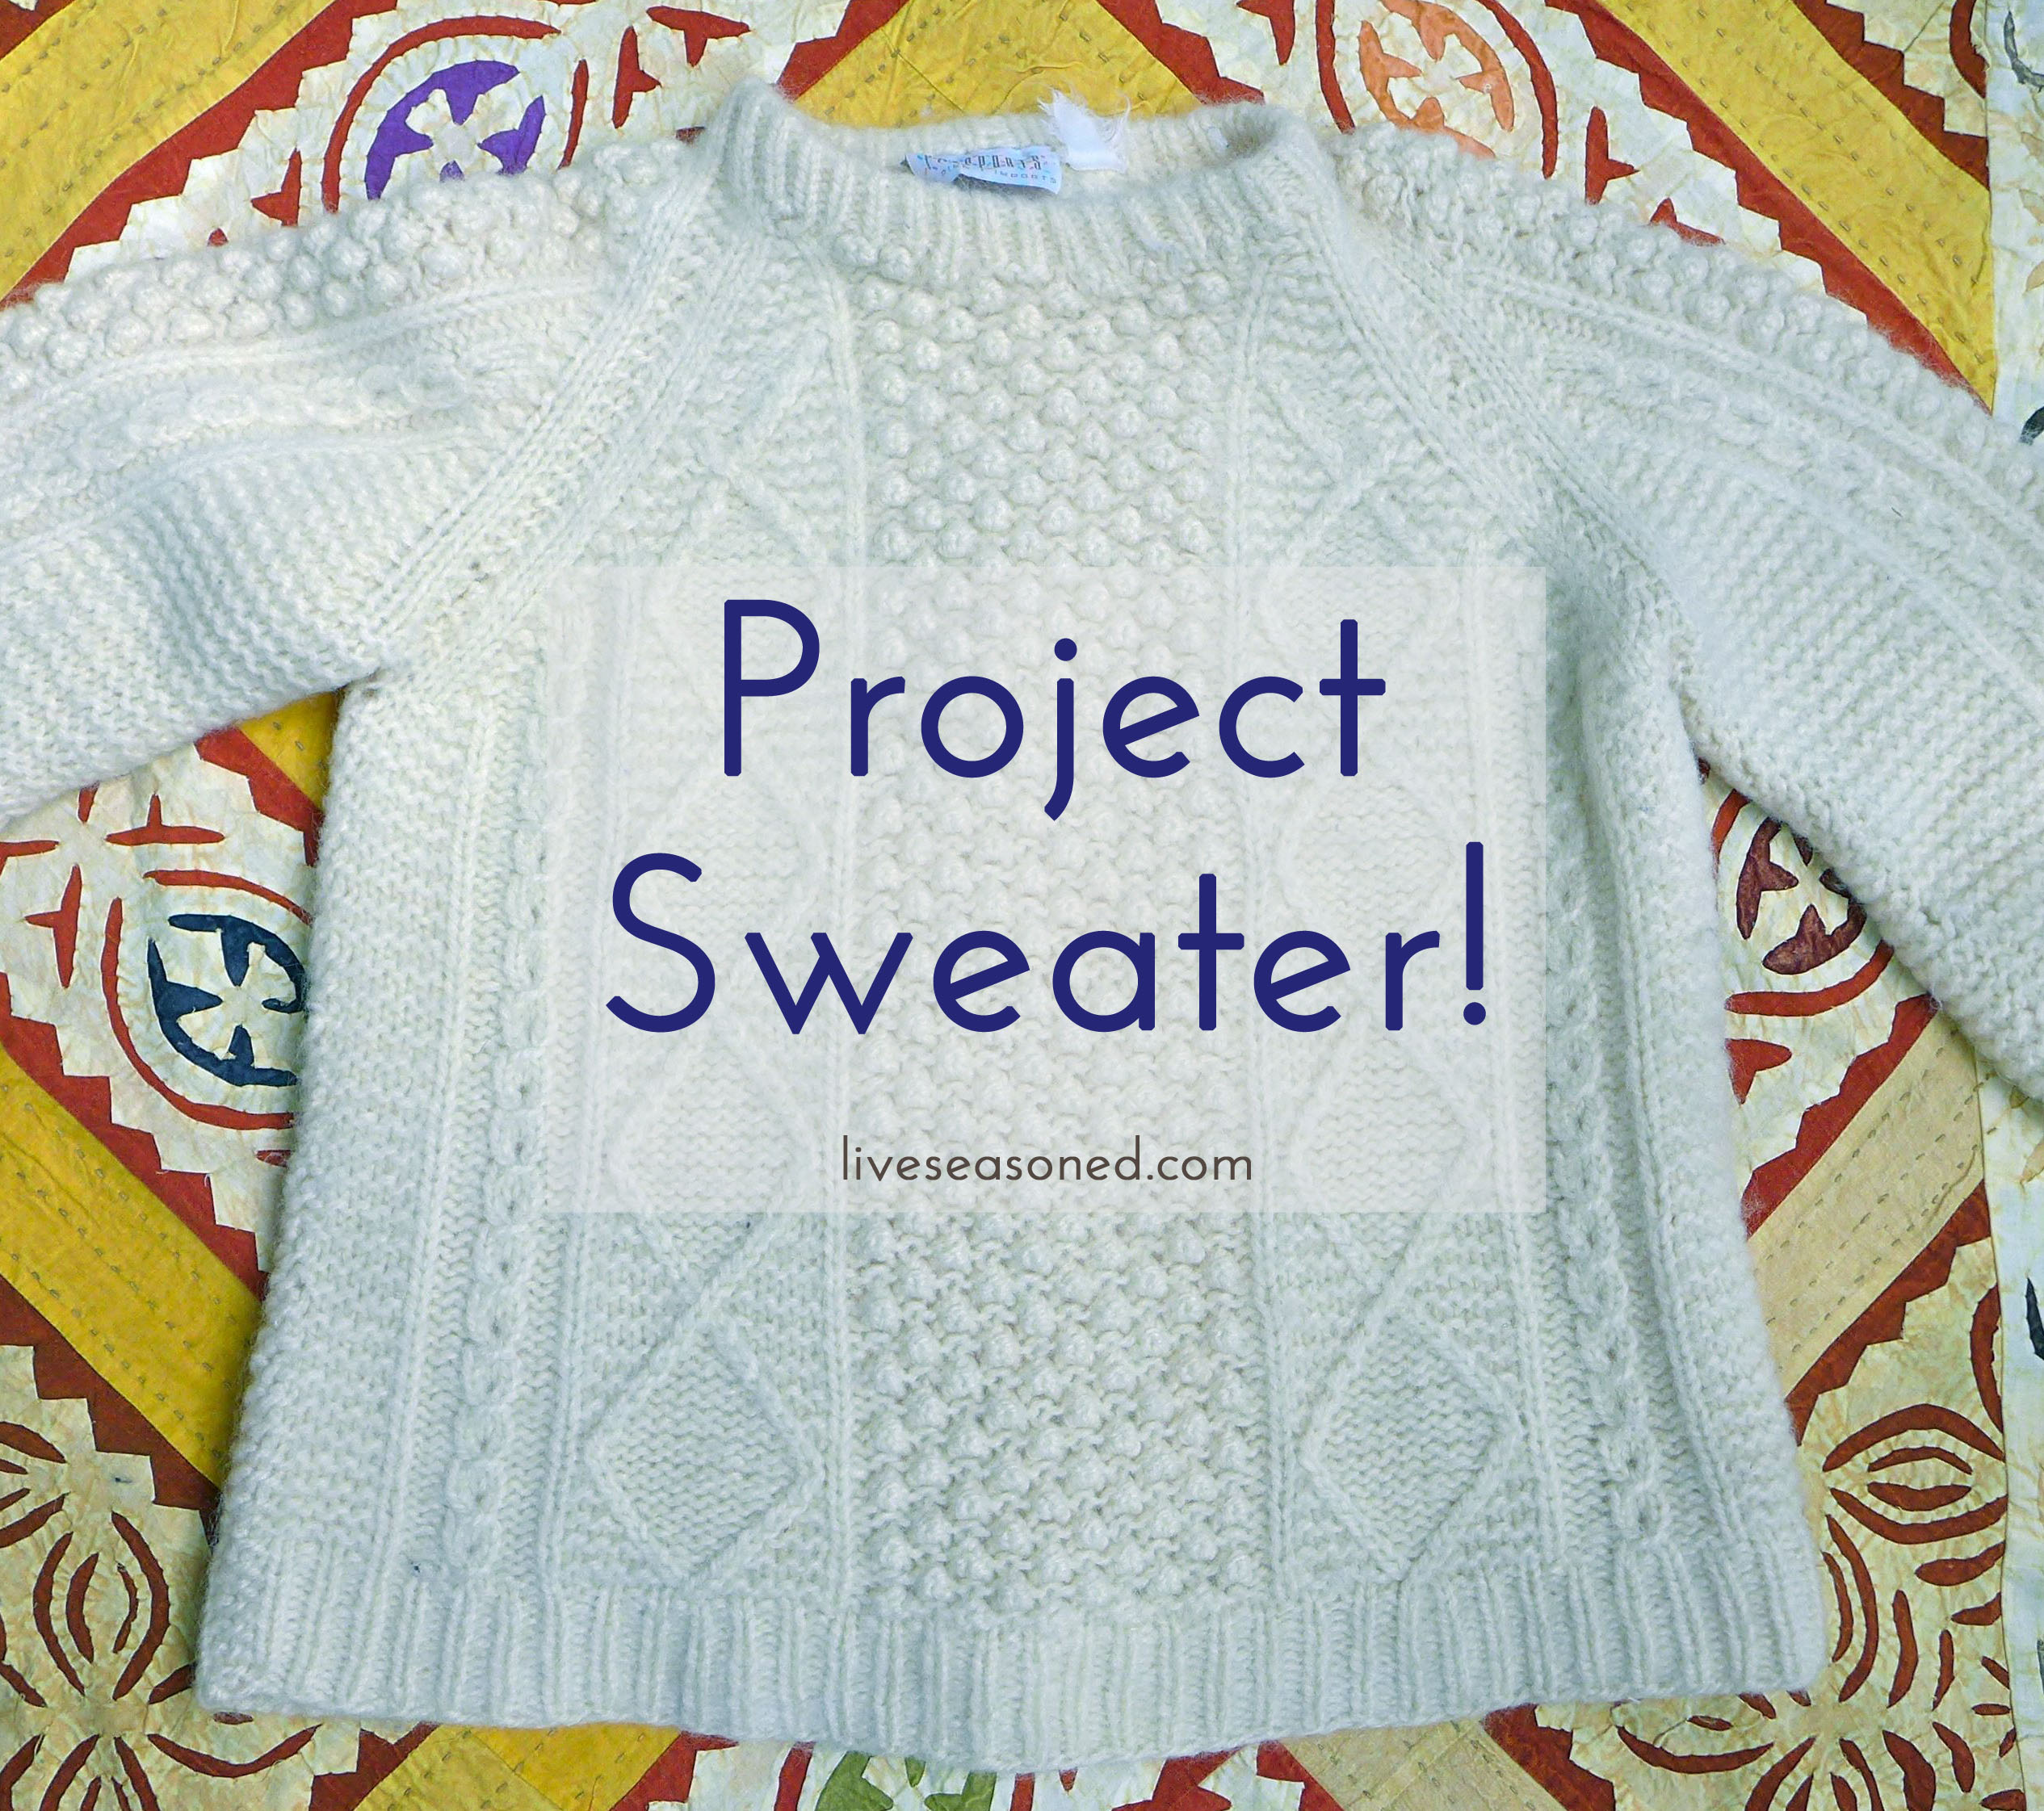
As I mentioned in this post, I have a growing uncontrollable pile of knitting projects going on. One of those is this sweater project. This is a friend’s sweater that she’s worn and loved for many years (I don’t remember how many, but she bought it at Pier One when they still imported and sold clothes!).
I’m not sure if you can tell in these photos, but the sweater is well-worn and has been slightly felted. She asked me to re-knit the sweater and add some length (about 4 inches or so). Rather than work on the whole project behind the scenes and share the finished sweater, I thought it would be fun to turn this into a series and share the process. Today I’m going to talk about my first two steps, which I try to conquer at the same time: 1. choosing the appropriate yarn and 2. working out the stitch pattern.
The Stitch Pattern
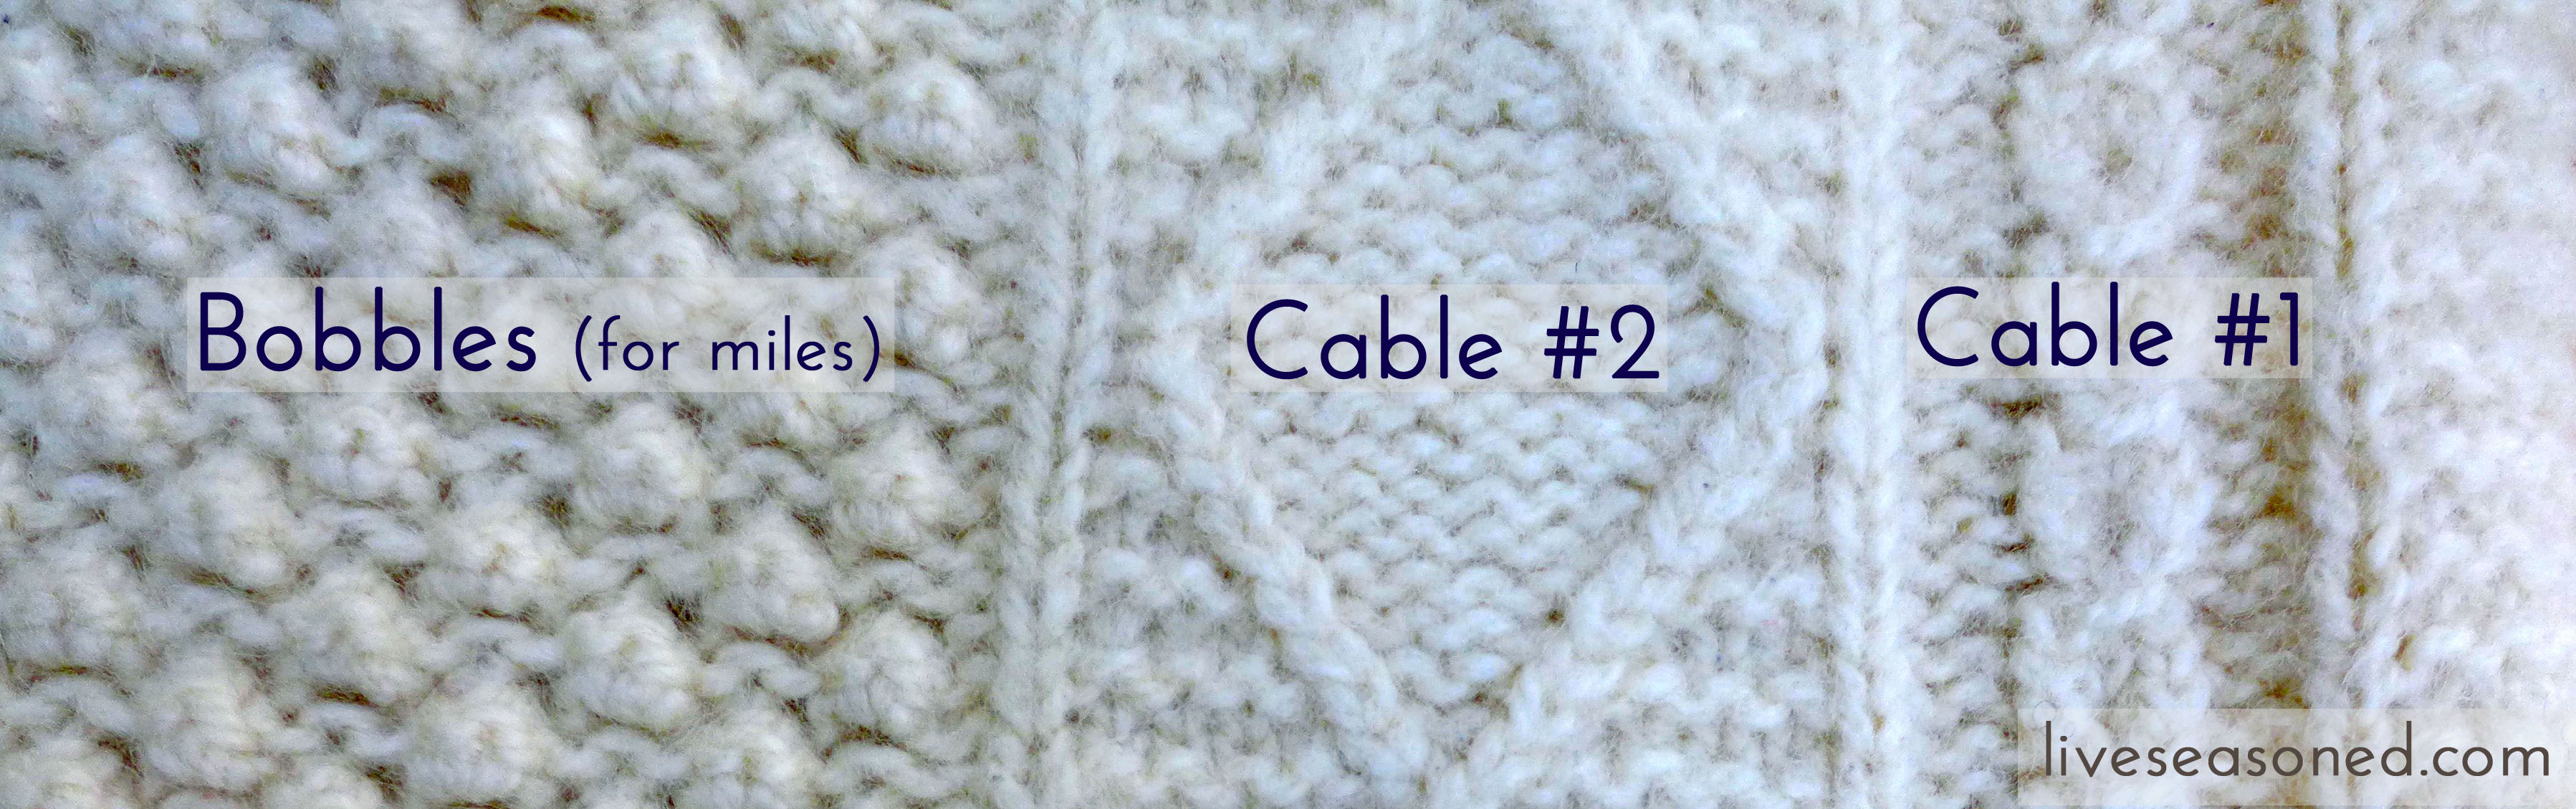
I start by just looking at the sweater and identifying simple stitches and bigger blocks. If you look at the first picture in this post, you’ll see that the areas on the sides of the sweater and the underside of the arms are garter stitch (the most basic knitting stitch). The cuffs and sweater bottom are knit 1 purl 1 ribbing. The bigger blocks are identified in the photo above: Cable #1, Cable #2, and the bobbles. The next trick is figuring out exactly (or approximately) how those blocks of stitches are made.
Cable #1. I work from right to left because that’s how the rows are knit. Cable #1 is relatively simple to figure out because it’s so small, worked across just 3 stitches. The area where it narrows is typically a point where the cabling actually occurs (where we would change the order of one or more stitches moving them in front of or behind others). In this case, that doesn’t happen, and at the same time you will make the small eyehole that’s in the cable! It was a fun puzzle to work this one out, but I’ll save the exact pattern for a future post.
Cable #2. If you’ve ever knit a simple cable pattern before, Cable #2 should look relatively easy. There are two stockinette stitches that are forming the diamonds: moving out from the middle to the sides and then back in again. Inside the diamonds is a stockinette stitch and outside the diamonds is garter stitch.
Bobbles! The bobbles were definitely the hardest stitch to work out (as you’ll see below in Swatch #1). I was able to figure out the cable stitches within a few attempts, but the bobbles took a lot longer. I began by looking at a few stitch guides online and knitting the bobble patterns. It took a long while to find a bobble that wasn’t too big or too small and with a spacing between bobbles that matched the original sweater.
Choosing the Yarn
The easiest way to narrow your choices is decide what type of fiber you want. In this case we wanted to go with a wool again, then comes narrowing in on weight. I knew that this sweater was knit with a bulkier yarn, but the lines between yarn weights can be fuzzy. I started with a yarn that I used before and loved, Cascade Eco. Eco is a softer wool, and the Ecru color was a fairly good color match. As you can see, it’s considered a bulky wool on the Cascade site, but it’s really on the thinner side of bulky. The second yarn I tested was Knit Picks Bare Wool of the Andes. A slightly thicker bulky weight yarn and again a good (even better) color match but not as soft to the touch.
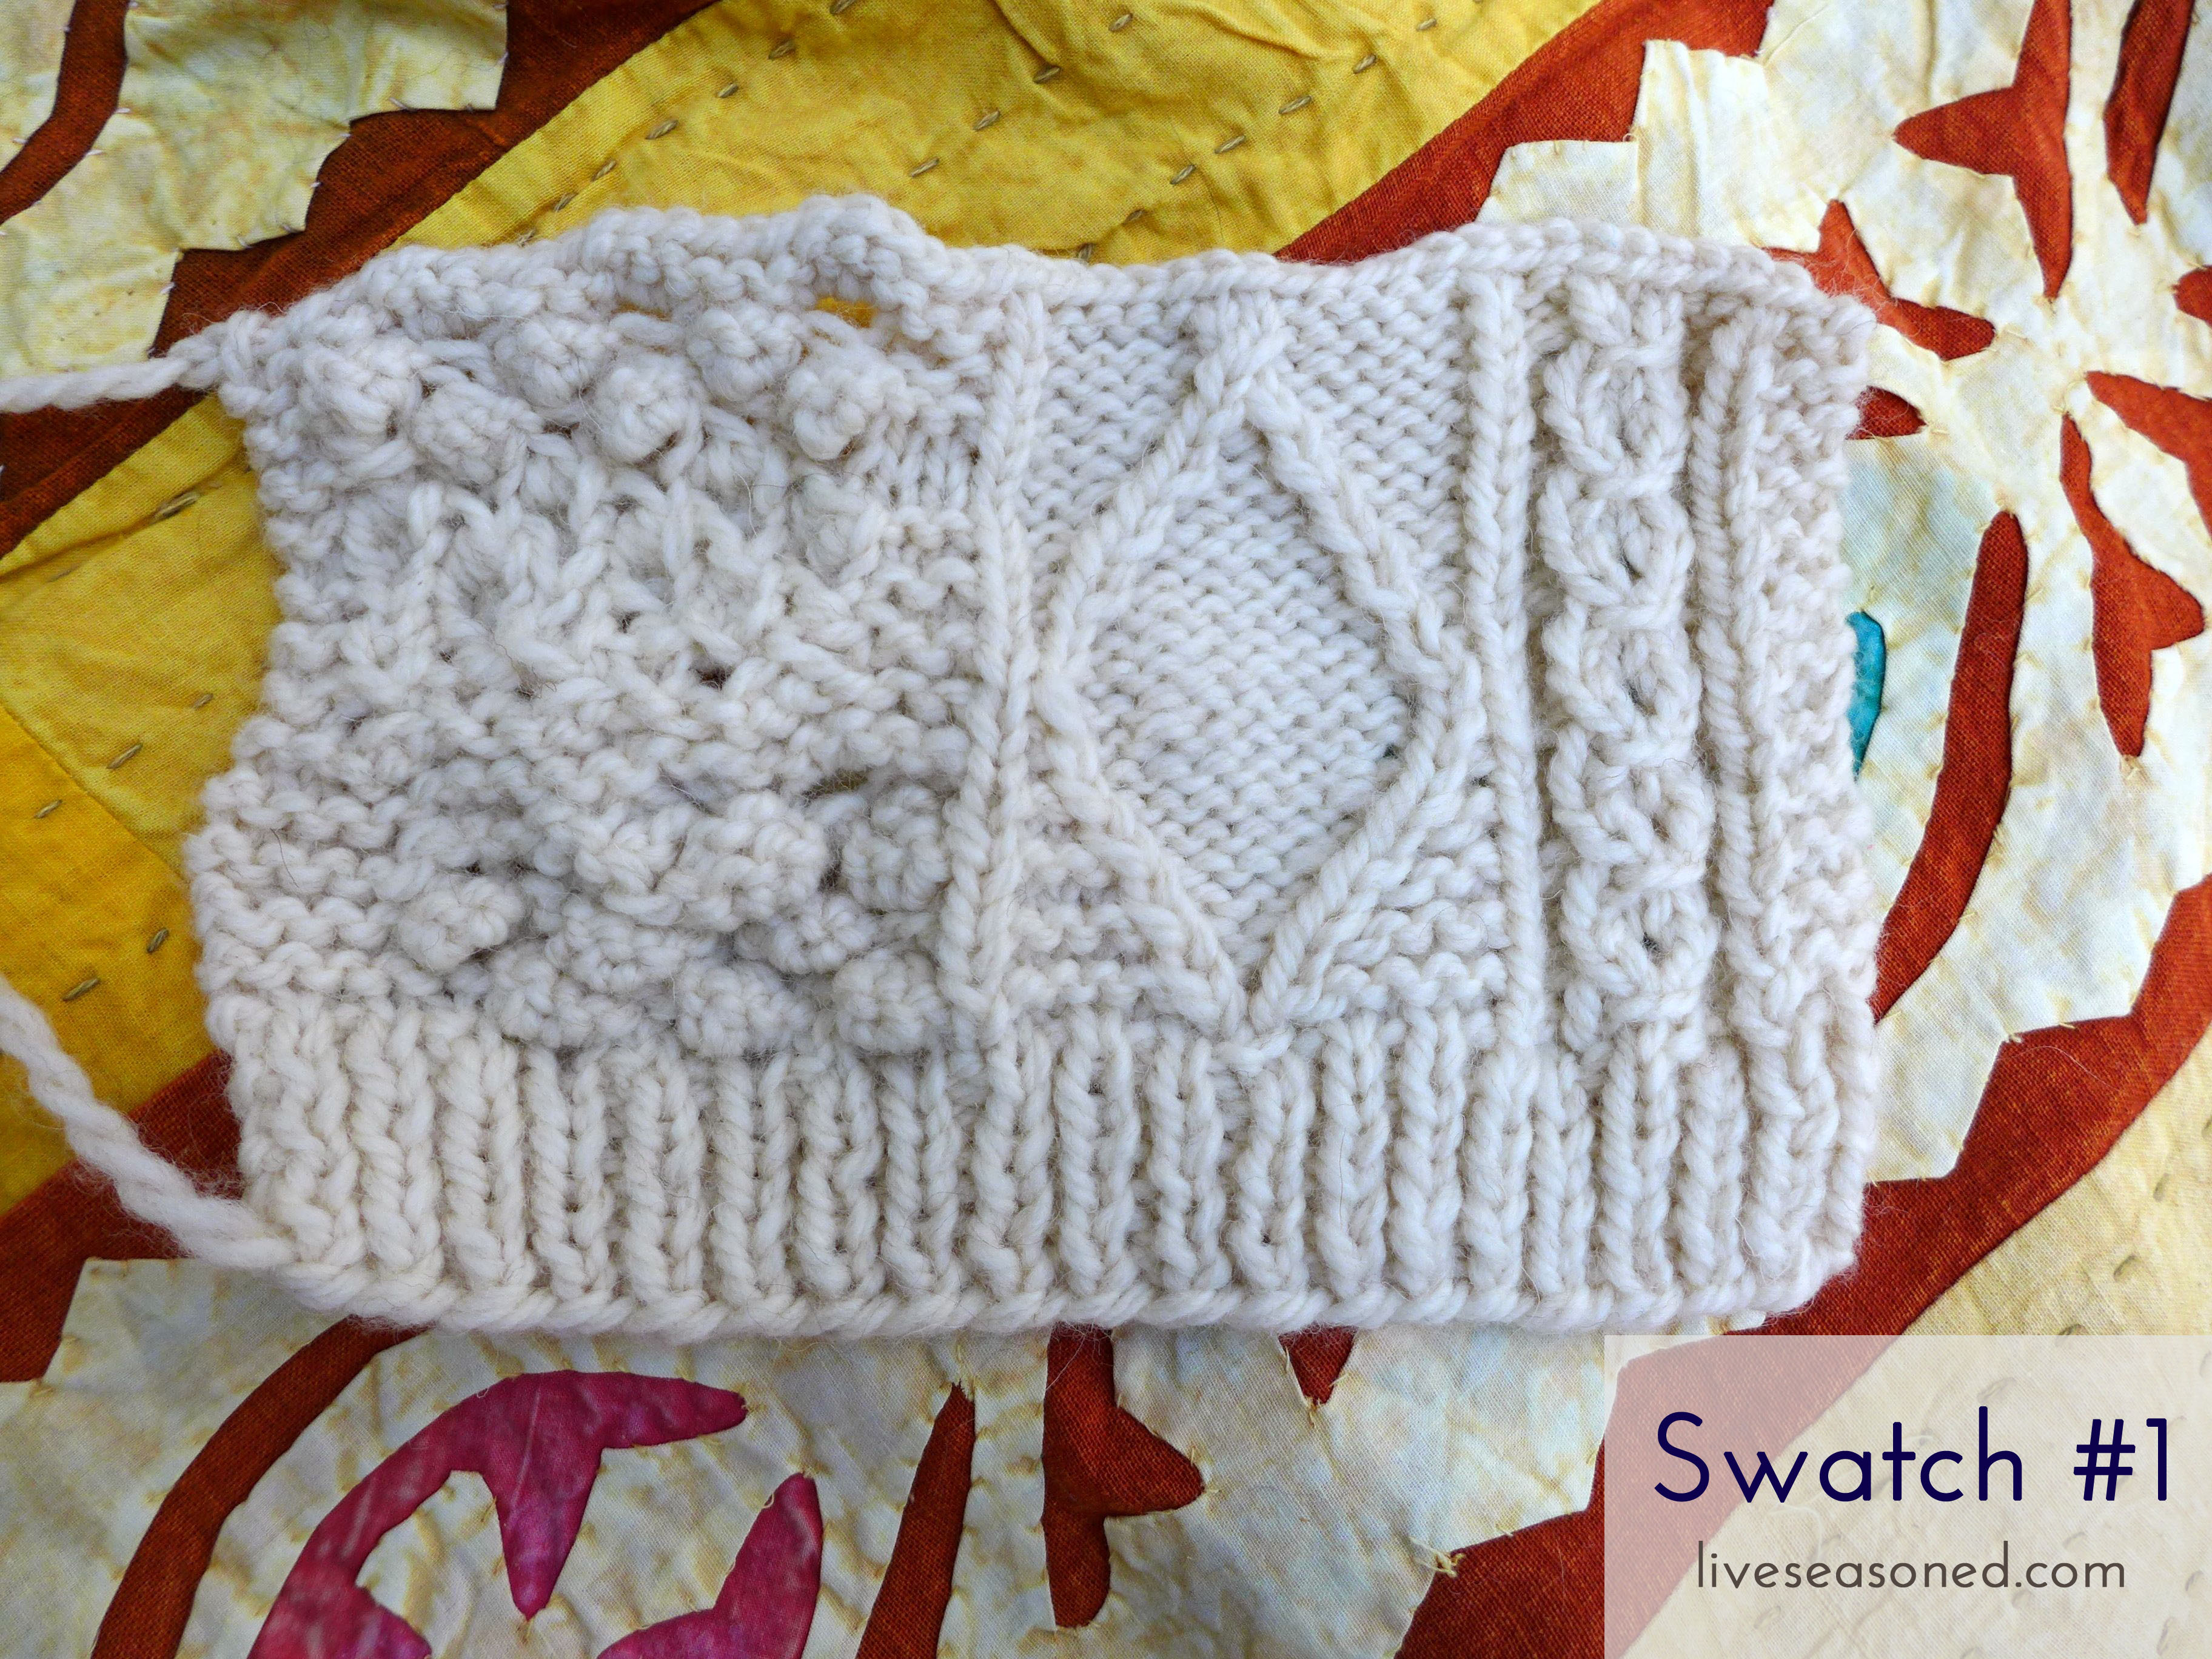
Swatch #1
Yarn: Cascade Eco ~~~ Needles: US9
This is the swatch where I worked out most of my stitch confusion, particularly the bobbles as you can see in the left panel. As mentioned above, the cables were easy, but the bobbles are a mess. I finally worked things out in the last few rows at the top of the swatch. You can also see that I made a mistake in Cable #2, using stockinette rather than garter on the top half of the diamonds. It’s good to see where you make those absent-minded mistakes in the swatches, so that you know where to be extra careful while knitting the sweater.
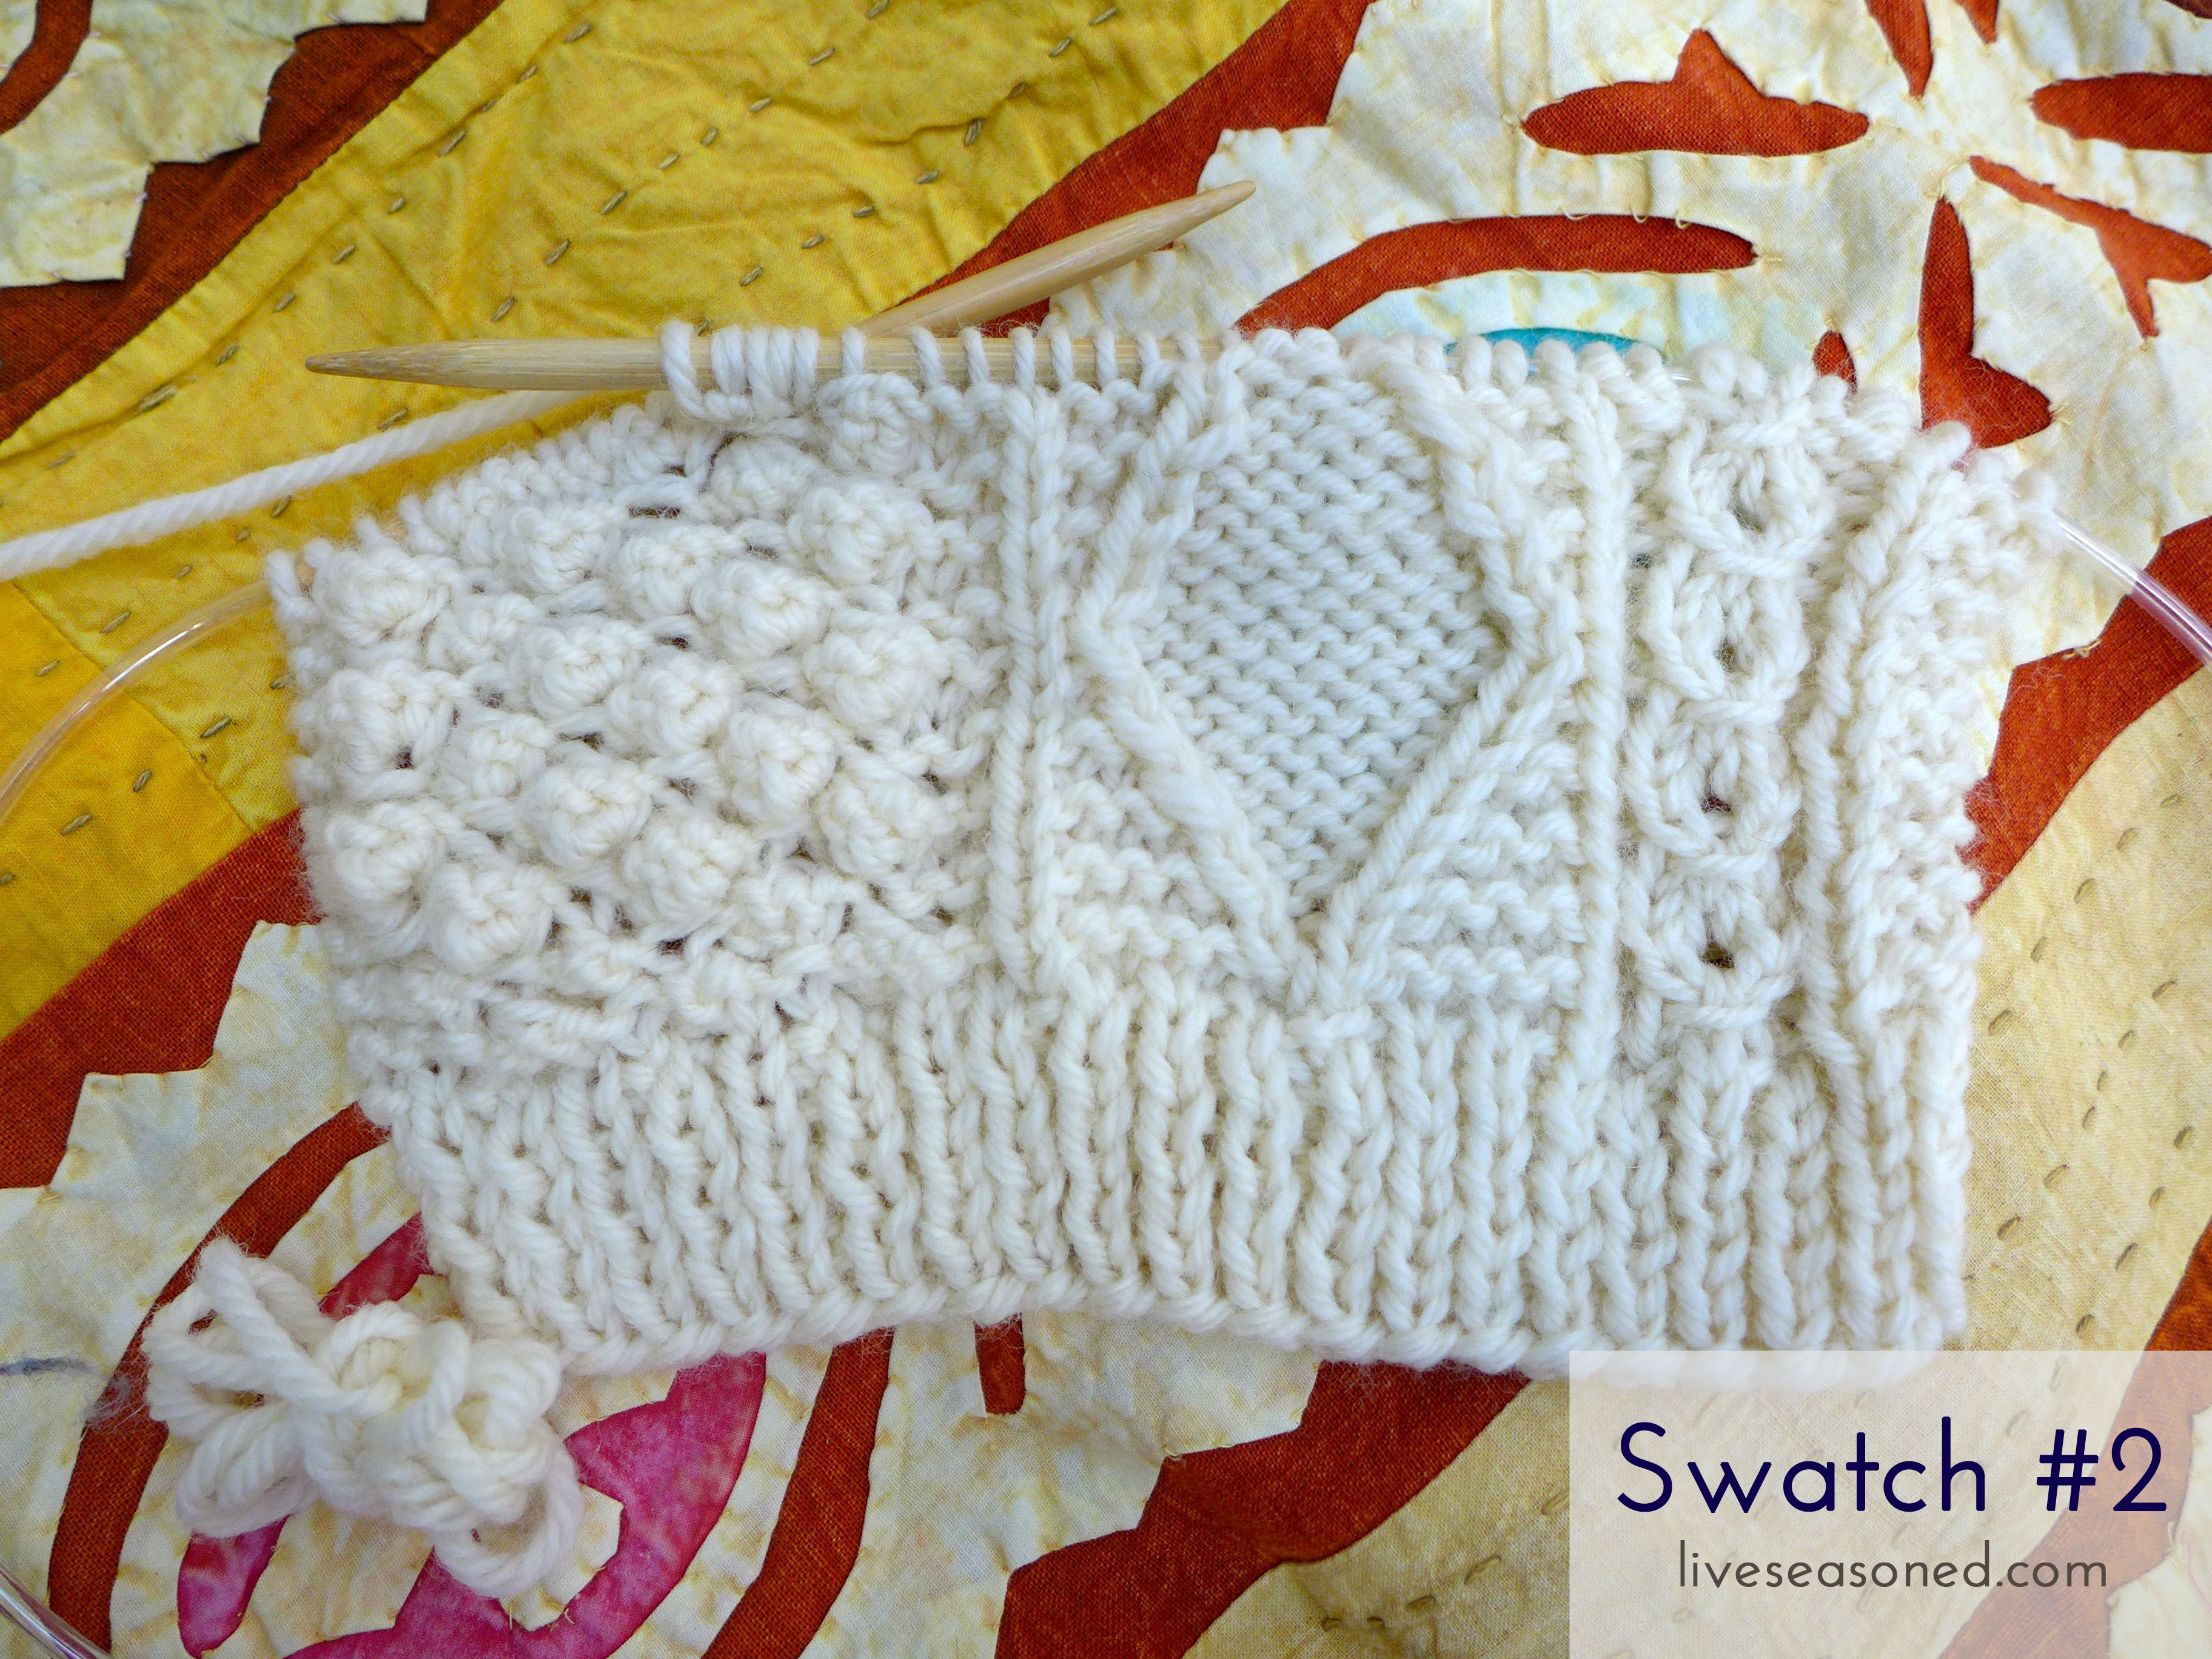
Swatch #2
Yarn: Knit Picks Wool of the Andes ~~~ Needles: US10.5
With the stitches worked out, this swatch was more about testing the second yarn and double-checking my notes to confirm the patterns.
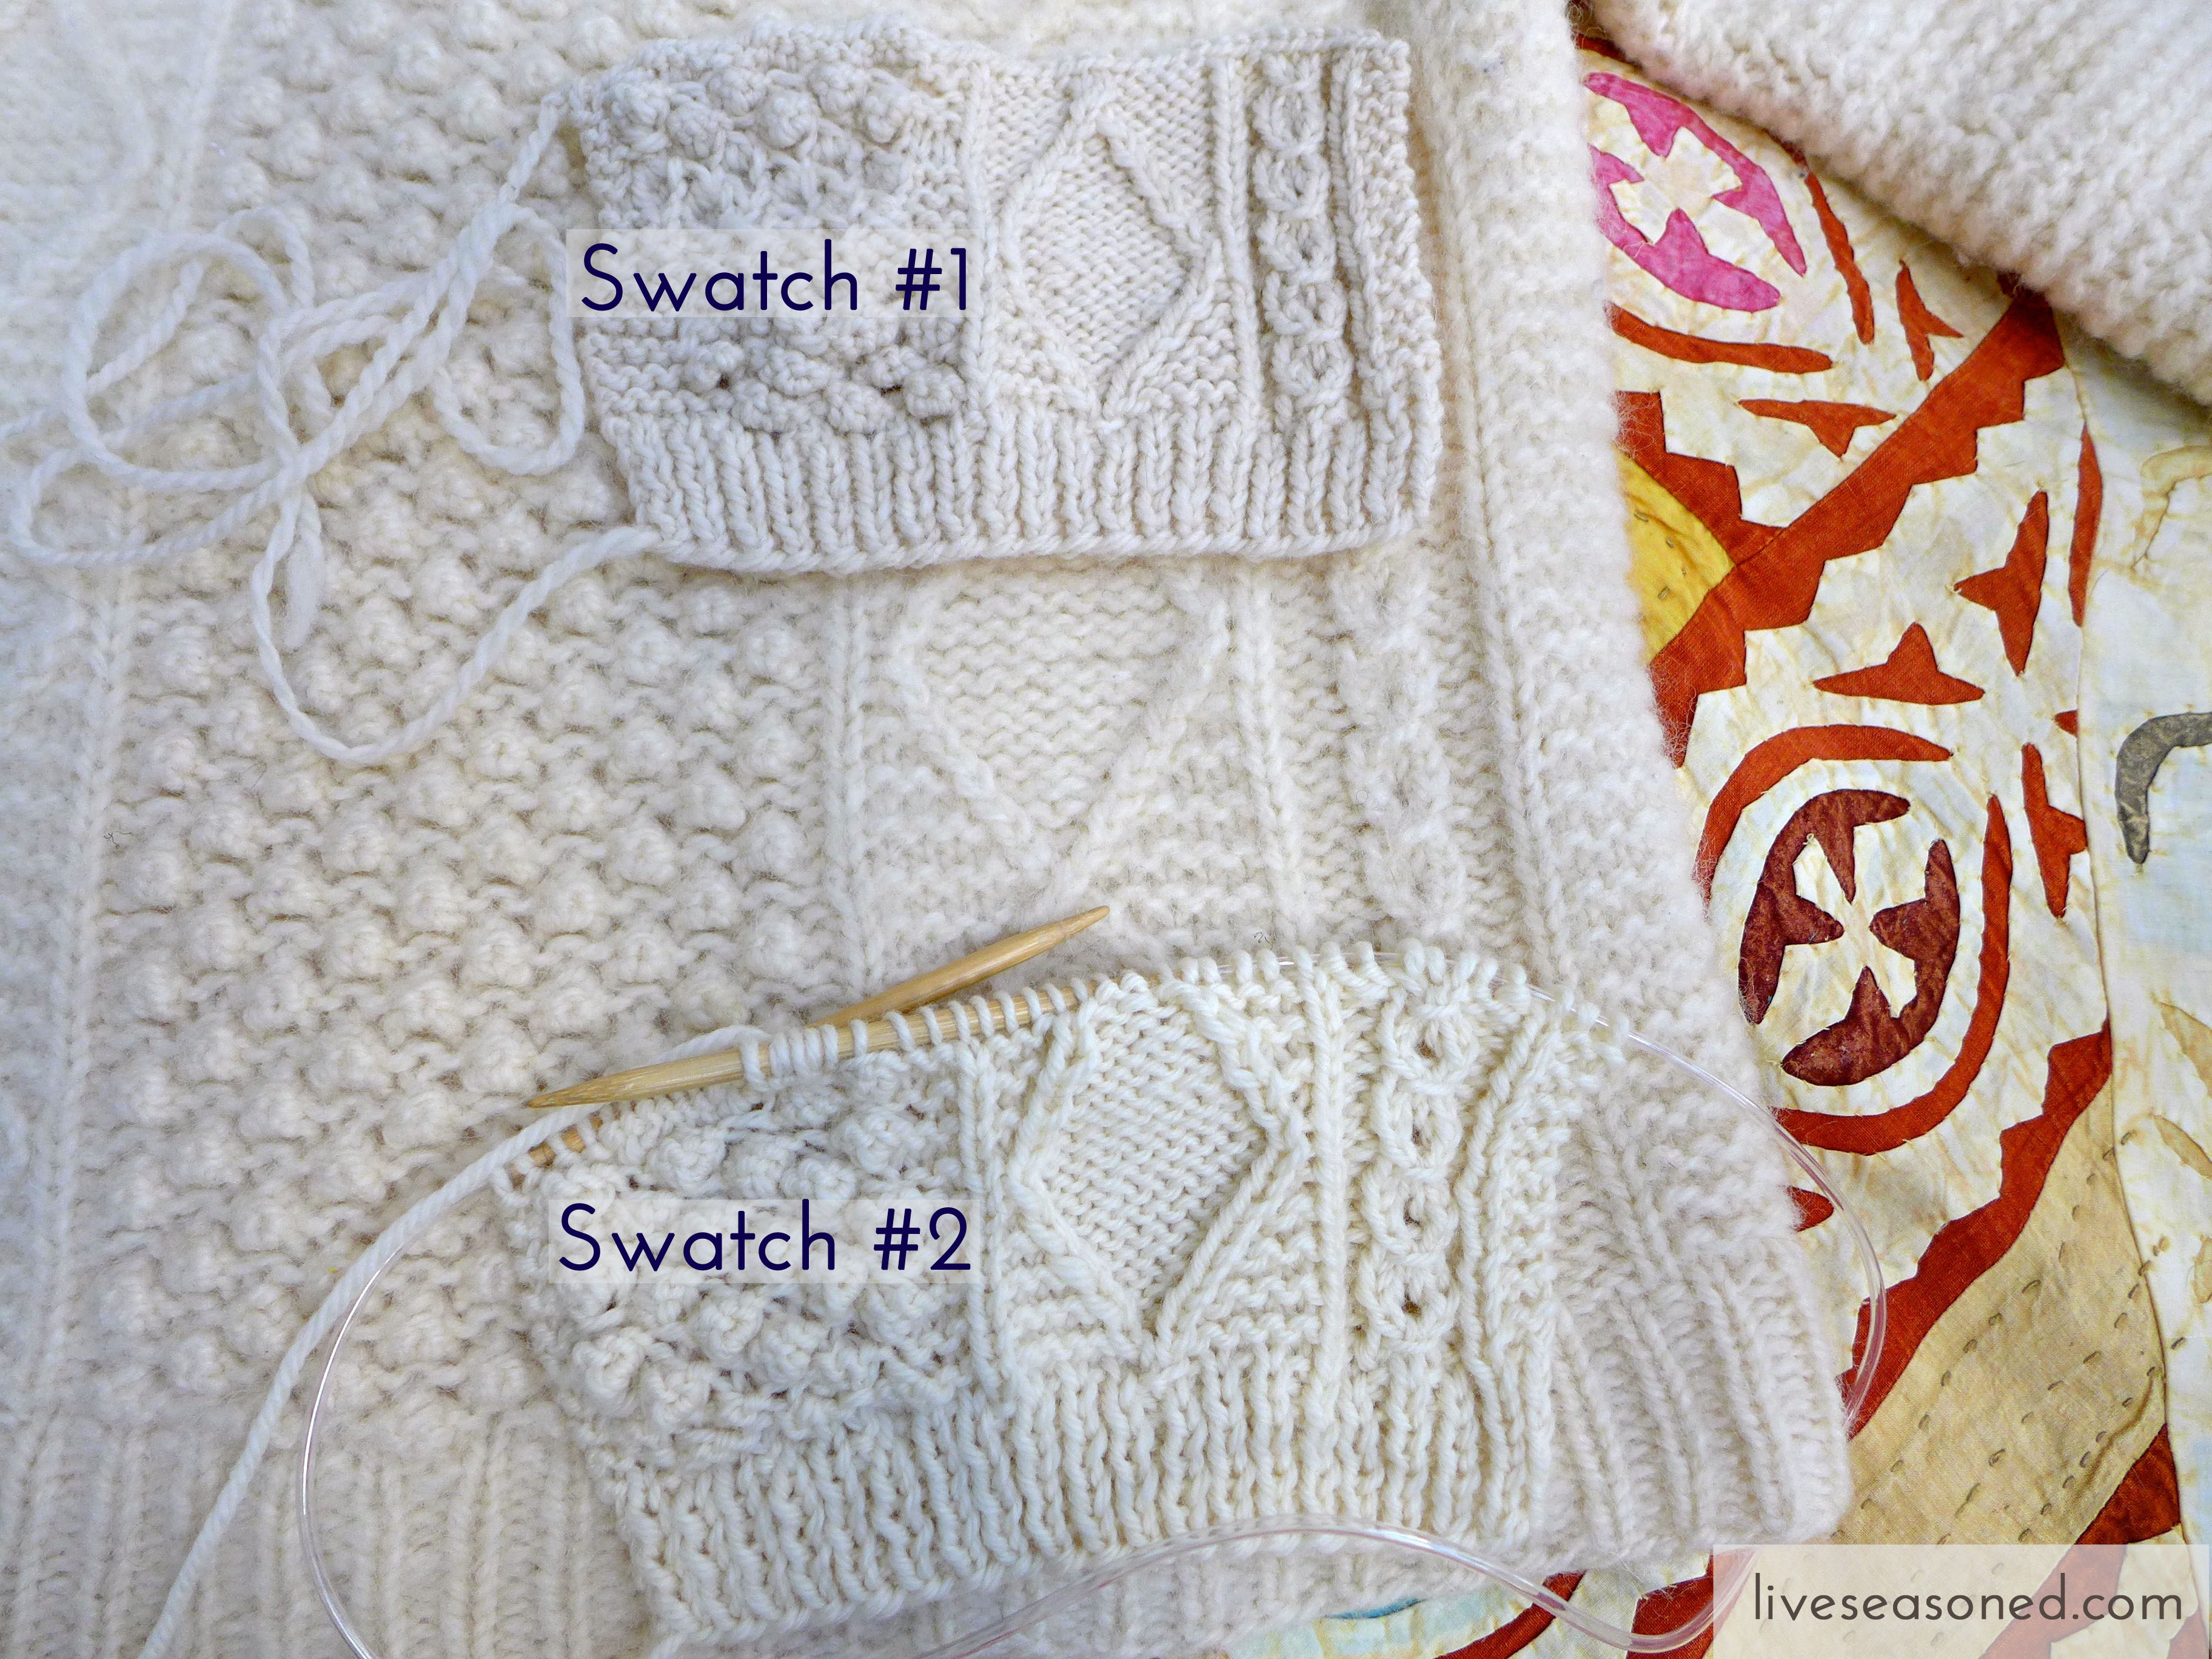
Putting both swatches on the sweater, a few things are apparent. The gauge (the size of the swatch over a standard number of stitches or pattern) of the first swatch is definitely too small for this sweater. The gauge for the second swatch is slightly better, but still looks to be on the small side, but the stitch patterns look like a perfect match!
What’s next?
It’s time to test the second yarn in a few more ways. First, before ruling out a swatch that is close to the final object, I’ll block it (more on this in the next post). If it seems slightly too small after blocking, then I’ll move up a needle size and see how that works. There’s a risk that it could make the knitting look too loose, but in this case the original sweater looks to have a more loose weave so that might be the ticket.
Here in SW Florida, wool sweaters are hard to come by. Would most of these projects work just as well with cotton and other fibers?