Make with Me : Baby Hat

At the beginning of the year, I encouraged our readers to “make with me“. In that post I shared a few of the many benefits that you may get from picking up a hobby, and I gave you a few simple suggestions for how to turn your hobby into a regular habit (that’s good for you!).

Previous posts in this series included:

~
little-heaume

(image source)

The list above contains a nice mix of projects, relatively simple sweaters for both kids and adults. A scarf, which is a great project because getting the right fit doesn’t matter! The god’s eye provides a no-knitting yarn project. And there’s an adult hat. To round out the mix, today I want to share one of my most favorite hats to knit for babies and toddlers.

Continue reading

Knitting Pattern : Seven Year Stitch

Knitting literally and figuratively takes up a lot of room in my life. You can find previous knitting posts here.

At the beginning of the year, I encouraged our readers to “make with me“. In the Make with Me series, I was sharing the projects that I was working on and/or finished in near-real time. That came to a sudden halt in March. Then, I started working on a few secret projects that really put a cramp in my ability to share. Today’s post is about one of those projects.


7yearstitch3b

I’m excited to announce that I’ve finally put together a self-published knitting pattern!

Continue reading

Make with Me : Be a Test Knitter

At the beginning of the year, I encouraged our readers to “make with me“. In that post I shared a few of the many benefits that you may get from picking up a hobby, and I gave you a few simple suggestions for how to turn your hobby into a regular habit (that’s good for you!).

If you follow our Instagram feed or have been a long-time reader, it’s no surprise that my primary hobby is knitting. I always have a project (or ten) in the works. While I don’t need the encouragement to knit more, I’m taking this resolution as a nudge to share more of my projects, in their many phases, on the blog. And if you’d like to find me on Ravelry, my username is winterfoliage.

~

live seasoned sweater - print res-3

Continue reading

Make with Me : Simple Kid’s Sweater

At the beginning of the year, I encouraged our readers to “make with me“. In that post I shared a few of the many benefits that you may get from picking up a hobby, and I gave you a few simple suggestions for how to turn your hobby into a regular habit (that’s good for you!).

If you follow our Instagram feed or have been a long-time reader, it’s no surprise that my primary hobby is knitting. I always have a project (or ten) in the works. While I don’t need the encouragement to knit more, I’m taking this resolution as a nudge to share more of my projects, in their many phases, on the blog. And if you’d like to find me on Ravelry, my username is winterfoliage.

~

rainbow4

Continue reading

Make with Me : Lace Scarf

At the beginning of the year, I encouraged our readers to “make with me“. In that post I shared a few of the many benefits that you may get from picking up a hobby, and I gave you a few simple suggestions for how to turn your hobby into a regular habit (that’s good for you!).

If you follow our Instagram feed or have been a long-time reader, it’s no surprise that my primary hobby is knitting. I always have a project (or ten) in the works. While I don’t need the encouragement to knit more, I’m taking this resolution as a nudge to share more of my projects, in their many phases, on the blog.


make_with_me3

Make with Me : Lace Scarf

This pattern is Goldfinch by Andrea Mowry of Drea Renee Knits.

Continue reading

Weekend Project : Knit a Stocking (or three!)

We’re republishing this today as a reminder to take it slow, get cozy, and complete a craft, but I couldn’t bring myself to delete Katie’s original text because it talks about the *first* Christmas as a family of three – wow so much has changed! <3 Here are all the Christmas decoration DIYs BTW.

Ok, maybe three’s a stretch, but we’re all a bit crazy at this time of year. This is the first year we’re celebrating Christmas morning as our own little family of three, and we didn’t have stockings. Knowing that my original plan was to do something fun and easy. Maybe buy a couple pair of festive knee high socks or some cozy looking wool men’s socks and use those for this year. But a month or so ago I ran across some bulky yarn, decided it was perfect for stockings and worth just testing the waters.

liveseasoned_w2015_stockings7_wm

It’s easy to fall down the knitting hole, but with so many other balls in the air, I didn’t want this project to consume me. So I picked up two skeins of yarn (one red and one white) and wanted to see how long it would take to knit a single stocking and how far the two skeins would go. When I knit that first stocking in a weekend using only those two skeins, it was a no-brainer to knit the other two!

If you have ever knit a sock before, this is a project that you can easily finish in a weekend. If you’ve never knit a sock before, then this project may take you a little bit longer, but knitting big is such a great way to learn some new sock-knitting skills, and I include links to some of my favorite resources in this post. Plus, a common problem for a first time sock knitter is finishing that second sock and/or getting it to match the first; you won’t have that problem here!

liveseasoned_w2015_stockings16_wm

Whenever I hear “knit stocking” the one thing I worry about is how dense the stitches are. If you have a loosely knit stocking, then as soon as it’s filled with treats, the stocking will stretch and you’ll get that holey look between the stitches. I wanted to avoid that, and one of the easiest ways to do it is to knit with a bulky yarn on needles that are a few sizes smaller than what you would normally use. That’s exactly what I did here, and it produced a nice dense fabric that doesn’t stretch out of shape too much when filled.

liveseasoned_w2015_stockings19_wm

Resources

  • Cast on. Turkish Cast On
  • Increasing. M1L and M1R
  • Short Row Heel : basic instructions or a video with a method for eliminating the little holes that are common at the start and finish of the heel. This heel is really easy to make, and the holes are so (soooo) minor, so I don’t want that to deter you. I have my own way of dealing with them by picking up extra stitches and then decreasing them later, but since you’re knitting a simple stocking that won’t be worn, you could easily just use some extra yarn to stitch the hole closed – if you even get them!
  • I cord bind off. You will have to use the cable cast on before starting the I cord bind off.

Materials

  • Yarn : Loops & Threads Cozy Wool in fleece (white) and claret (red)
  • Needles : US 10, you will need either one long circular for the magic loop method or a set of double pointed

liveseasoned_w2015_stockings15_wm

Instructions

You will be knitting these stockings from the toe up to the cuff. I’m going to give you a set of generic instructions that can be used to knit any stocking of this size, and then I’ll give you the details for the specific patterns you see in the photographs. I’ll assume that your stitches are split evenly between two needles (i.e. that you’re using the magic loop method).

  • Cast-on. use the Turkish method to cast-on 20 stitches (ten on each needle). Fortunately, these instructions show you how to do the Turkish cast-on with exactly that number of stitches, so you can follow it step by step.
  • Begin Knitting. When I start a sock, I like to knit one and a half rounds before starting my increase rows (I always think that knitting across the first needle creates a single row for the tip of the toe, and then knitting a complete round creates my first official round – I may be crazy).
  • Start the increase rows (this comprises the toe area of the sock). Round 1 (increase round) : k1, M1L, knit to the last stitch on the first half of the stocking, M1R, k1. Repeat over the stitches on the other half of the stocking. Four stitches added. Round 2 : knit all stitches.
  • Continue repeating rounds 1 and 2 until you have 44 stitches on your needle.
  • Knit the foot. Knit straight for 27 rows.
  • Knit the heel. Use the short row method to knit the heel. You will work the heel over the 22 stitches that are on one half of your sock. When making the stockings, I wrapped 7 stitches on each side of the heel, leaving 8 unwrapped in the middle.
  • Knit the leg. Once your heel is finished, knit the leg of the stocking for 53 rows.
  • Bind off using the i cord method. This is a great technique for binding off the stockings because it creates a strong final row that will not stretch out over time (unlike a ribbed cuff) and as you’ll see, it also seamlessly morphs into a loop for hanging your stocking. The only problem is that you may not be able to really stretch the cuff if you want to sneak an over-sized present in the stocking! The other problem that arises is that the loop for hanging your stocking will be placed where ever you start the i cord bind off. Thus far we have been knitting the stocking in the round starting from one side of the sock; you don’t want your loop on the side, but on the back of the stocking. Before beginning the i cord bind off, knit 11 stitches so that you are now positioned at the center back of the stocking. You will work the i cord bind off over three stitches, just like these instructions (lucky you!).  Once you come to the end of the cuff, don’t cast off the three i cord stitches, rather continue knitting an i cord for 21 more rows.
  • Finish your stocking. Sew the live stitches of your i cord to the start of the i cord row ~ creating a seamless-looking i cord band with a loop in the back. Weave in all loose ends. Hang your stocking and cross your fingers that it doesn’t get filled with coal!

Santa’s Sock Stocking Detail

  • Knit the toe. Use the basic instructions from above, casting on with the white yarn and using it to knit the toe area.
  • Knit the 27 rows of the foot in red.
  • Switch to the white yarn and knit the heel.
  • Knit 40 rows of the leg in red.
  • Switch to the white yarn and knit 11 rows in seed stitch.
  • Knit one complete round plus 11 stitches to position the start of the i cord at the back of the stocking. Finish with the i cord bind off.

Striped Stocking Detail

  • Knit the toe. Use the basic instructions from above, casting on with the red yarn and using it to knit the toe area.
  • Begin the stripes. Switch to the white yarn, but don’t cut the end of the red yarn (you can carry both colors up the length of the stocking, drastically reducing the number of loose ends that you’ll have to weave in). Knit five rows in white. Knit five rows in red. Repeat this pattern for 25 rows (ending with five white rows and just before starting a red row). Knit two rows in red.
  • The heel area. I like to work the heel in the middle of a stripe so that there aren’t any funny color switches immediately before or after the heel. Continuing to use the red yarn, knit the heel. Once the heel is complete, knit three more rows with the red yarn. When looking from the front/top of the stocking you should see the five red rows of the stripe pattern.
  • Knit the leg. You are now at the start of a white stripe. Continue working the five row stripe pattern for 50 more rows.
  • You are now at the top of the stocking. Knit 11 more stitches to position the start of the i cord at the back of the stocking and continue using the red yarn for the i cord bind off.

Snowflake Stocking Detail

  • Knit the toe. Use the basic instructions from above, casting on with the white yarn and using it to knit the toe area.
  • Knit the 27 rows of the foot in red.
  • Switch to the white yarn and knit the heel.
  • Knit the 52 rows of the leg in red (not the 53 listed above!).
  • Switch to the white yarn. Knit one round plus 11 stitches to position the start of the i cord at the back of the stocking. Work the i cord bind off.
  • Finish the stocking by embroidering a snowflake design into the side of your stocking. I make a very simple design using a backstitch. I decided to embroider the snowflake because I wanted it to have six points (like in nature), but it’s hard to find and/or to design a knit snowflake pattern with points rather than eight. As for other embroidered embellishments, the skies the limit! I added a line of running stitch around the toe and heel areas. You could add number of snowflakes, varying their size and shape.

liveseasoned_w2015_stockings1_wm

If you knit a stocking, we would love to see it! Leave us a comment below or tag us on instagram @liveseasoned. Happy knitting or happy rushing around buying those last minute presents ~ either way, we hope you have a great weekend!


Sweater Season

It’s sweater season! … at least for a day. Oh fall, you fickle thing.

I wanted to share the details on two sweaters that I’m excited to start rotating into my wardrobe this season.

Bohus Cowl

First up is the Bohus-inspired cowl neck sweater. It’s from an issue of Vogue Knitting, but lucky for you, the pattern is now available as a free download from their site!

Live Seasoned sweater progress-17

If you don’t know much about Bohus sweaters, it’s worth going down that rabbit hole and learning about these beautiful designs.

Continue reading

WIPS III

Happy Monday! … or should I use a question mark after that phrase? I’m never sure.

Today I wanted to summarize some of the projects that I’m working on at the moment.

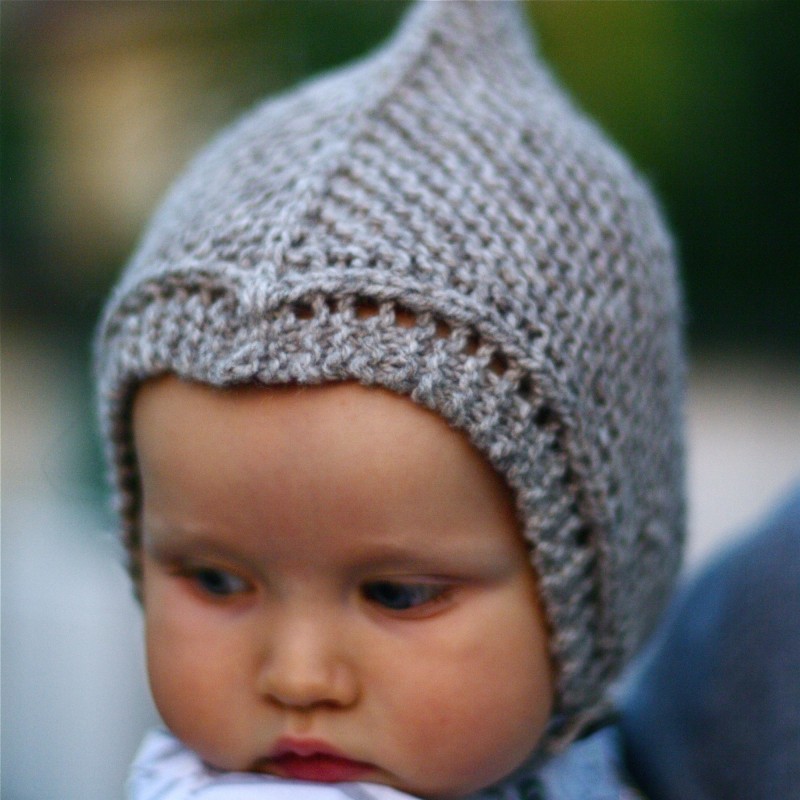
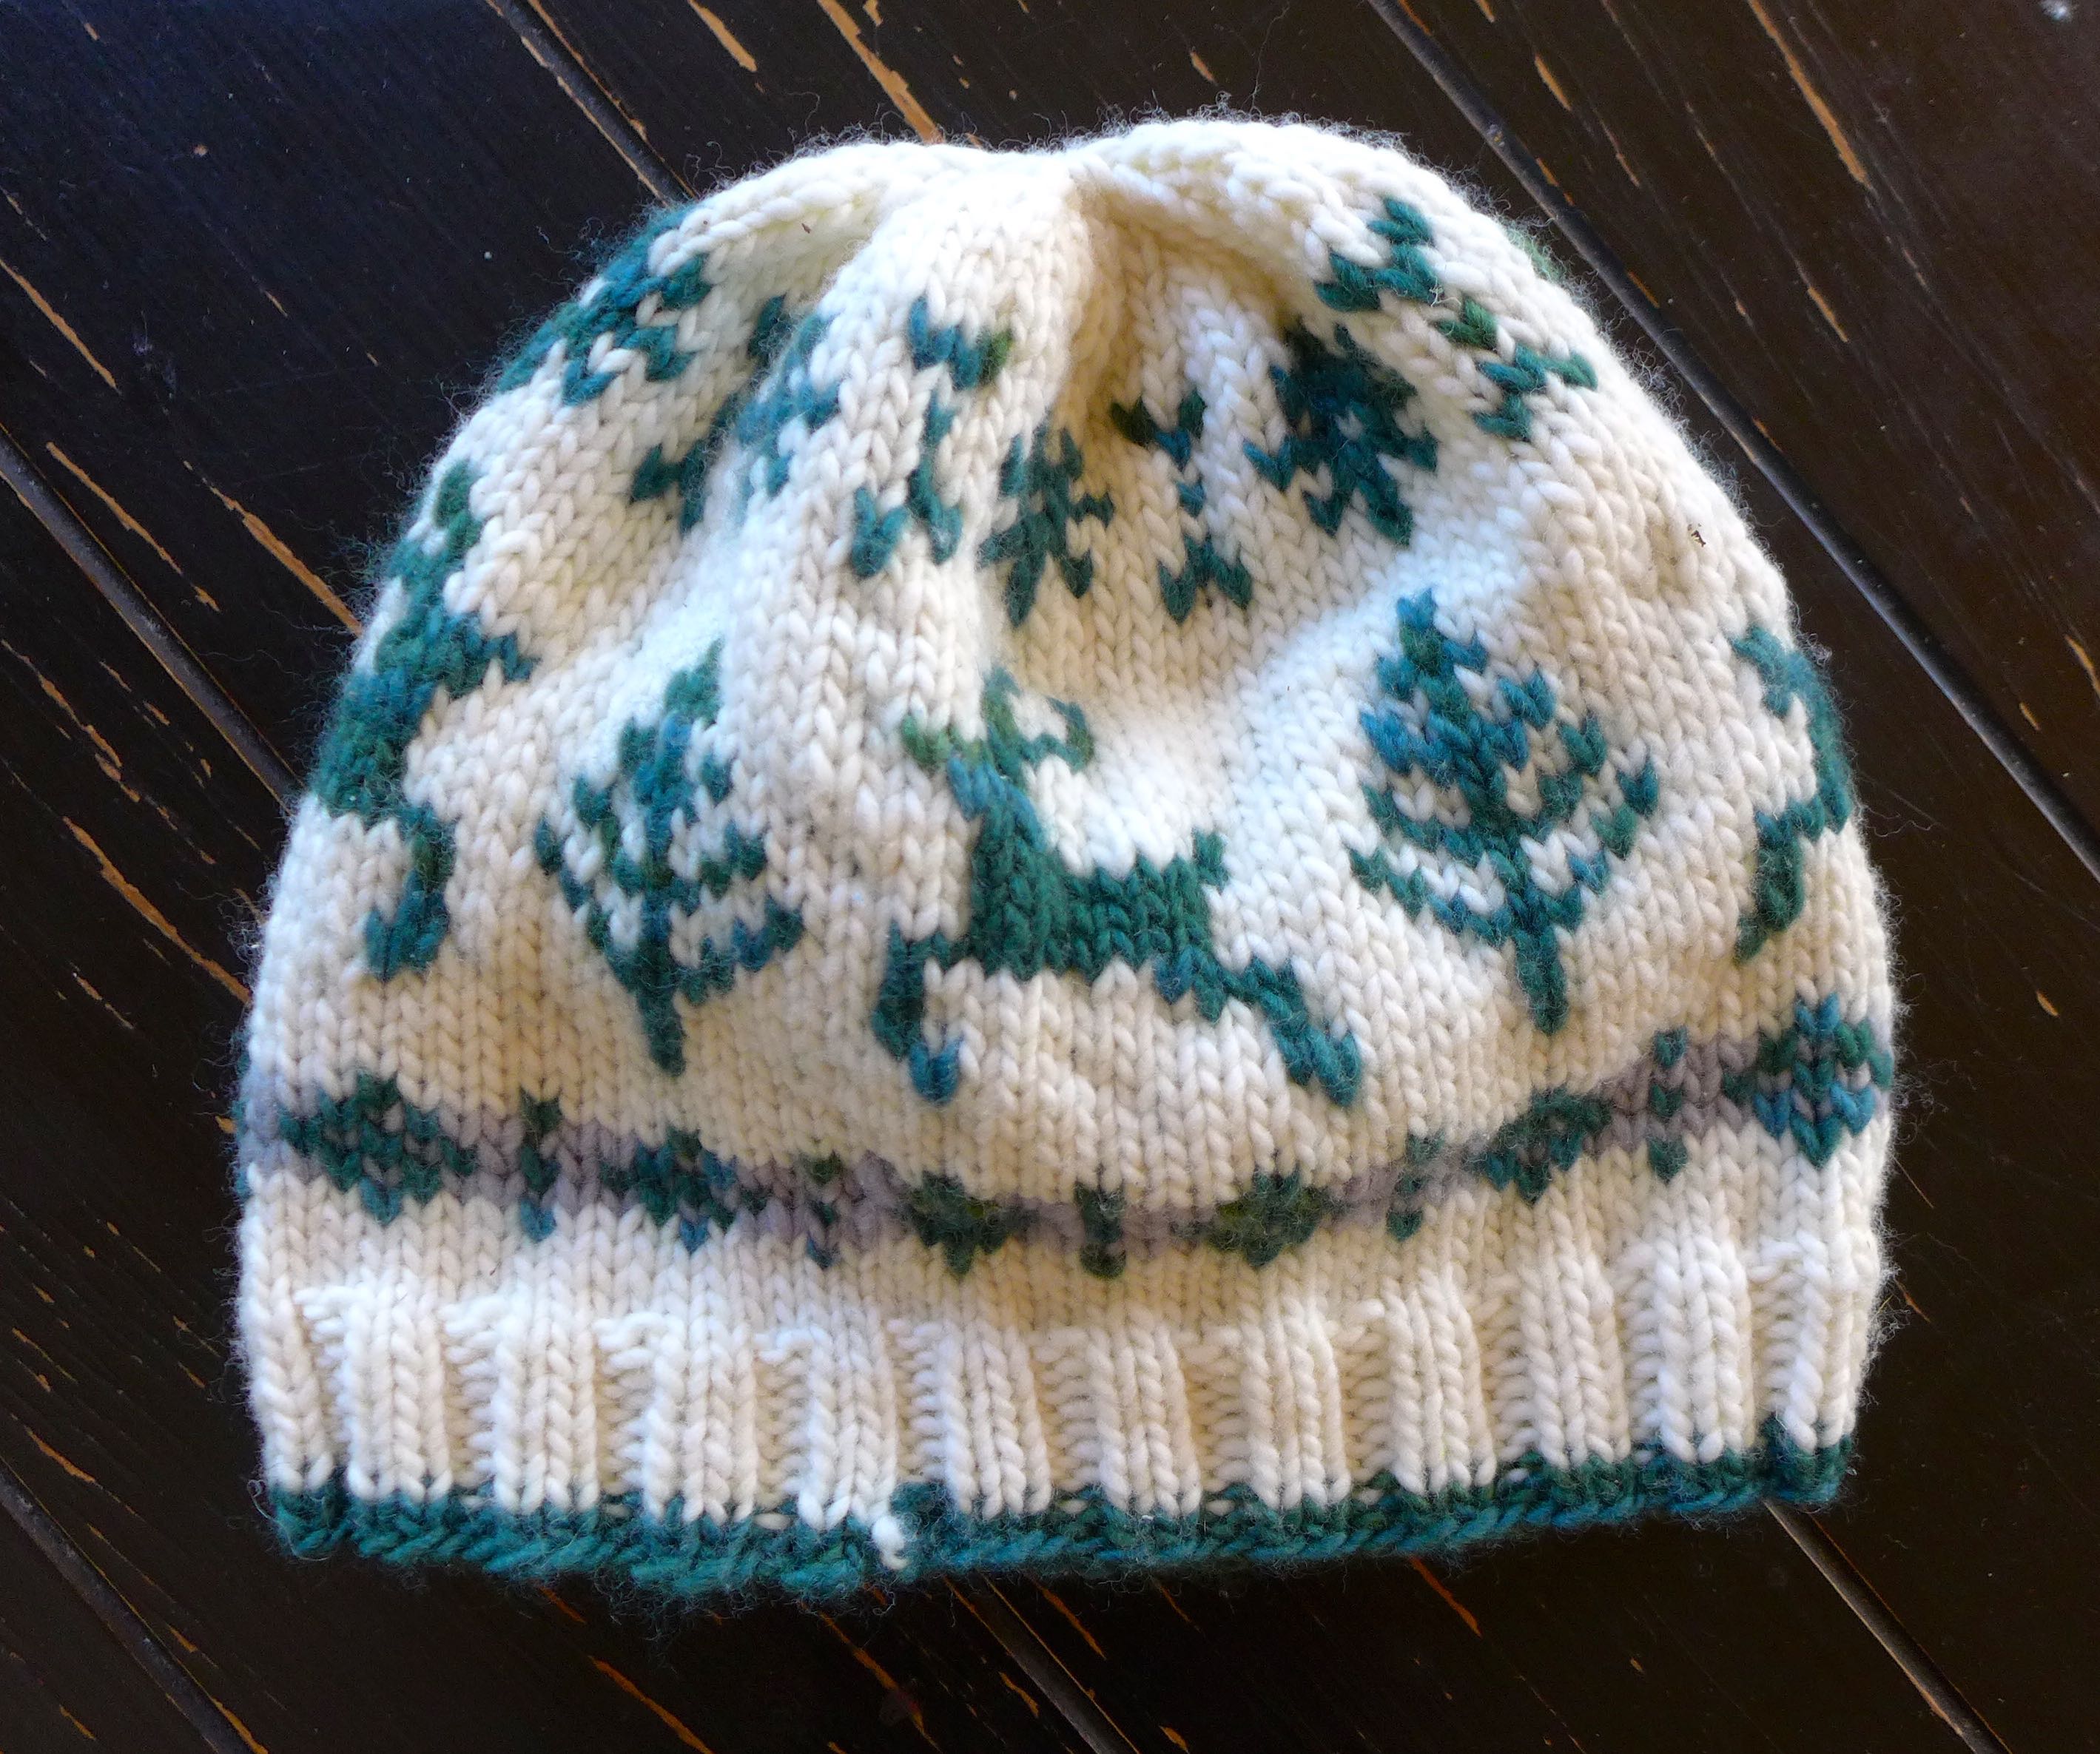
It’s been about a year since I’ve done one of these posts, and looking back at that post made me realize that: 1. I would like to get better at doing these posts more regularly (I find it inspiring to see what people are working on and it’s nice to see some progress shots rather than just the polished and finished pieces), and 2. I have to get better at following-up on the projects that I share. For example, the hat from the last post turned out so good (I wear it all the time!), but the mittens are still in their unfinished state, which is sad because I know that once they’re done I’ll use them all of the time.
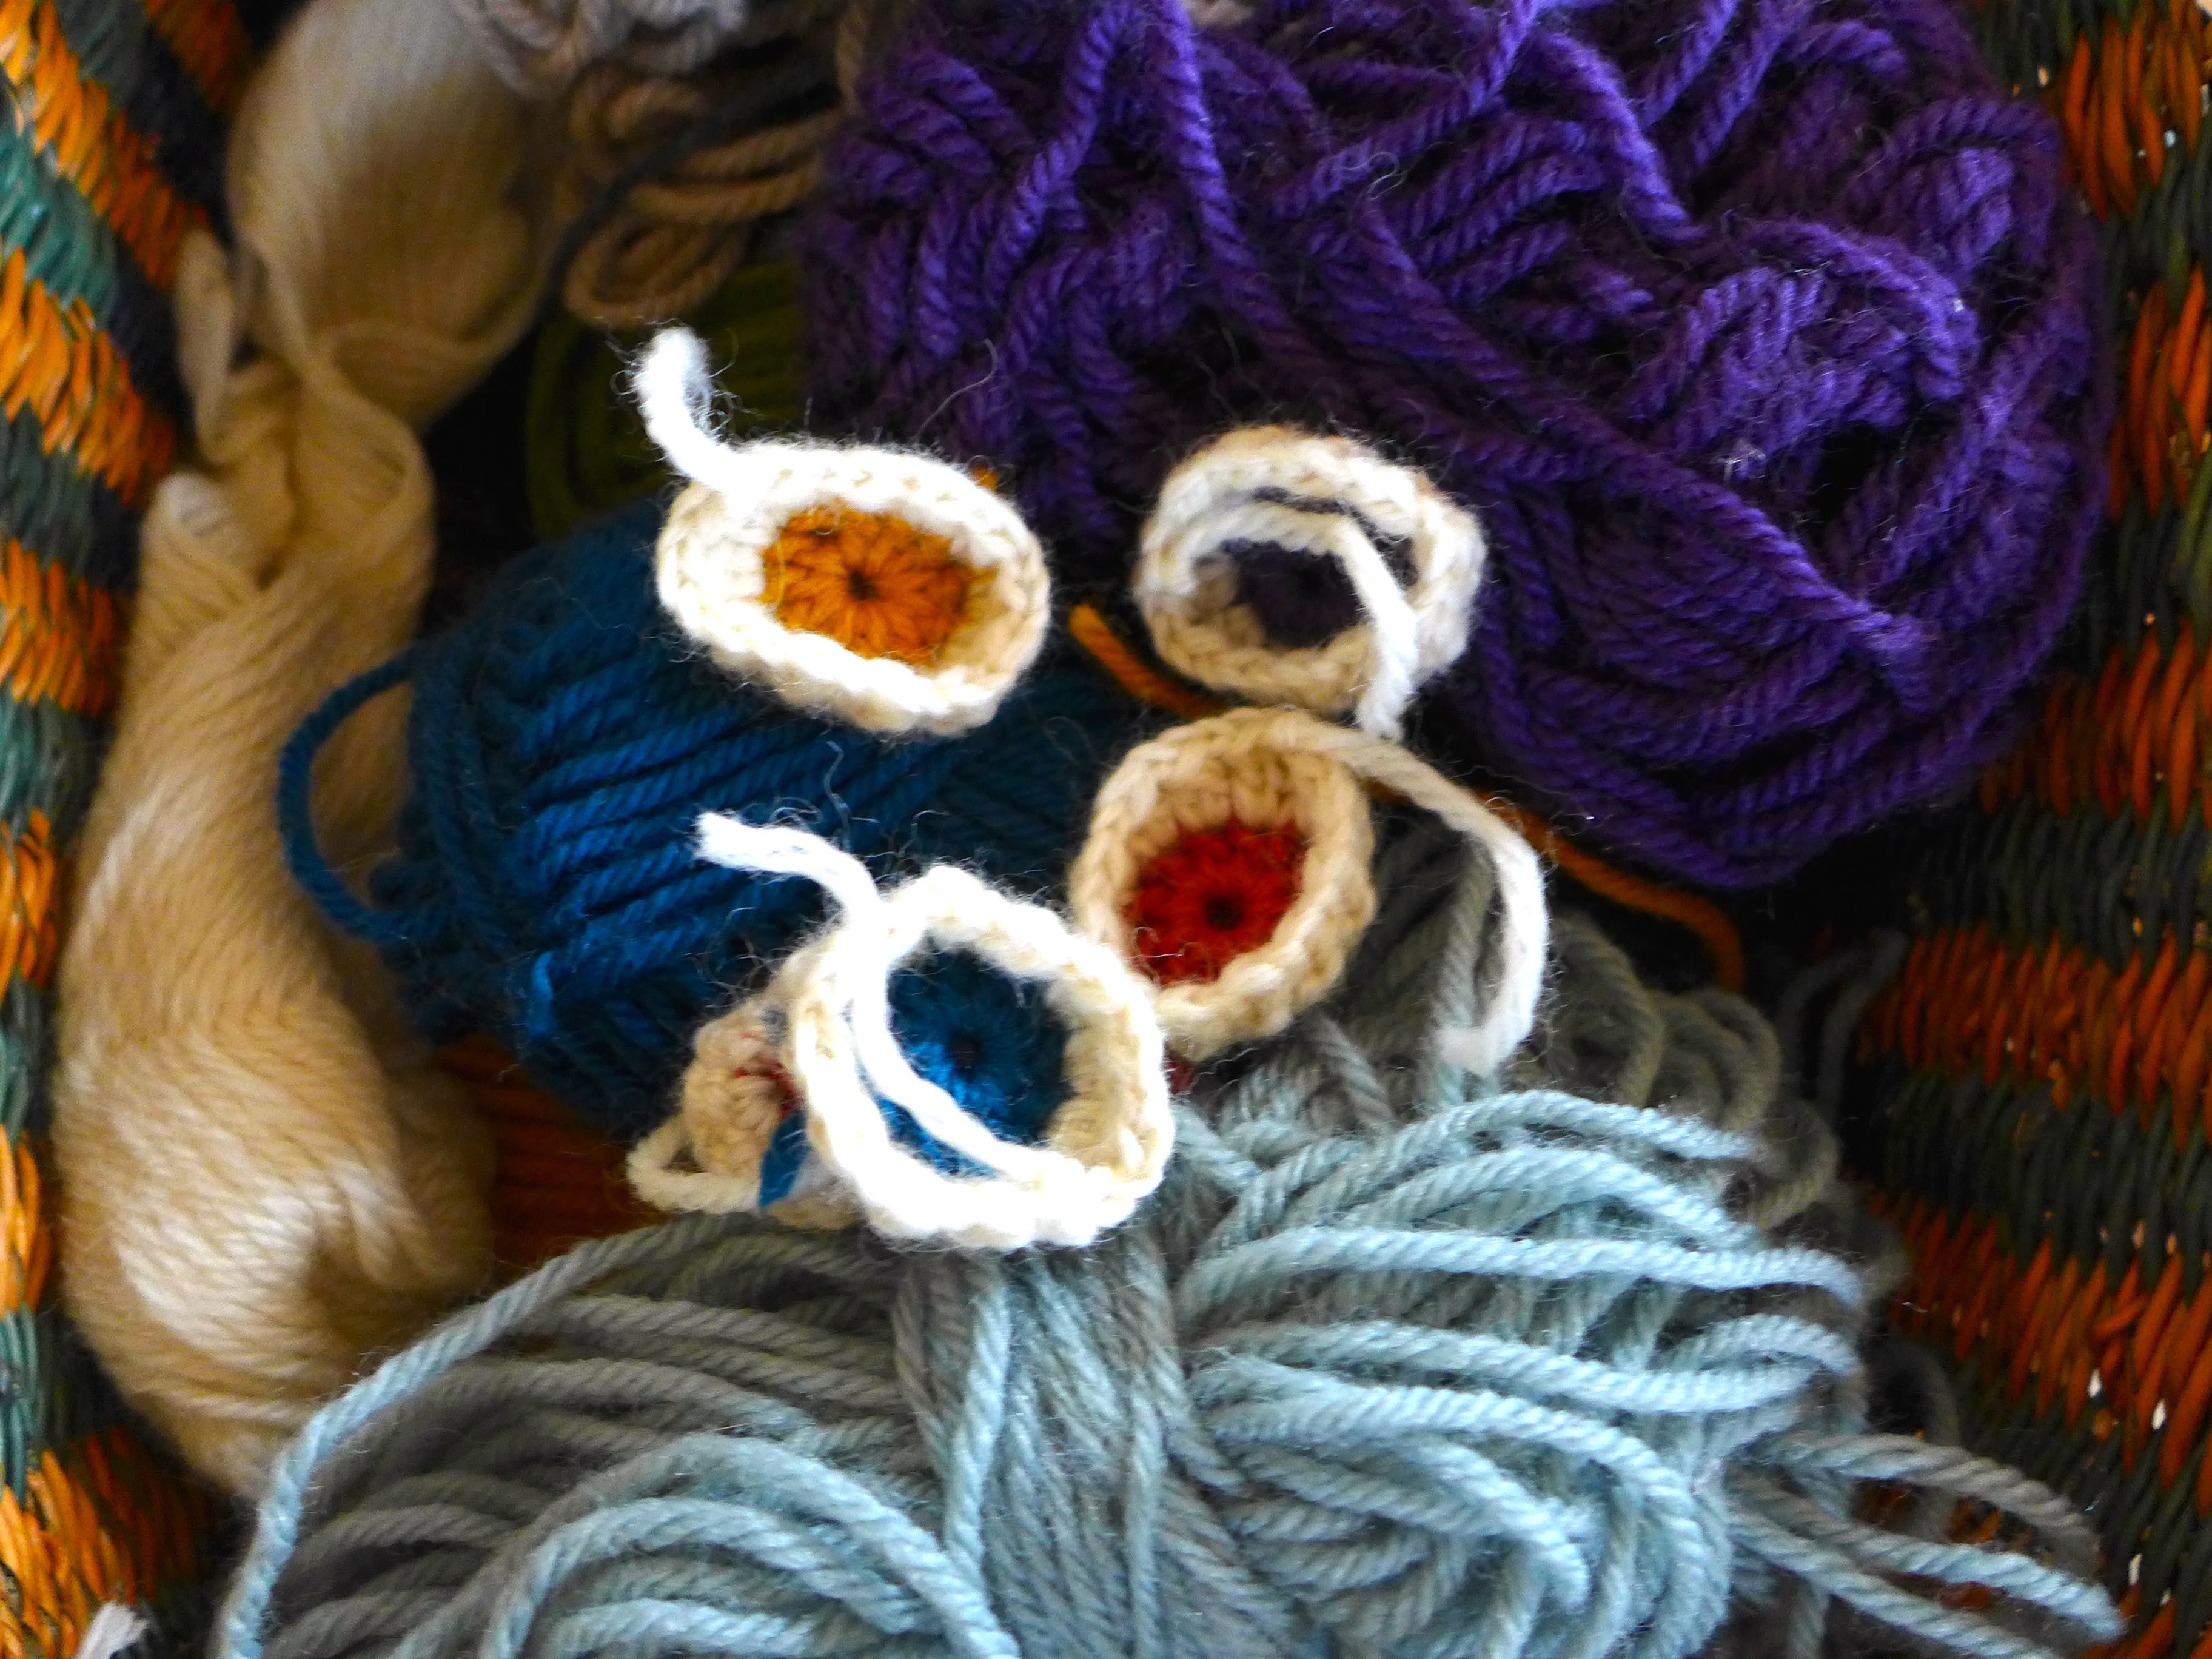
{Weaving}

WIPS_march2017b

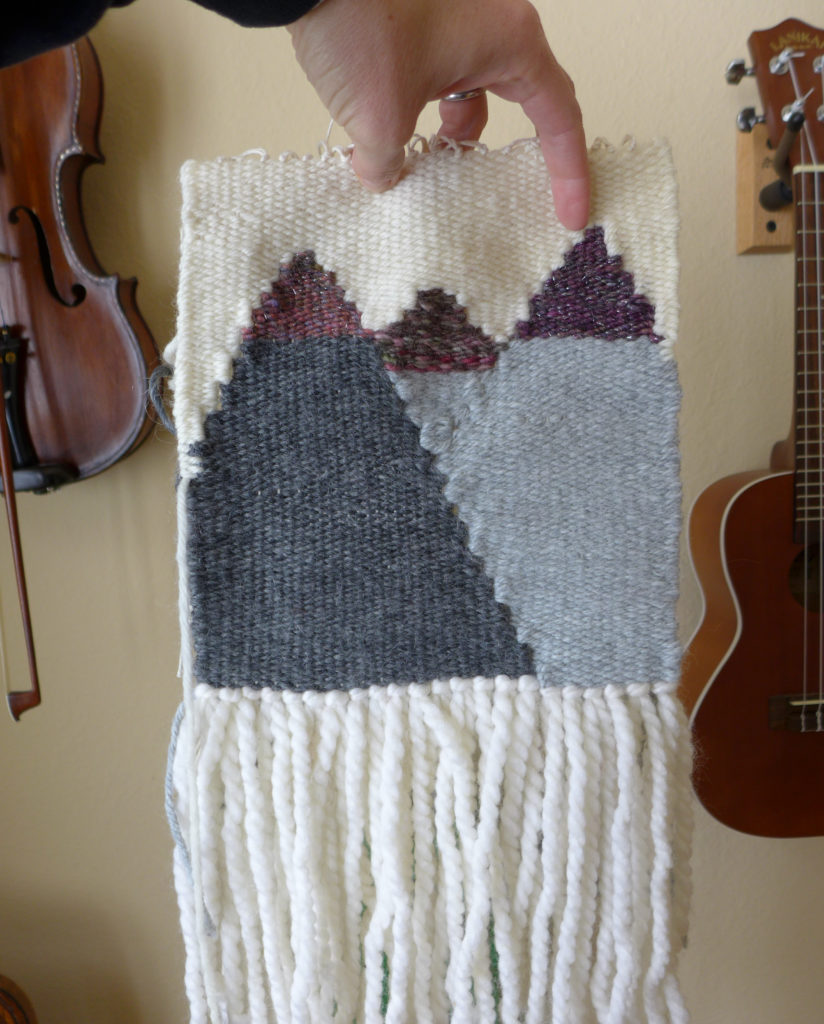
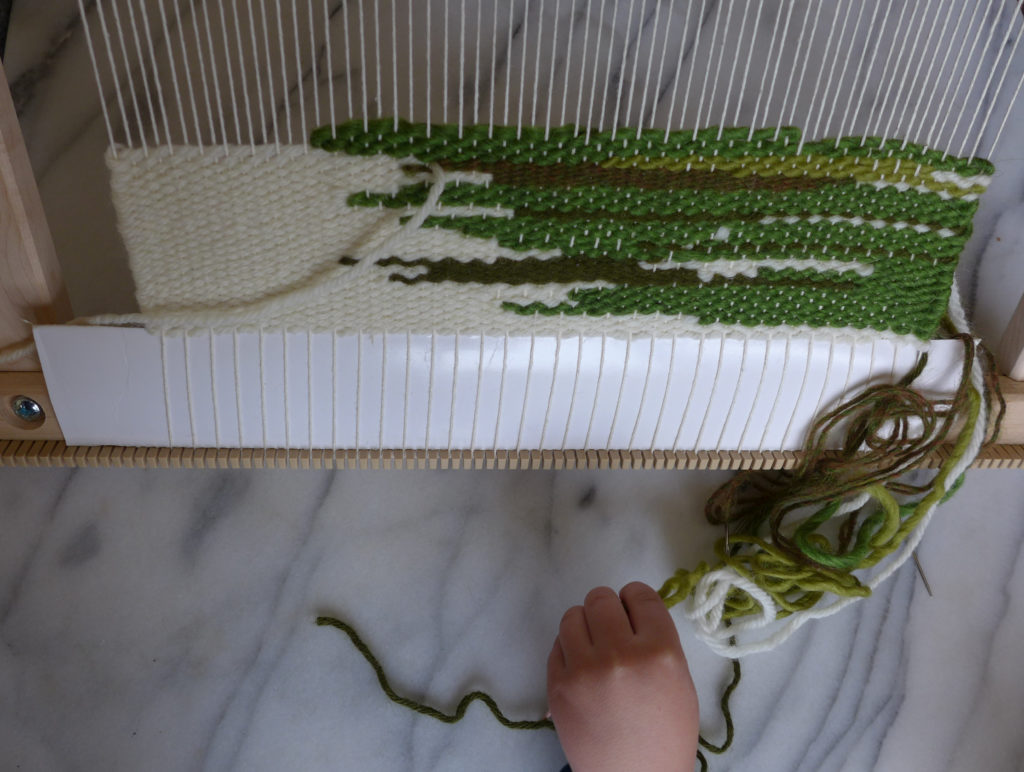
First up is the weaving! My dad gifted me this table/lap loom for Christmas, and I love it. I like the challenge of this art form – thinking about the “picture” I want to create, wether it’s mountains, abstract trees, or just a free-form burst of color. I’m also really happy to have a use for all of the odd bits of yarn that are left over from previous projects.

The other fun side-effect from learning this new craft is that now my eyes are open for examples of weaving everywhere! I’ve become obsessed with project updates from other weavers on Instagram. I fell in love with this huge weaving while shopping (and want to recreate something like it for one of our walls – imitation is the greatest form of flattery, right?).

And as you can see in the photo below, Amax has taken an interest in my new projects, so I’m excited to get him started with a little cardboard frame loom ASAP!
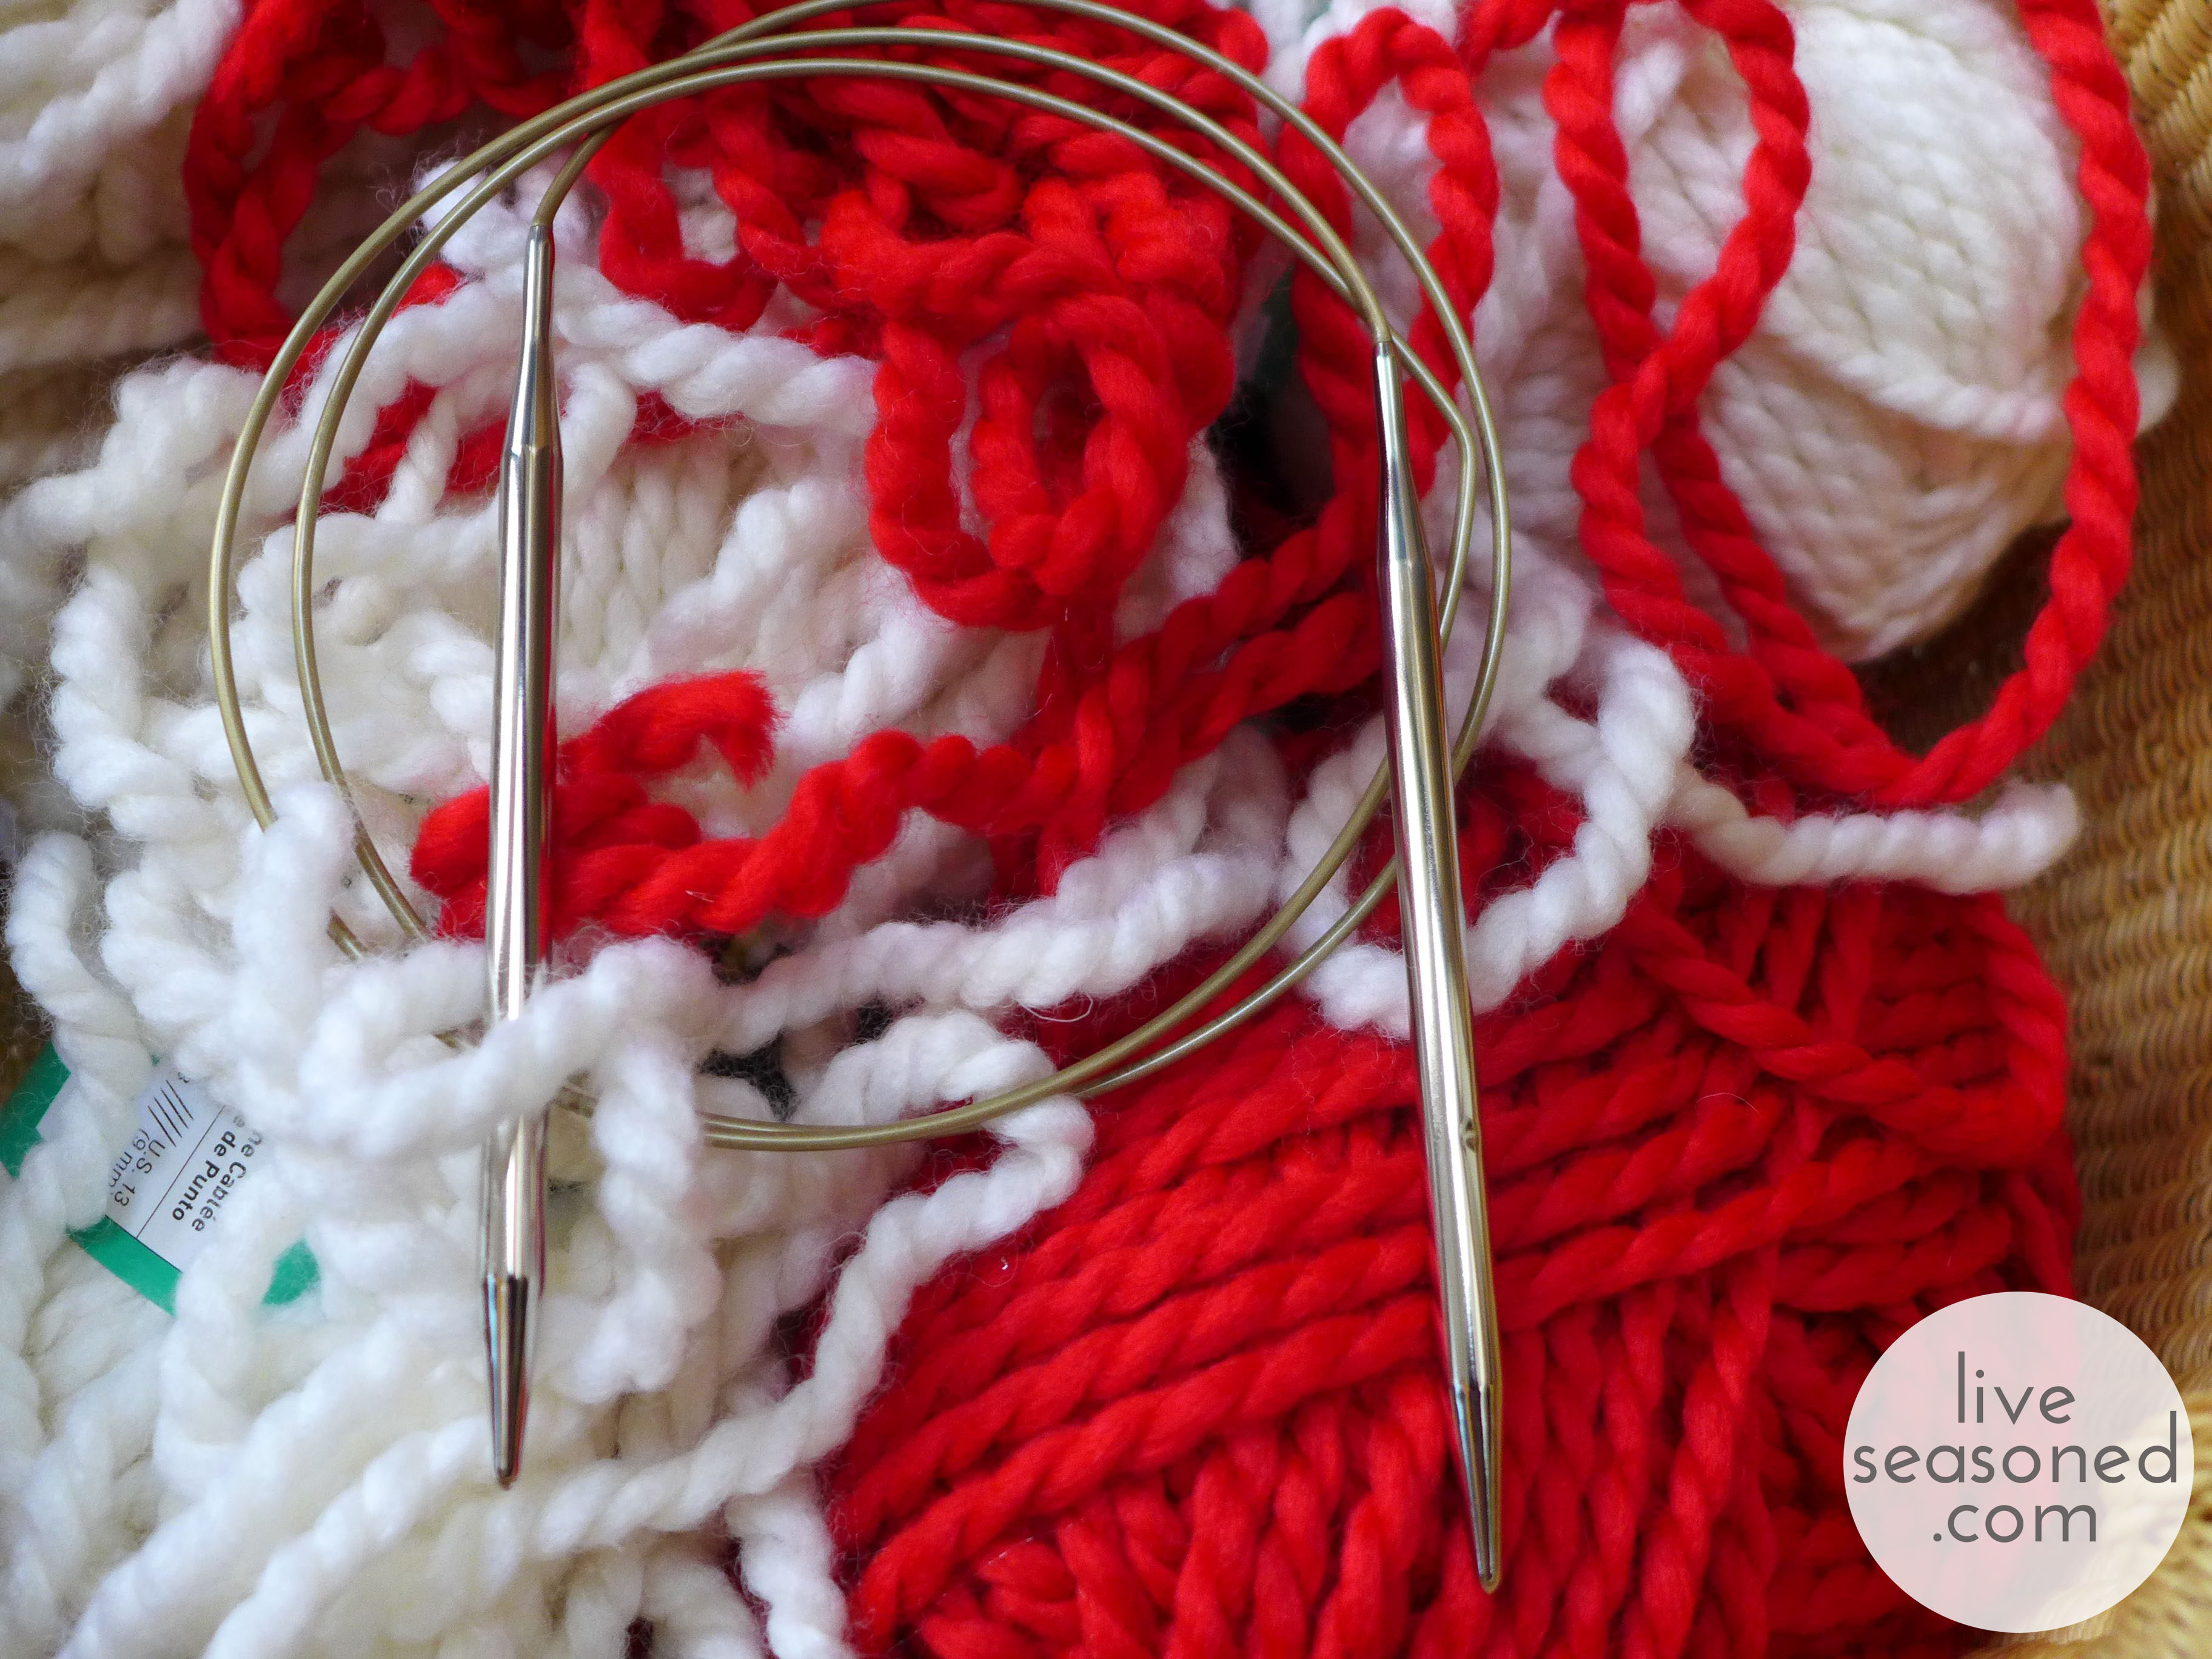
WIPS_march2017

{Knitting}

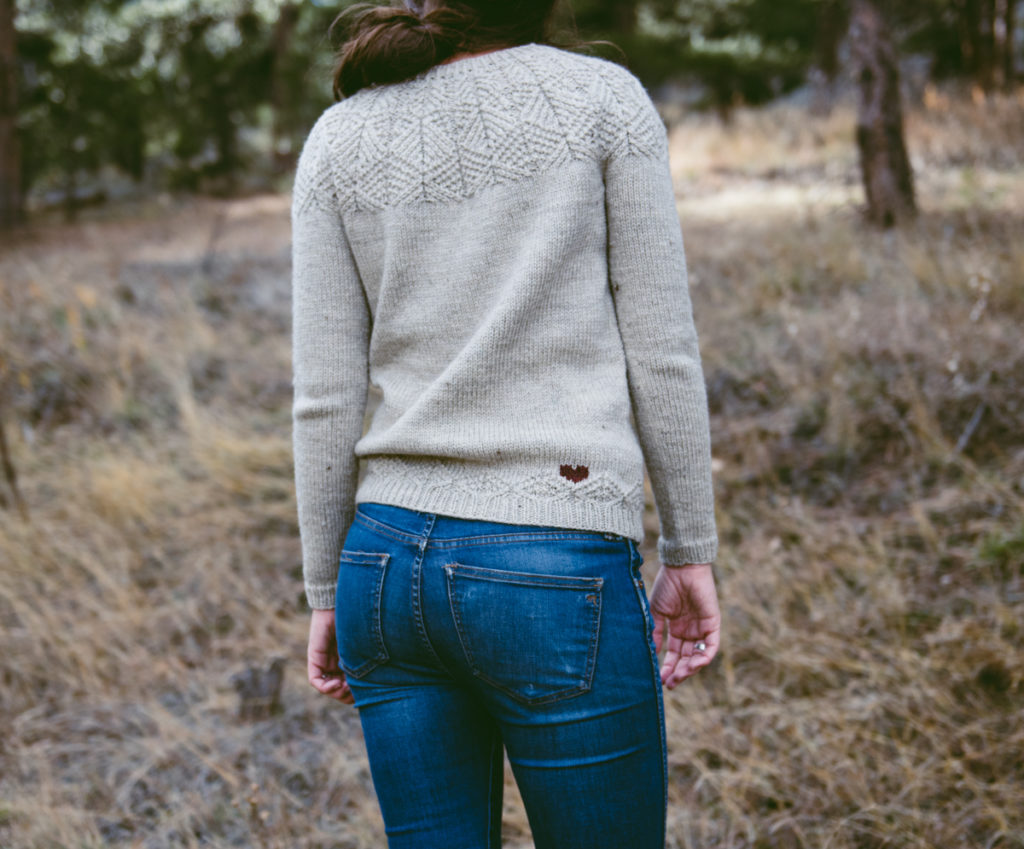
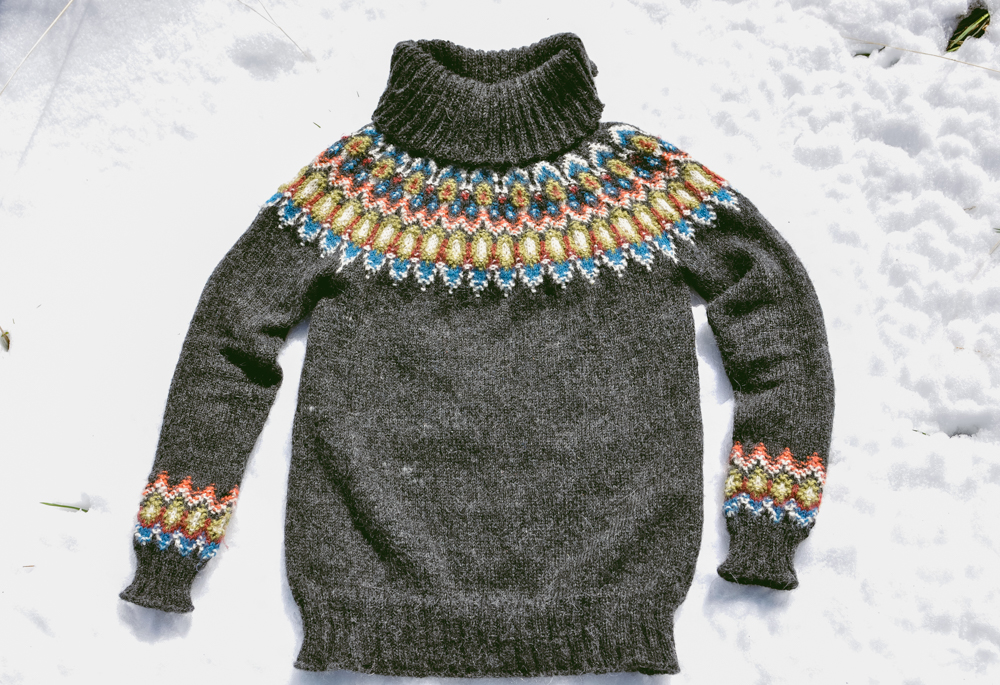
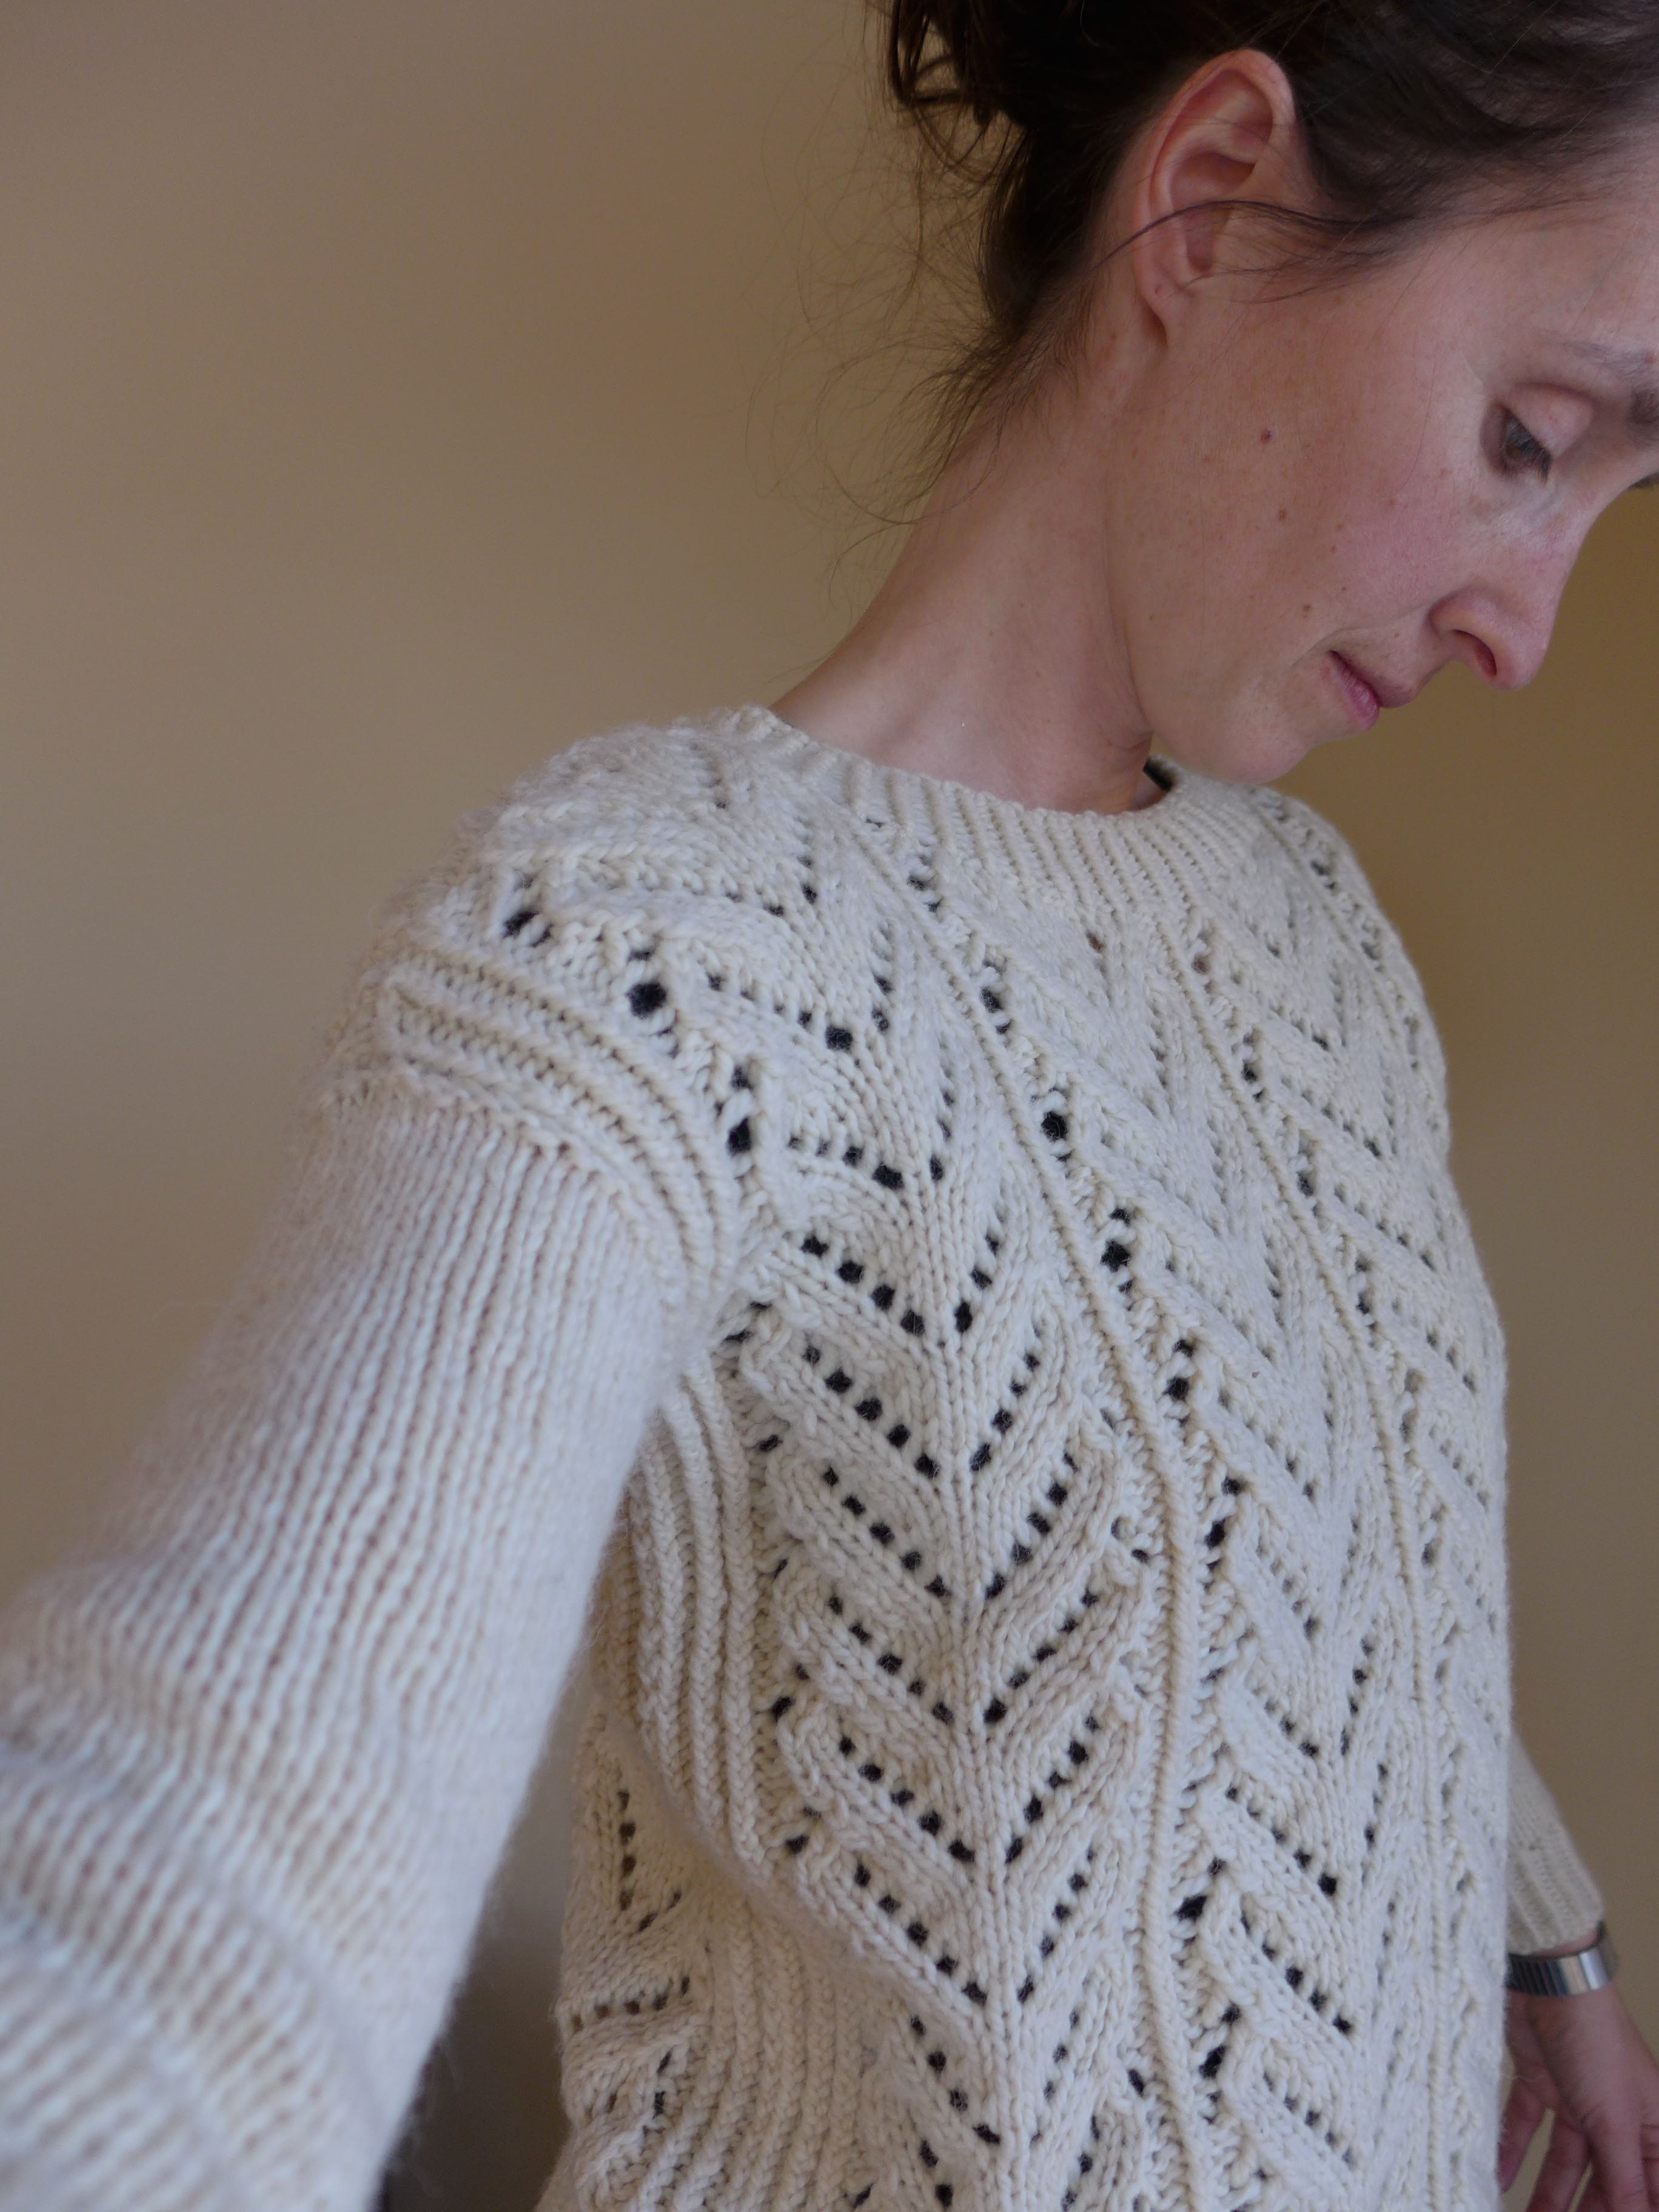
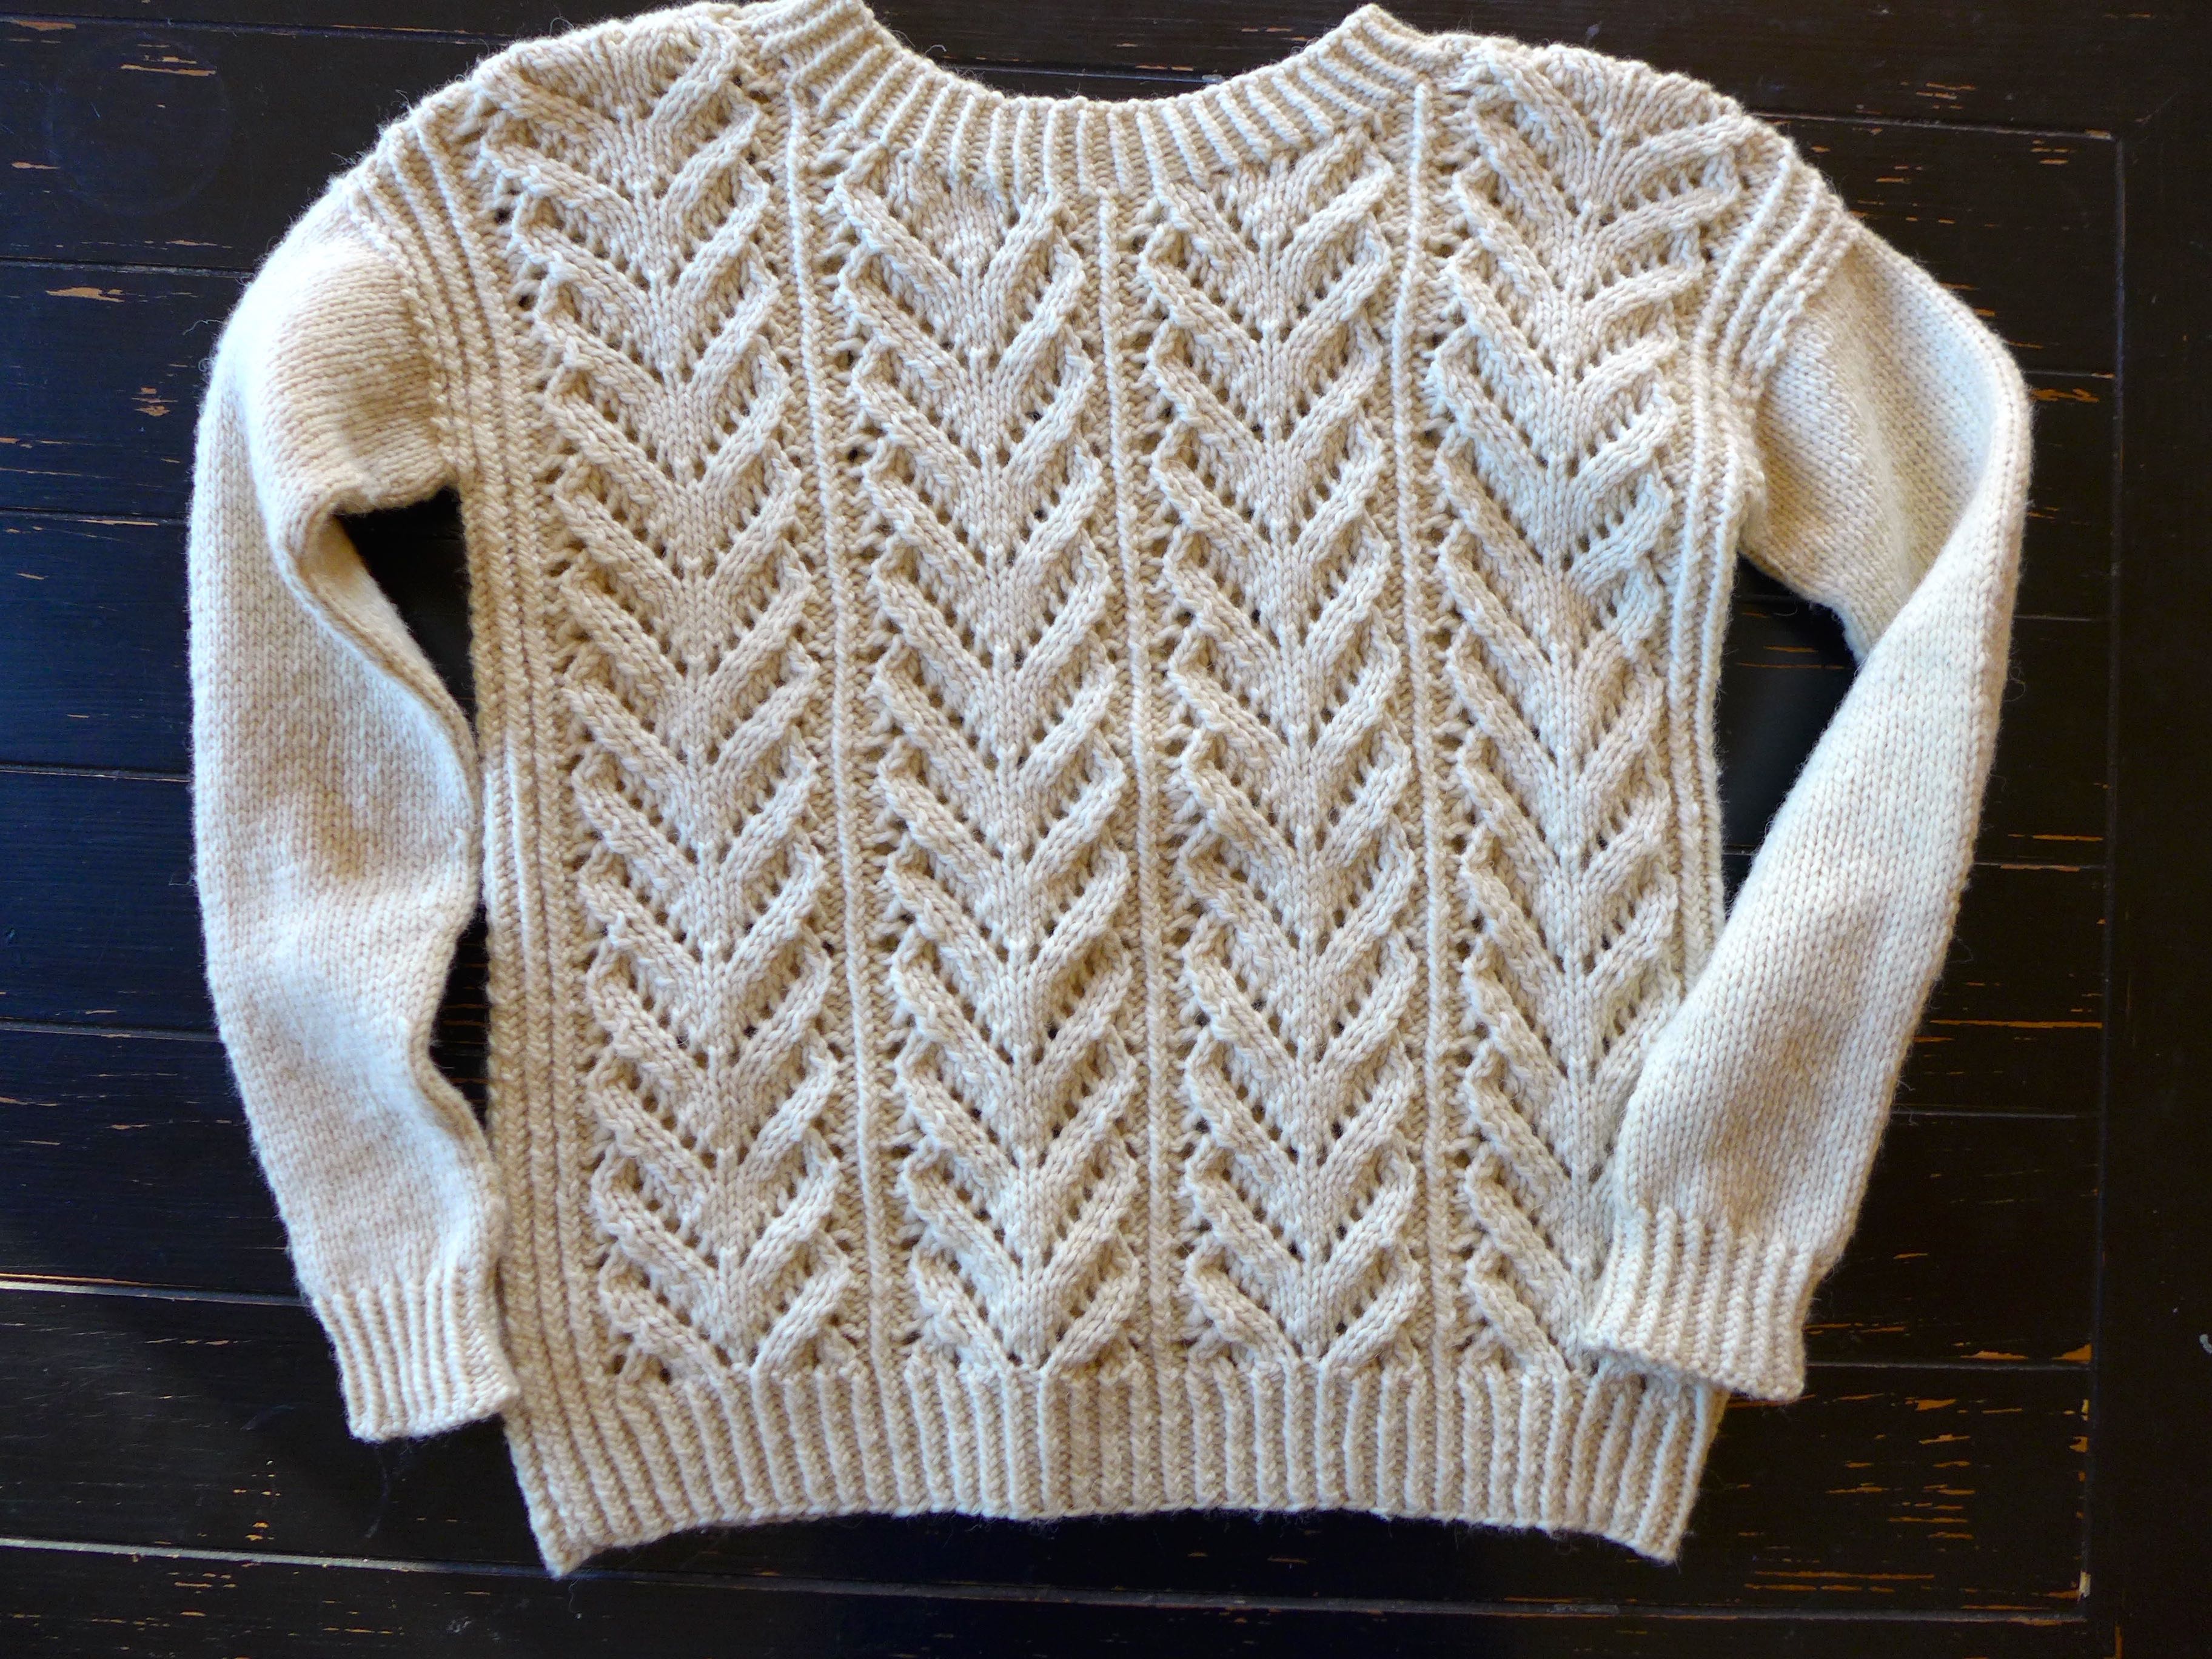
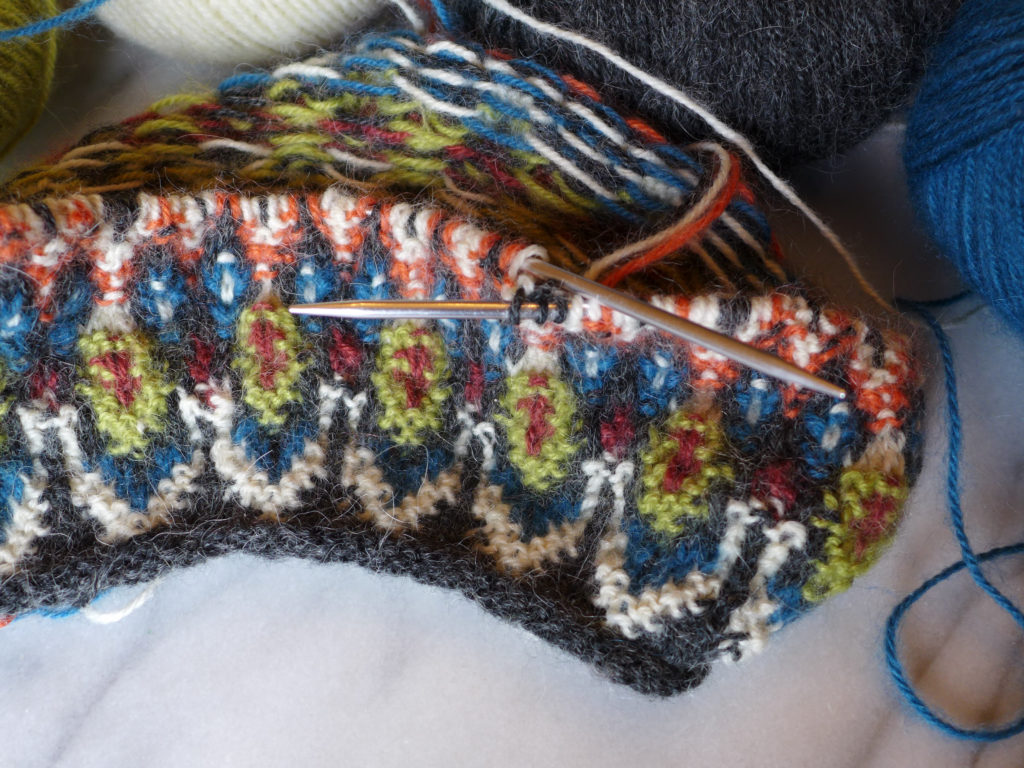
On the knitting needles, I’m working on a sweater for myself. It’s the Bohus inspired turtleneck from Vogue Knitting Winter 2015/2016. This is a top-down knit (you go back and add the turtleneck at the end). I’m really excited about it, and have been working on it so much over the past week, that I’ve made a lot of progress since the photo below was take. Now the body is nearly complete!
WIPS_march2017c

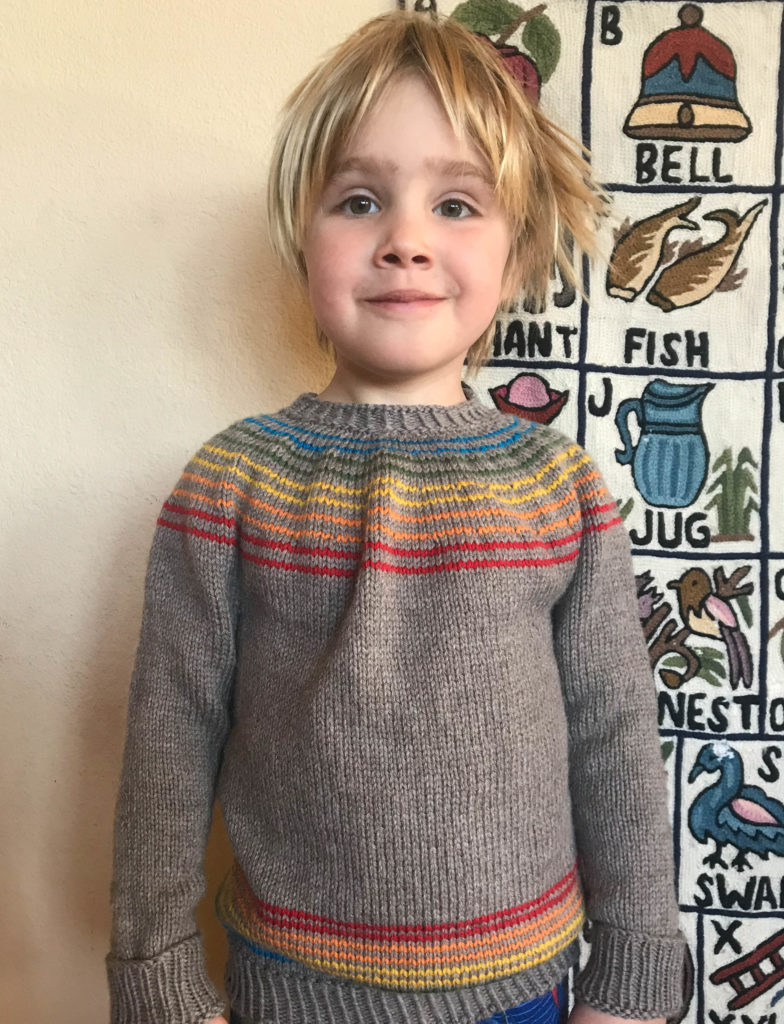
Not shown in this post are the two sweaters that I’m knitting for the boys that are nearly complete, but have been completely ignored since I started my sweater. eek! I’m hoping to finish up theirs this week and then take them on our next winter camping trip for some photos – nothing like a good finished project photoshoot to inspire actually finishing the project.

{Sewing}

But don’t worry, the boys are getting plenty of DIY attention. I was also gifted a serger for Christmas, so I’ve started to experiment with sewing clothes from knitted and spandex fabrics. This was something that I was always nervous to do on my regular sewing machine, but funnily enough, I’ve since experimented and successfully sewed spandex on the regular machine! WIPS_march2017d

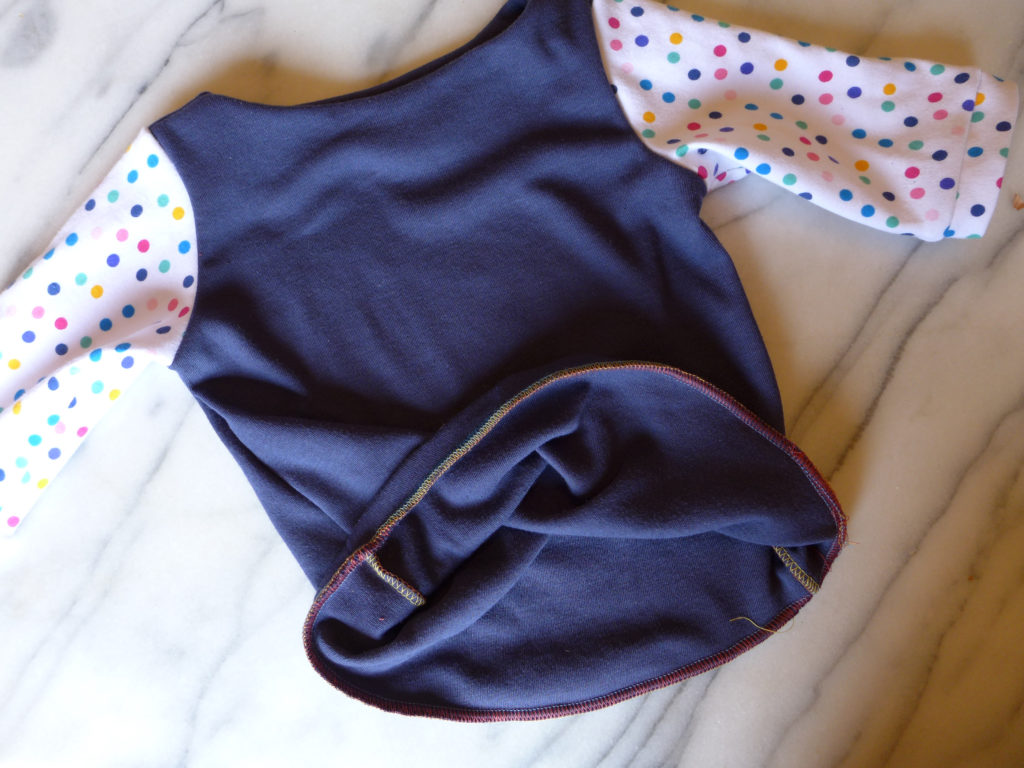
Above is a simple boatneck shirt that I made for Luc. This was my very first serger project, and I’m so happy with how it turned out – look at those seams!

After that project, I sewed a pair of spandex leggings for Alex. The leggings were a bit more complicated with their elastic waist and the more slippery fabric, but they’re passable!

In the process of just those two projects, I’ve learned so many new techniques, and just like the weaving, I’m now paying attention to clothes, patterns, and new-to-me sewing resources online. I have plans to sew a few simple things for myself, and (of course) I want to continue blogging about these projects, so when I do, I’ll share some of those resources, tips, and tricks in a future posts!

~

So, that’s what’s going on in this house, what about you? Do you have any fun projects going on? Any new skills that you’re learning?

And most importantly, what are you doing to calm your mind when you think the news can’t get any crazier, and then {BAM!} someone’s wires are tapped? Or crossed. Yes, the wires definitely got crossed somewhere along the way.

How to : Cultivate a Creative Life

If you like this post, you may want to read Sarah’s post on how to Cultivate a Life of Travel, but be warned that you’ll have the sudden urge to buy a plane ticket or two!

We’re coming up on a year of living in our house, and I’m still organizing things. Unfortunately (for me) one of the last places to get some special treatment has been my office, but I just recently spent a couple of days unpacking the final boxes and during the process I thought about the things I do around the house to encourage creativity (mine, the boys’, and visitors).

Sarah and I grew up in a house that encouraged creativity in all aspects of life, and I’m working to do the same now, whether it’s trying a new recipe, playing musical instruments, working in the garden, knitting or sewing. So even if you aren’t “crafty”, I hope you’ll find some useful advice in this post.

liveseasoned_spring2016_creativelife7


Continue reading

Knitting WIPs II

Hey there, I’m popping in this afternoon to share some of the knitting projects that I’ve recently finished, am working on, or are on my mind. I’m exciting. You may need an extra cup of coffee.

After I finished up the big sweater project, I immediately cast on a sweater of my own, Wolf River. I love how this turned out and now have a case of sweater fever (there are so many good patterns out there!). I haven’t even worn this one yet and I’m already itching to start another sweater, but as you’ll read below, there are a few other little projects that I’m hoping to get out of the way first.

liveseasoned_winter2016_knittingupdate7

Wolf River is a boxy sweater – no waist shaping at all – and it got me thinking that this is a great characteristic to look for if you’re new to sweater knitting. Of course, this sweater’s lace pattern may not be the easiest thing for a new knitting, but there are other simple boxy designs out there.

liveseasoned_winter2016_knittingupdate6

This sweater was knit with less than two skeins of Cascade Ecological Wool, one of my favorites. I have two more skeins in my stash and am thinking that it would be fun to make a second Aidez since I wear my first all of the time.

Last year I designed and knit a fair isle hat for Alex and realized that it would be fun to knit the boys new hats every year. I made this one over the weekend (after knitting a sweater, little hats are a breeze!).
liveseasoned_winter2016_knittingupdate5

Continue reading