
We’re republishing this today as a reminder to take it slow, get cozy, and complete a craft, but I couldn’t bring myself to delete Katie’s original text because it talks about the *first* Christmas as a family of three – wow so much has changed! <3 Here are all the Christmas decoration DIYs BTW.
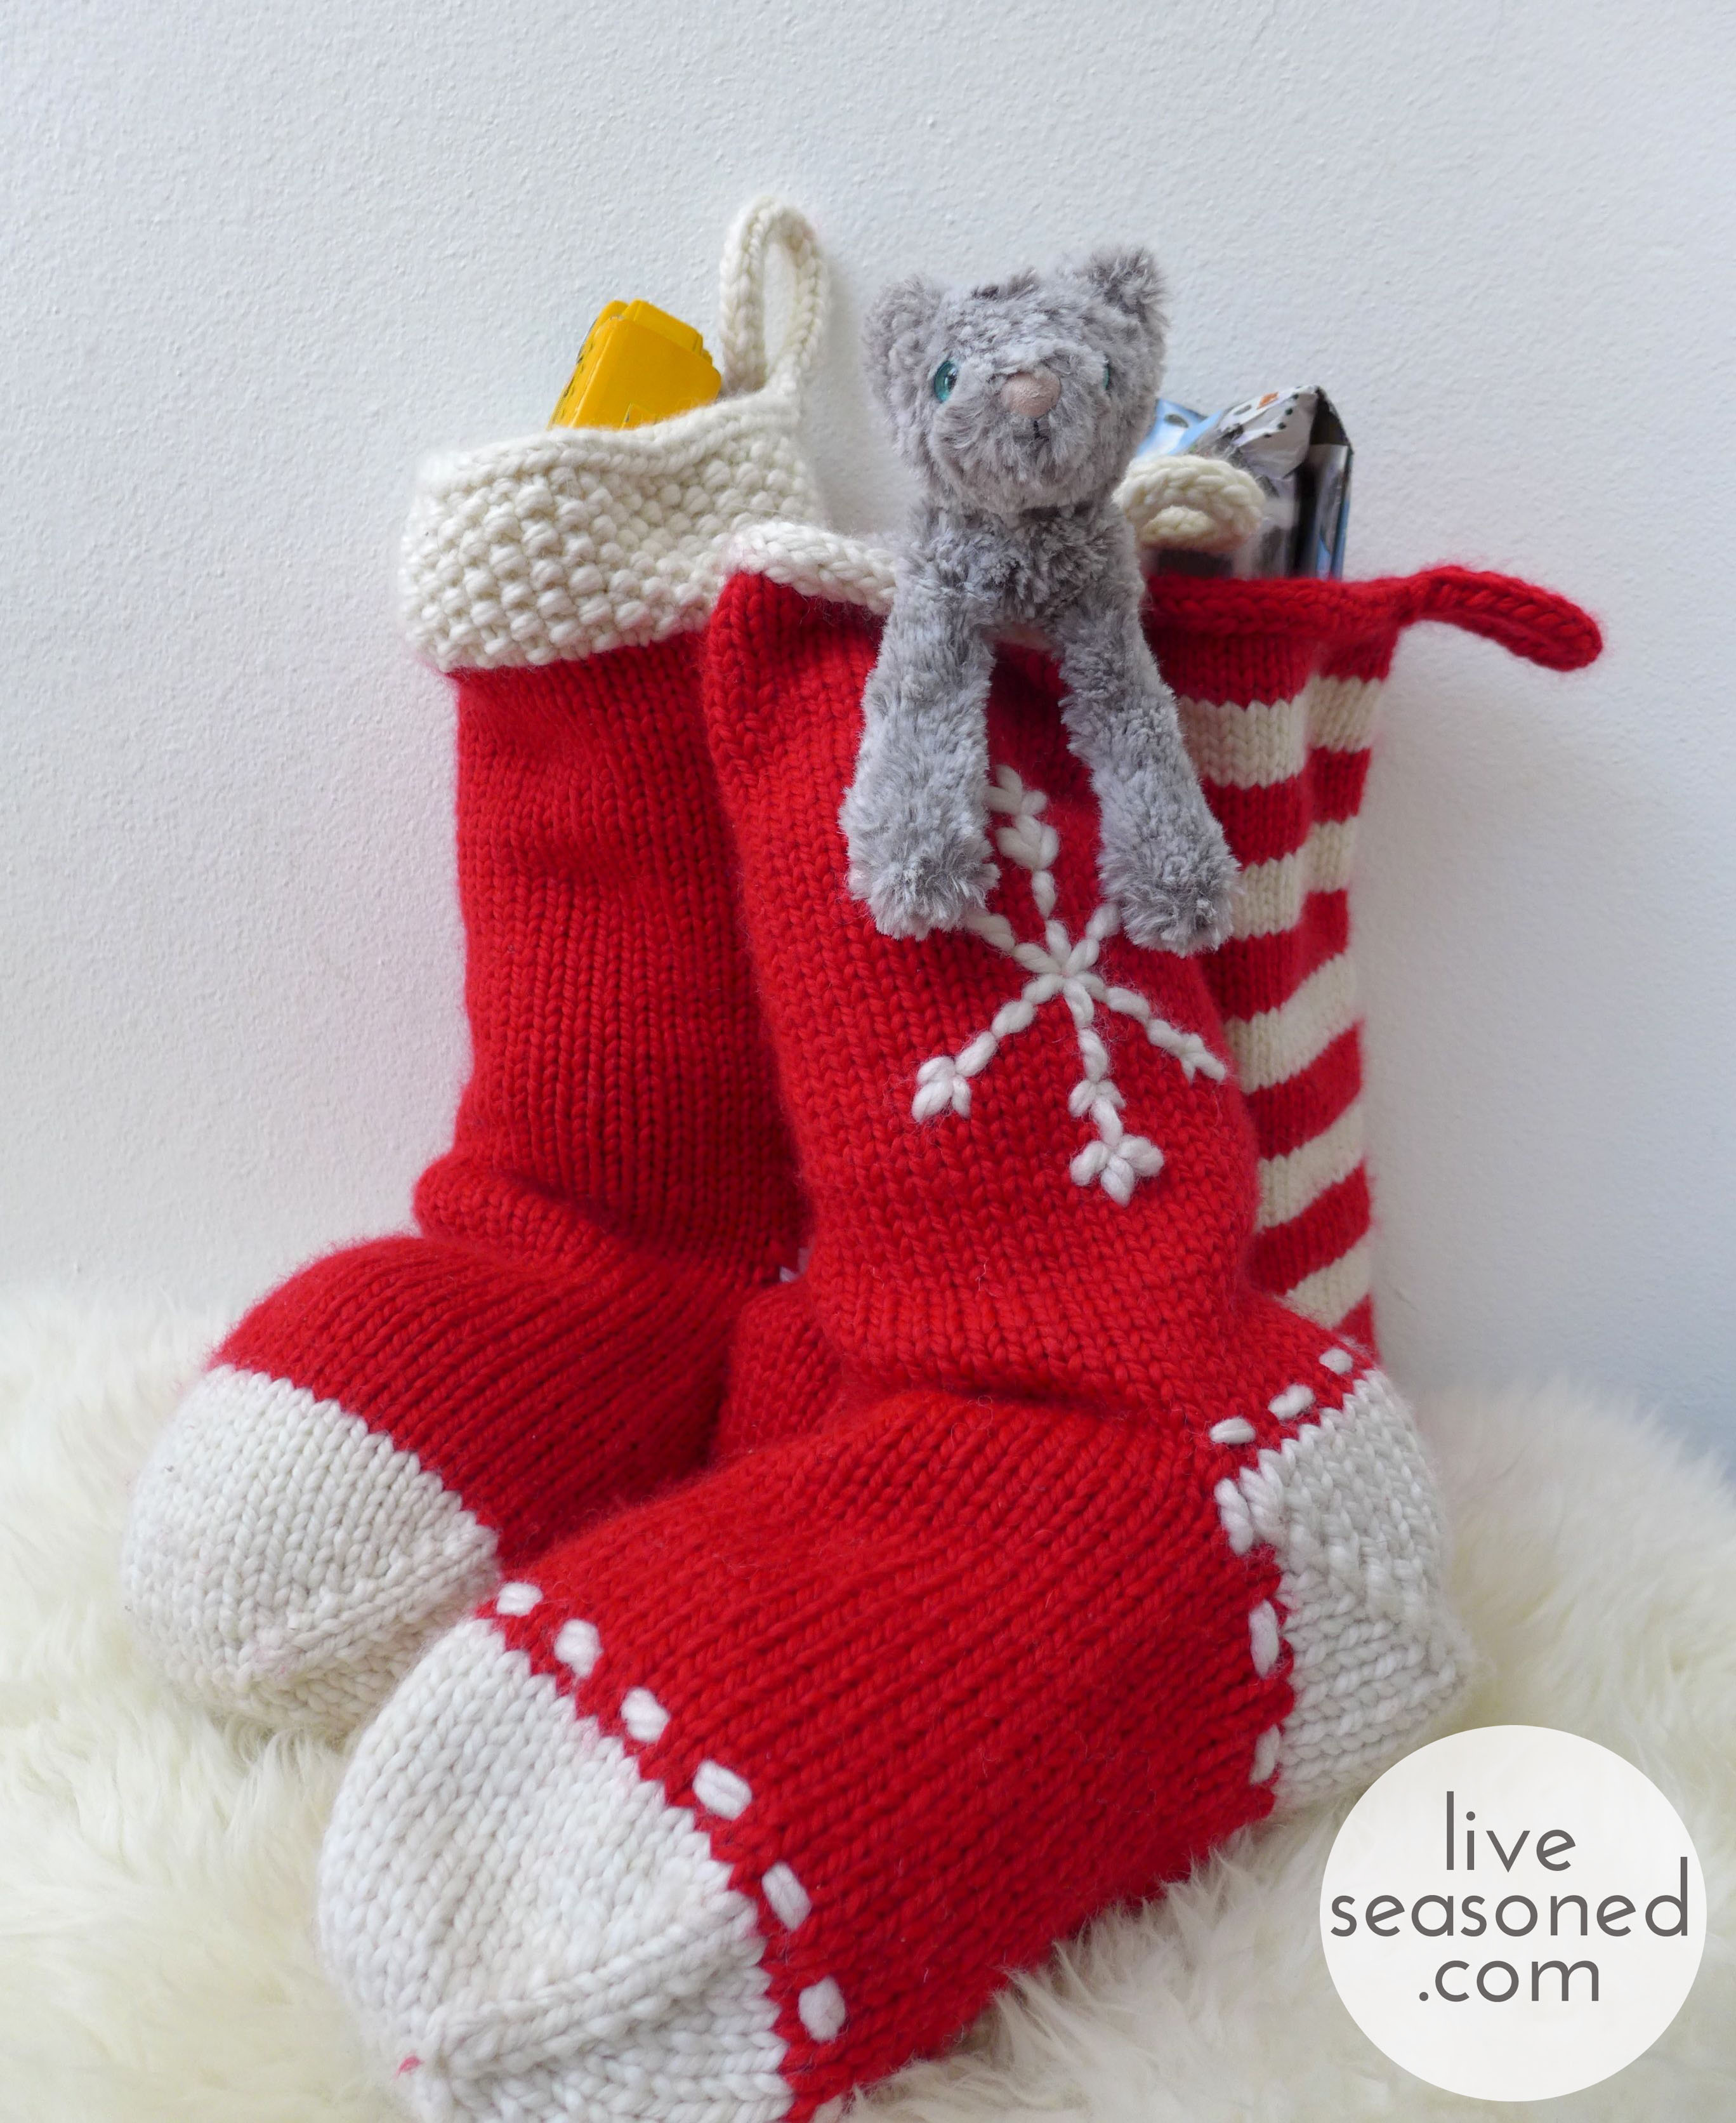
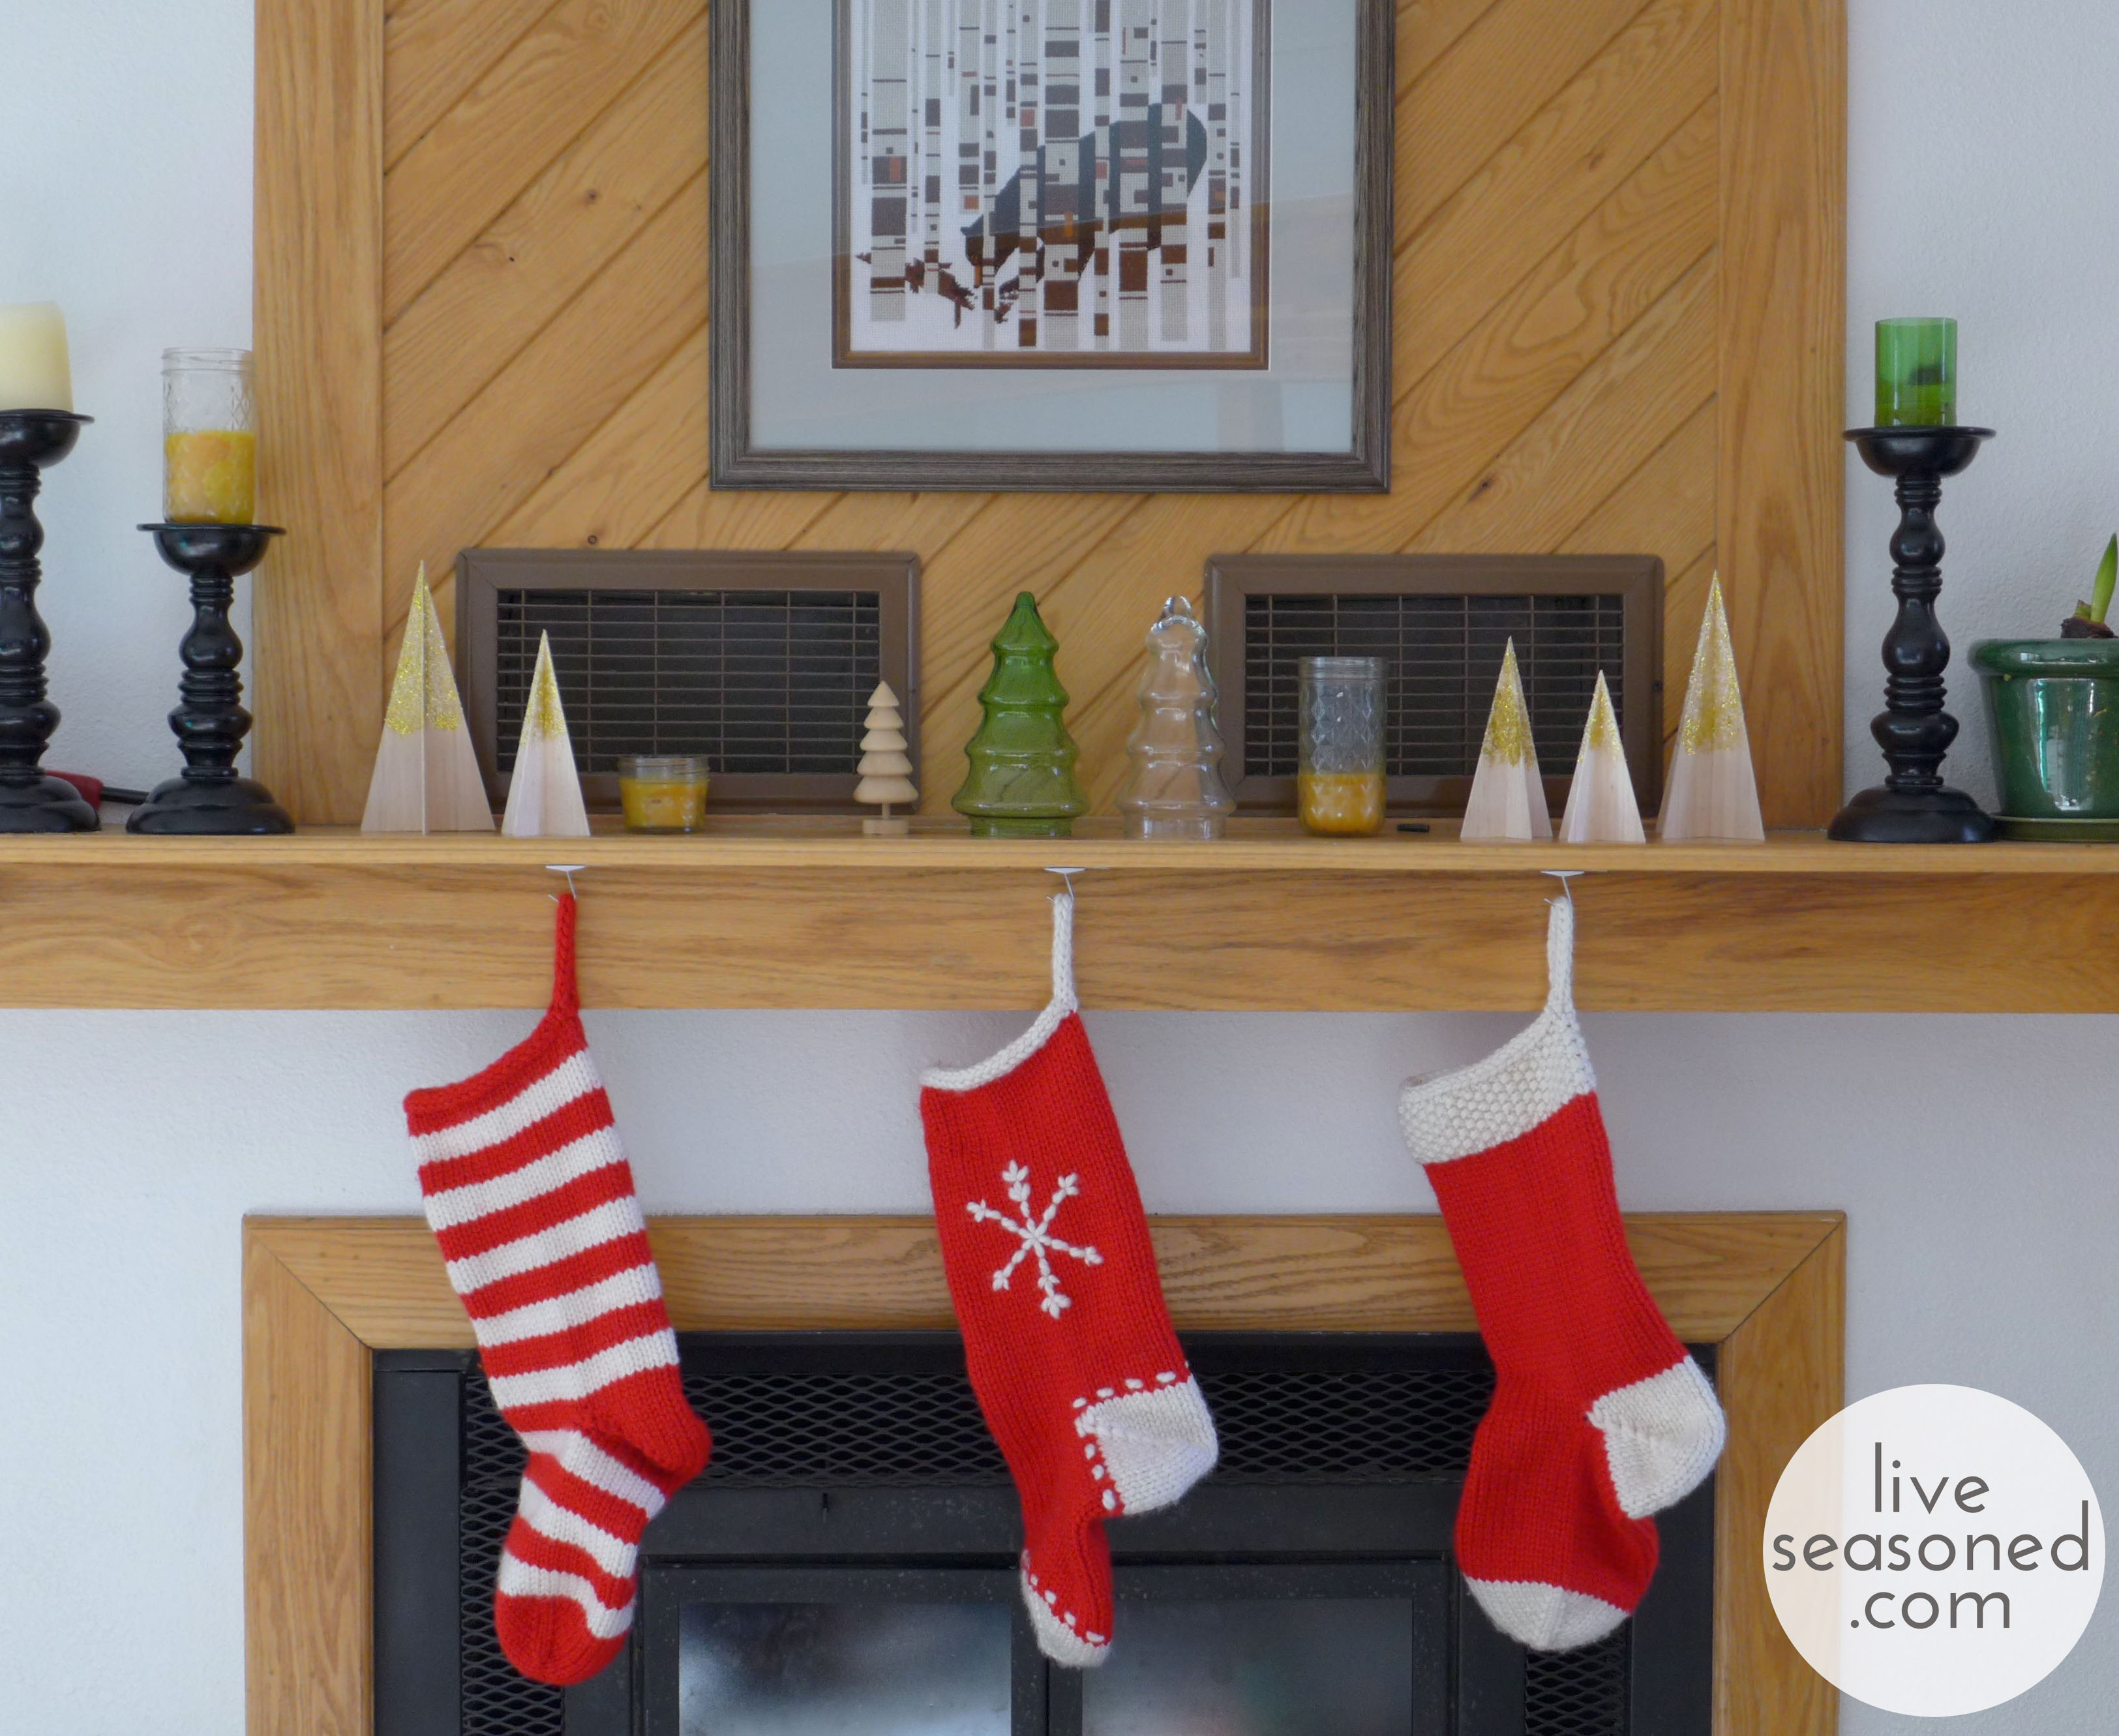
Ok, maybe three’s a stretch, but we’re all a bit crazy at this time of year. This is the first year we’re celebrating Christmas morning as our own little family of three, and we didn’t have stockings. Knowing that my original plan was to do something fun and easy. Maybe buy a couple pair of festive knee high socks or some cozy looking wool men’s socks and use those for this year. But a month or so ago I ran across some bulky yarn, decided it was perfect for stockings and worth just testing the waters.
It’s easy to fall down the knitting hole, but with so many other balls in the air, I didn’t want this project to consume me. So I picked up two skeins of yarn (one red and one white) and wanted to see how long it would take to knit a single stocking and how far the two skeins would go. When I knit that first stocking in a weekend using only those two skeins, it was a no-brainer to knit the other two!
If you have ever knit a sock before, this is a project that you can easily finish in a weekend. If you’ve never knit a sock before, then this project may take you a little bit longer, but knitting big is such a great way to learn some new sock-knitting skills, and I include links to some of my favorite resources in this post. Plus, a common problem for a first time sock knitter is finishing that second sock and/or getting it to match the first; you won’t have that problem here!
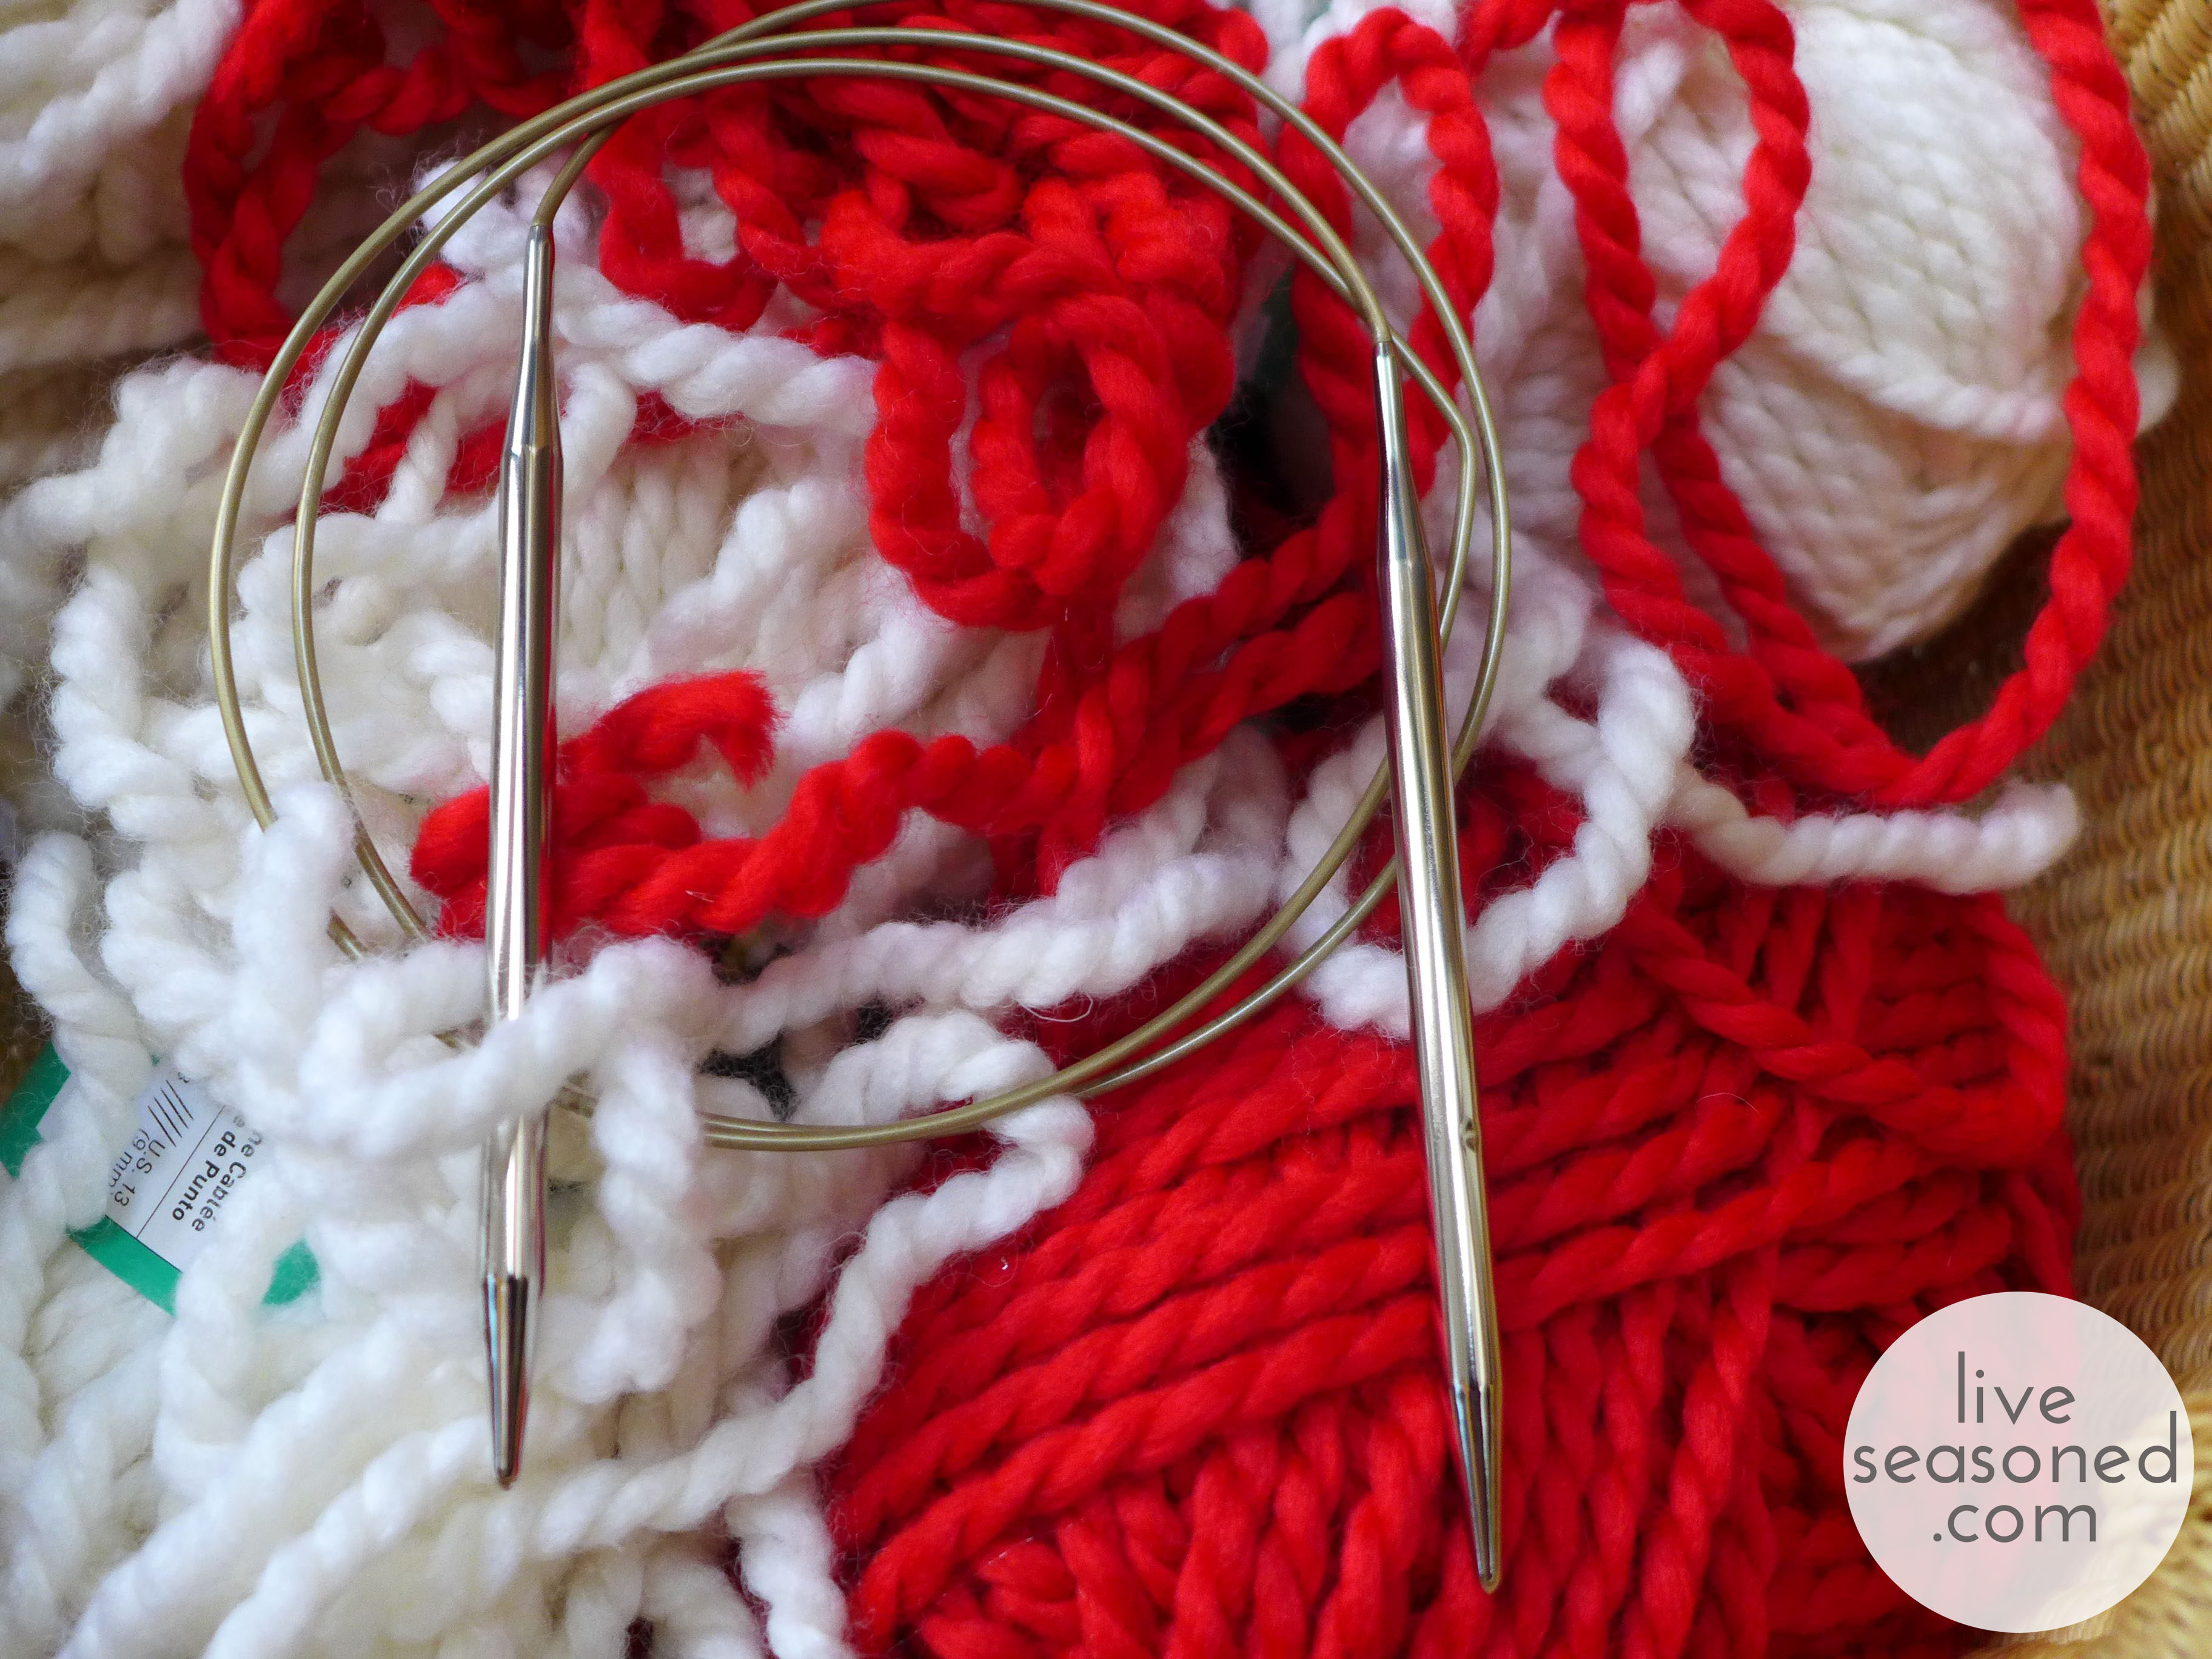
Whenever I hear “knit stocking” the one thing I worry about is how dense the stitches are. If you have a loosely knit stocking, then as soon as it’s filled with treats, the stocking will stretch and you’ll get that holey look between the stitches. I wanted to avoid that, and one of the easiest ways to do it is to knit with a bulky yarn on needles that are a few sizes smaller than what you would normally use. That’s exactly what I did here, and it produced a nice dense fabric that doesn’t stretch out of shape too much when filled.
Resources
- Cast on. Turkish Cast On
- Increasing. M1L and M1R
- Short Row Heel : basic instructions or a video with a method for eliminating the little holes that are common at the start and finish of the heel. This heel is really easy to make, and the holes are so (soooo) minor, so I don’t want that to deter you. I have my own way of dealing with them by picking up extra stitches and then decreasing them later, but since you’re knitting a simple stocking that won’t be worn, you could easily just use some extra yarn to stitch the hole closed – if you even get them!
- I cord bind off. You will have to use the cable cast on before starting the I cord bind off.


Materials
- Yarn : Loops & Threads Cozy Wool in fleece (white) and claret (red)
- Needles : US 10, you will need either one long circular for the magic loop method or a set of double pointed
Instructions
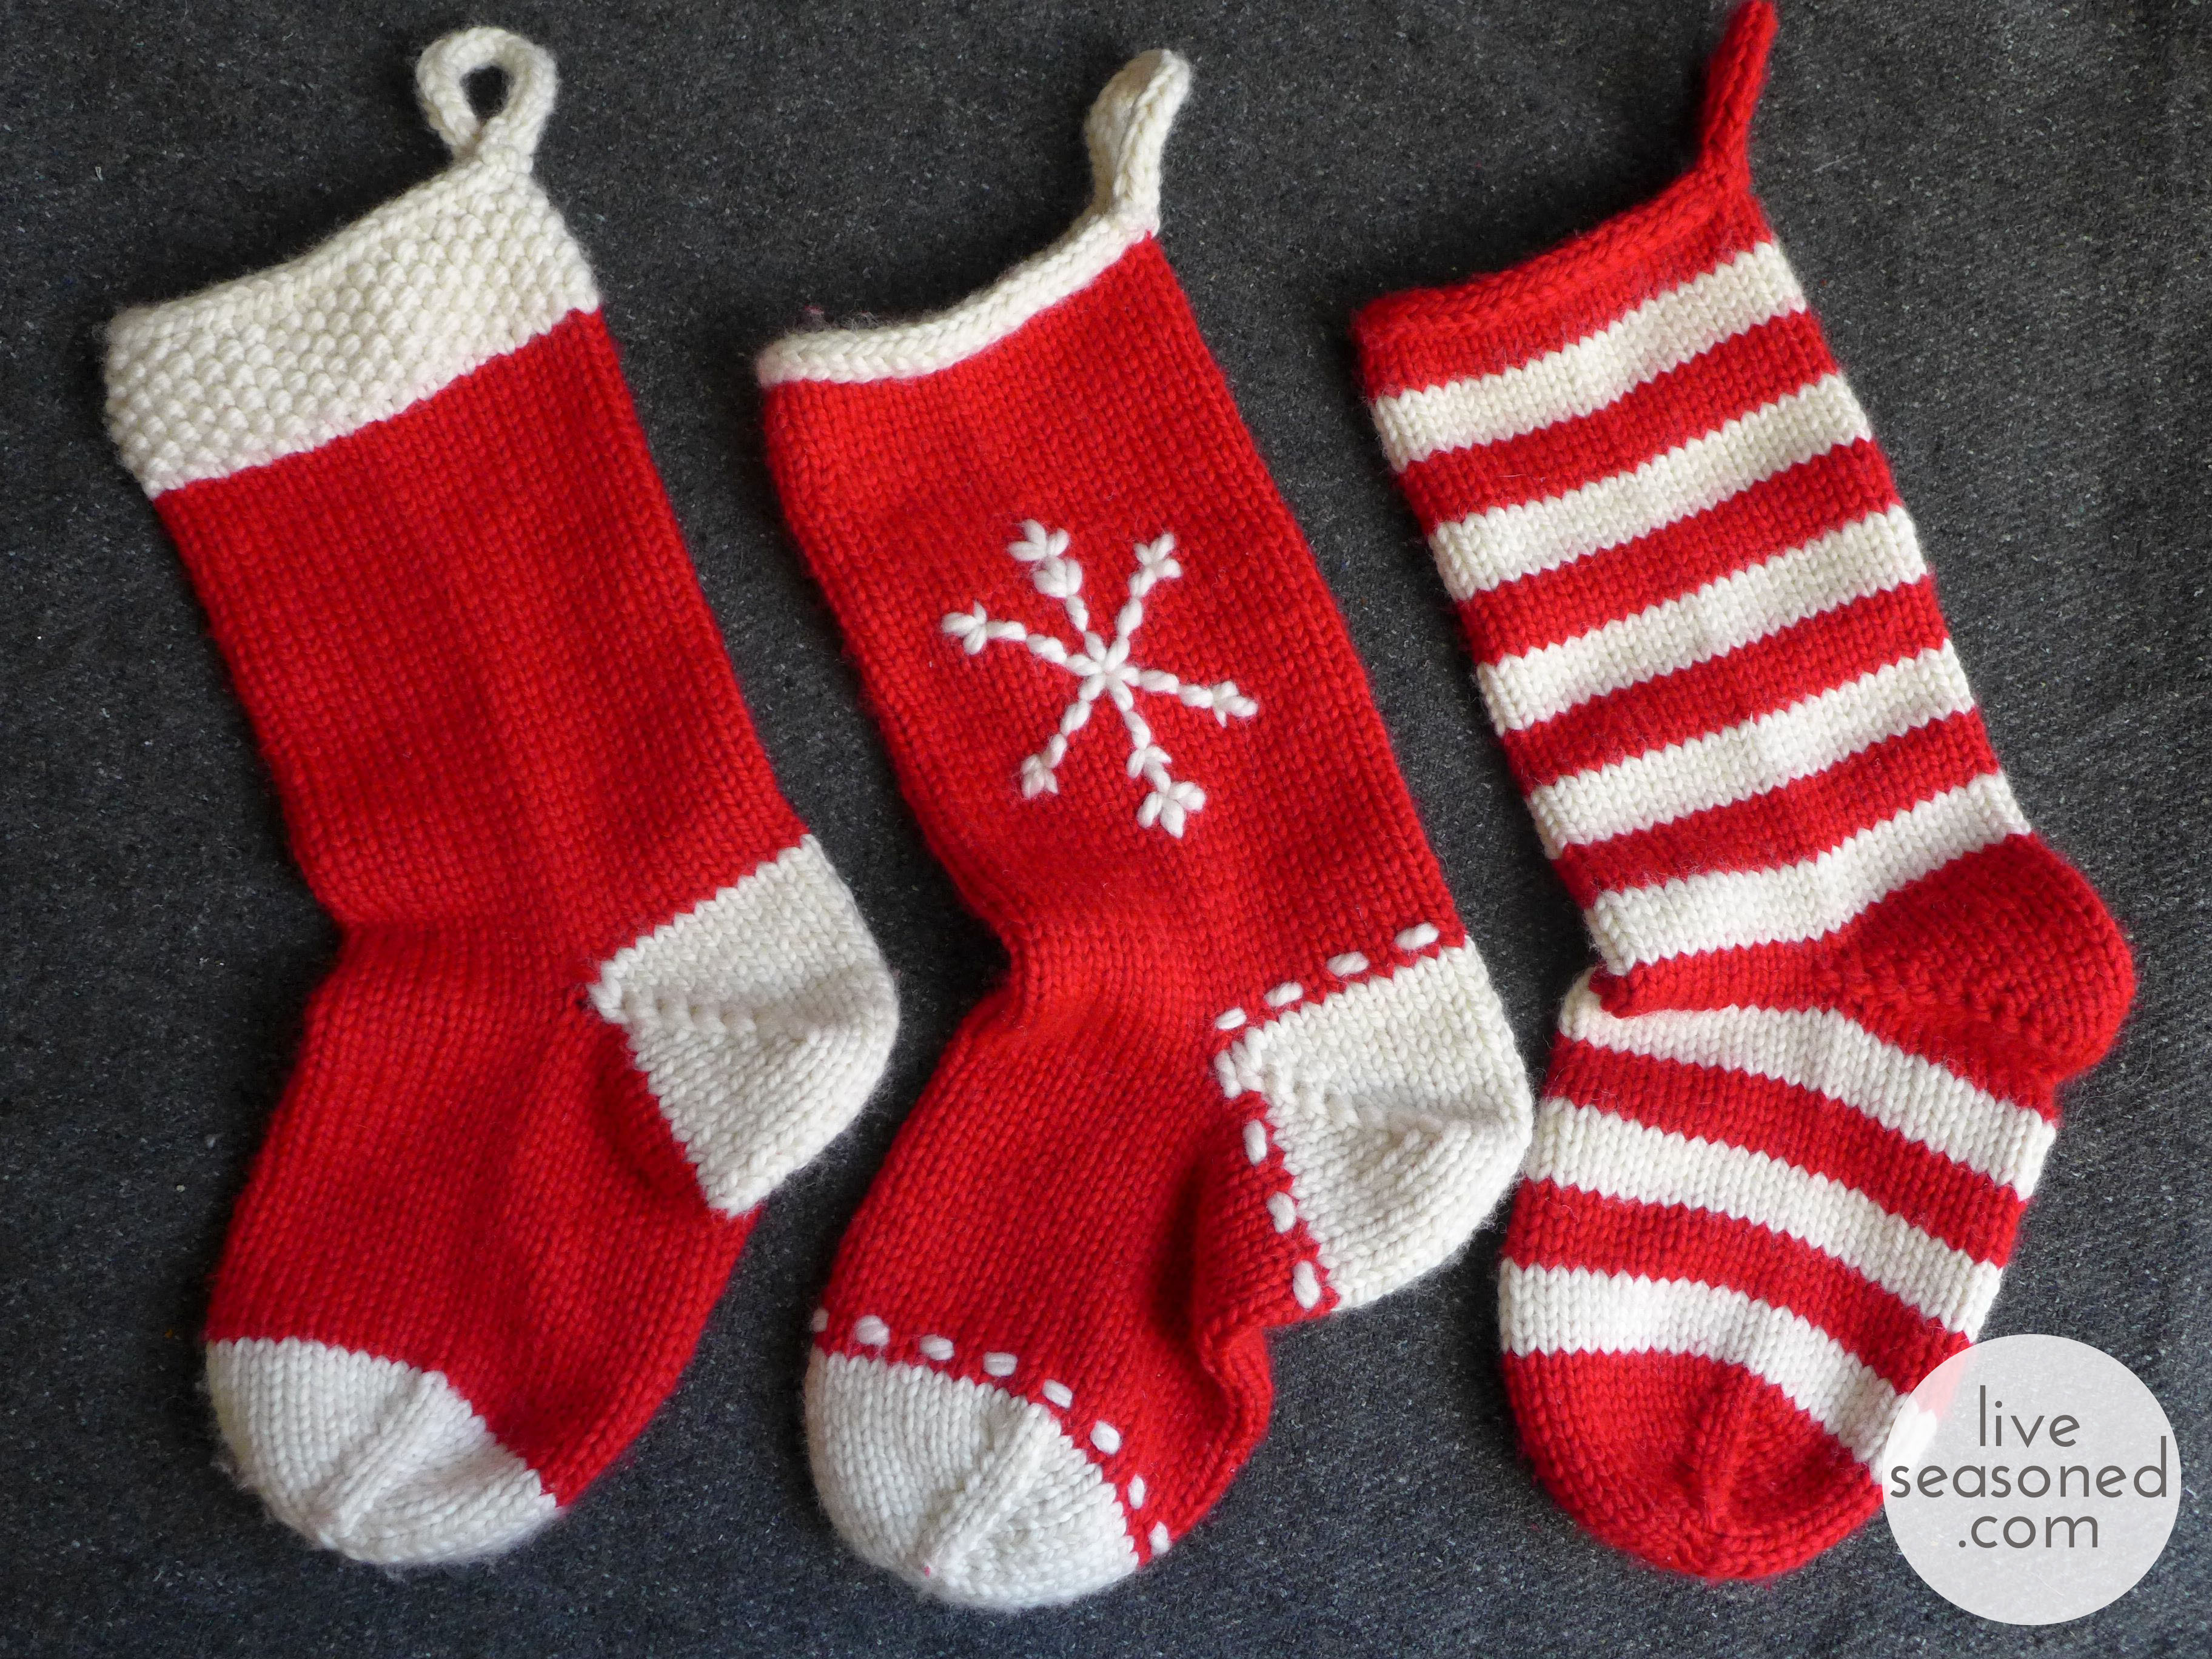
You will be knitting these stockings from the toe up to the cuff. I’m going to give you a set of generic instructions that can be used to knit any stocking of this size, and then I’ll give you the details for the specific patterns you see in the photographs. I’ll assume that your stitches are split evenly between two needles (i.e. that you’re using the magic loop method).
- Cast-on. use the Turkish method to cast-on 20 stitches (ten on each needle). Fortunately, these instructions show you how to do the Turkish cast-on with exactly that number of stitches, so you can follow it step by step.
- Begin Knitting. When I start a sock, I like to knit one and a half rounds before starting my increase rows (I always think that knitting across the first needle creates a single row for the tip of the toe, and then knitting a complete round creates my first official round – I may be crazy).
- Start the increase rows (this comprises the toe area of the sock). Round 1 (increase round) : k1, M1L, knit to the last stitch on the first half of the stocking, M1R, k1. Repeat over the stitches on the other half of the stocking. Four stitches added. Round 2 : knit all stitches.
- Continue repeating rounds 1 and 2 until you have 44 stitches on your needle.
- Knit the foot. Knit straight for 27 rows.
- Knit the heel. Use the short row method to knit the heel. You will work the heel over the 22 stitches that are on one half of your sock. When making the stockings, I wrapped 7 stitches on each side of the heel, leaving 8 unwrapped in the middle.
- Knit the leg. Once your heel is finished, knit the leg of the stocking for 53 rows.
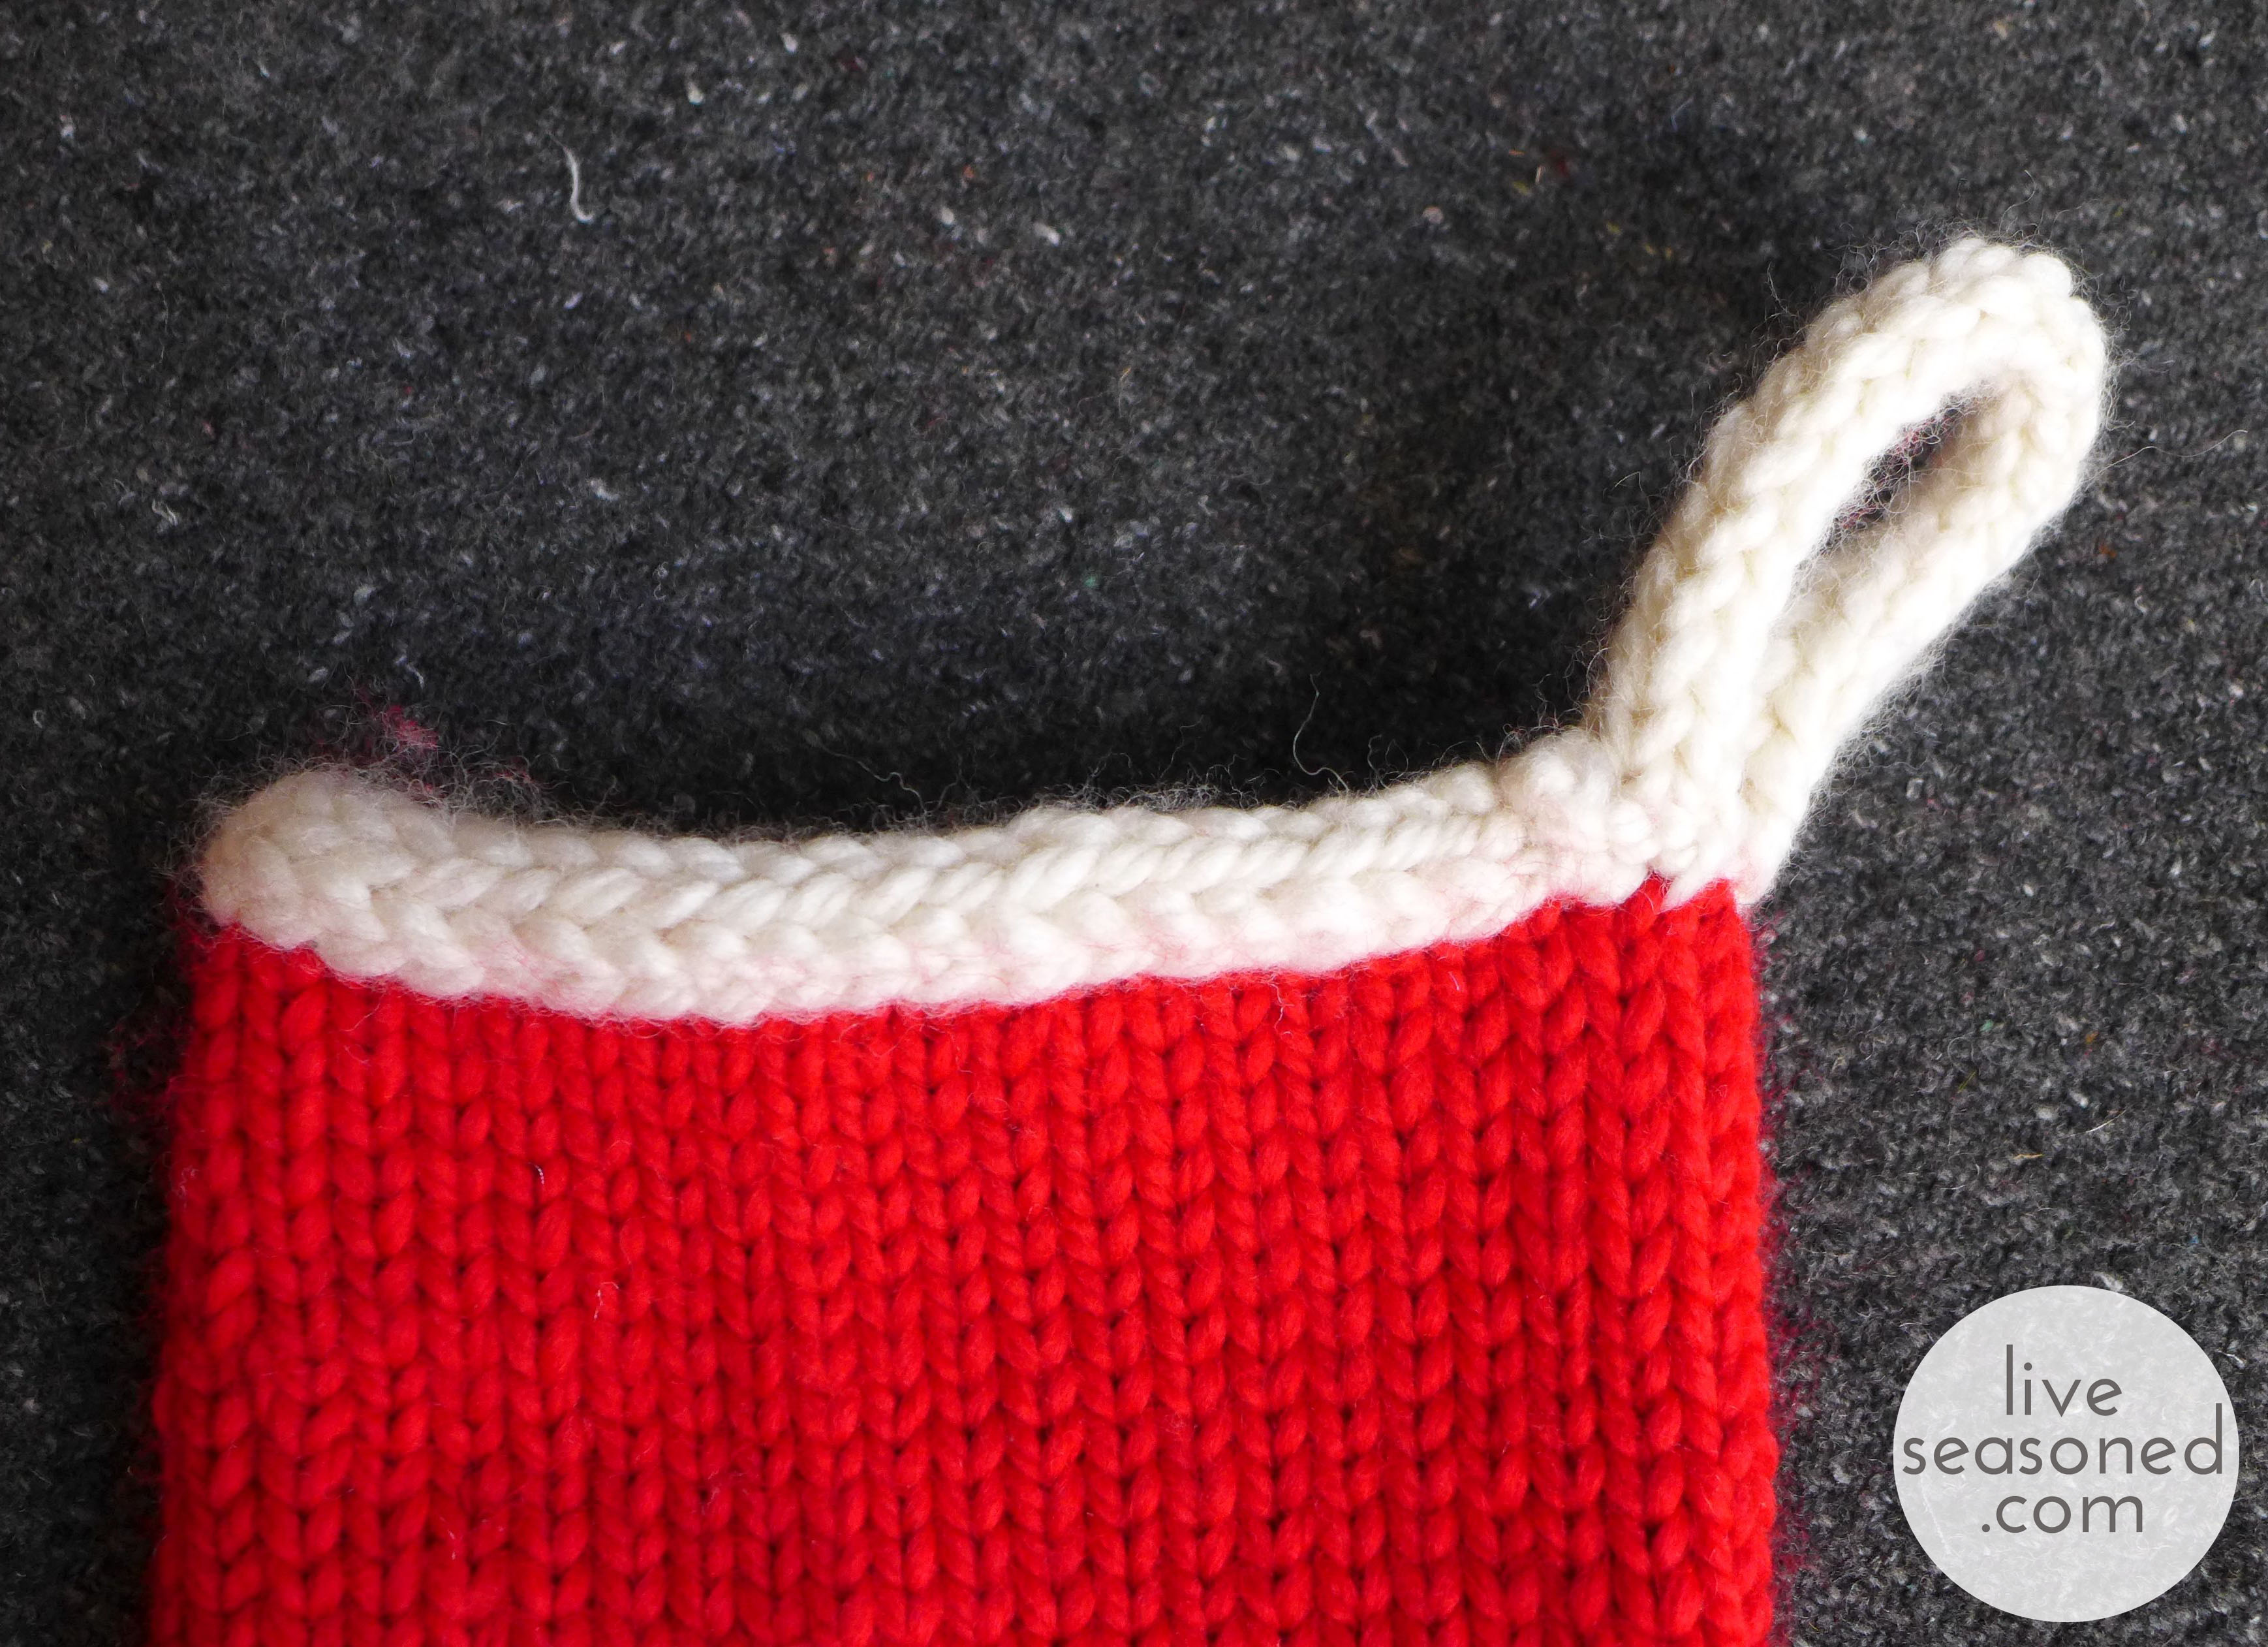
- Bind off using the i cord method. This is a great technique for binding off the stockings because it creates a strong final row that will not stretch out over time (unlike a ribbed cuff) and as you’ll see, it also seamlessly morphs into a loop for hanging your stocking. The only problem is that you may not be able to really stretch the cuff if you want to sneak an over-sized present in the stocking! The other problem that arises is that the loop for hanging your stocking will be placed where ever you start the i cord bind off. Thus far we have been knitting the stocking in the round starting from one side of the sock; you don’t want your loop on the side, but on the back of the stocking. Before beginning the i cord bind off, knit 11 stitches so that you are now positioned at the center back of the stocking. You will work the i cord bind off over three stitches, just like these instructions (lucky you!). Once you come to the end of the cuff, don’t cast off the three i cord stitches, rather continue knitting an i cord for 21 more rows.
- Finish your stocking. Sew the live stitches of your i cord to the start of the i cord row ~ creating a seamless-looking i cord band with a loop in the back. Weave in all loose ends. Hang your stocking and cross your fingers that it doesn’t get filled with coal!


Santa’s Sock Stocking Detail
- Knit the toe. Use the basic instructions from above, casting on with the white yarn and using it to knit the toe area.
- Knit the 27 rows of the foot in red.
- Switch to the white yarn and knit the heel.
- Knit 40 rows of the leg in red.
- Switch to the white yarn and knit 11 rows in seed stitch.
- Knit one complete round plus 11 stitches to position the start of the i cord at the back of the stocking. Finish with the i cord bind off.


Striped Stocking Detail
- Knit the toe. Use the basic instructions from above, casting on with the red yarn and using it to knit the toe area.
- Begin the stripes. Switch to the white yarn, but don’t cut the end of the red yarn (you can carry both colors up the length of the stocking, drastically reducing the number of loose ends that you’ll have to weave in). Knit five rows in white. Knit five rows in red. Repeat this pattern for 25 rows (ending with five white rows and just before starting a red row). Knit two rows in red.
- The heel area. I like to work the heel in the middle of a stripe so that there aren’t any funny color switches immediately before or after the heel. Continuing to use the red yarn, knit the heel. Once the heel is complete, knit three more rows with the red yarn. When looking from the front/top of the stocking you should see the five red rows of the stripe pattern.
- Knit the leg. You are now at the start of a white stripe. Continue working the five row stripe pattern for 50 more rows.
- You are now at the top of the stocking. Knit 11 more stitches to position the start of the i cord at the back of the stocking and continue using the red yarn for the i cord bind off.


Snowflake Stocking Detail
- Knit the toe. Use the basic instructions from above, casting on with the white yarn and using it to knit the toe area.
- Knit the 27 rows of the foot in red.
- Switch to the white yarn and knit the heel.
- Knit the 52 rows of the leg in red (not the 53 listed above!).
- Switch to the white yarn. Knit one round plus 11 stitches to position the start of the i cord at the back of the stocking. Work the i cord bind off.
- Finish the stocking by embroidering a snowflake design into the side of your stocking. I make a very simple design using a backstitch. I decided to embroider the snowflake because I wanted it to have six points (like in nature), but it’s hard to find and/or to design a knit snowflake pattern with points rather than eight. As for other embroidered embellishments, the skies the limit! I added a line of running stitch around the toe and heel areas. You could add number of snowflakes, varying their size and shape.
If you knit a stocking, we would love to see it! Leave us a comment below or tag us on instagram @liveseasoned. Happy knitting or happy rushing around buying those last minute presents ~ either way, we hope you have a great weekend!
You’re stocking are da bomb!
hehehehe, thanks!!
I apparently missed the increase on one side for one row. I can’t tell how far back it is that I need to rip it out. Should I do two increase rows back to back to get it back on track, or will I be okay to just continue where I’m at, and have 42 stitches total, instead of 44?
Hi Samantha,
Honestly, I think you’ll be perfectly fine to just continue where you’re at without adding the two additional stitches. Just adjust accordingly for the heel – you’d be doing it over 21 stitches rather than 22. If it were me, I’d probably still do the 7 wraps on either side and just have 7 unwrapped stitches in the middle (rather than 8). Good luck, and thanks for the question! – Katie
Hey
Sorry I’m fairly new to this – please could you clarify if when getting to 44 stitches whether that’s 22 on one needle and 22 on the other… or 44 and 44?
Thank you!
Hi Alex,
I’m sorry for the confusion (and for my delayed response – we weren’t checking in regularly over the holidays)! It should be 22 on one needle and 22 on the other – 44 total.
I hope your stocking worked out ok! Or if you’re still working on it, don’t hesitate to ask more questions – we’re always happy to help.
-Katie
Maybe this is something a seasoned knitted would know, but when creating the loop at the top of the stocking, we would need to add a stitch to the left hand needle at the start of each row, correct? I couldn’t figure out any other way to “continue knitting an I cord for 21 more roes” without adding a stitch each time.
Hi Molly,
You shouldn’t have to create any new stitches to make the icord. Instead, imagine it this way: knit the three stitches that are left on your needle (use either two doubled-pointed needles or one circular needle for this last part). The stitches are now all on your right hand needle. Slide them all the way to the other end of the needle, move this needle to your left hand, and now you’re ready to knit another row! Repeat that process (knitting those three stitches, sliding them along the needle, etc.) 21 times, and you’ll have a that tail of knitted icord that will become your loop. And here’s an icord video that might help: https://youtu.be/dfkFRa9tjns.
Good luck, but don’t hesitate to comment again if you’re still having trouble.
-Katie
Pingback: Knitting: 36+ Free Knitted Patterns for Christmas Stockings – CrochetingHearts.org
I’ve just seen your Christmas stockings and am really enjoying the toe-up method. How should I adjust the number of stitches to make a stocking that would be close to another that I made for grandson #1 that is
• 20 inches (51cm) from top of stocking to heel.
• 8½ inches (21½cm) from toe to heel.
• 64 stitches cast on starting at the top cuff
I am using a medium 4 acrylic yarn, 18 st/inch with #8 circular needle.
Thanks so much!
Correction! The gauge is about 4-1/4 stitches per inch, not 18!
Hi Florence,
I’m sorry for my delayed response. If you’re knitting either of the red stockings in this post, then I think this will be easy! If you want to do the faire isle pattern, that would take a little bit of work to adjust the pattern repeats. I don’t have my stockings with me, but I don’t think it’ll be too hard to adjust this pattern to match the size of your other stocking. Since you’ll be knitting from the toe to the top, you can adjust the lengths of each section to fit your needs (just stop when you reach the desired length for each section), rather than using my row counts. Getting the desired circumference may take a little work. If the other stocking that you knit uses the yarn & needle combination that you mentioned, then I would think that you can increase the toe to match the number of stitches on your other stocking (64), and you’ll achieve a similar size. Does that make sense? If you have any more questions, please let me know. Thank you and happy knitting!
Thank you for sharing project.
About to start on this but wondering if you cast-on using a single circular needle or two. Most sources show 2 circulars are required but I did come across this: https://www.browneyedbabsknits.com/turkish-cast-on-on-one-circular-needle.html
Any thoughts?
Hi Luke! We do like using a single circular needle for the cast-on, but either method works well. Happy knitting!
Is it just me, but I don’t see instructions for knitting heel? You only say, “Knit the heel.
Use the short row method to knit heel. You will work the heel over the 22 stitches that are on one half of your sock”. “I wrapped 7 sets. on each side of the heel, leaving 8 unwrapped sis. in the middle.” . . . “Knit the leg. Once your heel is finished, knit the leg . . .” That is all that is said about working the heel. Okay, but just how do I work those 22 stitches???
Please help, I started this stocking before Christmas, but finally just gave up.
Hello! I’m so sorry that you’re having trouble with the heel. It looks like my link in the resources and heel sections of the post was broken. I’ve fixed it now, and you should be able to see those instructions here: https://www.craftsy.com/post/short-row-heel-knitting/ . Once you work out the heel, the rest of the stocking is a breeze! But please, don’t hesitate to leave another comment if you have more questions. Happy knitting, -Katie
Thank you very much! Looking forward to knitting this stocking, now!
Hi I can’t see where it says how much wool to buy for the Santa stocking could someone please tell me. Thanks
Started this last year and got to the icord part. Didn’t have time to figure it out before Christmas then.
Ready to finish last part and feel confident about the icord and bind off BUT.. My stocking is backwards! Was trying to figure out the 11 stitches before starting which wasn’t making sense then realized mine is backwards.
Right now I’m on the side near the back at beginning of round. Knitting 11 stitches takes me to the center of the front. Don’t know how this happened, lol…
So before starting the icord, should I just knit X stitches until I’m at the center back or undo Y stitches to get to the center back?
Hope that makes sense.
Thank you.
Hi Luke,
Your question makes perfect sense! I’m so glad that you noticed before knitting the icord. You can work either of the options that you suggested (knitting forward to the right spot or removing stitches). If you knit a striped stocking, then you could take a look at the stripes to help you determine whether or not an extra row would make that top stripe look too big. Otherwise, there’s absolutely no harm in fudging that top row a bit. Good luck! – Katie
Pingback: Best 16 how to knit christmas stockings – lifefindall.com