
This June I’m sharing some of the crafts that made their way into my wedding, which was four years ago this month! A couple of weeks ago I showed you the bunting that decorated our reception tents and ceremony. Last week I shared the homemade purses that I embroidered for each of the bridesmaids (you also got a sneak peak at the sash that my mom made and hand-beaded to go with my wedding dress!). Today, I want to show you the tags that we made for both our place cards and as the labels on our favors. As you’ll see below, in each case, the cards were the icing on the cake of even bigger DIY projects!
We used rubber stamps that were custom ordered for these projects, yet while we were planning, we knew that these stamps would have a use well beyond the wedding. It was important to me that we didn’t purchase too many items that would only have a one-time use for the wedding, and four years out, I’m happy to see how often we’ve reused some items (and how well-loved others are). On another note ~ I know that the thought of using rubber stamps can drive people nuts when you think about having to line things up and make your stamping straight. As you’ll see, we tried to eliminate that problem. We didn’t worry about making our words perfectly straight, and we let some stamps, like the honeycombs, have a design that would fall off the edge of the tags. This strategy helped to minimize the stress and time that would go into projects like these.
Favors
Seeing that so much of our wedding was crafted by us (tomorrow I’ll tell you more about Calder’s HUGE part in an already big day), I wanted to give our family and friends a little something homemade. But – I didn’t want the favors to be something that would sit around and collect dust, rather I wanted to give something consumable. With that in mind, we decided to give a variety of canned goods for the favors. My mom and I already liked canning and between the two of us, we had a nice variety of recipes that we liked to can, so our hope was that everyone would leave with something they loved or something they were excited to try.
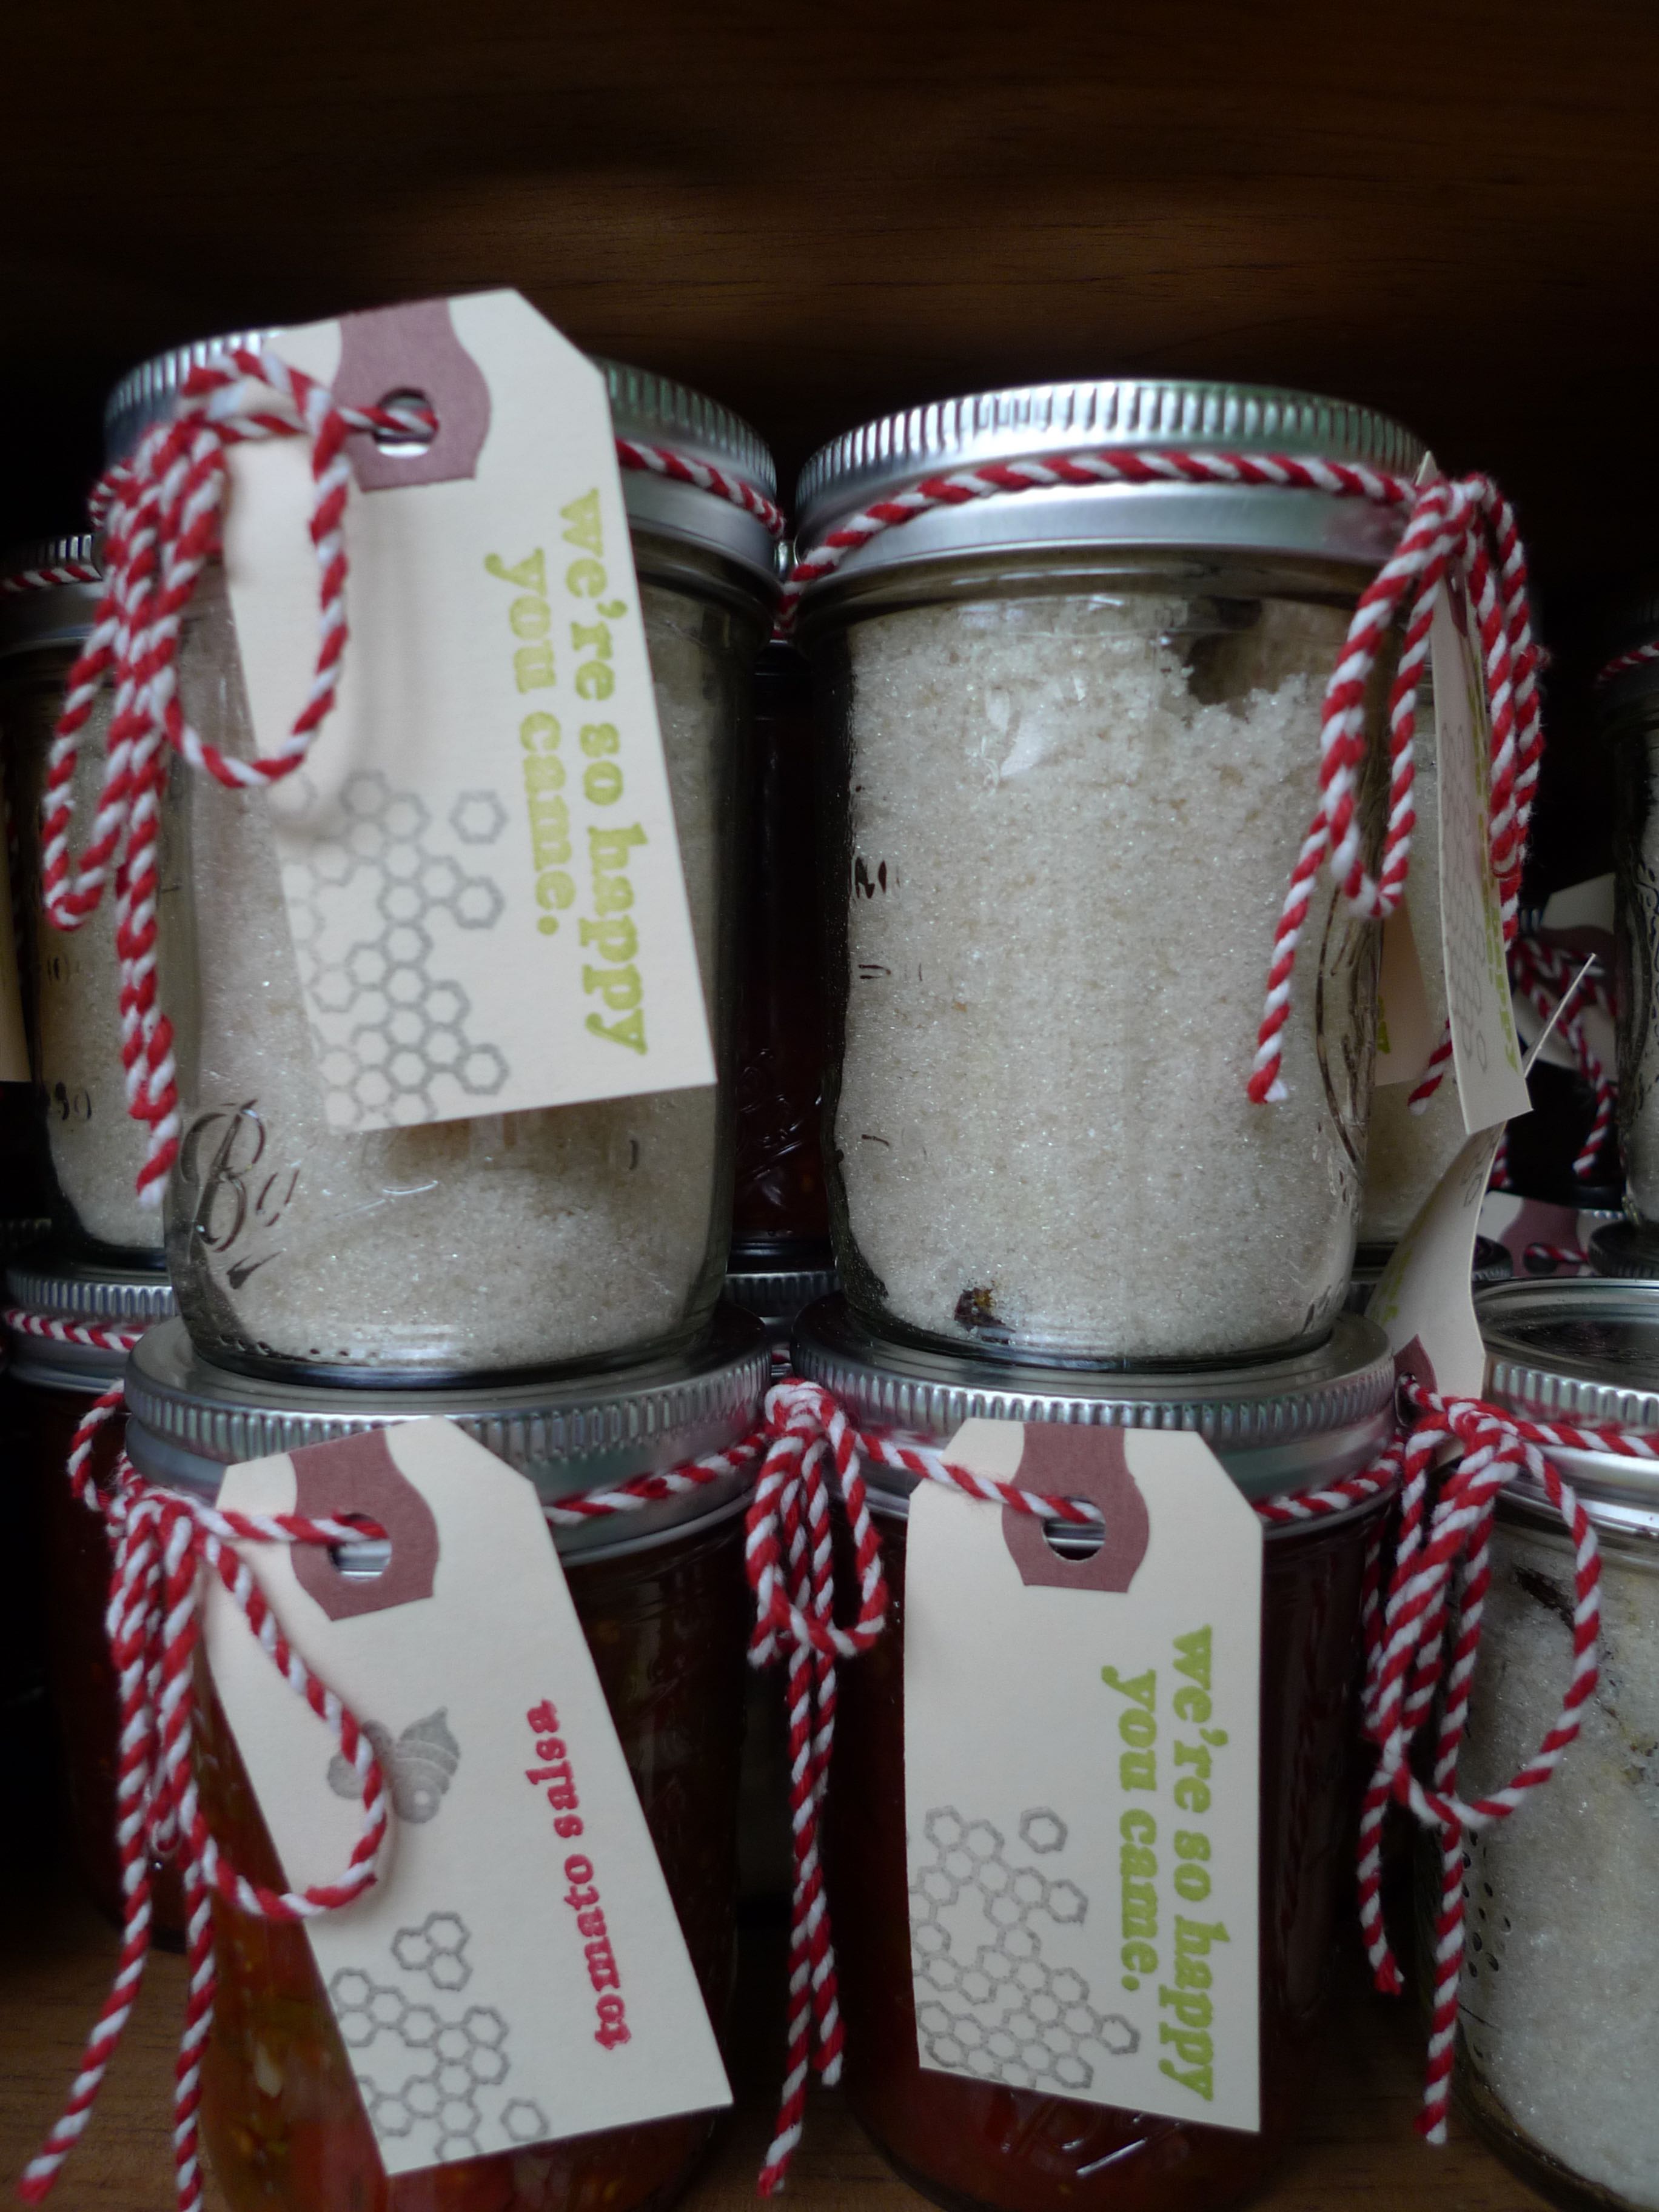
My mom made chili sauce and tomato salsa. I made marmalade and vanilla sugar. I’m sure the last three are common, but if you’ve never had it, chili sauce is a great condiment for sandwiches, subs, sausages, etc. It’s a common canned good in our area, so we knew that a lot of the guests from my side of the family would recognize it. I made the vanilla sugar because it was a nice treat for guests who didn’t like the other options and/or for those people that were flying and needed something they could take home in the carry-on luggage. There’s no actual canning required for the sugar, just pre-planning to give the vanilla beans enough time to enrich the sugar with their aroma (plus we left a vanilla bean in each jar). What I loved about this project was that each of these recipes are things we make fairly regularly, so the stamps will get used again and again to stamp jar labels.
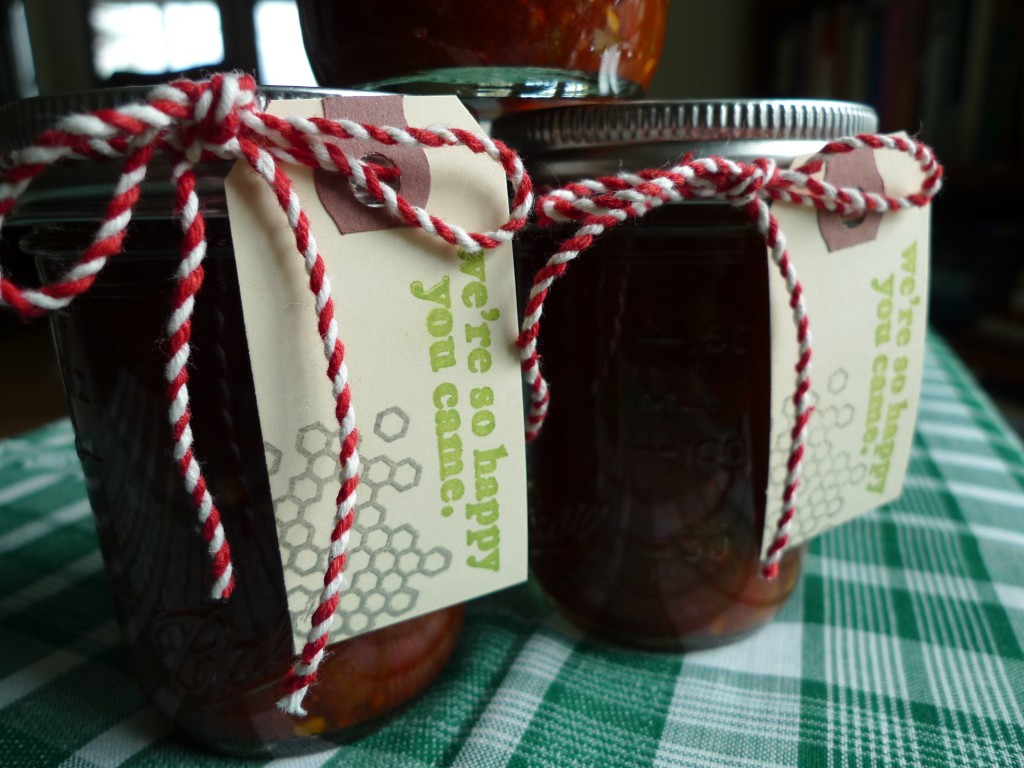
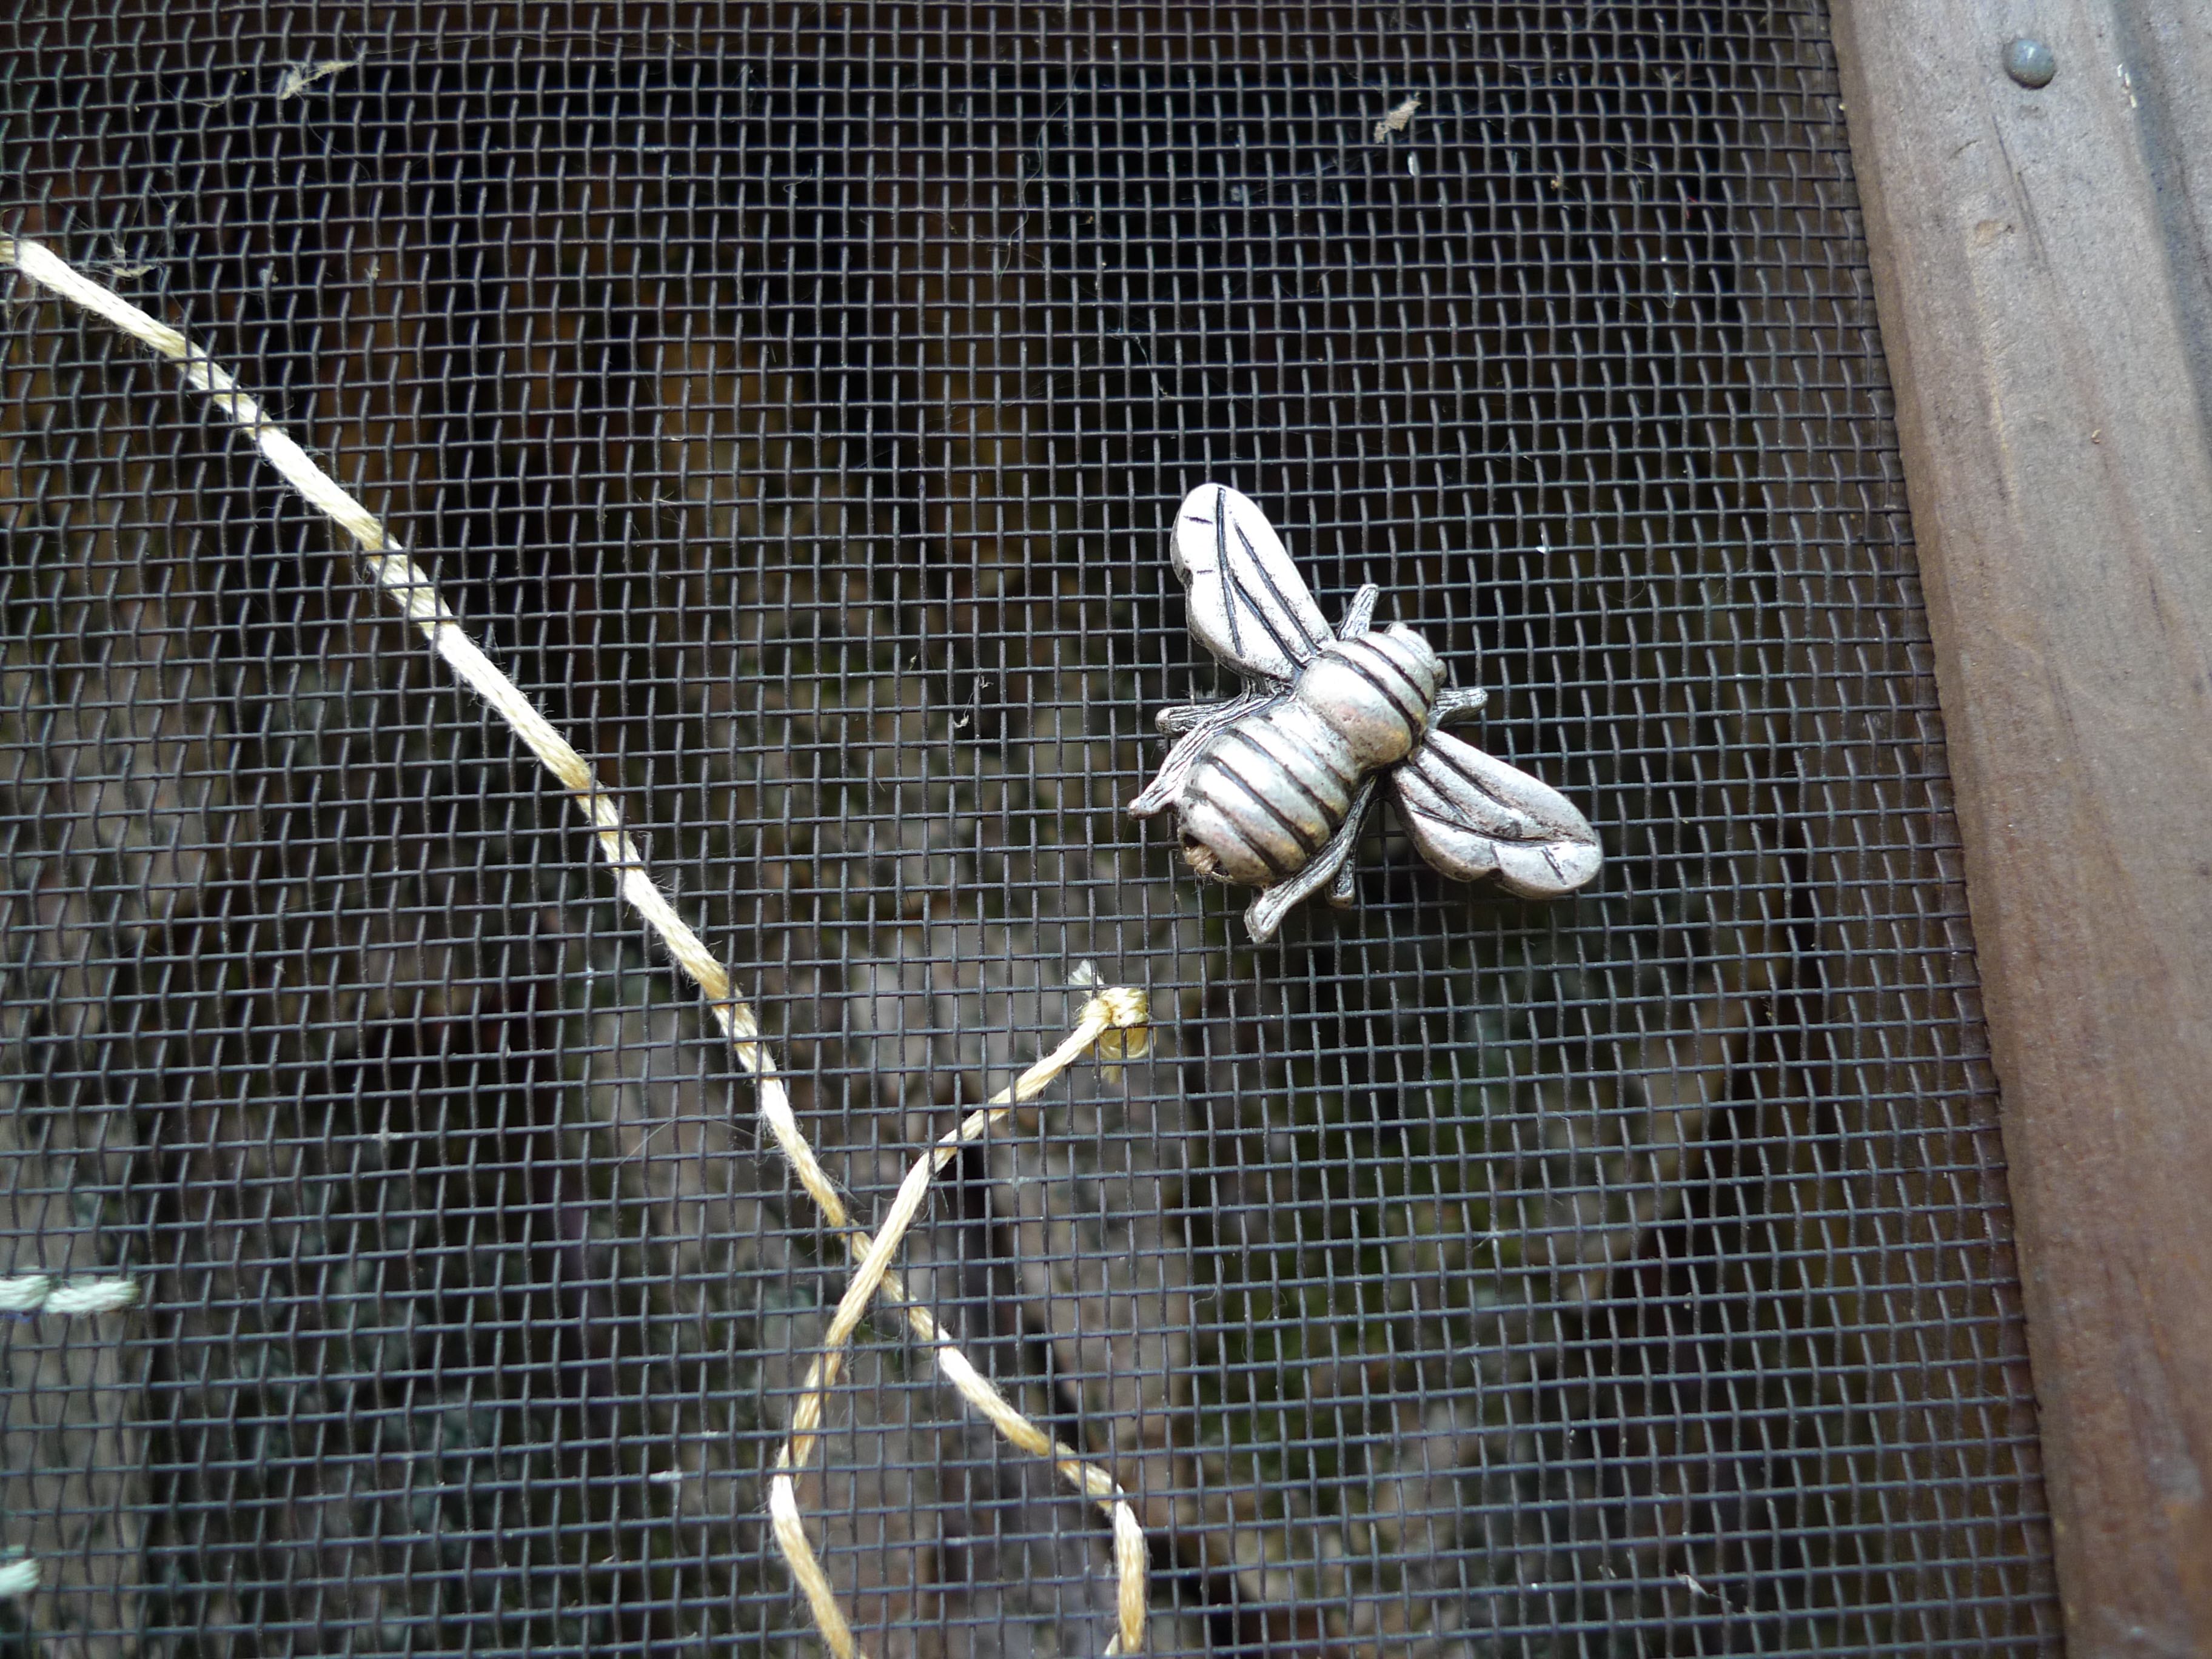
As you can see from the photos, we stamped a little note telling the guests that we were so happy they came to the wedding. Sarah and I worked on these tags, and honestly, we had such a hard time coming up with a “thanks for coming” phrase that would fit nicely on the tags and sound sincere. We settled on “we’re so happy you came”, but even now it makes me laugh because I think it sounds a bit awkward. In addition to the note of thanks, we used a stamp to say what was in each jar, and then we decorated the tag with the honey comb and bee stamps.
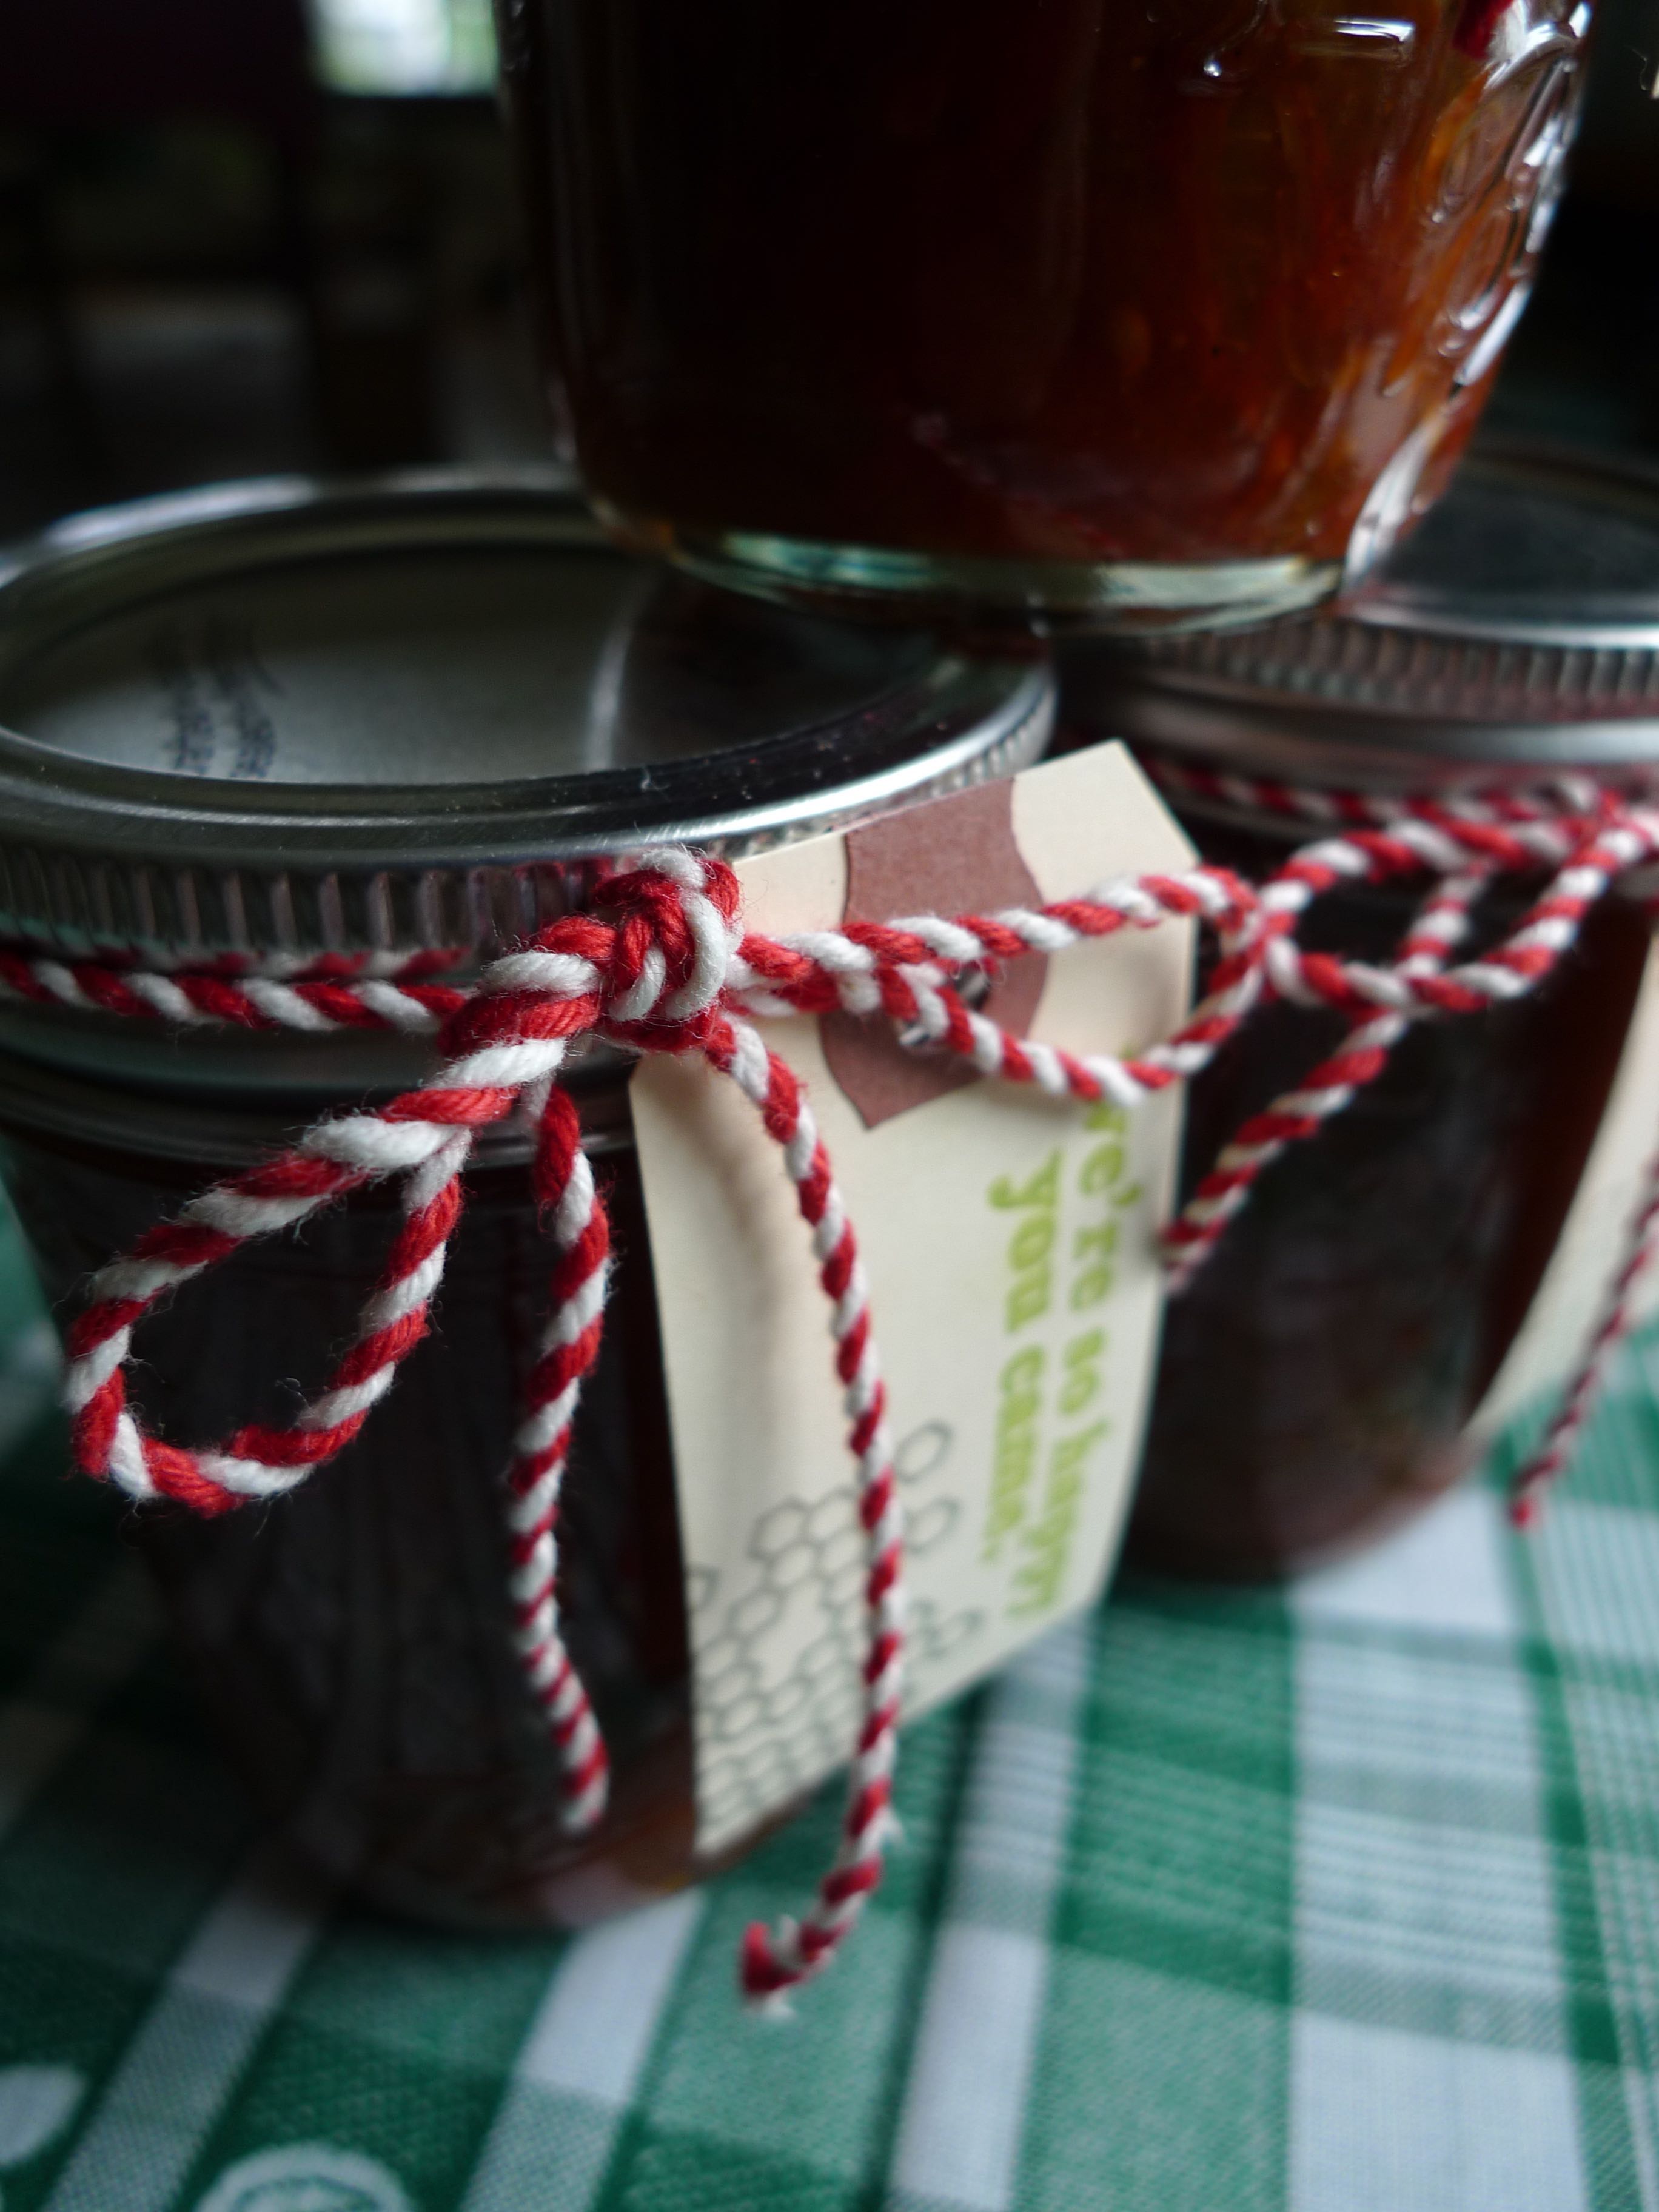
Finally, to complete the favor packaging and tie (ha! pun intended) them into the wedding colors and design, we used baker’s twine to attach the tags to each jar. I tied on some tags so that the “thank you” phrase was showing and others so that the name of the jar’s contents was visible. Rather than using standard baker’s twine, I some special ordered thick vintage baker’s twine. Unfortunately, the shop I ordered it from is no longer in business, and a quick search didn’t turn up an equivalent product. Hopefully it’s still available somewhere because I love it!


Finally, rather that setting all of the jars out on a table, we used an old hutch that we already had in the house. We filled the hutch with the jars, mixing the different options together rather than trying to keep things sorted (we wanted to make it like a comfy old kitchen cupboard). Next to the hutch we set up an old school desk with a few favors on it and a sign that reiterated our note of thanks to the guests and invited them to take a favor.
We had enough extras that we were happy to let people take a few different jars if they wanted, and it made me especially happy when they did! There was nothing like seeing our guests leave with a little bit of homemade goodness filled with love.
Place Cards
At such a casual affair, it may seem silly for us to have assigned seats, but while planning the wedding, I came to see the value in the seating chart. I realized that I didn’t want guests to end up in awkward seating positions, where our college friends fill up half a table only to have a great aunt and uncle sit down with them. It’s not that my great relatives aren’t awesome, but they may not have the same taste in music as our friends, you know? I also didn’t want a situation where we had half full tables because people didn’t know who to sit with, meanwhile, there’s a perfectly good strangers that would hit it off, if only they had a chance to meet. So, we eliminated those awkward tables and made the awesome ones happen by pulling out the place cards.
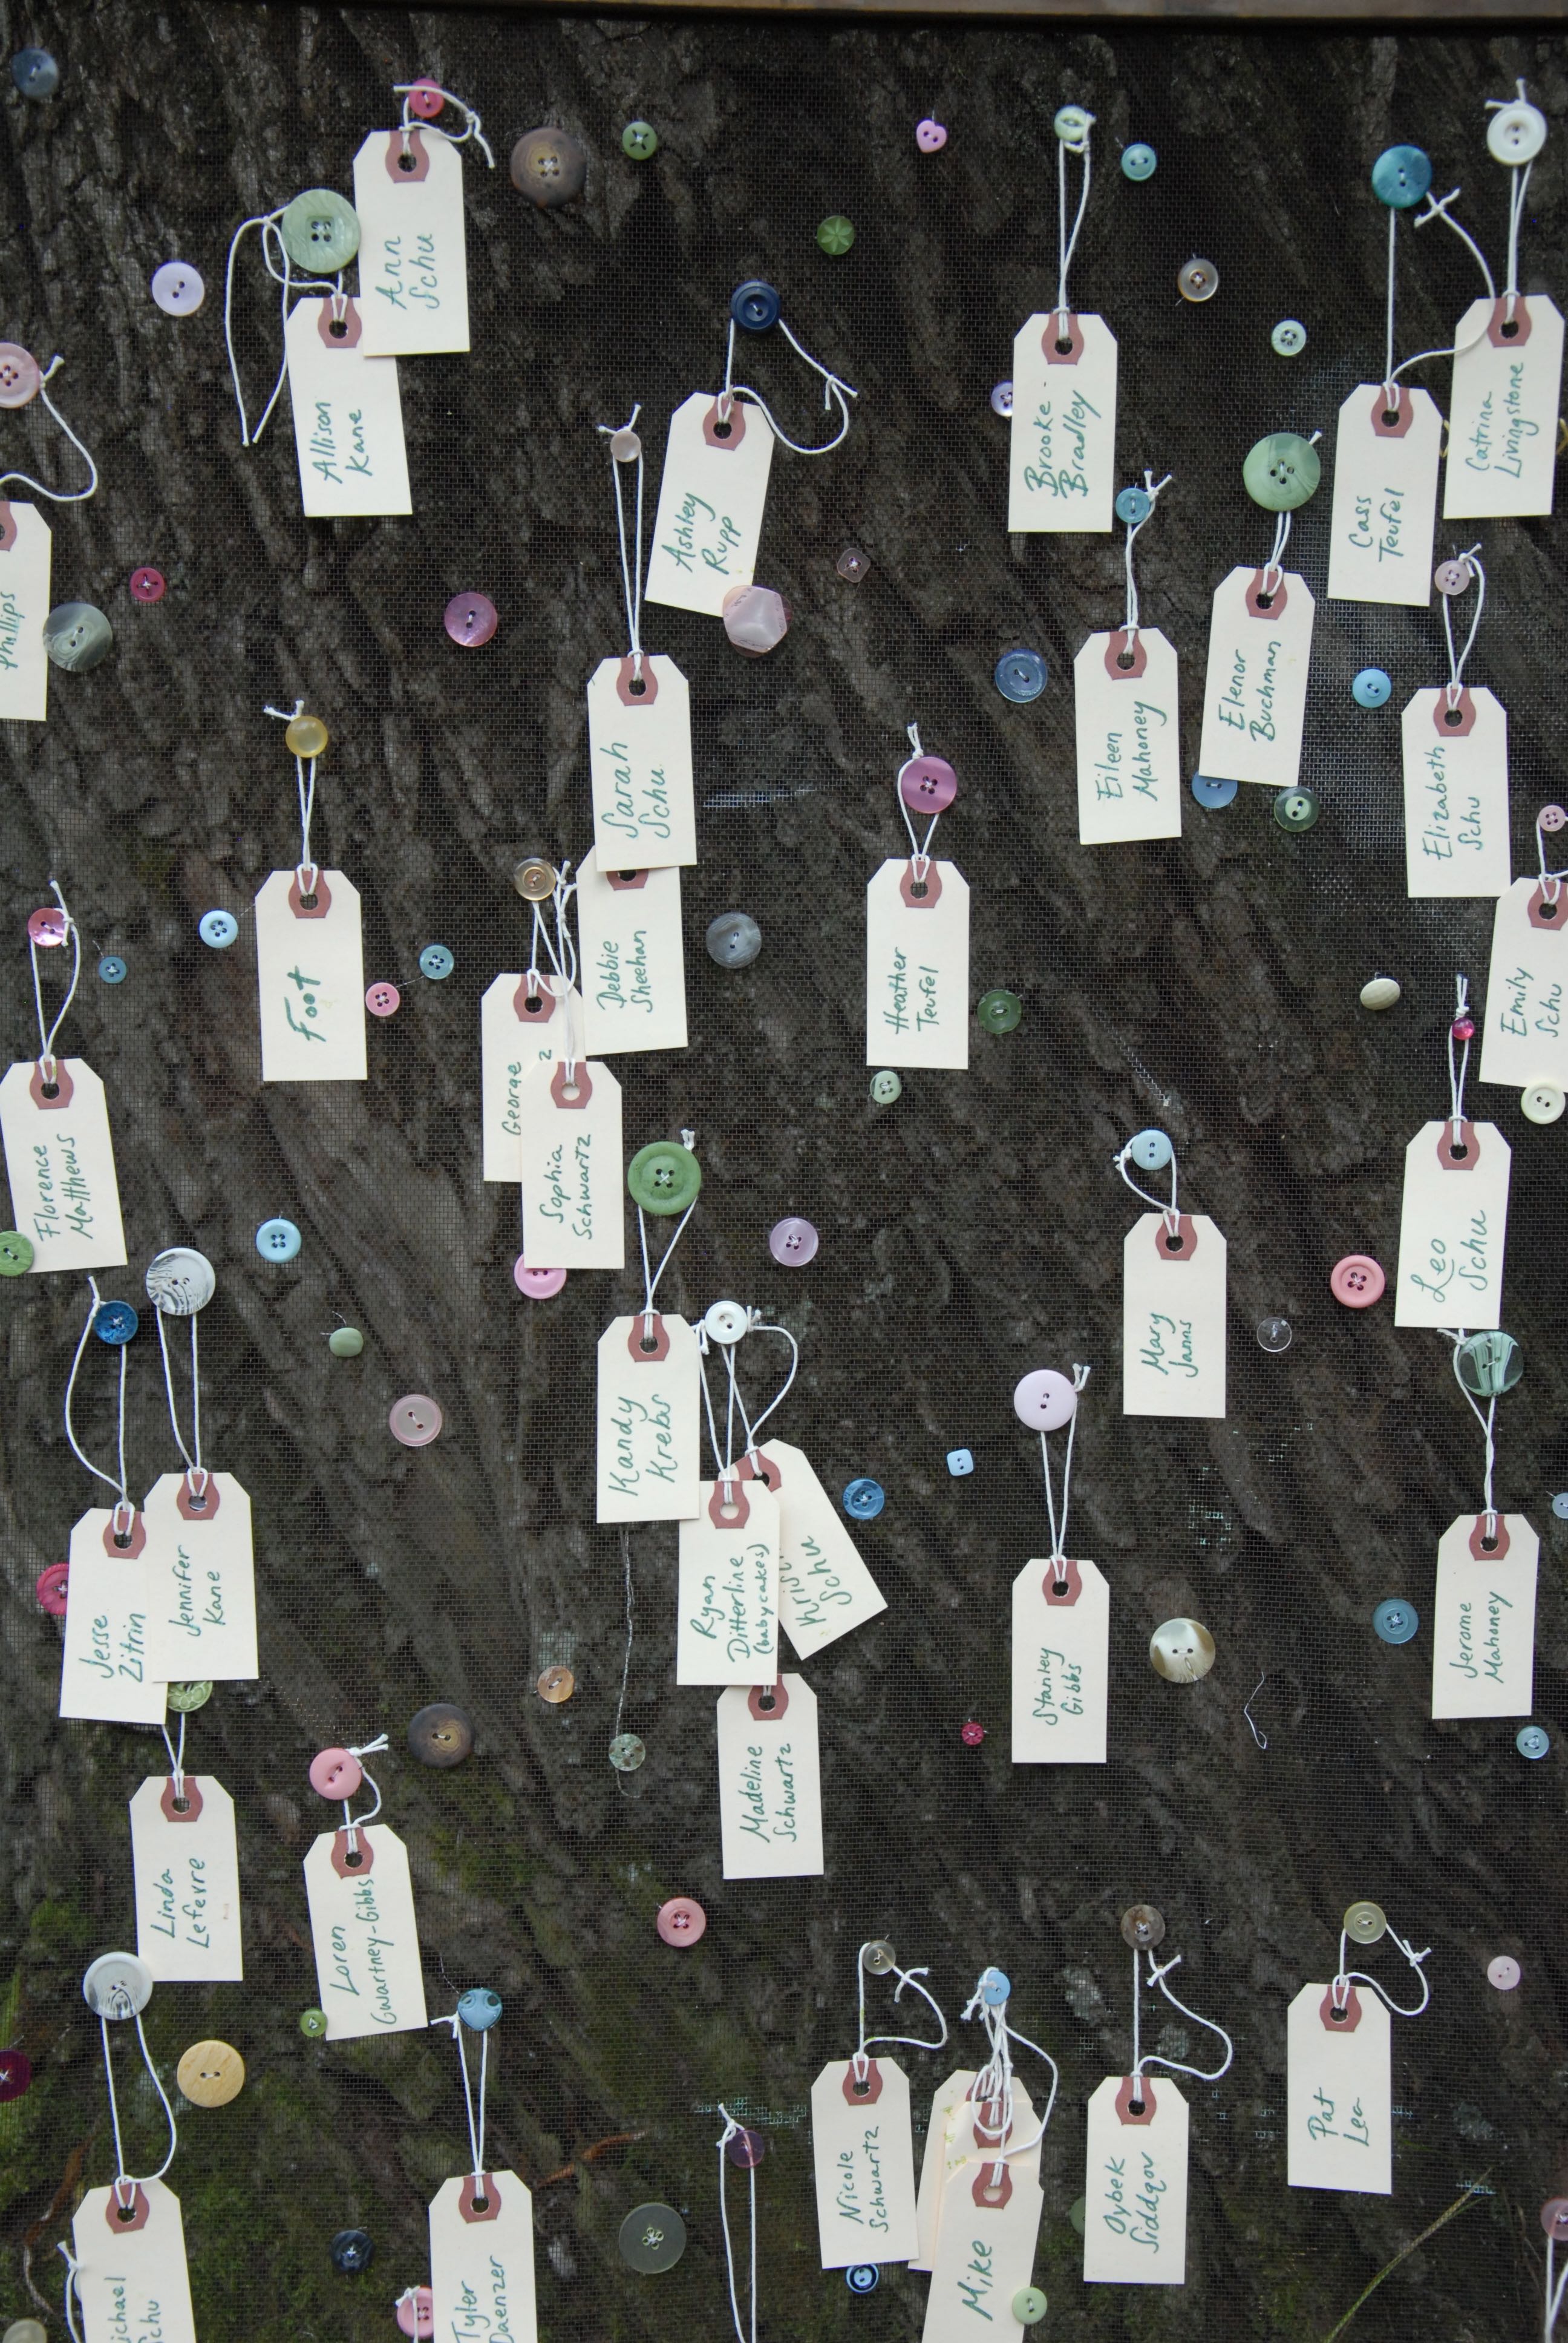
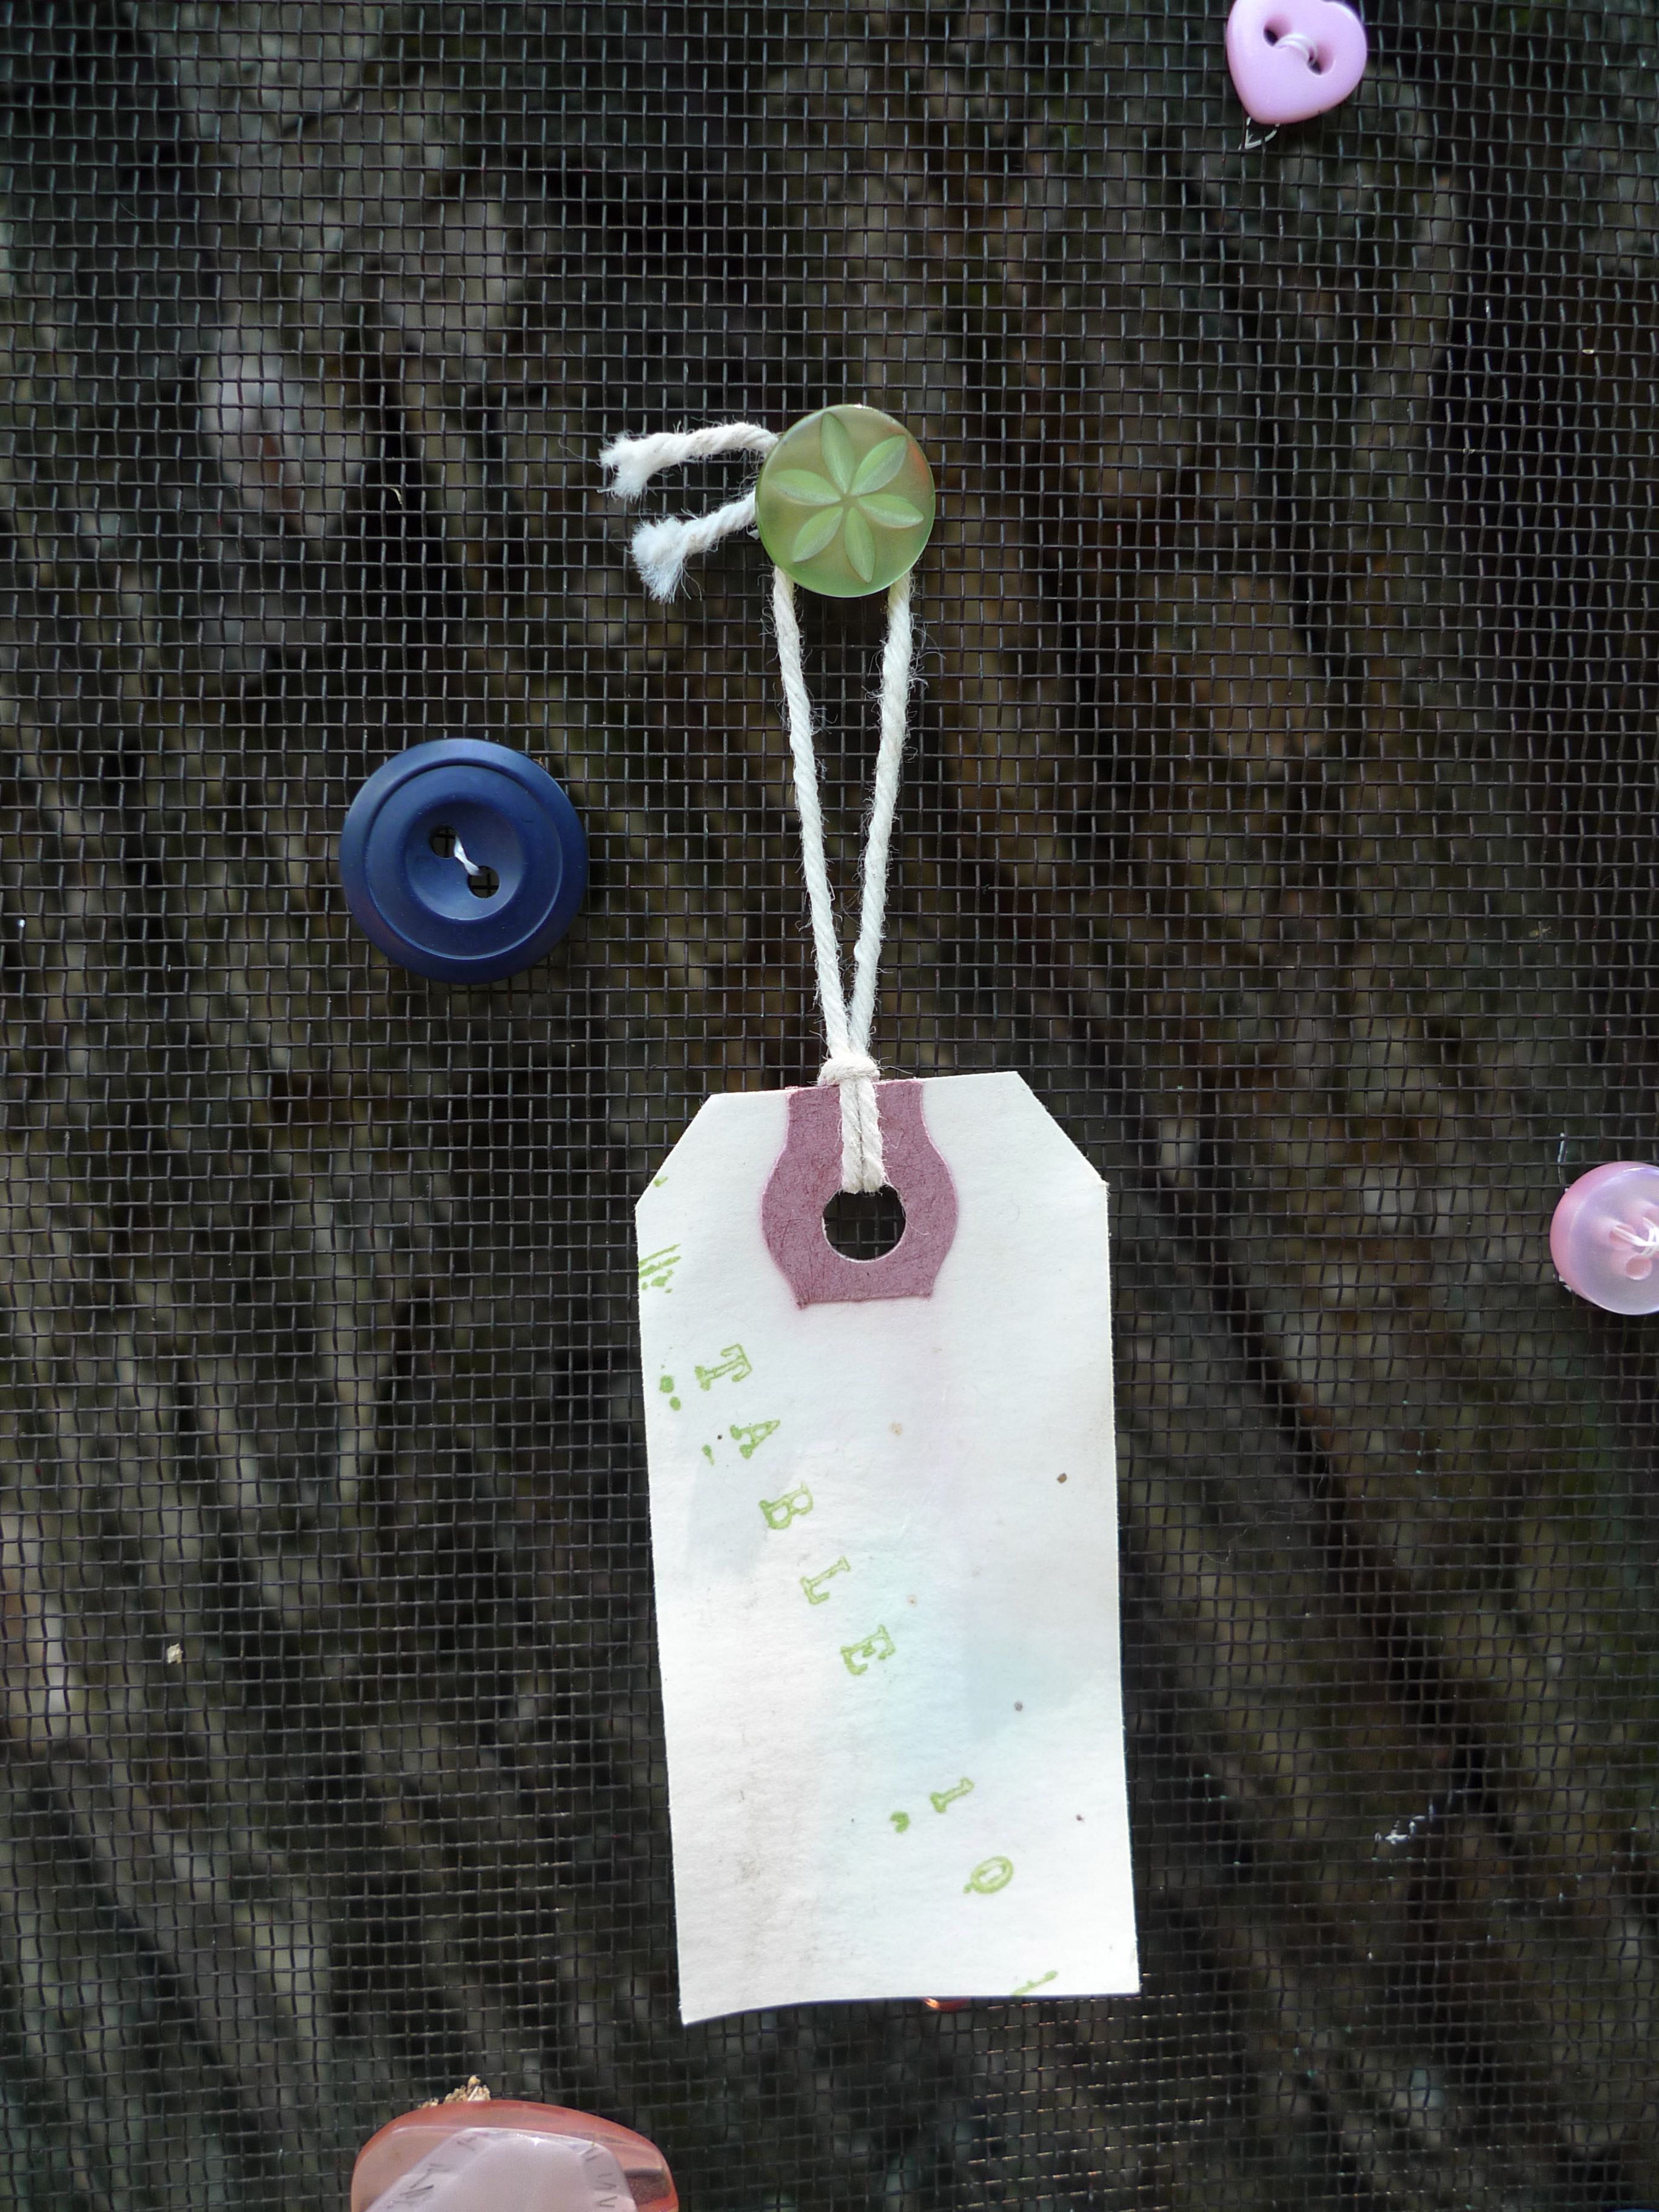
Just as with the favors, we used manila tags for this project. On one side we wrote down each guest’s name, and on the other side we stamped their table assignment using this customizable rubber stamp. Again, that was a great stamp purchase because I still use it all the time, especially around the holidays – it’s perfect for stamping names or notes on packages.
The real fun of this project came when thinking about where to display the tags until they were picked up by each guest. Just like the bridesmaids’ purses, this was an idea that evolved for the better. I had this random old wooden screen door that I trash-picked while living in Boston. Can you believe someone was throwing it away? I couldn’t, obviously, so I took it home, and then drove it all the way to PA when I moved.
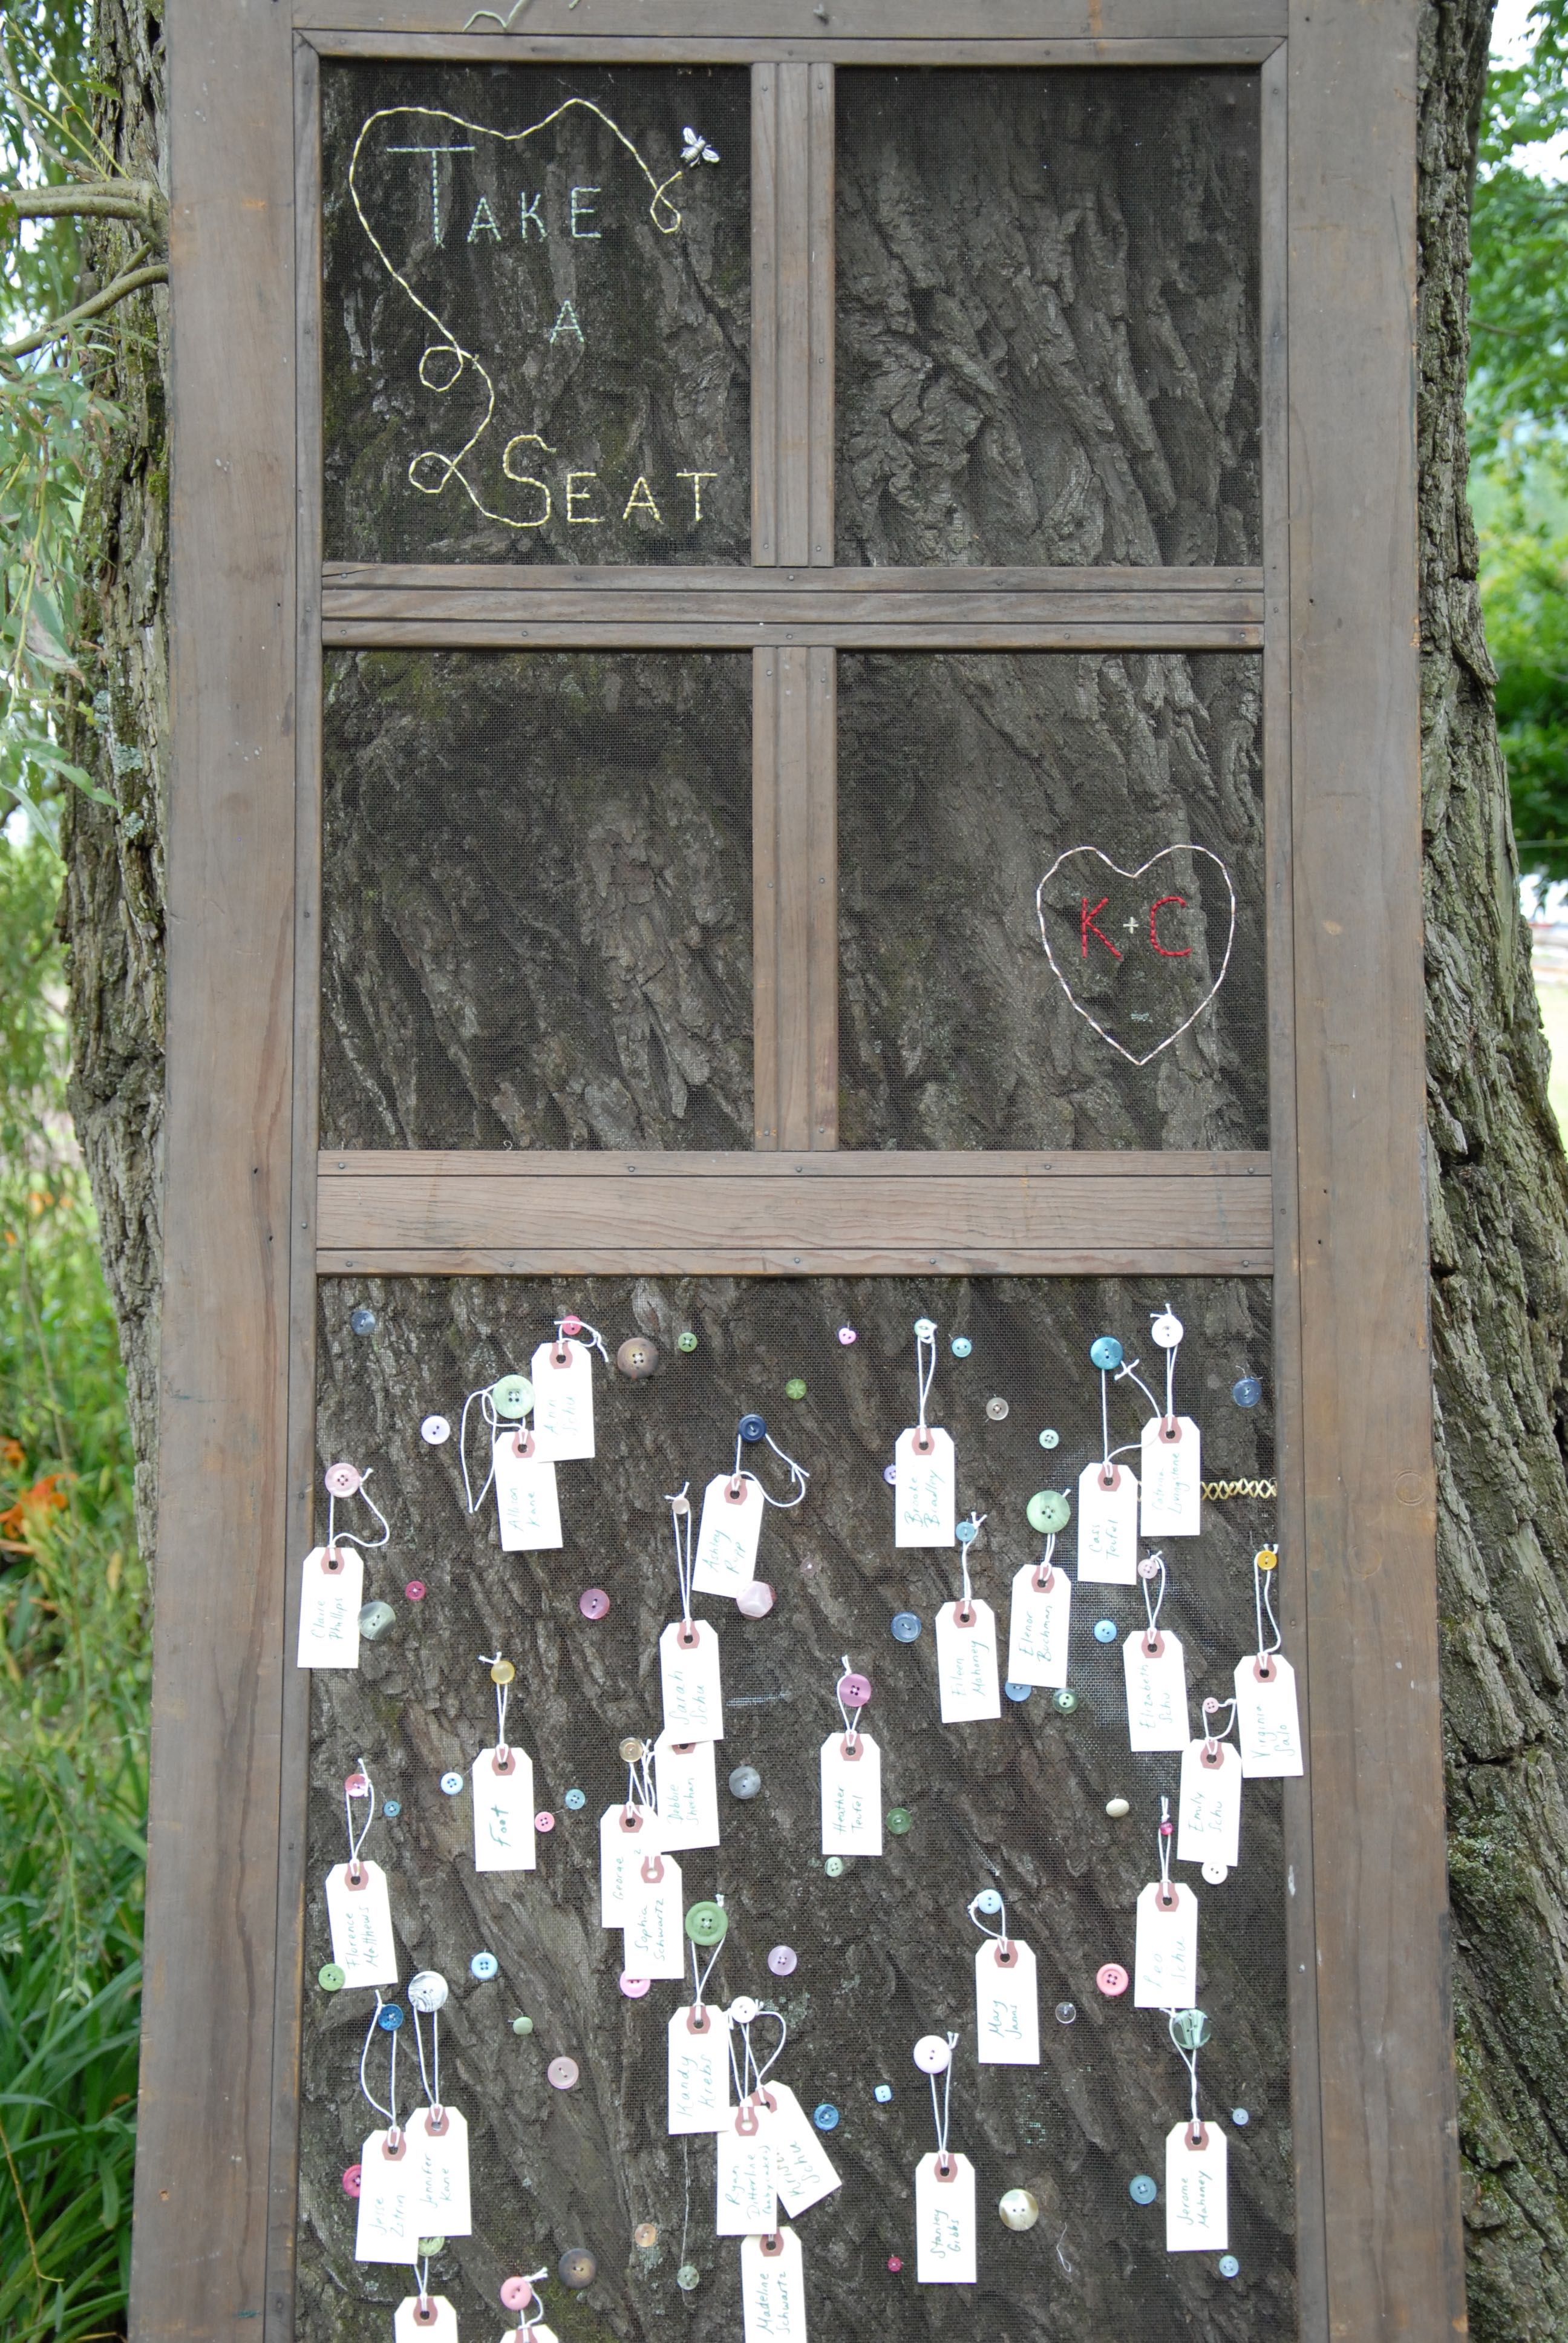
I always wanted to turn it into a piece of art and embroider something on the screen, but never got around to it. Then, as we were planning the wedding, I decided that the door would get used one way or another. And one day it dawned on me that if we combined the door with my button collect and these tags, then I would have a great place to display the place cards!
In two of the window areas on the top half of the door, I embroidered a little “take a seat” design and a heart with our initials. In the lower half of the door, I just sewed a bunch of buttons to the screen. The button placement was random, and I put on more than we needed for the tags. Additionally, the door’s screen had a single tear in the lower half, so rather than try to hide it, we had some fun and sewed it back together.
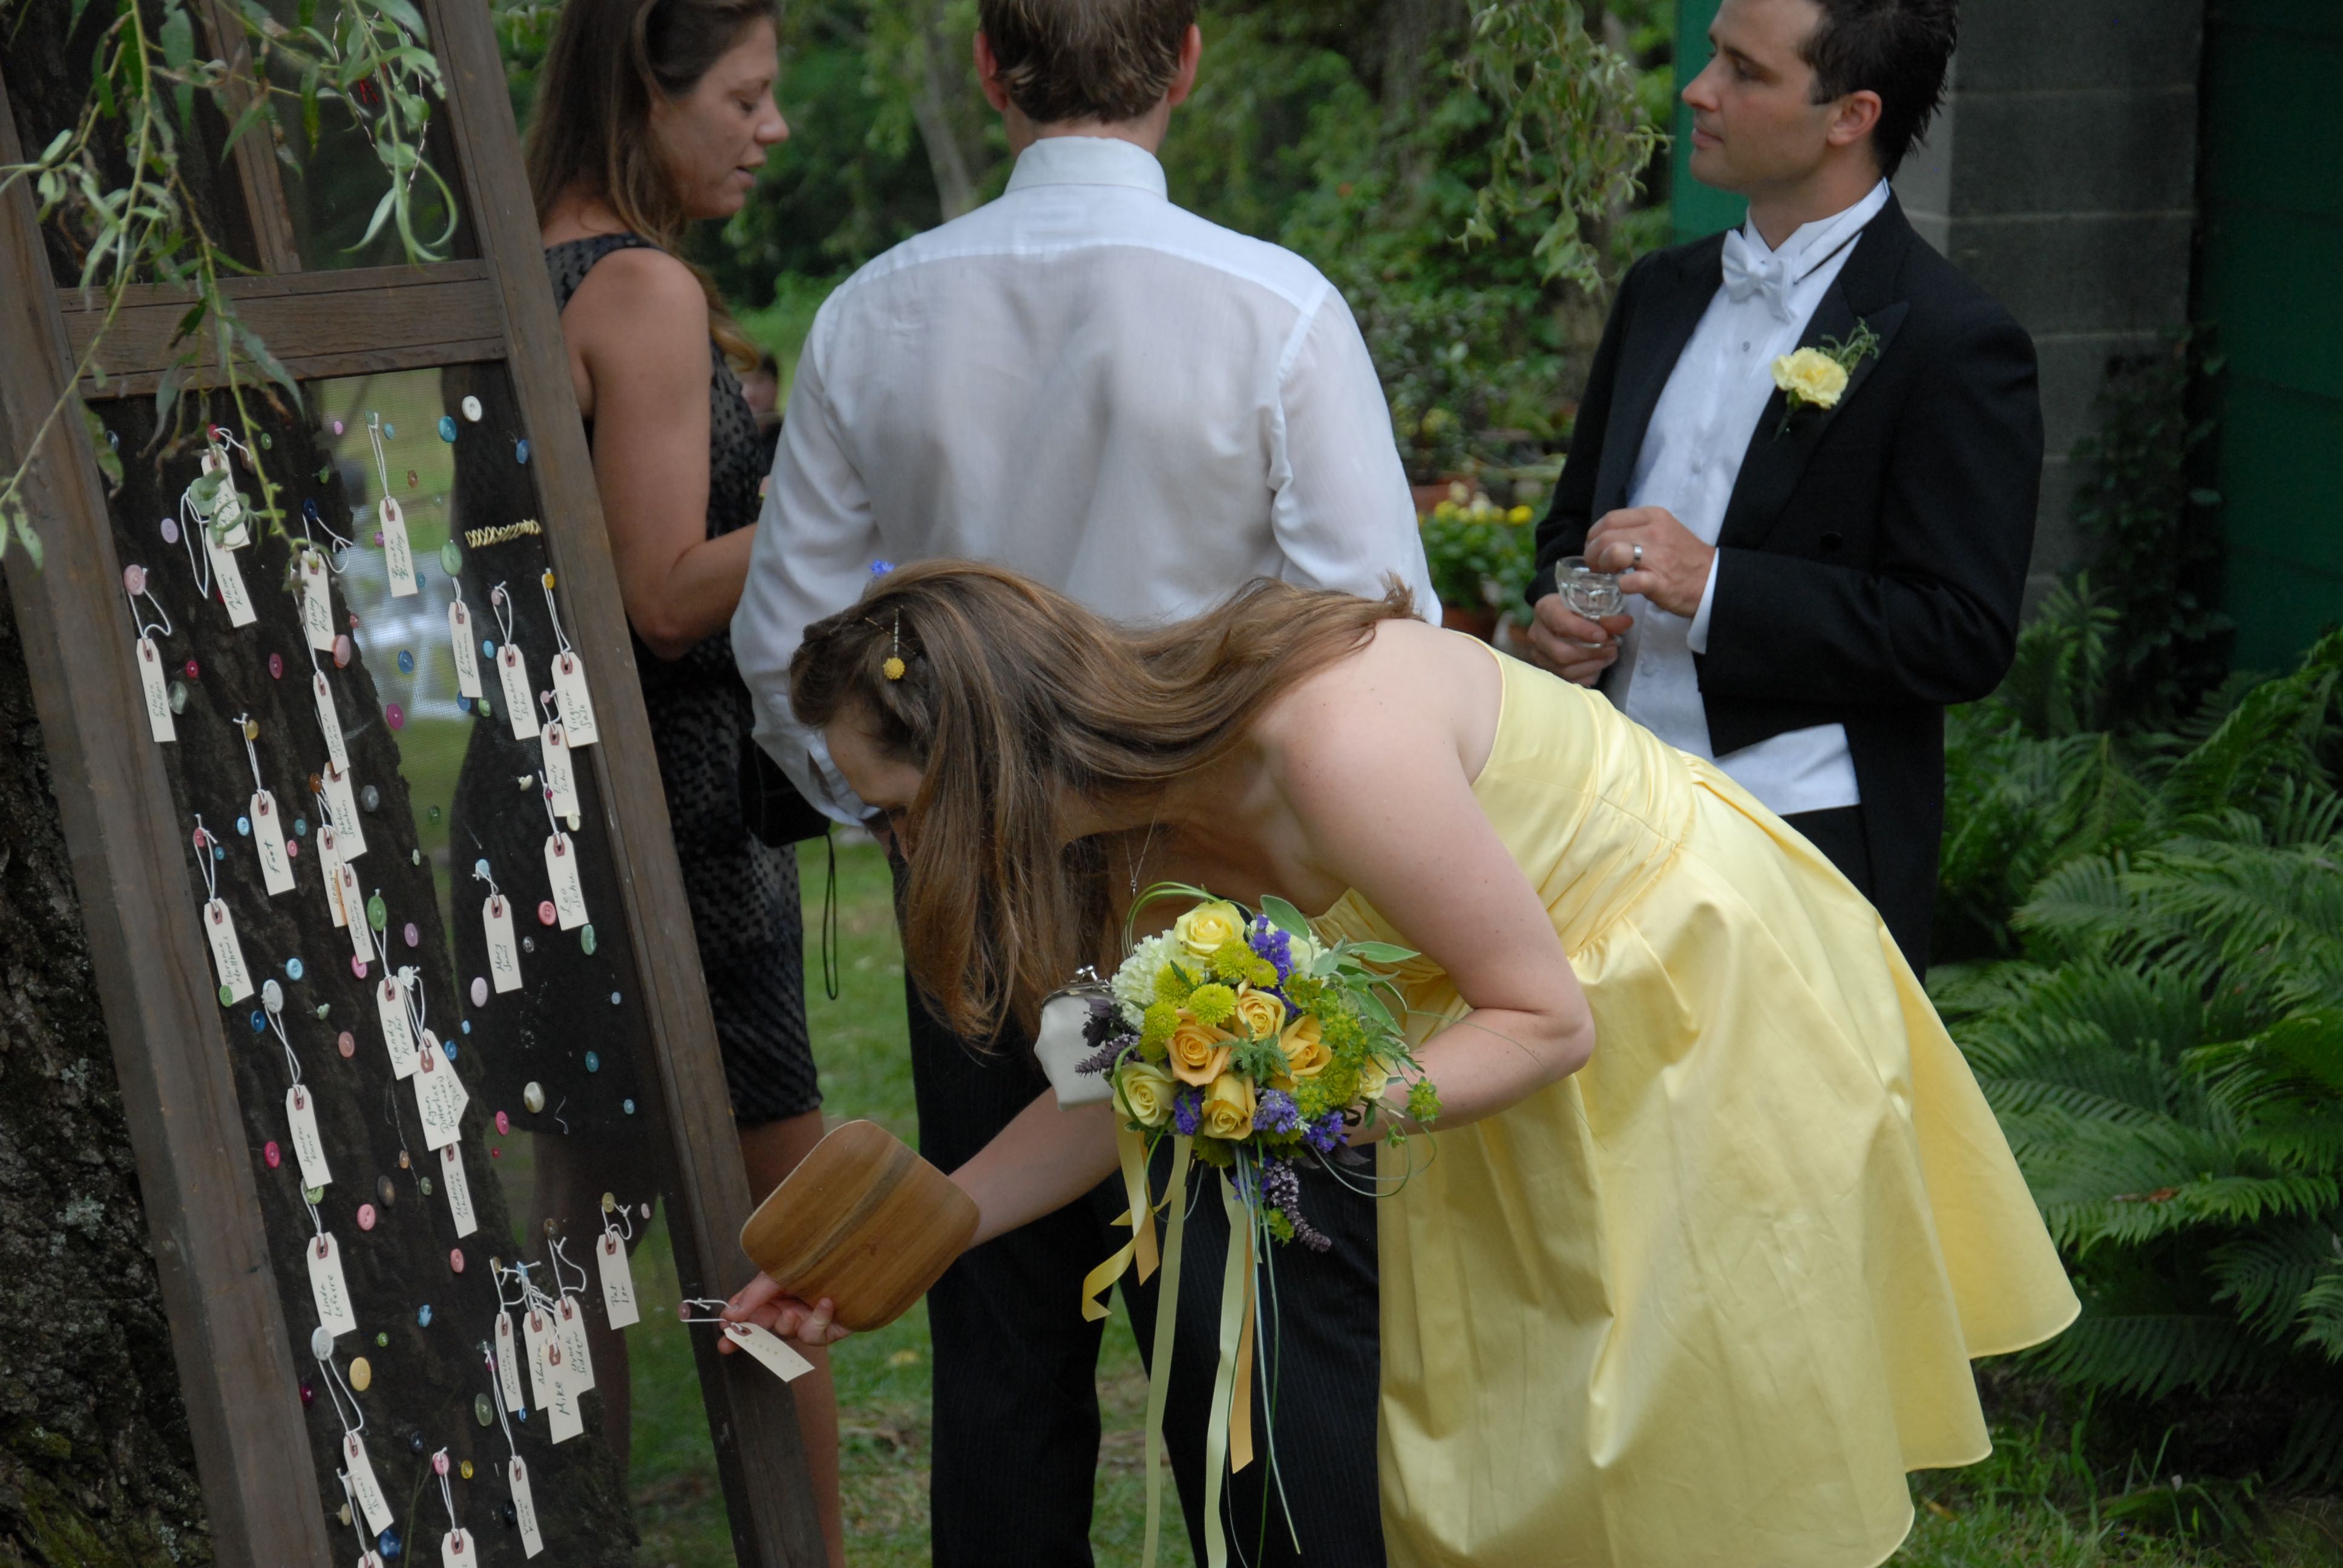
On the day of the wedding, we propped the door up against the trunk of an old willow tree that was just steps from the reception tent. And that was it, we had the perfect vertical display for the place cards. I loved this project, because after all of the cards were picked up, we weren’t left with a random empty table, instead, we still had something fun to look at.
Oh, and you know those scenes in wedding movies where people are mulling over their seating chart for months as they try to figure out where to seat old Aunt Betty? Fortunately, our planning turned out to be pain-free. I’m not sure how that happened, but it made me love the whole seating chart and place card project even more!
What do you think? Are you enjoying seeing these projects? If so, come back tomorrow and we’ll share just a few more things. If you’re not enjoying them, what’s wrong with you?! 😉