
Hey baby mommas and poppas! From time to time I like to share photography tips and bits. Today I’ll show you a simple setup for a newborn photography session. If you have a DSLR, this tutorial is especially for you! If you’re working with an iPhone or point and shoot camera, these tips will totally help you out too, but there’s going to be some information that you don’t need so just skim through all that junk. Like I said, this is a simple setup. Nothing crazy goin’ on here. I think it’s best to master the basics first and that’s what we’ll be focusing on in this post.
Time It Right
- A sleepy baby is a happy baby. Time your portrait session around nap time making sure the little lad or lady is well fed before you lay her down for the photoshoot.
- Set everything up before hand so all you have to do is lay the little nugget down, snap a few shots, arrange and repeat.
- Remember, a quick photoshoot is a painless photoshoot.
Find Your Light
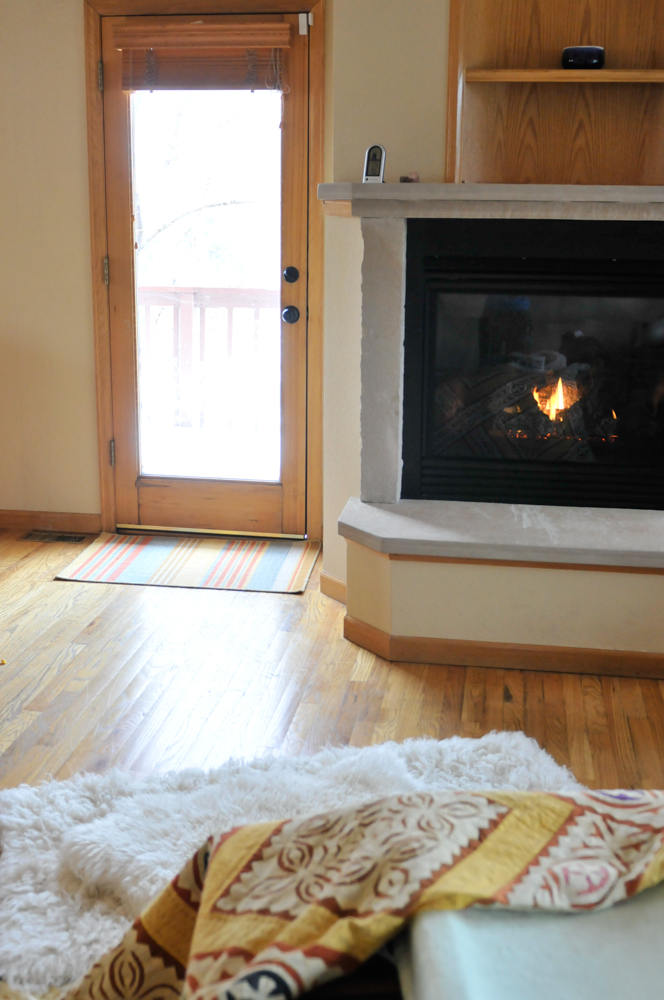
- A big soft natural light source is best. You’ll want to set up shop in the brightest room in your house. This will probably be a window-lined room or one with a large sliding glass door or if you’re lucky enough to have skylights – that’s the room I’m talking about!
- Create soft lighting. If it’s a cloudy day the light is probably perfect. If your room is getting direct, bright light, hang a white sheet over the window or door to diffuse the light. You don’t want to use colored curtains because the light will reflect the color and green babies are not cute babies.
- Now determine the direction of the light. I do this by standing in front of the light source and holding up my hand that way I can actually see how the light reacts with my hand and creates shadows.
- In most cases, you want to minimize shadows while taking portraits. If you search baby portraits you can see 98% of them have little to no shadows on the baby’s face that’s what we’re going for as well. Take a test shot of your hand to test the direction of the light and then set up your portrait backdrop accordingly.


Create a Cozy Nest
- Turn the temperature in the house up and create a soft and cozy nest for your baby to be photographed on.
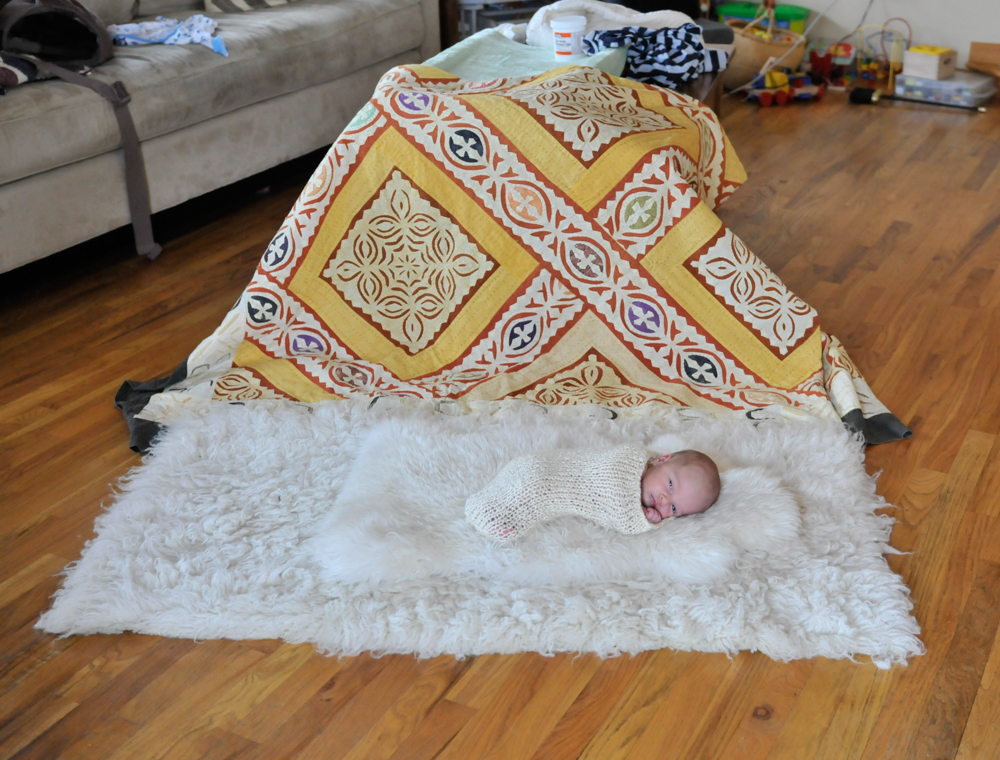
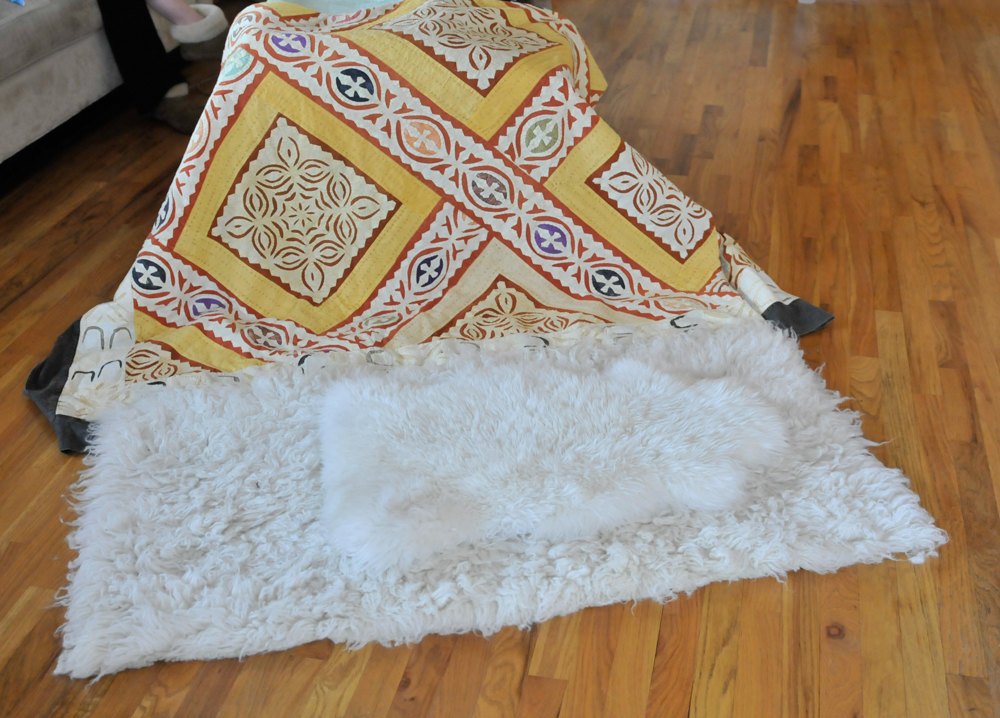
- Create a wrinkle-free and distraction-free backdrop! This is super important and really easy. As you can see, we used a coffee table to drape the fabric on, but you could also use a bench, chair or wardrobe bar, really whatever you have on hand. The fabric is everything. Use something that doesn’t wrinkle and your portraits will look bajilliontrillion times cleaner and prettier.
- Use a soft prop under the baby like a boopy or a feather pillow so their little bottom is comfortable.
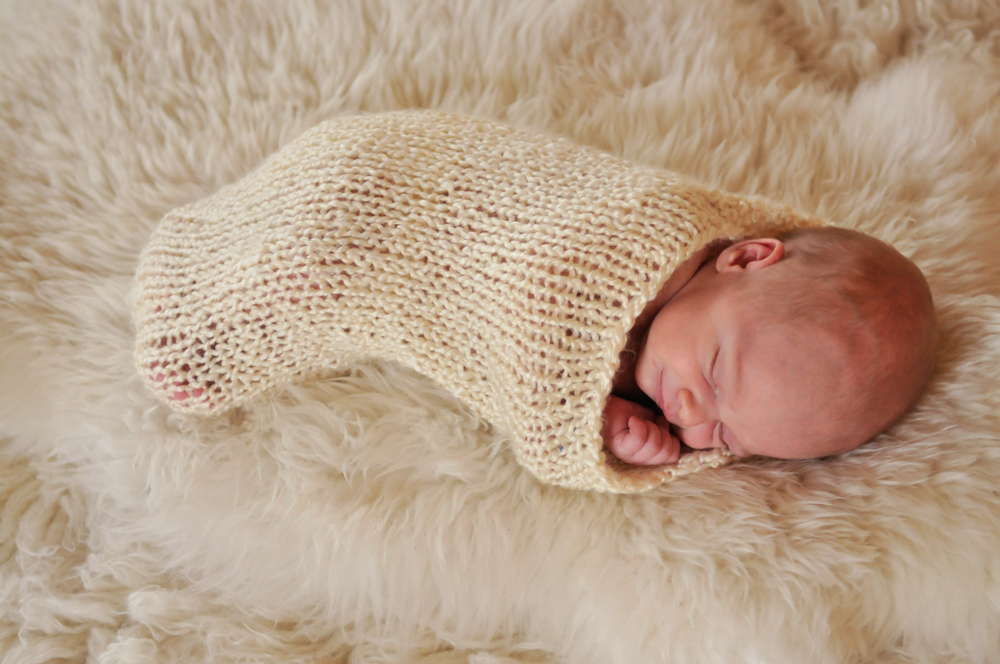
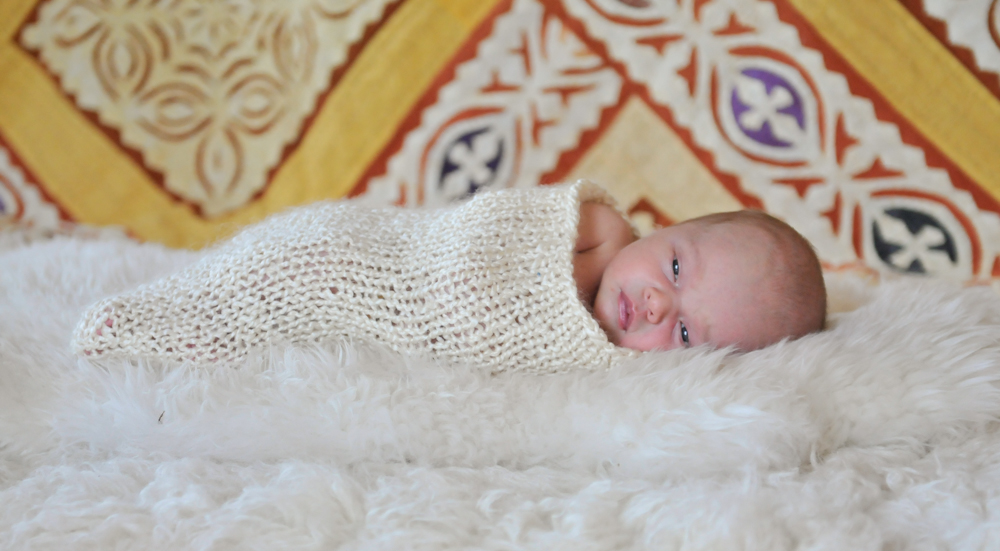
- Keep it simple. Choosing plain props, pillows and blankets will create a timeless portrait. For Alex + Luc we stuck with a simple white sheepskin and a hand-knit cocoon courtesy of Mamma Kate!


Choose Your Camera Settings
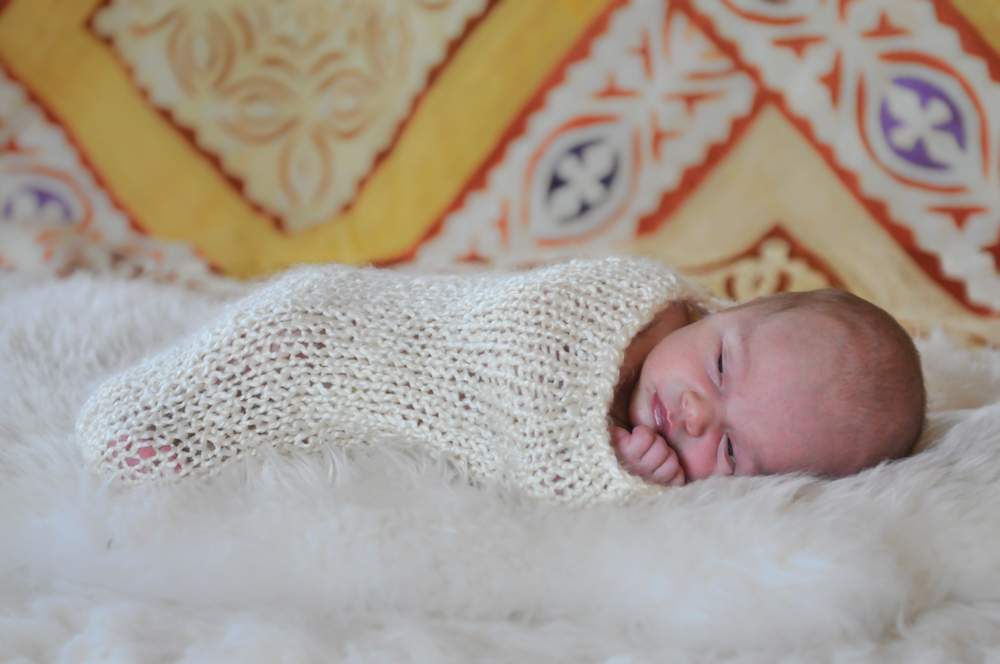
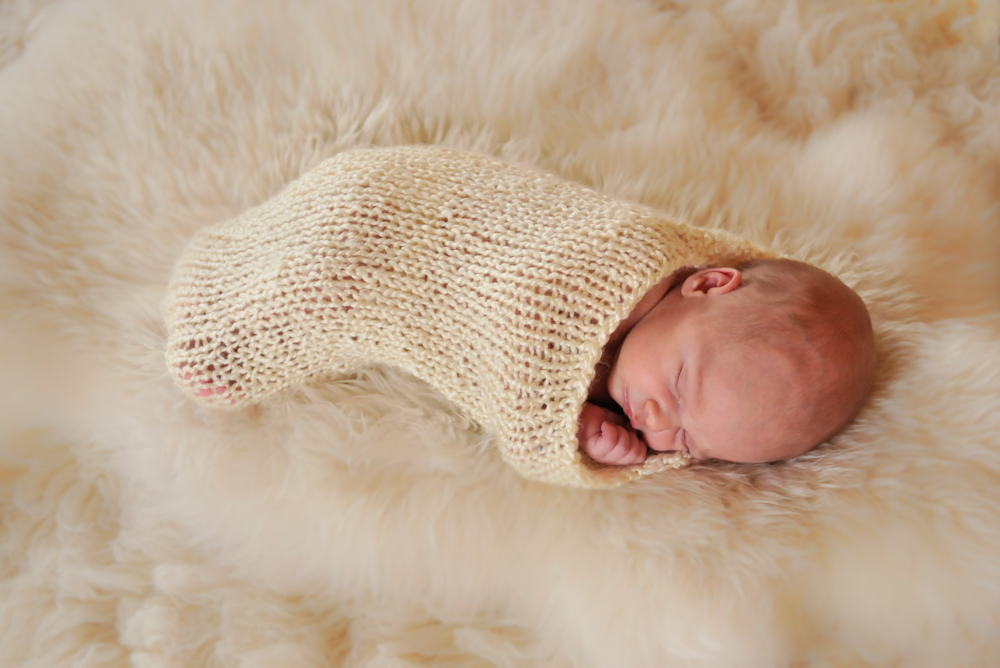
- White Balance – This depends on your light source. Hopefully you’re near a window and it’s sunny or cloudy in which case choose the setting that records the truest white or the one you desire. I say that because sometimes I photograph on cloudy WB when it’s actually sunny in order to produce a warmer photograph. You can see the WB differences in the two photos below. Now is a good time to use your hand as a test subject 🙂
- ISO – low! 200-800 would be best. ISO should always be set at the lowest number possible for the scene you’re shooting in. In this case, the shutter speed should be at least 1/100, but if you find it’s much faster, like 1/500, lower your ISO some more. If you need a refresher, learn about ISO here, but know that the lower the ISO, the better the overall quality of photo file.
- Aperture or Fstop – low! 2.8 or 4.5 or the lowest your lens will allow. A low Fstop number means a shallow depth of field and a large aperture opening that will let in lots of light. You may have to focus manually to prevent mis-focusing like shown above.
- Shutter Speed – whatever creates a properly exposed photo. Use your light meter to determine this or set your camera to Aperture Priority and let the machine do the thinking for you.
- Shoot on Continuous Shooting or Burst mode so that you don’t miss a moment.
- Stand back and zoom in. Normally I wouldn’t say that, but in the case of newborn photography, do it to it.
That’s all folks! Really, that’s all you need to know to take a simple portrait of a precious newborn. These shots are wonderful for birth announcements. As a professional photographer, I feel I must say that taking photos at home are no substitute for a paid professional, but I know not everyone has the budget or desire to hire a professional when you can DIY. I feel ya and that’s perfectly OK too, which is why I’m giving you these tips 🙂 Let me know if you have any other questions about this process and I’ll be happy to share what I know.
Katie here :
I thought I would chime in with a few tips and tricks for birth announcements. I’m no expert when it comes to design, and I know that beauty is in the eye of the beholder, but I really like the way that both Alex and Luc’s birth announcements turned out, so I thought I would share a few simple ideas.
Unfortunately, some of this advice comes from spending far too many hours in the OB’s office during the last month of pregnancy with Luc (more on that someday soon!). I had to sit for tests, and they all occurred in the room where that practice hung many of the birth announcements they received, so I saw all sorts of cards and baby pictures. Here’s what I took away from those cards :
- The bad 1: There were photographs of the babies that were taken from a distance, so you really didn’t get a great picture of the baby, AND you were distracted by the photo’s busy background.
- The bad 2: Some cards would include multiple pictures of the baby. Again, this was distracting because rather than being the size of the card, the photos are smaller, and often overlaid on top of each other as part of the design, but the layering created a busy card that distracted from the baby.
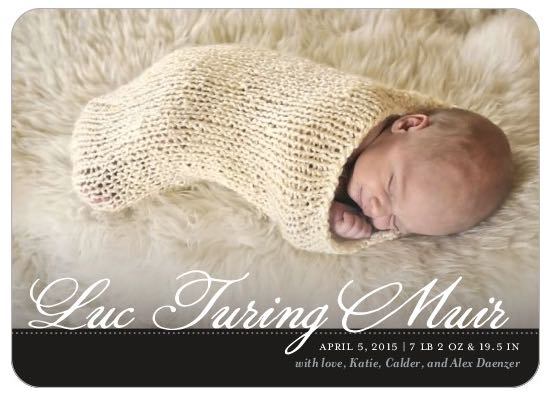
I found that the most beautiful and striking cards were ones that used a single, well-staged photograph of the baby.
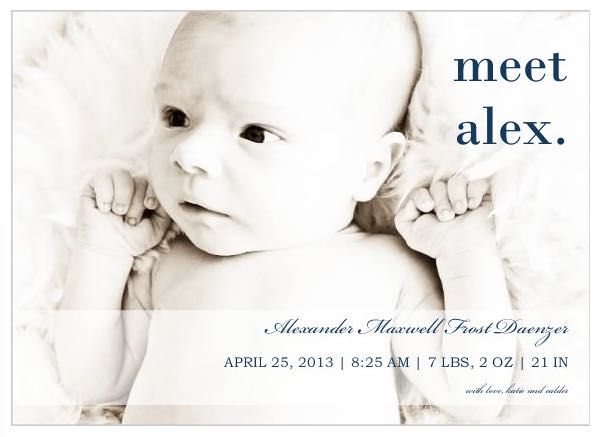
We created these cards for Alex and Luc using pre-made designs from Shutterfly. While they offer many cards with multi-photo designs that break rule #2 above, I can always find a number of beautiful single-photo designs that I love. That said, you should test a couple of designs to find the text layout and colors that best fit your photo. For example, Alex’s card would not work with Luc’s photo because the baby would end up under the words “Meet Alex”. Alex’s card also works well because the color of the text is dark against the light photograph. There were a number of designs available when making Luc’s card that also put text directly on the photo, but the text was golden in color and did not show up well against Luc’s warmer photograph. As a result, we settled on the design above that put most of the text on the black area.
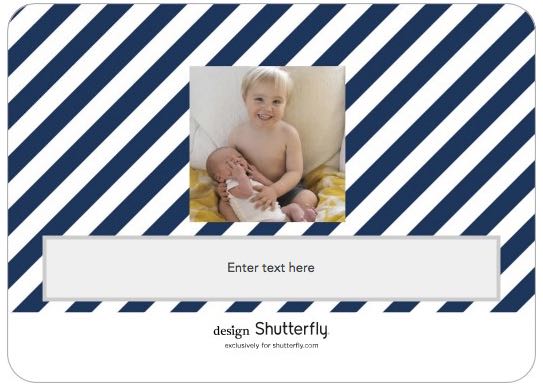
If you really want to add a second photo to your announcement, use the back of the card. Sarah took some fantastic photos of Luc with big brother Alex, and we thought it would be fun to include one, but I still wanted the front of the card to be all about Luc. So I included their photo on the back with some blue stripes to fill out the space.
Oh, and if you’re making birth announcements, don’t forget to send one to the White House! Your baby will receive a great response from the president.
President Obama Greetings Office Room 391600 Pennsylvania Ave
Washington, DC 20500
Now, go have a baby so you can take some photos!
this post warmed my heart SO MUCH. and your birth announcements are so on point!
Yay! We can’t wait for you to meet little Luc. He’ll melt your heart!