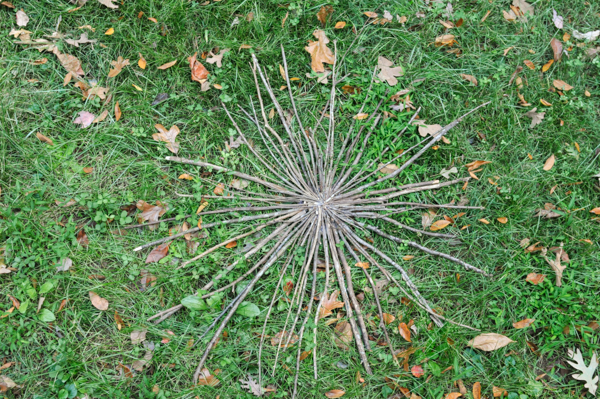
Happy Fall! This foraged twig wreath screams autumn and the best part about it is it encourages you to go outside and prance around in the woods. You’ll need to gather a bunch of twigs and sticks, which is really easy at this time of year. The forest should be full of dry kindling waiting to be collected. I wanted to create a natural looking decoration that was quick and easy, but also cheap. This wreath ended up costing me nothing but time (most of which I spent looking for my glue gun) since I already owned the other materials. I made a pretty big wreath because I wanted it to be the center of attention on my tiny shed wall. First things first, think about where you’d like to hang your wreath and measure or eye it up so that you have a general idea of how big you’d like your finished product to be.
Supplies:
- thick cardboard
- pen
- scissors
- tape
- twine
- glue gun
- big ol’ pile of twigs
Steps:
- Step 1: Draw a donut onto some scrap cardboard (I traced a random jar, but it doesn’t have to be perfect) and cut it out. My cardboard seemed flimsy so I cut two identical donuts and taped them together with masking tape.
- Step 2: Dispense a line of glue on one side of your donut. Press the twine into it and wrap it neatly around the donut. Continue dispensing glue (on what will be the back side of your donut) and wrapping twine until you cover the entire donut. Cut a length of twine (mine was about 4 inches) and tie it in a loop around your donut so you can hang it up later.
- Step 3: Now it’s time to place the twigs. This is where you can let your creativity come through. Do you want a wreath of all tiny twigs? Bigger sticks? Bark or no bark? That’s all up to you. I wanted something that looked really rustic so I strived for lots of variation in both size and color. Start by placing the 12 o’clock and three o’clock sticks, but don’t glue them down yet. Choose sticks to fill in the space between 12 and 3. Once you have a quarter of your wreath laid out, you can begin hot gluing the sticks to the donut. Don’t rush this process, glue each stick individually and pay attention to how they are arranged in the center of the donut. You will want the center to resemble a star when you’re finished.
- Step 4: After you have filled in 12 o’clock to 3 o’clock section, place the 6 o’clock stick on the donut and repeat the process. Continue until your entire donut is covered and your wreath is complete.
- Because my wreath is so large, I wanted to create an additional layer of smaller twigs to add some depth. I did this by repeating steps 1-3 and simple gluing my smaller wreath onto the larger one.
I had a great time creating this project because there really is no way you can screw it up. It was a stress free craft project, which kind of equates to meditation for me. I hate sitting idle, but sometimes I don’t feel like concentrating too hard on a project. It’s also perfect for kiddos. They can search for twigs and lay them out to their liking while a parent glues them to the donut. Another reason I’m keen on this twig wreath, it gives me something to photograph in all seasons. Have you ever taken the same photo over and over during each season? It’s nice to have a single object that remains unchanged yet altered by whatever is going on in the shot (rain, sleet, snow). I’m excited to see how this simple craft holds up this year and how pretty it will look with a dusting of snow 🙂


