Sweet Potato & Mushroom Soup

Potato was our ingredient of the season in 2018. We’re fudging it a bit and group sweet potatoes with their distantly related cousins. You can find our full archive of potato(ish) posts here.

I recently made another pot of this soup, and it has held up well to the test of time. The combination of simple ingredient list with a rich finish make this the perfect soup for chilly winter evenings.

***

Seeing as how the east coast is shoveling out from another storm, we’re bringing you a delicious, nutritious, and simple sweet potato and mushroom soup.

sweet_potato_soup3

As we mentioned above, sweet potatoes are not within the same taxonomic family as potatoes. Potatoes are in the nightshade family while sweet potatoes are in the morning glory family. If you’ve ever grown a decorative sweet potato vine that bloomed, you would immediately see the resemblance. But for our purposes, this season we’re grouping all of these tubers together.

Continue reading

Roasted Cabbage with Crispy Onions

IMG_6321

During the Hot Springs Crating Ritual and Cultivating Mindfulness Retreat, we must have only had cabbage a couple of times, but we couldn’t stop talking about it. Seriously. There were multiple conversations I wandered into where people were talking about how underrated cabbage is and how delicious Jami’s cabbage recipes are. Especially the roasted cabbage with crispy onions. I mean, how often have you heard, “is there any more cabbage left?” and sadly the answer was, ‘No.’

As an ode to all you cabbage lovers out there (I’m lookin’ at you Luc!) I’m here with the perfect side dish. Cabbage is cheap and seemingly always in season. I feel like I often overlook it, but maybe that’s because I haven’t really tried anything exciting or flavorful. I always stick with haluski, pigeons, basically any cabbage dish that involves a lot of butter. Here’s to changing that. Grab your machete and throw that head of cabbage in the air like you are a real-life fruit ninja. Wait! Actually, you’ll want to slice it. Read the recipe below and start writing a grocery list, you’re gut will thank you too as cabbage is shown to improve digestion and reduce inflammation.

Roasted Cabbage with Crispy Onions

Ingredients

  • 1 head of red or green cabbage
  • 1 small red onion, medium diced
  • 1/2 stick of unsalted butter (or vegan butter)
  • ¼ olive oil, plus 2 tablespoons
  • Salt & pepper

Instructions

  1. Preheat oven to 400F
  2. Wash and remove any leaves of the cabbage that are loose.
  3. Cut into Wedges with steam still attached. About 8 wedges.
  4. Line a cookie sheet with foil and drizzle 1 tablespoon of olive oil on the foil.
  5. Add the Cabbage wedges and drizzle the rest of the oil.
  6. Season with salt & pepper.
  7. *I add a very small piece of butter to each cabbage wedge. Adds flavor and
  8. helps crisp the cabbage.
  9. Roast the cabbage wedges for 20- 25 minutes, or until crispy and golden
  10. brown.
  11. *You are looking for the cabbage to have a lot of crisp to the outer layers and
  12. still have a soft interior.
  13. As the cabbage is roasting, use a medium skillet on medium heat.
  14. Melt the
  15. butter and olive oil together. Once the butter has melted add the diced onion,
  16. salt & pepper.
  17. Stir every 2 minutes, this will help create crispy onion bits.
  18. Cook for about 7 minutes.
  19. Once the cabbage is finished, plate and spoon the onion with the butter and
  20. oil over the cabbage.
  21. Garnish with chopped chive or scallion, maybe some flake salt.
https://liveseasoned.com/roasted-cabbage-crispy-onions/

Looking for a little more? You can also add some chopped bacon to the roasted cabbage with crispy onions.

You could also whip up an easy chive and sour cream sauce to drizzle over the top.

Simply mix:
  • 1 cup sour cream
  • 1/4 c Greek yogurt
  • 2 tablespoons of chopped chives
  • some salt and pepper

Carrot Hummus

This week, I’m sharing half a dozen recipes from the Crafting Ritual and Cultivating Mindfulness retreat.  Our personal chef, Jami, prepared all our delicious meals from basic, whole ingredients. Jami demonstrated how little preparation some of these yummy veggie dishes take. Food-13 Food-12 Food-11

Carrot hummus, is the easiest way to add color to your spreads, and the quickest way to impress your guests. This bright carrot hummus goes great with a vegetable platter or pita chips. You can see we used it as a topping for our open faced sandwiches at brunch, along with beets, micro greens, mushrooms, avocado, and egg. Wholesome.

Continue reading

Thanksgiving Inspired Tapas

We’re republishing this yummy Thanksgiving inspired Tapas post from last year because it was so darn yummy.  Steal a recipe or two (or all five) for your big dinner this year.

liveseasoned_fall14_thanksgivingtapas-7

Happy Thanksgiving! I know, I’m a couple days early, but I wanted to show you how I celebrated Thanksgiving with my bf  last week.  I’m currently visiting a friend in Florida so I wanted to celebrate with K before I left.  I decided to create a tapas inspired Thanksgiving because it is perfect for couples, small families or those who are scared of cooking a turkey (me!). With some prep the night before, this all came together in under an hour.  Can you believe it?! I think my favorite part was the aioli tossed potatoes and the fact that everything is bite sized.  Eating tapas helps me slow down, enjoy the meal and talk between tiny bites.  We had a bunch of leftovers too and who doesn’t love that?!

One thing I try to do before starting to prepare a huge meal is to write a schedule.  I jot down all the names of the recipes in the order that I should start them.  That gives me a general guide so I’m not standing over the stove wondering what to do next.  At the end of the post, I’ll share my schedule with you.  I think it’d be easier to understand after you read the recipes.

liveseasoned_fall14_thanksgivingtapas-5

Garlic Tossed Green Beans with Toasted Pine Nuts

  • Half of an onion
  • 2 garlic cloves
  • 1/3 cup pine nuts
  • 1 lb green beans, trimmed
  • salt and pepper to taste
  • 2 tablespoons olive oil
  • Fill a tea kettle with water and turn it on to boil.
  • In a large sauté pan, pour 1 tablespoon of olive oil and turn the burner onto medium heat.  After a couple minutes, when the oil has heated up, add the pine nuts.  Toss the nuts every couple minutes.  When they start to pop or turn slightly brown, use a slotted spoon and place the nuts on a paper towel to drain. Turn the burner off for a moment. This should take no more than six minutes.
  • Place the trimmed green beans in a medium sized pot.  Pour the boiling tea kettle over the green beans and turn the burner on high heat.  Time the beans for seven minutes.  The green beans should be cooked, but still crisp. Once they’re done, drain them in a colander.
  • While the green beans are cooking, finely chop half an onion and two cloves of garlic. Add the onion to the sauté pan that you toasted the nuts in. Sprinkle a little salt over the onions.  Cook the onions on medium low heat until they are soft and translucent, about five minutes.  Add the garlic and continue to sauté for two more minutes.
  • By this time the green beans should be finished boiling.  Add them to the sauté pan and drizzle the remaining tablespoon over the green beans. Sprinkle with salt and pepper.  Stir the beans around to coat them with onions and garlic and add the pine nuts.  Stir for another minute or two to incorporate all the flavors and serve.

liveseasoned_fall14_thanksgivingtapas-6

Brown Sugar and Maple Syrup Glazed Carrots

  • 1/2 lb of baby carrots or large chunks of full-sized carrots
  • 1/4 cup of maple syrup
  • 2 tablespoons of brown sugar
  • Preheat the oven to 375°.
  • Whisk together the maple syrup and the brown sugar.
  • Put the carrots in a cast-iron pan or a vessel that is able to be baked.
  • Add the carrots to the pan and pour the glaze over them.  Don’t worry if the carrots aren’t completely covered or saturated. The glaze will bake into the carrots just fine.
  • Cover the pan with tin foil to create a steaming effect.
  • Time for thirty minutes. Check the carrots by piercing them with a fork.
*These measurements are based on baking carrots for 3 people – increase as necessary.

liveseasoned_fall14_thanksgivingtapas-3

Roasted Brussel Sprouts

  • Stalk of brussels sprouts
  • 2 tablespoons of olive oil
  • 1/4 teaspoon cayenne pepper
  • 1/4 teaspoon salt
  • 1/4 teaspoon pepper
  • Preheat the oven to 375°
  • Optional step: Wrap the stalk of brussels in plastic wrap and microwave for three minutes.
  • Whisk together olive oil, cayenne, salt and pepper.
  • Place the brussels sprouts in a glass baking dish and drizzle with olive oil mixture.
  • Place in the oven and bake for 30 minutes.
*I like my brussels sprouts nice and brown, if you don’t, check the sprouts every ten minutes.

liveseasoned_fall14_thanksgivingtapas-1

Aioli Tossed Potatoes

  • 1 egg – room temperature
  • 2 garlic cloves, pressed
  • 2 tablespoons olive oil
  • 2 tablespoons of vegetable oil
  • 1 tablespoon fresh lemon juice
  • sprinkle of pepper
  • 1 teaspoon of salt
  • 1 lb of very small potatoes
  • 2 tablespoons finely chopped fresh parsley
  • Bring a medium-sized pot of salted (add the tsp of salt) water to boil. Add the potatoes and cook until just soft.  Test the potatoes by piercing them with a fork.  About ten minutes.
  • Whisk together the room temperature egg, pressed garlic cloves, olive oil, and fresh lemon juice.  Sprinkle some pepper into the aioli.
  • Slowly drizzle in the vegetable oil, little by little while whisking the aioli.
  • When the potatoes are cooked, drain them and put them in a large bowl.
  • Toss the warm potatoes with aioli and parsley.
  • Let sit for 10-15 minutes before serving so that aioli soaks into the potatoes.

liveseasoned_fall14_thanksgivingtapas-4

Warm and Spicy Grilled Pork Skewers

  • 1/4 teaspoon cayenne
  • 1/4 teaspoon cloves
  • 1/4 teaspoon nutmeg
  • 1/4 teaspoon cinnamon
  • 1/4 teaspoon allspice
  • 1/4 teaspoon pepper
  • Juice from one large lemon
  • 3 tablespoons olive oil
  • 3 garlic cloves, pressed
  • 3 tablespoons roughly chopped parsley
  • 1/2 – 1 lb pork
  • skewers
  • The marinade must be made the night before; please keep that in mind.
  • Whisk all the spices, garlic, lemon juice, parsley and olive oil in a bowl.
  • Cut up the pork pieces into quarter-sized chunks and place in a single layer in a shallow nonmetallic dish.
  • Pour the marinade evenly over the pork pieces, cover with plastic wrap and place in the fridge. Ideally, you should stir the pork two or three times over the course of 8-12 hours.
  • 8-12+ hours later, place the pork pieces onto skewers.  If you’re using wooden skewers, soak them in water for at least twenty minutes prior to grilling.
  • Place the pork skewers on the grill or broil them.  I used a George Foreman grill and it took approximately 6 minutes to grill each group of skewers.

liveseasoned_fall14_thanksgivingtapas-8

Also shown in the photos are cranberry goat cheese topped crackers and mini no bake pumpkin pies.  I picked up the goat cheese from Trader Joe’s; served at room temperature, it is the perfect appetizer. The mini pumpkin pie recipe will be shared tomorrow, so stay tuned 🙂

After typing all those recipes, I realize that seems like a lot to do, but with a little preparation it comes together quickly.  The night before you can prep by washing the carrots, brussels, green beans and potatoes.  Chop a big pile of parsley and make the marinade and the aioli as well.  I also did a mental walkthrough of all the recipes and pulled out garnishes, gadgets, pots, pans and serving dishes for everything.  It’s a small step, but it really helps on the morning of.  That way everything is sitting out on the counter ready to be grabbed at a moments notice.

The day of, start by making the brussels sprouts and carrots.  Then bring several pots of water to boil for your beans and potatoes.  After your green beans are completely finished and the potatoes are tossed with aioli, quickly grill up the pork skewers.  By that time the oven veggies should be finished up and you are ready to serve dinner!

Quick Pickles

If you’ve been following along, you may have heard and seen that our farm share started. I’m still in disbelief that we were able to get a share that is this awesome so late in the season! And now I’m remembering what it’s like to have (the wonderful) pressure of a fridge full of veggies pushing me to get creative with dinner.

liveseasoned_fall2014_quickpickels2_wm

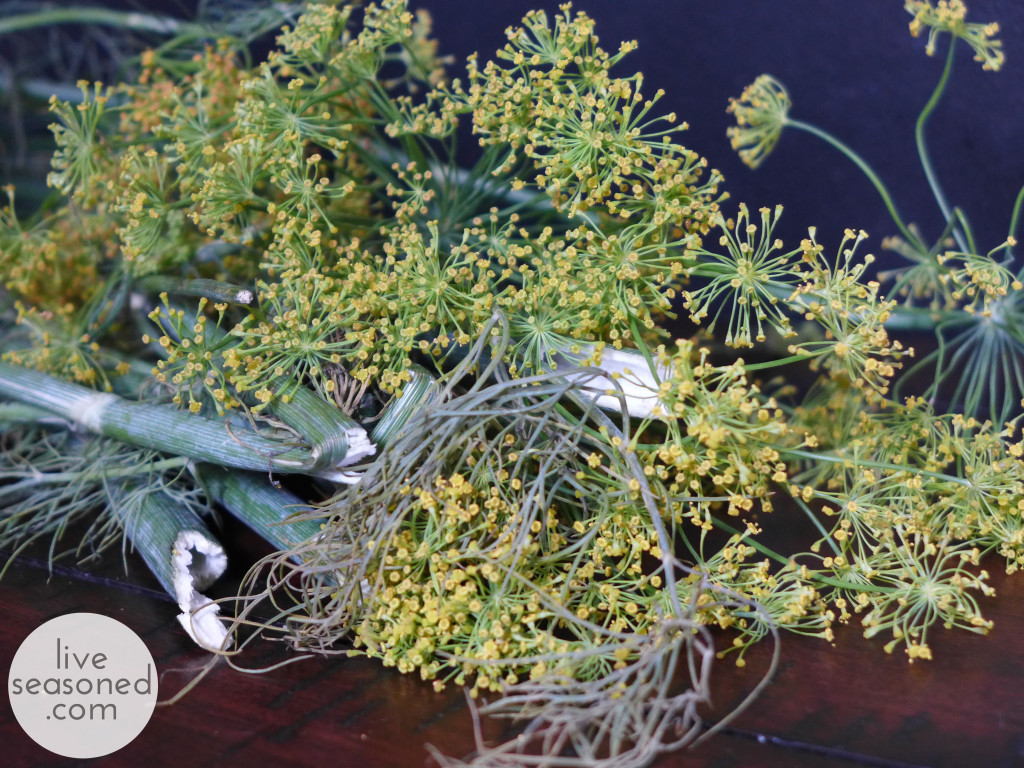
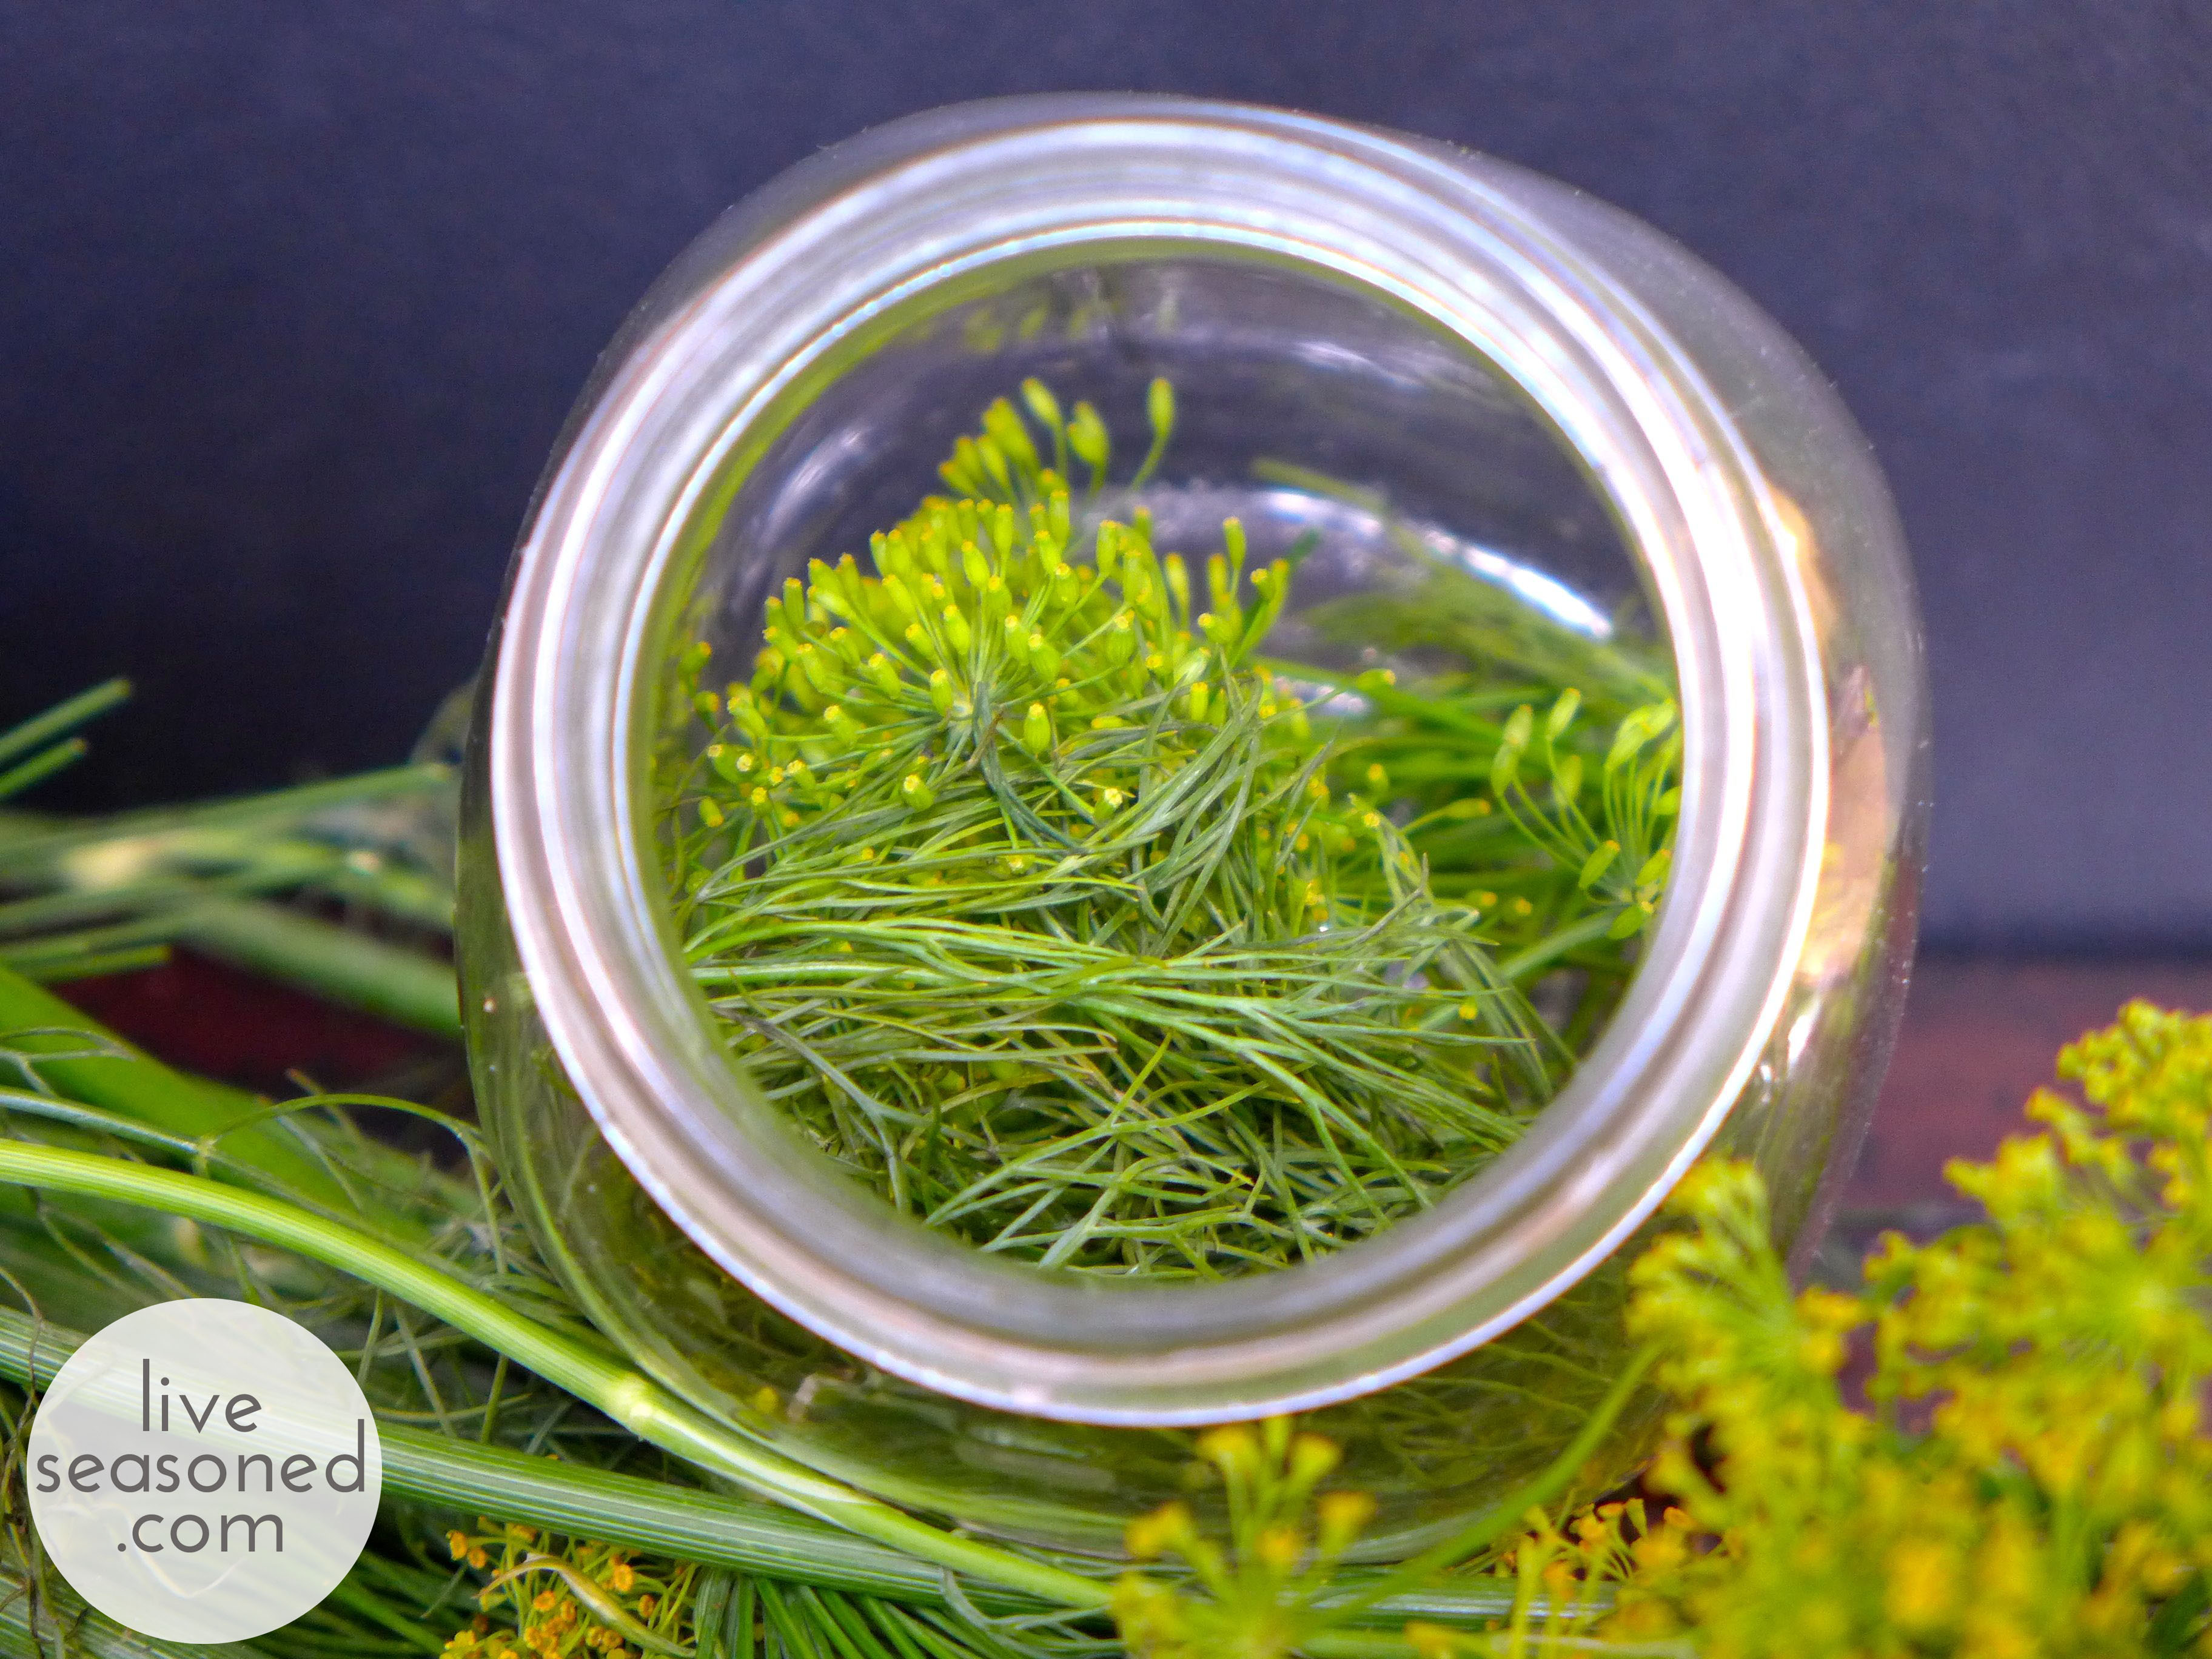
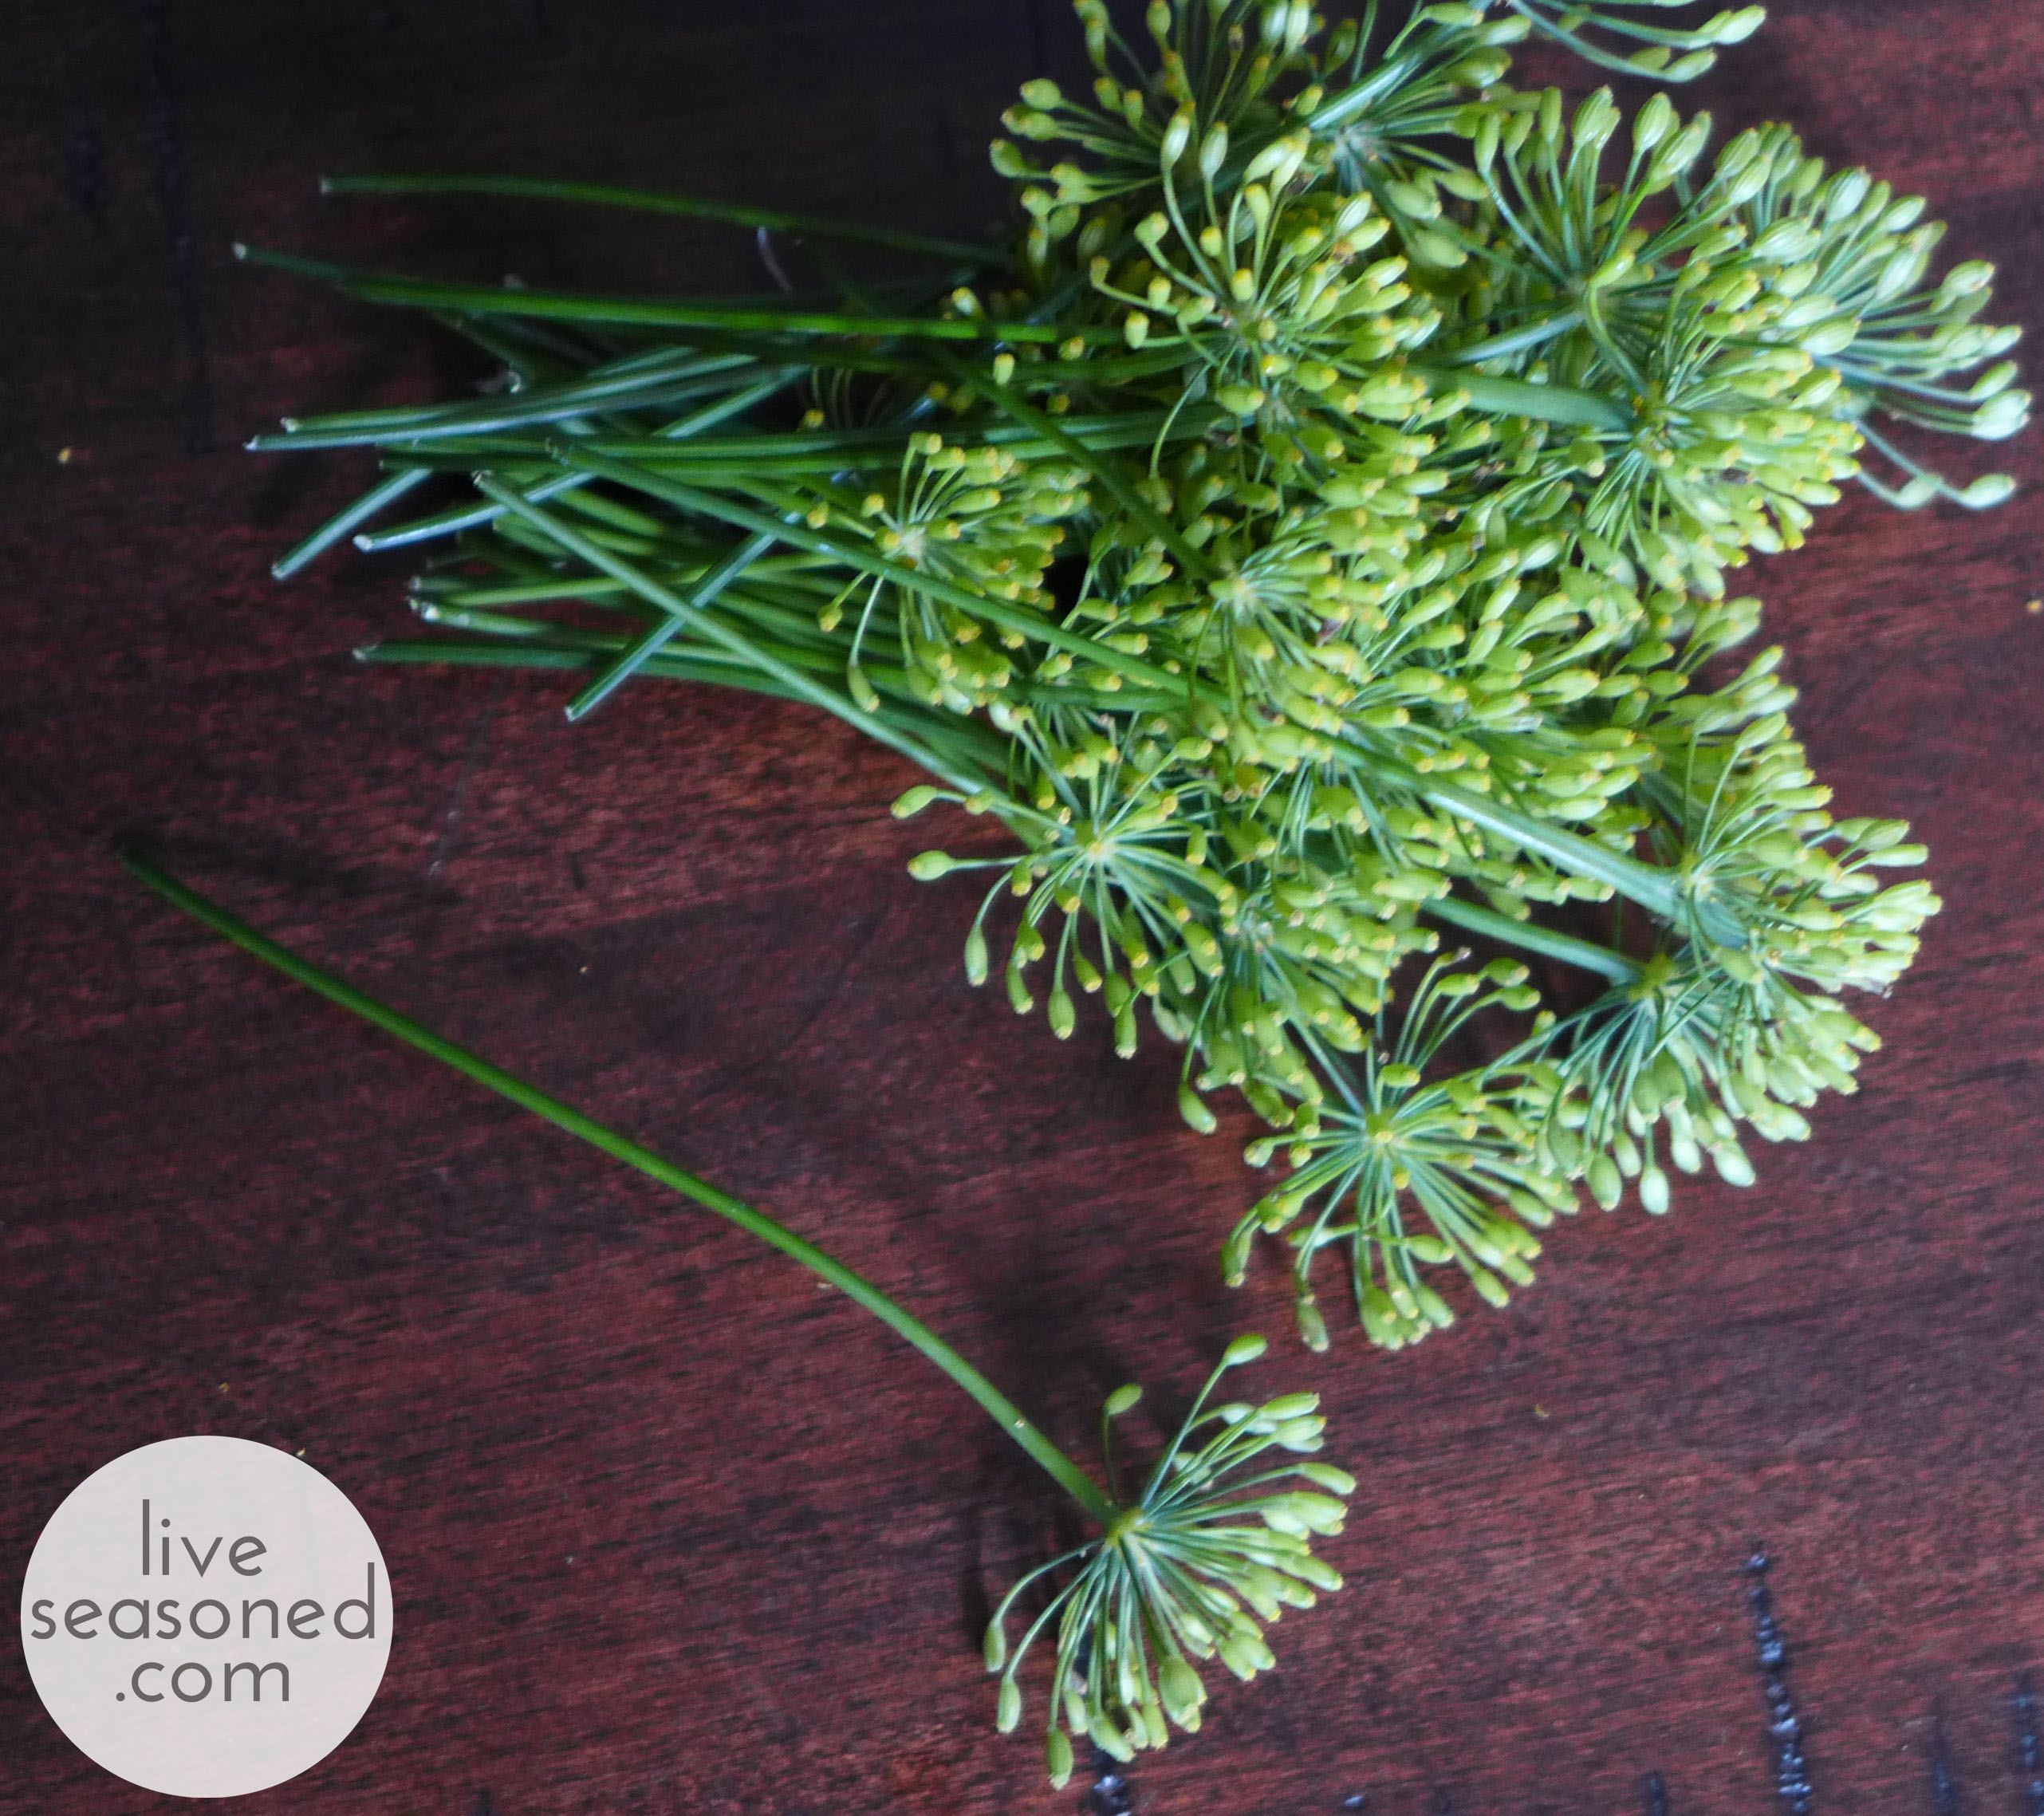
In this first box we received your typical fall fare: a few bunches of kale and chard, potatoes, squash, etc. What I didn’t expect were the couple of cucumbers and the big beautiful bunch of dill blossoms. I thought cucumber season had passed, and I’ve never received the dill blossoms, so this was a new and unexpected surprise. I have to admit that I have a tendency to buy cucumbers and forget about them, but I didn’t want to let that happen this time. So I turned to one of my favorite easy ways to use up those cukes in a jiffy: overnight pickles! We don’t buy pickles often (and when we do they tend to sit in the fridge for months), but these are different. They are so fresh and delicious,  barely lasting a week in our house.

liveseasoned_fall2014_quickpickels4_wm

This recipe comes from my mom, but I adjusted it to make use of what I had on hand: eliminating the green pepper and adding the dill blossoms and a bit of fresh dill. Do you hear that? The blossoms were totally a bonus, this recipe is just as delicious without the fresh herb, but as you’ll see, they sure add a touch of something beautiful to the jar.

Ingredients

  • 3 average-sized cucumbers (here I used 2 large)
  • 1 green pepper
  • 1 onion
  • 1 Tbsp salt
  • 2 tsp celery seed
  • 3/4 cup sugar
  • 1/2 fresh lemon juice
  • 1 sliced lemon
  • optional – dill blossoms

liveseasoned_fall2014_quickpickels3_wm

How-to

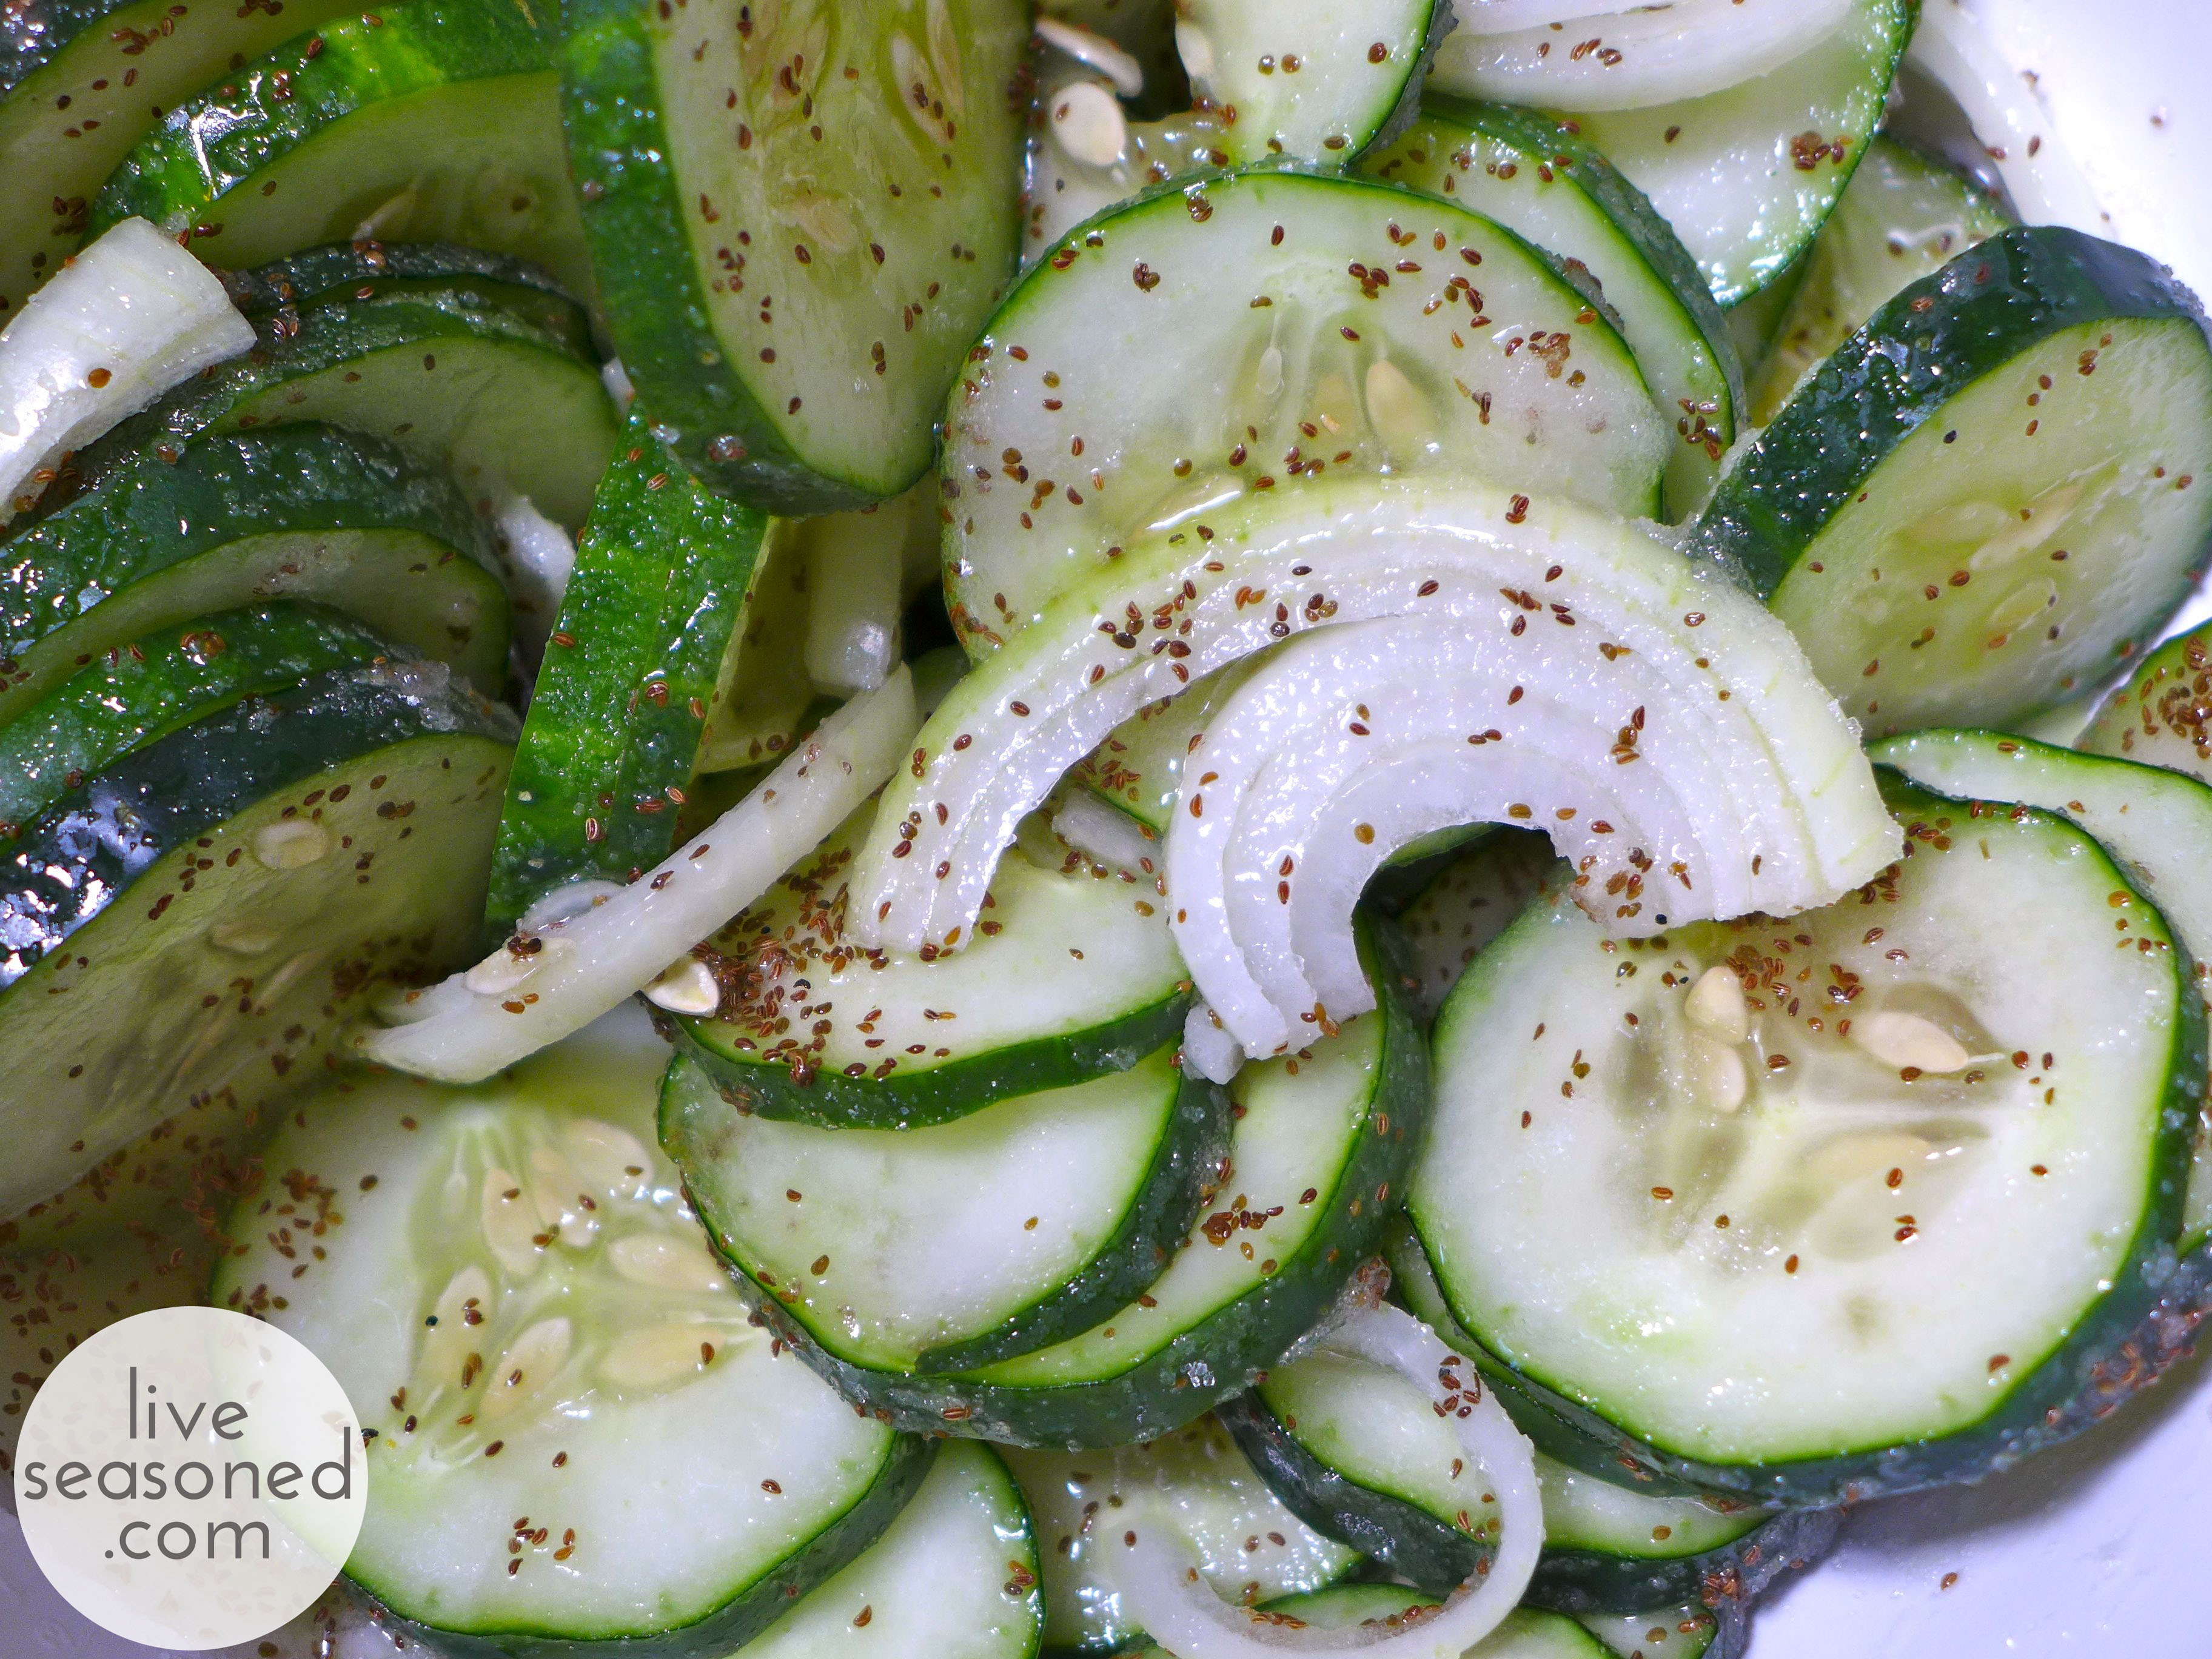
  • Slice the cucumbers, green pepper, and onion, and mix them in a bowl with the salt and celery seed. Let this mixture stand for one hour.
  • Mix together the sugar and lemon juice and add it to the cucumber mixture. Add the sliced lemon and stir.
  • Cover the container and refrigerate for 24 hours before eating. I like to go in there and give it a stir once in a while, or if using a jar I just give it a gentle shake, slowly turning it upside down. The juices may not cover your mixture right away, but they will as the 24 hours progresses.

liveseasoned_fall2014_quickpickels5_wm

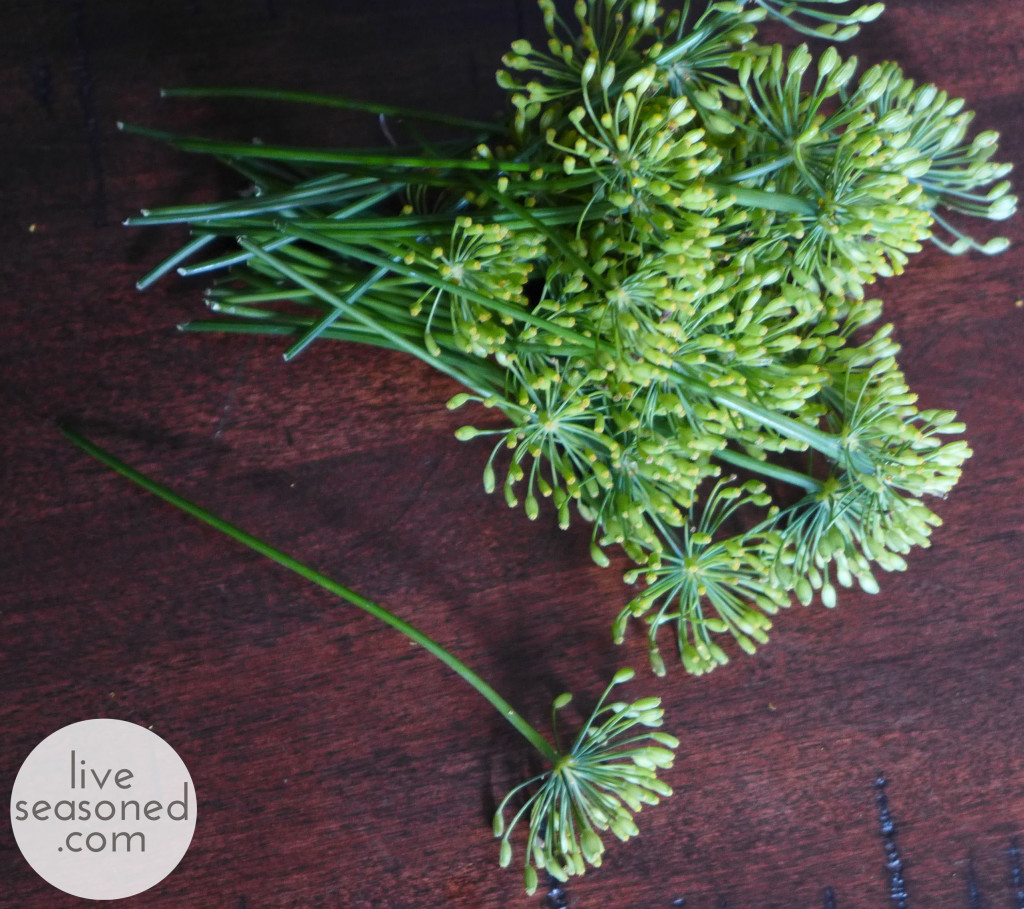
The blossoms are a really flavorful part of the dill plant. I added a few to a warm veggie mixture as it cooked, and they imparted a fantastic but not overpowering dill flavor. I found that they did a same thing here ~ creating a batch of pickles that had a sweet dill flavor. I added blossoms that weren’t fully open to my jar before filling it with the cucumber mixture (I’m not sure if there’s any difference in the flavor imparted by open versus closed blossoms?).

While the pickles taste delicious, I think I get just as much fun out of opening my fridge and seeing this beautiful jar sitting on the shelf (for the whole 2-3 days that it’s there!).

Ack, ok, maybe it’s even more fun seeing little A gobble them up and then sign for more with celery seeds sticking to his face!