Donut Day Take Two – Two Donuts, Too Easy

This post was originally published in 2014. We’re republishing it today because donuts never go out of style.

Donuts are a bit sweet for my taste, so I rarely make them, but when I do I’m reminded of how quick, simple, and delicious they are. They’re so much fun that I almost want to make them faster than I can eat them, which is perfect if you have my sweet tooth of a boyfriend.  I only ate two from the chocolate-cherry batch and he kindly took care of the rest.  I can’t say the same for the little fried rings; we both scarfed those down at record speed. By record speed, I mean less than three minutes.  They’re best when they’re hot, we all know that, and in this case, I almost didn’t get a chance to dip them in icing.

First is a delicious baked chocolate donut with cherry frosting and second comes the easiest fried donut of all time.  I learned about the latter in YMCA when I was eight, yeah, it’s that easy.  So cruise through these recipes with me, but I’m warning you, you’ll want to head immediately to the store to grab the ingredients.

Cherry Glazed Chocolate Donuts Continue reading

Happy Donut Day!

This post was originally published in 2014. We’re republishing it today, because making these donuts on Fat Tuesday is always a good idea.

Today is Mardi Gras, but it’s also known as Fat Tuesday or Donut Day; a day to celebrate and indulge before Lent.  Traditionally a fried donut would be served today, so we’ll start with one this morning, but there are so many delicious (and easy!) donut recipes out there, that we thought we would be fun to check in again this afternoon with two different donut recipes, one baked, one fried, both glazed!

liveseasoned_spring2014_donuts15_wm Continue reading

DIY Christmas Presents : Eats & Treats

Happy Friday everyone! Christmas is coming quicker than I can handle, so while I shop online today, I’m also going to whip up a few homemade Christmas gifts that everyone on my list will enjoy.  I love giving and receiving edible gifts. Knowing the treats were made with love and care in someone’s kitchen makes them extra enjoyable.  If you still don’t have a present for me, here are a few suggestions 😉 liveseasoned_spring2015_hazelnutliqueur3-1024x889 liveseasoned_spring2015_hazelnutliqueur6

Continue reading

Tiramisu

Coffee is our ingredient of the season, and we’re slowly building up an awesome  archive of coffee posts!

This is the last coffee post to close-out our Ingredient of the Season, so there was no other choice than to end it with dessert. And tiramisu at that… here’s the part where I admit that we’re ending with tiramisu because I was too intimidated to make it earlier in the season.

tiramisu2

Don’t be me; tiramisu is not a difficult dessert to make. Just follow our instructions below, and then refrain from eating it all by yourself. Because that’s the hard part.

Tiramisu

Tiramisu is a coffee-flavored Italian dessert that’s a little bit cake-like and a little bit creamy custard, but note that you don’t even bake the “cake” part, and you barely do anything to form the custard layers…. of course, not everyone *has* to learn how to make tiramisu.

From my basic web-browsing, this is a dessert that comes with a lot of opinionated makers and eaters. But not us, we aren’t from the motherland, we aren’t sticklers about our lady fingers (lady parts, now that’s another story), we’re ok with trying different alcohols with the coffee. All we know is a good thing when we taste it, and this is good!

The recipe below is a variation on this one. As you’ll see, that recipe has five star reviews. After reading the comments below that recipe, we made a few changes and were really happy with the results.

tiramisu

tiramisu3

*And note that the final 4-6 hours of rest time means that you should make this at least that far in advance of when you want to eat it. I made mine the night before and it was perfect.

Ingredients

  • 6 egg yolks
  • 3/4 cup white sugar
  • 2/3 cup milk
  • 1 1/2 cups heavy cream
  • 1/2 tsp vanilla extract
  • 16 oz mascarpone cheese
  • 1/2 cup strong coffee
  • 1 Tbsp rum
  • 3 Tbsp coffee liqueur (Kahlua or DIY).
  • 5 oz lady finger cookies
  • 1 Tbsp cocoa powder

tiramisu4

How-to

  • In a saucepan, whisk together the egg yolks and sugar. Add in the sugar and continue to stir the mixture over medium heat until it comes to a low boil. Boil gently for 1 minute, stirring/lightly whisking the entire time. Take the mixture off the heat and let it cool slightly. Then pour the mixture into a bowl, cover with plastic wrap or bees wrap (pressing it down onto the top of the mixture to prevent a skin from forming), and place it in the fridge to cool for an hour.
  • Once the egg mixture has cooled, continue on with the recipe.
  • Whisk the heavy cream and vanilla until stiff peaks form (you’re just making a simple whipped cream).
  • In a bowl, mix together the coffee, rum, and coffee liqueur.
  • Split the lady fingers in half lengthwise.
  • Place one layer of split lady fingers on the bottom of a 9×9 inch baking dish. Brush the lady fingers with the coffee mixture – you want it to soak in without any excess pooling in the bottom of the dish. Gently cover the lady fingers with about half of the egg mixture (I used slightly less than half and had some leftover). Then cover the egg mixture with half of the whipped cream. Repeat the layers one more time: lady fingers, coffee, egg mixture, and whip. Finish with a dusting of cocoa powder across the top of the whipped cream.
  • Place the finished tiramisu in the fridge to rest for at least 4-6 hours or even overnight before serving.

tiramisu5

Ginger Whoopie Pies

Ginger is our ingredient of the season. You can find our archive of ginger recipes here.

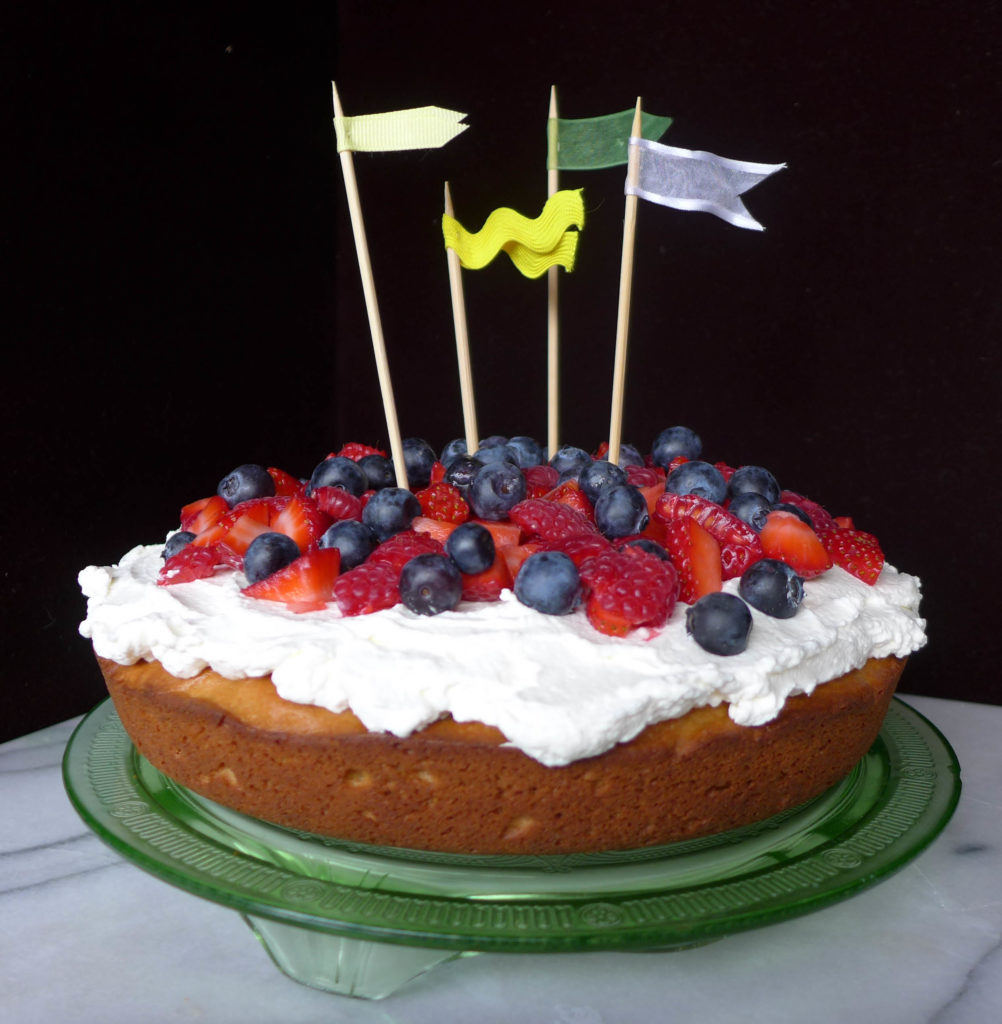
I love a good spice cake. In my book, there’s only one way to improve any good cake : make it portable! That must be why the whoopie pie was invented.

ginger_whoopie_pie2

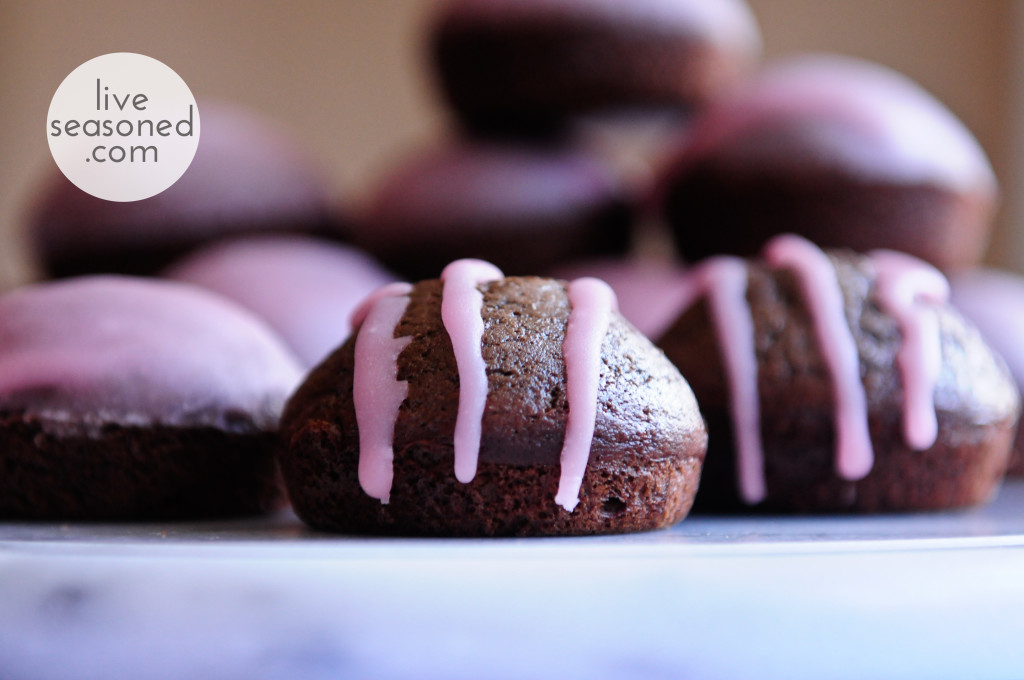
If you’re unfamiliar with a whoopie pie, let us introduce you. These are small treats made by sandwiching frosting between two small circular cakes. Most commonly, the cakes are chocolate and the frosting is vanilla, but I always felt lucky when I found a place selling the chocolate pies with peanut butter frosting!

Growing up in PA, it was common to see individual whoopie pies wrapped and for sale at farmer’s markets and near the cash registers of mom & pop markets. If you’re in Philly – stop into Reading Terminal and pick up a whoopie pie from the Amish stand. You can thank me later.

ginger_whoopie_pie4

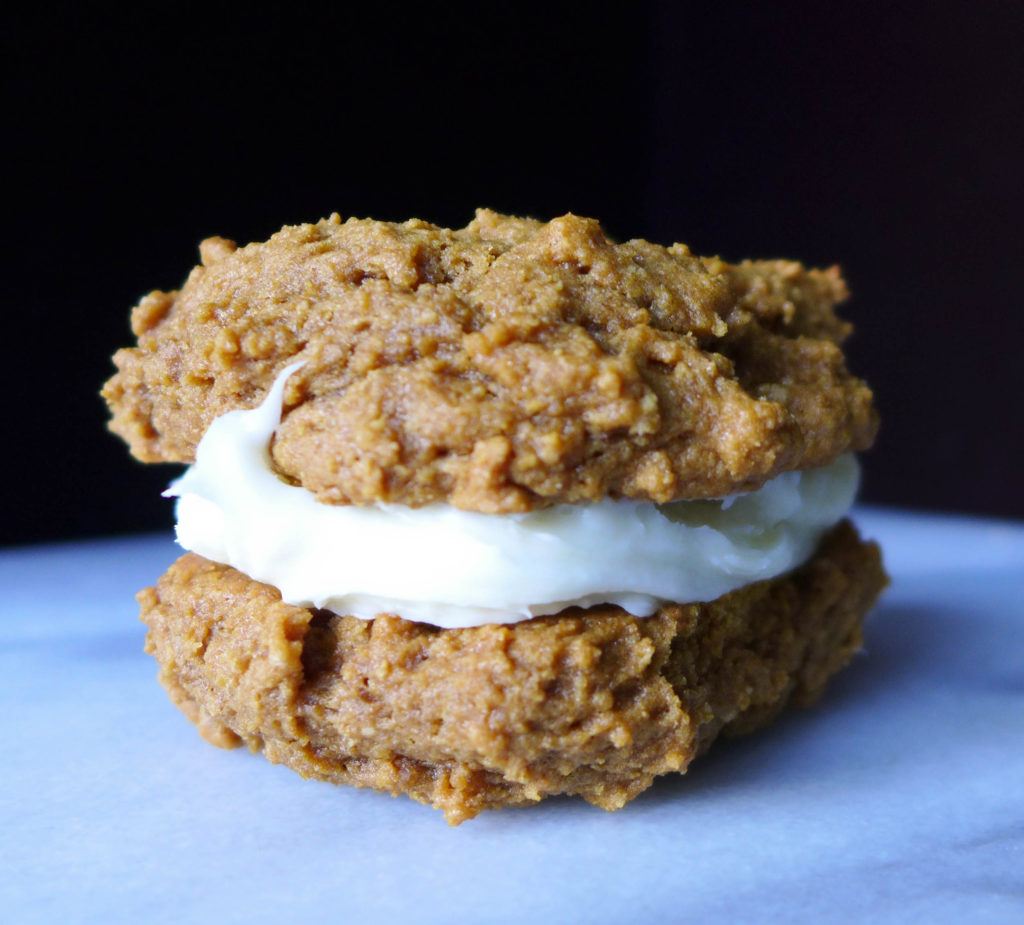
Today we’re sharing a recipe for ginger whoopie pies with cream cheese frosting. This recipe comes from the cookbook (appropriately named) Whoopie Pies. While this is still a fairly common whoopie pie flavor, that book is filled with a wide variety of cake and frosting options for mixing and matching.

ginger_whoopie_pie

Ginger Whoopie Pies

Ingredients

  • 4 cups flour
  • 1 1/2 tsp ground ginger
  • 1 1/2 tsp ground cinnamon
  • 1 tsp salt
  • 1 tsp baking soda
  • 1/2 tsp ground cloves
  • 1/4 tsp ground nutmeg
  • 1/2 cup butter
  • 4 Tbsp shortening
  • 3/4 cup packed brown sugar
  • 1 large egg
  • 3/4 cup molasses
  • 3/4 cup buttermilk

Instructions

  1. Preheat the oven to 325F and line two baking sheets with parchment paper.
  2. Sift together the dry ingredients: all ingredients from flour through nutmeg.
  3. In an electric mixer with a paddle attachment, beat together the butter, shortening, and brown sugar on low speed. Increase to high speed and beet for an additional 5 minutes until the mixture is light and fluffy. Add the egg, beat well. Add the molasses, and again beat well.
  4. Add half of the dry mixture and half of the buttermilk to the butter mixture. Beat on low speed until just incorporated. Scrape down the sides of the bowl, add in the remaining dry mixture and buttermilk, and beat until fully combined.
  5. Drop approximately 2 Tbsp scoops of batter onto the prepared baking sheets (leaving about 2 inches of space between each one).
  6. Bake one sheet at a time for about 10-12 minutes. The pies should spring back when pressed gently. Let the cakes cool completely before frosting.
https://liveseasoned.com/ginger-whoopie-pies/

The cookbook comes with a candied ginger frosting recipe, if you want to go whole-hog with the ginger.

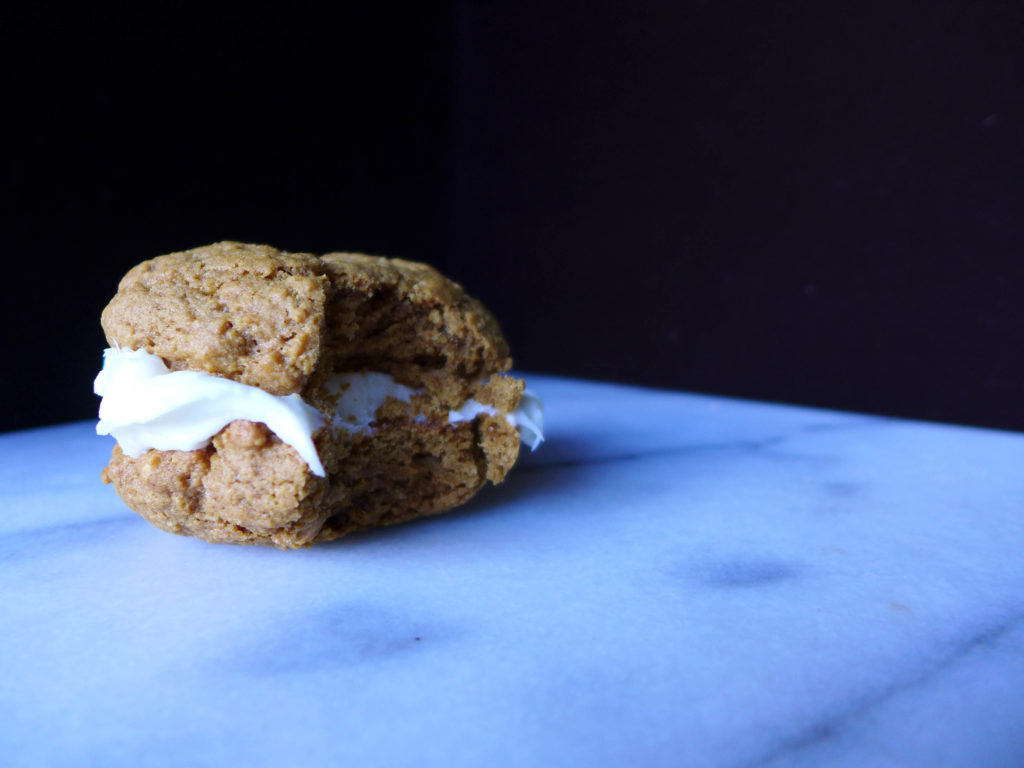
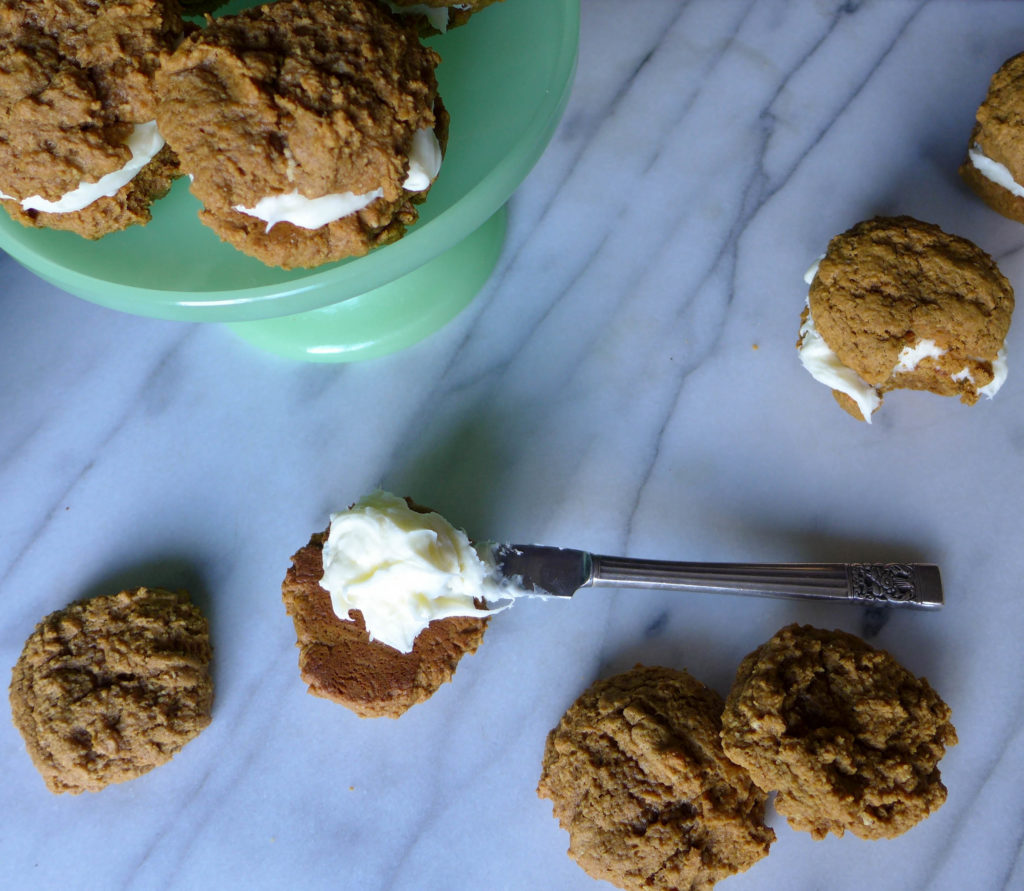
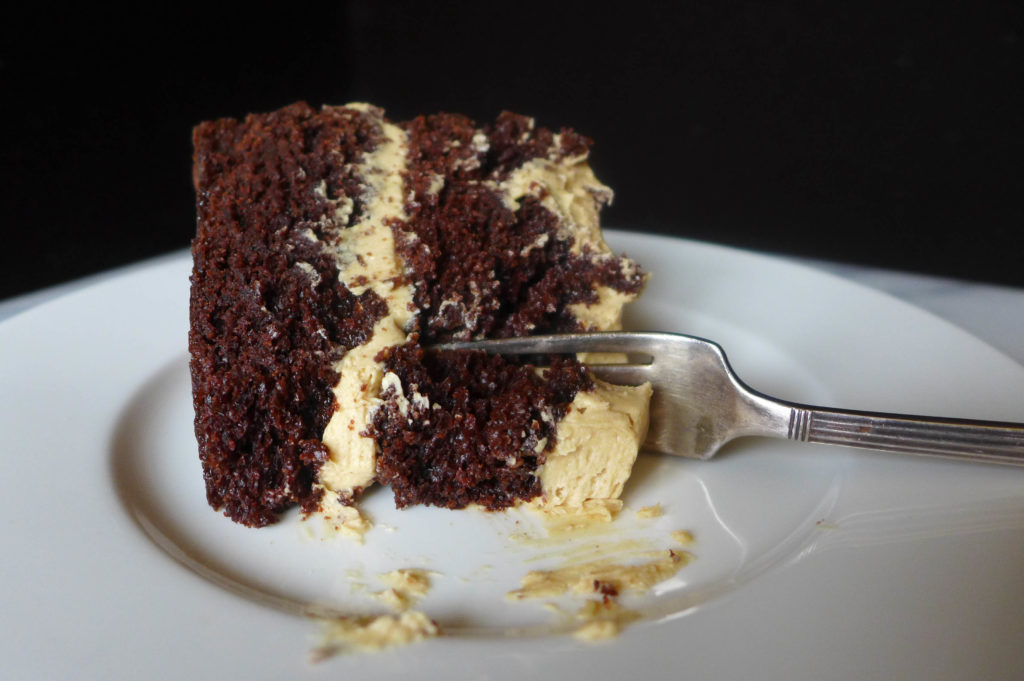
Personally, I love pairing these cakes with a simple cream cheese frosting. Beat together 8 oz cream cheese + 1 stick butter + 2 cups powdered sugar + 1 tsp vanilla. Spread a generous layer between two cakes.

ginger_whoopie_pie3

In my opinion, these are cakes that get better with age. Give them a few hours or even a day for the flavors to meld, and you won’t be disappointed.

As I mentioned, these are super portable cakes. We had a friend over last week that packed an extra one for the slopes… pass these out on the chairlift, and you’ll become a legend.

DIY Edible Gifts

Do you need a reminder that the holidays are right around the corner? We don’t! WE CAN’T WAIT. too much?

Today we’ve rounded up a few ideas that make perfect edible DIY gifts. There’s a range of options on this list, from nuts in solid and liquid form to citrus peels and marshmallow. Some take a bit more preparation than others (some are so easy you’ll have all of your teacher gifts done in an afternoon). But I may be a bit biased when I say that possibly the best gift on this list is the one that takes the longest to make.

And, as we all know, the best part about giving receiving an edible gift is that you don’t have to remember to put out that neon light up statue of Mt. Rushmore every time Aunt Peggy comes to visit. So get on with it.

~

Spiced Mixed Nuts : a truly perfect blend of sweet and spicy. These are super easy to make with basic ingredients (think nuts, honey, cayenne pepper). Just make sure you share more than you eat!

~

Hazelnut Liqueur : give this and you will be loved by all. Especially if you pass along a few key serving suggestions, such as mixing a shot into a cup of hot chocolate or a vanilla milkshake. BUT start making this one ASAP, because you need about three weeks of steeping time.

~

Marshmallows! : There are so many perks to making your own marshmallows. You can personalize the color and flavor. Cut them out with cute cookie cutter shapes. Pair them with hot co for a real treat. And we aren’t kidding when we claim that these are easy to make.

~

Candied Citrus Rinds : Again, another super easy treat. I added chocolate to these, but you can totally skip that. And as a bonus – we shared our orange marshmallows at the bottom of that post.

~

Use this post as an excuse to get a jump start on the eating, drinking, and merriment! xo