Thanksgiving Inspired Tapas

We’re republishing this yummy Thanksgiving inspired Tapas post from last year because it was so darn yummy.  Steal a recipe or two (or all five) for your big dinner this year.

liveseasoned_fall14_thanksgivingtapas-7

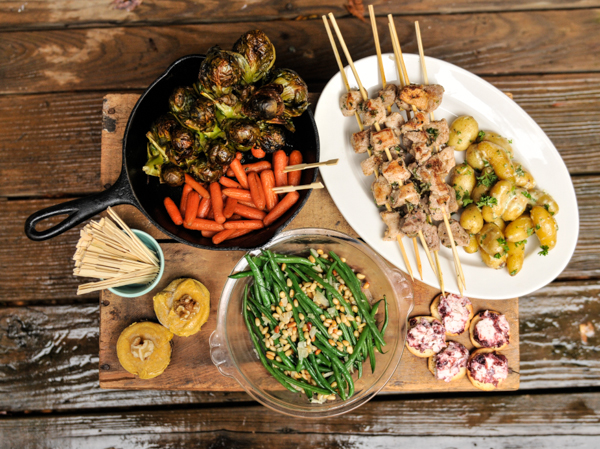
Happy Thanksgiving! I know, I’m a couple days early, but I wanted to show you how I celebrated Thanksgiving with my bf  last week.  I’m currently visiting a friend in Florida so I wanted to celebrate with K before I left.  I decided to create a tapas inspired Thanksgiving because it is perfect for couples, small families or those who are scared of cooking a turkey (me!). With some prep the night before, this all came together in under an hour.  Can you believe it?! I think my favorite part was the aioli tossed potatoes and the fact that everything is bite sized.  Eating tapas helps me slow down, enjoy the meal and talk between tiny bites.  We had a bunch of leftovers too and who doesn’t love that?!

One thing I try to do before starting to prepare a huge meal is to write a schedule.  I jot down all the names of the recipes in the order that I should start them.  That gives me a general guide so I’m not standing over the stove wondering what to do next.  At the end of the post, I’ll share my schedule with you.  I think it’d be easier to understand after you read the recipes.

liveseasoned_fall14_thanksgivingtapas-5

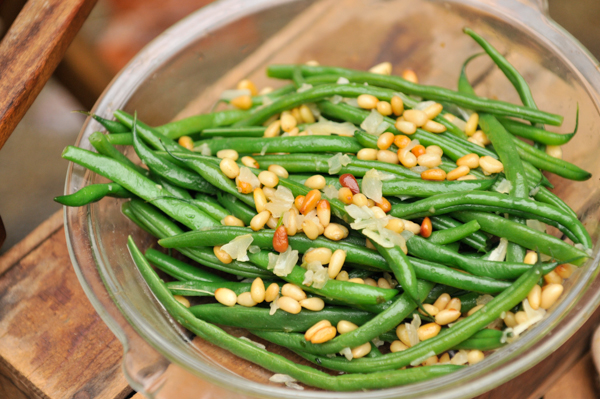
Garlic Tossed Green Beans with Toasted Pine Nuts

  • Half of an onion
  • 2 garlic cloves
  • 1/3 cup pine nuts
  • 1 lb green beans, trimmed
  • salt and pepper to taste
  • 2 tablespoons olive oil
  • Fill a tea kettle with water and turn it on to boil.
  • In a large sauté pan, pour 1 tablespoon of olive oil and turn the burner onto medium heat.  After a couple minutes, when the oil has heated up, add the pine nuts.  Toss the nuts every couple minutes.  When they start to pop or turn slightly brown, use a slotted spoon and place the nuts on a paper towel to drain. Turn the burner off for a moment. This should take no more than six minutes.
  • Place the trimmed green beans in a medium sized pot.  Pour the boiling tea kettle over the green beans and turn the burner on high heat.  Time the beans for seven minutes.  The green beans should be cooked, but still crisp. Once they’re done, drain them in a colander.
  • While the green beans are cooking, finely chop half an onion and two cloves of garlic. Add the onion to the sauté pan that you toasted the nuts in. Sprinkle a little salt over the onions.  Cook the onions on medium low heat until they are soft and translucent, about five minutes.  Add the garlic and continue to sauté for two more minutes.
  • By this time the green beans should be finished boiling.  Add them to the sauté pan and drizzle the remaining tablespoon over the green beans. Sprinkle with salt and pepper.  Stir the beans around to coat them with onions and garlic and add the pine nuts.  Stir for another minute or two to incorporate all the flavors and serve.

liveseasoned_fall14_thanksgivingtapas-6

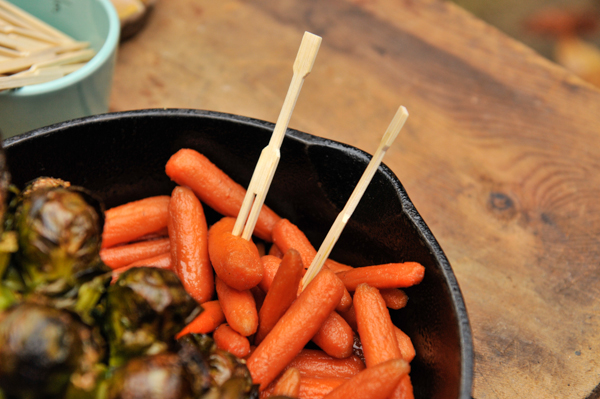
Brown Sugar and Maple Syrup Glazed Carrots

  • 1/2 lb of baby carrots or large chunks of full-sized carrots
  • 1/4 cup of maple syrup
  • 2 tablespoons of brown sugar
  • Preheat the oven to 375°.
  • Whisk together the maple syrup and the brown sugar.
  • Put the carrots in a cast-iron pan or a vessel that is able to be baked.
  • Add the carrots to the pan and pour the glaze over them.  Don’t worry if the carrots aren’t completely covered or saturated. The glaze will bake into the carrots just fine.
  • Cover the pan with tin foil to create a steaming effect.
  • Time for thirty minutes. Check the carrots by piercing them with a fork.
*These measurements are based on baking carrots for 3 people – increase as necessary.

liveseasoned_fall14_thanksgivingtapas-3

Roasted Brussel Sprouts

  • Stalk of brussels sprouts
  • 2 tablespoons of olive oil
  • 1/4 teaspoon cayenne pepper
  • 1/4 teaspoon salt
  • 1/4 teaspoon pepper
  • Preheat the oven to 375°
  • Optional step: Wrap the stalk of brussels in plastic wrap and microwave for three minutes.
  • Whisk together olive oil, cayenne, salt and pepper.
  • Place the brussels sprouts in a glass baking dish and drizzle with olive oil mixture.
  • Place in the oven and bake for 30 minutes.
*I like my brussels sprouts nice and brown, if you don’t, check the sprouts every ten minutes.

liveseasoned_fall14_thanksgivingtapas-1

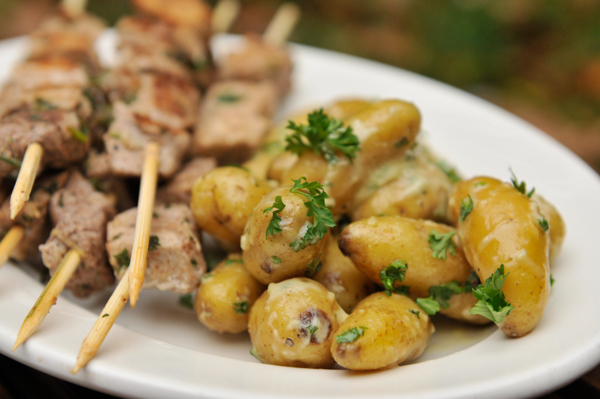
Aioli Tossed Potatoes

  • 1 egg – room temperature
  • 2 garlic cloves, pressed
  • 2 tablespoons olive oil
  • 2 tablespoons of vegetable oil
  • 1 tablespoon fresh lemon juice
  • sprinkle of pepper
  • 1 teaspoon of salt
  • 1 lb of very small potatoes
  • 2 tablespoons finely chopped fresh parsley
  • Bring a medium-sized pot of salted (add the tsp of salt) water to boil. Add the potatoes and cook until just soft.  Test the potatoes by piercing them with a fork.  About ten minutes.
  • Whisk together the room temperature egg, pressed garlic cloves, olive oil, and fresh lemon juice.  Sprinkle some pepper into the aioli.
  • Slowly drizzle in the vegetable oil, little by little while whisking the aioli.
  • When the potatoes are cooked, drain them and put them in a large bowl.
  • Toss the warm potatoes with aioli and parsley.
  • Let sit for 10-15 minutes before serving so that aioli soaks into the potatoes.

liveseasoned_fall14_thanksgivingtapas-4

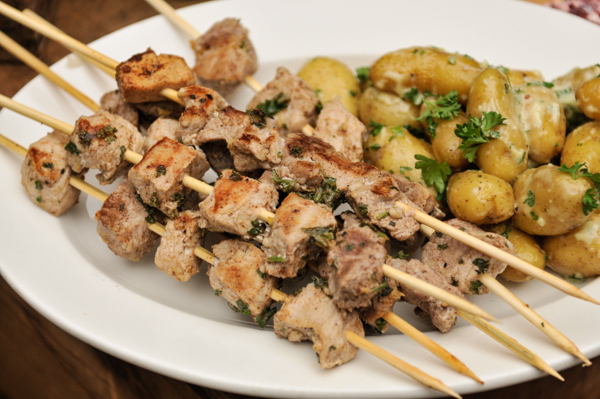
Warm and Spicy Grilled Pork Skewers

  • 1/4 teaspoon cayenne
  • 1/4 teaspoon cloves
  • 1/4 teaspoon nutmeg
  • 1/4 teaspoon cinnamon
  • 1/4 teaspoon allspice
  • 1/4 teaspoon pepper
  • Juice from one large lemon
  • 3 tablespoons olive oil
  • 3 garlic cloves, pressed
  • 3 tablespoons roughly chopped parsley
  • 1/2 – 1 lb pork
  • skewers
  • The marinade must be made the night before; please keep that in mind.
  • Whisk all the spices, garlic, lemon juice, parsley and olive oil in a bowl.
  • Cut up the pork pieces into quarter-sized chunks and place in a single layer in a shallow nonmetallic dish.
  • Pour the marinade evenly over the pork pieces, cover with plastic wrap and place in the fridge. Ideally, you should stir the pork two or three times over the course of 8-12 hours.
  • 8-12+ hours later, place the pork pieces onto skewers.  If you’re using wooden skewers, soak them in water for at least twenty minutes prior to grilling.
  • Place the pork skewers on the grill or broil them.  I used a George Foreman grill and it took approximately 6 minutes to grill each group of skewers.

liveseasoned_fall14_thanksgivingtapas-8

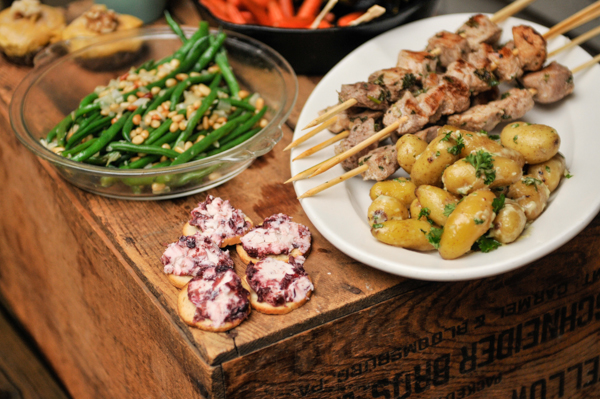
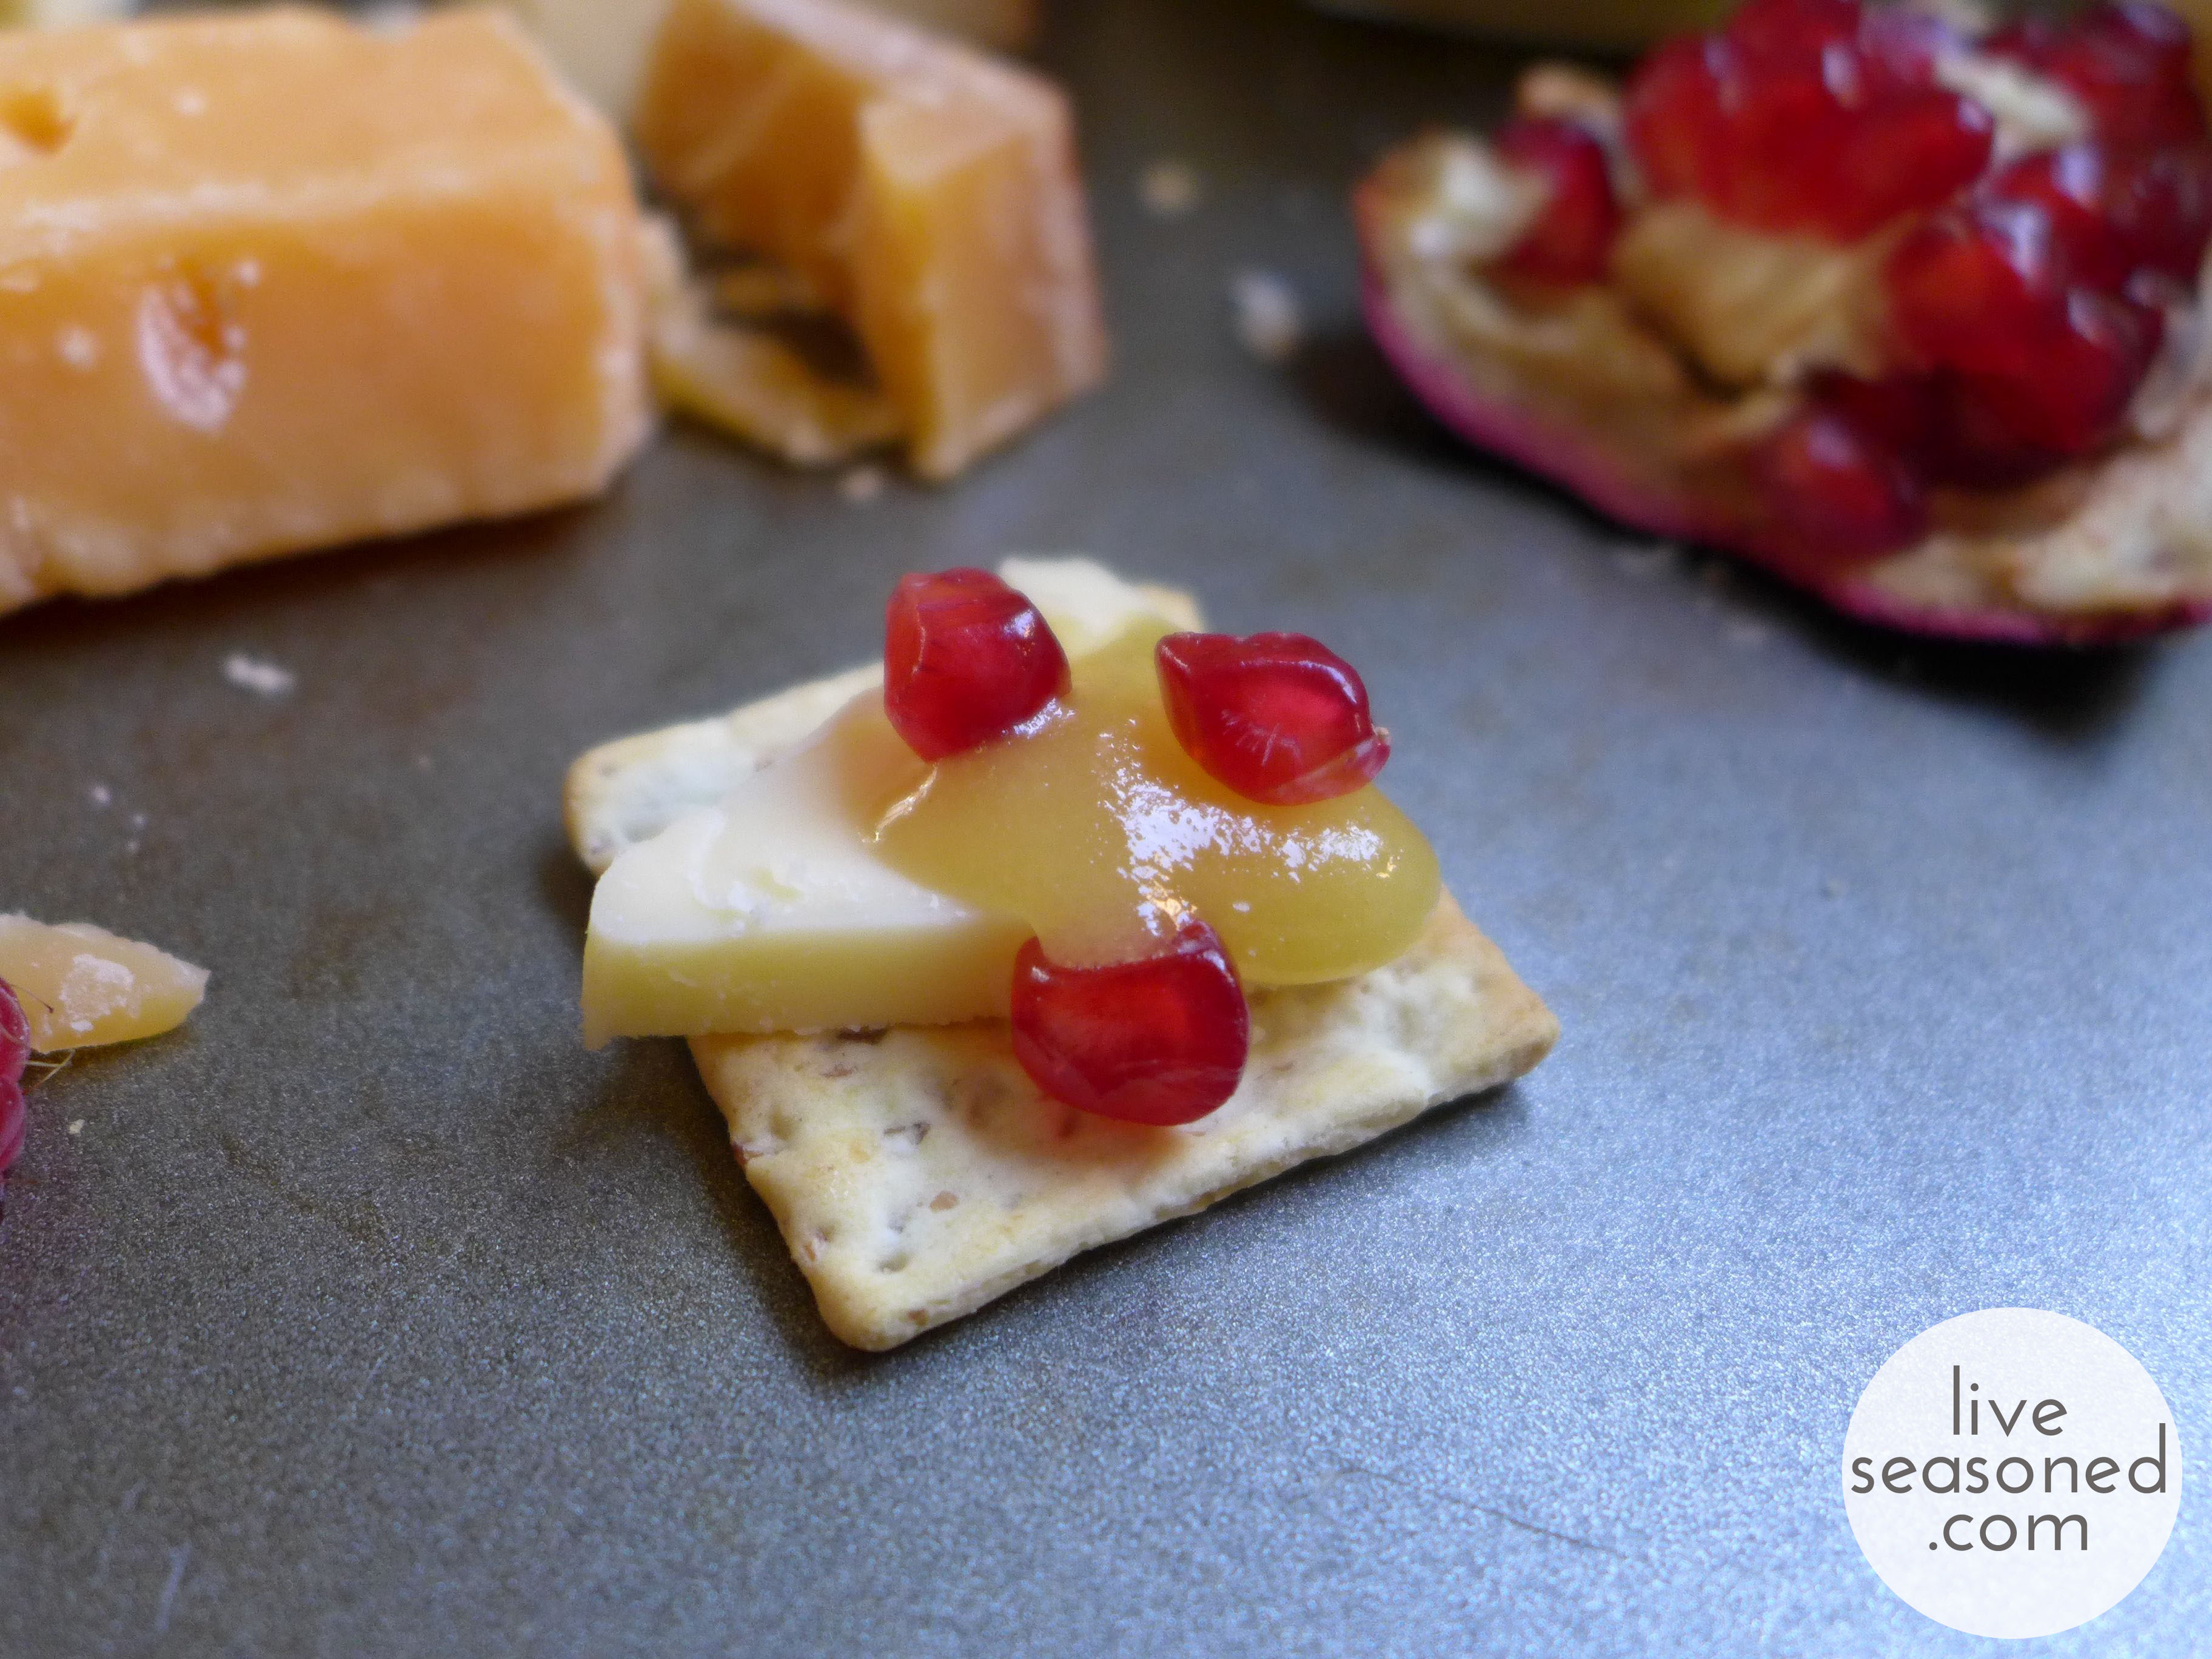
Also shown in the photos are cranberry goat cheese topped crackers and mini no bake pumpkin pies.  I picked up the goat cheese from Trader Joe’s; served at room temperature, it is the perfect appetizer. The mini pumpkin pie recipe will be shared tomorrow, so stay tuned 🙂

After typing all those recipes, I realize that seems like a lot to do, but with a little preparation it comes together quickly.  The night before you can prep by washing the carrots, brussels, green beans and potatoes.  Chop a big pile of parsley and make the marinade and the aioli as well.  I also did a mental walkthrough of all the recipes and pulled out garnishes, gadgets, pots, pans and serving dishes for everything.  It’s a small step, but it really helps on the morning of.  That way everything is sitting out on the counter ready to be grabbed at a moments notice.

The day of, start by making the brussels sprouts and carrots.  Then bring several pots of water to boil for your beans and potatoes.  After your green beans are completely finished and the potatoes are tossed with aioli, quickly grill up the pork skewers.  By that time the oven veggies should be finished up and you are ready to serve dinner!

Rosehip Jam

While roses and treats are synonymous with Valentine’s Day, we wanted to turn that tradition on its head by suggesting you make a sweet rosehip jam instead! Plus, you can get around those thorny environmental and social impacts by skipping the bouquet this year. And, if you’re about to tune out because we’re suggesting making a jam, hang in there because this jam contains only two (2!) ingredients and doesn’t require any cooking. It’s that easy, folks. liveseasoned_w2015_rosehipjam4-1024x954 copy

Continue reading

Roasted Root & Squash Soup

Last week Sarah shared her fantastic recipe for squash soup with a citrus zing. Then we debated: should share another soup recipe this week, especially another one that uses squash? The answer was yes, because for us, it’s most definitely soup season and squash season! I was also jumping at the bit to share this recipe before Thanksgiving because I think it could make a fantastic addition to your feast, but it’s also a great way to use up leftover roasted vegetables, turning them into a completely new dish so you’re not eating the same leftovers for days.

liveseasoned_fall2014_roastedvegsoup14_title

I made up this recipe a few years ago, and I never make it exactly the same way twice. I truly believe that anything goes when it comes to the vegetables. In this post I’m giving you an example of a typical vegetable mix in our house, but you could easily add more vegetables to the mix and subtract the ones you don’t like. The same goes for the garnish. I don’t buy anything special for the garnish and always make a point of using what I have on hand. If you do the same, I’m sure you’ll come up with some pretty surprising and delicious combinations.

liveseasoned_fall2014_roastedvegsoup1_wm

Soup Ingredients

  • olive oil
  • 4 cups vegetable or chicken broth + additional water
  • 1 medium/large butternut squash
  • 3 large carrots
  • 1 medium/large onion
  • 2 large beets
  • 3-5 medium potatoes

Garnish Suggestions

  • beet or chard greens
  • tuffle oil
  • parmesan cheese
  • sour cream

liveseasoned_fall2014_roastedvegsoup2_wm

 How To

  • Prepare the vegetables for roasting. Cut the squash in half and clean out the seeds. Coarsely chop the beets, potatoes, and two carrots. Place all vegetables on an oiled cooking sheet or baking pan and roast until soft (about one hour), stirring halfway through.
  • While the vegetables are roasting, dice the onion and remaining carrot and saute them in olive oil until the onions are translucent.

liveseasoned_fall2014_roastedvegsoup7_wm

liveseasoned_fall2014_roastedvegsoup9_wm

  •  When the vegetables are done roasting, add them to the soup pot (removing the squash from its rind) with the broth and enough water to reach the top of the vegetables. Bring this mixture to a boil and then turn down to low heat for blending.
  • Carefully puree the soup using either an immersion or upright blender. Return the soup to the pot and bring to a slow simmer. Simmer for about 10 minutes, and then you’re done!

liveseasoned_fall2014_roastedvegsoup5_wm

About the Garnishes

I think garnishes add a special touch to what is otherwise a homogeneous soup (not that that’s a bad thing). As I mentioned, there’s no particular right or wrong when it comes to the garnish, but you may want to think about using things that will add a different color, texture, or flavor to the soup. I often use some cooked greens because they add both color and texture to the smooth, pureed base. I like parmesan or cheddar cheeses for their nutty taste, but the tang of yogurt or sour cream is also a great compliment to the sweet flavor of the vegetables. And, as you know, I love the taste of truffles, and a dash of truffle oil works really well on this soup.

If using greens, saute them in some olive oil to prepare them. You can do this with a touch of salt and some diced onion and/or crush garlic or garlic powder.

liveseasoned_fall2014_roastedvegsoup8_wm

Alex loves this soup, I’m sure it has something to do with the sweet/savory combination from the roasted vegetables and the easy-to-eat pureed texture. I love knowing that he’s eating such a wide variety of vegetables with every bite. Oh, and I already have two quarts of this frozen for when I’m too tired to cook!

There you have it! A relatively simple soup that is so easy to prepare, packed with flavor, and with so many different veggies! Try making this for friends and family over the holiday season and I’m sure it’ll be a hit… if not, just send it to my house, I have a freezer that I’m looking to fill ;-).  
liveseasoned_fall2014_roastedvegsoup12 copy

Sampling Cheese from the Nibble Nook

We’re snacking on a lot of cheese this season. So far we’ve talked about our favorite way to eat a few staples, but today we’re going out on a limb and trying some new varieties!
liveseasoned_fall2014_nibblenook5_wm

There really are so many cheeses out there, and while I’m an adventurous eater, I often find myself sticking to a handful of cheeses that I know and love. Just walking up to the cheese counter is overwhelming ~ so many varieties, where do I even start? And then I would look at some of the prices and just shyly turn around and pick up my Cabot or Brie Supreme and go on my merry way. Or, that was the scene until I discovered Whole Food’s Nibble Nook!

liveseasoned_fall2014_nibblenook1_wm

The Nibble Nook is a little basket of cheese ends/remnants (you can see it above tucked in between their off-the-shelf cheddar, feta, and mozzarella). My guess is that many grocers selling cuttings of large cheese wheels may have their version of a nibble nook. If you’re open to trying some new cheese and flexible as to the options available, the Nibble Nook is a great place to look. The selection within the basket is constantly changing as different cheeses are cut and as shoppers pick out their favorites. And the cuts are small, so while I would be hesitant to be a large wedge of a cheese that’s priced at over $20/lb, I’m happy to buy a small bit for nibbling.

liveseasoned_fall2014_nibblenook3_wm

I always approach the bin with an open mind and pick out any cheeses that look promising (that’s every cheese), and right now I’m also sticking to only those made with pasteurized milk. On this particular visit, the bin was overflowing with two varieties of hard cheese from Uniekaas, a Dutch company: a 3 year Gouda and a Parrano. I’m sad to say, I had to pass on a beautiful looking cheese that had bits of black truffle throughout but was made with unpasteurized milk. From the labels, you can see that each of the cheeses I picked has a big price tag ($22 and $15 per pound), but the wedges are both close to a tenth of a pound, making it an affordable splurge (is that a thing?).

liveseasoned_fall2014_nibblenook2_wmI also love Whole Foods visits for their constant sample tables, on this particular day a table of raw uber-local honey (from hives within our county!), was perfectly positioned at the end of the cheese aisle. They even happened to be serving up the samples with a variety of Parrano, so I had to pick up a jar. And as you’ll see, it ended up making such a perfect treat!

liveseasoned_fall2014_nibblenook10_wm

A little bit about the cheeses. Both of these cheeses are considered great snacking cheeses in the Netherlands, their home country.

Gouda

(The orange cheese in these photos)

Gouda is a Dutch hard yellow cheese made from cow’s milk. The cheese may be aged anywhere from a month to many years. This particular Gouda was aged for three years, classifying it as a “very old cheese”.  As a Gouda ages it acquires a caramel sweetness and develops a slight crunch from cheese crystals that form as water within the cheese evaporates. The cheese’s sweetness is due to removing some of the whey, which also removes some of the lactic acid, early in the cheese-making process and replacing it with water.

Parrano

(The white cheese in these photos)

Parrano is also a technically a Dutch Gouda, but with a flavor similar to aged parmesan. Parranos are aged for about 5 months, giving them a semi-firm texture. As described on the company’s website, Parrano is “slightly sweet, a little bit nutty but still with a deliciously strong flavour”.

liveseasoned_fall2014_nibblenook6_wm

As is common, I like to include some fruit on my cheese plates. Continuing with my adventurous ways, I’m not too picky when it comes to the fruits I choose. I’ll often look for anything in season and deliciously ripe (there’s no point in serving out-of-season strawberries that taste like water, right?). On this particular day, I already had some raspberries and pomegranate in my fridge. As it turns out, their slight tartness was a perfect complement to the sweet honey and sharp cheeses!

liveseasoned_fall2014_nibblenook7_wm

 The Honey

This is a raw, unfiltered, and unheated honey. As a result, it has a cloudy appearance from the honey crystals that have begun to form (it may also have some bits of wax, pollen, bee wings, and such in the jar). If you put a dollop of raw honey on a plate, you’ll find that it spreads more slowly than crystal clear honey. It turns out that this is really useful for gluing some fun cheese/cracker/berry combos together! And here you thought raw honey was just good for its enzymes.

liveseasoned_fall2014_nibblenook9_wm

Look at how beautiful that cracker looks with a bit of cheese, dollop of honey, and a few perfectly placed pomegranate seeds! There’s no way those seeds will fall off on the way from the plate to your mouth. This is a particularly handy trick for cocktail parties if you want to make a few fancy cracker/cheese combos rather than having guests make their own. You definitely don’t have to worry about the appetizer falling apart before it’s served. I also found honey to be particularly useful for keeping the crumbly gouda on my cracker. You can see that I double-dipped in the last photo – starting with a slice of Parrano and then adding crumbles of Gouda over the honey. indulge much?

liveseasoned_fall2014_nibblenook11_wm

I can’t emphasize enough how delicious these particular combos were. The crackers were just a basic wheat thin. Both cheeses had a bit of a nutty flavor. The honey added that touch of sweetness. And then, as I already mentioned, the fruit added a bit of a tart note. Plus it was extra fun to get that little spray of juice and crunch when biting down on the pomegranate seeds.

liveseasoned_fall2014_nibblenook12_wm

And this adventure all started with a quick trip to the Nibble Nook. Who knows what next week’s visit will hold… and I can only hope that come April they add some of that truffle cheese back to the bin!

So tell us – does your grocery store have their own version of the nibble nook? Did you find any really outstanding cheeses there?


Fall Cheese Trifecta

While apples may be our ingredient of the season, cheese is definitely our snack of the season. So far we’ve spent more time exploring condiments to pair with our favorite cheese rather than the vast world of cheese varieties, but we’re ok with that, because these combinations are top notch!

liveseasoned_fall2014_cheese_applebutter6_wm

With today’s combination, I’m not sure who’s the star. Our delicious homemade apple butter? Carr’s hearty whole wheat crackers biscuits? Or the ever reliable bite of Cabot’s Extra Sharp cheddar? I do know that when you put the combination together you create a hearty snack that evokes the flavors of season and will satisfy the hunger you build up while outside on these crisp fall days.

liveseasoned_fall2014_cheese_applebutter5_wm

If you haven’t had a Carr’s whole wheat cracker yet, add them to your next grocery list. You’ll find them to be much more substantial than a typical cracker. The whole wheat really fills you up, but they also have a touch of sweetness that makes it seem like you’re eating more of a cookie than a cracker. It’s hard to explain, but I know that I can eat two or three with a cup of tea and consider it the perfect mid-morning snack. 

liveseasoned_fall2014_cheese_applebutter1_wm
liveseasoned_fall2014_cheese_applebutter3_wm

We’ve already raved about our love of apple butter in this post, so there’s not much more to say there. Other than to remind you to pick up a sack of apples and get yourself a jar.

Then there’s the cheese. Do you have a favorite cheddar? Whenever I want a basic, not too expensive cheddar that has that perfectly sharp bite, I look for Cabot’s Extra Sharp. The description on their site says it best, the cheese is “creamy white in color with an almost crumbly texture and has a sophisticated, citrusy tang”.

liveseasoned_fall2014_cheese_applebutter7_wm

Cheddar gets its name from an extra step in the cheese-making process called cheddaring where loaves of curds are allowed to set until they reach a certain acidity, they are then cut into loaves, stacked, and turned every 10 minutes until further acidity points are reached. While changing the acidity, this process adds flavor and creates the crumbly texture that cheddars are known for. After the batch has been cheddared and salted, the curds are placed into cheese molds and aged for anywhere from 1 month to over 10 years, depending upon the type of cheddar being made. The Cabot Extra Sharp is aged for anywhere from 9 to 14 months (whereas their mild cheddar is aged for just 2 to 3 months).

liveseasoned_fall2014_cheese_applebutter8_wm

Want a few more fun cheddar facts?

  • It’s the second most popular cheese in the US behind mozzarella
  • Our average annual consumption is 10 lbs per person!… my personal consumption is more like 20 lbs (minimum)
  • The cheese originated in the English village of Cheddar in the 12th century
  • Easy Cheese is not cheddar
  • A single 1 oz serving gives you 20% of your daily calcium requirements
  • And what do you call the hunk of cheddar sitting in my fridge? Nacho cheese! ha!

Brie with Truffle Honey

We plan on eating a whole lot of cheese this fall, and then we’ll talk abut it here. Sarah kicked off the cheese-fest with a nut crusted brie, and while there are many different cheeses in the world, I couldn’t help but share another delicious brie idea. Next time a hard cheese, we promise.

I love the flavor of truffles, and whenever there is a truffled this or that on a menu, I’m going to order it. My last truffle indulgence was the delicious Lamb Bolognese with Truffled Ricotta Gnucchi at The Pullman in Glenwood Springs, CO. So good! And what a great guy Calder is by indulging my truffle love – he hates the flavor (thinks it tastes like gasoline!), but he knew that a jar of truffle honey would be the perfect Valentine’s Day gift.

liveseasoned_fall2014_briehoney6_wm

The Honey

Truffle honey is made by adding shaved truffles to honey and then heating it to speed up the extraction of the truffle flavor. You should be able to find some at gourmet cheese shops, but it’s also easy to buy online. It’s not cheap, but a single jar goes a long way. The jar I have has an intense flavor, so just like dishes that use truffle oil or real truffles, this may not be for everyone. Of course, if you know a truffle lover, I guarantee you that they will love this!

Until receiving this gift, I never had or heard of truffle honey and wasn’t sure what to do with it, but quickly discovered that it’s commonly paired with cheese and bread. But what cheese? It seems that everyone has their favorite pairing, some swear by a hard and strong cheeses like parmesan or cheddar while others gush over a soft and mild brie. I decided that I didn’t want to pair the honey with a strong flavored cheese, so I went with a relatively mild and rich brie. Once I had my cheese, I knew that the soft cheese/honey combination was calling out for a chewy bread that wouldn’t crumble with each bite. So I threw a baguette into my cart and we had the makings for a perfect appetizer.

liveseasoned_fall2014_briehoney5_wm

The Cheese

Bries are soft cheeses from France. They’re made from cow’s milk and surrounded by a hard, moldy or “bloomy“, edible rind. The mold will have a white to light yellow color (not the blues of the molds that come to mind when talking about blue cheese). The mold is essential to creating the cheese as it works to break down the fat and proteins of the milk and cream. Bries vary by the amount of cream used to make them, you may see “double” or “triple” on the label signifying increasing amounts of cream. Increasing the cream level increases the richness and buttery-smooth texture of the final cheese.

liveseasoned_fall2014_briehoney1_wm

When picking a brie you want to look for a “ripe” cut. When brie is perfectly ripe, it won’t be runny or pungent (there are other soft cheeses that are made to be purposefully pungent, brie isn’t one of them). As a brie ripens, you may notice that the wheel of cheese will bulge slightly, especially when cut. You’ll likely buy a wedge from a larger wheel, which makes picking easier. Look for a wedge with a uniform interior consistency that is slowly falling out of the rind. For comparison, an unripe wedge will have a firm interior (or combination firm and soft) that is the same shape as the wedge, i.e. not expanding beyond the original cut.

There are a variety of bries on the market, and I think Supreme is a great, basic example that’s affordable and readily available at many grocers (including Trader Joes if you’re looking for a source).

Serving Suggestion

Once you have your cheese, honey, and bread, serving is easy. We placed everything on a marble board with utensils for self-service. A bread knife for the baguette, a spreader for the cheese, and a small spoon for the honey. That way everyone could personalize their serving. Calder could skip the honey, I could pile it on (and then eat it straight from the spoon), and our civilized guests could take as much or little as they wanted with each slice.

liveseasoned_fall2014_briehoney4_wm

If you have the opportunity, I hope you’ll give truffle honey a try. And with the upcoming holiday/entertaining season, this makes a fantastic surprise to any cheese plate or gift for your truffle-loving friends!

Quick Pickles

If you’ve been following along, you may have heard and seen that our farm share started. I’m still in disbelief that we were able to get a share that is this awesome so late in the season! And now I’m remembering what it’s like to have (the wonderful) pressure of a fridge full of veggies pushing me to get creative with dinner.

liveseasoned_fall2014_quickpickels2_wm

In this first box we received your typical fall fare: a few bunches of kale and chard, potatoes, squash, etc. What I didn’t expect were the couple of cucumbers and the big beautiful bunch of dill blossoms. I thought cucumber season had passed, and I’ve never received the dill blossoms, so this was a new and unexpected surprise. I have to admit that I have a tendency to buy cucumbers and forget about them, but I didn’t want to let that happen this time. So I turned to one of my favorite easy ways to use up those cukes in a jiffy: overnight pickles! We don’t buy pickles often (and when we do they tend to sit in the fridge for months), but these are different. They are so fresh and delicious,  barely lasting a week in our house.

liveseasoned_fall2014_quickpickels4_wm

This recipe comes from my mom, but I adjusted it to make use of what I had on hand: eliminating the green pepper and adding the dill blossoms and a bit of fresh dill. Do you hear that? The blossoms were totally a bonus, this recipe is just as delicious without the fresh herb, but as you’ll see, they sure add a touch of something beautiful to the jar.

Ingredients

  • 3 average-sized cucumbers (here I used 2 large)
  • 1 green pepper
  • 1 onion
  • 1 Tbsp salt
  • 2 tsp celery seed
  • 3/4 cup sugar
  • 1/2 fresh lemon juice
  • 1 sliced lemon
  • optional – dill blossoms

liveseasoned_fall2014_quickpickels3_wm

How-to

  • Slice the cucumbers, green pepper, and onion, and mix them in a bowl with the salt and celery seed. Let this mixture stand for one hour.
  • Mix together the sugar and lemon juice and add it to the cucumber mixture. Add the sliced lemon and stir.
  • Cover the container and refrigerate for 24 hours before eating. I like to go in there and give it a stir once in a while, or if using a jar I just give it a gentle shake, slowly turning it upside down. The juices may not cover your mixture right away, but they will as the 24 hours progresses.

liveseasoned_fall2014_quickpickels5_wm

The blossoms are a really flavorful part of the dill plant. I added a few to a warm veggie mixture as it cooked, and they imparted a fantastic but not overpowering dill flavor. I found that they did a same thing here ~ creating a batch of pickles that had a sweet dill flavor. I added blossoms that weren’t fully open to my jar before filling it with the cucumber mixture (I’m not sure if there’s any difference in the flavor imparted by open versus closed blossoms?).

While the pickles taste delicious, I think I get just as much fun out of opening my fridge and seeing this beautiful jar sitting on the shelf (for the whole 2-3 days that it’s there!).

Ack, ok, maybe it’s even more fun seeing little A gobble them up and then sign for more with celery seeds sticking to his face!

Nut Crusted Brie

Apples are our ingredient of the season.  This recipe is perfect served and garnished with a thinly sliced apple. This is also the first of a few cheese plates that we’ll be serving up this fall.  If you are vegan, we apologize in advance.

LIVESEASONED_fall14_brie2

Calling all cheese lovers! This recipe goes out to you…

Autumn is the perfect time to turn on the oven, wouldn’t you agree?  I love heating up my house a bit and making something warm to snack on.  This nut crusted brie is ridiculously simple and it’s classy as all get out.  Need a quick hors d’oeuvre? Having a few friends come over? Wanna feel better about eating an entire wedge of cheese?  Need snacks for Sunday night football?  All those and more are perfectly good reasons to roll your brie in crushed nuts and pop it in the oven. This takes ten minutes max (and only about a minute of active work) and you’re likely to have at least half the ingredients on hand.

Ingredients:

  • Brie (I used Auguste Le Petit. You can use whatever you’re comfortable with)
  • Buttermilk (or heavy cream)
  • Egg
  • Nuts of choice (I used almonds+walnuts. Macadamia would work well.)
  • Apple
  • Baguette

Instructions:

  • Preheat your oven to 300° and line a baking sheet with tinfoil.
  • Pulse the nuts in a blender or food processor until finely chopped, but not powdery.  I used about a half cup of nuts for a medium sized wedge. Set the bowl of nuts aside.
  • Whisk together one egg with a half cup of buttermilk.
  • Coat the brie wedge or wheel in the buttermilk and then press it firmly into the nuts. Repeat on each side of the brie making sure to completely coat it.
  • Delicately transfer the brie to the baking sheet and put it in the oven for 5-8 minutes.  You want the brie to be very warm, but not a melted puddle.  A full wheel will take about 10 minutes.
  • While the brie is baking, thinly slice the baguette and arrange on a baking sheet.  Put the bread in the oven while the brie is baking.  If you like your bread slightly browned, once the brie is done baking, turn the oven onto broil and toast the baguette.  Watch the bread closely so it doesn’t burn!
  • Thinly slice an apple or two and serve it along with the brie and baguette.

LIVESEASONED_fall14_brie4

I love this recipe for fall. Apples, nuts and warm cheeses, I don’t think there is a better combination. Unless you’re talking drinks, then I’m all about the fresh apple juice, cinnamon and vodka…