Want more yoga and exercise? Become a woods warrior, try this lower body workout, then end the day with bedtime stretches that relieve lower back pain. Check out my 200hour yoga teacher training experience and read about the school I attended here.
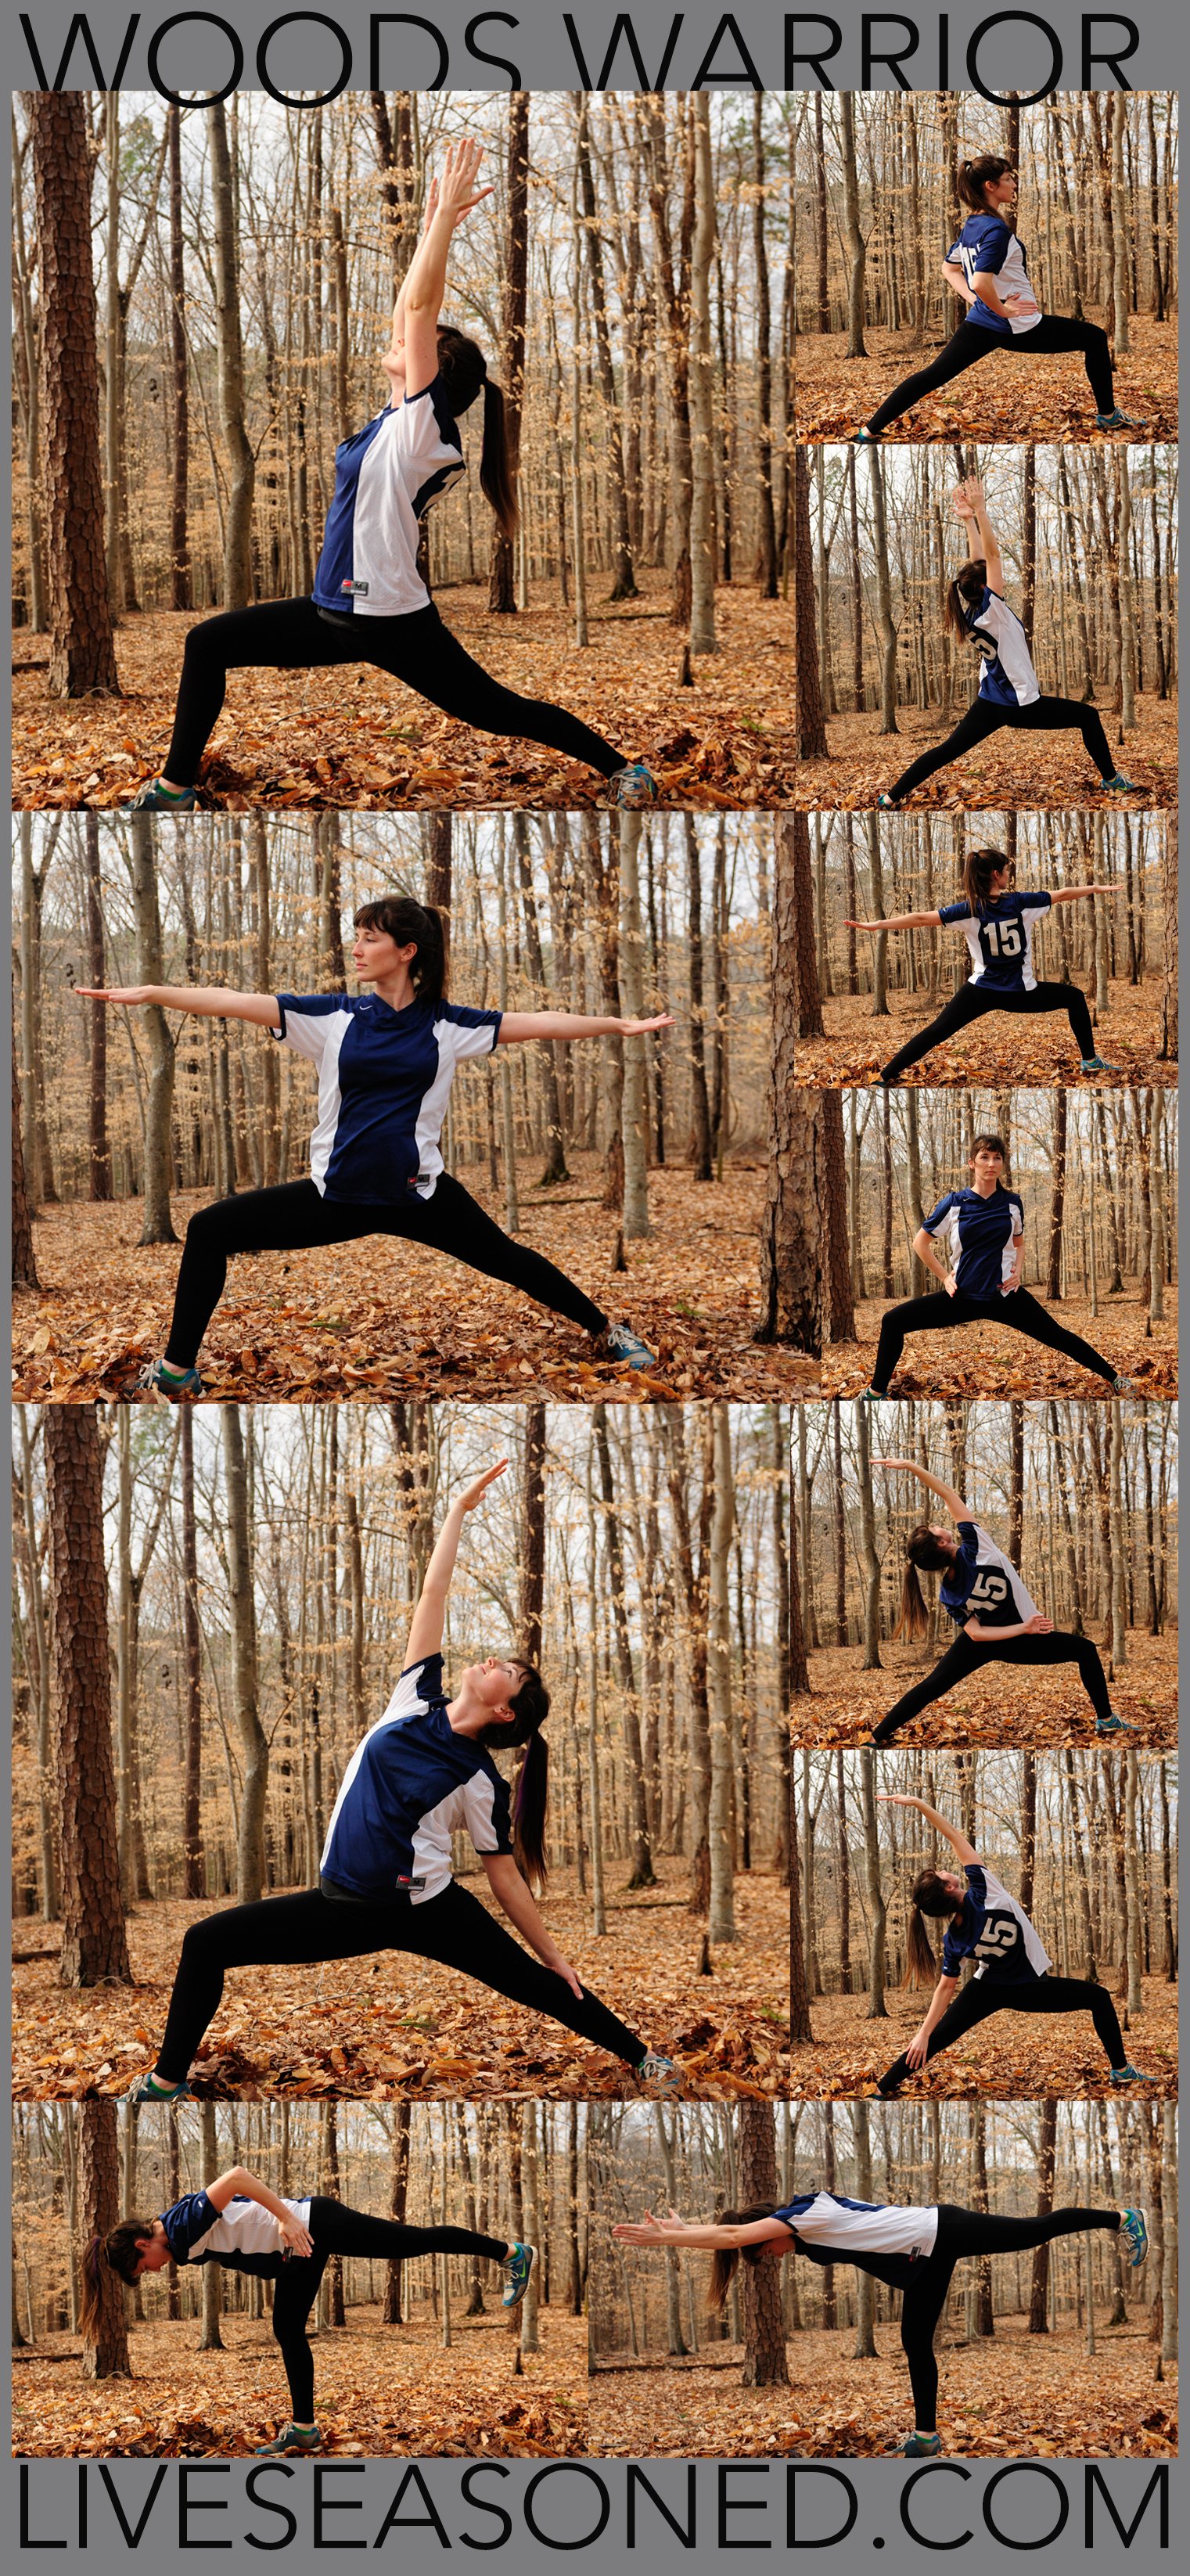
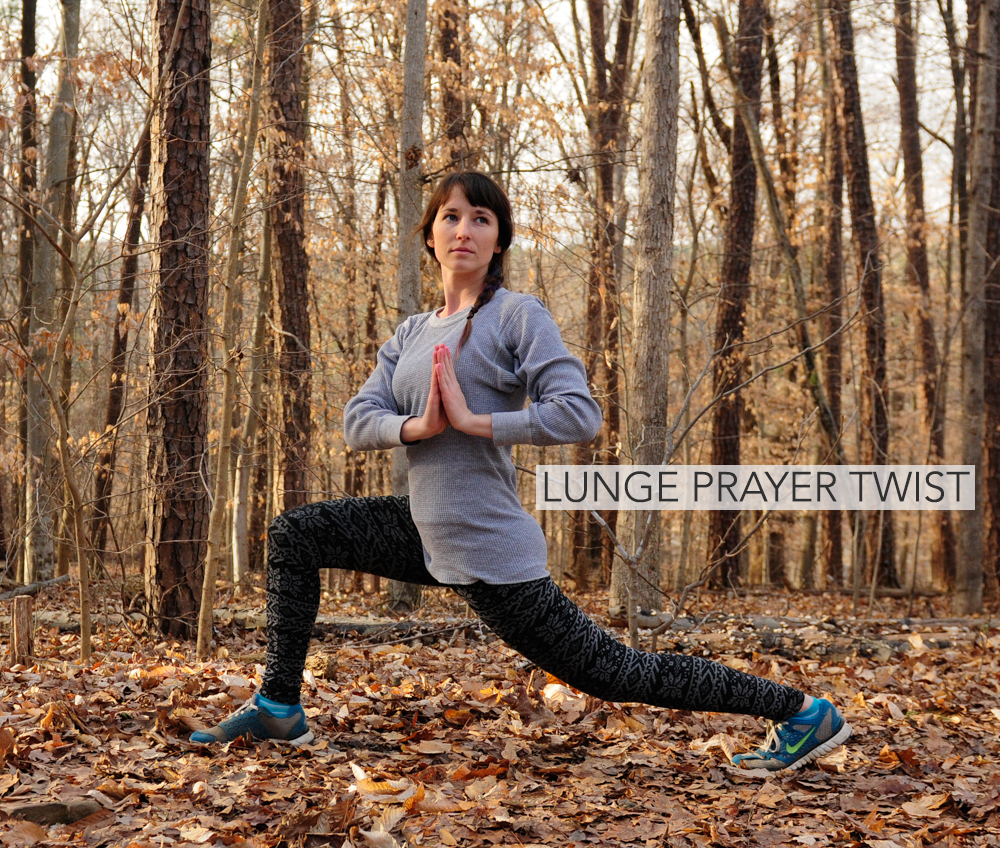
Become a woods warrior. Nope, not the kind that wields a sword, instead the kind that smiles peacefully and stretches deeply. Warrior pose is also known as Virabhadrasana (vira=hero, bhadra=gentle, asana=pose). You can be a warrior anywhere, but I believe the woods to be the calmest and most inspiring space for these stretches. There’s nothing like holding warrior one while you gaze up at your fingertips and see the tops of tall trees swaying in the wind. You have the overwhelming sense of feeling grounded yet flexible like those limbs. Then comes warrior two where you can pause and gaze miles past your fingertips. The forest gives you ample spaces for exalted (reverse) warrior so you can stretch and lengthen until you’re as limber as the trees that surround you. I love looking down at my environment in warrior three. It gives me time to take in the dry leaves and tiny bugs as I breathe, balance, lengthen and stretch with all I’ve got.
After recently completing a month-long yoga challenge, I was a little bored with the warrior poses. I was eager to move on to harder, more intriguing postures, but I realized that isn’t the yogi way. It’s important to be present with each pose, no matter how many times you’ve practiced. The more you appreciate the present, the more space you create for improvement and appreciation. Of course, the same is true with life. The more we focus on the task at hand, the more we come to contribute, improve, appreciate and love what we’re doing. So even if you’ve practiced warrior one, two, and three a thousand times, try them all again and appreciate their presence in your life and your ability to stretch and strengthen your body.
A few tips:
- Wear stretchy pants or shorts so you can practice your fullest expression of each pose.
- Pick a relatively flat and non-slip surface.
- Move into each pose slowly and with intention. Think about each part of your body in order to achieve the proper alignment.
- Breathe deeply and evenly through your nose. If the pose seems tough, focus on your breath.
- Try each pose for a couple breaths and then go back and hold them longer if you’d like.
- My form isn’t perfect so don’t just peep at the pics – read through each warrior before practicing.
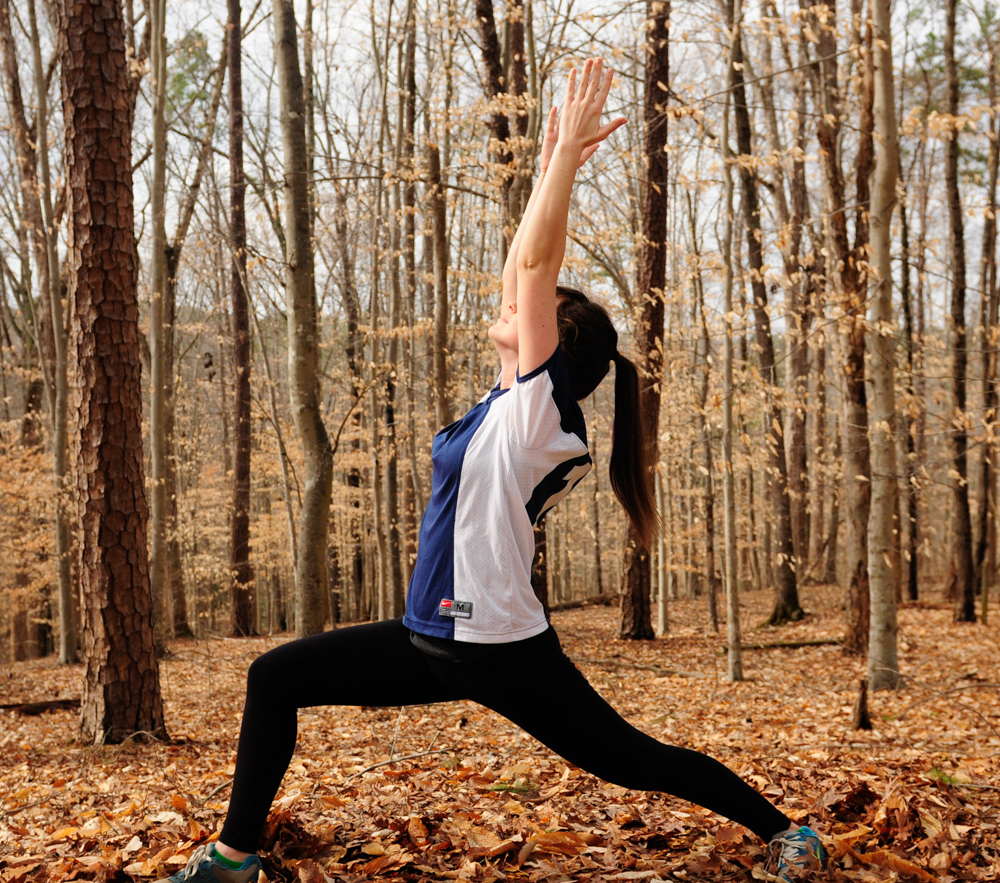
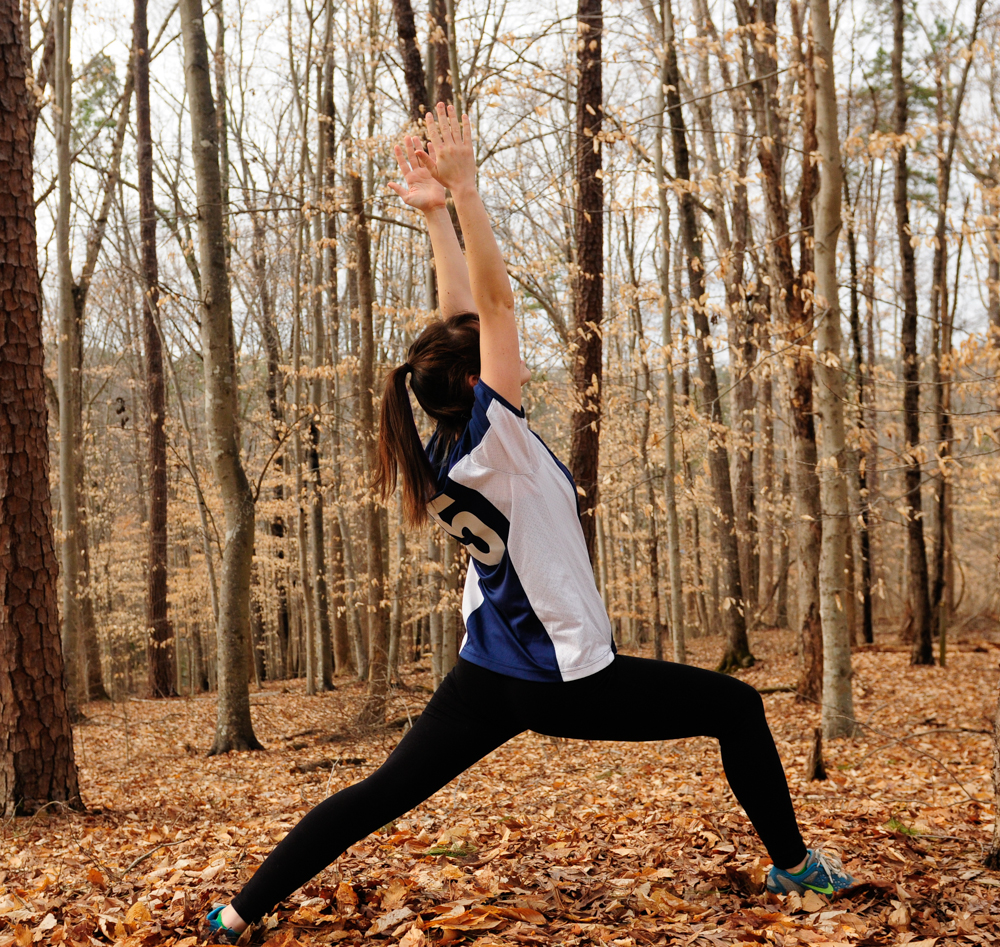
Warrior One
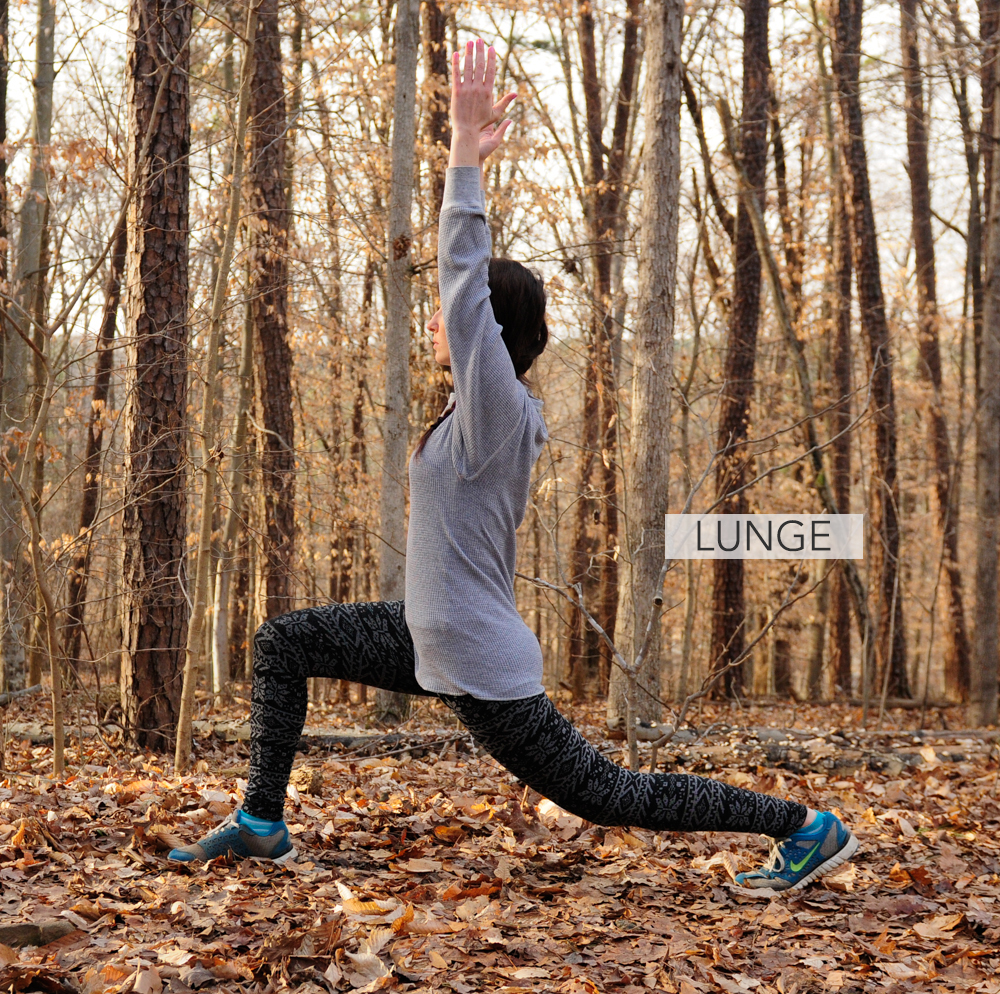
- Stand up straight with your feet together, arms down by your sides, and palms facing forward. Inhale and as you exhale, step your right foot forward about 4 feet. Reach your arms upwards (perpendicular to the floor) as you rotate your palms to face each other and actively reach through your fingertips towards the sky. Breathe as you roll your shoulders down and back into their sockets.
- As you inhale, make sure your heels are aligned and turn your back foot (left) out 45-65 degrees to the left (anywhere from 9 o’clock to 11 o’clock). Exhale and rotate your hips and torso to face forward while grounding into your back leg. You’ll probably have to pull your left hip forward and your right hip back. Try to square your pelvis as much as possible, this is difficult (especially if you have tight hips like myself) and won’t happen overnight. I like to bring my arms down for a moment, touch both my hips and direct them towards the front of my invisible mat.
- Keep your back foot firmly planted and as you exhale, bend your right knee over the right angle so the shin is perpendicular to the floor and your thigh is as close to parallel as possible. You may have to scoot your front foot forward a little bit if your knee is tracking over the front of your ankle (you never want that to happen). Your back leg should be straight and your heel should be touching the ground.
- Anchor yourself firmly with both legs, even though your front leg is probably burning a little more, your weight should feel equally grounded. Inhale as you reach towards the sky, look up at your fingertips and those beautiful trees and reach some more. There can be a slight bend in your back. You can also bring your palms together overhead and spread your fingers if you’d like.
- Relax into warrior one with strength, breathing deeply for thirty seconds to a minute. To release, straighten the front leg while bringing the back leg forward to meet at the front of your invisible mat.
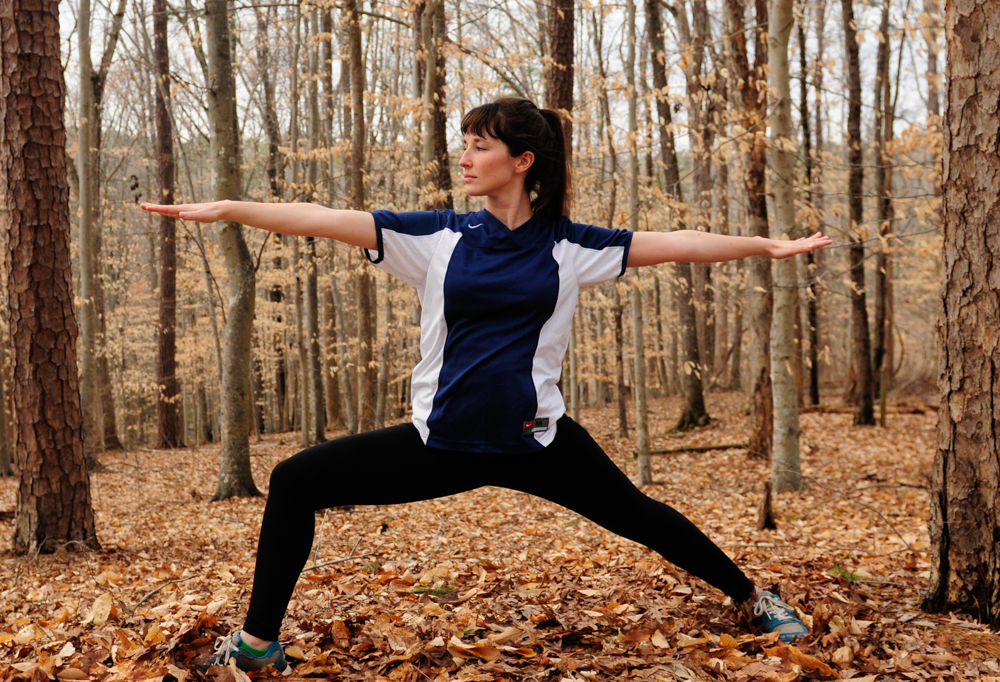
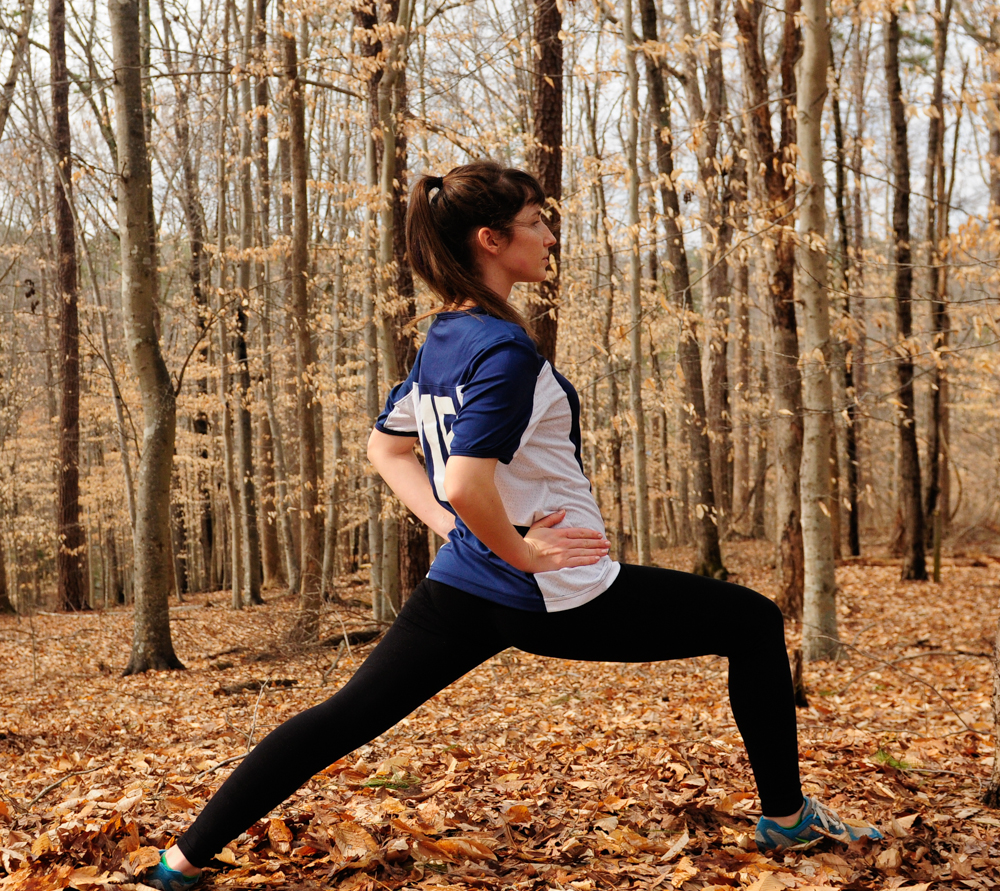
Warrior Two
- Starting from warrior one (with your right foot forward), rotate your left arm back and your front arm forward so they create a straight line (parallel to the ground). Keep a tall spine and feel strength radiating from your core. At the same time rotate your hips and your back toes outward. Your shoulders should be stacked directly over your hips and your left toes should be pointed towards the left side of your invisible mat (perpendicular to your right toes) . The heel of your front foot should line up with the arch of your back foot.
- Sink lower into your lunge and exhale while relaxing your shoulders. Just like in warrior one, the weight should be distributed evenly in your legs, which means the outer edge of your back leg is pressing firmly into the ground.
- Even though you’re actively reaching forward and backwards with your arms, they should be slightly relaxed not rigid. I like to imagine a string tied to each middle finger, knowing I could sway my abdomen forward and backward if someone came along and pulled either string.
- When you’re properly aligned, look out over the edges of your front fingertips. Keep your gaze soft and your face relaxed. Hold the pose for thirty seconds to a minute all the while breathing deeply. To release, rotate the arms upwards and the back toe and hips forward to return to warrior one and then straighten the front leg while bringing the back leg forward to meet at the front of your invisible mat.

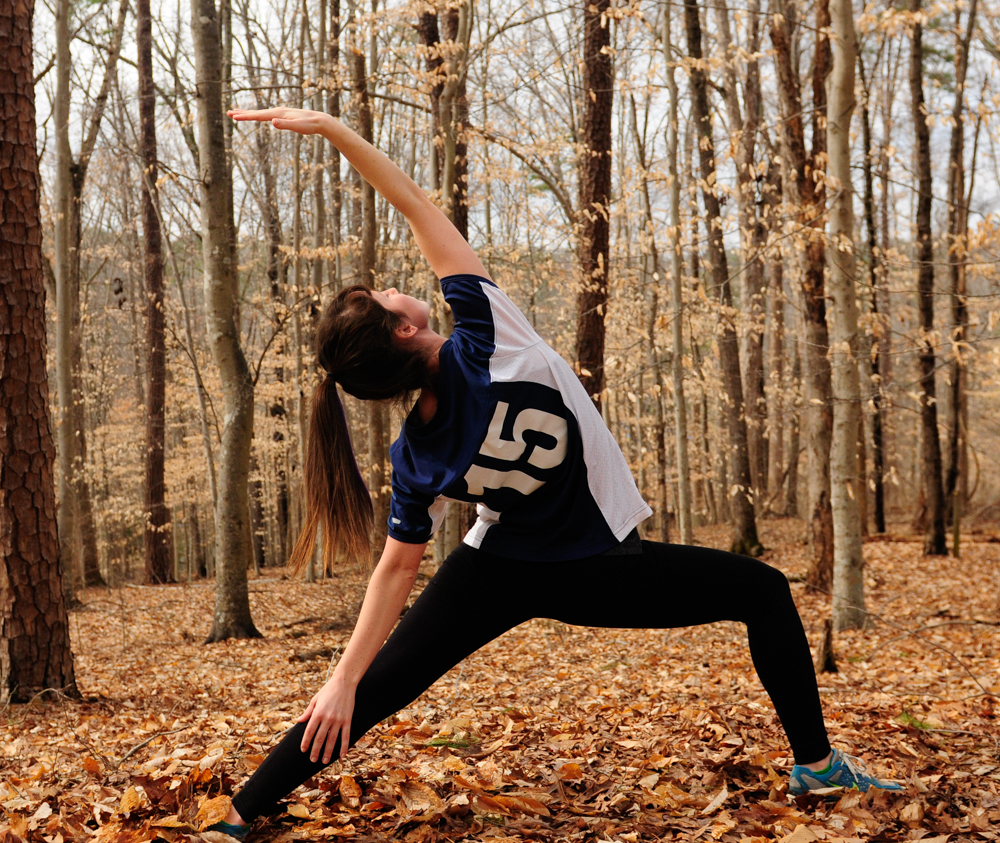
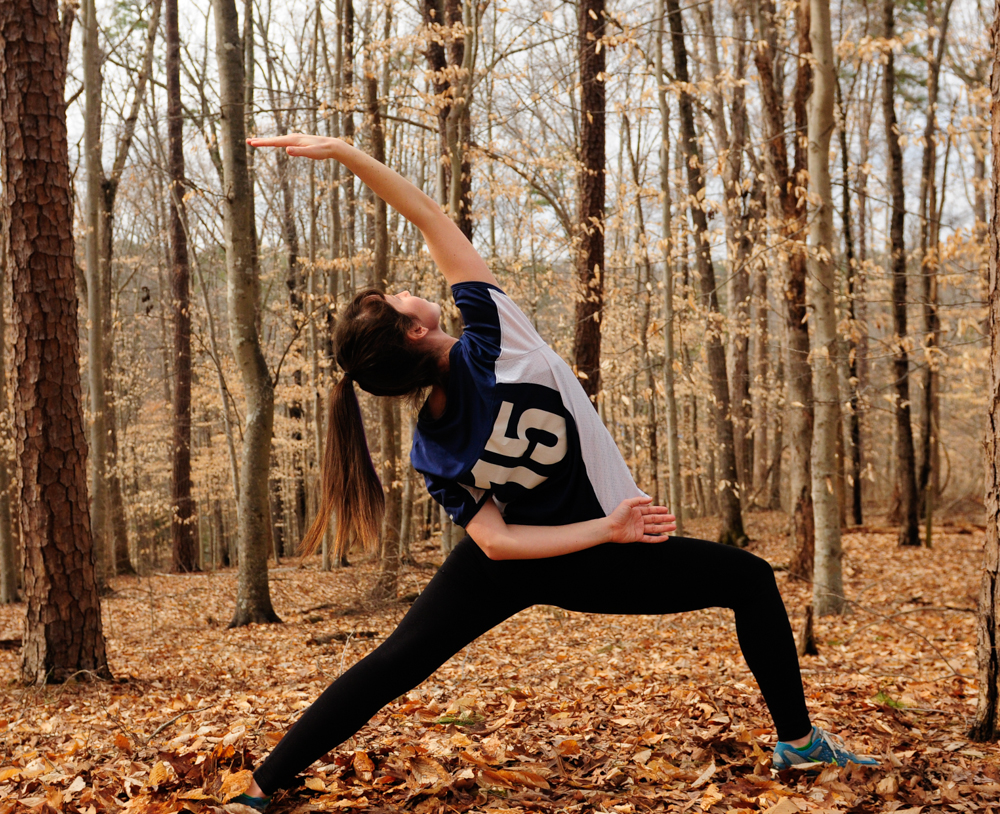
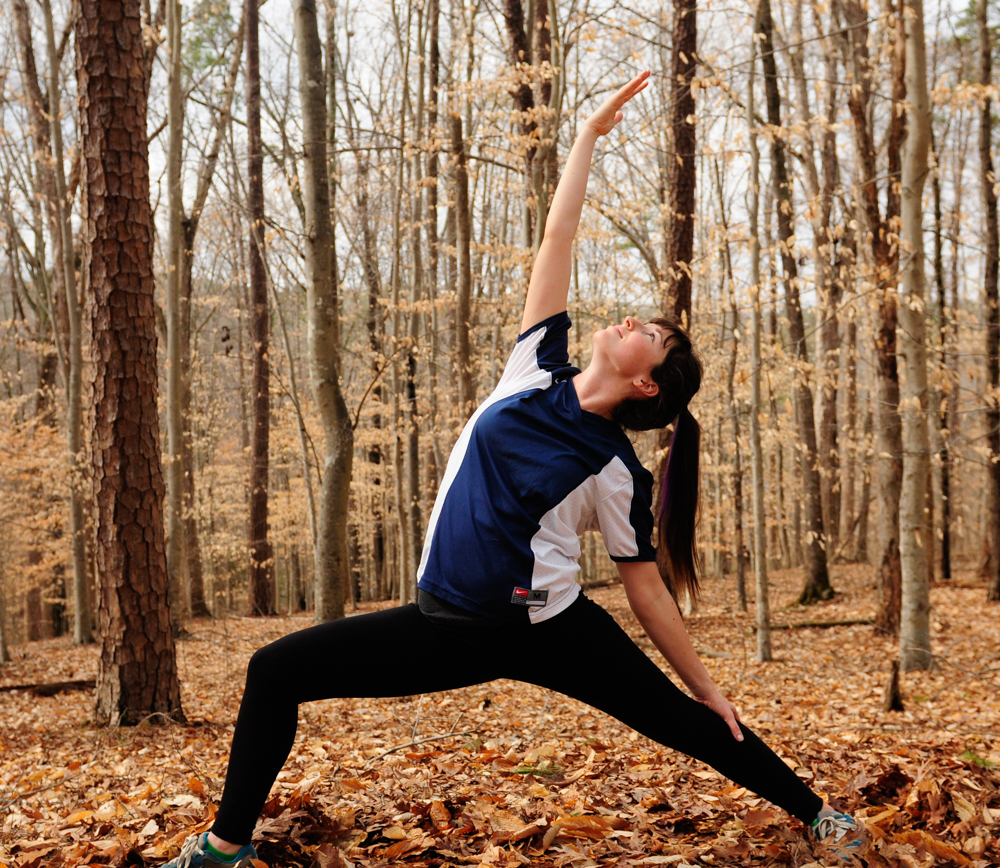
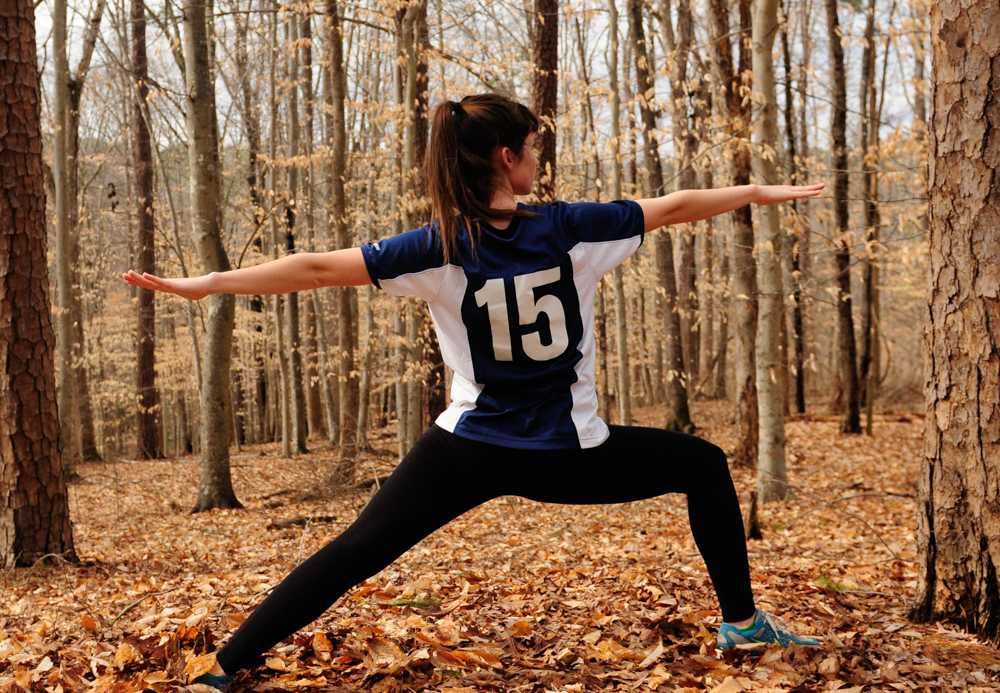
Exalted or Reverse Warrior
- Starting in warrior two, simply rotate the front palm towards the sky and slide the back palm gentle down your back thigh. Inhale the front arm towards the sky, reaching and lengthening the front side of your body while your back hand extends lower on your thigh and eventually calf. You don’t want to put any weight on your back hand, instead use your abdominal muscles and right hand to lengthen and raise your heart towards the sky. Gently gaze up at your fingertips while keeping your neck relaxed.
- Deepen the lunge in your front leg and breathe deeply for up to thirty seconds. To exit, return to warrior two, warrior one and then straighten the front leg while bringing the back leg forward to meet at the front of your invisible mat.
- *If you’d like to go into a half bind in reverse warrior, bring your lower hand around your back and place your fingertips in your front hip crease. Make sure you keep a deep lunge and your upper body uplifted.
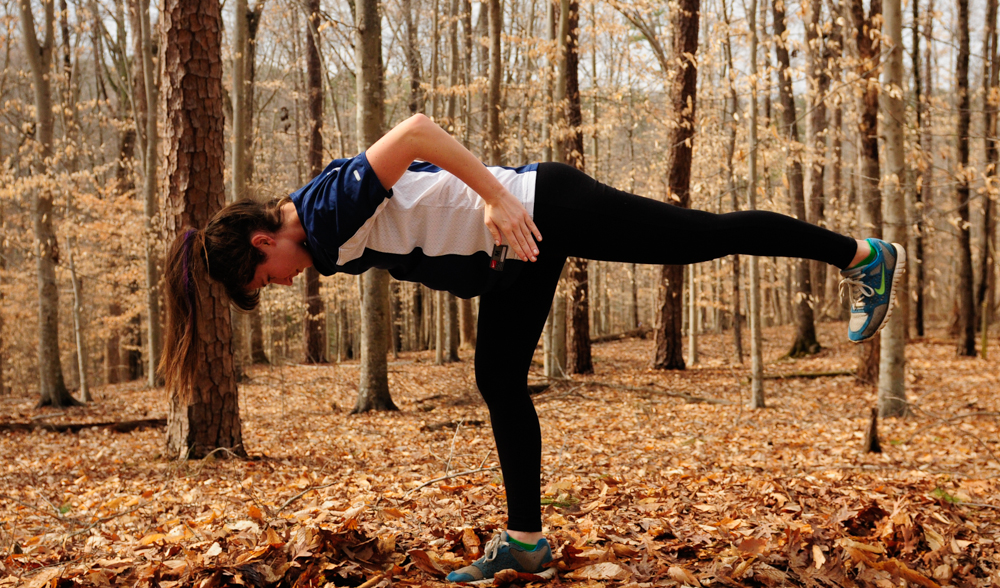
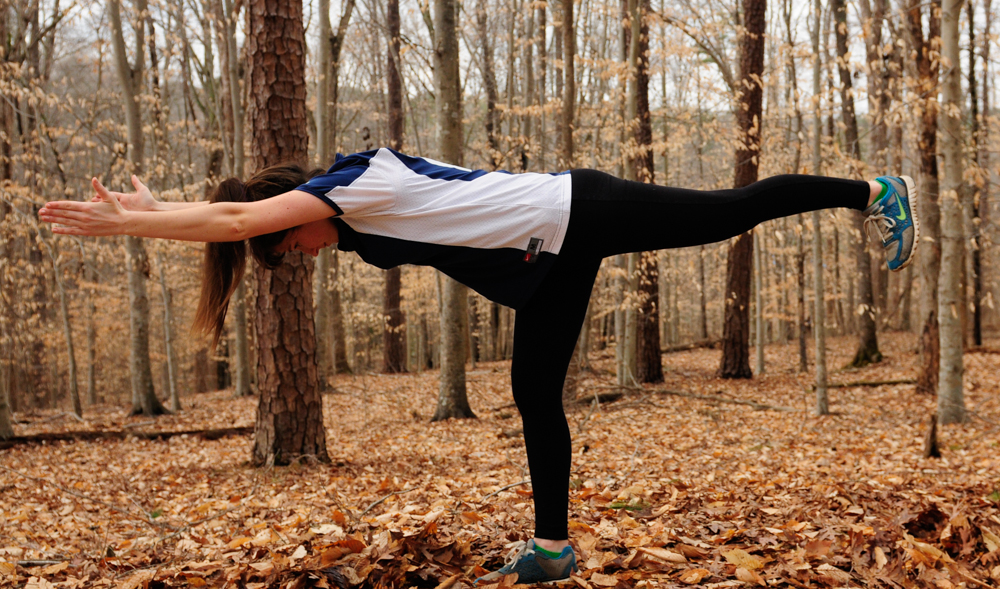
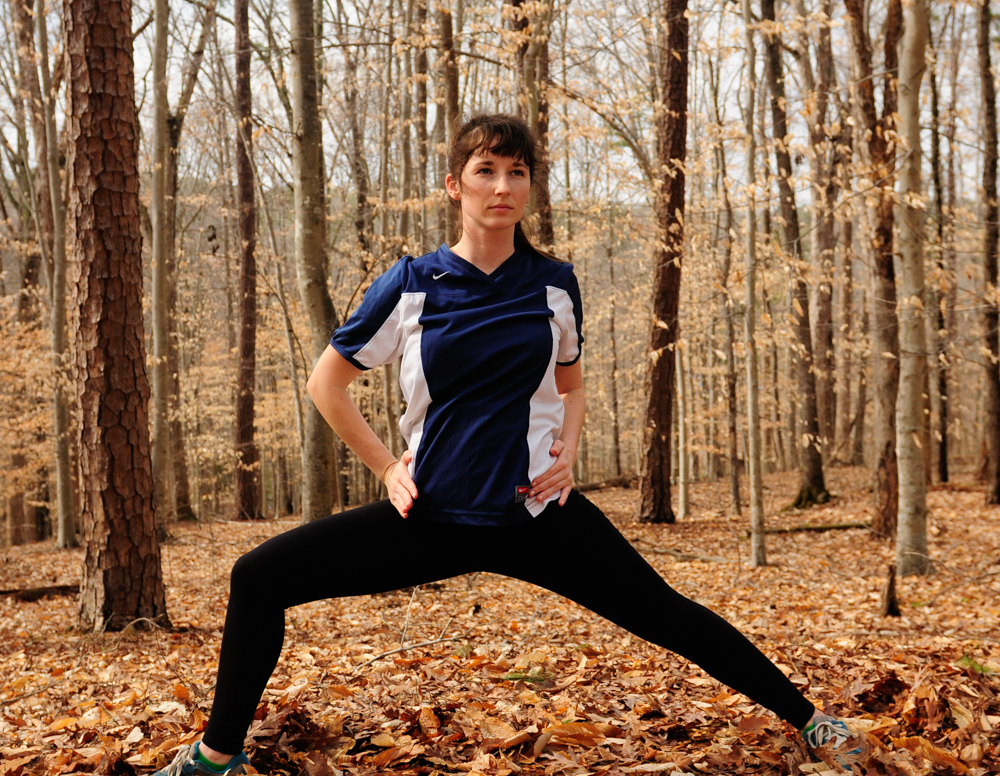
Warrior Three
- Starting from warrior one, simply (ok nothing is simple about this pose) tilt your upper body forward about 45 degrees and simultaneously straighten your front leg while you gently push forward and lift your back leg. The goal is to look like the letter T. Your hips should be squared towards the ground. Stretch your arms forward so they’re parallel to the ground while you flex your back foot and push backward. I like to imagine a wall directly behind me that I’m pushing against with my heal. You don’t want your shoulders to sink below your hips so engage your core muscles and lengthen your arms while you gaze at the ground. Hold this for up to thirty seconds, which is a major challenge, and gently release back into warrior one. To release, straighten the front leg while bringing the back leg forward to meet at the front of your invisible mat.
Now you’re well versed with warrior and equipped to take your calming strength out into the woods. I hope you enjoyed a magnified look at these important postures. I’m sure you’ll find yourself in one, if not all four, of these poses during any vinyasa class. And remember that everyone’s body looks and works differently even though we’re all made up of the same parts, which means everyone’s warriors will differ slightly. Embrace yours, whatever it may look like today and leave it in the woods when you’re finished. It may look different tomorrow, embrace that too!
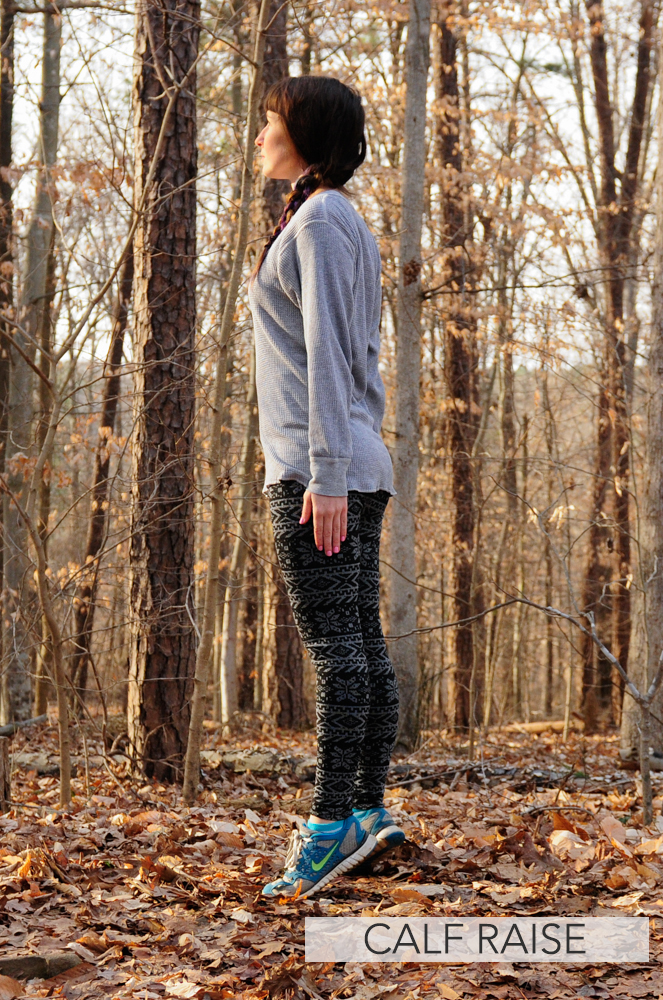
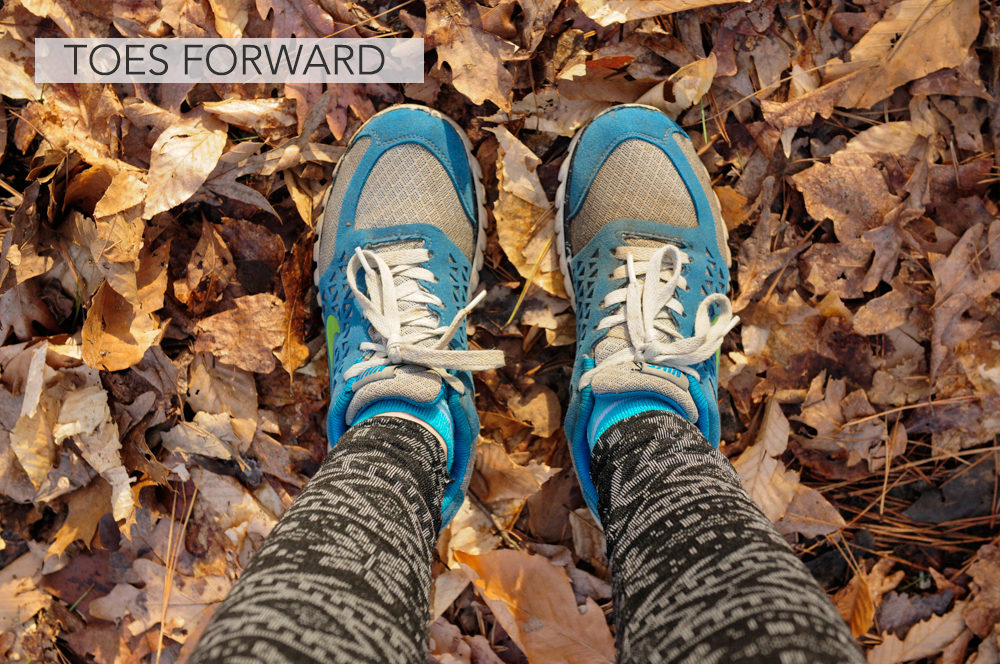
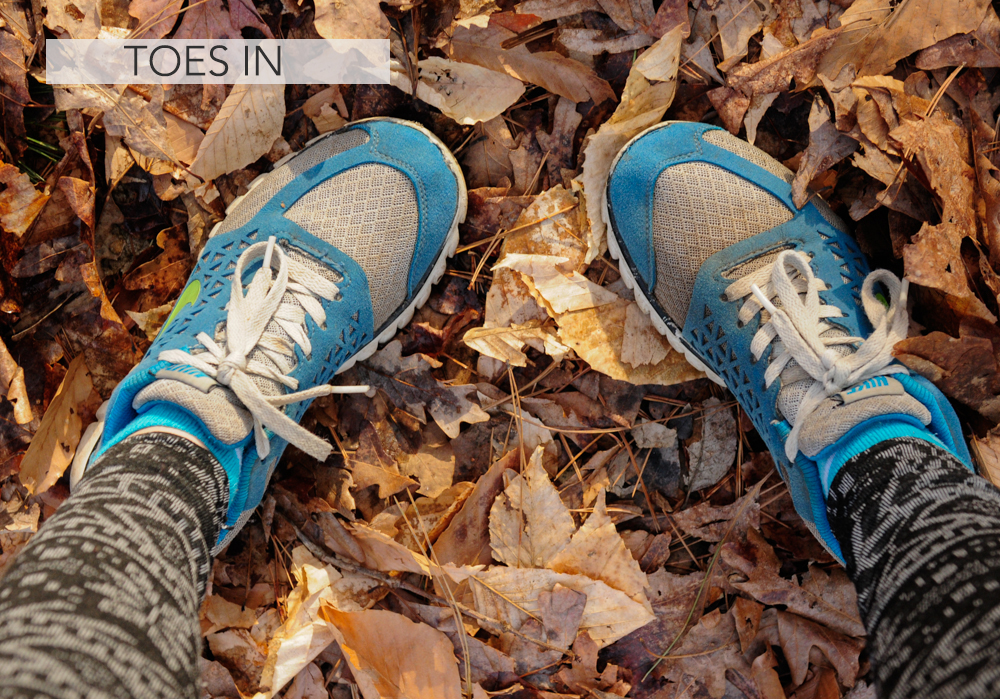
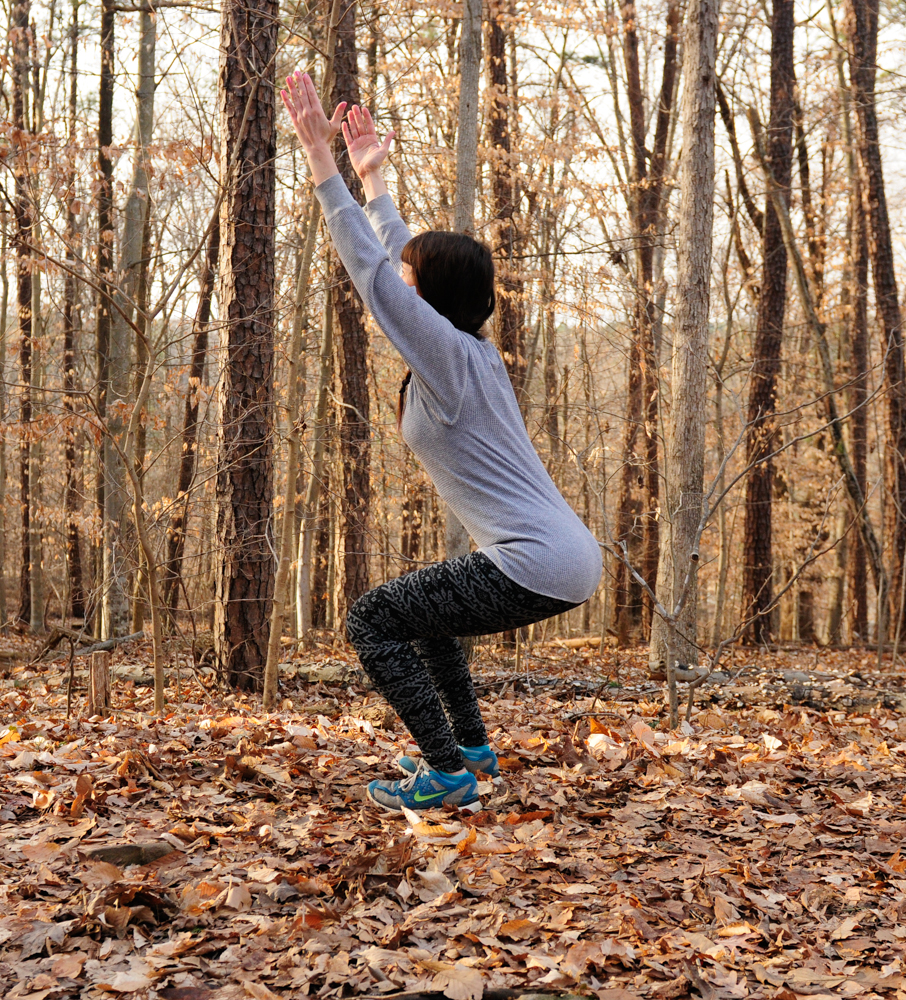
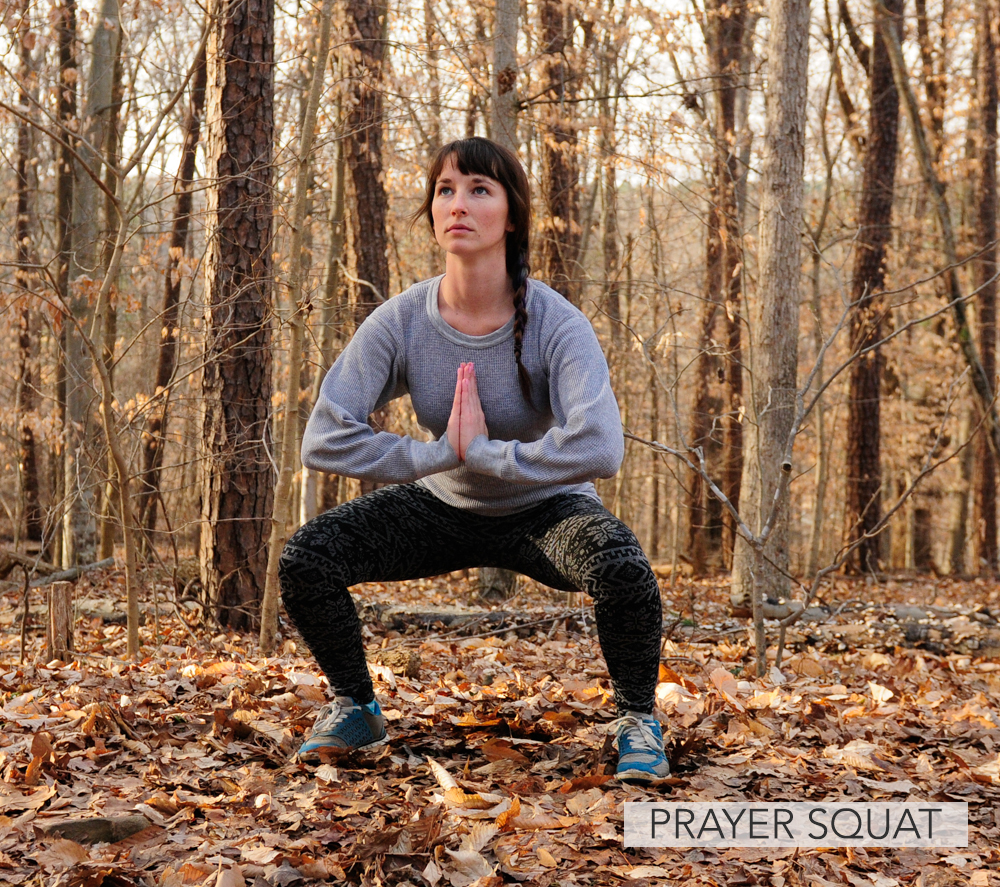
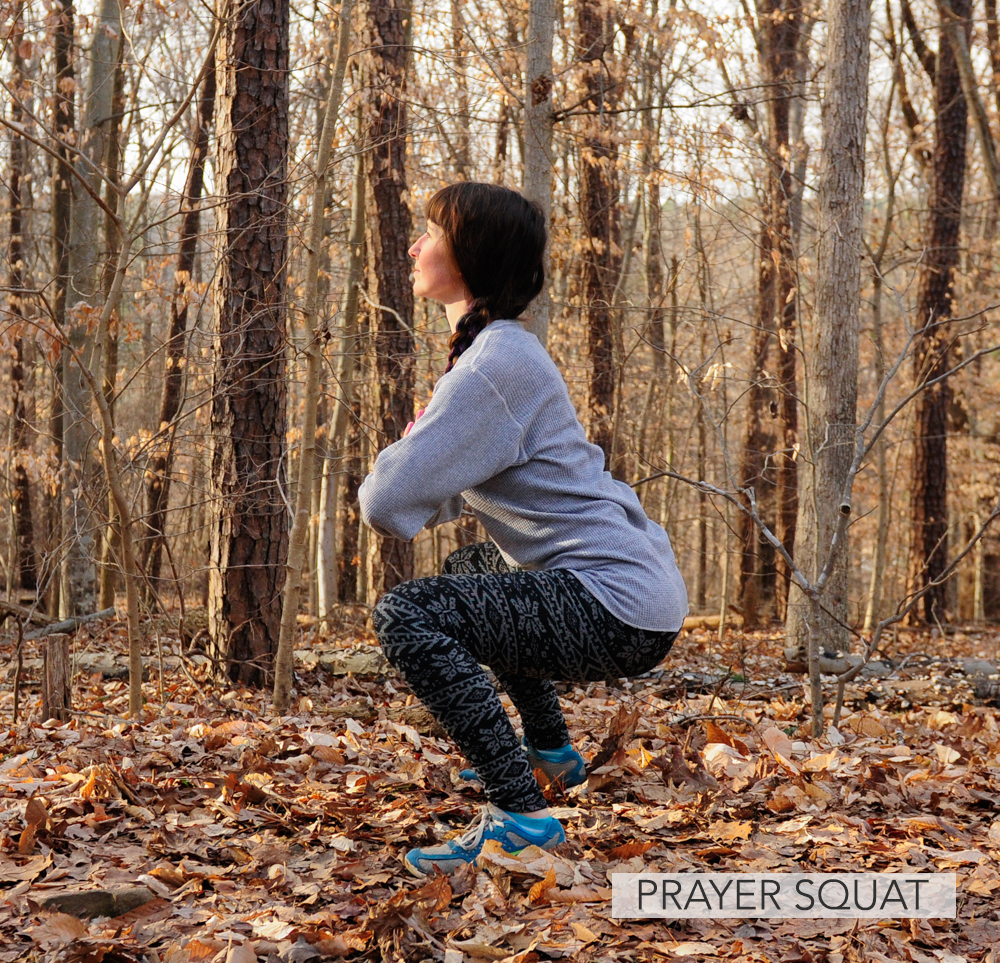
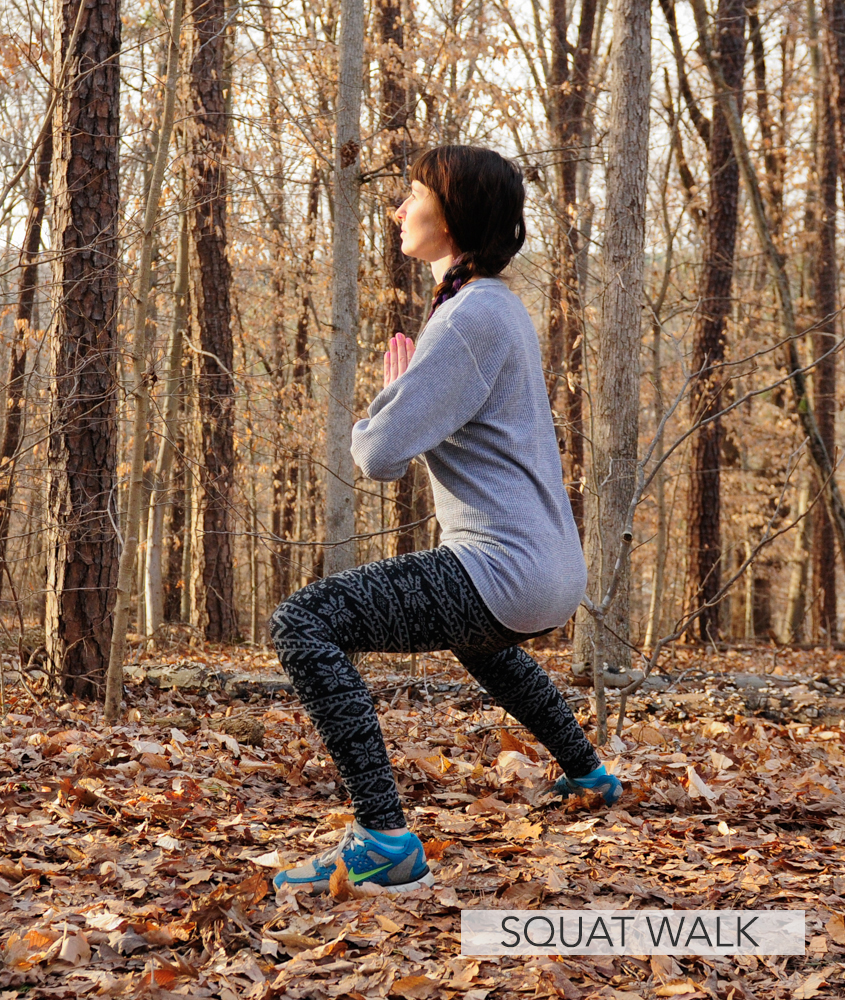
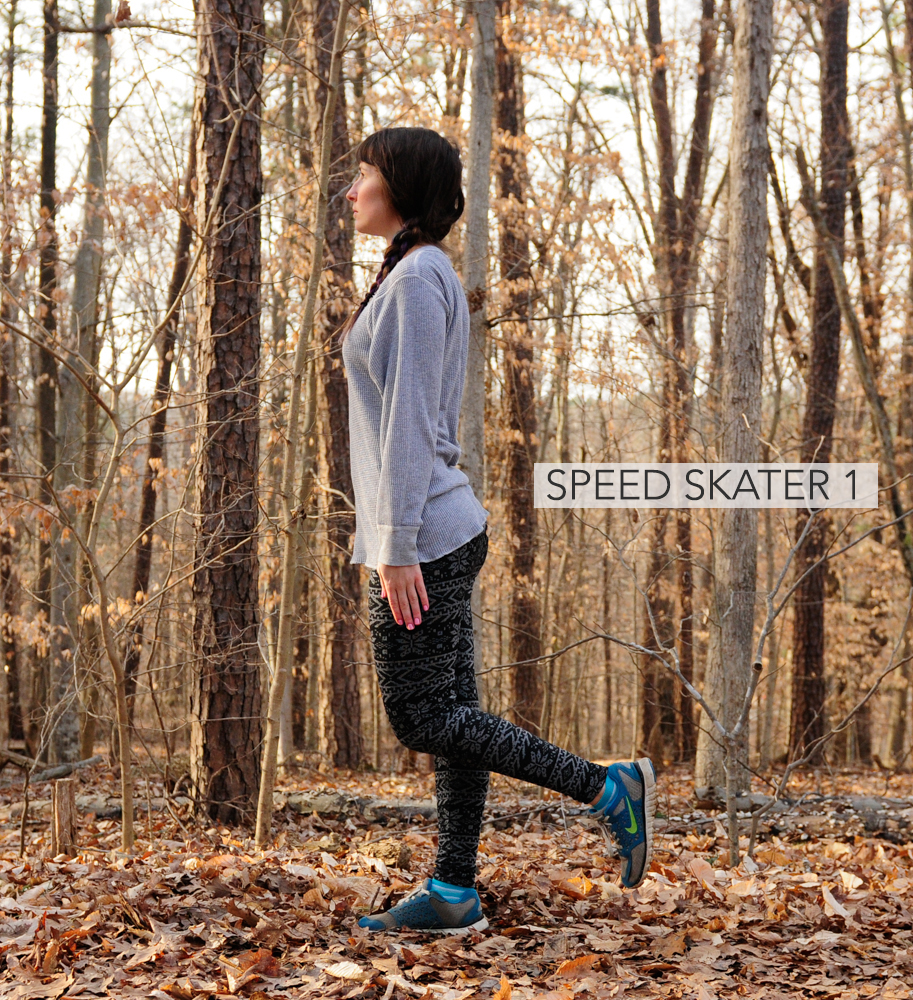
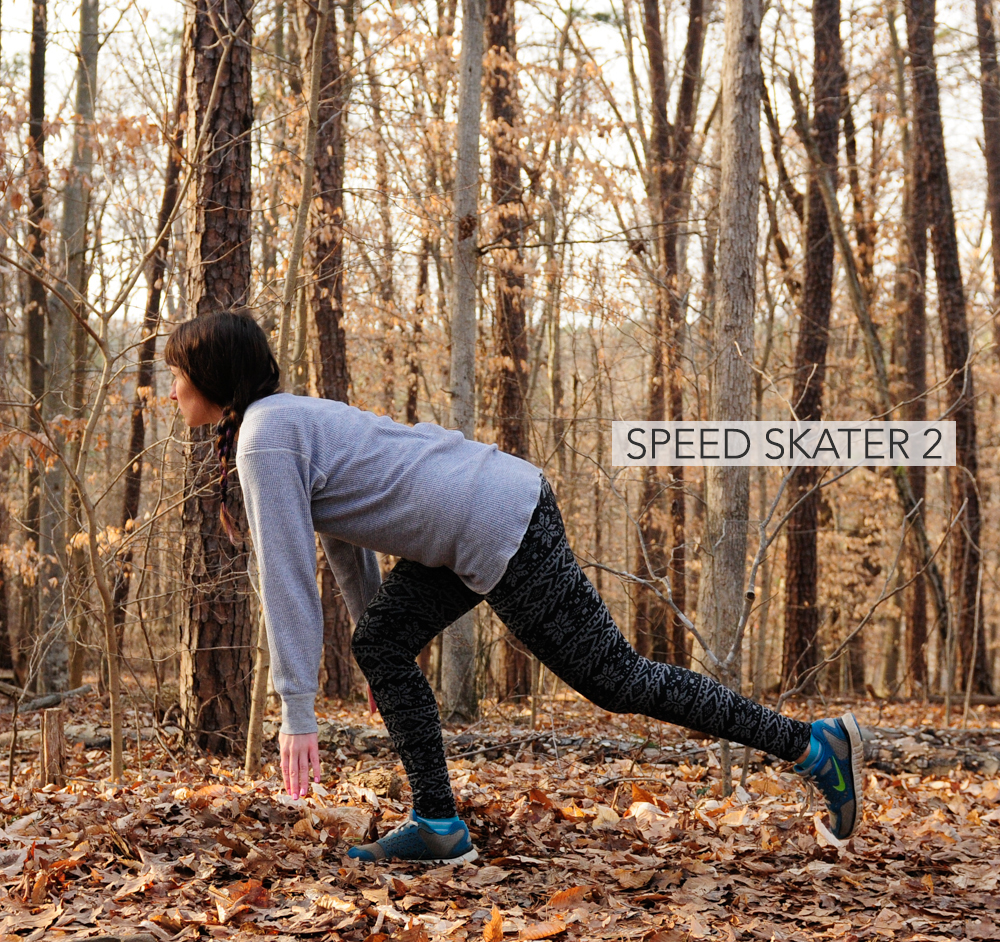
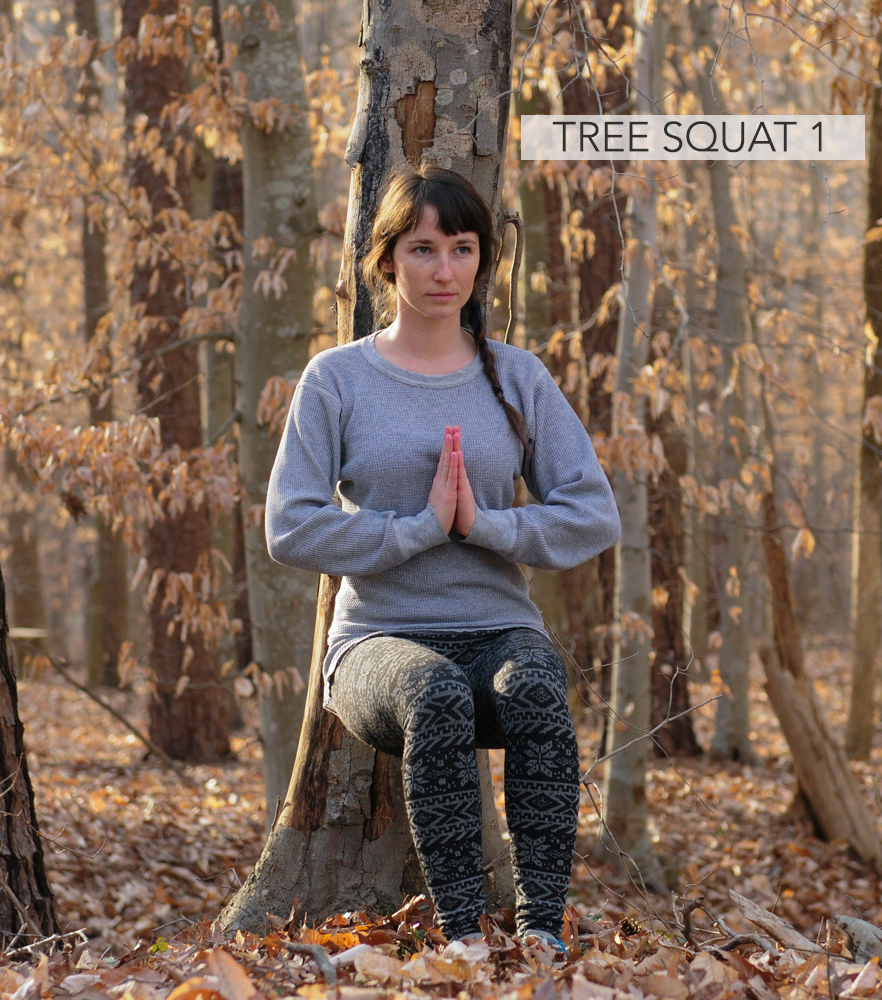
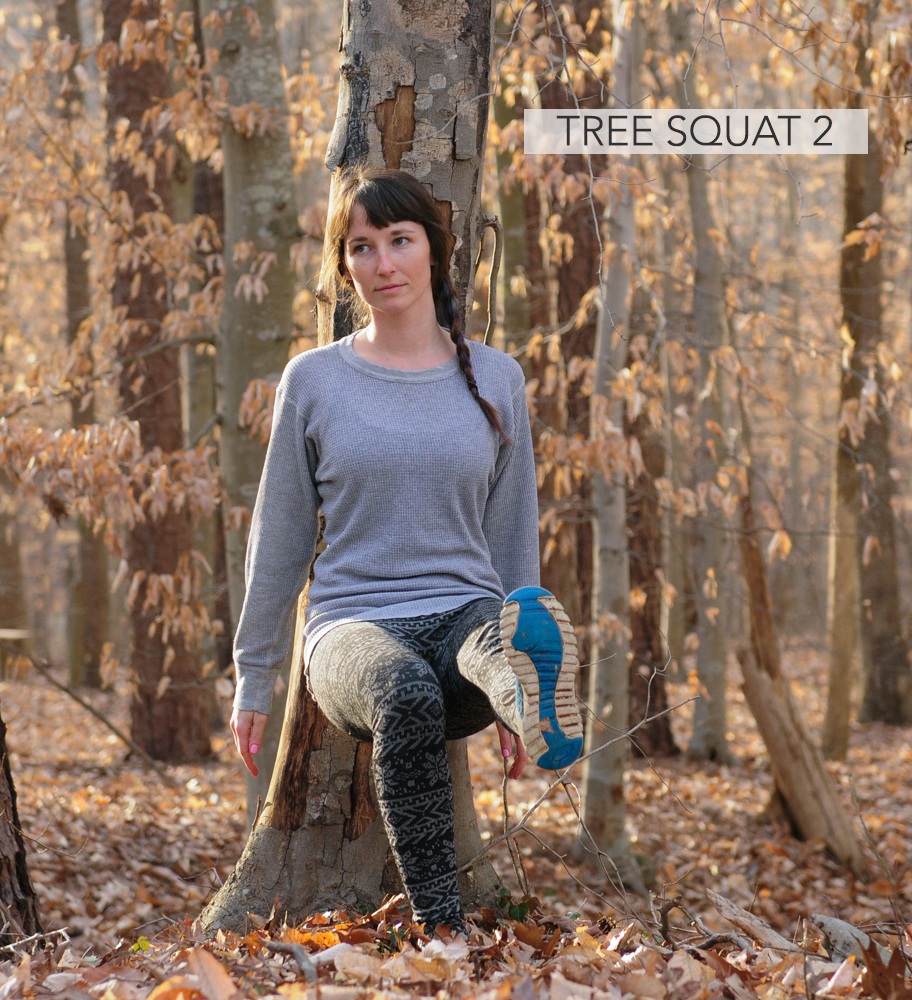
 Growing up, I’ve always been involved in some type of activity, whether it was playing tag with my neighbors, going backpacking with my father or running around on the soccer field. Because of this, my legs have always been the biggest part of my body and I admit, I used to feel a little insecure about it. Struggling to squeeze into skirts and skinny jeans that my friends easily slipped on with their cute little bird legs and knobby knees. Now that I’ve grown up a little bit and realized that Barbies and models are far from average, I love my muscular legs. Are they proportionate to the rest of my body? Sometimes no, but it’s cool, thunder thighs are where it’s at. They take me everywhere I need to go, even if it’s twenty miles from point A to B, I know they’ll carry me. Climbing up a volcano? Yep, they were there. Walking three miles home from class carrying a twenty-pound camera lens? No biggie. Taking dozens of photos while frozen in the same pose for an hour during this tutorial? No problem they say! They even requested a yoga class afterwards. They’re that good. So, after years of self-doubt and twirling in the mirror wishing they’d shrink up a bit, I decided it’s time to give my legs some love and some more exercise. Time to cherish those limbs and treat them right. This lower body workout is really basic, but can be easily modified if you’d like it to be a bit tougher. I designed it to be easily remembered and equipment free that way you can add it to the end of a hike or a walk. These moves target your thighs (especially the inner thighs), glutes, calves and even your abdominal muscles. Read through all the exercises so you’re familiar with proper form. You’ll find a concise workout routine at the bottom of the post.