Waste Less Wednesday: Halloween Costume

It’s our very irregular Wednesday series where we share simple tips to reduce your consumption and environmental impact. You can find our full WLW archive here.

Halloween’s just 5 days away! Don’t have a costume yet? We have a pretty simple suggestion that’s going to cost you less than $10, and you may not even have to leave your house to get it.

Continue reading

DIY Christmas Decorations + Crafts

This post was originally published in 2015, we’re re-posting it today to inspire some simple crafting before Christmas!

Today we’re rounding up past Christmas crafts. While Sarah was busy ordering gifts yesterday, I was finishing up the decorating. I love to get everything up as soon as possible so that there’s plenty of time to enjoy it (plus, I need the decorating out of the way so that I have every extra moment left to think about gift shopping!). If you’re taking your time and in need of decorations, we put together a list of past DIY projects that we made, love, and we’re excited to put out again this year.

This list provides a range of projects from those that can be finished in 30 minutes to others that may take a few hours, and the skill-level required varies from the simple to the more complex. In addition to decorating your house, some of these projects like the felt and cinnamon ornaments make great gift tags. What we have here is a little bit of something for everyone.

liveseasoned_w2015_stockings7_wm

liveseasoned_w2015_cinnamonornament4_wm

Continue reading

Balsa Mat & High School Geometry

Were you one of those kids sitting there in high school geometry thinking about when you’d ever use that stuff? And now you’re crafting up a storm and haven’t thought about Pythagorean Theorem since. Well, today’s the day you’re going to put that famous formula to work! … now before you get the cold sweats, just know that you won’t *have* to use the formula (I’ll show you a trick), BUT if you want to impress your high school geometry teacher, then we’ll also whip out our calculators phones.

What am I talking about? Cutting angles for a super-simple DIY balsa wood mat.

balsa_frame7b


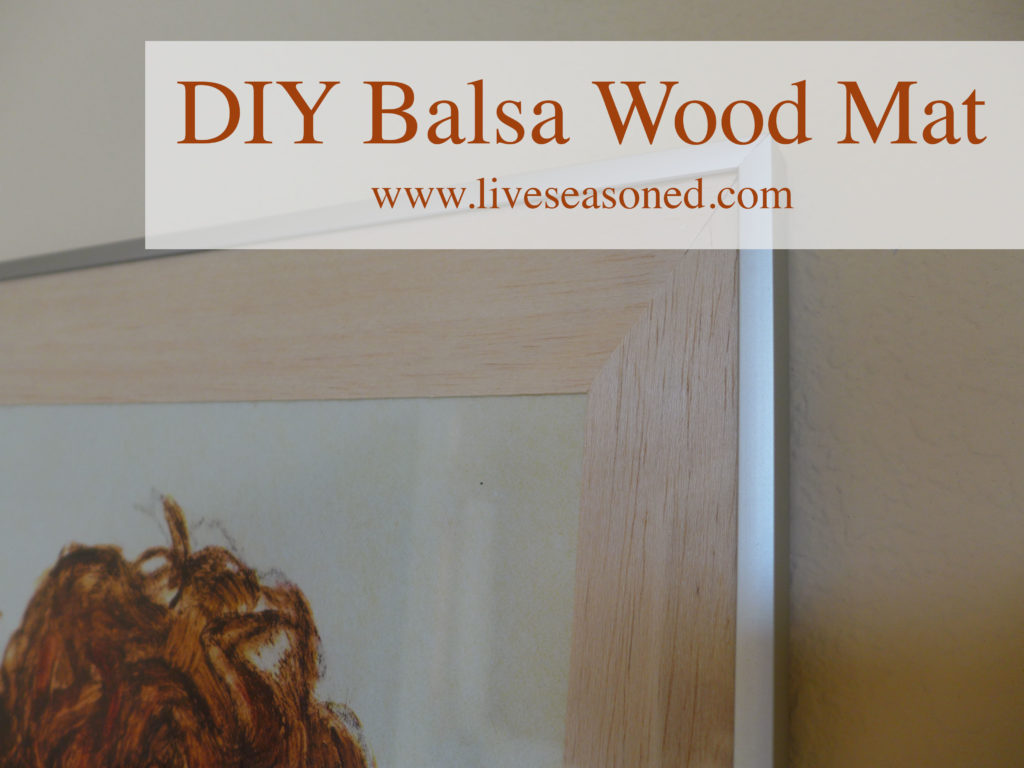
I came up with this project out of desperation. My mom gave us a poster of an Egon Schiele print (I know what you’re thinking – why’d she cheap out and not buy the original? What a bum.), and I wanted to frame it to hang on the wall. The print itself was about 32″ by 21″, requiring at least a 36″ x 24″ frame. The problem was that I couldn’t easily find a mat large enough for the frame. I’m sure I could have ordered one from a framing shop or the framing counter at Michaels, but that would require talking to someone and explaining my problem. Did you know that young kids love to yell and scream at the exact moment you’re trying to talk to someone else?

(Side note, while I love original art on the walls, I’m totally comfortable enough in my house decorating to still use posters of art that I love but can’t afford. Call me crazy.)

Then I came up with an idea to shirk the traditional mat and make something more visually interesting out of balsa wood! If you haven’t worked with balsa wood before, it’s a very soft and lightweight wood that can be cut into thin sheets and used for any variety of craft projects (as well as having many structural uses beyond crafts). Balsa wood for crafts and model building is sold in Michaels, art stores, and some hardware stores. I bought the 36″ x 3″ x 1/16″ sheets for this project.

Supplies

  • balsa wood sheets
  • double-sided tape
  • sheet of paper as large as the framed area (I used the sheet that was already in the frame advertising its size)
  • exacto knife
  • cutting mat or board

Hints

The basic overview of this project is that you’re going to center your print on the large piece of paper and place the pieces of the balsa mat around it, attaching the print and the balsa wood to the paper with double-sided tape. What I’m going to help you with below is making sure that the balsa wood ends are cut at the correct angle so that they fit together nicely in the frame.

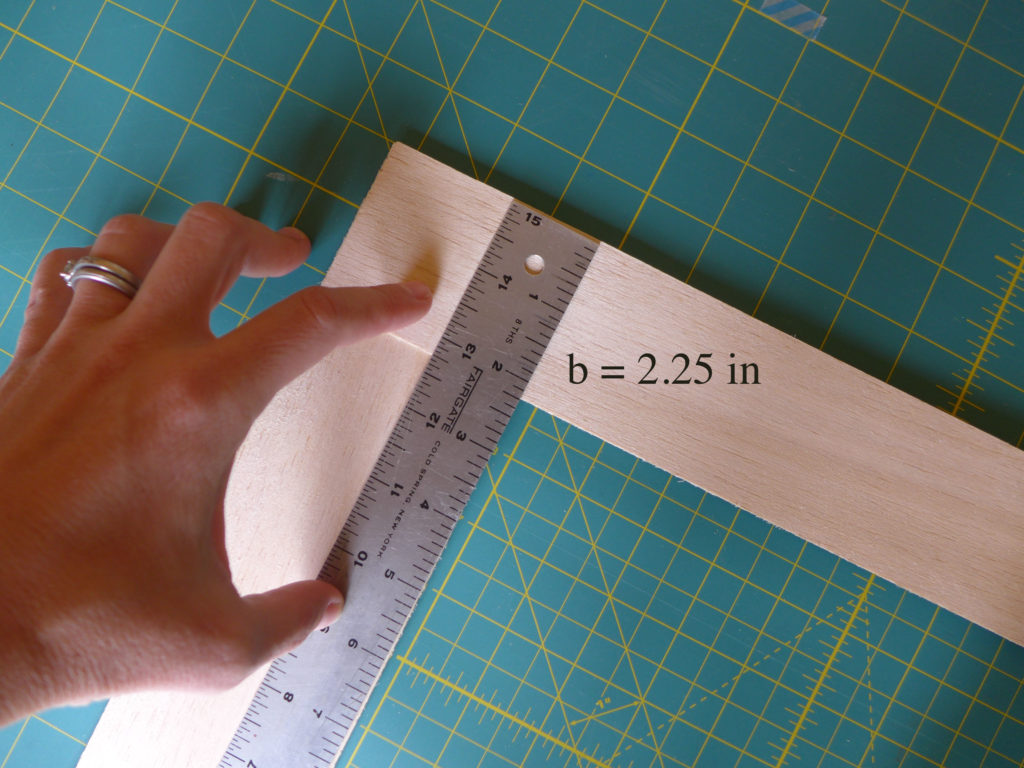
Begin by decided how wide the balsa sheets will be on the top/bottom and sides of the print. For example, in my situation, I wanted the mat to be approximately 2.25 inches on the top and bottom, and only 1.5 inches on each side.

Cut the balsa sheets so that they are the length and width you want for your mat. Again, in my case I had two pieces of balsa that were 24″ x 2.25″ for the top and bottom, and two more pieces that were 36″ x 1.5″ for each side.

balsa_frame

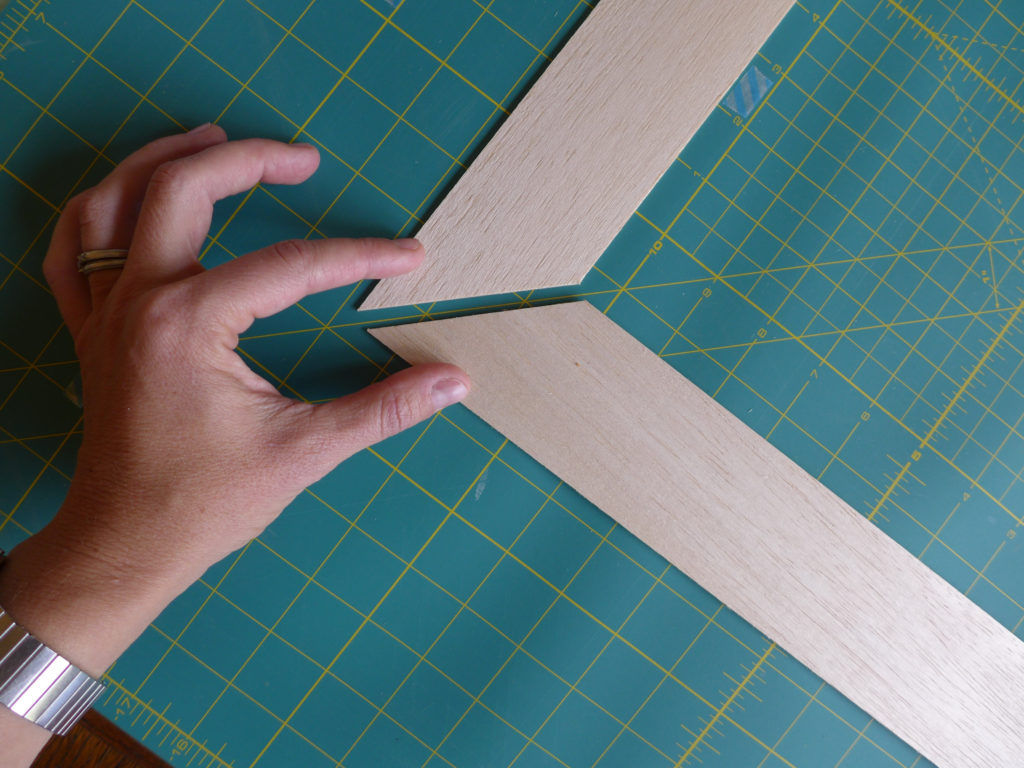
Once you have the four rectangles, you’ll have to cut the corner angles. If your sides and top/bottom pieces are the same width (i.e the mat will be the same width all the way around the picture), then you can easily cut the angles using the 45 degree line on your cutting mat as a guide as in the photo above.

BUT if the width of your side pieces doesn’t match the width of the top/bottom pieces, as in the example photos below, where the width of one piece measures 2.25″ and the width of the other measures 3″, then you’re going to have to use the Pythagorean Theorem to calculate the length of the corner angle.

balsa_frame3-copy

balsa_frame4-copy

Good Old Pythagoras taught us that “a-squared + b-squared = c-squared”. Remember that? This formula only applies to right triangles, where one corner (the one opposite the hypotenuse) is a 90 degree angle. In this case, if we know the lengths of any two sides of the triangle, we’ll be able to find the length of the third using that equation.

Can you see the faint triangle drawn on the balsa wood in the photo below? That’s our right triangle with the 90 degree angle on the top right (bottom left), and we’re looking to calculate the length of the hypotenuse that runs from the outer corner of the mat to the inner corder.

balsa_frame2b

triangles2

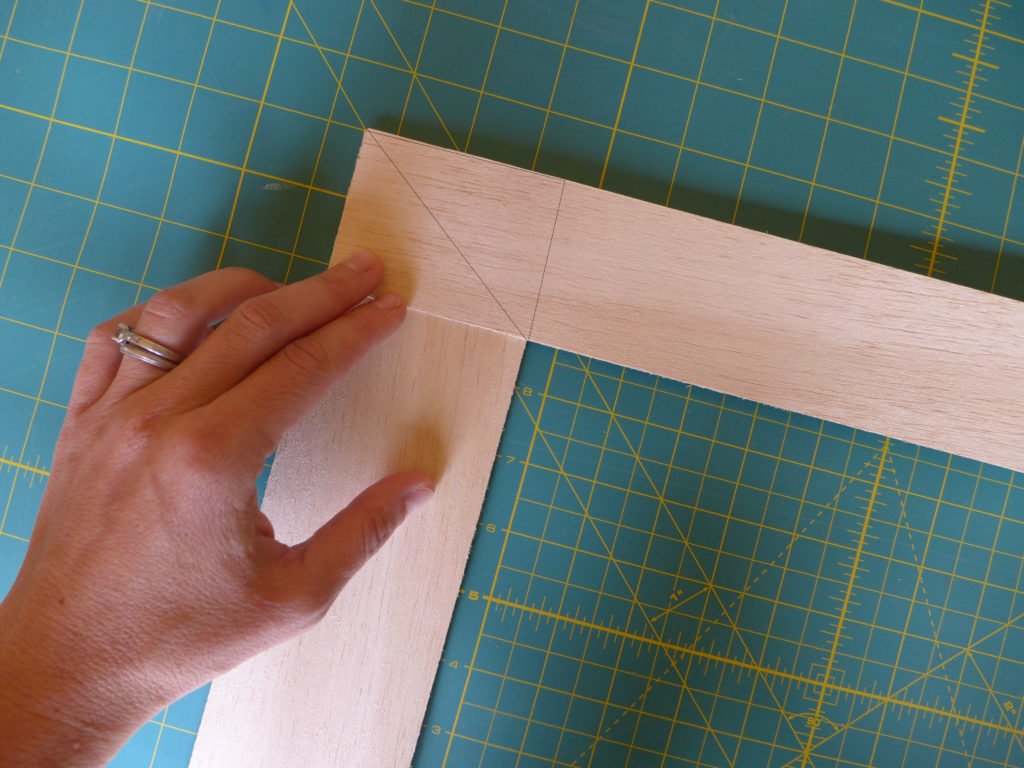
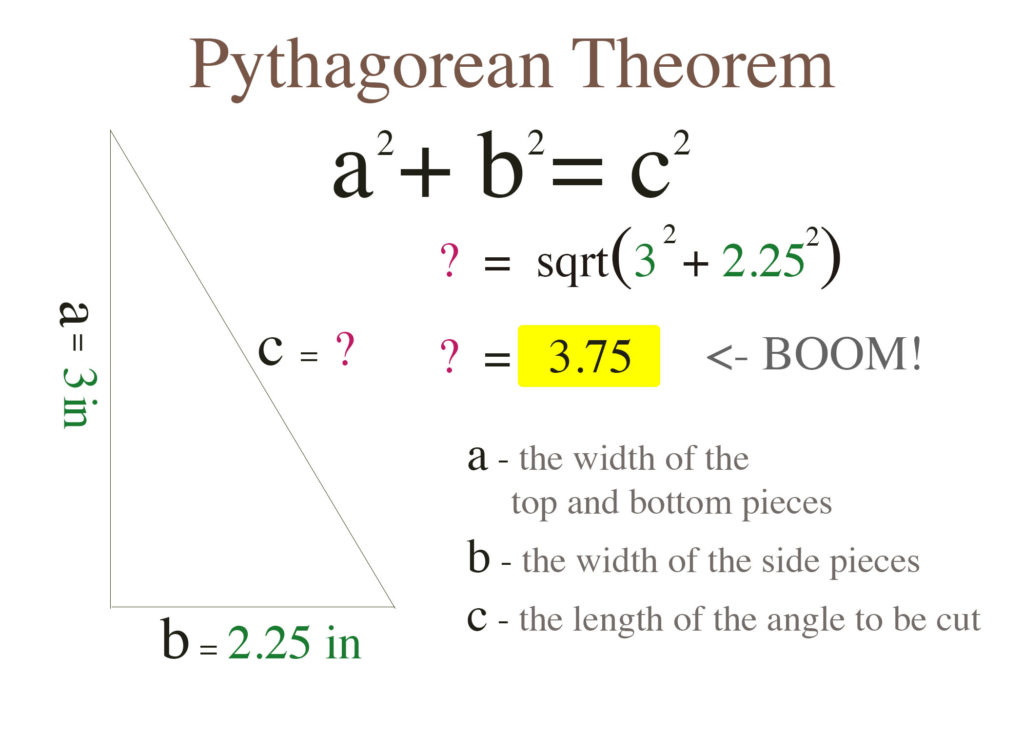
Applying the pythagorean theorem to this problem, I calculate a length of 3.75 inches for the corder cut, and by holding the ruler up to my mat, I see that that number matches the length of the cut from the outer to inner corners – it works! And as I mentioned in the photo, it’s worthwhile to note that the angle of our ruler doesn’t match the 45 degree line on the mat, so using that as your guide would give you corners that don’t line up.

balsa_frame5b

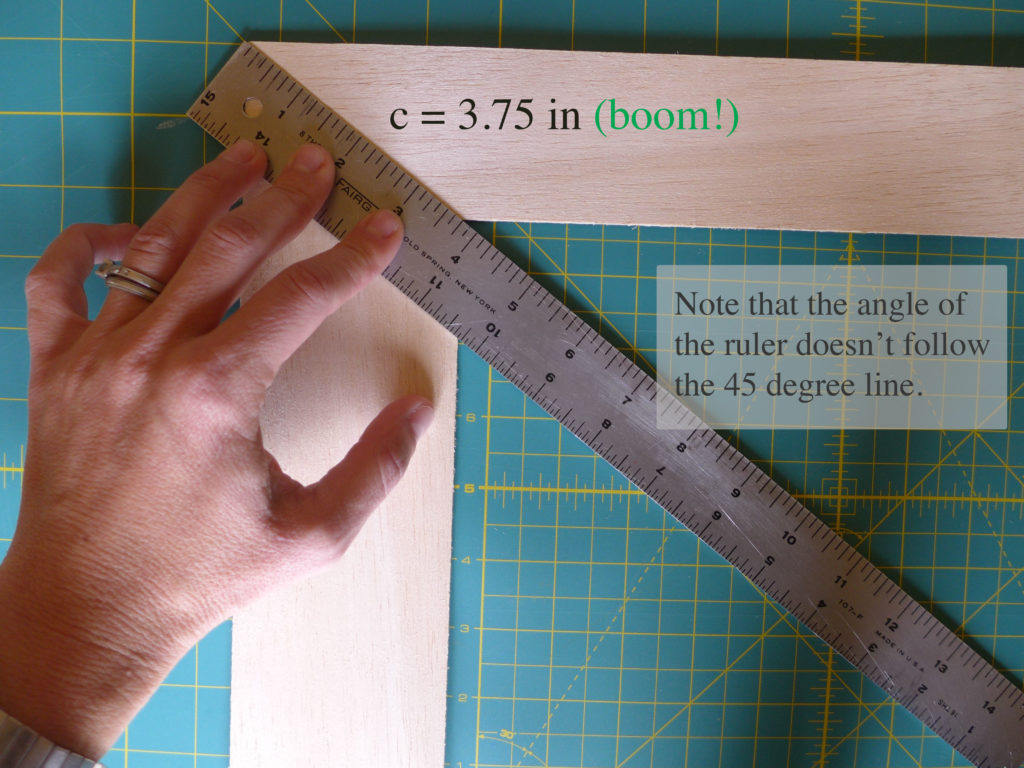
Ok, but as I’m sure you’ve already realized by now, you don’t *have* to make those calculations, you could just hold the ruler up as I’m doing below and use your exacto knife to cut along that edge without giving it’s length a second thought…. but come on, don’t you want to impress your better half? Or at least make your high school geometry teacher proud?

balsa_frame6

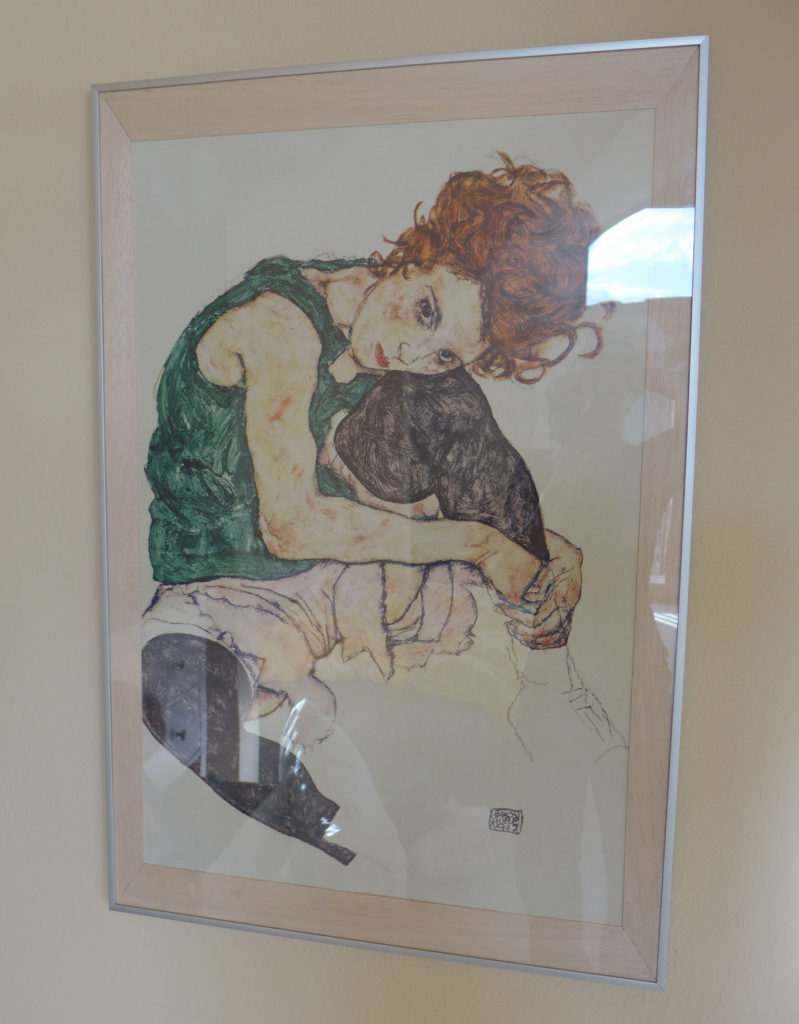
After your corners are cut, use the double-sided tape to secure the balsa pieces to the large piece of background paper, and then carefully place the whole thing (art and balsa mat attached to the background paper) into your frame, and your customized mat is done!

Wedding Projects : The Book!

Four years ago today, Calder and I got married! This June I’ve been sharing some of the crafts that made their way into our wedding. A couple of weeks ago I showed you the bunting that decorated our reception tents and ceremony. Last week I shared the homemade purses that I embroidered for each of the bridesmaids (you also got a sneak peak at the sash that my mom made and hand-beaded to go with my wedding dress!). Just yesterday you saw the tags that labeled our homemade favors and were used as place cards. Today I’m sharing the book that we made to remember our big day. It also serves as a cookbook and highlights the huge role Calder had to play in our wedding. He planned our dinner and did most of the cooking, including the grilling during our reception!

Kate's wedding2-160 copy

Interspersed throughout this post, you’ll see photographs from our wedding as well as snapshots of the book. We never got around to hiring a professional photographer for the day, but of course, with Sarah being a professional, that is what we would recommend to capture your important memories. Fortunately for us, between Sarah and a few of our friends with professional cameras, we had a great impromptu crew on hand, and they captured the day beautifully. All of the photos throughout this post come from their keen eyes, and we can’t thank them enough!

Continue reading

Wedding Crafts : Tags

This June I’m sharing some of the crafts that made their way into my wedding, which was four years ago this month! A couple of weeks ago I showed you the bunting that decorated our reception tents and ceremony. Last week I shared the homemade purses that I embroidered for each of the bridesmaids (you also got a sneak peak at the sash that my mom made and hand-beaded to go with my wedding dress!). Today, I want to show you the tags that we made for both our place cards and as the labels on our favors. As you’ll see below, in each case, the cards were the icing on the cake of even bigger DIY projects!

liveseasoned_summer2015_favors

We used rubber stamps that were custom ordered  for these projects, yet while we were planning, we knew that these stamps would have a use well beyond the wedding. It was important to me that we didn’t purchase too many items that would only have a one-time use for the wedding, and four years out, I’m happy to see how often we’ve reused some items (and how well-loved others are). On another note ~ I know that the thought of using rubber stamps can drive people nuts when you think about having to line things up and make your stamping straight. As you’ll see, we tried to eliminate that problem. We didn’t worry about making our words perfectly straight, and we let some stamps, like the honeycombs, have a design that would fall off the edge of the tags. This strategy helped to minimize the stress and time that would go into projects like these.

Continue reading

Embroidered Christmas Cards

liveseasoned_winter14_stitchedxmascards-3-2I like to call them stitchmas cards.  I wanted to make cards this year, but I don’t have a printer so I had to think of an easy way to add a design.  I drew a few doodles, messed around with some graph paper and I came up with these simple card ideas.  Depending on how detailed you want to get, this is a great kids craft as well.  Add a few cute and easy stitches to your handmade Christmas cards this year.  I dare ya.

liveseasoned_winter14_stitchedxmascards-9liveseasoned_winter14_stitchedxmascards-1

Supplies:

  • Piece of cardboard or foam to work on
  • Card stock (I used scrapbooking paper and these in neutral)
  • Blank cards or folded card stock
  • Paper cutter (optional)
  • Scissors
  • Thread
  • Needle
  • Thumbtack
  • Pen
  • Paper
  • Tape
  • Glue

The How:

  • Doodle a design on a piece of notebook paper.  It’s up to you how complex you want to make your cards.
  • Tape the design onto the card stock and the piece of cardboard you are working on. Use the thumbtack to poke holes at every angle in your design.  If you’re using graph paper, poke holes in each corner of the squares.
  • Carefully remove the tape and doodle.  At this point, I poked secondary holes onto my tree design adjacent to the original holes. I did this so I would not have to backstitch the entire design; instead it is similar to a running stitch.  The design and hole placement is really up to you.  There’s no strict rules for stitching cards, just a general practice.
  • Once you are finished stitching with a particular color, use a small piece of tape to secure the thread.  If you’re using paper with an adhesive backing leave the thread loose until the entire design is stitched.  Carefully remove the backing, pull the threads tight and stick them down.  Adhere the sticky sheet to the front of your card and place it under a stack of books.  If using regular card stock, use rubber cement to glue the design to the front of your card and place under a stack of books.

liveseasoned_winter14_stitchedxmascards-1-2

Have you already mailed out your holiday cheer this year? I like to wait until the last moment so that my friends and family open their card closer to Christmas and New Years. That or I procrastinate until the week before where you’ll find me hustling to make them all in time 😉liveseasoned_winter14_stitchedxmascards-8

Map Stitching Tutorial

There is no better way to remember a special trip than to have it hanging on the wall.  That is why I have gotten into the habit of stitching my trips onto paper maps.  That way I can be reminded of and inspired by past trips as I walk through my home.  Is it weird that I rarely take selfies while traveling or ever for that matter?  When you walk into my apartment, you won’t see me smiling in front of waterfalls or on tops of mountains, nope, none of that. Cheers to you if that’s your style, but I’m just a little too camera shy and usually I’m the one taking all the pictures.  It does not even cross my mind to ask someone else to take my picture in front of amazing landscapes.  Sometimes I think I would like to work on that, but then a trip comes and goes without a selfie thought and here I am stitching maps in my free time.

liveseasoned_spring2014_maps-1

Stitched maps make great gifts for your road trip buddies too.  It is also a cool way to tell someone you are taking them on a trip.  Imagine opening up a framed stitched map of Europe and having your sister yell, “Surprise! Pack your bags!”  Or whatever else really amazing sisters say when they are taking you to Europe.  [Katie here : now I’m hoping a stitched map shows up in the mail today! ;)] Grab your chosen map and let’s get started.

Continue reading

Woven Valentine Tutorial

liveseasoned_DIYwovenvalentines-1024x882 copy

Today we’re sharing the simple instructions and templates to make a woven Valentine’s Day card. This is an especially convenient craft because the materials are probably stashed away somewhere in your home. While weaving paper sounds simple (and it is!), you’ll see that with a bit of creativity it produces a card with big impact. After you’ve finished this project,  you can flex your creative muscles and use this technique for a variety of holidays and occasions! Additionally, If you have little kiddos at home weaving paper is a really simple, yet fun, way for them to work on their developing coordination and dexterity.

We’ve provided printable templates at the bottom of this post, making the project even easier by eliminating the need to do any measuring or sketching.  Of course, if you’re comfortable with a ruler or you don’t have access to a printer then follow our written instructions.    

liveseasoned_DIYwovenvalentines6

Materials & Tools:

  • Card stock or any colored paper
  • Printer (optional)
  • Ruler
  • Exacto Knife
  • Scissors
  • Pen
  • Tape
  • Cutting Mat or old magazine

Cost $1

These instructions will create a 5.6 by 5.2 inch heart centered on a 7.6 by 7.2 inch piece of card stock.

  • Choose your base paper. If you aren’t using a template, you’ll begin by preparing the white base paper that the colored strips will be woven into. Our heart is going to be centered on the paper, so it will have a 1 inch border on all four sides. Having the nice wide border makes it easier to weave, and your finished work will look cleaner.  If you’re using a different sized paper, subtract 5.6 inches from your paper’s width and 5.2 inches from your paper’s length, divide by two and that will determine your respective borders.  

liveseasoned_DIYwovenvalentines9


liveseasoned_DIYwovenvalentines8

  • Draw and cut vertical lines on your base paper. Begin by marking dots where the vertical lines will fall. Starting an inch (or your given border length) from the left and top edges of the base paper, measure and mark every 3/8th of an inch working across your paper until you reach the right border area.  So your first dot should be 1 and 3/8th inches in.  Simply mark a little dot every 3/8th of an inch until you have a total of 16 dots.  Repeat this process again an inch up from the bottom of the paper.  Remember your first dot will be at 1 and 3/8th. Stop once you have 16 dots.  Now place your ruler from top to bottom on the paper and draw a straight line to connect the first dot on the top to the first dot on the bottom.  The line should measure 5.2 inches.  Continue drawing straight lines from the dots on the top to the dots on the bottom of the paper.  You should have a total of 16 lines.  Now place your paper on a cutting mat or if you’re like me and don’t own one, on an old magazine.  Take your time and carefully use an exacto knife to cut each line, making 16 slits in the paper.

liveseasoned_DIYwovenvalentines10

  • Cut the colored strips for weaving. Cut 14 strips of paper that are each 3/8th inches wide and at least 7 inches long. You can do this with your exacto knife or scissors, but it’s even easier if you have a straight edge paper cutter. 

liveseasoned_DIYwovenvalentines11

liveseasoned_DIYwovenvalentines12

  • It’s time to weave!  On the backside of your base paper (the side with the pen markings) follow our template to mark the heart area. We marked the backside of our paper with the x’s you see above. If you’re using the template, the printed side is the back of your paper.  When you’re weaving, you will covered the x’s with your colored paper (producing a white heart). When you turn your paper over, BAM! your colored heart will be nice and crisp without any of the markings used for measuring and planning. You can add a highlight on the heart if you desire.  I found that nifty highlight idea here.
  • Finish your card. Secure each strip with a tiny piece of clear tape and then trim the ends. Glue your woven heart to a piece of colored paper to make a postcard or to the front of a folded piece of card stock.  I made both versions, but I can’t decide which I prefer.  Put a stack of books on your finished cards to ensure that they dry nice and flat before sending them off in the mail.

Now that you get the general idea, feel free to run wild with this technique.  The only rule is to keep the width of the strips and the width of the slits consistent. It’s always helpful to sketch up a new idea before you cut and measure.  Measure twice, cut once, right? For me it’s more like do the math three times, measure twice, and sketch once more.

Here are templates for the Small Woven Heart Tutorial, the Large Woven Heart Valentine Tutorial and the camouflaged Love Card Template.  Print page one on a piece of colorful card stock (this will be your background) and page two will be your strips, so find a color that will look nice with whatever you chose for the background.   If you want to spell something else, you can find a pixel alphabet here, which should help with planning.  Let us know how it goes!