DIY Advent Calendar


liveseasoned_winter14_adventcalendar-10

It’s time guys! You can finally start singing Christmas carols and hanging holiday wreaths!  I spent this past week with my dearest friend who is also on the ‘no Christmas cheer until Thanksgiving is here’ train so it wasn’t until Saturday night that I crafted this little advent calendar. It is the sweetest little addition to a bookshelf or mantle.  There is nothing more childlike than counting down the days until Christmas, but really, if we didn’t count them they would just fly right by.  Advent calendars remind me to crank up the Christmas tunes, send out those glittery cards and craft gifts for my friends and family.

liveseasoned_winter14_adventcalendar-9

This sweet miniature advent calendar is easy to make and pretty perfect for the wee ones to create. No exacto knives or blowtorches involved here.  The fun doesn’t end with the making of this little advent chest either, then you must fill it with tiny treasures and on Christmas eve you have to unscramble the secret picture!  Put on a Christmas record pandora and pour yourself some eggnog mudslides.
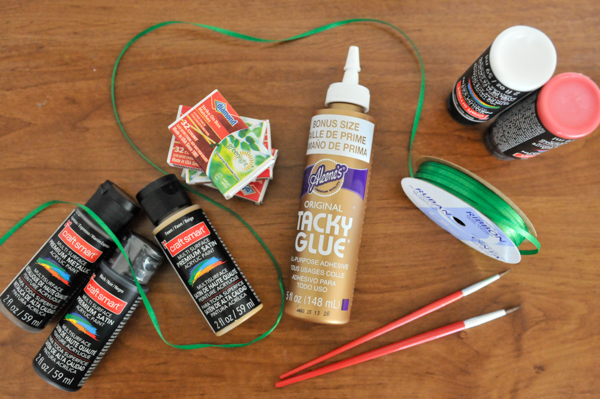
liveseasoned_winter14_adventcalendar-1

Supplies:

  • 24 mini match boxes
  • Tacky glue
  • Paint brushes
  • Paints
  • Ribbon
  • Card stock or construction paper

Steps:

  • Glue 8 matchboxes together vertically. Repeat two times so that you have 3 tall stacks each with 8 matchboxes each. Glue the three stacks together side-by-side like shown.
  • Once the chest is securely glued, about 15 minutes, remove all the matches from the boxes and set aside for another project or that horrid moment when your power goes out while you are cooking dinner or washing your hair.
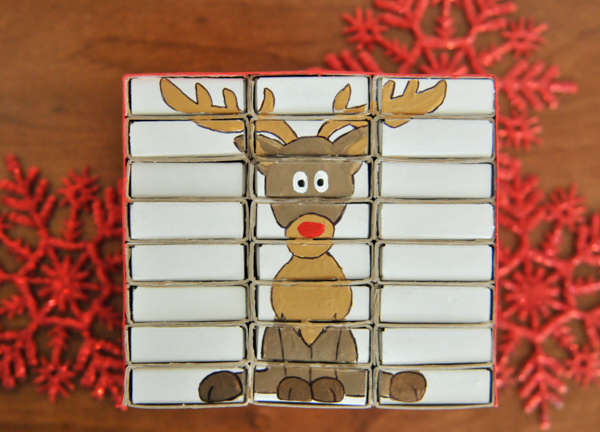
  • Paint a holiday design on the chest.  I choose to paint a reindeer. Some other ideas are a tree, an ornament, a candy cane, a toy soldier, santa or maybe a kitty wearing a santa hat (I wish I had that kind of skill). Allow the design to dry completely.
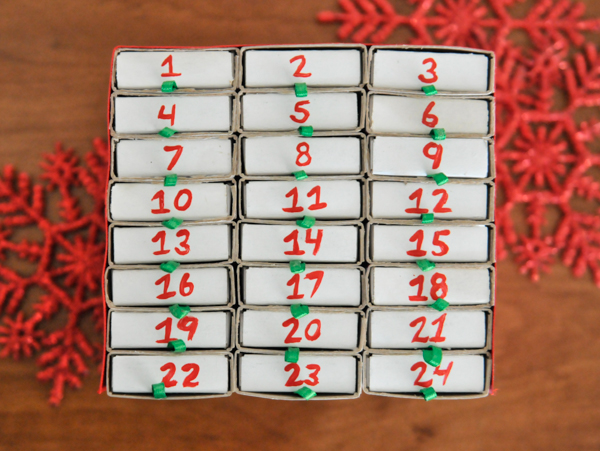
  • Remove each drawer and randomly number them 1-24. You can use acrylic paint or a marker.
  • Attach a small ribbon loop to the bottom of each drawer on the numbered side.  Simply squeeze a dab of glue, press one end of the ribbon onto it and then squeeze another dab of glue and press the other end onto it forming a loop.  Allow each drawer to dry completely.
  • Place the drawers back into the chest. You can place them in order or randomly, either way the painted design on the back should be scrambled.
  • Finally, cut a piece of card stock or paper to cover the top and sides of the advent calendar.  I cut a strip of red card stock and dabbed a few dots of white paint to make some snowflake inspired swirls.
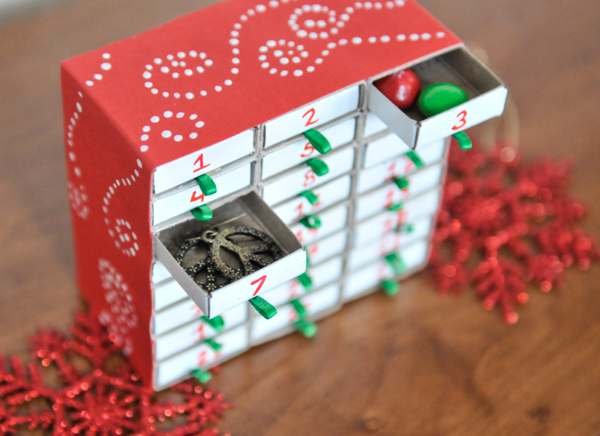
  • Fill the drawers with little candies, notes, event tickets or even jewelry.
  • As each day passes, open the drawers and put them in backwards so the painted design side is now facing forward.  On Christmas even you’ll be left with a mini puzzle picture to unscramble, good luck!

liveseasoned_winter14_adventcalendar-11

Think you’ll give this quick Christmas craft a try? I had a bunch of fun creating this advent calendar because it is cheap and disposable. There wasn’t a ton of pressure to paint the perfect reindeer or perfectly align the $1 match boxes, it was merely a little project to jumpstart my holiday crafting sessions and an excuse to eat a few peanut butter M&Ms every day until Christmas. Cheers!


Indoor Herb Gardening 101

If you haven’t grown your own food yet, we think herbs provide one of the easiest ways to begin gardening.  Herbs can be grown indoors or outside, whichever you prefer.  Once they get growing, they’re relatively low maintenance, and you can begin harvesting almost immediately.  I recently moved to an apartment with no yard so I began an indoor herb garden.  This post contains a few things I’ve learned about growing herbs indoors, and that terra-cotta pot painting tutorial we promised is at the end of the post!

liveseasoned_spring2014_herbsguide

Continue reading

Potato Stamp Tutorial

If you’ve never transformed a vegetable into a stamp now’s your chance.  It’s a quick and disposable option for those days when you want to create something without too much preparation and effort.  Potatoes are cheap and it’s likely that you have a couple living in your kitchen right now.  Sliced in half, potatoes are a perfectly blank canvas just waiting to be customized.  Cheap, easy and customizable means a perfect craft for groups so test out this tutorial at summer camp, in the classroom or on a rainy day.  We love stamping so much here at Live Seasoned that this is just the first post in a Stamping Series.  From time to time we’ll be back to teach you how to make stamps from just about anything from Styrofoam takeout containers to pencil erasers.  For now grab your spuds and let’s get starchy.

Supplies:

  • Canvas or Cardstock
  • Potato
  • Pen
  • Pairing Knife
  • Paint
  • Exacto Knife (optional)
  • Paper (optional)
  • Stencil (optional)

Instructions:

  • Pick a potato, any potato.  Slice your potato in half and boom, we’re already on our way to making two stamps.
  • First cut the desired letters or shapes out of card stock to create a stencil.  If you’re a confident cutter, by all means skip the stencil step.
  • Stick a stencil on each half of the potato.  The moisture will adhere the paper to the potato; it’s quite convenient.
  • Carve around each stencil, basically tracing its form onto the potato.  I actually did this step with a pen.  I poked it in a little bit and then dragged it along the outside of each stencil.  (I had planned on doing it with the exacto knife, but the pen worked so well and I figured it’s more likely that you have a pen handy.)  If you aren’t using a stencil then carve your chosen shape into the potato using a pen, exacto knife or pairing knife.
  • After your shape is carved into the top of the potato, take your pairing knife and slice into the potato about a quarter to a half-inch.  Drag it all the way around the circumference of the potato making sure not to cut all the way through, which would cut off the design you just created.  Then cut down into the potato on each edge of the design removing any excess potato.
  • You should be left with a raised design, in my case an X and an O.  Clean up the edges of your design with an exacto knife, pairing knife or even your fingernail.
  • Finally make a small mark on the skin of the potato to signify where the top and sides of your design is.  This will help if you want to line up your stamp or space it evenly on your project.
  • Next dip your stamp in paint or brush some directly onto the potato and stamp your heart out.  I found that it worked best to dip my spud in a thin layer of paint rather than a puddle.  Potatoes have a high water content, that mixed with paint can make them slip around on your paper or canvas.  I used an old tin can lid as my paint palette, which worked well as far as pushing around the paint and ensuring only a thin layer was being applied.

Each stamping will look a little different and that’s really the beauty of the potato stamp.  It’s not rigid and formal; it’s unique and playful.  I played around with both repetition and white space.  I could have decorated a dozen canvases, but I only had three.  As you can see, some of the stamps are more opaque than others.  I decided to use a paintbrush on some and others I left alone.  It’s all a matter of personal preference.

I had a great time playing around with these potato stamps and it made me excited to babysit or teach again so that I could pass on the fun.  I’m always looking for cheap and easy household crafts that I can create in a pinch to entertain bored kiddos.  Potato stamps are the perfect solution for creating decorations, invites, or gift wrapping for those random occasions or specific party themes.  I know I’d rather run to my kitchen rather than a craft store whenever I need a simple stamp.  I hope you’ll try this out next time you’re entertaining some art-lovin’ little ones or maybe you’ll throw your first ever ‘Buds and Spuds’ art party.  Be sure to instagram your results and tag @liveseasoned, we’ll love you forever.

*This post contains affiliate links