
It’s Christmas week!!! We’ve been having so much fun with Alex this year since he really understands that Christmas is something special, but he’s still asking a lot of questions and trying to make sense of what’s going on around him. “When can we open the presents?” “We get to put the tree in our house?!” “It’s Christmas season, but not Christmas day, right?”
Tag Archives: craft[holiday]
Valentine Archives
Hey there sweethearts! With Valentine’s Day right around the corner, we wanted to share/re-share some super simple projects for dressing up your space and celebrating the ones you love. And don’t forget to put on your favorite lovey-dovey playlist as you craft.

Instead of packing away the felt hearts I made as Christmas ornaments, I strung them on a piece of rustic twine to create a mini garland that greets guests right inside our door.

If you’re throwing a party, Sarah’s tassel and lace garland makes the perfect decoration and photo backdrop!
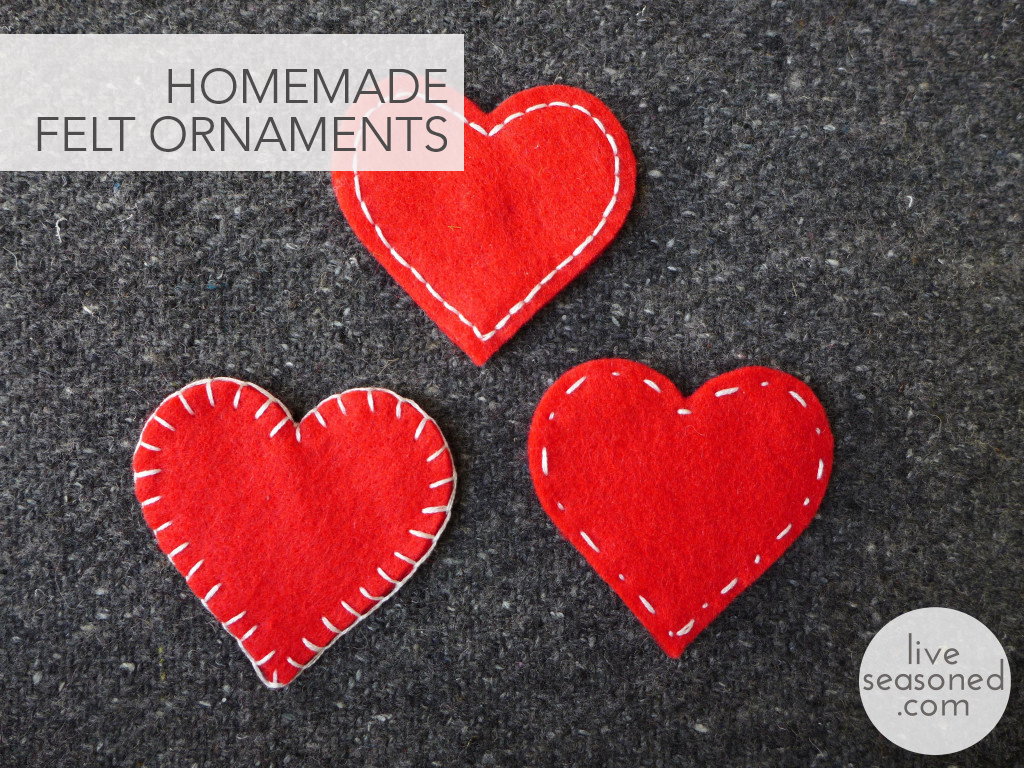
Felt Ornaments
Hey! I looked at our calendar and realized that we have entered a week of Christmas crafting making on the blog! This isn’t necessarily gift crafting, just more little projects to decorate the tree, your walls, to send off in the mail (technically, I guess that’s giving), and maybe we’ll even have something to eat or drink by the time the week’s complete.

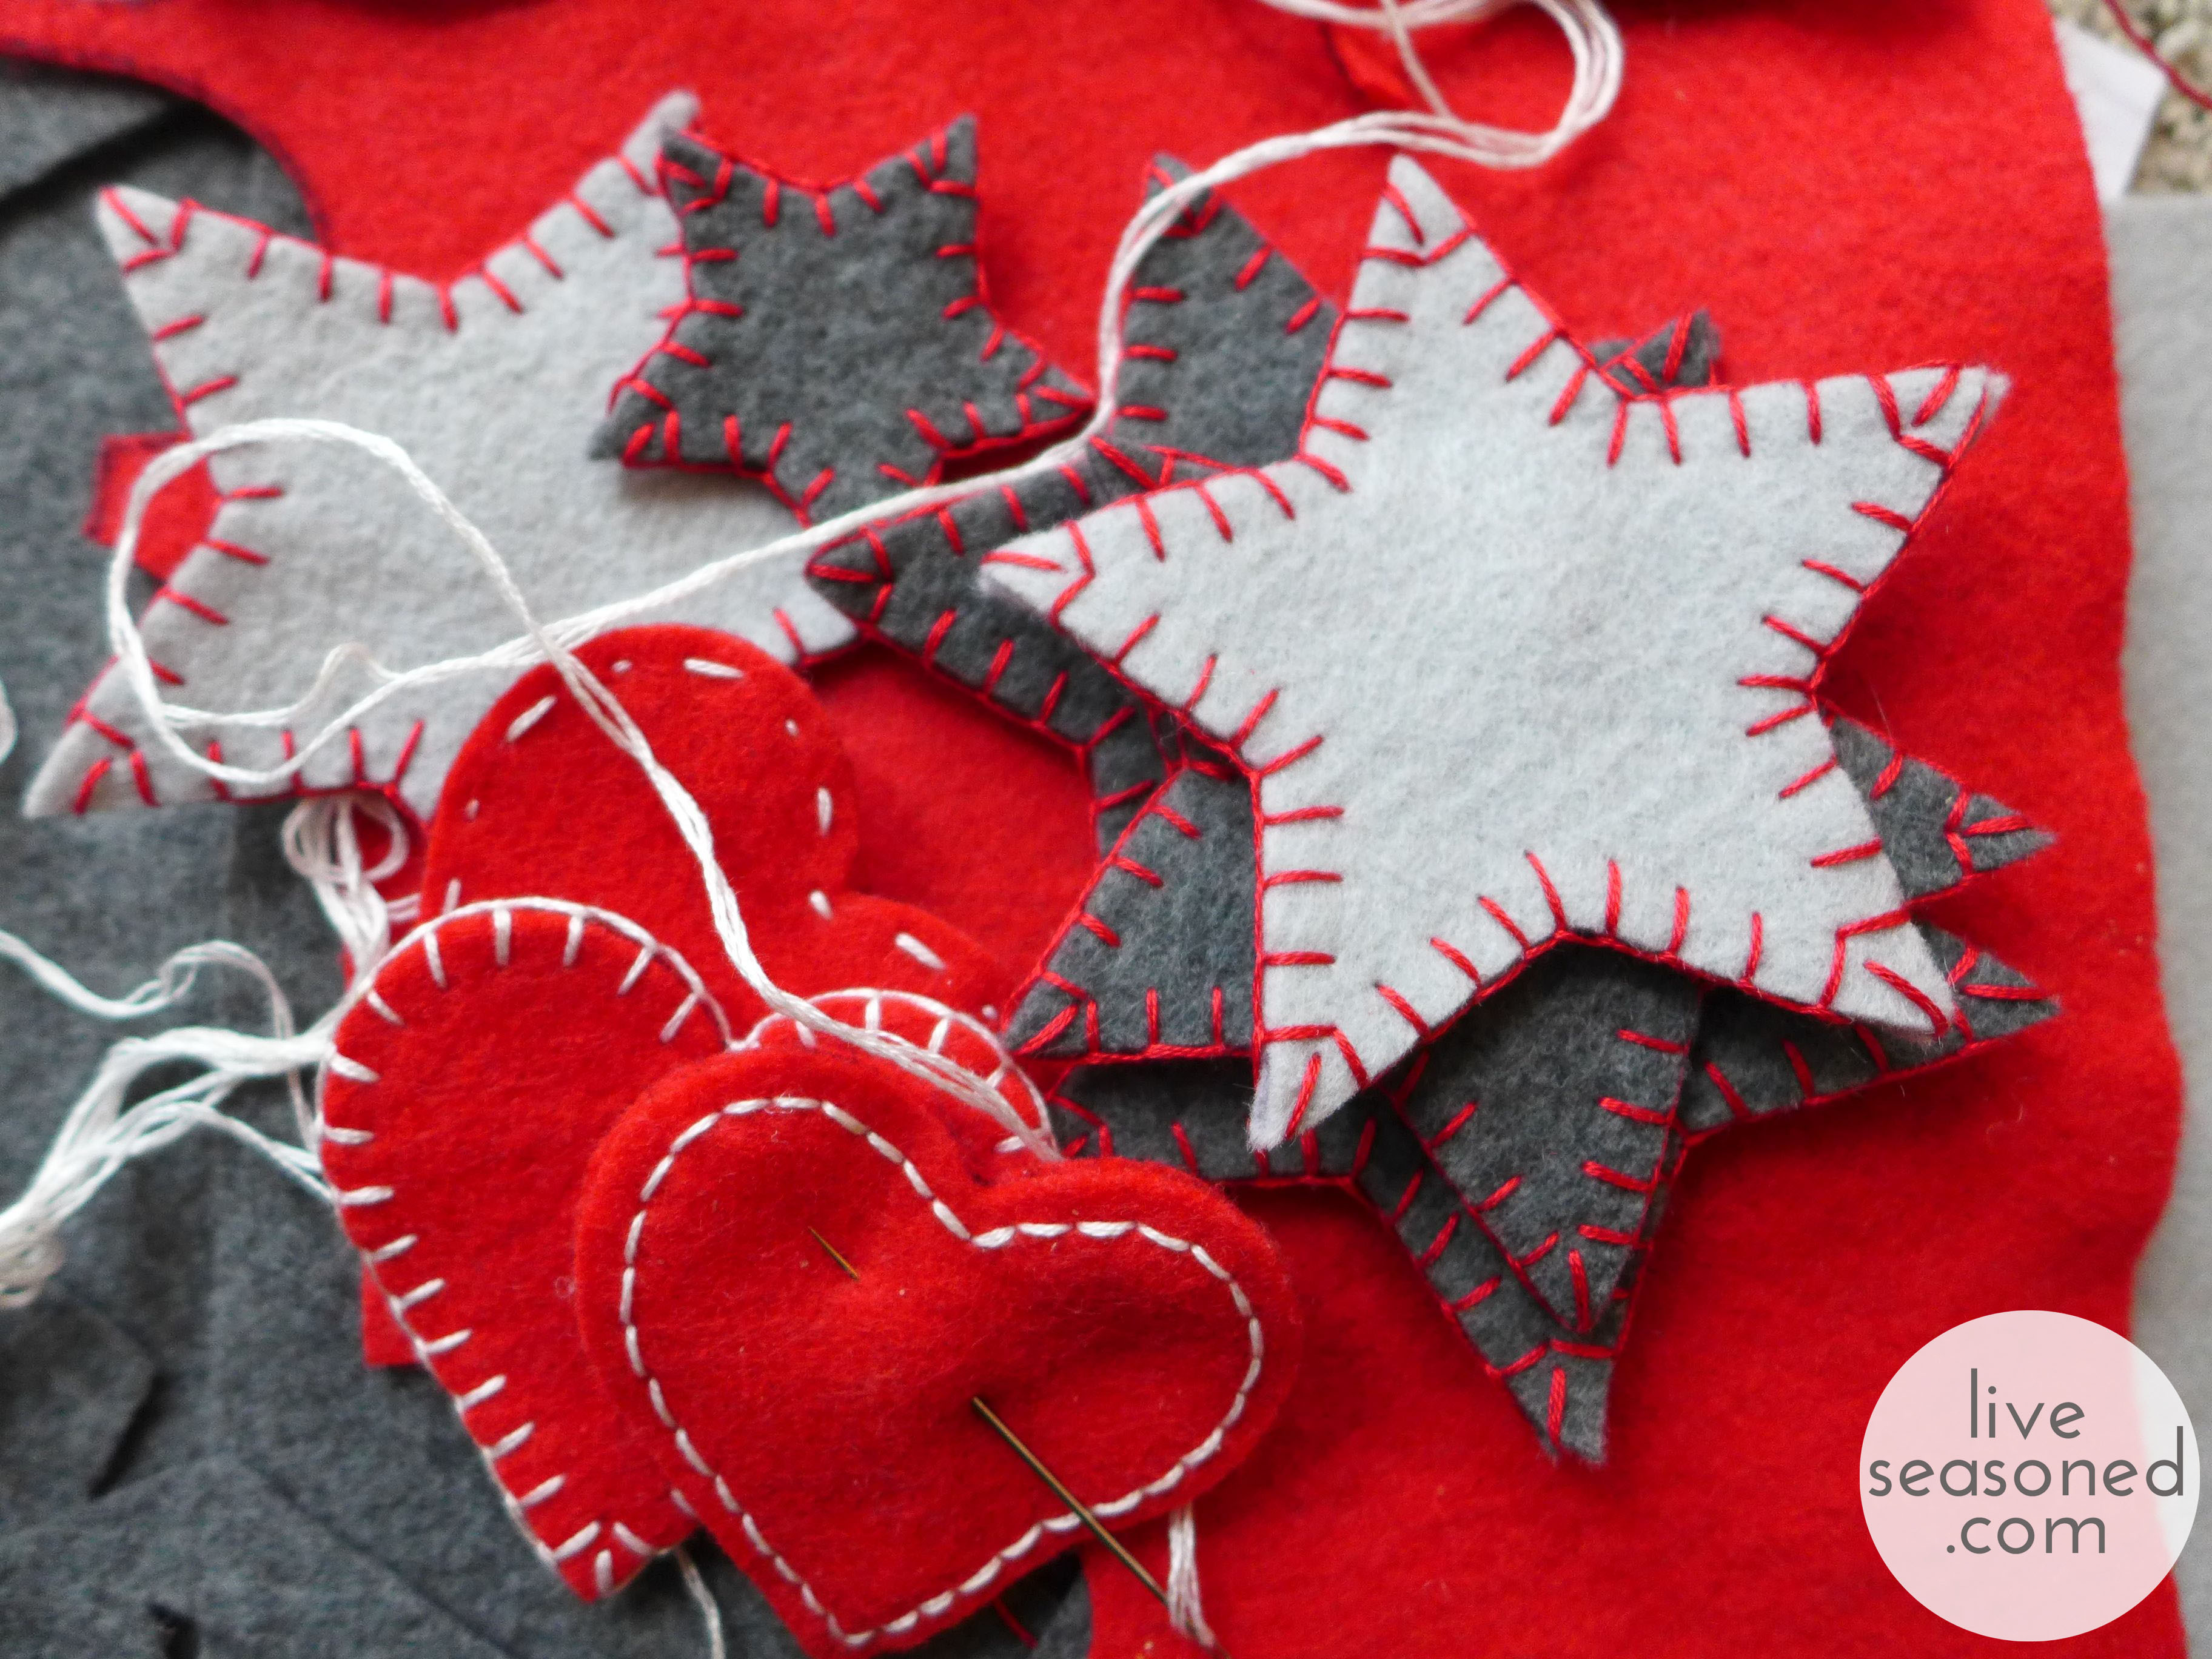
Today I’m talking about the felt ornaments and wreath that were pictured in this post. Both of these ideas came from my Christmas board on Pinterest, but unfortunately the links associated with the pins won’t take you to the original source for attribution. You’ll see that I’ve pinned many different felt ornaments, and I’m thinking that over the next few years I may make quite a few as we become a house with two little boys! Felt ornaments are just so kid-friendly, with a big loop, they are easy for little hands to hang and pull off the tree, and there’s so little investment in terms of both time (the the case of the ones I’ve made) and money, that I don’t mind if little A throws them around a bit while playing. Plus, they look really cute.
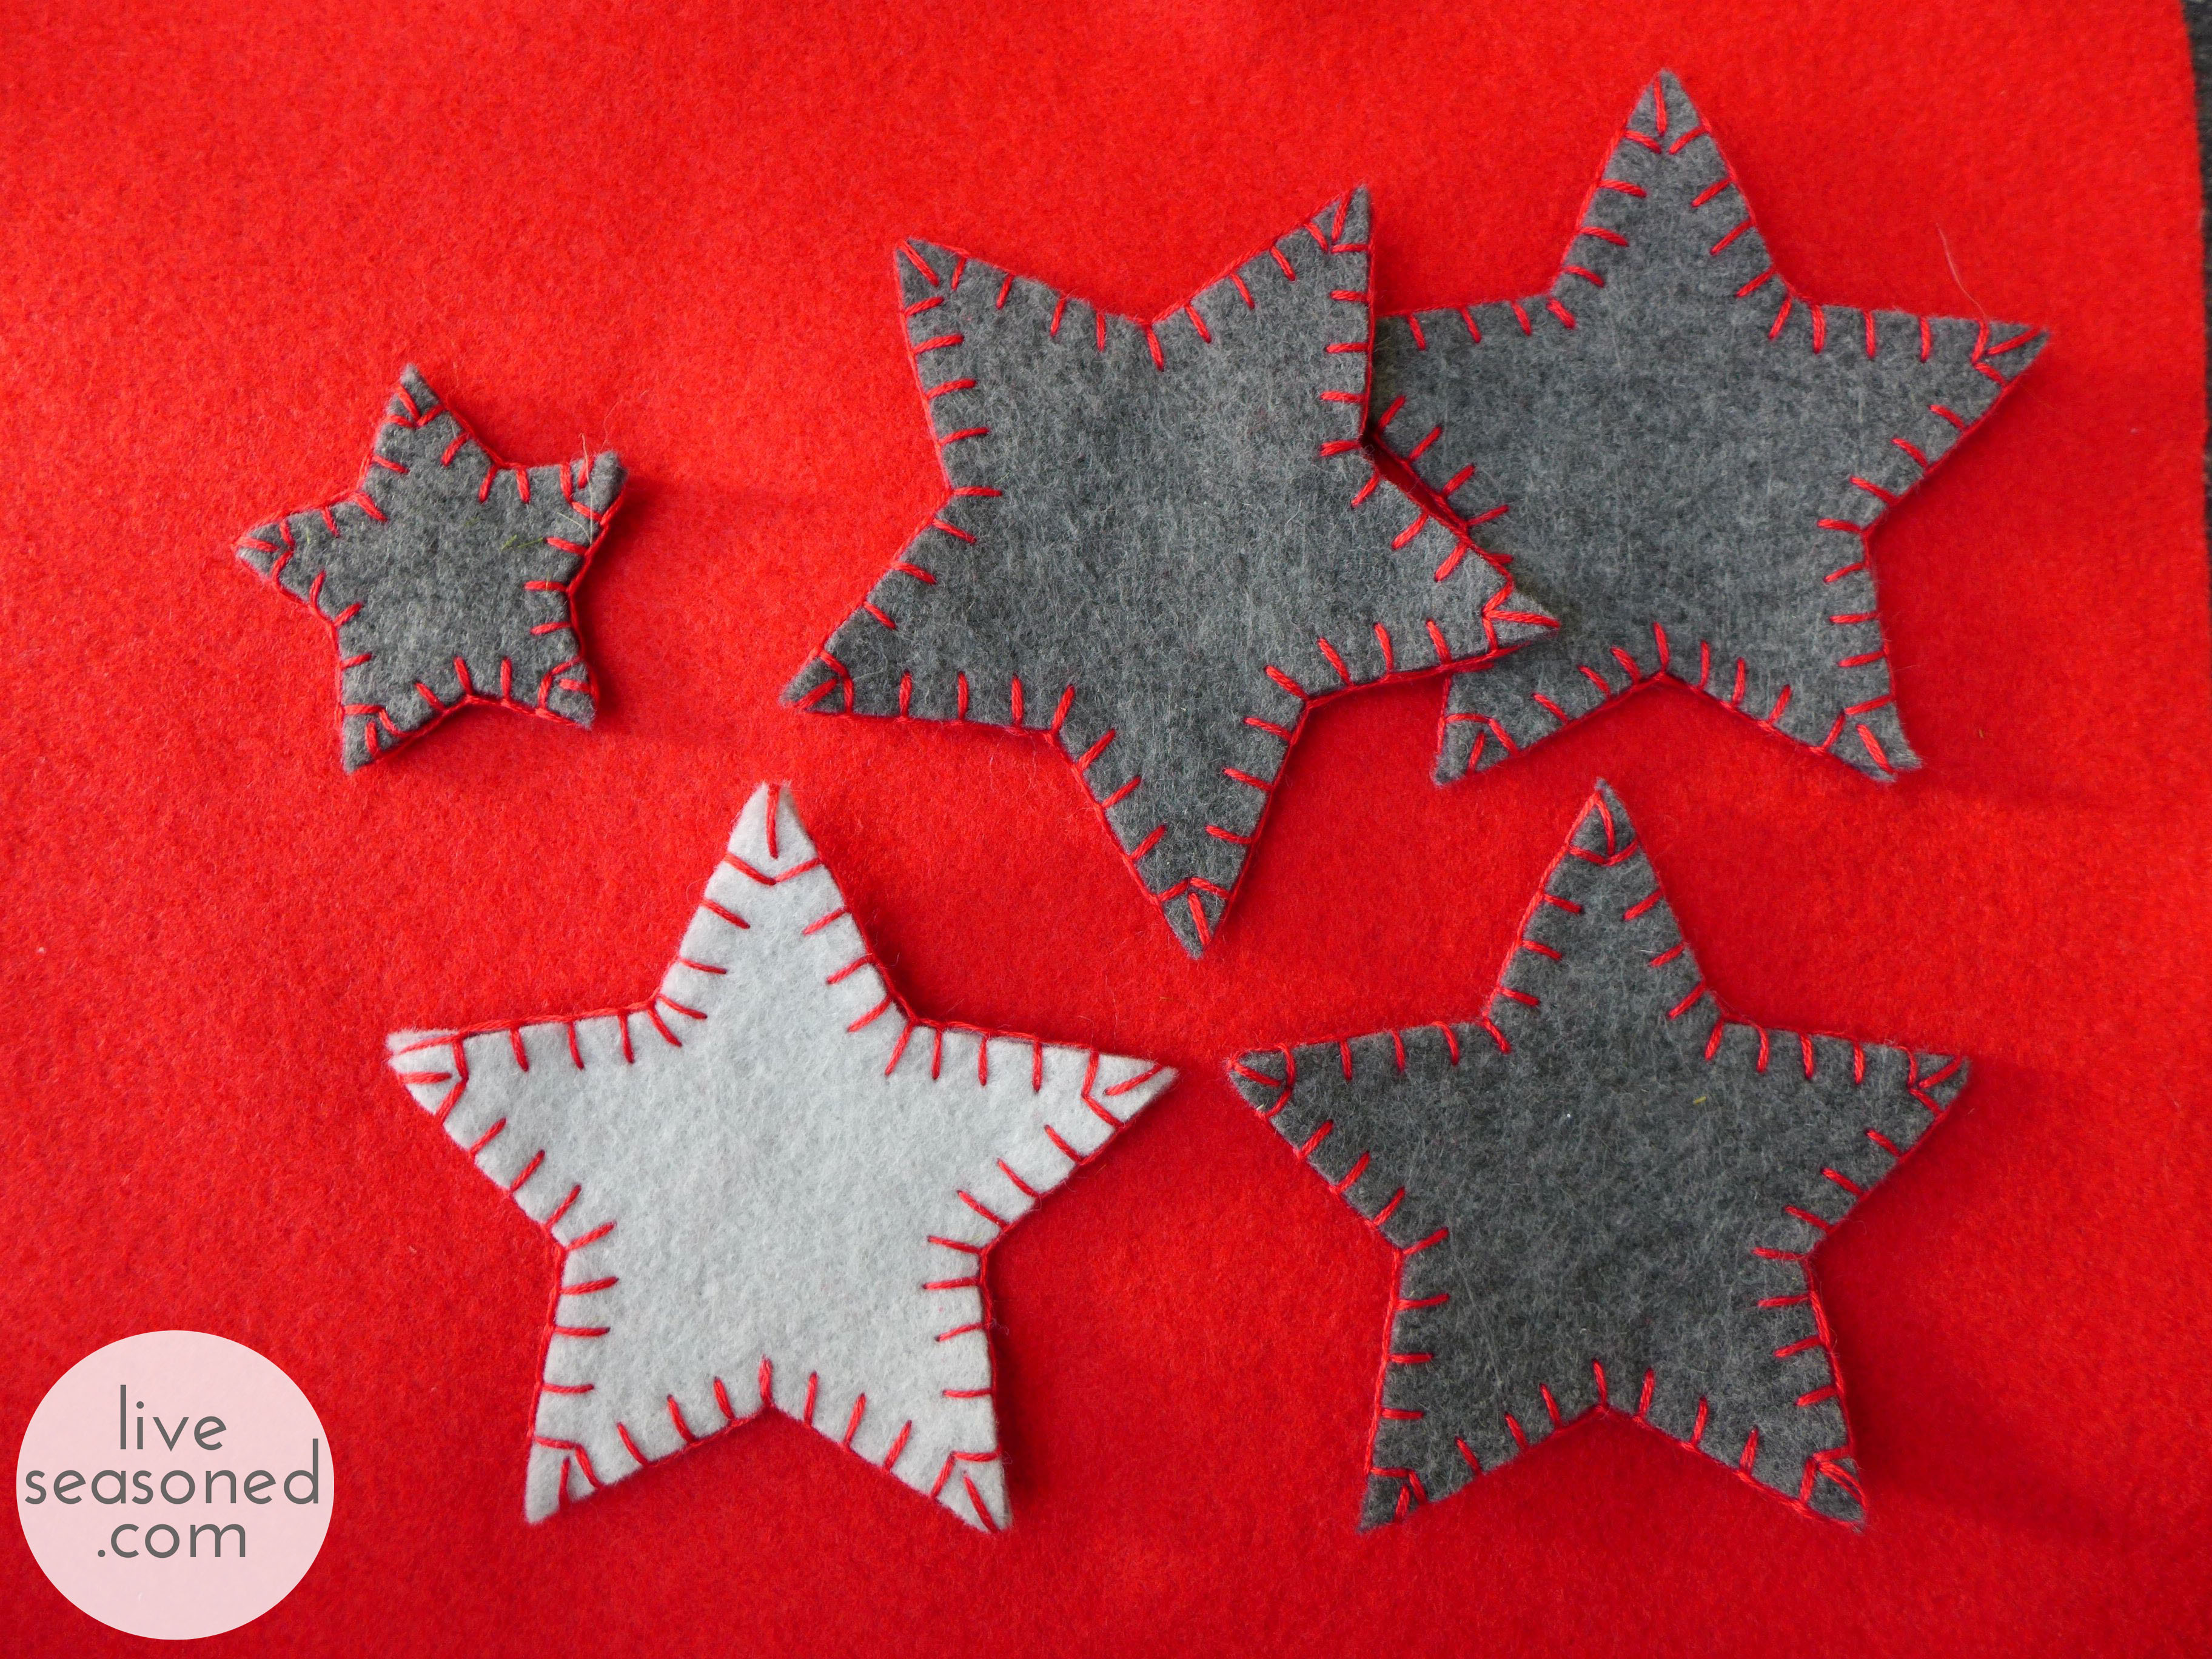
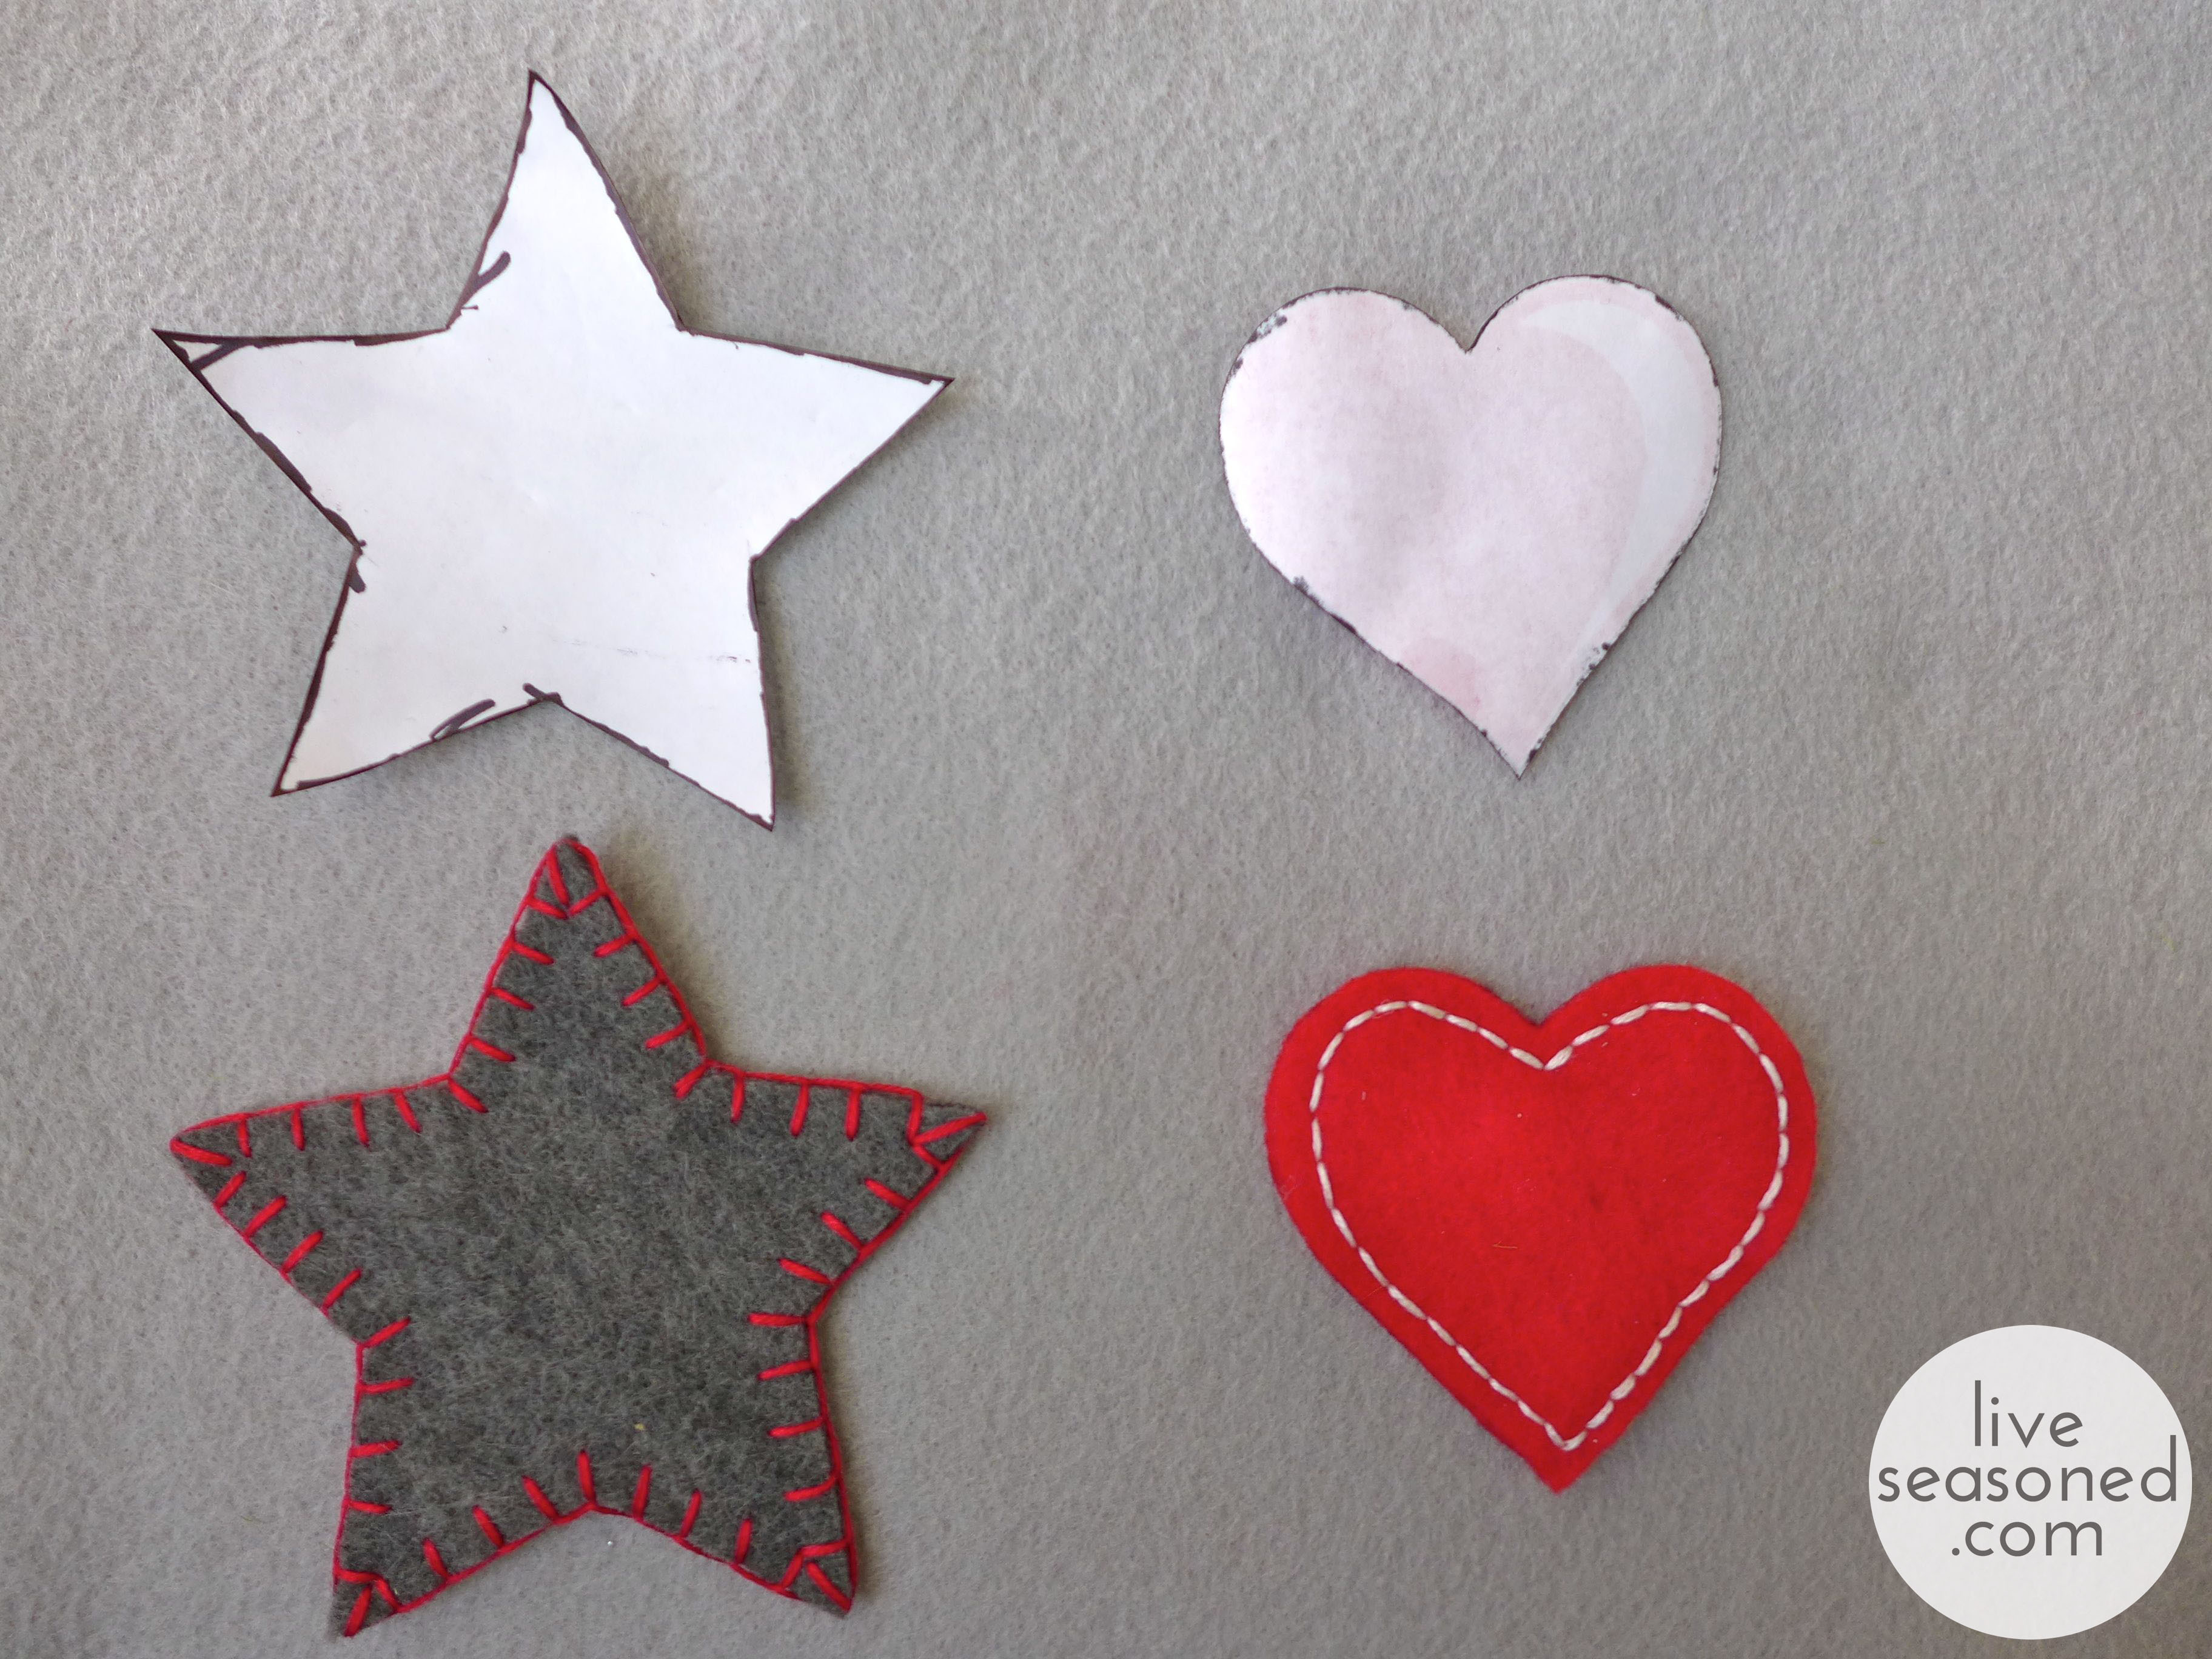
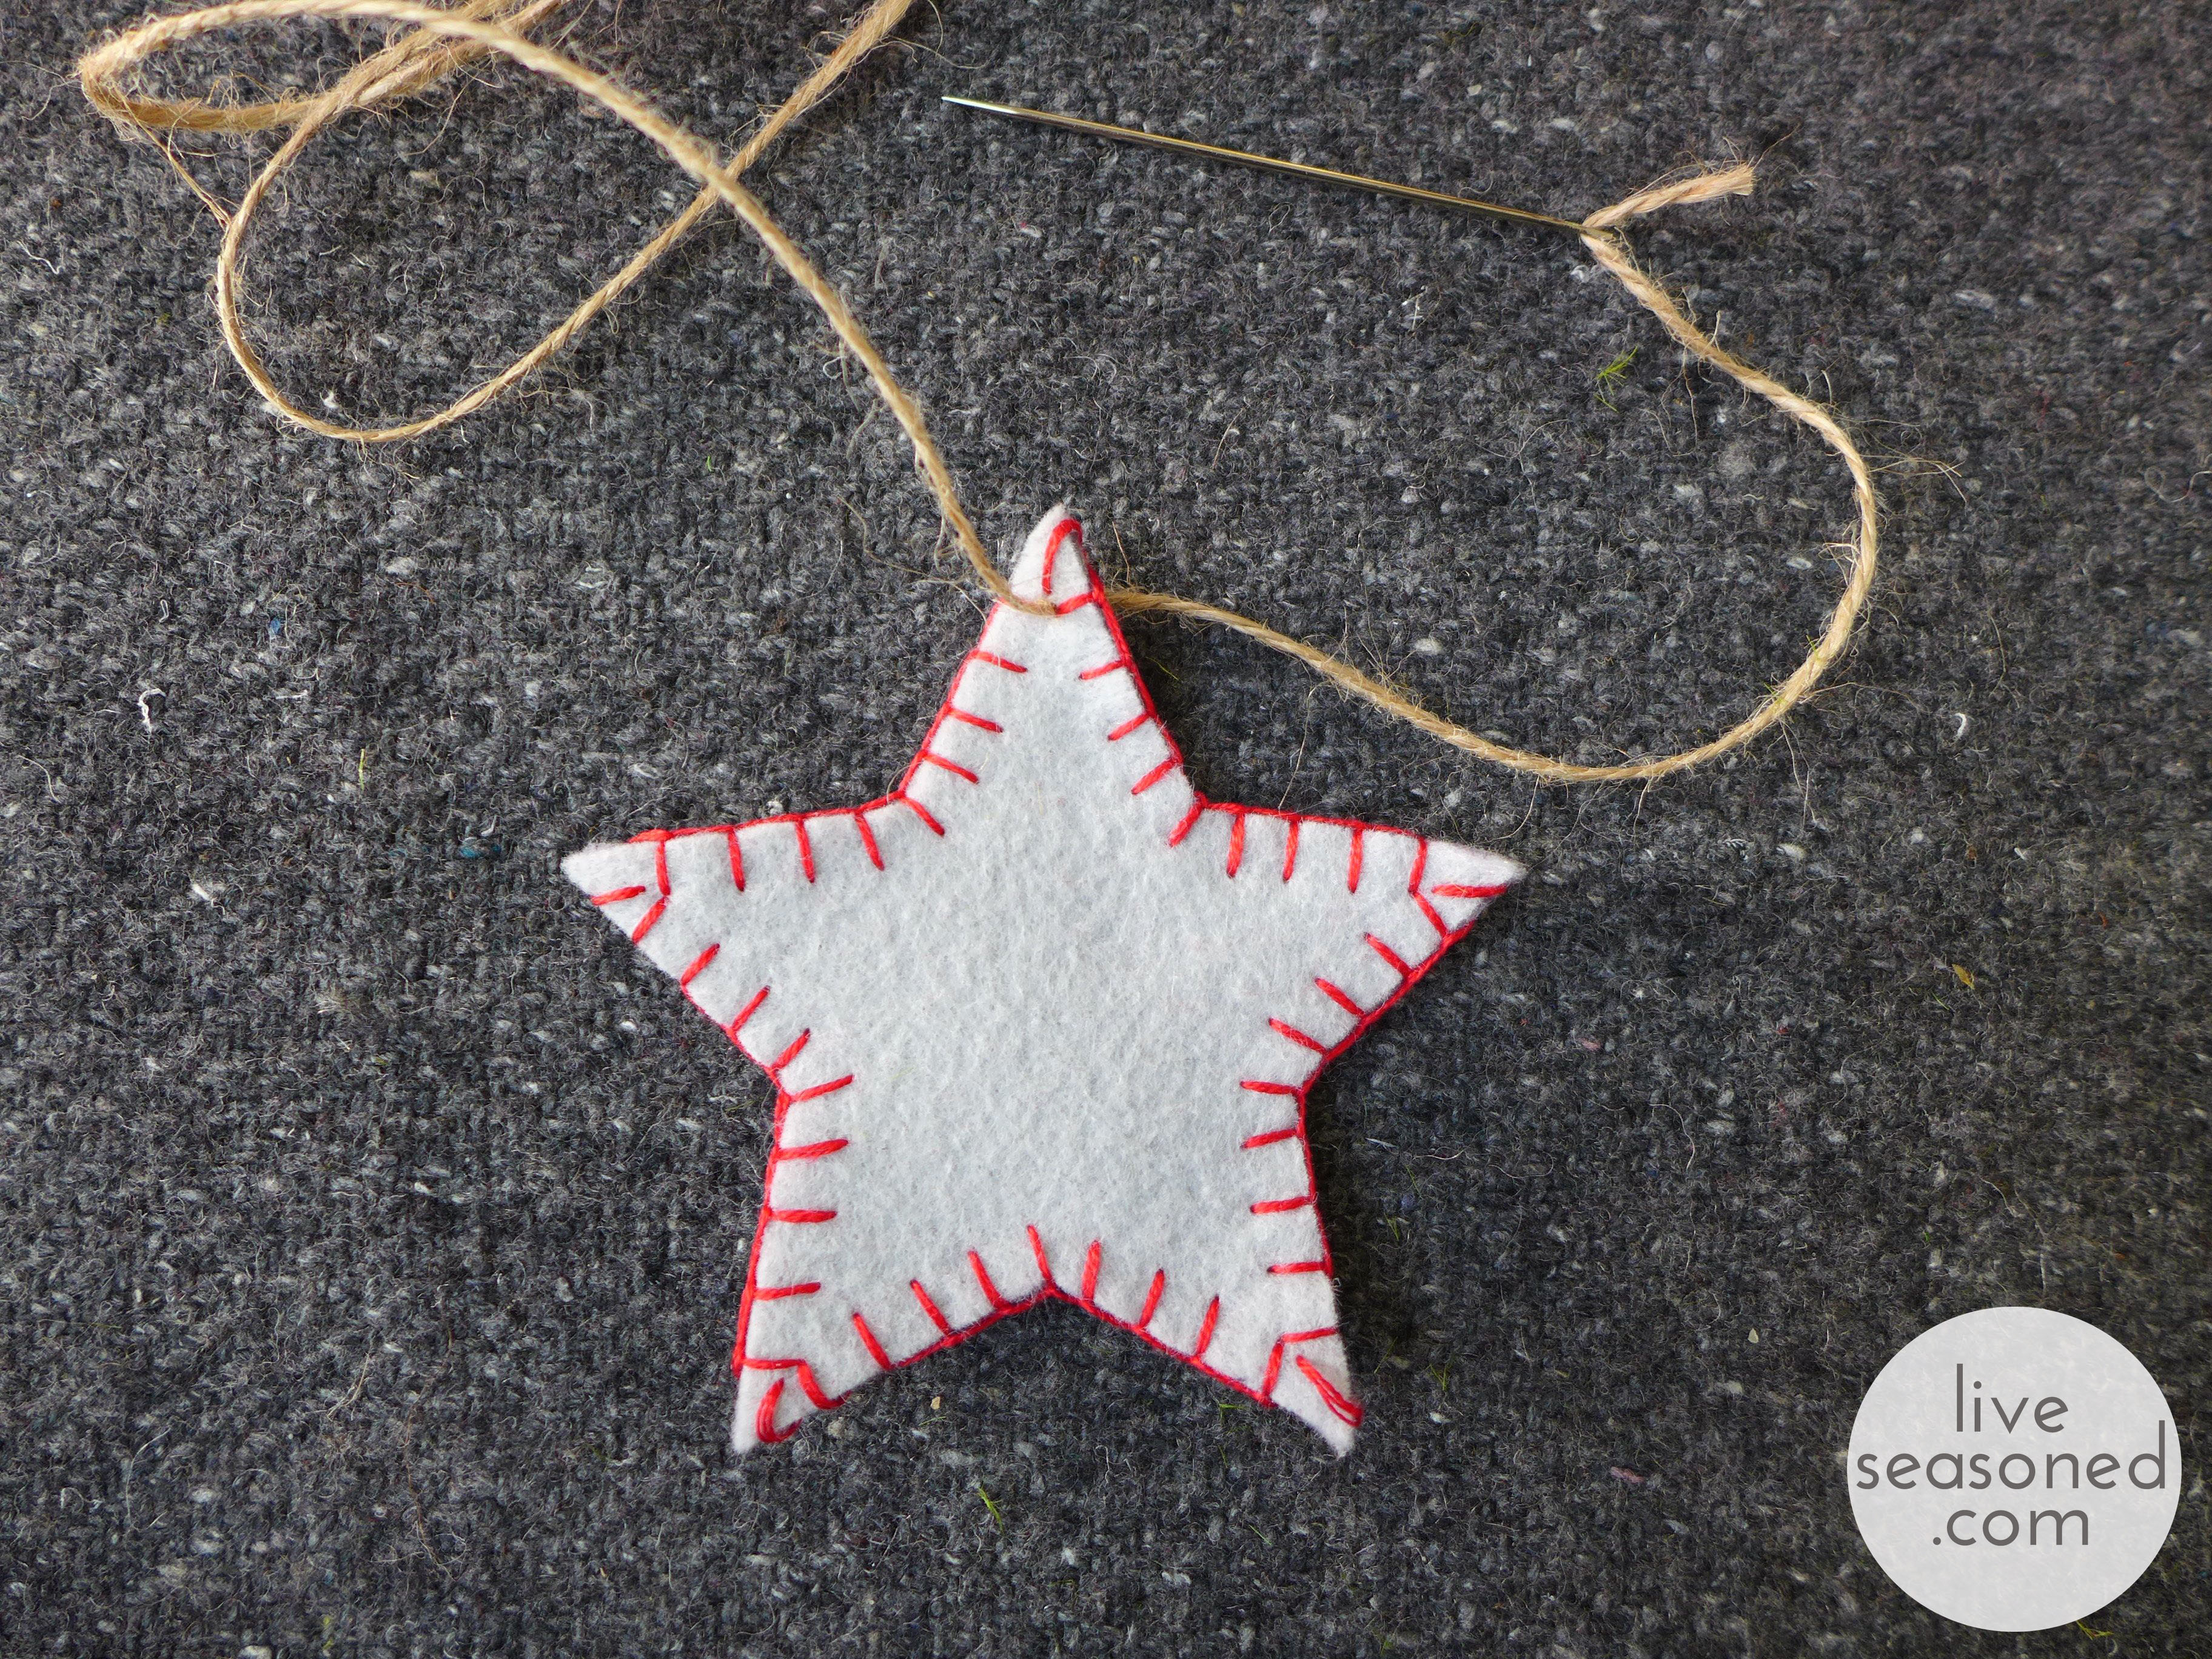
For today’s ornaments, I was first inspired by this photo. In addition to the stars, I added a few hearts with white stitching to our collection, inspired by these red felt ornaments. I personalized the stars by using a red blanket stitch around the edges, and I drastically simplified my hearts from the inspiration photo, eliminating the stuffing and choosing simple stitches that would follow the hearts’ edges.

Supplies & Tools
- Felt
- embroidery floss
- thin jute
- sewing needle
- scissors
- shape template
Instructions
- Find or draw your template. For my templates, I did a Google image search for “heart clipart” and “star clipart”. I was able to find images that included hearts and stars of different sizes, so I printed them out and cut out the size that I liked for each.
- Trace your template on the felt and cut out two of the same shape. As you can see from my template, I traced around it with a marker. Having those marker images on your felt isn’t a problem, because you can have the marked sides face inwards.
- Sew your pieces together. Use three stands of embroidery floss for the embroidery. Holding the two felt pieces together (marked sides in), use your favorite stitch to hand sew the pieces together. I used blanket stitch for all of the stars, but was more creative with the hears, using blanket stitch, back stitch, and a simple combination of long and short running stitches to create the third.
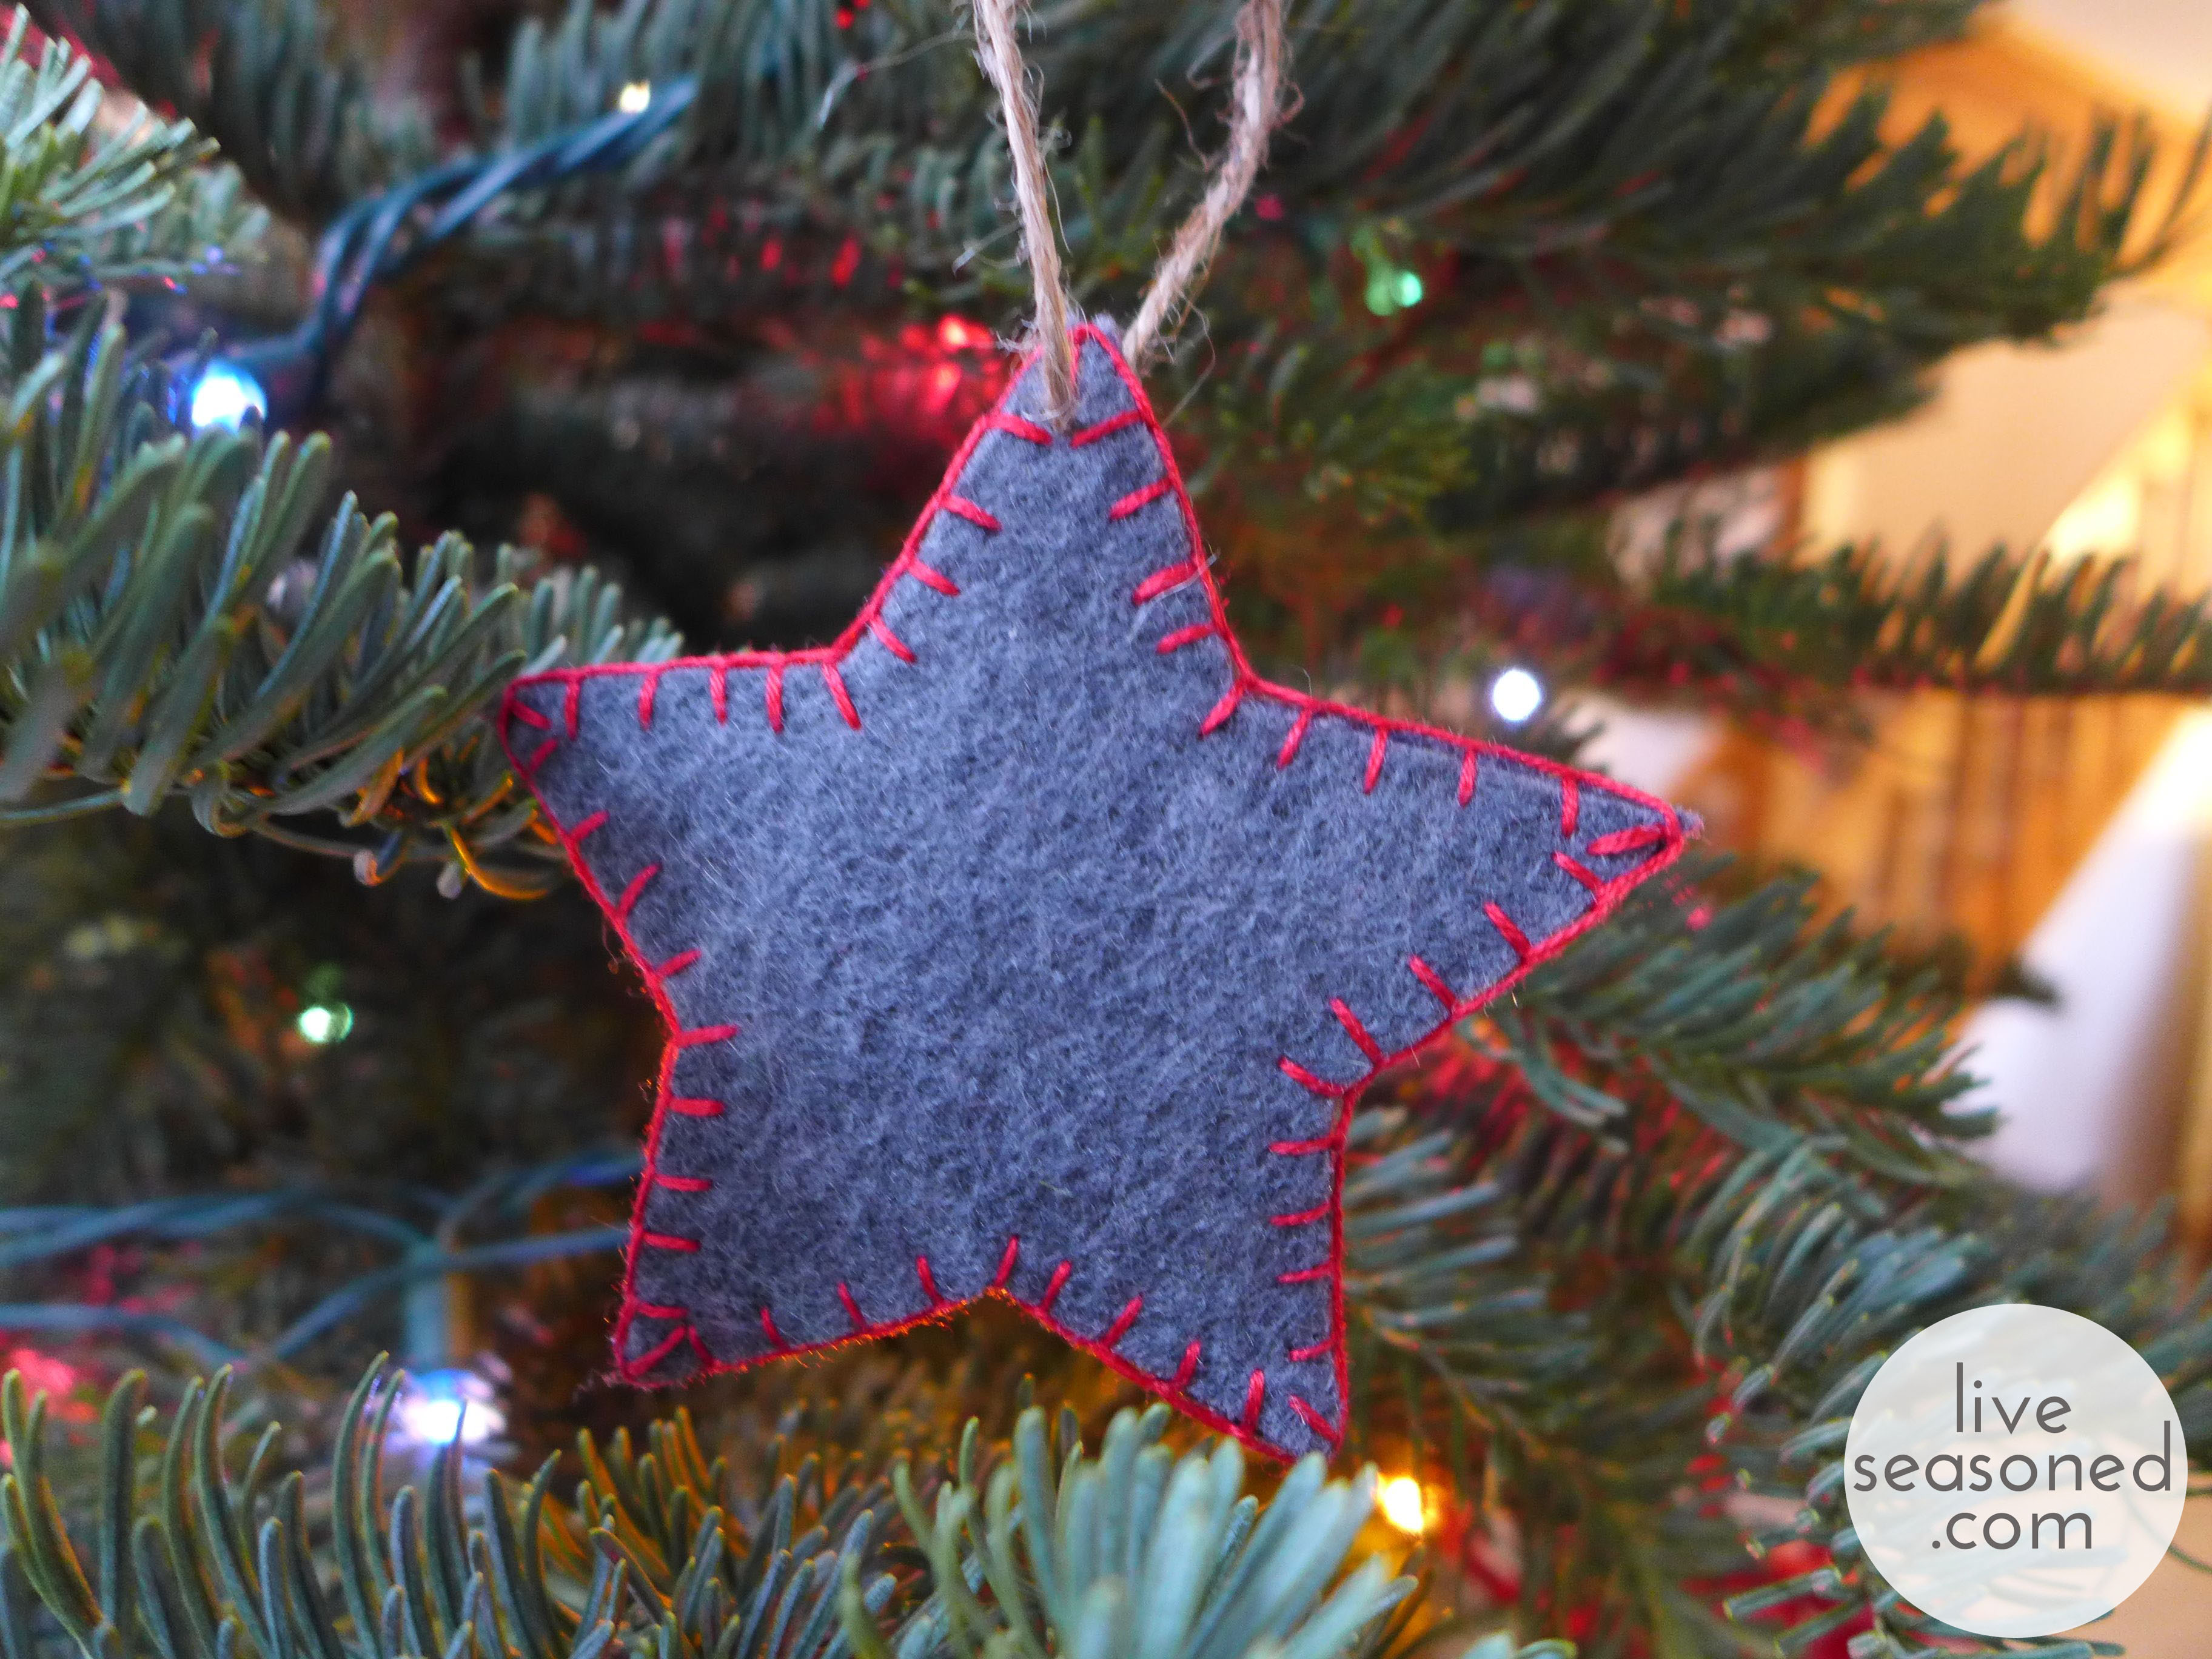
- Add your loop for hanging. I used skinny jute for the hanging loops. You can find this in craft stores, and it’s usually sold in a smaller quantity than the bigger balls of fat jute (you can see the packaging in my supplies photo). The jute will not pull through your felt as easily as the embroidery floss. I found that it was easiest to thread the jute through the eye of my needle, pierce the felt with my needle, and then move the needle in circles to create a larger hole (but one that is still snug) for the jute to fit through.
While we were so excited to put the tree up, after the lights were hung it looked so pretty that we’ve been really lazy about adding more decorations. But a few nights ago we were looking for one more activity for little A before bath time, so I pulled out these ornaments and a few others for him to add to the tree. The pictures aren’t great, but I think you can tell that he was excited to get in on the tree action (clapping after each ornament was hung), and now it’s become a daily activity to remove and rehang a few.


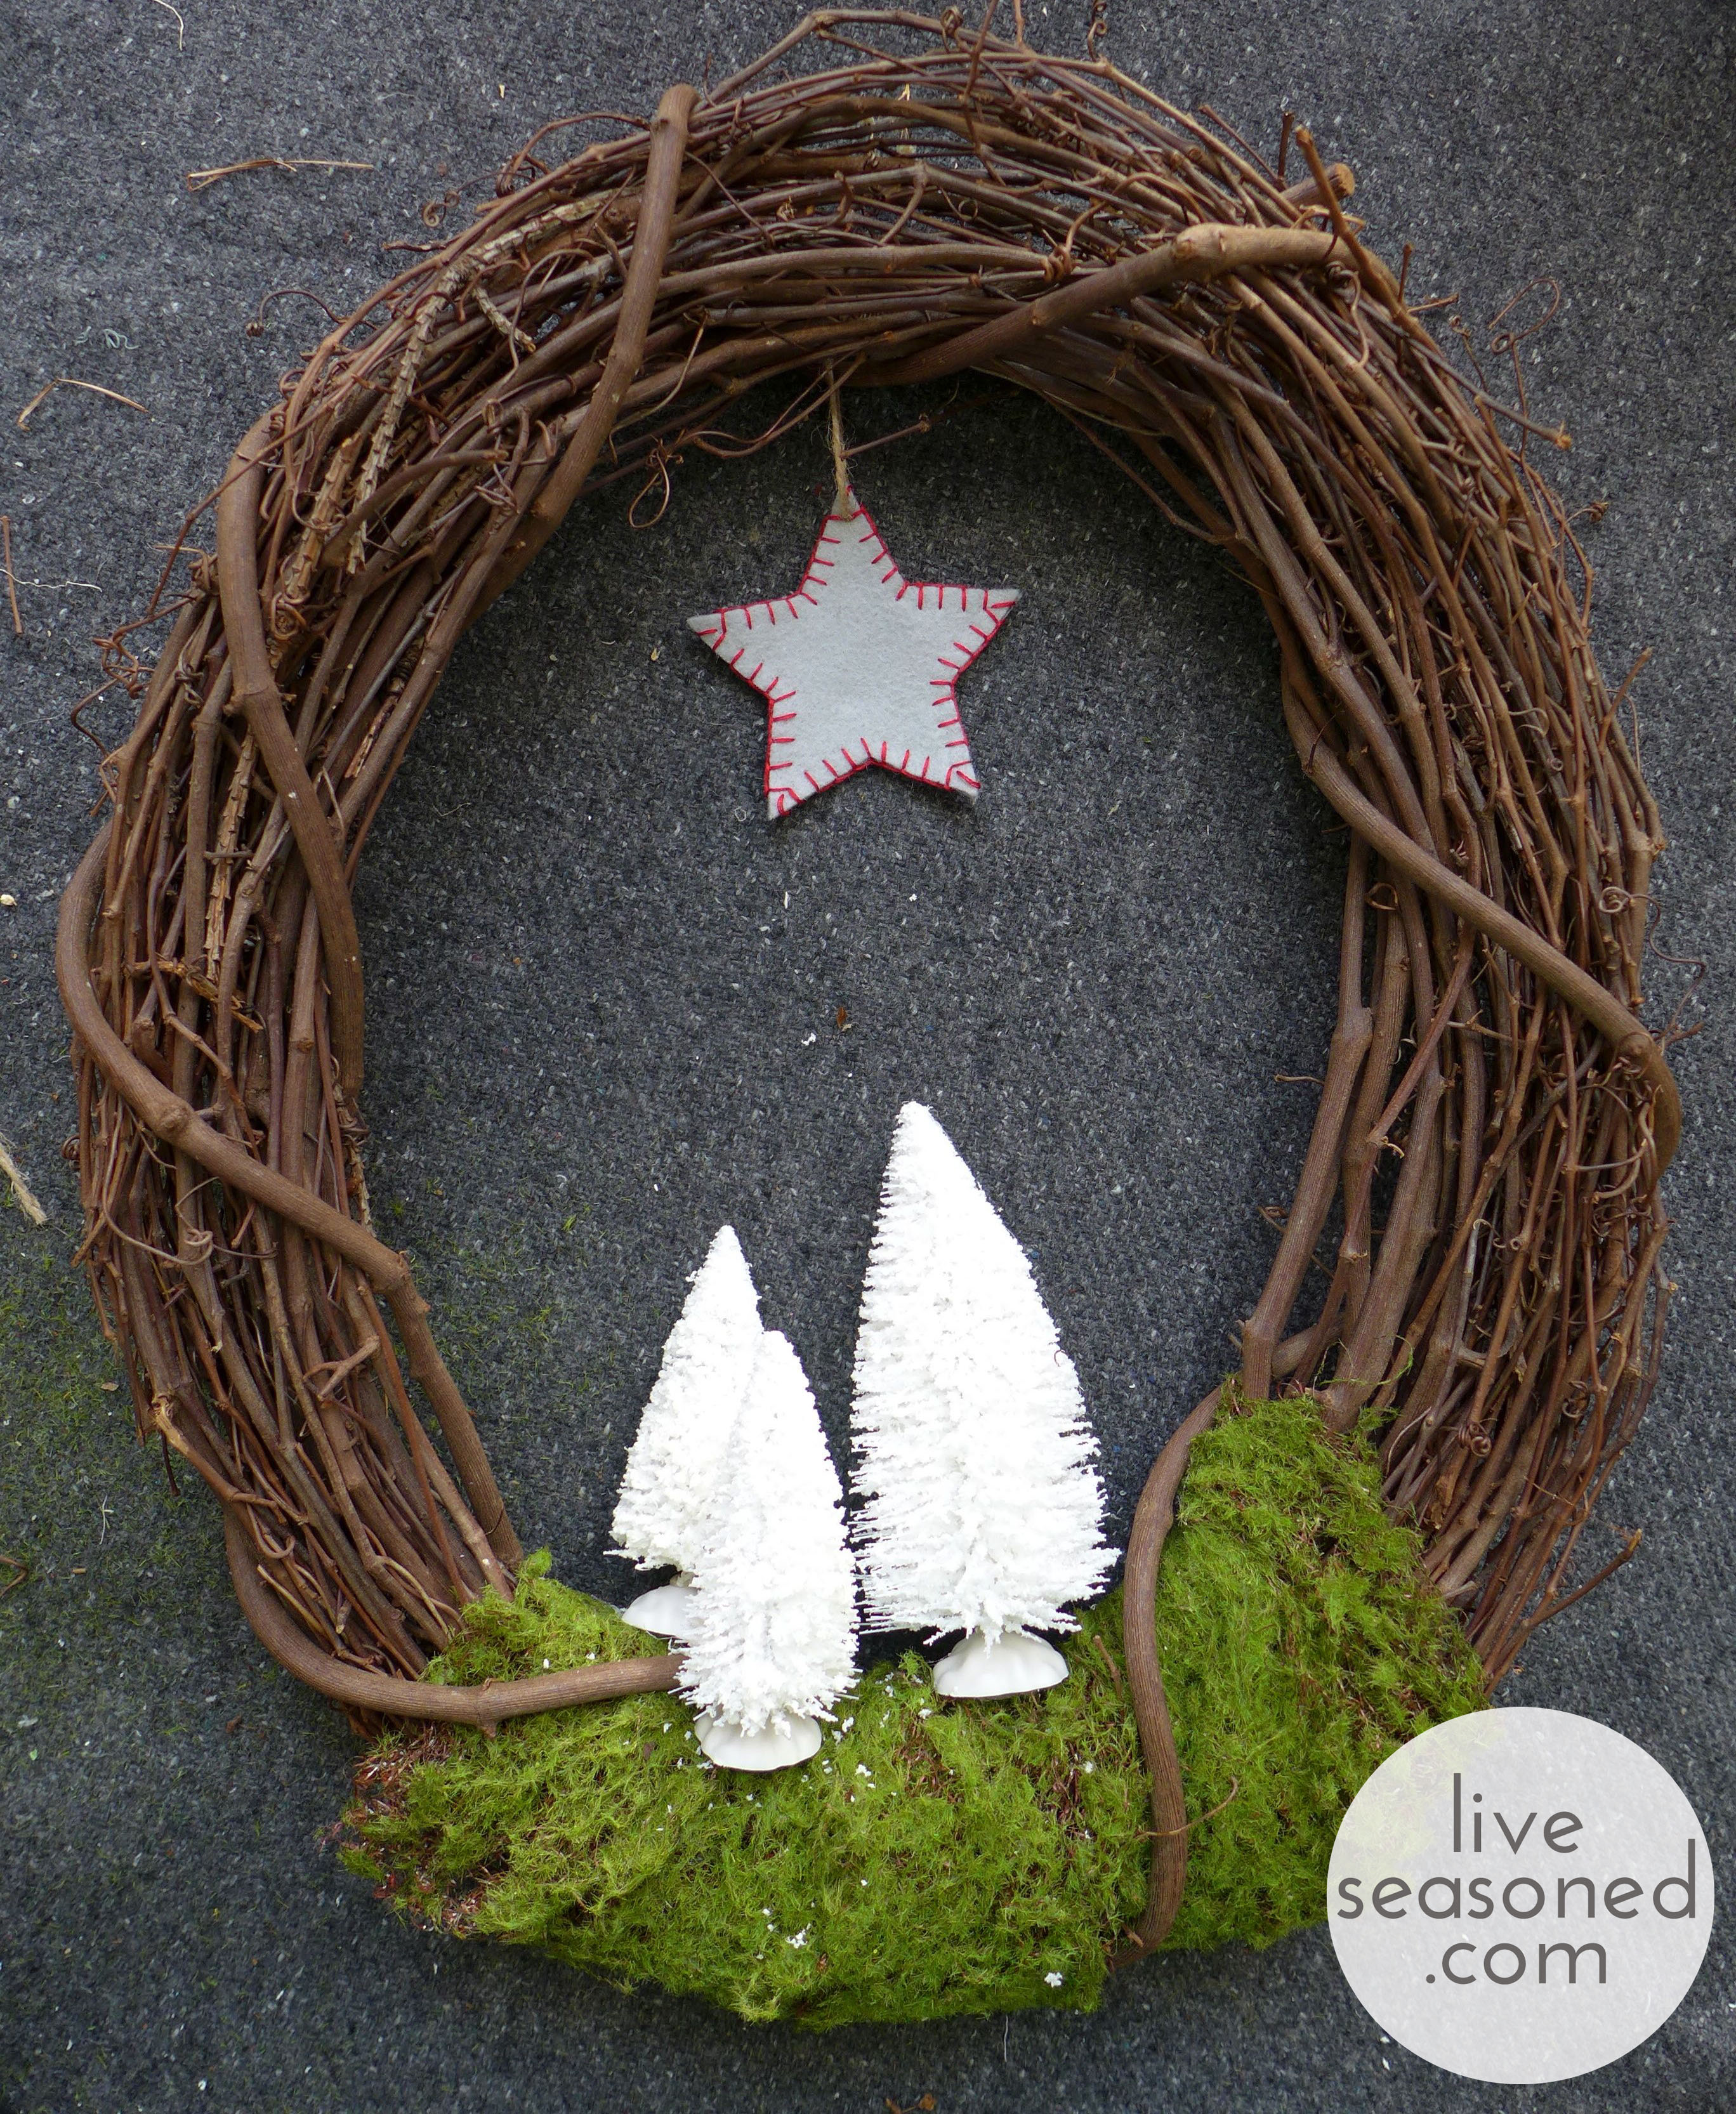
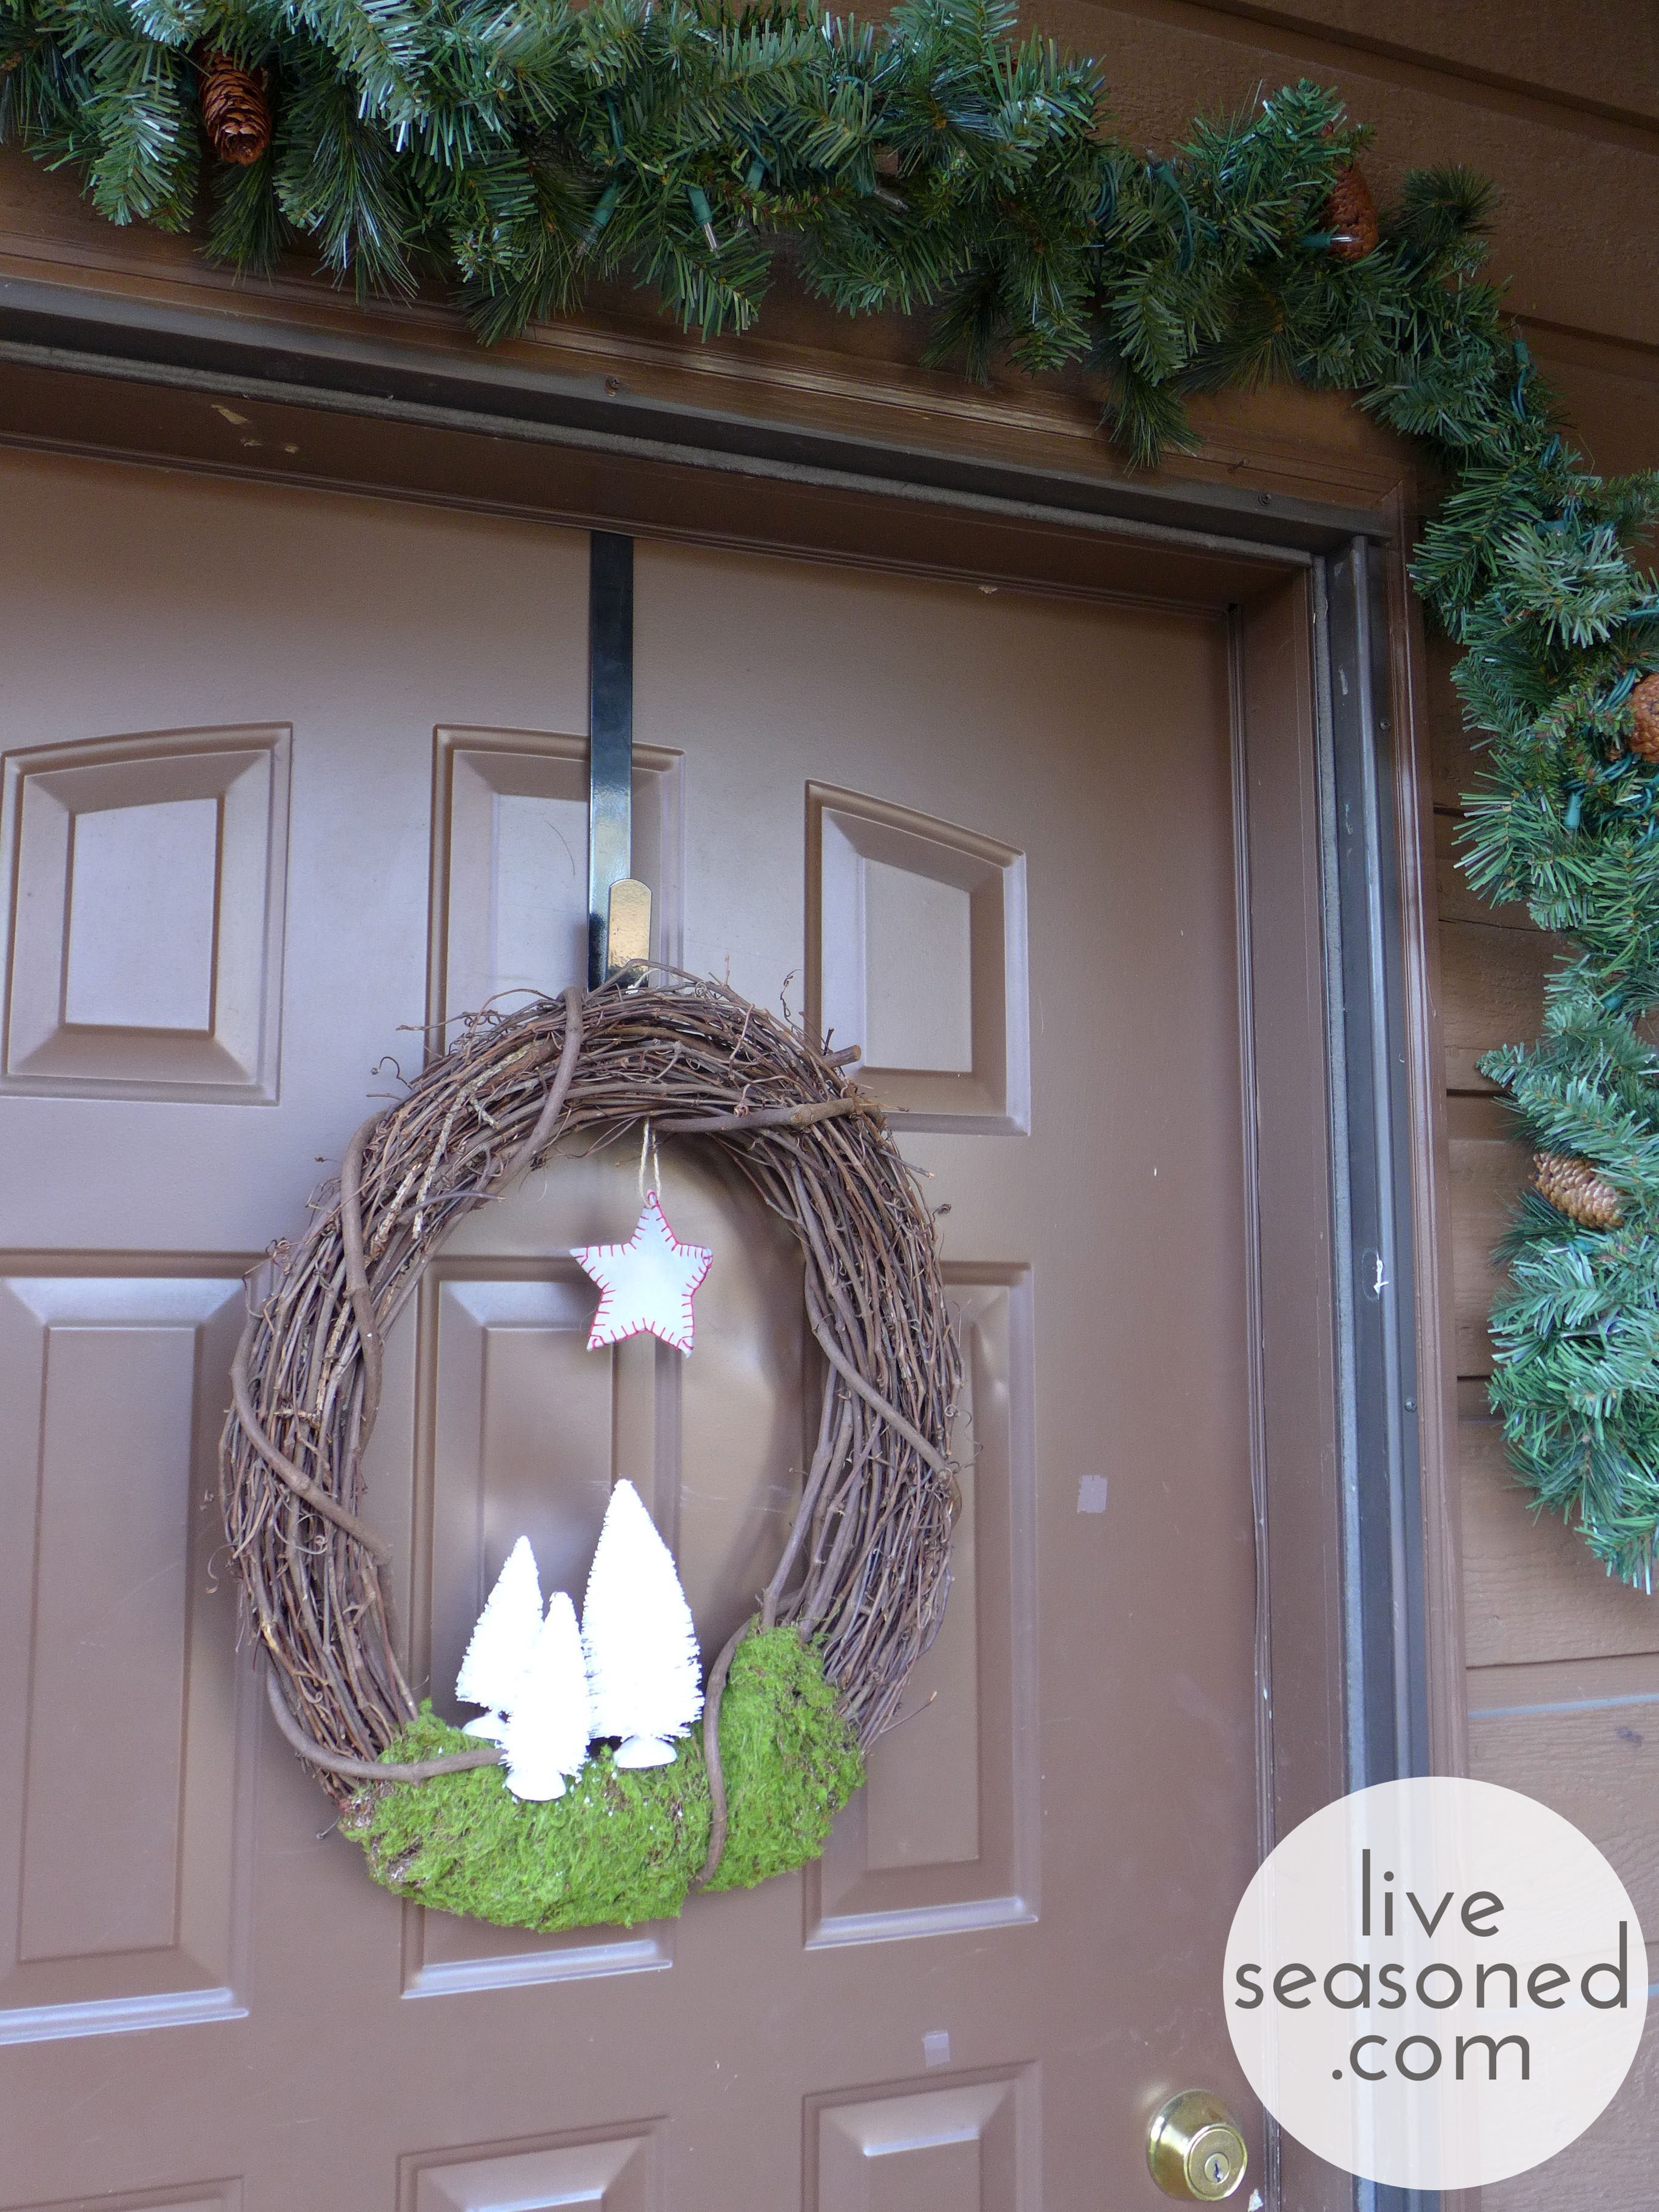
In addition to making their way onto the tree, I used one of the stars in our new wreath. Again, I’m borrowing and modifying this idea from something brilliant I saw online.
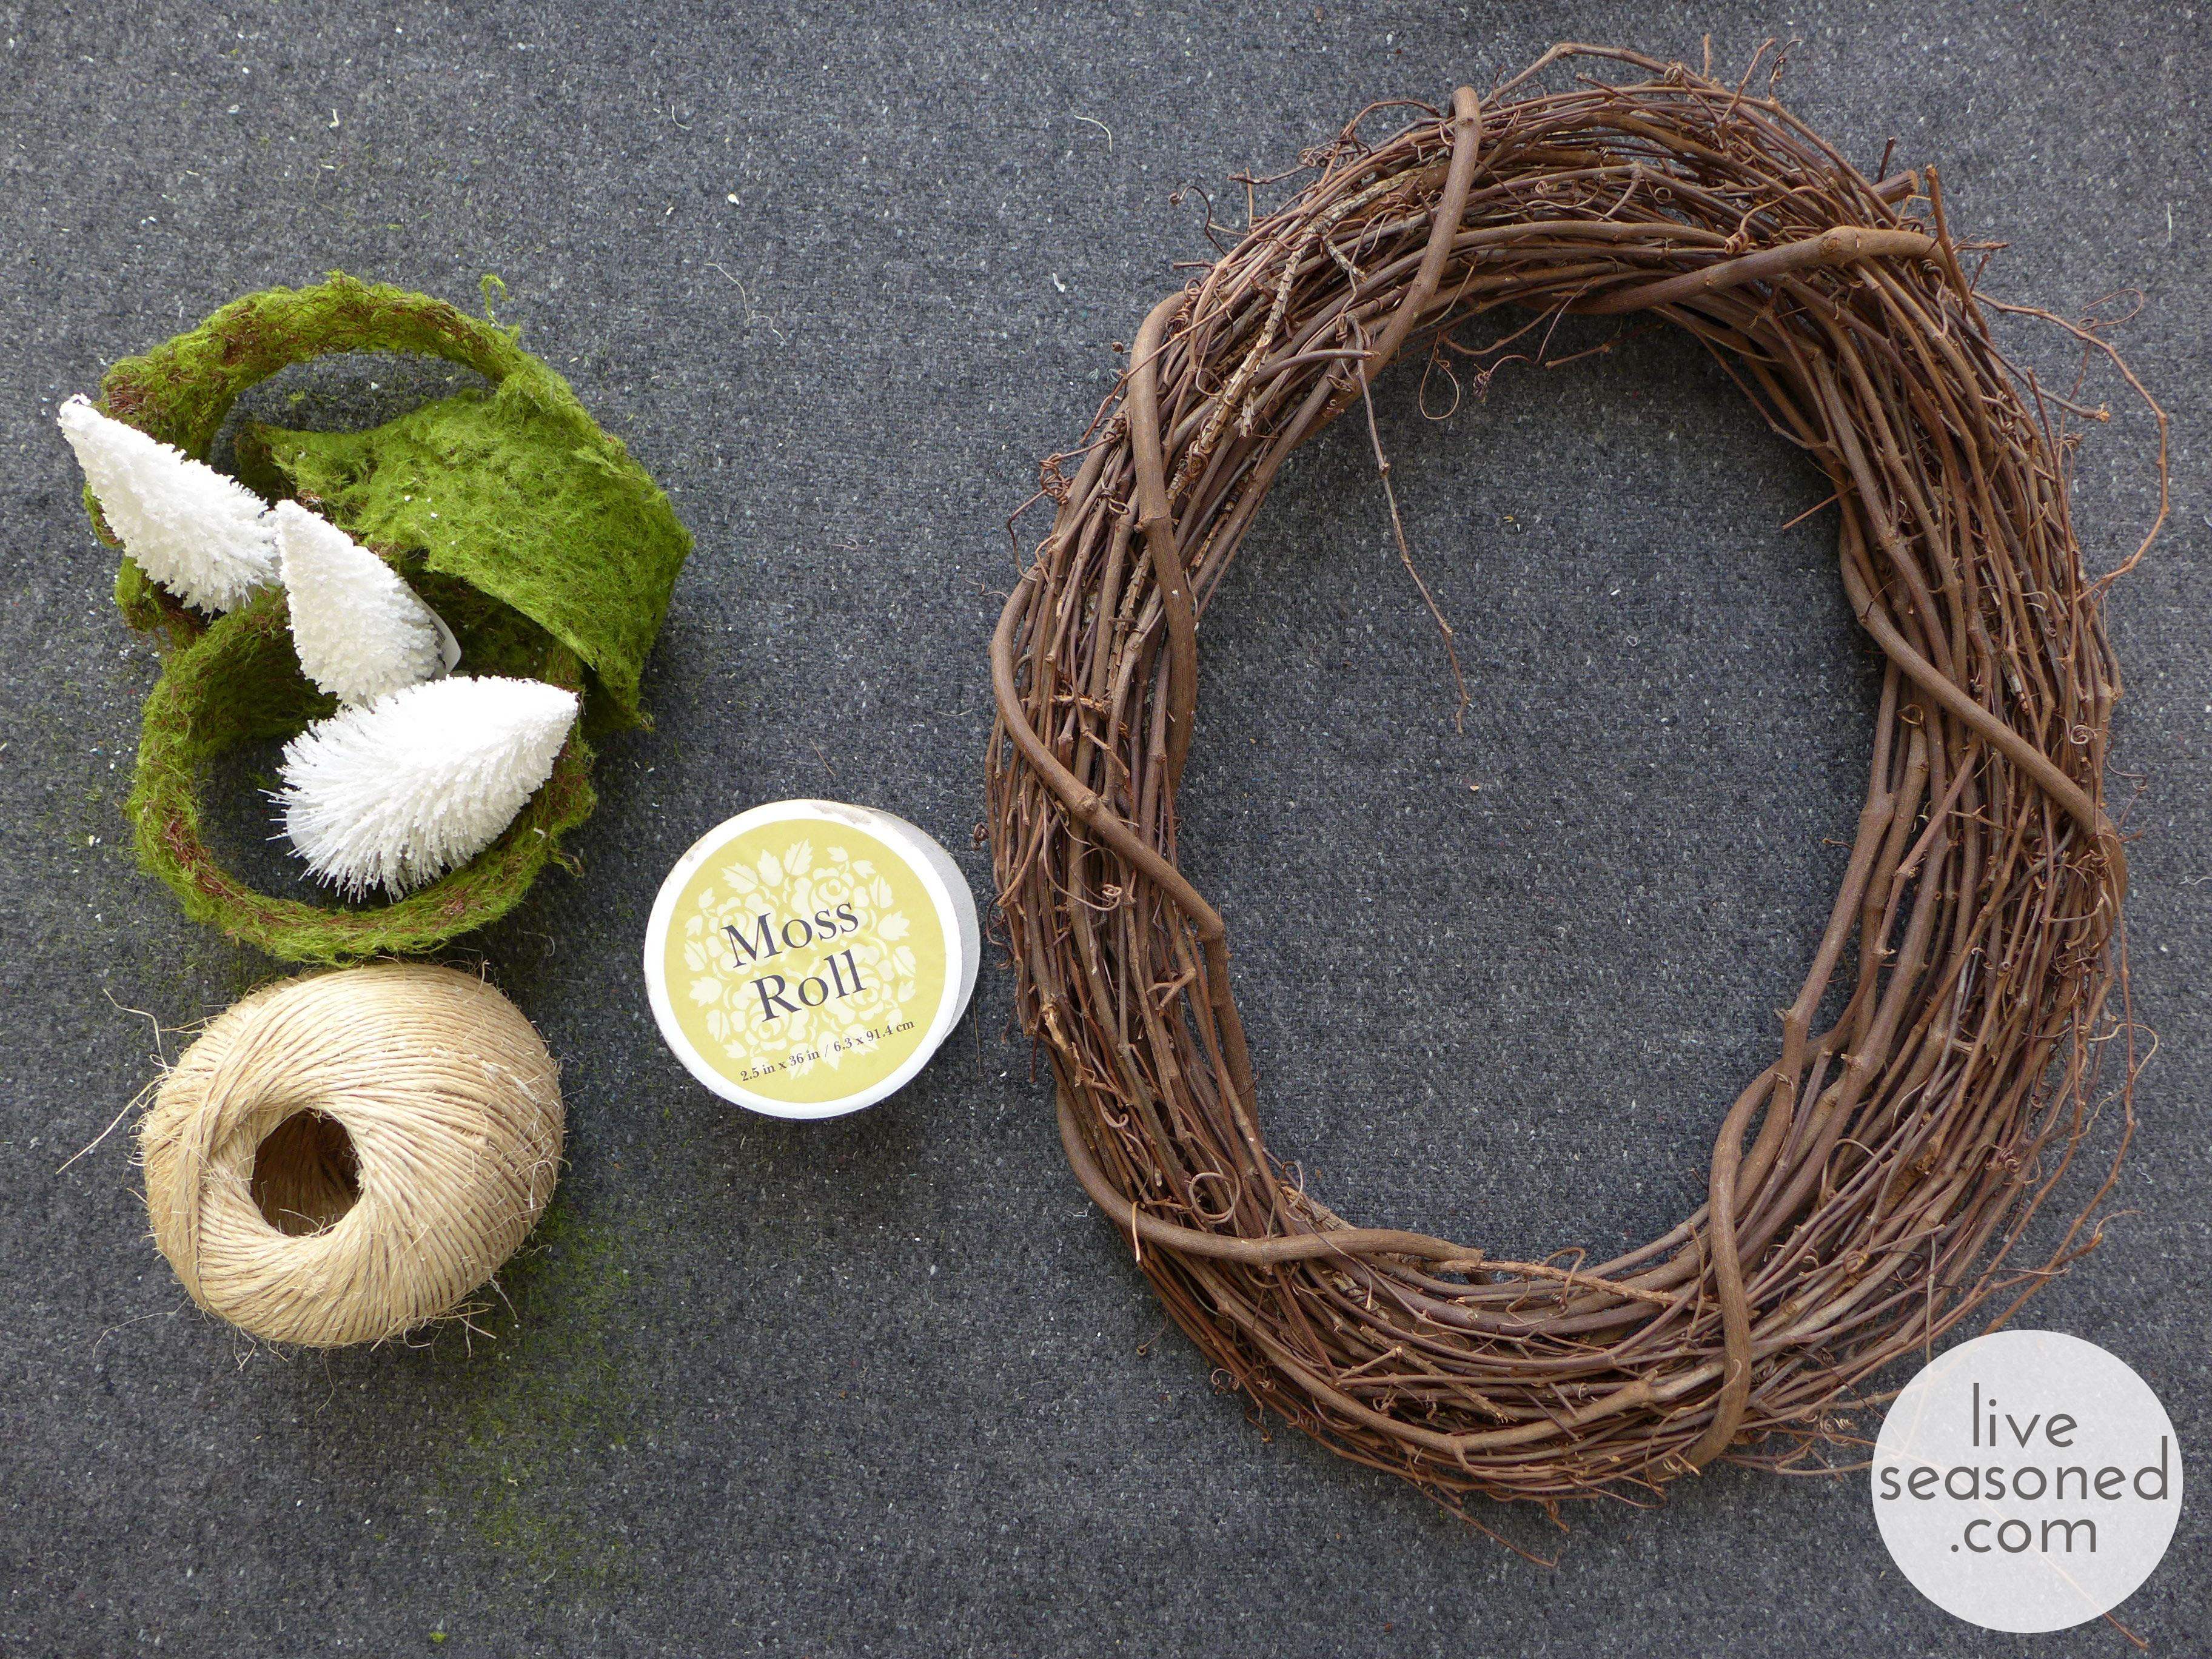
Supplies
- grapevine wreath
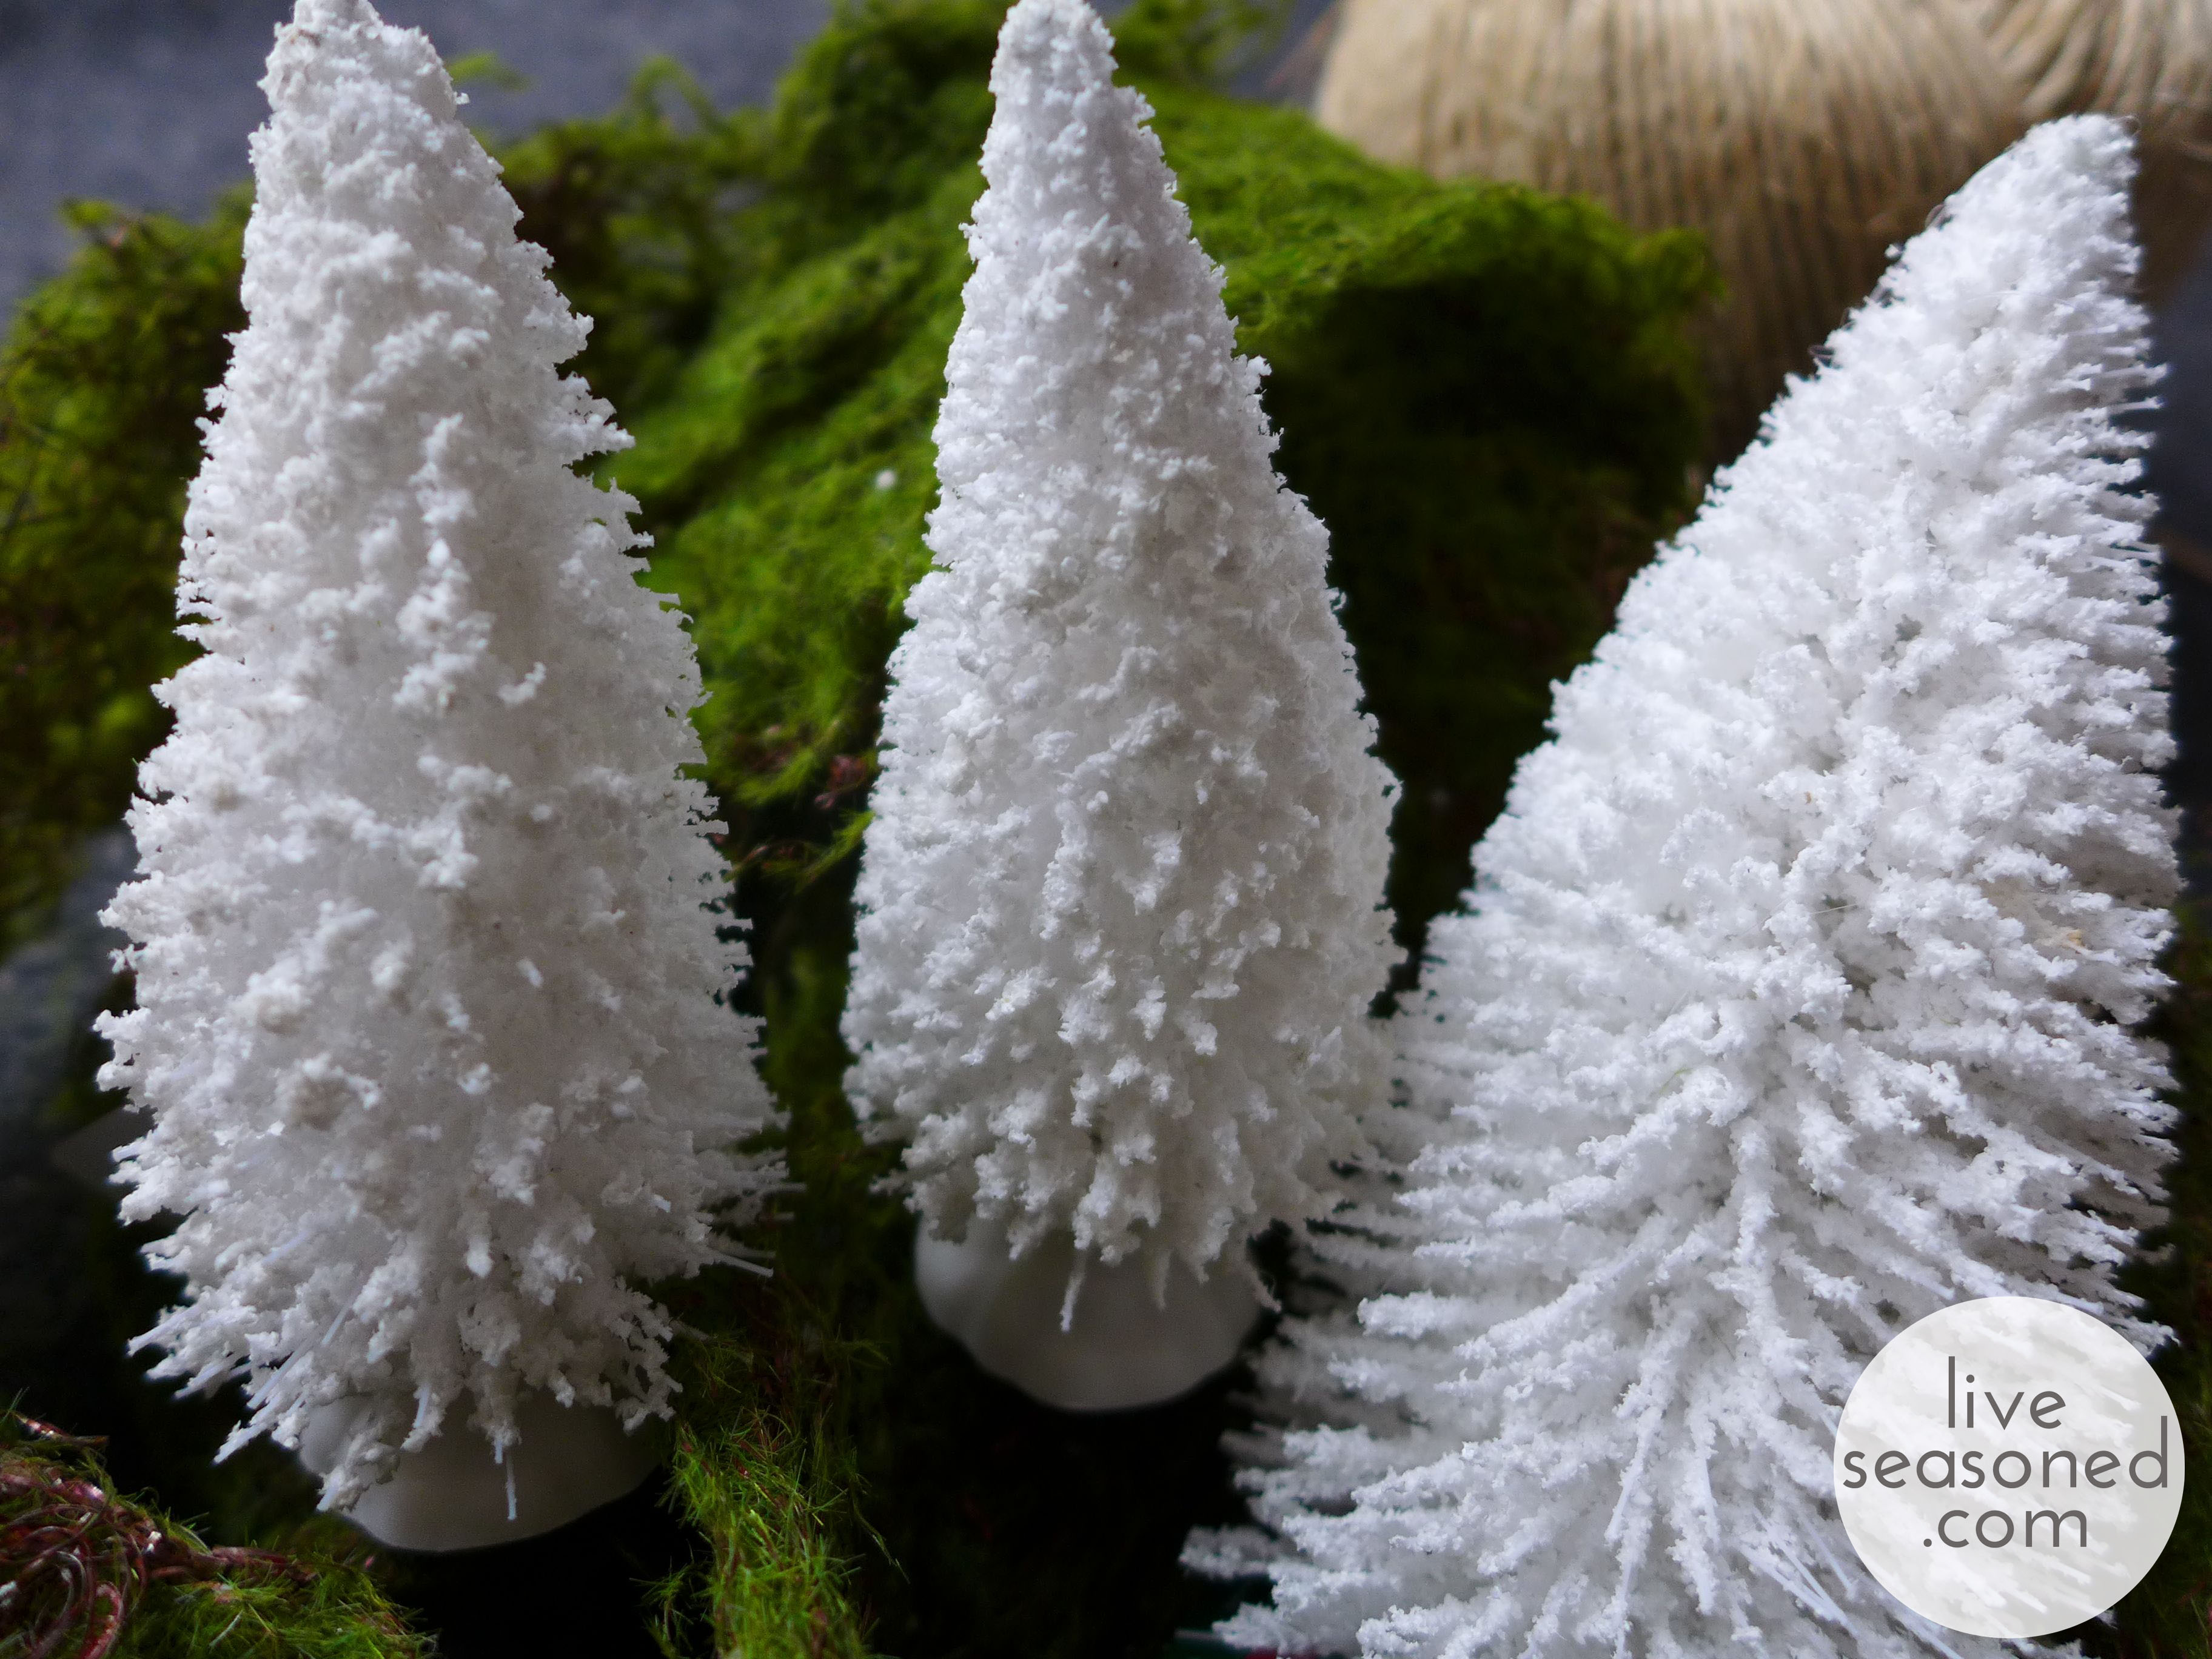
- white bottle brush trees
- moss roll (you can see the packaging below)
- hot glue gun & glue
How cute is that wreath? It came together easily with a few supplies from the craft store. The project is relatively self-explanatory : wrap the moss around your wreath, slipping it under a few of the larger vines if possible (this just takes a bit of wiggling). Glue the trees where you would like them. Tie a star ornament from the top of your wreath. Bam!
Once I hung this and the green garland above the door, I realized that we have a lot of brown and green going on out on the front porch. Maybe this year it would have been nice to go with something brighter? But I’m loving the peaceful look every time we walk in the door.
 So, that’s my little felt project for the season. It’s been a long time since I’ve done anything with felt (or even had a little supply of it in my craft room), and I’m excited work with it more in the future. I really enjoyed making these ornaments because they were so easy and mindless to put together, creating a polished result. What does that mean for you? If you want to slow this weekend, but still feel a little bit productive, this is a great meditative project

Orange and Clove Pomanders
Oranges our our ingredient of the season. We have big plans for a winter of zesty recipes and sweet crafts.

Today we’re sharing a super simple craft that you often see around the holidays : the orange and clove pomander.
Pomanders are balls made of some sort of scented or perfumed material. They are considered an original form of aromatherapy and have a long history dating back to the Middle Ages!
The orange and clove pomander is considered a modern version, and if properly dried, you can use these sweet and spicy smelling balls year after year as holiday decorations or in place of sachets in your dresser drawers.
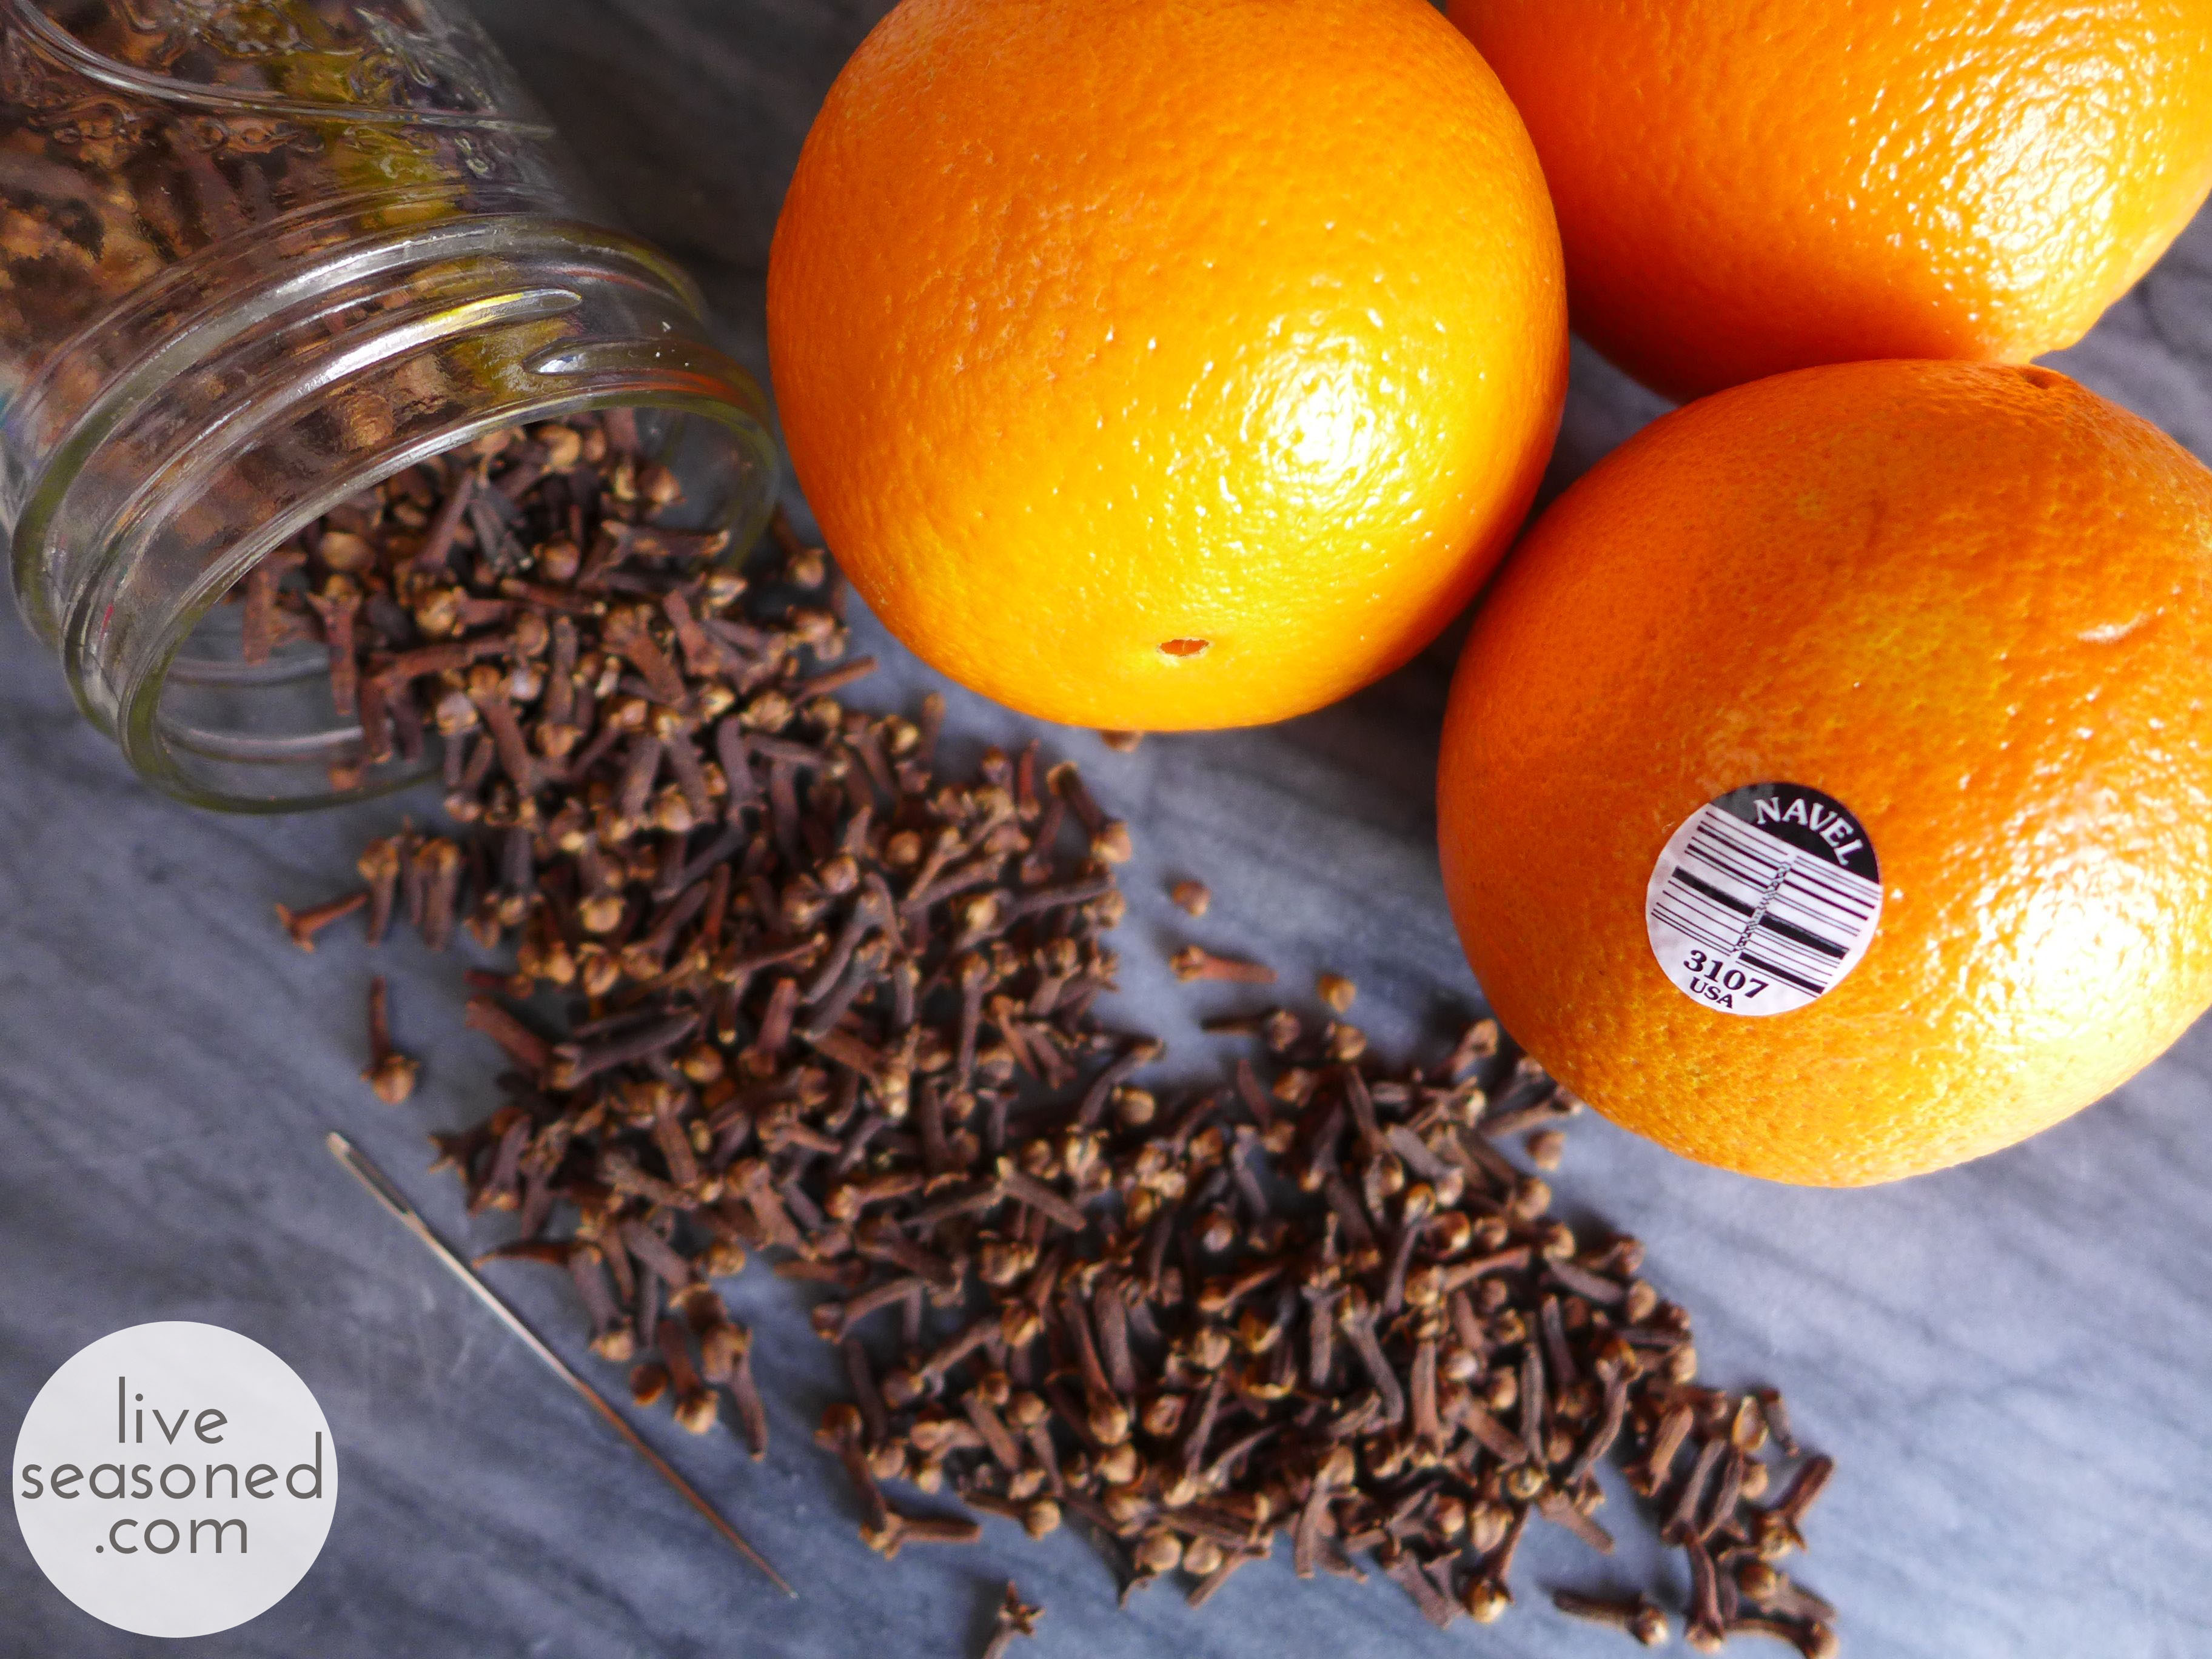
This is a very easy and kid-friendly craft! To make a bare-bones pomander all you need are oranges and cloves (buying your cloves in bulk is the way to go here). If you want to get fancy, you can add ribbon, either tied around your orange and incorporated into the design or looped through your orange for hanging.

With your supplies ready, start making a design on your orange. I did all of these over the course of a couple of days ~ whenever A. Max was busy playing and I had a minute to myself. So rather than fuss over a specific design, I just played with the cloves and did a few free-form patterns.

There were curved lines.
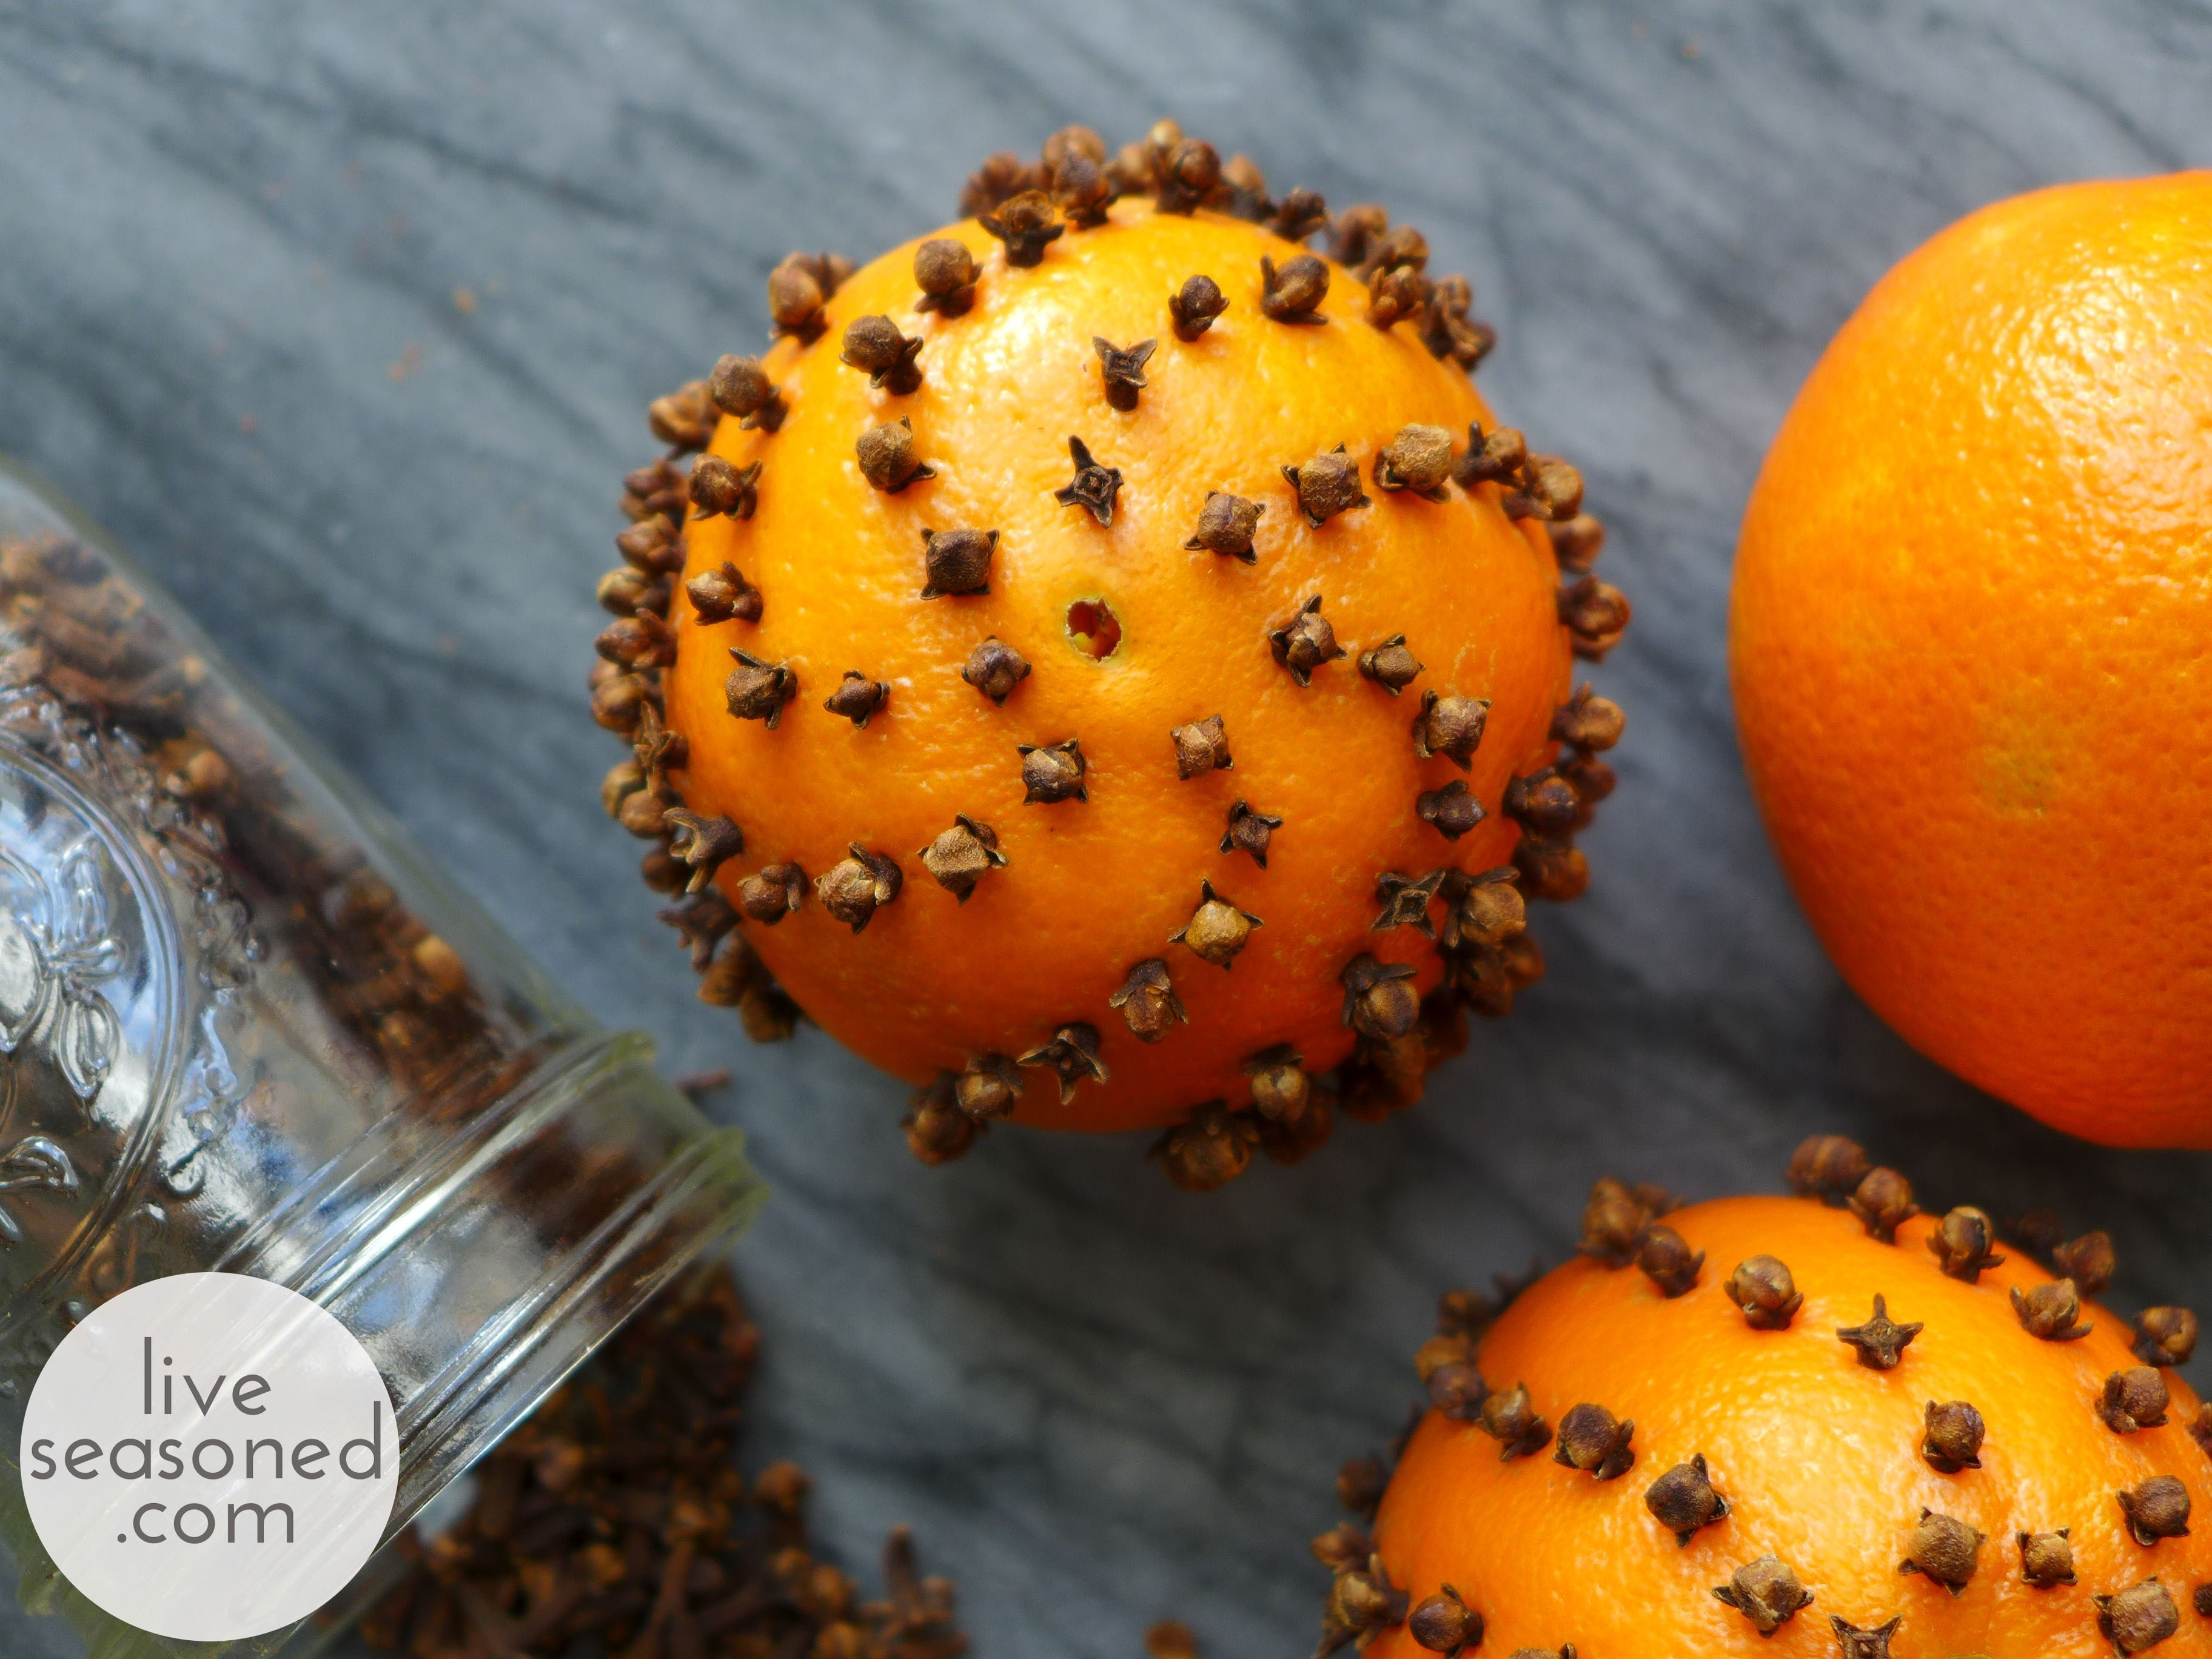
That looked like swirls from the top.

One had a vine with flowers.
And there were polka dots!
The one issue you’re likely to have, especially if you’re in a more humid climate, is some mold growth. I’m hoping that the dry CO climate is going to help us out here! But to be on the safe side, once I was done with the designs, I put these in a cool, dark closet for about a week to dry out more. As they dry, you’ll notice that the cloves are sticking out a touch, so you can go around a poke them back in.
A traditional way to avoid mold growth is to sprinkle your finished oranges in orris root powder. This will help to dry out the orange and will add a violet scent to your pomander. In an effort to keep this project simple and low cost, I’m taking my chances and skipping the orris root!
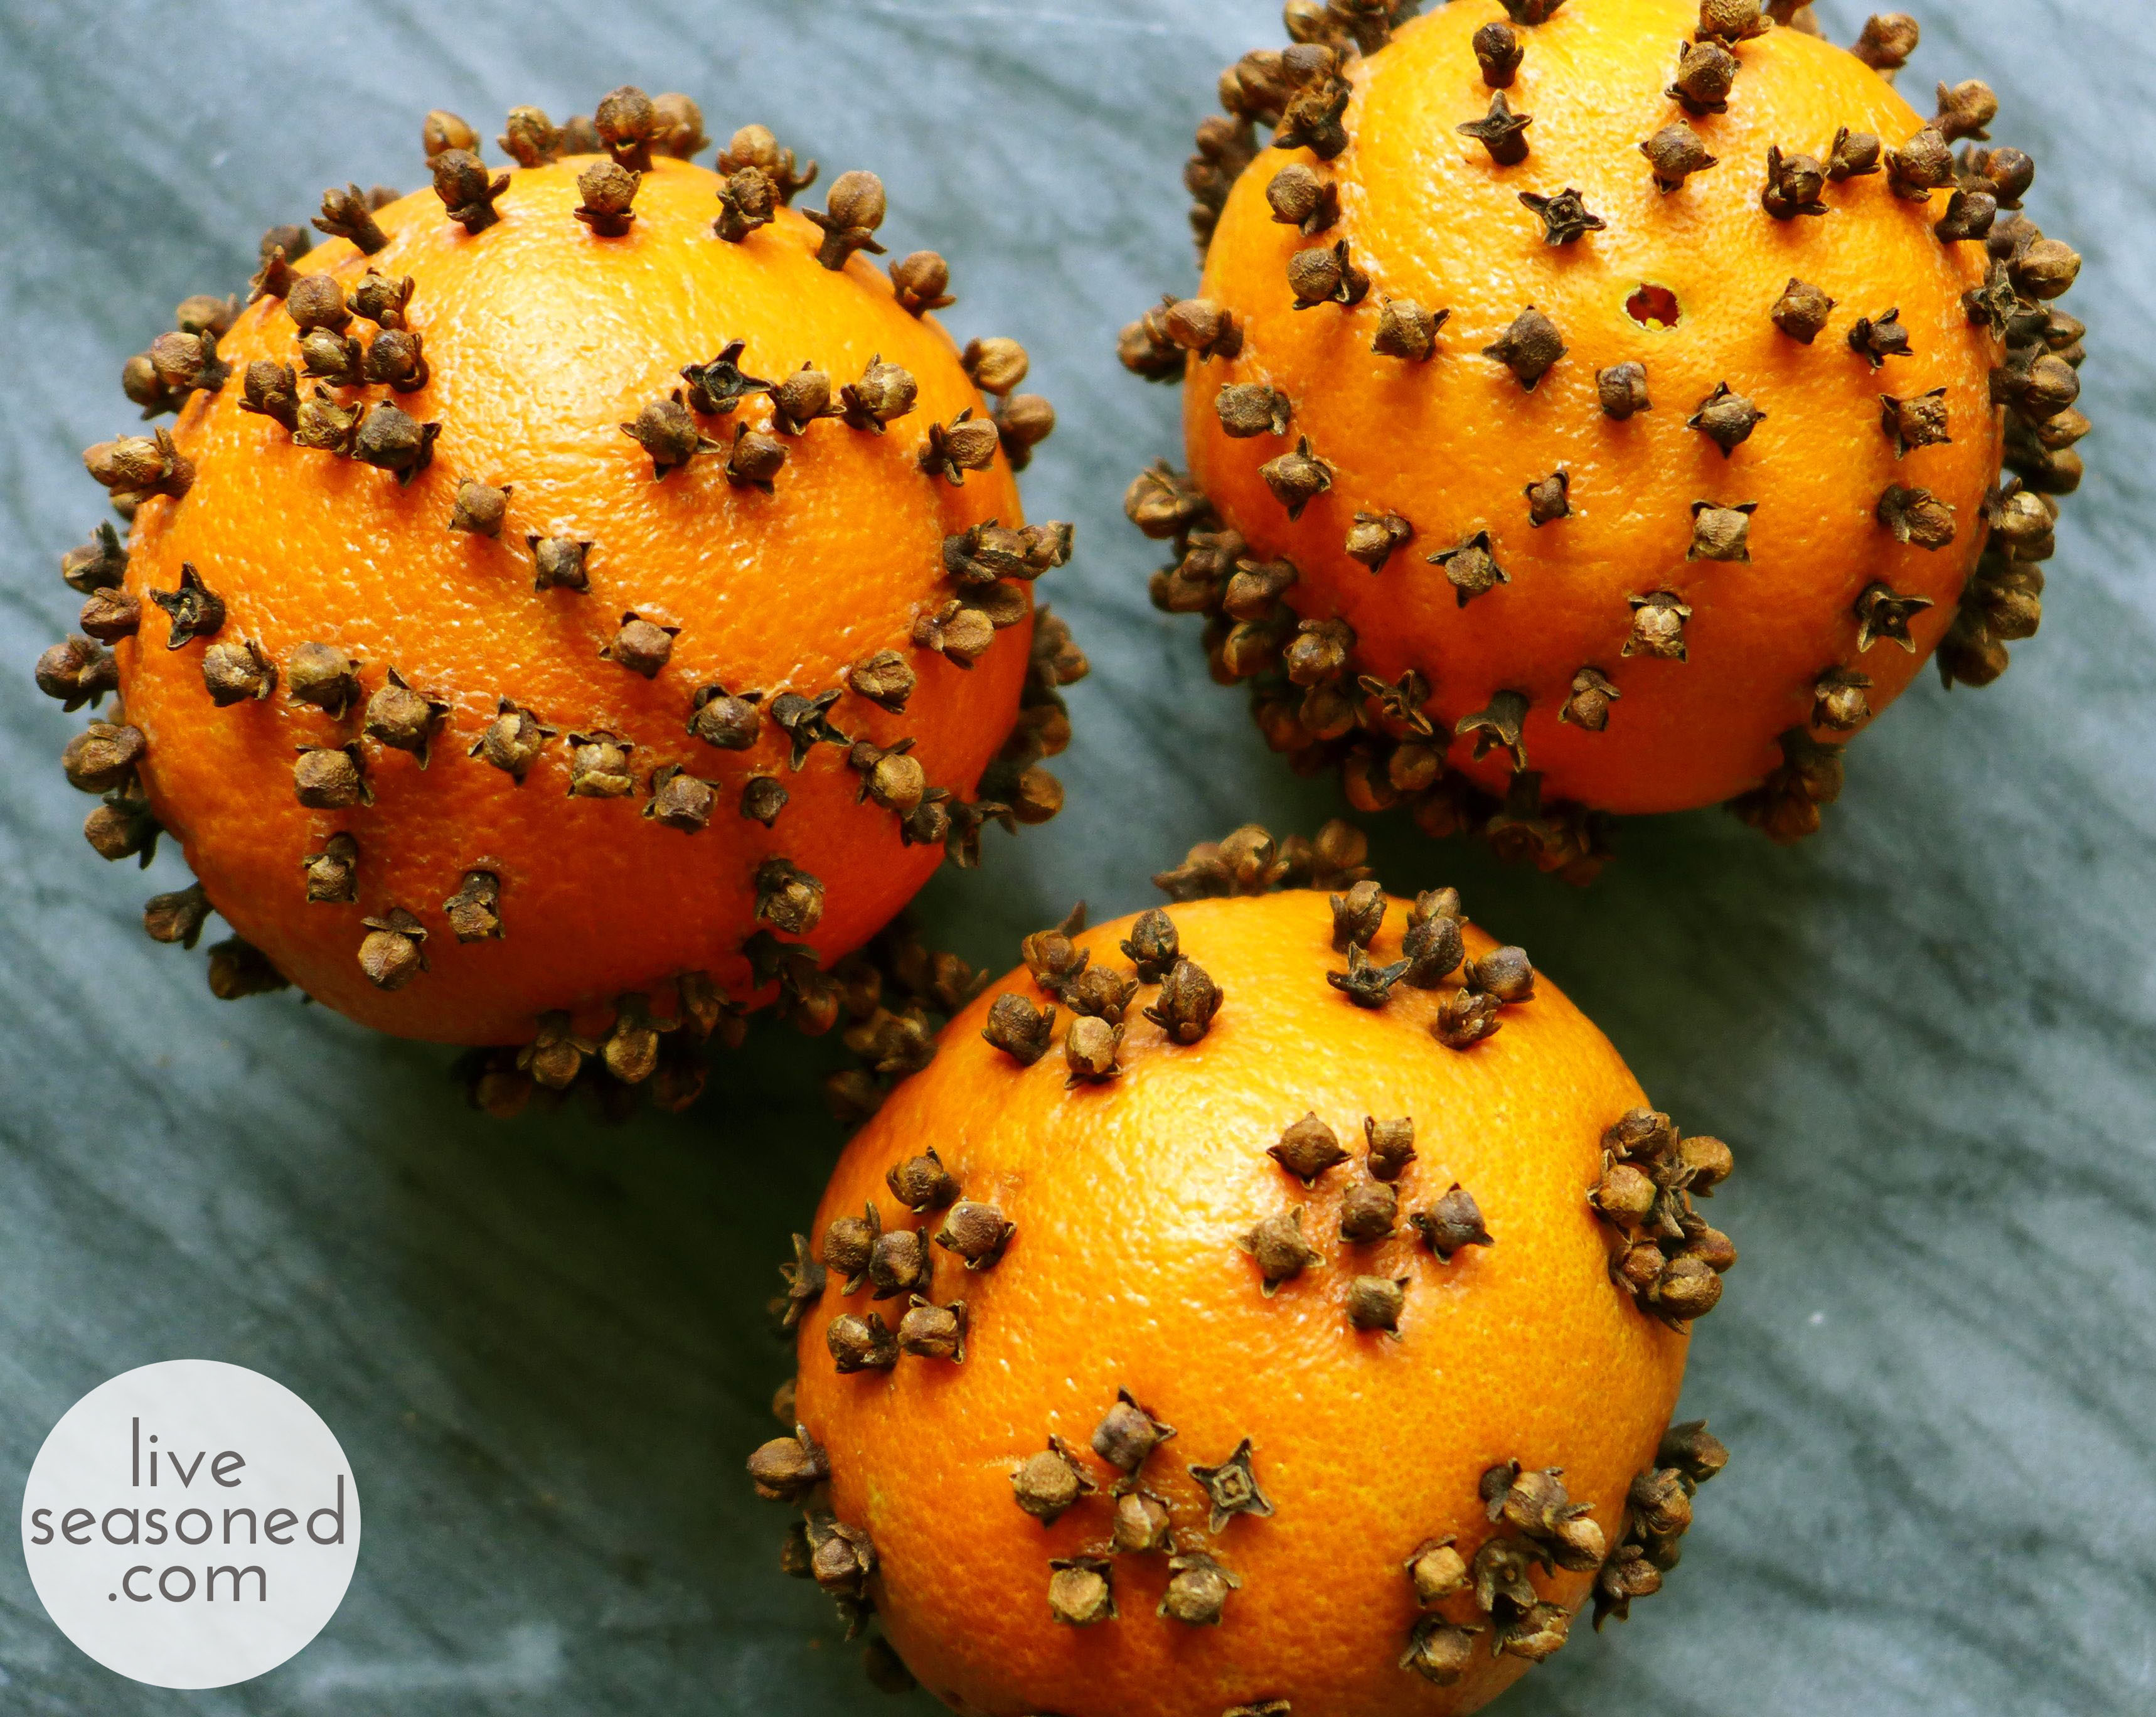
Putting them all together, it’s a nice little display of pattern that smells unbelievable! Alex loves to walk over to them and take a big whiff, which is unbelievably cute!
Balsa Christmas Trees
Happy Monday! How was your weekend? Did you get your tree? We had a disappointing, but funny, experience at a local tree “farm”. In more uplifting news, I was excited to realize that we’re almost done with the Christmas shopping! Unbelievable, right? Of course, there’s still a bit of Christmas crafting to do, but I’m feeling confident that it will get done. As a result, I had time to work on some of the decorations that have been on my list. First up ~ some super simple and quick Christmas trees for our mantel.
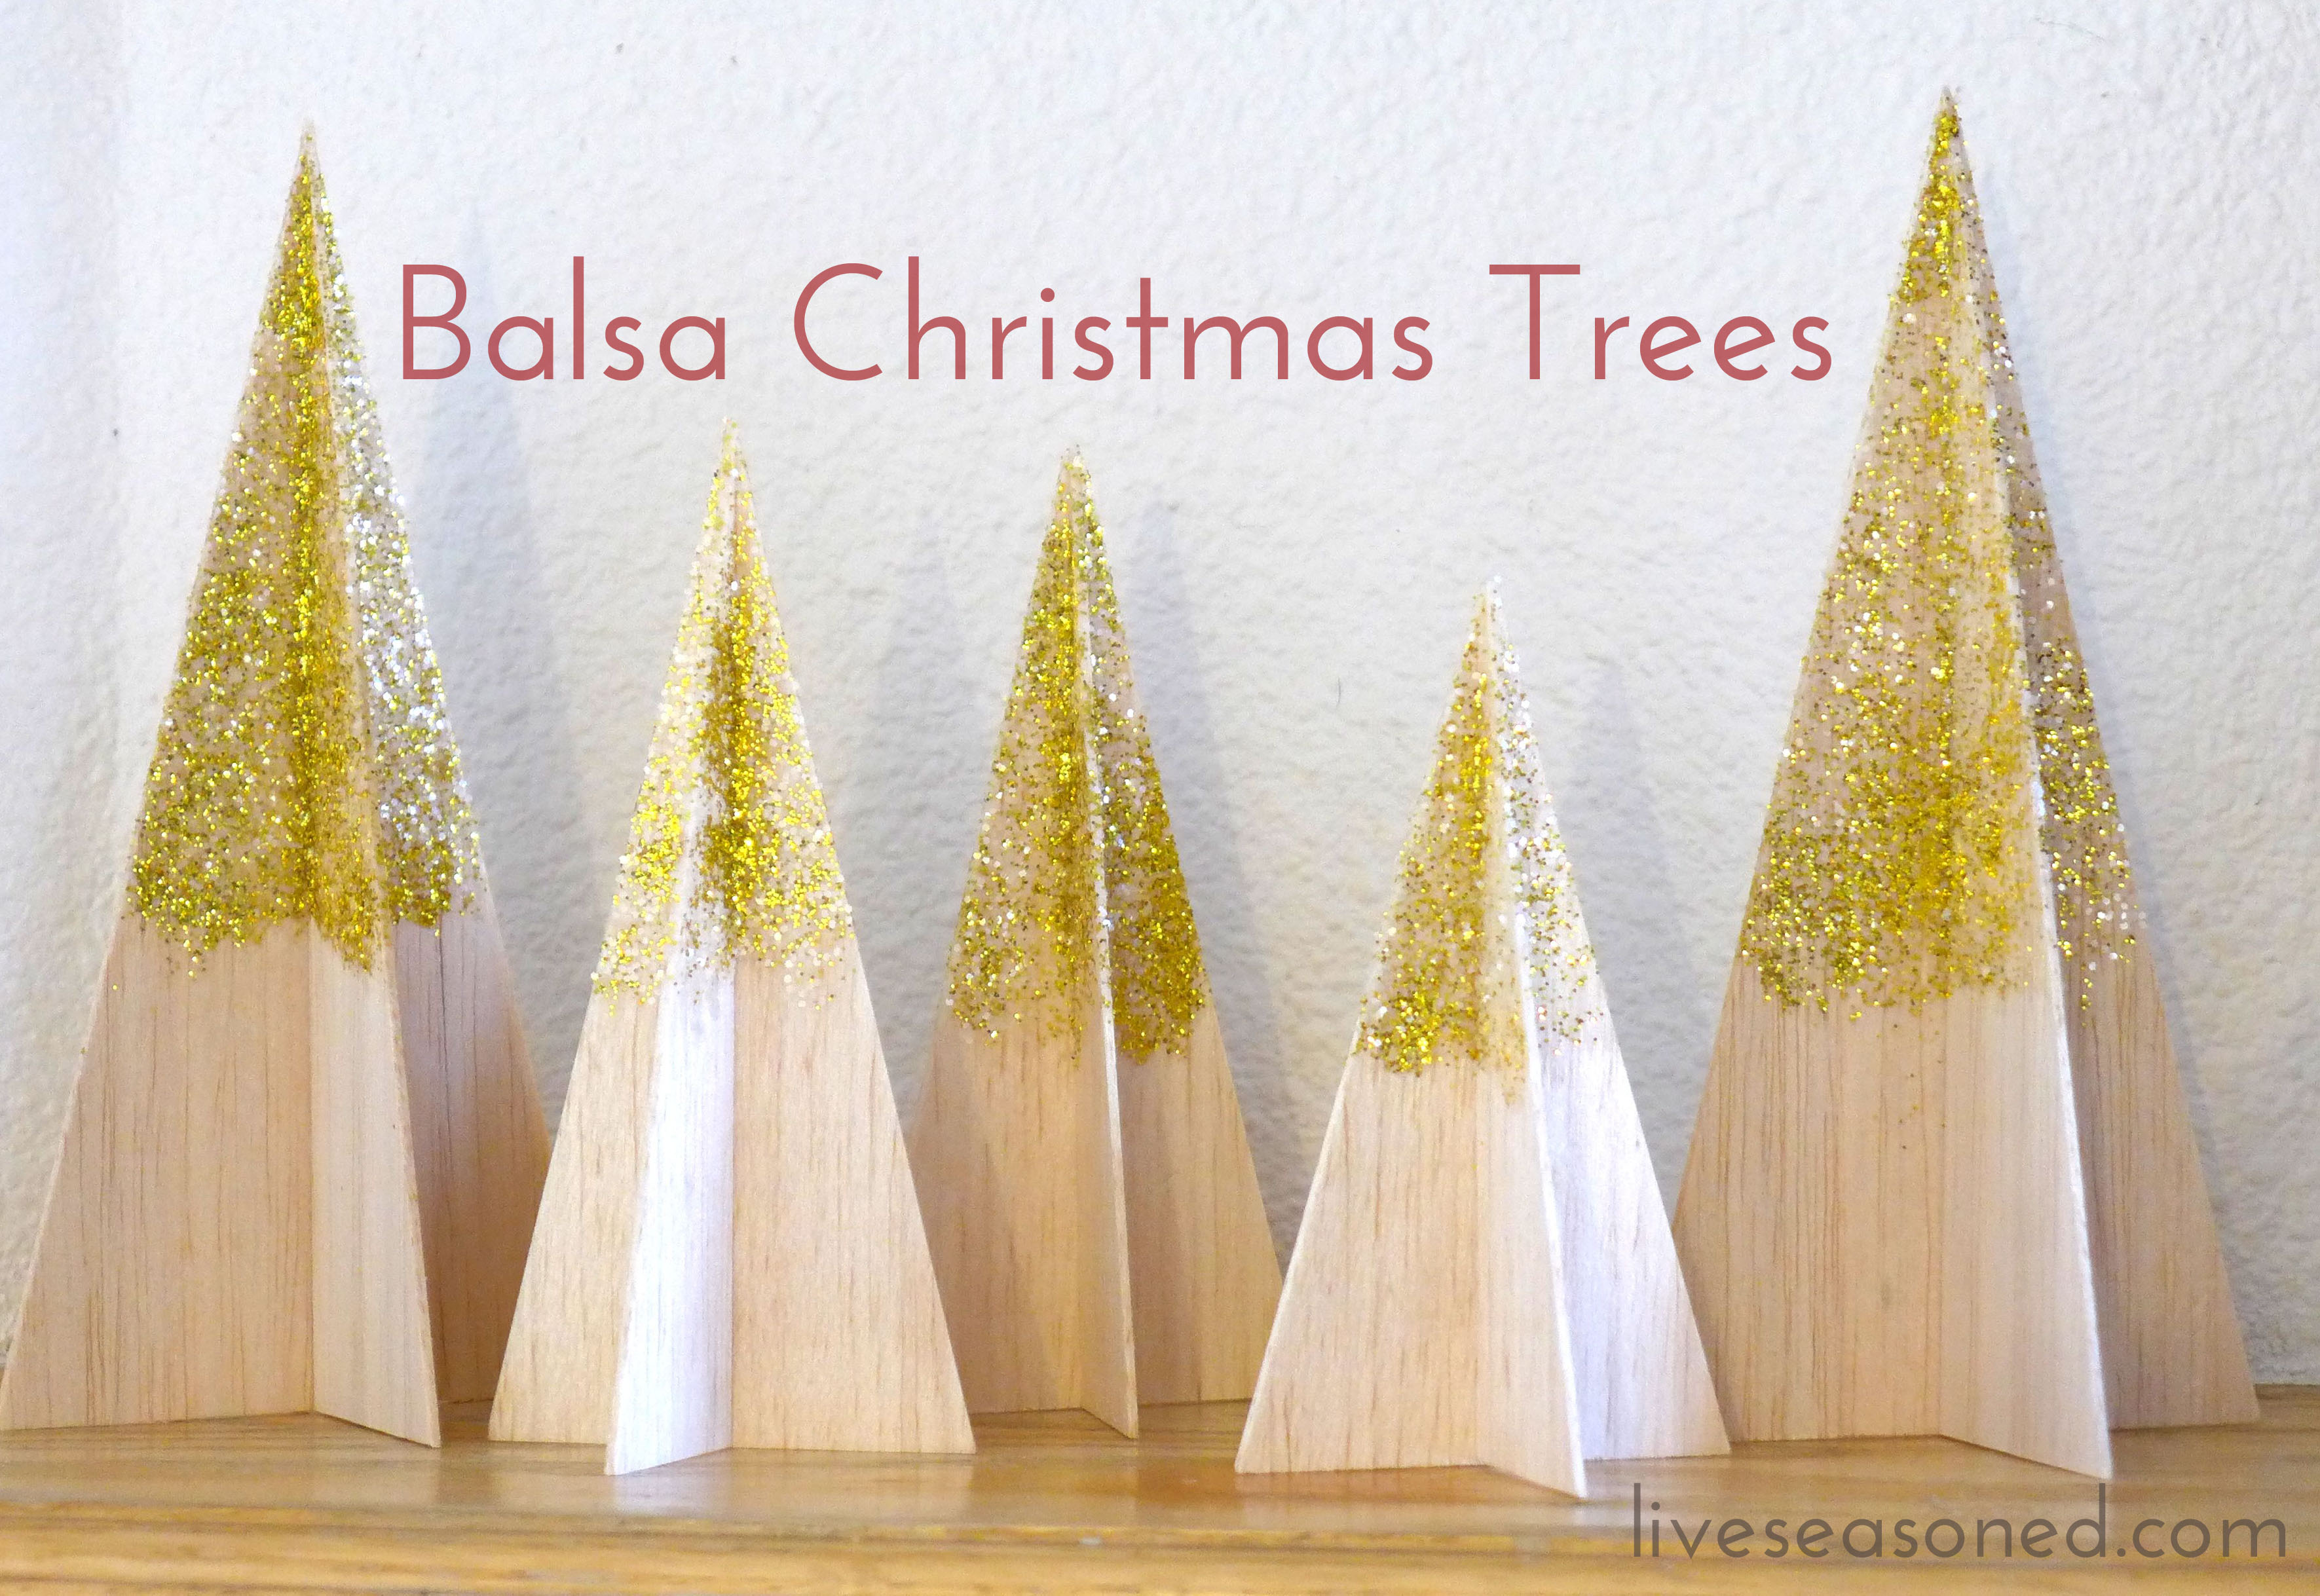
As I mentioned in my Elving post a couple of weeks ago, browsing Pinterest provided the inspiration for many of my Christmas decorations this year, including these simple Christmas trees. It started when I found an image from this post. I liked the simplicity of those trees and that they were made using balsa wood (no power tools or hard cutting required). I wasn’t as excited about how they were put together – mainly using glue to hold the pieces together. Having also come across this wooden tree post, I knew there was an easier way to build the same tree. And really, between those two posts, you have all the information you need for this project, but I’m happy to share my process photos below. And again I want to stress how quick these trees were to make – with all of the materials on hand, it took me less than an hour and a half to make the five trees from first cut to last dash of glitter!

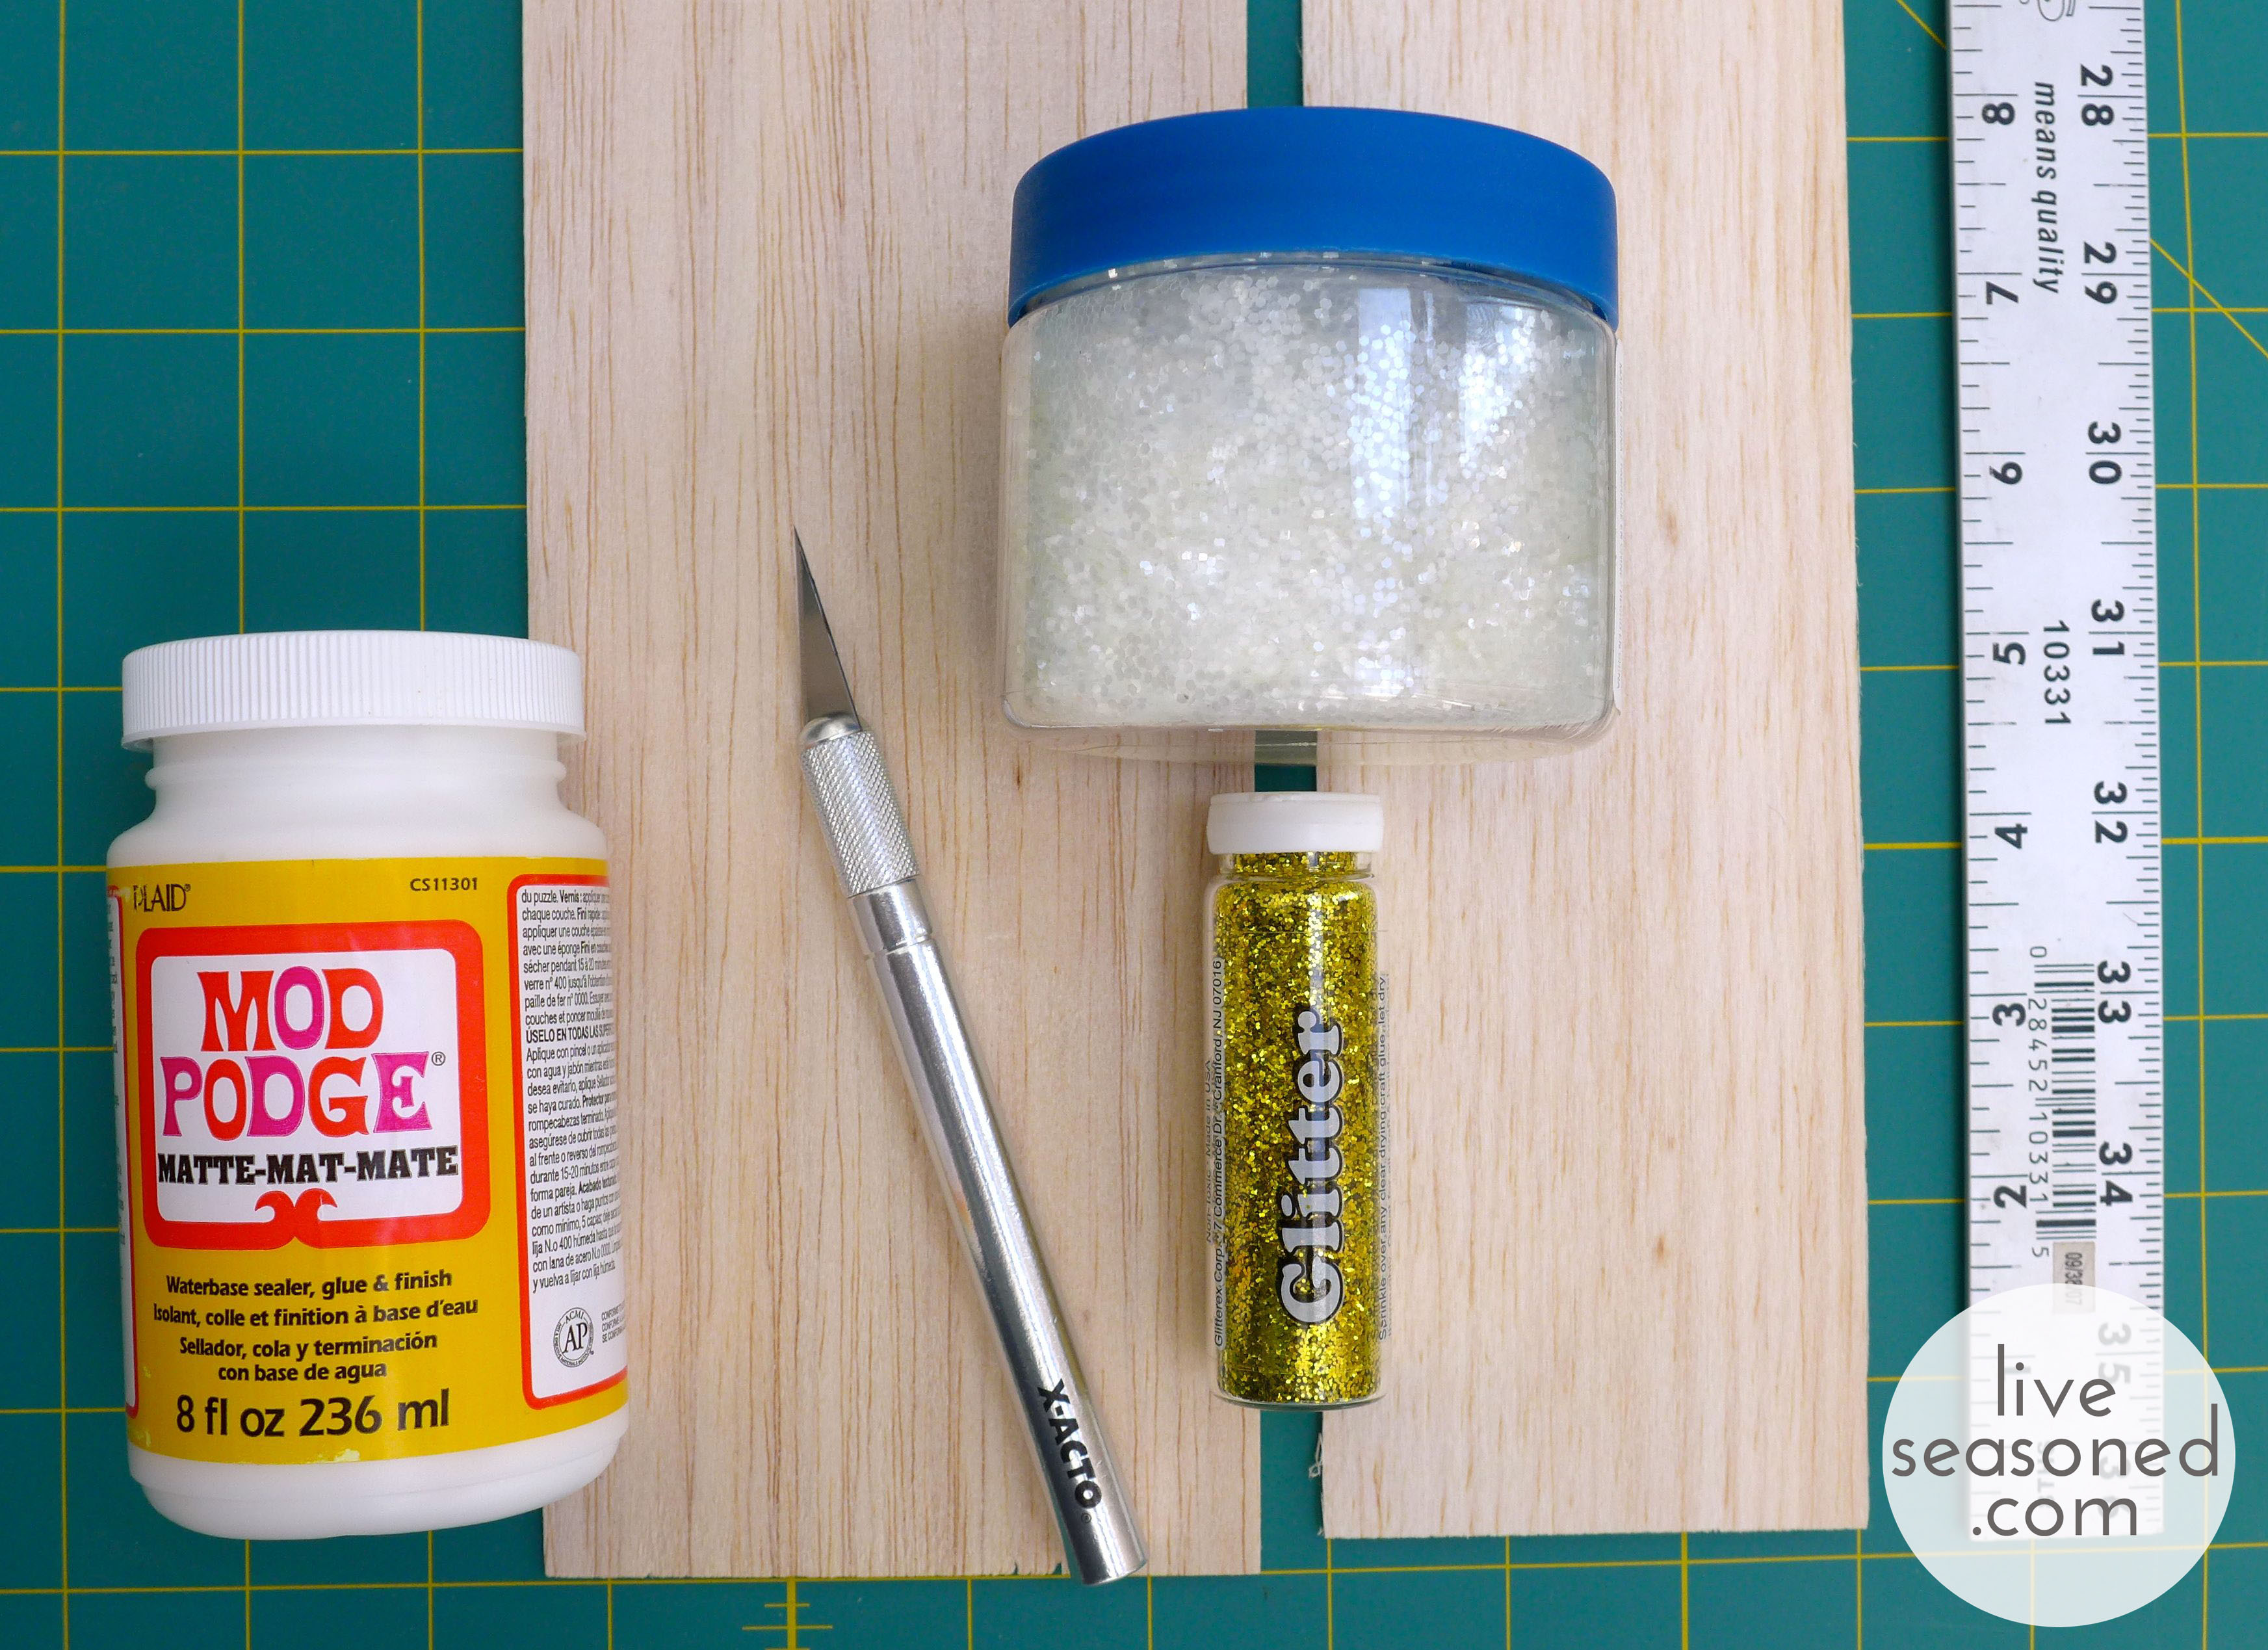
Materials & Tools
- balsa wood
- Mod Podge
- glitter
- Exacto knife
- ruler
- cutting mat or board
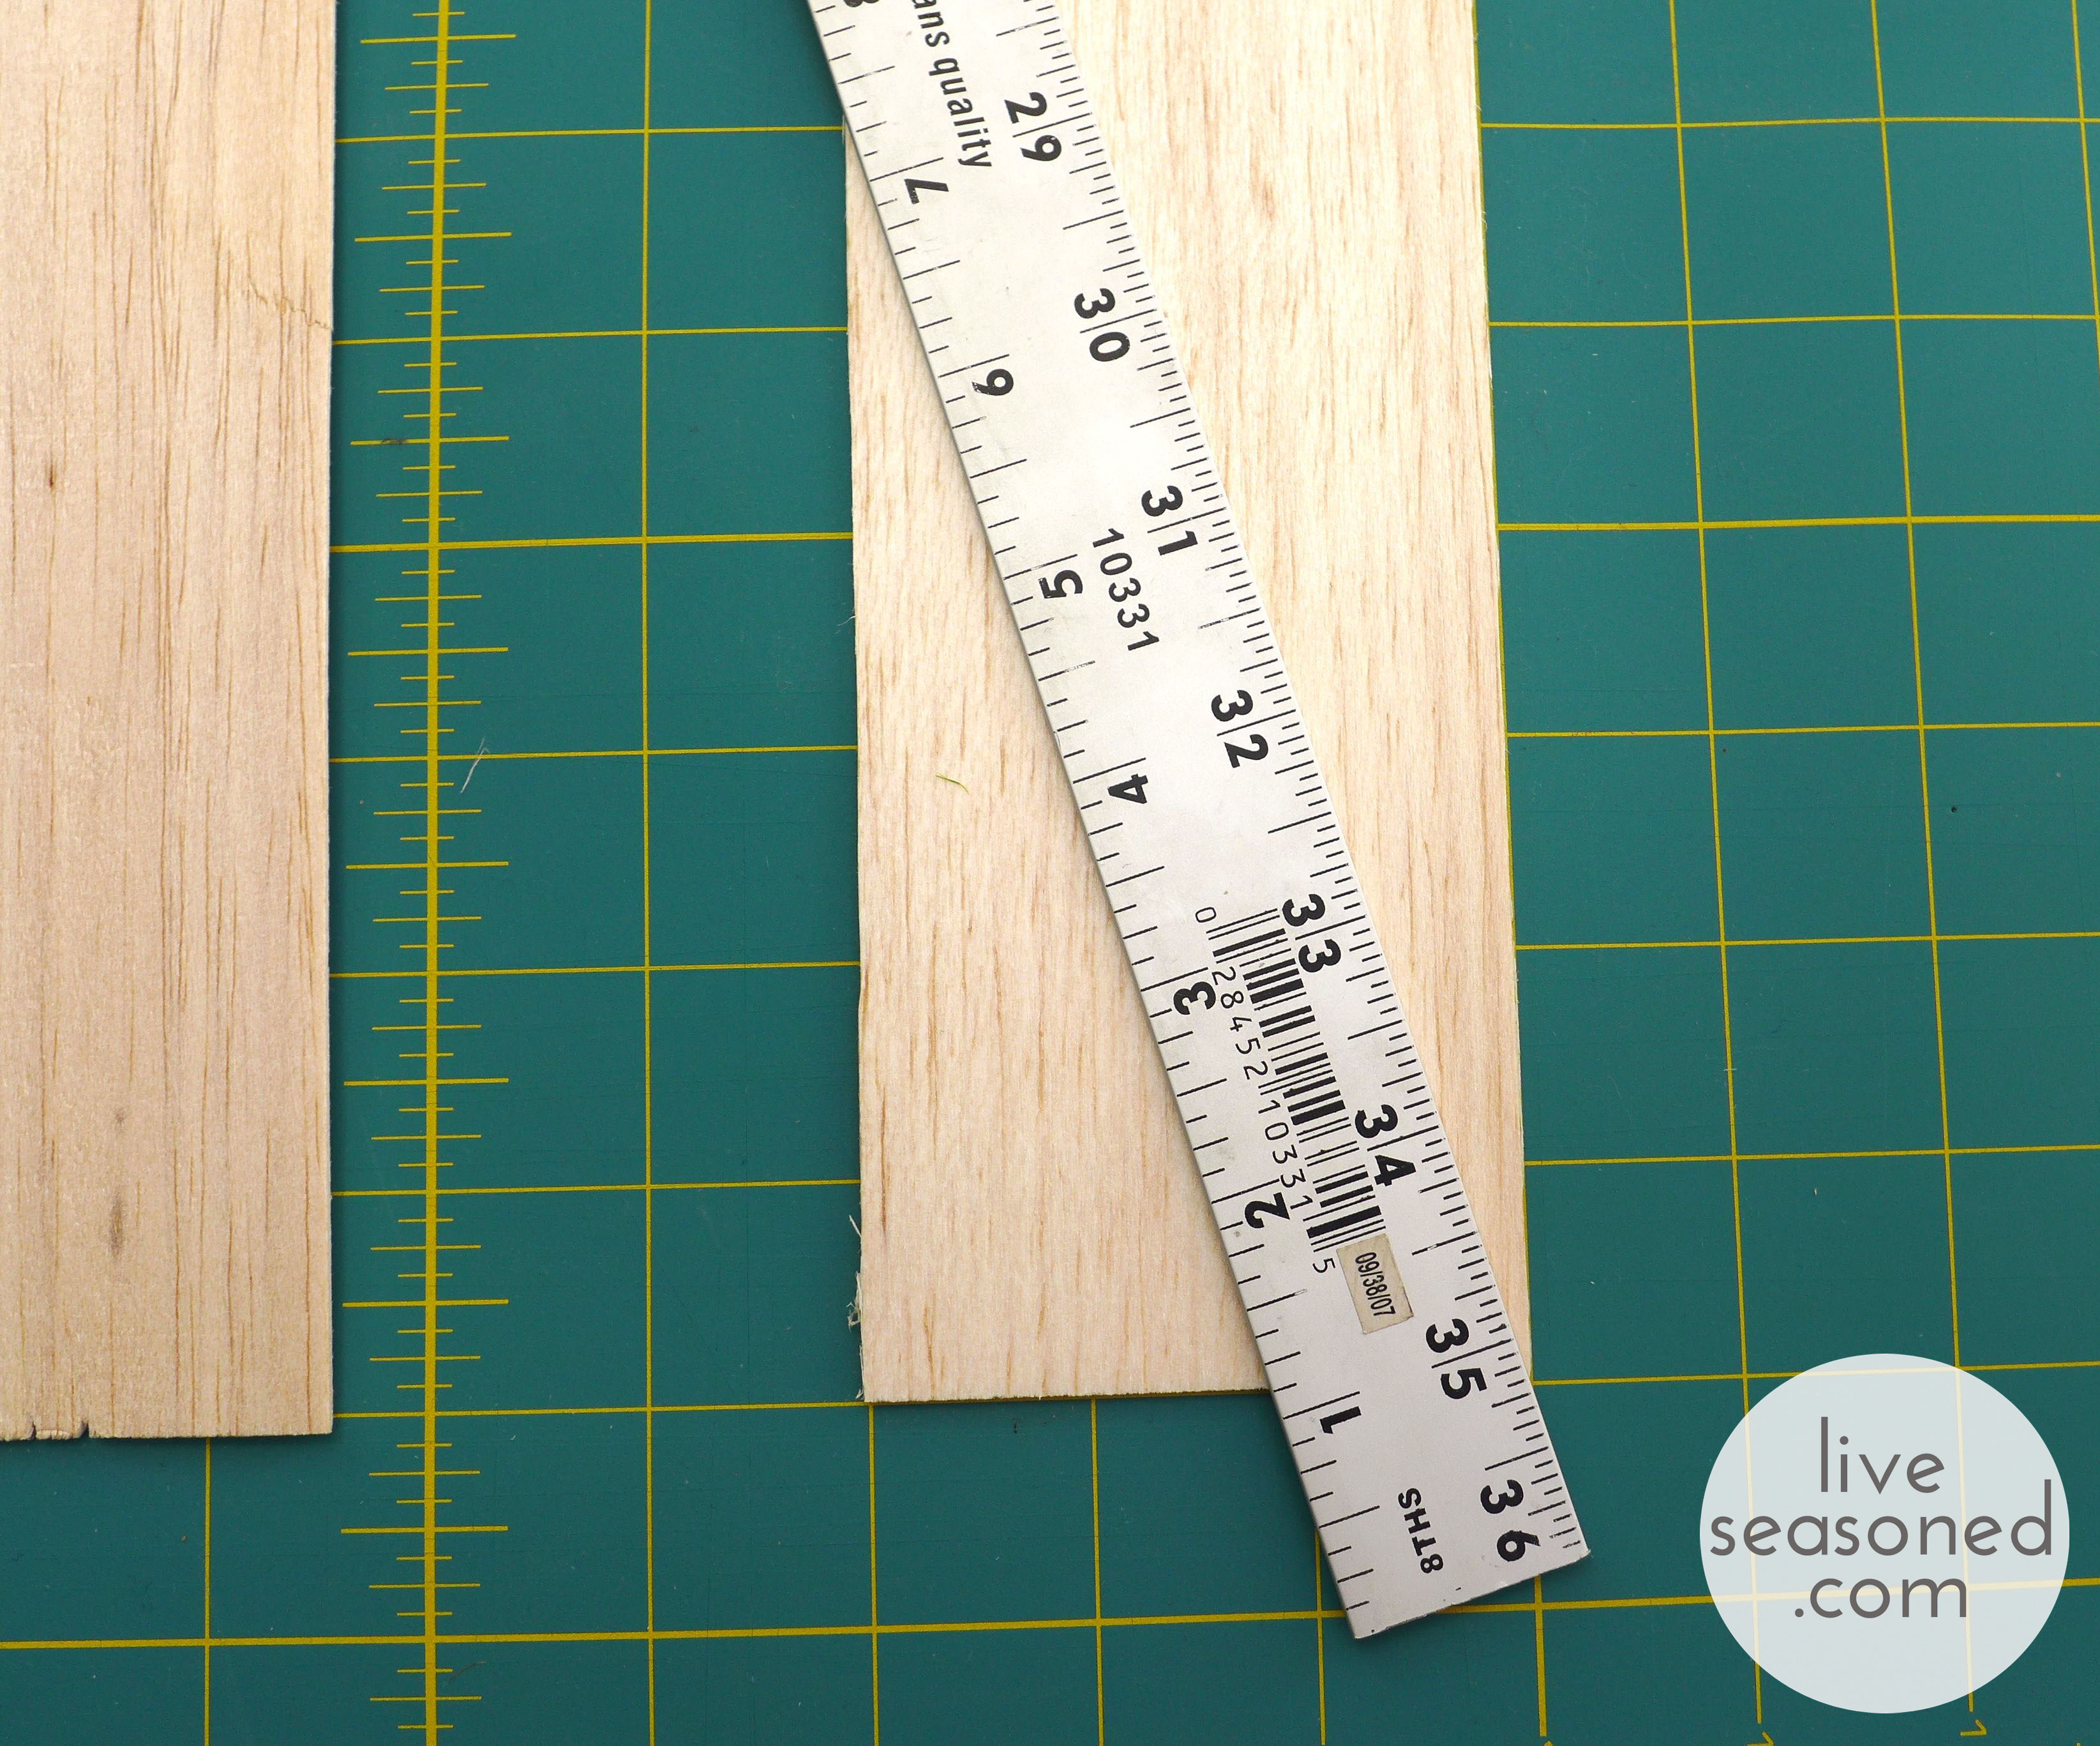
About the wood : You can find balsa wood at many crafts stores, but not all (some Joann’s and some Michael’s carry it, but not all). If you’ve never worked with it, balsa wood is extremely soft and very easy to cut with an exacto or craft knife. It comes is a variety of thicknesses and widths, and there is no strict rules as to what you should buy for this project. I picked up two 36” long and 1/8” thick balsa boards; one was 3” wide and the other was 4” wide.
Process
- Cut two isosceles triangles of the same size. I found that it was easy to do this without using a pen or pencil. Just mark the height of your triangle with a small cut, noting with a poke of your knife where the middle point of the board is width-wise. For example, the tree I’m cutting in the photo above is going to be 5” tall on the 3” wide board. The middle top point of the triangle is at the 31” mark on the ruler above. To cut the sides of the triangle, just place your ruler on the board, so that the ruler’s edge is at a diagonal from one of the bottom triangle points to the top middle point (as I did in the photo above). Make a cut along the ruler, and then follow this same process to cut the other side of the triangle.
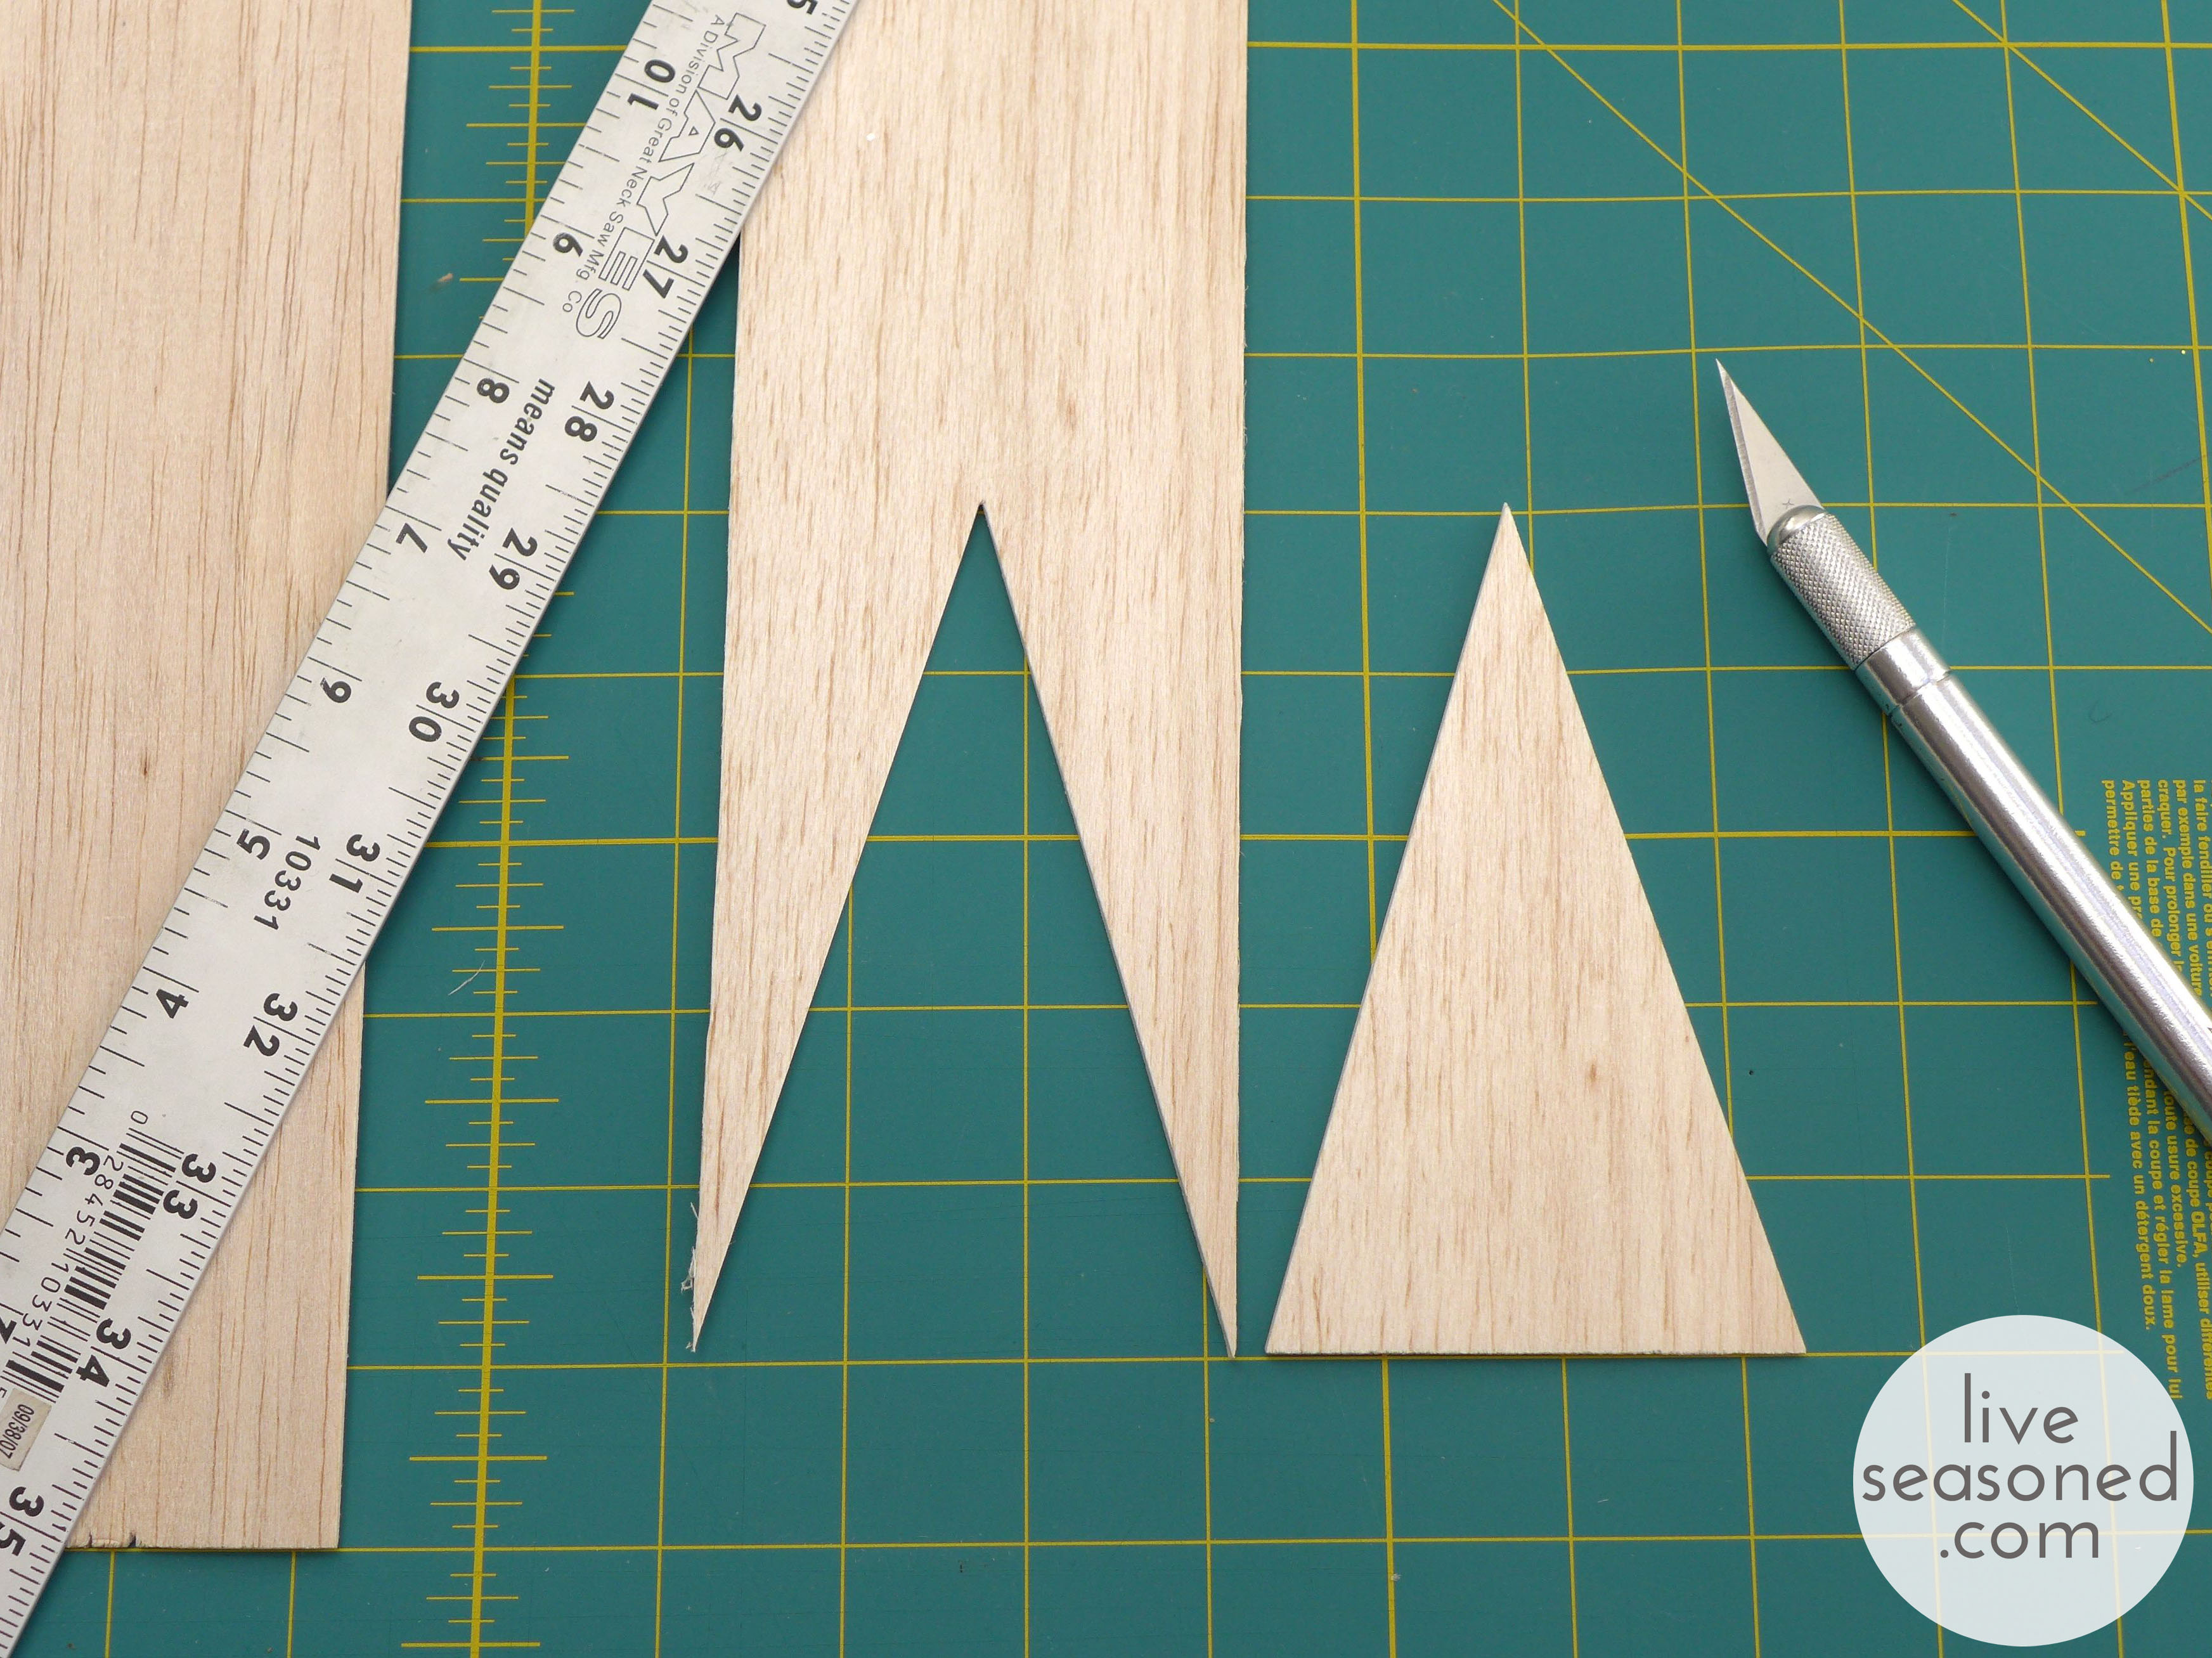
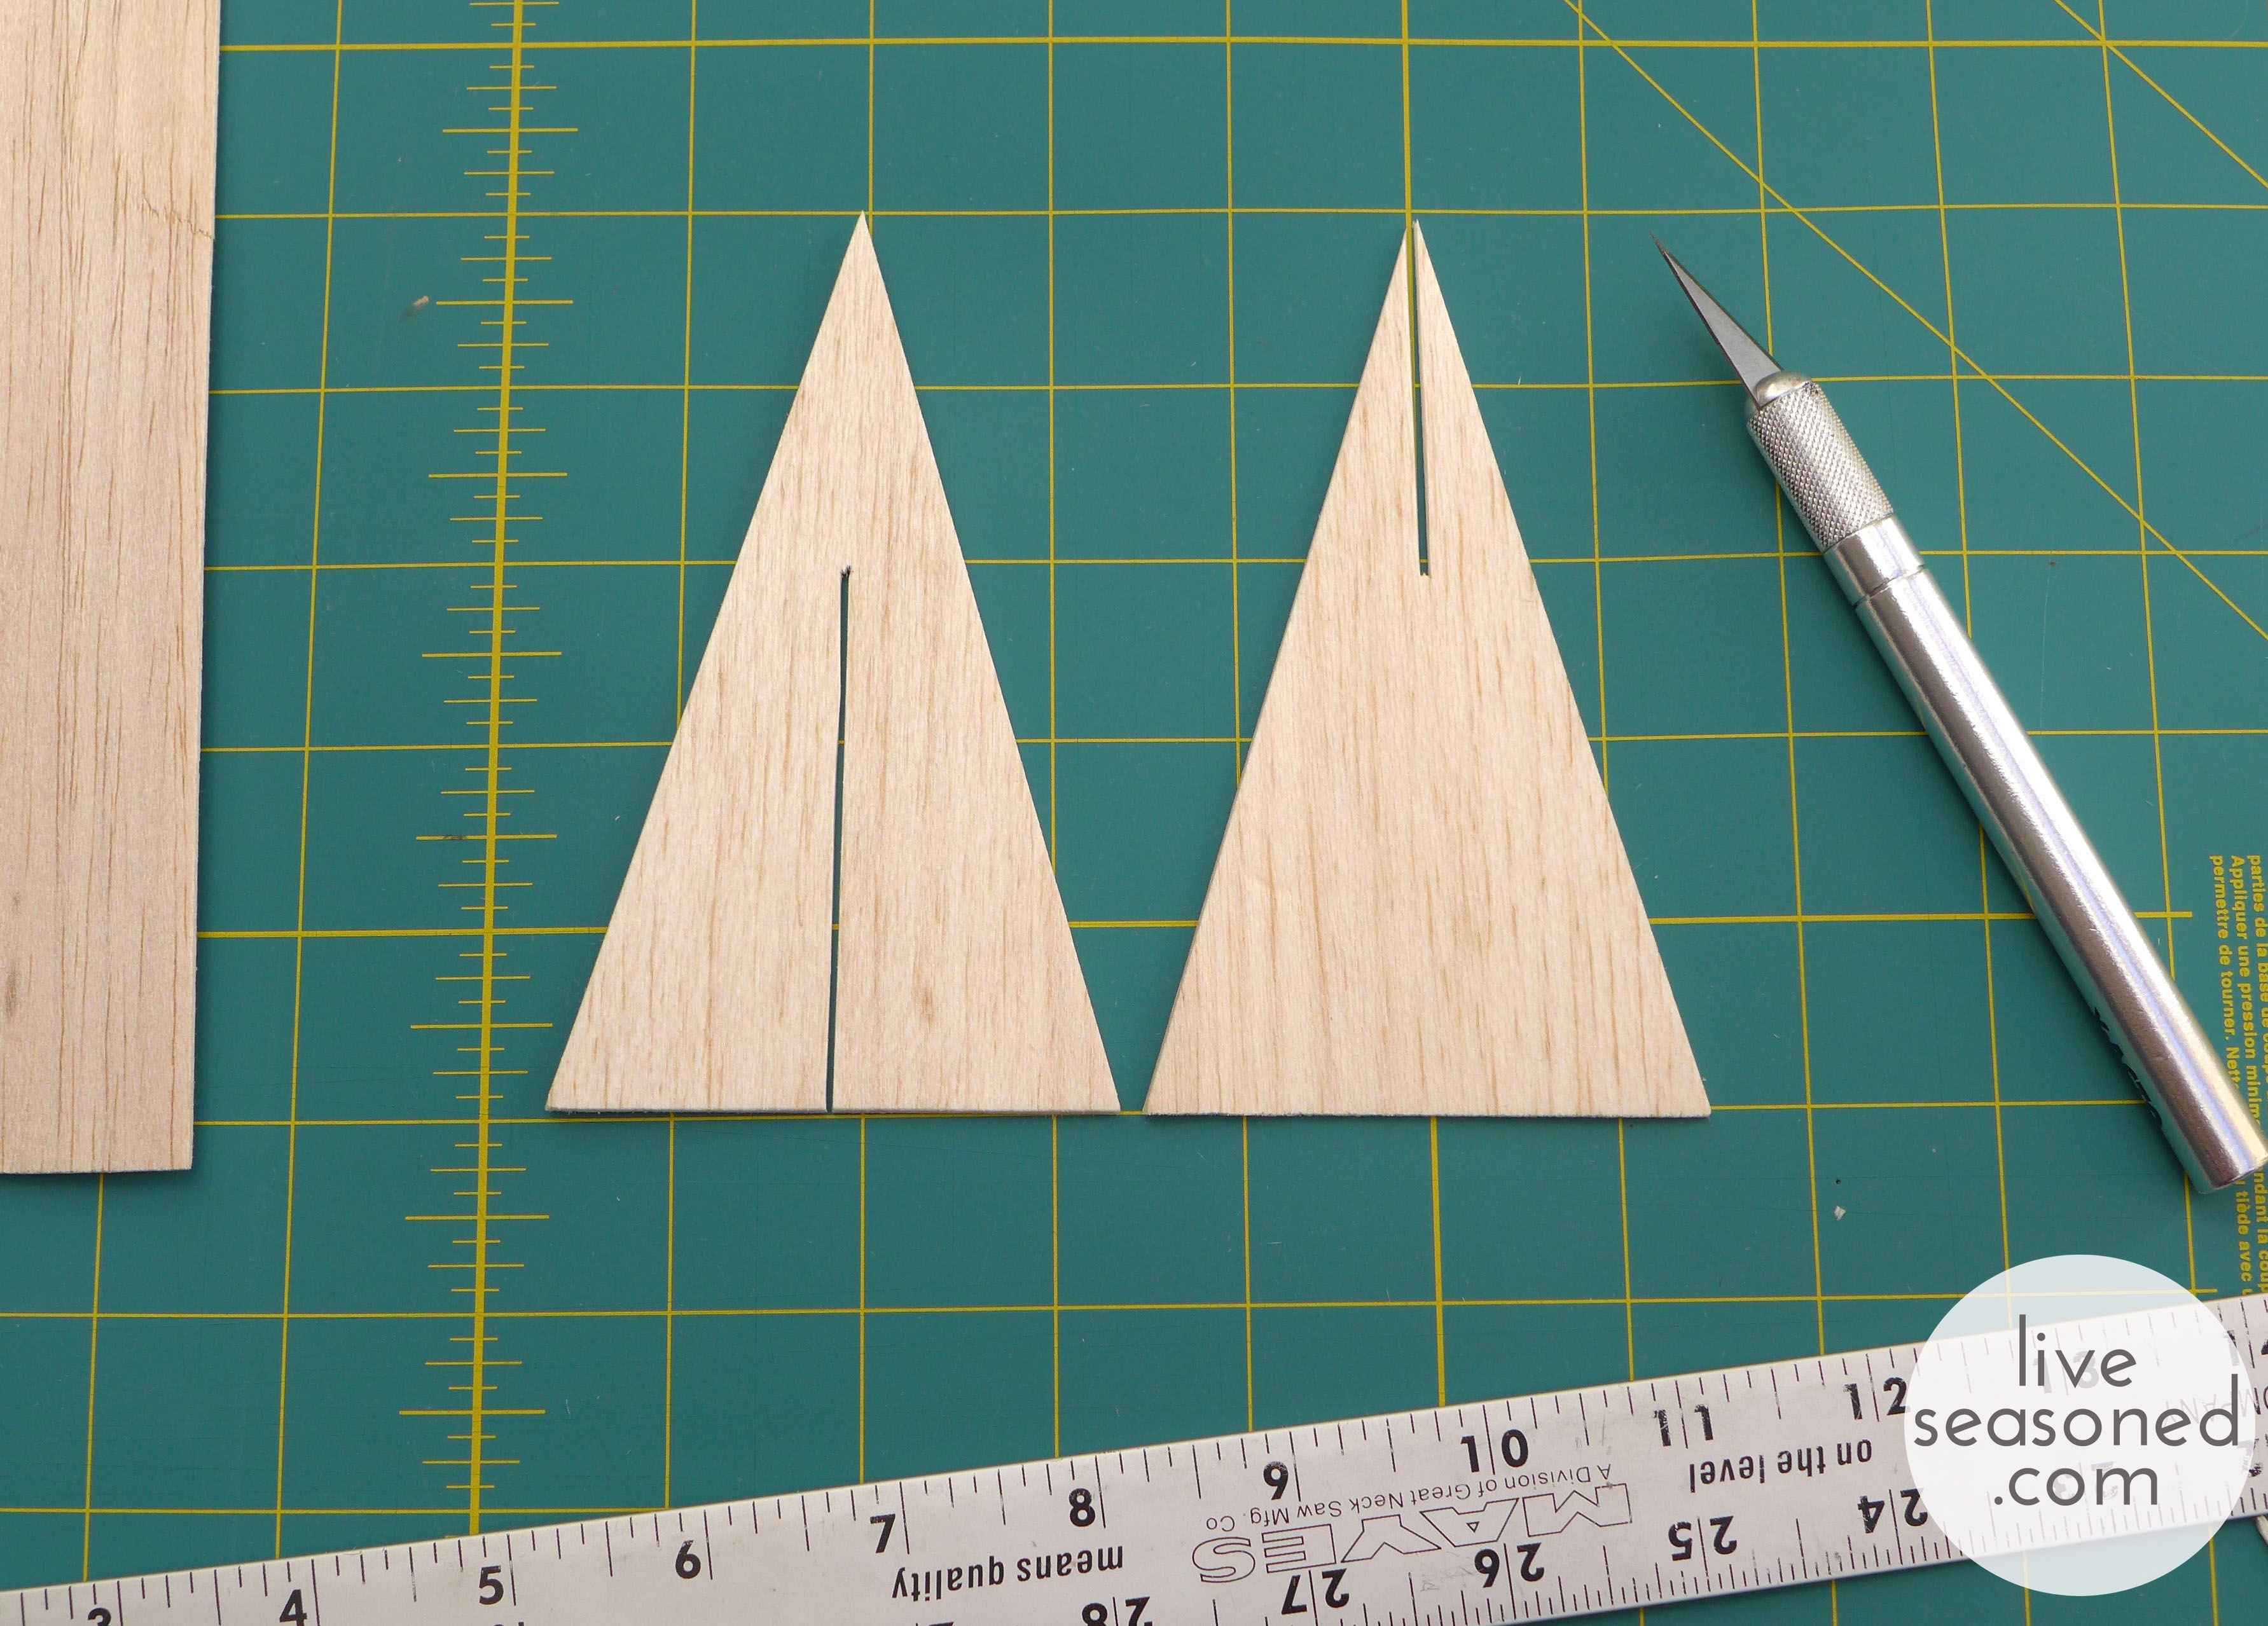
- Following the image above, cut the slits that will be used to fit your triangles together. You want to cut a slit in each triangle that is as wide as the width of your wood (1/8” in my case). One piece will have a slit that runs from the top middle of the triangle halfway down the height of the tree. The other triangle will have a slit that runs from the bottom middle of the triangle halfway up the height of the tree.
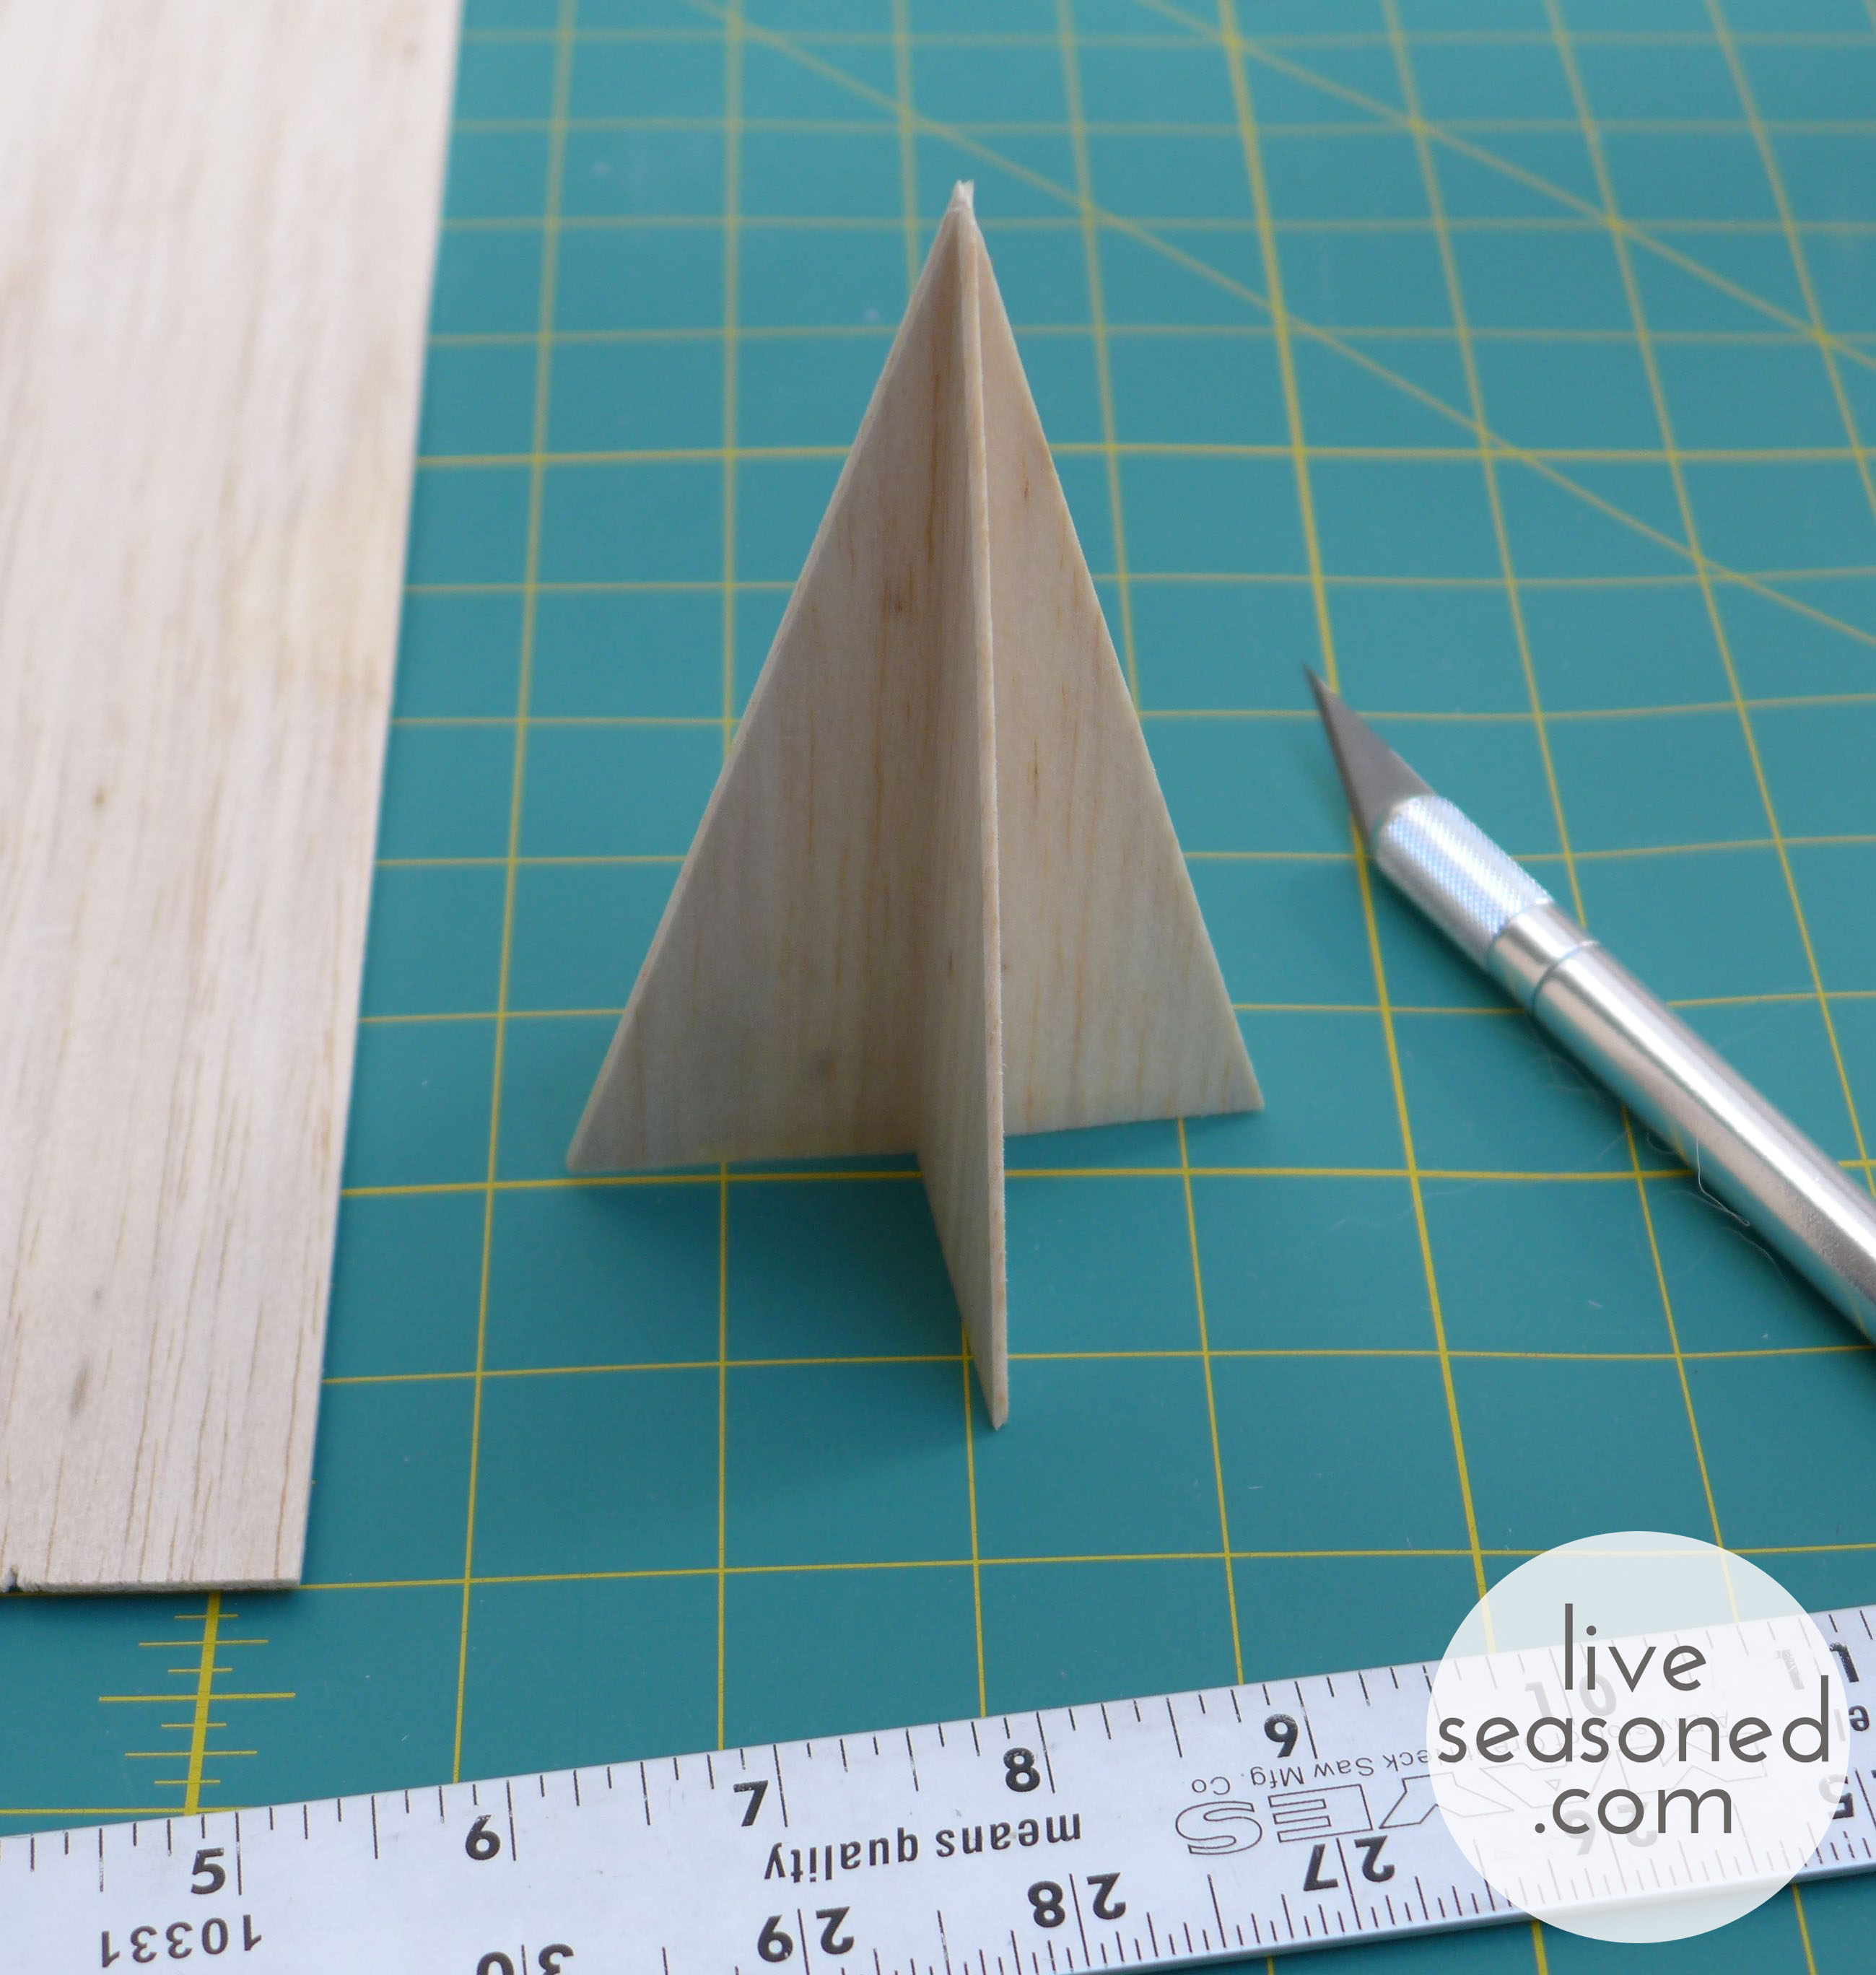
- Put your tree together! Placing the triangles perpendicular to each other, slide the piece with the bottom cut down over the piece with the top cut. You’ll produce a free-standing tree that looks like the photo above.
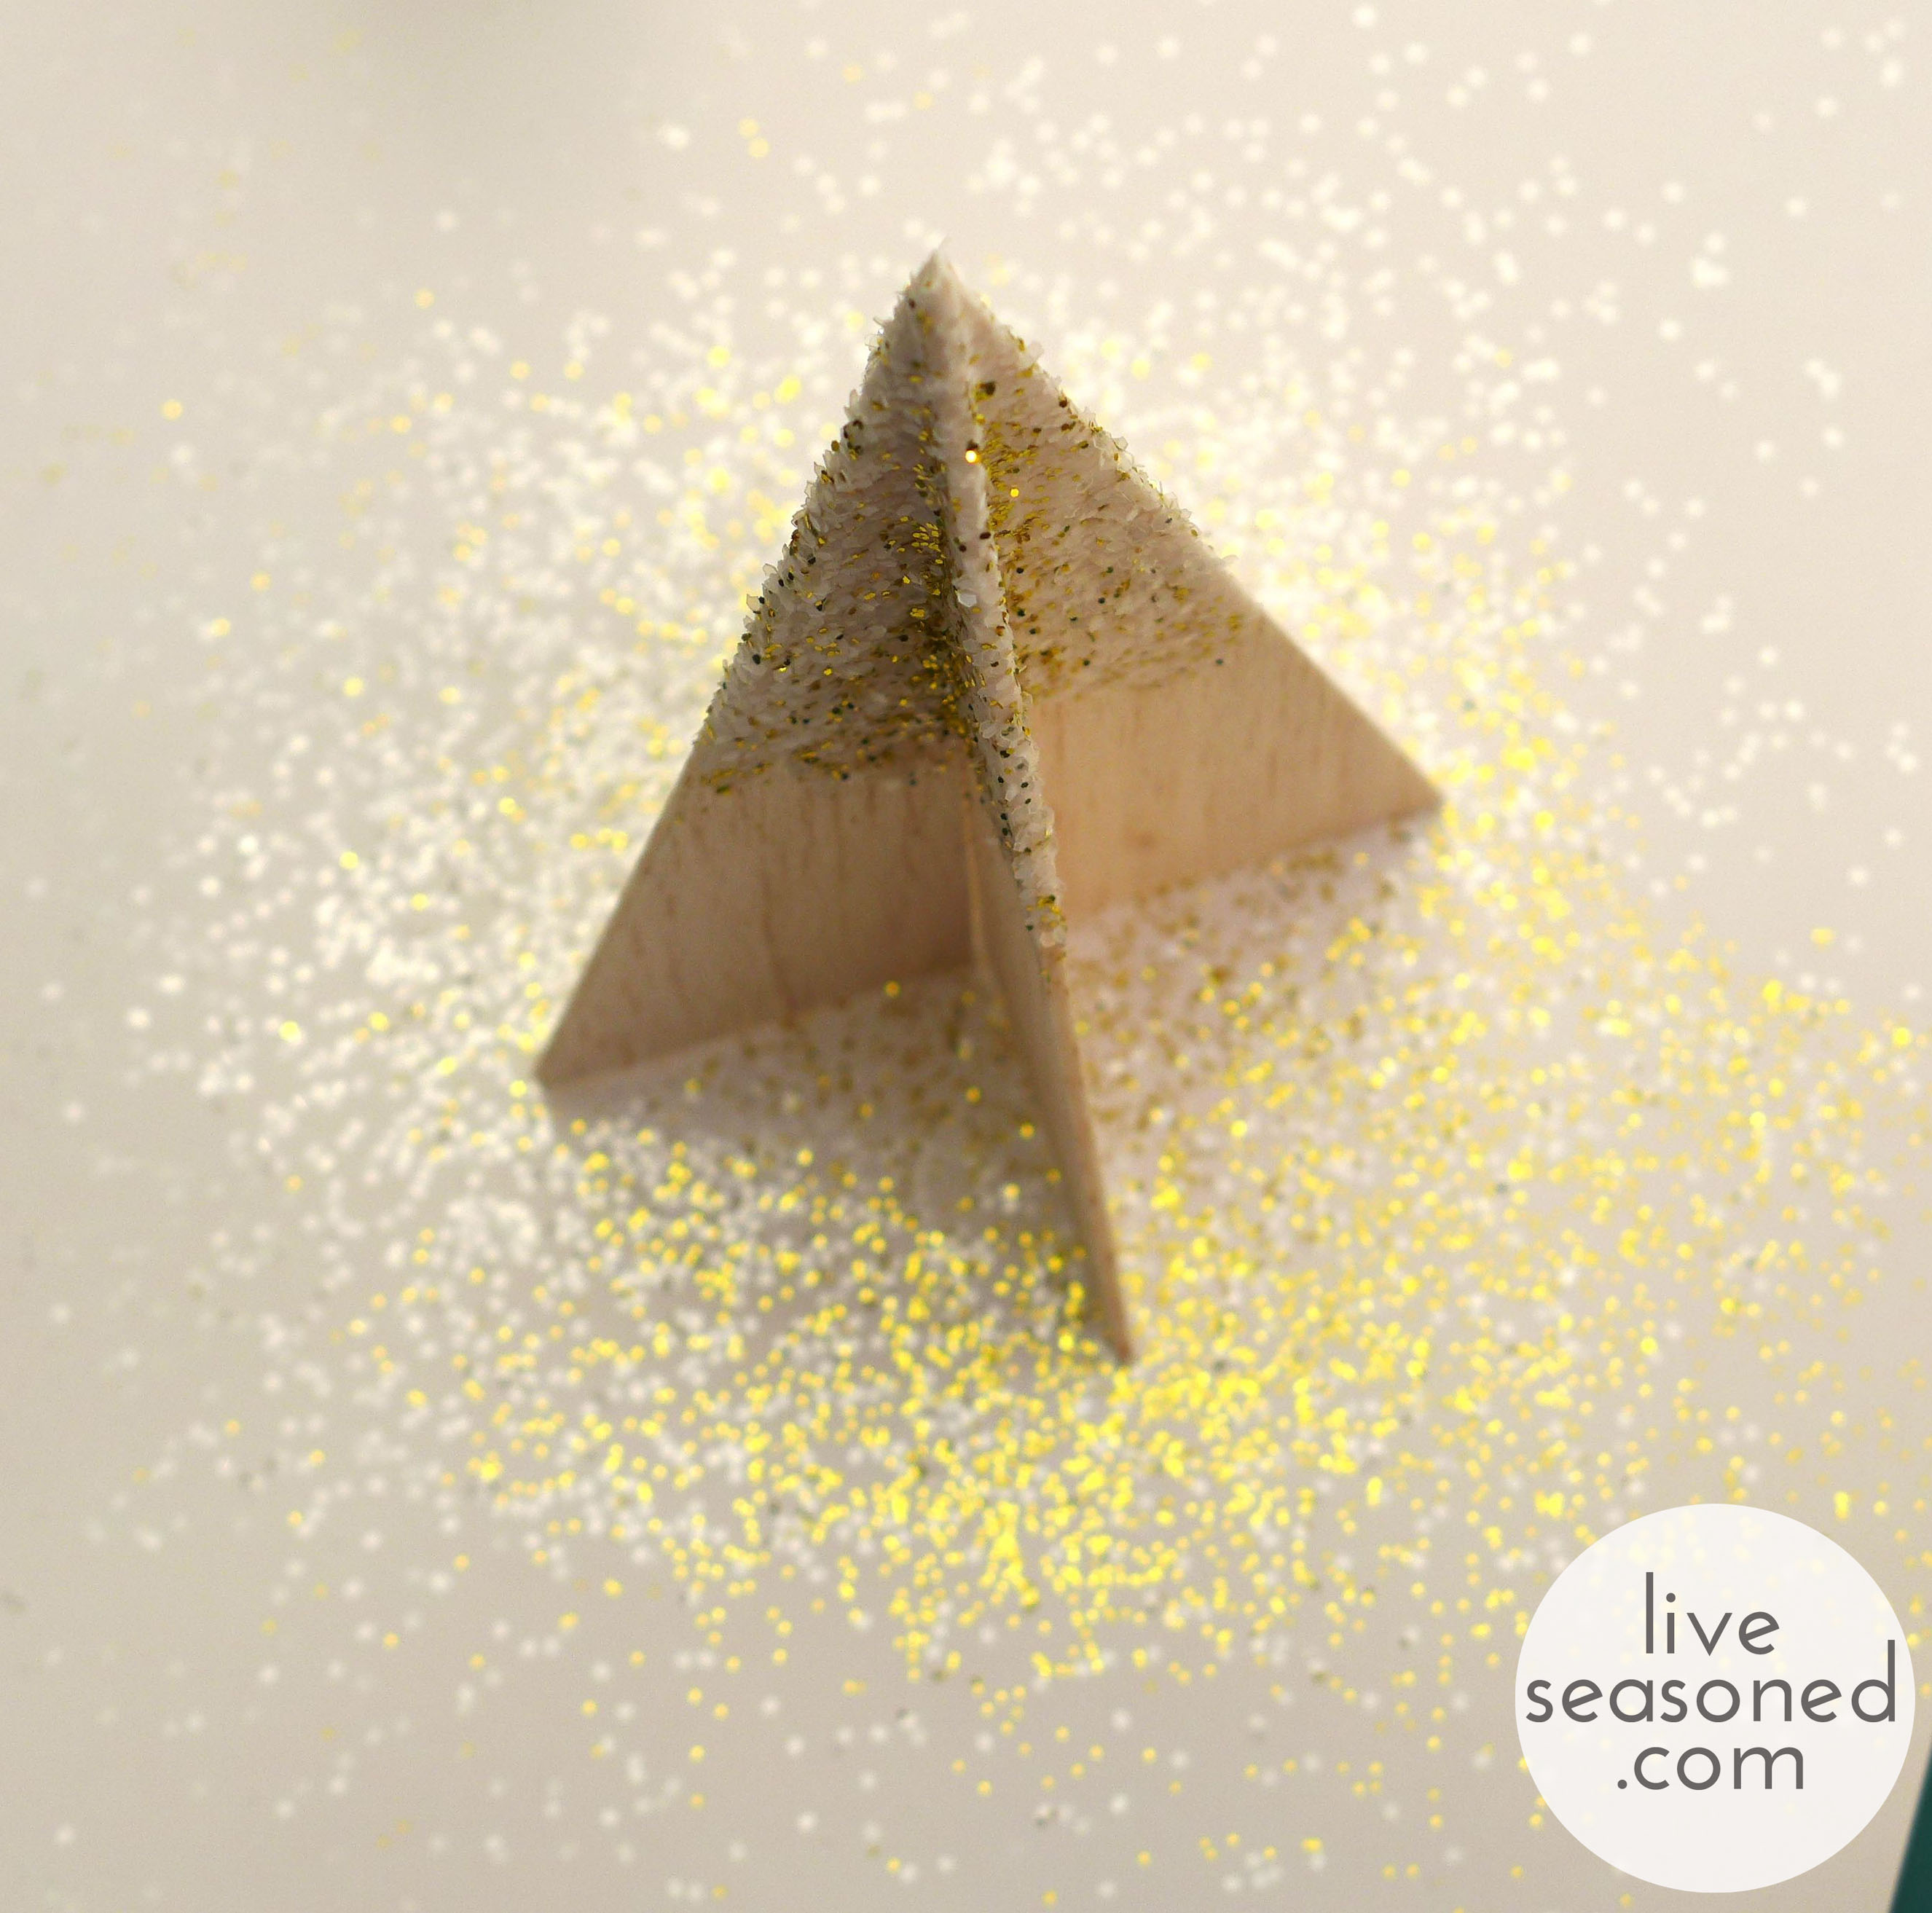
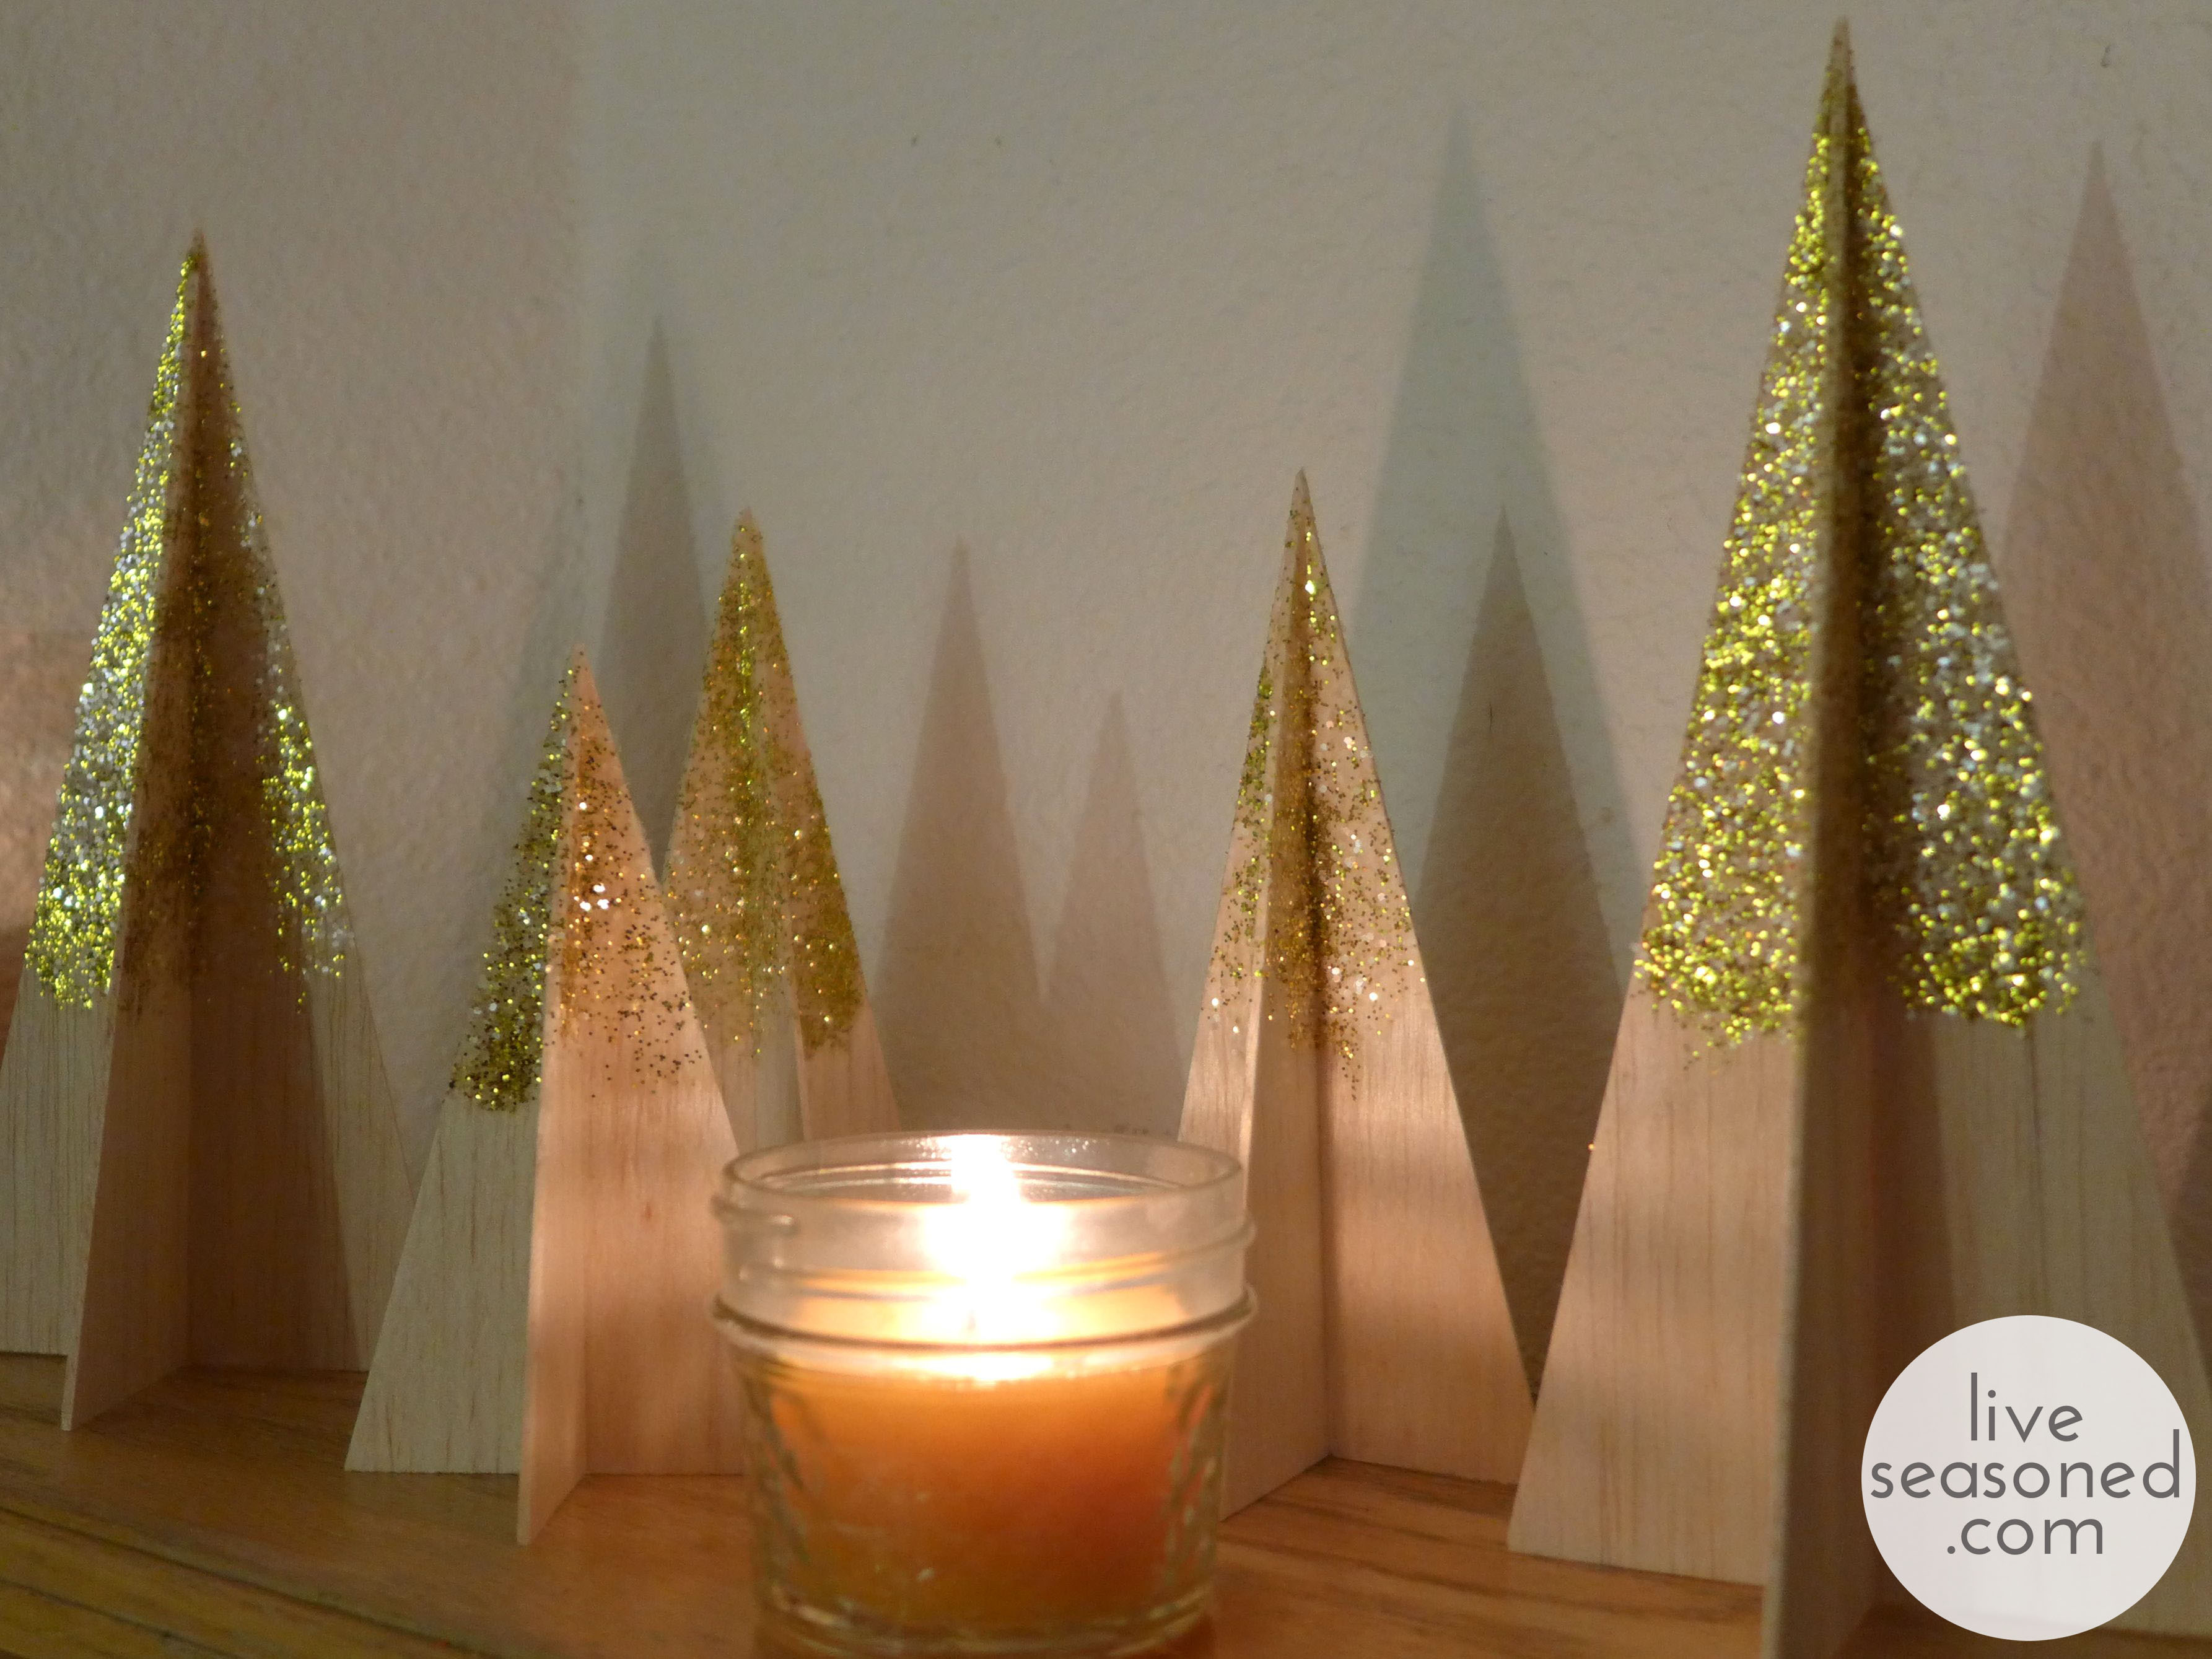
- Decorate your tree! I put a layer of Mod Podge on the upper portion of my trees, and then sprinkled iridescent and gold glitters over the surface. Do what you want: you could leave your trees natural, add glitter, or paint!
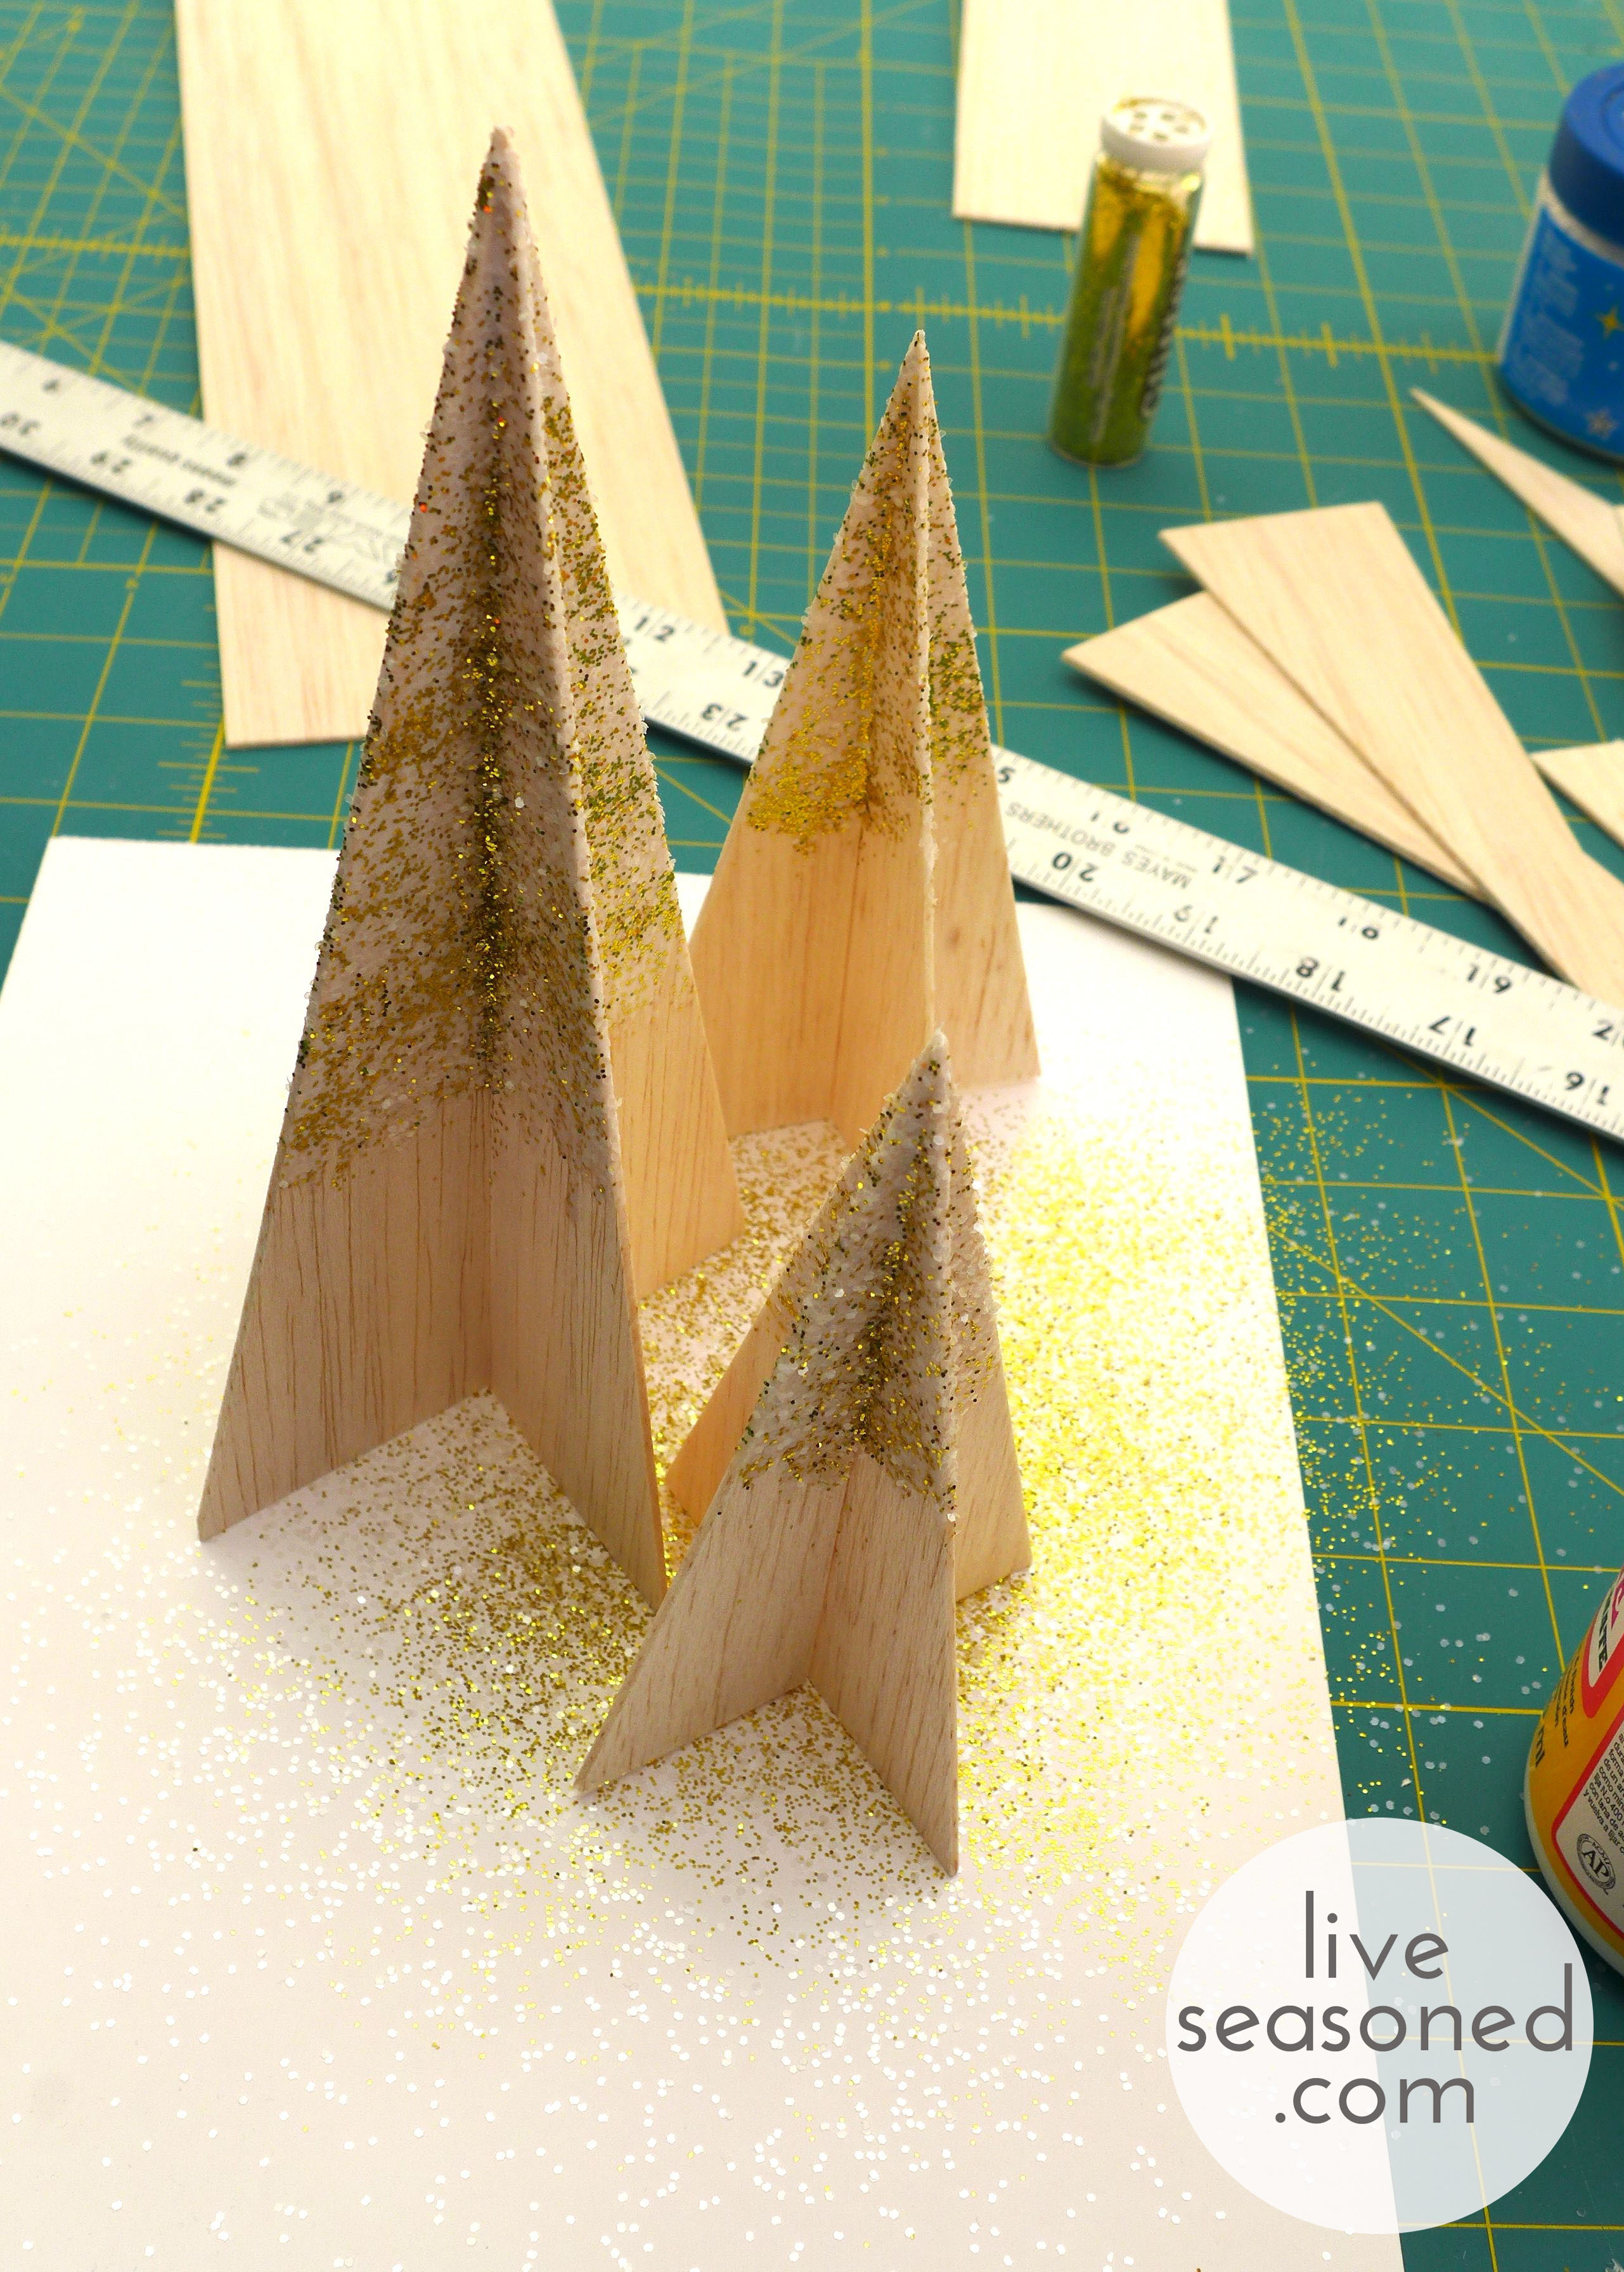
- Repeat the process making trees of different heights. From the 3” wide board I made two trees that are 6” high and one that is 5” high. From the 4” board I made two 8” high trees.
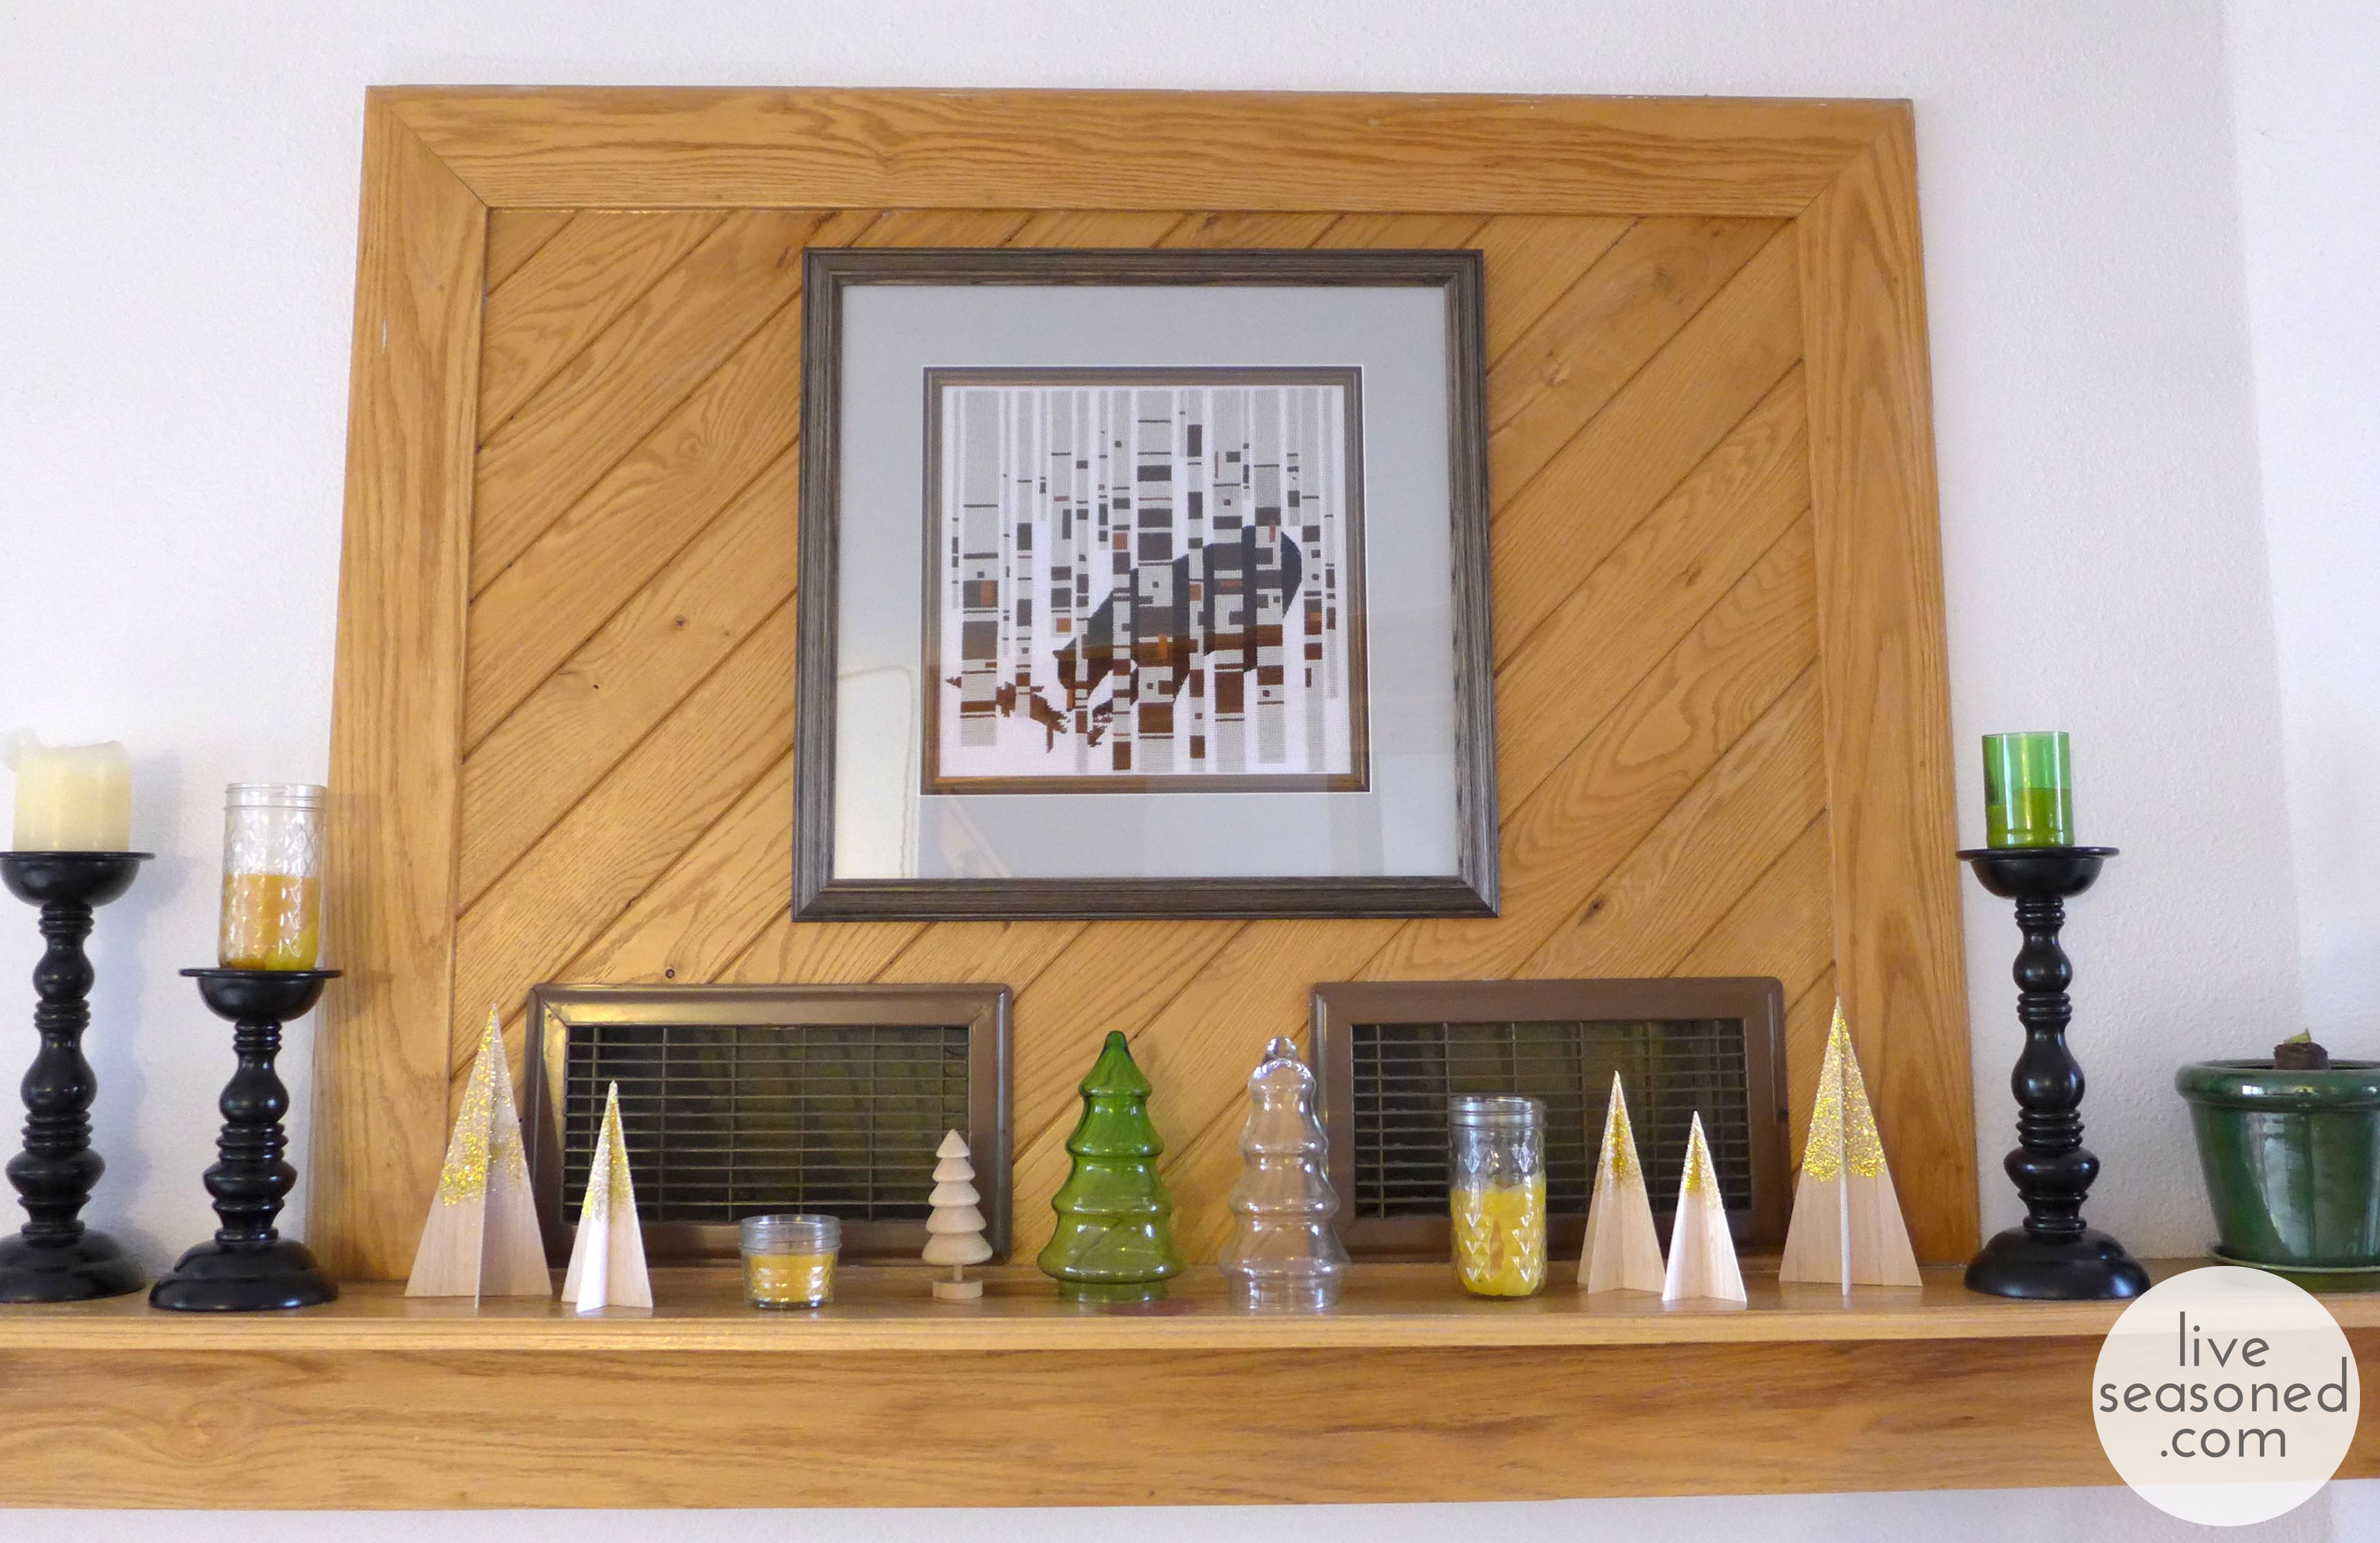
I used these trees for simple forest scene on the mantel ~ pairing them with a cute little wooden tree from Michael’s and a couple of old glass trees that were once candy dishes (they have an opening on the bottom, but without their lids, they’re just glass trees). In addition to the trees, I added a few beeswax candles that were leftover from our wedding. You can read about how we made the candles (choosing your wick is key) and cut the green bottles here and here.

It’s so much fun to see the trees sparkle in the candlelight and to see their shadows on the wall. Calder mentioned that they also look like mountain peaks, which I think is really true when they are grouped together creating overlapping shadows!
DIY Advent Calendar
It’s time guys! You can finally start singing Christmas carols and hanging holiday wreaths! I spent this past week with my dearest friend who is also on the ‘no Christmas cheer until Thanksgiving is here’ train so it wasn’t until Saturday night that I crafted this little advent calendar. It is the sweetest little addition to a bookshelf or mantle. There is nothing more childlike than counting down the days until Christmas, but really, if we didn’t count them they would just fly right by. Advent calendars remind me to crank up the Christmas tunes, send out those glittery cards and craft gifts for my friends and family.
This sweet miniature advent calendar is easy to make and pretty perfect for the wee ones to create. No exacto knives or blowtorches involved here. The fun doesn’t end with the making of this little advent chest either, then you must fill it with tiny treasures and on Christmas eve you have to unscramble the secret picture! Put on a Christmas record pandora and pour yourself some eggnog mudslides.
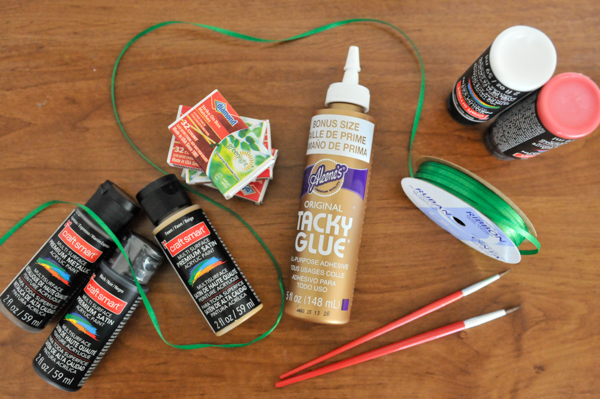
Supplies:
- 24 mini match boxes
- Tacky glue
- Paint brushes
- Paints
- Ribbon
- Card stock or construction paper


Steps:
- Glue 8 matchboxes together vertically. Repeat two times so that you have 3 tall stacks each with 8 matchboxes each. Glue the three stacks together side-by-side like shown.
- Once the chest is securely glued, about 15 minutes, remove all the matches from the boxes and set aside for another project or that horrid moment when your power goes out while you are cooking dinner or washing your hair.
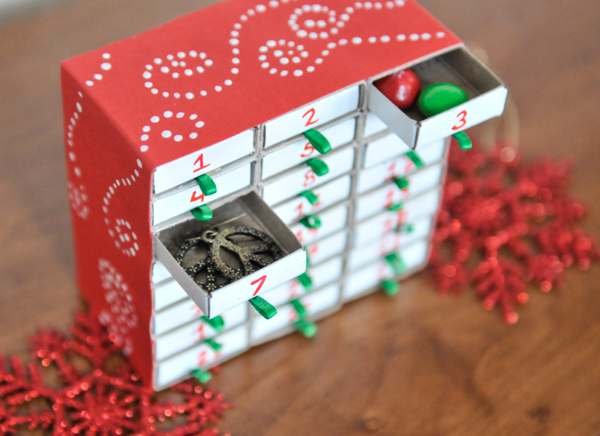
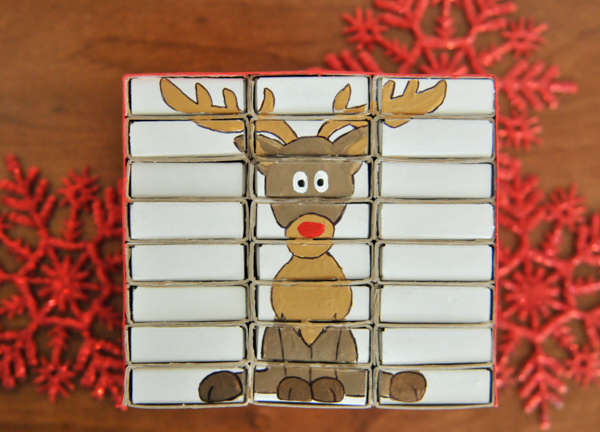
- Paint a holiday design on the chest. I choose to paint a reindeer. Some other ideas are a tree, an ornament, a candy cane, a toy soldier, santa or maybe a kitty wearing a santa hat (I wish I had that kind of skill). Allow the design to dry completely.
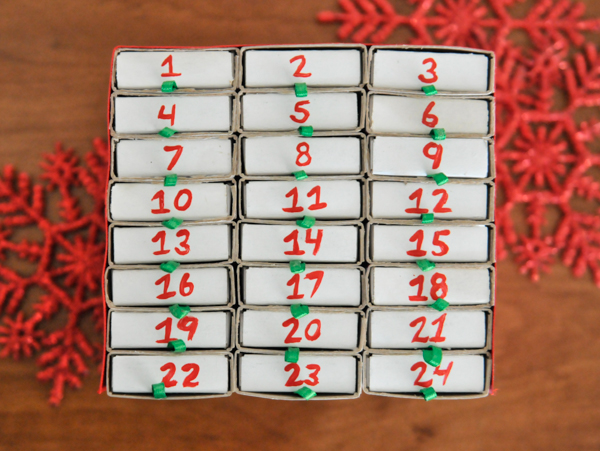
- Remove each drawer and randomly number them 1-24. You can use acrylic paint or a marker.
- Attach a small ribbon loop to the bottom of each drawer on the numbered side. Simply squeeze a dab of glue, press one end of the ribbon onto it and then squeeze another dab of glue and press the other end onto it forming a loop. Allow each drawer to dry completely.
- Place the drawers back into the chest. You can place them in order or randomly, either way the painted design on the back should be scrambled.
- Finally, cut a piece of card stock or paper to cover the top and sides of the advent calendar. I cut a strip of red card stock and dabbed a few dots of white paint to make some snowflake inspired swirls.
- Fill the drawers with little candies, notes, event tickets or even jewelry.
- As each day passes, open the drawers and put them in backwards so the painted design side is now facing forward. On Christmas even you’ll be left with a mini puzzle picture to unscramble, good luck!


Think you’ll give this quick Christmas craft a try? I had a bunch of fun creating this advent calendar because it is cheap and disposable. There wasn’t a ton of pressure to paint the perfect reindeer or perfectly align the $1 match boxes, it was merely a little project to jumpstart my holiday crafting sessions and an excuse to eat a few peanut butter M&Ms every day until Christmas. Cheers!


Elving : Part 1
Ok, after I hit publish on this post, my attention will turn back to Thanksgiving (at least until Thursday!), but today we thought it would be fun to jump ahead and give you a sneak peek of the Christmas crafting that’s begun in our house. Somewhere along the way, Calder and I started referring to this as “elving” ~ sneaking away to my craft room to either work on Christmas presents or decorations. Today is labeled “Part 1” because I’m sure this will be the first of many elving posts from the Seasoned sisters!
On Friday, I shared a picture of one of the Alex-friendly ornaments for the tree. Along with the filled balls, I’m also sewing a few simple felt ornaments. I have to admit that I really leaned on Pinterest for ideas this year, getting my inspiration for the ornaments from photos I saw while browsing pins and then just putting my own spin on them.
Another Pinterest-inspired project is going to come from the white trees and ribbon of moss in the photo below. This little project surprise is something that’s so simple, and I’ve wanted to make it for years. So I may be a little too excited that it’s finally happening.
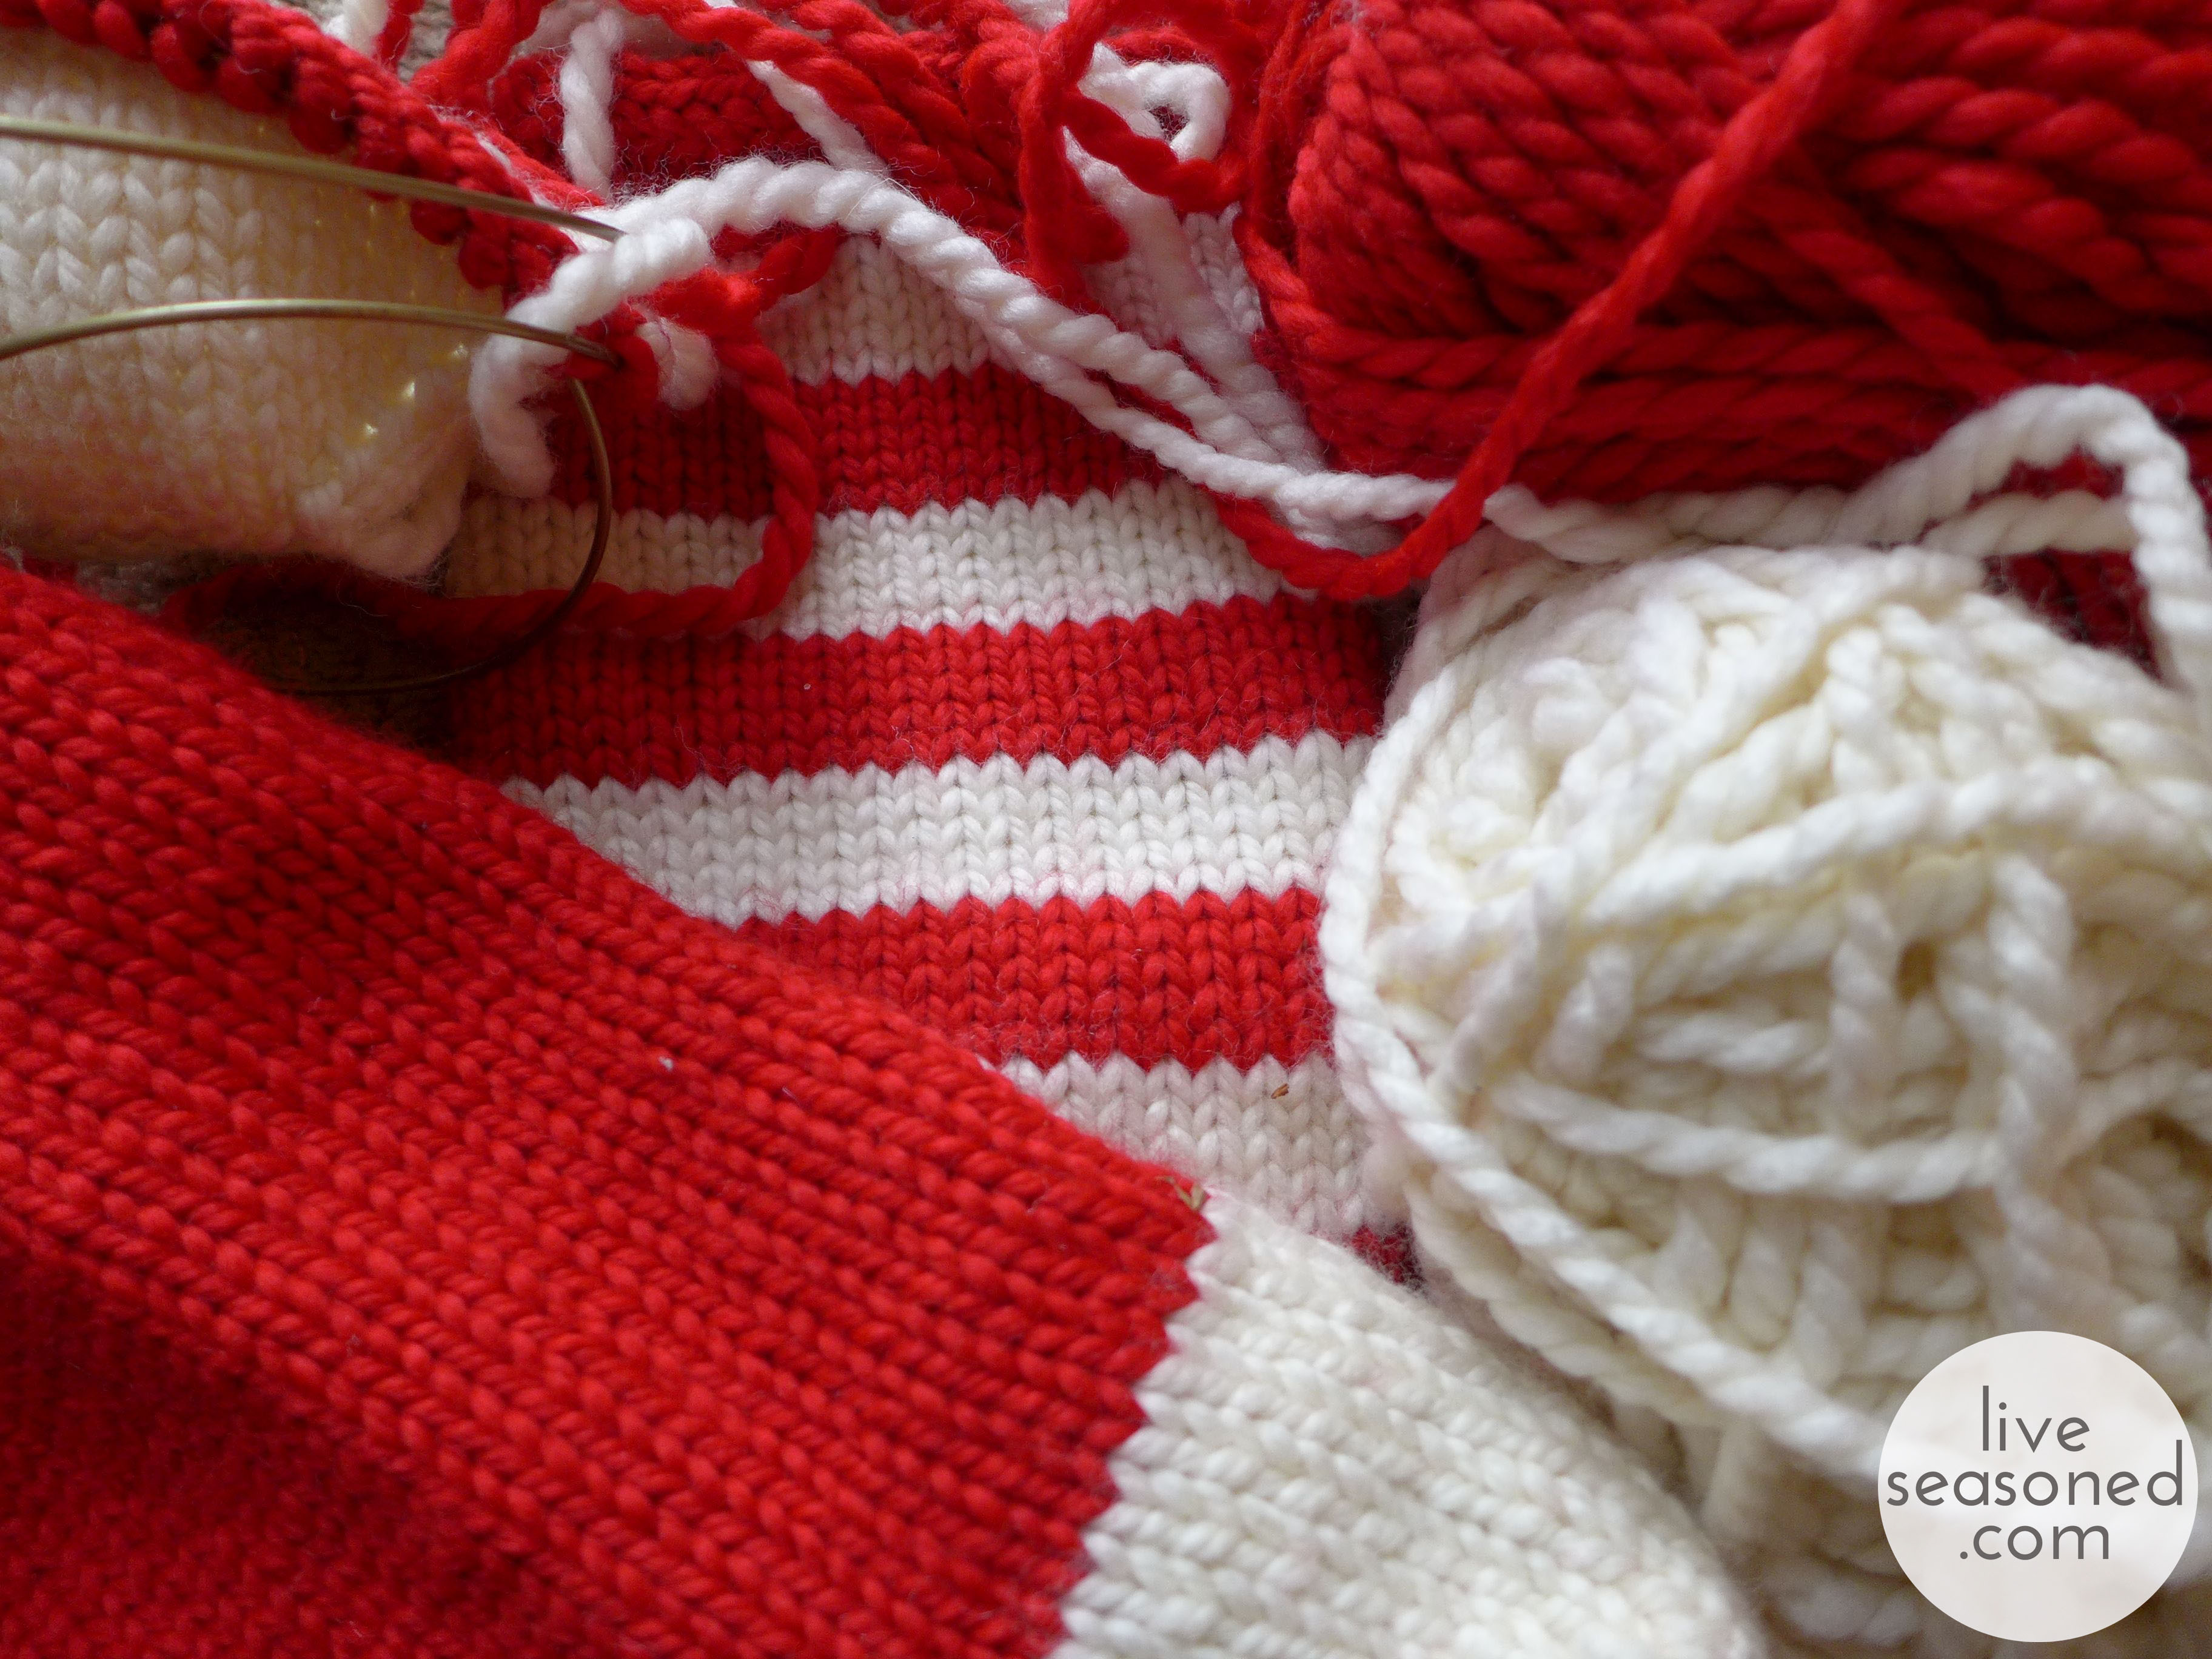
Then, there’s my impulse buy of yarn last weekend that is turning into some fun red and white stockings for our house. I saw the yarn in Michaels, and knew it was bulky enough to knit up quickly, but I didn’t want to commit to knitting the stockings if it turned out to take longer than I expected (there are too many other little elving balls in the air to add a big unexpected knitting one!). I picked up two skeins, and they made one cute stocking. When I went back to the store for more yarn, I discovered that the white was out of stock in most stores and online (it’s a holiday made-for-tv tragedy in the making!). After calling a few more stores, I found some in stock and bought enough of both colors to make the remaining two stockings for this year and to add another to our mantel for next year… maybe I went a bit overboard and bought enough to knit stockings for every possible future family member, including future pets.
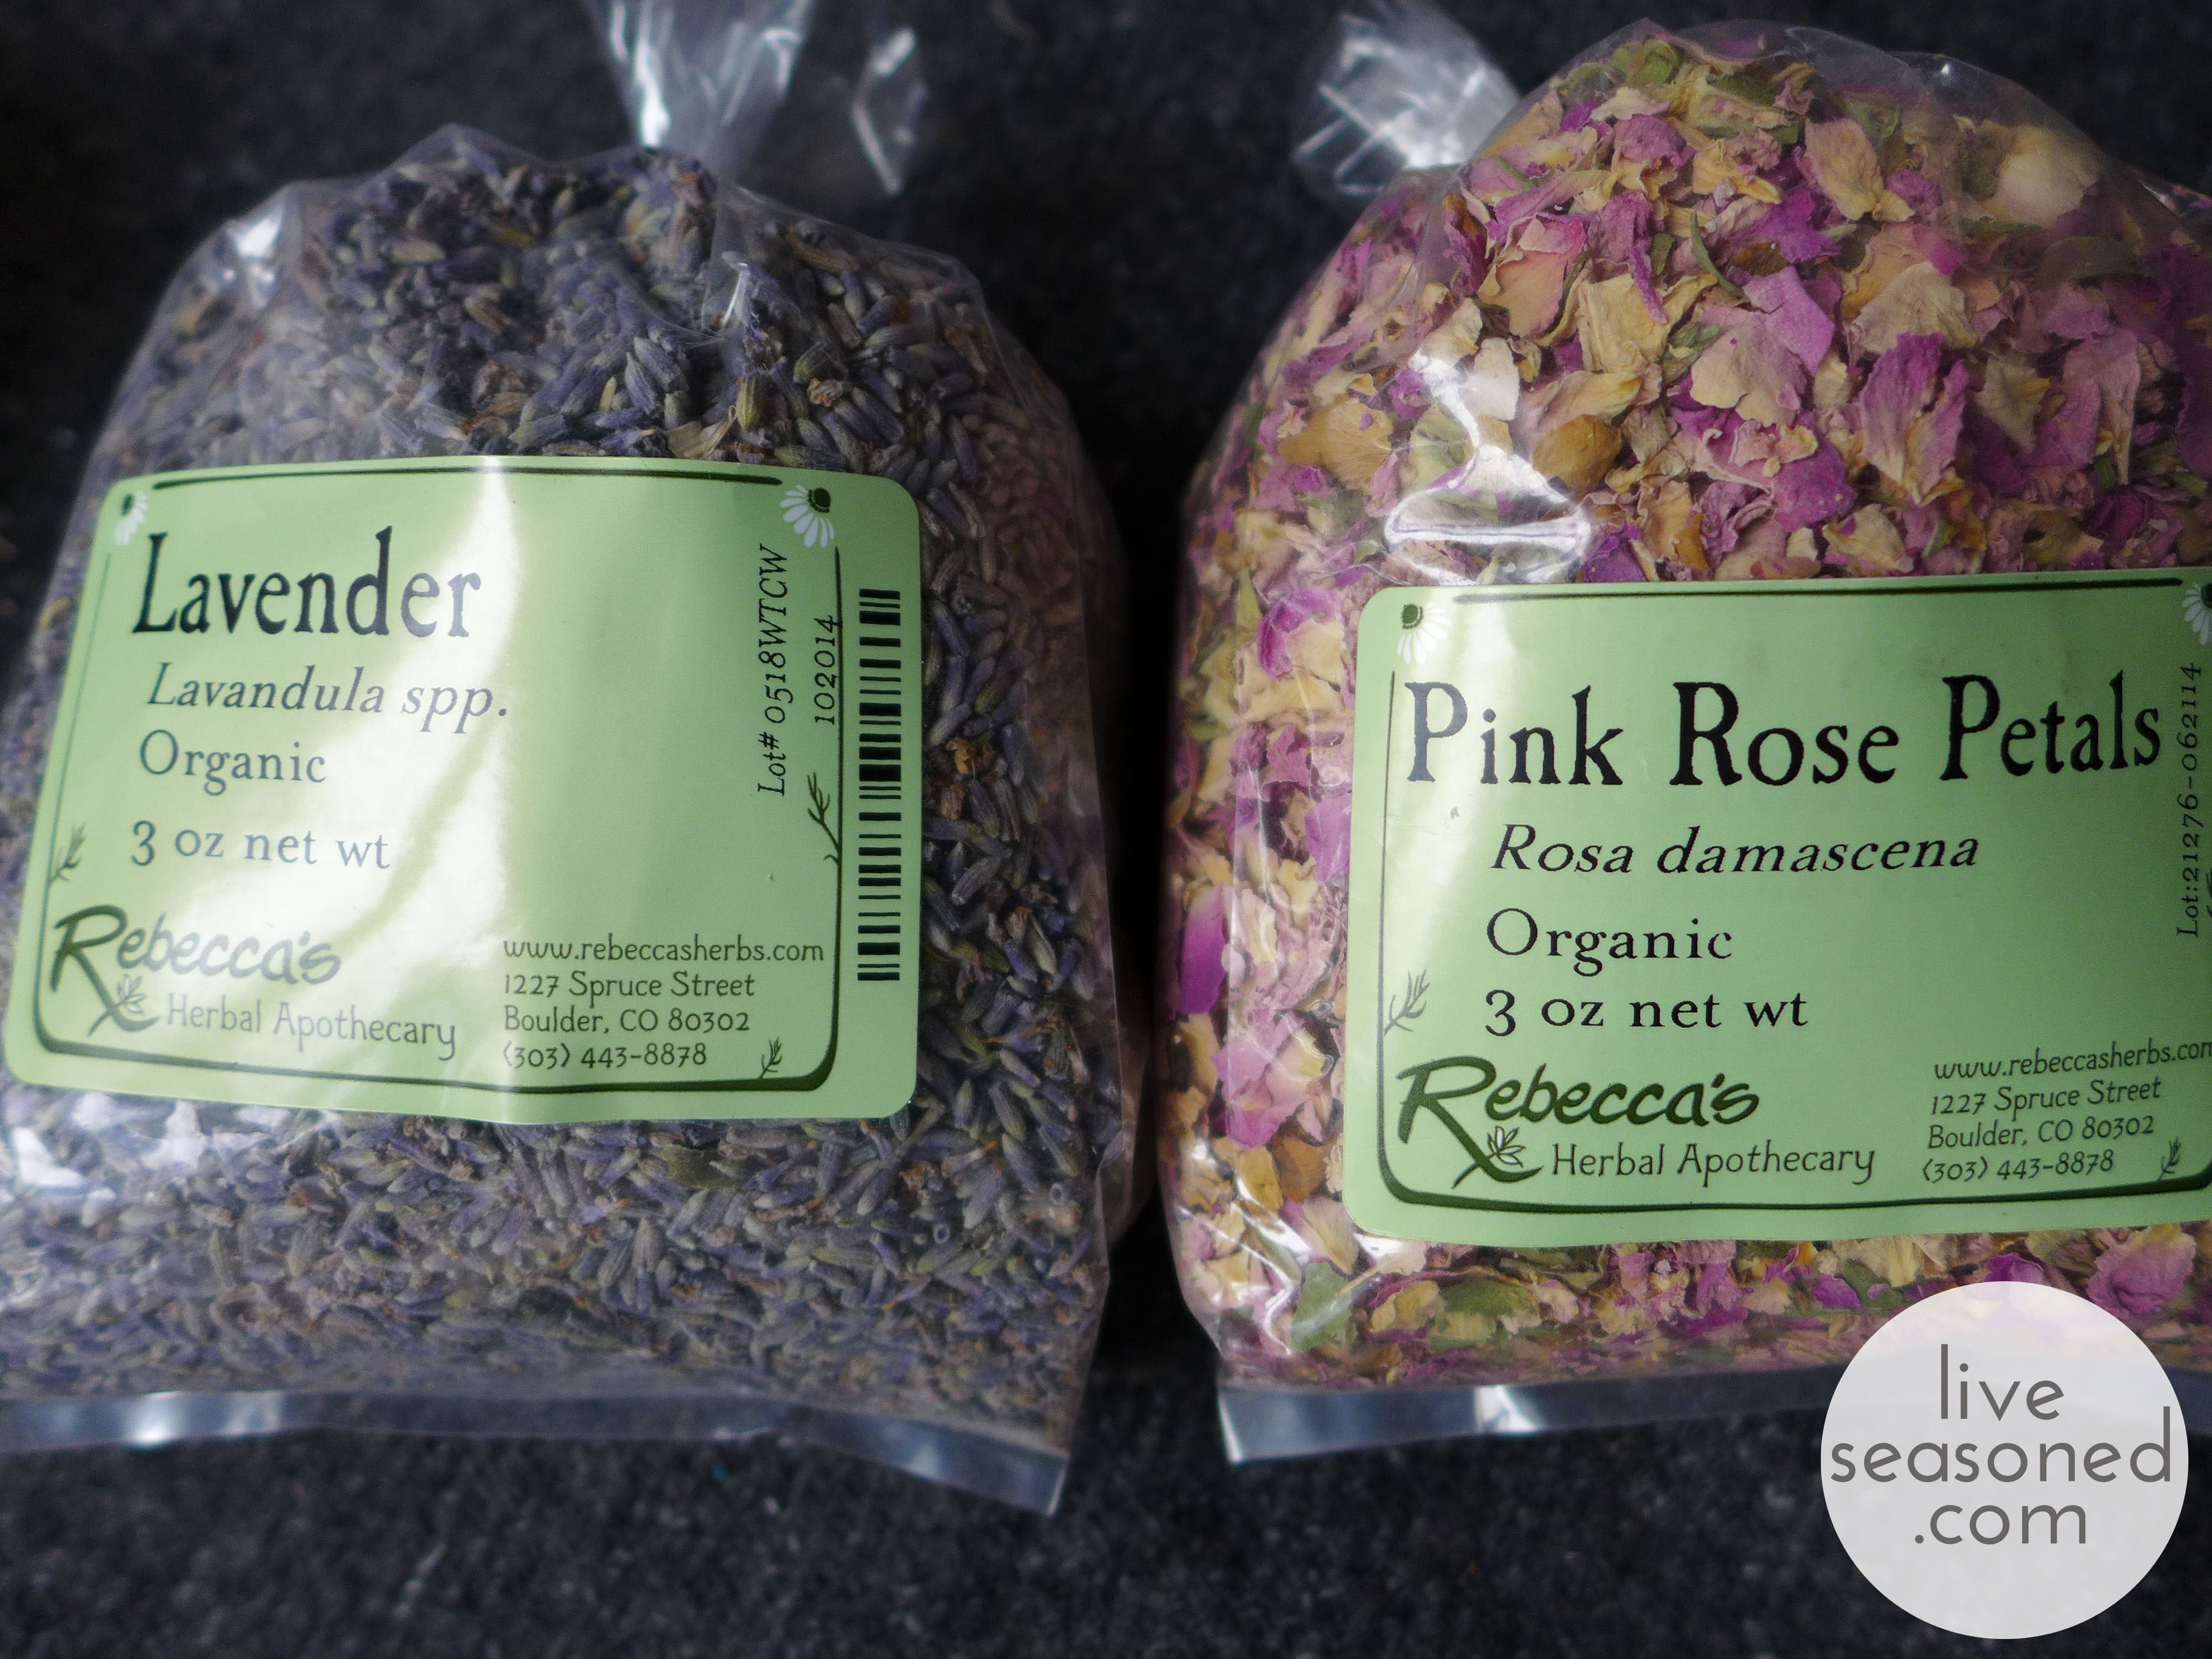
I’ve mentioned our local apothecary a few times. I love that place, and it’s quickly becoming my number one elving resource this year. I stopped in this week to pick up oils, herbs, and other ingredients to make a few different gifts for giving. These are my top secret projects that I’ll be so excited to share come January when the gifts are all finally opened.
 So that’s just a snippet of what’s going on around here. What doesn’t come through in this post is that I may have already started playing my Pandora Christmas station and downing glasses of eggnog nonstop whenever crafting… I promised myself that I would hold off until Thanksgiving, but the mood struck when the elving started.
Pressed Leaf Garland and Place Cards
I love nothing more than bringing the outdoors in. One day I hope I live in a mountain cottage full of fur, bones, feathers, antlers, crystals and insect specimens but until then I’ll build my collection and make leaf garland each autumn. If you follow us on Instagram you know that I tried to pick up a live praying mantis (I thought it was dead) the other day, what a shocking moment! I actually found that big brown guy while I was collecting leaves for this project 🙂


I love projects that encourage you to go outside and walk in the woods and making leaf garland is just that. Wander around with a shallow cardboard box or bag and collect a big old pile of freshly fallen leafs. You want some moisture in your leaves so that they haven’t started to brown or curl just yet. You also want to preserve the leaves so that they continue to retain some color and lay flat on your string or table.
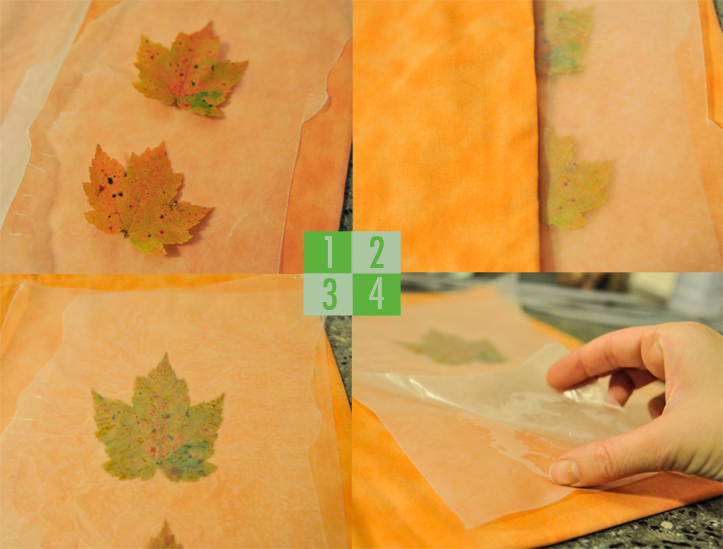
There are several methods for preserving fall leaves. I choose what I found to be the easiest and safest method, which is sealing them in wax paper.
- Simply lay down a piece of material (I used an old pillow case) and tear off two pieces of wax paper.
- Lay as many leaves as possible (without the leaves touching) between the sheets and then place the material on top as well.
- Iron slowly and on the highest setting for a minute or two, flip the entire material, wax and leaf sandwich over and iron the other side for another minute.
- Remove the wax paper and let it cool while you repeat the process on more leaves. Once the wax cools, gently peel the pieces apart and release the leaves.
The leaves should be dry and coated in a very thin layer of wax. They’re now ready to be used as escort cards or strung onto embroidery thread for garland or a table runner.


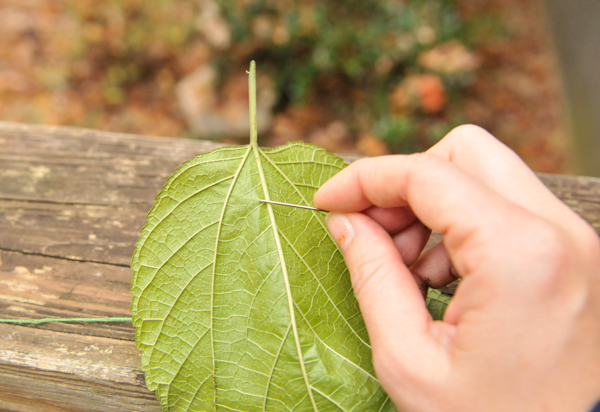
To make the garland, simply cut a length of embroidery thread, tie a knot at one end and thread the needle at the other and start stringing them up. This is a somewhat delicate process, but it’s easy enough that you can sit and watch a show while you’re working on it. For the best results, pierce the leaf at least an eighth of an inch in the any edges and gently move it down the thread. As you become familiar with the fragility level of the leaf, you can pierce several at a time making the process move right along.


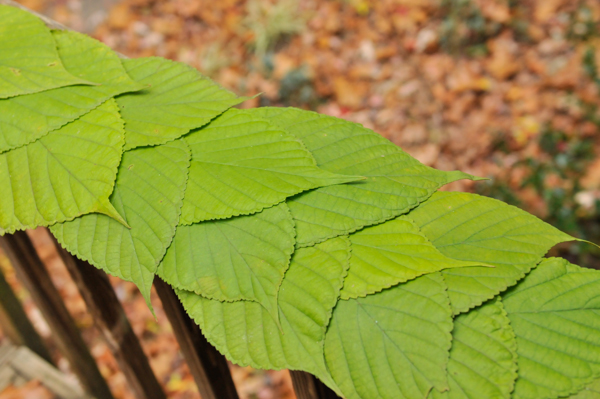
Making the table running is similar to making the garland, but I found it helps to work directly on the space you’ll be decorating. As you can see, my work in progress photos were taken outside, but that was solely to photograph them in good light. It’s a little tough to pick up a finished table runner and carry it so I recommend choose the space that you’ll decorate and making it there. Like most crafts that we make on Seasoned, we encourage you to inject your own creativity into it; the sky is the limit. For the green table running, I cut a long length of green embroidery floss, tied a knot and threaded a needle. I then added the leaves in a spaced out, loose and layered way. I wanted the leaves to look like they were simply placed on the table. I also wanted them to kind of flow or drift through the center of the table, which is why I had them pointing in different directions. I’m very pleased with the result, too bad I’m not entertaining this year!
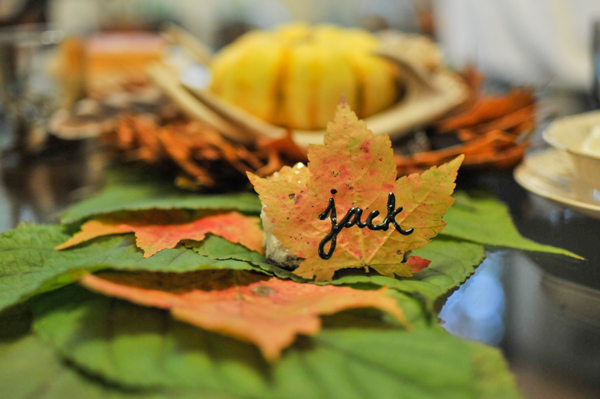
The escort cards and super simple to make as well. Again, gather and preserve some colorful leaves. Then use paint bottle with a tip or a paint marker to write each person’s name. I propped mine up against crystals, but they look just as lovely laying flat on a cloth napkin or plate.
I had a great time making the leaf garland. I spent some time outside, had the opportunity to look closely at nature and then preserve it in my home. It’s a free and simple craft that is great for kids too. Iron up some leaves and let them do what they please. How are you decorating your table for turkey day?
*Just so you know, I did press the green table runner leaves, but I didn’t press the orange and brown leaves that are hanging up and also arranged in a circle. I kind of liked the transitional look for the hanging garland, but I didn’t want the table runner leaves to be dry and brittle.
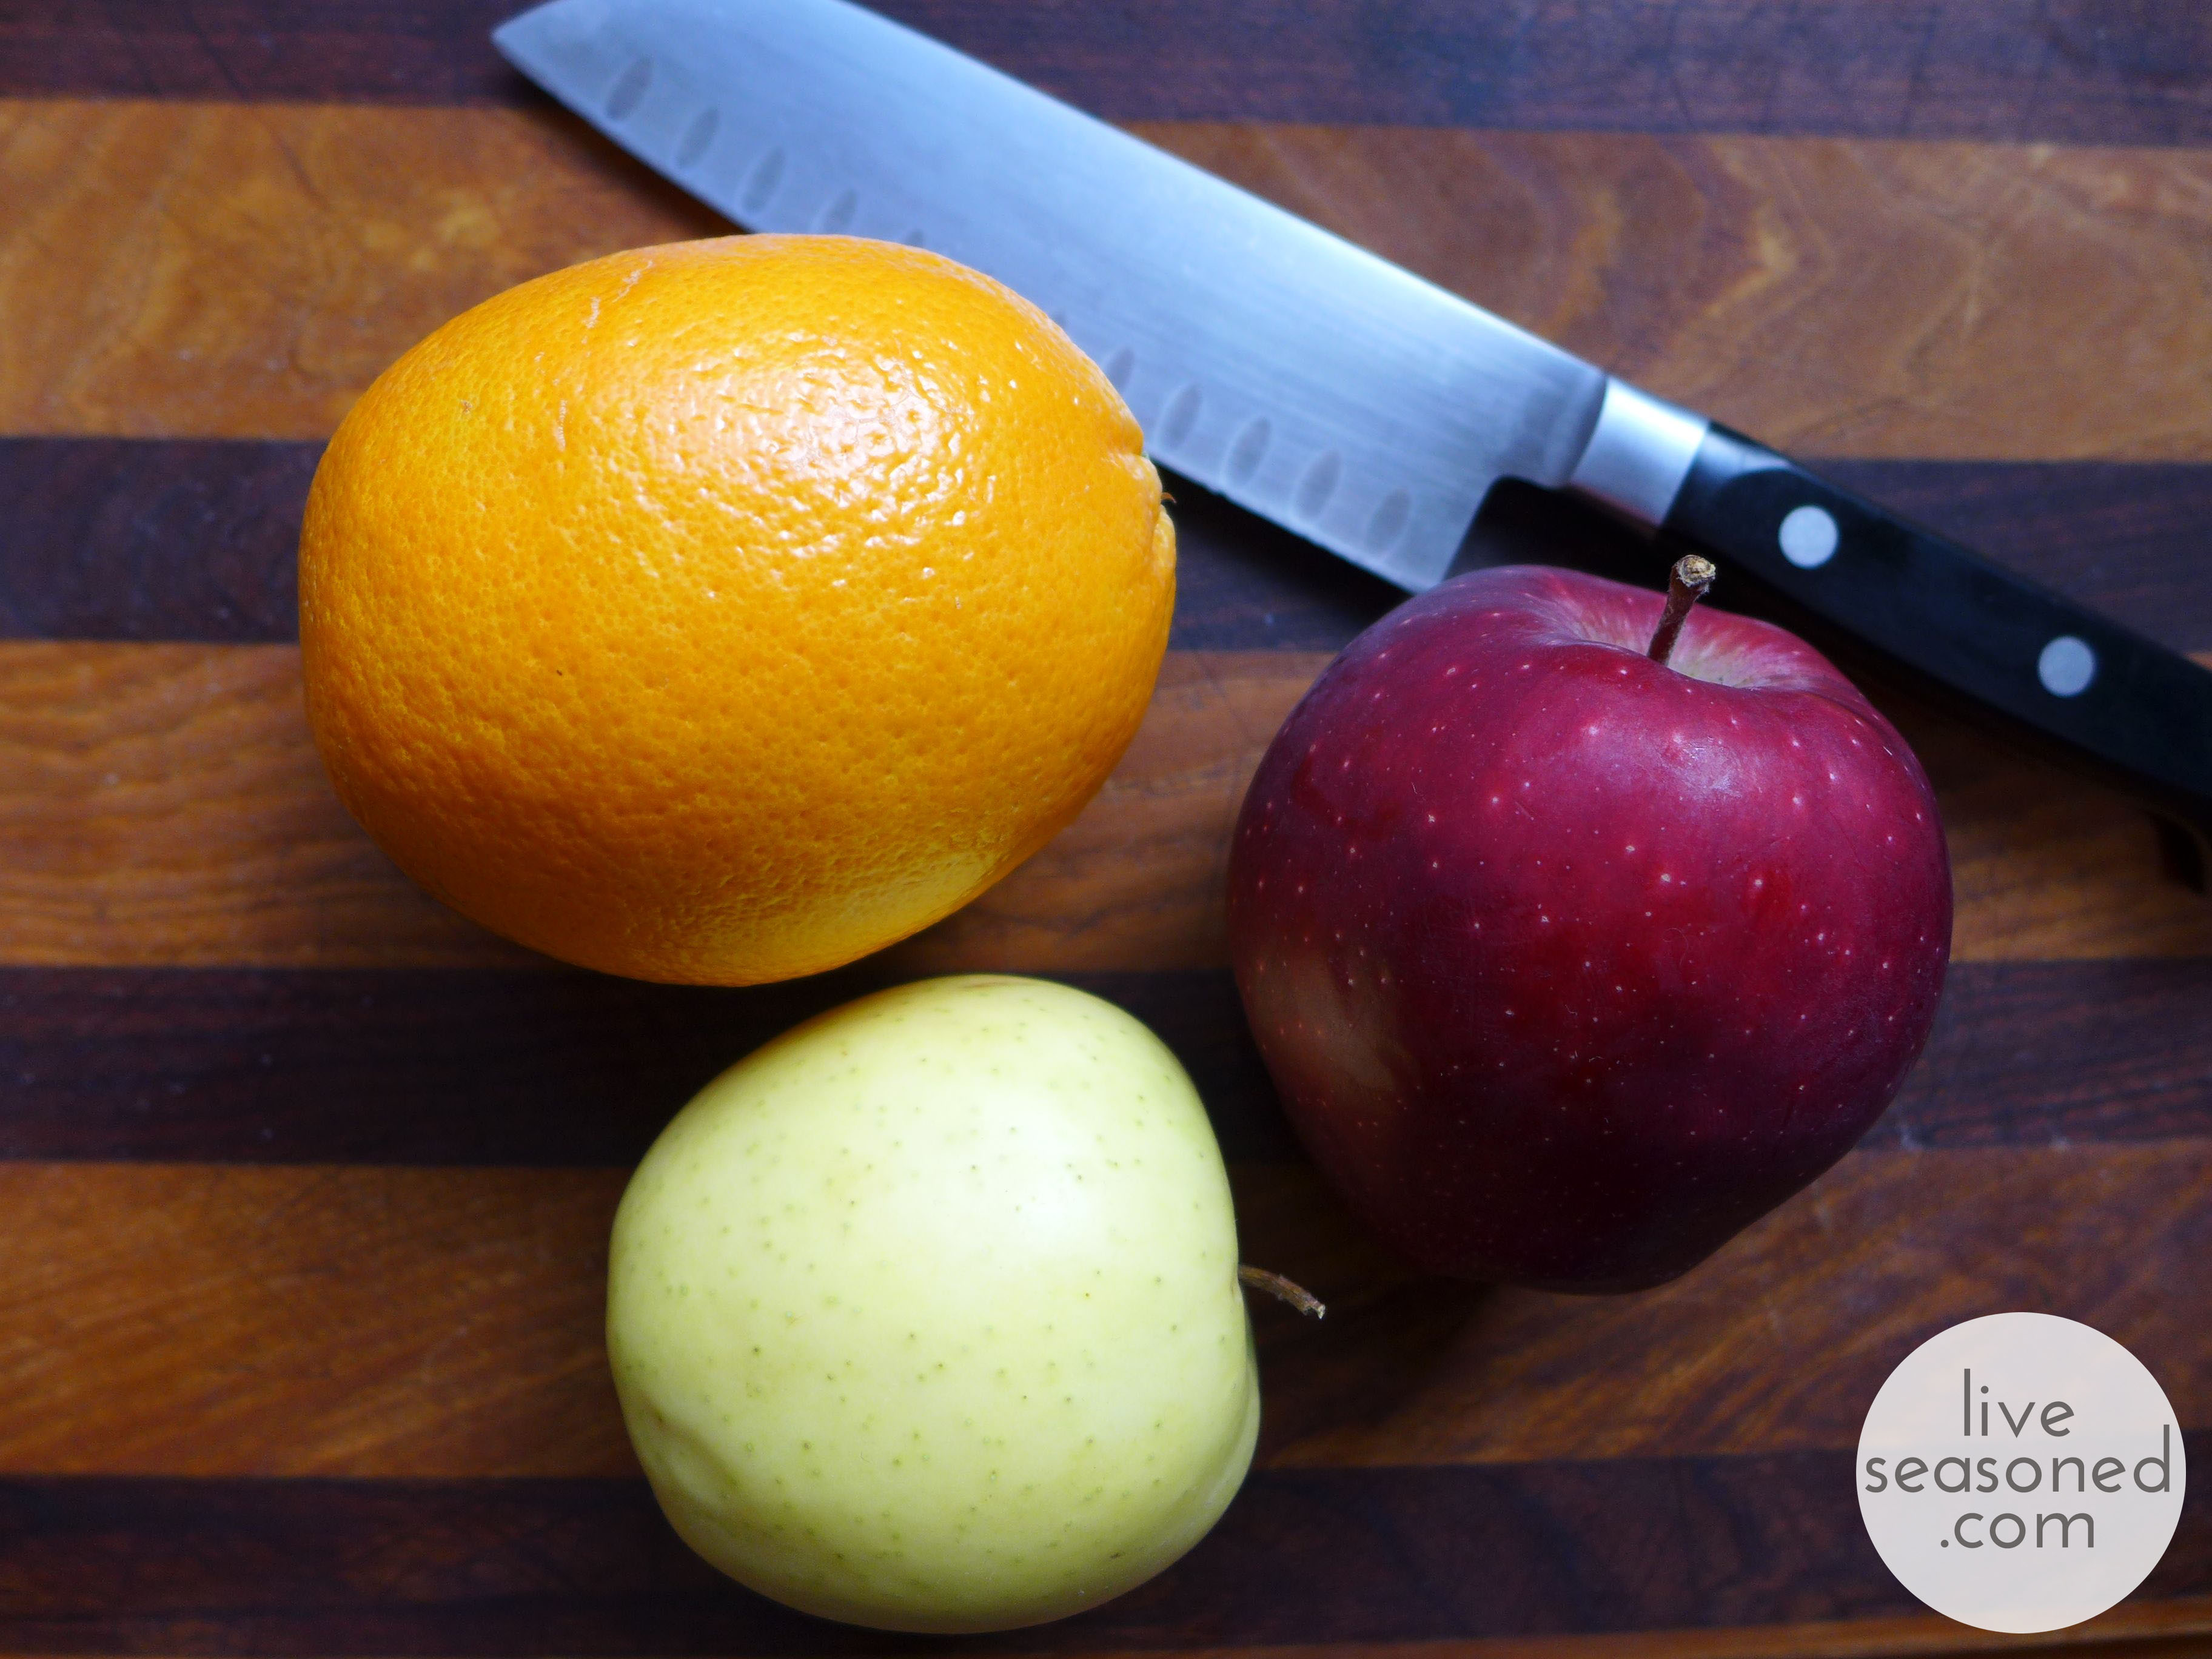
Dried Fruit Garland
Apples are our ingredient of the seasons. So far we’ve gone crazy with them in the kitchen, but today we’re filing getting crafty!
This year, after taking down our Halloween decorations and while waiting to up a Christmas tree, I was really feeling the urge to decorate. So I put together this simple garland that’s a snap to make, celebrates the bounty of the season, and is perfectly suited for my need to add a little touch of something to our November walls.
Supplies:
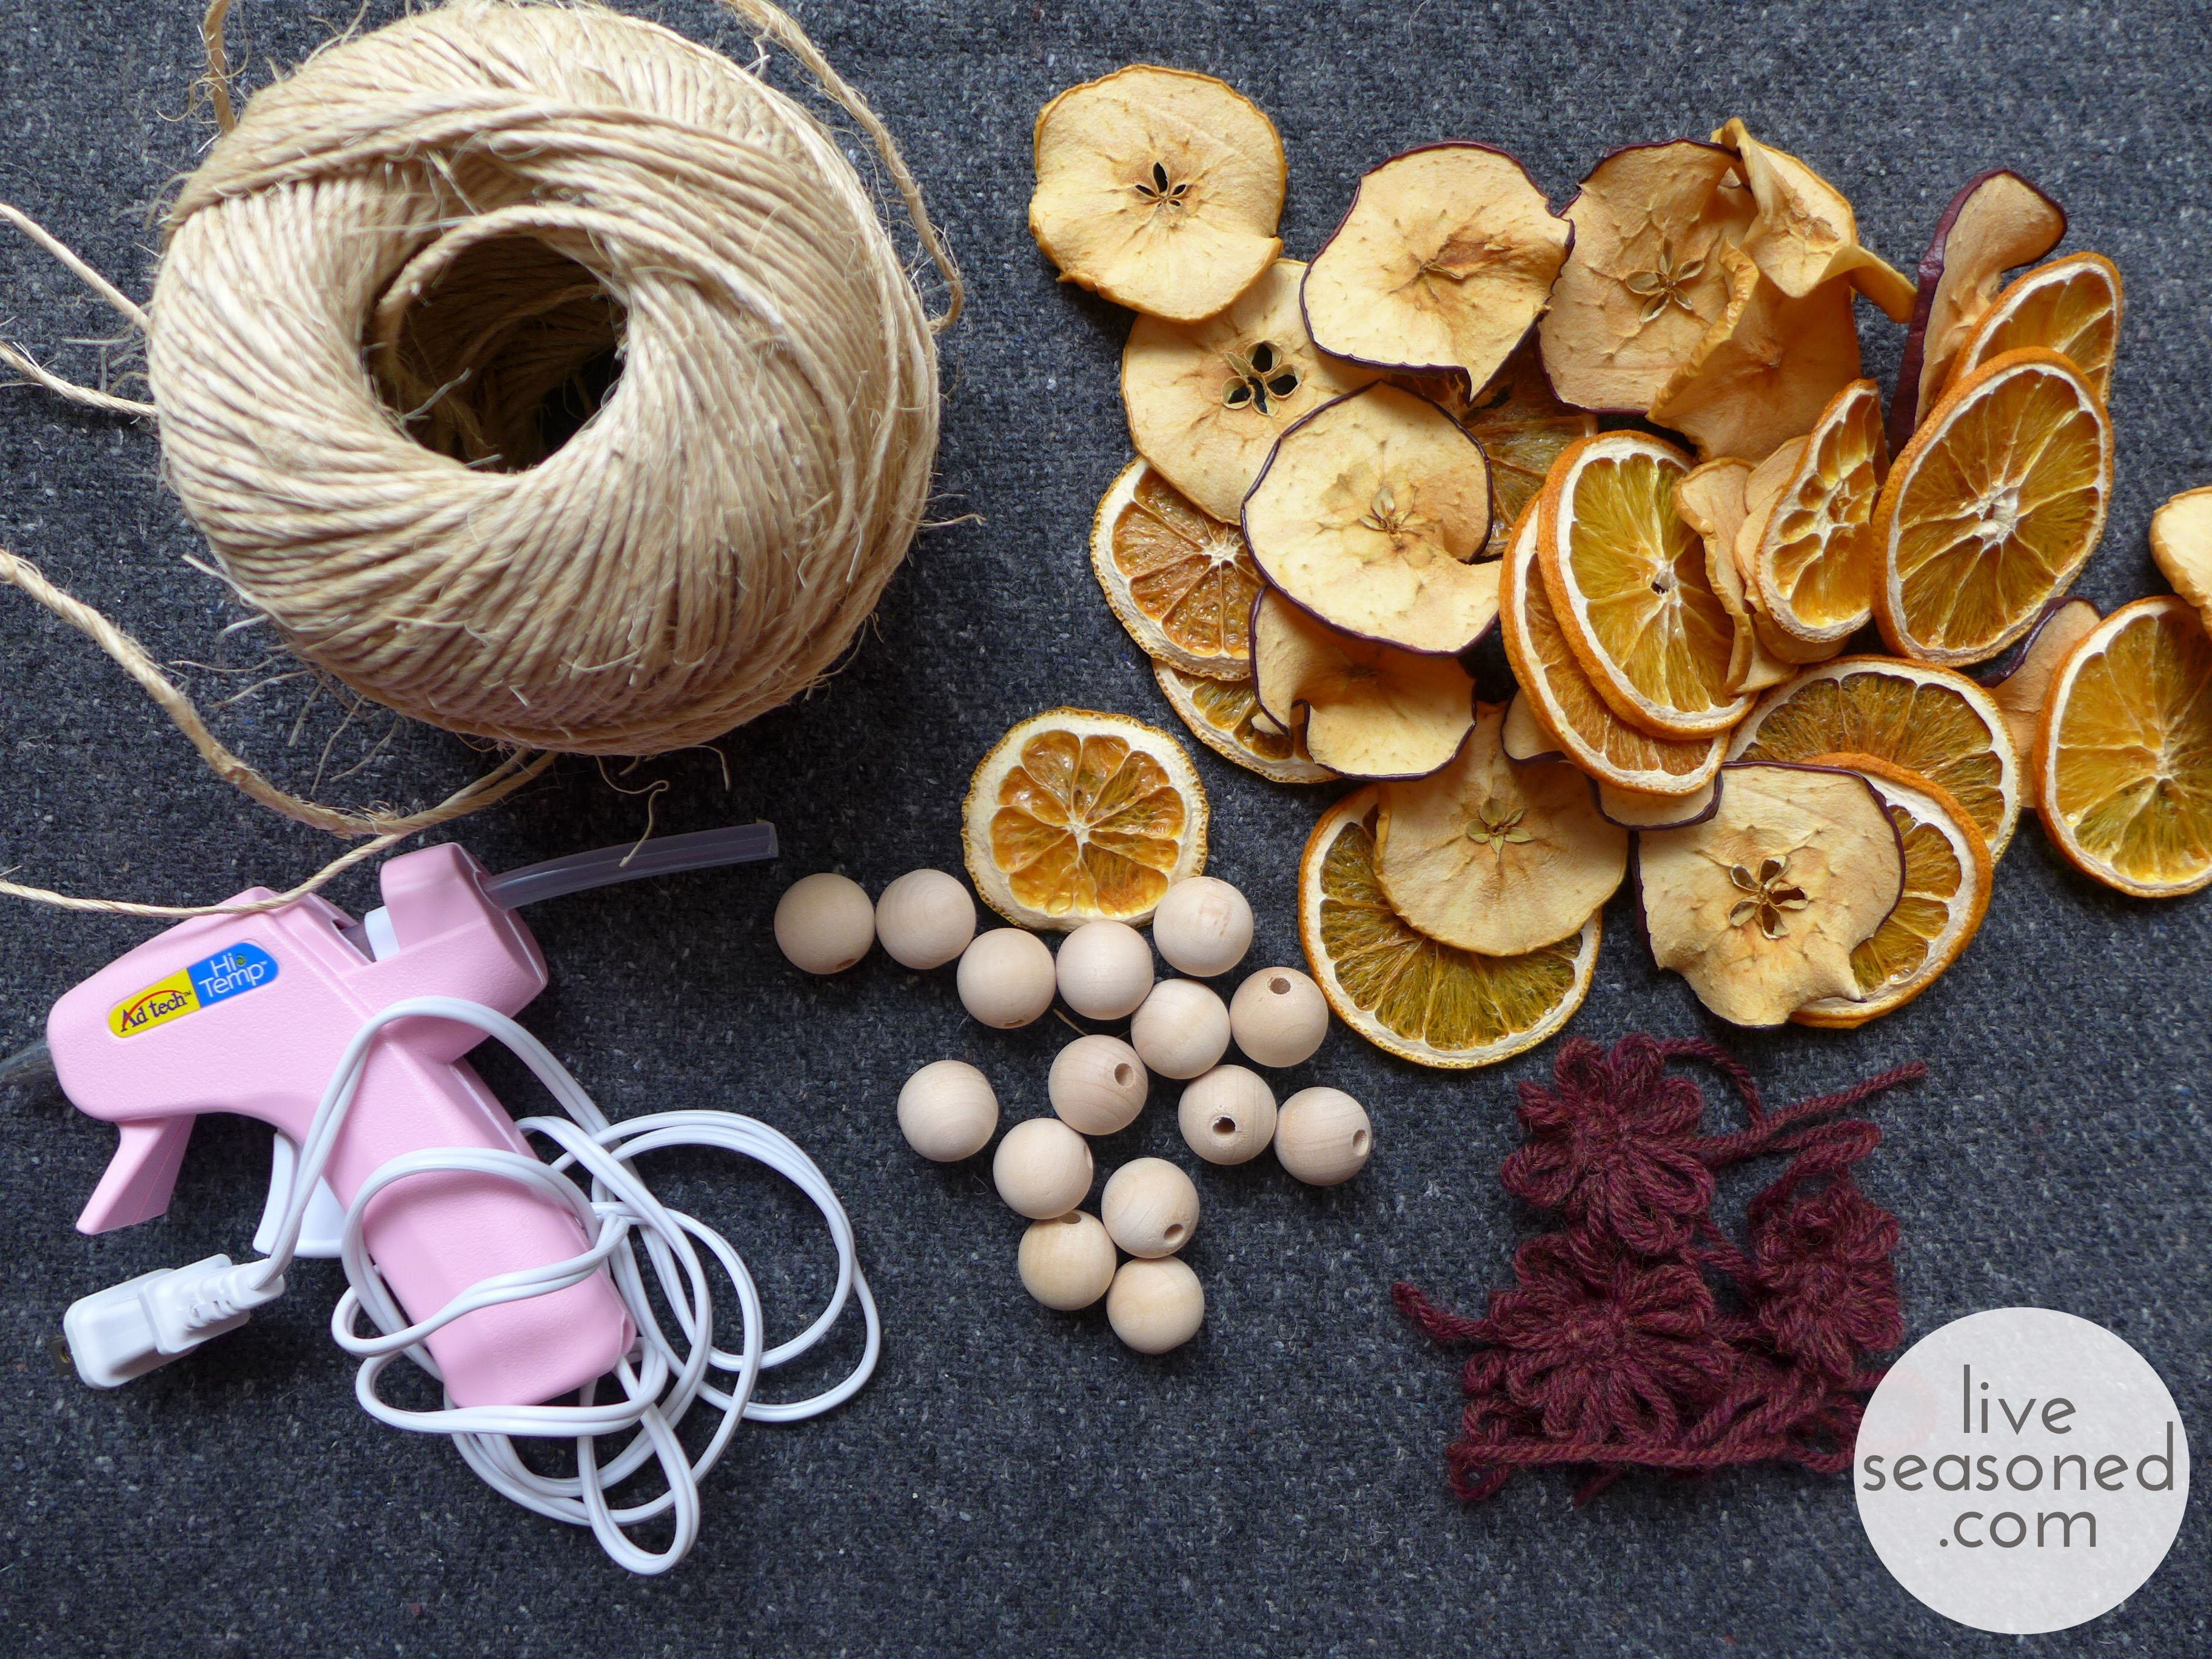
This project requires relatively few supplies, but as with everything we do around here, the garland is easily customizable, so look around your craft room and get creative!
- twine
- dried fruit (more on this below)
- wooden beads
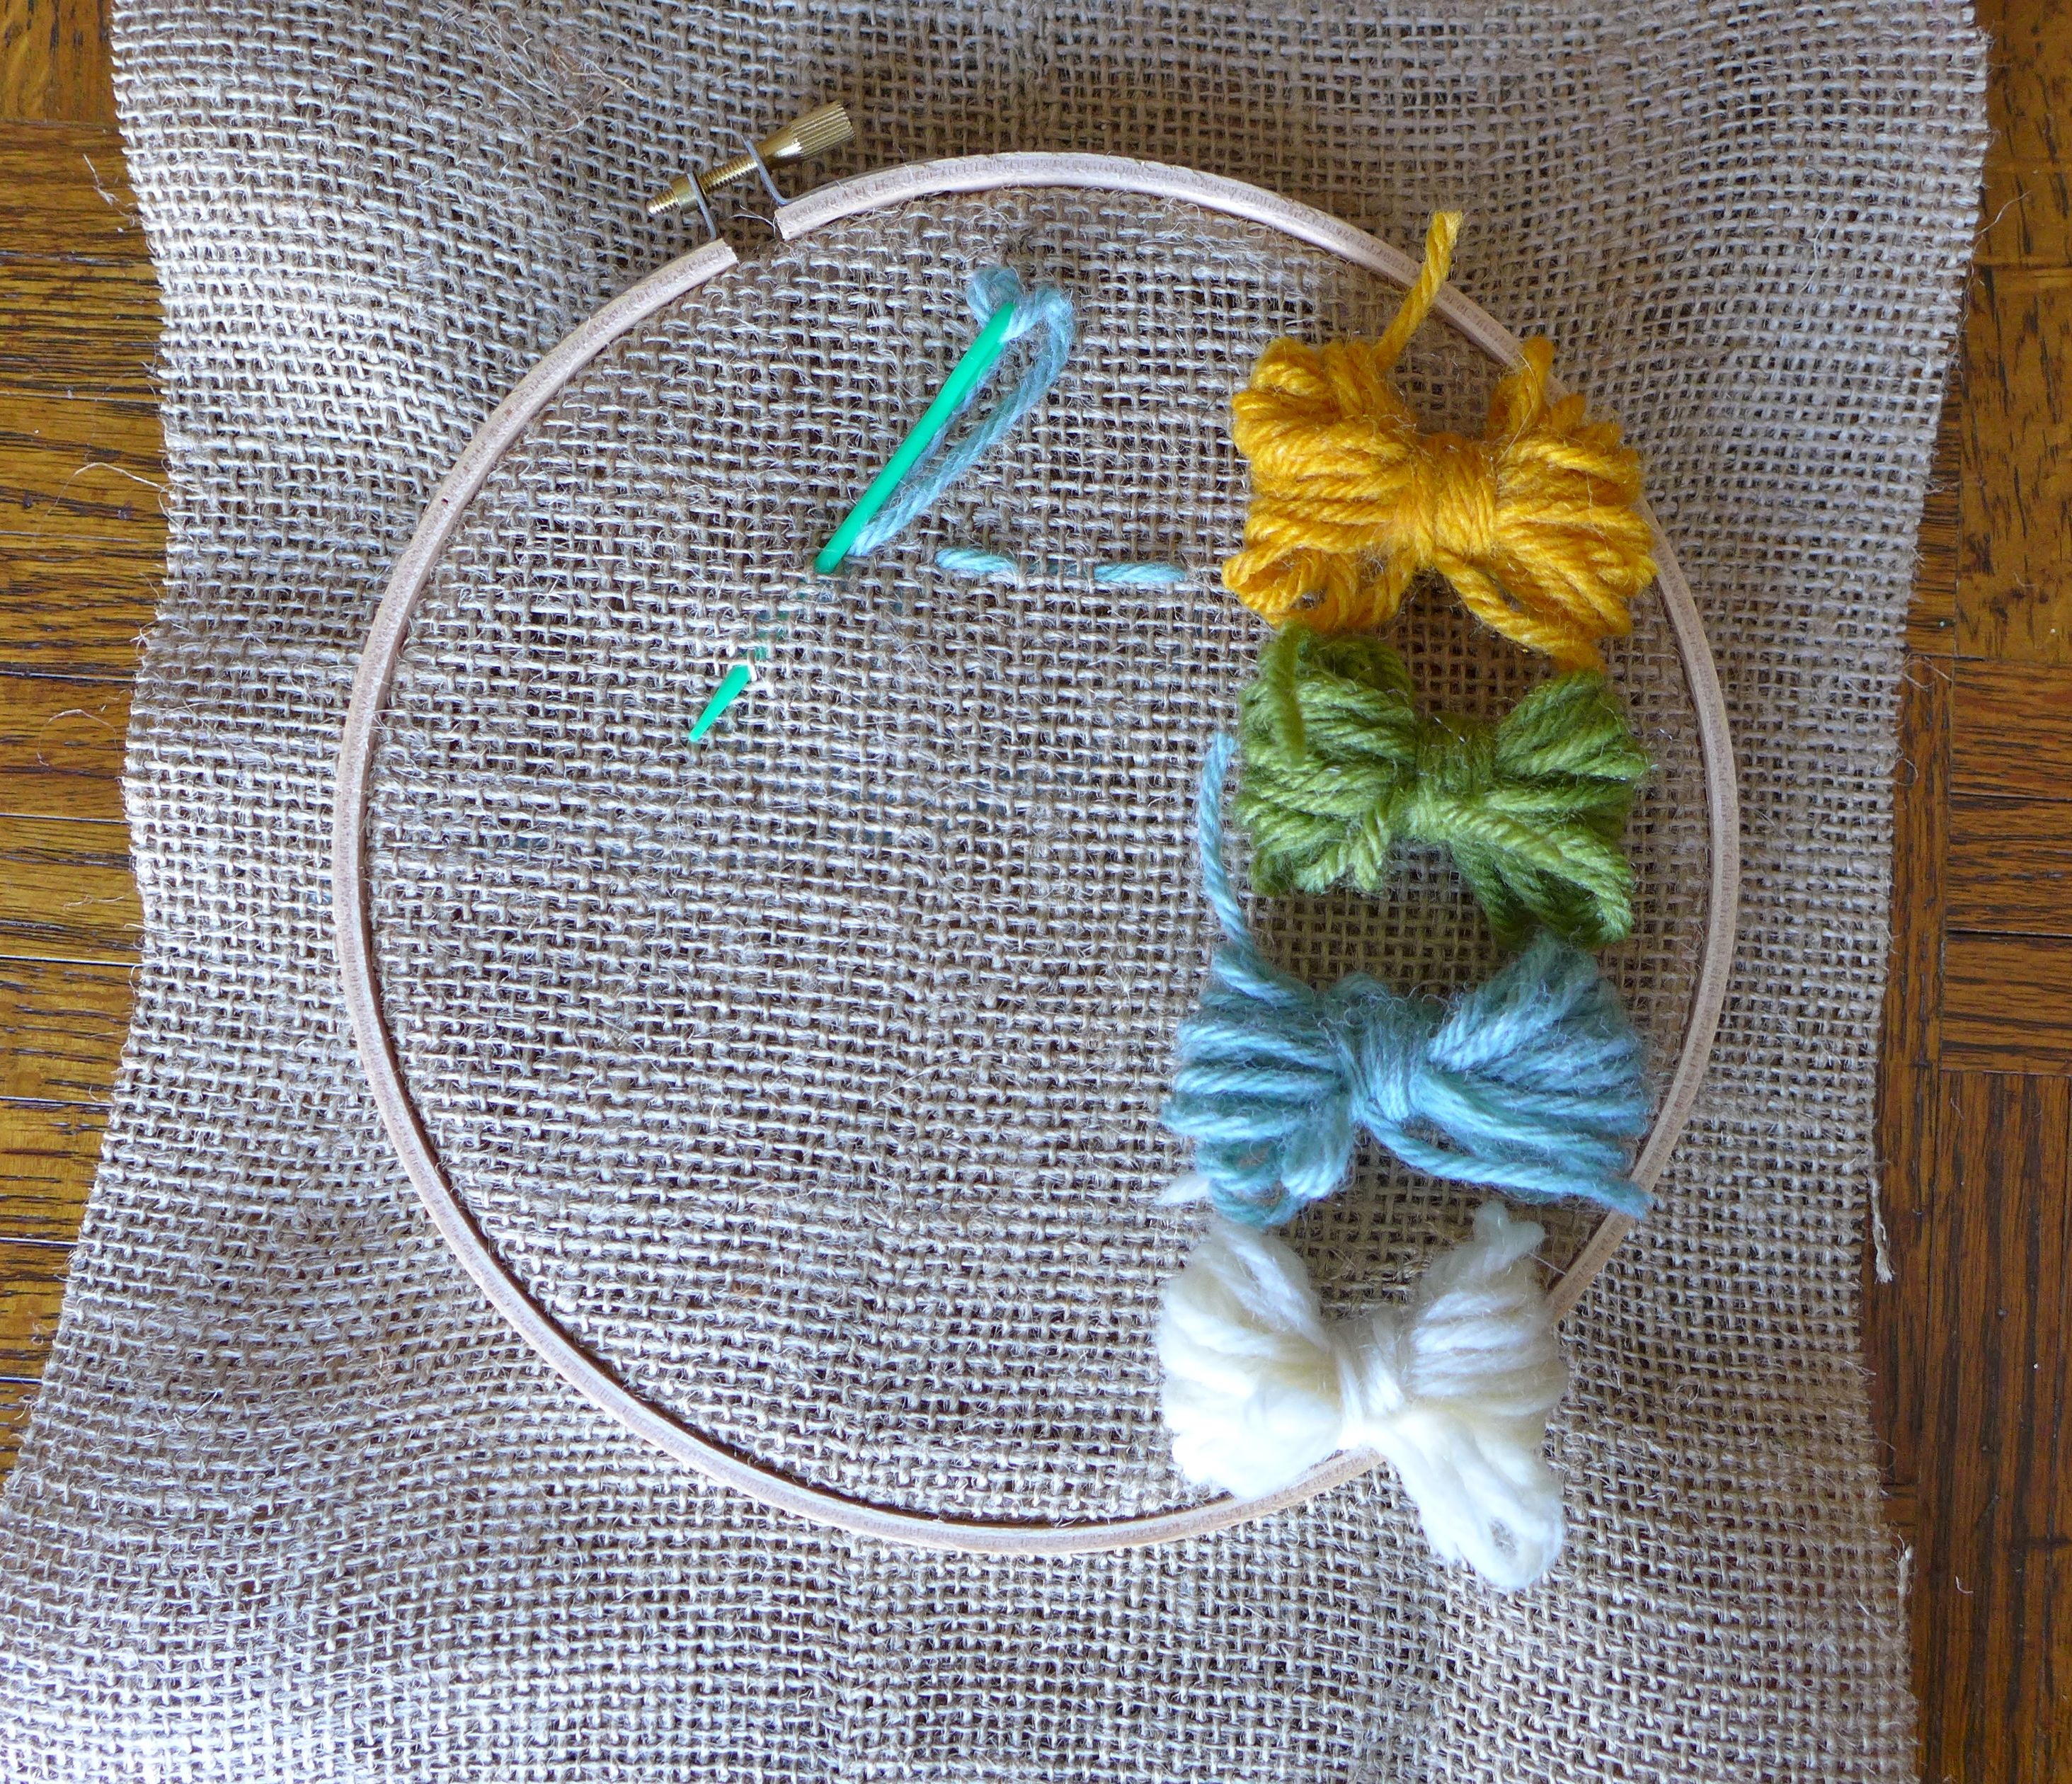
- simple yarn flowers (how-to below)
- hot glue gun
Drying the Fruit
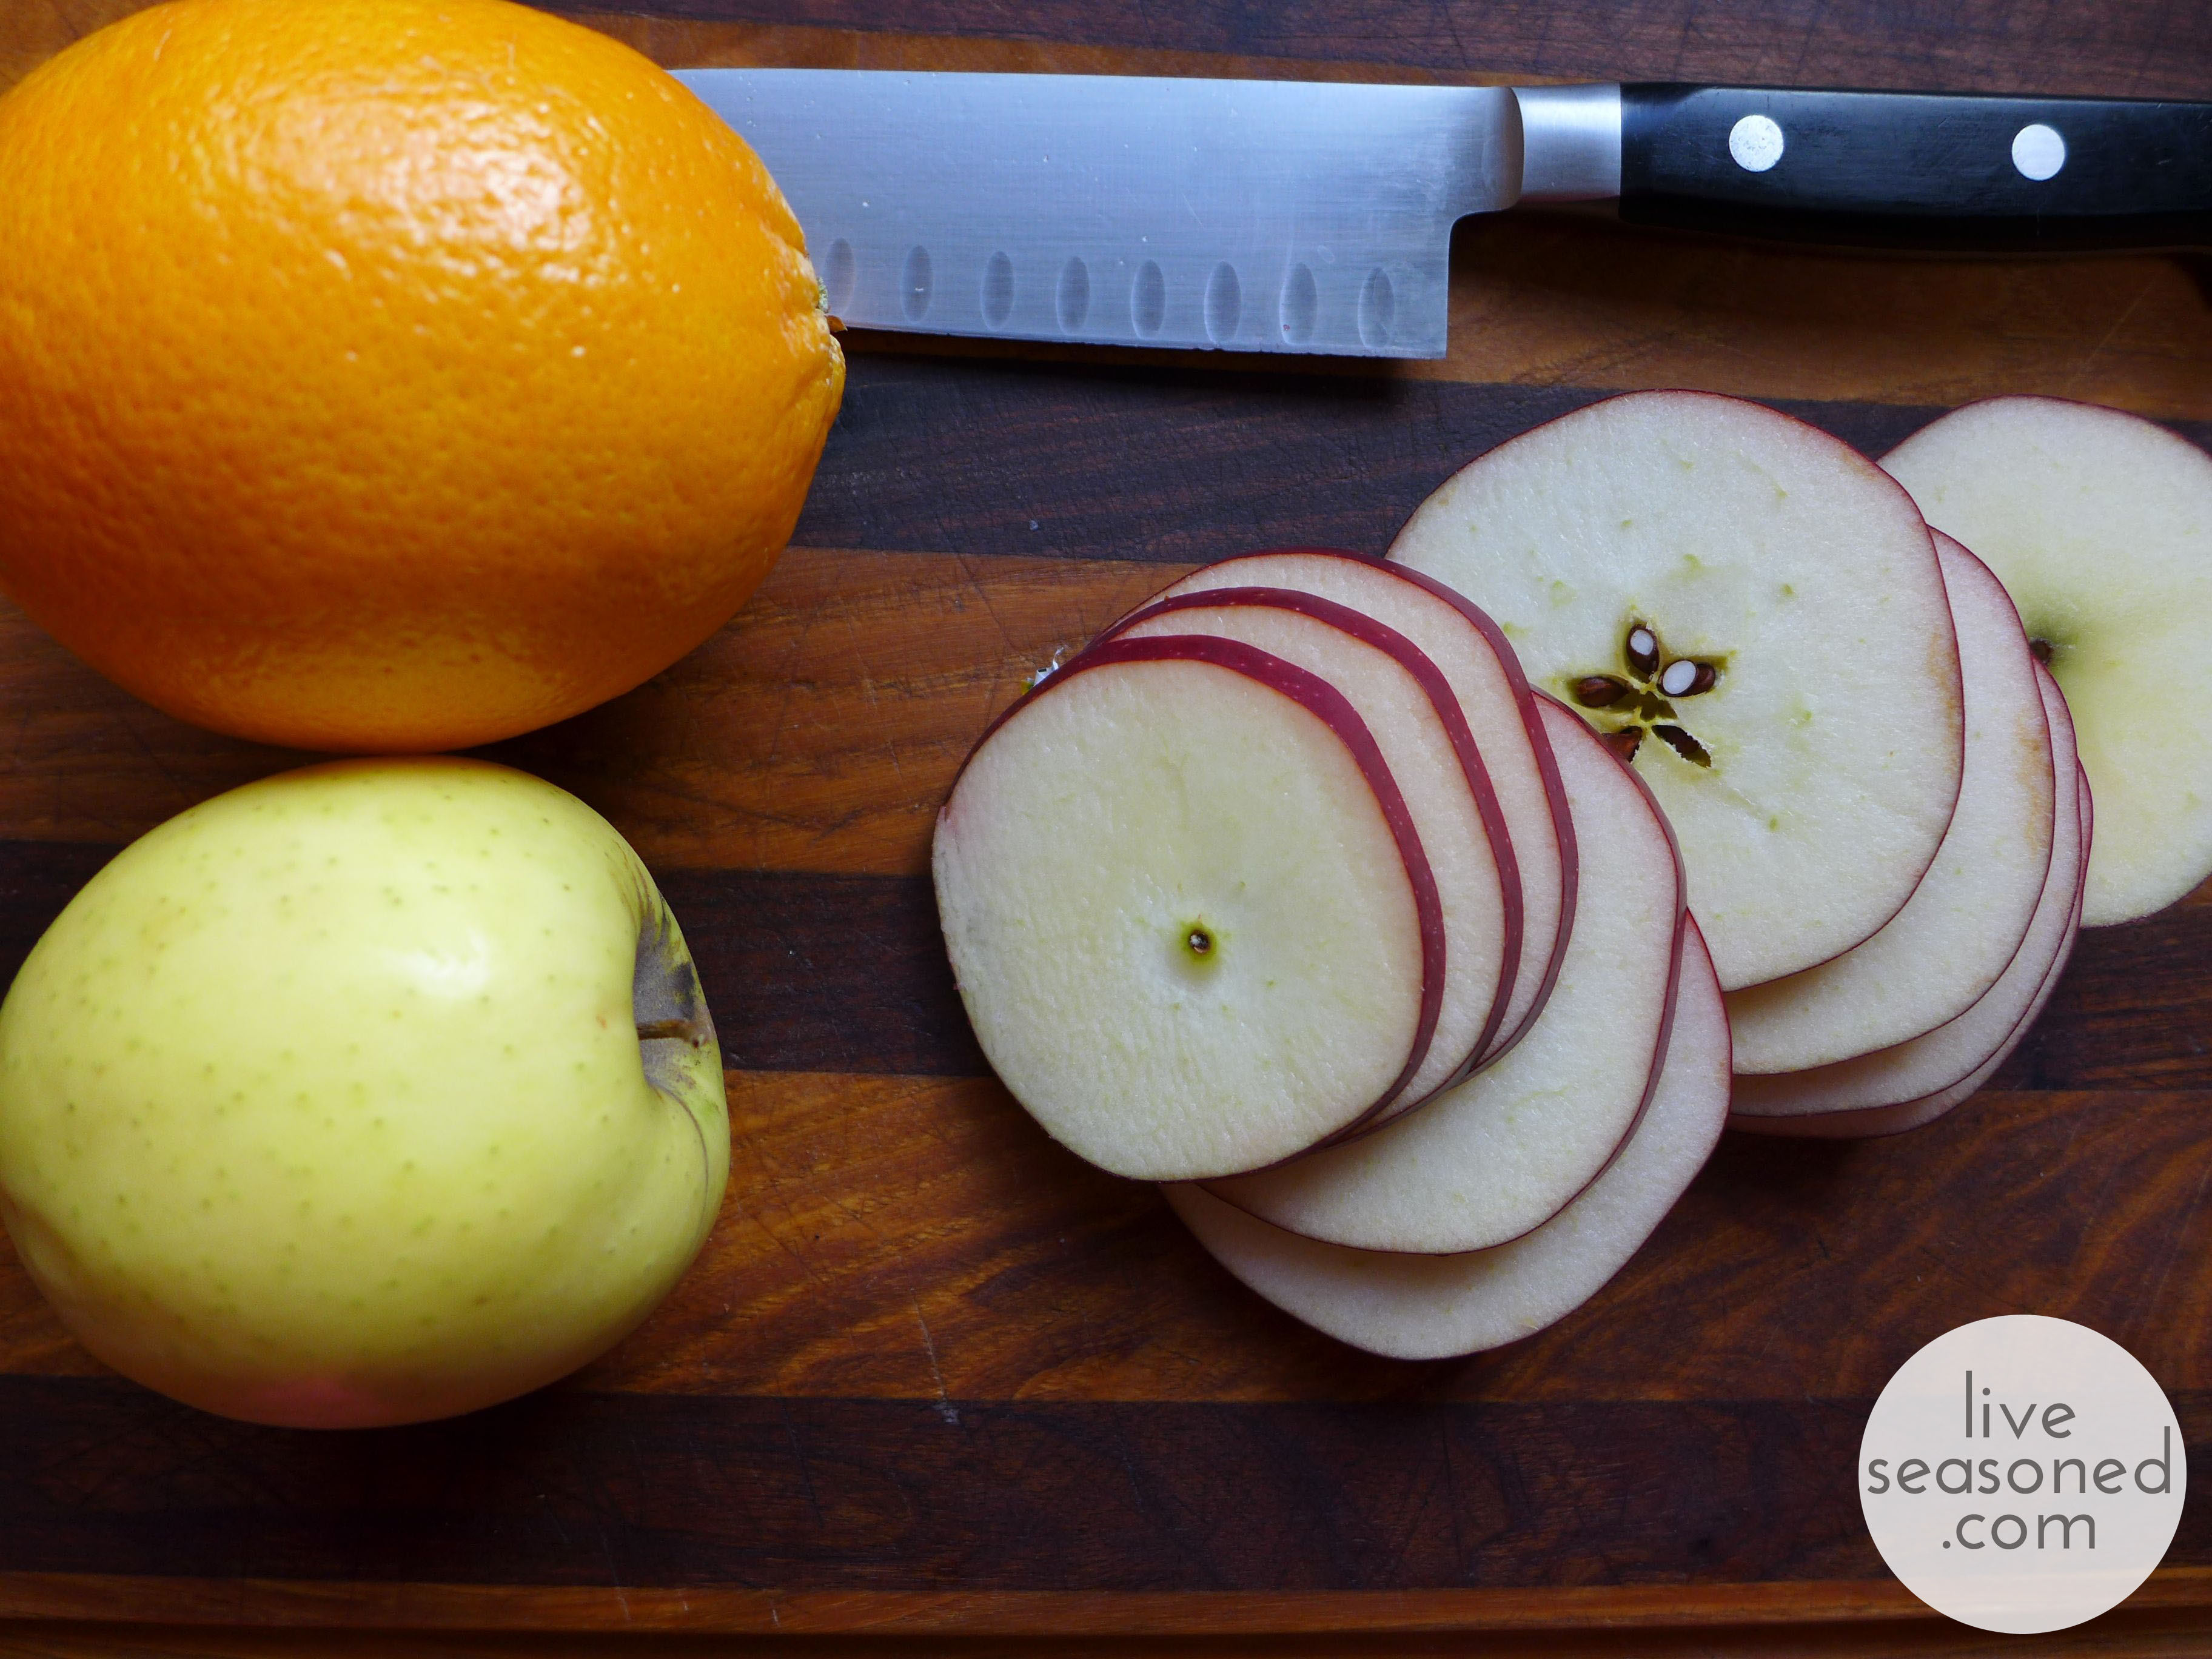
I began the project by slicing and drying three pieces of fruit: red and gold delicious apples and a seedless navel orange. The fruit were sliced into quarter inch discs. Sharpening your knife will go a long way towards helping you make even slices with nice smooth surfaces. You’ll find it difficult to cut through the seeded area of the apples, but my advice is to keep your knife horizontal (rather than pushing the point or handle ends up and down) and to saw back and forth with even pressure.
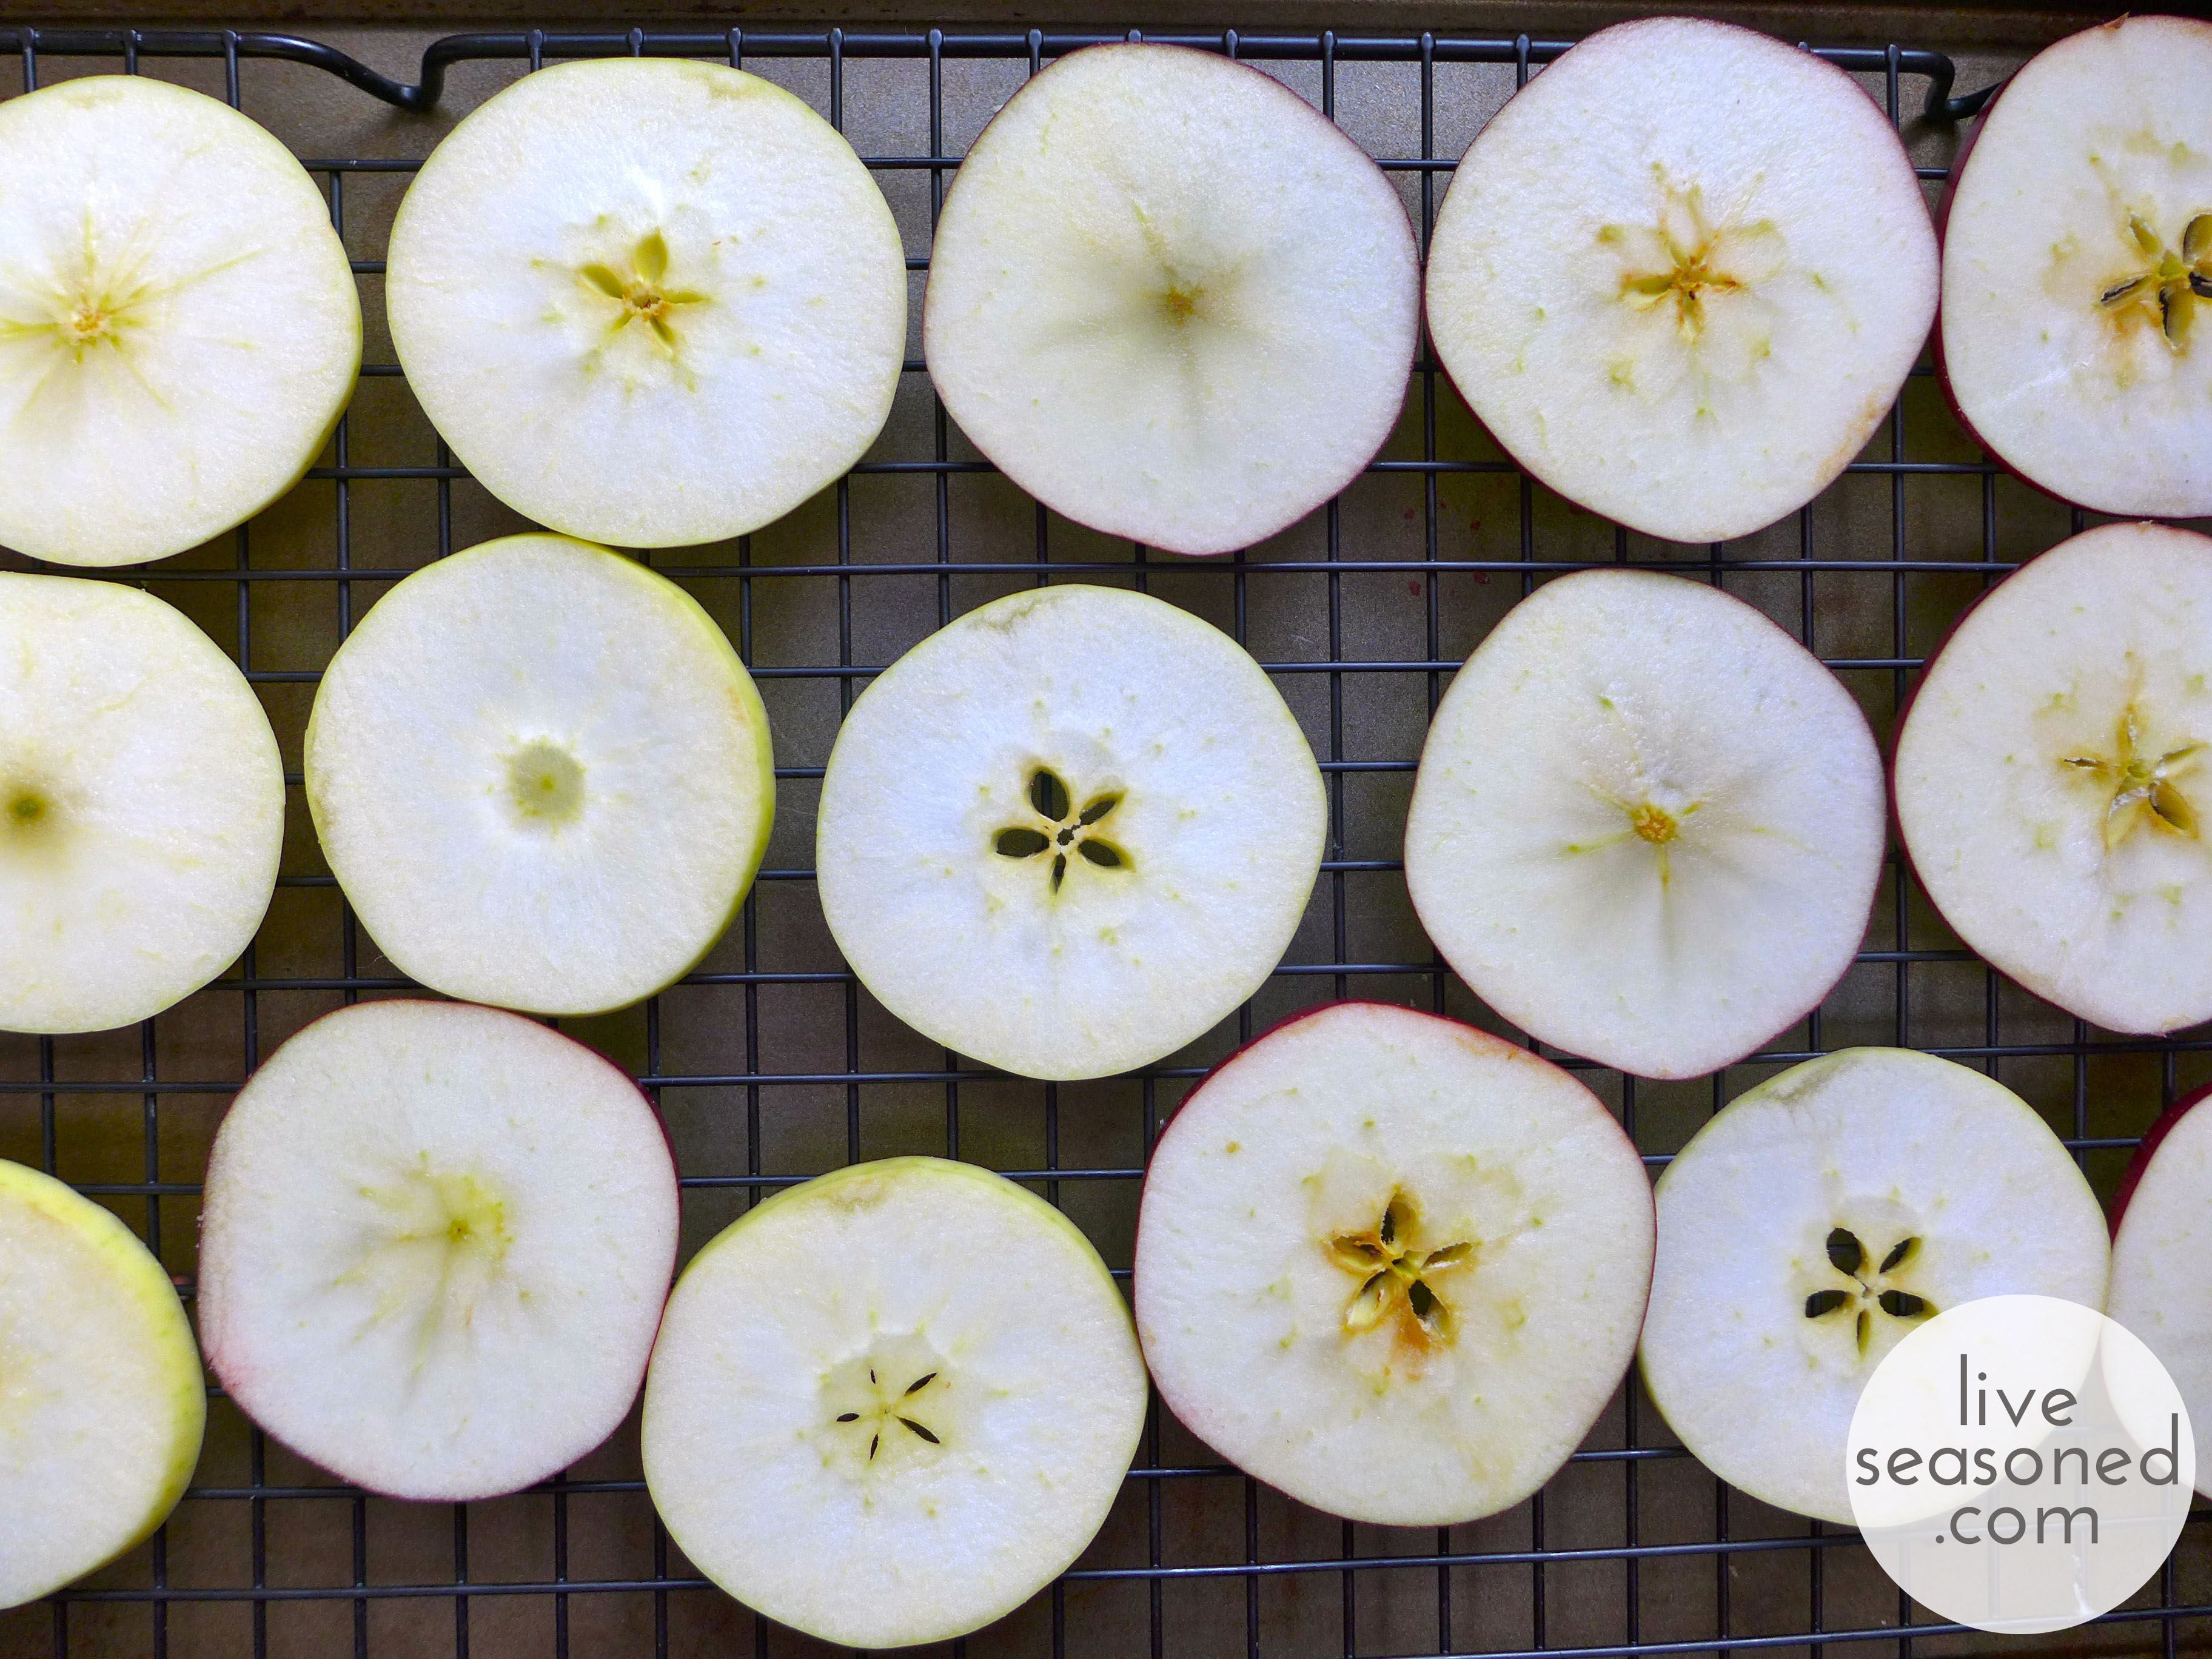
Once sliced, I removed all seeds and placed the pieces on cooling racks over cookie sheets for drying. I then dried the fruit in a 200F oven for about 5-6 hours, flipping the slices twice to help minimize curling of the fruit.


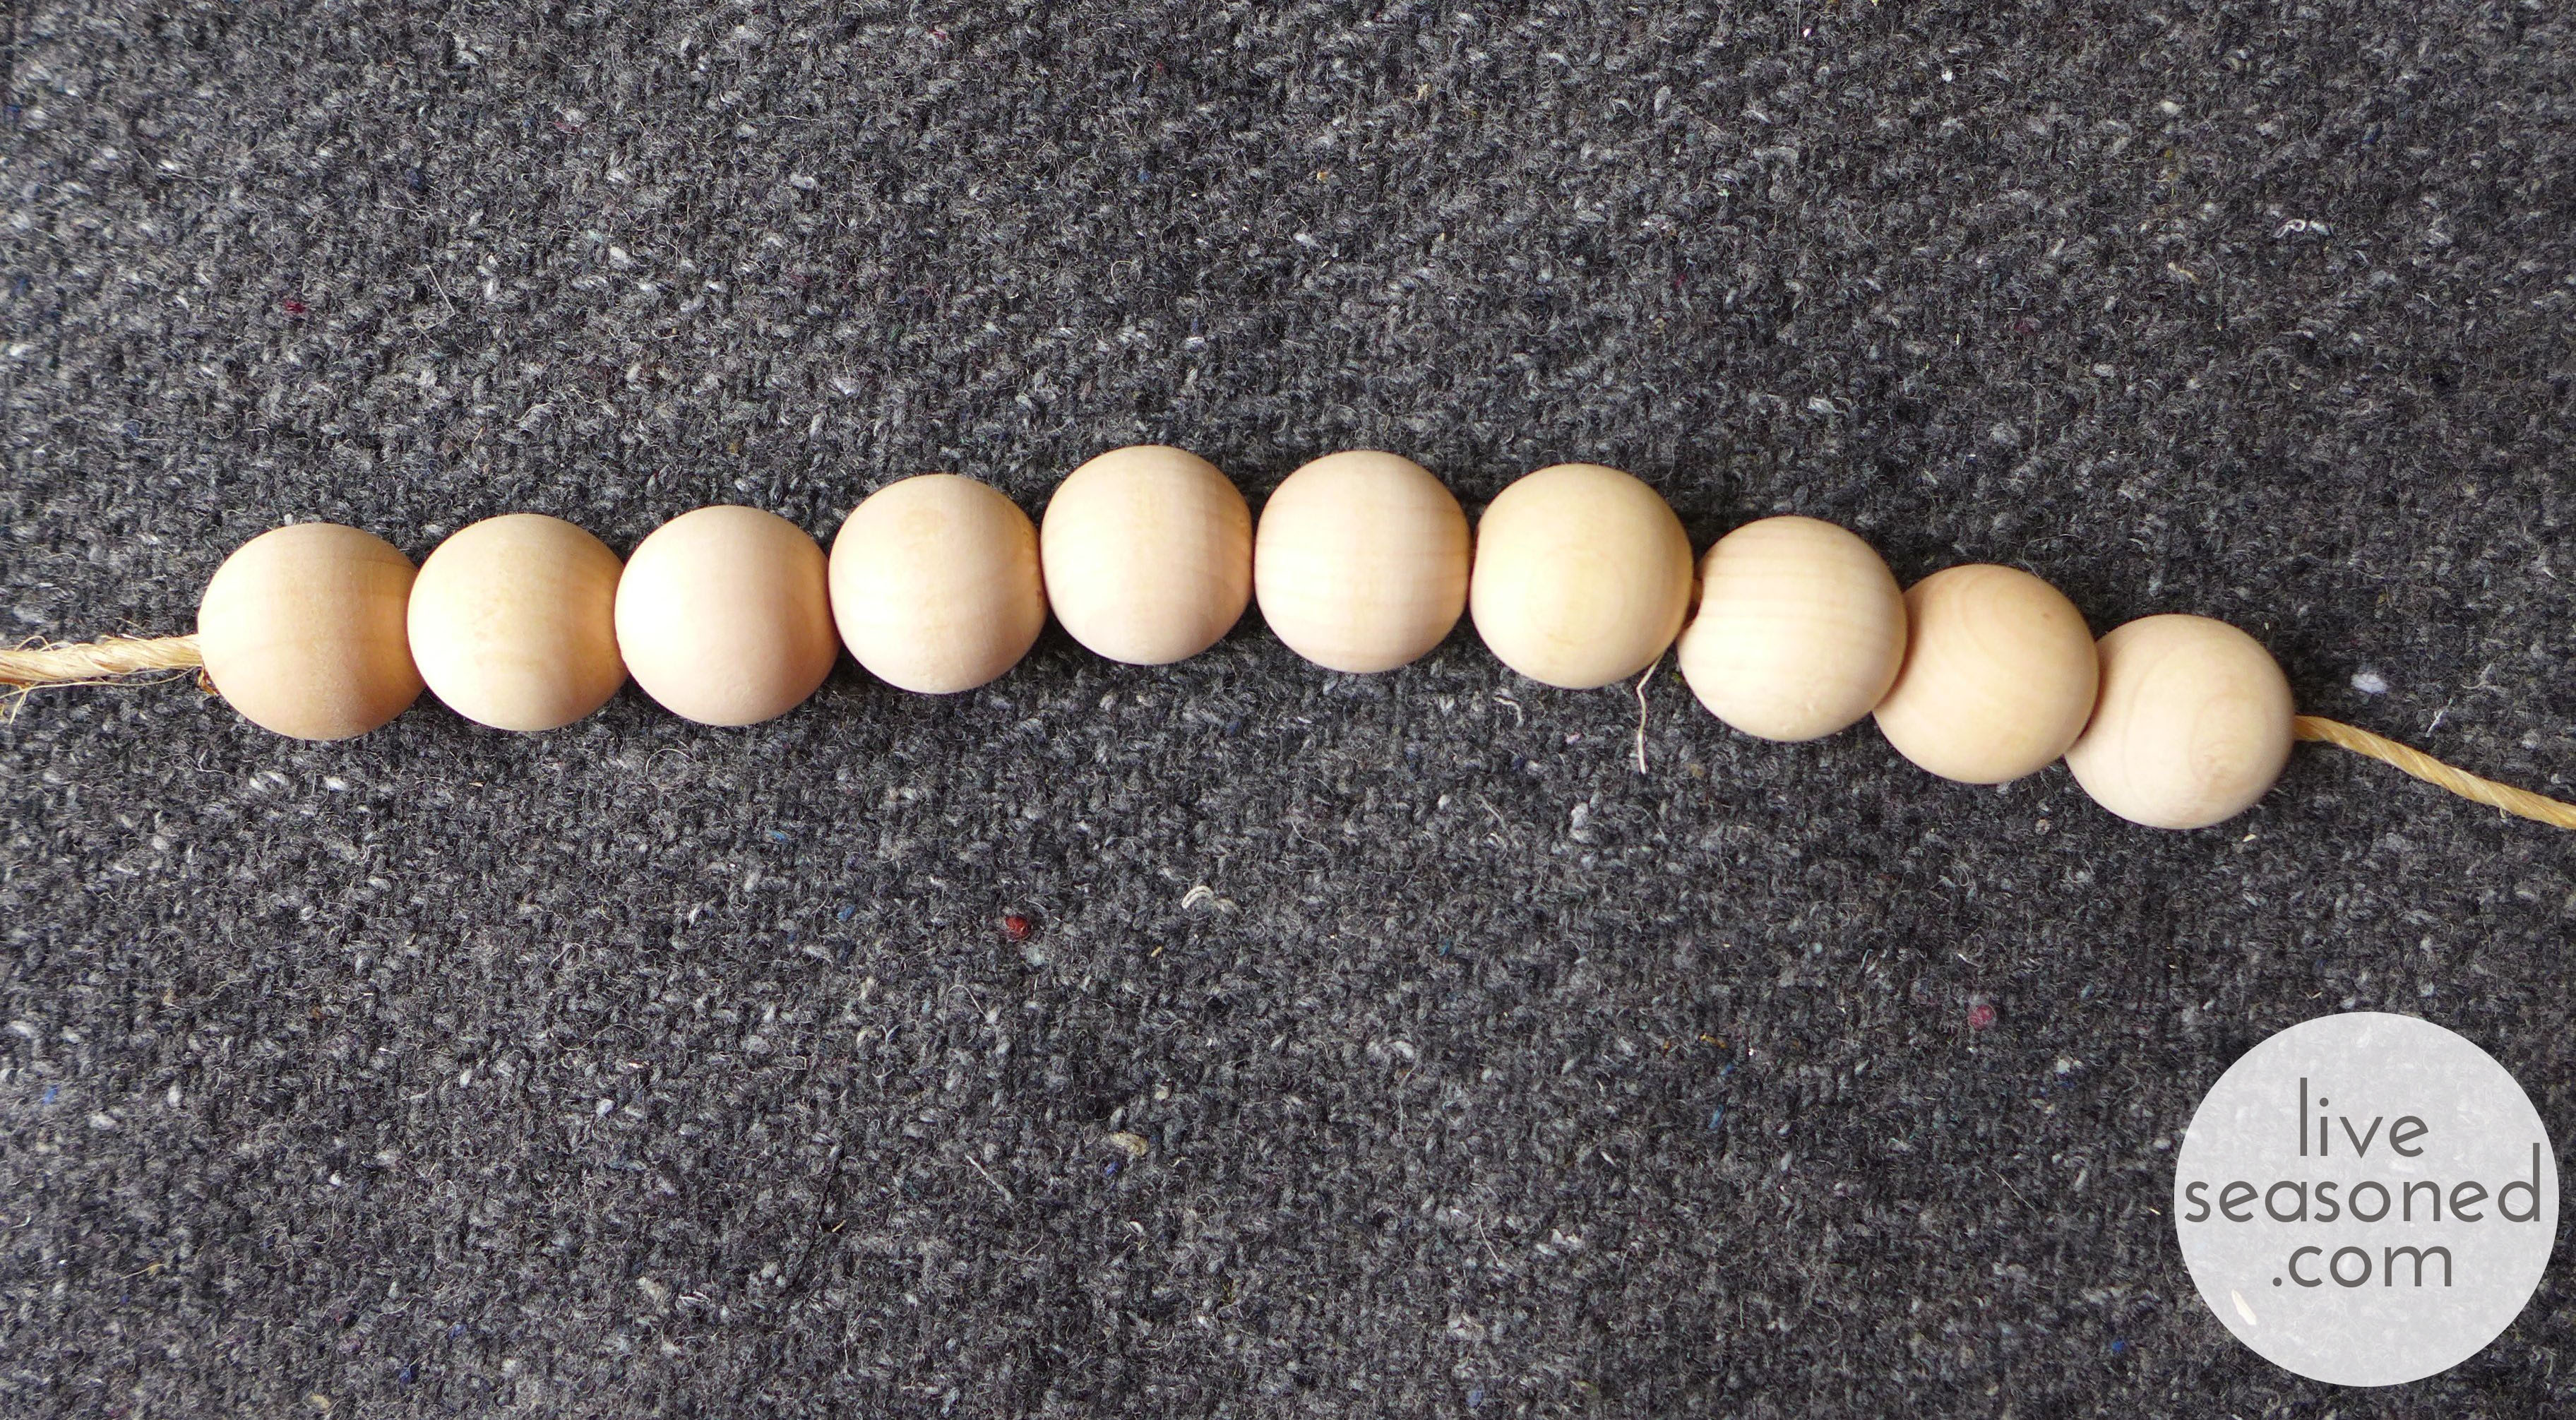
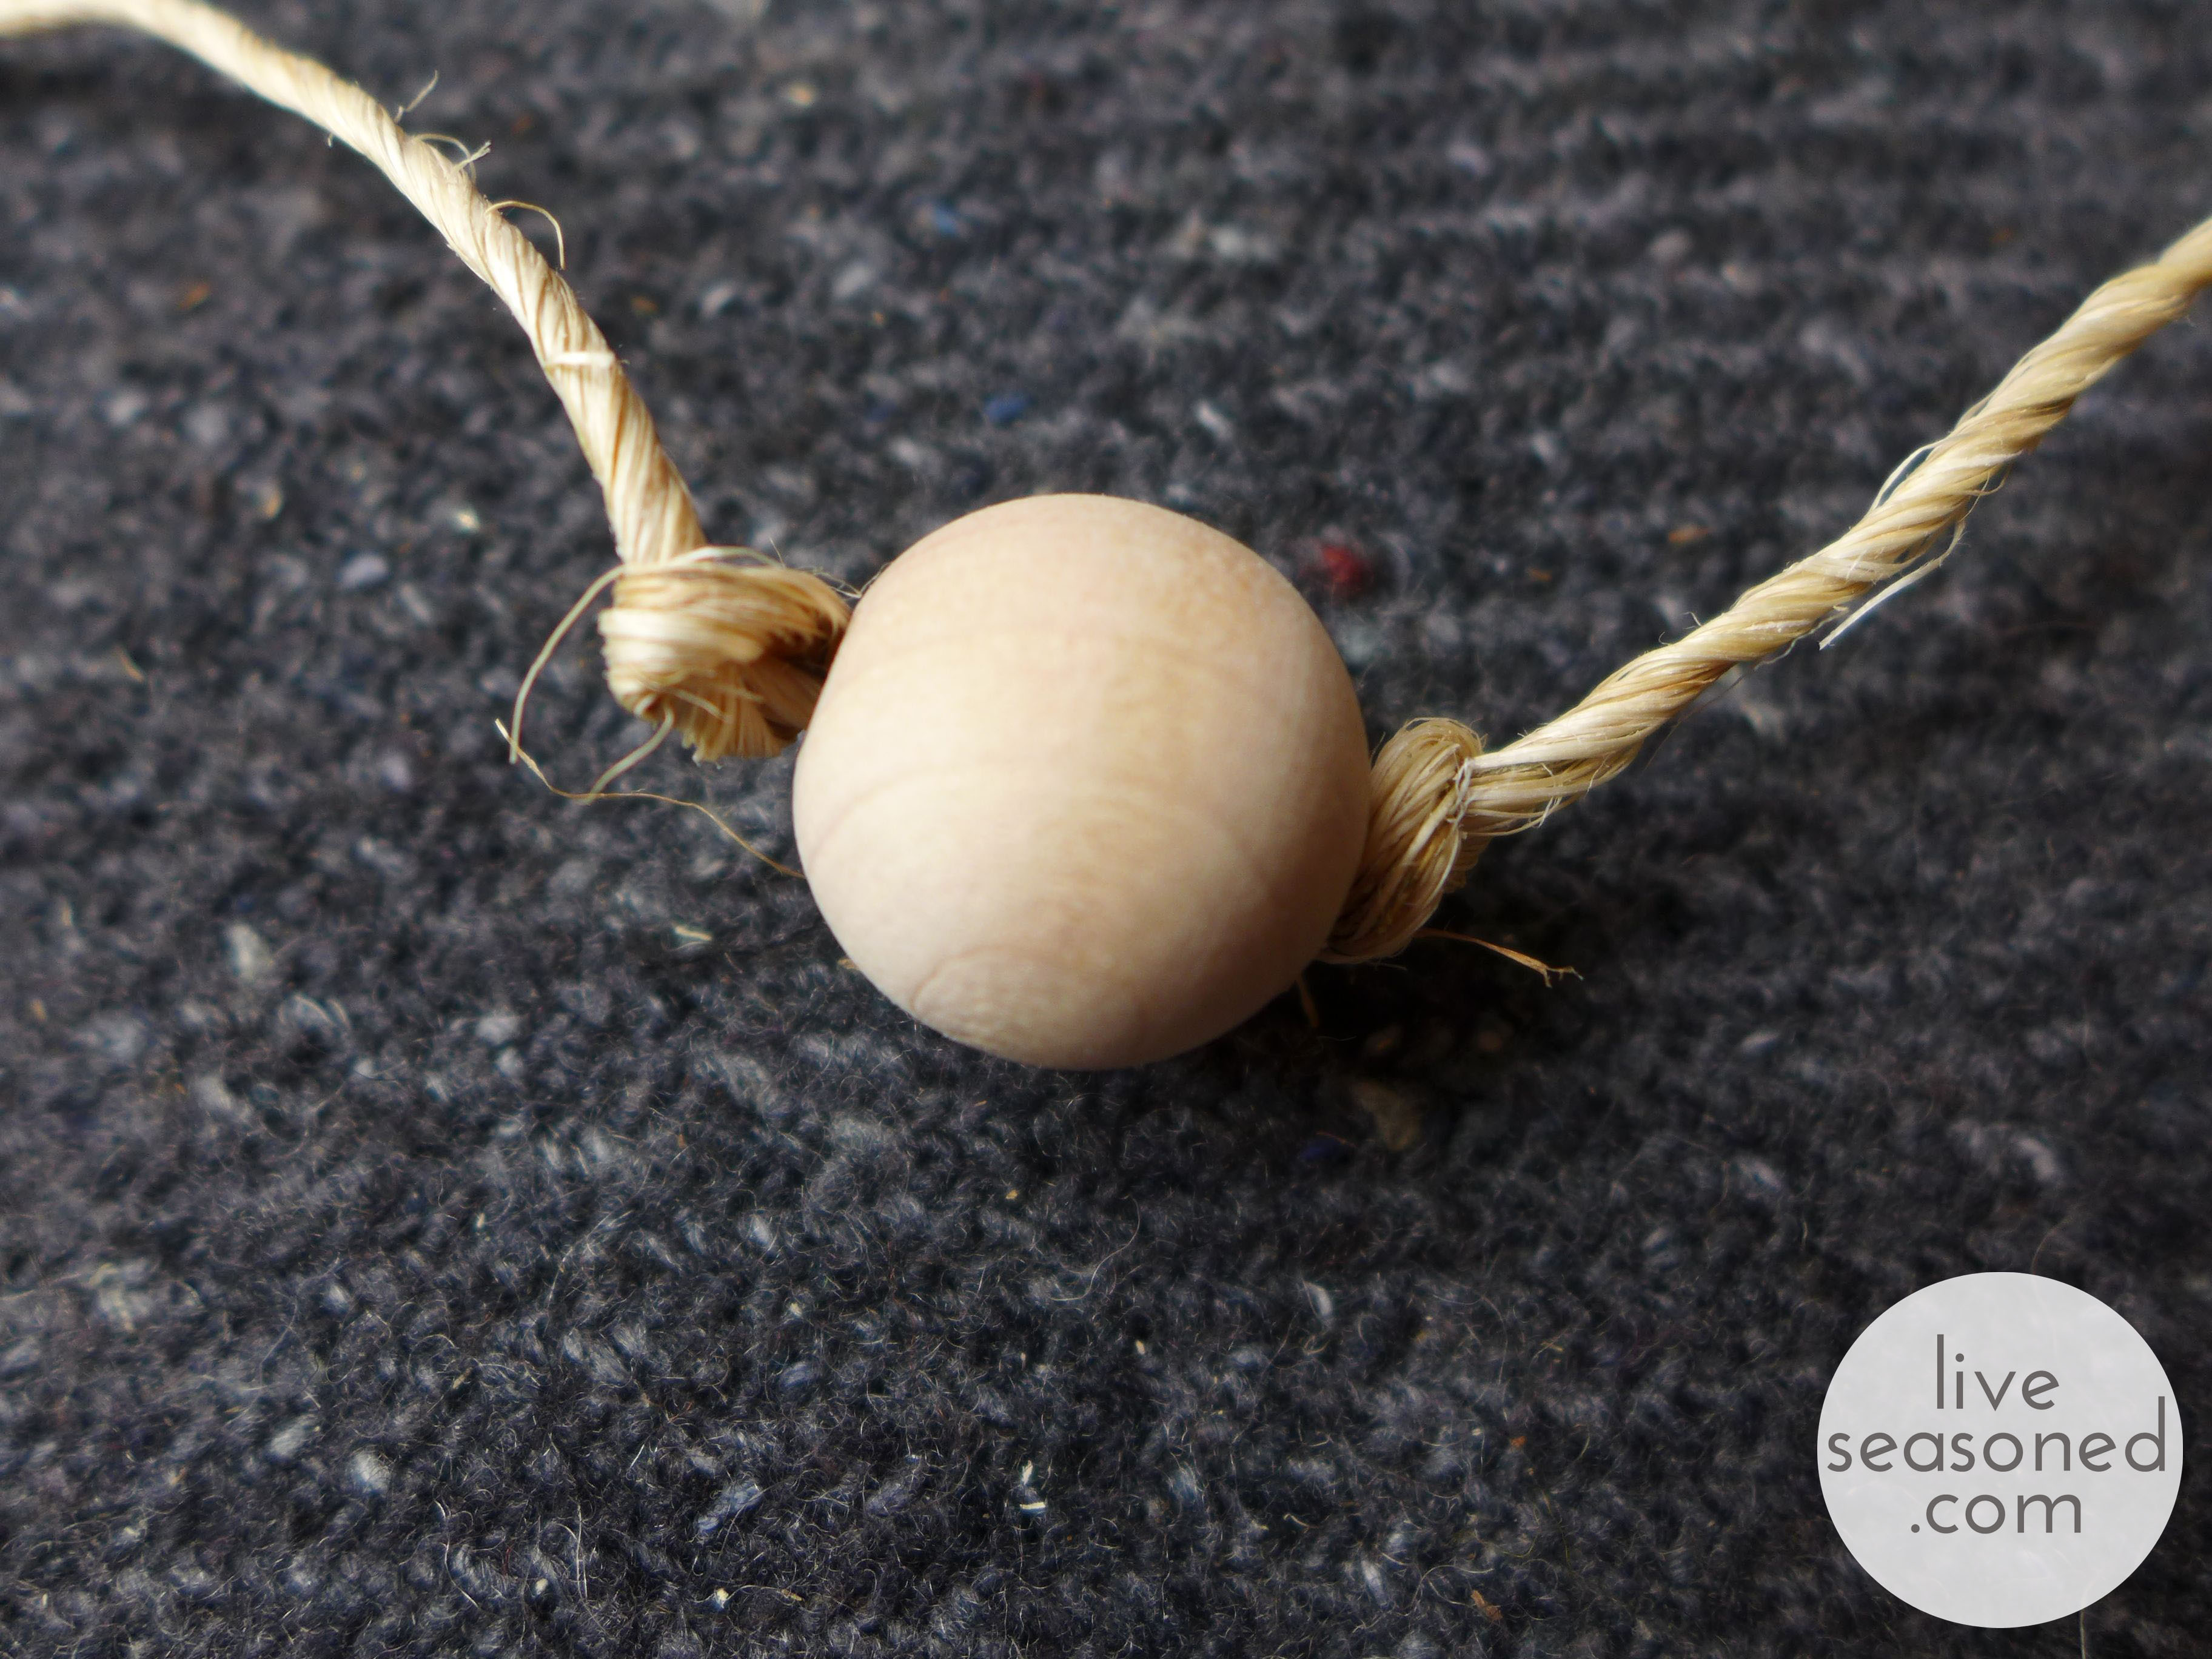
The Beads
In addition to the fruit, I wanted to add a few other textures and colors to the garland. First up, some natural wooden beads. I bought a 20-pack of these beads at Joann’s. Once home I thought about painting these, but didn’t have any craft paint, so decided to keep them natural and add color with a bit of yarn (something I have plenty of!).
The Flowers
Using some rusty-red yarn, I made a few very simple flowers. I originally saw these flowers on Pinterest and made from twine. The link to that Pin was bad, but a quick Google search led me to this really helpful how-to video.
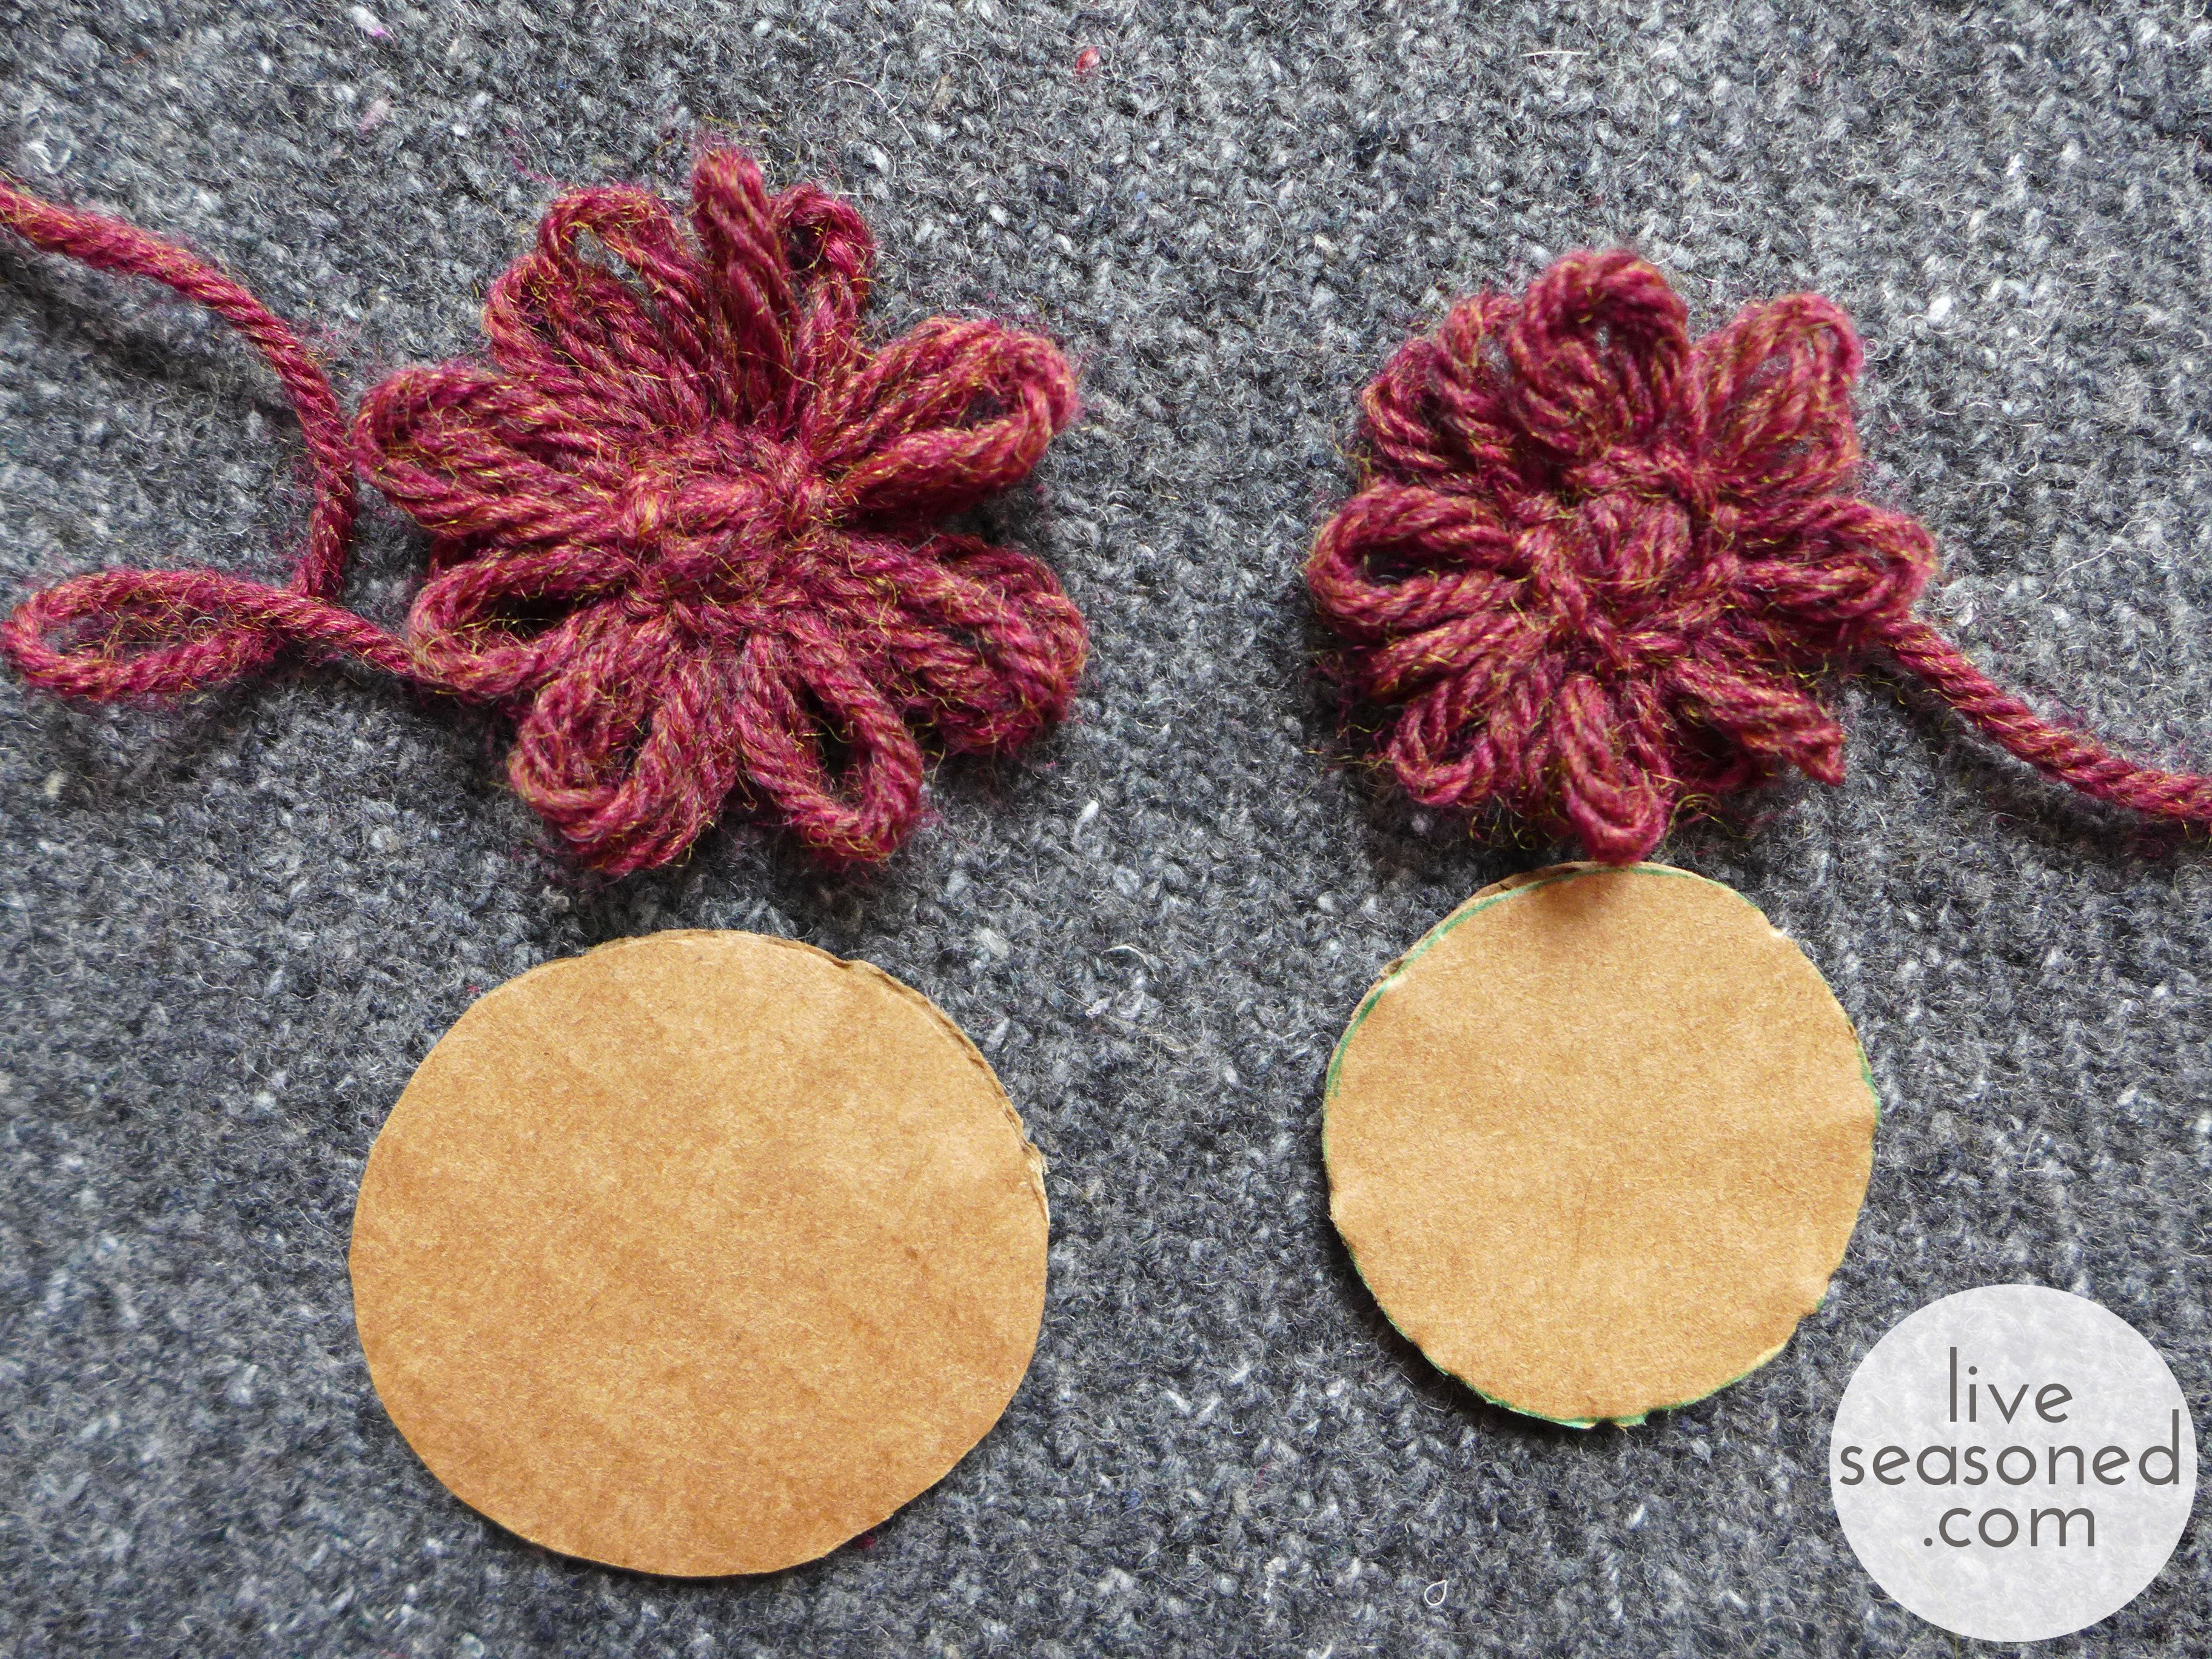
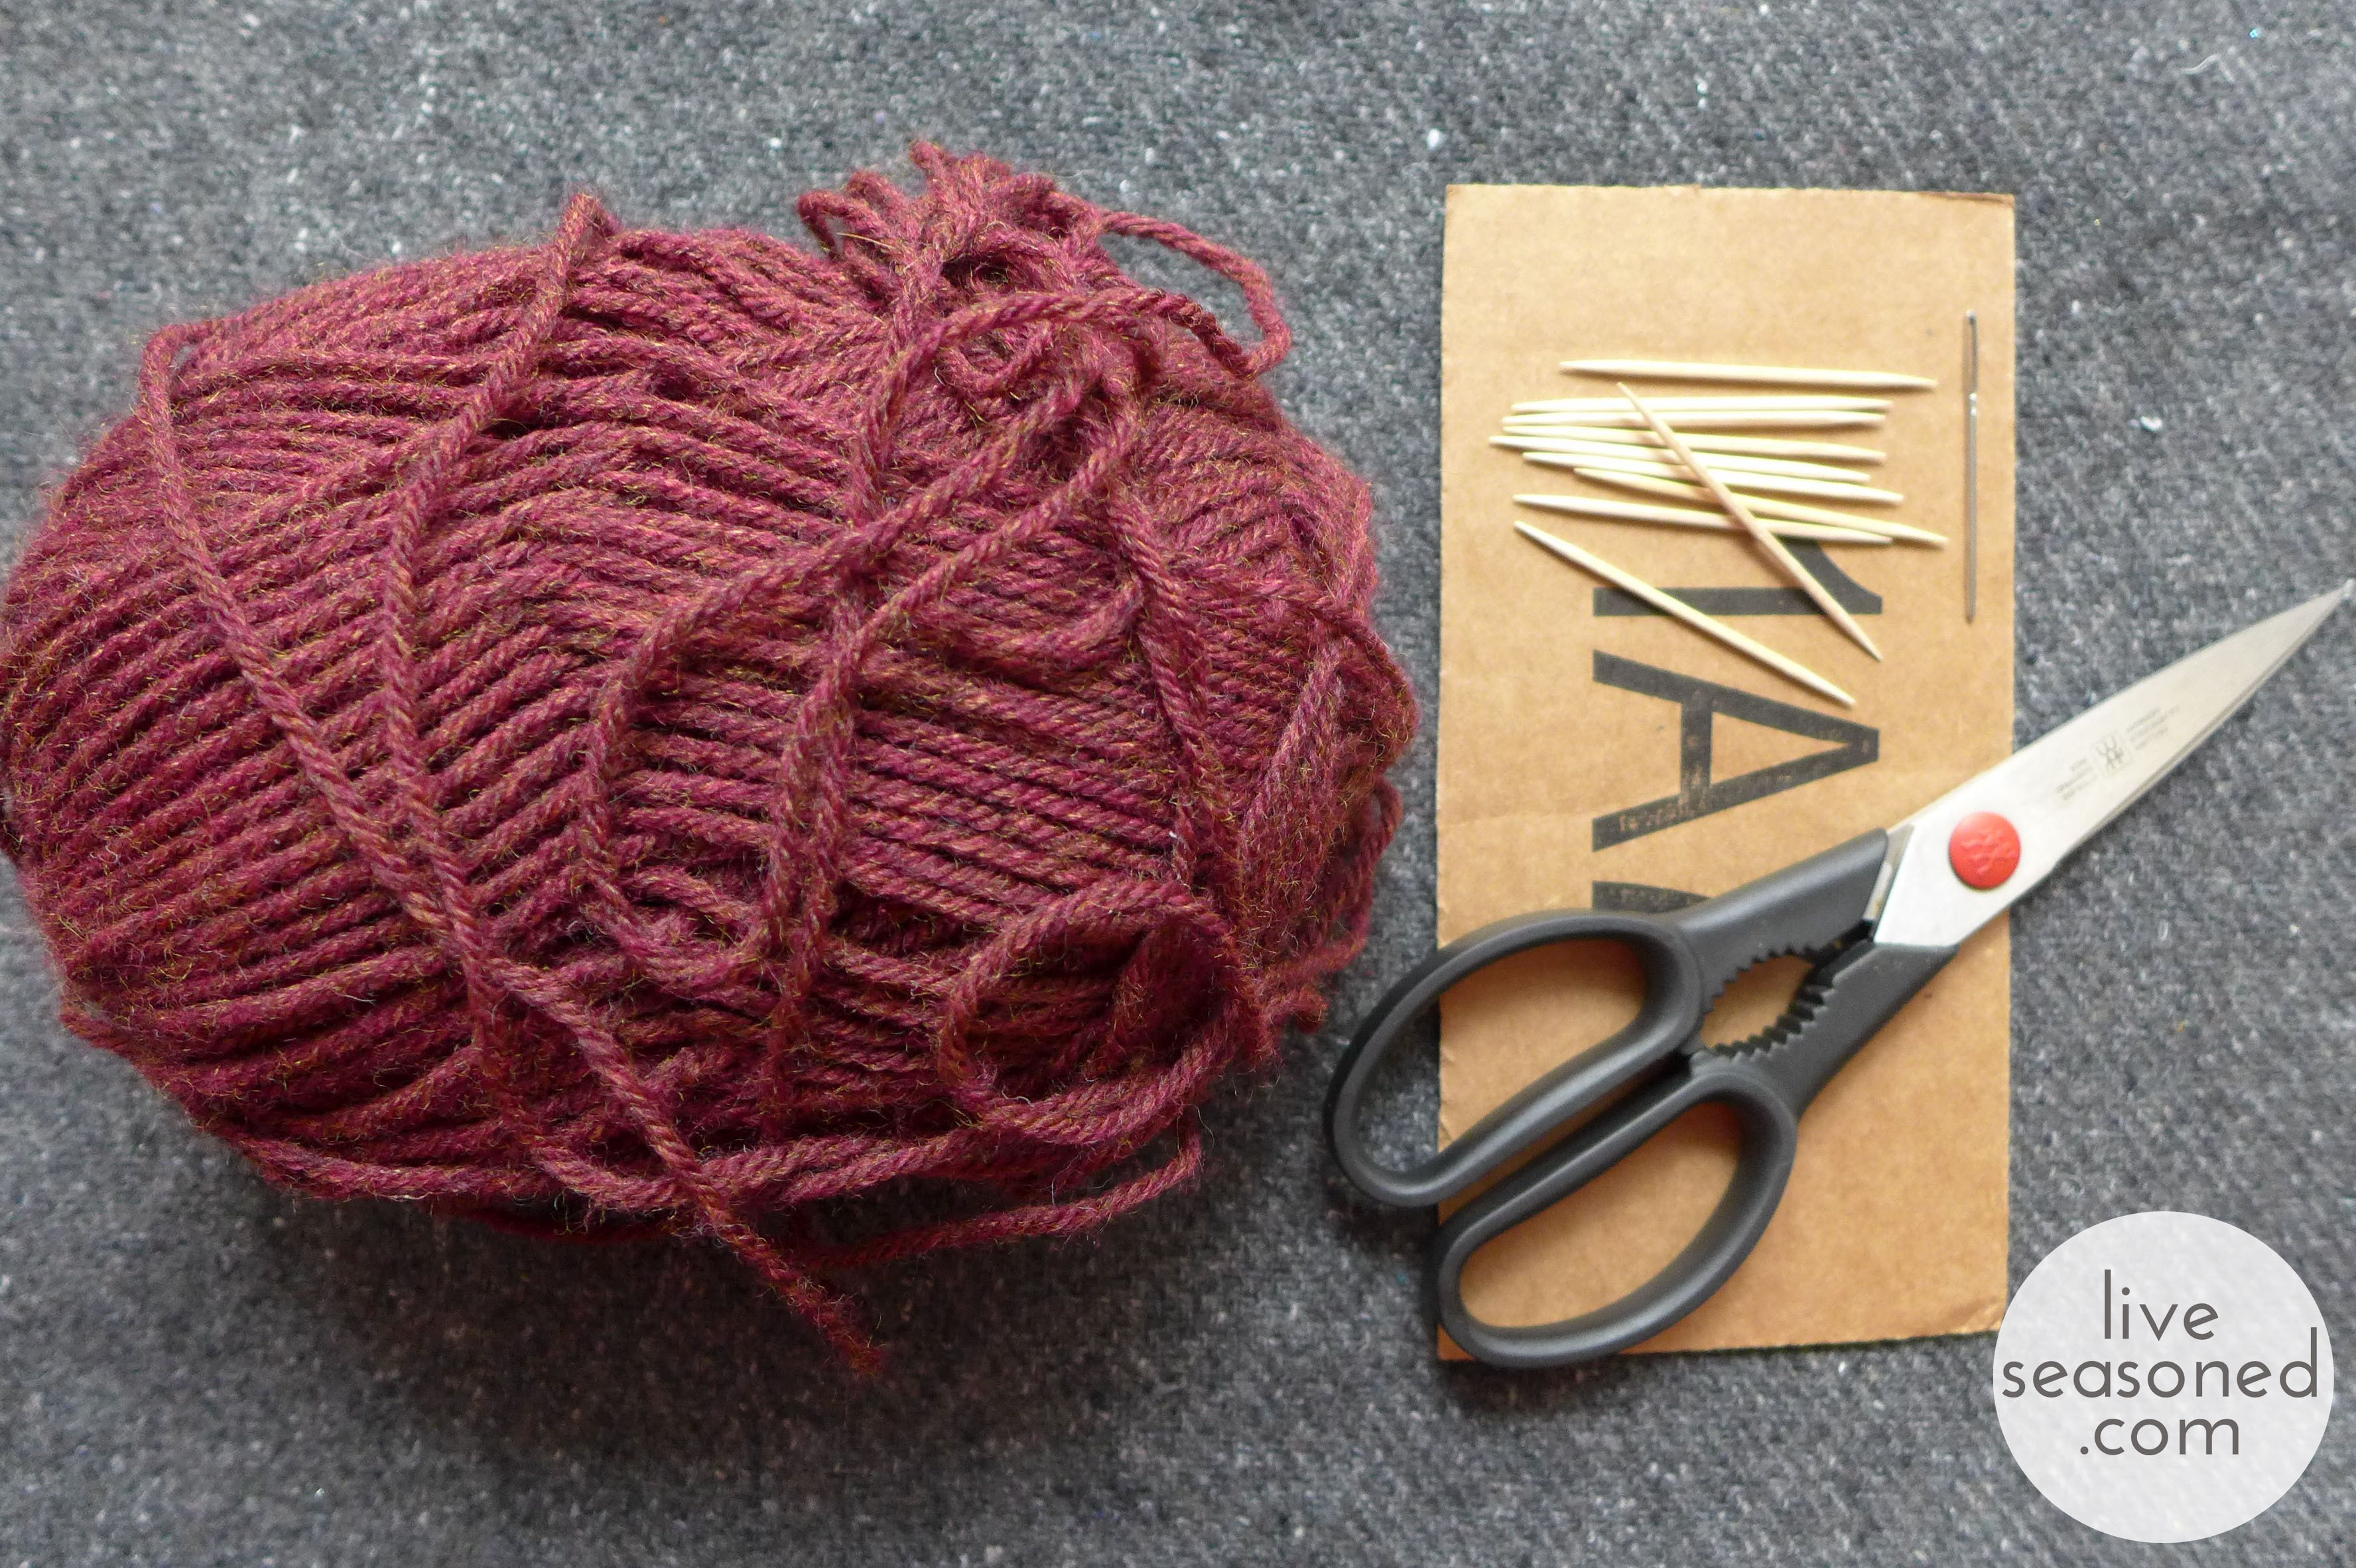
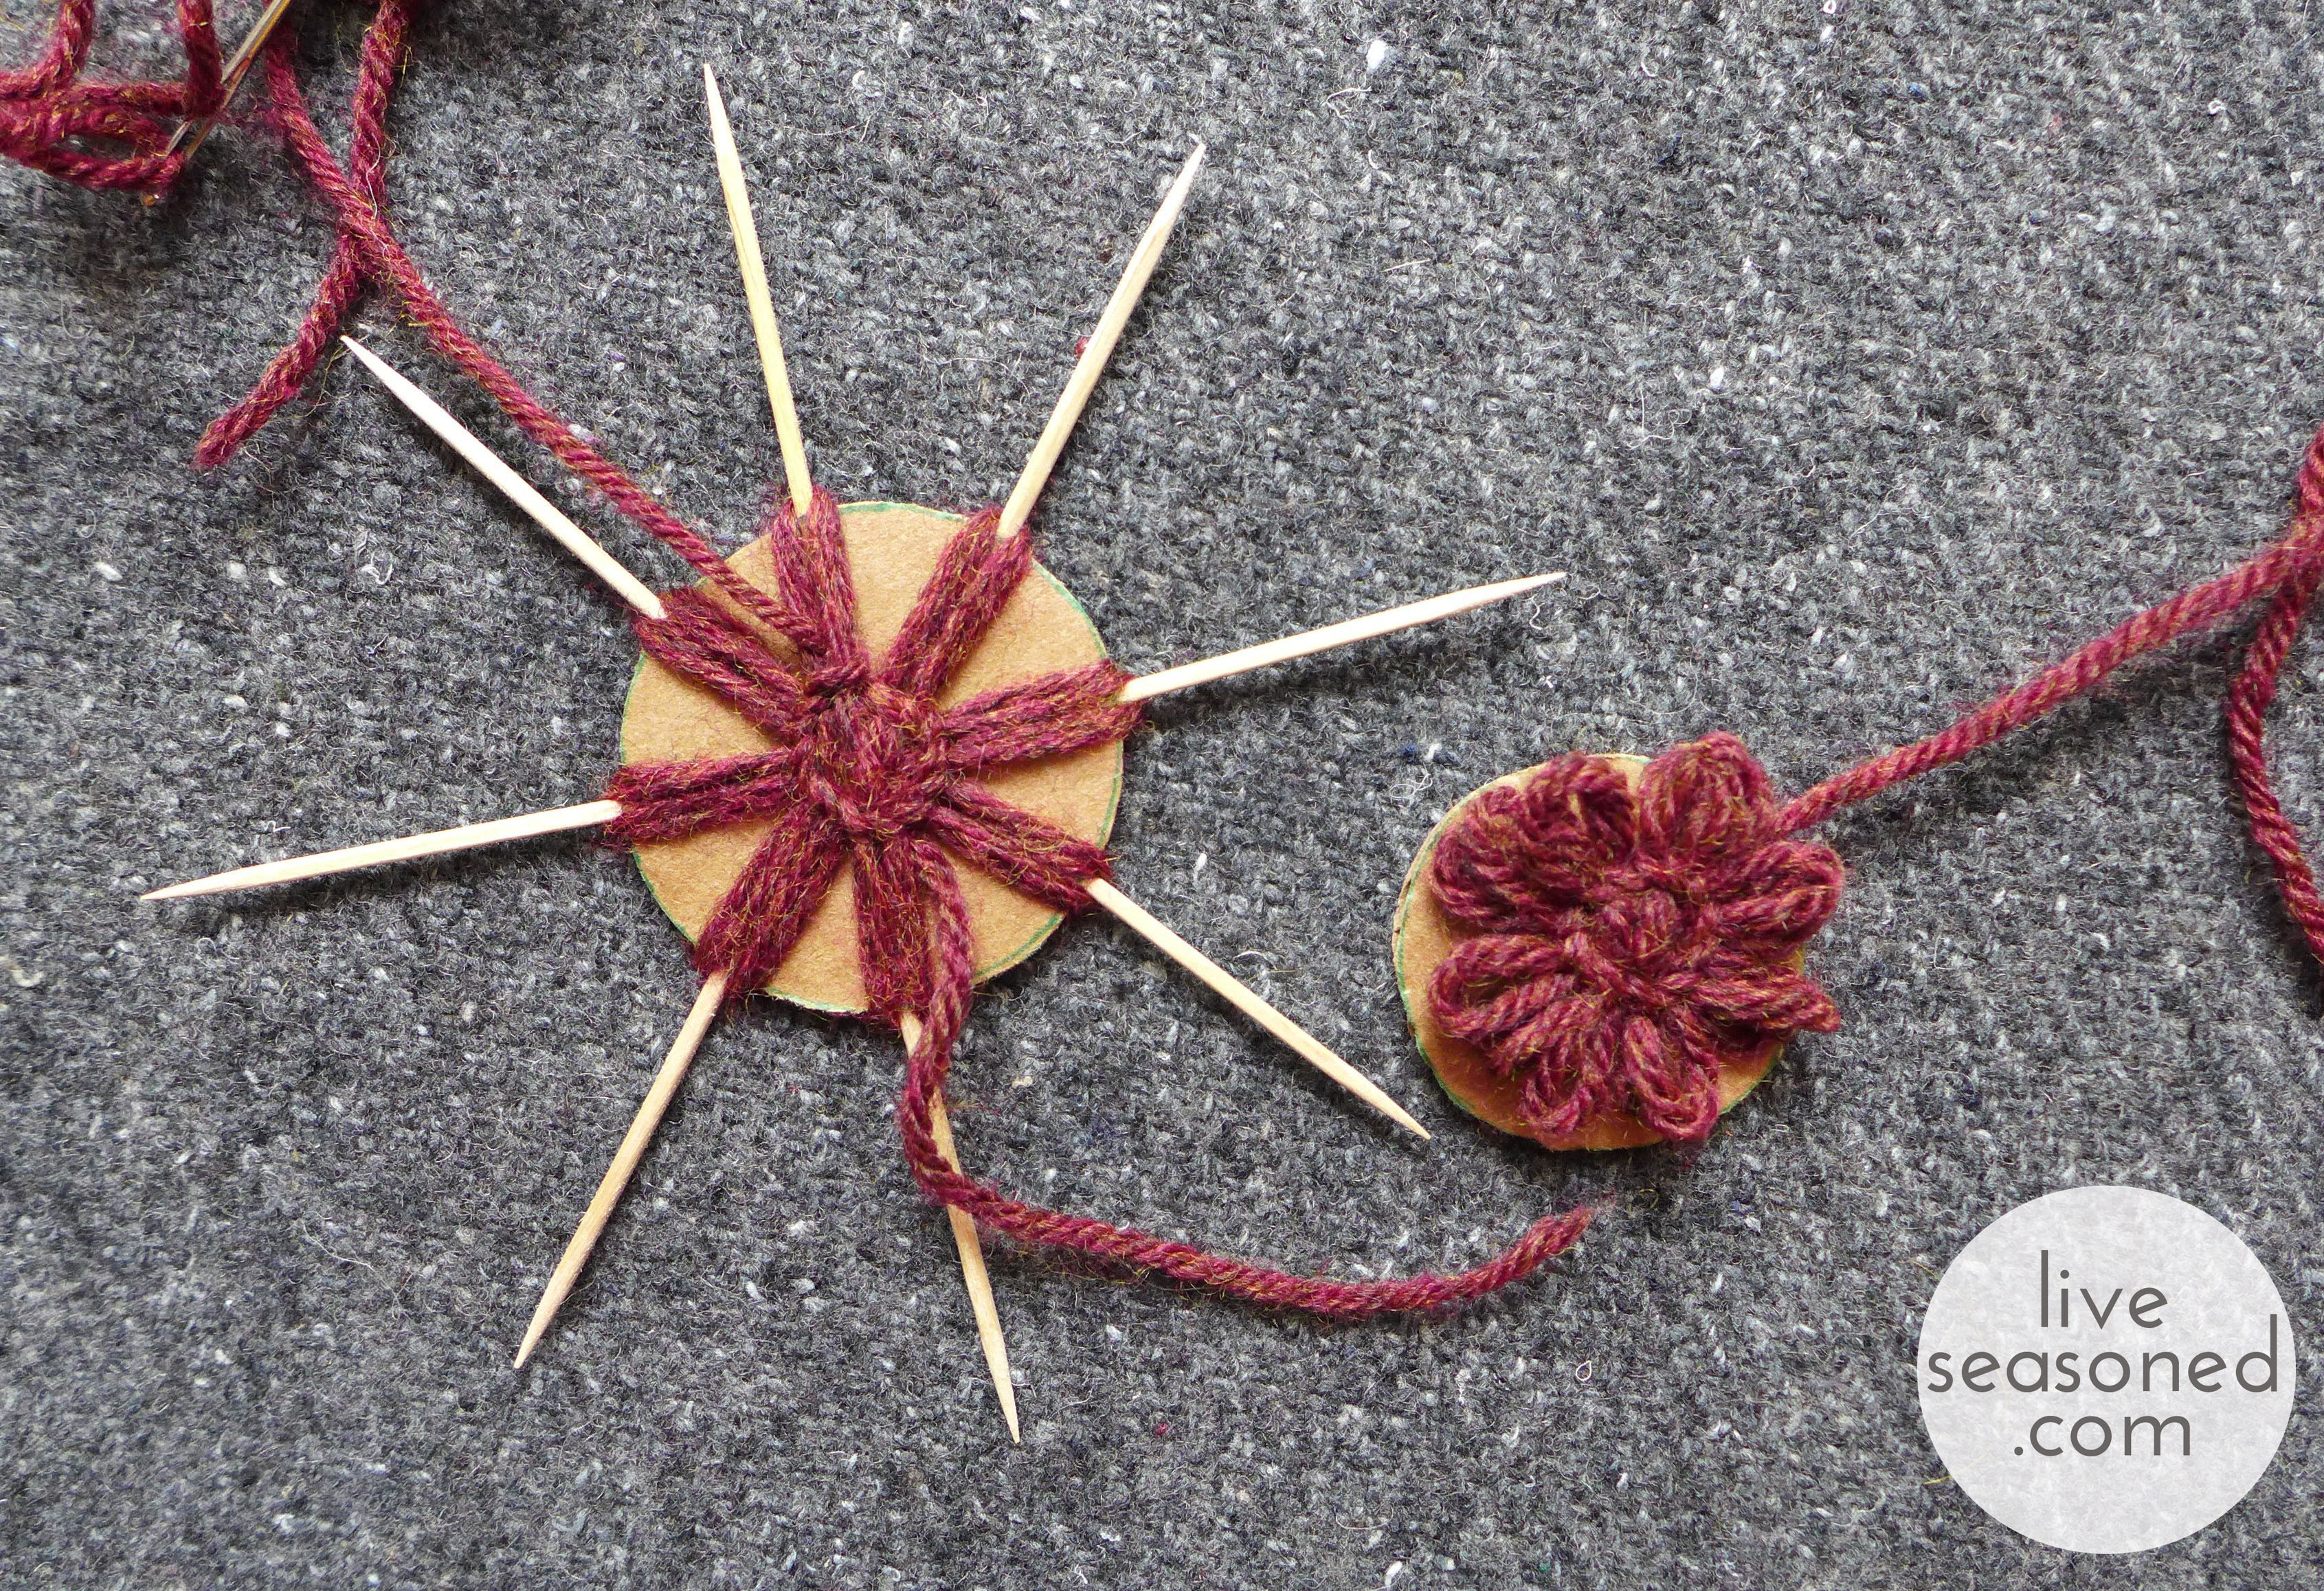
The only supplies you’ll need to make these are a piece of cardboard, yarn or twine, scissors, a yarn needle, and 8-12 toothpicks. If you assemble that, you’ll be able to make a flower right along with the video because she explains everything at a nice slow speed.
In the video, 12 toothpicks are used, but as I mention, you may need as few as 8, depending upon how large and full you make your flower. I made my flowers with cardboard discs that were 1.5 and 2 inches in diameter. As you can see in these photos, the diameter of your disc determines the final diameter of your flower. I wouldn’t go any smaller than 1.5 inches, and if I were to do it again, would probably uses discs that were 2 and 2.5 inches. As you can see, my flowers are quite full with only 8 petals, and I think 12 would have been too much, but may be just right for a 2.5 inch flower.
*Don’t cut off the extra yarn ends when you’re done making your flower – these come in handy for tying the flowers to the twine.
Assemble the Garland
With your garland swag in order, it’s time to assemble! I attached the fruit with hot glue. In order to get the fruit to hang nicely, you should glue the twine on no more than 1/3 of the way down the slice (rather than along the widest part, if that makes sense?). If you glue the twine too far down, the weight of the fruit will cause them to face downwards rather than out. The flowers were tied on by the extra yarn ends. If you cut off the yarn ends, you could easily hot glue these too. Once tied, I then cut any excess yarn off. And to make bead placement easier, I strung a whole bunch at once (as you saw in the photo above), then just knotted the twine on either side of the bead.
With those instructions, just go for a random placement of your items, but still keeping in mind that odd-numbered groupings are more appealing. The beads sort of act as breakpoints in your garland, so I thought it was useful to place 3 or 5 of the fruit and flower items between any two beads.

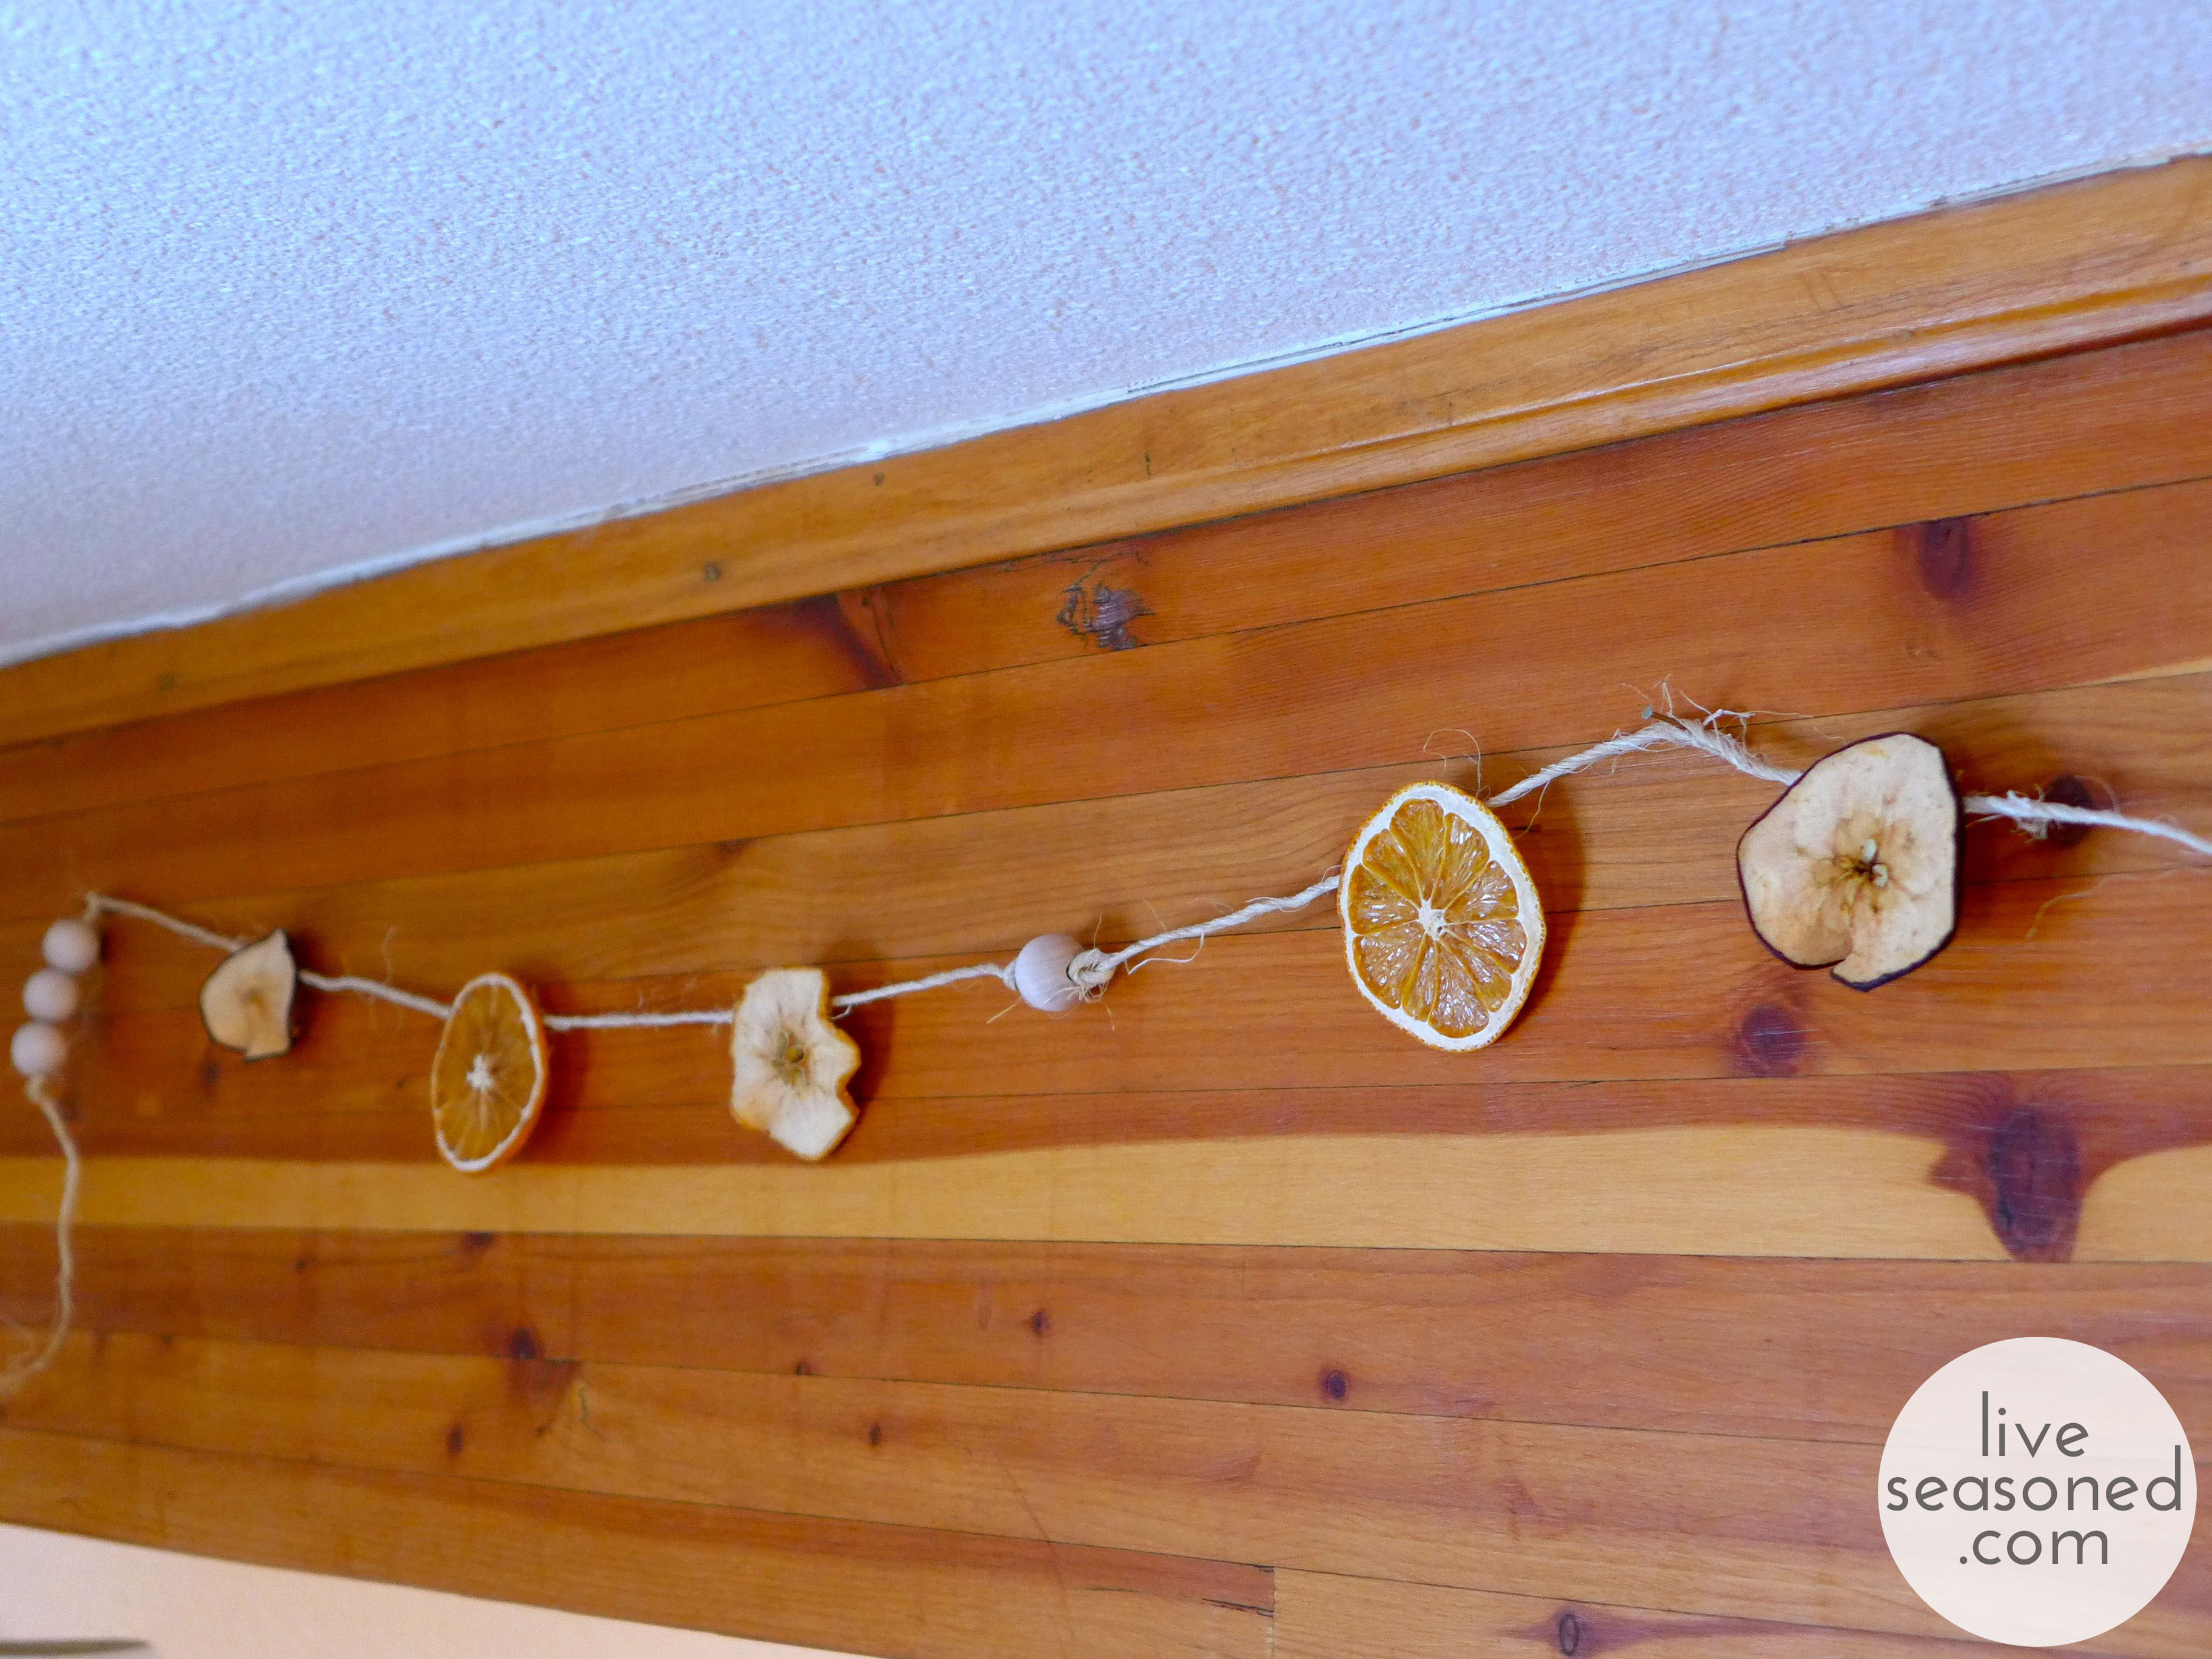
Hang it up!
And now comes the hardest part, figuring out where to hang your garland. I started by stringing mine along one of our ceiling beams and thought that it looked OK, but maybe a little bit too puny for that space? What do you think?

From there I took the garland over to our fireplace. First, I tried stringing it along the mantel and letting the excess hang down on either side. I loved the look of the garland along the skinny front of the mantel, but knew that if we were to keep it here, I’d have to shorten the ends to keep Little A from pulling on or trying to eat it.


So I moved the garland with the same hanging profile to above the mantel. I’m not completely in love with how it looks here, I feel like there’s nothing specific that’s anchoring the garland to that spot (am I wrong?). I do love being able to see it as we sit on the couch, especially when I catch a look at the fruit in the glow of the candle light. But, now what’s this renter to do with those ugly brown vents? Any tips?


So, that’s our simple bit of decoration for November. Just enough to tide me over until I go evergreen and light crazy!
Post-Halloween Costume Update
Last Monday I shared a progress post of our Halloween costumes. At that point Little A’s disco ball costume was all ready to go, but his strong man still needed some work. Today I’m back to share the final strongman costume and some family photos from our fun weekend.
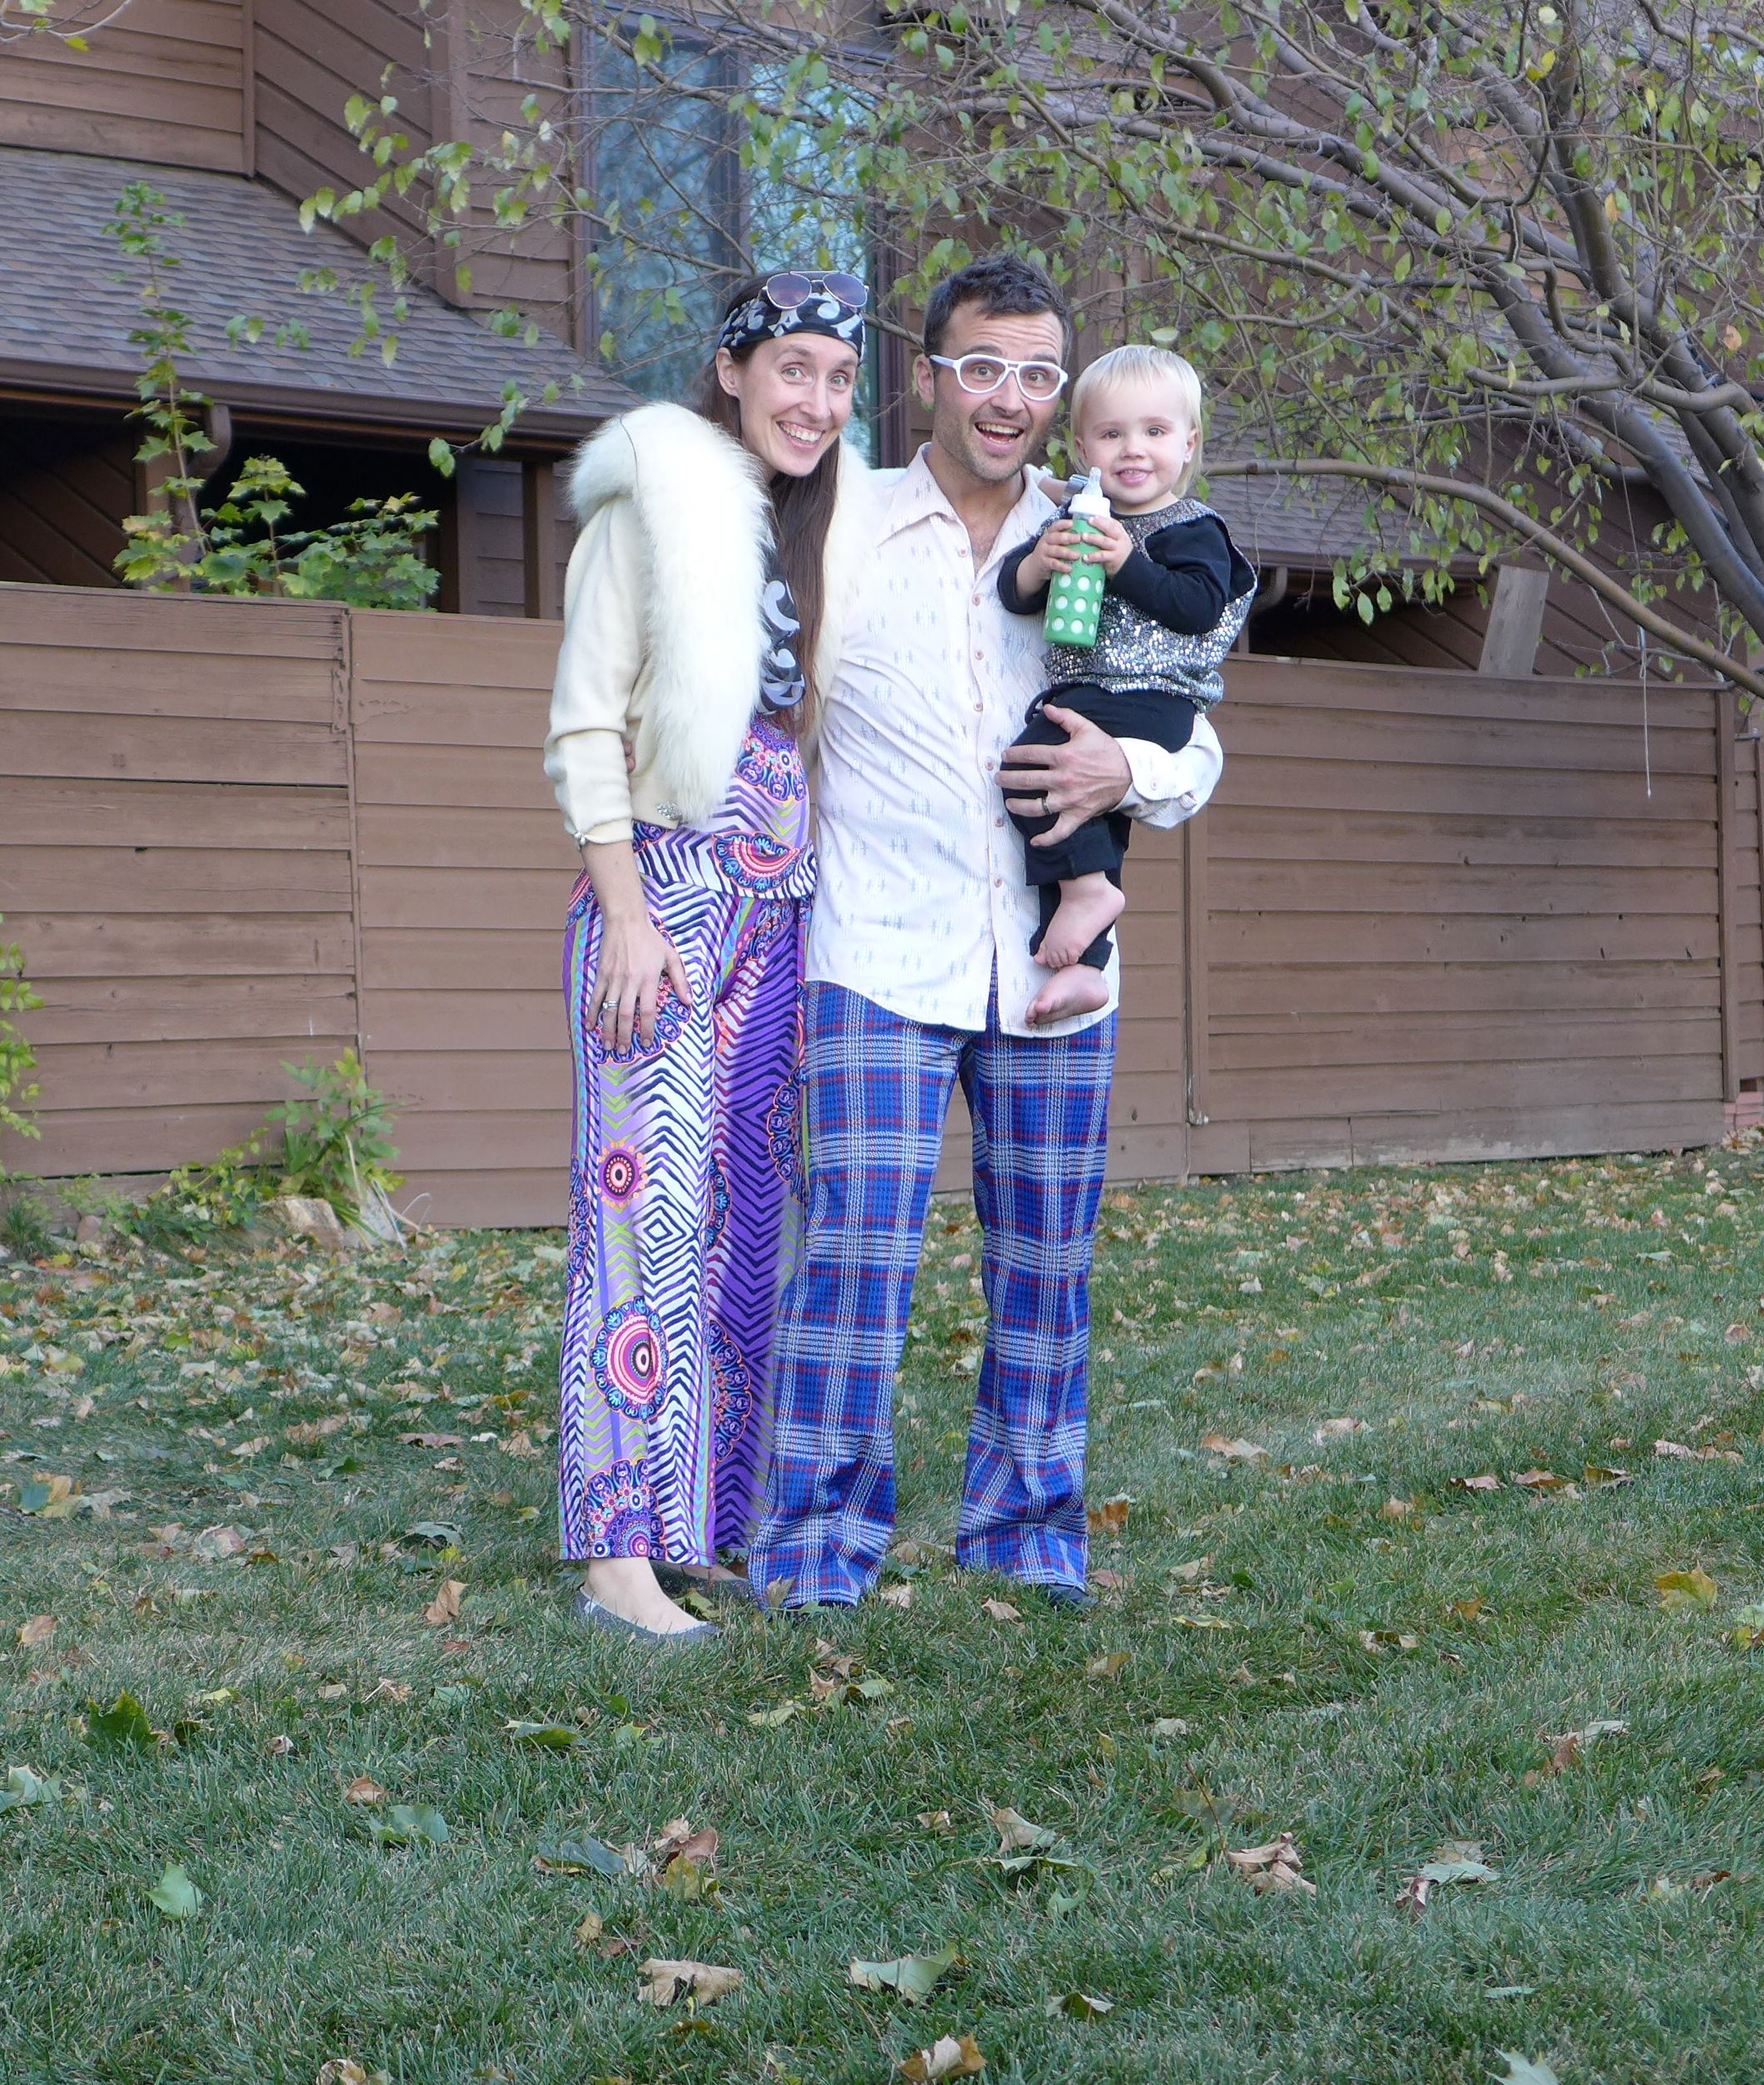
Here we are, ready for the disco, and I have to mention that Alex’s costume really worked like a disco ball! On Saturday we went to a party at our friend’s house, which had plenty of large windows and sliding doors facing the setting sun. Anytime Alex would walk past a window or in/out the doors, his shirt would reflect sunlight all over the room, just like a disco ball! Needless to say, everyone, especially the adults in the room, loved it!
Finishing the Strongman


When we left off, I had the onesie and leggings for Alex’s costume, but was still working on his tattooed arms. I made the original set shown in the previous costume post out of a pair of women’s stockings, but they were pretty large, so the tattoos were super wrinkly unless I decided to stuff the arms and give him BIG muscles. I thought about stuffing them, but knew that our finicky guy might refuse that look, so I decided to go back to the store and pick up a pair of girl’s stockings.
After buying them, I immediately realized a second benefit – if I turned the stockings upside down, and cut a hole in the crotch area, I could slide the one piece over Alex’s head rather than cut off the stocking legs to create two sleeves (that I would then have to attach to the onesie in order to keep them up)! win. win. In addition to cutting the hole for his head, I cut off the tighter elastic material around the stocking’s waist area as well as cutting off the toe seams.


I then drew the tattoos (a heart, cloud with lightening, kite, mermaid, whale, sailboat, anchor, spiderweb, rose, stars, and a shell). I only drew the tattoos from his shoulder area down to about his wrist, this still left a bit of stocking length, and rather than cut it off, I folded it under the sleeves to create a double layer for added warmth. They were still a touch wide for his arms, but his cuteness totally distracted anyone from noticing ;-).
And speaking of cuteness, here we are on Friday night, just before going trick-or-treating at the most amazing/bizarre house (we only went to two houses, because that was more than enough for the little guy).
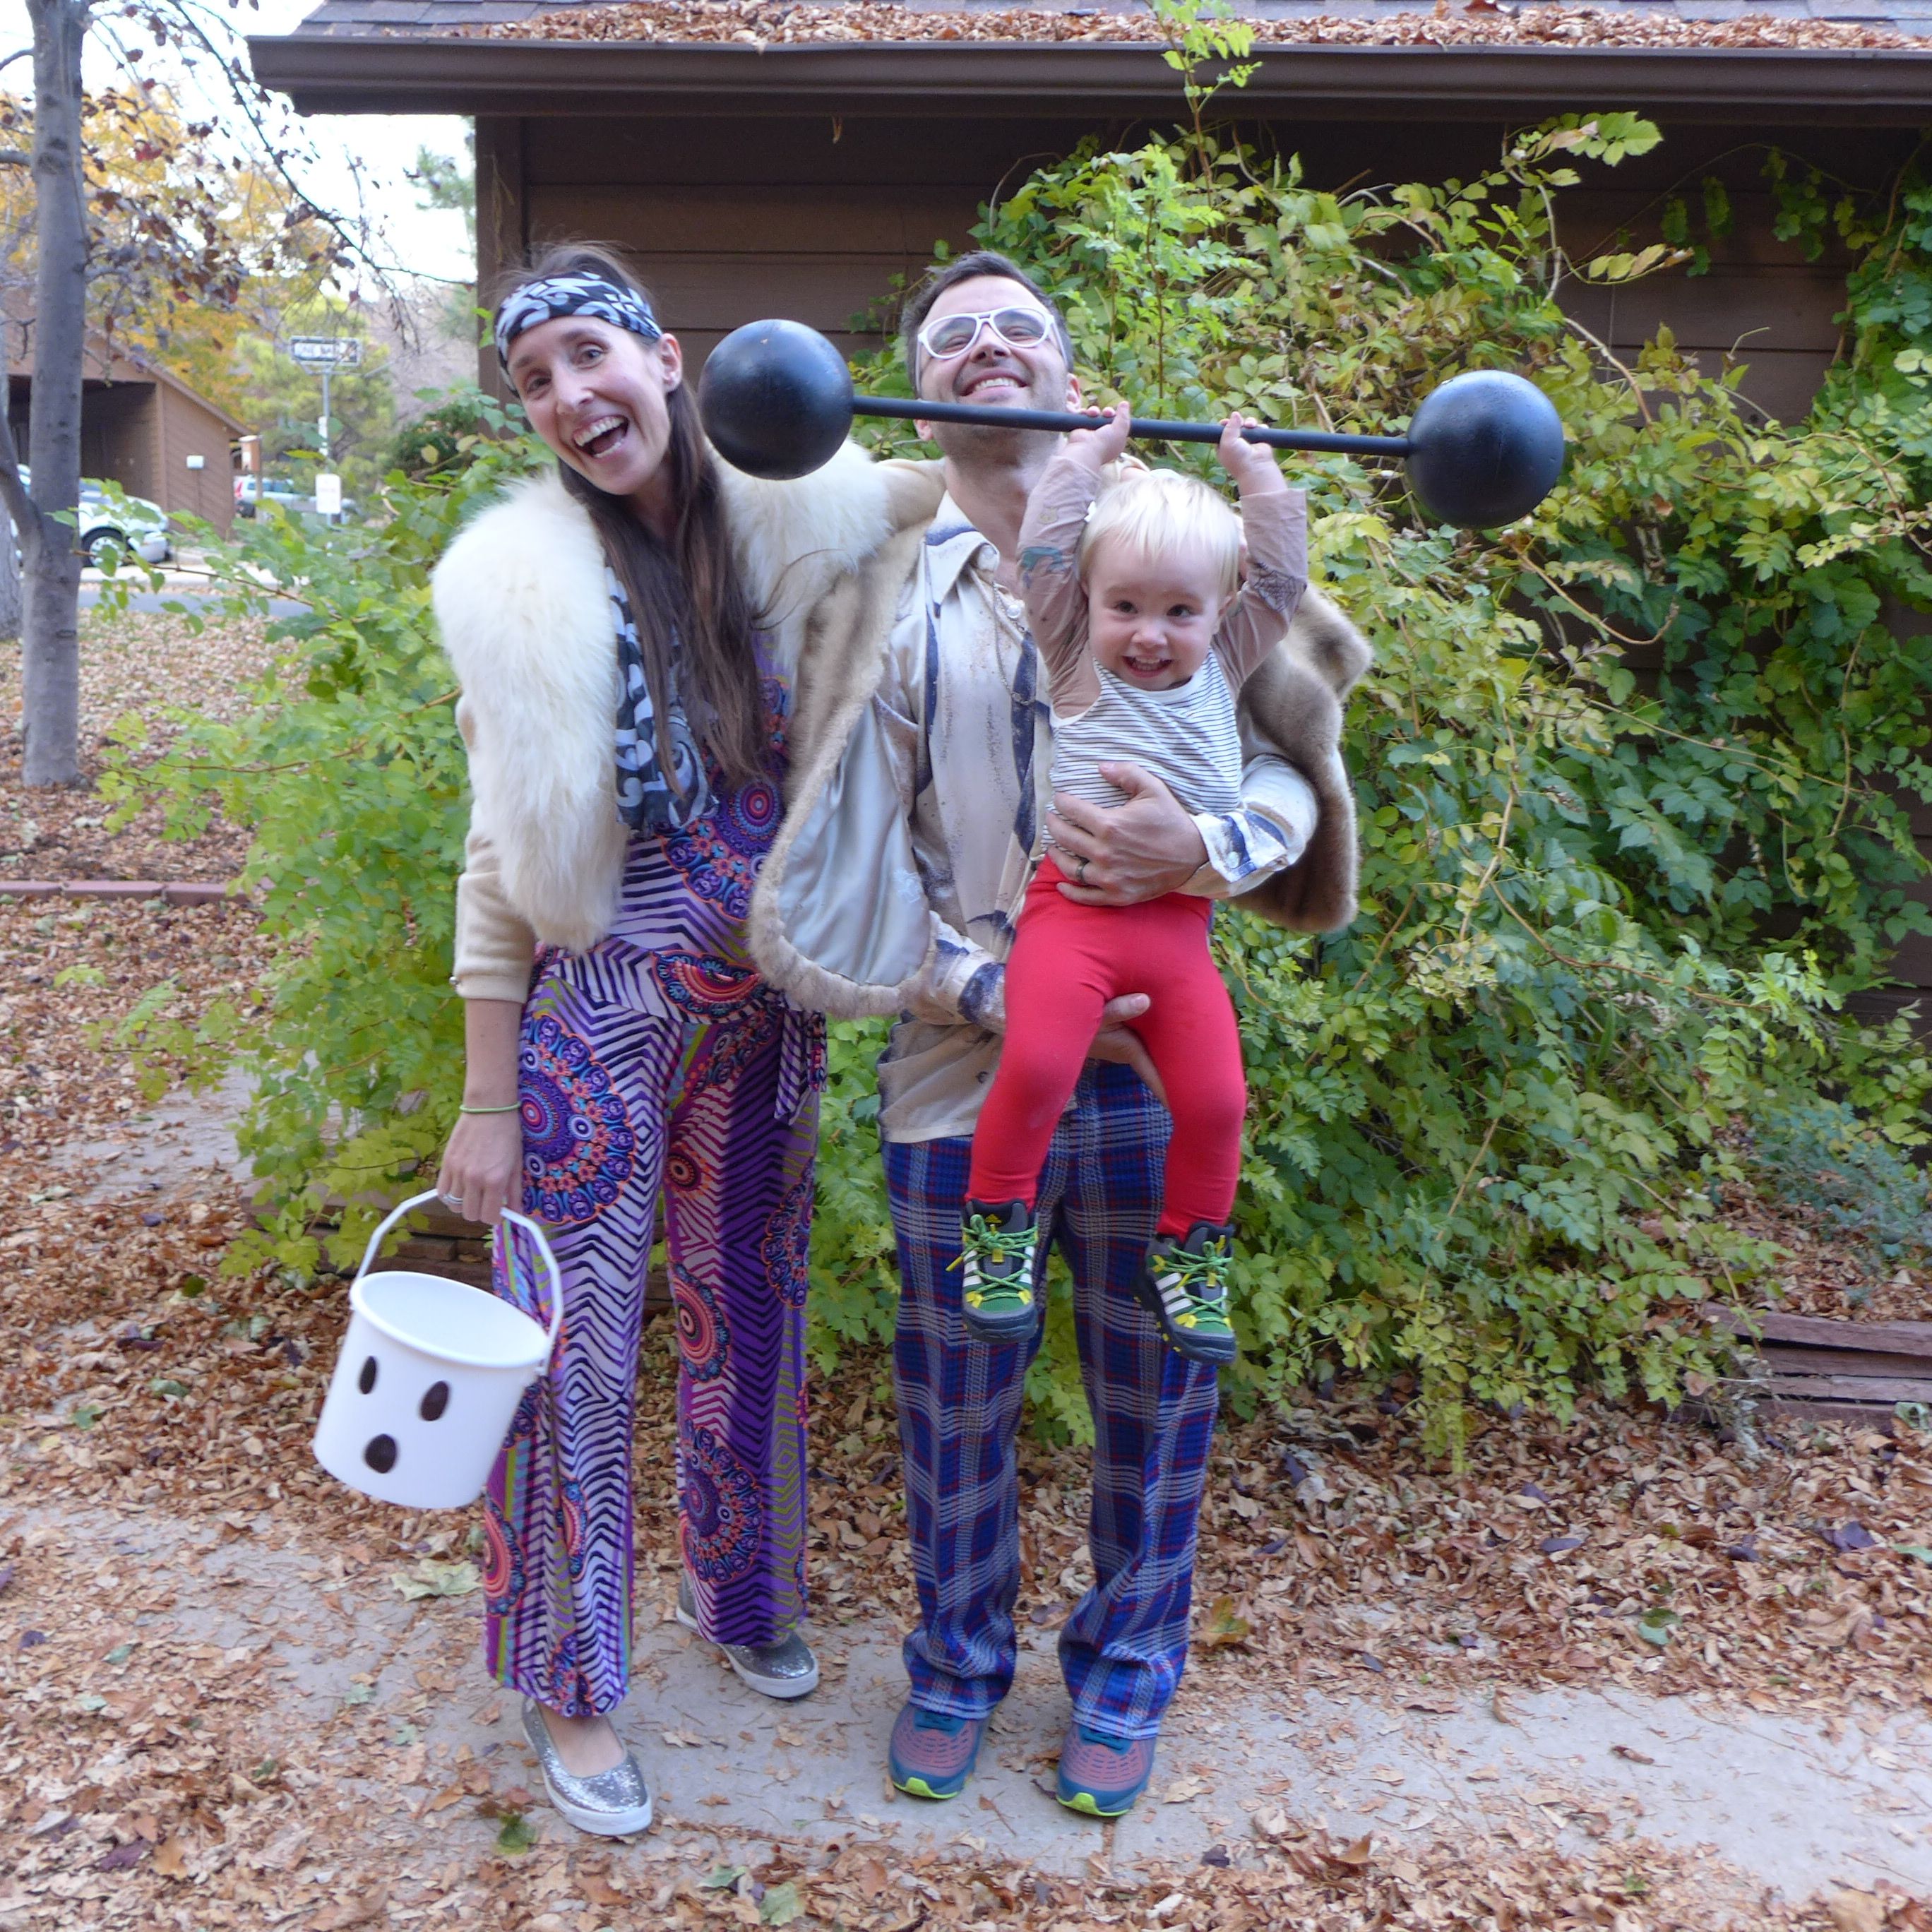
Funny thing, I had just finished Alex’s barbell (two styrofoam balls and a wooden dowel spray painted black), so this is his first time holding it. As we were about to take the picture, we told him to hold his barbell in the air, and he surprised everyone by doing it! So that’s us, surprise smiling/laughing as he performs on cue.

After these photos, he was more than happy to walk down the street holding his barbell and lifting it up whenever prompted. What a little guy! And what a great Halloween.