

Our Cooking with Kids post are taking a major step forward this week in that there are no parents involved! We’re going to have to change to name of this series to Kids Cooking. And I’m 100% A-OK with that.
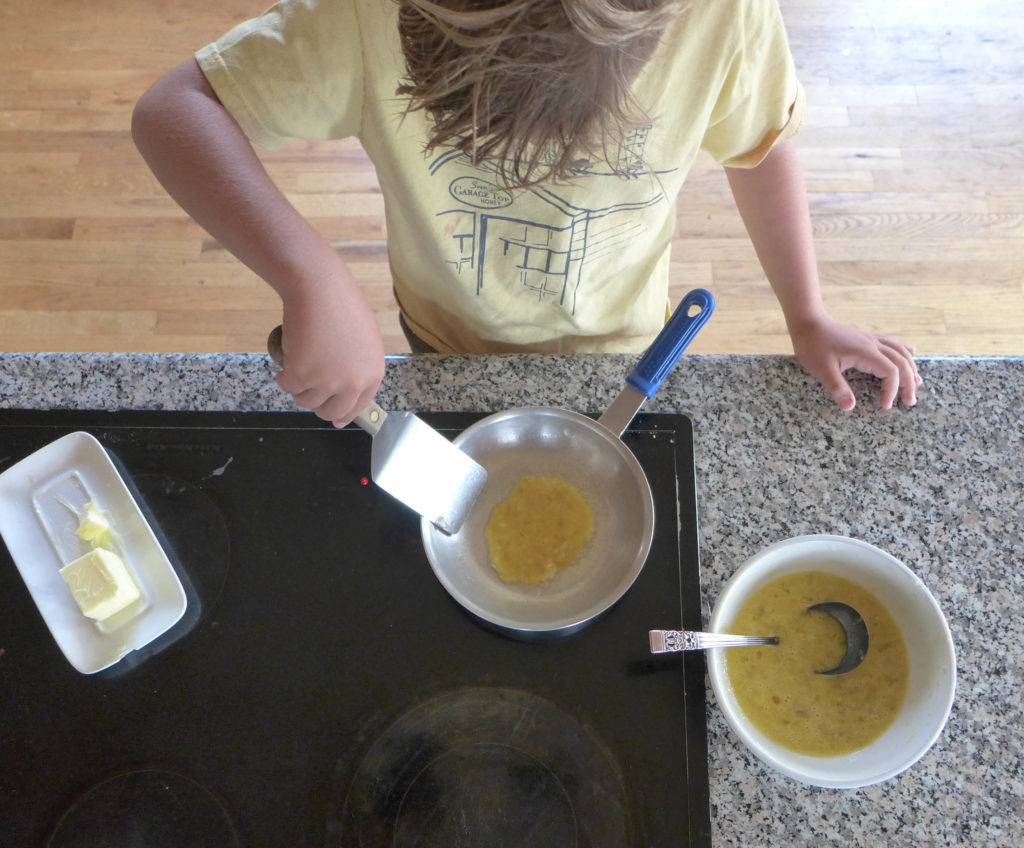
Both boys love to help with meal prep, but 7 y.o. Alex was really itching to make a meal (that required the stove) completely on his own. And it couldn’t be something as a simple as an over-easy or scrambled eggs. He wanted it to be more complex, so we gave it a thought a came up with banana pancakes!
These are nothing new, and I’m sure most parents of toddlers are familiar with this tasty two-ingredient recipe (four ingredients if you count the salt and butter!). Anyway, we realized that not only is this dish a great early food for your baby, it’s also a great “first recipe” for your budding chef.
Banana Pancakes
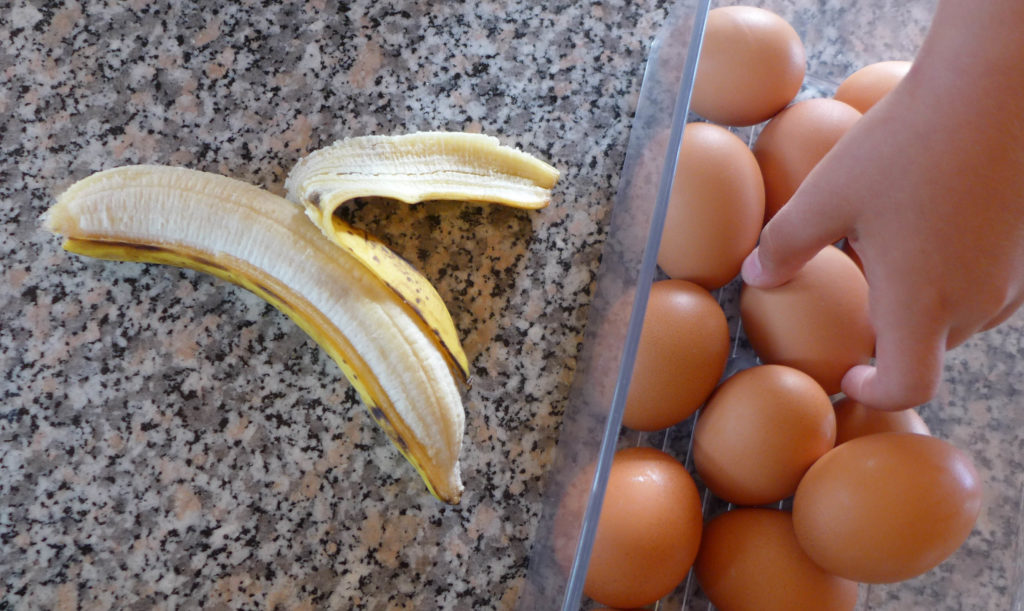
- 1 ripe banana
- 2 eggs
- butter
- salt
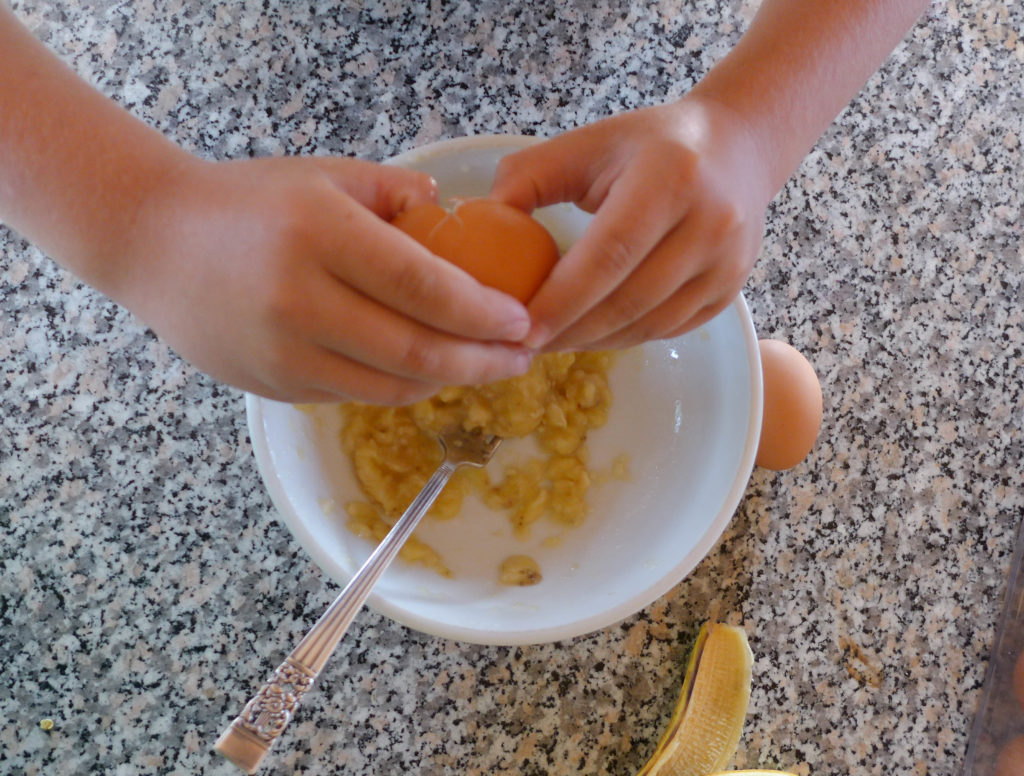
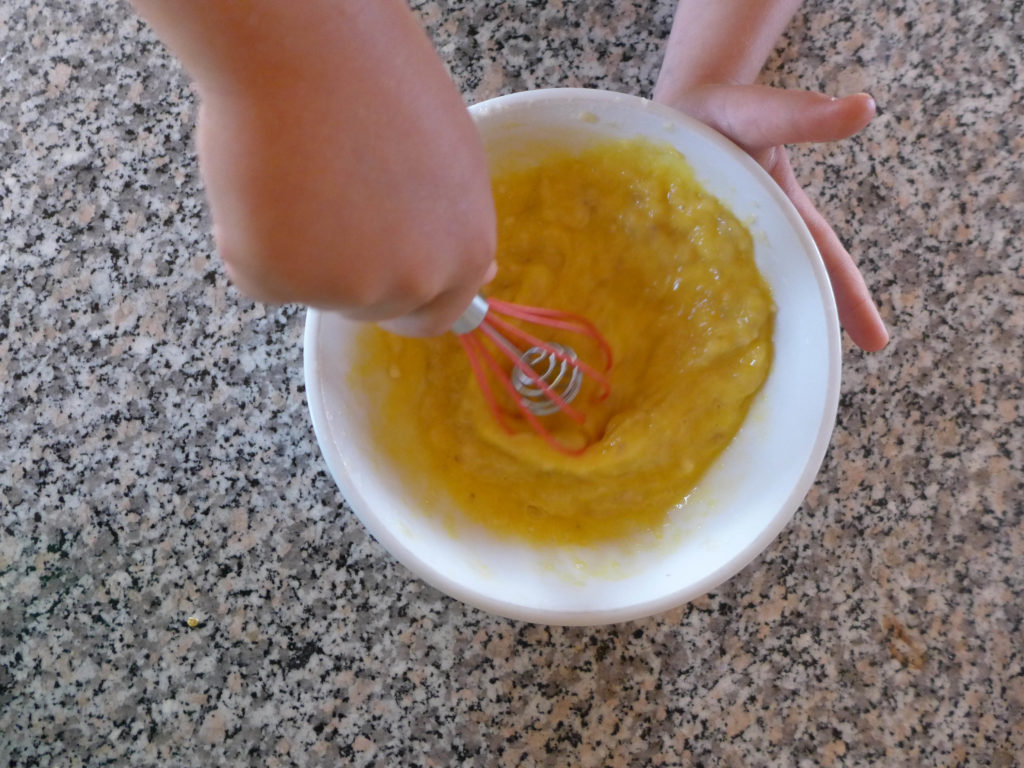
Peel and mash the banana. In a separate bowl whisk the eggs. Add the mashed banana and mix well.
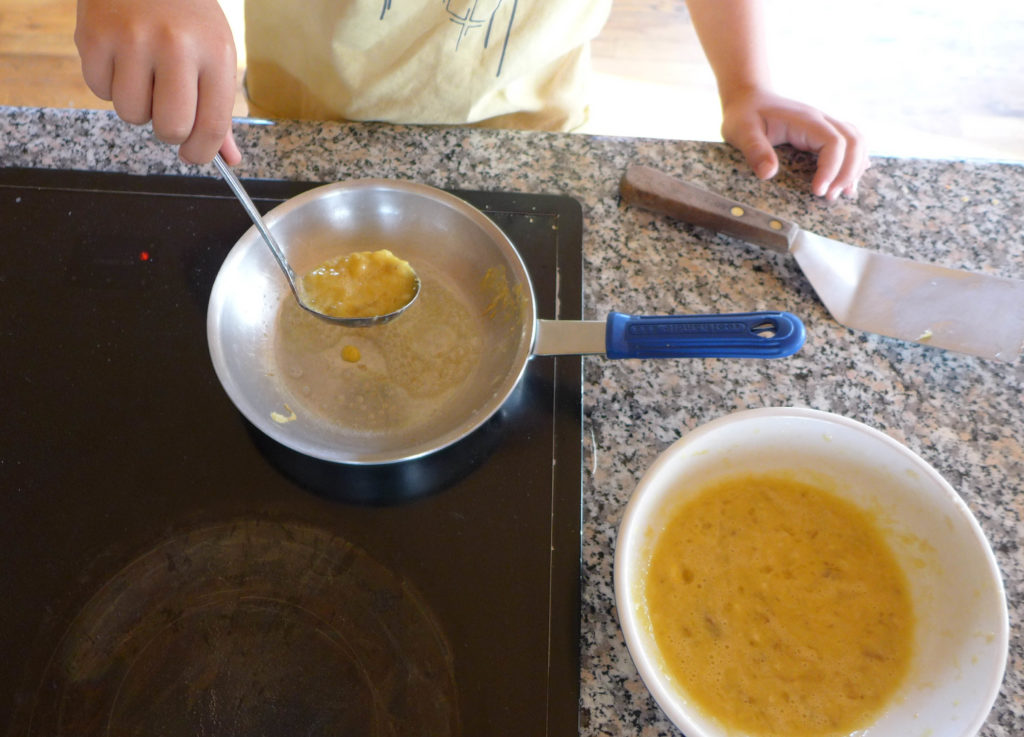
Warm a frying pan over medium heat. Add a tab of butter and let it coat the bottom of the pan. Pour in the appropriate amount of batter to make a pancake that’s a “flippable” size for your kiddo. We found that having a smaller ladle for pouring the batter into the pan helped with this task and with keeping the pancake size consistent.
After the pancake has cooked on one side, flip it and allow the other size to cook. We determine doneness based upon color and how well the pancake sticks together (it can fall apart if you try to flip it too soon).
Add a sprinkle of salt and then serve! We don’t add any additional condiments, like maple syrup, but you’re welcome to cross that sticky bridge if you’re feeling courageous.
Additional Tips
You know your kids and their skill level best, but here are a few things that we found helpful.
- Teach the kids how to use the burner and be specific about where the knob should be facing for the best cooking temp. We helped Alex learn the trick to turn the burner to high at first and then turn it down to the best temp for the burner he commonly uses. You could even add a tiny sticker to the knob area to identify where the knob should be pointing.
- Having designated tools for the job really helps kids to tackle the task without your help. As I mentioned above, we have a specific ladle that he uses which helps to keep the pancakes consistent. He also has two different pans that he’s comfortable cooking on. Neither of them are non-stick (one is cast iron and the other aluminum), but he’s become comfortable using either.
- Rather than using hot pads, we really like these pan handle covers. They stay on the pan well while he’s cooking so he doesn’t absentmindedly grab a hot handle and there’s no risk of them getting too close to the burner and catching fire.
- Get a good metal spatula. This is one of our favorites and it’s make in the USA! I find that the thin metal spatulas make lifting the edge of pancakes and flipping them easier than trying to wiggle a thick spatula underneath. I also like that you don’t have to worry about the end of the spatula getting banged up or misshapen from the heat.
- Your kids will be so excited to make a meal for the family. You can make it an extra fun experience by letting younger kids wait on you. They can take your order and deliver the dishes to the table.
