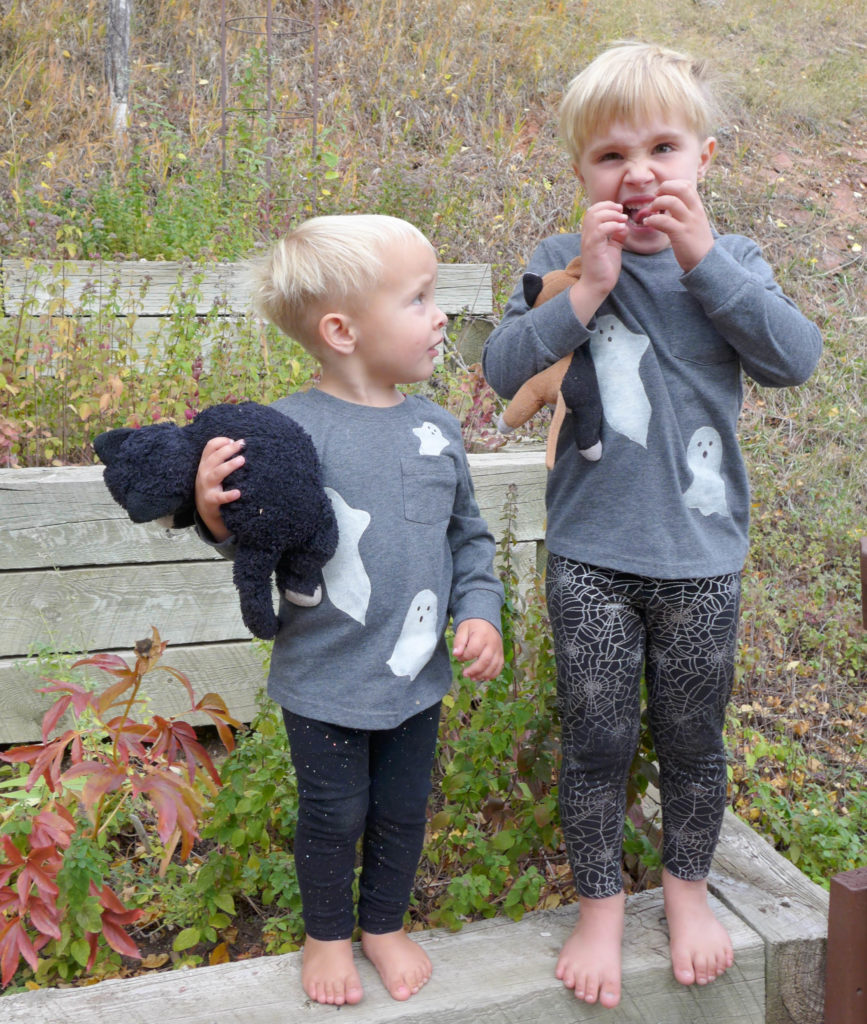
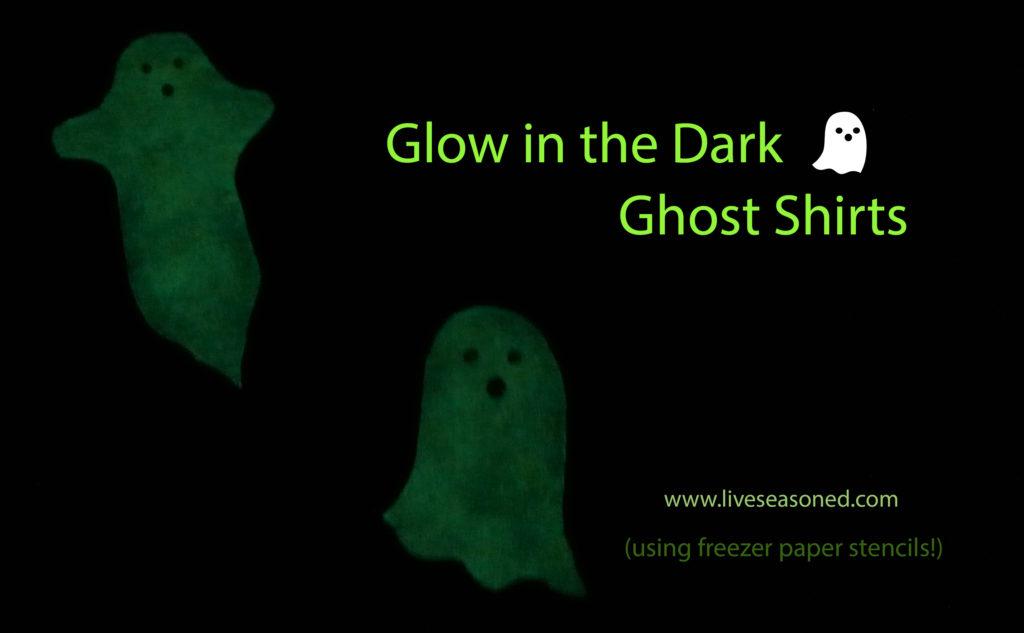
Ghost Shirts! With glow-in-the-dark paint! Need we say more? How about that they really glow!
 Last year we made bat shirts with freezer paper stencils and bleach. This year I wanted to do another shirt, and I was going to use bleach again, but then I saw this paint in Joann’s and thought it was worth a try.
We used the old freezer paper stencil again this year, and it’s just awesome. If you don’t know about it, let me wax (haha!) poetic.
Freezer paper has a waxy coating on one side, not both sides like wax paper. So, you can cut a design out of the freezer paper and with a warm iron temporarily stick it to your shirt, paint the stencil area, and then remove the paper. So easy, and with great results!
I’ll walk you through our simple process with a few pics and discussion…
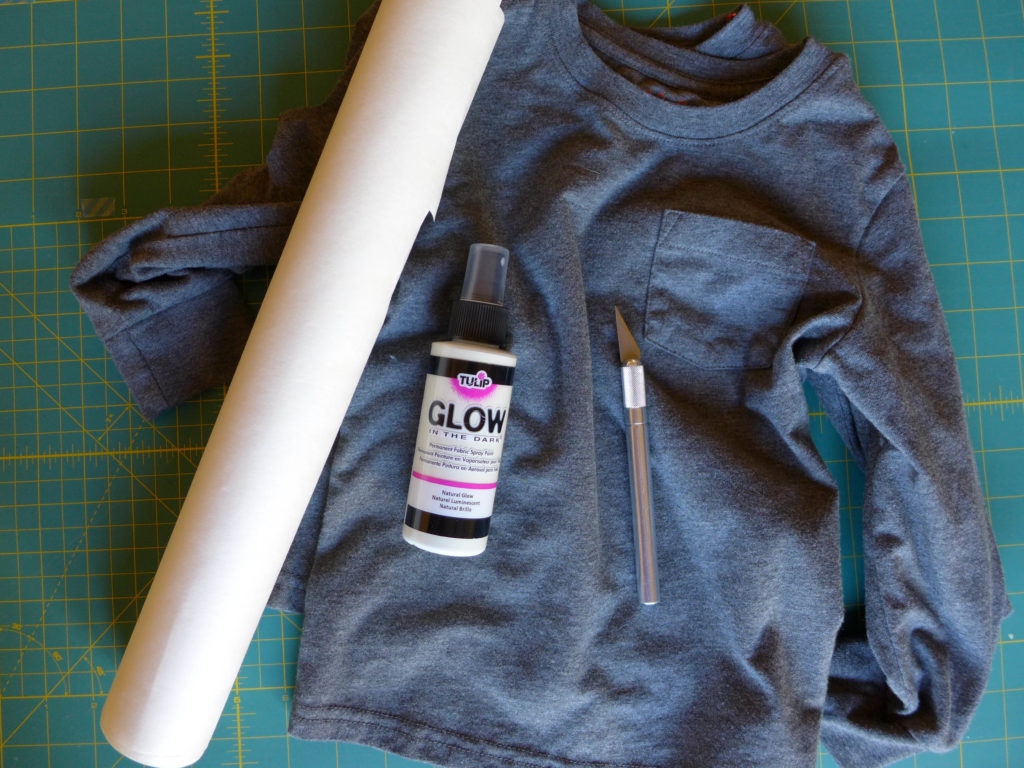
Gather your supplies:
- freshly washed plain shirts : don’t wash with fabric softener (as explained on the paint bottle). I think dark is better for this project unless you want to create surprise glow designs that aren’t as visible during the day. Could be fun!
- glow in the dark paint : we used this exact kind. The paint worked great for our purposes, but read my notes in Step #4 below. Depending upon your design this one may work well for you too.
- freezer paper
- Exacto knife & scissors
- pencils/pen/marker
- cardboard or paper bag
Step #1 : draft your design
As you can see above, I cut out a few ghosts from scrap paper and played with where I would put them on the shirt. If you’re having trouble with a design, I highly recommend a few google searches (“halloween ghost” “ghost clipart” “ghost silhouette” will all produce great results). You can print those out or just get ideas and free-hand a design.
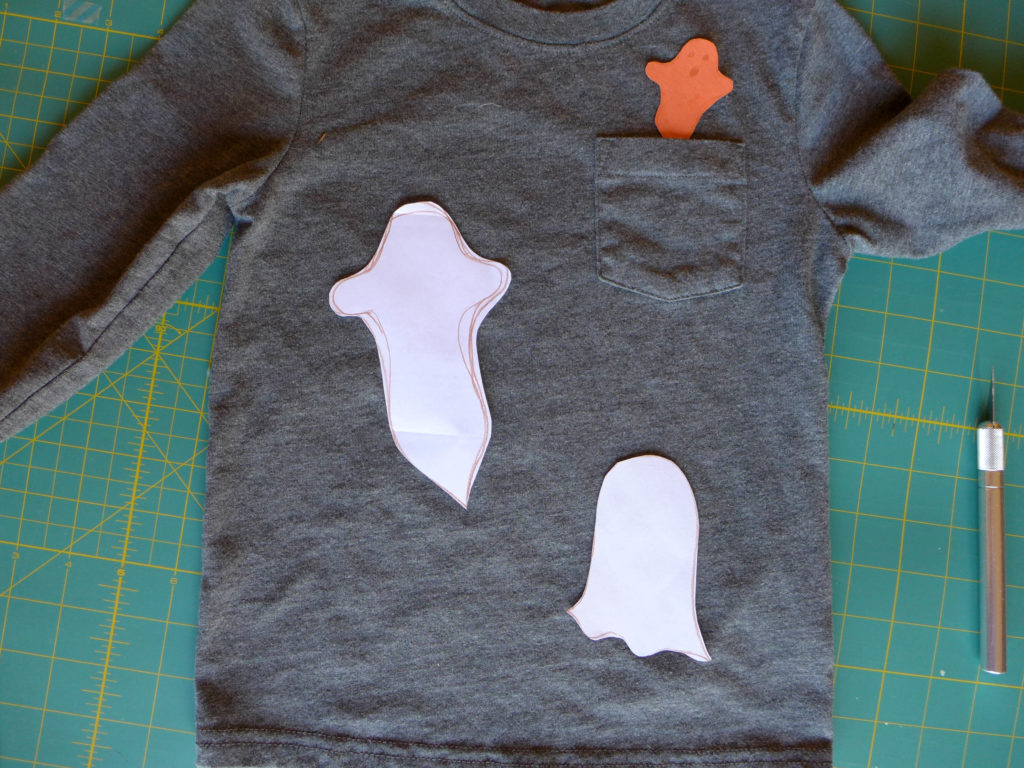
Step #2 : cut out your design
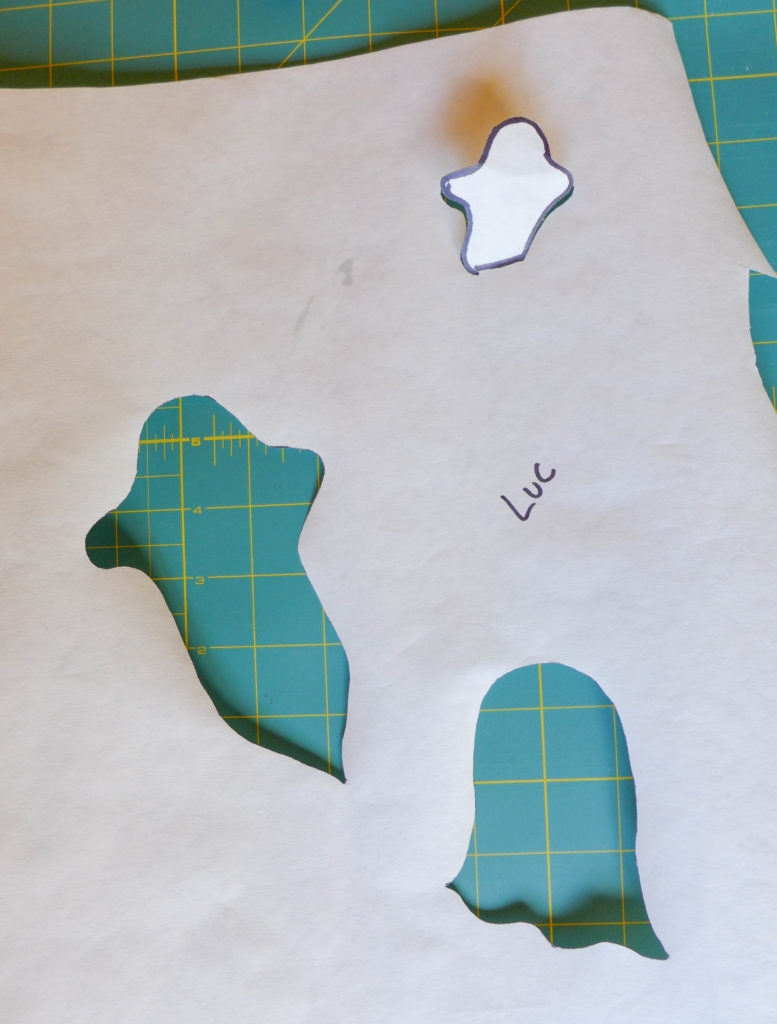
First make sure that you’re cutting out your design so that the waxy side of the paper will be touching your shirt. Direction may not matter for all designs, but it did for ours because of the pocket placement.
With these shirts, we wanted the painted design to be the ghosts themselves, and the rest of the shirt to be free of paint. I decided to create one large stencil that had the ghosts cut out exactly as they should be placed on the shirts. You can see Luc’s above.
On each shirt there is one sneaky ghosts coming out of the shirt pocket. For that ghost, I cut it out everywhere except on the bottom side where the ghost lines up with the top of the shirt pocket. You can see in the photo above how that ghost is slightly standing up on the stencil. You’ll see why he isn’t completely cut out in the next step.
If you want to see an alternative stencil/design, look at how we did the bat shirts. For that design, we wanted the bats to become the silhouettes with bleach stars around them. In that case I cut out the bats and they were the wax paper “stencil” that was used for the shirts (you can see that process in this post).
Step #3 : iron on your stencil
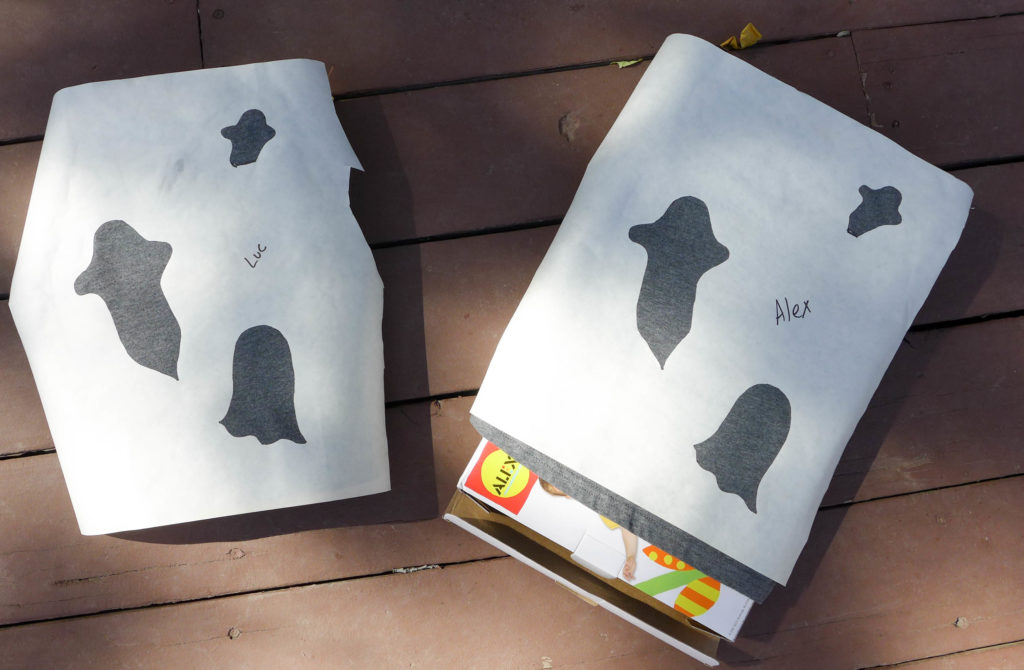
Precisely line up your stencil as you want it to be on your shirt. Again, making sure that the waxy side of your paper is touching the shirt.
In this case, it was important for us to get the ghosts at the pocket just right *and* I wanted to protect the pocket lip from paint, so I took that partially cut out ghost and folded it around the lip of the pocket and inside. You can see the straight line on at the bottom of the “pocket ghosts” above where the stencil is folded over and inside of the pocket.
With your iron on a low setting, iron the stencil to your shirt, paying close attention to the edges of the stencils.
After ironing on the stencil, place a piece of cardboard or folded paper bag inside the shirts to stop any paint from leaking through to the backs of the shirts. I also folded the shirt sleeves around to the back and covered any exposed hems with masking tape (basically protecting any parts of the shirt that you don’t want to get paint on.
Step #4 : paint your shirt!
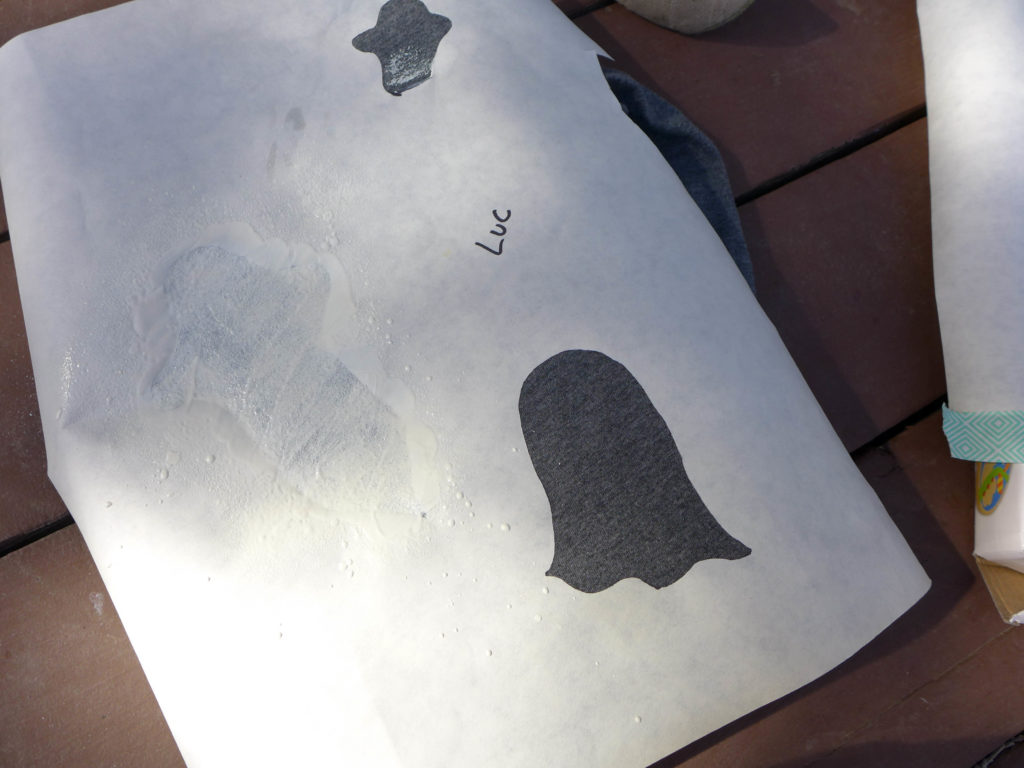 This is fairly straightforward – just paint the areas of your shirt where you want your design.
A note about our paint – we had trouble getting a nice, consistent spray from these bottles. It may have been because we were trying to spray down and at an angle (rather than holding the bottle straight up and down while painting). We would have some fine-mist sprays and others that were more gloppy.
I bought the spray paint because I was hoping for a misty ghost. When I realized that wasn’t going to work, we decided to just fill the stencil areas with paint and then smooth out the paint with our fingers. For our design, this worked perfectly well.
*I was hoping to make more bat shirts with a glowing night sky… so I may try to get the misty spray paint to work when the kids aren’t helping. If it works, I’ll edit this post with a paint update.
Step #5 : remove the stencil!
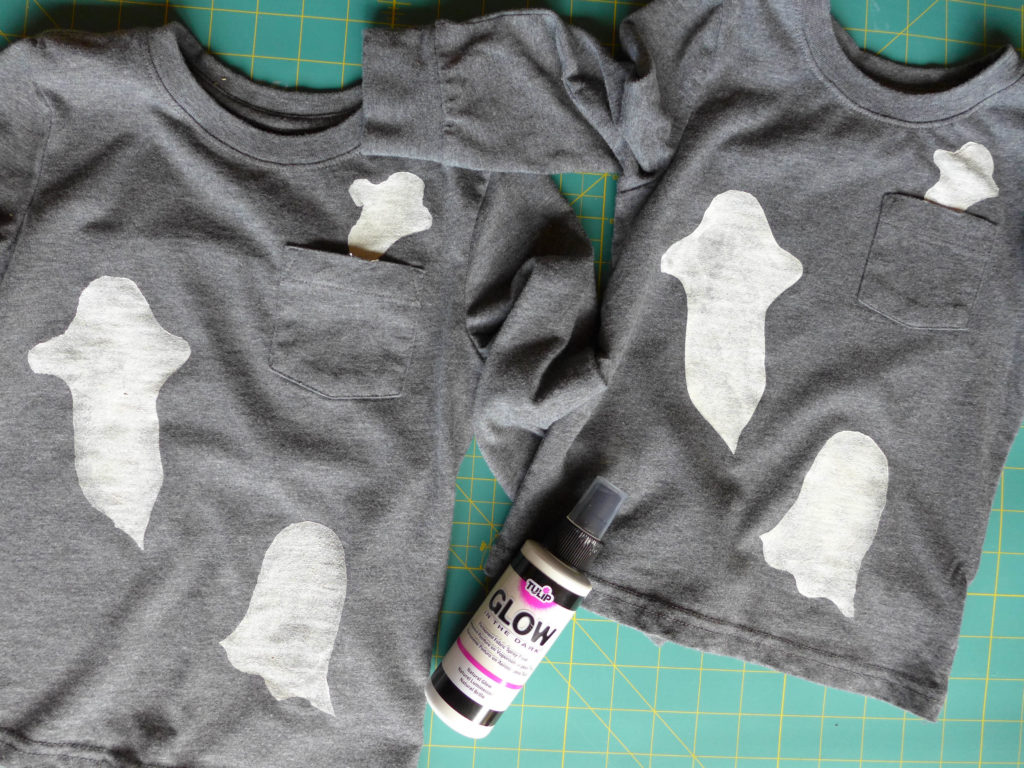
When the paint is dry enough to handle, carefully remove the freezer paper stencils.
This is also the point where I used a black sharpie to add eyes and mouths to our ghosts.
 Now it’s time to take your shirts into a dark room and enjoy your spooky handy-work! They really glow and it’s awesome.
Step #6 : take pictures!
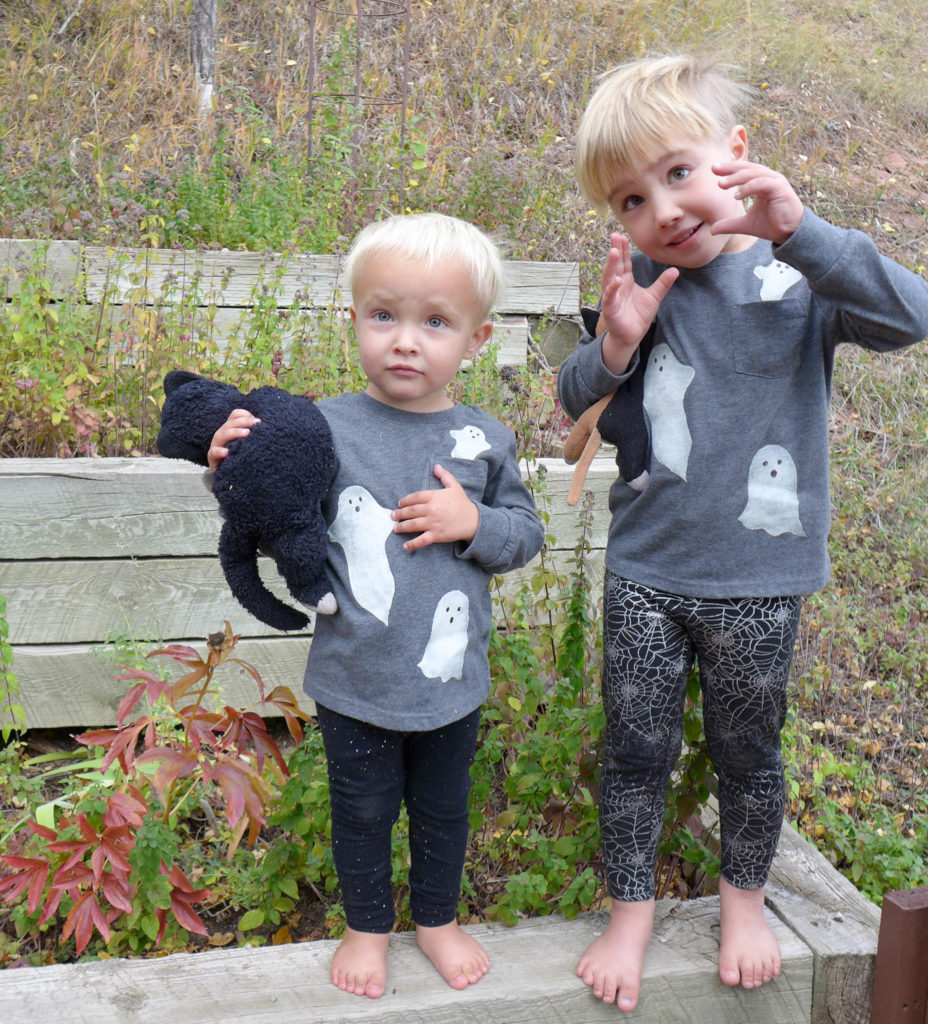
This is definitely the hardest step of all, especially once your kids realize that it’s time to practice their spooooky faces!