Woven Valentine Tutorial

liveseasoned_DIYwovenvalentines-1024x882 copy

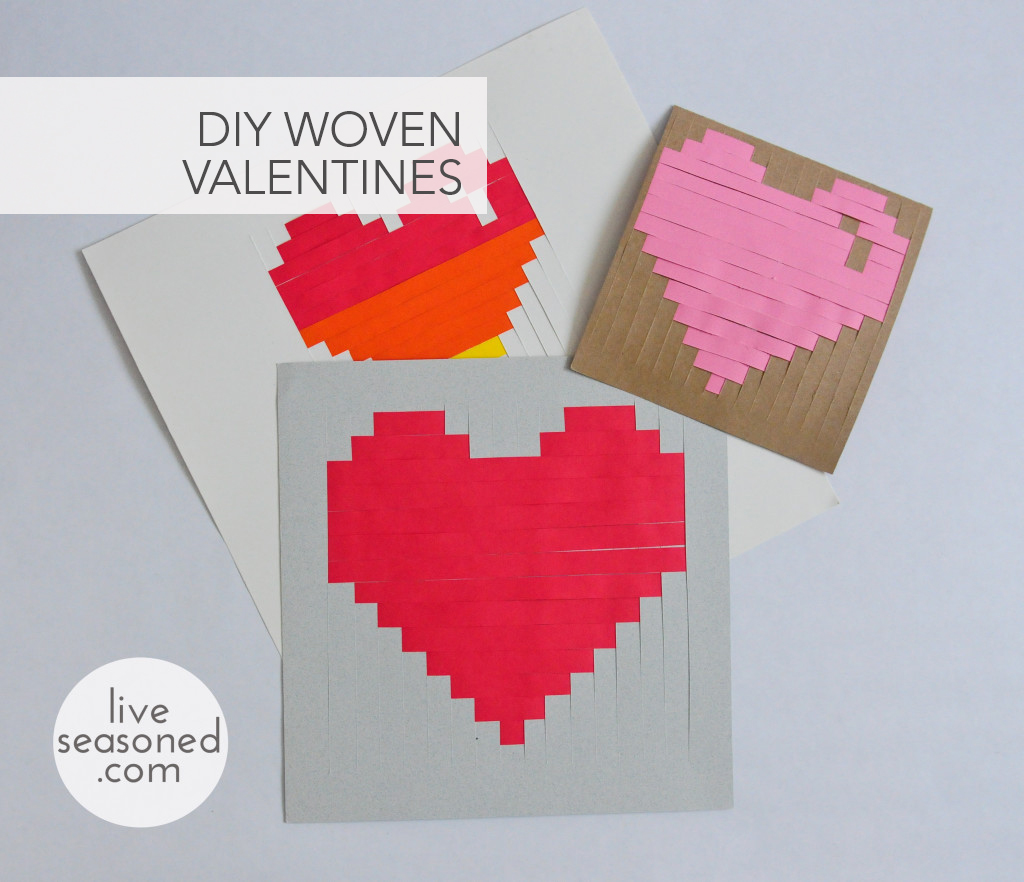
Today we’re sharing the simple instructions and templates to make a woven Valentine’s Day card. This is an especially convenient craft because the materials are probably stashed away somewhere in your home. While weaving paper sounds simple (and it is!), you’ll see that with a bit of creativity it produces a card with big impact. After you’ve finished this project,  you can flex your creative muscles and use this technique for a variety of holidays and occasions! Additionally, If you have little kiddos at home weaving paper is a really simple, yet fun, way for them to work on their developing coordination and dexterity.

We’ve provided printable templates at the bottom of this post, making the project even easier by eliminating the need to do any measuring or sketching.  Of course, if you’re comfortable with a ruler or you don’t have access to a printer then follow our written instructions.    

liveseasoned_DIYwovenvalentines6

Materials & Tools:

  • Card stock or any colored paper
  • Printer (optional)
  • Ruler
  • Exacto Knife
  • Scissors
  • Pen
  • Tape
  • Cutting Mat or old magazine

Cost $1

These instructions will create a 5.6 by 5.2 inch heart centered on a 7.6 by 7.2 inch piece of card stock.

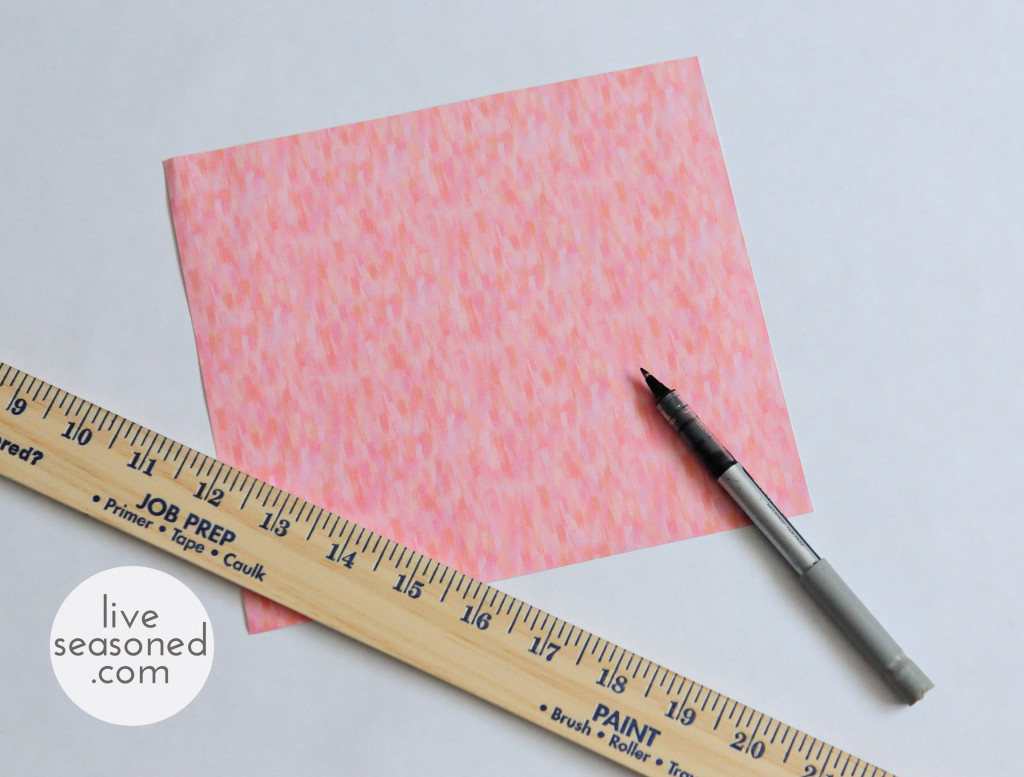
  • Choose your base paper. If you aren’t using a template, you’ll begin by preparing the white base paper that the colored strips will be woven into. Our heart is going to be centered on the paper, so it will have a 1 inch border on all four sides. Having the nice wide border makes it easier to weave, and your finished work will look cleaner.  If you’re using a different sized paper, subtract 5.6 inches from your paper’s width and 5.2 inches from your paper’s length, divide by two and that will determine your respective borders.  

liveseasoned_DIYwovenvalentines9


liveseasoned_DIYwovenvalentines8

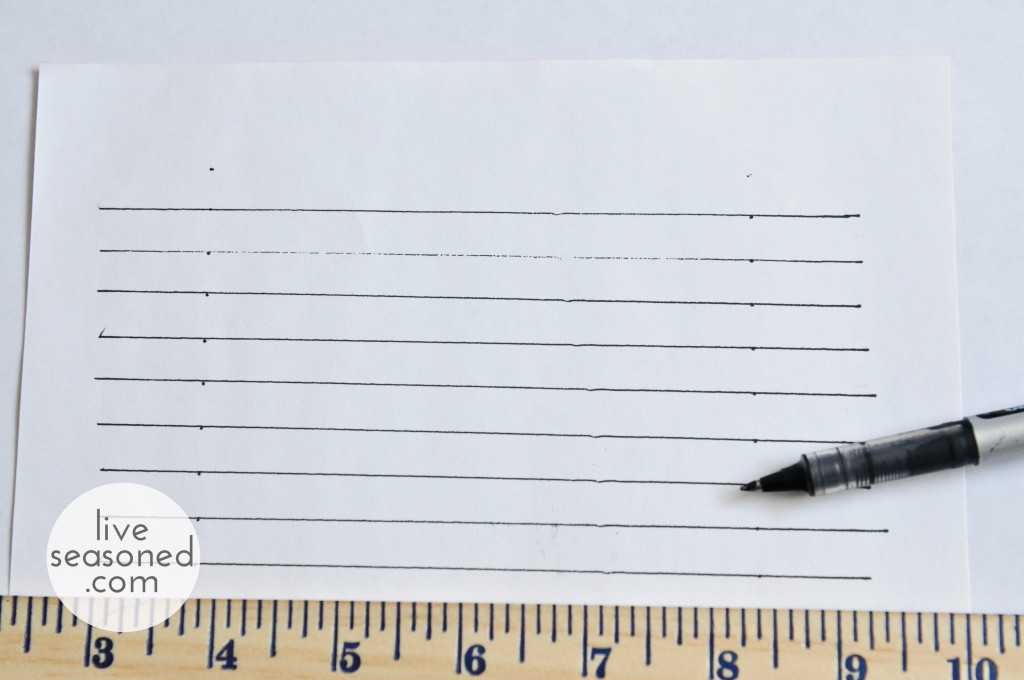
  • Draw and cut vertical lines on your base paper. Begin by marking dots where the vertical lines will fall. Starting an inch (or your given border length) from the left and top edges of the base paper, measure and mark every 3/8th of an inch working across your paper until you reach the right border area.  So your first dot should be 1 and 3/8th inches in.  Simply mark a little dot every 3/8th of an inch until you have a total of 16 dots.  Repeat this process again an inch up from the bottom of the paper.  Remember your first dot will be at 1 and 3/8th. Stop once you have 16 dots.  Now place your ruler from top to bottom on the paper and draw a straight line to connect the first dot on the top to the first dot on the bottom.  The line should measure 5.2 inches.  Continue drawing straight lines from the dots on the top to the dots on the bottom of the paper.  You should have a total of 16 lines.  Now place your paper on a cutting mat or if you’re like me and don’t own one, on an old magazine.  Take your time and carefully use an exacto knife to cut each line, making 16 slits in the paper.

liveseasoned_DIYwovenvalentines10

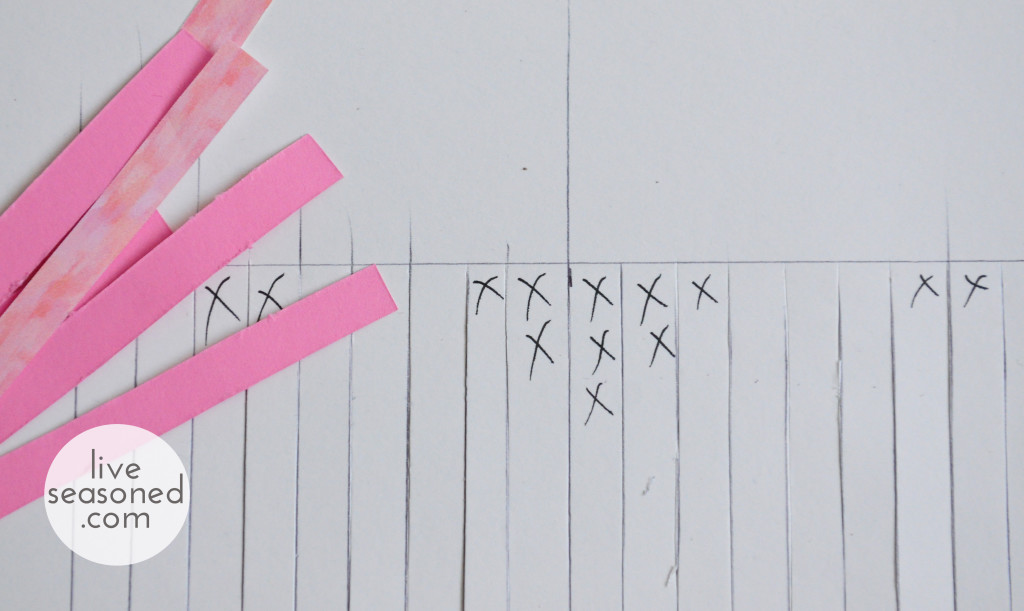
  • Cut the colored strips for weaving. Cut 14 strips of paper that are each 3/8th inches wide and at least 7 inches long. You can do this with your exacto knife or scissors, but it’s even easier if you have a straight edge paper cutter. 

liveseasoned_DIYwovenvalentines11

liveseasoned_DIYwovenvalentines12

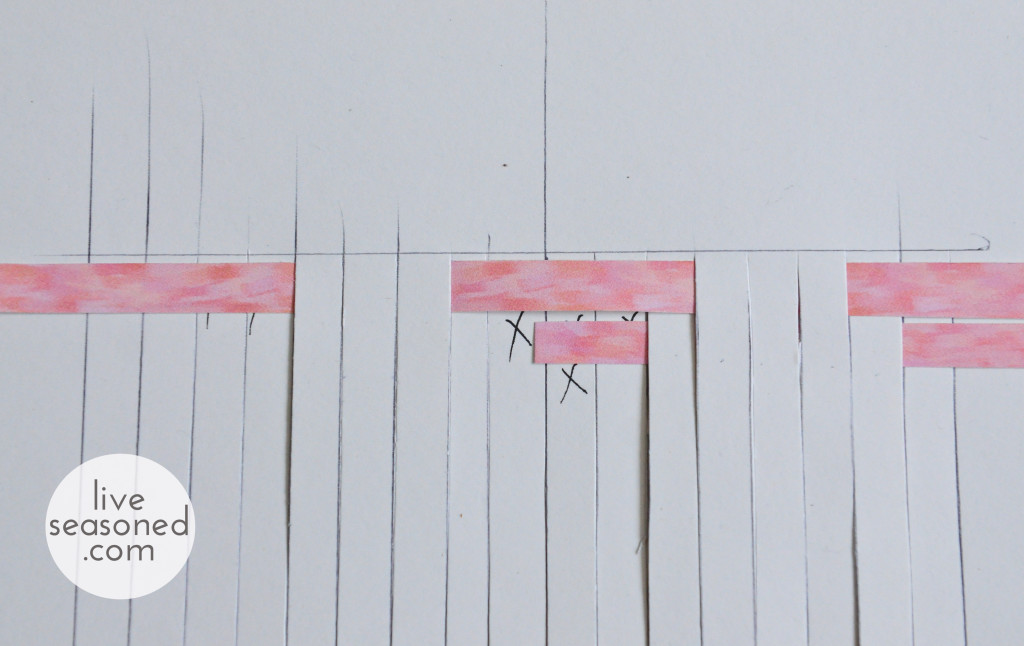
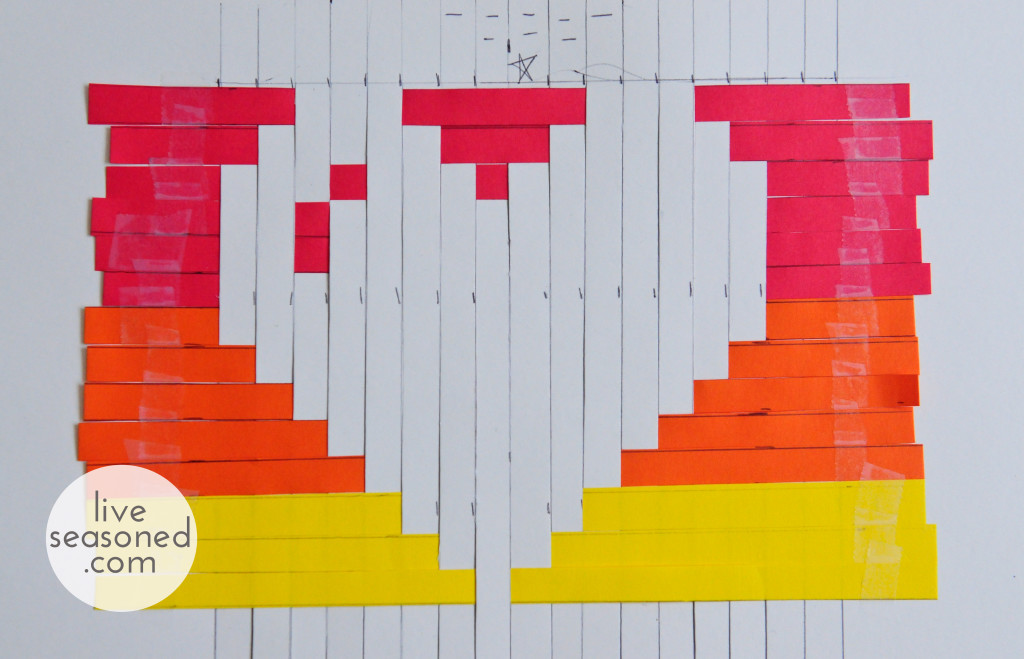
  • It’s time to weave!  On the backside of your base paper (the side with the pen markings) follow our template to mark the heart area. We marked the backside of our paper with the x’s you see above. If you’re using the template, the printed side is the back of your paper.  When you’re weaving, you will covered the x’s with your colored paper (producing a white heart). When you turn your paper over, BAM! your colored heart will be nice and crisp without any of the markings used for measuring and planning. You can add a highlight on the heart if you desire.  I found that nifty highlight idea here.
  • Finish your card. Secure each strip with a tiny piece of clear tape and then trim the ends. Glue your woven heart to a piece of colored paper to make a postcard or to the front of a folded piece of card stock.  I made both versions, but I can’t decide which I prefer.  Put a stack of books on your finished cards to ensure that they dry nice and flat before sending them off in the mail.

Now that you get the general idea, feel free to run wild with this technique.  The only rule is to keep the width of the strips and the width of the slits consistent. It’s always helpful to sketch up a new idea before you cut and measure.  Measure twice, cut once, right? For me it’s more like do the math three times, measure twice, and sketch once more.

Here are templates for the Small Woven Heart Tutorial, the Large Woven Heart Valentine Tutorial and the camouflaged Love Card Template.  Print page one on a piece of colorful card stock (this will be your background) and page two will be your strips, so find a color that will look nice with whatever you chose for the background.   If you want to spell something else, you can find a pixel alphabet here, which should help with planning.  Let us know how it goes!

Seasonal Tunes: Valentine’s Day Special

liveseasoned_valentinetunes copy

I really enjoy groovin’ to music while I cook, work out, tidy up or hang around my apartment.  I do this weird half humming, half high-pitched off-key singing thing too.  I totally sound like Regina Spektor (to me at least).   In the spirit of Valentine’s Day, I compiled a list of both classic and modern tunes for you to jam out to.  Hopefully you’ll discover something new and appreciate the old!

I created this list on Spotify.  Simply click the link and you can listen to it online for free.  If you don’t have an account, it’s super easy to sign up.  I’m new to Spotify and so far I like it, but their library lacks the Beatles! What a crime.  Enjoy ninety minutes of lovey dovey tunes!

Love Tunes

  1. Florence + The Machine – You’ve Got The Love
  2. Ingrid Michaelson – You and I
  3. Etta James – At Last
  4. Van Morrison – Crazy Love
  5. Keren Ann – It Ain’t No Crime
  6. Fleetwood Mac – You Make Loving Fun
  7. The Ronettes – Be My Baby
  8. Cat Power – Sea of Love
  9. Bruce Springsteen – She’s the One
  10. Frankie Valli – Can’t Take My Eyes Off You
  11. First Aid Kit – Emmylou
  12. The Knife – Heartbeats
  13. Edward Sharpe & The Magnetic Zeros – Home
  14. Regina Spektor – Us
  15. Brandi Carlile – If There Was No You
  16. Frank Sinatra – I’ve Got You Under My Skin
  17. Bright Eyes – First Day Of My Life
  18. The Civil Wars – Dance Me to the End of Love
  19. John Prine – In Spite of Ourselves
  20. Fleet Foxes – Montezuma
  21. Talking Heads – This Must Be The Place
  22. Nat King Cole – L-O-V-E
  23. Edward Sharpe & The Magnetic Zeros – Simplest Love
  24. Fleetwood Mac – Songbird
  25. Hellogoodbye – Oh, It Is Love
  26. Bruce Springsteen – Two For The Road


Skeleton Artwork by Stay Gold Media

Winter Hiking ~ Quick Tips

liveseasoned_winterhike_calder2

We are serious about our hikes.

They aren’t crazy epic adventures, just 40-90 minutes in the woods on any given afternoon. Unfortunately, because of the shorter days we end up taking a lot fewer hikes in the winter than in the summer. But ~ when we push it and get out, that simple walk cures any sign of crazy cabin fever that’s so contagious at this time of year.

liveseasoned_winterhike_chimney

When we were on this hike, Calder and I were talking about what we each find essential for a good winter walk. His answer: all you need is a charged iPhone and a good pair of boots. My list, which I’ll share below, was a bit more detailed, but the focus was the same: keep it simple, smart, and of high quality. This is the key to making it to the woods when all you want to do is hibernate.

Don’t let having a baby hold you back! We love to get out with Alex, and he definitely loves to take in the scenery. While being in the house all day may make this little guy grumble, a trip outdoors really soothes his soul. He’s quiet and wide-eyed, absorbing the sights and the sounds of the forest.

My list for a short winter hike:

  • good shoes and socks. This is key. You won’t be comfortable if you don’t have a secure footing and warm toes for trails that may have snow, some ice, mud, rocks, and roots. 
  • hat and gloves (obvs, I know)
  • a charged phone (for all of the reasons Calder mentions below)
  • a map or good knowledge of the area. If you’re hiking in a new-to-you area, pick up a good trail map. We go hiking in a local state forest, and many of the bike and outdoor supply shops sell maps marking all of the forest trails. 
  • the right timing. You don’t want to get caught in the woods in the dark in the cold (of course, this is when your phone’s flashlight comes in handy). Ideally you can start your hike with plenty of daylight left, but if you know the sun is going to set in 30 minutes, do a quick 15 min out and back hike, and don’t push it. 
  • a lifeline. I know Sarah’s reading this and shaking her finger saying the most important thing is to tell someone where you’re going, even for short walks. You never know when something will happen, and it’s better to be safe than sorry, so call or text someone and let them know you’re heading off into the woods. 

My second tier list:

  • camera (more on this below)
  • water bottle. For short walks, I find that this isn’t necessary and just adds weight. I keep mine in the car and sip it before I take off and when I return. 

The baby gear:

  • a warm hat
  • warm socks
  • a baby carrier. We’ve found the Ergo to be the most comfortable carrier, particularly as Alex has packed on the pounds. The straps are easy to adjust, making it a piece of cake for both Calder and I to use it, and to switch off during the walk if we want to give each other a break. 

That’s it!

Whoever is wearing the baby just zips their coat up and around him ~ that way the baby doesn’t have to wear a bulky coat, but he stays nice and cozy. Alex is nine months old, and still breastfeeding, so as long as I’m along on the walk, we don’t have to worry about food.

But back to Calder, he wanted to explain his list. The boots are a no-brainer.

The phone is essential because it will provide your flashlight and camera. If you have an app like Garmin’s navigation app, it’ll also provide your maps using satellite data (even when you don’t have cell service!). AND if you’re still nervous about setting off into the snowy woods, you can always download a winter survival app.

He had a really thoughtful response when pressed about what makes a winter hike great: a camera. He said that on any hike, if he has a camera (i.e. phone) along it, he’ll often slow down to take in the details more than if he doesn’t. I agree, sometimes I can be on autopilot, just walking along and thinking without really taking in the scenery. Don’t get me wrong, that kind of walk is great too, but if my mission is to get out and enjoy the woods, then I want to keep my eyes and mind open to what’s in front of me. Before Alex (B.A.), I used to take my digital camera on every hike, now there are times when I just take the phone and use its camera.

And surprise! In an effort to keep it simple for this post, we just used our phones for the photos. What do you think? Could you tell?

liveseasoned_winterhike_calder

What about you? Are you a winter hiker? If so, anything on your list that I missed?

Welcome to Seasoned!

Hey, you discovered a new corner of the web, welcome!

This is the start of an adventure dreamed up by us (Katie and Sarah). We are sisters that grew up in the woods of Pennsylvania, from there we took off in our own directions, studied, traveled, and now have settled for a bit in east coast college towns. Along the way, we each developed a serious love of creating a well-nourished life, full of food, movement, crafting, and exploring. But just as our wardrobes change by the seasons, so do our meals, projects, and travels.

After finishing her degree in photojournalism, Sarah took off for a semester of teaching in Thailand followed by a few months traveling around southeast Asia. Now she lives in North Carolina, where the winters are just warm enough to keep her sane. Between blog posts she’s an avid yogi, a self-employed photographer, and is busy preparing for her first solo photo exhibit!

Katie’s older than Sarah by nine (9!) years. With a few environmental science and geography degrees under her belt, she can’t help but get excited whenever she can blend her formal training with her creative endeavors at home. Katie’s son was born in the spring of 2013. She’s still learning the ropes of motherhood and anticipates that the lessons won’t stop for the next few decades. You can expect Katie to offer the more mature (i.e. frazzled new mom) perspective to Sarah’s younger spirit!

We are both serious about living a life that is choreographed by the seasons, and Seasoned is a space we created to share this adventure. We’ll post local and international exploits under the Explore tab. Dwell & Craft are where you’ll find ideas for creating a richer life at home. And perhaps most importantly, it’s hard to take on the world if you’re not healthy. Nurture is where you’ll find us looking for ways to care for our body and mind.

We’re so excited you stopped by and we hope you’ll stick around!

xo,

-Sarah & Katie